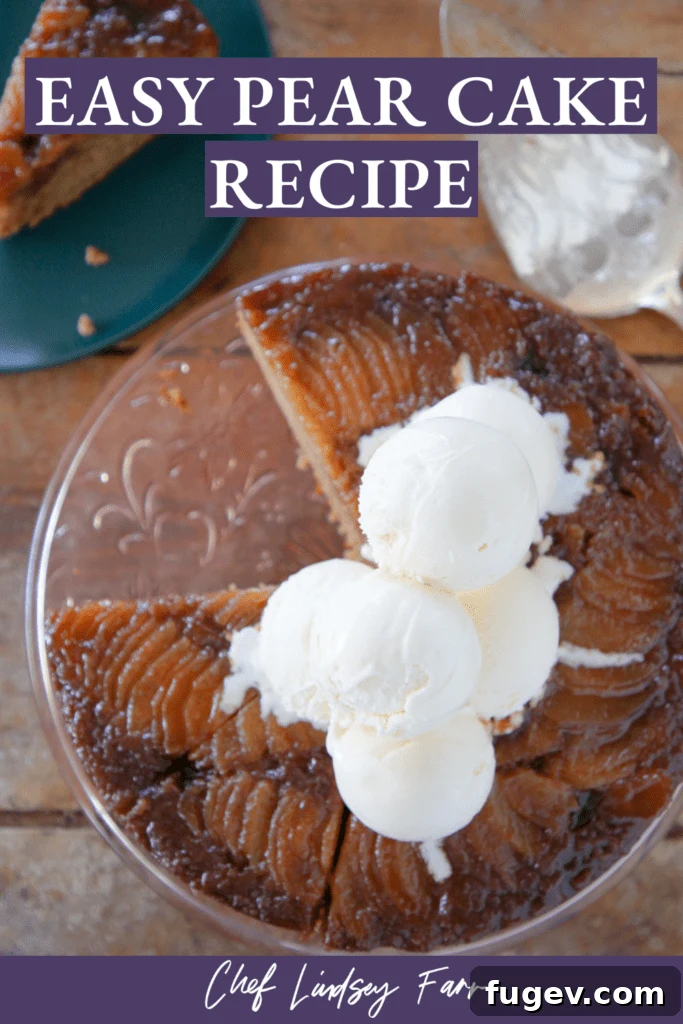
The Ultimate Pear Upside Down Cake: A Spiced Winter Dessert You’ll Love
Prepare to be enchanted by this exquisite Pear Upside Down Cake, a dessert that masterfully combines a luscious brown sugar caramel with beautifully arranged pear layers and a uniquely tender, cardamom-spiced cake. This isn’t just any cake; it’s a winter essential, designed for effortless elegance. Its simple preparation belies its stunning presentation, promising a warm, inviting treat that gracefully emerges from its pan to delight all who gather around your table. Perfect for festive occasions or a cozy night in, this recipe will quickly become a cherished favorite.
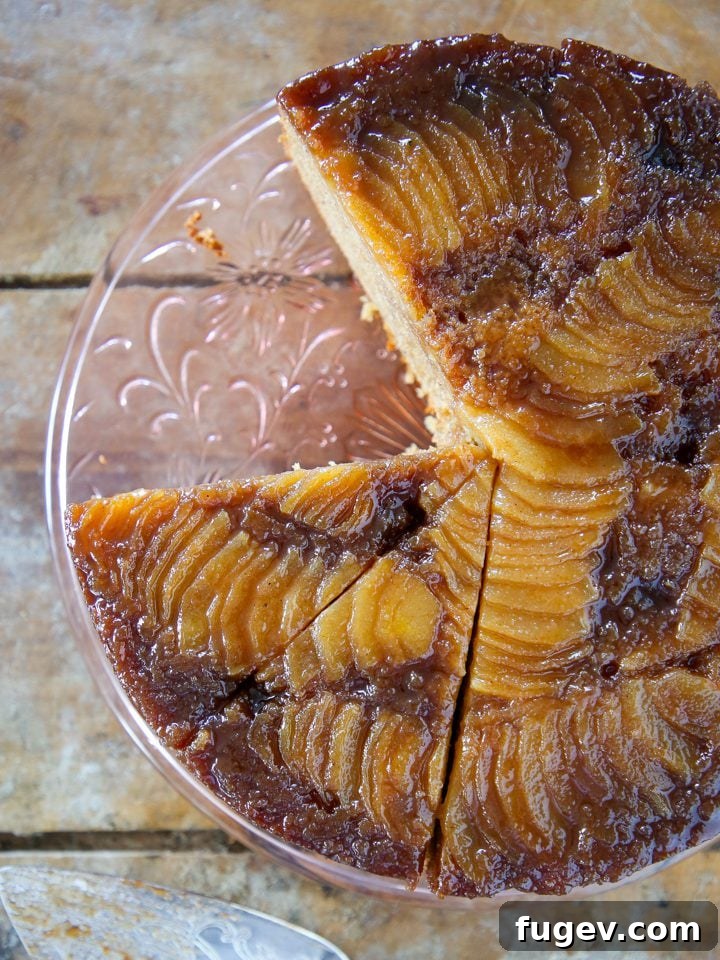
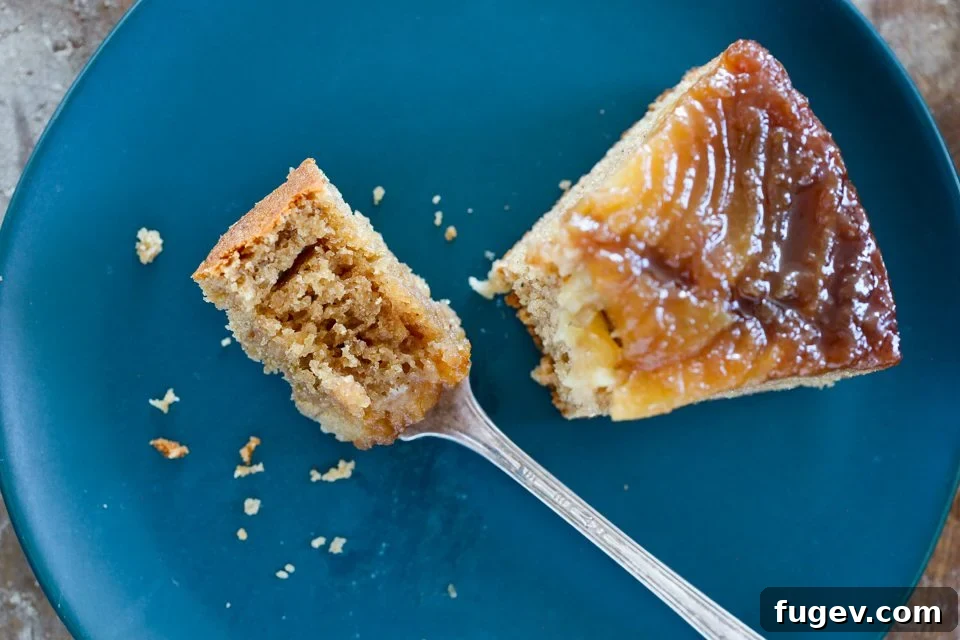
While the perfectly caramelized pears on top are undeniably captivating, the deeply flavored, spiced brown sugar cake underneath holds an equally unforgettable charm. Crafted with a harmonious blend of buttermilk and brown sugar, the cake boasts an extra moist crumb that is both fluffy and incredibly tender. The carefully selected warming spices—cardamom taking the lead, balanced by cinnamon and clove—are not merely an addition but an elegant enhancement, designed to accentuate the natural sweetness and delicate flavor of the pears.
This recipe offers an impressively easy baking experience, delivering a flawless presentation akin to popular classics like orange upside down cake or a traditional apple tarte tatin. The extraordinary combination of cardamom and pear is truly out of this world. Once you experience this pairing, you’ll undoubtedly want to try my Cardamom Pear Crisp next! Serve this magnificent cake warm, perhaps with a generous scoop of creamy vanilla ice cream or a dollop of freshly homemade whipped cream, for the perfect conclusion to any winter meal.
Table of Contents
- Why You Will Love This Recipe
- Professional Tips for Perfect Baking
- Key Ingredients for Success
- Creative Variations to Try
- How to Make Pear Upside Down Cake
- Chef Lindsey’s Recipe Tip
- Frequently Asked Questions
- Pear Upside Down Cake Recipe Card
- Before You Go: More Delicious Recipes
Why You Will Love This Recipe: A Symphony of Flavor and Simplicity
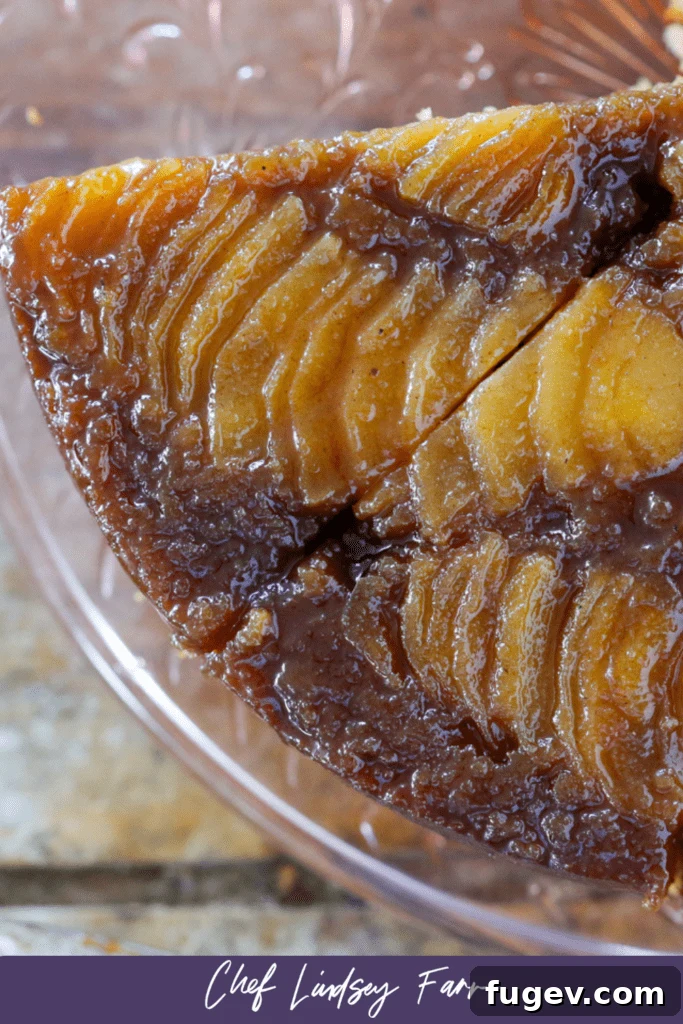
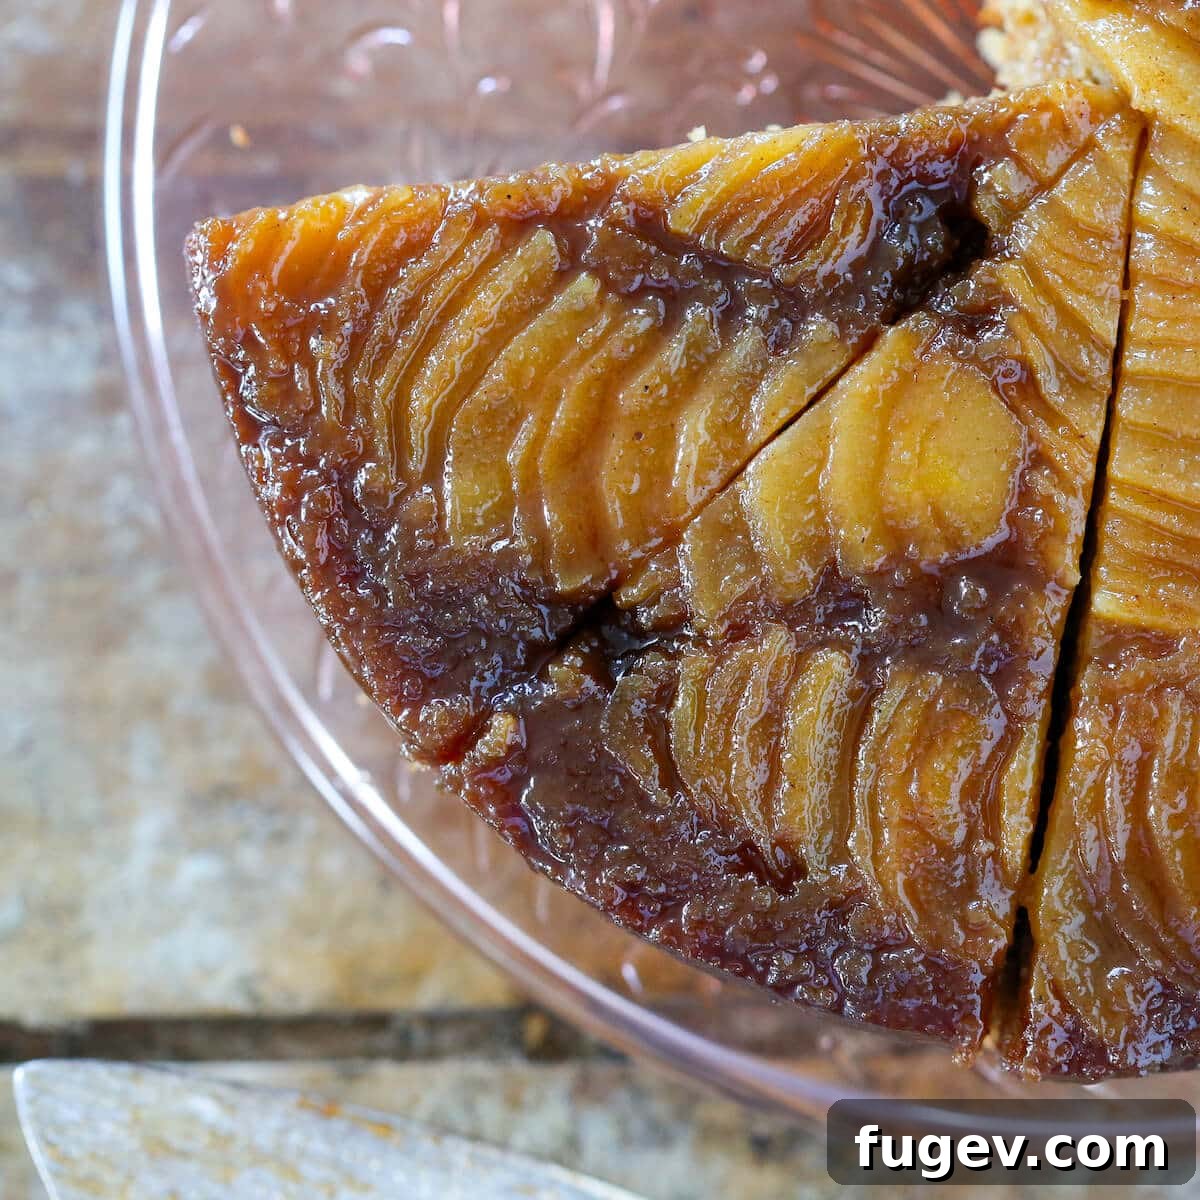
- A Collage of Pears for a Stunning Top. Imagine a cake where each slice reveals a mosaic of perfectly caramelized pears. I’ve carefully selected a mix of pear varieties, layering them in an elegant fan shape to create an eye-catching and truly luscious topping. The beauty of this design is its versatility; you can meticulously arrange your pears for a magazine-worthy finish or opt for a more rustic, scattered approach – either way, the flavors will shine, making every piece a work of art. This visual appeal makes it a fantastic centerpiece for any dessert table, promising “oohs” and “aahs” from your guests.
- Delicately Spiced, Moist Brown Sugar Cake. An upside down cake is only as good as its foundation, and this cake base is exceptional. The recipe features an easy-to-prepare buttermilk cake, infused with the comforting warmth of brown sugar and a thoughtful blend of spices. The buttermilk reacts with the leavening agents to ensure an incredibly light and fluffy texture, while brown sugar not only adds sweetness but also a depth of molasses flavor and essential moisture. This combination results in a cake that practically melts in your mouth, perfectly complementing the sweet and tangy pear topping without overpowering it.
- Straightforward, No-Guesswork Directions from a Professional. Say goodbye to baking anxieties! This recipe has been meticulously tested and re-tested by a professional pastry chef, ensuring that every step is clearly outlined and foolproof. You won’t find yourself wondering when to flip the cake, how long to mix the batter, or what consistency to look for. Each direction is concise and precise, designed to guide you seamlessly through the process, guaranteeing success even for novice bakers. This expert guidance means you can bake with confidence, achieving consistently perfect results every time.
Professional Tips for Perfect Baking: Elevate Your Pear Upside Down Cake
- Use Cake Flour and Sift It for Superior Tenderness. While I don’t always insist on cake flour, this recipe is where it truly shines. Cake flour, with its lower protein content, develops less gluten, resulting in a significantly more tender and delicate crumb that almost melts on your tongue. Sifting the dry ingredients is equally crucial. It not only eliminates any lumps but also ensures a perfectly even distribution of leavening agents and spices throughout the batter. This meticulous preparation contributes directly to the cake’s light, airy texture and uniform rise, making a noticeable difference in the final product.
- Minimize Stirring While the Caramel is Cooking to Prevent Crystallization. The caramel topping, though simple to make, can be prone to crystallization if agitated too much. This occurs when sugar crystals on the side of the pan fall back into the boiling syrup, causing the entire batch to seize. For the best results, resist the urge to stir frequently. Allow the sugar to dissolve and caramelize gently. If, by chance, your caramel does crystallize slightly, don’t despair! Keep cooking it. It will likely melt down again with heat and will not significantly impact the taste or final appearance of the cake once flipped.
- Turn the Cake Out While Still Warm for a Clean Release. The brown sugar caramel at the bottom of the pan is a delicious, sticky substance. If left to cool completely in the pan, it will solidify and adhere firmly, making it difficult to release the cake without damaging the pear topping. The key is timing: immediately after removing the cake from the oven, run a thin butter knife or offset spatula around the edges to loosen it. Then, wait approximately 15 minutes. This allows the caramel to cool slightly and firm up just enough to hold the pears in place, but remain warm and pliable enough to release cleanly from the pan.
- Cut with a Serrated Knife for a Flawless Slice. This is a game-changer tip learned from years of serving this very cake in bustling Manhattan restaurants. Due to the varying shapes and textures of the pear pieces within the caramel, a straight-edged knife can tear or drag the fruit. A sharp serrated knife, however, glides smoothly through both the cake and the fruit, creating clean, elegant slices every time. This ensures a beautiful presentation for each serving, maintaining the cake’s integrity.
Key Ingredients for Success: Crafting the Perfect Pear Upside Down Cake
Every ingredient in this recipe plays a vital role in achieving its perfect balance of flavor and texture. Here’s a closer look at what you’ll need and why:
- Pears: The star of our show! You have the freedom to choose your favorite variety or even a delightful mixture. Anjou, Bosc, Bartlett pears, or Comice are all excellent choices for baking, as they tend to hold their shape well when cooked. Note that I typically use small to medium-sized pears to ensure they fit harmoniously with the cake batter in a standard 9-inch pan. Larger pears might overcrowd the pan, leading to uneven baking or difficulty flipping.
- Lemon Juice: A small but mighty addition! Lemon juice is essential for balancing the sweetness of the caramel, adding a touch of bright acidity that prevents the topping from becoming cloyingly sweet. It also helps to prevent the sliced pears from browning prematurely as you prepare them.
- Cake Flour: This is a non-negotiable for achieving that signature light, airy crumb. Cake flour has a significantly lower gluten content and a finer texture compared to all-purpose flour. These characteristics are crucial for a delicate cake that nearly melts in your mouth, much like in an angel food cake.
- Baking Powder & Baking Soda: This dynamic duo works in tandem to give our cake its ideal height and fluffy texture. Baking powder provides a steady, even lift, while baking soda reacts powerfully with the acidity of the buttermilk, contributing to a quick rise and a tender crumb. Using both ensures a perfectly balanced leavening action.
- Cinnamon: A classic warming spice that pairs beautifully with pears, adding a comforting and familiar aromatic note to both the caramel and the cake batter.
- Cloves: Offering a pungent, sweet, and slightly peppery flavor, cloves deepen the spice profile of the cake. While pre-ground cloves are convenient, the flavor from freshly grinding whole cloves is truly sensational. If grinding fresh, use a spice grinder and then sift to ensure a smooth texture in your batter.
- Cardamom: My ultimate obsession! Cardamom introduces a unique floral, citrusy, and slightly spicy note that is simply divine with pears. For the most vibrant flavor, I highly recommend purchasing cardamom seeds and grinding them in small batches as needed. This ensures maximum freshness and aromatic intensity. You’ll find this enchanting spice in many of my other recipes, including these delightful cardamom walnut snowballs, rich browned butter cardamom snickerdoodles, and easy ice box cookies.
- Kosher Salt: More than just a seasoning, Kosher salt is essential for enhancing all the other flavors in the cake and, crucially, tempering the overall sweetness, creating a more balanced and sophisticated taste experience.
- Unsalted Butter: This provides a smooth richness to the luscious caramel topping. In the cake batter, unsalted butter is creamed with sugar to incorporate air for a lighter texture and contributes fat, ensuring a beautifully tender and moist cake.
- Light Brown Sugar: Used in both the caramel and the cake, light brown sugar offers a distinct sweetness with subtle molasses undertones. Its inherent moisture content is key to keeping the cake incredibly soft and tender, adding a wonderful depth of flavor.
- Whole Eggs: Eggs provide structure and richness to the cake batter, acting as a binder and contributing to the cake’s overall moistness and golden hue.
- Pure Vanilla Extract: A staple in baking, vanilla extract deepens and rounds out all the other flavors, adding a comforting and aromatic warmth that beautifully complements the spices and pears.
- Buttermilk: A secret weapon for moist cakes! In recipes like this and my devil’s food cake, I prefer low-fat buttermilk. It provides just the right amount of fat to keep the cake tender and moist, along with sufficient liquid to hydrate the batter. Crucially, its acidity activates the baking soda, resulting in a perfectly tall, light, and airy cake.
Please refer to the detailed recipe card below for precise measurements and quantities for each ingredient.
Creative Variations to Try: Customize Your Pear Upside Down Cake
While this recipe is perfect as is, it also offers a fantastic canvas for creative adaptations. Feel free to experiment with these variations to suit your taste or what you have on hand:
- Buttermilk Alternatives: If you find yourself without buttermilk, avoid the common homemade substitute of milk and lemon juice, as it doesn’t replicate true buttermilk’s properties for baking. Instead, I recommend using ½ cup sour cream mixed with 2 tablespoons of water. This substitution will yield a cake that is ever so slightly denser than one made with buttermilk, but still wonderfully moist and flavorful. You can also use plain full-fat yogurt thinned with a little milk.
- Change the Cake Flavor: This is where you can truly make the cake your own!
- Citrus Zest: Add the zest of one orange or lemon to the cake batter for a brighter, more aromatic profile that beautifully complements the pears and spices.
- Adjust the Spices: While cardamom is a star here, you can easily adjust the spice blend. Increase the cinnamon, add a pinch of nutmeg or allspice, or introduce a touch of ginger for an extra kick. You could even incorporate pre-made blends like homemade apple pie spice or my delightful pumpkin spice recipe. For something unique, try a very light hand with speculoos spice mix – its complex notes are surprisingly good with pears.
- Double the Vanilla: For a richer, more pronounced vanilla flavor, feel free to increase the amount of vanilla extract to 3 teaspoons.
- Use Any Fruit on Top: The beauty of an upside down cake lies in its versatility with fruit. The key is to choose fruits that maintain their shape and texture during baking.
- Good Choices: Apples (especially firmer varieties like Honeycrisp or Granny Smith), peaches, plums, pineapple rings, or even firm berries like cranberries or sturdy cherries. Consider red wine poached pears, as seen in my Hazelnut Pear Tart, for an exceptionally elegant and flavorful twist.
- Fruits to Avoid: Overly soft fruits like very ripe mangoes or bananas will bake into a mushy layer, detracting from the visual appeal and texture.
- Preparation: Always slice fruits uniformly to ensure even cooking. For stone fruits, peel and pit them.
How to Make Pear Upside Down Cake: Step-by-Step Guide for a Flawless Dessert
Creating this stunning pear upside down cake is a rewarding experience. Follow these detailed instructions for a perfect result. Further specific measurements can be found in the recipe card below!
Prepare Pears: The Foundation of Your Beautiful Topping
Step 1: Begin by preparing your pears. Carefully peel each pear, then slice them into quarters lengthwise. With a small spoon or corer, scoop out the core. Now, slice each quarter crossways into approximately ¼-inch thick pieces. This uniform thickness is ideal for creating an elegant fanned arrangement. Set these prepared pear slices aside while you work on the caramel and pan preparation.
Make the Topping: Crafting the Golden Caramel Base
Step 2: Prepare your baking pan. Generously spray a 9-inch round cake pan with cooking spray, ensuring full coverage. Crucially, line the bottom of the pan with a circle of parchment paper. This parchment barrier is vital for a clean release and will save you from potential heartbreak later! Once lined, set the pan aside. Preheat your oven to 325°F (160°C) if using a convection oven (with a fan) or 350°F (175°C) if using a conventional oven (no fan).
Chef’s Note: Lining the cake pan with parchment paper is an integral step that you should never skip! Neglecting this can lead to the delicious caramel and pear topping sticking stubbornly to the bottom of the pan, making it impossible to invert cleanly.
Step 3: Now, let’s create the rich caramel topping, which will form the first layer in your prepared pan. In a small, heavy-bottomed saucepan, melt the unsalted butter over medium heat. Once melted, add the lemon juice, cinnamon, and light brown sugar. Stir gently to combine the ingredients. Continue to cook, stirring only occasionally to prevent crystallization, until the mixture comes to a full boil. Allow it to boil for 1-2 minutes, or until the sugar has fully dissolved and the mixture thickens slightly, transforming into a beautiful medium amber color – reminiscent of autumn leaves. Carefully pour this warm caramel into your prepared cake pan and use an offset spatula to spread it evenly across the bottom.
Step 4: Once the caramel is in the pan, artfully arrange your sliced pear pieces on top. You can create an elaborate fan design, overlapping slices in concentric circles, or simply scatter them randomly for a rustic charm. Rest assured, the cake will be equally delicious regardless of your arrangement!
Chef’s Note: Allowing the caramel to set slightly before arranging your pears is a helpful trick. A slightly cooled (but still pliable) caramel will act as a gentle adhesive, helping the pear slices stay in their desired spots throughout the baking process.
Make the Cake: Preparing the Moist, Spiced Batter
Step 5: In a medium-sized bowl, begin by sifting together all your dry ingredients: cake flour, baking powder, baking soda, kosher salt, cinnamon, cloves, and cardamom. Sifting ensures all ingredients are well combined and lump-free, contributing to a smooth batter and tender cake. Set this mixture aside.
Step 6: In the bowl of a stand mixer fitted with the paddle attachment (or using a hand mixer), cream together the softened unsalted butter and light brown sugar on medium speed. Beat until the mixture is light, fluffy, and pale in color, typically 3-5 minutes. This creaming process incorporates air, essential for a light cake. Next, add the eggs one at a time, beating well after each addition and scraping down the sides of the bowl with a spatula to ensure everything is fully incorporated. Add the pure vanilla extract with the final egg, mixing just until combined.
Step 7: Reduce the mixer speed to low. Alternately add the sifted flour mixture and the buttermilk to the wet ingredients. Start and end with the flour mixture (e.g., ⅓ flour, ½ buttermilk, ⅓ flour, ½ buttermilk, ⅓ flour). Mix only until just combined. Overmixing can develop too much gluten, resulting in a tough cake.
Chef’s Note: I prefer to complete the last few folds of the batter by hand with a spatula. This gentle technique prevents overmixing and ensures a perfectly tender cake. If you have any leftover pear slices that didn’t fit into your artful arrangement, feel free to gently fold them into the cake batter at this stage!
Step 8: Carefully pour the prepared cake batter over the arranged pears in the pan. Using an offset spatula, gently spread the batter evenly across the pears, making sure not to disturb the pear layer underneath. Ensure the batter is level for even baking.
Step 9: Place the cake pan in your preheated oven and bake for 35-40 minutes. The cake is done when it is beautifully puffed, golden brown, and a cake tester or toothpick inserted into the center comes out with only a few moist crumbs clinging to it (not wet batter). This indicates it’s cooked through but still moist.
Step 10: Once baked, immediately remove the cake from the oven. While still warm, run a thin butter knife or offset spatula around the inside edges of the pan to loosen the cake. Let the cake cool in the pan for exactly 15 minutes. This waiting period is critical. After 15 minutes, place a rimmed baking sheet or a wire rack (with a tray underneath to catch drips) over the top of the cake pan, then carefully and confidently flip the cake over. Gently lift the pan away. The warm caramel will continue to drip, so be sure your catching tray is in place!
Critical Timing for Flipping: Waiting too long to invert your cake will cause the caramel to cool and set, making it stubbornly stick to the pan and potentially ruining your beautiful pear topping. However, flipping it too soon means the caramel sauce will be too hot and runny, resulting in a sticky pool on your counter rather than clinging to your cake! The 15-minute window is the sweet spot. If, by chance, some caramel does escape, don’t worry! Simply pour it into a small jar or bowl and drizzle it over individual slices when serving. Problem solved!
Chef Lindsey’s Recipe Tip: The Case for Peeled Pears
For the best overall flavor and most delightful texture in your pear upside down cake, I strongly recommend taking the extra step to remove the pear skins before baking. While you can certainly skip this step if you’re short on time, pear skins, when baked, can sometimes become slightly tough or develop an off-putting texture that not everyone enjoys. Peeling ensures a uniformly soft and tender pear layer that blends seamlessly with the caramel and cake, enhancing the luxuriousness of every bite. It’s a small effort that yields a significant improvement in the gourmet experience of this dessert.
Frequently Asked Questions About Pear Upside Down Cake
How do you store a pear upside down cake?
For optimal flavor and texture, I recommend baking this cake immediately after mixing the batter due to the quantity of baking soda, which begins reacting quickly. Once baked, allow the cake to cool completely on a wire rack. Then, wrap it tightly in plastic wrap or aluminum foil. It can be stored at room temperature for up to 3 days, remaining beautifully moist. If you need to keep it longer, store it in the refrigerator for up to a week. For extended storage, the cake freezes exceptionally well for several months. To freeze, wrap slices or the whole cake thoroughly in plastic wrap, then again in foil, and place in an airtight container. Thaw at room temperature before serving.
When should you flip an upside down cake?
Timing is critical for a successful flip! I advise allowing the cake to cool in its pan for precisely 15 minutes after removing it from the oven. This crucial window allows the caramel to firm up just enough to adhere to the pears and the cake, preventing a sticky mess or the topping from separating. Before flipping, ensure you’ve baked the cake in a pan lined with parchment paper – a step that cannot be stressed enough. Run a thin butter knife or offset spatula around the edges of the cake to loosen it from the pan. Then, confidently place a serving platter or wire rack on top of the cake pan and invert it with a swift motion. Gently lift the pan away. If any fruits have shifted, you can gently rearrange them. Any excess caramel that drips can be collected and poured over the cake as a natural “cake soak” or extra topping. Allow it to cool completely for the caramel to fully set before slicing, though a warm slice is also heavenly.
How to serve a pear upside down cake?
This pear upside down cake is delightful on its own, but its warming spices and rich pear flavor truly sing when paired with complementary accompaniments.
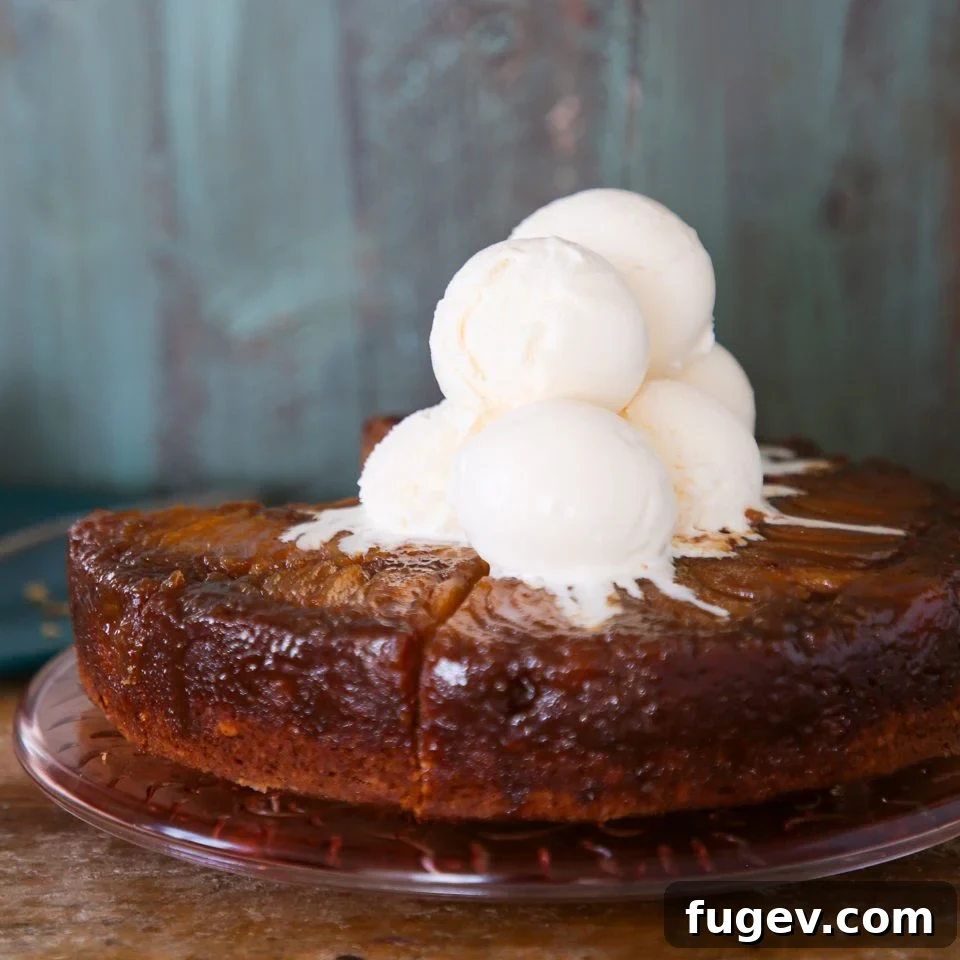
- Creamy Delights: A generous scoop of rich vanilla bean ice cream, as shown in the photos, is a classic pairing that provides a lovely contrast in temperature and texture. Alternatively, a luscious spoonful of homemade whipped cream or a delicate vanilla bean crème anglaise (custard sauce) would be exquisite.
- Caramel Accents: Lean into the caramel notes by serving it with a drizzle of my irresistible butterscotch sauce or a decadent salted caramel sauce.
- Fruit Forward: For an extra fruity touch, a dollop of homemade apple butter can be a surprisingly delicious accompaniment, adding another layer of spiced fruit flavor.
- Crunchy Textures: A little crunch always elevates a dessert! Sprinkle on some toasted pecans, walnuts, or almonds just before serving. For an even more decadent option, a spoonful of my brown sugar streusel topping would add delightful texture and flavor.
Serve it slightly warm to best enjoy the melty caramel and tender fruit.
If you tried this recipe and loved it, please leave a 🌟 star rating and let me know how it goes in the comments below. I love hearing from you; your comments make my day!
Pear Upside Down Cake Recipe
Comment
Print Recipe
Ingredients
- 3 pears, divided
For Caramel:
- 1 cup light brown sugar, not packed
- ½ teaspoon cinnamon
- 2 ½ tablespoons unsalted butter
- 1 tablespoon lemon juice
For the Batter:
- 2 cups cake flour
- 2 ¼ teaspoons baking powder
- ½ teaspoon baking soda
- 2 teaspoons cinnamon
- ¾ teaspoon cloves, ground
- ¾ teaspoon cardamom, ground
- 1 teaspoon kosher salt
- 9 ½ tablespoons unsalted butter, softened
- 1 ¼ cups light brown sugar, packed
- 2 large eggs
- 1 ½ teaspoons pure vanilla extract
- 1 cup buttermilk
Instructions
Prepare Pears:
- Prepare the pears by peeling them and slicing them into quarters lengthwise. Remove the core and then slice crossways about ¼ inch thick to facilitate fanning. Set aside.
Make the Topping:
- Spray a 9-inch round pan generously with cooking spray, then line the bottom with parchment paper. Set aside. Preheat your oven to 325°F convection (with fan) or 350°F conventional (no fan).
- To make the caramel (your first layer), melt butter in a small saucepan. Add lemon juice, cinnamon, and brown sugar. Cook until boiling and the sugar has fully dissolved and caramelized to a medium amber color (like fall leaves). Pour into the prepared pan and spread evenly.
- Artfully arrange pear slices on top of the caramel. You can create a beautiful design or simply scatter them; the cake will be delicious either way.
Make the Cake:
- In a medium bowl, sift together cake flour, baking powder, baking soda, salt, cinnamon, cloves, and cardamom. Set aside.
- In the bowl of a stand mixer, cream butter and light brown sugar until light and fluffy. Beat in the eggs one at a time, scraping down the bowl between additions. Add the vanilla extract with the last egg.
- Reduce the mixer speed to low and alternately add the flour mixture with the buttermilk, beginning and ending with the flour mixture. Mix until just combined.
- Pour the batter into the prepared pan on top of the pears, spreading it out evenly with an offset spatula.
- Bake in the preheated oven for 35-40 minutes, or until the cake is puffed, golden brown, and a cake tester or toothpick inserted into the center comes out with a few moist crumbs clinging to it.
- Immediately upon removing from the oven, run a butter knife or offset spatula around the edges of the cake to loosen it from the pan. After exactly 15 minutes, carefully flip the cake out onto a rimmed baking sheet or a wire rack with a tray underneath. The caramel may continue to drip, so be prepared to catch it!
Video
Notes
Makes: One 9 x 9 inch round cake.
Presentation: For clean slices through the fruit and cake, always use a sharp serrated knife.
Technique: To prevent overmixing, I recommend finishing the last few folds of the batter by hand with a spatula. Don’t hesitate to fold any spare pear pieces into the batter!
Storage: Cool completely, then wrap tightly. Store at room temperature for up to 3 days, refrigerated for a week, or frozen for several months.
Nutrition
Calories: 366kcal | Carbohydrates: 60g | Protein: 4g | Fat: 13g | Saturated Fat: 8g | Polyunsaturated Fat: 1g | Monounsaturated Fat: 3g | Trans Fat: 1g | Cholesterol: 62mg | Sodium: 461mg | Potassium: 171mg | Fiber: 2g | Sugar: 43g | Vitamin A: 421IU | Vitamin C: 3mg | Calcium: 118mg | Iron: 1mg
Before You Go: Explore More Chef-Tested Delights
We trust you thoroughly enjoyed this professionally chef-tested recipe for our Pear Upside Down Cake. It’s a true testament to the joy of baking. If you’re eager to expand your baking repertoire, I invite you to explore our collection of other delicious, chef-developed cake recipes. You might discover your next favorite, like my highly acclaimed best carrot cake recipe. And for the perfect accompaniment to any cake, don’t forget to browse our array of delightful ice cream recipes – because every great cake deserves an equally great scoop! Happy baking!