
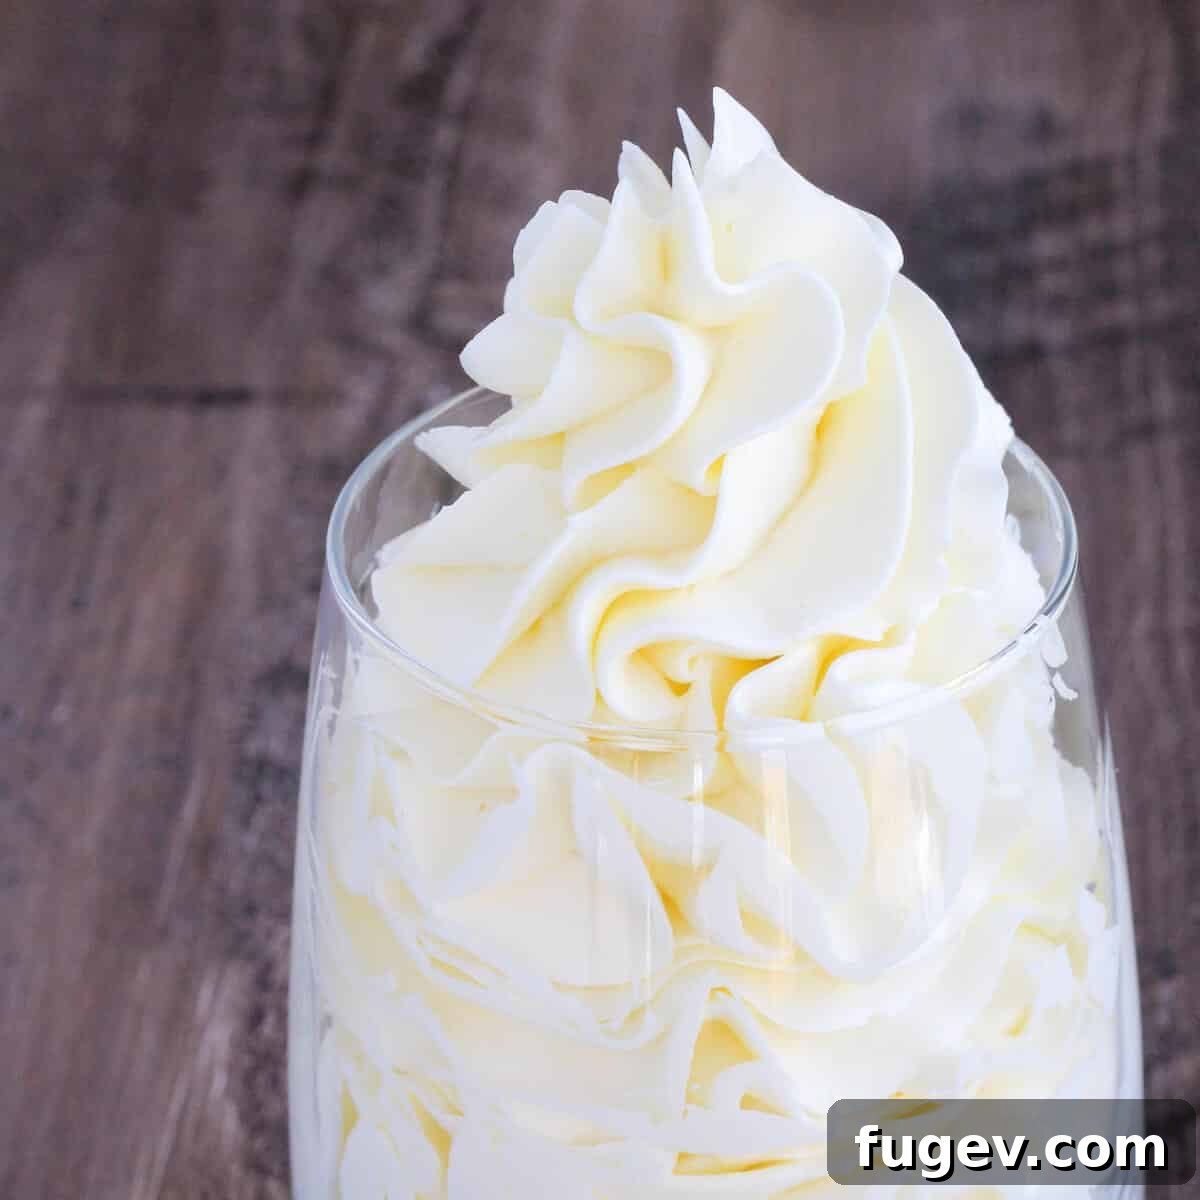
Mastering Italian Meringue Buttercream: Your Ultimate Guide to Silky Smooth Frosting
Discover the secrets to crafting the perfect Italian Meringue Buttercream (IMB) – a truly luxurious frosting renowned for its incredible silkiness, airy texture, and professional finish. While often perceived as complex, IMB is surprisingly achievable with the right techniques and a clear understanding of its unique characteristics. This comprehensive guide will equip you with all the expert tips, step-by-step instructions, and troubleshooting advice to master this elegant buttercream, ensuring your desserts look and taste spectacular every time.
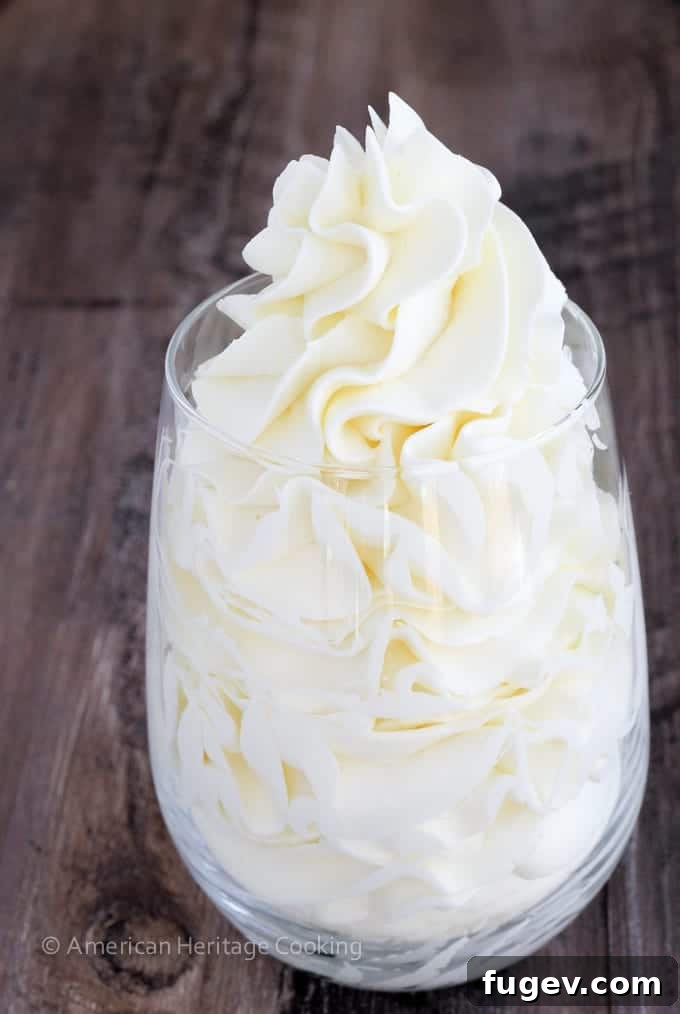
Italian Meringue Buttercream stands out for its delicate balance of rich creaminess and light airiness. Unlike many other frostings, it’s not overly sweet, making it a favorite among professional pastry chefs and home bakers alike. Its magical stability also makes it incredibly forgiving and suitable for intricate cake decorating, capable of being frozen for months without losing its quality. Even if you think you’ve made a mistake, take heart – it’s probably totally fixable! We’ll dive into all the troubleshooting advice below.
This versatile buttercream is perfect for creating smooth, impeccably frosted layer cakes, such as the devil’s food cake used in my layer cake assembly tutorial, or for piping beautiful, intricate designs on cupcakes like these delightful lemon coconut cupcakes.
Table of Contents
- Why Choose Italian Meringue Buttercream?
- Understanding Italian Meringue Buttercream
- IMB: A Class Apart from Other Buttercreams
- Professional Secrets for Flawless Italian Meringue Buttercream
- Essential Ingredients for Italian Meringue Buttercream
- Creative Flavoring Options for Italian Meringue Buttercream
- Coloring Italian Meringue Buttercream
- Step-by-Step Guide: Crafting Your Perfect Italian Meringue Buttercream
- Chef Lindsey’s Master Tip: Embrace Control!
- Revitalizing Stored Italian Meringue Buttercream
- Troubleshooting Your Italian Meringue Buttercream: Common Issues & Solutions
- Storage Guidelines for Italian Meringue Buttercream
- Italian Meringue Buttercream Recipe
- Explore More Professional Baking Tips and Recipes
Why Choose Italian Meringue Buttercream?
Italian Meringue Buttercream is a favorite among professional pastry chefs for many compelling reasons:
- Elegantly Less Sweet: If you find traditional American buttercreams overly saccharine, IMB is your ideal choice. Its balanced sweetness allows the flavors of your cake or added ingredients to truly shine through, offering a refined and sophisticated taste experience that delights the palate without being cloying.
- A Masterpiece Canvas: Consider this recipe your pristine white canvas, ready for your culinary artistry. Its neutral, clean flavor profile makes it incredibly versatile. You can effortlessly transform it by adding luscious melted chocolate, rich salted caramel sauce, tangy lemon curd, creamy Nutella, or virtually any flavor extract or paste you can imagine, creating endless possibilities for your desserts.
- Unmatched Stability for Any Occasion: Italian Meringue Buttercream is celebrated for being the most stable among all meringue-based buttercreams. It offers superior resistance to heat compared to its Swiss meringue counterpart, though it will still soften above 70°F (21°C). This remarkable stability makes it the perfect choice for elaborate cake decorations, intricate piping, and ensuring your creations hold up beautifully, even in slightly warmer environments.
- Trusted Professional Expertise: This isn’t just a recipe; it’s a culmination of extensive professional experience. As an Executive Pastry Chef, I have personally crafted this buttercream close to a thousand times for high-demand custom cake orders. This recipe has been rigorously tested and perfected, ensuring its reliability and flawless performance every single batch. You can confidently trust that it will deliver consistent, professional-grade results in your kitchen.
Understanding Italian Meringue Buttercream
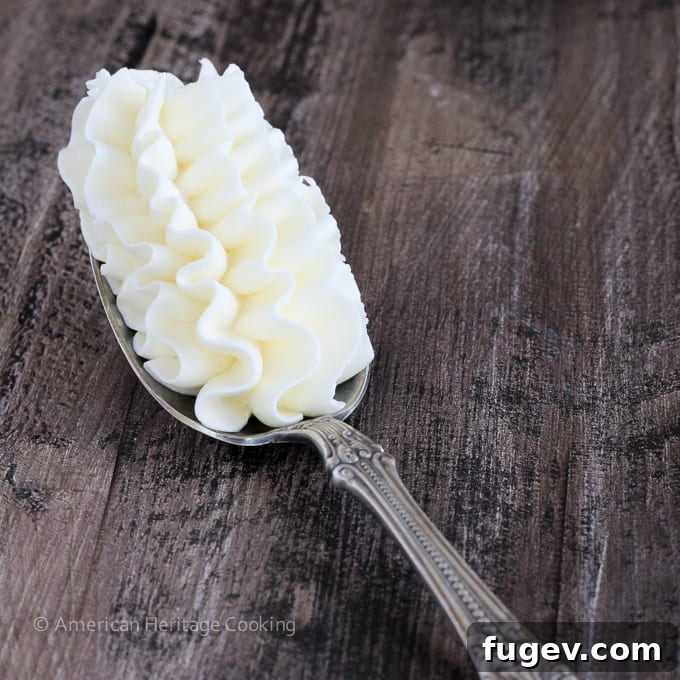
Italian Meringue Buttercream (IMB) might seem complicated at first, presenting itself as the most sophisticated of its buttercream peers. However, understanding its elegant simplicity demystifies the process. Simply put, it is made by first whipping egg whites to stiff, glossy peaks. Simultaneously, a hot sugar syrup is cooked to the soft-ball stage (typically 235°F or 113°C). This molten sugar syrup is then slowly and carefully poured into the whipping egg whites, effectively cooking them and creating a stable, perfectly tempered meringue. Finally, softened butter is gradually added to this meringue base, transforming it into the iconic light, creamy, and remarkably stable buttercream that is Italian Meringue Buttercream.
IMB: A Class Apart from Other Buttercreams
Italian Meringue Buttercream is uniquely distinguished from other popular buttercream types, primarily due to its distinct meringue base. As its name suggests, it leverages the stability and lightness of an Italian meringue. This method results in a buttercream with a noticeably lighter texture and a more refined taste compared to the richer Swiss Meringue Buttercream and denser German buttercream varieties. Unlike French Buttercream, which derives its characteristic rich flavor from a base of pure butter and egg yolks, IMB offers a more balanced profile without tasting predominantly of butter. Crucially, it stands out for being significantly less sweet than the often saccharine American Buttercream, making it a preferred choice for those seeking a more sophisticated and subtly sweet frosting.
Professional Secrets for Flawless Italian Meringue Buttercream
Achieving perfect Italian Meringue Buttercream is about understanding key techniques and having confidence in the process. Here are my professional tips for guaranteed success:
- Master Your Pace, Not the Clock: There’s no strict rule demanding you whip egg whites on high while cooking your sugar. If your egg whites reach stiff peaks before your sugar syrup is stubbornly stuck at 220˚F (a scenario I’ve encountered countless times), simply reduce the mixer speed to low. The critical instruction is to keep that mixer running; never stop it entirely, just slow it down. This prevents over-whipping and allows your sugar syrup to catch up perfectly.
- Pour Your Sugar on HIGH Speed: Do you want scrambled eggs on your cupcakes? I didn’t think so! When it’s time to add the hot sugar syrup, ensure your mixer is running on HIGH. This rapid whipping disperses the hot syrup quickly and evenly throughout the egg whites, preventing them from cooking into clumps and ensuring a smooth, stable meringue base.
- Precision Pouring Down the Bowl’s Side: When adding the hot sugar syrup, pour it slowly and steadily down the inside edge of the mixing bowl. Crucially, avoid letting the stream hit the whisk attachment. Hot syrup splatter is unpleasant and dangerous (235˚F syrup in the face is definitely not fun!). You’ll know you’ve done it right if there’s one small, cooled lava-like trail of solidified sugar down one side of the bowl, indicating a clean pour and minimal waste.
- Achieve the Exact Sugar Temperature: This might sound obvious, but it bears repeating: cook your sugar syrup precisely to 235˚F (113˚C). While “soft-ball syrup” technically refers to a range, aiming for this specific temperature is ideal. By the time you transfer the syrup from the stove to the mixer, if it inches up a few degrees, no harm is done. You’ll recognize overcooked sugar if you find a hard, crystallized pool at the bottom of your mixer bowl – a sign it reached the hard-ball or crack stage.
- Optimal Butter Temperature: When you begin adding your butter, it should be soft and pliable, but still slightly cool to the touch – not melted, and certainly not cold from the refrigerator. If it feels a bit too firm, add it one small piece at a time, gently squeezing each piece to soften it further before tossing it into the mixer. It’s surprisingly satisfying, and a little bit messy!
- If Your Buttercream Gets Soupy: Don’t panic! If your buttercream appears soupy after adding butter, it usually means the meringue was too warm. Switch from the paddle attachment back to the whisk and beat it on high. If it still doesn’t firm up, place the bowl (with the buttercream and whisk attachment) in the refrigerator for 15-30 minutes, then re-whip until emulsified and fluffy. All is not lost; trust me, it’s fixable!
- Rescuing Curdled Buttercream: If your buttercream “breaks” and looks curdled when you start adding the butter, take heart – it will come together! This often occurs if the butter is too cold. Continue adding the butter in small, squeezed pieces to encourage emulsification. For a quicker recovery, you can gently warm the outside of the mixing bowl with a kitchen torch (keeping the flame constantly moving!) while the mixer is on high. The goal is to warm the bowl and encourage the butter to integrate, not to melt the buttercream.
Essential Ingredients for Italian Meringue Buttercream
Crafting perfect Italian Meringue Buttercream starts with selecting quality ingredients and understanding their specific roles. Each component contributes significantly to the desired texture, flavor, and stability of your final frosting:
- Granulated Sugar: Beyond simply providing sweetness, the granulated sugar in the meringue is crucial for its structure and stability. A precise amount of sugar helps create a robust meringue that can hold its shape. Generally, more sugar yields a more stable, though slightly less voluminous, meringue.
- Water: Unlike when making a dry caramel, the exact amount of water in an Italian meringue recipe is critical. In a caramel, all water evaporates before caramelization begins, but this is not the case here. Carefully measuring your water ensures the sugar syrup reaches the correct consistency and temperature for optimal results, directly impacting the final stability of your buttercream.
- Egg Whites: For the most reliable and stable meringue, it is highly recommended to use freshly separated egg whites. Liquid egg whites (from a carton) often contain stabilizers and foaming agents that can make them less stable and more prone to curdling when the hot sugar syrup is added. Don’t let those egg yolks go to waste – use them to make a rich lemon curd, which you can then fold into your finished buttercream for a fantastic lemon twist!
- Kosher Salt (Optional): While optional, a pinch of kosher salt serves a dual purpose. It subtly balances the sweetness of the buttercream, preventing it from tasting flat, and also contributes to the overall stability of the meringue, helping the egg whites whip more effectively.
- Cream of Tartar (Optional): Cream of tartar is another excellent, albeit optional, stabilizer for meringue. Adding a pinch helps the egg whites achieve and maintain stiff peaks, giving you an extra layer of assurance for a successful meringue. Why not stack the deck in your favor for perfect results?
- Unsalted Butter: The quality of your butter will significantly impact the flavor and texture of your Italian Meringue Buttercream. Always opt for a good quality unsalted butter for the most stable and delicious buttercream. Using salted butter will result in a noticeably salty frosting, which is generally undesirable for desserts.
Creative Flavoring Options for Italian Meringue Buttercream
One of the true joys of Italian Meringue Buttercream is its versatility. Its neutral, less-sweet base makes it a perfect canvas for a myriad of flavors, allowing you to customize it to perfectly complement any dessert:
- Lemon: Achieve a vibrant and tangy lemon flavor using high-quality extracts (I highly recommend Nielson Massey lemon extract for its authentic taste) or concentrated lemon paste (again, Nielson Massey lemon paste is excellent). You can also infuse the sugar with fresh lemon zest for the meringue, or for a rich, tangy experience, fold in homemade lemon curd.
- Strawberry: While strawberry puree can sometimes destabilize the buttercream due to its high water content, delicious strawberry flavor can be achieved with alternatives. Incorporate a good quality strawberry jam, such as my strawberry jam without pectin, or use concentrated dehydrated strawberry powder for an intense, natural burst of fruitiness that won’t compromise texture.
- Other Berries: For all other berries (e.g., raspberry, blueberry, blackberry), I generally prefer using a thick, well-reduced fruit jam or a high-quality fruit powder. This method provides concentrated flavor without introducing excess moisture that could destabilize the buttercream.
- Peanut Butter: For a delightful nutty twist, incorporate approximately ½ cup of smooth peanut butter into the finished buttercream. If you desire a textural contrast, consider garnishing your finished dessert with crushed salted peanuts rather than adding chunky peanut butter directly into the frosting.
- Nutella: Transform your buttercream into a decadent chocolate-hazelnut dream by folding in about ½ cup of Nutella or another high-quality chocolate hazelnut spread. Mix until thoroughly combined and smooth.
- Chocolate: For a rich chocolate buttercream, melt 200g (approximately 7 ounces) of your preferred chocolate (milk, semi-sweet, or unsweetened, depending on your taste). Allow the melted chocolate to cool slightly but remain liquid, then gently fold it into the finished buttercream until evenly distributed.
- Vanilla: For a classic, aromatic vanilla flavor, enhance your buttercream with up to 2 tablespoons of premium vanilla extract. For those beautiful specks and an even deeper flavor, use 1 tablespoon of vanilla bean paste, or the seeds from 2 split and scraped vanilla bean pods. Don’t discard the used pods – they can be saved to infuse milk for fragrant vanilla bean anglaise or vanilla bean pastry cream!
Coloring Italian Meringue Buttercream
Achieving vibrant and appealing colors in your Italian Meringue Buttercream is straightforward. The best option for coloring is to use high-quality gel food colorings, as they are highly concentrated and won’t introduce excess liquid that could thin out your buttercream. For those preferring a more natural approach, you can experiment with natural colorings like dehydrated strawberry powder (which also subtly enhances flavor) or beet powder to create beautiful, earthy hues.
Step-by-Step Guide: Crafting Your Perfect Italian Meringue Buttercream
Phase 1: Preparation – The Foundation for Success
The success of your Italian Meringue Buttercream hinges on meticulous preparation, a concept known in professional kitchens as “mise en place” (everything in its place). This recipe, while straightforward, demands seamless execution, so ensure every step is carefully followed.
Step 1: Gather and Measure All Ingredients. Before you even start, ensure all your ingredients are accurately measured and readily accessible. This critical step prevents frantic searching mid-process and allows for smooth, uninterrupted transitions between steps. Having everything ready means you can focus purely on the technique.
Step 2: Prepare Your Equipment. Cleanliness is paramount. Ensure your stand mixer bowl and whisk attachment are impeccably clean and completely free of any grease or fat residue. Even a tiny trace of oil can prevent your egg whites from whipping to stiff peaks, leading to a runny and unstable meringue. Similarly, your saucepan for the sugar syrup must be spotless to avoid any dirty residue that can cause the sugar to crystallize.
Phase 2: Mastering the Italian Meringue
The heart of this buttercream is the Italian meringue, a cooked meringue known for its exceptional stability and glossy finish.
Step 3: Begin the Sugar Syrup. In a medium saucepan, combine half of your granulated sugar with the water. Heat this mixture over medium heat, stirring gently just until the sugar completely dissolves. As the pan heats up and the syrup begins to simmer, use a clean pastry brush dipped in water to carefully brush down the sides of the pot. This crucial step dissolves any sugar crystals that may have adhered to the edges, preventing them from seeding and causing the entire syrup to crystallize. (A rolled-up paper towel or even a clean finger can work in a pinch if you don’t have a brush handy).
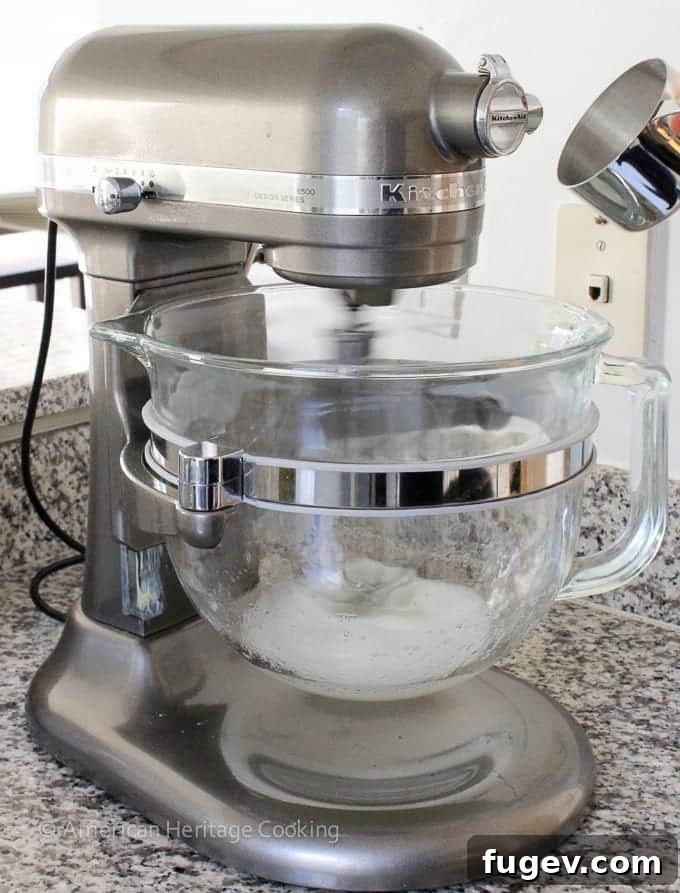
Step 4: Start Whipping Egg Whites. The moment your sugar syrup starts to bubble actively, begin whipping your egg whites in the bowl of a stand mixer fitted with the whisk attachment. You can add a pinch of kosher salt and/or cream of tartar at this stage for added stability if you wish. Once your egg whites begin to look frothy and gain some volume, slowly begin adding your remaining reserved sugar, continuing to whip constantly on medium-high speed.
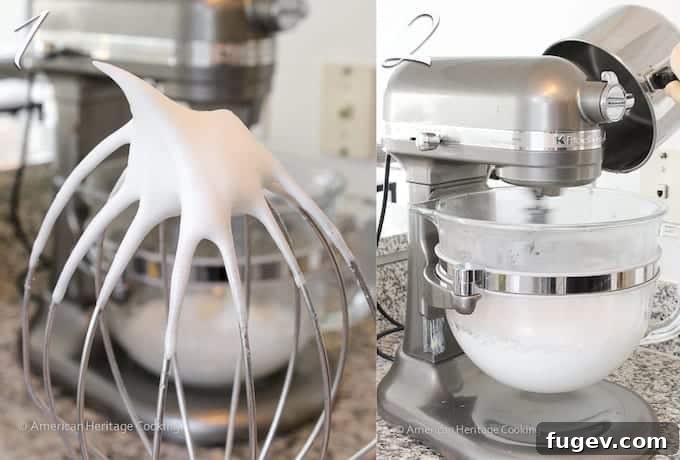
Step 5: Synchronize Meringue and Syrup. Continue whipping your egg whites until they form firm, glossy stiff peaks (as exemplified in photo 1 above). The ideal scenario is for your meringue to reach this stage simultaneously as your sugar syrup reaches precisely 235°F (113°C) – the soft-ball stage. This synchronization is key to a perfect meringue.
Expert Tip for Timing: If your egg whites are whipping too quickly and reach stiff peaks before your sugar syrup is ready, simply reduce the mixer speed to medium or even low. Conversely, you can adjust the heat under the sugar syrup to make it cook faster or slower. Just be aware that turning the heat on the sugar syrup too low for an extended period can cause it to crystallize. It’s frustrating, but with careful adjustments, you can do this!
Step 6: Verify Sugar Syrup Temperature. To ensure your syrup is at the perfect 235°F (113°C), you can either use a reliable candy thermometer or employ the old-fashioned “cold water test,” which I often use. Take a tiny bit of the hot syrup on a spoon and carefully dip it into a glass of ice water. Reach into the water and gently gather the sugar. If it dissolves, it’s not close to ready. If it forms a small, soft, and malleable ball that you can roll between your fingers, it’s perfectly ready! (I don’t have a photo of this precise moment because if I had paused to snap one, my sugar would have inevitably overcooked!)
Step 7: Incorporate Hot Sugar Syrup. Immediately turn your mixer up to HIGH speed and SLOWLY pour the hot sugar syrup in a steady stream down the inside side of the bowl (as hinted at in photo 2 above). Be very careful not to let the stream hit the whisk attachment, as this can cause dangerous splatters and lead to hard sugar clumps. Ideally, you want to pour it in one continuous, solid stream along the edge, because the syrup will solidify where it hits the bowl. If you pour it in multiple places, you risk losing valuable sugar by forming multiple clumps.
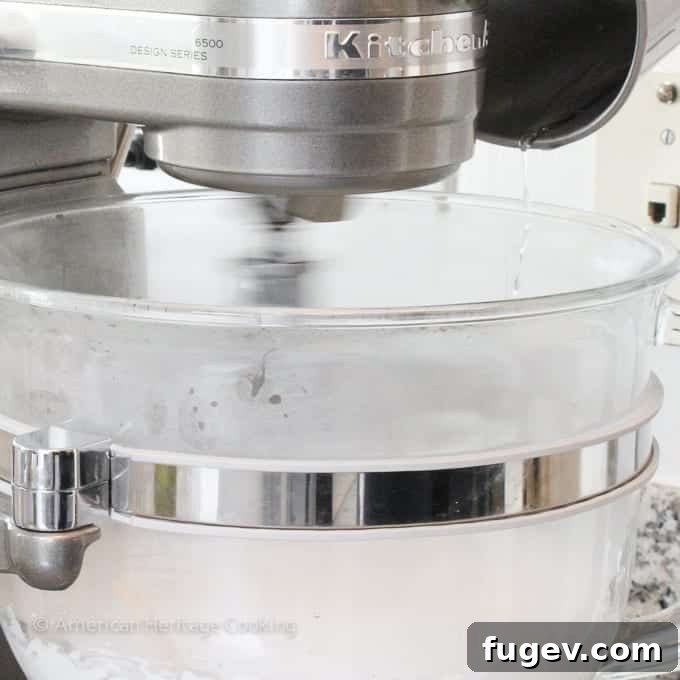
The Art of the Perfect Pour: If you look closely at the above photo, you can just make out where my sugar hit the side of the bowl. One little stream, no excess sugar lost. Go ahead, take a closer look… This is what perfection looks like. 😉
Phase 3: Finishing the Buttercream – The Transformation
Now that your meringue is perfectly crafted and stable, it’s time for the magical transformation into luxurious buttercream.
Step 8: Cool the Meringue Appropriately. Continue whipping the Italian meringue on high speed until it forms stiff, glossy peaks, similar to the first photo below. However, what is even more important than the stiffness of the meringue at this stage is its temperature. Before you begin adding the butter, the bottom of the mixing bowl should feel only barely warm to the touch. This cooling is crucial for a stable emulsion.
Patience is Key for Cooling: There is so much sugar in this meringue that it is highly stable and will not easily over-whip before it cools appropriately. Even though my meringue had reached stiff peaks in photo 1, I still needed to whip it for another few minutes to ensure it had cooled down sufficiently. An overly warm meringue will melt the butter, leading to a soupy buttercream.
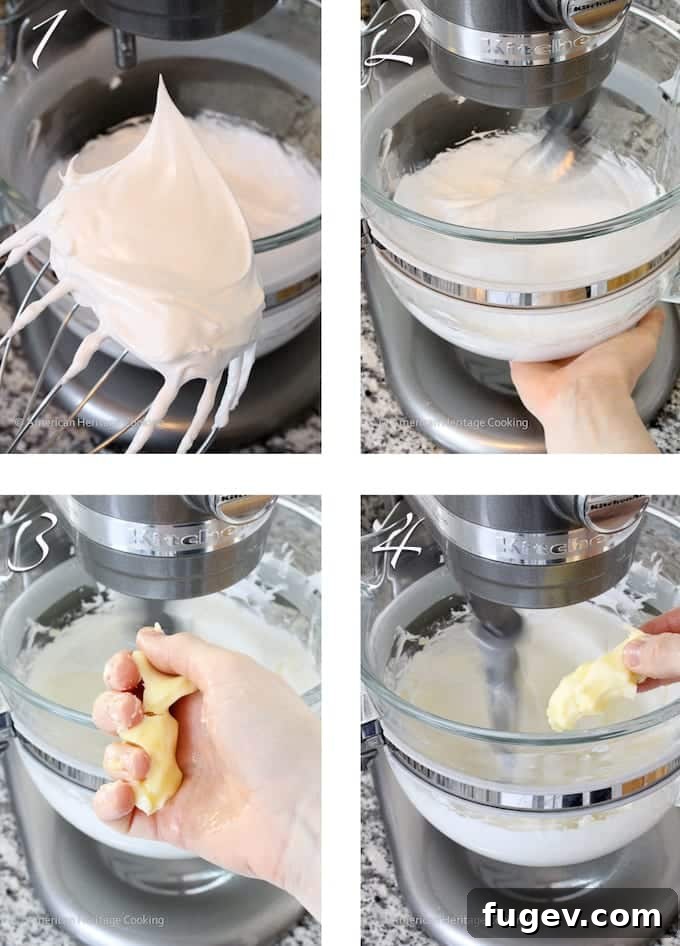
Step 9: Incorporate the Butter. When the mixing bowl feels just slightly warm to your touch, switch from the whisk attachment to the paddle attachment. Begin adding your softened unsalted butter, one piece at a time (as shown in picture 3). I always take my butter out of the fridge when I first start measuring my ingredients, allowing it sufficient time to come to the correct pliable temperature. Before adding each piece, you can gently squeeze the butter. This helps to further warm it slightly and ensures it’s at the perfect cool but not cold temperature. While not strictly necessary once your comfort level grows, it’s a great habit for beginners!
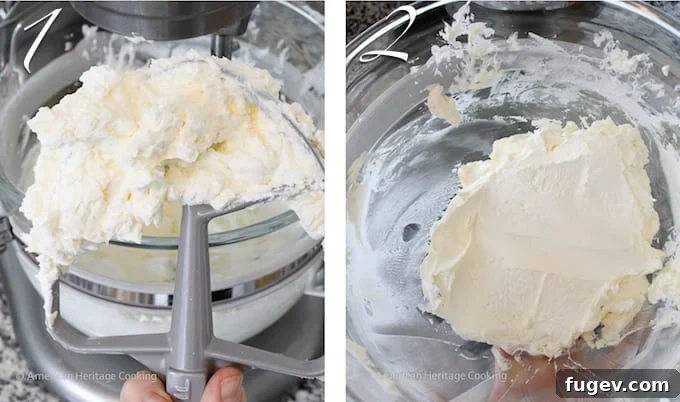
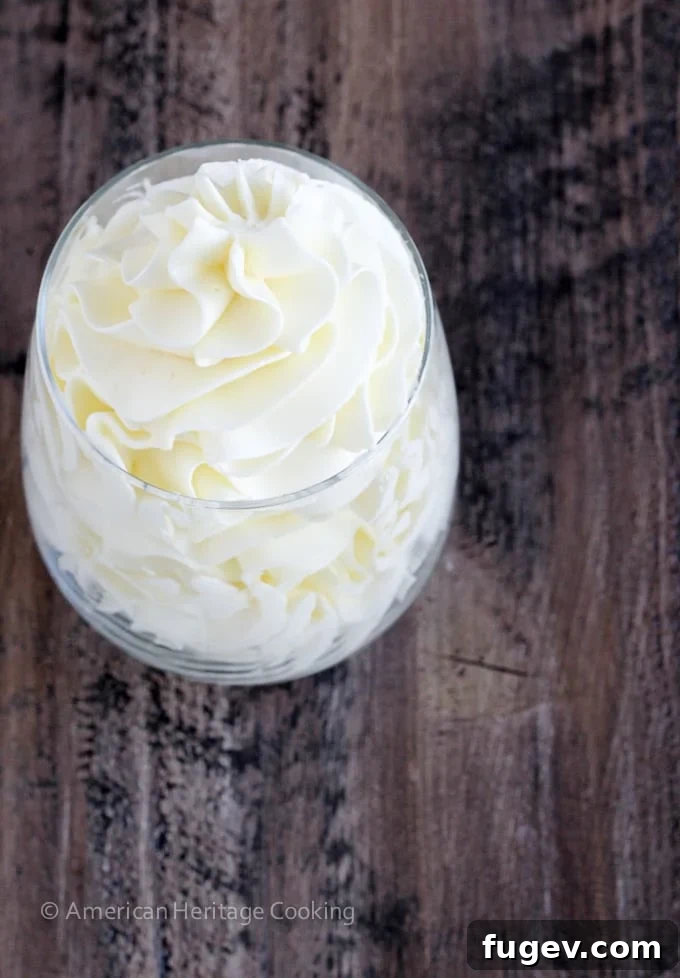
Step 10: Achieve Creamy Smoothness. Continue to beat the butter into the meringue on medium-high speed until the buttercream is completely smooth and homogeneous, with no remaining visible pieces of butter. The buttercream in the first photo above is still a bit lumpy – not there yet! Photo 2, however, illustrates the desired smooth and creamy consistency. At this glorious stage, I switch back to the whisk attachment, add any desired flavorings, and beat it for another minute or two until it becomes beautifully light, airy, and fluffy. Your luxurious Italian Meringue Buttercream is now ready to frost!
Step 11: Add Your Favorite Flavorings. This is where your creativity comes alive! Incorporate flavorings such as extracts (vanilla, almond, etc.), tangy lemon curd, rich salted caramel sauce, cooled melted chocolate, vibrant fruit jams, or savory nut pastes. Mix until well combined and perfectly integrated.
Chef Lindsey’s Master Tip: Embrace Control!
The biggest take-away here is that you are always in control! You have the power to influence the heat of your sugar and how quickly it cooks; you control the speed at which your egg whites whip; and you precisely manage the temperature delta between your butter and meringue. If any element seems to be getting away from you, simply adjust and confidently keep going! This proactive approach empowers you to achieve perfect results every time, turning potential challenges into successful outcomes.
Revitalizing Stored Italian Meringue Buttercream
One of Italian Meringue Buttercream’s fantastic qualities is its make-ahead and storage potential. Here’s how to bring it back to its luscious, freshly made best:
- To Refresh Refrigerated Buttercream: Allow the cold buttercream to sit at room temperature for 30-60 minutes to soften slightly. Then, place it in your stand mixer fitted with the paddle attachment and beat on medium-low speed until it becomes smooth and homogenous. Once smooth, switch to the whisk attachment and whip on medium-high until it’s light, airy, and beautifully fluffy, ready for piping or spreading.
- To Refresh Frozen Buttercream: Thaw your frozen buttercream in the refrigerator overnight. Once completely thawed, let it warm slightly at room temperature for about an hour. Then, proceed with the refreshing instructions for refrigerated buttercream as described above.
- Speed Up the Process (with caution!): You can accelerate the refreshing process by gently warming the outside of the mixing bowl (with the buttercream inside) over a very low gas stovetop flame or with a kitchen torch while the mixer is running on low speed. It is crucial to keep the heat source moving constantly to avoid melting the butter in specific spots; you only want to encourage a slight, even warming to help it re-emulsify.
Troubleshooting Your Italian Meringue Buttercream: Common Issues & Solutions
Don’t panic if your buttercream doesn’t look perfect initially! Italian Meringue Buttercream is remarkably forgiving and often fixable. Here’s how to tackle common problems and bring your frosting back to perfection:
It will look curdled if it is too cold. This is most common when trying to refresh or rewhip cold buttercream that hasn’t adequately come to room temperature. The easiest way to fix it is to gently heat the outside of the bowl with a kitchen torch while beating it with the paddle attachment on medium-low speed. Keep the torch moving constantly around the bowl to warm the mixture evenly without melting specific sections of butter. You can also simply let it mix on medium-low speed with the paddle attachment; the friction will gradually warm itself up enough, allowing it to come together into a smooth consistency. Patience can work wonders here!
It is soupy if it is too warm. This typically happens because the meringue base was still too warm for the temperature of the butter you added. Adding perfectly room temperature butter to an overly warm meringue will almost always lead to a soupy consistency, as the butter melts rather than emulsifies. To fix the soupy buttercream, place the entire mixing bowl, its soupy contents, and the mixer attachment into the refrigerator. Chill for 30 minutes to 2 hours, depending on how warm it is. Once significantly cooled and firmed up, continue to mix on medium speed with the paddle attachment until it miraculously comes together into a smooth, stable buttercream. As a last resort, when you have tried everything else, just keep mixing it on medium speed. Sometimes, all she needed was time to get herself together. And I think we can all feel that!
Sadly, this indicates the butter was too cold when it was added to the buttercream. The cold butter pieces didn’t fully emulsify into the meringue. You can try to fix this by gently warming the entire bowl with a kitchen torch while beating the buttercream with the paddle attachment, keeping the torch moving constantly to prevent melting. Most likely, in order to completely get rid of all the lumps, you will have to warm the whole buttercream to a soupy consistency. If this happens, simply pop it in the refrigerator to chill and firm up, then beat it again with the paddle attachment once cool until smooth. Alternatively, you could just accept some small butter pieces, especially if you plan to cover the cake in sprinkles or other decorations – no one will notice! And that, my friends, is my professional opinion.
Unfortunately, a complete meltdown of all the butter is the one mistake from which Italian Meringue Buttercream cannot typically recover. If you start adding the butter and immediately see it melt into a liquid state within the meringue, stop adding butter at once. Continue beating the meringue on its own and allow it to cool down significantly before attempting to add *new, properly softened* butter. A little melted butter can sometimes be integrated if caught early, but if all the butter turns liquid and the emulsion is broken, the buttercream is generally ruined. This emphasizes the critical importance of ensuring your meringue is adequately cooled and your butter is at the correct pliable temperature before combining them.
Storage Guidelines for Italian Meringue Buttercream
Proper storage ensures your Italian Meringue Buttercream stays fresh and ready for your next baking adventure. Its stability makes it an excellent make-ahead component:
- Room Temperature: If your kitchen is cool (below 70°F or 21°C), Italian Meringue Buttercream can be stored in an airtight container at room temperature for 2-3 days.
- Refrigerated: For longer storage, transfer the buttercream to an airtight container and refrigerate it for up to 2 weeks.
- Frozen: For extended shelf life, IMB freezes beautifully. Store it in a freezer-safe, airtight container for up to 3 months.
Before using any stored buttercream, always allow it to come to room temperature. Once softened, place it in the bowl of a stand mixer fitted with the paddle attachment and beat on medium speed until it comes back together smoothly. It will likely look curdled at first – this is completely normal! Don’t stress; just keep mixing, and it will miraculously re-emulsify and become smooth and luscious again.
If you tried this recipe and loved it, please consider leaving a 🌟 star rating and sharing your experience in the comments below. Your feedback truly brightens my day and helps other bakers!
Italian Meringue Buttercream Recipe
Italian Meringue Buttercream
by Chef Lindsey
A comprehensive, step-by-step tutorial for Italian Meringue Buttercream, designed to help you create the smoothest, creamiest, and most professional frosting for your cakes, cupcakes, and other desserts. It’s truly easier than you think!
Prep Time: 30 minutes
Total Time: 30 minutes
Yields: 24 cupcakes or one 2-3 tiered cake
Print Recipe
Ingredients
- 2 cups granulated sugar, divided
- ⅔ cup water
- 5 large egg whites
- Pinch kosher salt (optional)
- Pinch cream of tartar (optional)
- 2 cups unsalted butter, cubed, cool but not cold
- 2 teaspoons vanilla extract (or other desired flavoring)
Instructions
- Ensure all ingredients are precisely measured and your mixing bowl and saucepan are meticulously clean and completely free of any residual fat. This is critical for meringue success.
- In a medium saucepan, combine half of the sugar with the water. Heat over medium heat, stirring just until the sugar dissolves. As the syrup heats, use a wet pastry brush to dissolve any sugar crystals adhering to the sides of the pot.
- When the sugar syrup begins to bubble, start whipping egg whites in the bowl of a stand mixer fitted with the whisk attachment. Optionally, add a pinch of salt and/or cream of tartar for stability. Once frothy, slowly begin adding the remaining reserved sugar, whipping constantly on medium-high speed.
- Continue whipping egg whites until they form stiff, glossy peaks. Simultaneously, cook the sugar syrup until it reaches exactly 235˚F (113˚C) – the soft-ball stage. Adjust mixer speed or syrup heat as needed to synchronize these steps.
- Verify the sugar syrup temperature using a candy thermometer or by performing the cold water test: a small drop of syrup in ice water should form a soft, malleable ball.
- Immediately turn your mixer to HIGH speed. Slowly and carefully pour the hot sugar syrup down the inside side of the bowl in a single, steady stream, taking care not to hit the whisk attachment.
- Keep whipping the Italian meringue on high speed until the bottom of the mixing bowl feels only barely warm to the touch. Cooling the meringue sufficiently is more critical than its stiffness at this stage.
- Once the bowl feels just slightly warm, switch to the paddle attachment. Begin adding the cubed, cool-but-not-cold unsalted butter, one piece at a time. Squeeze butter pieces if they feel too firm to ensure pliability.
- Continue beating on medium-high speed until the buttercream is completely smooth and emulsified, with absolutely no remaining pieces of butter visible. The mixture should be homogenous and creamy.
- Stir in vanilla extract or any other desired flavorings. For maximum lightness, switch back to the whisk attachment and beat on high until the buttercream is beautifully light, airy, and fluffy. Your Italian Meringue Buttercream is now ready to pipe or spread as desired!
Video Tutorial
Notes
- Variations: Get creative with flavorings! You can incorporate tangy lemon curd, 200g (7 oz) of melted and cooled chocolate, ½ cup of a favorite nut paste (like pistachio or almond), various extracts (such as almond or peppermint), or ½ cup of a thick fruit jam. For a classic, pure vanilla flavor, use the seeds from a split and scraped vanilla bean pod.
- Storage: Italian Meringue Buttercream stores remarkably well. Keep it at room temperature for 2-3 days (in a cool environment), refrigerated for up to 2 weeks, or frozen in an airtight container for up to 3 months. Always refresh cold buttercream before use.
- Yield: This recipe yields a generous amount of buttercream, sufficient to beautifully frost a 2-3 tiered cake or approximately 24 standard-sized cupcakes.
Nutrition Information (per serving)
Calories: 203kcal | Carbohydrates: 17g | Protein: 1g | Fat: 15g | Saturated Fat: 10g | Polyunsaturated Fat: 1g | Monounsaturated Fat: 4g | Trans Fat: 1g | Cholesterol: 41mg | Sodium: 133mg | Potassium: 15mg | Sugar: 17g | Vitamin A: 473IU | Calcium: 5mg | Iron: 1mg
Course: Dessert
Cuisine: French (referring to the classic meringue technique)
Like this recipe? We’d love to hear from you!
Leave a comment and a star rating below to share your experience and help fellow bakers.
Explore More Professional Baking Tips and Recipes
I sincerely hope you enjoyed this professional chef-tested recipe and detailed tutorial on Italian Meringue Buttercream. Continue your baking journey by exploring our other delicious, chef-developed cake frosting recipes. Or, perfect your foundational skills by baking up my irresistible moist vanilla cake recipe to beautifully pair with your freshly made Italian Meringue Buttercream!