

Indulge in the bright and comforting taste of our exquisite **Lemon Scones**, crafted to deliver that authentic British crumb and a burst of bold citrus flavor. This carefully developed recipe emphasizes the foundational elements of scone perfection: deeply chilled dough, precisely cut cold butter, and a generous infusion of fresh lemon zest and juice. The result is a scone that is wonderfully tender, incredibly moist, and brilliantly flavorful – a truly perfect and bright addition to your breakfast, afternoon tea, or any moment deserving of a delightful treat.


A Quick Look At The Recipe
This is a brief summary of the recipe. Jump to the detailed recipe below for full instructions.
Jump to Recipe
Prep Time
20 minutes
Cook Time
25 minutes
Chill Time
3 hours
Total Time
3 hours 45 minutes
Servings
12 scones
Difficulty
Intermediate
Calories *
257 kcal per serving
Technique
Utilizing the cut-in butter method, followed by essential chilling, rolling, cutting, and a final freeze, then brushed with heavy cream and sugar before baking to golden perfection.
Flavor Profile
A harmonious blend of bright, tangy lemon, rich buttery notes, subtle sweetness, and a delightful crunch from sparkling sugar.
* Based on nutrition panel
I made these last weekend, and the tip about keeping the butter cold made such a difference. My scones came out with that dense, crumbly texture I have been chasing for years, and the lemon flavor came through in every bite. The sparkling sugar on top added just the right crunch. These are on permanent rotation. ⭐⭐⭐⭐⭐
Lauren
Why These Lemon Scones Stand Out
Achieving a truly exceptional scone requires more than just good ingredients; it demands a precise method. Our lemon scone recipe is designed to consistently deliver superior results, setting it apart from many others. Here’s why these scones will become your new favorite:
- Authentic British-Style Crumb, Not Crumbly: Unlike dry, crumbly American-style biscuits, these scones offer a slightly dense, incredibly tender, and melt-in-your-mouth interior. They boast crunchy, golden edges and a beautifully soft, moist center. This perfect texture is entirely attributed to the meticulous use of very cold butter, a well-chilled dough, and careful handling at every stage of preparation. We avoid overworking the dough to prevent gluten development, ensuring a light rather than tough result.
- Prominent Lemon Flavor in Every Bite: The secret to an intense and evenly distributed lemon flavor lies in zesting the fresh lemons directly into the granulated sugar. This simple yet crucial step allows the sugar crystals to absorb and release the lemon’s essential oils, infusing a vibrant citrus aroma and taste throughout the entire dough. This method ensures that every single bite is bursting with bright, tangy lemon, rather than having the flavor concentrated in just a few spots.
- Delightful Sparkling Sugar Finish: A generous dusting of coarse white sparkling sugar on top of each scone provides a satisfying crunch that beautifully contrasts with the soft, tender interior. Beyond texture, this sugar also caramelizes slightly during baking, creating a wonderfully golden, slightly crisp surface that enhances both the visual appeal and the flavor profile of the scones.
- Convenient Make-Ahead and Freezer-Friendly: Life is busy, but freshly baked scones don’t have to be a last-minute endeavor. Our recipe is designed for convenience; the shaped, unbaked scones can be frozen, allowing you to go straight from the freezer to the oven whenever a craving strikes. This means you can enjoy warm, homemade scones without the need to prepare dough from scratch every time, making them ideal for spontaneous guests or a quick morning treat.
Table of Contents
- Why These Lemon Scones Stand Out
- Essential Ingredients & Thoughtful Substitutions
- Creative Variations for Your Lemon Scones
- Professional Baking Tips for Perfect Scones
- Step-by-Step Guide: How to Make Lemon Scones
- Crafting the Lemon Scone Dough
- Chill, Roll, Cut, and Bake to Perfection!
- Chef Lindsey’s Expert Recipe Tip
- Lemon Scone Recipe FAQs
- More Bright Lemon Recipes to Explore
- Full Lemon Scones Recipe Card
- Before You Go: Further Culinary Delights
The secret to these truly exceptional **lemon scones** lies almost entirely in the precision of the method. It’s the diligent application of techniques – particularly the use of very cold butter, a gentle touch when mixing, and the proper chilling of the dough – that distinguishes a tender, moist, melt-in-your-mouth scone from a dense, dry, or tough one. Every step, from incorporating the butter to the final bake, plays a critical role in achieving the signature texture and flavor.
These are the delightful scones I consistently turn to when I crave a serious burst of lemon flavor without any unnecessary fuss. The crucial step of zesting the lemon directly into the sugar makes an immense difference, unlocking the full potential of the citrus oils and distributing that bright tang throughout the dough. This technique is one I also employ in my popular lemon olive oil cake and my irresistible lemon blondies! For more vibrant lemon desserts, don’t forget to explore my easy lemon curd recipe and my classic lemon meringue pie.
Essential Ingredients & Thoughtful Substitutions
Crafting perfect lemon scones begins with understanding the role each ingredient plays. Here’s a detailed look at what you’ll need and potential alternatives:
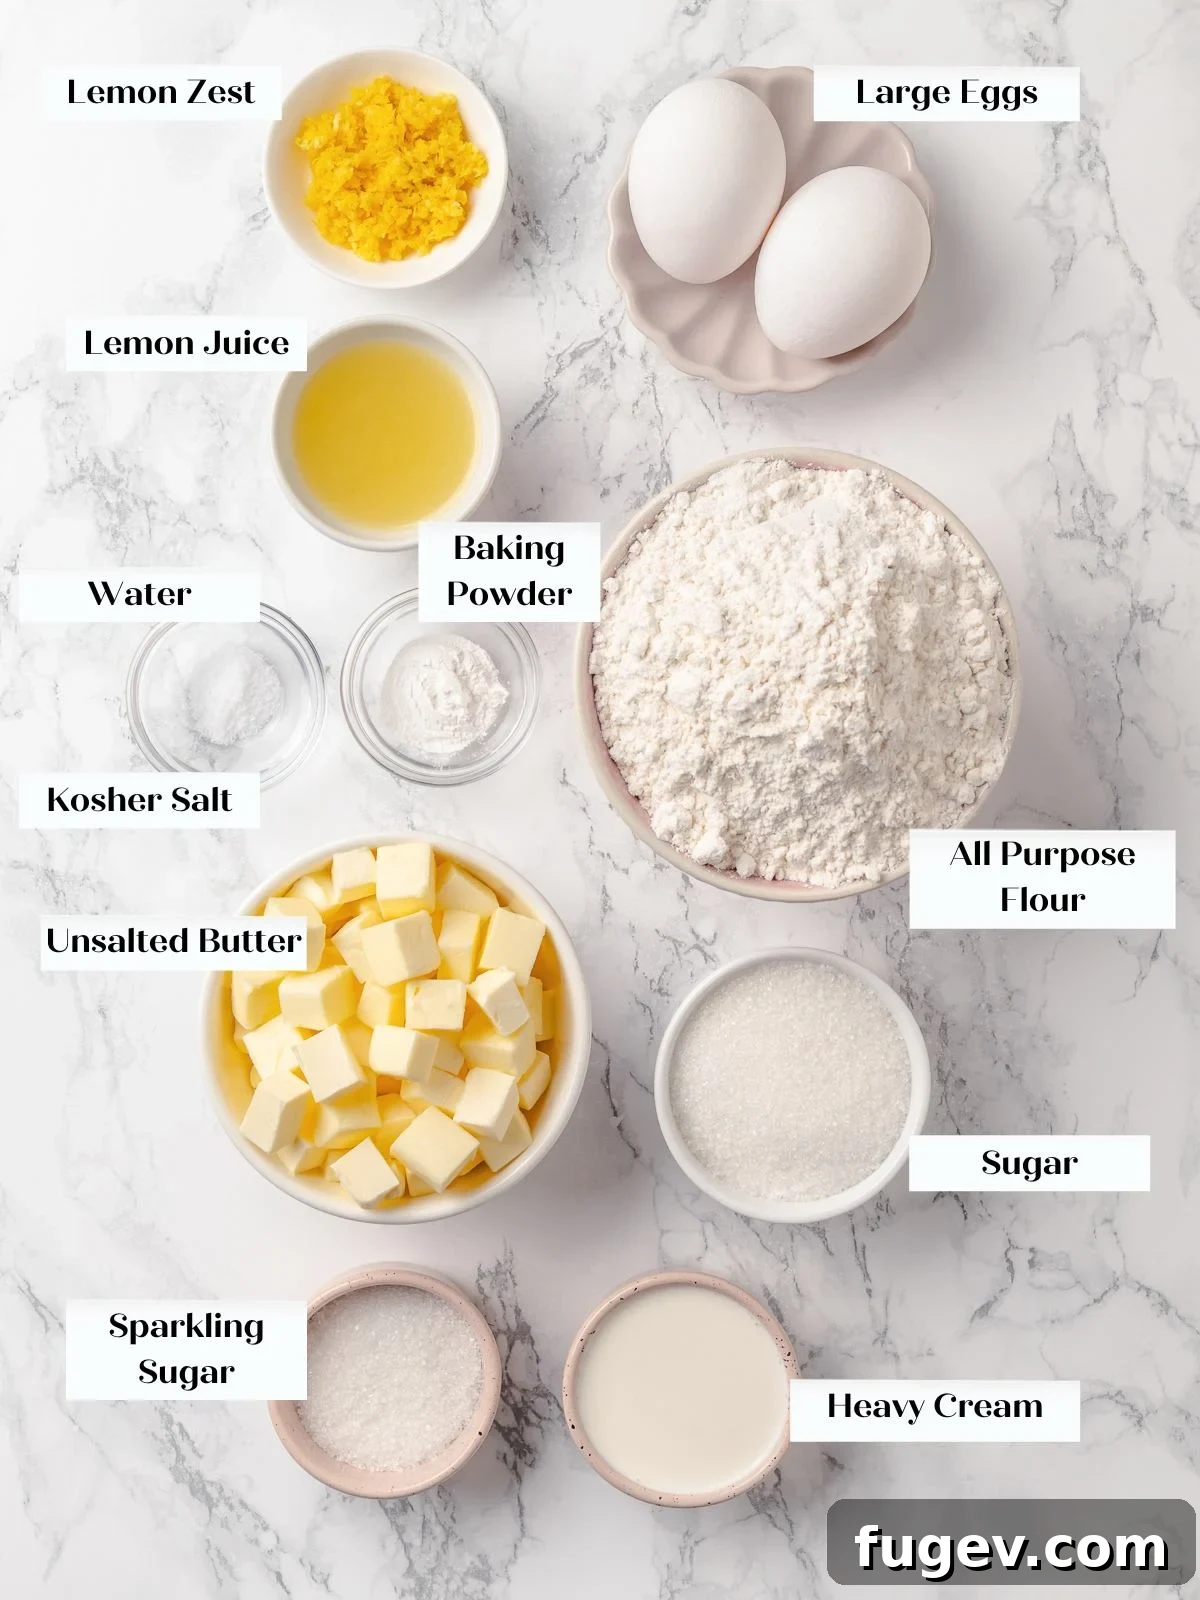
- All-Purpose Flour: This is the backbone of our scone structure, providing the necessary framework without making them overly tough. For an even more tender crumb, you could opt for pastry flour, which has a lower protein content. Always weigh your flour using a kitchen scale (ideally 295 grams for 2 ½ cups) to ensure consistent and accurate results; volume measurements can vary significantly.
- Granulated Sugar: Beyond sweetness, sugar contributes to the scones’ moisture, aids in achieving a beautiful golden-brown crust, and masterfully balances the sharp, tangy notes of the lemon. It’s a key element in both flavor and texture.
- Fresh Lemon Zest: The true star of the show! Fresh lemon zest is paramount for imparting that bold, bright, and invigorating lemon flavor throughout the entire scone dough. It’s crucial to zest the lemon directly over your bowl of sugar. This allows the sugar crystals to absorb the aromatic essential oils as they are released, preventing them from evaporating and ensuring maximum flavor infusion. Remember to use only the bright yellow outer layer, carefully avoiding the white pith underneath, which can introduce a bitter taste.
- Kosher Salt: A fundamental baking ingredient, kosher salt elevates all the other flavors, making the lemon brighter and the butter richer. It also plays a subtle role in strengthening the gluten structure.
- Baking Powder: This leavening agent is responsible for the scones’ lift and tender texture, creating those small, delicate pockets of air that give scones their signature “crumb.” Ensure your baking powder is fresh for optimal rise.
- Unsalted Butter: The cornerstone of a tender scone. It is absolutely essential that your butter is cubed and thoroughly cold, straight from the refrigerator, before you begin mixing. As the cold butter is cut into the flour, it coats the gluten strands, shortening them and preventing them from forming a strong, elastic network. This inhibition of gluten development is precisely what results in delicate, melt-in-your-mouth scones, rather than chewy or tough ones.
- Whole Eggs: Eggs provide richness, moisture, and act as a binder, helping to hold the dough together. They also contribute to the beautiful golden color and slightly enriched flavor of the finished scones.
- Heavy Cream (in the dough): Cream is a vital ingredient for tenderness and richness. Its higher fat content, compared to milk, adds a luxurious mouthfeel and ensures even browning without making the dough excessively wet. It helps create that desirable soft and moist interior.
- Fresh Lemon Juice: Reinforcing the vibrant citrus profile, fresh lemon juice adds a delightful tang that perfectly complements the richness of the butter and cream. Its acidity also subtly interacts with the gluten, helping the scones maintain their shape while enhancing their bright flavor.
- White Sparkling Sugar (for finishing): This coarse sugar isn’t just for decoration; it creates a wonderfully crunchy, glistening crust on top of the scones, offering a fantastic textural contrast to the soft interior. It also adds an extra touch of sweetness and visual appeal.
- Heavy Cream (for finishing): A final brush of heavy cream before baking is key. It promotes an even, deep golden-brown crust and helps the sparkling sugar adhere beautifully. The extra surface fat also contributes to a slightly crisp and glossy top layer.
See the full recipe card below for precise measurements and quantities.
Creative Variations for Your Lemon Scones
While these lemon scones are perfect as is, they also serve as a versatile canvas for culinary creativity. Feel free to experiment with these delightful variations:
- Add a Glaze for Extra Sweetness: If you prefer a sweeter, more decorative finish, skip the sparkling sugar and instead drizzle a simple lemon glaze over your cooled scones. A basic glaze made from powdered sugar and lemon juice works beautifully. For a fruitier twist, you could even adapt the strawberry glaze from my popular lemon pound cake recipe.
- Experiment with Delightful Mix-ins: Scones are wonderfully adaptable to various additions. You can incorporate fresh fruits, much like I do with my luscious strawberry scones and classic blueberry scones. Alternatively, consider adding a handful of white chocolate chips for a sweet complement to the lemon, or dried blueberries for a chewy texture and tart sweetness. Just be mindful not to overcrowd the dough.
- Change the Citrus for a New Flavor Profile: Lemon is fantastic, but imagine the possibilities with other citrus fruits! Key limes would lend a wonderfully distinct tangy flavor, while blood oranges would offer a beautiful hue and a subtly sweeter, less acidic profile. Simply swap in the zest and juice of your favorite citrus to transform these scones into a new, exciting treat.
- Explore Different Shapes: The traditional triangular shape is charming, like in my carrot cake scones, but don’t limit yourself. You could use a round cutter to create classic circular scones, similar to my cinnamon scones. For a rustic, free-form look, simply press the dough into a circle and cut into wedges without prior shaping. Just remember to bake pieces of similar size together to ensure even cooking and prevent some scones from overbaking while others are still raw.

Professional Baking Tips for Perfect Scones
Mastering the art of scone baking, especially for that coveted British crumb, often comes down to a few key techniques. These professional tips will ensure your lemon scones turn out perfectly every time:
- Completely Incorporate the Butter: This is arguably the most critical step for achieving the desired tender, dense crumb of a British scone. Unlike recipes aiming for flaky layers, like homemade buttermilk biscuits where pea-sized butter pieces are desired, here you want the butter fully worked into the flour until no visible pieces remain. The mixture should resemble coarse, damp sand. This complete incorporation of cold fat shortens gluten strands, preventing toughness and yielding a truly tender, melt-in-your-mouth interior.
- Prioritize Chilling and Freezing the Dough: Skipping or shortening the chilling periods is a common mistake that leads to less-than-perfect scones. Chilling the dough before rolling allows the butter to firm up and the flour to fully hydrate, making the dough easier to handle. Freezing the shaped scones for at least one hour (or even overnight) before baking is non-negotiable. The intense cold keeps the butter solid until it hits the hot oven, creating steam that contributes to the scones’ lift and tender texture, while also preventing premature gluten development.
- Bake Uniform Sizes Together: For consistent results and to avoid dry, overbaked scones, ensure that pieces of similar size are baked together on the same sheet. If your scones vary significantly in size, it’s best to sort them onto separate baking sheets and bake them in batches. Smaller scones will finish baking much faster than larger ones, and there’s no way to rescue an overbaked, dry scone.
- Thoroughly Blend Wet Ingredients: Before combining them with the dry mixture, take the time to vigorously whisk the eggs, heavy cream, and lemon juice until they are completely smooth and uniform. This thorough blending ensures that the wet ingredients incorporate quickly and evenly into the dry mix. Less mixing time in the final stages means less gluten development, which directly translates to a more tender scone. Adding the lemon juice right before combining with dry ingredients also helps preserve its vibrant flavor.
Step-by-Step Guide: How to Make Lemon Scones
Follow these instructions with careful attention to detail and, most importantly, do not rush the crucial chill times. By moving through each step with intention, you are guaranteed to achieve perfect, tender, and flavorful lemon scones every single time!
Crafting the Lemon Scone Dough
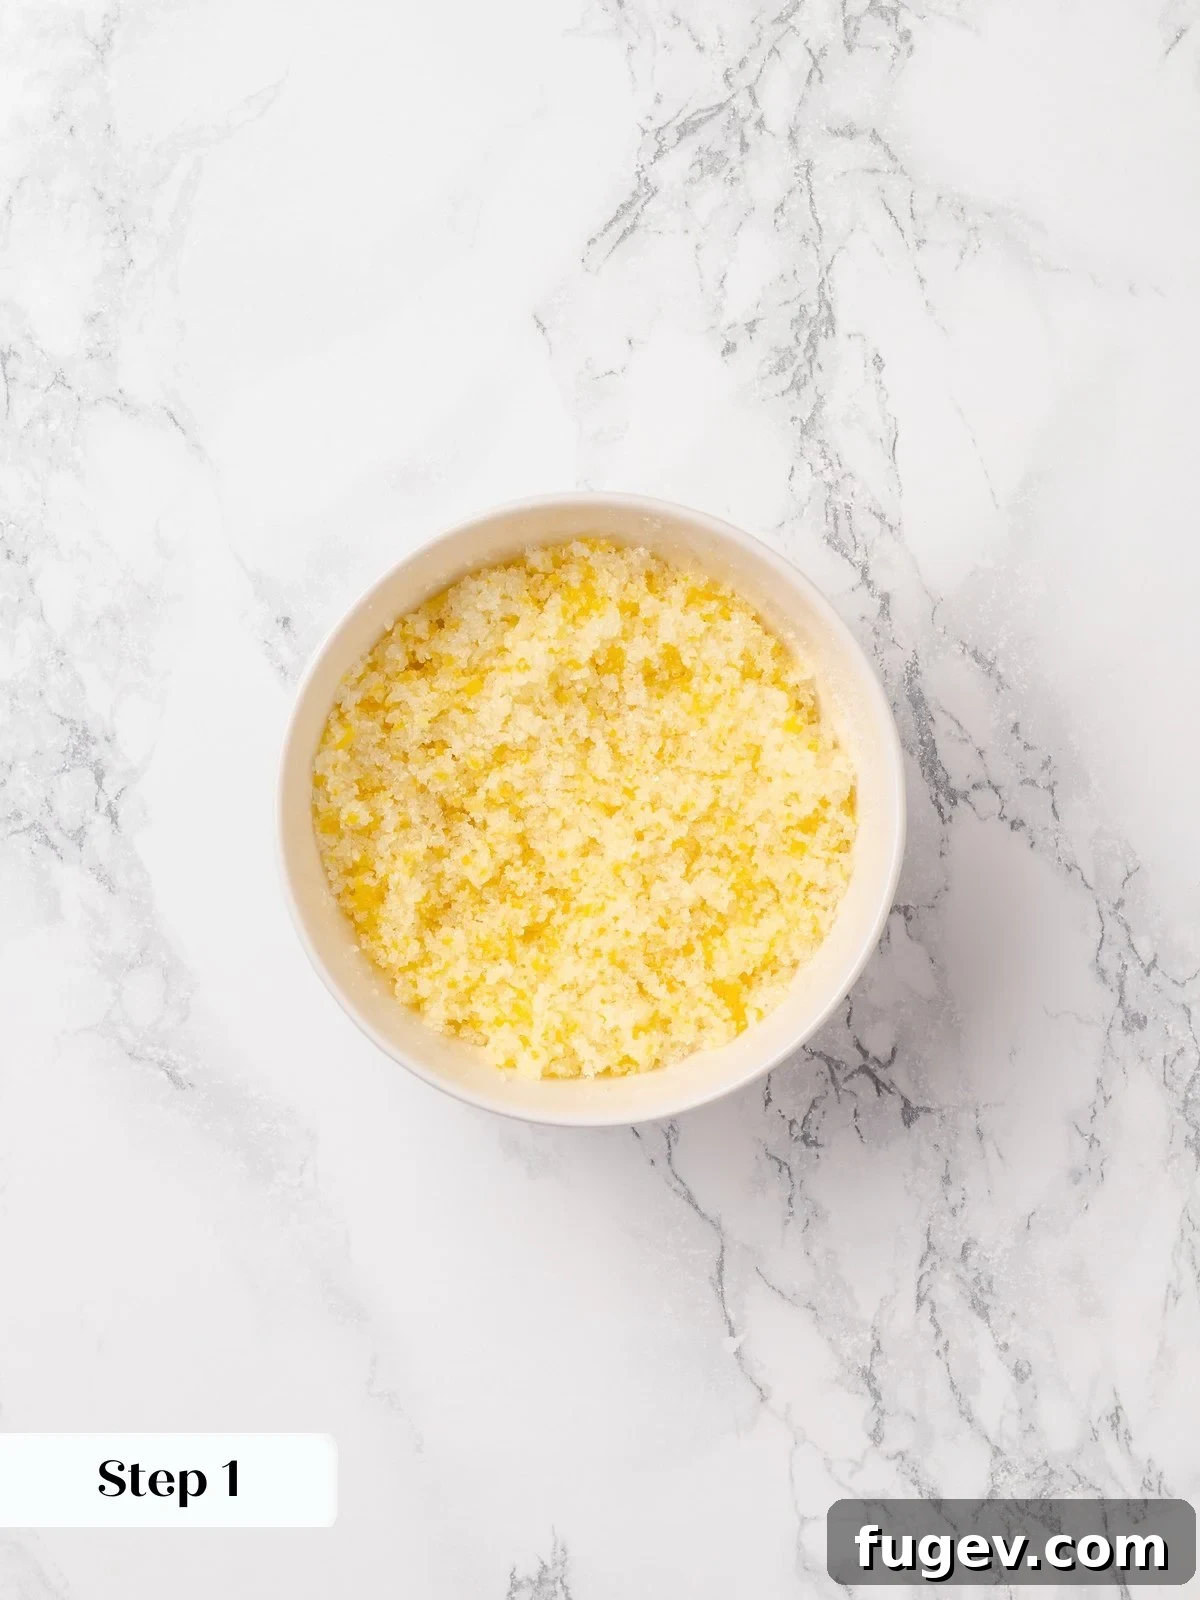
Step 1: Infuse the Sugar with Lemon Zest. Begin by zesting the fresh lemons directly into the granulated sugar. Use your fingertips to gently rub the lemon zest into the sugar until the sugar becomes wonderfully fragrant and takes on a pale yellow hue. This action releases the essential oils from the zest, allowing the sugar to absorb and hold onto that bright lemon flavor. (photo 1)
The longer this lemon-infused sugar mixture sits, the more intensely the citrus oils will infuse the sugar. If time permits, let it rest while you gather your remaining ingredients, or prepare this step the night before and store it in an airtight container in the fridge for an even deeper flavor.
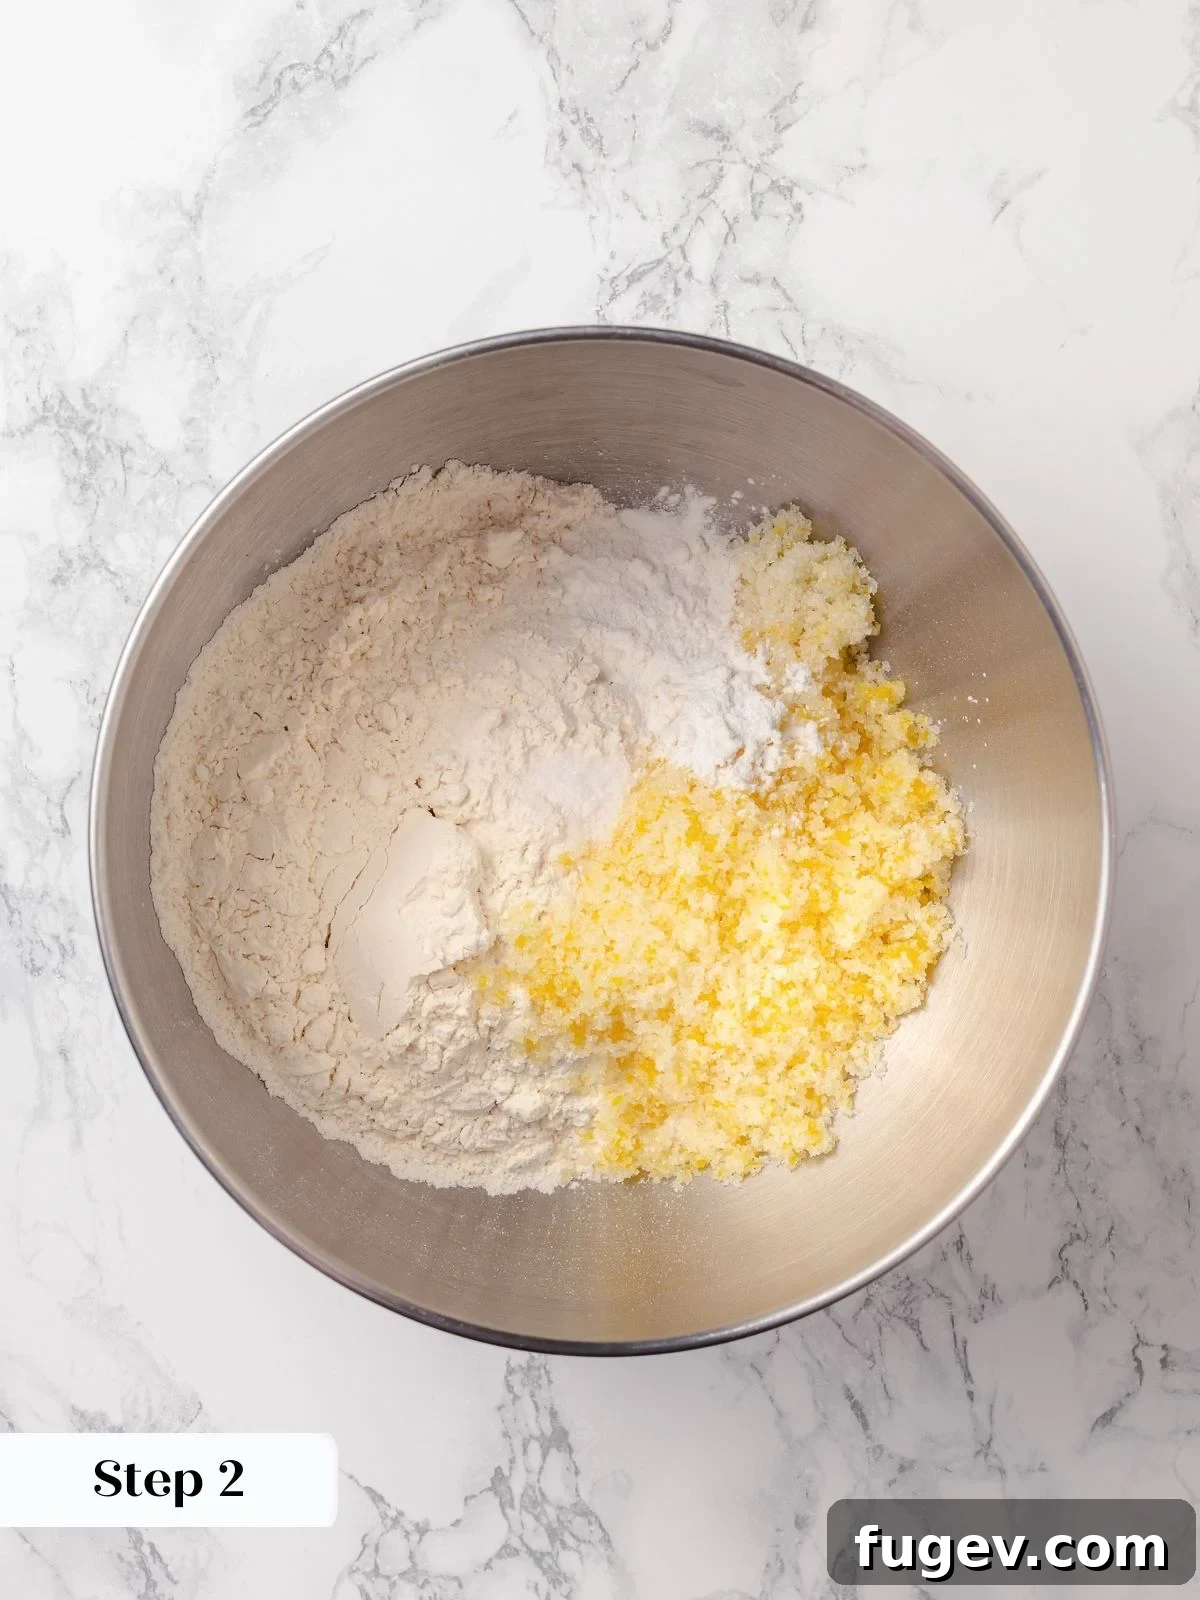
Step 2: Combine the Dry Ingredients. In the bowl of your stand mixer, fitted with the paddle attachment, add the all-purpose flour, the fragrant lemon-infused sugar, kosher salt, and baking powder. Mix these dry ingredients on low speed for just a minute or two, ensuring they are well distributed and thoroughly combined. This even distribution is important for consistent leavening and flavor. (photo 2)
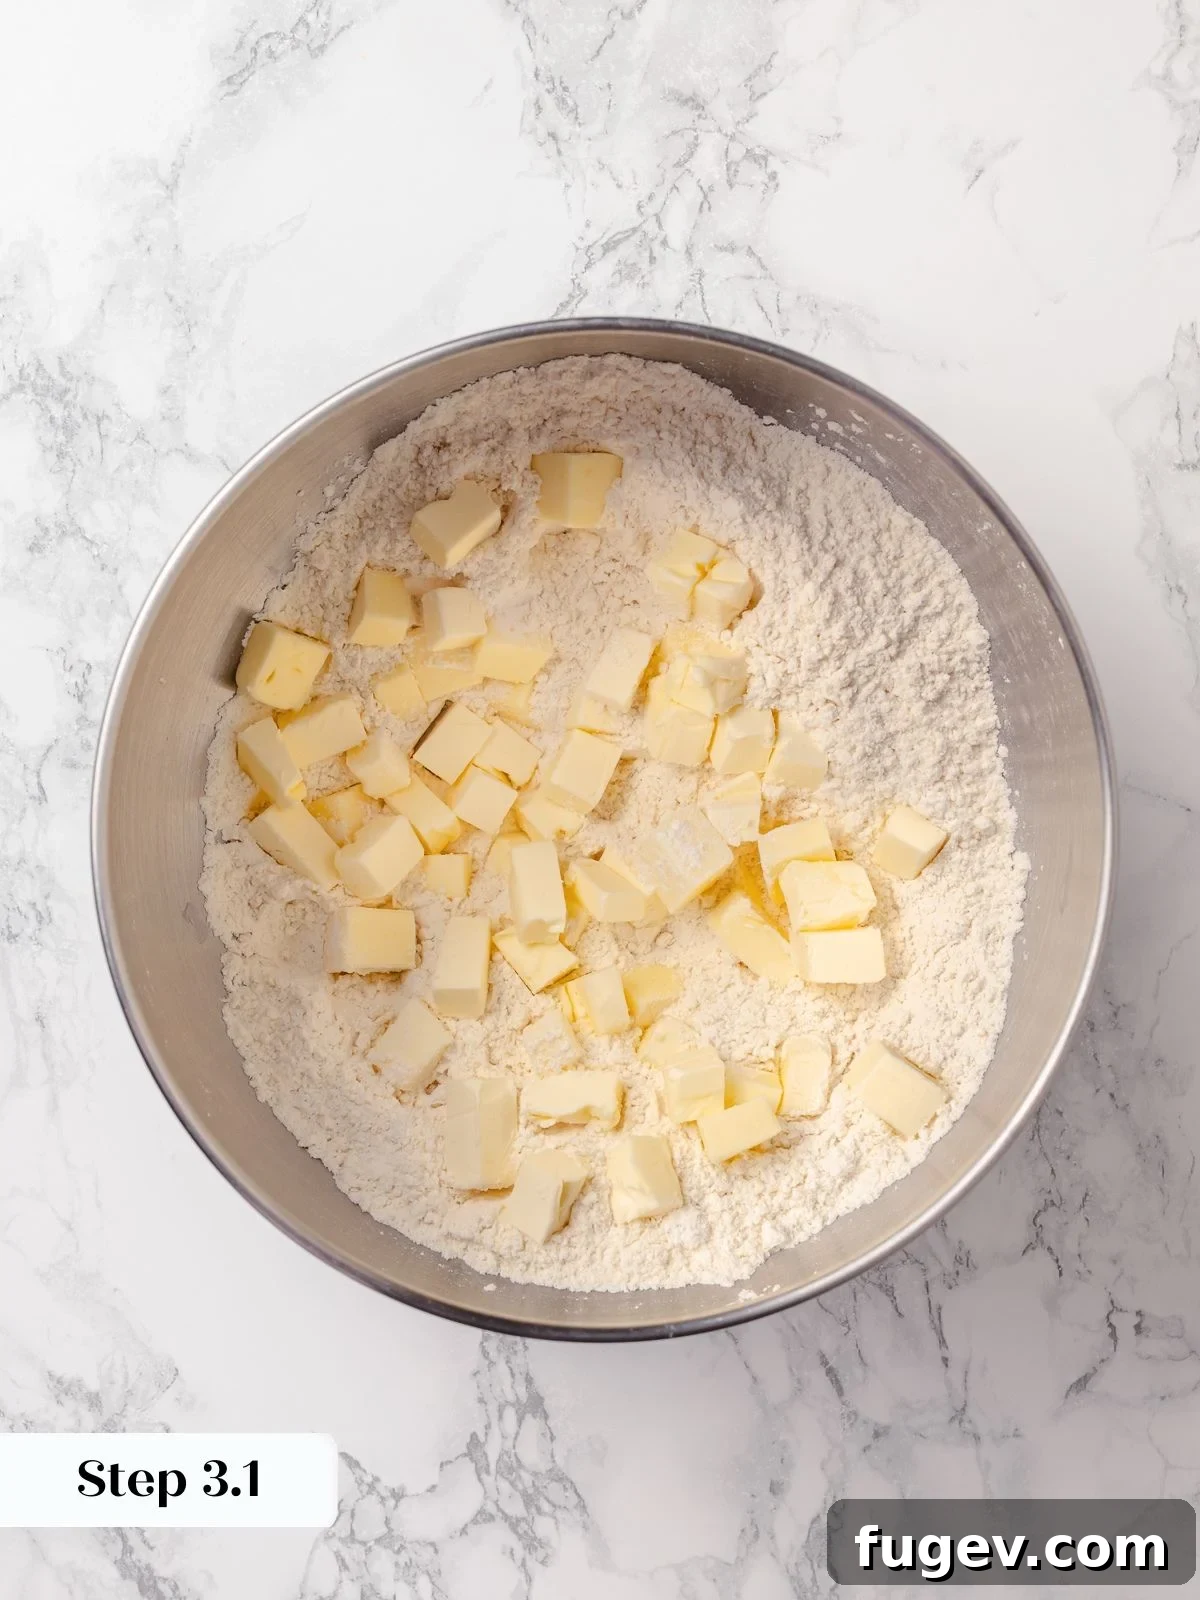
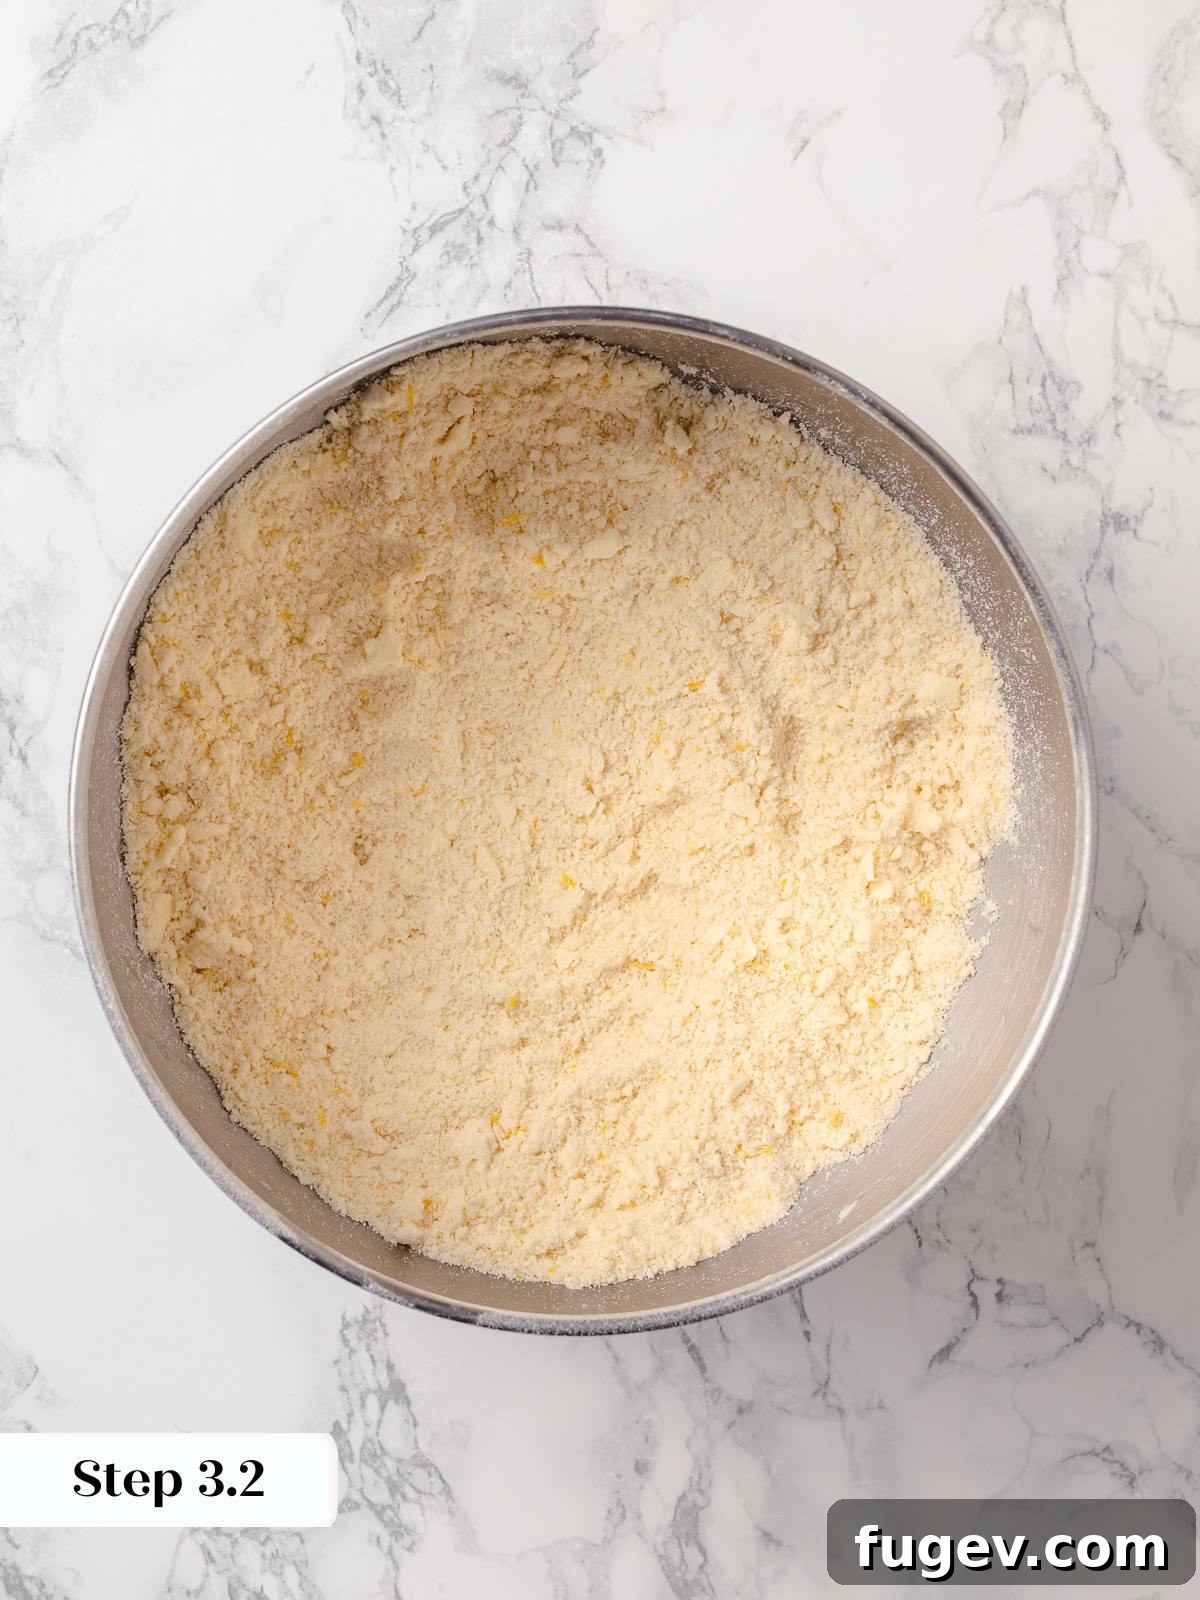
Step 3: Cut in the Cold Butter. Add the cold, cubed unsalted butter to the dry ingredients in the mixer. Mix on low speed until the butter is completely incorporated into the flour mixture. It’s essential that no visible pieces of butter remain; the mixture should uniformly resemble coarse, damp sand. Stop the mixer occasionally and run your hands through the bottom of the bowl to check for any larger, unmixed butter chunks. (photo 3 & 4 below).
Achieving full butter incorporation is critical for these scones. Coating the flour in fat before introducing any liquid effectively inhibits gluten formation. This precise technique is what imparts these scones with their distinct tender, melt-in-your-mouth texture, distinguishing them from flakier pastries.
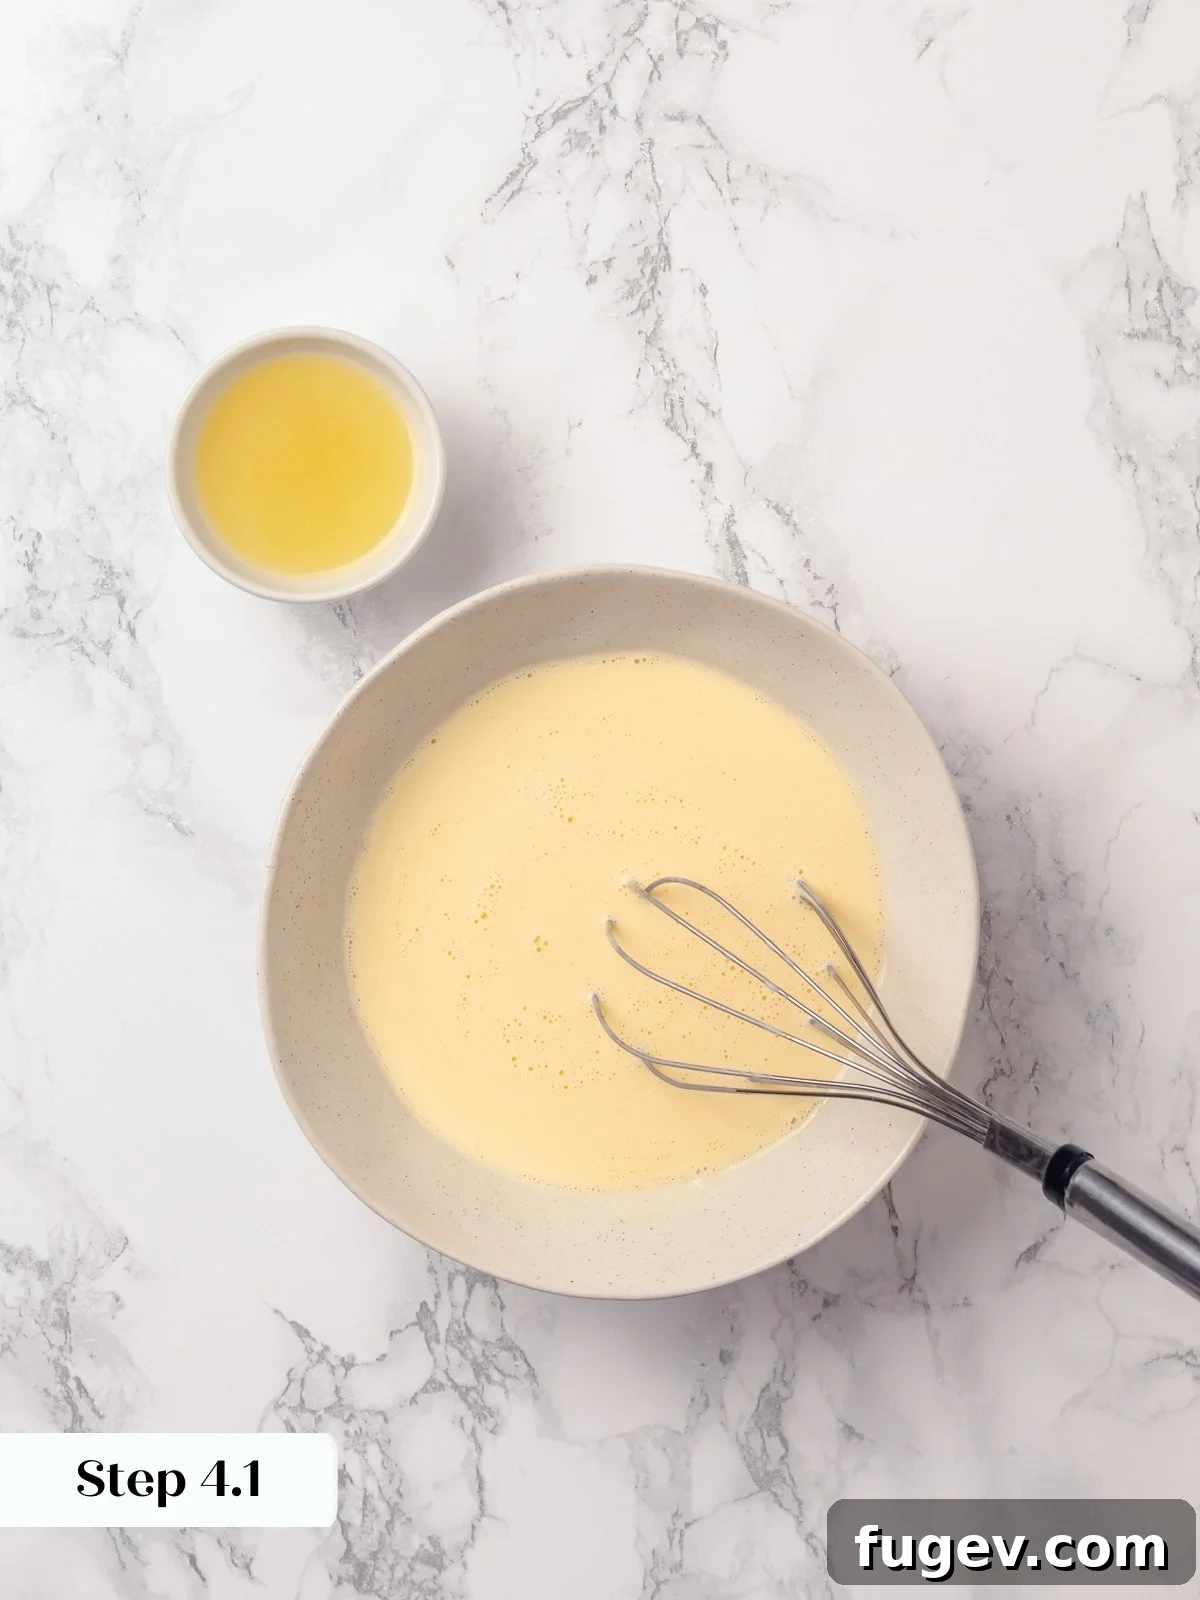
Step 4: Whisk the Wet Ingredients Separately. In a medium bowl, combine the whole eggs and heavy cream. Whisk these ingredients vigorously until the mixture is completely smooth, uniform, and well-blended. Just before you are ready to add this mixture to the dough, stir in the fresh lemon juice. This ensures the lemon juice’s acidity and flavor are at their peak. (photo 5).
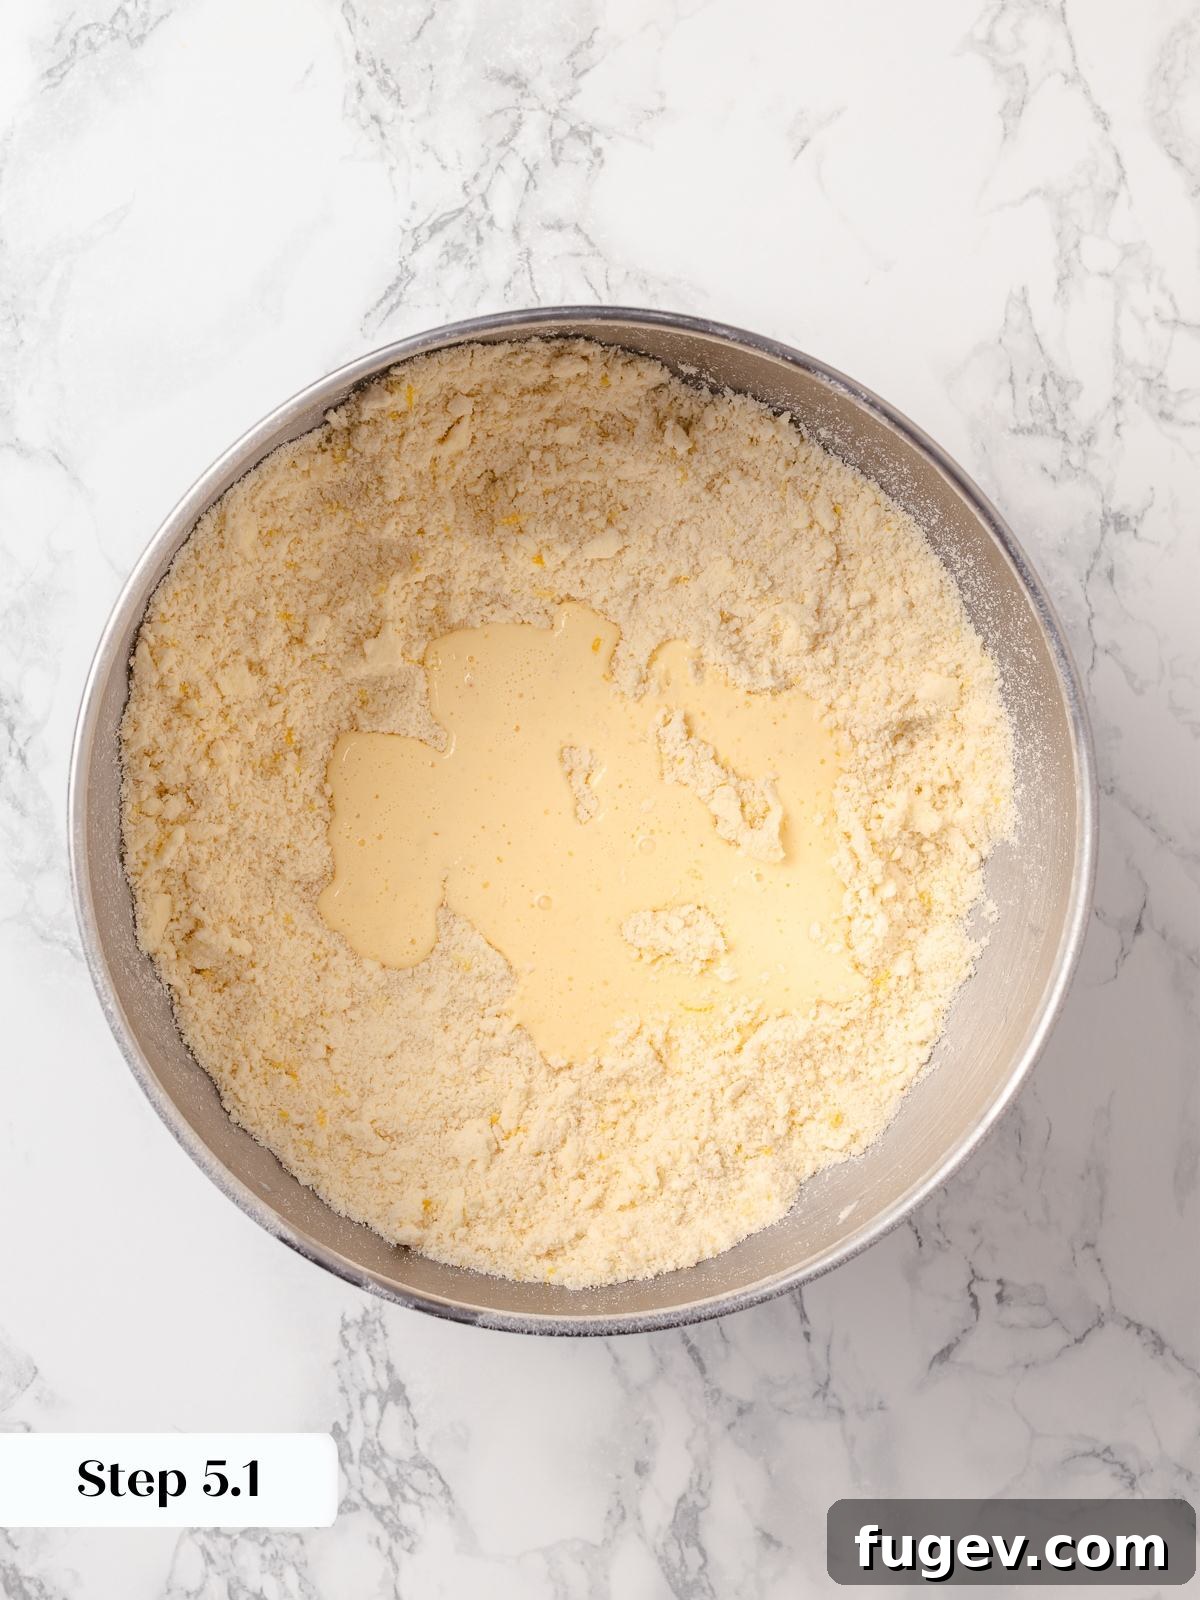
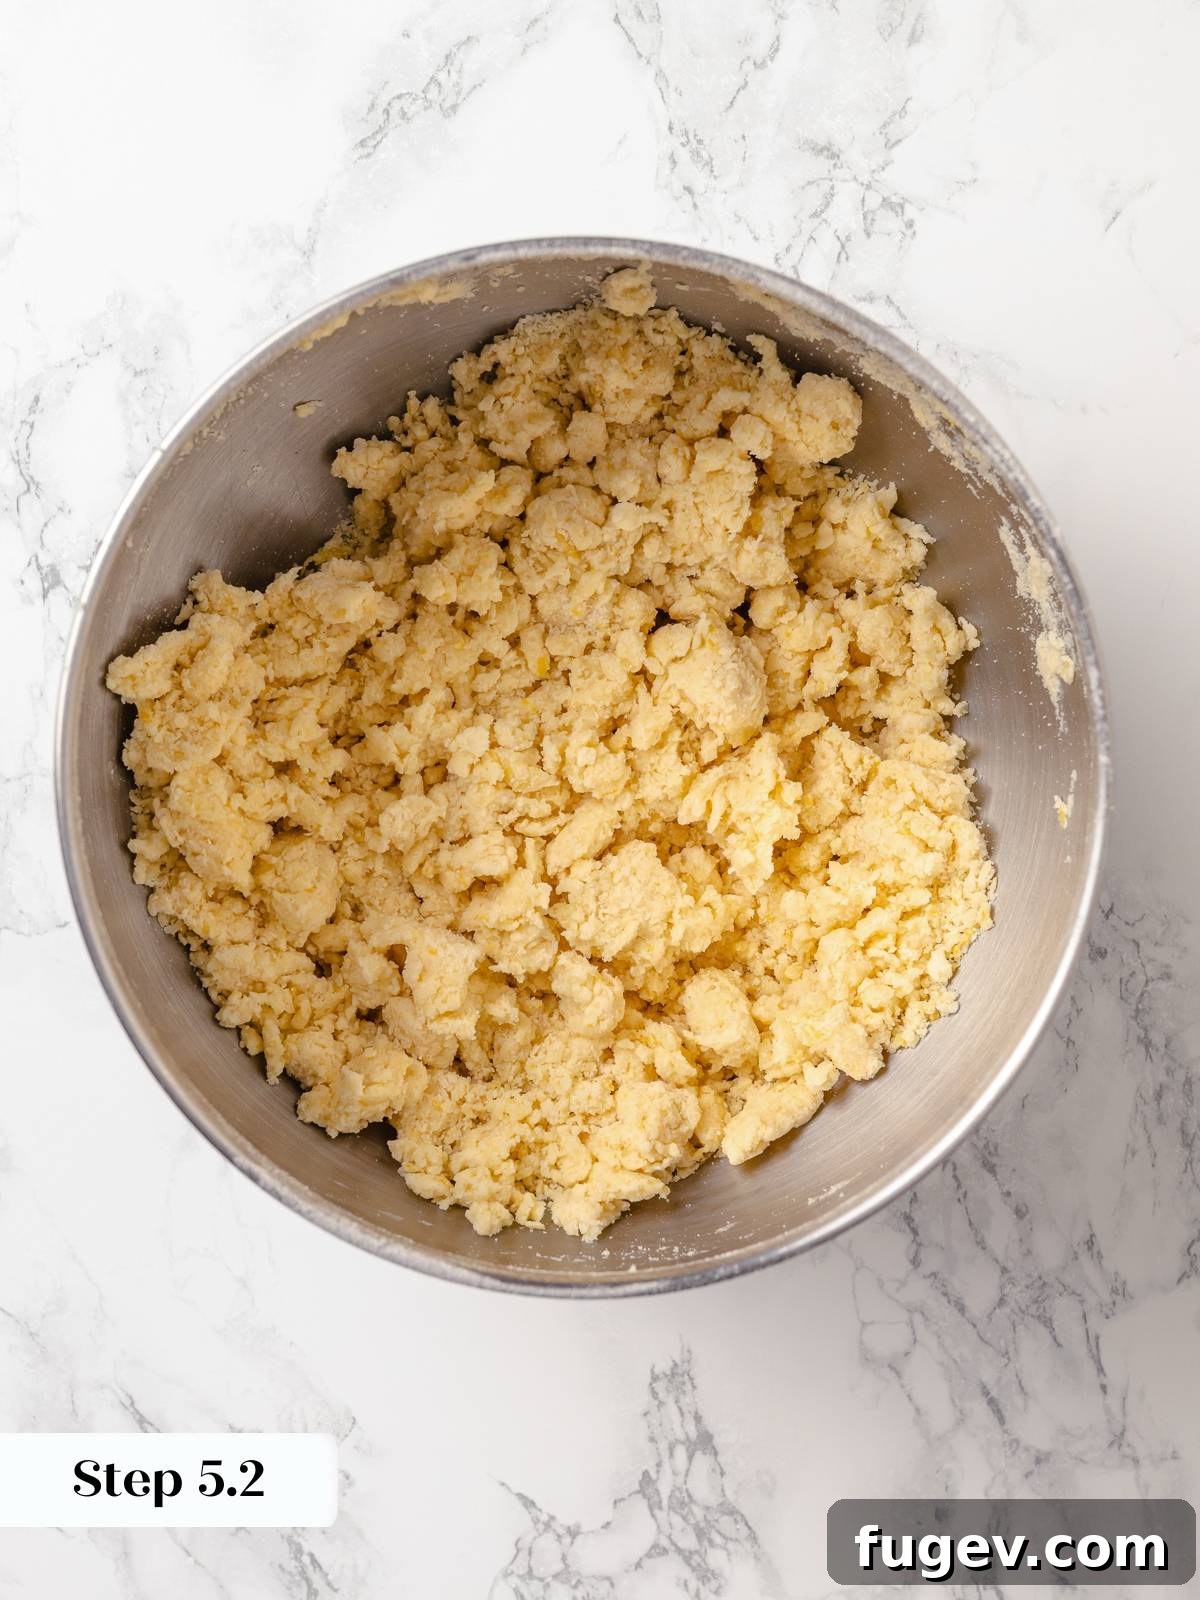
Step 5: Combine Wet and Dry Ingredients. With the stand mixer on its lowest speed setting, slowly and gradually pour the whisked cream mixture into the dry ingredients. Mix just until the dough comes together and no longer shows streaks of dry flour at the bottom of the bowl. The dough will appear shaggy and a little rough around the edges, which is perfectly normal. Stop mixing the very moment you see no dry flour to avoid overworking the dough, which could lead to tough scones. (photos 6 & 7 below)
Chill, Roll, Cut, and Bake to Perfection!
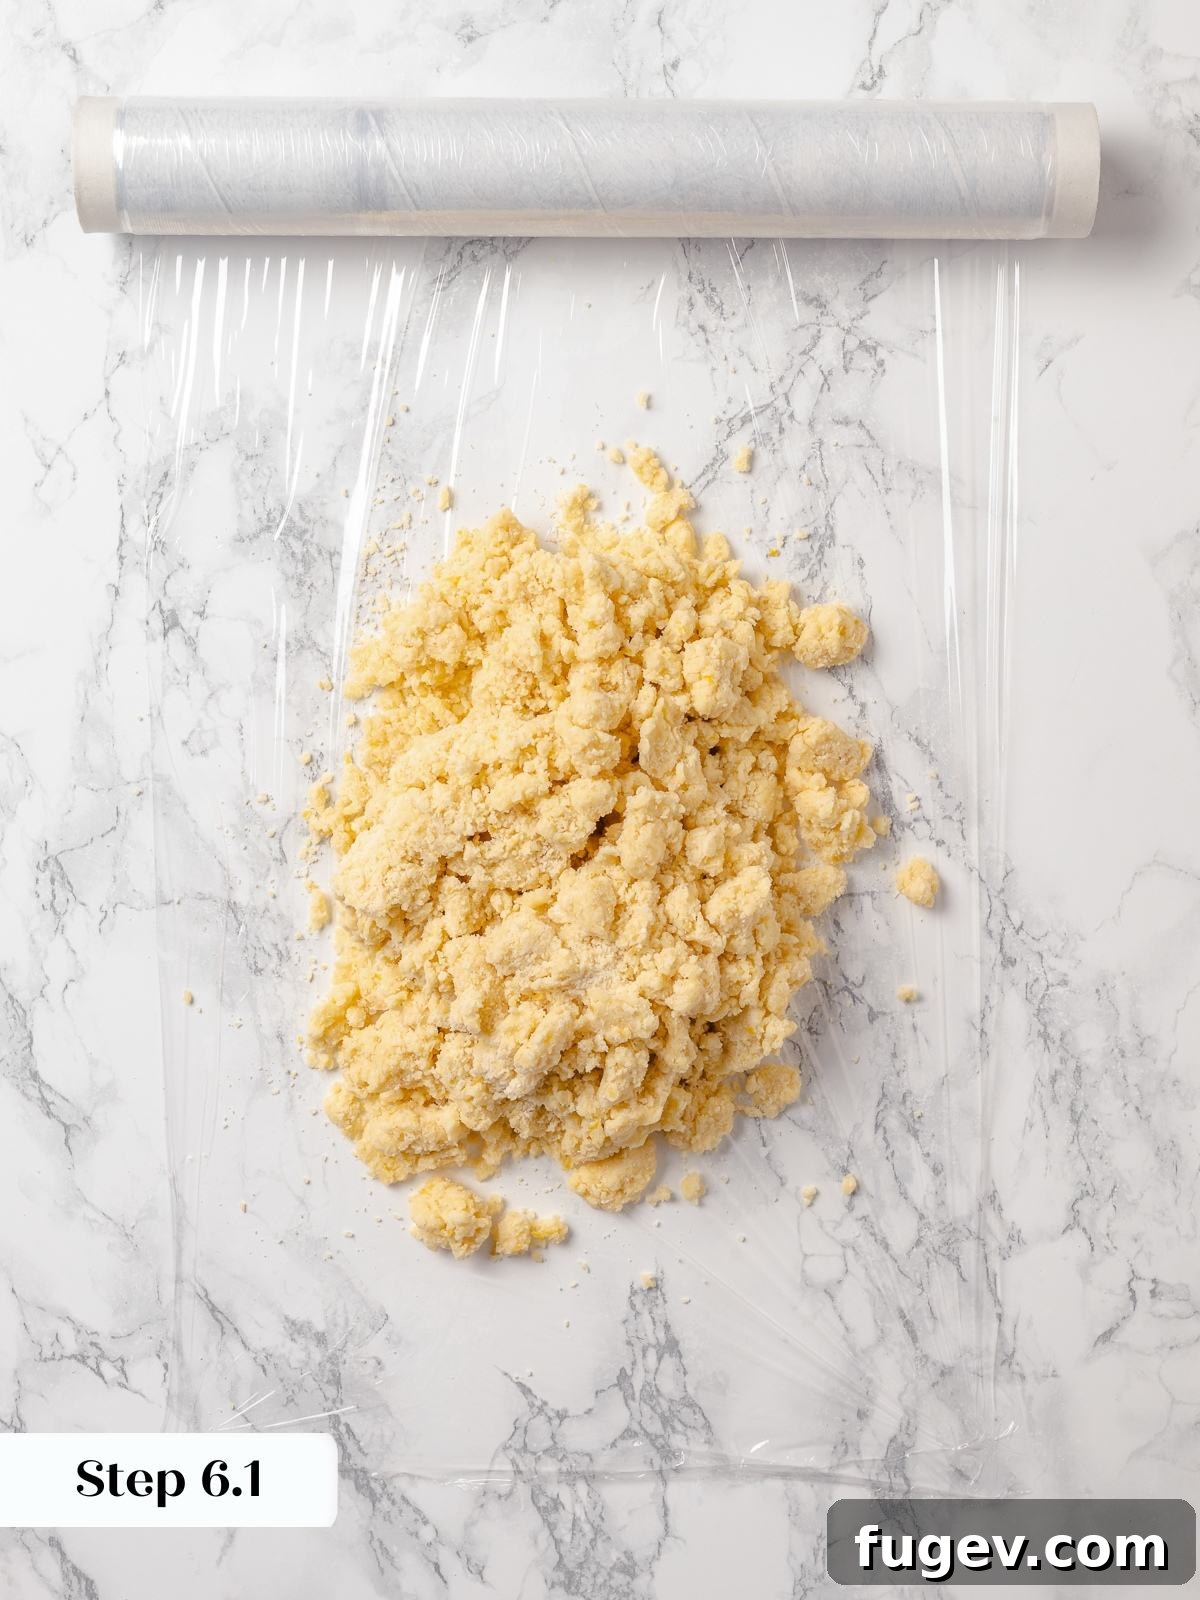
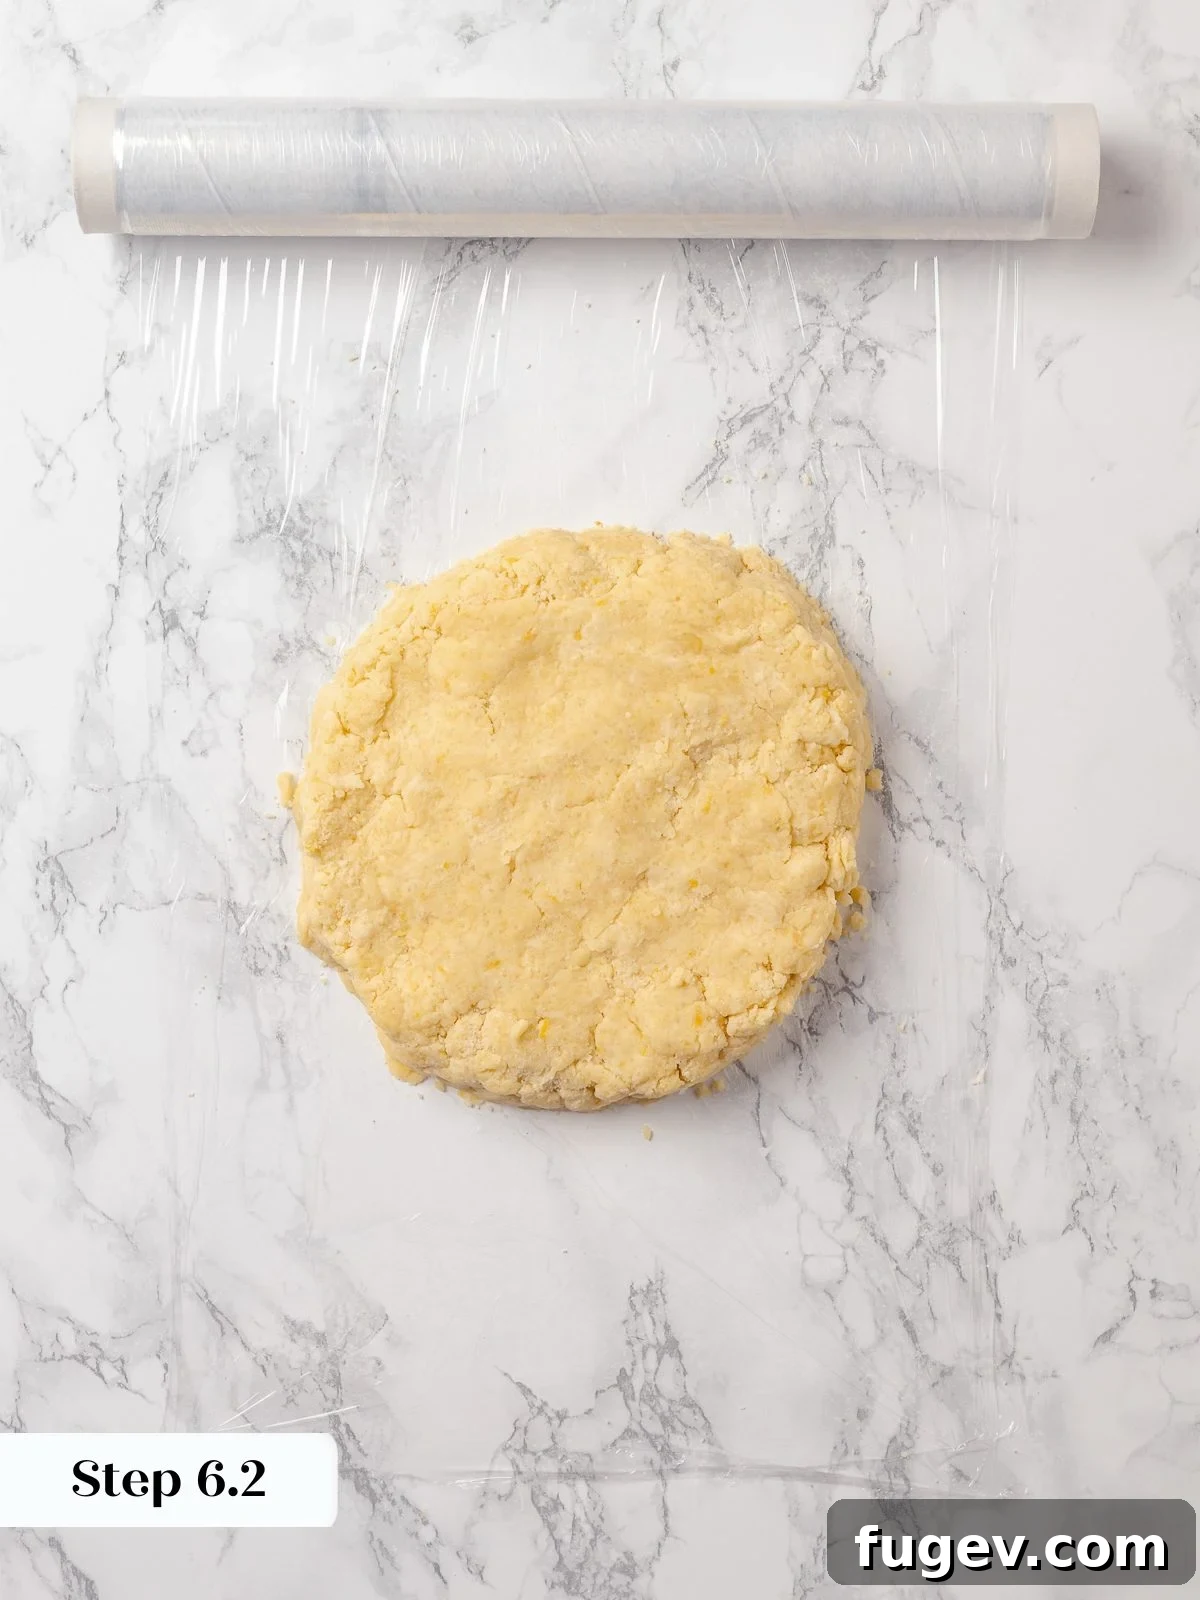
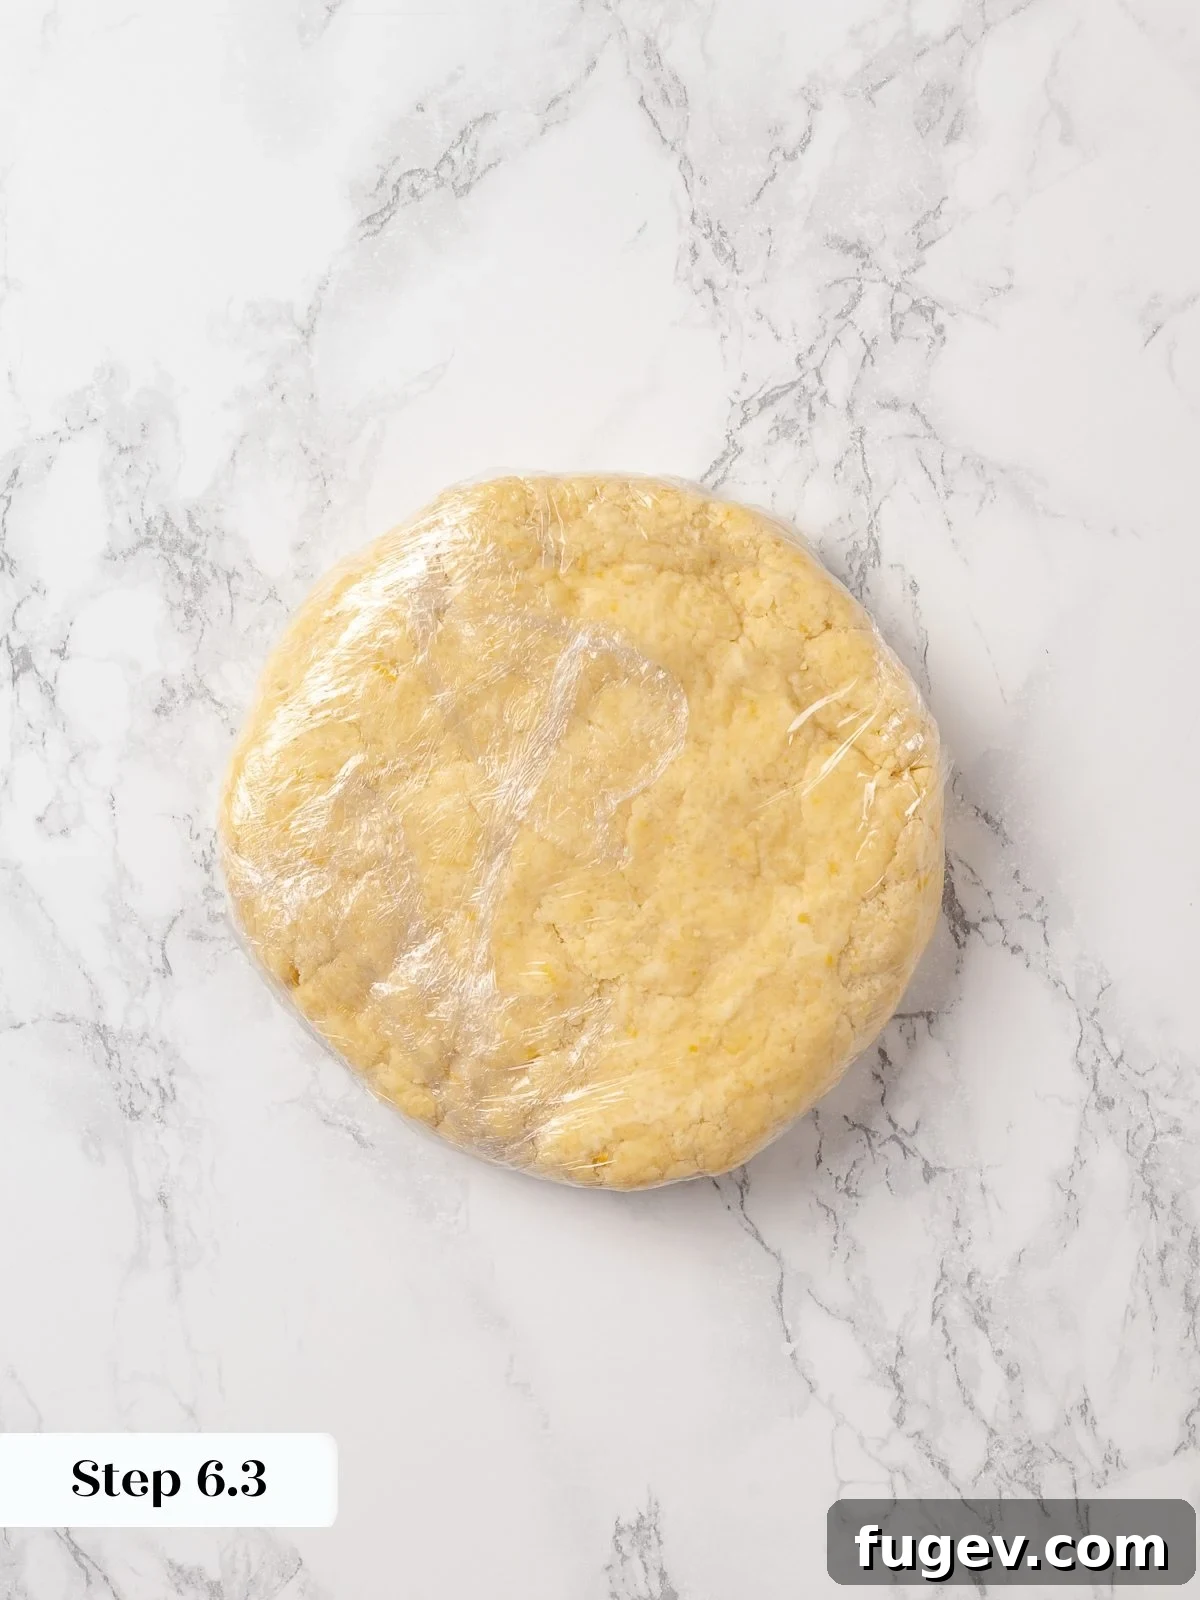
Step 6: Form and Refrigerate the Dough Disk. Carefully scrape all the scone dough, including any loose pieces, onto a sheet of plastic wrap. Gently but firmly squeeze and press the dough together to form a rough, cohesive disk. Flatten it slightly into an even shape, then wrap it tightly in the plastic wrap. Transfer the wrapped dough disk to the refrigerator and chill for a minimum of 2 hours. This crucial chilling period allows the butter to re-firm completely and gives the flour ample time to fully hydrate, resulting in a dough that is much easier to roll and cut cleanly, and ensuring a tender final product. (photos 8, 9 &10)
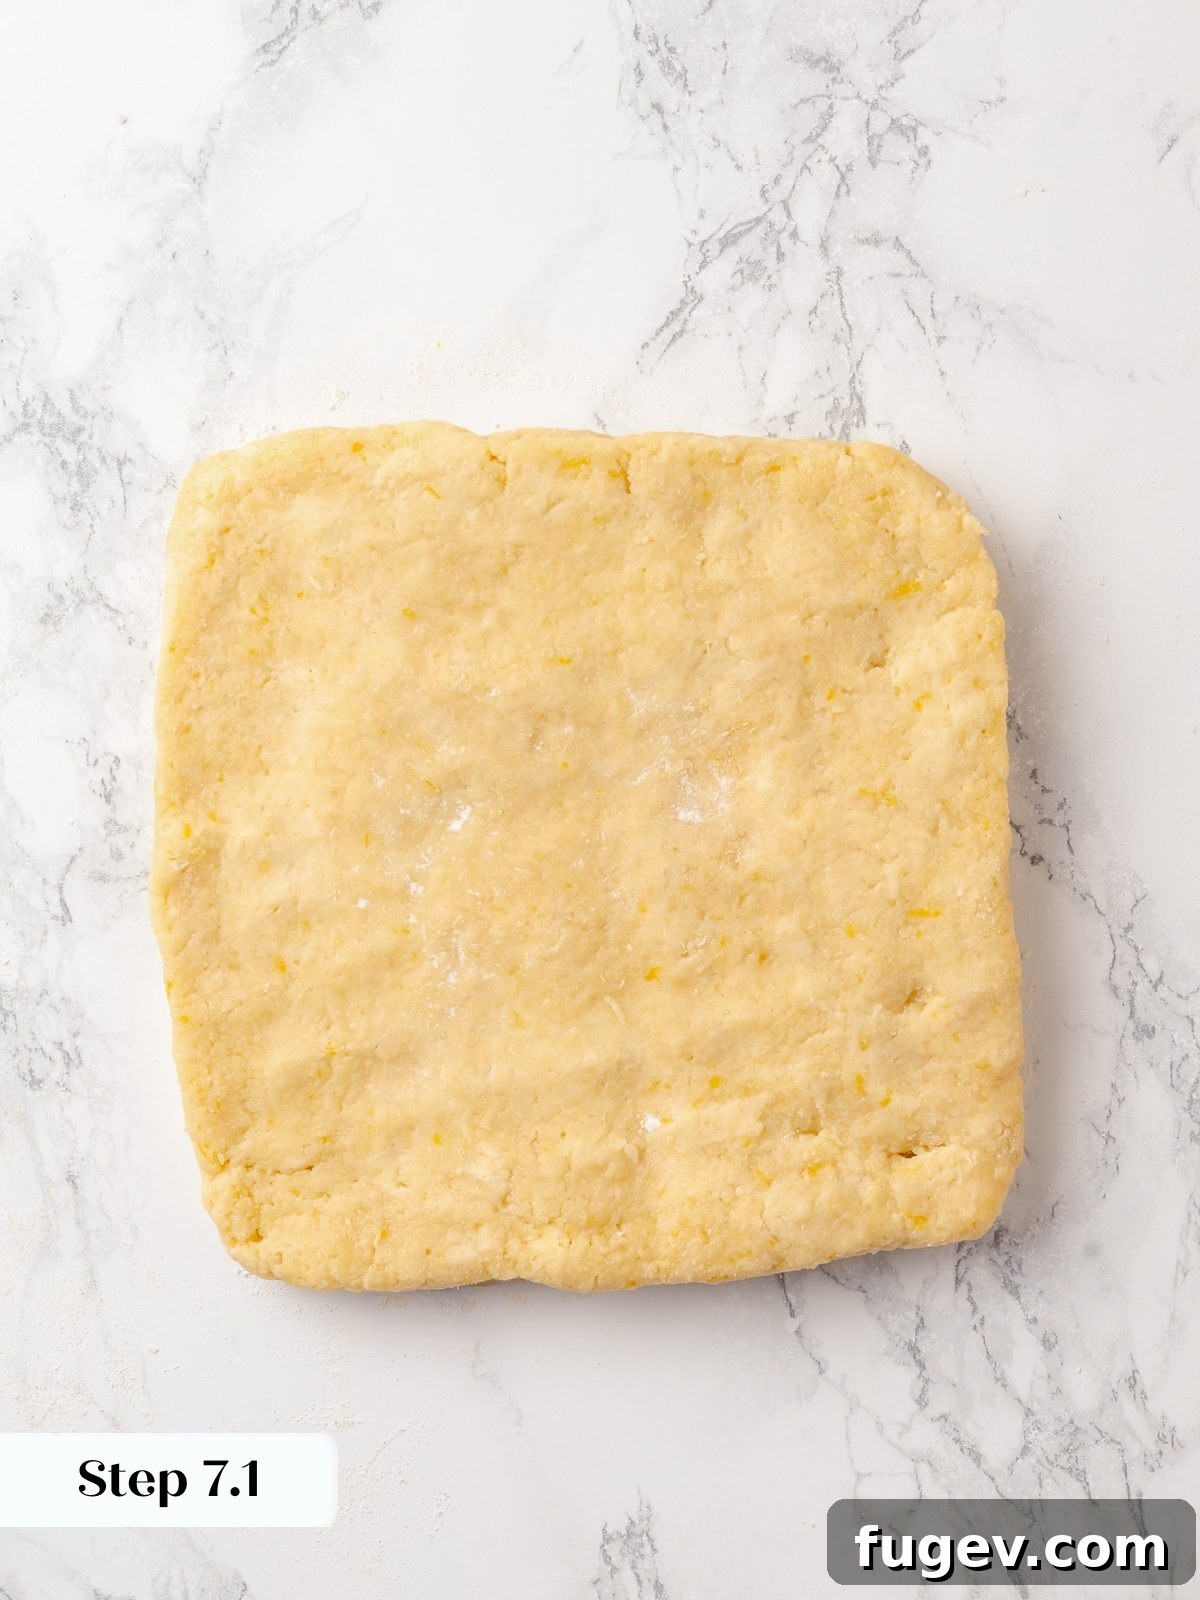
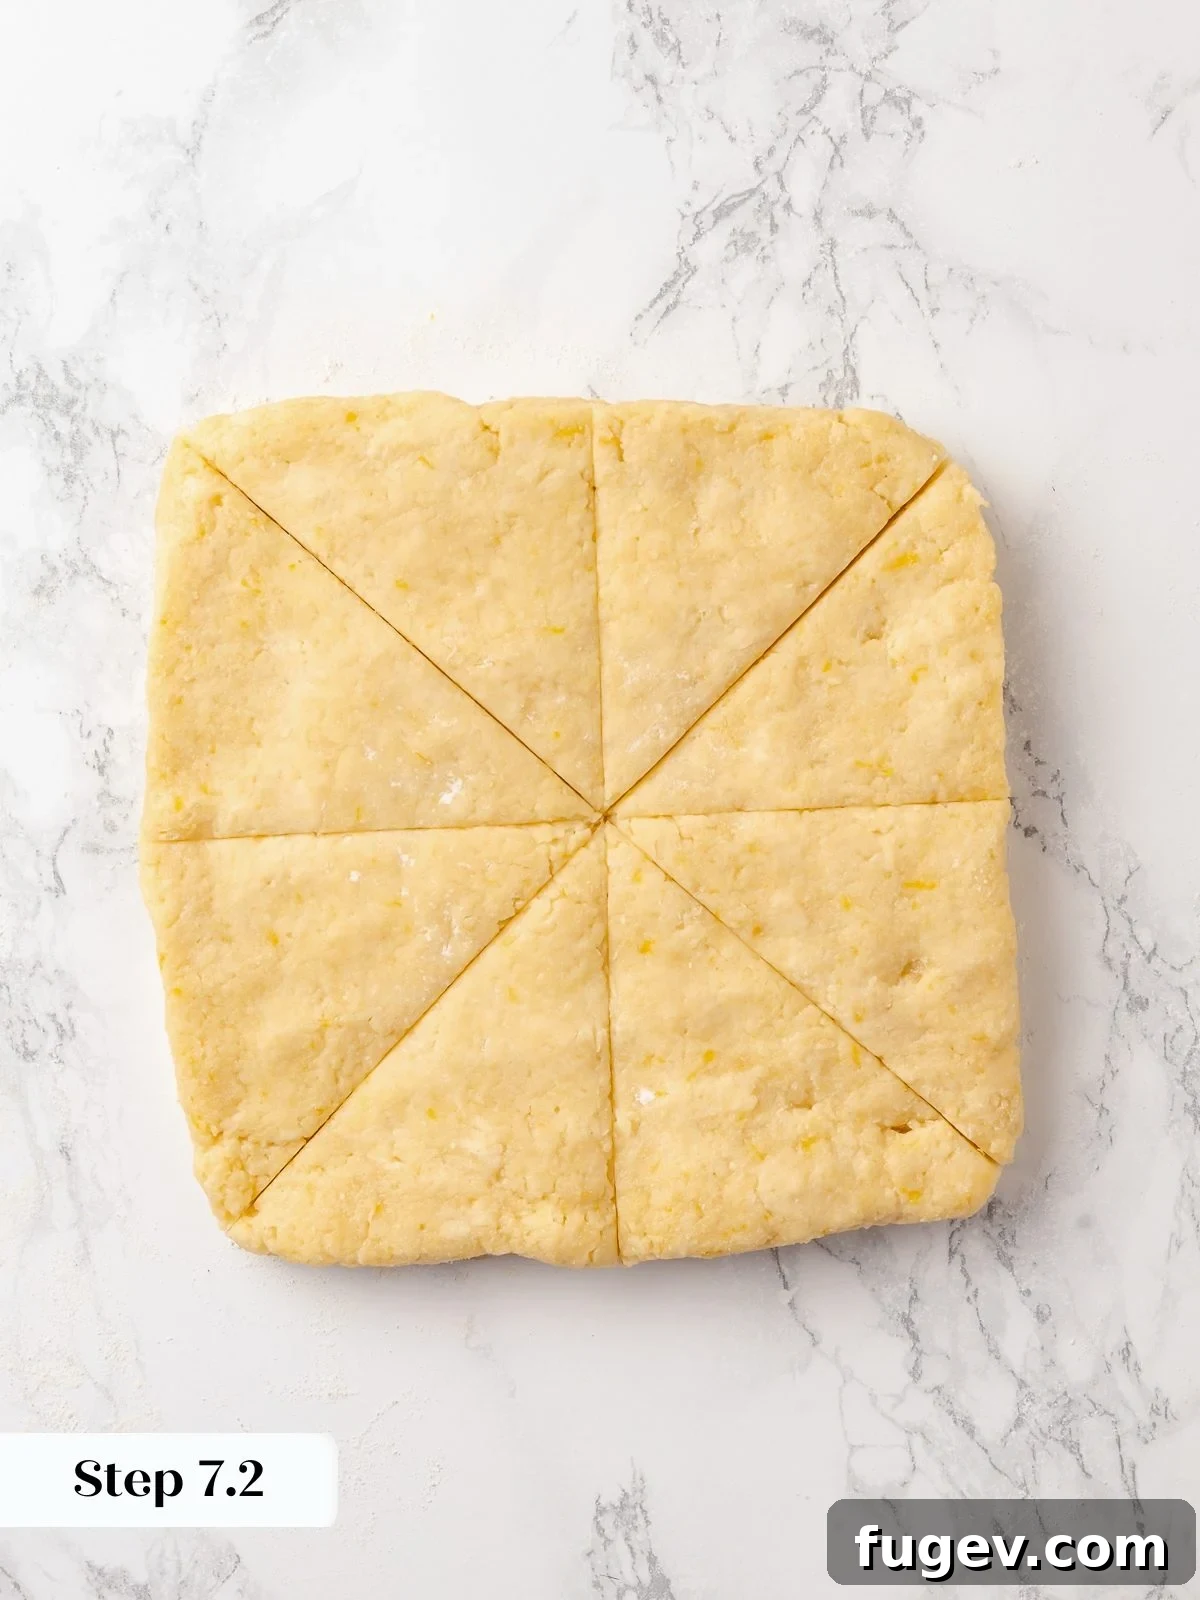
Step 7: Roll and Cut the Scones. Once the dough is thoroughly chilled, unwrap it. On a lightly floured surface, use a rolling pin to roll the dough out evenly to a thickness of approximately ½ inch. If you prefer, you can also gently press the dough out with your hands. For precise, uniform scones, roll the dough into a 6-inch square, then divide each side in half to create four 3-inch squares. Cut each square diagonally to form two perfect triangles. (photo 11).
Step 8: Freeze the Cut Scones. Carefully transfer the cut scones to a parchment-lined baking sheet, ensuring they are spaced about 2 inches apart to allow for proper air circulation during freezing and baking. Once all scones are on the tray, wrap the entire tray tightly with plastic wrap and place it in the freezer for at least 1 hour, or preferably overnight. This final freeze is crucial for maintaining their shape and achieving that desirable lift and texture in the oven. (photo 12)
For truly **uniform scones,** aim to roll the dough into a consistent 6-inch square. Then, divide each side in half to create four 3-inch squares, and finally, cut each square diagonally to yield perfect, evenly sized triangles.
For more **rustic scones**, you can simply press the dough into a large circle and cut it into 12 wedges, much like slicing a pizza. Just ensure that the wedges are roughly similar in size to promote even baking.
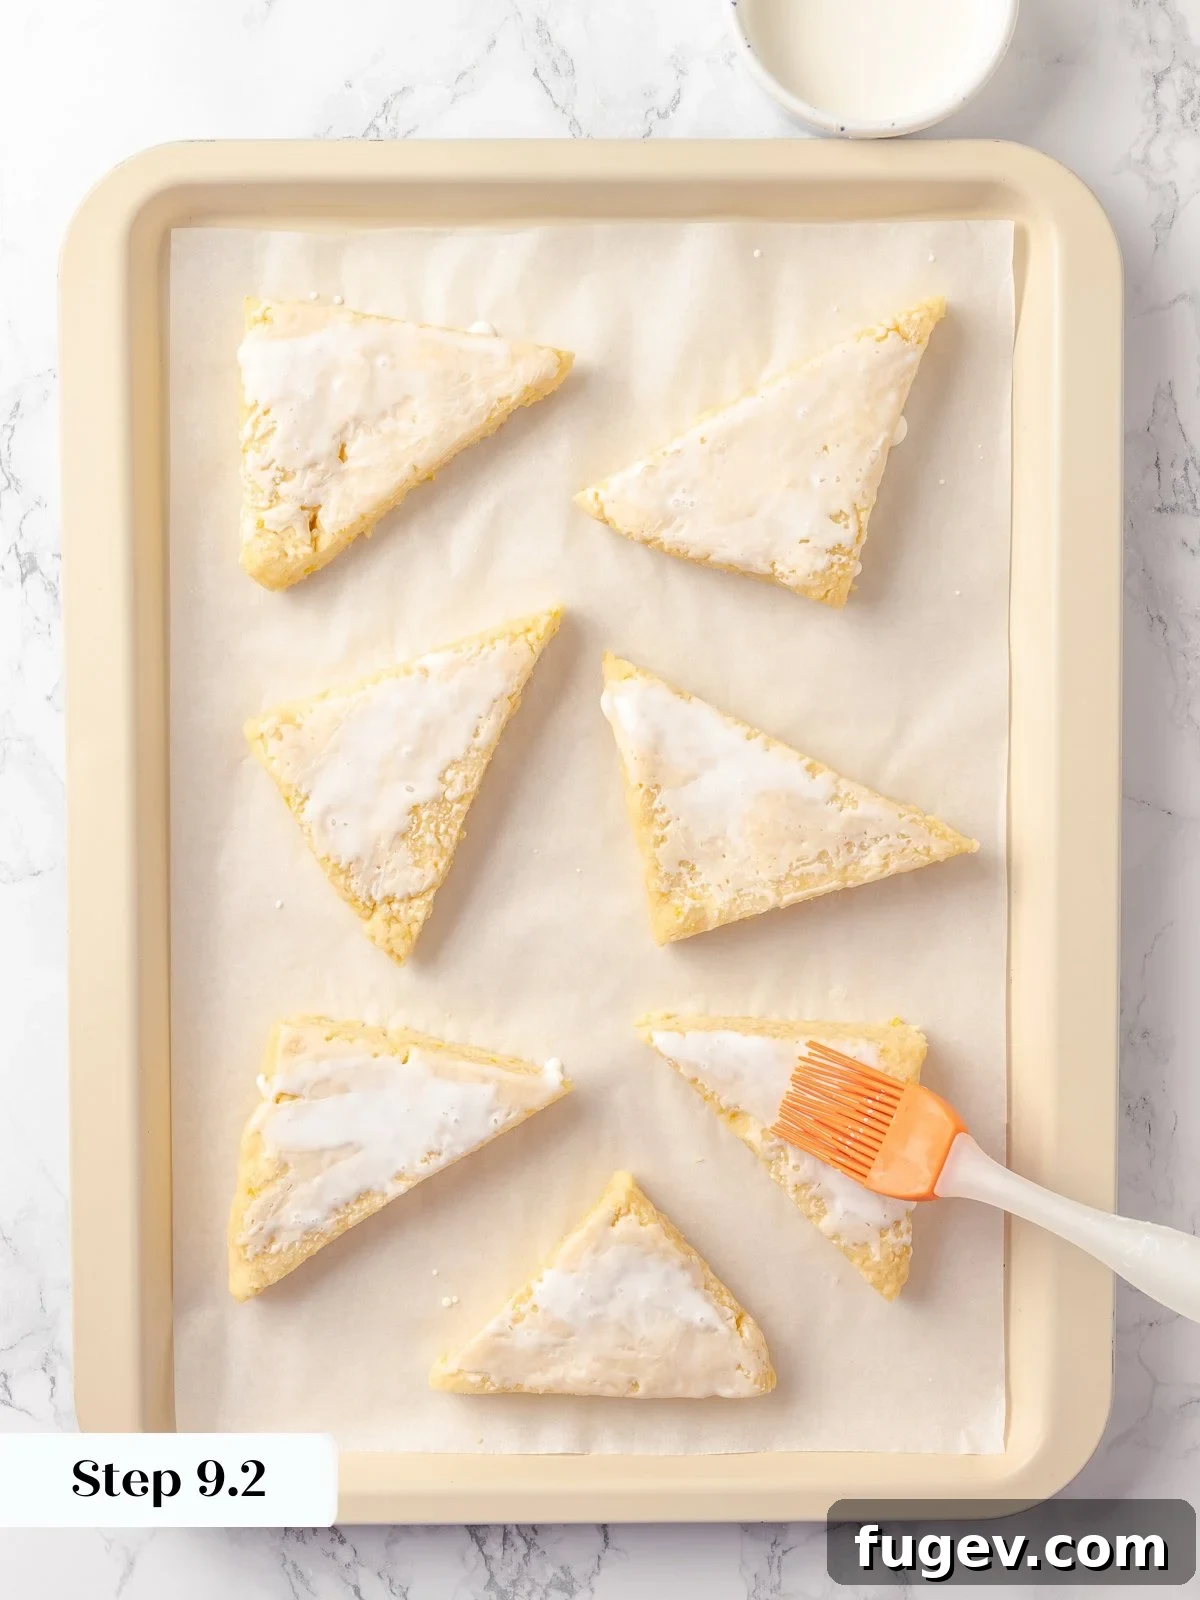
Step 9: Prepare for Baking with Cream and Sugar. Before you start, preheat your oven to 325°F (160°C) for convection settings, or 350°F (175°C) for conventional ovens. Remove the frozen scones from the freezer. Working quickly with 2 to 3 scones at a time, brush the tops with a thin, even layer of heavy cream. Immediately sprinkle a generous amount of white sparkling sugar over the cream. The heavy cream will freeze quickly on the cold dough, so working in small batches ensures the sugar adheres properly before the cream solidifies too much. (photo 13)
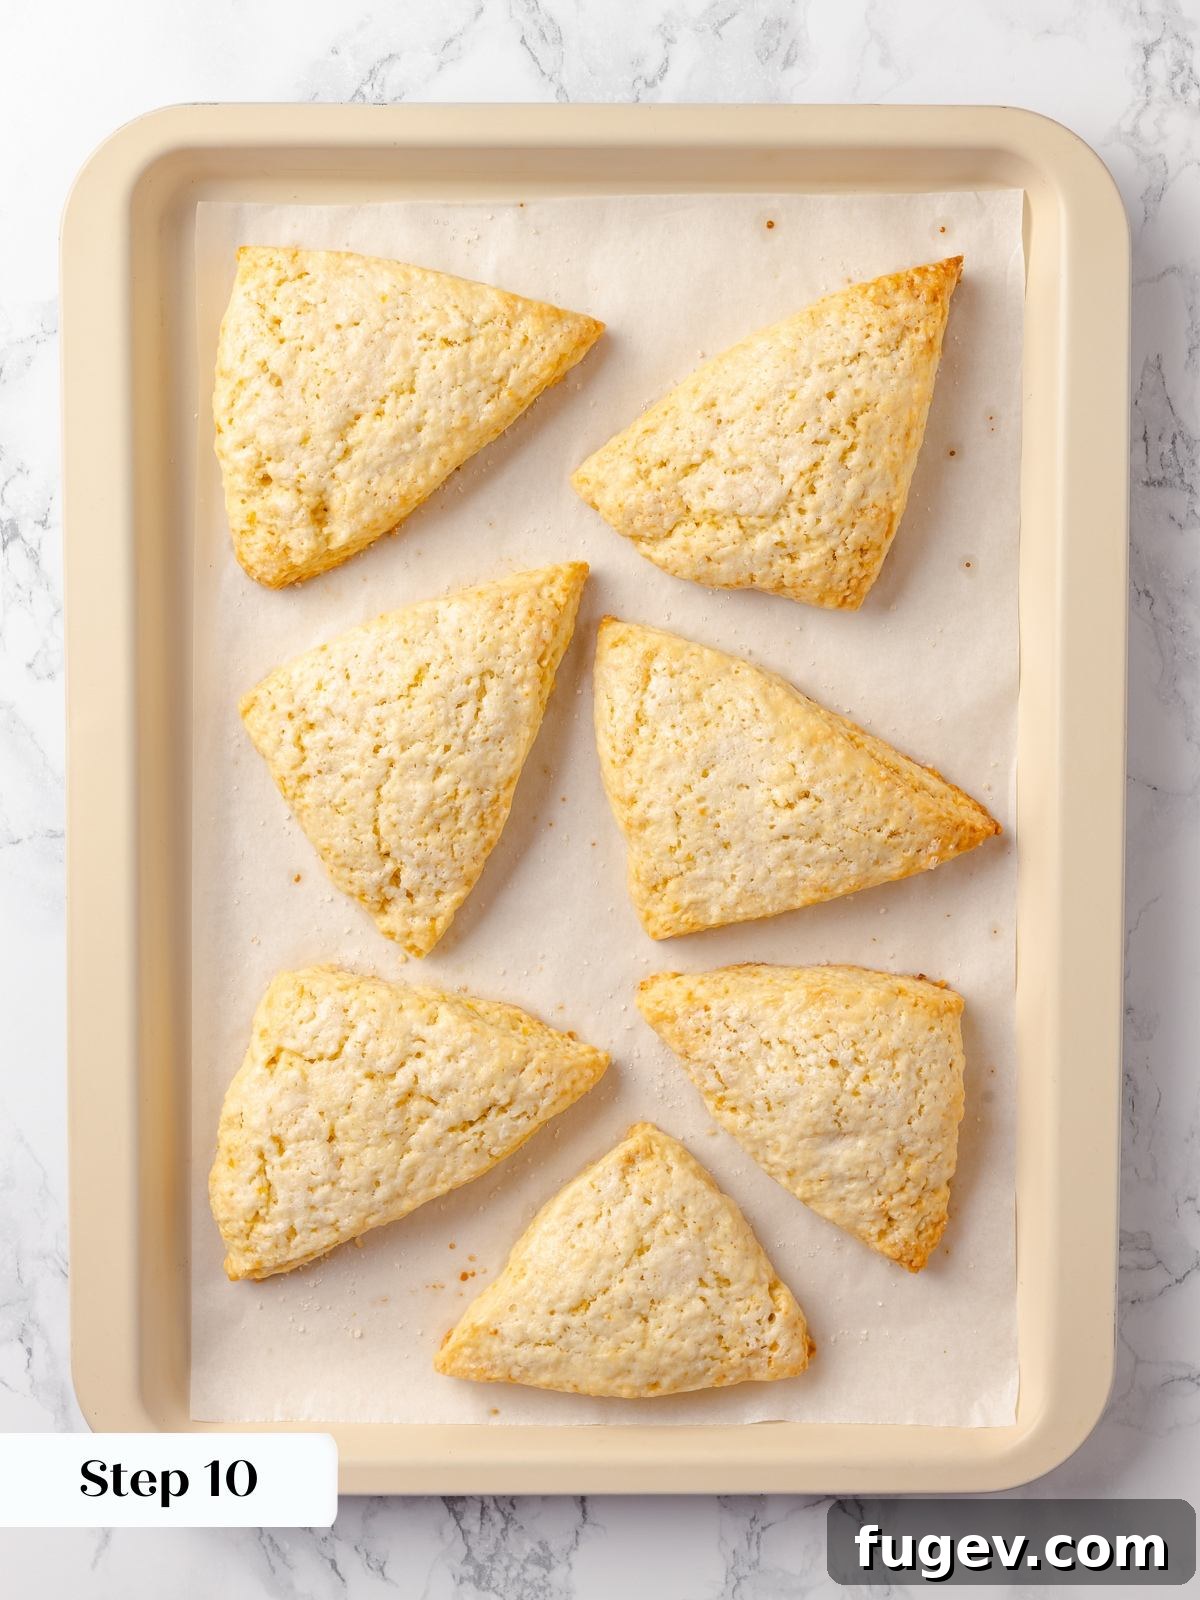
Step 10: Bake to Golden Perfection. Place the prepared baking sheet into the preheated oven. Bake the lemon scones for approximately 20 to 25 minutes. They are ready when their edges are beautifully golden brown, their centers are puffed up with small, delicate cracks, and they offer a slight resistance when gently pressed. The internal temperature for fully baked scones should be around 200-205°F (93-96°C). (photo 14)
That gentle resistance is your cue: The scones should not feel hollow or hard, nor should they give way completely when pressed. Mine consistently reach perfection at 24 minutes, but it’s always wise to start checking a minute or two early. Overbaked scones are genuinely dishearteningly dry, and unfortunately, there is no recovering them once they’ve crossed that threshold.
Step 11: Cool Completely Before Serving. Once baked, remove the scones from the oven but leave them on the baking pan to cool fully. This cooling process is essential as the interior of the scones continues to set during this time. Cutting into them too early will result in a gummy or under-set crumb that doesn’t accurately reflect their true, tender texture. Once completely cooled, the edges will remain perfectly crisp, and the interior will be wonderfully soft, moist, and buttery – precisely the perfect scone texture you’ve worked to achieve!
Chef Lindsey’s Expert Recipe Tip
In this recipe, the method truly triumphs over any single ingredient, and the step most frequently overlooked or rushed by home cooks is the butter incorporation. For that quintessential British crumb – dense yet moist through the center – every visible piece of cold butter must be completely worked into the flour before any wet ingredients are introduced. We’re not aiming for pea-sized or almond-sized chunks here; think coarse, damp sand. This complete and uniform dispersion of butter is the critical factor in preventing gluten overdevelopment and ensuring your scones achieve that irresistibly tender, melt-in-your-mouth texture.
Lemon Scone Recipe FAQs
The signature British scone texture is primarily achieved through two critical factors: ensuring the butter is cut in completely until no visible pieces remain, and diligently chilling the dough both before and after shaping. Skipping or shortening these essential chill times is the most common reason scones turn out cakey, greasy, or dry rather than dense, moist, and tender. Additionally, handle the dough as little as possible once the wet ingredients are added. This minimal handling prevents excess gluten development, which would result in tough scones, rather than the delicate texture we desire. We’re baking scones, not creating potato bread!
For the best possible rise and texture, we recommend freezing unbaked lemon scones for up to one week. There’s a subtle chemical reaction occurring between the lemon juice and the baking powder in this recipe. While using baking powder (rather than baking soda) slows this process, prolonged freezing beyond a week might lead to a noticeably less vigorous puff during baking. This makes these lemon scones less suitable for long-term freezer storage before baking compared to, for example, my chocolate chip scones. Always bake them directly from frozen for optimal results, without thawing.
Once baked, these delicious lemon scones can be stored at room temperature for up to 2 days. To keep them fresh, ensure they are wrapped well in an airtight container or plastic wrap. For longer storage, you can freeze the baked scones for up to 1 month. When you’re ready to enjoy them, simply let them come to room temperature on your counter before serving. You can also gently reheat them in a low oven for a few minutes for a “freshly baked” experience.
The most frequent culprit behind dry lemon scones is overbaking. Scones bake quickly, and even a few extra minutes in the oven can strip them of their moisture. Begin checking for doneness at the 20-minute mark, and pull the scones the moment their edges are golden and their centers feel just set with a gentle resistance. Another common cause of uneven dryness is baking unevenly sized scones together; smaller scones will finish much earlier than larger ones, leading to some becoming dry and others underbaked. Always bake uniformly sized pieces together to ensure consistent results.

More Bright Lemon Recipes to Explore
If you adore the vibrant flavor of lemon, you’ll love these other fantastic recipes from my kitchen!
Easy Buttercream & Frosting Recipes
Lemon Swiss Meringue Buttercream
Cake Recipes
Lemon Cake Recipe
Date Night
Lemon Meringue Pie
Recipe Roundups
Recipes with Lemon Curd
If you tried this recipe and loved it, please leave a 🌟 star rating and let me know how it goes in the comments below. I love hearing from you; your comments truly make my day!

British-Style Lemon Scones
Print Recipe
Ingredients
- 2 ½ cups all-purpose flour
- ½ cup granulated sugar
- 2 lemons zested
- ¼ teaspoon kosher salt
- 1 teaspoon baking powder
- ¾ cup unsalted butter cold, cubed
- 2 large eggs
- ¼ cup heavy cream
- 3 tablespoons lemon juice
- Heavy cream for finishing
- White sparkling sugar for finishing
Instructions
-
Zest the lemons directly into the granulated sugar. Use your fingers to rub the zest into the sugar until fragrant. The longer this mixture sits, the more pronounced the lemon flavor will be.
-
In the bowl of a stand mixer fitted with the paddle attachment, combine the flour, lemon sugar, salt, and baking powder. Mix on low speed just to distribute evenly.
-
Add the cold cubed butter and mix on low speed until fully incorporated. The mixture should resemble coarse, damp sand with no visible butter pieces remaining. Check the bottom of the bowl with your hands.
-
In a separate bowl, whisk the eggs and heavy cream until smooth. Add the lemon juice immediately before adding this mixture to the dough.
-
With the mixer on low, slowly pour in the cream mixture and mix just until the dough comes together and no dry flour remains. Do not overmix.
-
Scrape the dough onto plastic wrap, gently press it into a disk, wrap tightly, and refrigerate for 2 hours.
-
Unwrap the chilled dough and roll or press it to ½ inch thickness. For uniform scones, roll into a 6-inch square, divide into four 3-inch squares, and cut each diagonally into triangles. For rustic scones, press into a circle and cut 12 triangles. Place the cut scones on a parchment-lined baking sheet, wrap in plastic wrap, and freeze for at least 1 hour or overnight.
-
Preheat the oven to 325°F (160°C) convection or 350°F (175°C) conventional.
-
Working with 2 to 3 scones at a time, brush the frozen scones with heavy cream and immediately sprinkle with white sparkling sugar. The cream freezes quickly on the cold dough, so work fast to ensure the sugar adheres.
-
Bake for 20 to 25 minutes, starting to check at 20 minutes. The scones are done when the edges are golden, and the centers feel just set. Cool completely on the baking sheet before serving.
Notes
Doneness: Begin checking your scones at 20 minutes. The ideal doneness is when the edges are a beautiful golden brown and the centers feel just set with a gentle spring when lightly pressed. Overbaked scones will be dry, and sadly, once dry, they cannot be revived.
Freezer storage (unbaked): For optimal rise and flavor, freeze the unbaked, shaped scones for up to 1 week. Bake them directly from frozen; no thawing is required. Freezing longer than one week might result in a slightly reduced rise due to the interaction between lemon juice and baking powder.
Storage (baked): Baked lemon scones can be stored, wrapped well in an airtight container, at room temperature for up to 2 days. For longer storage, you can freeze the baked scones for up to 1 month. Allow them to come to room temperature before serving, or gently reheat in a low oven.
Nutrition Information (per serving)
Carbohydrates: 29g |
Protein: 4g |
Fat: 14g |
Saturated Fat: 9g |
Polyunsaturated Fat: 1g |
Monounsaturated Fat: 4g |
Trans Fat: 0.5g |
Cholesterol: 63mg |
Sodium: 98mg |
Potassium: 50mg |
Fiber: 1g |
Sugar: 9g |
Vitamin A: 467IU |
Vitamin C: 1mg |
Calcium: 35mg |
Iron: 1mg
Before You Go: Further Culinary Delights
If these bright and zesty lemon scones have sparked your interest in more citrus-infused baking, you’re in luck! Be sure to explore my delightful lemon cake recipe for a show-stopping dessert, or try these light and airy lemon poppy seed muffins for another perfect breakfast or snack option. You can also browse all my favorite breakfast recipes to find your next baking adventure. Happy baking!