
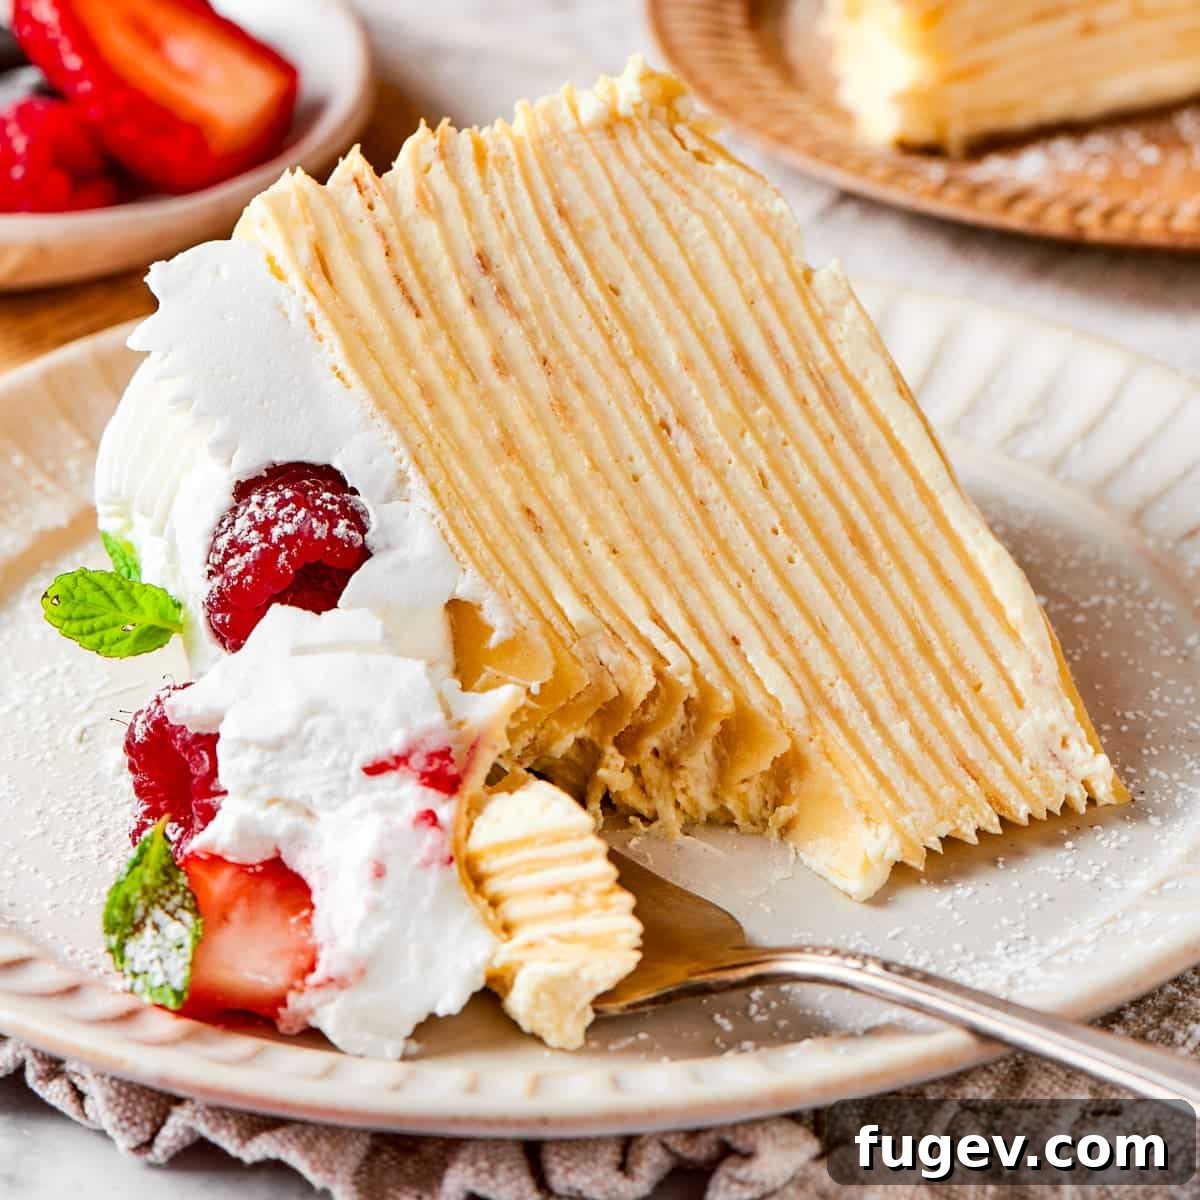
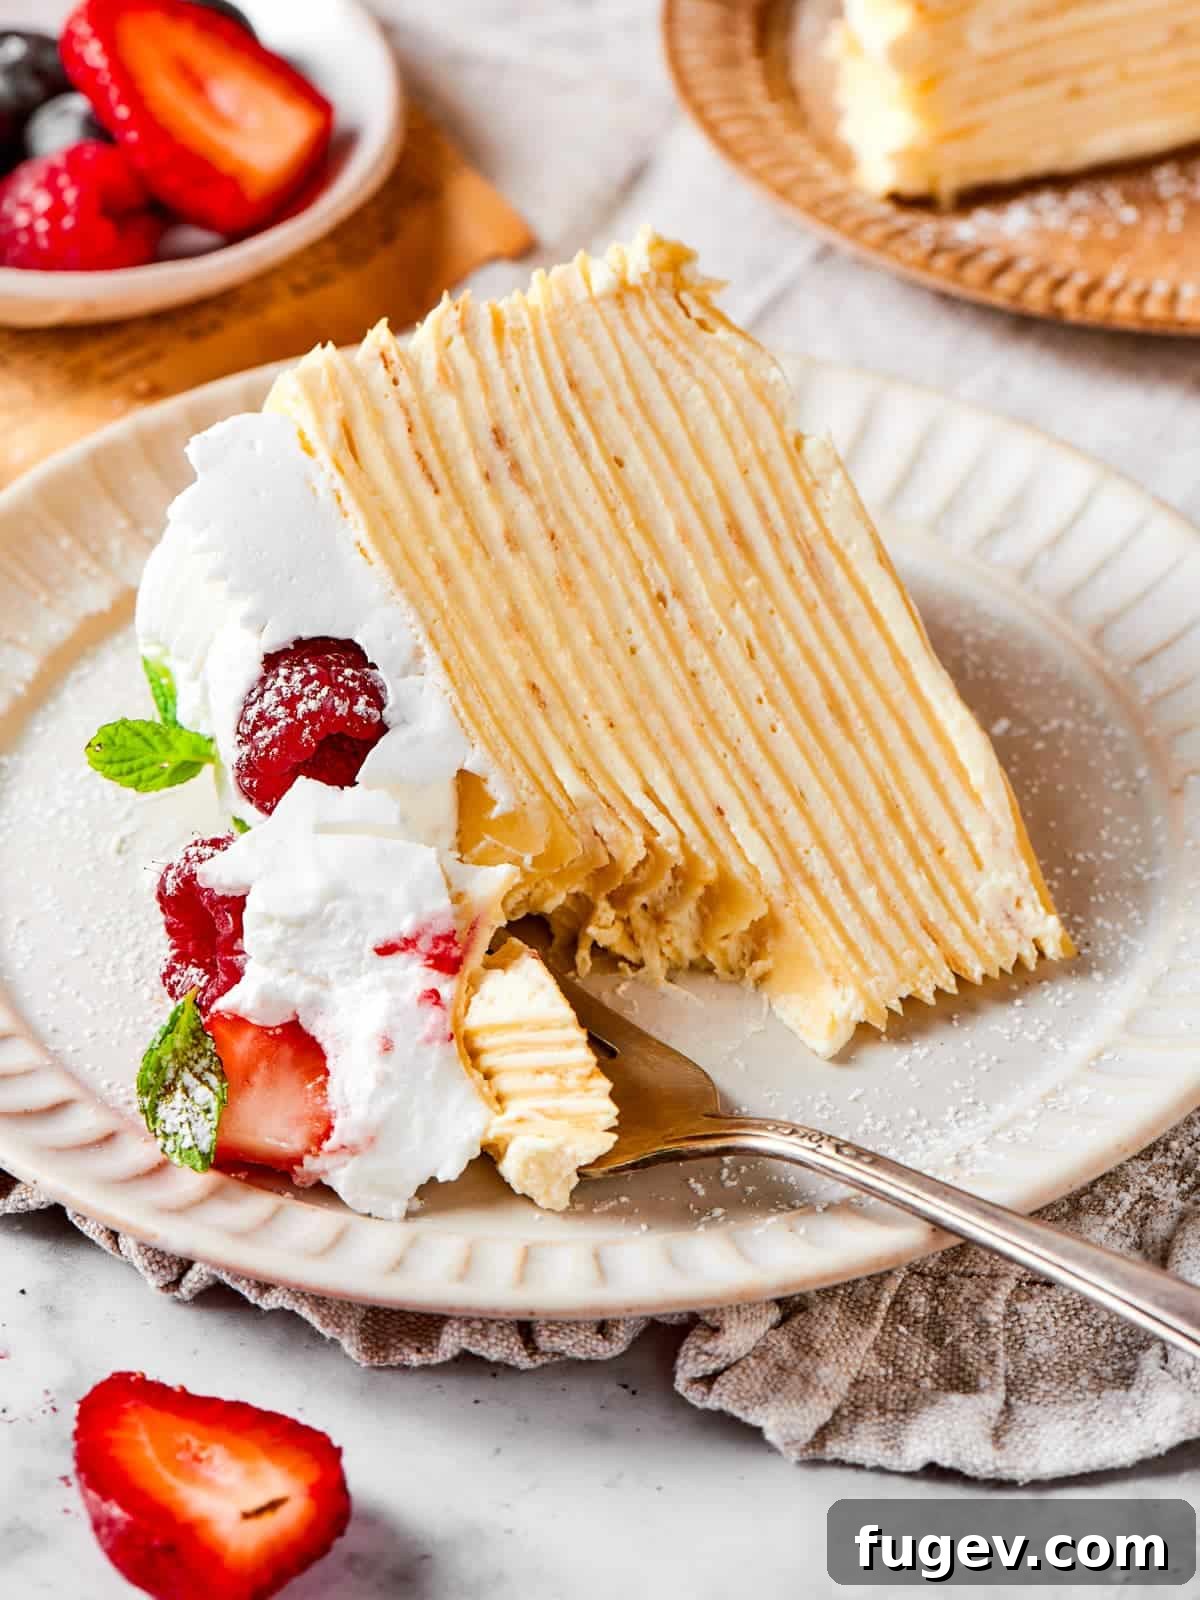
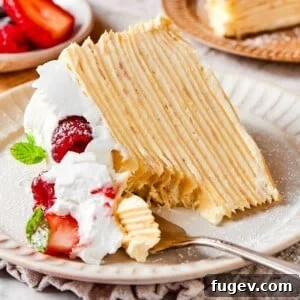
Indulge in the exquisite elegance of a homemade Vanilla Mille Crêpe Cake, a true masterpiece featuring fifty gossamer-thin layers of sweet crêpes meticulously stacked with a velvety vanilla crème légère. This sophisticated dessert promises a sublime balance: a rich, profound vanilla essence harmoniously paired with a surprisingly light and airy texture, thanks to a stabilized whipped cream filling enhanced by expertly crafted pastry cream.

Recipe at a Glance
A brief overview of this delightful recipe. For full details, jump to the complete recipe instructions.
Jump to Recipe
Prep Time
20 minutes
Cook Time
1 hour
Chill Time
4 hours
Total Time
5 hours 20 minutes
Servings
12 slices
Difficulty
Intermediate – requires patience and resting periods, but the steps are straightforward.
Calories *
478 kcal per serving
Technique
Preparing delicate crêpes, crafting rich pastry cream, whipping cream, and artfully layering into a stunning cake.
Flavor Profile
A symphony of tender, slightly caramelized crêpes meeting silky, aromatic vanilla cream with a delicate sweetness.
* Based on nutrition panel
Summarize & Save this content on
google ai
perplexity
grok
Why This Vanilla Mille Crêpe Cake Will Enchant You
Prepare to fall in love with this extraordinary dessert, a culinary journey that combines classic French technique with irresistible vanilla flavor. Here’s why this recipe will become your new favorite:
- Achieve Perfectly Delicate Homemade Crêpes: Forget flimsy, easily torn crêpes. Our recipe ingeniously blends both cake flour and all-purpose flour, creating crêpes that are incredibly tender yet robust enough to support numerous layers of rich filling. Guided by expert pastry chef tips, you’ll master the art of making flawless crêpes every single time, ensuring a superior base for your cake.
- Experience an Exquisitely Smooth and Flavorful Filling: The heart of this cake lies in its bespoke crème légère – a divine vanilla whipped cream filling that’s light in texture but profoundly rich in flavor. Crafted specifically for this recipe, it uses whole eggs and premium vanilla powder, resulting in an intense vanilla experience and a perfectly stable, luxurious texture that holds up beautifully under the weight of 50 layers.
- The Ultimate Make-Ahead Dessert: One of the most appealing aspects of this mille crêpe cake is that it actually improves with time. It’s designed to be assembled and then chilled, ideally overnight, allowing all the nuanced flavors to meld and the cream to set perfectly. This makes it an ideal dessert for entertaining, holiday gatherings, or a spectacular brunch centerpiece, freeing you from last-minute stress.
Table of Contents
- Why This Vanilla Mille Crêpe Cake Will Enchant You
- The Art of the Mille Crêpe Cake
- Essential Ingredients & Smart Substitutions
- Creative Variations for Your Mille Crêpe Cake
- Professional Chef Tips for Success
- Step-by-Step Guide to Crafting Your Mille Crêpe Cake
- Chef Lindsey’s Recipe Tip for Perfect Slices
- Frequently Asked Questions (FAQs)
- More Delightful Breakfast & Brunch Recipes
- Classic Vanilla Mille Crêpe Cake Recipe
- Before You Go: Explore More Culinary Delights
Allow me to transport you straight to the heart of France with this truly exceptional mille crêpe cake! It’s an embodiment of simple elegance, a dessert where countless delicate, paper-thin crêpes are lovingly layered with a cloud-like, creamy vanilla crème légère. To elevate its charm and flavor even further, don’t forget to adorn the top with a vibrant array of your favorite fresh, in-season fruits.
There’s an undeniable magic in desserts that celebrate simplicity, allowing their core flavors to shine brightly. The French, in particular, have perfected this art, as seen in timeless creations like the silken vanilla crème brûlée or the custardy richness of crème caramels. In my own home, where vanilla reigns supreme as a beloved flavor, this moist vanilla cake recipe is also a frequent and cherished request, but for a truly show-stopping experience, the mille crêpe cake takes center stage.
The Art of the Mille Crêpe Cake: A French Masterpiece Explained
The term “mille crêpe cake” directly translates from French to “thousand crêpes,” a name that beautifully encapsulates the essence of this magnificent dessert. Much like its esteemed cousin, the mille-feuille (a dessert of “thousand leaves” made from classic puff pastry), this cake is defined by its impressive verticality and the sheer number of its layers. Typically, a mille crêpe cake will feature at least 20, and often up to 50, ultra-thin crêpes, each carefully layered with a rich, sweet, and incredibly creamy filling. This filling is most commonly a stabilized whipped cream or a luxurious pastry cream, creating a delightful interplay of textures. The success of this cake lies in its delicate balance: the tender, slightly chewy texture of the crêpes contrasting with the smooth, melt-in-your-mouth richness of the cream, resulting in a dessert that is both substantial and remarkably light.
Originating in France and popularized globally, the mille crêpe cake is more than just a dessert; it’s a testament to patience and precision. Each layer contributes to a harmonious whole, making every slice a revelation of flavor and texture. It’s a true showstopper, often reserved for celebratory occasions or when you simply want to impress with your baking prowess.
Essential Ingredients & Smart Substitutions for Your Mille Crêpe Cake
Crafting the perfect mille crêpe cake begins with selecting the right ingredients. Here’s a detailed look at what you’ll need and how to handle potential substitutions to ensure the best results for both your delicate crêpes and the luscious vanilla crème légère:
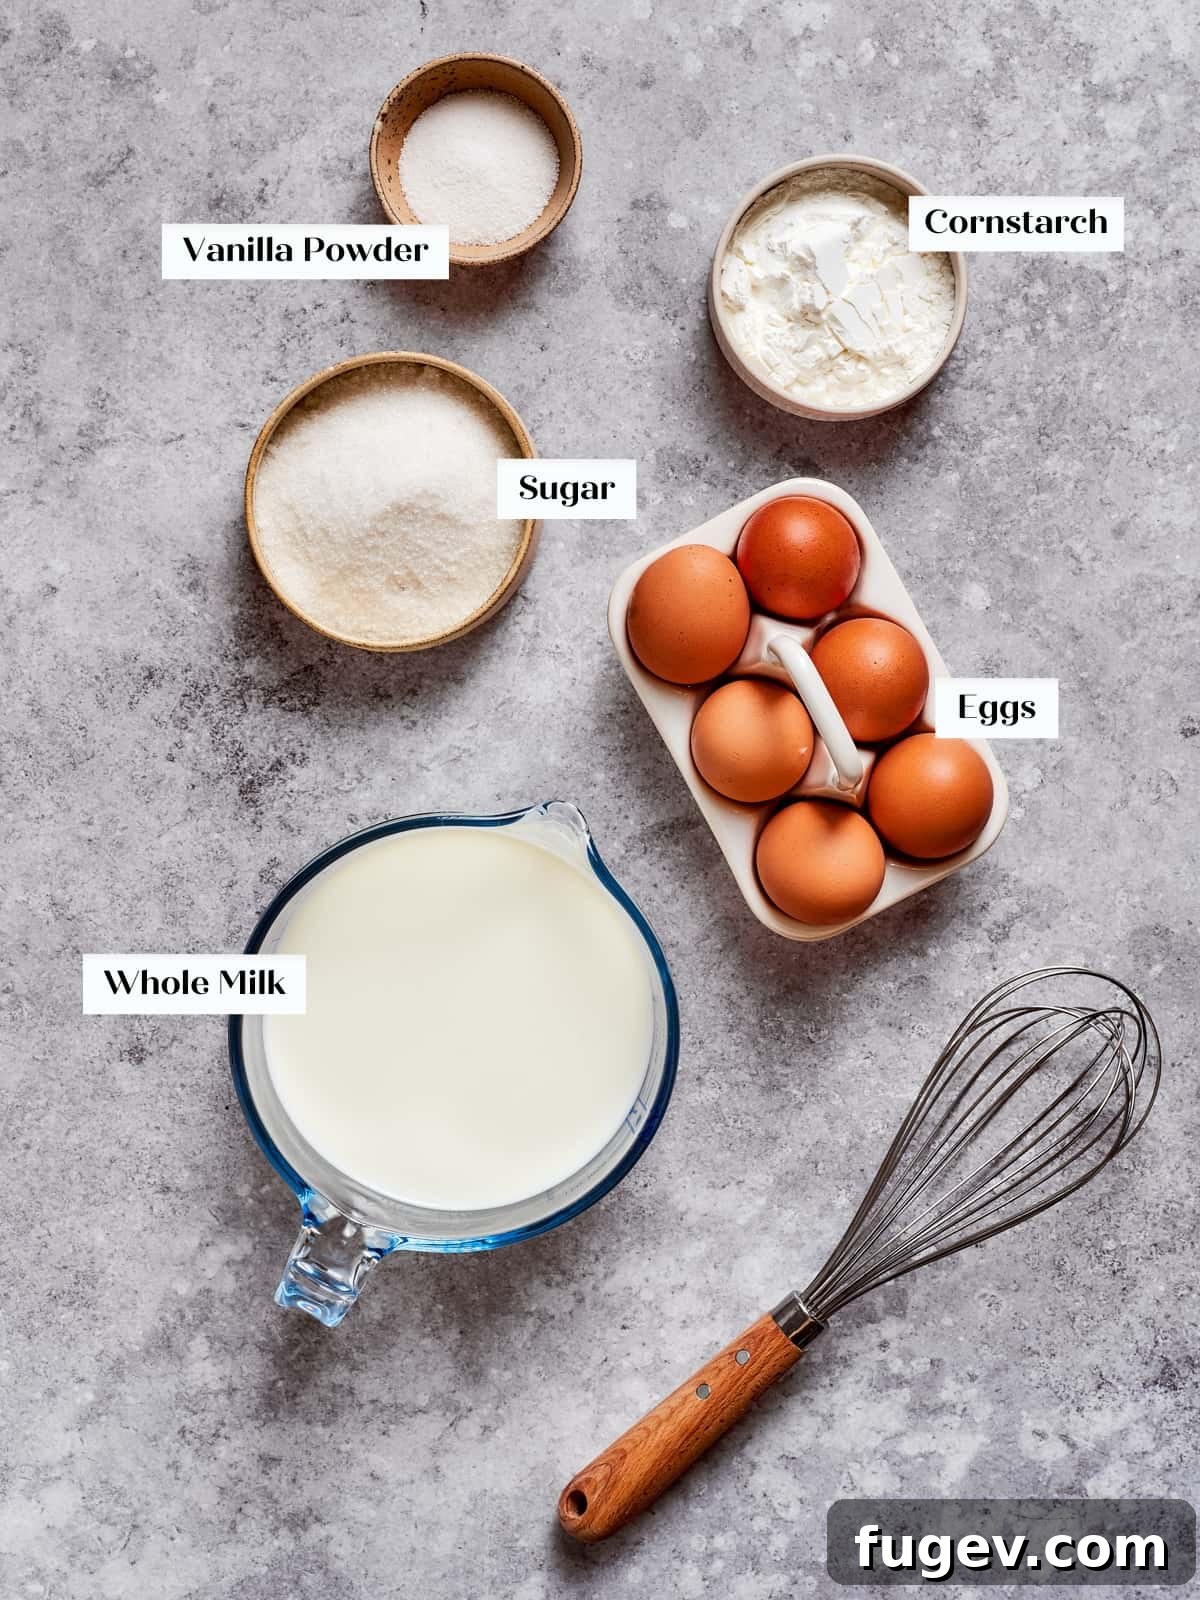
- Whole Milk: For both the crêpe batter and especially the pastry cream, whole milk is non-negotiable. Its higher fat content is crucial for achieving the rich, creamy texture and stability of the custard. I strongly advise against using milk alternatives for this specific recipe, as they lack the necessary fat and protein structure. If you must use a dairy-free option, please refer to a dedicated pastry cream recipe designed for milk alternatives to ensure proper setting and consistency.
- Whole Eggs: Unlike some pastry cream recipes that call solely for egg yolks, this recipe utilizes whole eggs. This choice is deliberate, as it contributes to a lighter, more ethereal texture for the crème légère. However, this means thorough chilling of the custard is paramount, ideally covered overnight, to allow it to fully set and achieve its intended stability.
- Vanilla Powder: Our secret weapon for an intense vanilla flavor that permeates every bite. Vanilla powder offers a more potent flavor profile compared to extract and blends seamlessly into cooked custards without thinning them. While vanilla extract is a common substitute, or for a truly gourmet touch, the seeds scraped from a fresh vanilla bean can also be used, adjusting quantities to taste.
- Sweet Crêpes: The foundation of your cake. You’ll need to prepare a double batch (2x) of our specialized sweet crêpe recipe. This ensures you have ample delicate layers for a truly impressive mille crêpe creation, typically around 50 layers for a standard 10-inch cake.
For a complete list of ingredients with precise quantities, please refer to the detailed recipe card below.
Creative Variations for Your Mille Crêpe Cake: Beyond Vanilla
While the classic vanilla mille crêpe cake is undeniably divine, this versatile dessert lends itself beautifully to a myriad of flavor explorations. Don’t be afraid to experiment and customize your creation to suit your taste or the season!
- Experiment with Different Filling Flavors: Unleash your creativity by changing the crème légère’s core flavor. Imagine layering your delicate crêpes with a rich and buttery caramel pastry cream for a decadent twist. This cake would also be incredibly delicious with the bright, zesty notes of my lemon curd whipped cream recipe. For chocolate lovers, consider a sophisticated filling using our dark chocolate pudding recipe, or for a comforting, nostalgic flavor, my butterscotch pudding would be an exceptional choice.
- Infuse with Your Favorite Jam or Spread: Introduce delightful pockets of fruitiness or nutty richness between your crêpe layers. A swirl of homemade mixed berry jam or our simple strawberry jam recipe would add a wonderful tart-sweet contrast. For a more indulgent treat, consider spreading thin layers of rich Nutella or creamy peanut butter – a guaranteed crowd-pleaser, especially with a banana variation!
- Embrace Seasonal Flavors: The Pumpkin Crêpe Cake: For an autumnal delight, transform this cake into a seasonal showstopper! Infuse your crêpe batter with our aromatic pumpkin spice recipe. Then, layer these spiced crêpes with the luscious, no-bake pumpkin cheesecake filling from my beloved maple pumpkin trifle. The result is a wonderfully spiced, creamy, and truly unforgettable fall dessert.
Professional Chef Tips for Your Mille Crêpe Cake Success
Achieving a bakery-quality mille crêpe cake is entirely within your reach with these expert tips, honed from years in the pastry kitchen. Follow these guidelines for flawless results:
- Master the Crêpe with a 4-oz Ladle: The key to uniform, delicate crêpes is consistent batter distribution. I’ve discovered that a 4-ounce ladle is the absolute sweet spot for our crêpe recipe. This precise measurement allows you to pour the batter quickly into the pan’s center and execute a single, even swirl to cover the surface. This technique not only ensures perfectly circular crêpes every time but also prevents the need to awkwardly spread too little batter, which can lead to irregular shapes or tearing. Attempts to make crêpes thinner with less batter (e.g., 3 oz) often result in misshapen or easily damaged layers.
- Embrace the Make-Ahead Advantage: To significantly streamline your process and reduce stress, prepare your crêpes and pastry cream the day before you plan to assemble the cake. This strategic approach allows the crêpes to cool completely and relax, becoming more pliable and easier to handle. Crucially, it gives the pastry cream ample time to set fully in the refrigerator, ensuring it’s firm and stable enough for layering, preventing any potential leaning or collapse of your masterpiece.
- Patience is Key: Allow the Cake to Set Overnight: Once your magnificent mille crêpe cake is assembled, the hardest part is waiting! It is absolutely essential to refrigerate the cake for a minimum of 4 hours, but ideally overnight. This extended chilling period allows the crème légère to firm up completely and, more importantly, gives all the exquisite flavors a chance to meld and deepen throughout the layers. This is a critical step, much like allowing my linzer cookies to rest, ensuring that when you slice into it, you’re greeted with beautiful, clean layers and a harmonious taste.
- Don’t Fear the Golden Brown Spots: Traditional crêpe advice often suggests aiming for “blonde,” spot-free crêpes for a refined appearance. However, as a pastry chef, I encourage you to embrace and even celebrate those delicate golden-brown spots! These aren’t imperfections; they are glorious caramelization of the sugar within the crêpe batter. These caramelized spots contribute an extra depth of flavor and a subtle nutty note, enhancing the overall complexity and deliciousness of your mille crêpe cake. They add character and a hint of rustic charm that is truly delightful.
Step-by-Step Guide to Crafting Your Vanilla Mille Crêpe Cake
Embark on the journey of creating this elegant vanilla mille crêpe cake with confidence. Follow these detailed instructions, and remember that further measurements and specific ingredient quantities are available in the recipe card below.
Phase 1: Preparing the Delicate Crêpe Batter
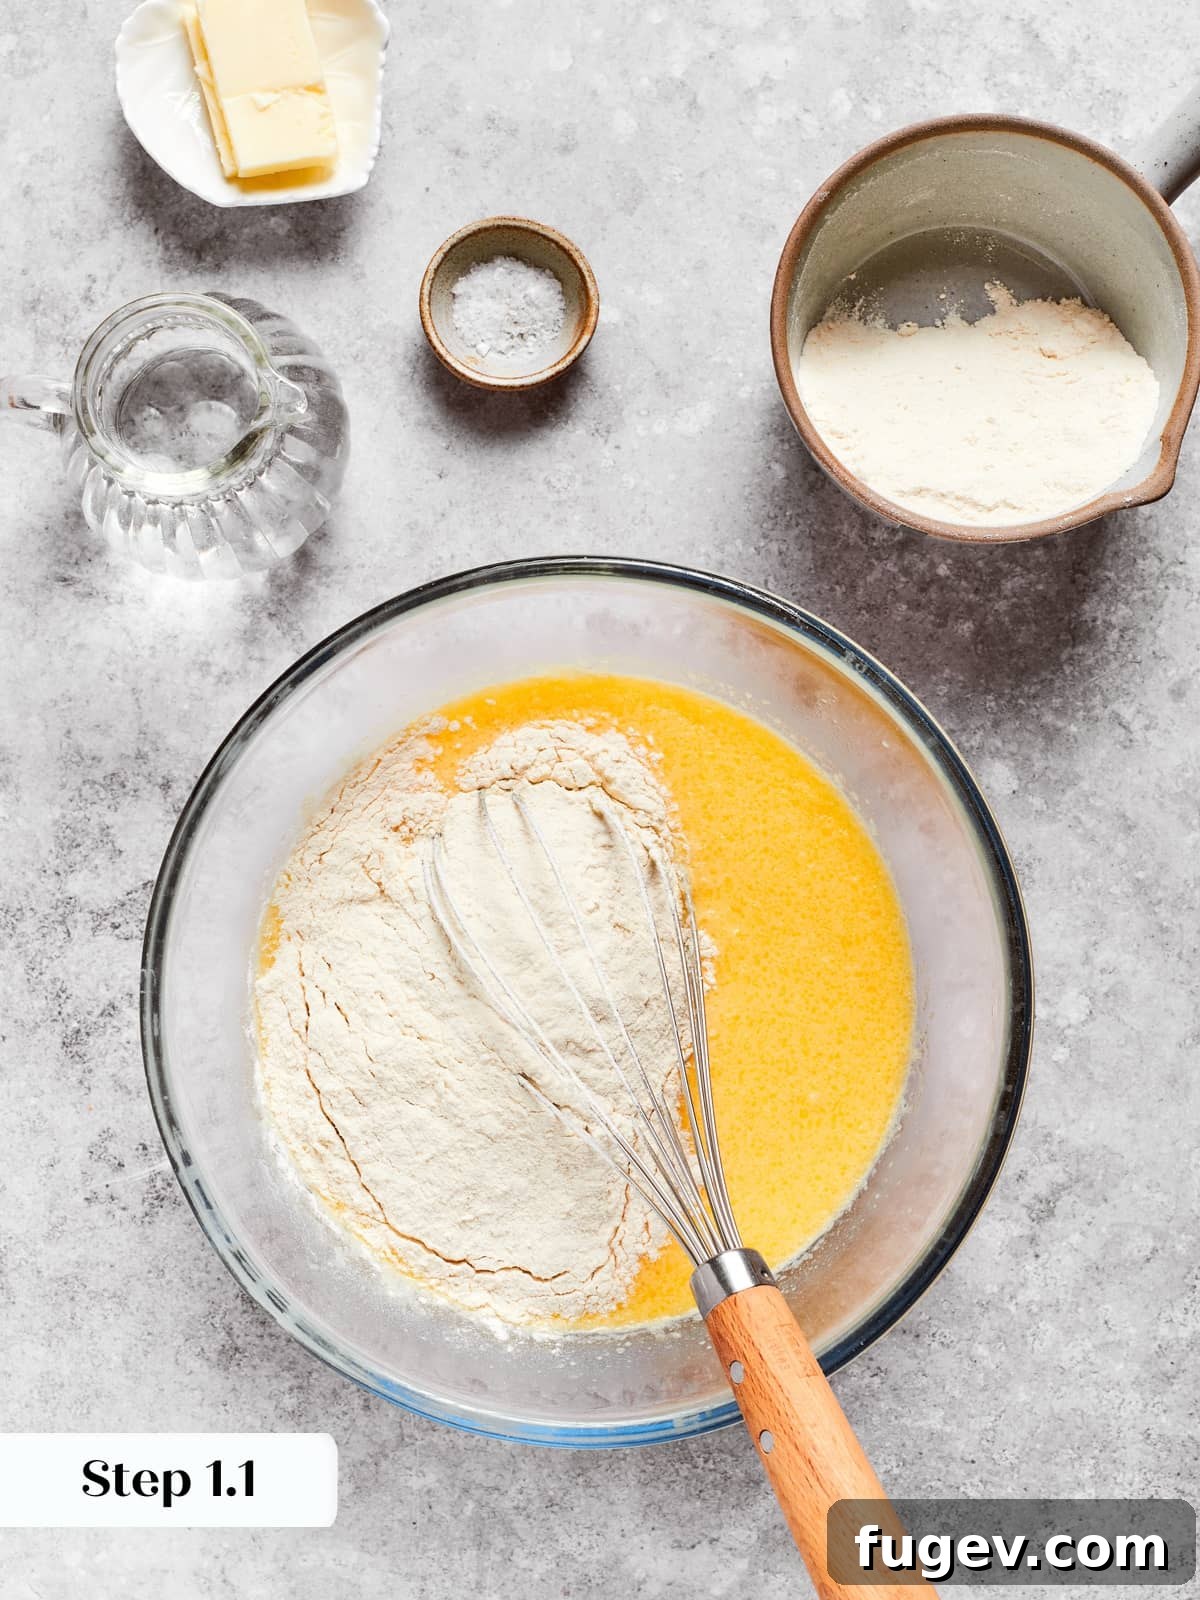
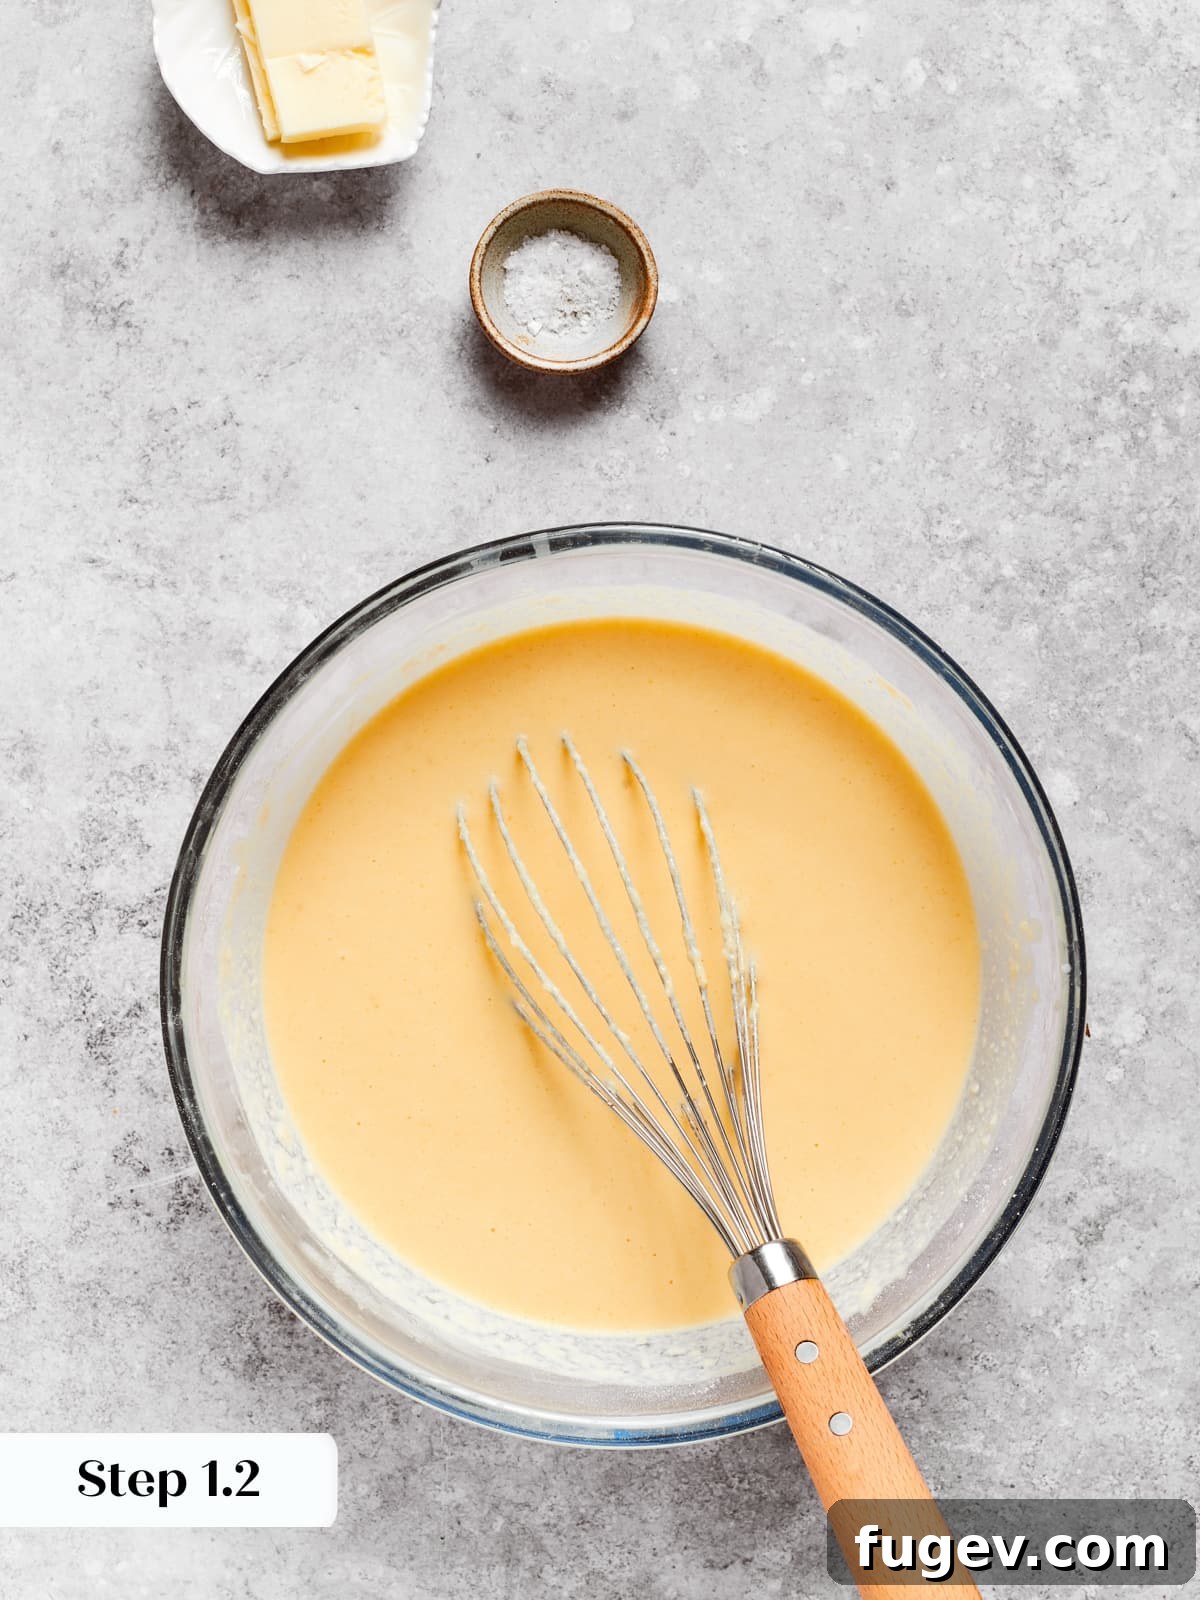
Step 1: Combine Wet and Dry Ingredients. In a large mixing bowl, start by whisking together the whole eggs, a pinch of salt, the whole milk, and the melted butter until thoroughly combined and smooth. Next, gradually whisk in the pre-sifted flours (both cake and all-purpose), adding only a little at a time to prevent lumps, similar to how you’d prepare batter for popovers. Finally, whisk in the water until the batter is completely homogenous (photos 1-2). You will notice the batter is quite thin – this is intentional. A very liquid batter is key to producing those ultra-thin, delicate crêpes essential for a mille crêpe cake.
Remember, a thinner batter yields thinner crêpes, while a thick batter will result in crêpes that are too dense for this layered dessert.
Step 2: Crucial Resting Period for the Batter. Once your batter is mixed, cover the bowl and transfer it to the refrigerator to rest overnight, or at a minimum, allow it to sit at room temperature for at least 1 hour. This resting phase is vital: it allows the flour to fully hydrate, resulting in a more tender crêpe, and permits any gluten that may have developed during whisking to relax. A well-rested batter is easier to work with and produces superior crêpes.
Phase 2: Mastering the Art of Cooking Crêpes
If your batter has been refrigerated, remove it from the fridge approximately one hour before you plan to begin cooking. This allows it to come closer to room temperature, which helps with even spreading.
Step 3: Preheat Your Pan with Precision. Place a crêpe pan or a good quality nonstick skillet over medium heat. The key here is “slow and steady wins the race” – consistent, moderate heat is much better than high heat, which can burn your crêpes quickly.
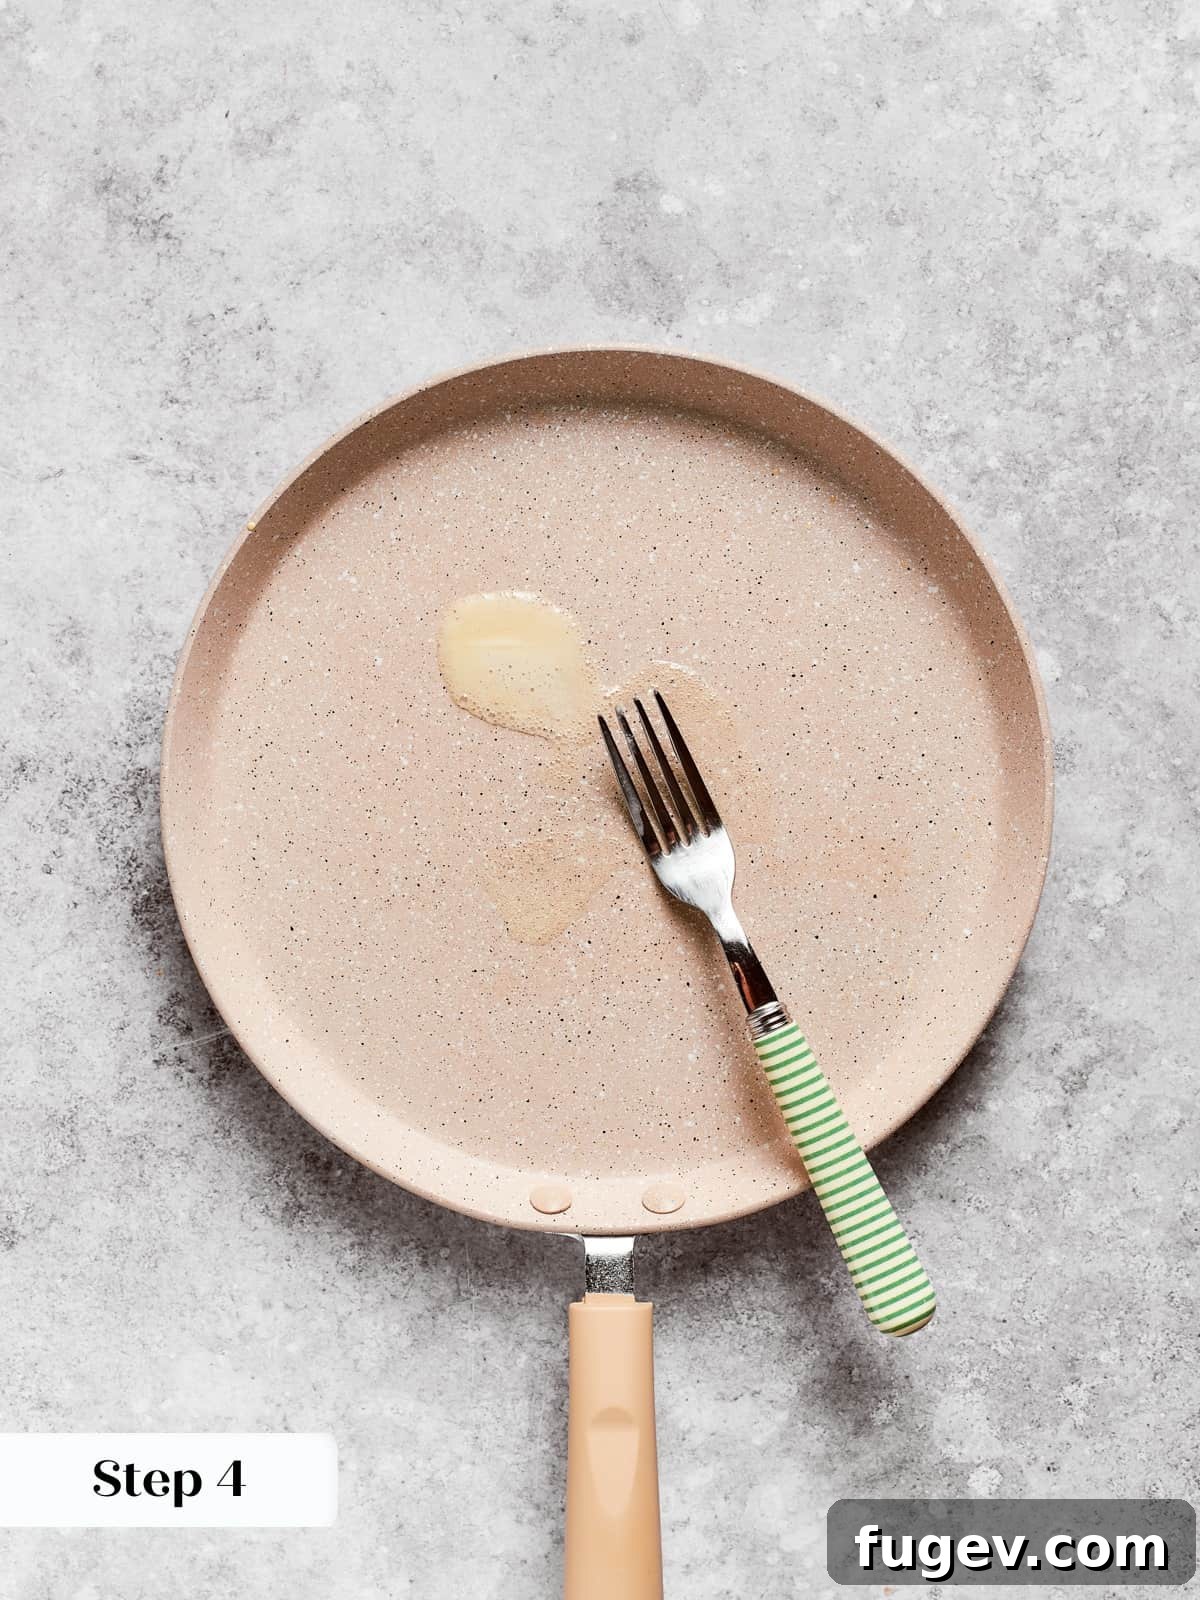
Step 4: Lightly Butter the Pan (Just Once). For the very first crêpe, lightly butter the pan. The easiest way is to stab a small piece of butter with a fork and quickly rub it around the hot surface (photo 3). For subsequent crêpes, you typically won’t need to re-butter the pan unless crêpes start sticking.
Step 5: Pour and Swirl for Perfect Circles. With one hand, pour a ladleful (just under 4 ounces is ideal, as per our professional tip) of batter directly into the center of the preheated pan. Simultaneously, with your other hand, immediately lift and swirl the pan in a circular motion to evenly distribute the batter across the entire surface. This swift, confident swirl is what creates perfectly thin and round crêpes.
The swirl technique is truly optimal for crêpe cakes, as it guarantees each crêpe is consistently round and perfectly sized, making assembly much easier.
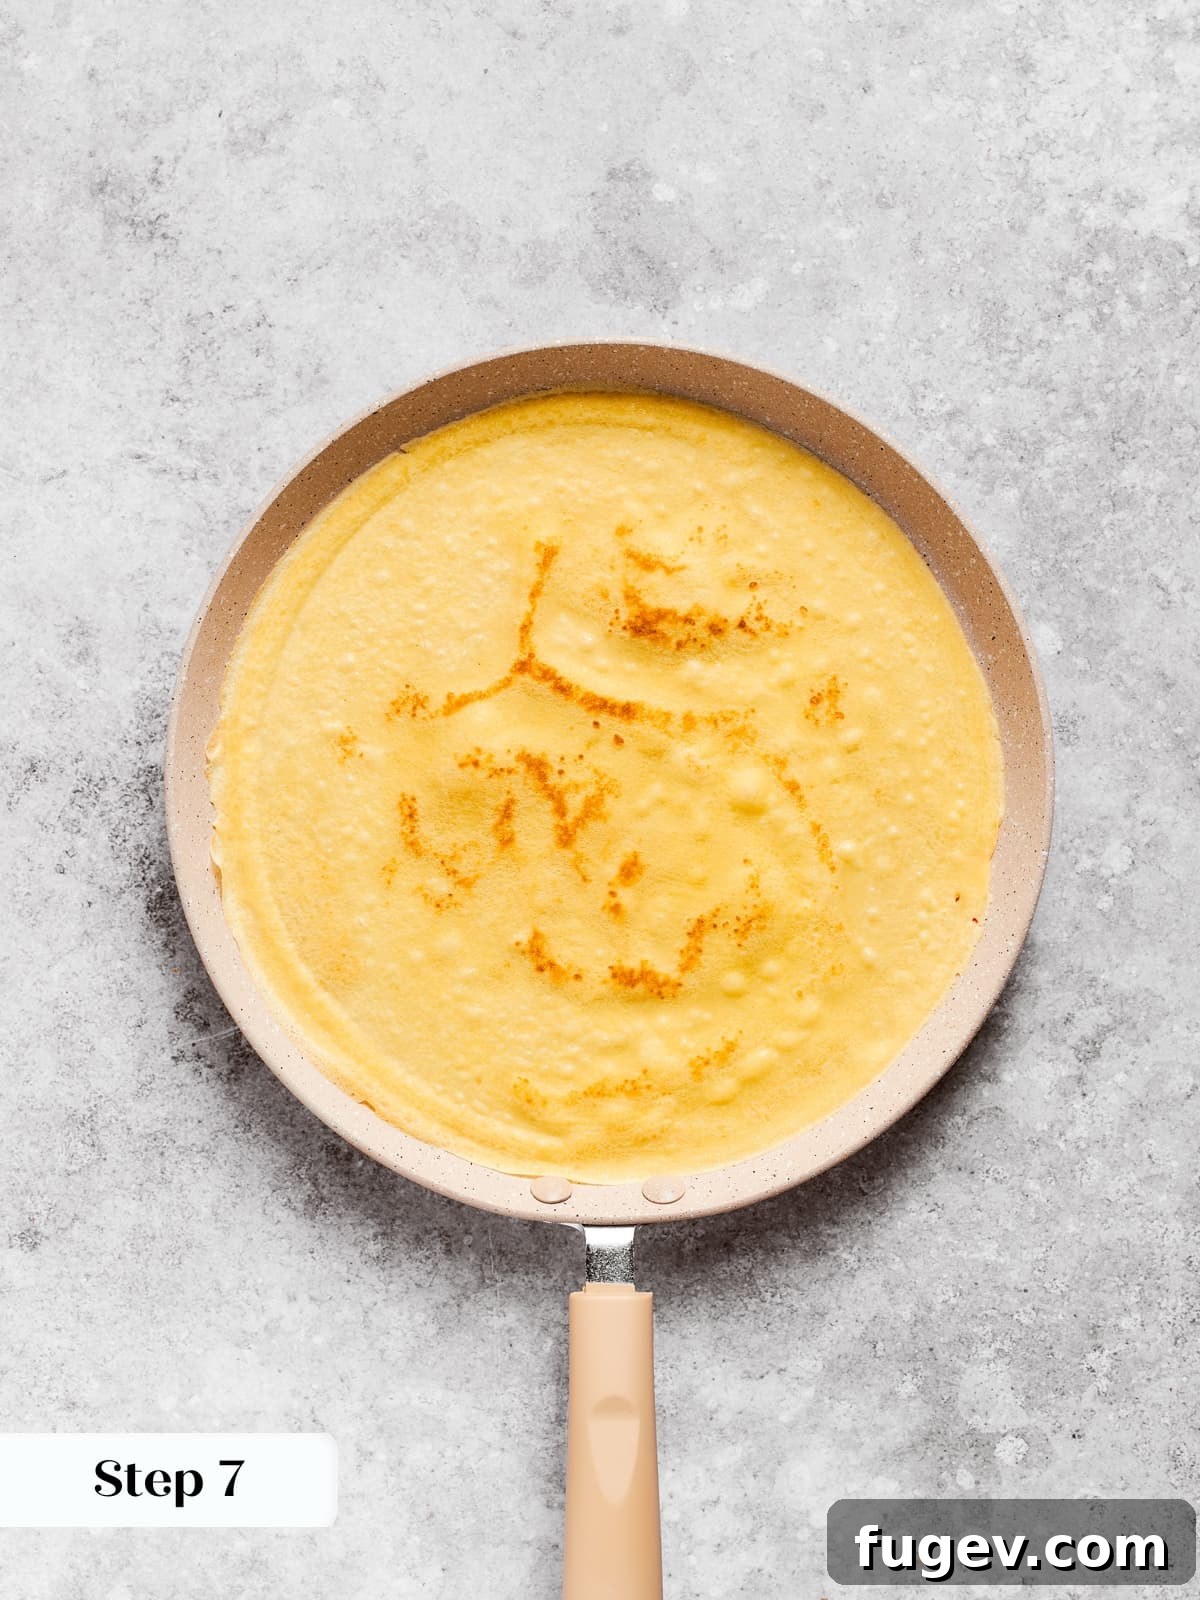
Step 6: Cook the First Side Until Golden. Allow the crêpe to cook over medium-low heat. You’ll know it’s ready to flip when the edges begin to turn a light golden brown, and you might see subtle darker spots forming towards the center. The outer edge provides an excellent visual cue for readiness. For a 12-inch crêpe in my pan, this typically takes about 6 minutes, but cooking times can vary based on your stove and pan.
Step 7: The Art of the Flip. Gently slide a thin, flexible spatula underneath the center of the crêpe and, with a swift motion, flip it over like a pancake. Don’t panic if it folds over itself – simply unfold it with your spatula. If you flip it too soon and it still appears very pale or “blonde,” just carefully flip it back over to continue cooking on the first side. Don’t stress; practice makes perfect!
Step 8: Finish Cooking and Cool. Continue cooking the second side for an additional 1-2 minutes, just until lightly golden. Once cooked, transfer the crêpe to a wire rack to cool completely before you begin stacking them. Cooling individually prevents them from sticking together and ensures they retain their delicate texture.
Step 9: Repeat and Prepare for Assembly. Continue this process with the remaining batter until all your crêpes are cooked and cooled. At this stage, you can refrigerate the stack of crêpes overnight, neatly wrapped, which is ideal if you’re making them ahead of assembly.
Phase 3: Crafting the Luxurious Vanilla Pastry Cream
Step 10: Prepare Your Chilling Surface. Line a baking sheet with parchment paper or plastic wrap. This will provide a clean, non-stick surface for rapidly cooling your pastry cream.
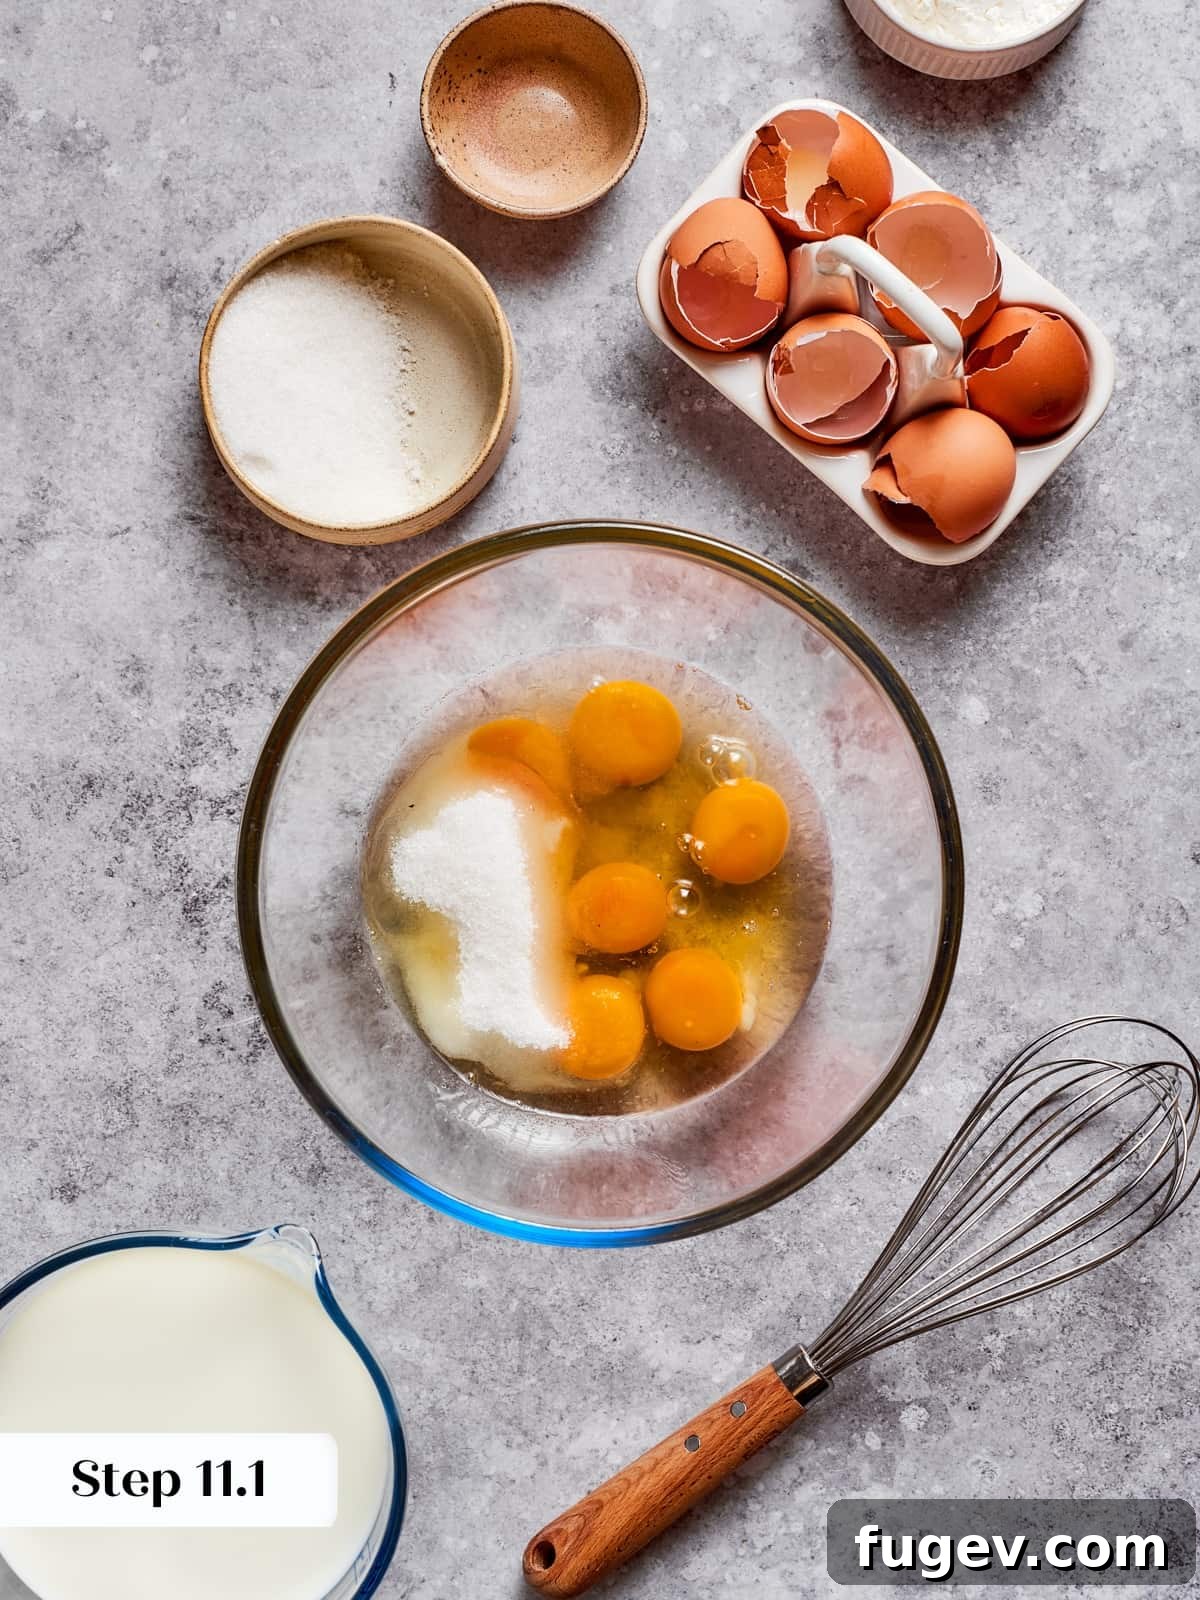
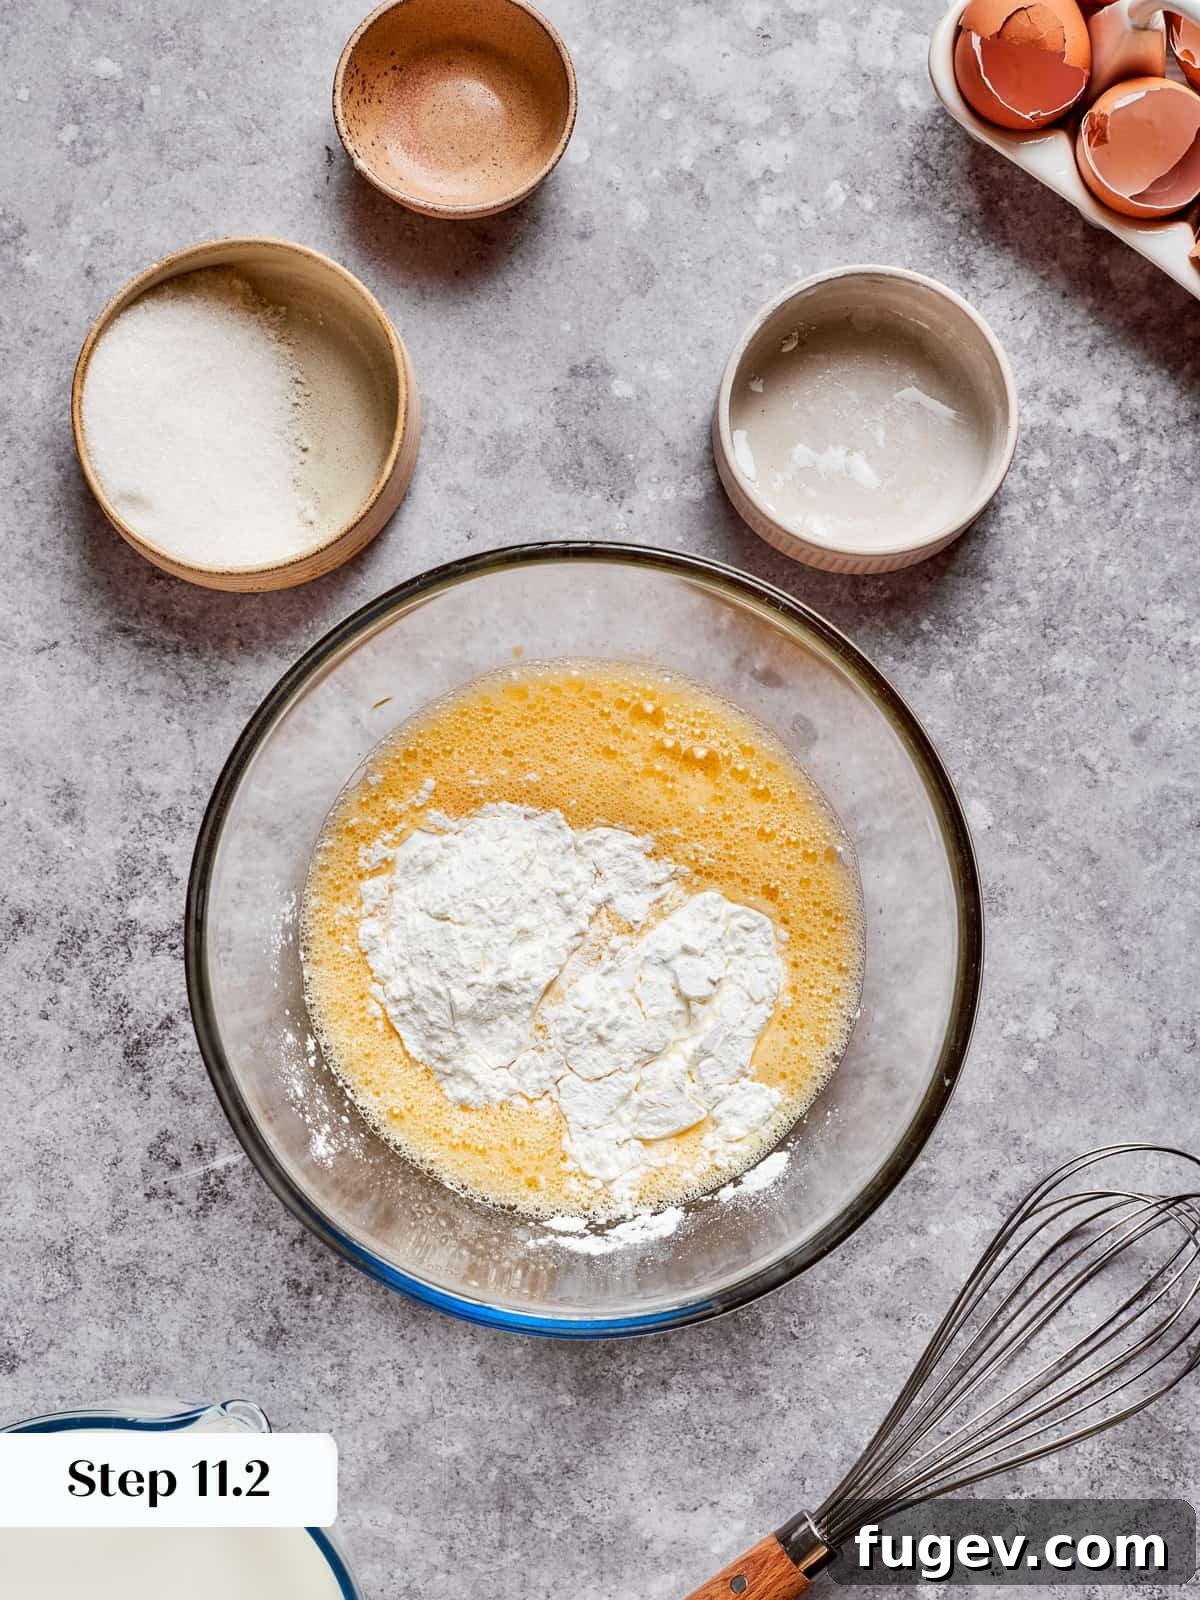
Step 11: Whisk Eggs, Sugar, and Starch. In a spacious mixing bowl, vigorously whisk together the whole eggs, vanilla sugar, half of the granulated sugar, the fragrant vanilla powder, and the cornstarch until the mixture is completely smooth and homogenous. There should be no lumps of cornstarch visible (photos 5-6).
Step 12: Heat the Milk and Remaining Sugar. In a medium-sized saucepot, combine the whole milk with the remaining half of the granulated sugar. Whisk these together to ensure the sugar dissolves and to prevent the milk from scorching on the bottom of the pot.
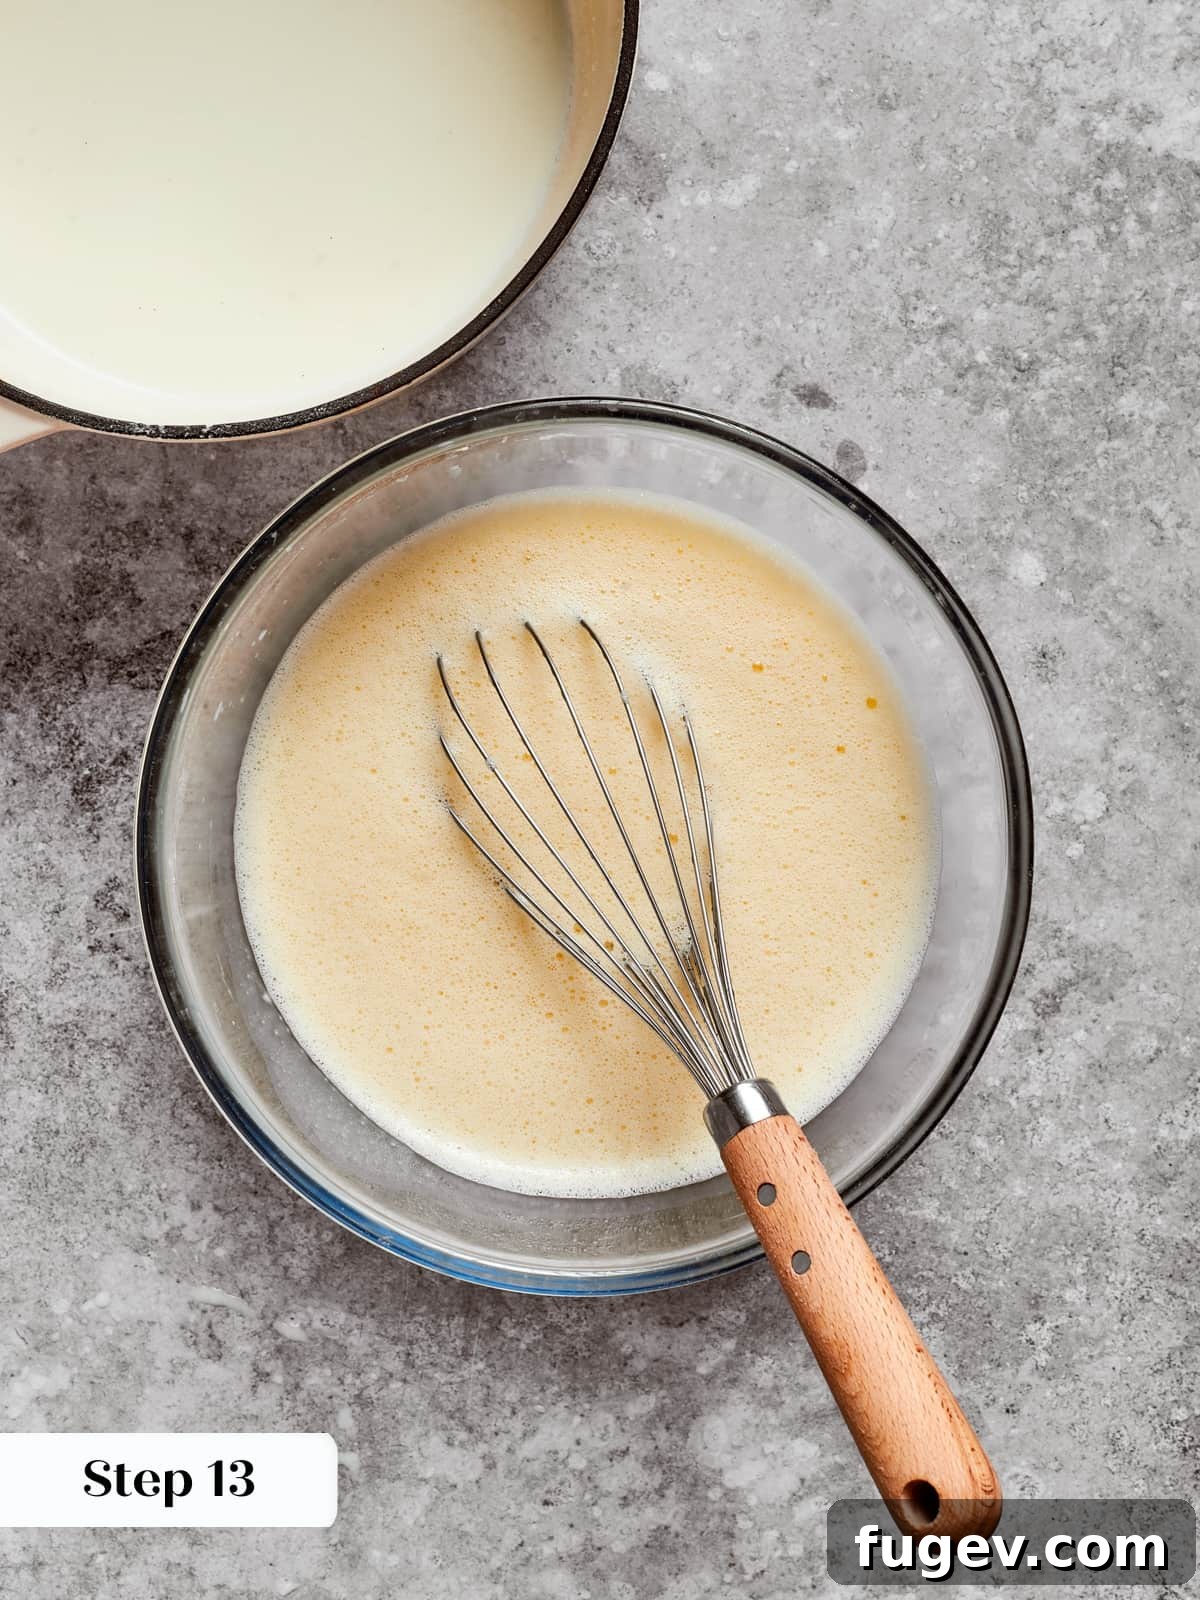
Step 13: Temper the Egg Mixture Carefully. Bring the milk mixture to a gentle boil over medium-high heat. Once boiling, begin the critical tempering process: slowly pour a small amount of the hot milk into the egg mixture, whisking constantly and vigorously. Continue adding the hot milk in a slow, steady stream, whisking all the while, until all the milk has been incorporated into the egg mixture (photo 7). This gradual addition prevents the eggs from scrambling.
Step 14: Return to the Pot. Pour the entire tempered milk-and-egg mixture back into the saucepot and return it to the burner over medium heat.
Step 15: Cook the Custard to Thickness. Whisk constantly and energetically as the custard heats, ensuring you reach into every corner of the pot to prevent any lumps from forming or sticking. Continue cooking until the mixture comes to a full boil and visibly thickens.
If your pastry cream unexpectedly starts to clump, immediately remove the pot from the heat and whisk furiously until it becomes smooth again, then return to low heat to continue cooking if needed.
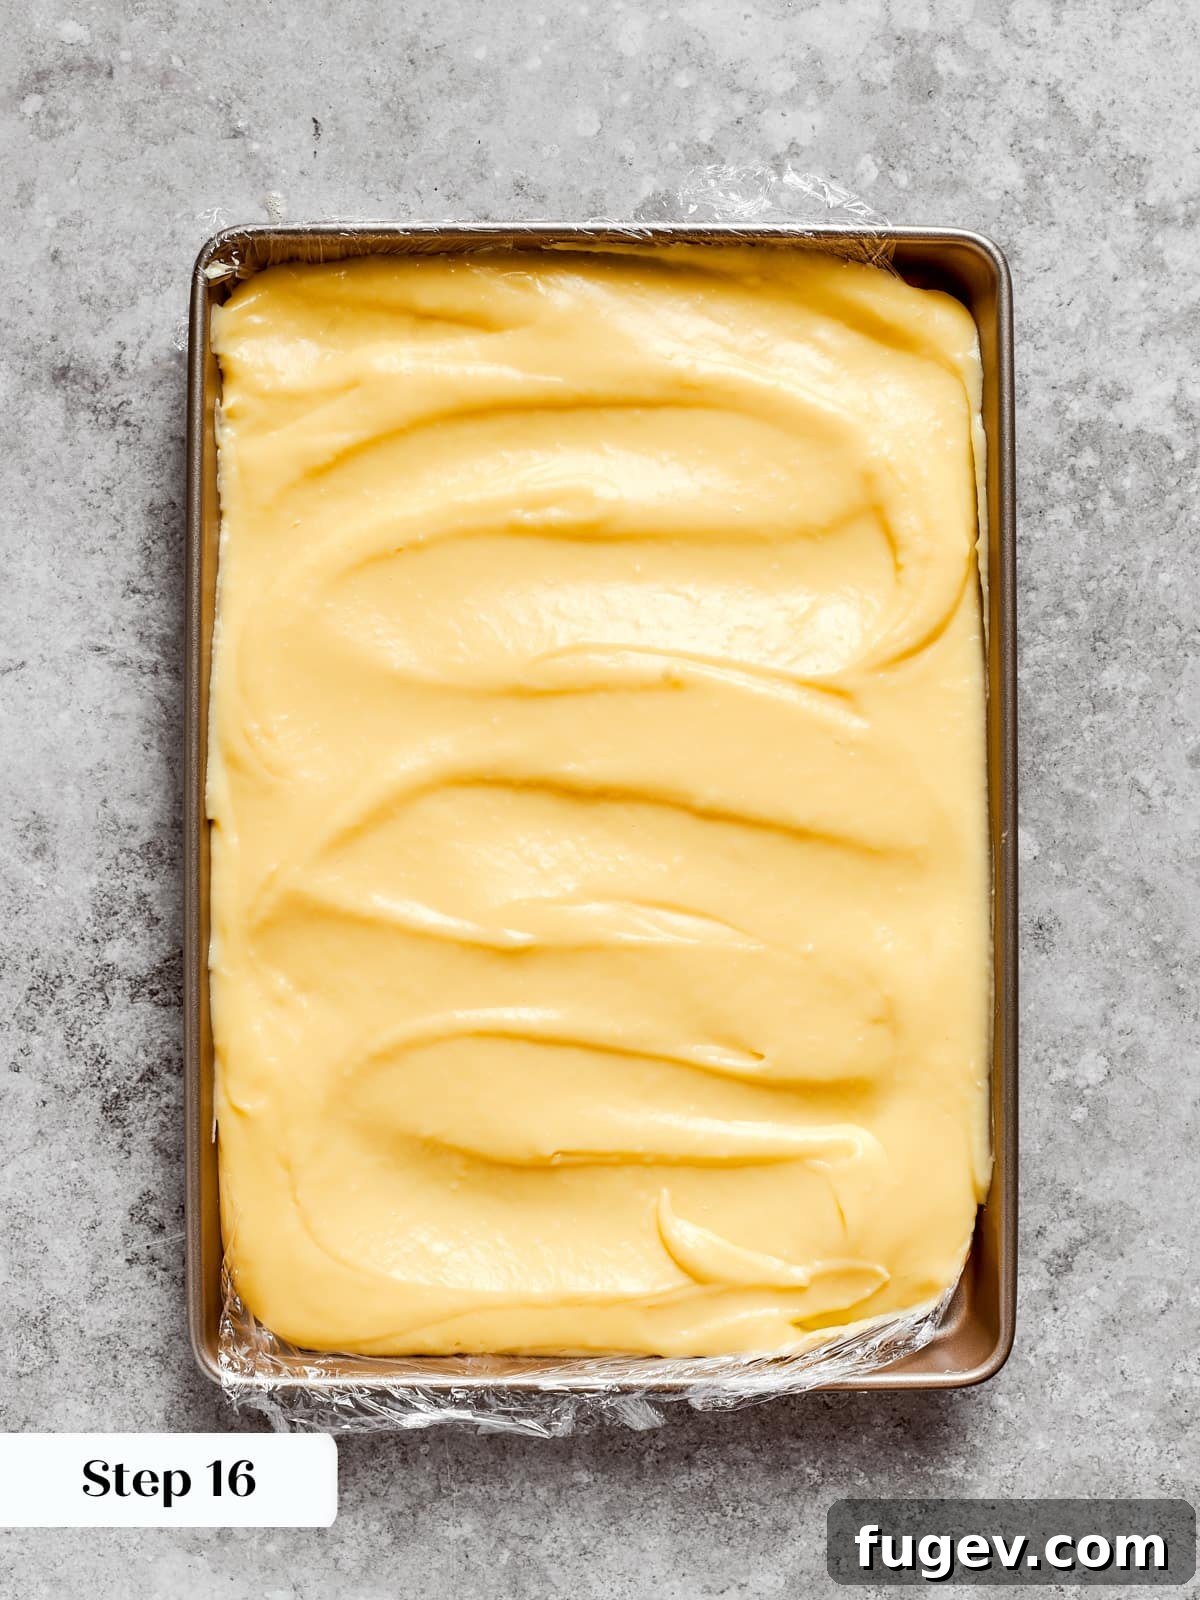
Step 16: Boil and Spread for Cooling. Once the custard reaches a rolling boil, continue boiling and whisking for precisely 1 minute to ensure it is fully cooked and stable. Immediately pour the hot pastry cream onto your prepared lined baking sheet. Spread it out into a thin, even layer, then cover the surface directly with plastic wrap to prevent a skin from forming (photo 8).
Step 17: Chill for Complete Setting. Poke a few small holes in the plastic wrap to allow steam to escape, then refrigerate the pastry cream until it is thoroughly chilled and completely set. For optimal results, I highly recommend chilling it overnight in a home refrigerator; this ensures maximum firmness for proper cake assembly.
Phase 4: Assembling Your Elegant Mille Crêpe Cake
Step 18: Whip the Heavy Cream to Soft Peaks. In the bowl of a stand mixer fitted with the whisk attachment (or a large mixing bowl for hand whisking), add the heavy cream. Whisk on medium speed until soft peaks form. Once achieved, transfer the whipped cream to a separate bowl and set aside.
Step 19: Loosen the Chilled Pastry Cream. Scrape the well-chilled pastry cream from your baking sheet into the bowl of a stand mixer fitted with the paddle attachment. Alternatively, you can do this by hand using a sturdy silicone spatula. Beat the pastry cream on medium-high speed for 30 seconds to a minute, just enough to loosen it and make it pliable.
Note that loosening the pastry cream will not eliminate any existing lumps. If your pastry cream is particularly lumpy, it’s advisable to strain it through a fine-mesh sieve before this step for a silky-smooth result.
Step 20: Prepare the Crème Légère with “Sacrificing.” Take approximately half a cup of your whipped cream and fold it aggressively into the loosened pastry cream. This technique, known as “sacrificing” in professional kitchens, helps to temper the pastry cream, bringing its consistency closer to that of whipped cream. This crucial step makes the subsequent full incorporation much easier, preventing the loss of volume and ensuring a light, airy final crème légère.
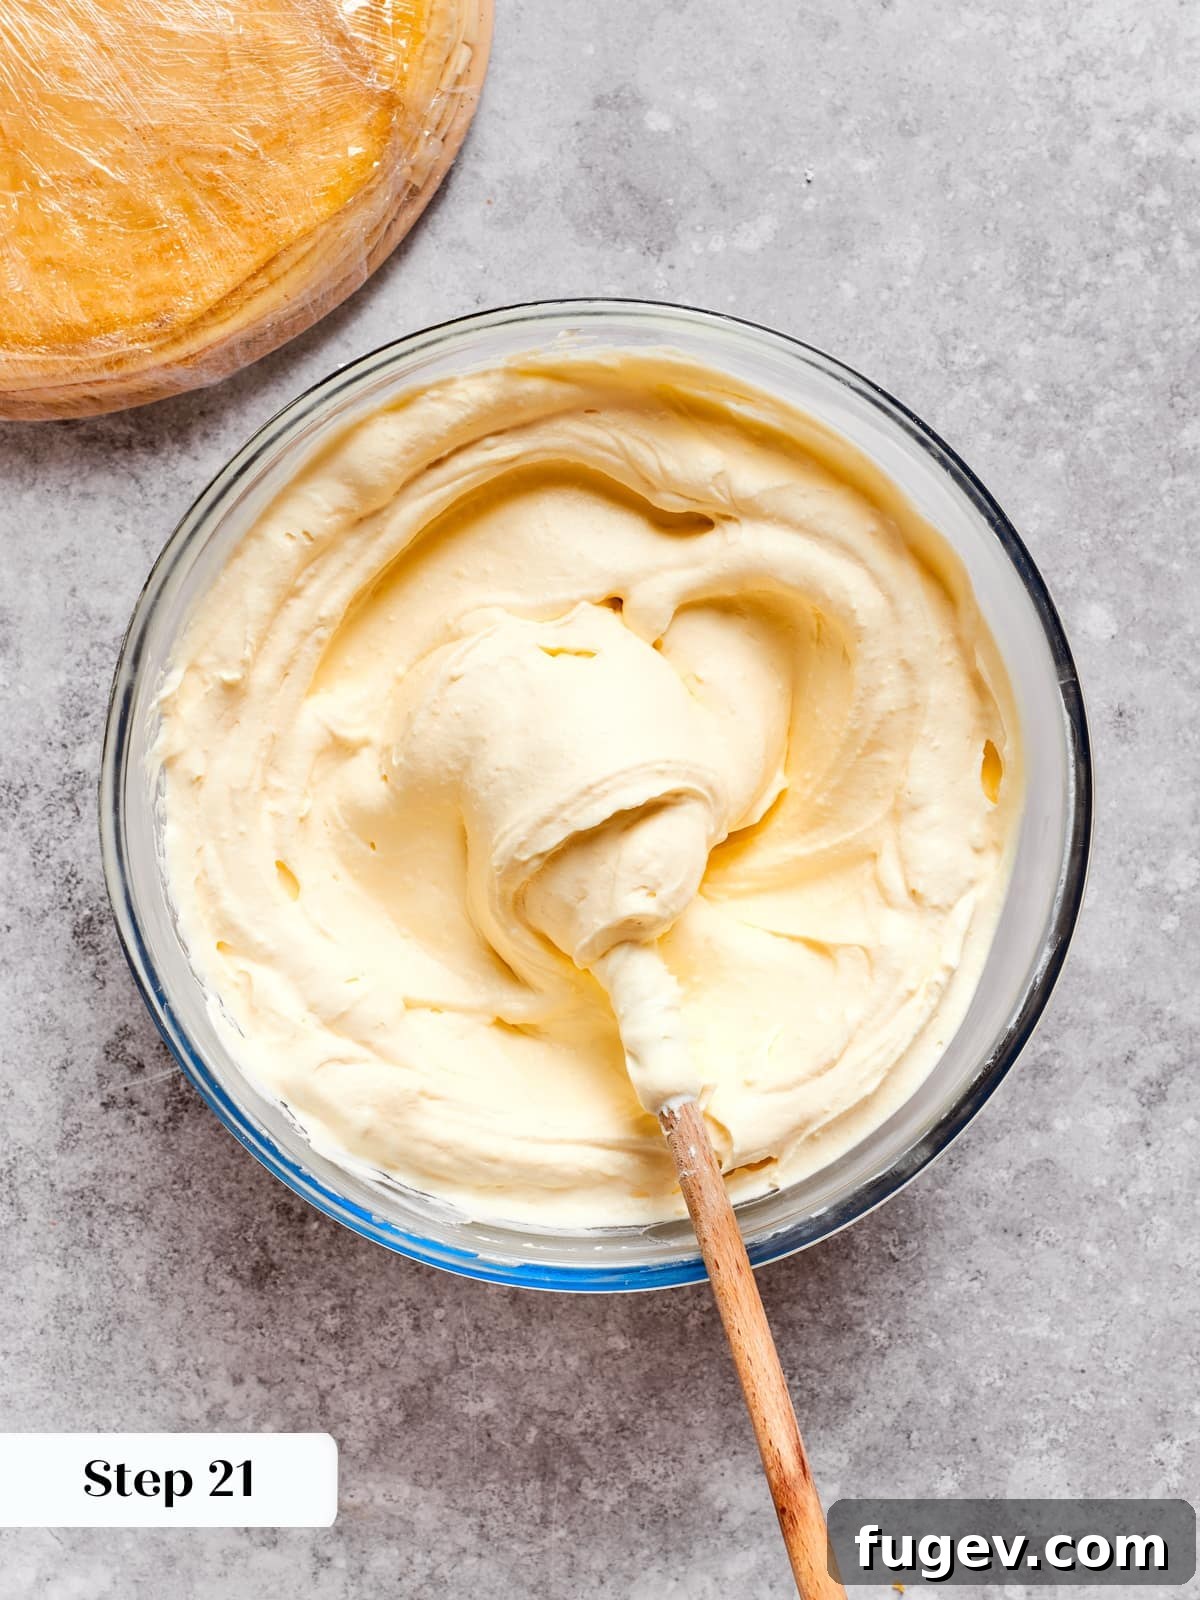
Step 21: Gently Fold in Remaining Whipped Cream. Delicately, yet thoroughly, fold the remaining whipped cream into the pastry cream mixture until it is fully combined and boasts a light, uniform texture (photo 9). Be careful not to deflate the mixture by overmixing.
Step 22: Begin Layering Your Crêpe Cake. Place a single crêpe precisely in the center of a flat cake plate or serving platter. Dollop about ½ cup of the prepared crème légère onto the center of the crêpe and gently spread it out evenly using a large offset spatula. Aim to cover most of the crêpe’s surface, striving for a consistent layer without excessively thin spots or heavy puddles of cream.
Due to the natural bubbling of crêpes during cooking, you may find it challenging to achieve a perfectly flat, uniform layer of cream on every single crêpe. This is completely normal and adds to the charm!
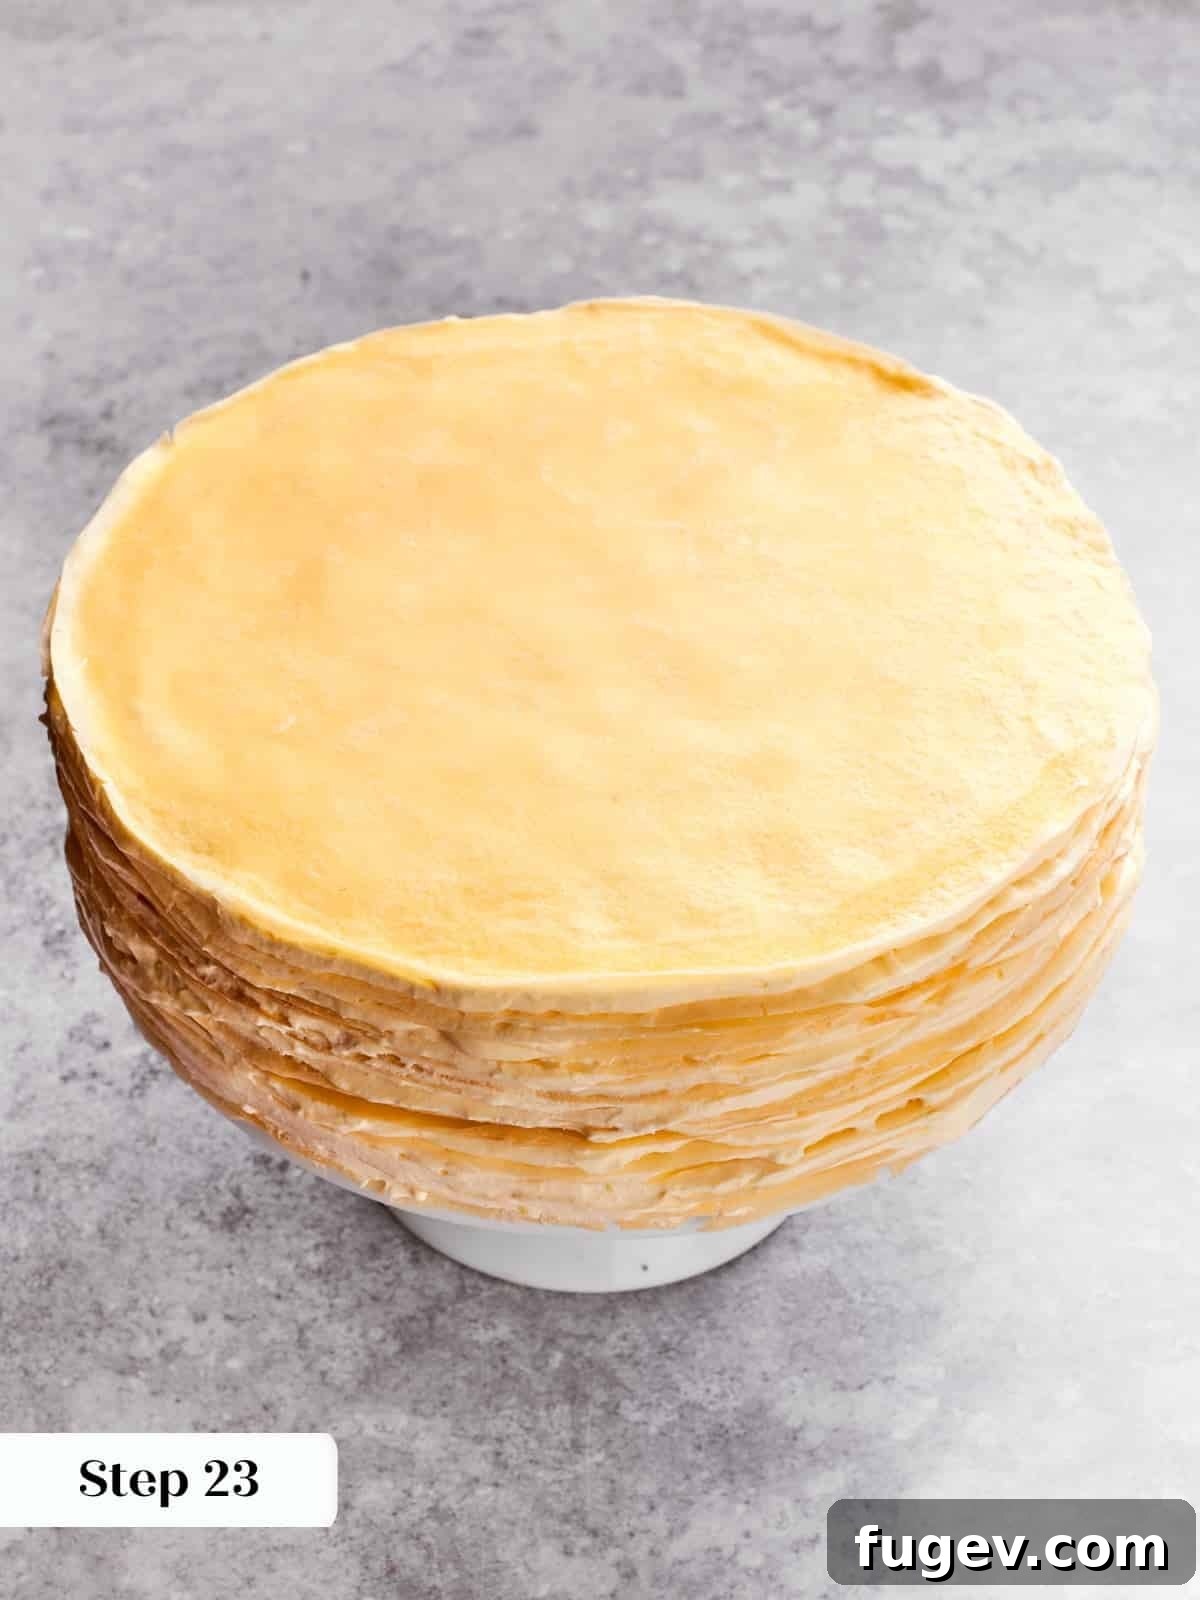

Step 23: Stack All Layers and Chill. Continue to repeat the layering process, placing a new crêpe on top of the cream and spreading another ½ cup of crème légère, until you have used all the crêpes except for one. Place the final, unadorned crêpe on the very top of your cake. Carefully wrap the entire cake tightly with plastic wrap to prevent drying and refrigerate it for at least 4 hours, or ideally, overnight (photo 10). This chilling time is essential for the crème légère to firm up and the cake to stabilize.
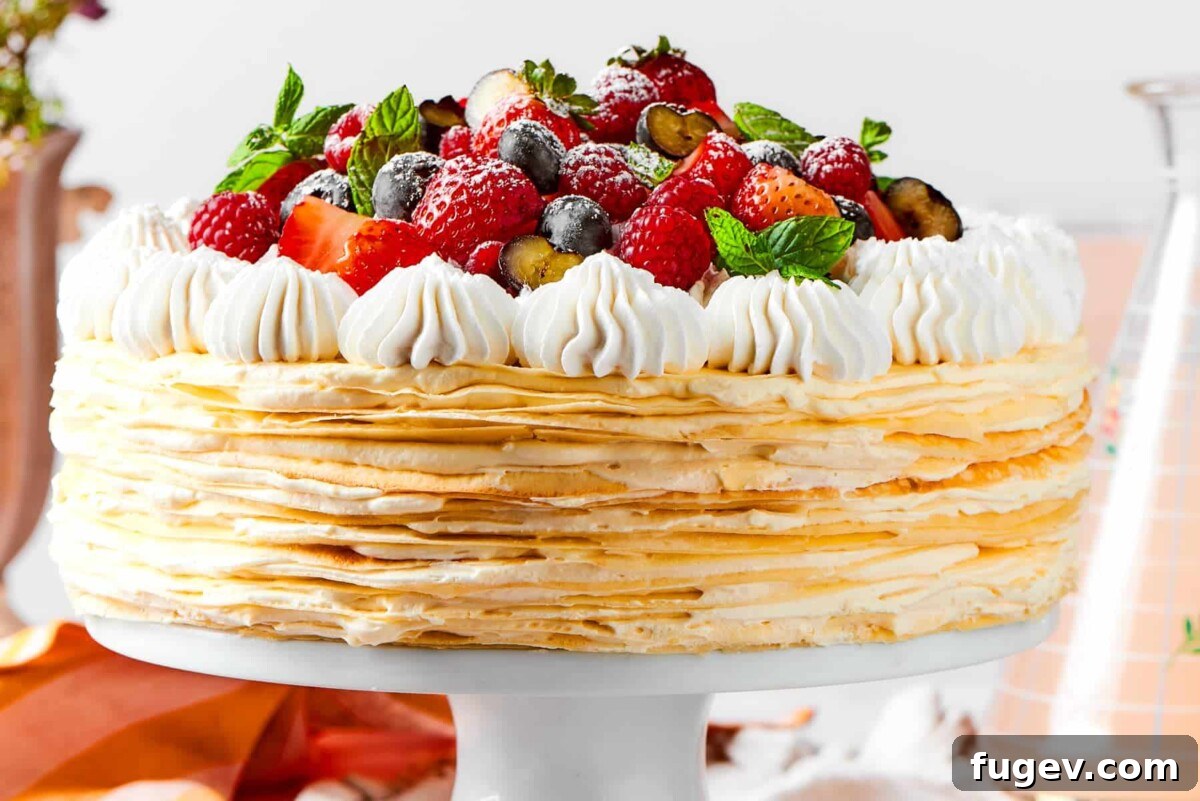
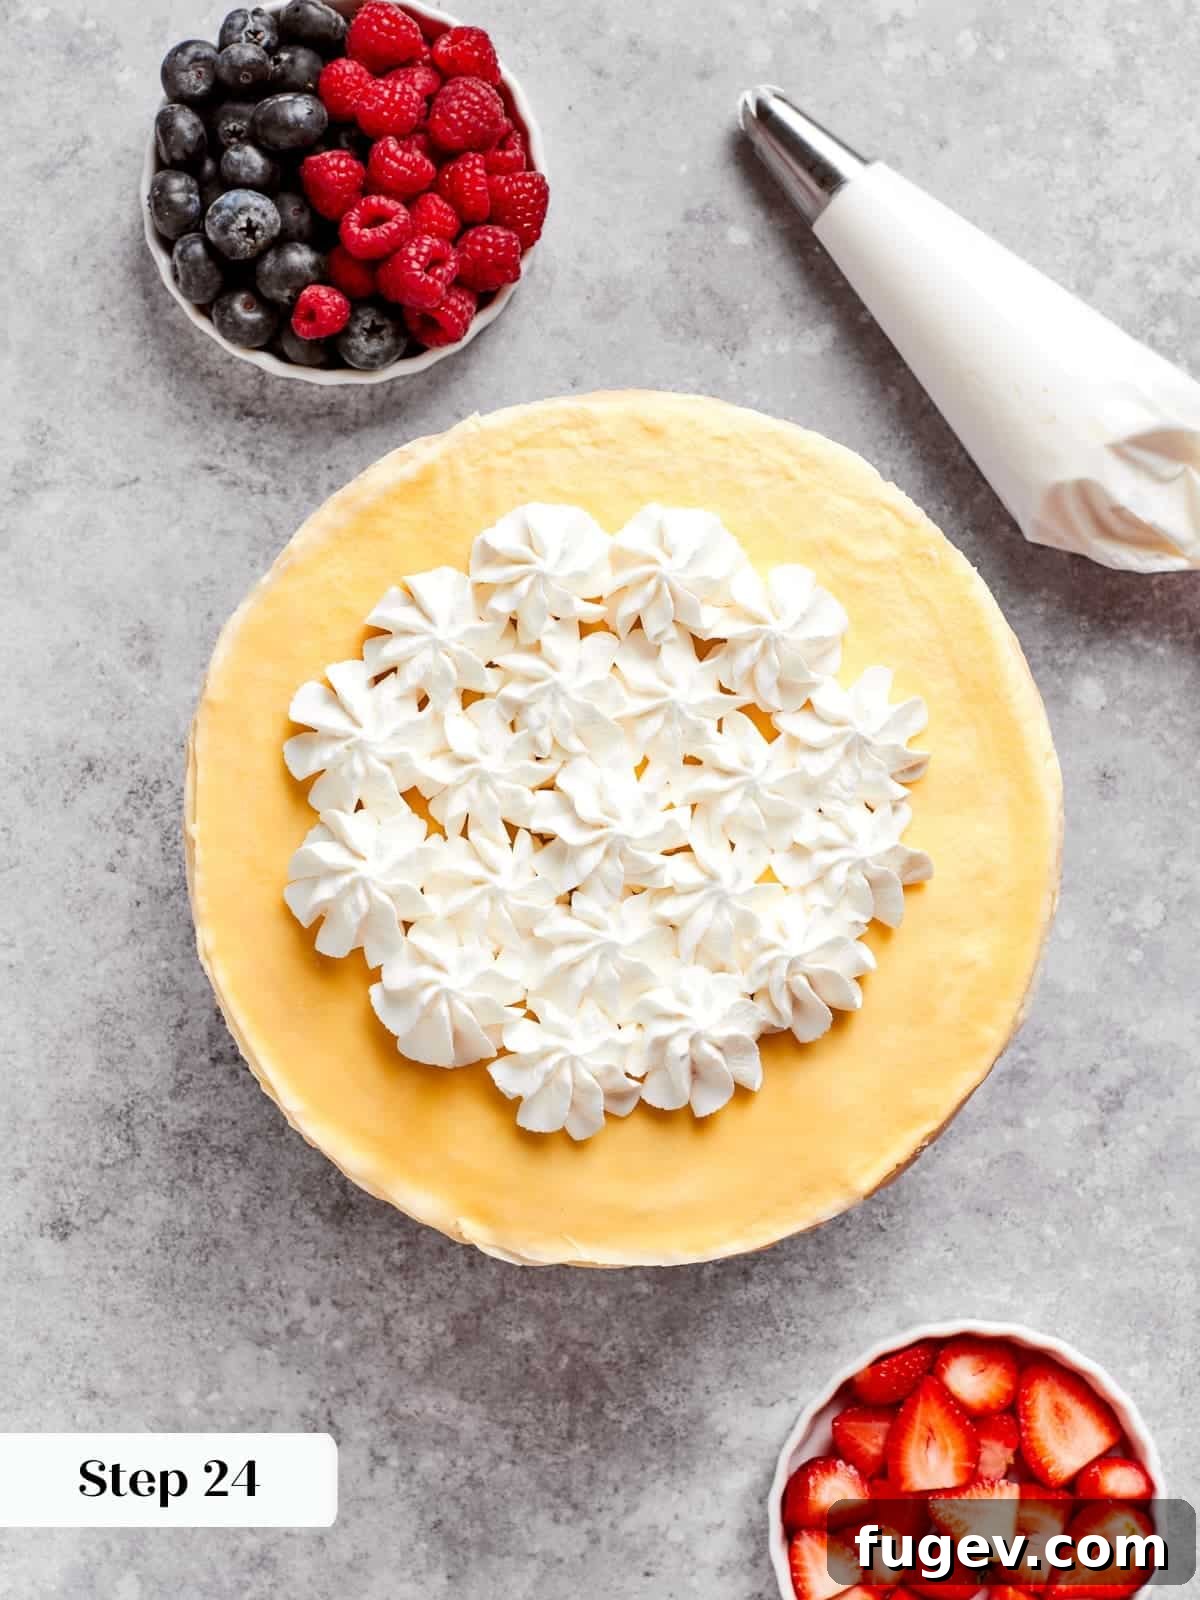
Step 24: Decorate and Serve Your Masterpiece. Once the cake is perfectly chilled and firm, you’re ready to decorate! Before serving, artfully cover the top crêpe with additional lightly sweetened whipped cream. Then, arrange an assortment of vibrant, sliced fresh fruits (such as strawberries, raspberries, or blueberries) and a sprinkle of chopped candied nuts for a beautiful presentation and added texture (photo 11). Serve chilled and enjoy the admiring gasps!
Chef Lindsey’s Recipe Tip for Perfect Slices
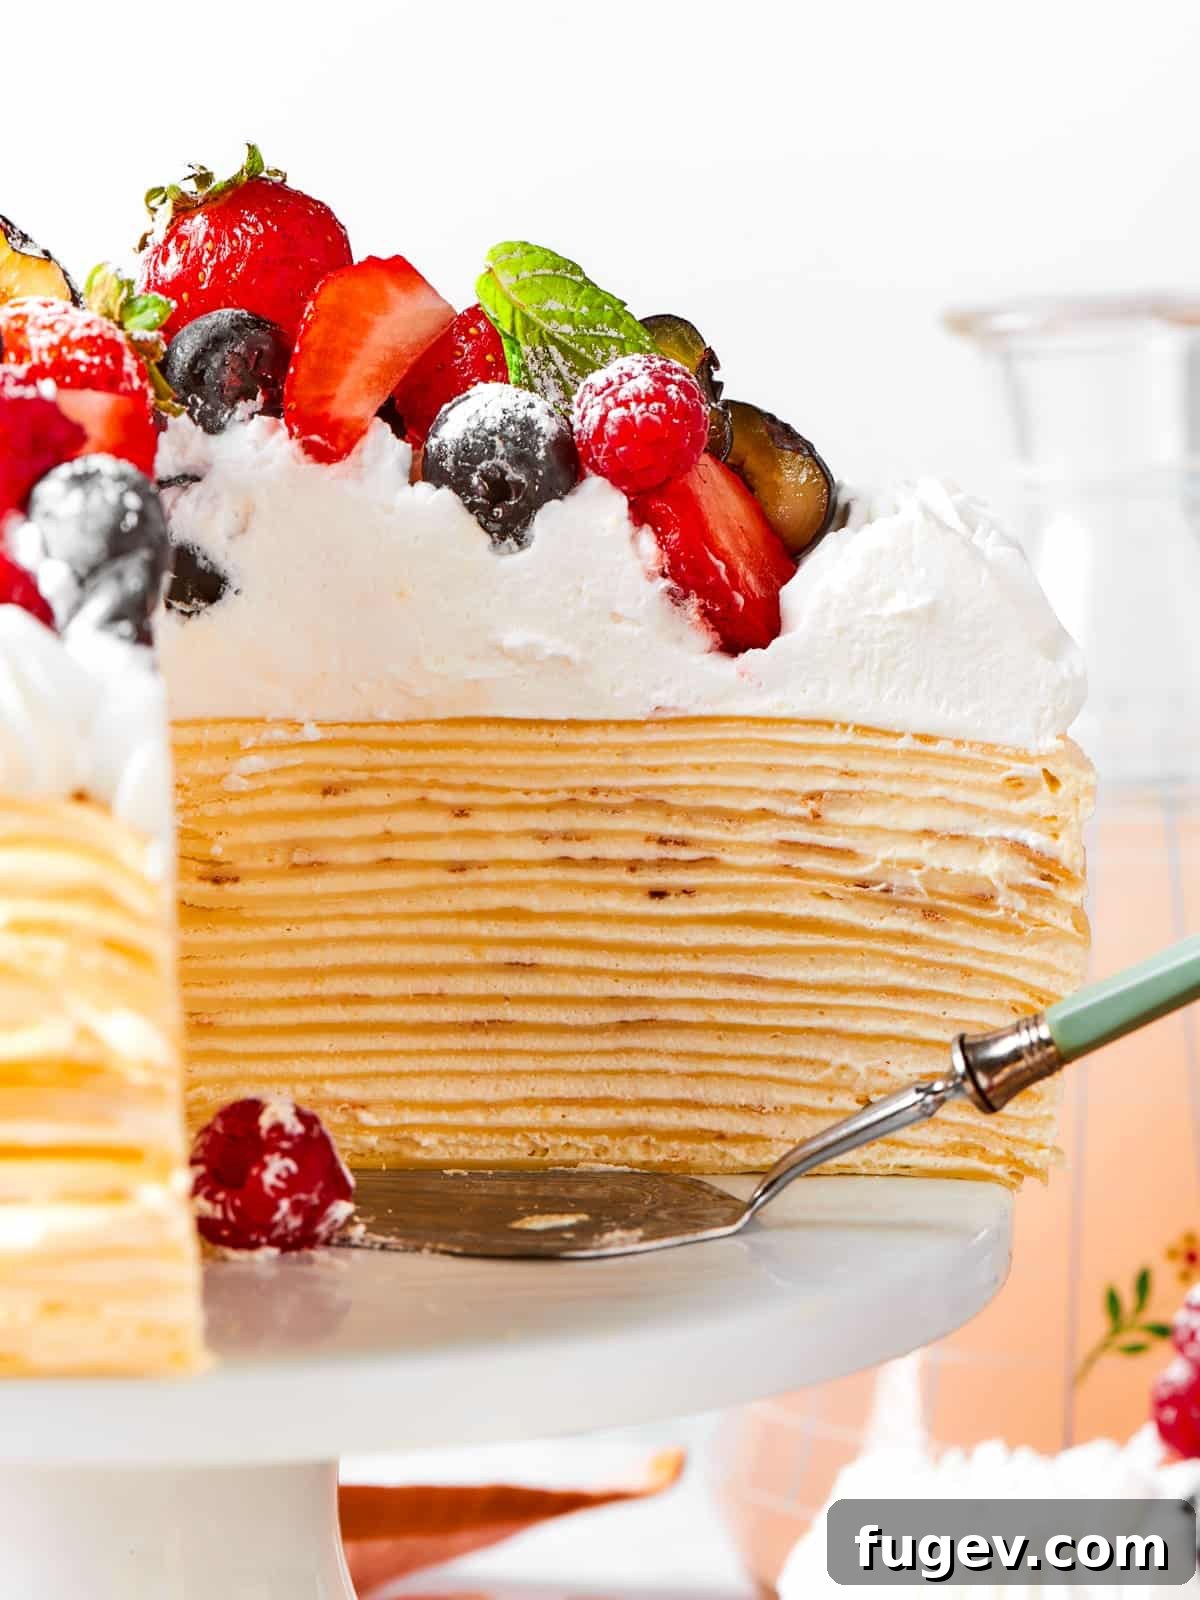
To achieve those picture-perfect, clean slices that beautifully showcase every delicate layer of your mille crêpe cake, here’s a professional secret: dip a sharp knife into hot water and thoroughly wipe the blade clean before making each individual cut. The warmth from the blade will gently melt through the rich crème légère, ensuring a smooth, effortless slice that doesn’t drag or tear the layers. This simple trick reveals a stunning cross-section of all your hard work, allowing everyone to admire the beautiful architecture of your cake!
Frequently Asked Questions (FAQs) About Mille Crêpe Cake
Once assembled, your mille crêpe cake can be stored, well wrapped in plastic or in an airtight container, in the refrigerator for up to a week. For the best quality and texture, I do not recommend freezing an assembled cake, as the crème légère tends to separate and doesn’t defrost well. However, you can prepare and store cooked crêpes in the freezer for up to a month, and the pastry cream can be made ahead and stored separately in the fridge for up to 5 days, ready for assembly.
A leaning crêpe cake is usually a sign of insufficient chilling. Like any tall, layered dessert, the individual components, especially the crêpes, must be completely cool before assembly. Warm crêpes will cause the delicate crème légère to melt, leading to slipping and an unstable structure. Another common culprit is pastry cream that wasn’t cooked long enough or adequately chilled; if it’s too thin or not firm enough, it won’t provide the necessary structural support for stacking dozens of layers. Always ensure both your crêpes and pastry cream are thoroughly cold and set.
This elegant cake can certainly stand alone as a magnificent dessert. However, to enhance its flavors, you might consider serving it with a drizzle of rich salted caramel sauce or a decadent hot fudge sauce recipe for a truly indulgent experience. For a more refined touch, a beautifully prepared red wine poached pear makes for an exquisite and complementary pairing, adding a touch of sophisticated fruitiness.
More Delightful Breakfast & Brunch Recipes from Chef Lindsey
Dessert Recipes
French Crullers
Cake Recipes
Gooey Butter Cake
Easy Scone Recipes
Chocolate Chip Scones
Muffin Recipes
Jumbo Blueberry Muffins
If you tried this recipe and loved it please leave a 🌟 star rating and let me know how it goes in the comments below. I love hearing from you; your comments make my day!
Classic Vanilla Mille Crêpe Cake
Pin Recipe
Comment
Print Recipe
Ingredients
For the Vanilla Pastry Cream:
- 4 cups whole milk
- 2 teaspoons vanilla powder (for potent vanilla flavor)
- 1 cup granulated sugar (divided)
- 6 large eggs
- ½ cup cornstarch
For Crêpe Cake Assembly & Topping:
- 2 ½ cups heavy whipping cream
- 2 tablespoon confectioner’s sugar
- 25 10-inch crêpes (prepared from a double batch of sweet crêpe batter)
- ½ cup heavy cream (whipped to soft peaks, for topping)
- fresh berries (sliced strawberries, raspberries, or blueberries for garnish)
Instructions
Prepare the crêpe batter:
-
In a large bowl, whisk together the eggs, salt, milk, and melted butter until smooth. Gradually whisk in the flours, adding a little at a time to prevent lumps. Finally, whisk in the water until the batter is thoroughly combined and liquidy.
-
Cover the batter and refrigerate overnight, or let it rest at room temperature for at least 1 hour. This crucial resting period allows the flour to fully hydrate and gluten to relax, yielding more tender crêpes.
How to cook crêpes:
-
If the batter was refrigerated, remove it about an hour before cooking to bring it closer to room temperature. Preheat your crêpe pan or nonstick skillet over medium heat, ensuring it’s consistently warm.
-
Using a fork, lightly butter the pan for the first crêpe. You typically won’t need to re-butter for subsequent crêpes.
-
Pour a ladleful (approximately 4 ounces) of batter into the center of the pan with one hand, while simultaneously swirling the pan with the other to evenly distribute the batter into a perfect circle.
-
Cook the first side over medium-low heat until the edges become golden brown and darker spots appear near the center. For a 12-inch crêpe, this usually takes about 6 minutes.
-
Flip the crêpe by sliding a spatula underneath its center. If it folds, gently unfold it. If it’s too pale when flipped, simply flip it back over to continue cooking.
-
Cook the second side for an additional 1-2 minutes. Remove the finished crêpe to a wire rack to cool completely before stacking.
-
Repeat the cooking process with the remaining batter. Once all crêpes are cooked and cooled, they can be refrigerated overnight, well-wrapped, before assembling the cake.
Prepare the vanilla pastry cream:
-
Line a baking sheet with parchment paper or plastic wrap for cooling the pastry cream.
-
In a large bowl, whisk together the eggs, vanilla sugar, half of the granulated sugar, the vanilla powder, and the cornstarch until the mixture is smooth and free of lumps.
-
In a medium saucepot, whisk together the whole milk and the remaining half of the granulated sugar to prevent scorching.
-
Bring the milk mixture to a boil over medium-high heat. Carefully temper the egg mixture by slowly pouring a small amount of the hot milk into the egg mixture while whisking constantly. Continue adding milk gradually until all has been incorporated.
-
Return the tempered milk-and-egg mixture to the saucepot and place it back over medium heat.
-
Whisk constantly, reaching into the corners of the pot, and cook the custard until it comes to a full boil and thickens significantly.
-
Once the pastry cream boils, continue boiling and whisking for 1 minute. Immediately pour it onto the lined baking sheet, spread it into a thin layer, and cover directly with plastic wrap to prevent a skin from forming.
-
Poke a few holes in the plastic wrap and refrigerate the pastry cream until it is completely set and cold, ideally overnight.
Assemble the mille crêpe cake:
-
In a stand mixer with a whisk attachment or a large bowl, whip the heavy cream until soft peaks form. Transfer to another bowl.
-
Scrape the chilled pastry cream into a stand mixer with a paddle attachment (or use a stiff spatula by hand). Beat on medium-high for 30 seconds to a minute to loosen it.
-
Prepare the crème légère: Take about ½ cup of the whipped cream and aggressively fold it into the loosened pastry cream. This “sacrificing” step helps to lighten the pastry cream’s consistency, making it easier to combine without deflating the remaining whipped cream.
-
Delicately fold the remaining whipped cream into the pastry cream mixture until completely combined and smooth, ensuring not to overmix.
-
Place one crêpe in the center of a flat cake plate. Spoon approximately ½ cup of the crème légère onto the center and spread it evenly across the crêpe with a large offset spatula, covering most of the surface.
-
Repeat the layering process with the remaining crêpes and crème légère, stacking them neatly. Place the final crêpe on top as the last layer. Wrap the entire cake tightly in plastic wrap and refrigerate for at least 4 hours, or ideally overnight, allowing the cake to set fully.
-
Before serving, decorate the top of the cake with lightly sweetened whipped cream, fresh sliced fruits, and a sprinkle of chopped candied nuts for an exquisite finish.
Notes
Presentation Perfection – The minimum 4-hour to overnight chilling time is non-negotiable for beautiful slices. Rushing this step will result in a messy, unstable cake.
Efficiency Tip – Each crêpe takes roughly 8 minutes to cook. To significantly speed up the process, consider using two crêpe pans simultaneously if available.
Flavor Variation: Banana Pudding – Transform this into a delightful banana pudding crêpe cake! Use the filling recipe from our banana pudding and layer it with alternating crêpes and sliced fresh bananas.
Storage Guidelines – Once fully assembled and chilled, wrap the cake tightly or place it in an airtight container. It will keep well in the refrigerator for up to a week.
Nutrition
Before You Go: Explore More Culinary Delights
We sincerely hope you’ve enjoyed crafting and savoring this classic French vanilla mille crêpe cake, a truly elegant and rewarding baking experience. If you’re eager to explore more delightful recipes to elevate your mornings or brunch spread, be sure to browse our collection of easy breakfast and brunch recipes. Perhaps you’ll find your next favorite in these comforting cinnamon scones with cream cheese glaze, or the indulgent flavors of this cinnamon raisin French toast. Happy baking and bon appétit!