
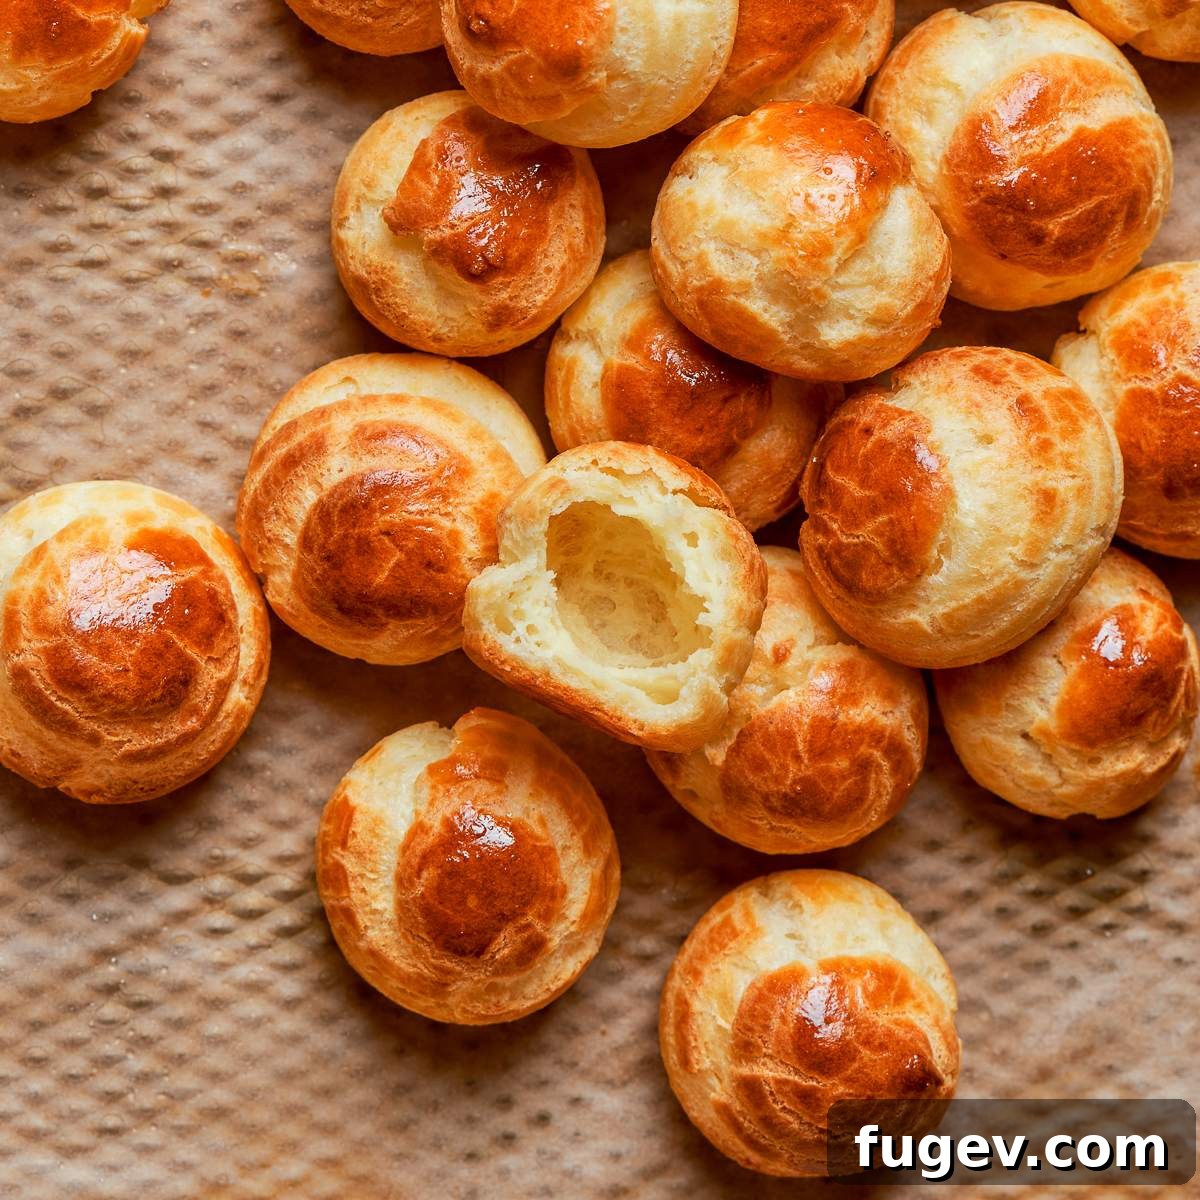
Choux pastry, or pâte à choux, stands as a fundamental cornerstone in the world of French baking. While its elegant appearance might suggest an intimidating culinary challenge, it is, in fact, a remarkably approachable dough that becomes second nature once you grasp its core principles and techniques. This comprehensive guide demystifies the process, equipping you with professional consistency tests and detailed instructions that eliminate guesswork, ensuring your dough is perfectly ready for piping and baking. Prepare to create exquisite cream puffs, delicate éclairs, and savory gougères with newfound confidence.
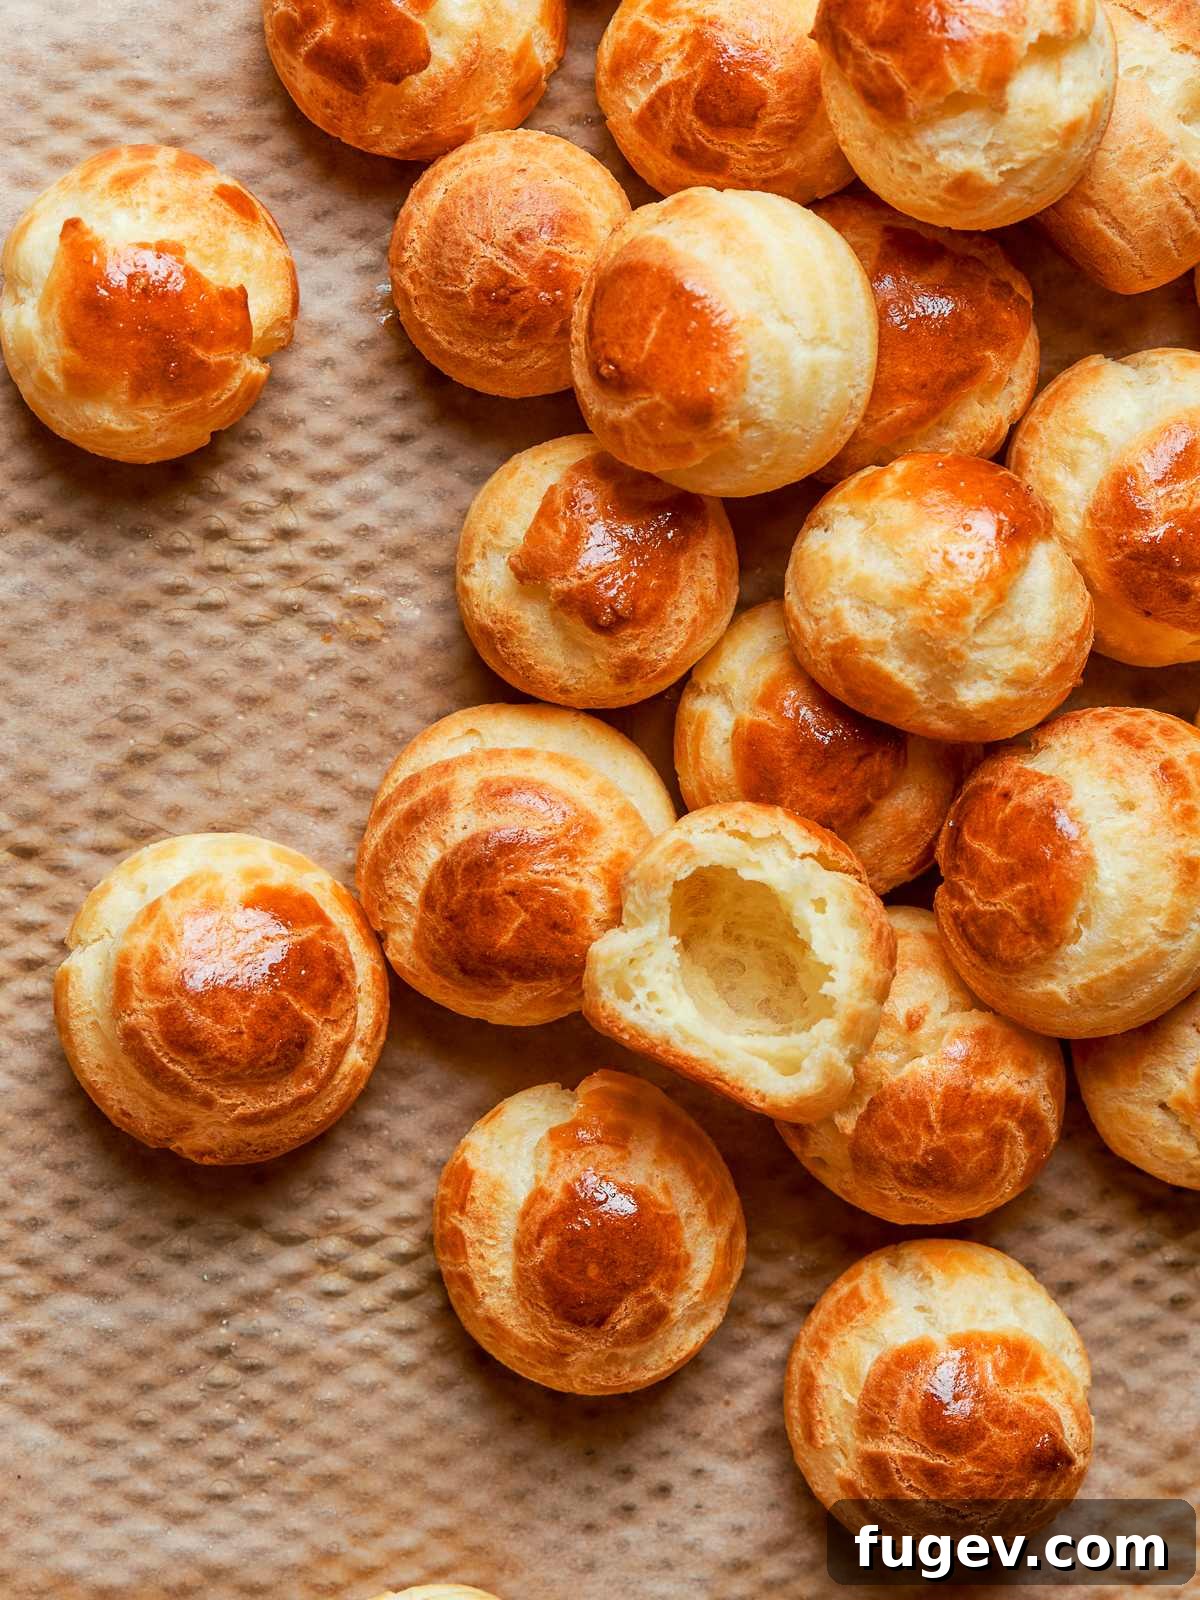
A Quick Overview of the Recipe
This section provides a brief summary of the recipe’s key aspects. For comprehensive details and a full ingredient list, please proceed to the complete recipe below.
Jump to Full Recipe
Prep Time
20 minutes
Cook Time
35 minutes
Total Time
55 minutes
Yields
Approximately 150 (4 cm) rounds
Skill Level
Intermediate — Involves a stovetop panade and precise, gradual egg incorporation, guided by expert consistency tests.
Calories (per serving)*
21 kcal
Key Technique
Stovetop panade method, careful egg blending, dough consistency validation, and baking until golden and perfectly hollow.
Flavor Profile
Richly buttery, subtly savory, neutral, with a delicate hint of egg, making it versatile for both sweet and savory applications.
* Based on the provided nutritional information panel.
I always felt apprehensive about attempting choux pastry at home, but the trench consistency test in this recipe was an absolute game-changer. For the first time, I could confidently identify when my dough was ready, eliminating all the guesswork. My cream puffs emerged perfectly hollow with a wonderfully crisp shell. I’ve already doubled the batch for an upcoming gathering and they were a huge hit! ⭐⭐⭐⭐⭐
Lauren, Enthusiastic Home Baker
Why This Pâte à Choux Recipe Delivers Exceptional Results
Creating truly excellent choux pastry consistently requires more than just following steps; it demands an understanding of the underlying principles. This recipe is meticulously crafted to empower home bakers with the knowledge and techniques used in professional pastry kitchens, ensuring success every single time. Here’s why this particular approach stands out:
- Incorporation of Professional Consistency Tests: The most crucial — and often the most daunting — step in choux pastry production is knowing precisely when the dough has reached the ideal consistency. Our recipe integrates three indispensable professional checks: the trench test, the hook test, and the ribbon test. These methods remove all uncertainty, guiding you to a perfectly hydrated and structured paste, exactly as done by seasoned pastry chefs.
- Controlled and Gradual Egg Incorporation for Stability: The gradual addition of eggs is paramount. Each egg is incorporated slowly, allowing you to meticulously monitor both the temperature and texture of the choux paste. This precision is vital for controlling the final hydration level of the dough. Rushing this step or adding too much egg too quickly can irrevocably alter the dough’s delicate structure and subtly impact the nuanced flavor of your finished pastries.
- Optimized High Butter Ratio for Superior Texture: Unlike many standard choux formulas, this recipe features a more generous butter ratio relative to the milk and flour content. This thoughtful adjustment yields several benefits: it significantly reduces the paste’s tendency to stick aggressively to the pot during the panade stage, making the cooking process smoother. More importantly, it contributes to a richer, more tender, and exquisitely crisp finished shell, elevating the overall quality of your choux creations.
- Engineered for Reliable Scaling: Whether you need a small batch for an intimate dessert or a large quantity for a celebration, this recipe is designed to perform reliably. It scales effortlessly from a half batch up to four times the base formula without compromising consistency or quality. Detailed notes are provided to address potential changes in stirring effort and equipment capacity when scaling, allowing you to adjust with complete confidence.
Table of Contents: Your Journey to Choux Mastery
- Why This Recipe Works: The Science Behind Perfect Choux
- Essential Ingredients & Smart Substitutions for Pâte à Choux
- Creative Variations on This Choux Pastry (Pâte à Choux)
- Professional Tips for Flawless Choux Pastry
- Step-by-Step Guide: Crafting Your Pâte à Choux
- Mastering Consistency: The 3 Indispensable Pâte à Choux Tests
- Chef Lindsey’s Expert Recipe Tip
- Choux Pastry FAQs: Your Questions Answered
- Discover More Classic French Recipes
- The Ultimate Pâte à Choux Recipe Card
- Before You Go: Continuing Your Culinary Journey
Pâte à choux has long carried a reputation for being somewhat temperamental, and frankly, that reputation isn’t entirely unfounded. However, what I can assure you is that once you develop a keen eye for what to look for at each critical stage of its preparation, it transforms into one of the most reliable and repeatable techniques in any professional pastry kitchen. The journey from hesitant home baker to confident choux creator begins here.
This versatile dough forms the essential foundation for a myriad of classic desserts and savory delights, including ethereal cream puffs, elegant éclairs, and savory gougères. If you are new to the art of choux pastry, this detailed guide is your ideal starting point, providing a robust base upon which you can confidently build your skills and explore further culinary creations.
Essential Ingredients & Smart Substitutions for Pâte à Choux
The beauty of choux pastry lies in its simplicity, requiring only a handful of common ingredients. However, the quality and preparation of each component play a pivotal role in the final texture and flavor of your creations. Understanding the function of each ingredient will not only enhance your success but also allow for informed adjustments and substitutions when necessary.
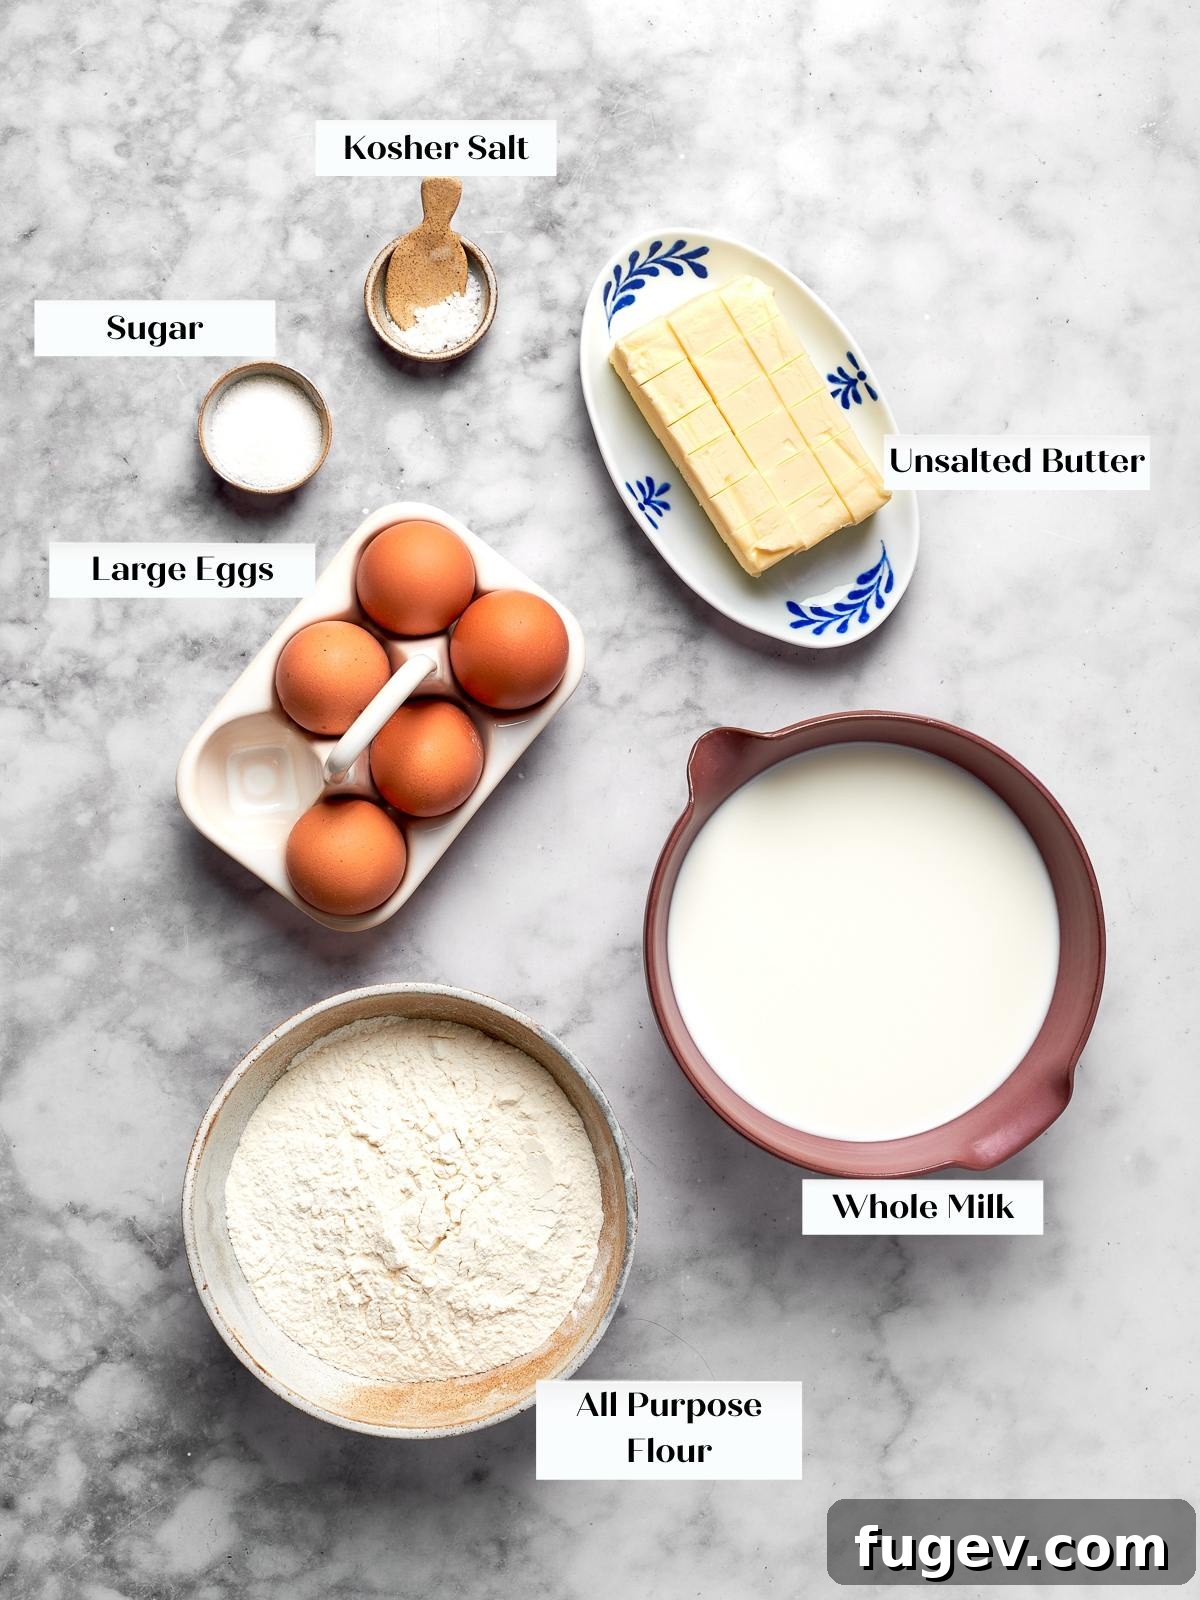
- Unsalted Butter: Butter is not merely a fat in this recipe; it’s a crucial structural element. During the panade stage, the butter coats the flour proteins, effectively inhibiting excessive gluten development. This ensures that your choux shells puff up light and airy, rather than becoming dense and bready. Always use cubed butter, as this promotes even melting, ensuring it perfectly synchronizes with the milk reaching a boil.
- Whole Milk: Milk is the primary source of moisture that transforms into steam within the oven, acting as the powerful leavening agent that inflates the choux pastry. Using whole milk is recommended because its higher fat content contributes to paler, drier shells with a richer, more custardy interior and superior browning. Lower-fat milk varieties may result in a less desirable texture and color.
- All-Purpose Flour: Flour provides the essential structural backbone for your choux. The starches within the flour gelatinize upon contact with the hot milk and butter mixture, forming a cohesive paste that is capable of trapping steam during the baking process. For consistent and reliable results, measuring your flour by weight using a kitchen scale is absolutely indispensable. Volume measurements can be highly inaccurate.
- Kosher Salt: Salt is more than just a seasoning here; it sharpens and enhances the overall flavor profile of the pastry, preventing the inherent richness of butter and eggs from tasting flat or one-dimensional. If you typically use a different brand or type of salt, it is advisable to measure by weight to account for variations in crystal size and density, which directly affect salinity.
- Granulated Sugar: A modest amount of granulated sugar plays a strategic role in the dough. It aids in promoting beautiful, even browning of the choux shells and contributes to a delicate, crisp exterior. Crucially, it achieves this without imparting an overtly sweet taste, maintaining the pastry’s versatile, neutral flavor. Additionally, sugar subtly tenderizes the finished shell, ensuring it snaps cleanly rather than becoming excessively hard or chewy.
- Large Eggs (Variable Quantity): Eggs are arguably the most critical and often misunderstood component of choux pastry. They act as the primary leavening agent and provide the essential structural framework. Their high water content generates steam for puffing, their proteins set the structure of the shell, and their fat contributes to the signature tender, hollow interior. The golden rule for eggs is to add them gradually, one at a time, continuously monitoring the paste’s evolving texture. You should stop adding eggs when the paste is smooth, glossy, and falls from your spatula in a thick “V” shape or ribbon. This visual cue is far more reliable than a fixed egg count, as the precise amount of water evaporated during the panade stage directly dictates how many eggs the dough can absorb. Over-incorporating eggs will loosen the paste beyond recovery, inevitably leading to flat, soggy, and disappointing puffs.
For comprehensive information on exact ingredient quantities and further specifics, please refer to the detailed recipe card at the end of this guide.
Creative Variations for Your Choux Pastry (Pâte à Choux)
The fundamental pâte à choux recipe is incredibly versatile, serving as a canvas for numerous sweet and savory creations. Once you master the basic technique, you can easily adapt it to suit your culinary desires.
- Adjusting Batch Size: This robust recipe is designed for flexibility. It scales flawlessly from a convenient half batch for smaller servings all the way up to four times the original formula for larger gatherings. For quantities exceeding four times the base recipe, be mindful of the increased physical effort required for stirring by hand and ensure your pot and stand mixer can accommodate the larger volume of dough.
- Savory Choux (Gougères): Elevate your choux to a delightful savory realm by folding finely grated Gruyère or Comté cheese into the finished paste just before piping. These savory cheese puffs, known as gougères, are perfect appetizers. The added cheese contributes significant salt and fat, so you might consider slightly reducing the measured salt in the base recipe, depending on the specific cheese variety and your personal preference.
- Hand Mixing Instead of a Stand Mixer: While a stand mixer with a paddle attachment offers unparalleled efficiency and consistency, producing a smoother paste and often a better rise, it is entirely possible to incorporate the eggs by hand. Using a sturdy wooden spoon and a strong arm, you can achieve excellent results. Be prepared for a genuinely labor-intensive process, but rest assured, the manual method is effective if it’s the equipment you have available.
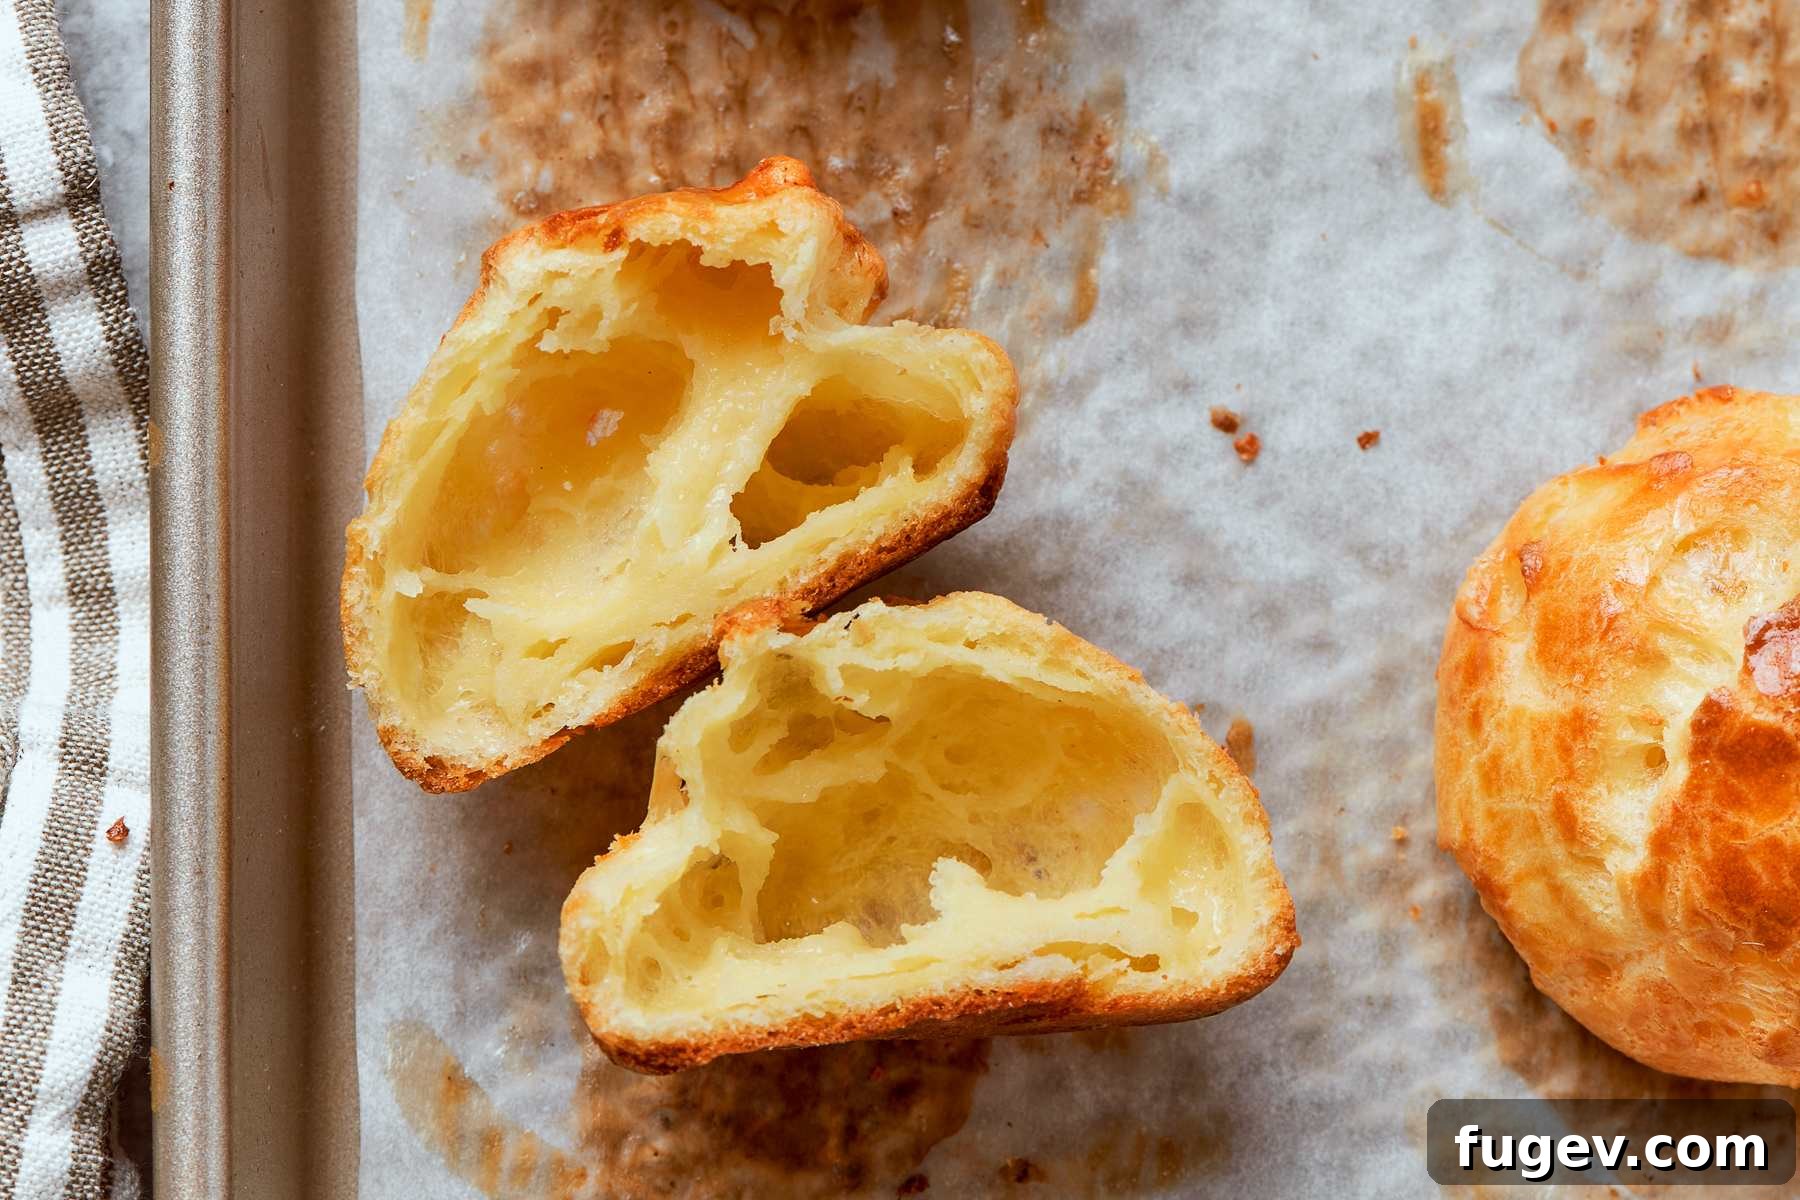
Professional Tips for Flawless Choux Pastry
Achieving consistently perfect choux pastry often comes down to mastering a few key professional insights. These tips, gleaned from years in busy pastry kitchens, will help you navigate potential pitfalls and ensure your choux rises to its full potential.
- Never Add All the Eggs at Once: This is perhaps the most critical rule in choux pastry. The gradual, controlled addition of eggs while constantly monitoring the dough’s texture is the only way to ensure optimal consistency. If you add all the eggs simultaneously, you lose the ability to halt the process at the perfect moment, and a paste that is too loose is, unfortunately, irreparable. Precision here is paramount for success.
- Maintain Momentum Post-Panade: The temperature of your dough when you begin incorporating the eggs significantly influences how many eggs the paste can absorb and how it develops its structure. It’s vital to work efficiently once the panade is cooked. If the dough cools excessively before you start adding eggs, it may require substantially more eggs than the recipe specifies to reach the correct consistency. This over-hydration can negatively impact both the texture and the delicate flavor of your finished pastries.
- Watch for Butter Separation: This recipe’s intentionally higher butter ratio contributes to a richer, more tender shell and minimizes sticking to the pot. However, if the panade is cooked for an excessively long period, the butter can begin to “melt out” or separate from the dough. Should you observe this, immediately transfer the paste to your mixer bowl and proceed with the egg addition step without delay. In such instances, you will likely need to incorporate an additional one to one and a half eggs to restore the proper consistency.
Step-by-Step Guide: Crafting Perfect Choux Pastry (Pâte à Choux)
Successful choux pastry starts with meticulous preparation. Setting up all your ingredients and equipment before you even turn on the heat is the hallmark of a professional approach, ensuring a smooth, controlled execution rather than a frantic scramble at the stovetop.
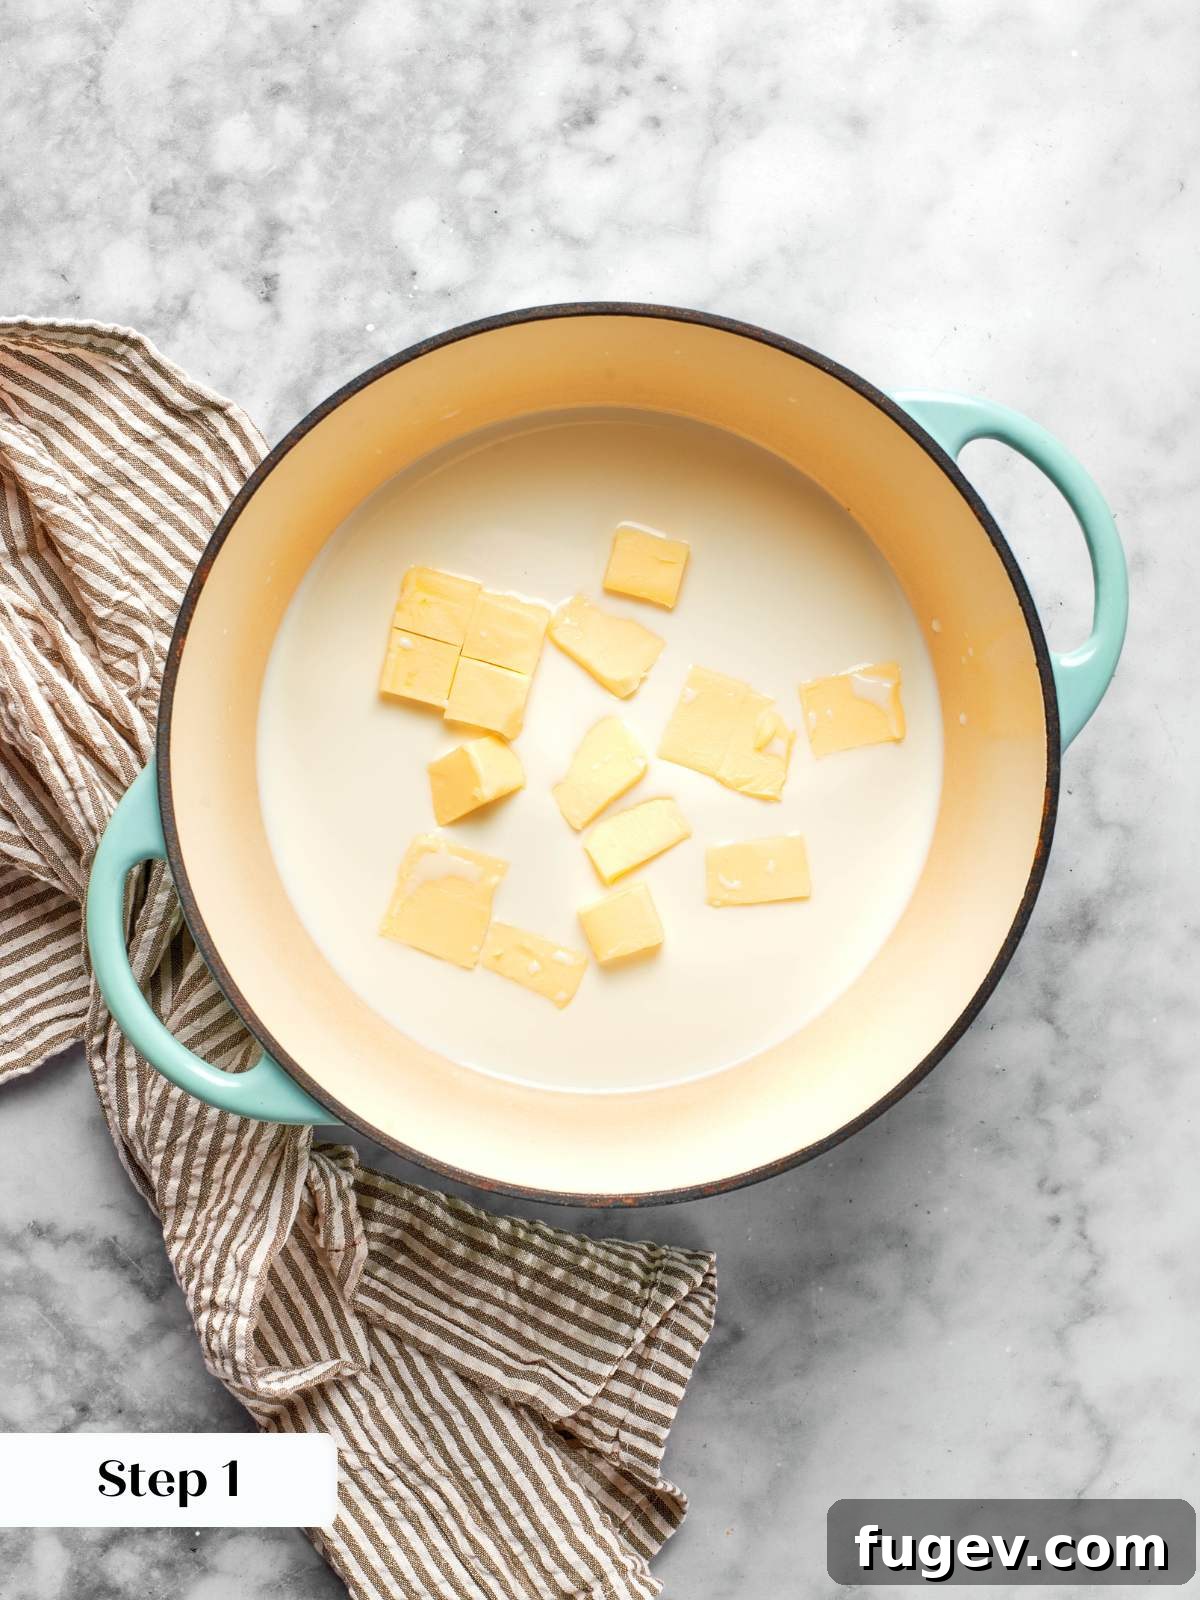
Step 1: Measure and Organize All Ingredients. Begin by precisely combining your all-purpose flour, kosher salt, and granulated sugar in a medium bowl; set this mixture aside. Crack your large eggs into a separate container, whisking them lightly, so they are ready to be added one at a time. If your butter is not already cubed, cut it into small, uniform pieces now. Cubing the butter is crucial as it helps it melt evenly and simultaneously with the milk reaching a boil, preventing the milk from boiling off prematurely while you wait for a large, cold block of butter to liquefy (photo 1). This mise en place is key to a stress-free process.
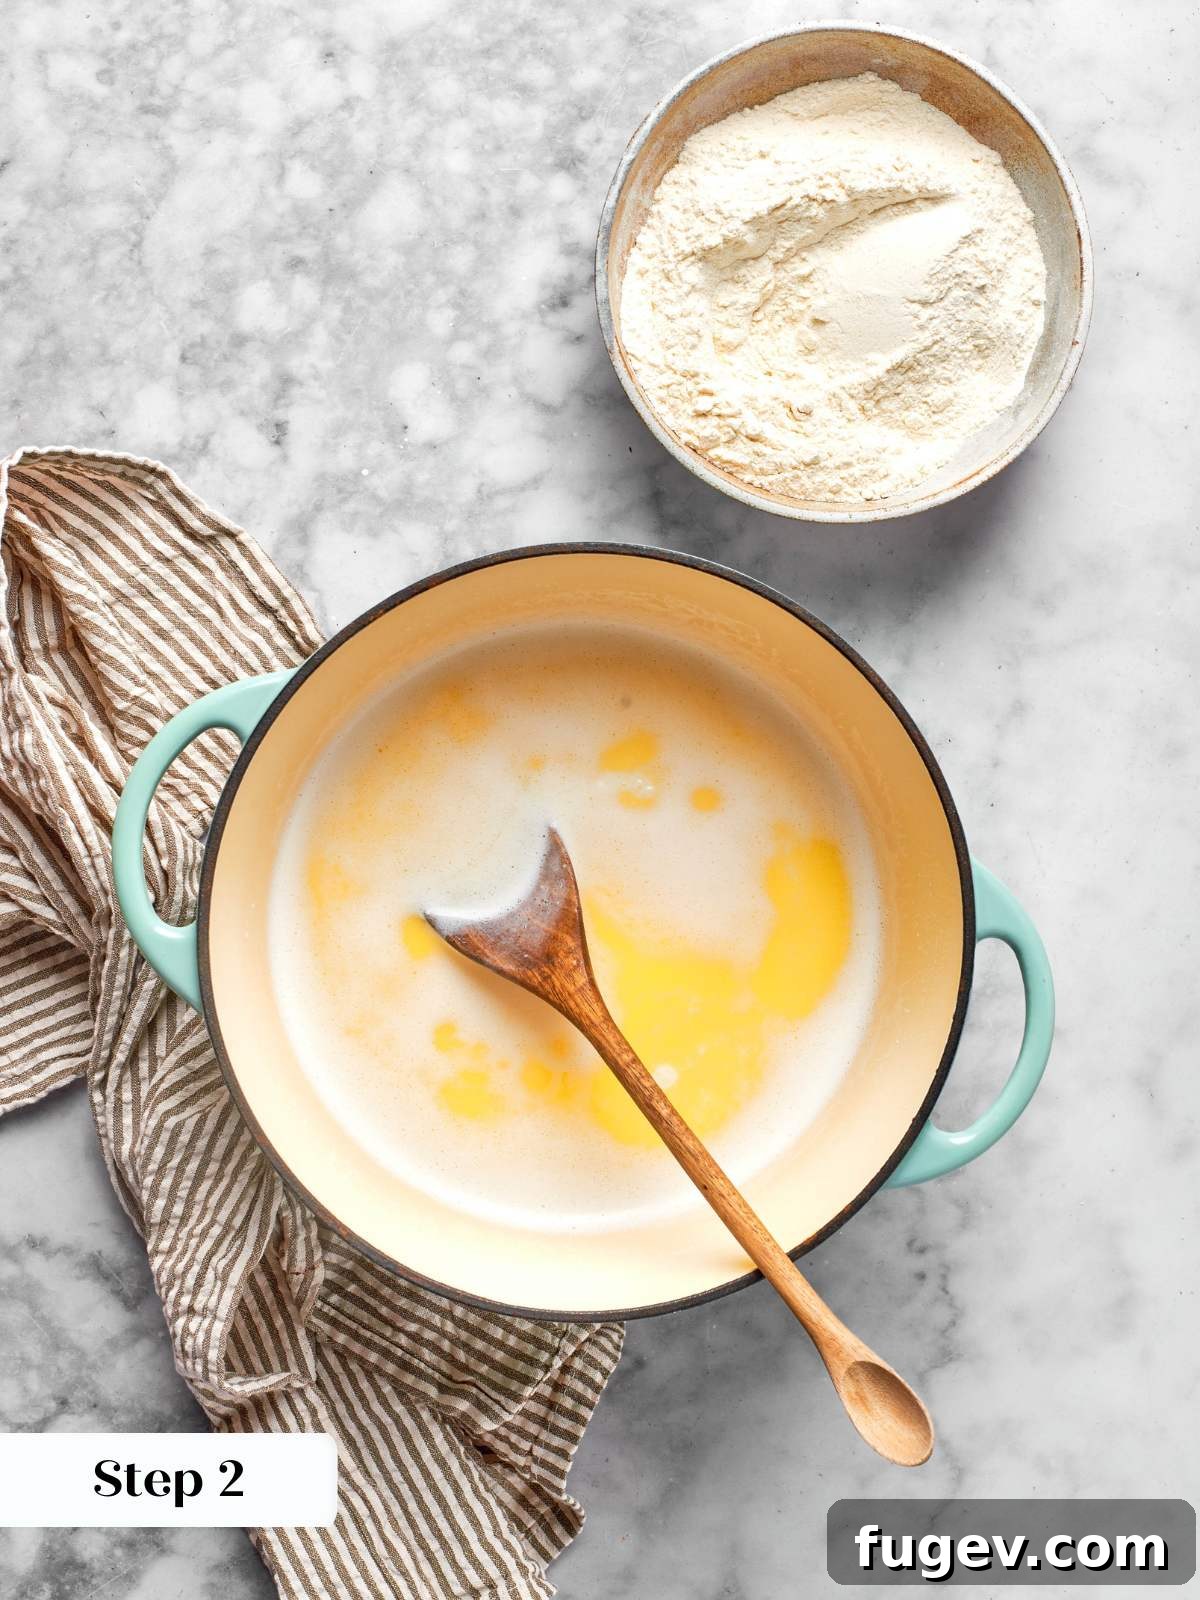
Step 2: Bring the Butter and Milk to a Boil. In a high-sided, heavy-gauge saucepot – the heavy bottom ensures even heat distribution – combine the cubed unsalted butter and whole milk. Place the pot over high heat. Watch this mixture very closely. Your objective is for the butter to be completely melted exactly at the moment the milk begins to boil. The instant you see the milk boil, proceed immediately to the next step. Do not allow it to continue boiling, as this will lead to excessive moisture evaporation (photo 2).
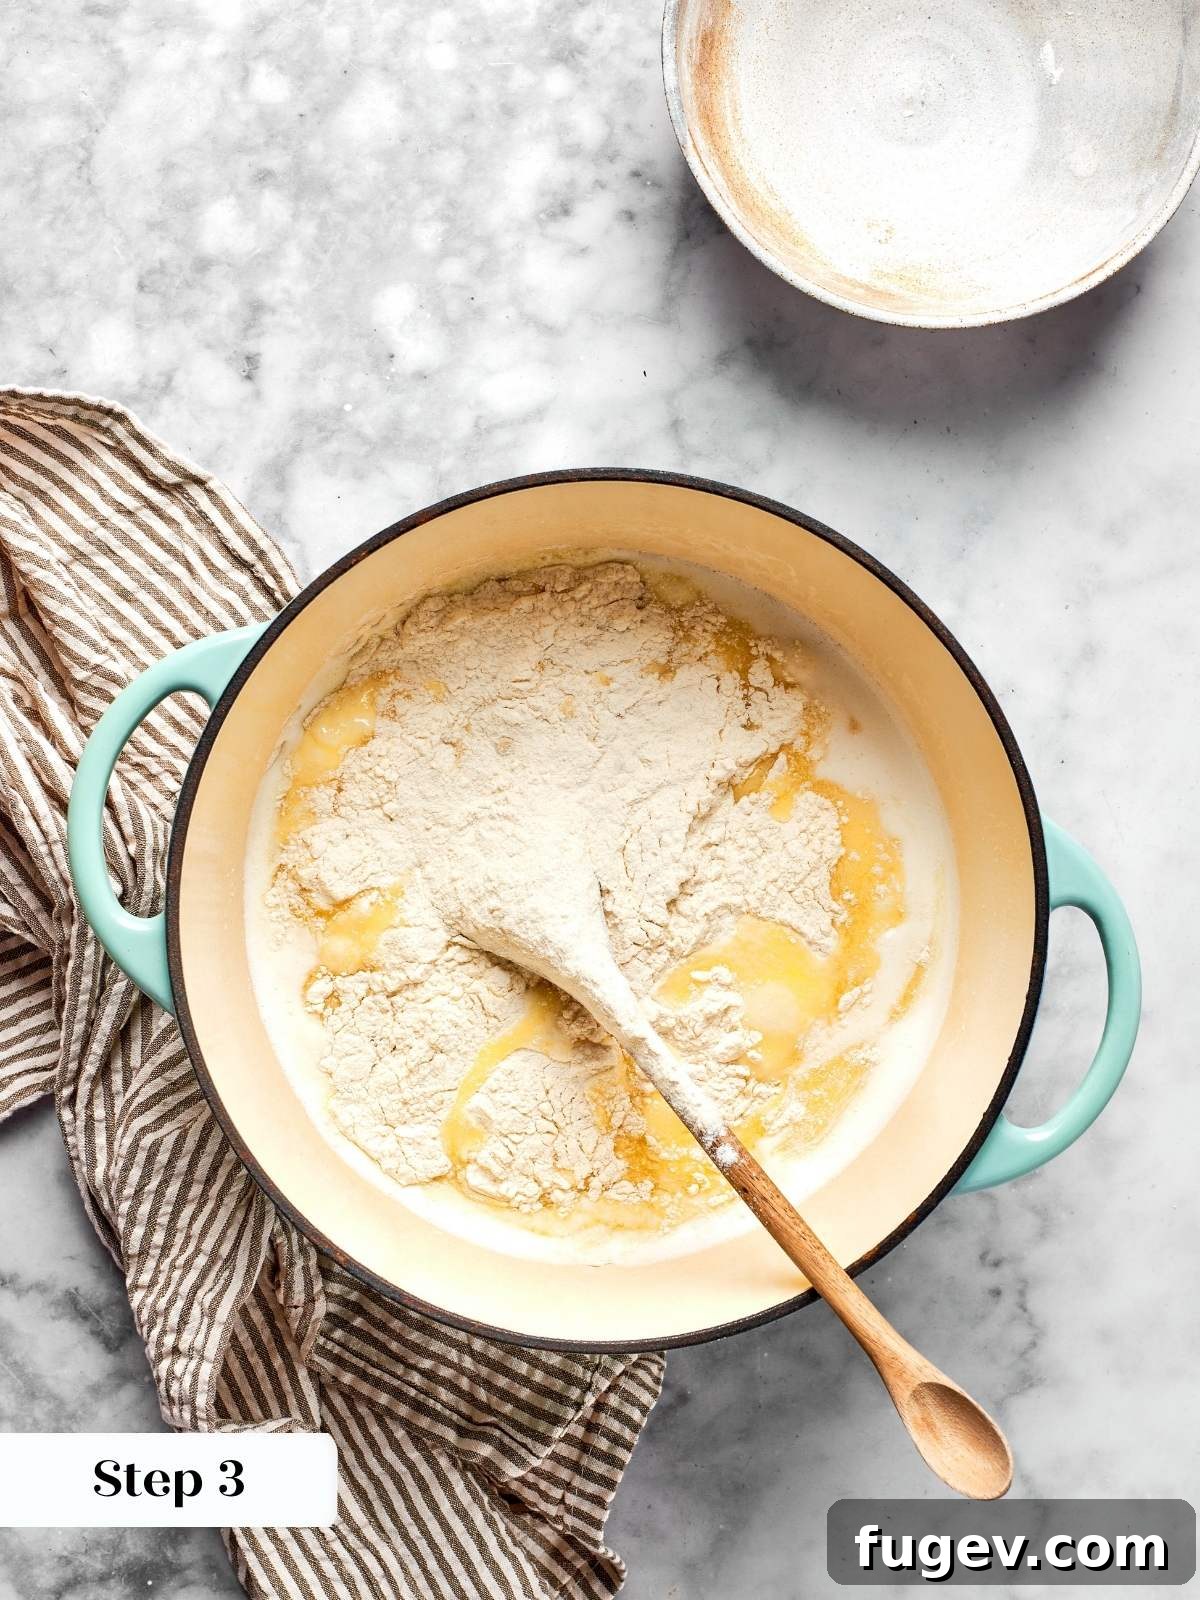
Step 3: Add the Flour Mixture and Begin the Panade. As soon as the milk boils and the butter is melted, remove the pot from the heat. Add the entire flour, salt, and sugar mixture to the hot liquid all at once. Initially, stir carefully to integrate the dry ingredients without splashing. As the flour rapidly absorbs the liquid and the mixture begins to thicken into a dough, switch to vigorous and continuous stirring to ensure a smooth, lump-free paste. A sturdy wooden spoon is the ideal tool for this stage; its leverage is invaluable against the thickening dough, and it provides a far more secure grip than a silicone spatula as the paste develops resistance (photo 3).
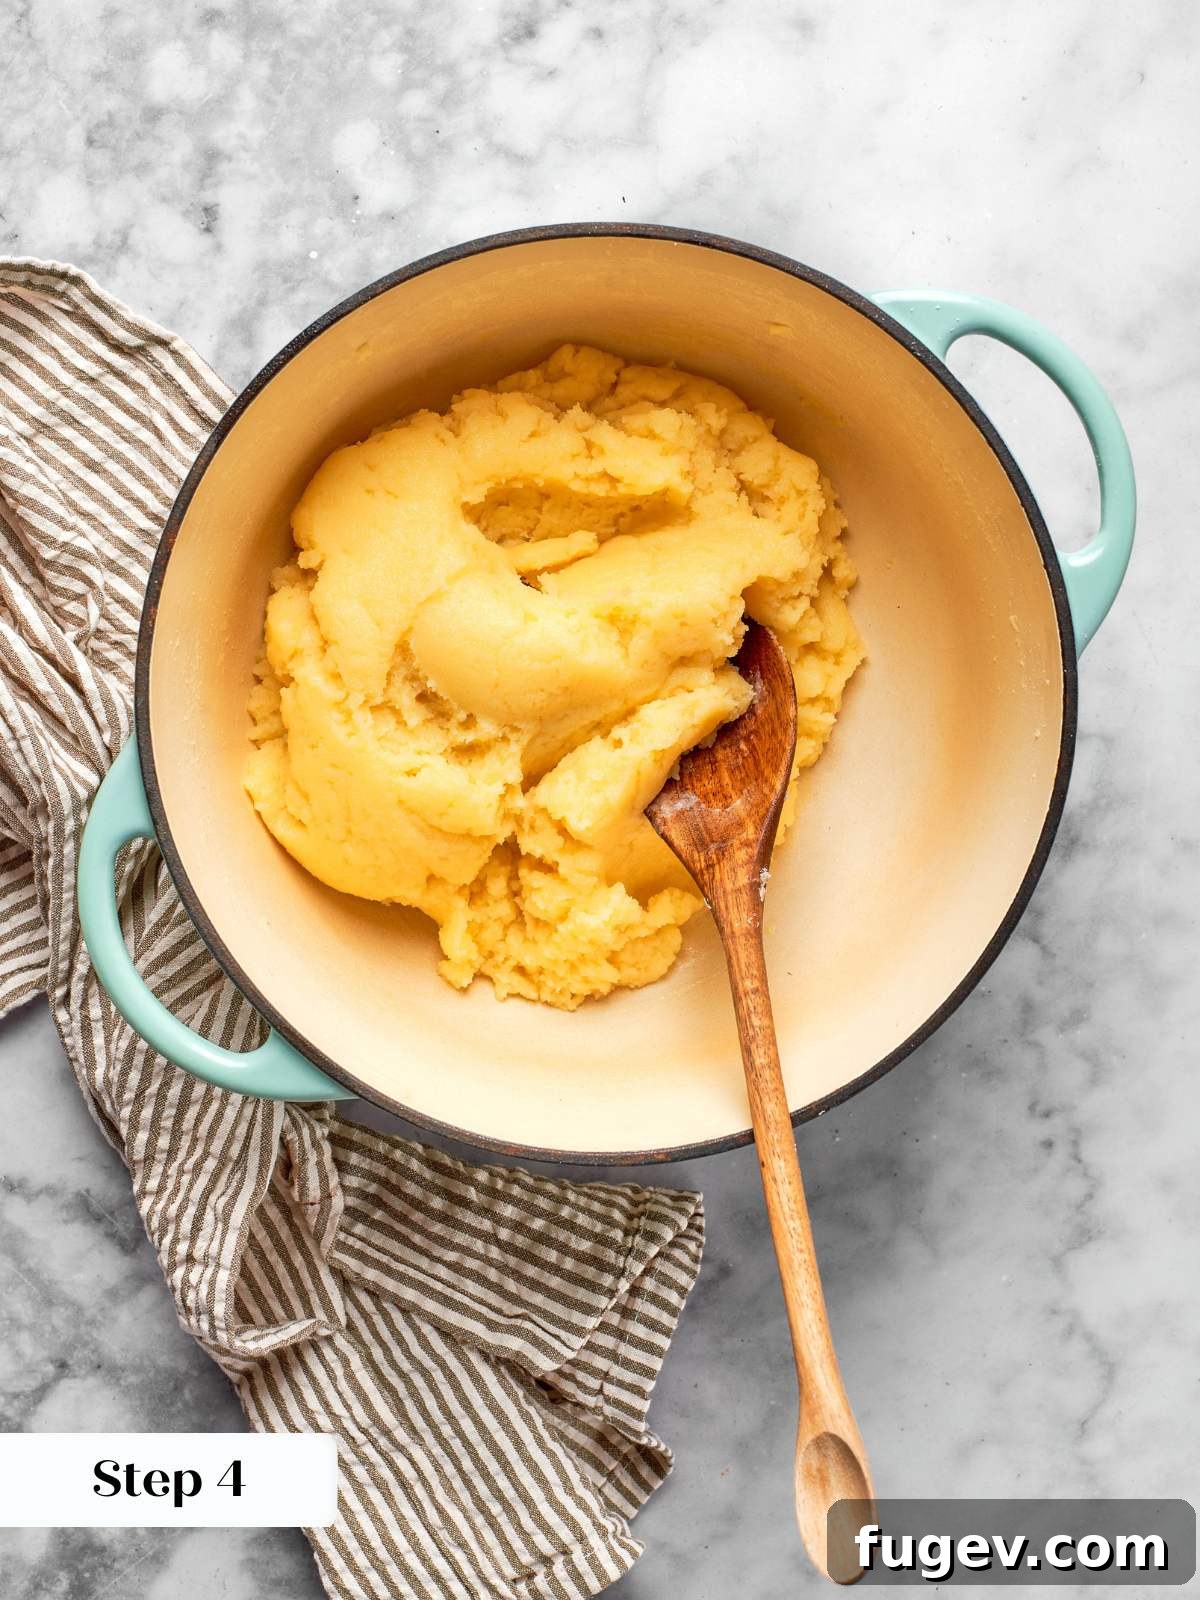
Step 4: Cook the Panade Until it Clears the Pot. Return the pot to high heat and continue to stir the dough constantly and vigorously. As you cook, the dough will start to pull away cleanly from the sides and bottom of the pot, leaving a thin, dry film or coating on the pot’s surface. This thin film is your definitive visual signal that sufficient moisture has evaporated from the milk and butter, indicating the panade has cooked properly and is ready to produce a perfectly pipeable choux paste. This crucial cooking phase typically takes approximately 2 minutes from the moment the flour is added. Do not rush this step or remove the dough prematurely, as undercooked panade will result in weaker choux that struggles to puff adequately (photo 4).
A Note on High Butter Ratio: This recipe intentionally features a generous butter-to-milk and flour ratio, which naturally minimizes the paste’s tendency to stick excessively to the pot. However, if you observe the butter beginning to melt out or separate from the dough, immediately transfer it to your stand mixer bowl and proceed directly to Step 5. In such a scenario, you will likely need to incorporate an additional 1 to 1.5 large eggs to achieve the correct consistency.
Step 5: Transfer to the Stand Mixer and Release Steam. Promptly transfer the hot panade from the pot into the bowl of a stand mixer. Fit the mixer with the paddle attachment. Begin beating the dough on medium-high speed. Initially, the dough will appear somewhat rough and visibly steamy; this is perfectly normal and expected. The primary purpose of this step is not incorporation, but rather to facilitate the release of steam and allow the mixture to cool down sufficiently. This cooling prevents the eggs, when added, from scrambling. Continue beating until you no longer see steam rising from the dough before you even consider adding the first egg (photo 5).
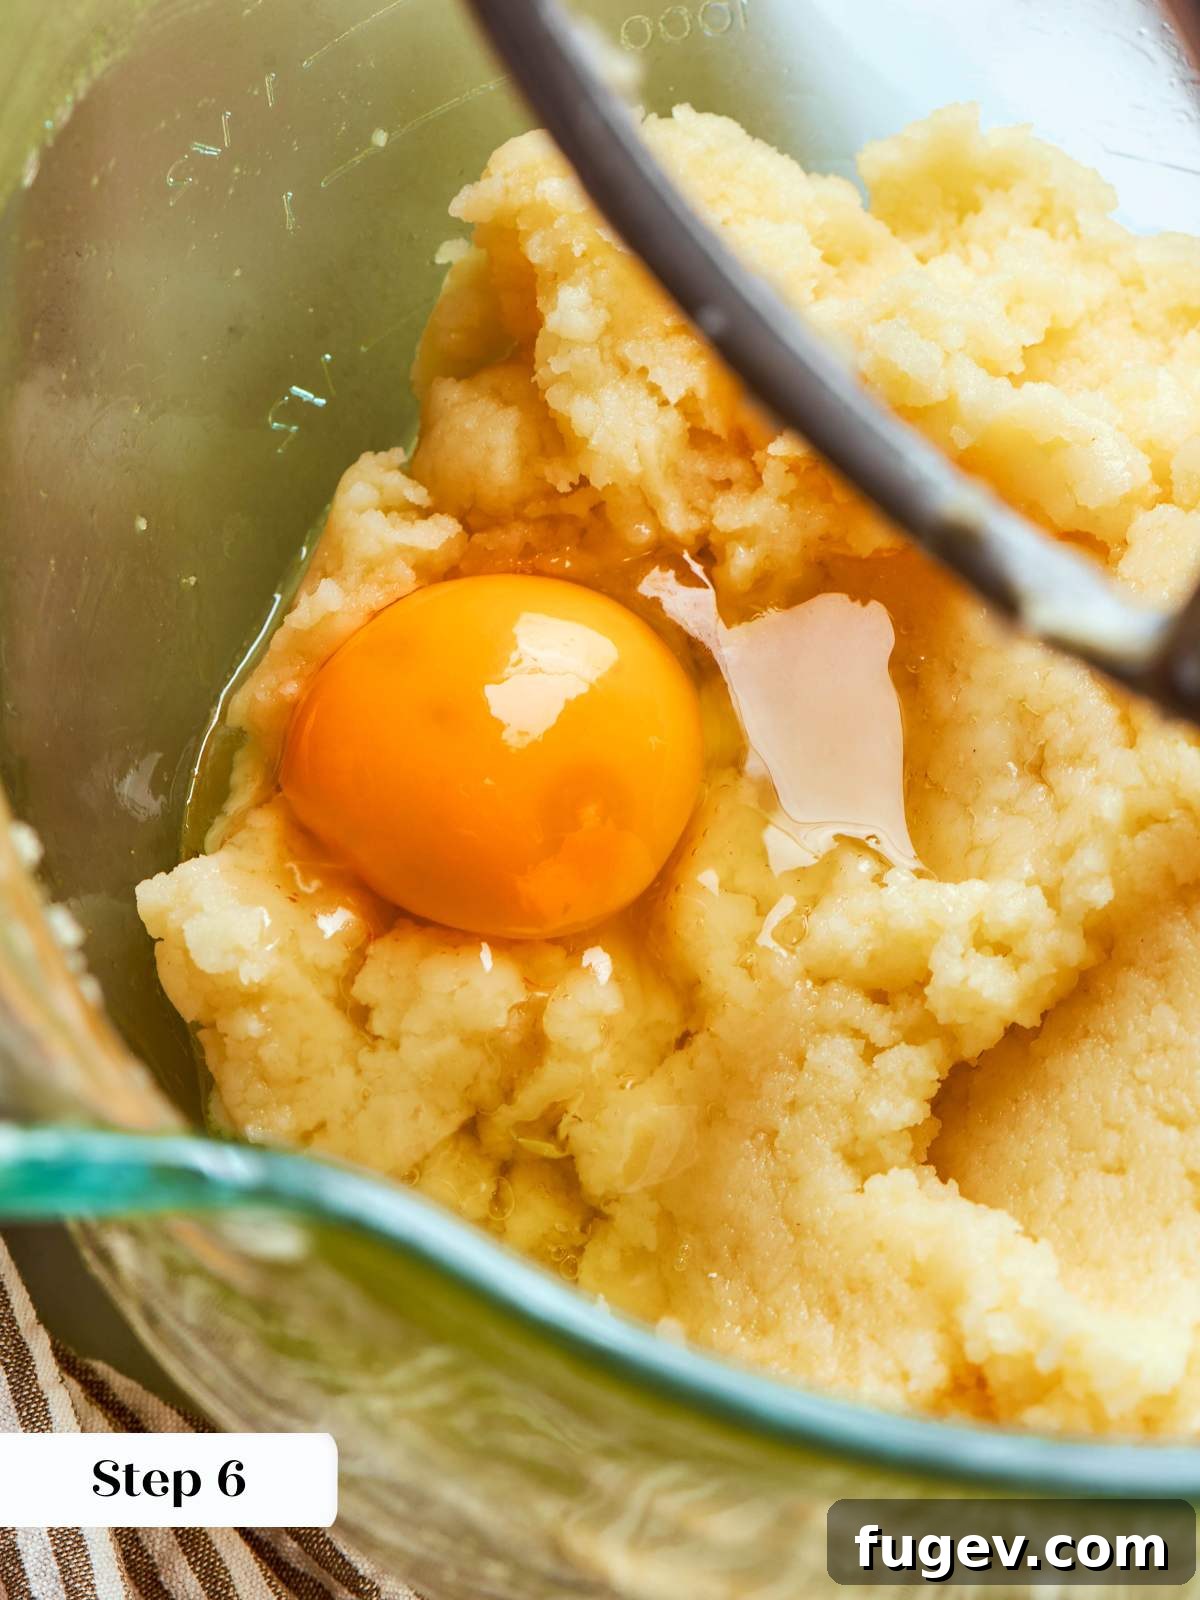
Step 6: Incorporate Eggs Gradually, One at a Time. Once the dough has ceased steaming, reduce the mixer speed to medium. Begin adding the eggs one at a time, ensuring that each egg is fully incorporated into the paste before introducing the next. After the first egg or two, the dough may temporarily appear broken, curdled, or separated; do not be alarmed, this is a normal phase, and the dough will come back together as you continue. The careful interplay between the residual heat of the paste and the moisture from the added eggs is crucial for proper dough development, similar to the final stages of Italian meringue buttercream. If the panade has cooled too much before you start adding eggs, you may find that the dough requires more eggs than specified in the recipe to reach the correct consistency, which, as noted before, will regrettably alter both the texture and flavor of the finished pastry. Our goal is to avoid this imbalance (photo 6).
Step 7: Test the Choux for Doneness. This is the most critical juncture for success. For this specific recipe, I find the “trench test” to be the most reliably accurate indicator of readiness. While some experienced pastry cooks on my team might favor the “hook test” or even a combination of methods, relying solely on the “ribbon test” often led to over-hydrated dough in their hands. The following section elaborates on these three essential consistency tests, providing visual cues to guide your decision-making.
Mastering Consistency: The 3 Essential Tests for Pâte à Choux
Before you pipe and bake, ensuring your choux paste has achieved the perfect consistency is paramount. Here are three widely recognized methods you can employ, each offering a slightly different perspective on the dough’s readiness.
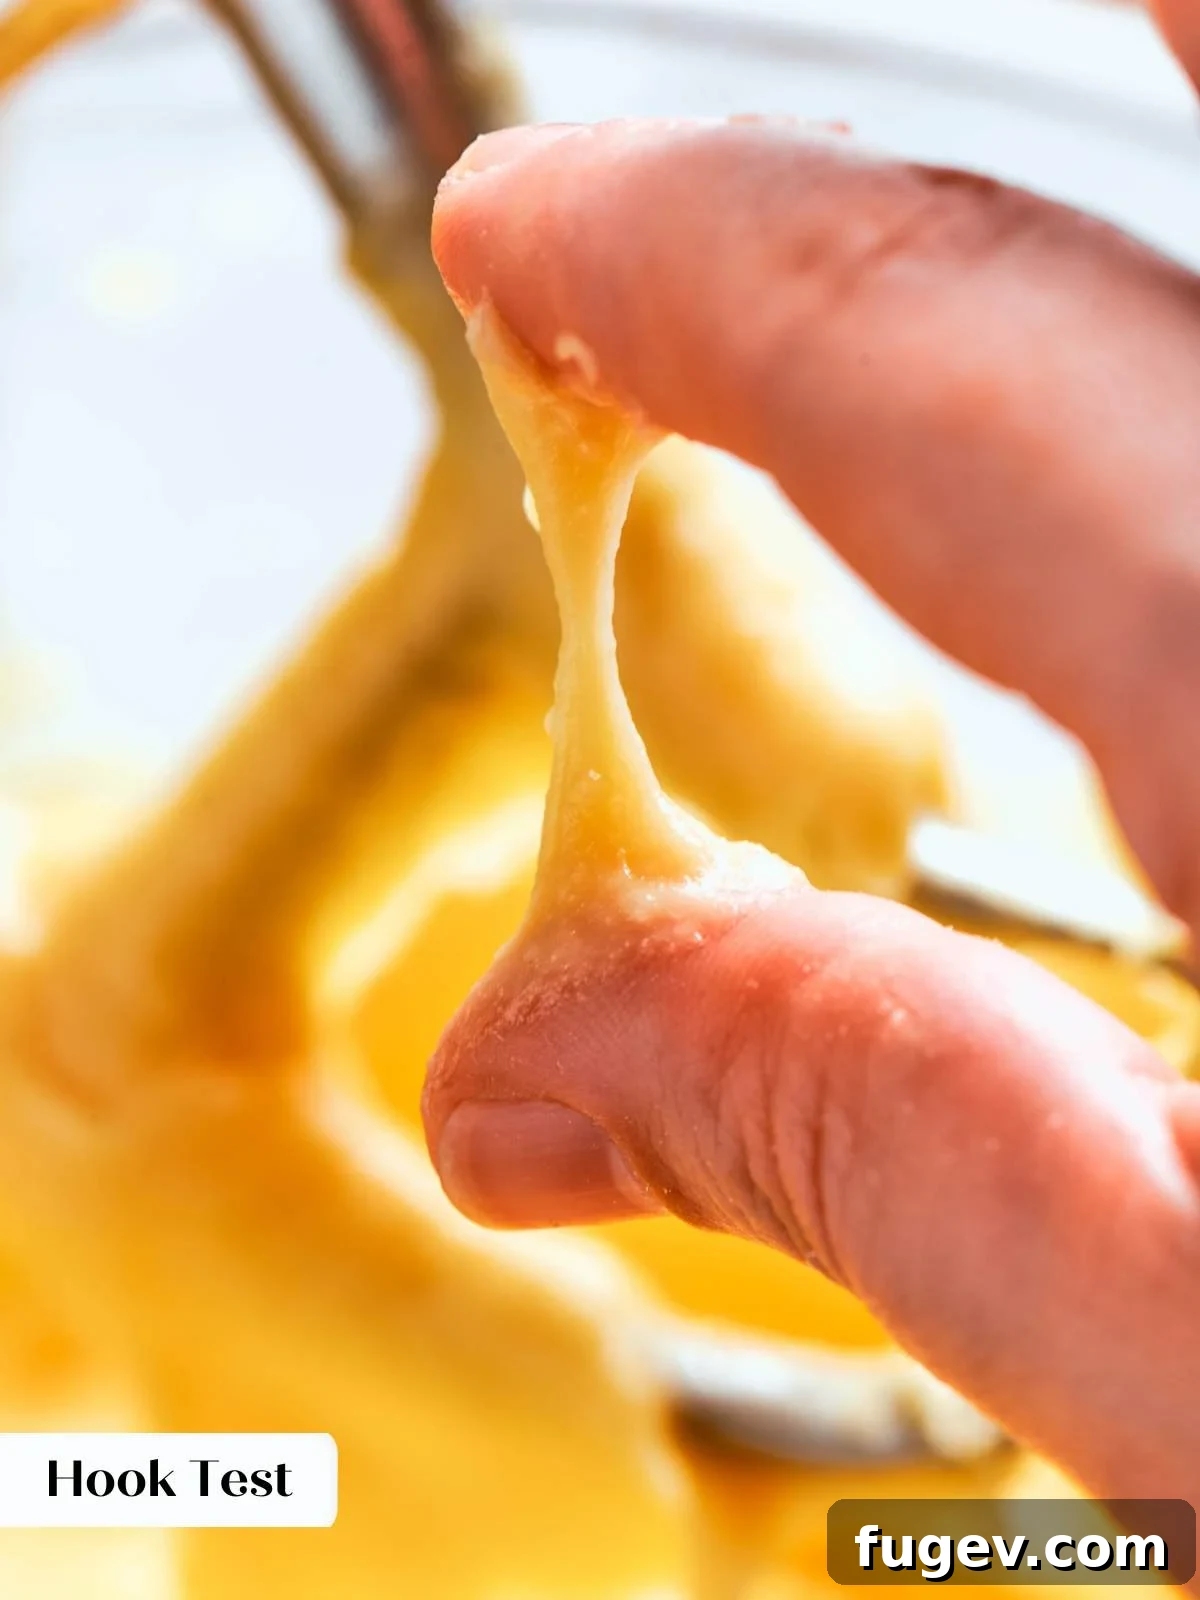
- The Hook Test: To perform this test, dip your forefinger into the choux paste, then bring your thumb and forefinger together, gently squishing a small amount of choux between them. As you slowly pull your fingers apart, observe the peaks that form on either side. These peaks should gently flop or curl to the side, particularly the one attached to your thumb, resembling a soft hook. This test requires a little practice to gauge the precise amount of choux to use; too much or too little can lead to misleading results.
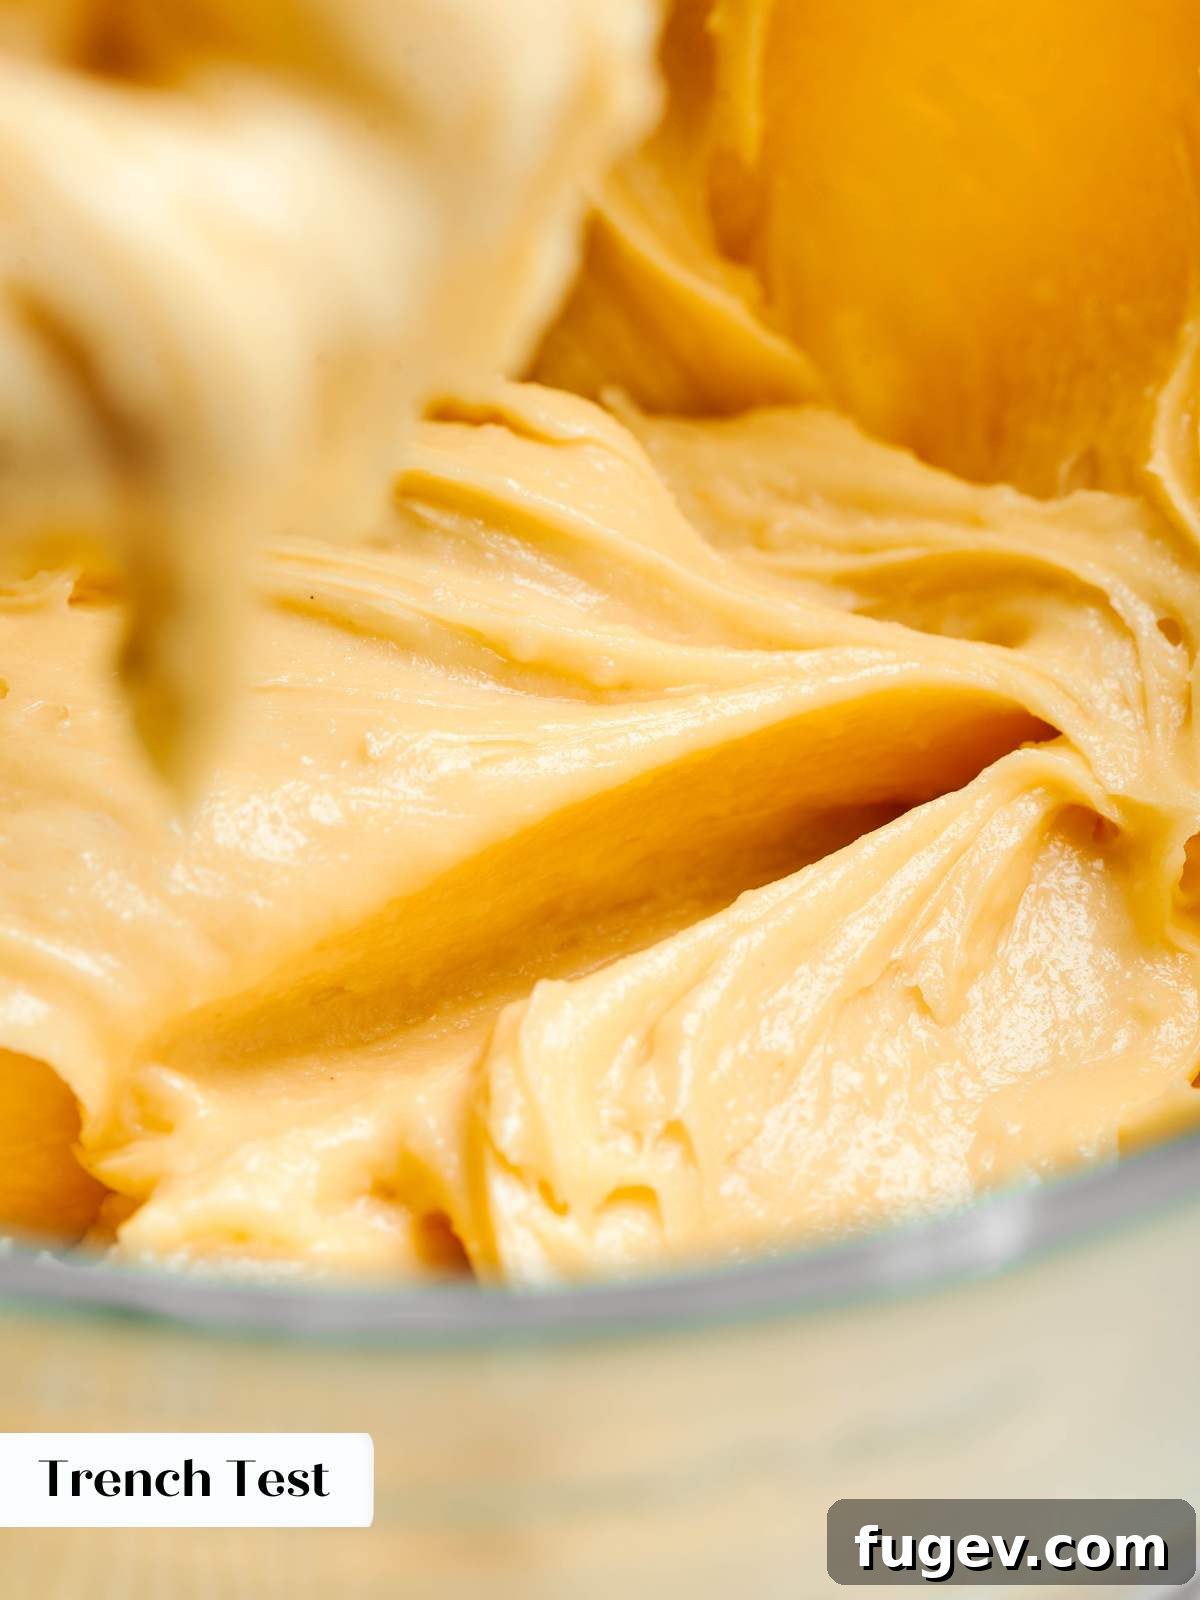
- The Trench Test: This is often considered the most reliable test for optimal choux consistency. With your finger, draw a clear “trench” or furrow through the choux dough in the bowl. Observe how the trench behaves. The ideal indication is that the sides of the trench should slowly and steadily begin to close in on themselves, gradually meeting in the middle. If the sides remain completely static and do not move at all, the choux is too stiff and requires a bit more egg – add about half an egg (beaten separately) before repeating the test. Conversely, if the trench immediately runs together and loses its definition, the paste is too loose. It’s important to be mindful that a cooler choux paste will exhibit a slower closing trench compared to a warmer one. Through years of daily choux preparation, my team and I rarely needed more than two additional eggs for a quadruple batch, which translates to about half an extra egg for a single batch of this recipe at most.
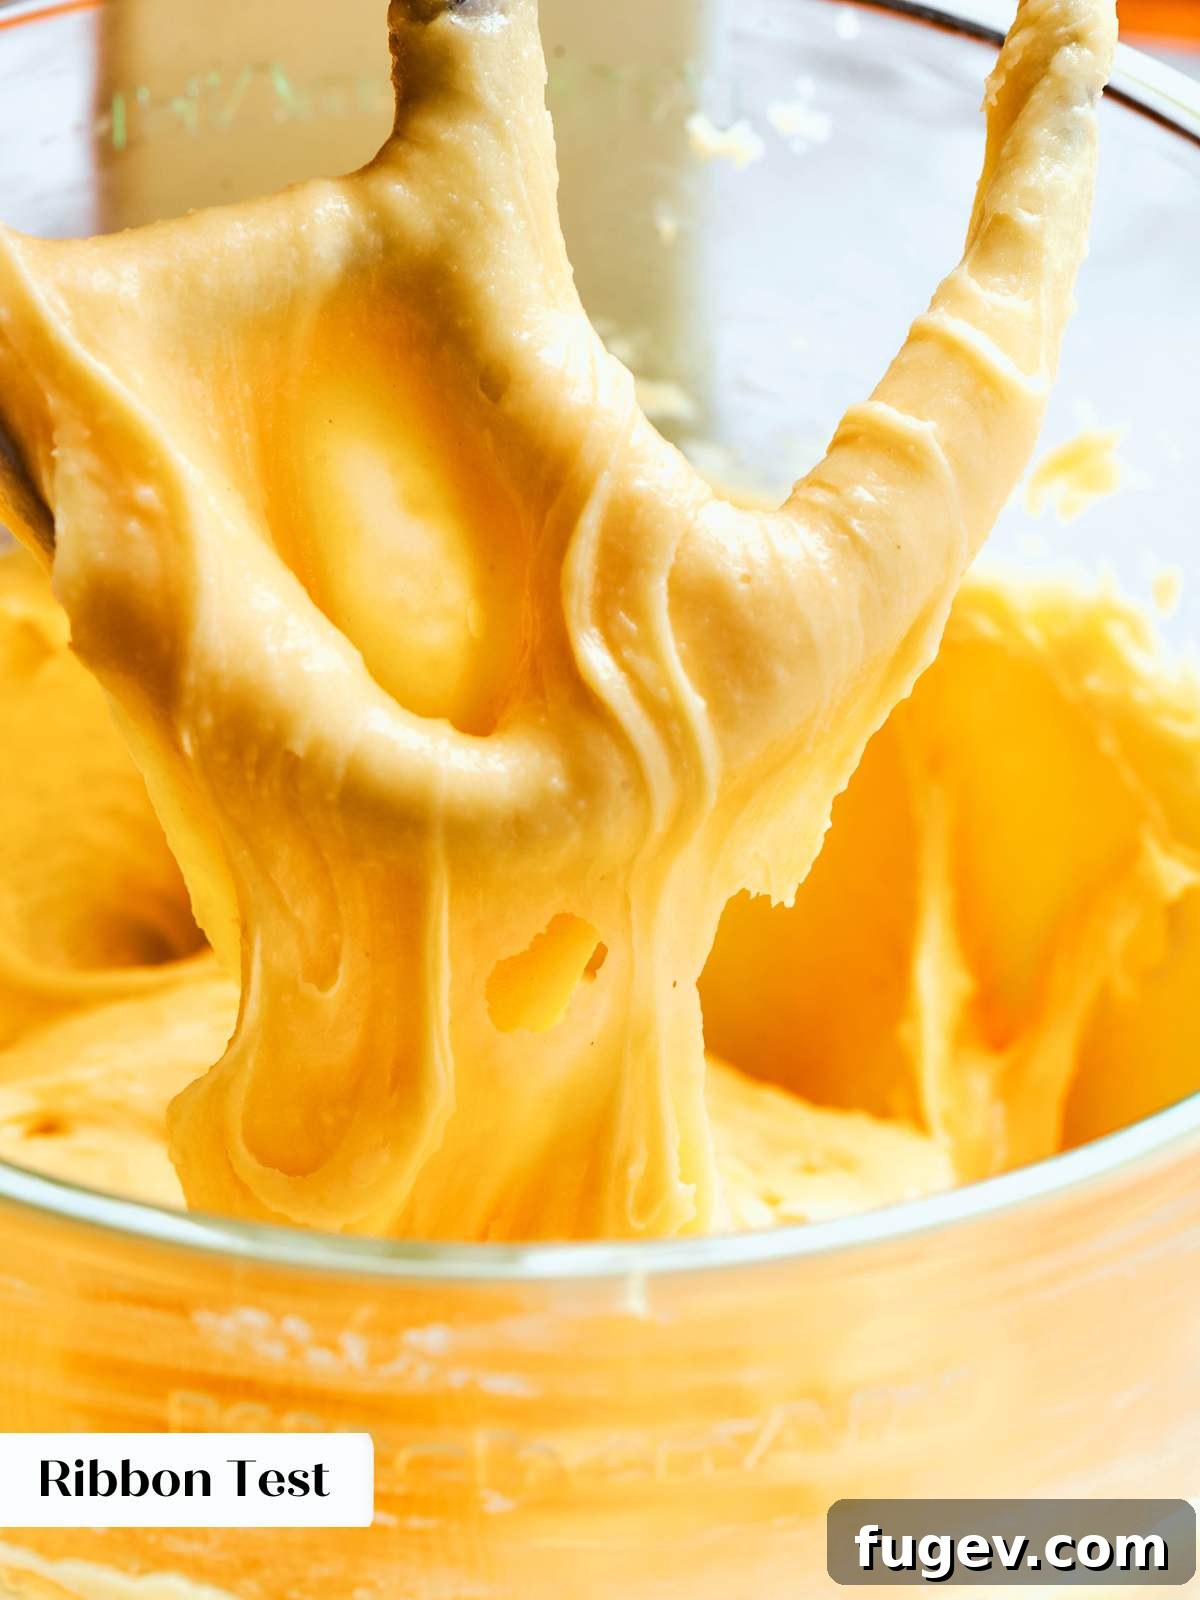
- The Ribbon Test: The ribbon test is passed when you insert the paddle attachment into the mixed choux dough and then carefully lift and remove it from the mixing bowl. The dough should fall off the paddle in large, glossy, and continuous ribbons, forming a distinct ‘V’ shape on the paddle’s underside. While visually appealing, I often find this to be the least reliable test for beginners, especially as the paste cools. Pastry cooks who rely solely on this test frequently end up with a choux paste that is slightly too thin or runny, which can negatively impact the final rise and structure.
In rare instances, you might find that your choux paste requires slightly more egg than the recipe initially specifies. If this occurs, beat an additional large egg separately in a small bowl. Add this extra egg to your choux paste in very small increments – perhaps half an egg or even a quarter at a time – meticulously testing the dough’s consistency after each addition using the trench test. For a standard single batch, you should typically not need to add more than half an additional egg at the absolute maximum.
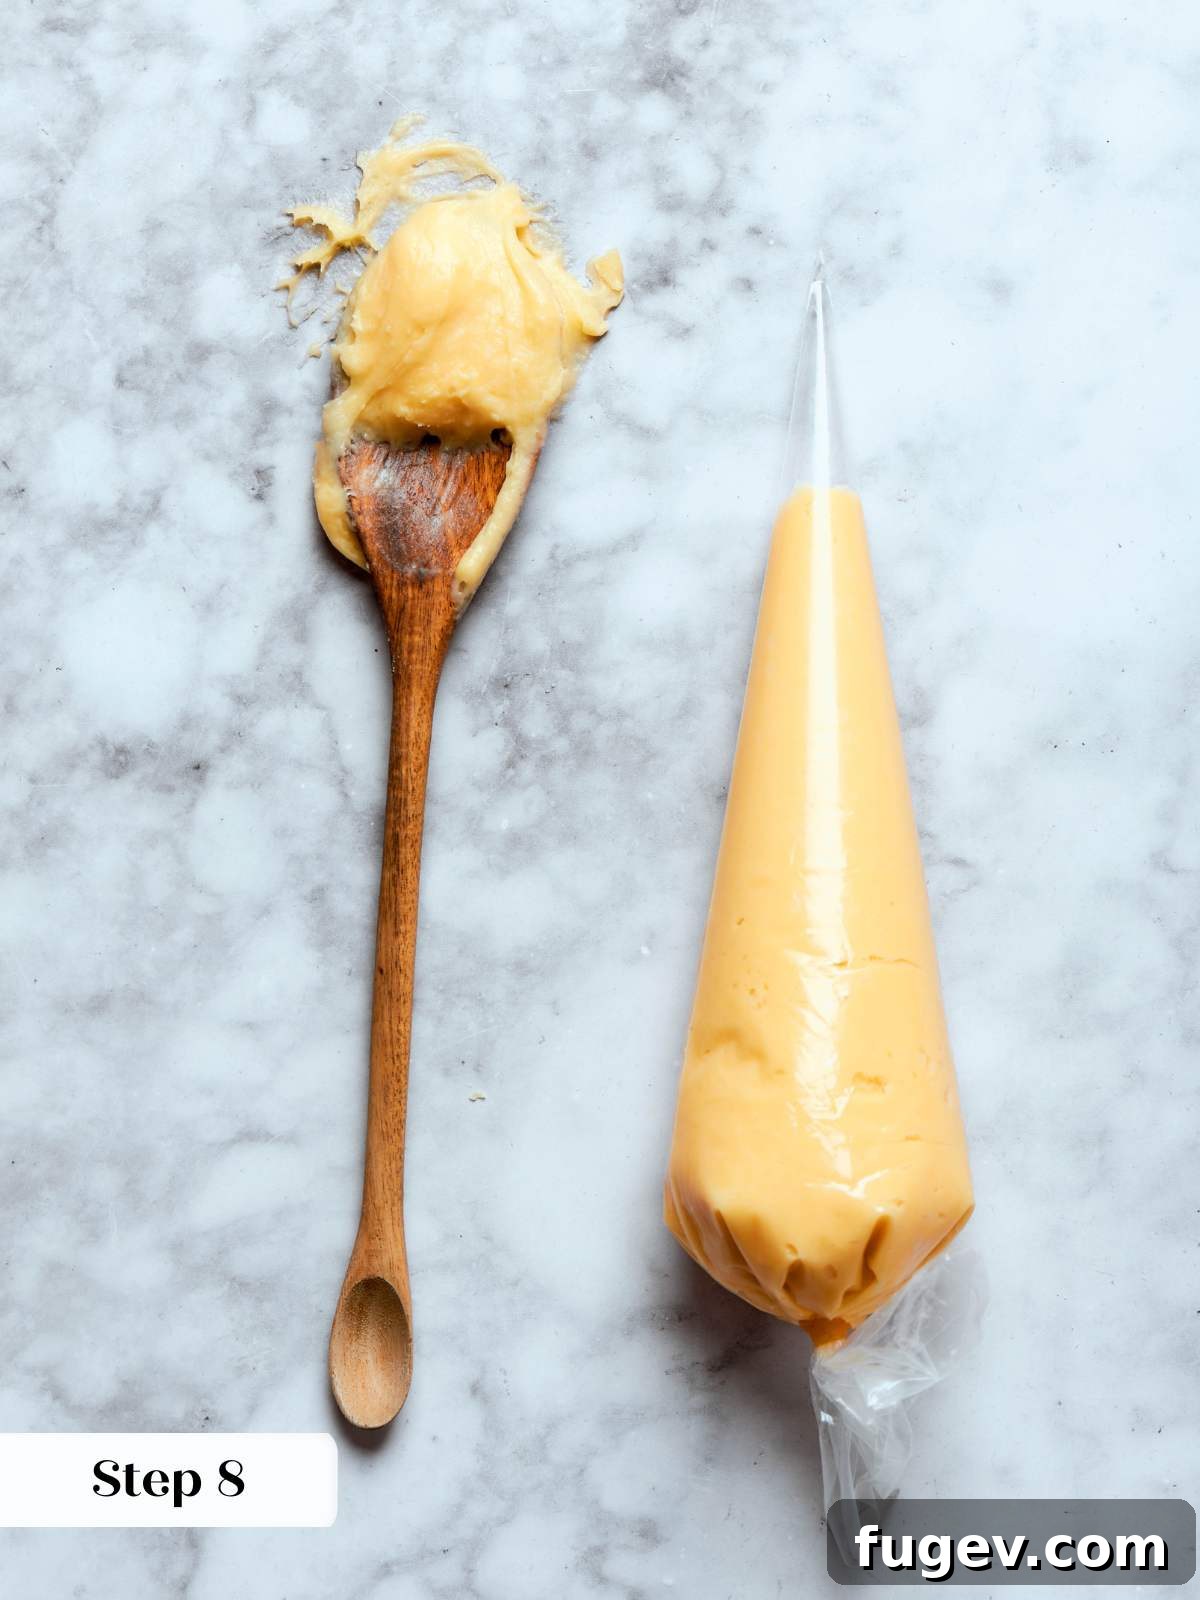
Step 8: Incorporate Mix-ins and Transfer to Piping Bags. If your specific choux recipe calls for any additional mix-ins, such as grated cheese for savory gougères, now is the time to add them. Beat briefly on low speed to ensure they are evenly distributed throughout the paste. Once mixed (or if no mix-ins are used), transfer the finished choux dough into piping bags. The paste can be piped immediately for baking, or you can refrigerate the filled piping bags for up to 3 days. It’s normal for the paste to develop slight spots or discoloration over time in the refrigerator, which does not affect its quality (photo 10).
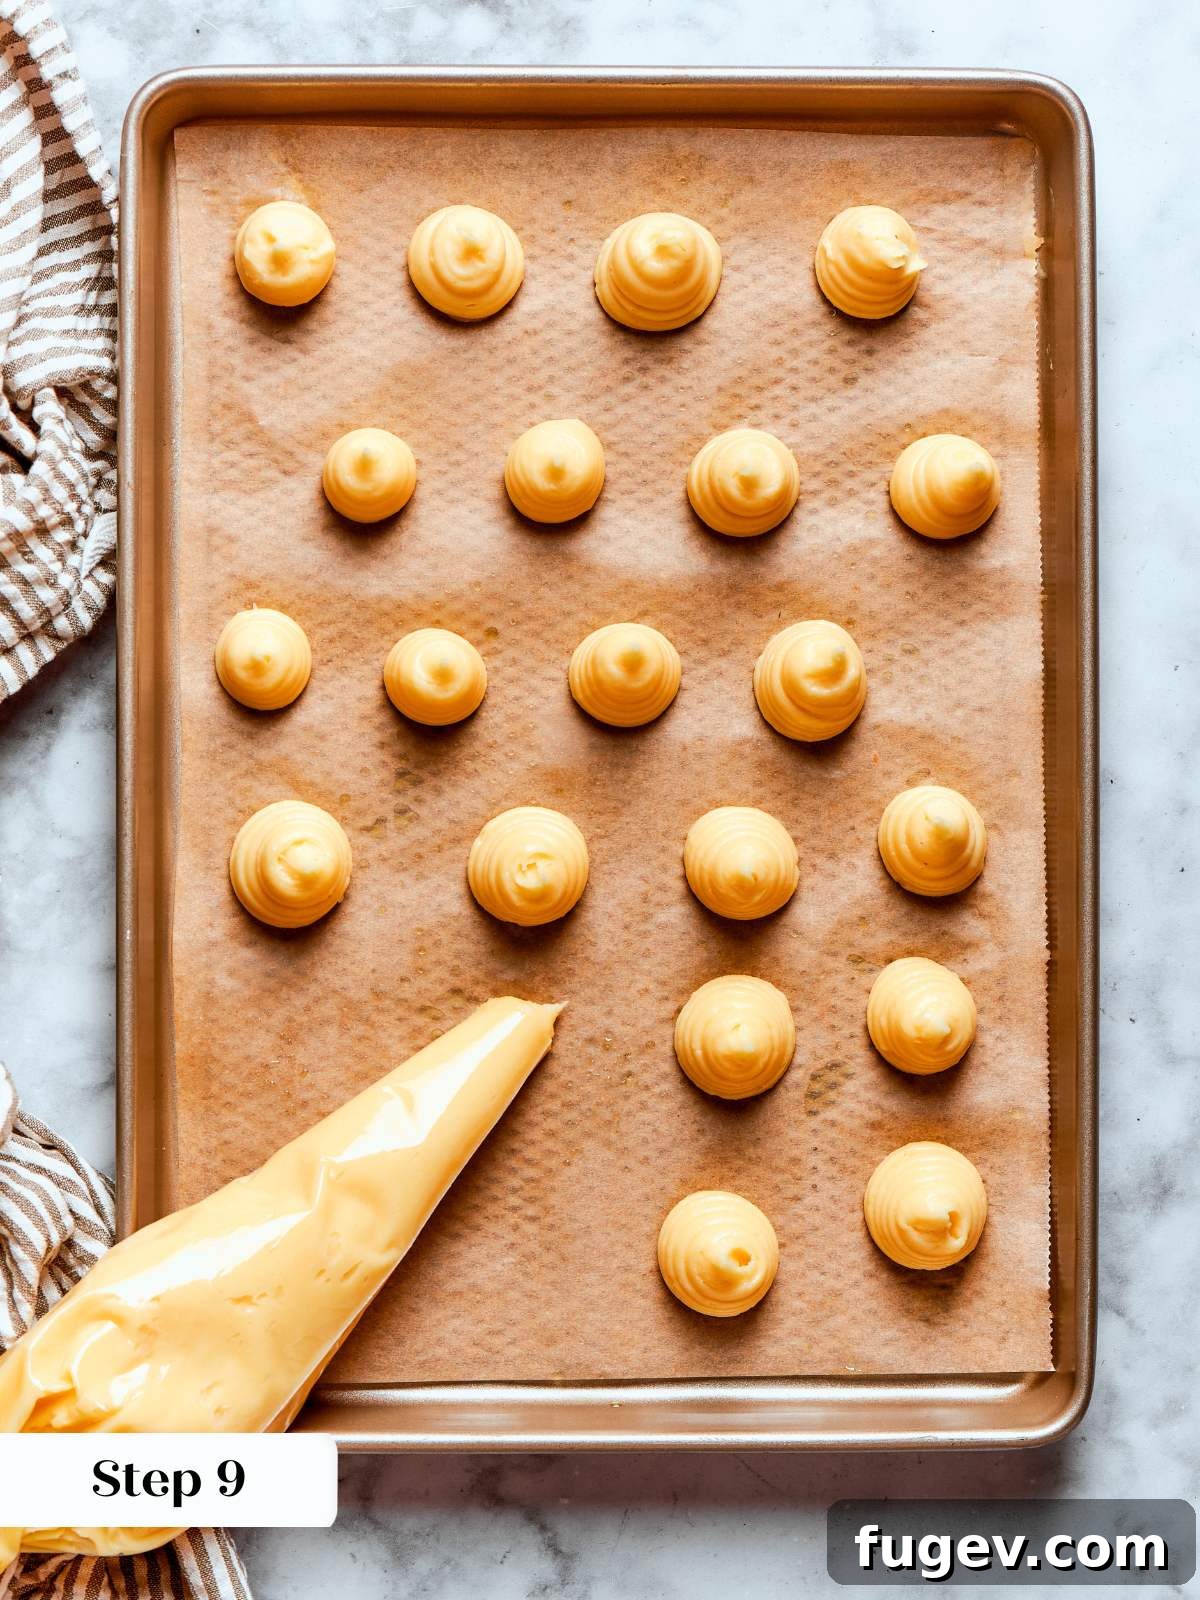
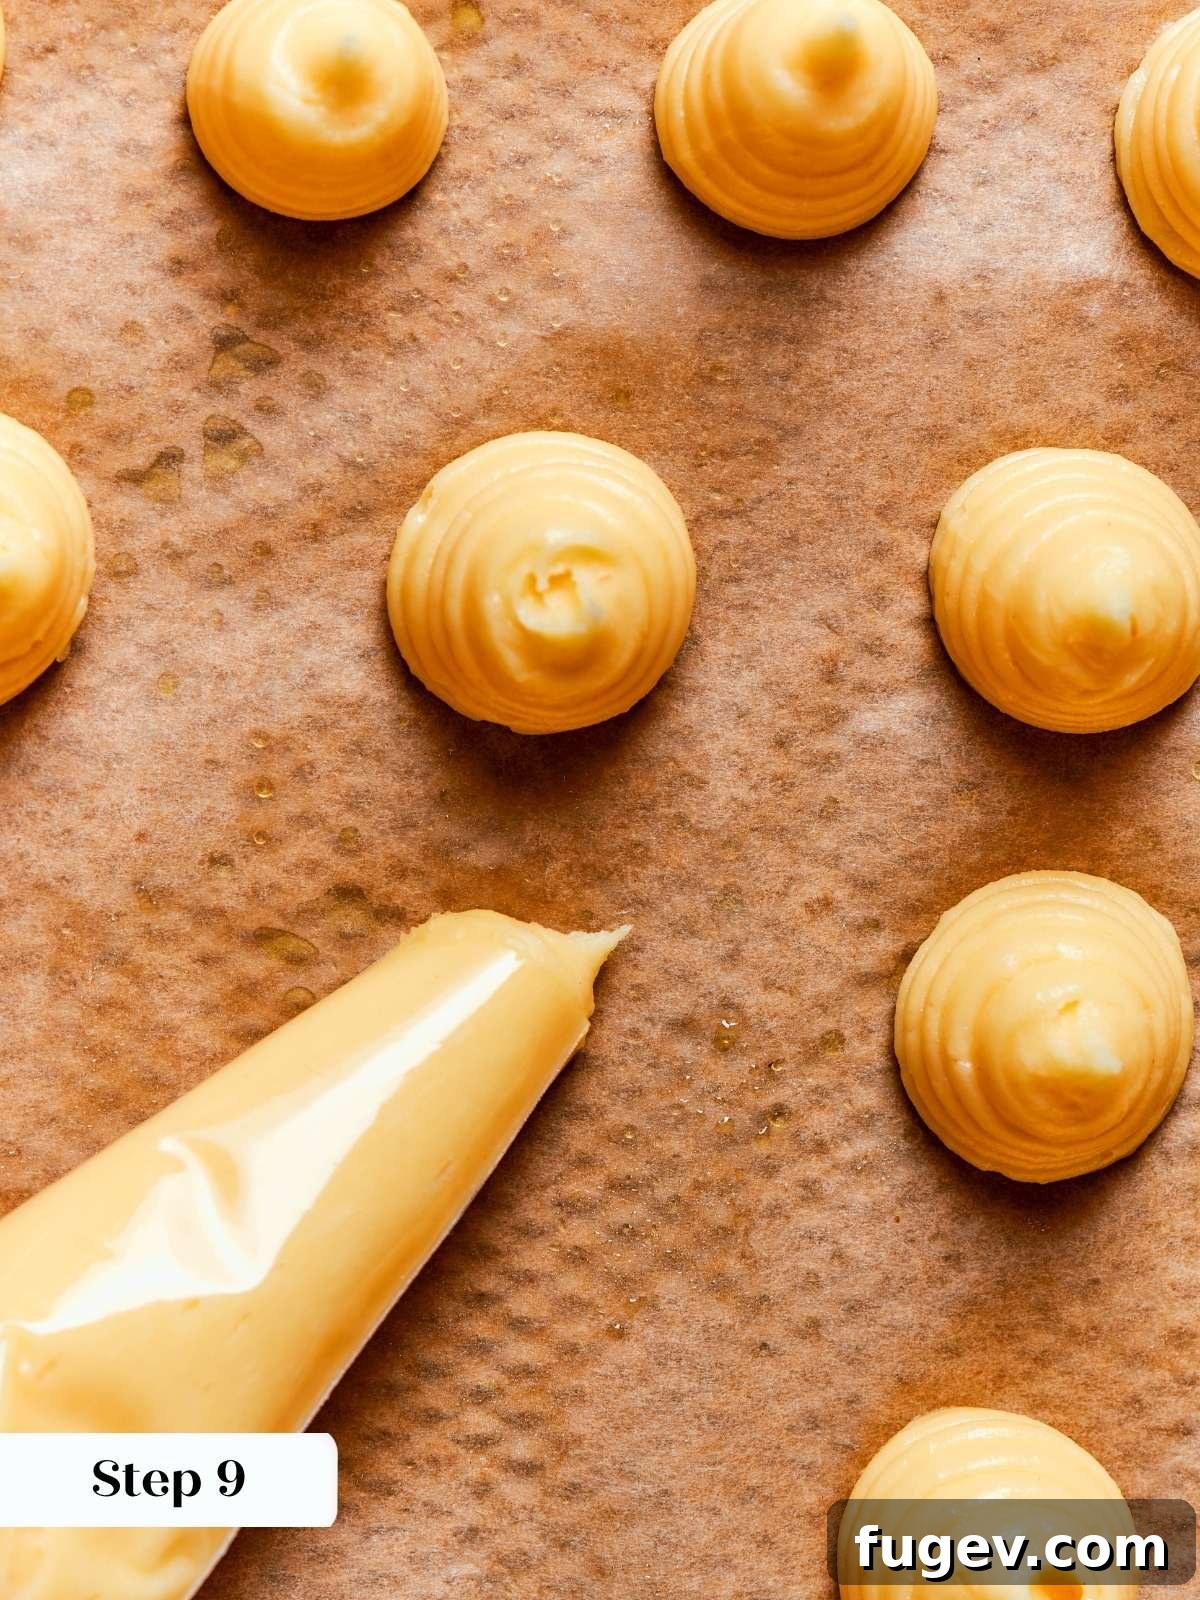
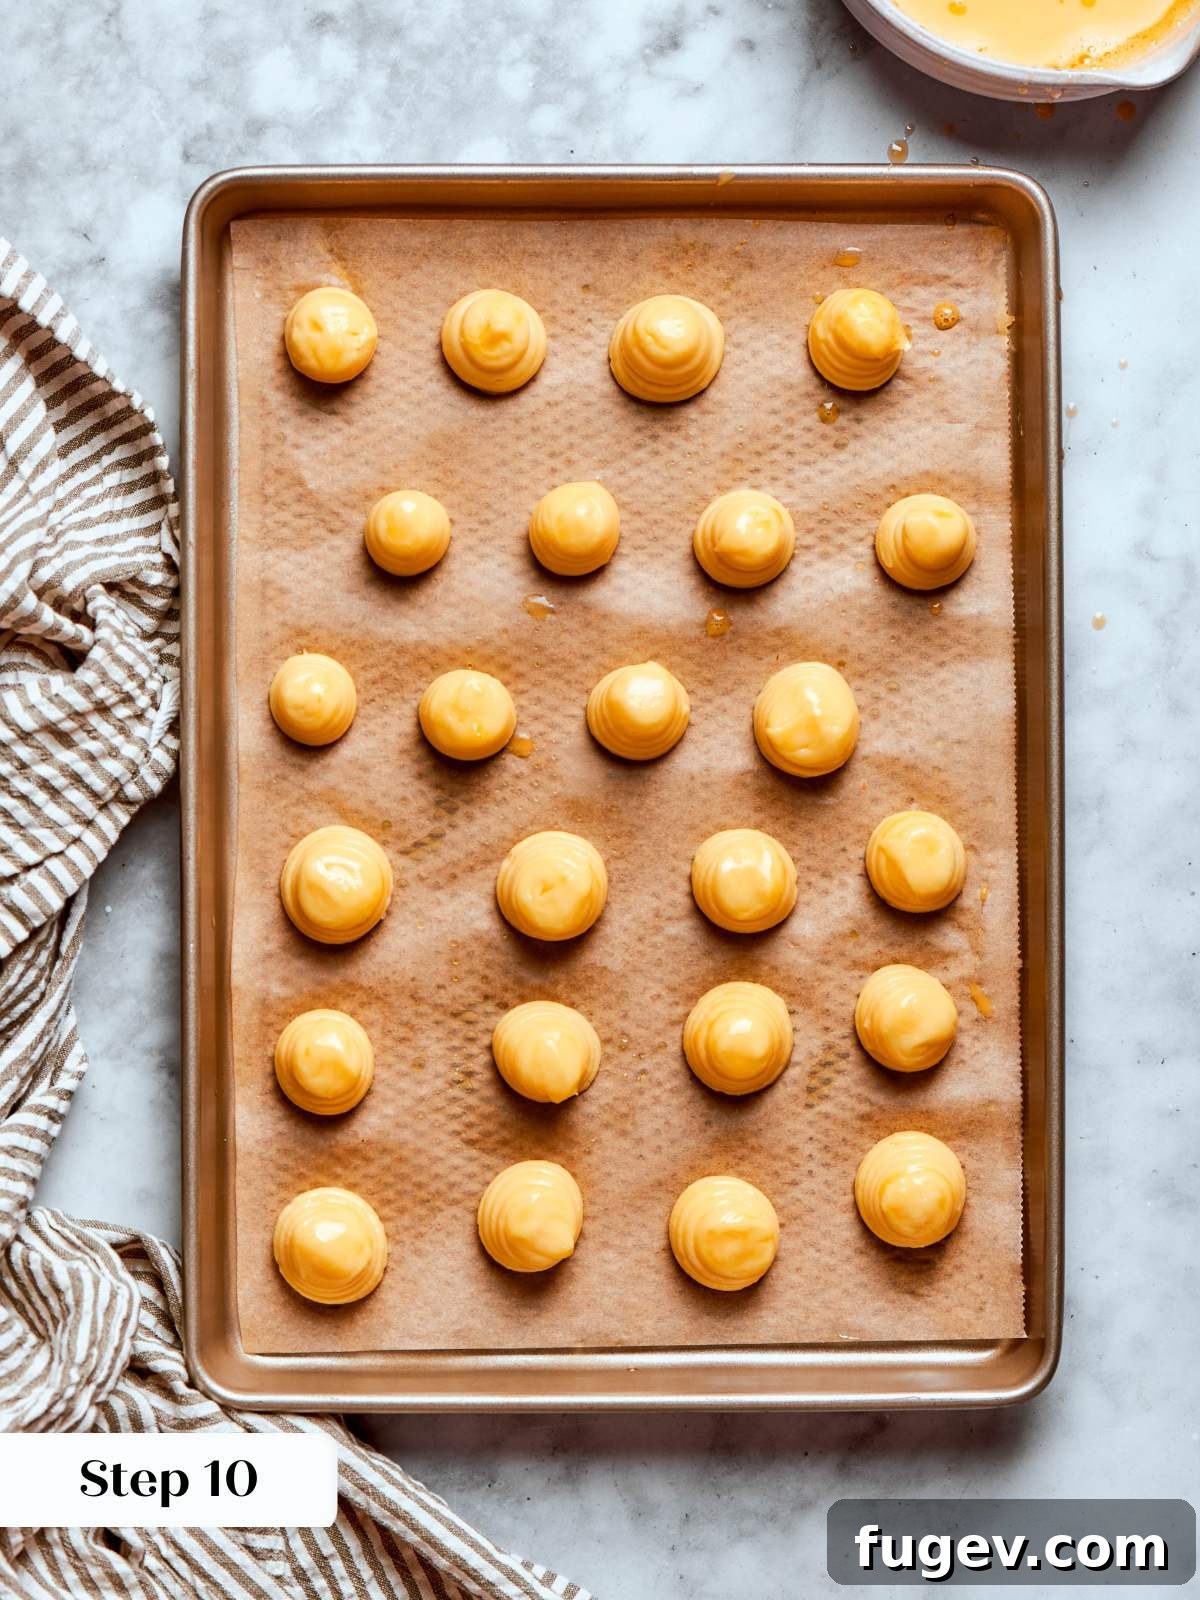
Step 9: Pipe Choux onto Prepared Baking Sheets. With your piping bag ready, pipe your desired choux shapes onto baking sheets lined with parchment paper or silicone mats. Aim for even, consistent pressure throughout the piping process to ensure uniform size and shape. For classic shapes like standard cream puffs or éclairs, a specific pastry tip is often unnecessary; simply cutting the end of the piping bag provides clean, consistent results without the added variable of tip size affecting your flow. Remember to space the individual pieces adequately, allowing ample room for them to expand significantly during baking without merging into one another (photos 11 & 12).
If you are working with choux dough that has been refrigerated, allow it to temper at room temperature for approximately one hour before piping. This helps relax the dough and makes it easier to pipe smoothly.
Step 10: Apply an Egg Wash to Piped Choux. Using a soft pastry brush, gently brush the tops of your piped choux pieces with a thin, even layer of beaten egg. If you happen to have any leftover beaten egg from making the choux dough itself, it is perfectly suitable for this egg wash. This is an excellent opportunity to carefully reshape any piped choux that might have developed slight points or unevenness. An unsightly browned point on a beautiful gougère or profiterole is a tell-tale sign of an inexperienced baker, so take the time to smooth these imperfections for a professional finish (photo 14).
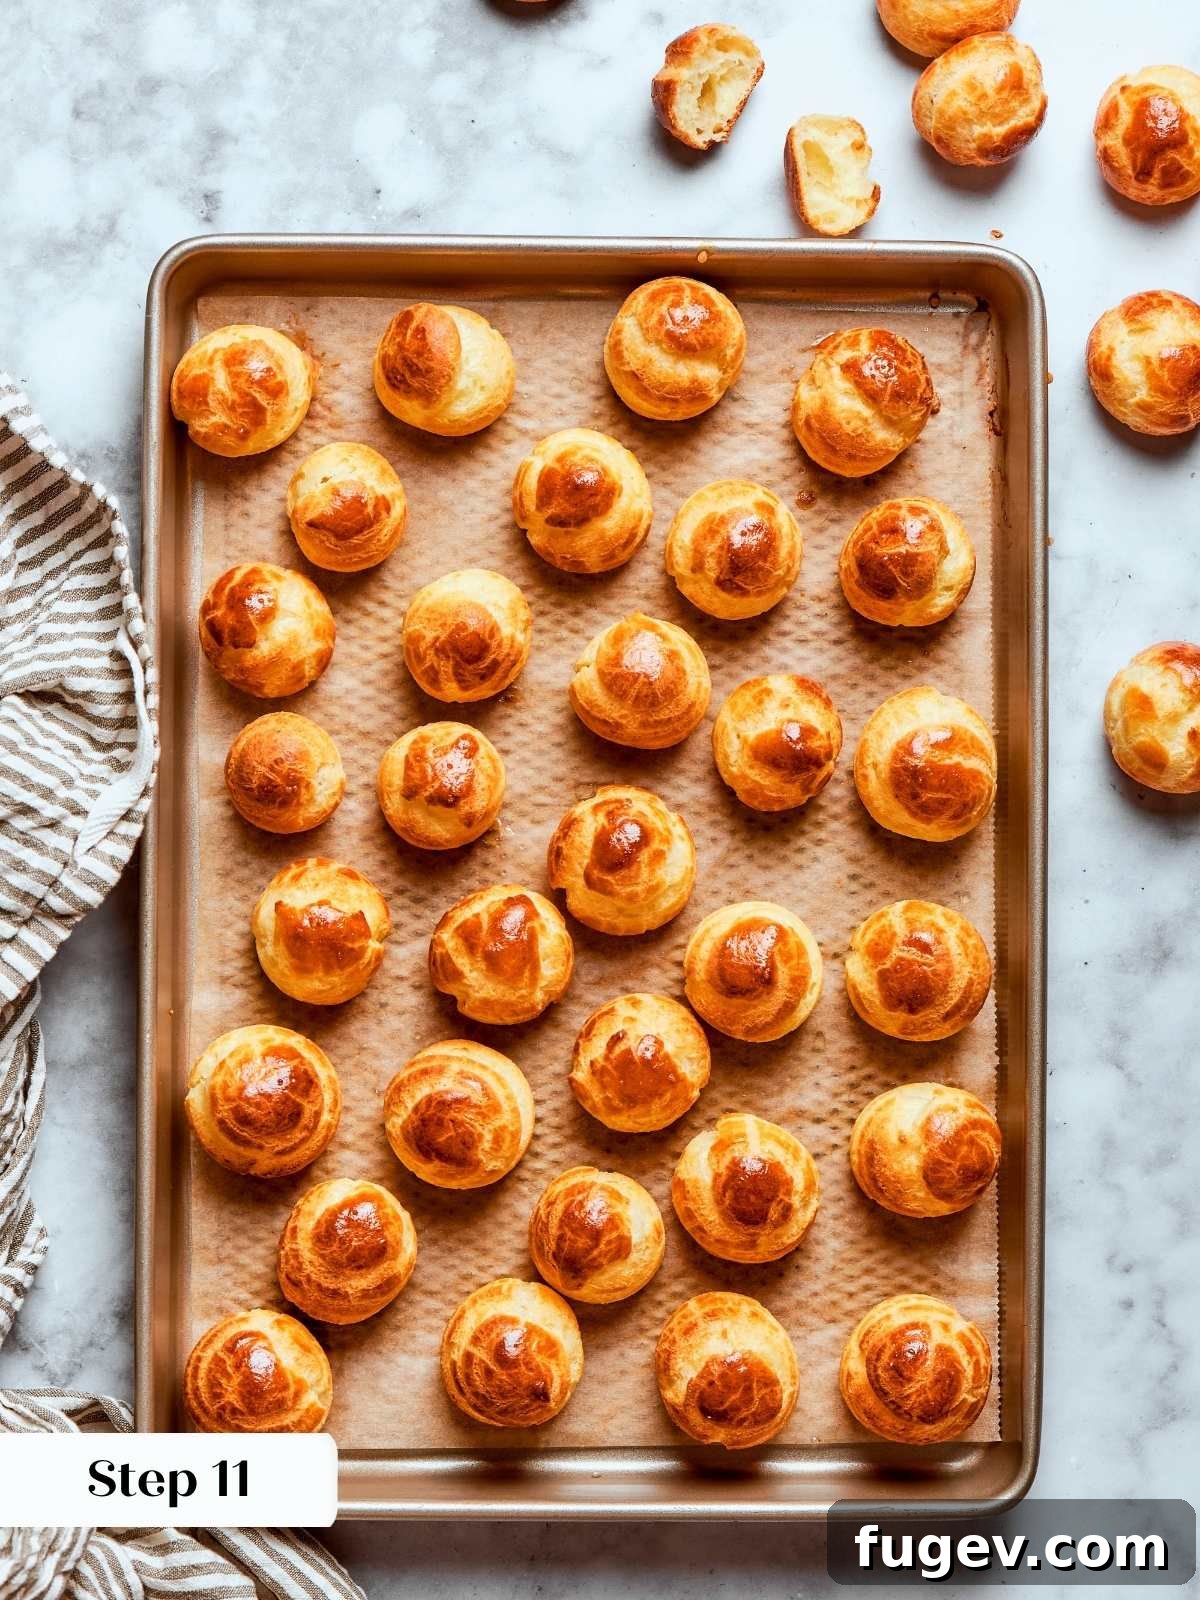
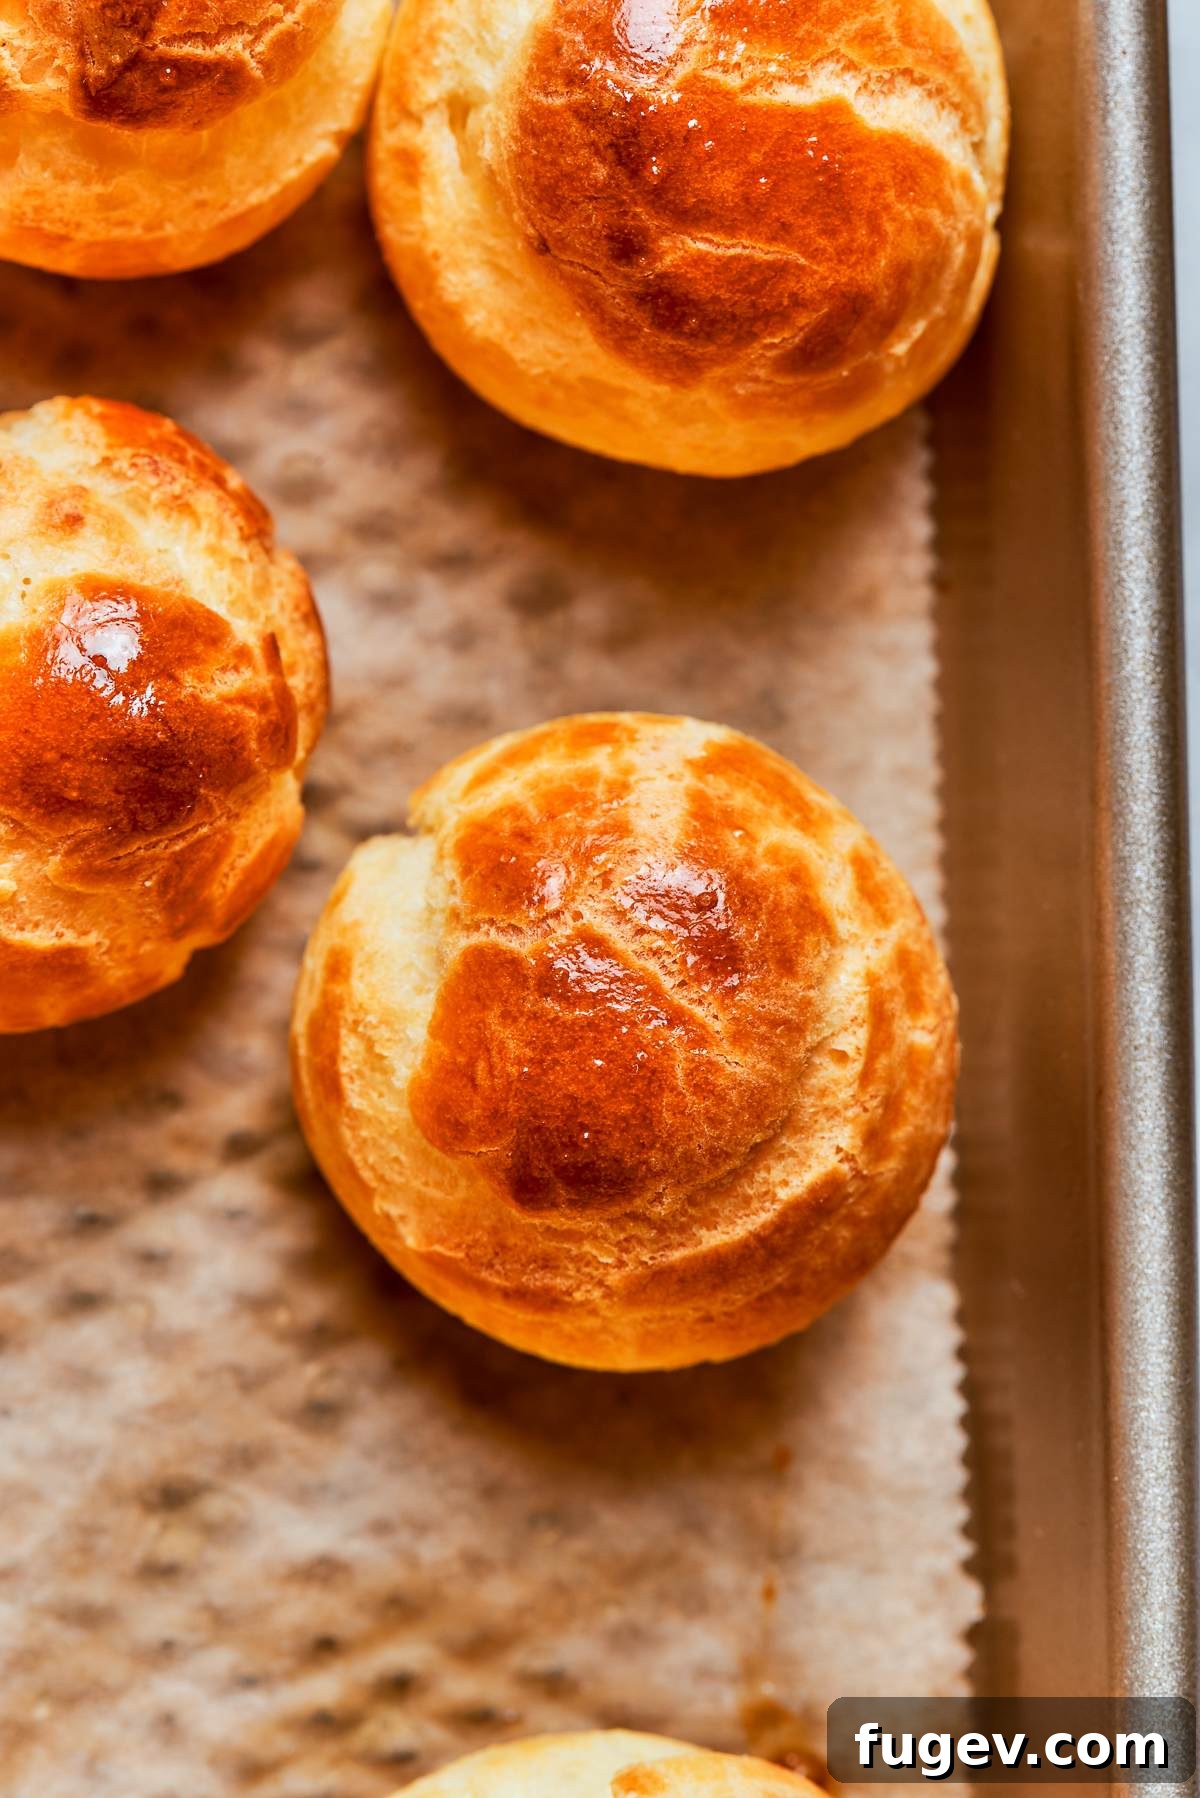
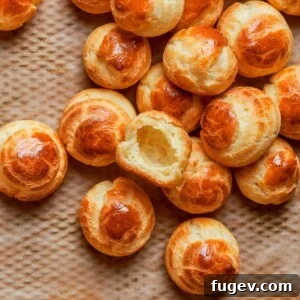
Step 11: Bake at Optimal Temperature. Preheat your oven to 350°F (175°C) if using convection, or 375°F (190°C) for a conventional oven. The precise baking time will vary depending on the specific size and shape of your piped choux. It is absolutely crucial that you do not open the oven door during the first two-thirds of the baking process. The choux shells require sustained, consistent heat and the trapped steam within the oven to rise fully and develop their characteristic hollow structure before their framework sets. Once the shells achieve a deep golden-brown color and feel notably hollow and rigid when gently tapped, they are completely baked. A shell that yields even slightly when pressed indicates it requires additional baking time. For the 4-centimeter gougères pictured, baking typically takes 20-23 minutes, with a recommended tray rotation after 10 minutes for even browning (photo 15).
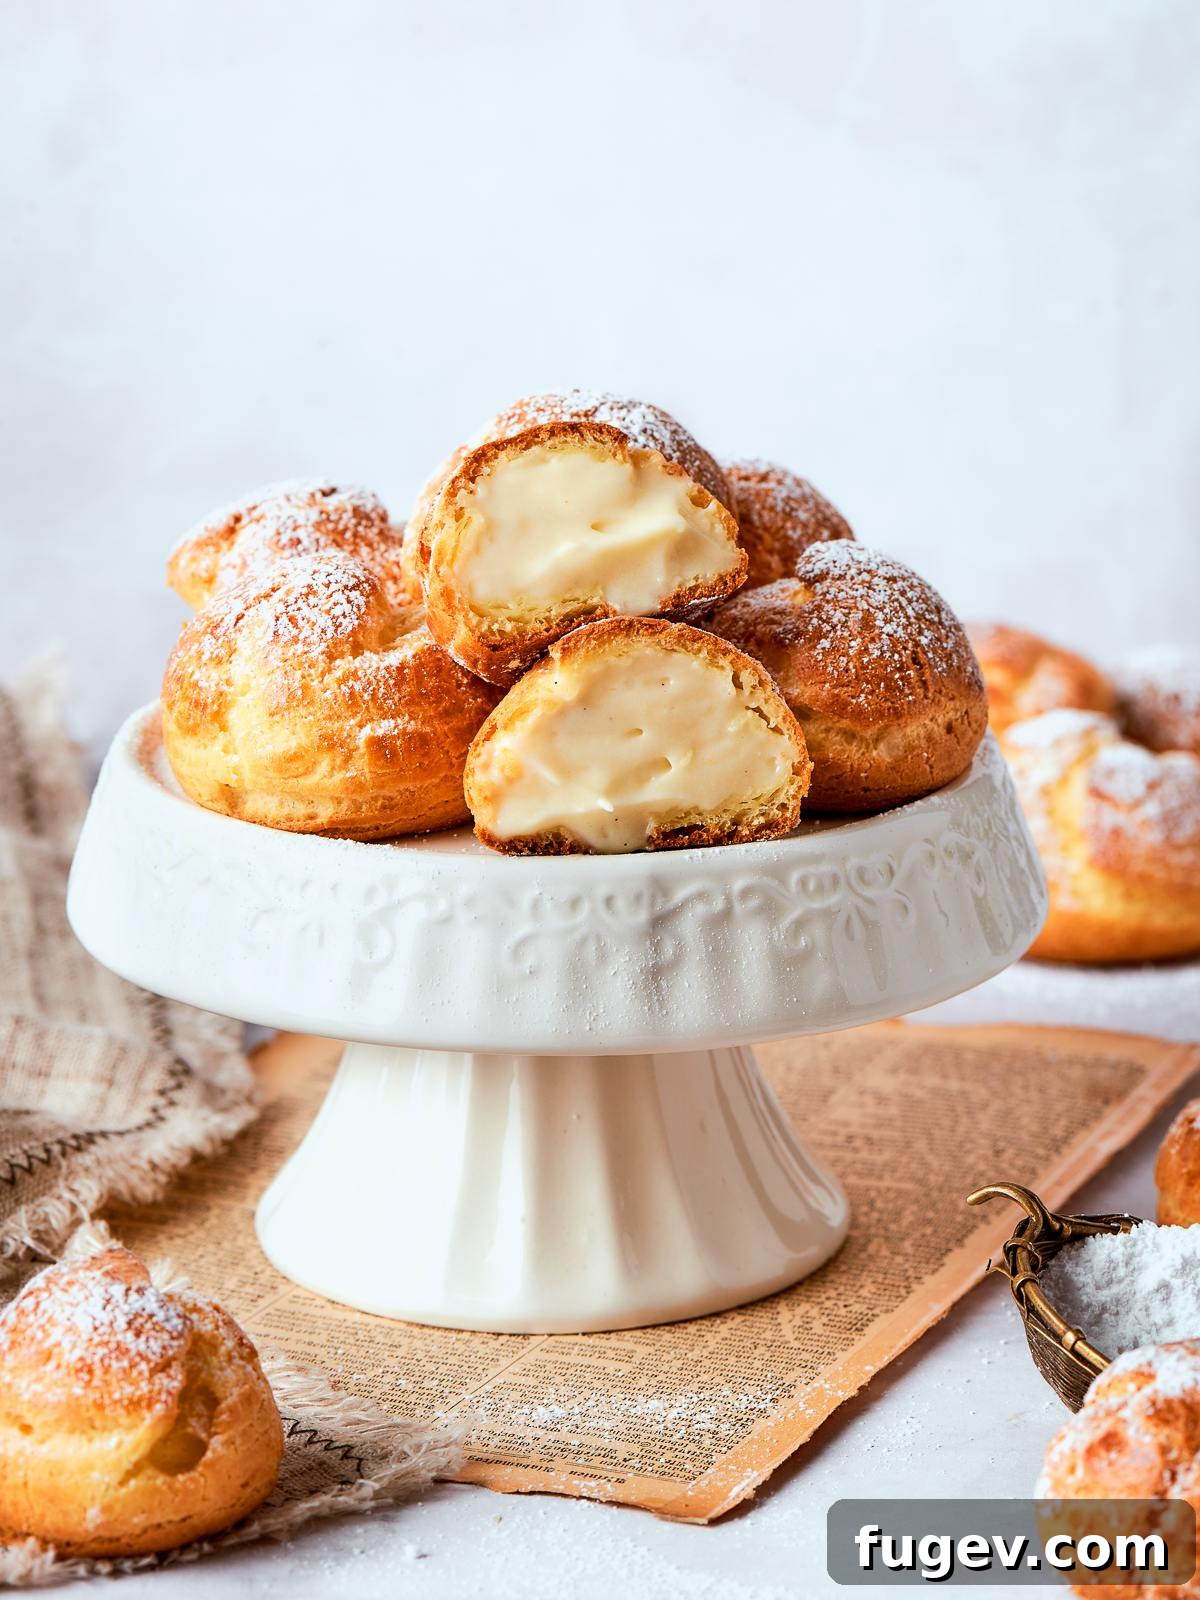
Step 12: Cool Completely Before Filling. Upon removing the baked choux shells from the oven, immediately transfer them to a wire rack to cool completely to room temperature. This cooling period is vital. Attempting to fill warm choux pastry will cause your filling to loosen and thin out prematurely, and the delicate shells will inevitably soften from the inside out, losing their desirable crispness. If you plan to store unfilled shells for future use, arrange them in a single layer and freeze until solid. To restore their crispness before filling, simply refresh them in a 350°F (175°C) oven for a few minutes. For savory items like gougères, this oven refresh is particularly important as it brings back the delightful snap and crunch that makes them so enjoyable (photo 16).
Chef Lindsey’s Essential Choux Pastry Tip
The single most frequent reason choux pastry unfortunately fails is the misconception that the stated egg count in any recipe is an absolute, fixed quantity. In reality, the number of eggs needed is merely a starting point, not a guarantee. The precise amount of water that evaporates during the crucial panade cooking phase directly determines how much egg the dough can truly absorb while maintaining its optimal consistency. Therefore, learning to “read the paste” – understanding its visual and tactile cues – is always a far more reliable indicator of readiness than simply adhering to a numerical egg count. Pâte à choux, much like mastering inverse puff pastry or any nuanced baking technique, profoundly rewards repetition. Each subsequent batch you create will inevitably teach you subtle insights and refine your instincts in ways the previous one could not, leading you towards true mastery.
Choux Pastry FAQs: Your Questions Answered by an Expert
Many home bakers have common questions about mastering choux pastry. Here are answers to some of the most frequently asked questions, designed to help you troubleshoot and achieve consistent success.
My preferred and most reliable method is the trench test: gently drag your finger through the choux paste in the mixing bowl and observe how the furrow closes. The sides of the trench should slowly and steadily converge, without immediately running back together. Concurrently, the paste should fall from a spatula in a thick, smooth ‘V’ shape, which is sometimes referred to as a ribbon or a hook. If the trench closes too quickly or the paste is runny, it’s too loose. If the sides of the trench do not move at all, the paste is too stiff and requires a small additional amount of egg. If you suspect it’s slightly too runny, chilling the choux for 2-3 hours before piping can sometimes help firm it up.
Several common culprits can lead to flat choux pastry. The most frequent issues include adding the eggs too rapidly, incorporating eggs while the panade is still excessively hot (which can partially scramble the egg proteins), or not cooking the panade for a sufficient duration to evaporate enough moisture from the dough. Any of these conditions can compromise the delicate structure of the paste before it even enters the oven. To achieve consistently light and hollow results, it’s paramount to meticulously monitor the dough’s temperature, add eggs gradually and with precision, and always perform a consistency test before you begin piping.
Absolutely, choux pastry is quite forgiving when it comes to making ahead, offering several options depending on your stage of preparation. You can store the raw choux paste directly in piping bags within the refrigerator for up to 3 days. Alternatively, you can pipe the individual choux shapes, apply an egg wash, wrap them tightly, and then refrigerate for up to 3 days or freeze for up to 1 month. When baking frozen piped choux, I find the best results are achieved by allowing them to temper in the refrigerator or at room temperature for about an hour before transferring them to the hot oven, rather than baking directly from frozen.
Unfilled, baked choux pastries can be stored effectively in the freezer for up to 1 month. For savory items like gougères, it’s highly recommended to refresh them in a 350°F (175°C) oven for a few minutes just before serving; this process revitalizes their crisp shell, restoring their fresh-baked texture. For sweet choux pastries, the best texture and flavor are enjoyed when they are filled and served on the same day they are baked or refreshed.
Yes, this choux pastry recipe is highly adaptable. A half batch performs reliably well, and I have routinely scaled this recipe up to four times the base formula with consistent success. When scaling beyond four times the original recipe, you will need to consider the increased physical effort required for stirring the panade, and ensure your pot and stand mixer have adequate capacity to handle the larger volume of dough. While scaling doesn’t alter the core technique, it does demand more physical exertion during the panade cooking stage.
Discover More Classic French Recipes to Master
Once you’ve conquered the art of choux pastry, a world of classic French baking awaits. Explore these other timeless recipes to further expand your culinary repertoire and delight your palate.
Pies and Tart Recipes
Puff Pastry Fruit Tart
Pies and Tart Recipes
Apple Tarte Tatin
Dessert Recipes
French Crullers
Custard Recipes
Pastry Cream Recipe (Crème Pâtissière)
If you tried this recipe and loved it, please consider leaving a 🌟 star rating and share your experience in the comments section below. Your feedback and stories truly make my day!
The Ultimate Pâte à Choux Recipe
Chef Lindsey
20 minutes
35 minutes
55 minutes
150
(4 cm) rounds
Leave a Comment
Print Recipe
Ingredients
- 1 cup unsalted butter (226g, cubed)
- 2 cups whole milk (520g)
- 2 cups all-purpose flour (248g)
- 1¼ teaspoons kosher salt
- 1 teaspoon granulated sugar
- 5 large eggs (plus 1 additional egg if needed)
Instructions
-
Measure and prepare all ingredients: Combine flour, salt, and sugar in one bowl. Crack eggs into a separate bowl. Cube butter if not already.
-
In a heavy-bottomed saucepot, combine cubed butter and milk. Heat on high until milk just boils and butter is fully melted simultaneously. Do not allow to boil further.
-
Remove from heat. Add the flour mixture all at once. Stir with a wooden spoon until incorporated and then vigorously to smooth out lumps, forming a cohesive dough.
-
Return to high heat, stirring constantly for about 2 minutes, until the dough (panade) pulls away from the pot sides and leaves a thin coating on the bottom. This indicates enough moisture has evaporated.
-
Transfer the panade to a stand mixer fitted with the paddle attachment. Beat on medium-high to release steam and cool the dough until no more steam rises.
-
Reduce speed to medium. Add eggs one at a time, beating fully after each. Continue until the paste is smooth, shiny, and passes a consistency test (e.g., the trench closes slowly, paste falls in a thick V-shape). If still too stiff after 5 eggs, beat an additional egg separately and add in small stages, testing after each.
-
Fold in any specific mix-ins (like cheese for gougères). Transfer the finished paste to piping bags. Use immediately or refrigerate.
-
Brush the tops of the piped pastry with beaten egg wash for a golden finish.
-
Bake piped choux at 350°F (convection) or 375°F (conventional) until deeply golden and hollow inside. For 4 cm gougères, this typically takes 20-23 minutes. Rotate trays after 10 minutes. Baking time varies by size and shape. Do not open the oven door during the first two-thirds of baking.
-
Cool completely on a wire rack before filling to maintain crispness and prevent sogginess.
Notes
Doneness Cue for Consistency: Use the trench test—when you drag a finger through the paste, the sides should close slowly and steadily, not immediately. This indicates perfect hydration.
Storage (Raw Paste): Unused choux paste can be stored in piping bags in the refrigerator for up to 3 days. Alternatively, piped choux shapes (with egg wash applied) can be wrapped tightly and refrigerated for up to 3 days or frozen for up to 1 month. If baking from frozen, allow piped choux to temper in the refrigerator or at room temperature for an hour before baking.
Storage (Baked Shells): Unfilled, baked choux pastries keep well in the freezer for up to 1 month. For savory items like gougères, refresh them in a 350°F (175°C) oven before serving to restore their crispness. For optimal texture, fill and serve sweet choux pastries on the same day.
Nutrition
Calories:
21
kcal
|
Carbohydrates:
1
g
|
Protein:
0.5
g
|
Fat:
1
g
|
Saturated Fat:
1
g
|
Polyunsaturated Fat:
0.1
g
|
Monounsaturated Fat:
0.4
g
|
Trans Fat:
0.1
g
|
Cholesterol:
9
mg
|
Sodium:
23
mg
|
Potassium:
9
mg
|
Fiber:
0.04
g
|
Sugar:
0.2
g
|
Vitamin A:
51
IU
|
Calcium:
5
mg
|
Iron:
0.1
mg
Dessert, Appetizer
French
21
Enjoyed this recipe? Share your thoughts below!
Before You Go: Continue Your French Pastry Adventure!
Congratulations on mastering the foundational technique of choux pastry! This versatile dough truly opens the door to one of the most rewarding categories in classical baking, allowing you to create everything from the iconic éclairs to delightful profiteroles and the impressive Paris-Brest. If you’re eager to continue your journey into the world of exquisite desserts and pastries, I invite you to browse more of our curated Dessert Recipes for your next culinary adventure. Happy baking!