

Discover the ultimate professional recipe for the most flavorful raspberry white chocolate scones you’ll ever bake. These remarkably easy scones are incredibly moist and tender, boasting a delicate, crumbly texture that melts in your mouth. Perfect for a weekend brunch, an afternoon tea, or a special breakfast treat, this recipe will guide you to creating bakery-quality scones right in your own kitchen. The delightful contrast between tart, juicy raspberries and sweet, creamy white chocolate makes every bite an unforgettable experience.


A Quick Look At The Recipe
This is a brief overview of the recipe. For complete details, jump to the full recipe card.
Jump to Recipe
Prep Time
20 minutes
Cook Time
20 minutes
Total Time
40 minutes
Servings
12 scones
Difficulty
Intermediate
Calories *
290 kcal per serving
Technique
A tender crumb is achieved by fully cutting cold butter into the flour, then gently folding in frozen raspberries and white chocolate.
Flavor Profile
A perfect balance of sweet, creamy white chocolate, bright, tart raspberries, and a rich, buttery scone base.
* Estimated based on nutrition panel
I was nervous about baking my scones right away but they turned out amazing. The white chocolate chips caramelized perfectly and the raspberries didn’t make the scone gummy! The scones stayed moist and tender a wonderful and flavorful recipe. ⭐⭐⭐⭐⭐
Lauren
Why This Is The Best Scone Recipe
This isn’t just another scone recipe; it’s a carefully developed method designed for perfect results every time. Here’s the science and technique that make these scones stand out:
- A Tender Crumb Through Proper Butter Technique: The secret to a truly tender scone, as opposed to a dry, tough one, lies in how you incorporate the butter. In this recipe, we fully cut cold butter into the flour until the mixture resembles wet sand. This process coats the flour particles with fat, which acts as a barrier, inhibiting the development of long, chewy gluten strands. The result is an exceptionally moist, dense, and tender interior, free from any hint of toughness.
- Pre-Mixing Wet Ingredients for Minimal Handling: Overworking scone dough is the most common pitfall, leading to dense, heavy results. We prevent this by combining all the wet ingredients—eggs, heavy cream, and vanilla—in a separate bowl before adding them to the dry mixture. This ensures they are evenly blended and can be incorporated into the flour quickly and with minimal mixing. Less manipulation means less gluten development, preserving that coveted tender texture, a technique we also use in our popular carrot cake scones.
- The Power of Frozen Raspberries: Using frozen raspberries is a non-negotiable professional tip for success. Fresh raspberries are delicate and tend to break apart, releasing their juices and creating a soggy, purple-streaked dough. Frozen berries, however, remain firm and intact during mixing and baking. They release their moisture slowly, creating distinct, beautiful pockets of tart, jammy fruit within the scone. This method ensures the dough maintains its structure and you get a clean, beautiful result with every bite. If you adore this flavor pairing, our white chocolate raspberry cookies deliver the same fantastic taste in a chewy cookie form.
Table of Contents
- Why This Is The Best Scone Recipe
- Ingredients You’ll Need & Potential Substitutions
- Creative Variations to Try
- Essential Professional Tips for Success
- How to Make Raspberry White Chocolate Scones: Step-by-Step
- Chef Lindsey’s Key Recipe Tip
- Frequently Asked Questions (FAQs)
- Raspberry White Chocolate Scones Recipe Card
These raspberry white chocolate scones are built upon the same reliable foundation as my fan-favorite blueberry scones, but they’ve been specifically adapted to celebrate the magical pairing of sweet white chocolate and tangy raspberry. Through extensive testing, I discovered that baking these scones immediately after shaping yields the absolute best interior texture and prevents the white chocolate from burning, allowing it to caramelize to a beautiful golden hue.
The raspberry and white chocolate combination is a classic for a reason: the bright, sharp tartness of the fruit perfectly cuts through the rich sweetness of the chocolate, creating a balanced and utterly addictive flavor profile. If you’re a fan of this timeless duo, you must also try this decadent white chocolate mousse and these festive white chocolate cranberry cookies after you’ve mastered these scones!
Ingredients You’ll Need & Potential Substitutions
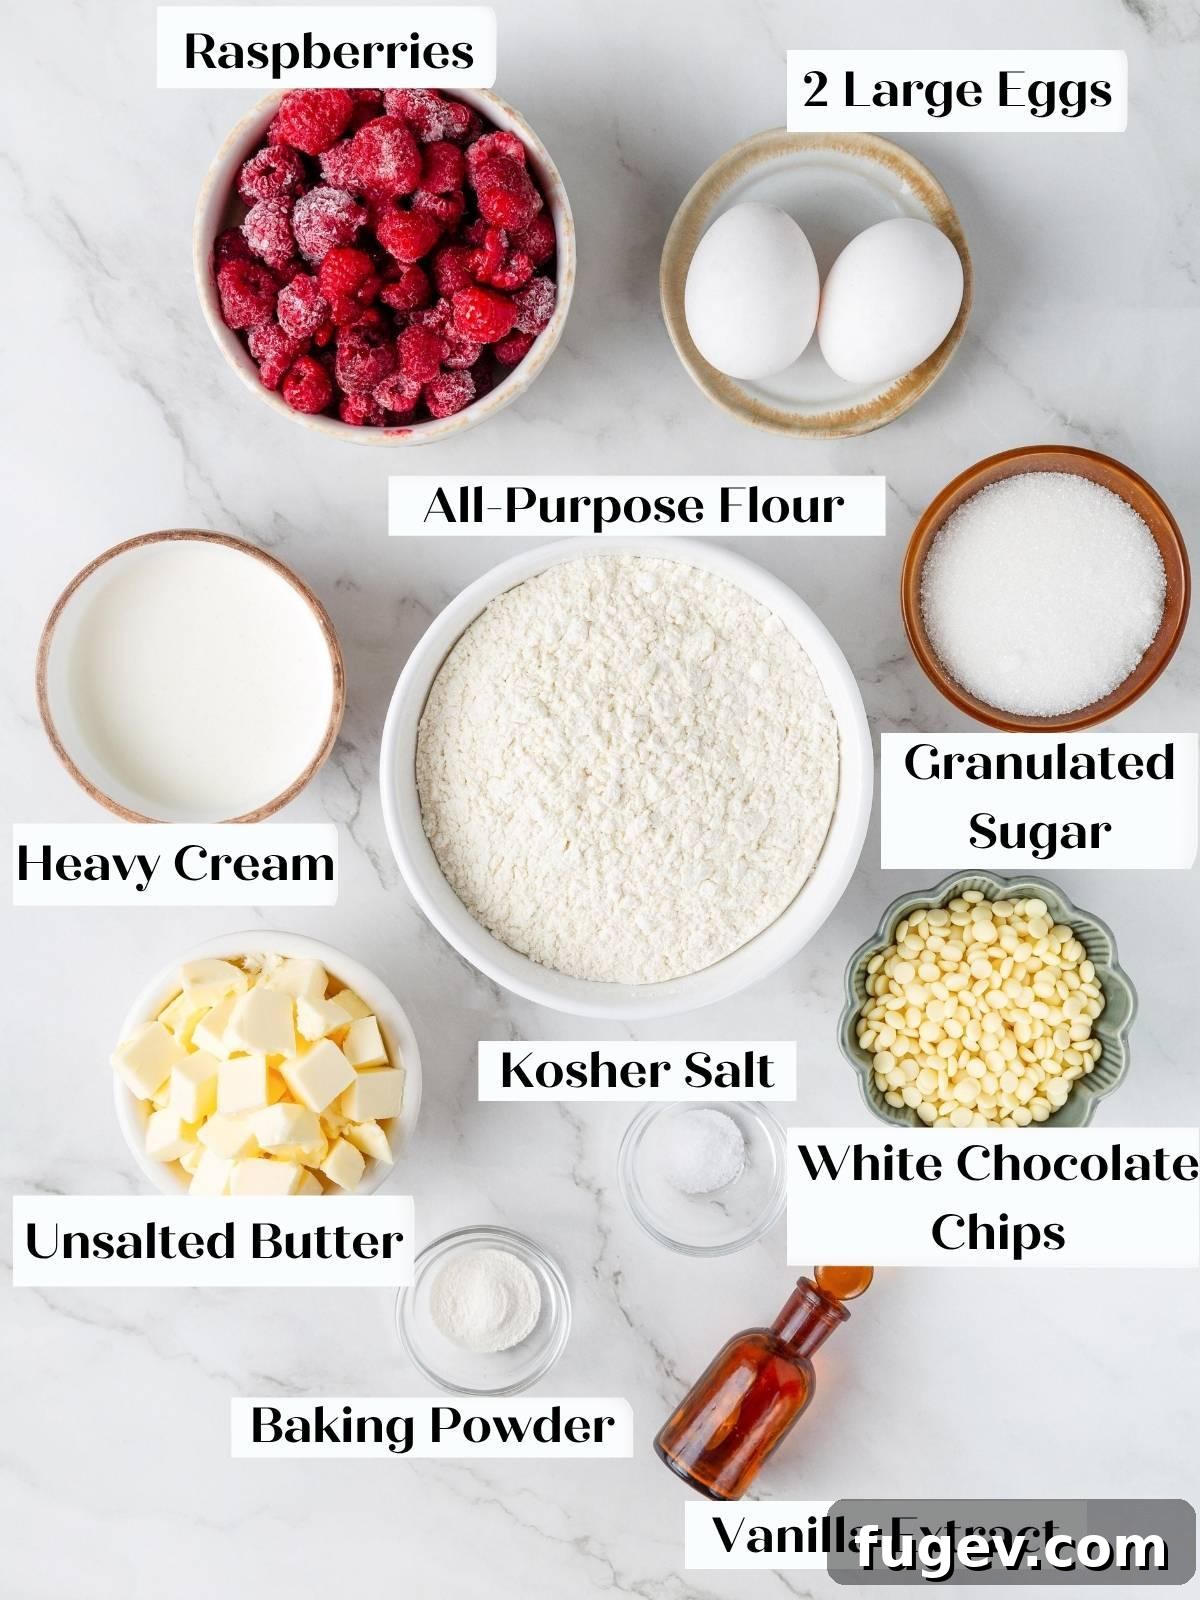
Using high-quality ingredients is the first step to a delicious result. Here’s a breakdown of what you’ll need:
- All-Purpose Flour: This provides the main structure for the scones. Ensure it is fresh for the best results.
- Granulated Sugar: Adds sweetness and helps create a tender texture and golden-brown color during baking.
- Kosher Salt: A small amount enhances all the other flavors, balancing the sweetness and tartness.
- Baking Powder: This is the leavening agent that gives the scones their lift and light, open crumb. Always check the expiration date; old baking powder will result in flat, dense scones.
- Unsalted Butter: The most crucial ingredient. It must be cold and cubed. The cold fat creates a tender, short crumb. If you only have salted butter, you can use it, but reduce the added kosher salt by half.
- Vanilla Extract: Adds a layer of warm, aromatic flavor that complements both the white chocolate and raspberry.
- Large Eggs: Eggs add richness, moisture, and structure. They help bind the ingredients and contribute to the golden color.
- Heavy Cream: The high fat content in heavy cream is essential for a rich, moist, and tender scone. It hydrates the flour more effectively than milk, resulting in a superior texture.
- Frozen Raspberries: Using frozen raspberries is the key to preventing a soggy dough. They hold their shape during mixing and create beautiful pockets of fruit. Do not thaw them before use. Gently break apart any large frozen clumps.
- White Chocolate Chips: These add pockets of creamy sweetness. Chips are designed to hold their shape well during baking. You can also use a chopped high-quality white chocolate bar for a more marbled effect. For another great use of white chocolate, try my white chocolate macadamia cookies!
- White Sparkling Sugar (or Turbinado Sugar): This is for the finishing touch. Sprinkling coarse sugar on top before baking creates a delightful crunchy, shimmery crust that contrasts beautifully with the soft interior.
See the recipe card at the bottom of the post for full ingredient quantities and instructions.
Creative Variations to Try
While this recipe is perfect as is, it also serves as a wonderful base for your creativity. Here are a few variations to explore:
- Lemon Raspberry White Chocolate Scones: Add a bright, citrusy note by incorporating the zest of one large lemon into the dry ingredients. The lemon will enhance the tartness of the raspberries beautifully. For an even more intense lemon flavor, use the dough from my lemon scones and fold in the white chocolate and raspberries.
- Add a Simple Glaze: Elevate your scones with a delicious glaze. You can use the tangy cream cheese glaze from these cinnamon scones, or a classic donut glaze. For a fruity touch, whisk together powdered sugar with a bit of raspberry jam and a splash of milk.
- Experiment with Different Fruits: Swap the frozen raspberries for other frozen berries. Blueberries, chopped strawberries, or blackberries would all be delicious. You could even add white chocolate to these apple scones for a cozy fall treat.
- Change the Chocolate: Not a fan of white chocolate? Feel free to substitute it with semi-sweet, milk, or dark chocolate chips. The combination of dark chocolate and raspberry is particularly sophisticated and delicious, as showcased in my chocolate raspberry cake!

Essential Professional Tips for Success
Follow these key tips from a professional kitchen to guarantee your scones turn out perfectly every single time:
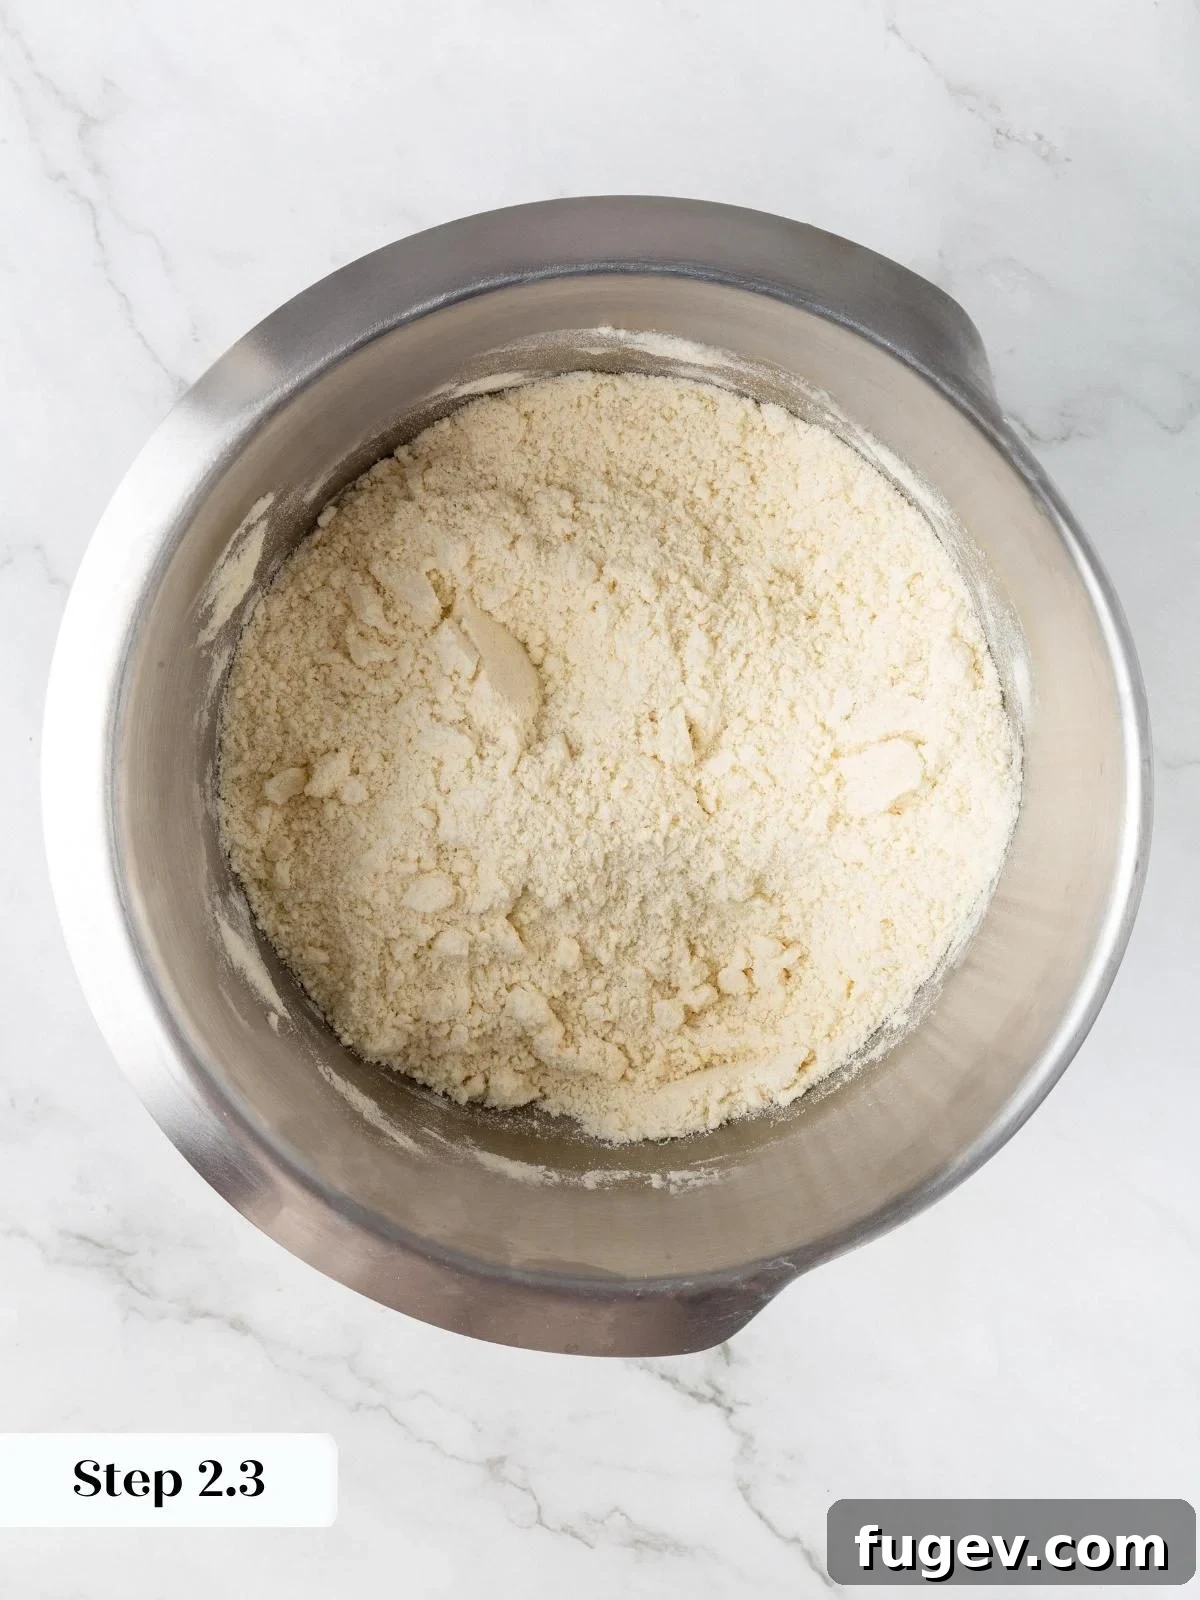
- Aim for a Sandy Texture, Not Flaky Layers: Unlike biscuits where visible pockets of butter create flaky layers, for these scones you want to cut the butter in completely. The goal is to coat the flour with fat to inhibit gluten. Your final mixture should resemble coarse, damp sand before you add any liquid. This is the foundation of a tender crumb.
- Bake Immediately—Don’t Refrigerate the Dough: This is crucial. Resting this specific dough in the refrigerator allows the frozen raspberries to thaw and release moisture, which will be absorbed by the surrounding flour, resulting in a gummy, spongy interior. For the best texture, shape, cut, and bake the scones in one continuous process.
- Keep Everything Cold: Temperature is paramount. Use cold butter, cold eggs, and cold cream. Your frozen raspberries should go directly from the freezer into the dough. Work quickly to prevent your hands from warming the dough, which could melt the butter and thaw the berries.
- Trust the Touch Test for Doneness: Don’t rely solely on the timer, as all ovens vary. The scones are done when the edges appear dry and golden. Most importantly, the centers should feel firm and spring back when you press them lightly with your finger. If your finger leaves an indent, they need a few more minutes in the oven. Start checking at the 18-minute mark to prevent overbaking.
How to Make Raspberry White Chocolate Scones: Step-by-Step
The key to these scones is a precise method. Follow these steps for a flawless batch.
Step 1: Preheat Oven and Prepare Pan. Preheat your oven to 325°F for convection or 350°F for a conventional oven. Line a large baking sheet with parchment paper to prevent sticking.
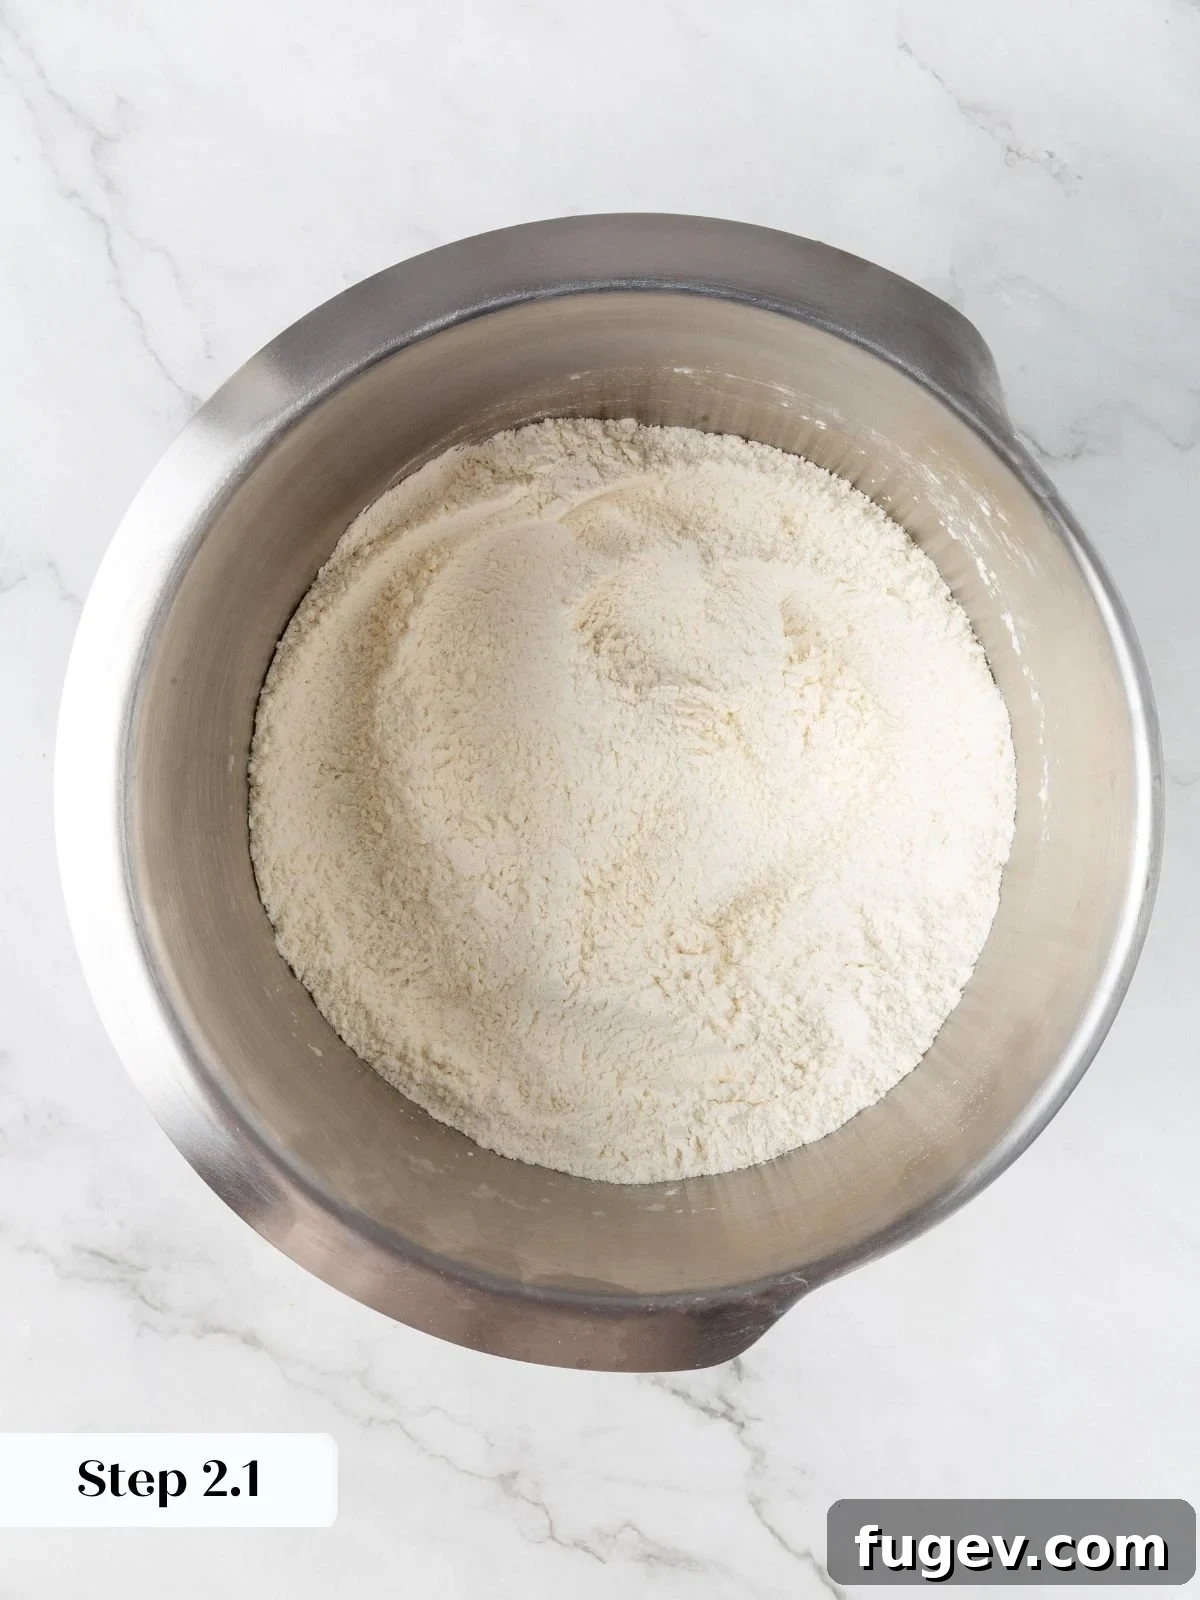
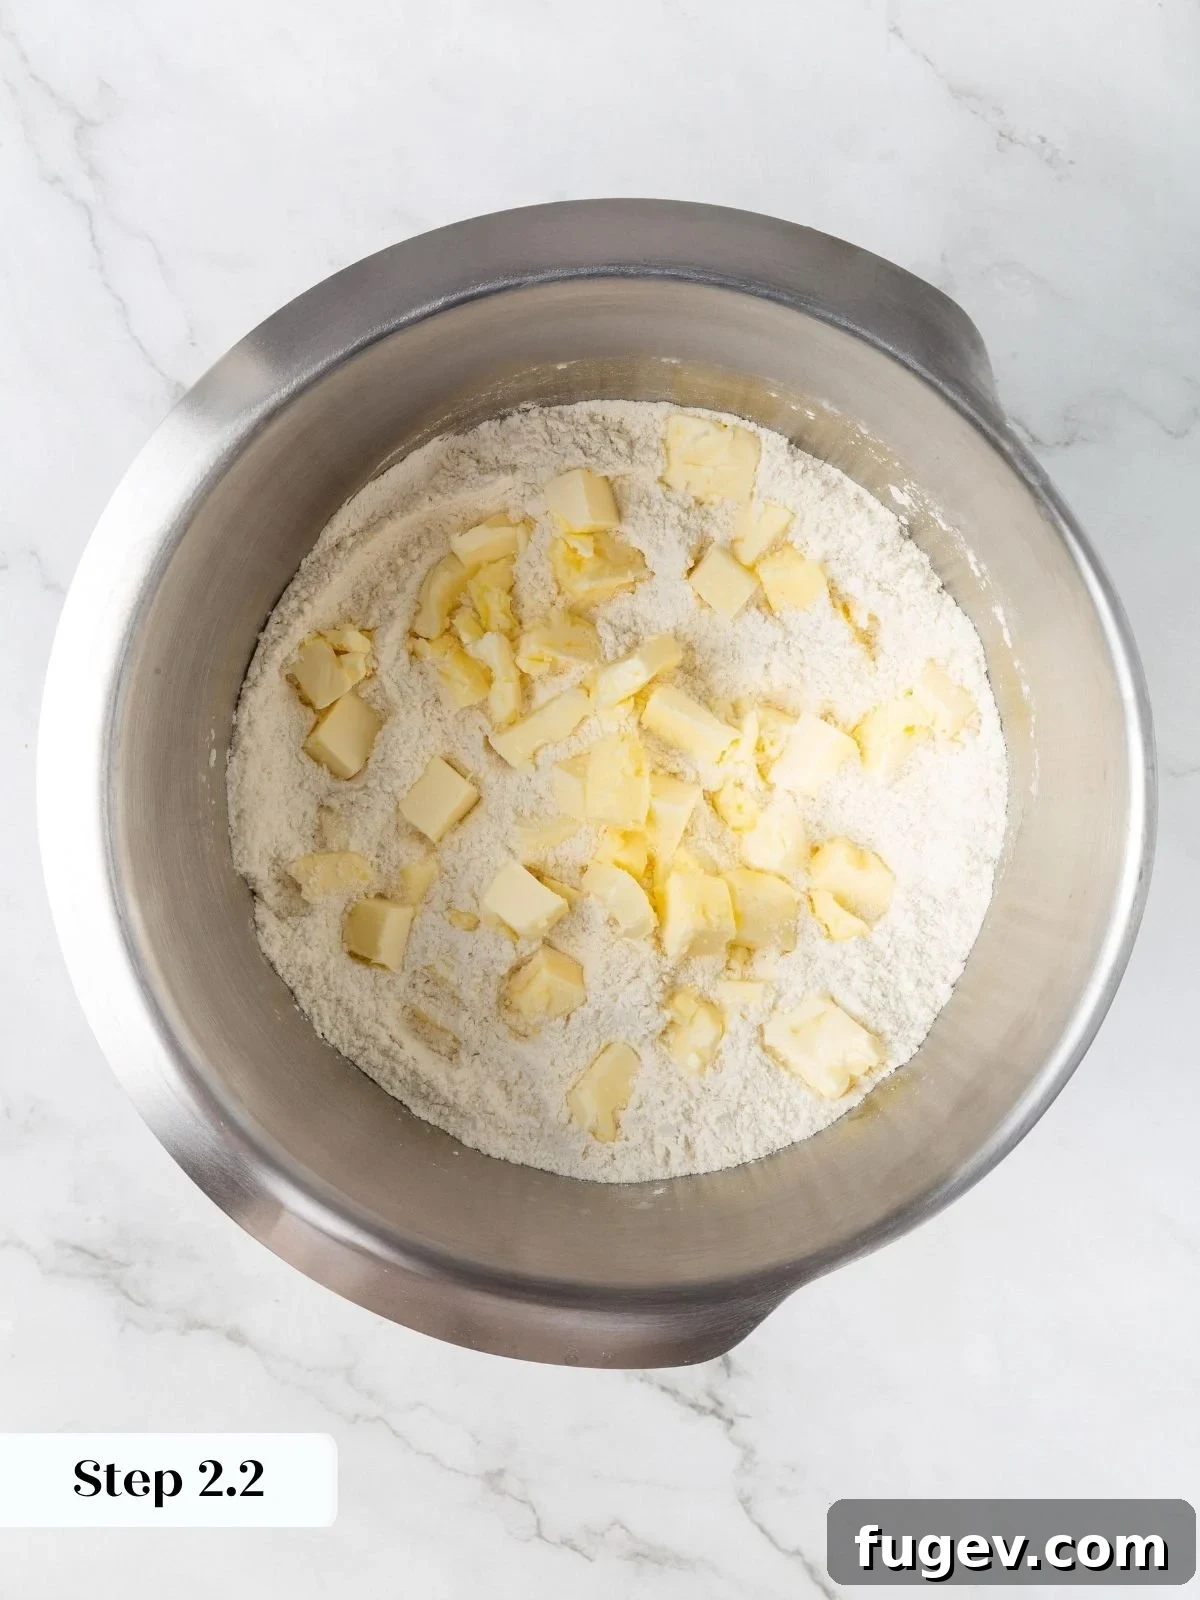
Step 2: Combine Dry Ingredients and Cut in Butter. In the bowl of a stand mixer fitted with the paddle attachment, combine the all-purpose flour, granulated sugar, kosher salt, and baking powder. Mix on low speed for a few seconds to distribute everything evenly. Add the cold, cubed butter and continue mixing on low until no visible chunks of butter remain and the texture resembles fine, wet sand. (See photos 1, 2 & 3 below).
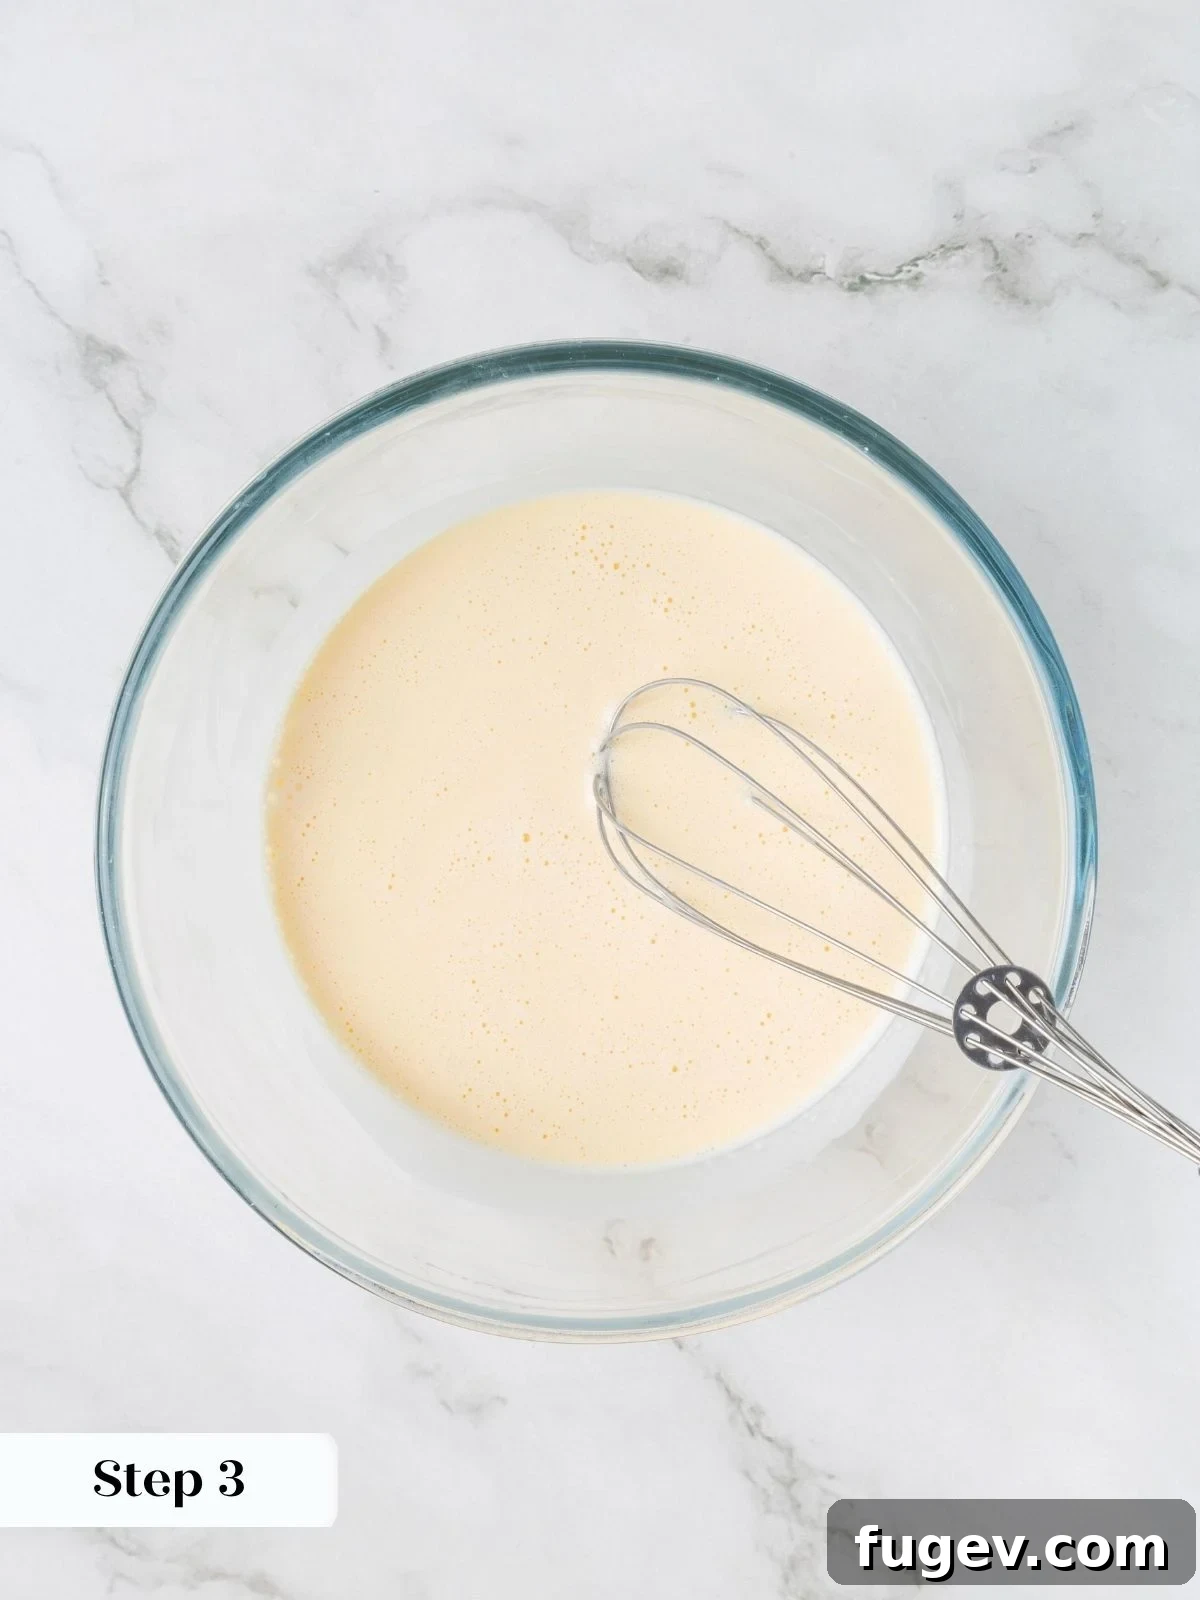
Step 3: Whisk Wet Ingredients. In a separate medium bowl, whisk the large eggs, heavy cream, and vanilla extract until the mixture is completely smooth and uniform in color. (See photo 4 above).
Step 4: Combine Wet and Dry to Form Dough. With the mixer still on its lowest speed, slowly stream the wet ingredients into the flour mixture. Mix only until the dough just begins to come together. It will look shaggy and slightly dry—this is exactly what you want. Scrape the dough out onto a clean work surface. (See photos 5 & 6 below).
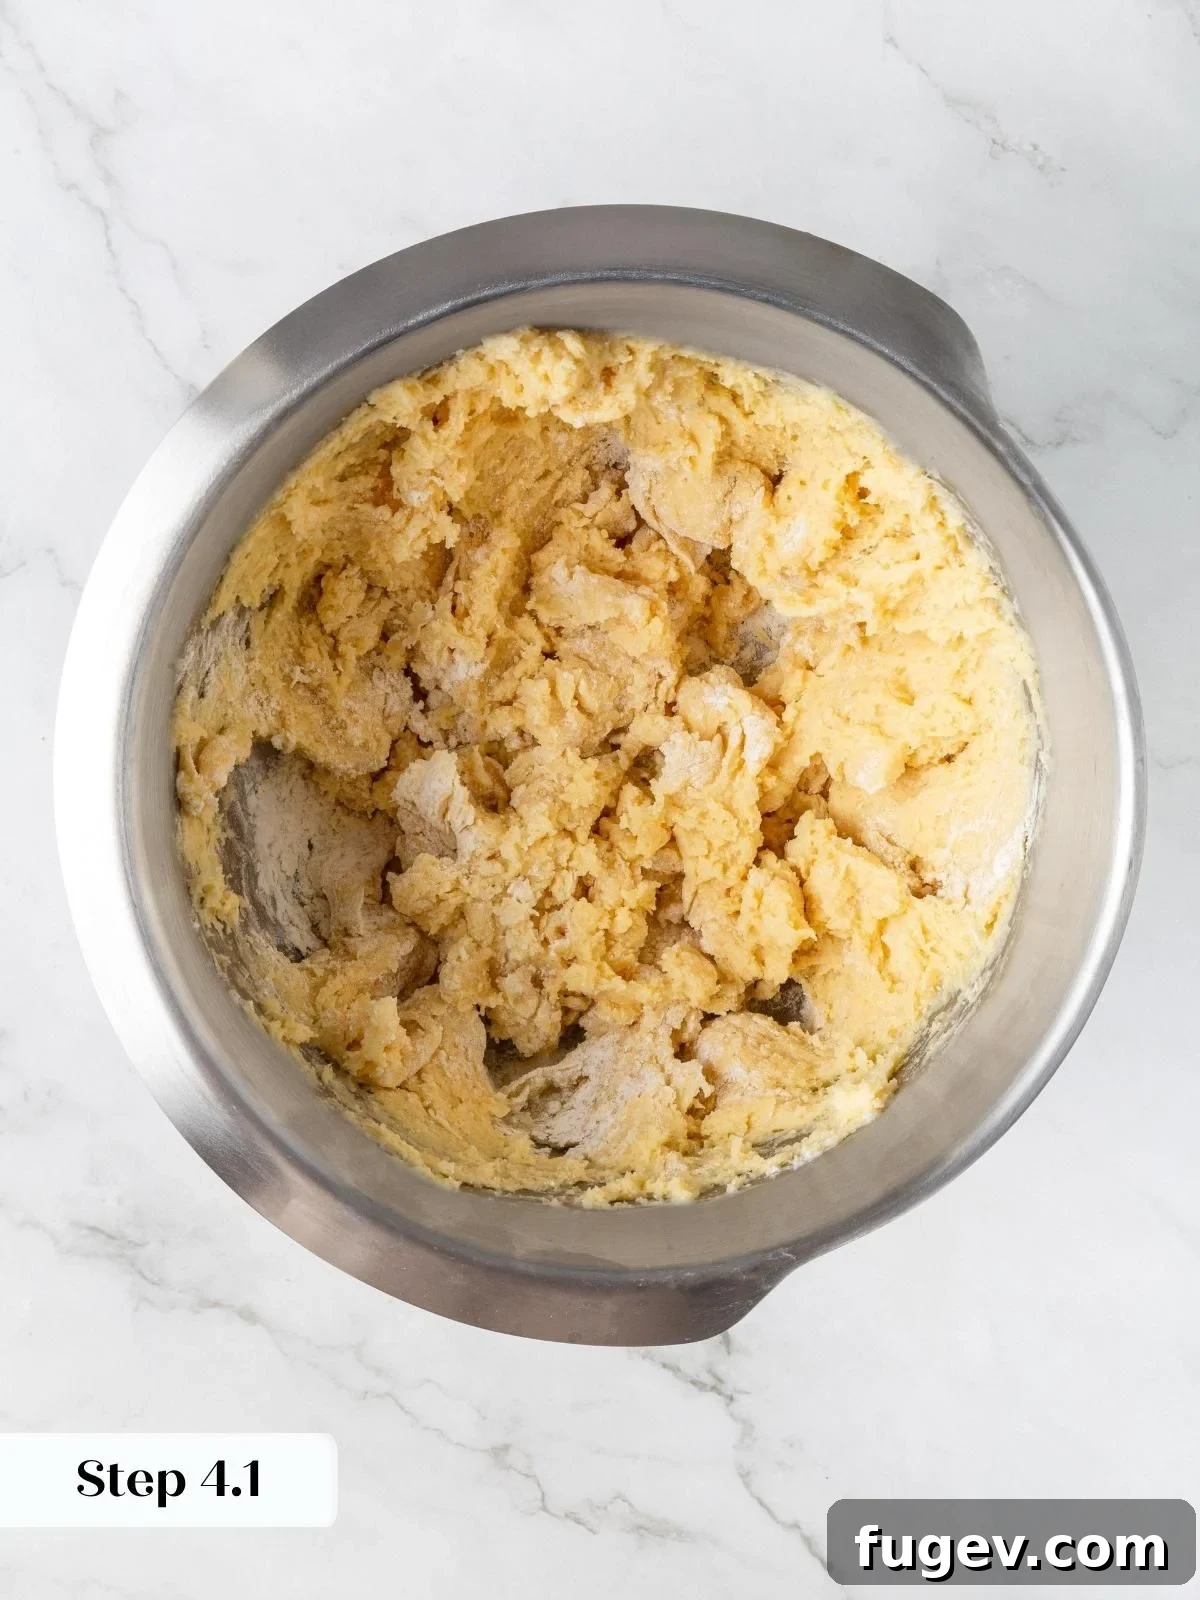
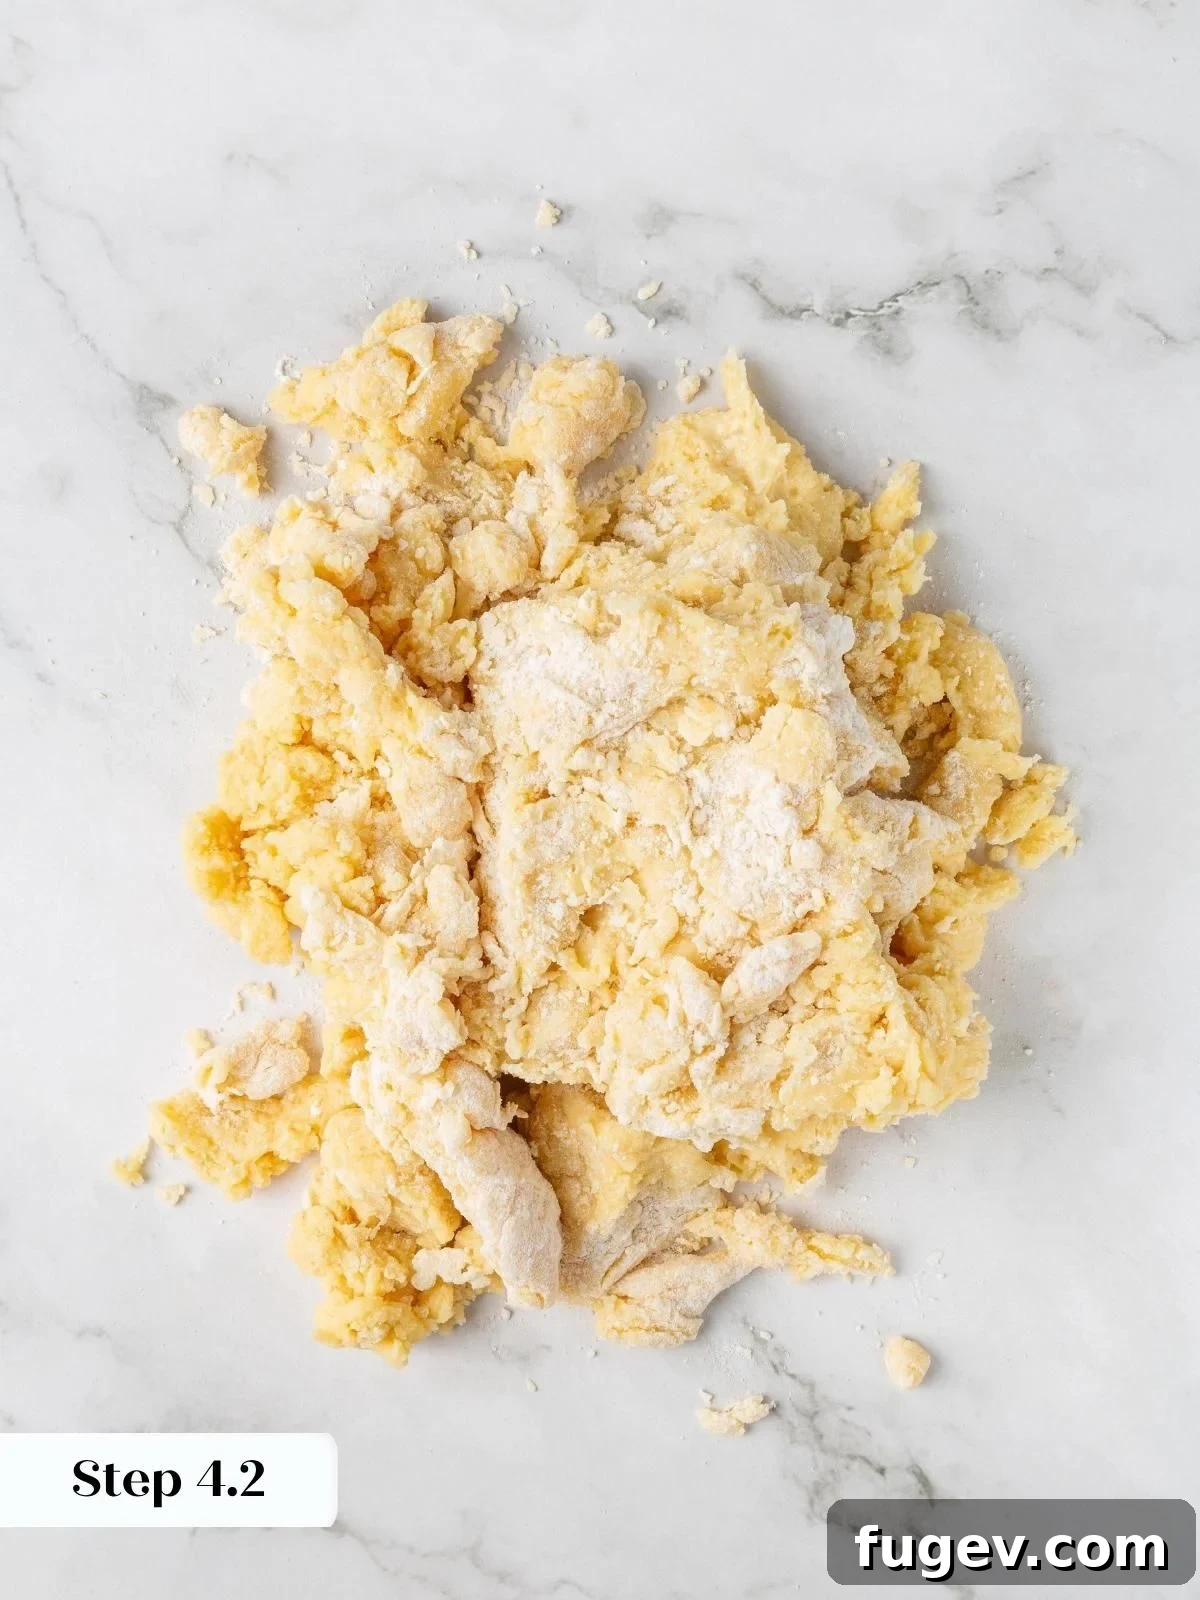
Step 5: Fold in White Chocolate and Raspberries. Add the white chocolate chips to the dough and gently press and fold the dough a few times until the chips are incorporated and no dry spots remain. Next, add the frozen raspberries. Fold them in very gently, being careful not to crush them. Work quickly to keep the berries frozen. (See photos 7 & 8).
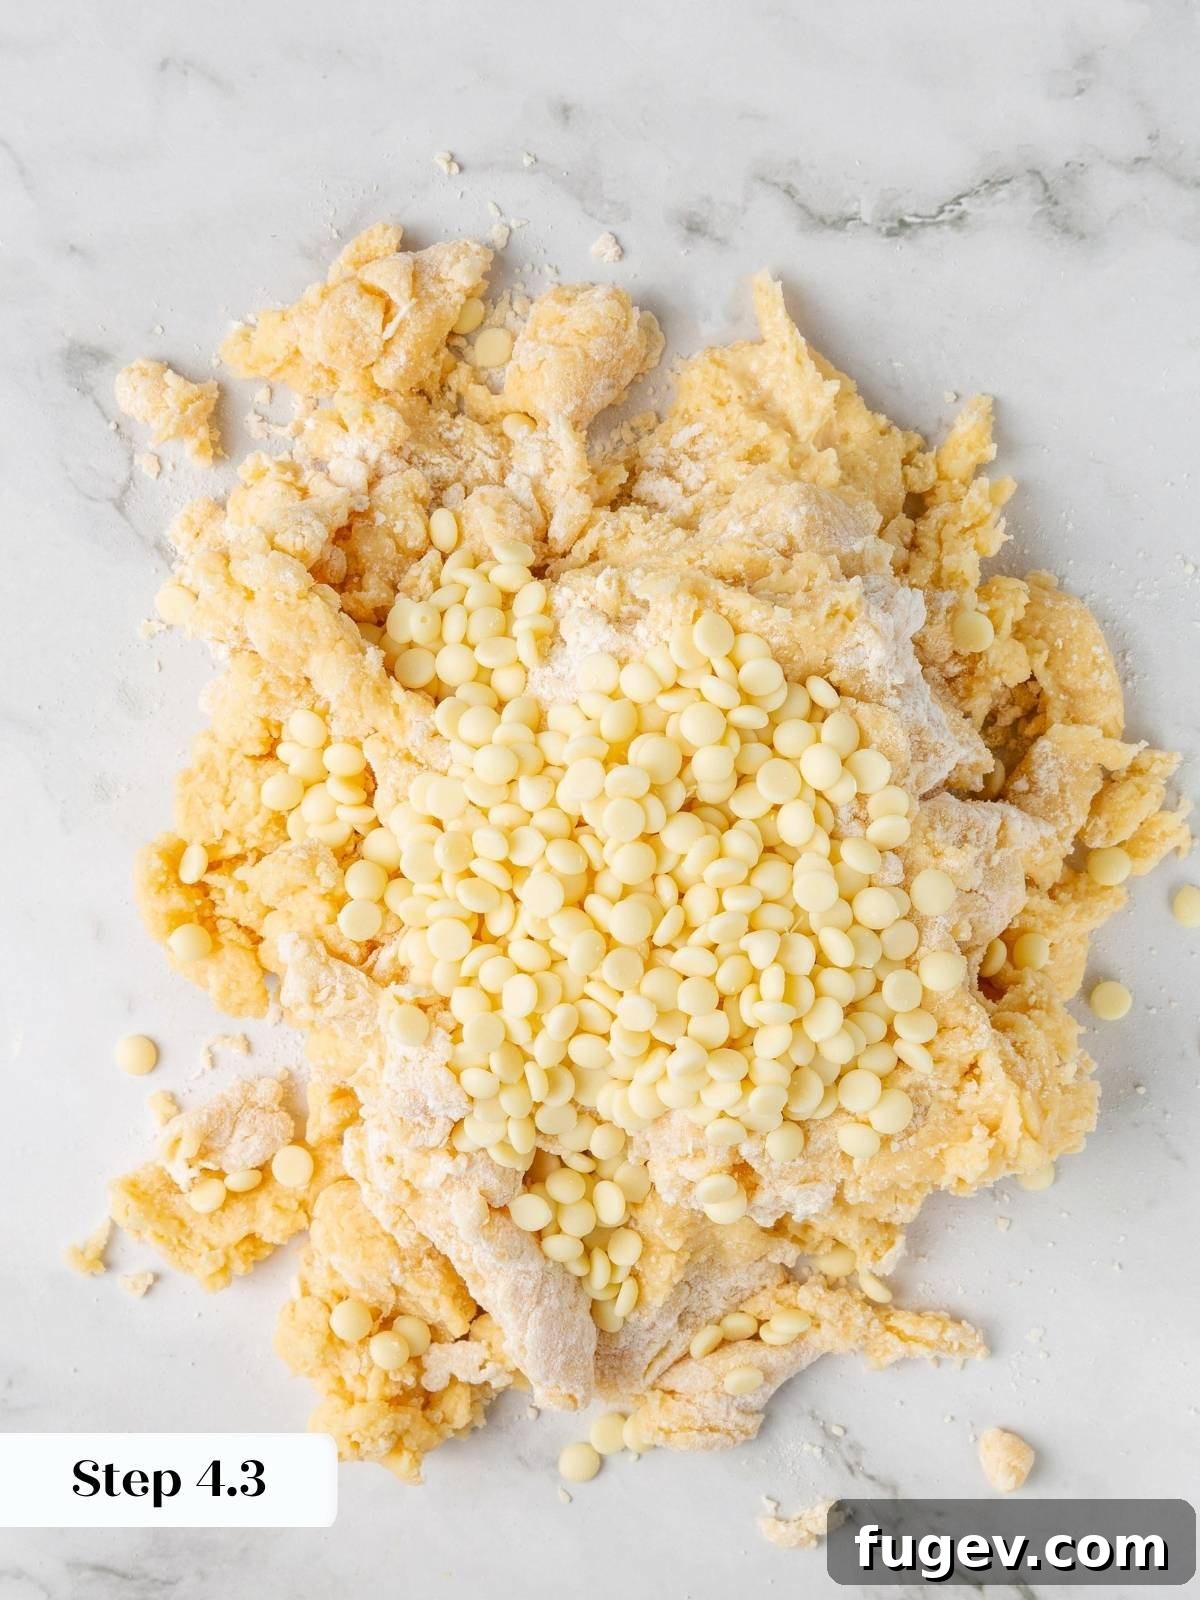
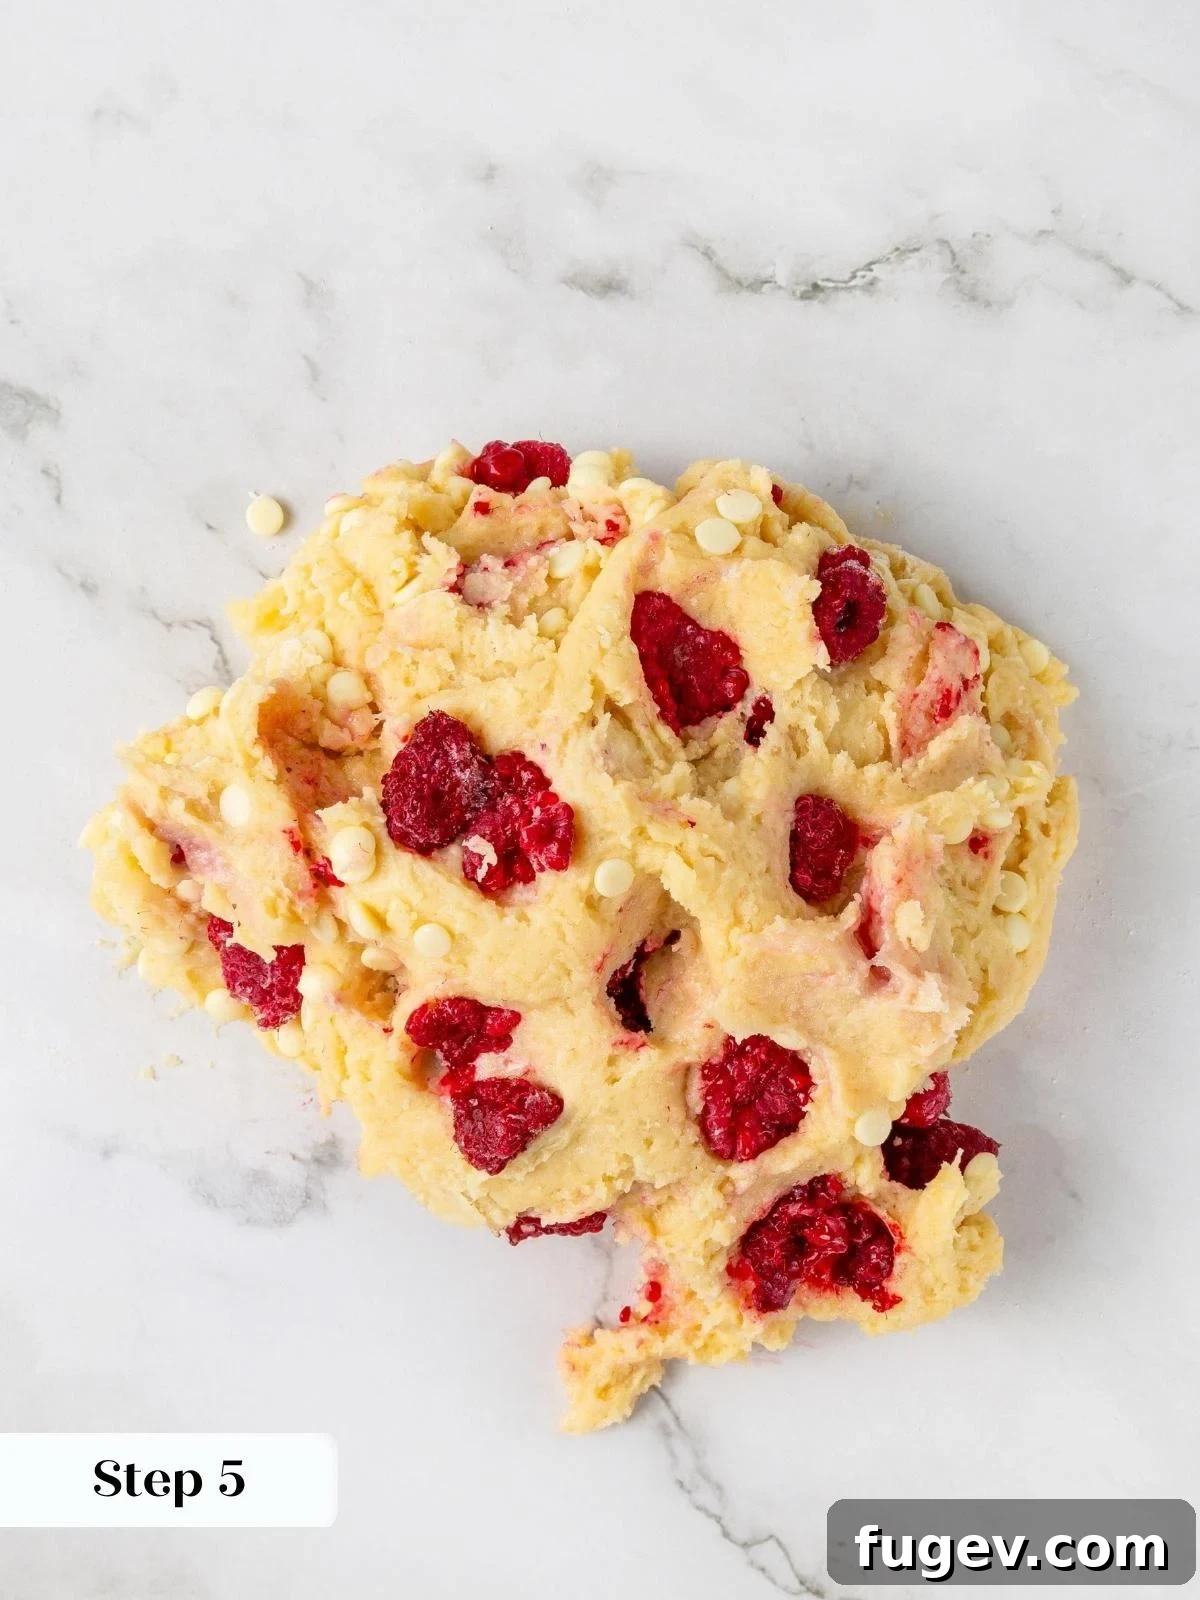
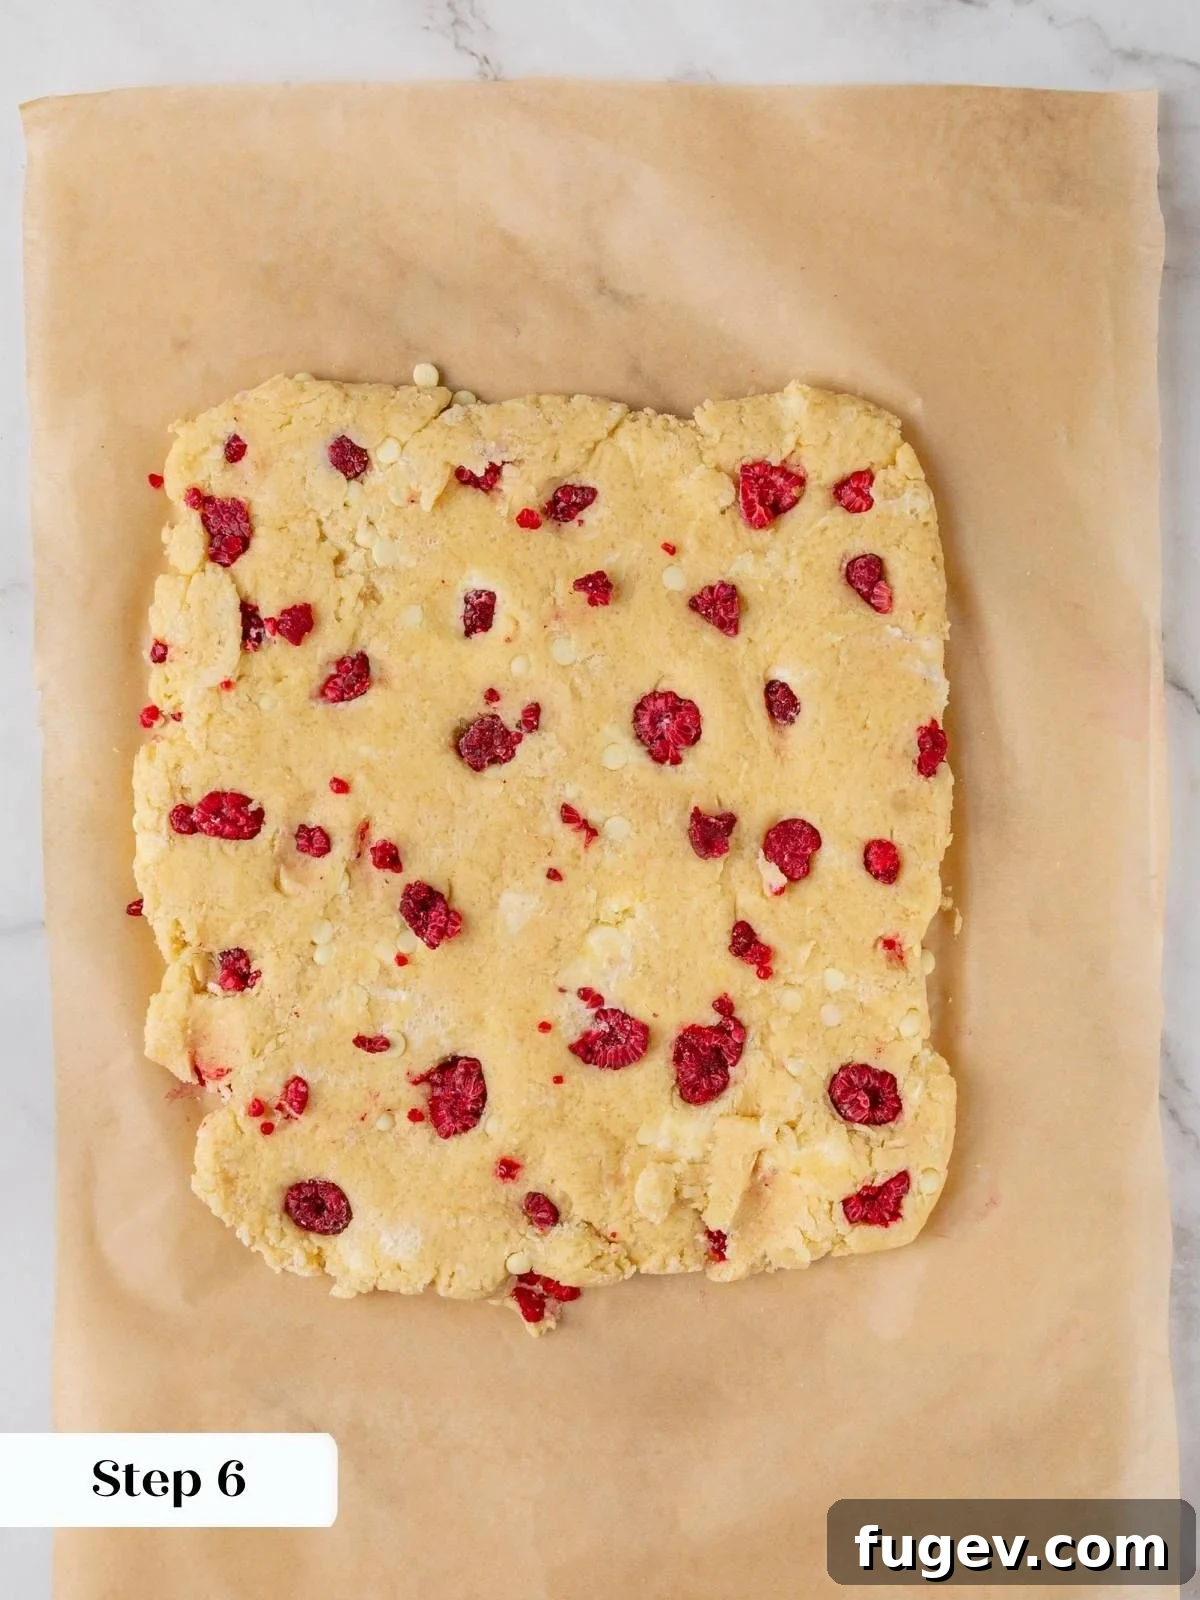
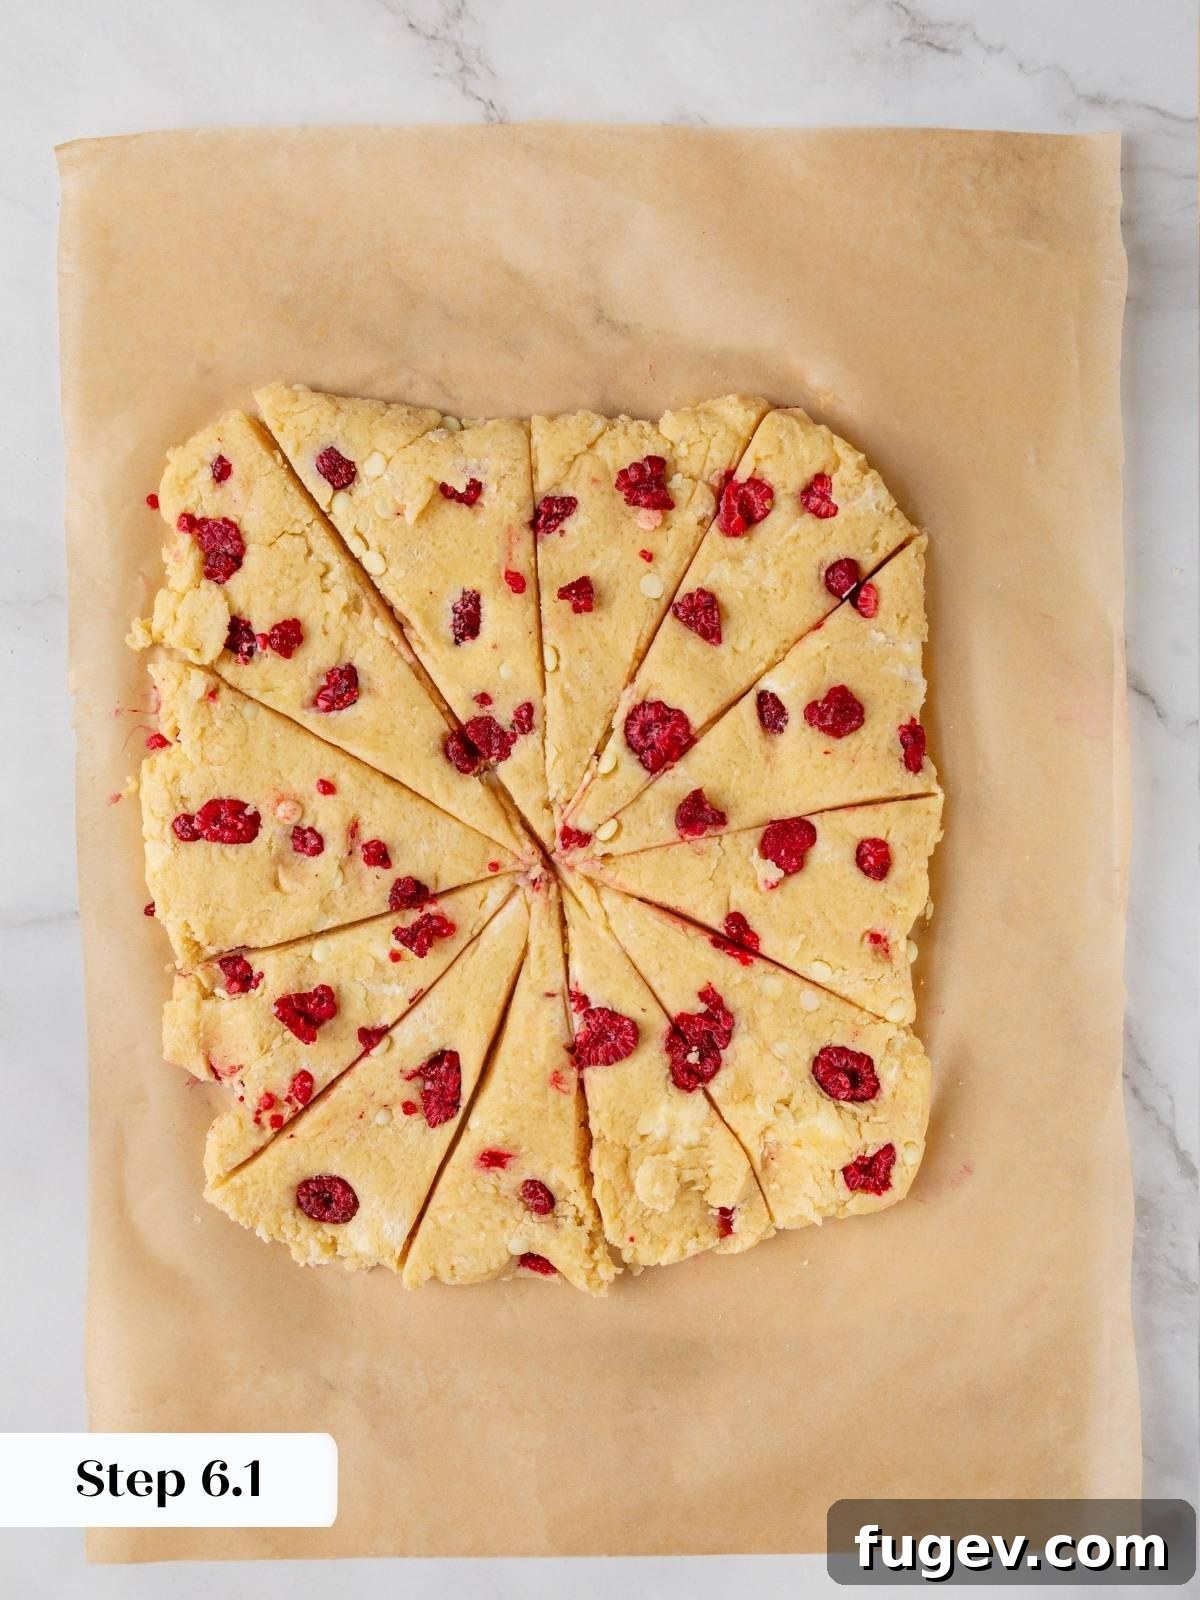
Step 6: Shape and Cut the Scones. Lightly flour your work surface. Gently pat the dough into a circle about 1 inch thick. Using a sharp knife or bench scraper, cut the circle into 8 or 12 equal wedges, like a pizza. For perfectly uniform triangles, you can shape the dough into a 6-inch square and cut it accordingly. (See photos 9 & 10).
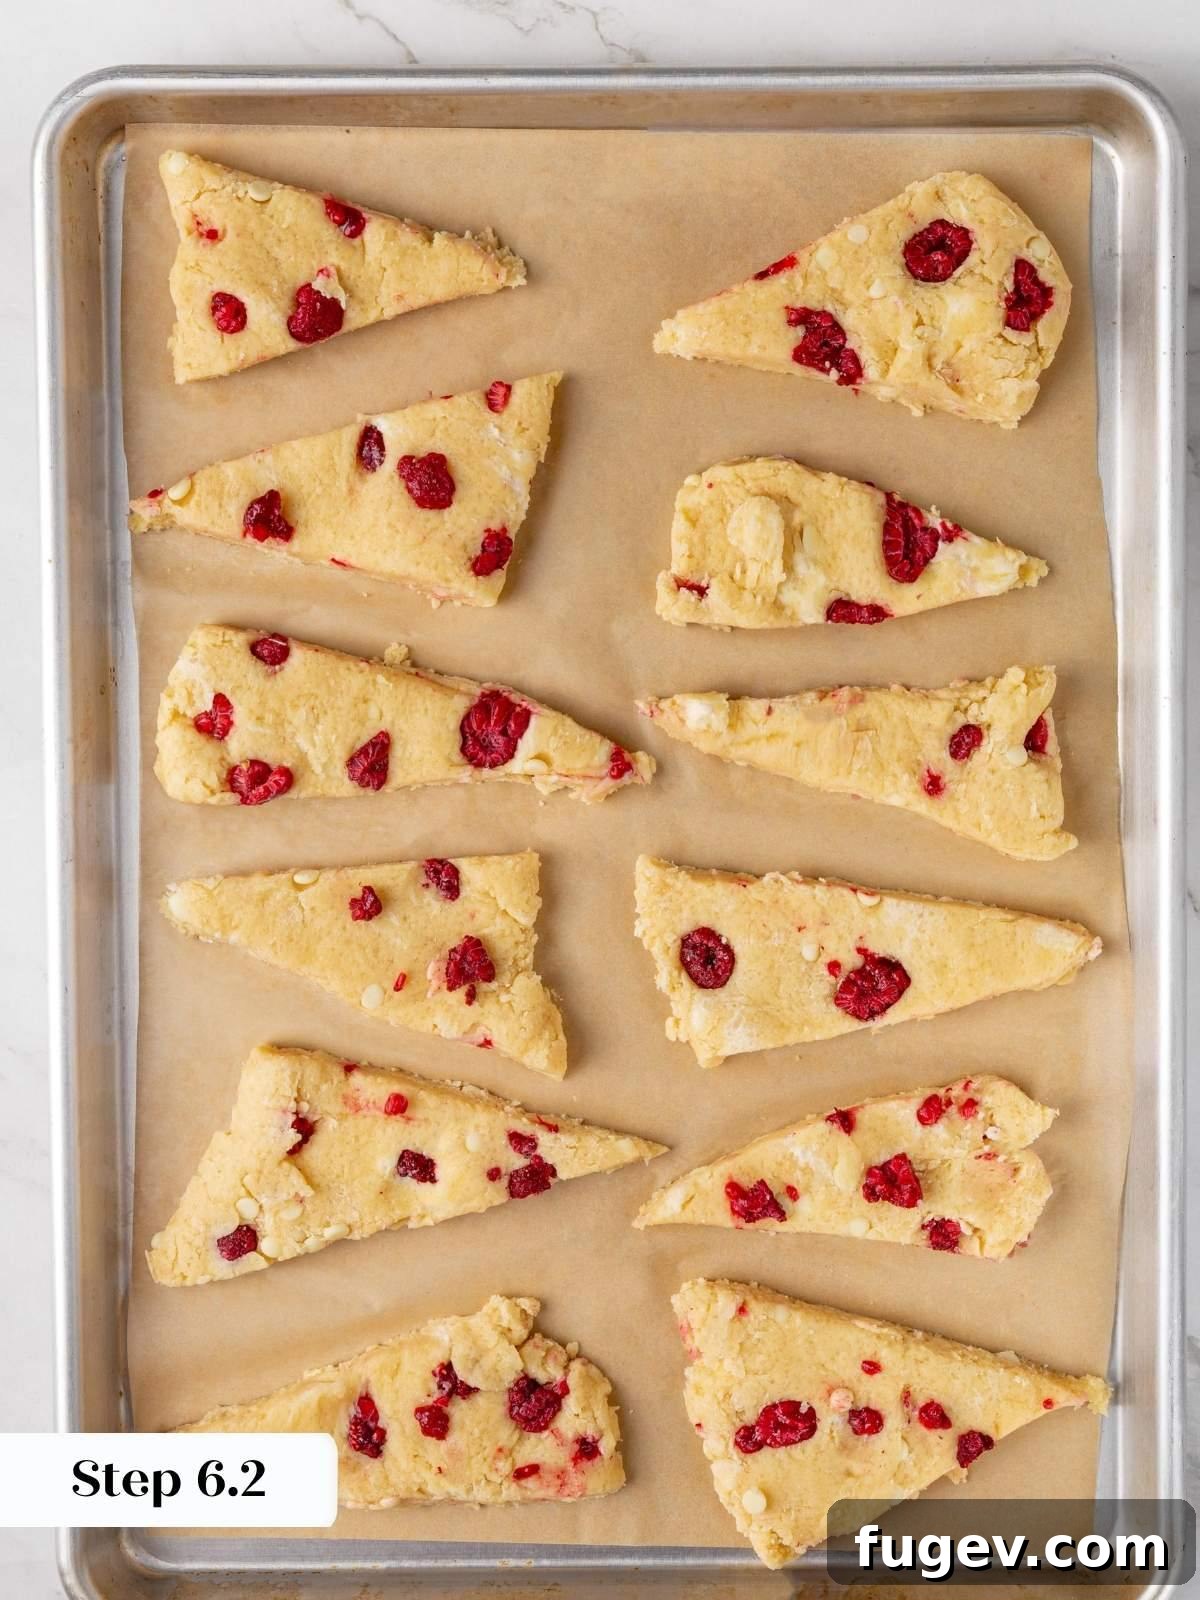
Arrange the cut scones on your prepared baking sheet, leaving about 2 inches of space between each one to allow for even baking and browning.
Step 7: Add the Finishing Touches. Using a pastry brush, lightly brush the top of each scone with a bit of heavy cream. This wash will help them brown beautifully. Immediately after brushing, sprinkle generously with the white sparkling sugar. This creates that irresistible crunchy topping. (See photos 11, 12 & 13).
Step 8: Bake to Golden Perfection. Place the baking sheet in the preheated oven. Bake for 18 to 20 minutes. The scones are done when they have risen, the edges are golden brown, and the centers feel firm to the touch. (See photo 14).
Step 9: Cool and Serve. Let the scones cool on the baking sheet for about 5 minutes before transferring them to a wire rack to cool completely. Allowing them to cool fully is important, as the interior crumb will continue to set. Once cooled, they are ready to be served and enjoyed!



Chef Lindsey’s Key Recipe Tip
The single most important piece of advice for this recipe is to resist the temptation to treat it like a standard scone dough that can be prepared ahead and refrigerated. Because we use frozen raspberries, even a short rest in the fridge allows them to thaw and release their juices. This moisture seeps into the surrounding flour and fundamentally changes the texture, turning the final crumb from tender to spongy. The entire process—shaping, cutting, brushing, and baking—should happen in one smooth, continuous motion for optimal results.
Frequently Asked Questions (FAQs)
Yes, but the key is to freeze them, not refrigerate them. Prepare the scones up to the point of cutting them. Place the unbaked, cut scones on a parchment-lined baking sheet and freeze until solid, about 1-2 hours. Once frozen, transfer them to an airtight container or freezer bag. You can bake them directly from frozen; just add about 4-5 minutes to the baking time. They are, however, at their absolute best when baked fresh.
A spongy texture is almost always caused by excess moisture being absorbed by the flour. This typically happens if the dough was refrigerated before baking, allowing the frozen raspberries to thaw and release their juices. It can also happen if fresh raspberries were used instead of frozen. To ensure a tender crumb, use frozen berries and bake the scones immediately after shaping.
Look for visual and tactile cues. The scones should be puffed and the edges should be a clear golden brown. The most reliable test is to gently press the center of a scone with your fingertip. It should feel firm and spring back immediately. If it leaves an indentation, the scones need more time. Start checking at 18 minutes to be safe.
These scones are best enjoyed on the day they are baked. Store any leftovers in an airtight container at room temperature for up to 2 days. To refresh a day-old scone, warm it in a 300°F (150°C) oven for 5-7 minutes. For longer storage, you can freeze the fully baked and cooled scones for up to 2 months. Let them thaw at room temperature before serving.


Perfect Raspberry White Chocolate Scones
Ingredients
- 2 ½ cups all-purpose flour
- ½ cup granulated sugar
- ¼ teaspoon kosher salt
- 1 teaspoon baking powder
- ½ cup unsalted butter, cold and cubed
- 1 teaspoon vanilla extract
- 2 large eggs, cold
- ½ cup heavy cream, cold, plus more for brushing
- 1 ½ cups raspberries, frozen
- ½ cup white chocolate chips
- White sparkling sugar, for finishing
Instructions
-
Preheat oven to 325°F convection or 350°F conventional. Line a large baking sheet with parchment paper.
-
In the bowl of a stand mixer with the paddle attachment, combine the flour, sugar, salt, and baking powder. Add the cold cubed butter and mix on low speed until the mixture resembles wet sand with no visible butter pieces remaining.
-
In a separate bowl, whisk together the vanilla, eggs, and heavy cream until smooth.
-
With the mixer on low, slowly pour the wet mixture into the dry ingredients and mix until just barely combined. The dough will be shaggy.
-
Turn the dough onto a clean surface. Gently fold in the white chocolate chips, followed by the frozen raspberries. Work quickly and gently to avoid crushing the berries.
-
Pat the dough into a 1-inch thick circle and cut into 8-12 wedges. Place them on the prepared baking sheet, about 2 inches apart.
-
Immediately brush the tops with heavy cream and sprinkle generously with sparkling sugar. Do not refrigerate the dough before baking.
-
Bake for 18-20 minutes, or until the edges are golden brown and the centers spring back when lightly touched.
-
Allow the scones to cool on the baking sheet for 5 minutes before transferring to a wire rack to cool completely.
Notes
Doneness Test: The scones are done when the edges are golden and a gentle press in the center springs back. If it leaves a dent, they need more time.
Storage: Scones are best the day they are made. Store in an airtight container at room temperature for up to 2 days. Reheat in a 300°F (150°C) oven for 5 minutes to refresh.
Nutrition
Before You Go
I hope you absolutely love this chef-tested recipe for raspberry white chocolate scones! If you try it, please leave a comment and a star rating below—I love hearing from you. For more delightful brunch and breakfast ideas, be sure to explore all my breakfast recipes. I highly recommend making these incredible peach muffins next!