
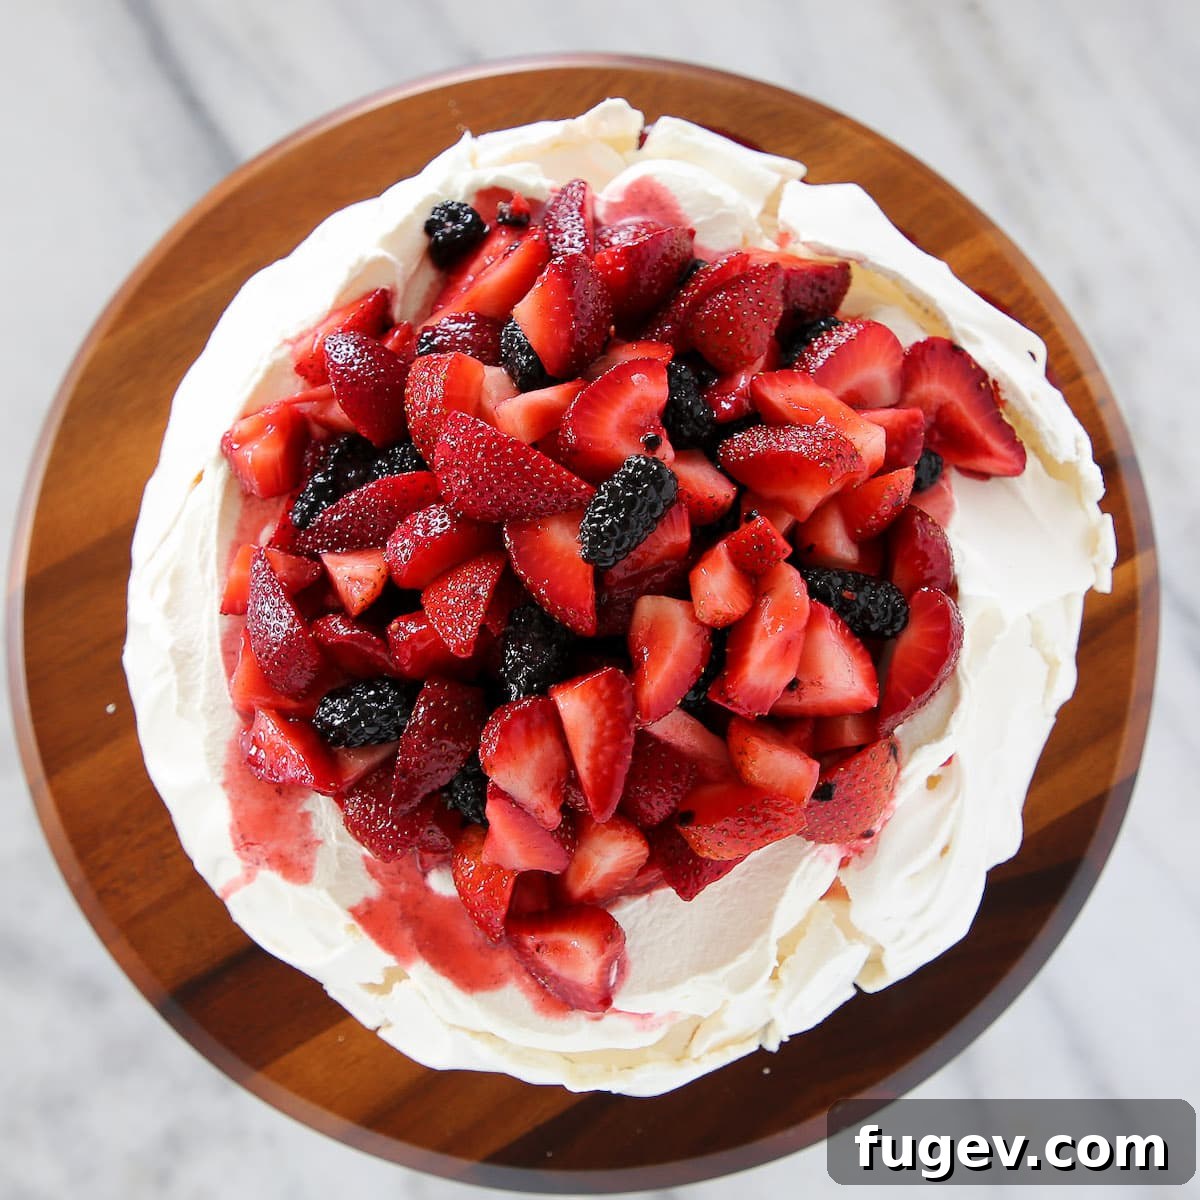
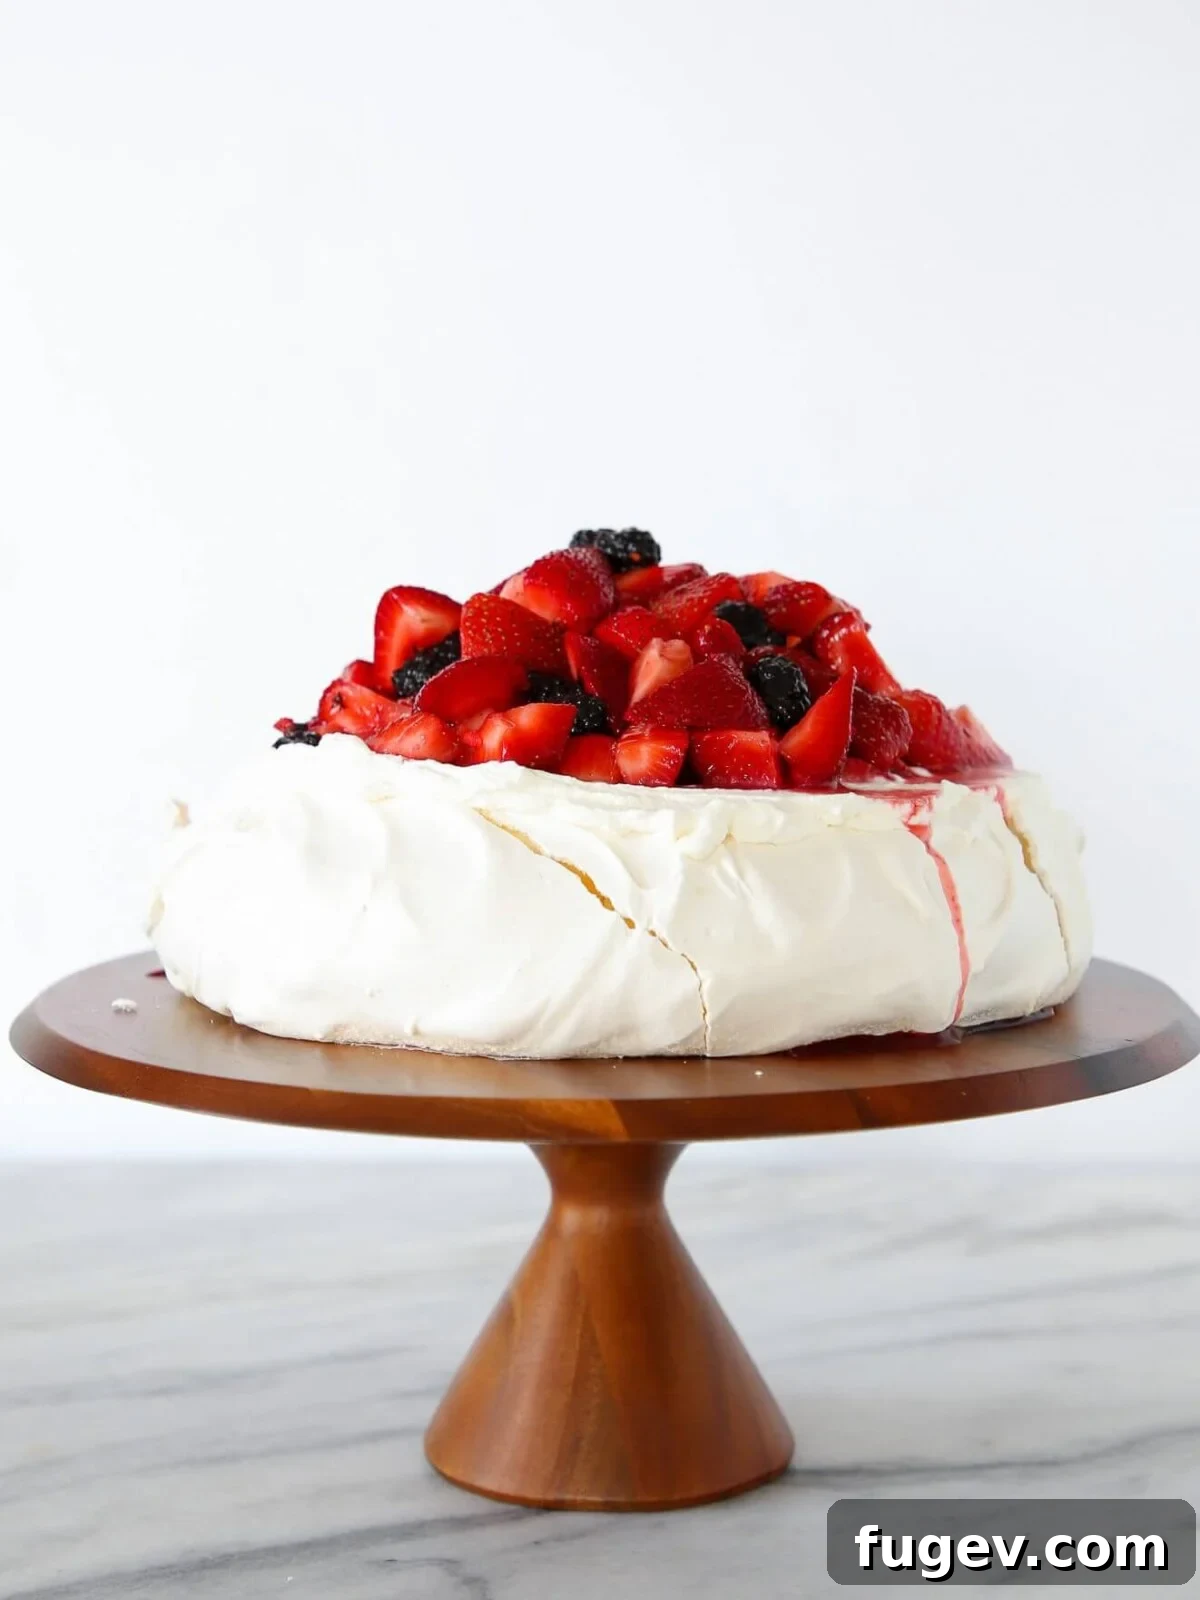
Prepare to create a truly show-stopping dessert with this easy-to-follow recipe for a Lemon Berry Pavlova Cake. This exquisite treat is celebrated for its glorious contrast: a wonderfully crispy exterior that gives way to a dreamy, marshmallow-soft interior. It masterfully balances the vibrant tartness of lemon and fresh berries with the delicate sweetness of meringue, resulting in a dessert that is both stunning to behold and utterly delicious to devour. Ideal for celebrations, family gatherings, or simply a luxurious personal indulgence, this pavlova is designed to impress.
A Quick Look At This Delicious Recipe
This section provides a concise overview of the recipe. For a complete guide, including detailed instructions and chef’s notes, please jump to the full recipe below.
Jump to Full Recipe
Prep Time
40 minutes
Cook Time
40 minutes
Total Time
1 hour 20 minutes
Servings
12 people
Difficulty
Moderate
Calories*
310 kcal per serving
Technique
Whip meringue, bake until crisp, cool thoroughly, and artfully assemble with toppings.
Flavor Profile
A delightful contrast of light, airy meringue with tart lemon curd and the natural sweetness of fresh berries.
* Based on approximate nutrition panel calculations for a single serving.
This is undeniably a must-try dessert! This lemon berry pavlova cake is not only breathtakingly gorgeous but also incredibly delicious. Every single member of my family was absolutely delighted. Plus, it’s perfectly Instagrammable! ⭐⭐⭐⭐⭐
Sharina
Why the Pavlova Reigns Supreme: A Pastry Chef’s Passion
Being a pastry chef, I often face the daunting question: “What is your favorite dessert?” It’s akin to choosing a favorite child, an impossible task for any true lover of sweets! However, if pressed, I confess my heart truly belongs to pavlovas, especially when they are lavishly topped with homemade lemon curd and a medley of beautifully macerated fresh berries. The ultimate indulgence? Crafting a giant, show-stopping Lemon Berry Pavlova Cake!
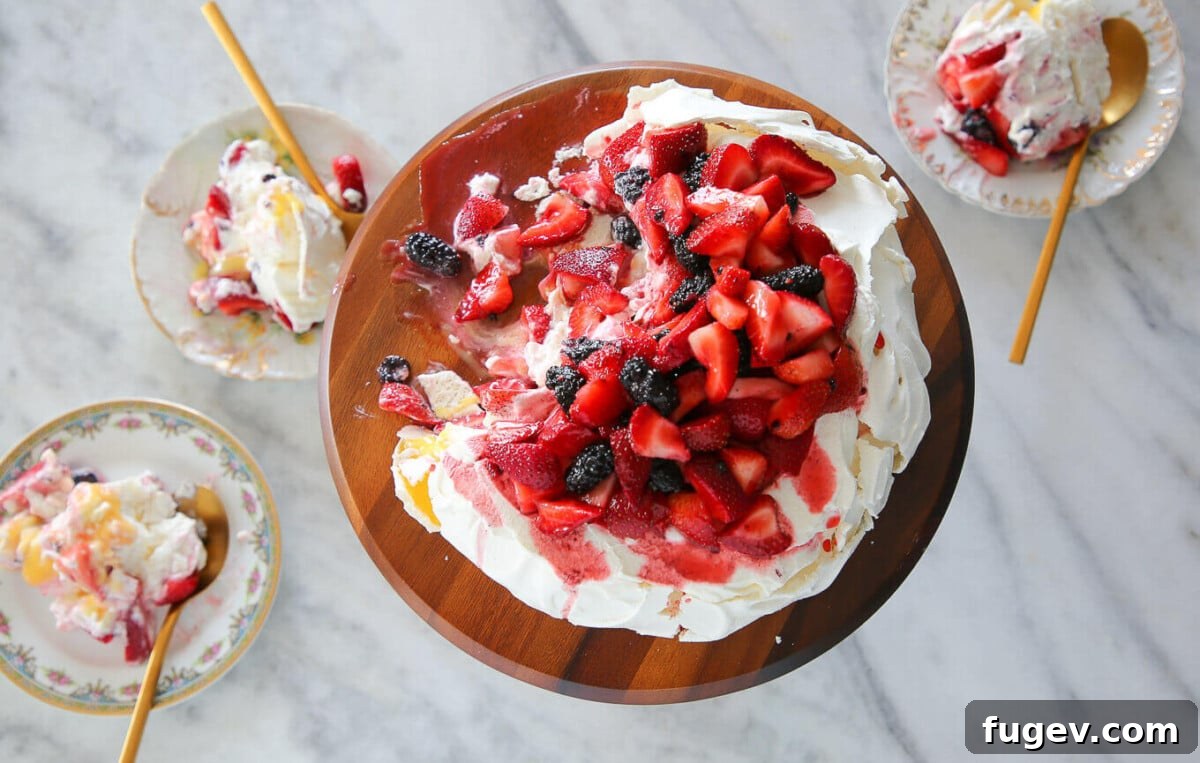
My profound admiration for pavlovas is evident in the countless hours I dedicate in restaurant kitchens to conceptualizing and perfecting new shapes and presentations for these elegant desserts. They are my absolute favorite because, when executed with care, a pavlova achieves a sublime balance that few other desserts can rival. The delicate meringue base offers a captivating textural interplay – a crisp, almost eggshell-like exterior that shatters gently to reveal an interior as soft and airy as a marshmallow cloud. This inherent sweetness of the pavlova is then brilliantly counterbalanced by the bright, tangy zest of homemade lemon curd and the fresh acidity provided by the lemon juice in the macerated berries. Aesthetically, the pristine white of the meringue serves as a dramatic canvas, allowing the vibrant yellow of the lemon curd and the jewel-like intensity of the berries to truly pop, creating a visually stunning masterpiece. After you inevitably fall in love with the harmonious flavors and textures of this pavlova, I highly recommend exploring my lemon pound cake with strawberry icing for another sensational lemon-berry combination that promises pure delight.
Mastering the Meringue: Expert Tips for Pavlova Success
While often perceived as a simple dessert, crafting a truly perfect pavlova involves a few crucial techniques and careful attention to detail. As a pastry chef who has spent innumerable hours perfecting this art, problem-solving common issues, and teaching aspiring bakers the nuances of meringue, I’m here to equip you with all the professional insights you need. These are the essential “tricks of the trade” that will transform your pavlova from good to absolutely extraordinary.
Key Elements for Achieving Pavlova Perfection:
- Egg Whites: The Heart of Your Meringue
The foundation of any great pavlova is impeccably prepared egg whites. For easier separation, it’s best to work with cold eggs. However, the absolute most critical rule is to ensure there is not even a trace of egg yolk in your whites. Yolk contains fat, and fat is the nemesis of meringue, preventing the whites from whipping up to their full potential and achieving those coveted stiff peaks. While some advise wiping down bowls with vinegar, it’s generally not necessary unless you suspect grease residue. Instead, focus on careful separation. My preferred method involves using three bowls: one for the yolks, one for the newly separated white, and a third clean bowl into which I transfer each successfully separated white. This way, if a yolk breaks, it only contaminates one single white, saving your entire batch from a truly saddening fate.
- Sugar: The Essential Stabilizer and Sweetener
The timing of sugar addition to meringue is a subject of much debate in the pastry world. My professional experience leads me to firmly stand in the “earlier rather than later” camp. While not the most popular opinion, I find it yields consistently superior results. Adding sugar too late, after the egg whites have already achieved substantial volume, can prevent the sugar crystals from fully dissolving into the meringue. This often results in a gritty texture and, more problematic, can cause the sugar to crystallize and “weep” or “pour out like lava” during the baking process. Gradually incorporating the sugar once the whites begin to foam allows it ample time to dissolve, creating a stable, glossy, and beautifully structured meringue that holds its shape and bakes perfectly.
- Cream of Tartar: Your Meringue’s Secret Strength
I am a strong advocate for stabilizing egg whites for all meringues, including lemon meringue pie and pavlovas. Cream of tartar is my go-to for this purpose. This acidic salt helps to strengthen the protein bonds within the egg whites, enabling them to hold more air and create a much more resilient and stable foam. This is particularly beneficial if you plan to pipe your pavlova into decorative shapes or desire a meringue that reliably maintains its structure during baking. The proper ratio of sugar to egg whites also contributes significantly to this crucial stability.
- Distilled White Vinegar: For That Pristine White Finish
This is a subtle yet incredibly impactful addition to your pavlova recipe. A small amount of distilled white vinegar serves a dual purpose: it adds another layer of stability to the meringue, and more importantly, it helps to keep the meringue beautifully white during the baking process, preventing undesirable browning. This is a true professional secret that ensures your pavlova emerges from the oven looking as pristine and elegant as it tastes, enhancing its visual appeal significantly.
- Cornstarch: The Key to the Perfect Texture Contrast
Another invaluable professional tip is the inclusion of cornstarch. This ingredient is pivotal in achieving the pavlova’s signature texture: a delightfully crispy, delicate shell encasing a soft, chewy, marshmallow-like interior. Cornstarch acts as an internal drying agent, helping the meringue to dry out evenly on the outside without becoming brittle throughout. Consider it your insurance policy for that coveted crisp-and-chewy contrast, ensuring you don’t end up with an overbaked, dry meringue.
- The Baking Process: Patience for Perfection
Achieving a perfectly baked pavlova demands a precise balance of low heat, adequate baking time, and a critical post-baking cooling period within the oven. Baking at too high a temperature or for too long will result in an entirely crisp meringue with no delightful chew – a truly tragic outcome. Conversely, insufficient baking time will leave you with a soft, collapsed structure lacking any desirable crunch. While there’s a little leeway, aim for the sweet spot where the exterior is firm and sounds hollow when gently tapped. Remember that every oven is unique, so careful observation and gentle testing are essential. The golden rule: turn off the oven and allow the pavlova to cool completely inside, ideally with the door slightly ajar, to prevent cracking and ensure that perfect texture.
- Whipping Technique: The Art of Stiff Peaks
The egg whites for pavlova must be whipped to the stage of stiff peaks. This means that when you lift the whisk, the meringue should hold its shape firmly, with a peak that stands tall and might curl slightly at its very tip, resembling a bird’s beak. This process requires patience, especially if you begin with colder egg whites (which, as discussed, are easier to separate cleanly). Do not rush; allow them to develop slowly. If, after a generous 15 minutes of whipping, your meringue still hasn’t achieved good volume or even soft peaks, it strongly suggests a trace of fat contamination. In such cases, it’s often best to discard the batch and start fresh. Properly whipped stiff peaks are absolutely crucial for the pavlova to puff up beautifully in the oven and maintain its elegant structure without spreading. Be equally wary of overwhipping; this can lead to a dry, granular meringue that won’t puff as nicely and will develop an unappealing bumpy crust instead of a smooth, glossy exterior.
- Handle Your Meringue with Tender Loving Care
Meringues are inherently delicate creations, essentially a delicate matrix of tiny air bubbles suspended within sweetened egg white proteins. Treat them with the utmost care and respect they deserve. Avoid any harsh movements, banging bowls, or slamming oven doors, as these sudden concussions can easily cause those precious air bubbles to collapse, leading to a deflated pavlova. Provide your meringue with the gentle, stable environment it needs to grow tall, proud, and perfectly ethereal in the oven. Think of it as nurturing a delicate, culinary cloud!
- Embrace the Journey (Even Imperfections Taste Great!)
While I’ve provided a comprehensive guide to achieving pavlova perfection, please don’t let these details overwhelm you. The beautiful truth about pavlova is that even if it’s not absolutely perfect – perhaps it has a slight crack, or didn’t puff quite as high as you hoped – it will almost certainly still taste incredibly delicious. Unless your meringue completely fails to whip up (which, again, points to fat contamination), it’s quite difficult to make a truly “bad” tasting pavlova. Most people won’t even notice the minor aesthetic imperfections. However, if you aspire to create a truly professional and show-stopping dessert, these expert tips will undoubtedly give you a significant advantage in your baking endeavors.
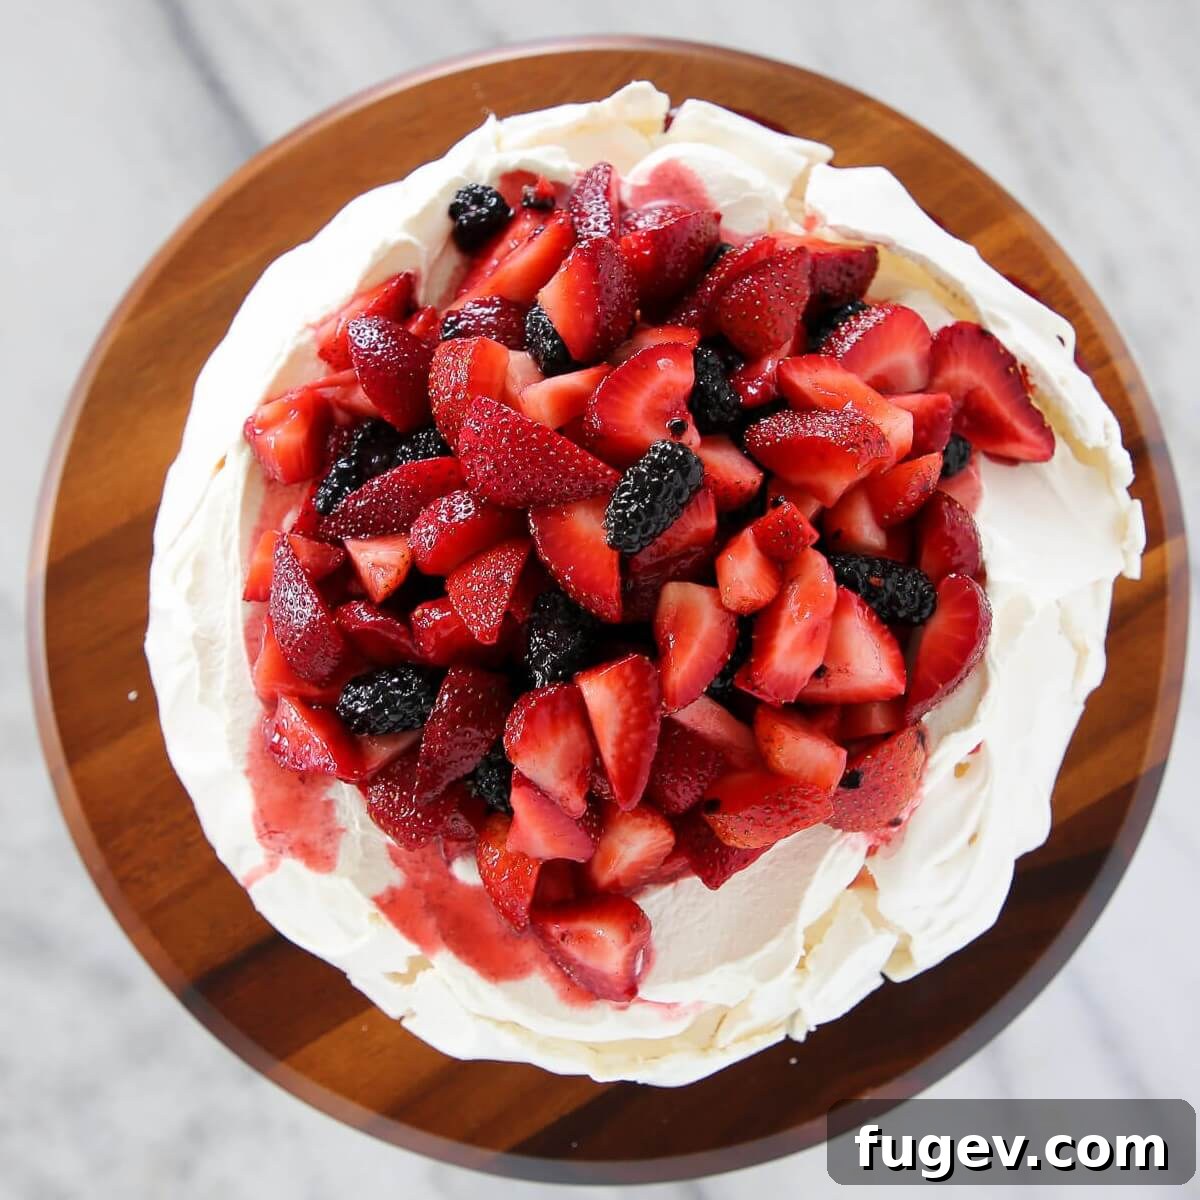
The Art of Topping: Lemon Curd, Macerated Berries, and Whipped Cream
Once your pavlova base has been flawlessly baked and thoroughly cooled, the exciting phase of assembly begins. This is where the magic truly comes alive with the addition of exquisite toppings that complete this iconic dessert. The classic combination of tangy lemon curd, lusciously sweet macerated berries, and a cloud of light, freshly whipped cream is nothing short of divine. While I often emphasize precise measurements in the delicate world of pastry, when it comes to these vibrant toppings, there’s a wonderful opportunity for a touch of improvisation and personal flair. As you might notice if you watch the accompanying video, I don’t always adhere to strict measurements for the macerated berries and whipped cream – and that’s perfectly acceptable for achieving delicious results!
However, for those who appreciate a more structured approach, or perhaps wish to elevate their whipped cream to an even more gourmet standard, I highly recommend consulting my dedicated lemon curd whipped cream recipe. This guide delves into all the “nerdy” details and precise ratios required for crafting an impeccably flavored and remarkably stable lemon-infused whipped cream that will perfectly complement your pavlova.
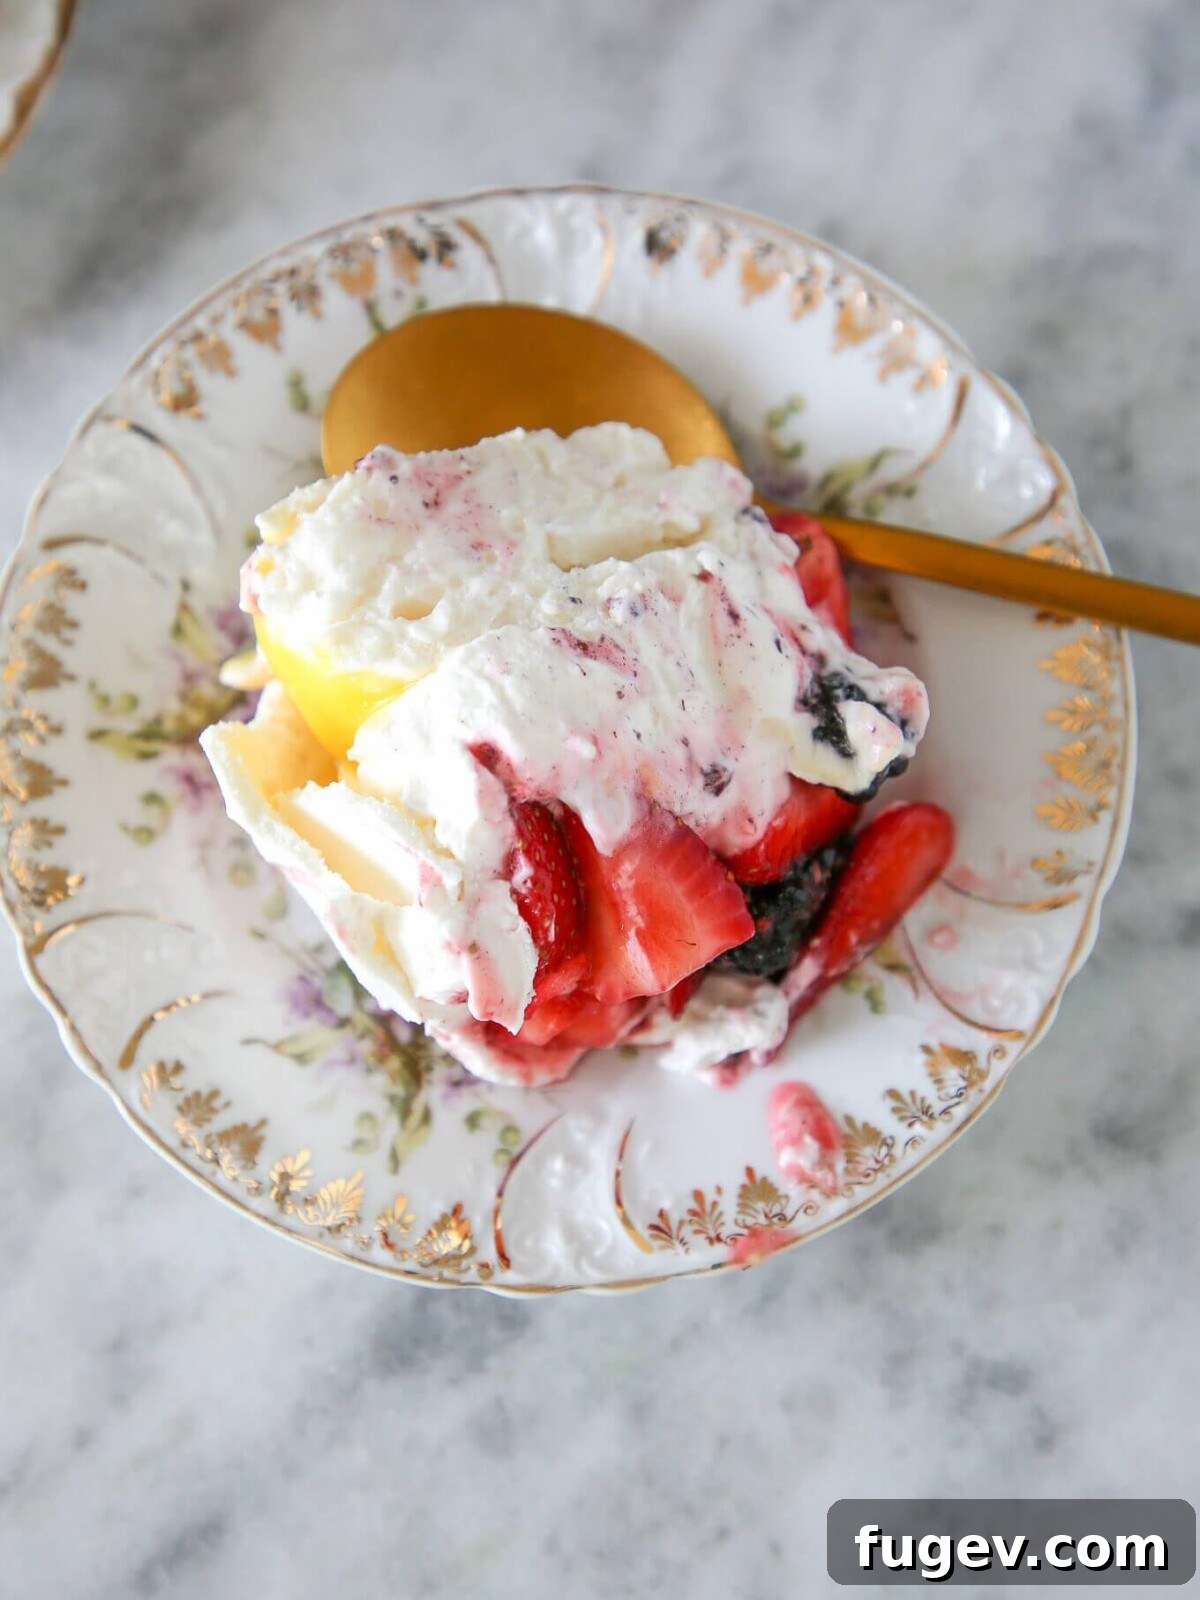
It’s important to remember that the sweetness of berries can vary significantly depending on their ripeness, variety, and the season. Therefore, I always advise tasting your macerated berry mixture as you prepare it. Feel free to adjust the amount of sugar and lemon juice to suit your personal preference. Some days, you might crave a dessert that leans a little sweeter, while on others, a more pronounced tartness hits just the right note. The beauty of home baking lies in this flexibility – feel empowered to make it truly “you,” and the result will undoubtedly be glorious!
Clever Uses for Leftover Egg Yolks
After meticulously separating all those egg whites for your magnificent pavlova, you’ll inevitably find yourself with a collection of leftover egg yolks. It would be a culinary crime to let them go to waste! Fortunately, these golden treasures are incredibly versatile and can be transformed into a myriad of other delicious creations:
- Indulgent Homemade Ice Cream: Egg yolks are a cornerstone ingredient in many classic ice cream bases, contributing richness, creaminess, and a luxurious mouthfeel. Use them to craft a decadent batch of vanilla, chocolate, or even a complementary lemon-infused ice cream to serve alongside your pavlova or as a standalone treat.
- Rich Crème Brûlée or Creamy Custards: These elegant, classic desserts rely heavily on egg yolks for their signature silky texture and profound flavor. They’re perfect for impressing guests or simply enjoying a sophisticated indulgence.
- Extra Lemon Curd: If you’re already making lemon curd for your pavlova, consider scaling up the recipe to use more of your leftover yolks. This ensures you have an abundant supply of this tangy, velvety spread for breakfast toasts, scones, or future dessert creations.
- Gourmet Mayonnaise or Hollandaise Sauce: For the more adventurous home chef, egg yolks are the emulsifying magic behind homemade mayonnaise and the luxurious Hollandaise sauce. These savory applications are a fantastic way to utilize yolks, though I must confess, I rarely venture into making homemade mayonnaise myself – but the option is always there for the truly keen culinary enthusiast!
⭐⭐⭐⭐⭐
The Best Lemon Berry Pavlova Cake Recipe
Chef Lindsey
40 mins
40 mins
1 hr 20 mins
12 people
Comment
Print Recipe
Ingredients
For the Pavlova:
- 180 g Egg whites (approximately 5-6 large eggs)
- ¼ tsp Cream of tartar
- 260 g Granulated Sugar
- 1 tsp Distilled White Vinegar
- 1 tbsp Vanilla extract
- 2 tsp Cornstarch (sifted)
For the Whipped Cream:
- 520 g Heavy whipping cream (very cold)
- 20 g Confectioner’s sugar (add more to taste)
- 1 tsp Vanilla extract (or any other extract that suits your fancy!)
For the Macerated Berries:
- 500 g Mixed berries (e.g., fresh strawberries, blackberries, and blueberries)
- 115 g Granulated sugar (adjust to taste; consider the sweetness of your berries)
- 50 g Fresh lemon juice (add more to taste for brightness)
Lemon Curd
- 1 batch of homemade Perfect Lemon Curd (prepared ahead of time)
Instructions
For the Pavlova:
- Preheat your oven to 200°F (95°C). For best results, use a convection setting if your oven has one. Line a large baking sheet with parchment paper or a silicone baking mat (such as a Silpat).
- In the very clean bowl of a stand mixer fitted with the whisk attachment, combine the egg whites, distilled white vinegar, and cream of tartar. Begin whisking on medium-low speed to gently break up the whites until they become frothy.
- Once the egg whites are foamy, slowly begin to add the granulated sugar, a tablespoon or two at a time. This is a substantial amount of sugar, so patience is key for proper incorporation. Periodically stop the mixer and scrape down the sides of the bowl to ensure all sugar crystals are thoroughly mixed in.
- After all the sugar has been added, increase the mixer speed to high. Continue whipping until very stiff, glossy peaks form. The meringue should be bright white, smooth, and hold its shape firmly when the whisk is lifted.
- Reduce the mixer speed to low and add the vanilla extract. Mix just until the vanilla is fully incorporated. Be careful not to overwhip the meringue at this stage.
- Stop the mixer and carefully remove the bowl. Gently tap the whisk against the side of the bowl to release any trapped meringue. Sift the cornstarch directly over the meringue. Using a large, flexible spatula, gently fold in the sifted cornstarch until it is just combined. Avoid over-folding, as excessive agitation can deflate the delicate air bubbles within the meringue.
- Spoon or pipe the meringue onto your prepared baking sheet, forming a large disk (approximately 10 inches in diameter). Create a slight indentation or well in the center of the disk to comfortably hold your toppings later. Bake in the preheated oven for 40 minutes to 1 hour. The pavlova is done when its exterior feels firm and dry to the touch. If it still feels squishy, gently close the oven door and continue baking for additional time. Baking duration can vary based on the size and shape of your pavlova and your specific oven.
- Once the baking time is complete, turn off the oven. Leave the pavlova inside the oven with the door slightly ajar (you can prop it open with a wooden spoon) for at least 1 hour, or until it has completely cooled to room temperature. This slow cooling process is crucial for preventing cracks and ensuring a perfectly crisp exterior with a soft interior. Carefully remove and transfer to a wire rack to cool fully before assembly.
For the Macerated Berries:
- At least one hour before you intend to serve the pavlova (or even the night before for deeper flavor development), gently combine all the ingredients for the berries in a large bowl. Stir occasionally until the sugar begins to dissolve and the berries start to release their delicious juices. Be aware that the longer the berries macerate, the more juice they will produce; this is simply a characteristic to note. Taste and adjust the sugar or lemon juice to your preferred level of sweetness and tartness.
For the Whipped Cream:
- In a large, preferably chilled bowl, combine the very cold heavy whipping cream, confectioner’s sugar, and vanilla extract. Whip the cream with a whisk (or in a stand mixer with the whisk attachment) until medium peaks form. If you desire a firmer texture, continue whipping until stiff peaks are achieved. This component can also be prepared ahead of time and stored in the refrigerator until ready to assemble.
Recipe Video
Notes & Serving Suggestions
This recipe is designed to yield one impressive large, 10-inch pavlova, perfect as a centerpiece. Alternatively, you can create 8-10 charming smaller, individual pavlovas. For individual servings, simply spoon smaller mounds of meringue onto your prepared baking sheet, ensuring each has a slight indentation in the center to cradle the delicious toppings.
For optimal freshness and texture, pavlovas are best consumed within 4 days of preparation. To preserve its delicate crispness, wrap the completely cooled pavlova (without any toppings) very well in plastic wrap. Store it at room temperature in the least humid area of your home. It is crucial to assemble the pavlova with the lemon curd, berries, and whipped cream just before serving to prevent the meringue from becoming soggy and losing its signature crispness.
To serve, carefully transfer your cooled pavlova base to your chosen serving platter. Fill the central well with generous dollops of the creamy homemade lemon curd, followed by a bountiful layer of the macerated mixed berries. Finish by artfully topping it with a cloud of freshly whipped cream. For an elevated presentation, consider garnishing with a few fresh mint leaves or a sprinkle of finely grated lemon zest.
Nutrition Information (Approximate per Serving)
Calories: 310 kcal | Carbohydrates: 40g | Protein: 3g | Fat: 16g | Saturated Fat: 10g | Polyunsaturated Fat: 1g | Monounsaturated Fat: 4g | Cholesterol: 49mg | Sodium: 38mg | Potassium: 105mg | Fiber: 1g | Sugar: 38g | Vitamin A: 656IU | Vitamin C: 3mg | Calcium: 34mg | Iron: 1mg
*Nutrition values are estimated and may vary based on specific ingredients, portion sizes, and preparation methods.
Dessert, Cake, Celebration Dessert
Australian, New Zealander
310
Did you enjoy this recipe? We’d love to hear from you!
Please leave a comment below and share your experience with making this Lemon Berry Pavlova Cake. Your feedback and ratings help others discover delicious recipes!