
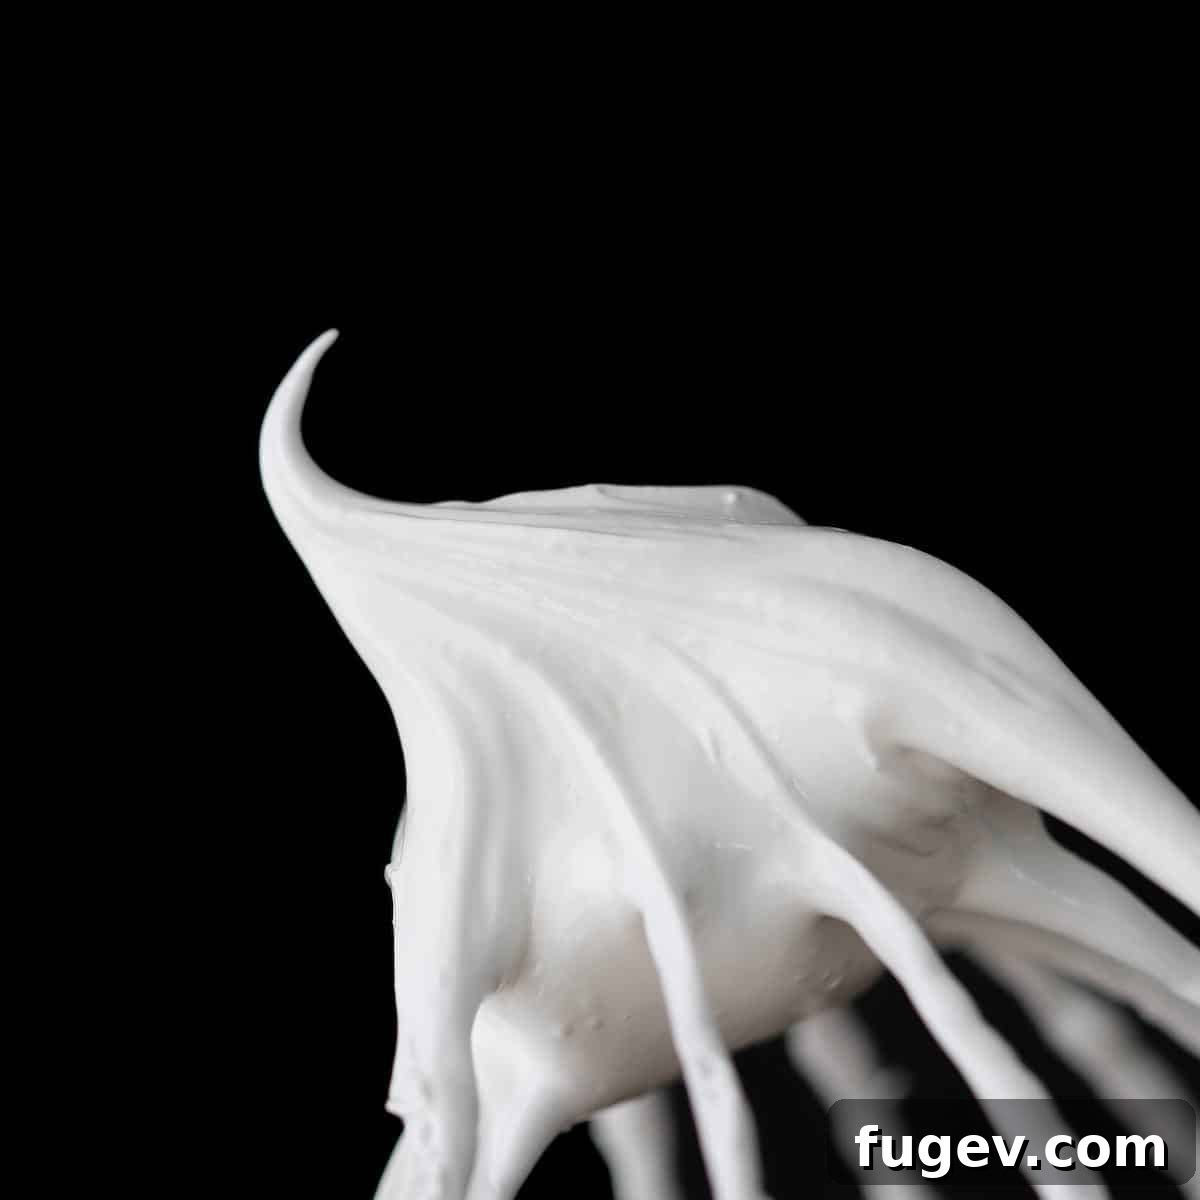
The Ultimate Homemade Marshmallow Fluff Recipe: Light, Stable & Absolutely Delicious
Prepare to elevate your dessert game with this incredibly easy and delightful homemade Marshmallow Fluff Recipe. Forget the bland, overly loose store-bought versions; our recipe delivers a light, airy, and truly satiny fluff that’s surprisingly stable. Requiring just 5 simple ingredients and less than 17 minutes of active preparation, you’ll achieve a perfect consistency that holds its shape beautifully. This stable fluff is an ideal topping or filling for a wide array of treats, from elegant cakes and cupcakes to fudgy brownies and delicate blondies. Get ready to experience the pure, authentic taste of vanilla marshmallow in a form that’s as versatile as it is irresistible!
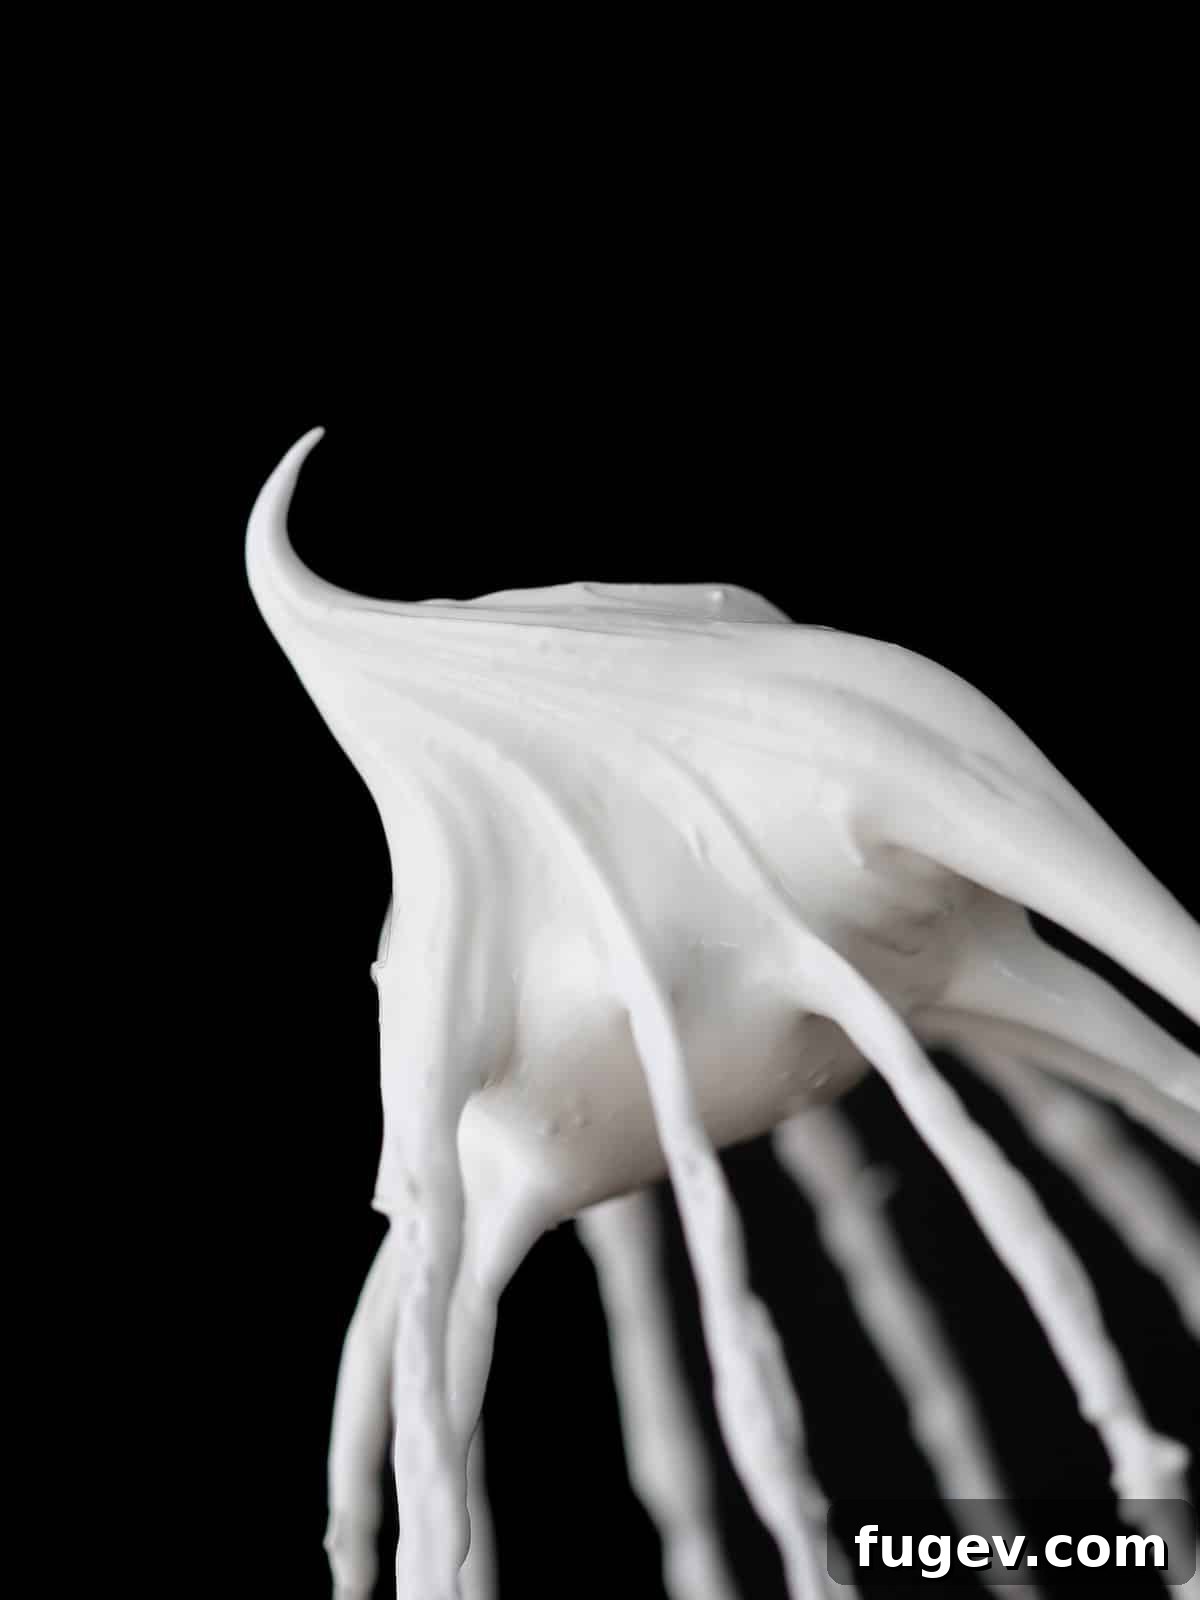
Making marshmallow fluff from scratch is not only simpler than you might imagine, but the results are also vastly superior and well worth the minimal effort. Commercial marshmallow fluff often lacks the structural integrity needed for piping and tends to feature artificial vanilla flavors. In contrast, our homemade version, based on a classic Italian meringue, develops a robust structure and a rich, natural vanilla essence that transforms any dessert. Swirl it into cookies, spread it generously over brownies, or mound it high on your favorite cakes. It’s also exquisite atop an instant pot chocolate cheesecake, bright lemon bars, decadent fudgy brownies, or any of our delightful cupcake recipes. This recipe is your secret weapon for creating memorable, bakery-quality desserts right in your own kitchen.
While I also have a fantastic marshmallow frosting recipe, the key distinction lies in the meringue base. That recipe uses a Swiss meringue, while this marshmallow fluff utilizes an Italian meringue. Both yield a light, airy, and beautifully shiny texture, but this Italian meringue-based fluff offers superior stability. For applications where a truly firm, pipeable, and long-lasting structure is paramount, this marshmallow fluff is the ideal choice. However, if you’re seeking a slightly lighter, cloud-like texture for a frosting and don’t mind a bit less rigidity, the Swiss meringue frosting might be your preference. This article will guide you through mastering the stable and versatile Italian meringue marshmallow fluff.
Table of Contents
- What is Marshmallow Fluff?
- Why Choose Homemade Marshmallow Fluff?
- Understanding Italian Meringue: The Secret to Stable Fluff
- Essential Ingredients Needed
- How to Make Homemade Marshmallow Fluff: A Step-by-Step Guide
- Professional Tips for Making Marshmallow Fluff
- Troubleshooting Common Marshmallow Fluff Issues
- How to Store Homemade Marshmallow Fluff
- Creative Ways to Use Marshmallow Fluff
- Frequently Asked Questions
- Marshmallow Fluff Recipe
What is Marshmallow Fluff?
Marshmallow fluff, often also called marshmallow crème, is essentially a luscious, whipped confection that captures the essence of soft, pillowy vanilla marshmallows before they fully set. At its core, this particular marshmallow fluff is a type of Italian meringue. It shares a close kinship with my Italian meringue buttercream and even homemade marshmallows, but with a crucial difference: it contains no butter, corn syrup (unless specifically added for extra insurance), or gelatin. Traditional store-bought fluffs often rely on corn syrup for stability, but with the robust structure of Italian meringue, it’s simply not needed here. This results in a purer flavor and a remarkably stable texture that is entirely homemade.
Why You’ll Fall in Love with this Homemade Marshmallow Fluff
- Unrivaled Light and Airy Texture with a Satin Finish: This fluff is truly as light as air, dissolving delicately on your tongue, yet boasting a luxurious, shiny, and smooth finish. It tastes like the delightful, sweet interior of a perfectly toasted marshmallow.
- Stiff Enough for Piping or Spreading with Confidence: Unlike many commercial fluffs that are too fluid to hold their shape, homemade marshmallow fluff can be whipped to firm, stiff peaks. This makes it ideal for elaborate piping designs on cakes and cupcakes, or for spreading smoothly as a stable frosting. You can also whip it to softer peaks if you desire a consistency similar to store-bought fluff for spreading.
- Incredibly Versatile for Endless Culinary Creations: The applications for this fluff are limited only by your imagination! Whether whipped to stiff peaks for decorative frosting or used as a soft swirl, it can enhance a myriad of baked goods, ice creams, hot beverages, and even savory dishes.
- Surprisingly Easy to Make, Even for Novices: Don’t let the term “Italian meringue” intimidate you! With just a little attention to timing and simple instructions, anyone can master this recipe. I promise, you’ll be guided through each step by a pastry chef to ensure your success.
- Exceptional Stability and Longevity: The Italian meringue technique gives this fluff remarkable stability. When stored correctly in the refrigerator or freezer, it maintains its perfect consistency for an extended period, far outperforming less stable options like some marshmallow frostings which tend to separate within a few days.
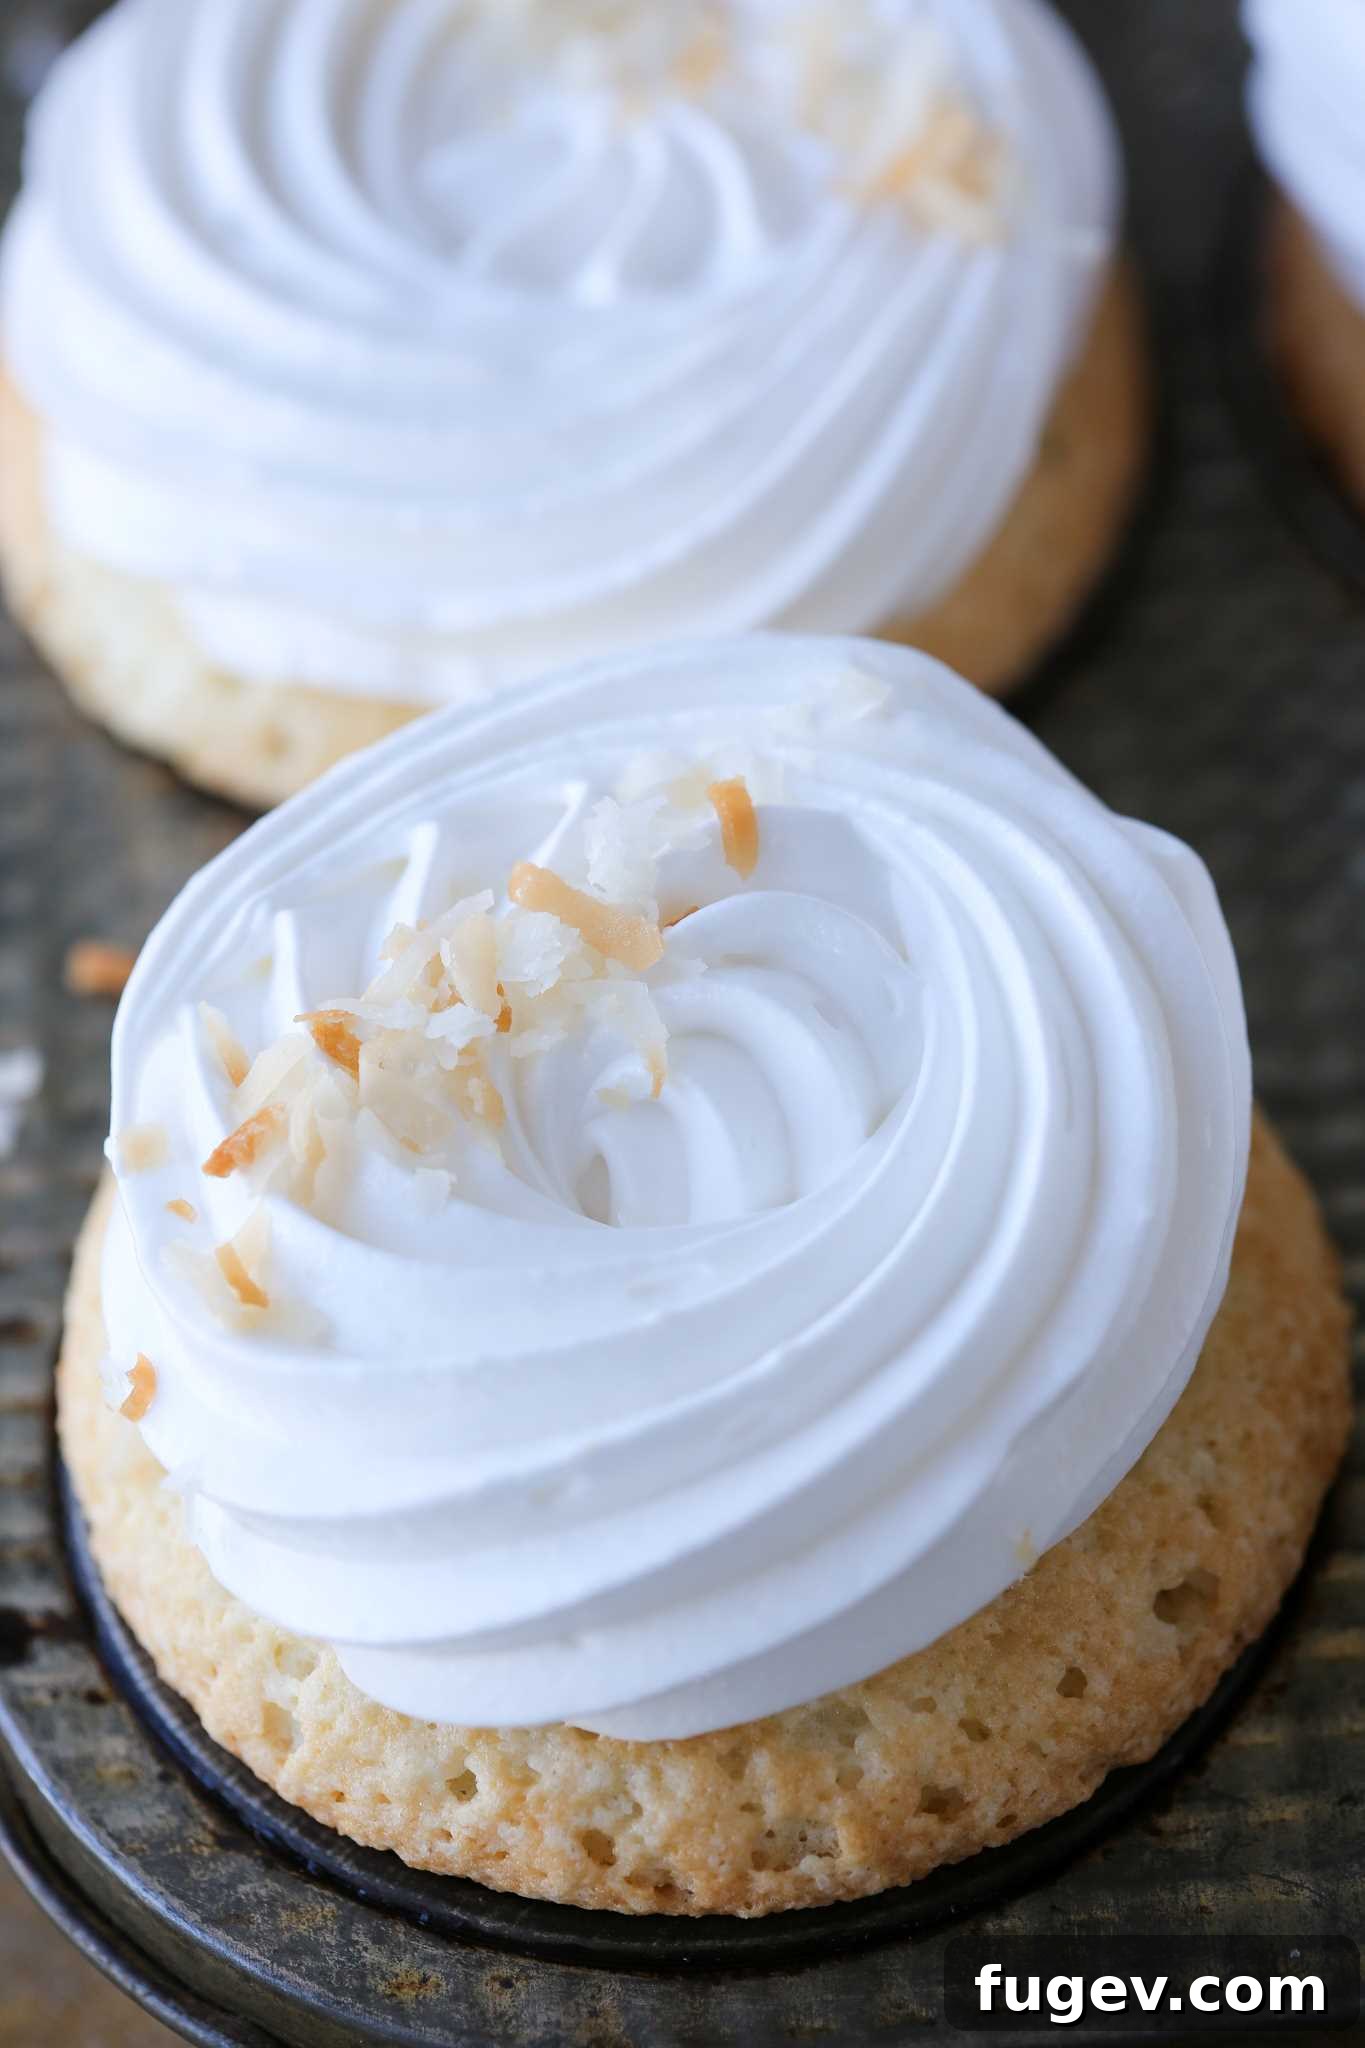
Understanding Italian Meringue: The Secret to Stable Fluff
Marshmallow fluff or marshmallow crème, in its most stable and delicious form, is fundamentally an Italian meringue. This superior meringue is created by carefully heating sugar and water to the “soft ball stage” (which is typically between 238-240°F or 114-116°C). This hot, cooked sugar syrup is then slowly streamed into egg whites that have been whipped to stiff peaks. The high temperature of the sugar syrup cooks the egg whites, making the meringue safe to eat without further baking and imparting an incredible stability that other meringue methods (like French or Swiss) simply cannot match for this application. The resulting confection is less intensely sweet than some other marshmallow frostings and possesses an impressive structural integrity, allowing it to be used in countless ways without collapsing. This method also eliminates the need for corn syrup, often found in commercial fluffs, ensuring a pure, unadulterated flavor profile.
Essential Ingredients for Perfect Homemade Fluff
Creating this delicious marshmallow fluff requires a handful of common ingredients, but the quality and preparation of each play a significant role in the final outcome:
- Egg Whites: For the silkiest, shiniest, and most stable marshmallow fluff, freshly separated egg whites are highly recommended. While pasteurized liquid egg whites from a carton can be used, be aware that they may result in a slightly less stable meringue that is more prone to weeping (separating) sooner, and the texture may not be quite as satiny. There’s also a higher chance that the whites might “break” when the hot sugar syrup is added if they aren’t fresh.
- Granulated Sugar: This is the primary sweetener and structure builder. When heated with water, it forms the crucial hot syrup that stabilizes the egg whites.
- Water: Used to dissolve the granulated sugar, allowing it to reach the precise temperature needed for the soft ball stage.
- Cream of Tartar: This is an excellent, inexpensive insurance policy for your meringue. As an acid, it helps to stabilize the egg whites, allows them to whip to greater volume, and prevents over-whipping. While you can omit it if you don’t have it on hand, it definitely aids in achieving the best results.
- Kosher Salt: More than just a flavor enhancer, kosher salt is critical in this recipe for two reasons: it perfectly balances the sweetness, enhancing the overall flavor profile, and it also contributes to the stability of the meringue.
- Vanilla Extract: To preserve its delicate flavor and allow the meringue to reach its maximum volume, always add the vanilla extract after the meringue has achieved stiff peaks and is cooling. This ensures the pure, aromatic vanilla shines through.
- For precise measurements and detailed instructions, please refer to the comprehensive recipe card below.
How to Make Homemade Marshmallow Fluff: A Step-by-Step Guide
Follow these detailed instructions to create luscious homemade marshmallow fluff without the need for corn syrup. Further precise details and quantities are available in the recipe card below.
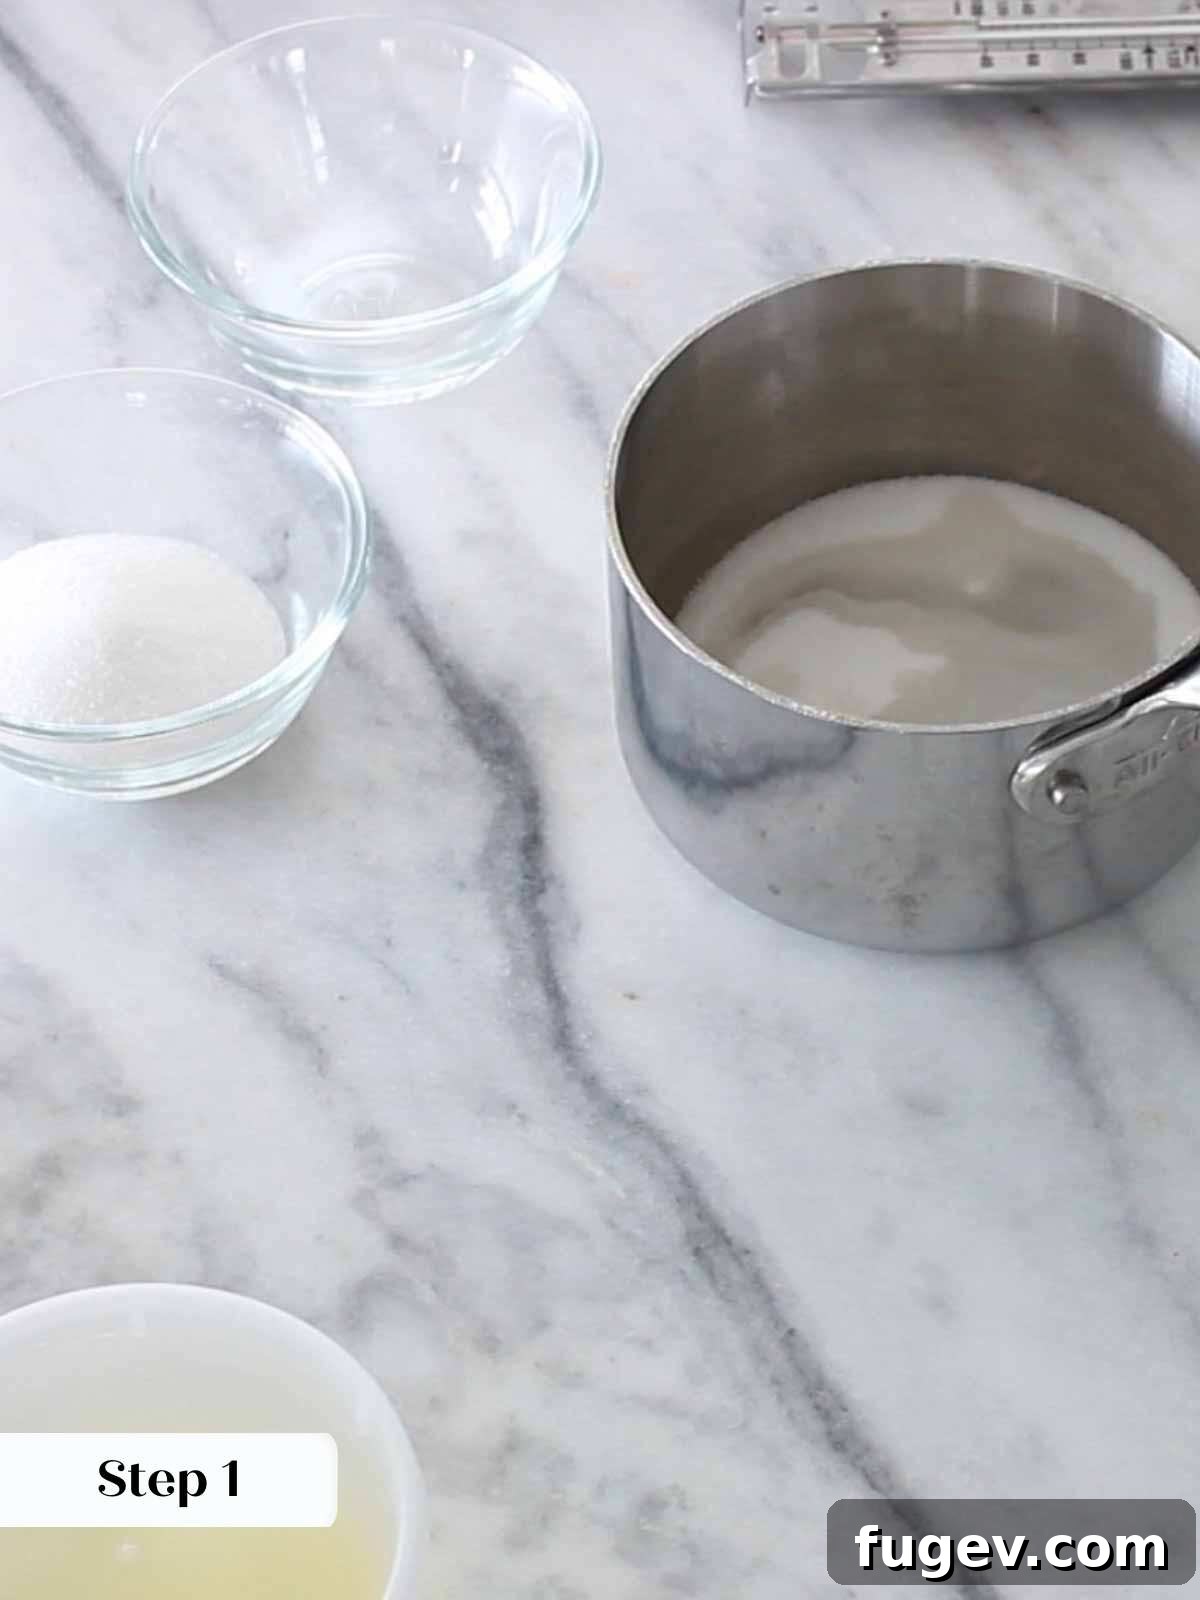
Step 1: Prepare the Sugar Syrup. In a small, heavy-bottomed saucepan, combine the granulated sugar and water. Stir them together briefly just to moisten the sugar. Place the pot over high heat and bring the mixture to a rolling boil. As the syrup heats, use a clean pastry brush dipped in water (or a folded damp paper towel) to gently brush down any sugar crystals that cling to the sides of the pot. This crucial step prevents crystallization, ensuring a smooth syrup. Clip a reliable candy thermometer to the side of the pot, ensuring its tip is fully immersed in the syrup without touching the bottom, for an accurate temperature reading.
Step 2: Whip the Egg Whites. While your sugar syrup is heating and once it has reached a boil, begin preparing your egg whites. In the impeccably clean bowl of a stand mixer fitted with the whisk attachment, add the egg whites, cream of tartar, and kosher salt. Begin beating on medium-high speed. Continue to beat until the egg whites achieve firm, stiff peaks. This means when you lift the whisk, the peaks should hold their shape without drooping. The goal is to time this so that your egg whites reach stiff peaks around the same time your sugar syrup reaches the soft ball stage.
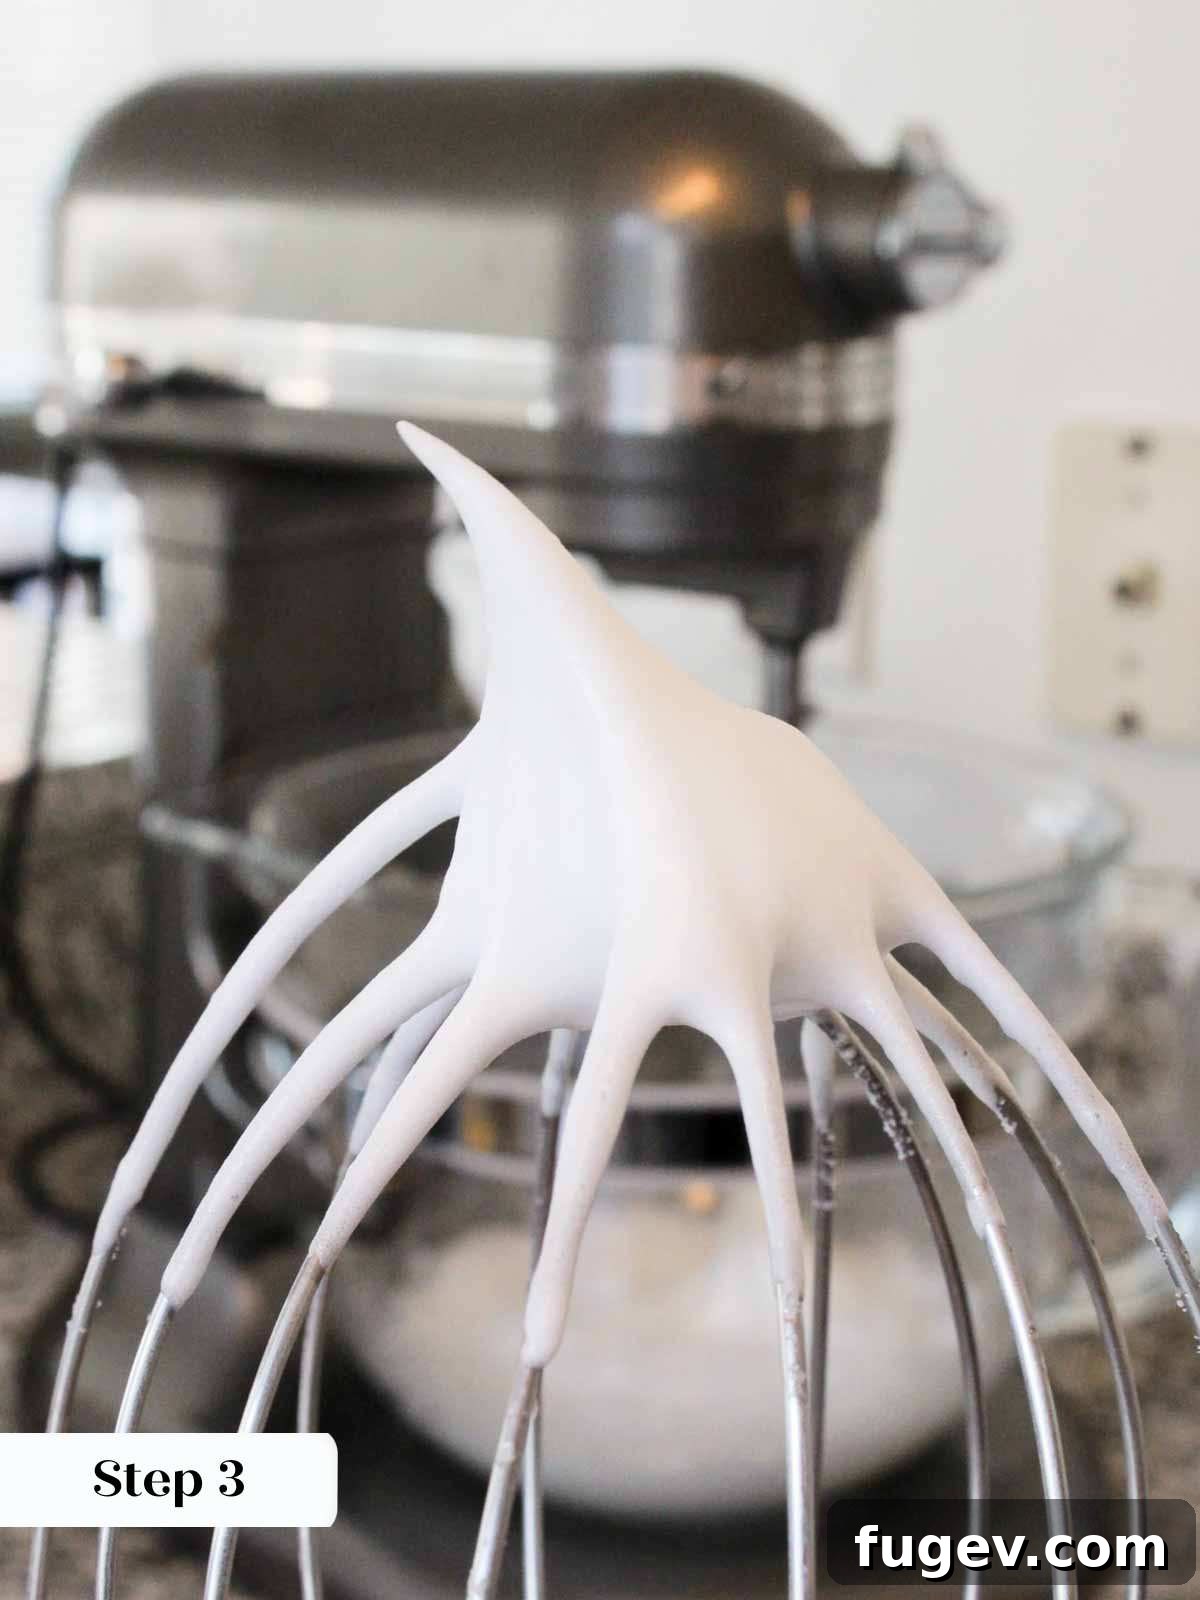
The most important thing to remember when making marshmallow fluff, particularly with Italian meringue, is that you are in complete control! You can adjust the speed of your mixer for the egg whites and the heat of your stove under the sugar syrup. Don’t hesitate to turn down the stove’s heat if your egg whites are not yet ready, or conversely, reduce the mixer speed if your whites reach stiff peaks before the syrup is at temperature. This flexibility allows both components to synchronize perfectly.
Step 3: Synchronize & Test the Syrup. Aim to have your egg whites at stiff peaks just as the sugar syrup reaches the “soft ball stage,” which is between 238-240°F (114-116°C). As mentioned, you can always reduce the mixer speed to maintain the whites if the syrup needs a moment longer to reach the correct temperature. A precise candy thermometer is your best friend here.
If you don’t have a candy thermometer, you can use the traditional soft ball sugar method. Drop a small amount of the hot sugar syrup into a bowl of ice water. If it forms a soft, pliable ball that can be flattened between your fingers, it has reached the perfect soft ball stage.
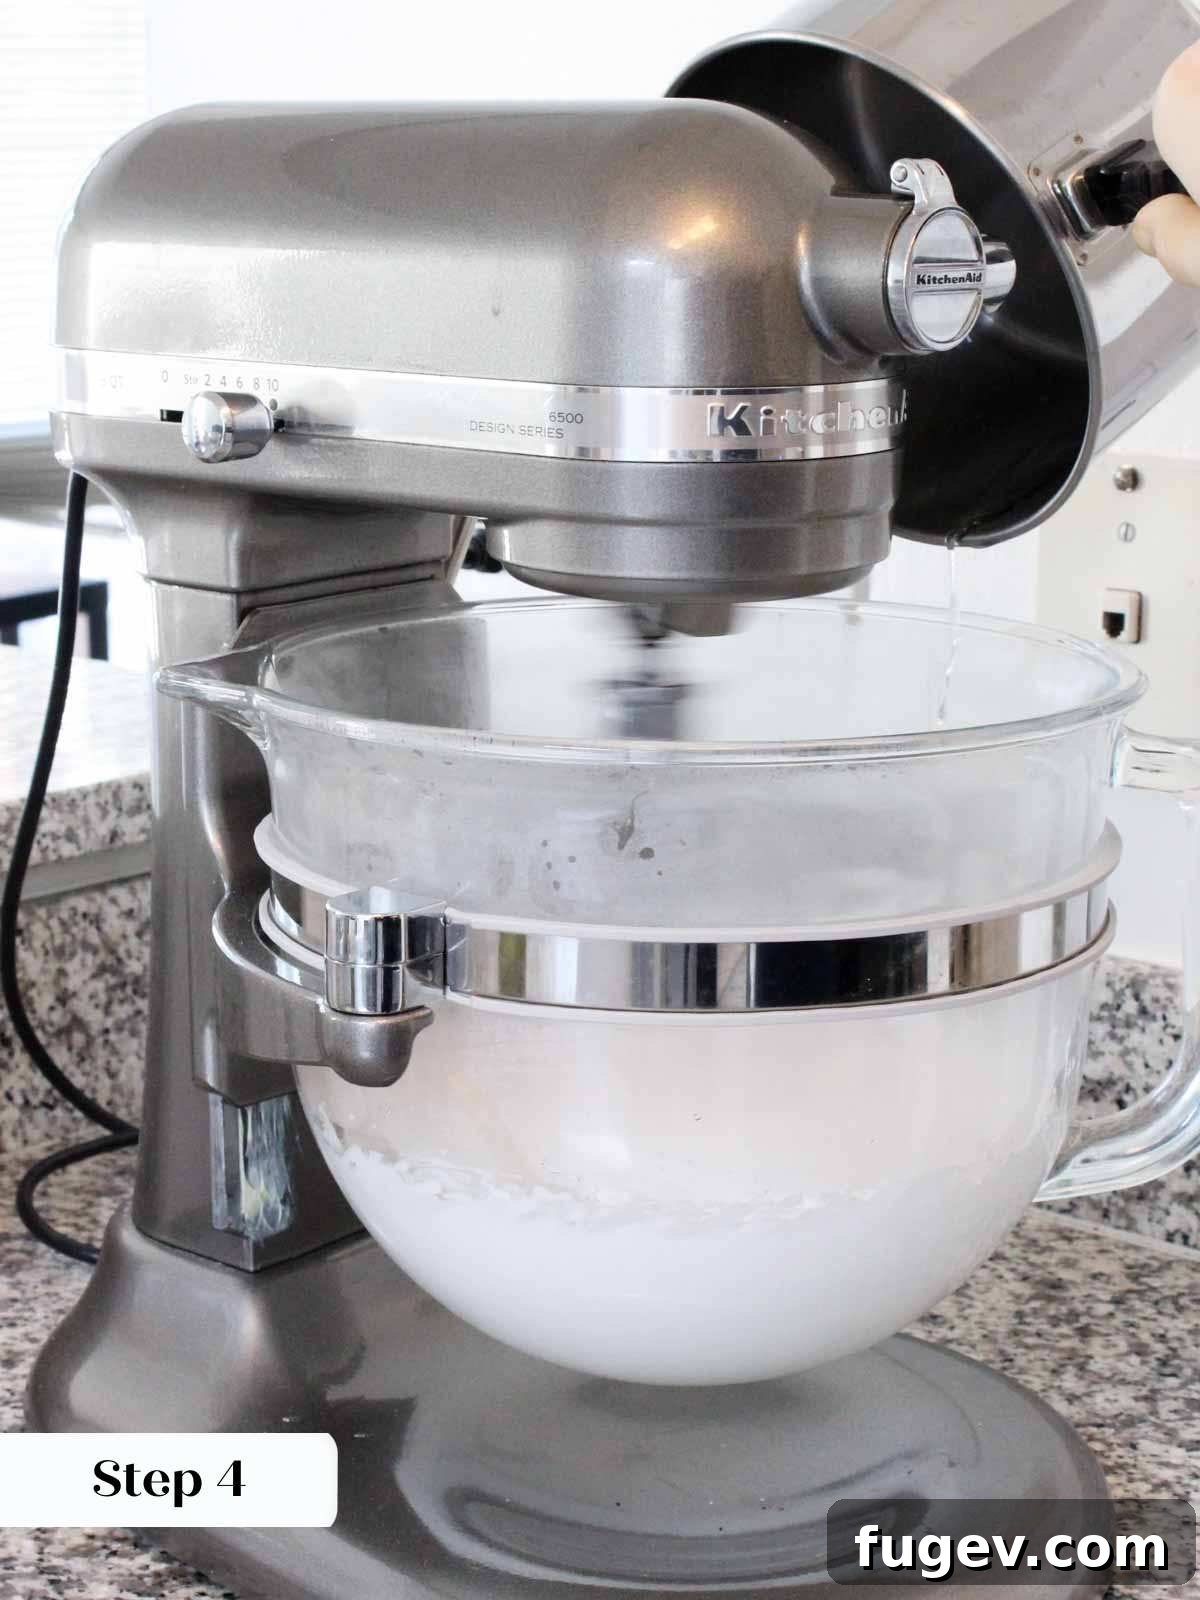
Step 4: Carefully Add the Hot Syrup. Once the sugar syrup hits the soft ball stage, immediately turn off the heat. Very carefully, move the hot pot of syrup to your stand mixer. With the mixer running on high speed, slowly and steadily pour the hot syrup into the whipping egg whites. Direct the stream down the side of the mixing bowl, trying your best to avoid pouring it directly onto the whisk attachment itself. This prevents the syrup from splattering and minimizes the risk of hot sugar syrup flying at your face. Safety is paramount when working with hot sugar!
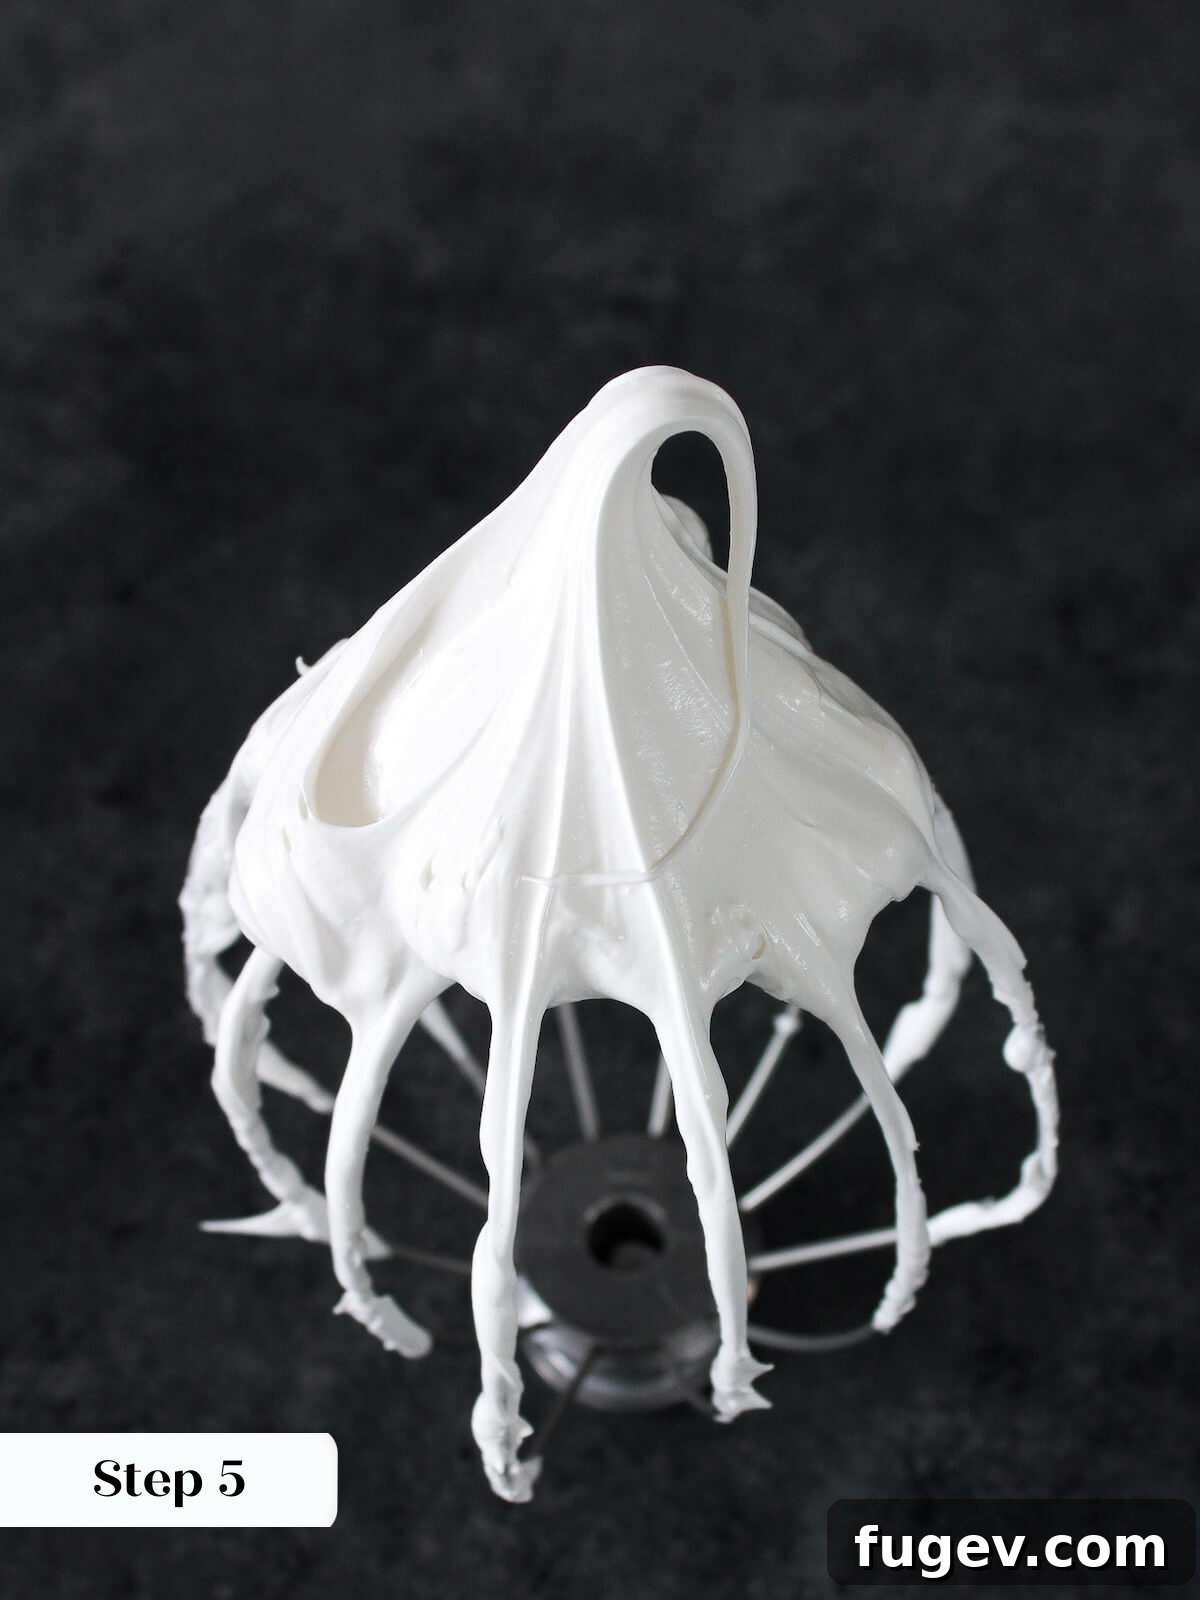
Step 5: Whip to Perfection. After all the sugar syrup has been incorporated, continue to beat the meringue on high speed. You will beat it until the meringue is incredibly stiff, beautifully shiny, and has cooled down significantly – this usually takes about 7 minutes or more, depending on your mixer and ambient temperature. The bowl should feel cool to the touch.
Chef Lindsey’s Professional Tips for Making Marshmallow Fluff
- Timing is Everything: Just like with my Italian meringue buttercream, making this fluff is a balancing act. You’re orchestrating the heating of the sugar syrup and the whipping of the egg whites simultaneously. Don’t be afraid to adjust your stove’s heat (turning it down or off) to give your meringue more time to whip, or conversely, slow down your mixer if your egg whites reach stiff peaks too quickly while waiting for the syrup. Maintaining control is key to perfect synchronization.
- Preemptive Stove Turn-Off for Safety: I always recommend removing the sugar syrup from the heat a tiny bit *before* it technically reaches the soft ball stage (e.g., at 238°F instead of 240°F). This slight buffer allows for “carry-over cooking” – the syrup will continue to heat up for a moment even after being removed from the stove. This gives you precious seconds to safely and slowly transfer the hot pot to your mixer, turn the mixer speed up, and begin pouring the syrup in a slow, steady stream. Remember, sugar burns are extremely serious, so prioritizing safety is crucial.
- Always Use Freshly Separated Egg Whites: While it might be tempting to use pasteurized egg whites from a carton, freshly separated egg whites will consistently yield a superior meringue. Fresh whites produce a much more stable, silkier, and shinier fluff. Using carton whites increases the probability of the meringue being less stable, weeping sooner, and even “breaking” (deflating or becoming watery) when the hot sugar syrup is added, even if all other steps are followed perfectly. This is a lesson I learned through many wasted batches of egg whites!
- Ensure Utensils and Bowls are Grease-Free: Any trace of fat or grease (from egg yolks, oily hands, or dirty equipment) in your mixing bowl or on your whisk attachment can prevent egg whites from whipping up properly. Always use clean, dry, and grease-free equipment.
- Patience During Cooling: Don’t rush the final whipping step. It’s essential that the meringue cools down while being beaten. This process solidifies its structure, giving you that stable, pipeable fluff. If it’s still warm, it’s not ready.
Troubleshooting Common Marshmallow Fluff Issues
- My Meringue Didn’t Get Stiff: This is often due to fat contamination (a speck of egg yolk, grease on the bowl/whisk), or under-whipping the egg whites before adding the syrup. Ensure all equipment is spotless. Also, if the sugar syrup wasn’t hot enough (didn’t reach soft ball stage), it won’t cook and stabilize the whites properly.
- My Fluff is Too Runny/Loose: This usually means the sugar syrup wasn’t cooked to the correct soft ball stage (238-240°F). If it’s undercooked, the meringue won’t set up properly and will remain too liquid. Ensure your candy thermometer is accurate and immersed correctly.
- My Meringue is Grainy: If you feel sugar crystals in your fluff, it’s likely that sugar crystals formed on the sides of the pot during syrup cooking and weren’t brushed down, or the syrup wasn’t poured slowly enough into the egg whites, allowing some sugar to crystallize.
- My Fluff is Weeping/Separating: While Italian meringue is very stable, it can eventually weep. This is more common with pasteurized egg whites. Ensure it’s stored in an airtight container in the fridge. Toasting the fluff can create a protective barrier, extending its non-weeping life.
How to Store Homemade Marshmallow Fluff for Maximum Freshness
Proper storage is key to enjoying your delicious homemade marshmallow fluff for as long as possible. Here’s how to keep it fresh:
- Room Temperature Storage: I would not recommend storing marshmallow fluff at room temperature for more than 2 hours before serving, especially if it’s topping a dessert. For the cleanest slices and best structural integrity, any cake or pie topped with fluff will benefit from being sliced straight from the refrigerator.
- Refrigerated Storage: Your homemade fluff will remain wonderfully stable and delicious when stored in an airtight container in the refrigerator for up to a month. After this period, it may begin to “weep,” meaning liquid (from the egg whites) might separate from the meringue. Interestingly, toasted meringue tends to keep longer without weeping because the toasted exterior creates a protective barrier, shielding the meringue from air exposure. However, while the fluff itself might last, whatever dessert you’ve frosted with it may not taste its best after a month in the fridge, so keep that in mind!
- Frozen Storage: For even longer preservation, marshmallow fluff can be stored in the freezer for up to 2 months. This applies whether it’s toasted or untoasted. Simply place it in an airtight container. In my experience, I’ve stored desserts like a coconut cupcake frosted with this fluff in an airtight freezer container for two months without any noticeable weeping. While the fluff holds up incredibly well, the quality of the underlying baked good might diminish over such a long freezing period.
Creative Ways to Use Your Delicious Homemade Marshmallow Fluff
Once you’ve mastered this recipe, a world of sweet possibilities opens up! Here are countless ways to enjoy your homemade marshmallow fluff:
- As a Superior Frosting or Topping: Treat homemade fluff just like you would any premium frosting! It’s perfectly pipeable and spreadable. Use it to create elegant designs on cupcakes or generously frost an entire chocolate mayonnaise cake. It’s also magnificent mounded high on cheesecakes, such as a bright lemon meringue cheesecake, a playful s’mores cheesecake, or a classic chocolate chip cheesecake. Its stability ensures it looks as good as it tastes.
- In Unexpected Dessert Creations: Venture beyond traditional applications! Mound this fluffy goodness on top of a decadent s’mores pie or a tangy key lime pie, offering a beautiful contrast in texture and flavor. Use it to top a luscious carrot cake roll. It makes an incredible filling for cupcakes, like these rich chocolate cupcakes, or serves as the perfect sweet center for s’mores whoopie pies. For an elegant layered dessert, spoon it into a trifle glass. You can also layer it onto individual servings of chocolate pudding crumbled with no-bake graham cracker crust for a quick and satisfying treat.
- Craft a Classic Fluffernutter Sandwich: If you know, you know! The combination of creamy peanut butter and sweet, airy marshmallow fluff is simply phenomenal. For a twist on this classic, try fluffernutter cookie cups or incorporate it into a delicious fluffernutter dip.
- Whip Up Irresistible Dips: This fluff forms a fantastic base for various sweet dips. Utilize this recipe in a refreshing marshmallow cream cheese fruit dip, a crowd-pleasing s’mores dip, or a unique Butterfinger dip for your next gathering.
- Elevate Your Hot Chocolate Experience: For a truly life-changing alternative to traditional marshmallows, generously top your hot chocolate with a dollop of homemade marshmallow fluff. Try it on a rich French hot chocolate or cocoa made with this homemade hot chocolate mix. The fluff melts into a creamy, dreamy layer that is simply divine.
- Explore Savory Applications: Why should dessert have all the fun? Marshmallow fluff can add a delightful, sweet-savory dimension to certain dishes. Use this fluff to top a comforting sweet potato casserole or creamy maple mashed sweet potatoes for a touch of unexpected sweetness and beautiful texture.
Frequently Asked Questions About Homemade Marshmallow Fluff
Achieving that beautiful toasted marshmallow flavor and golden-brown crust without a kitchen torch is surprisingly simple using your oven’s broiler! First, remove any racks from the top half of your oven and preheat the broiler to high. This method works particularly well with a gas broiler, but electric broilers are also effective. Carefully place your baked goods topped with fluff directly under the broiler. Hold them in your hand (using oven mitts for safety, of course) or place them on a baking sheet, and move them around gently to toast the fluff evenly to your desired golden hue. Keep a very close eye on it, as marshmallow fluff can brown quickly under a broiler. Once toasted to perfection, remove from the oven and turn the broiler off immediately.
Absolutely! Unlike many store-bought fluffs that are often too loose and runny to hold their shape, this homemade marshmallow fluff, based on an Italian meringue, can be whipped to beautifully stiff peaks. This makes it perfect for piping with various decorative tips. You can use a star tip to create intricate swirls, rosettes, or elegant borders, and it will maintain its gorgeous shape. For an added layer of texture and visual appeal, lightly toasting the piped frosting with a kitchen torch (or under a broiler as described above) creates a stunning finish.
While it is technically possible to make this recipe using pasteurized liquid egg whites from a carton, the final results will not be identical to those made with freshly separated egg whites. Meringues made with carton whites tend to be less stable and may lack the silky, satiny texture that fresh whites provide. Furthermore, there’s a higher probability that the meringue might “break” – meaning it could become watery or deflate – even if all other steps are followed correctly, especially when pouring in the hot sugar syrup. For the best possible outcome in terms of volume, stability, and texture, freshly separated egg whites are always the superior choice.
Yes, you certainly can. If you’re looking for additional insurance against sugar crystallization in your syrup, or if you simply prefer the slightly different texture that corn syrup can impart, you may add up to 2 tablespoons of light corn syrup to this recipe. The best time to add it is to the sugar and water mixture after it has already come to a boil, ensuring it fully incorporates into the hot syrup. This can help keep the syrup smooth and prevent unwanted crystallization, though with careful brushing down of the pot sides, it’s often not strictly necessary for this Italian meringue recipe.
Yes, this homemade marshmallow fluff is perfectly safe to eat. The Italian meringue method involves pouring very hot sugar syrup (cooked to 238-240°F) into the egg whites. This high temperature effectively cooks the egg whites, eliminating any concerns about consuming raw eggs. The process ensures that the meringue is not only safe but also incredibly stable and delicious.
If you tried this recipe and loved it, please leave a 🌟 star rating and let me know how it goes in the comments below. I love hearing from you; your comments make my day!
Marshmallow Fluff
Ingredients (US Customary)
- 1 cup granulated sugar
- ½ cup water
- 3 egg whites
- ⅛ teaspoon cream of tartar
- ⅛ teaspoon kosher salt
- 1 teaspoon vanilla extract
Instructions
-
In a small sauce pot, stir together sugar and water. Bring to a boil over high heat, brushing down the sides of the pot with a clean pastry brush dipped in water. (You can also use a paper towel that has been folded several times.)
-
Meanwhile, in the bowl of a stand mixer fitted with the whisk attachment, beat the egg whites, cream of tartar, and kosher salt until stiff peaks. Try to time the whites arriving at stiff peaks to the sugar syrup reaching soft ball stage (238-240°F). You can always turn the mixer down if the syrup needs a minute to catch up.
-
You can also test the syrup using the traditional soft ball sugar method where you drop a bit into a bowl of ice water and when the sugar forms a soft, pliable ball, it is perfect!
-
With the mixer on high, slowly pour the syrup into the whipping whites, trying to pour in one line down the side of the bowl and avoiding hitting the whisk at all costs! No hot, sugar syrup flying at your face, please!
-
Continue to beat until the meringue is stiff, shiny and cooled, about 7 minutes!
Video
Notes
Presentation – You can toast the meringue or leave it untoasted. It is delicious either way.
Storage – Store at room temperature for 2 hours, refrigerated for up to 1 month, or frozen for up to 2 months.
Nutrition