
Unlocking the Secret to the Perfect Old-Fashioned Raisin Bread
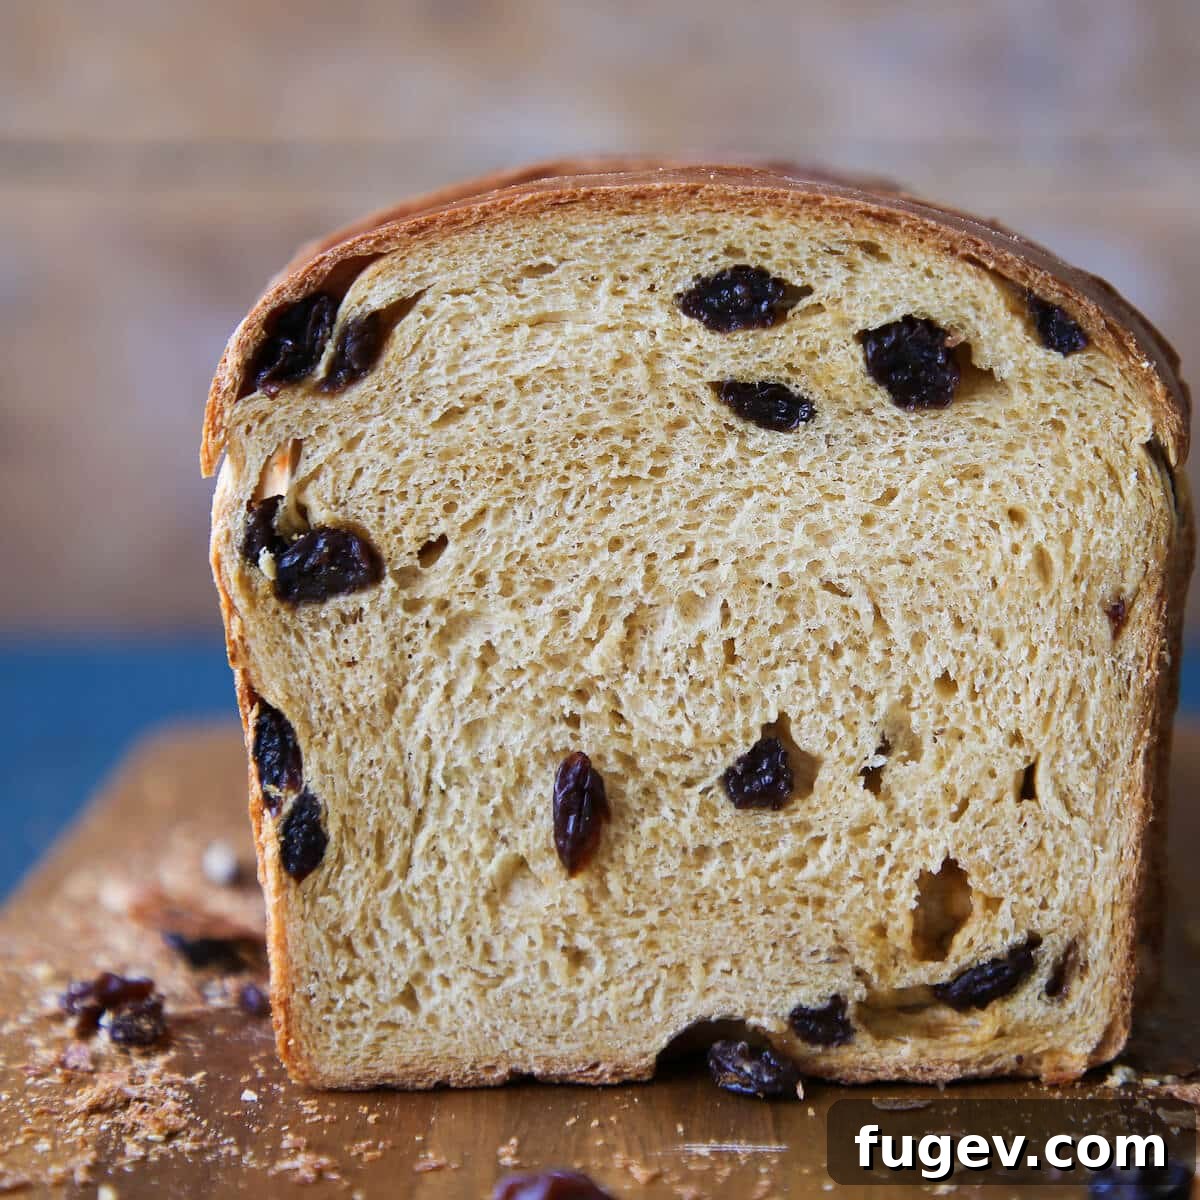
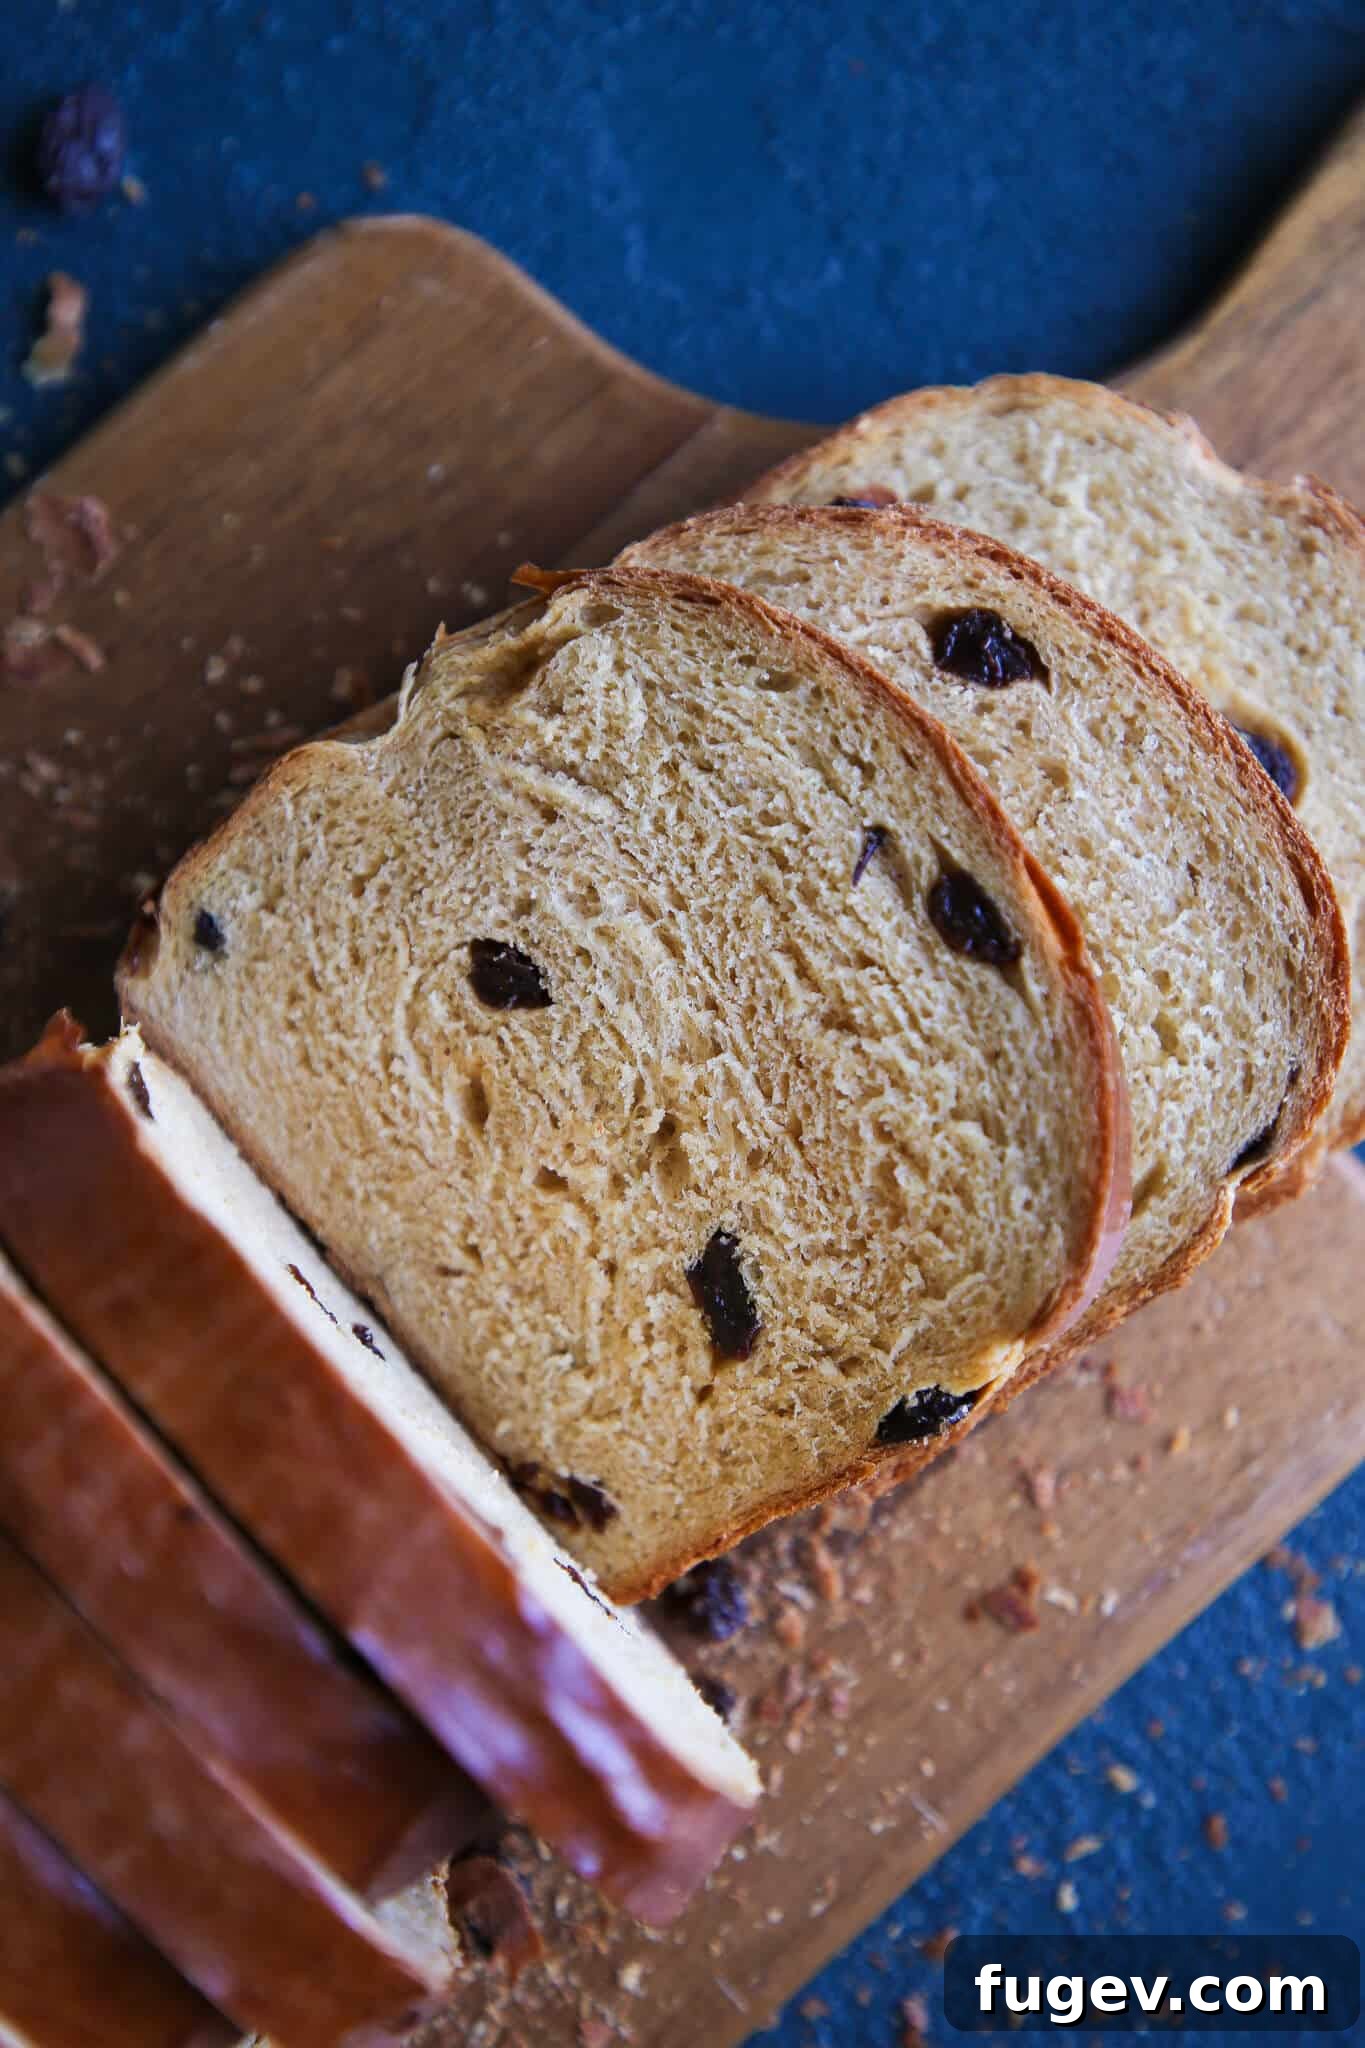
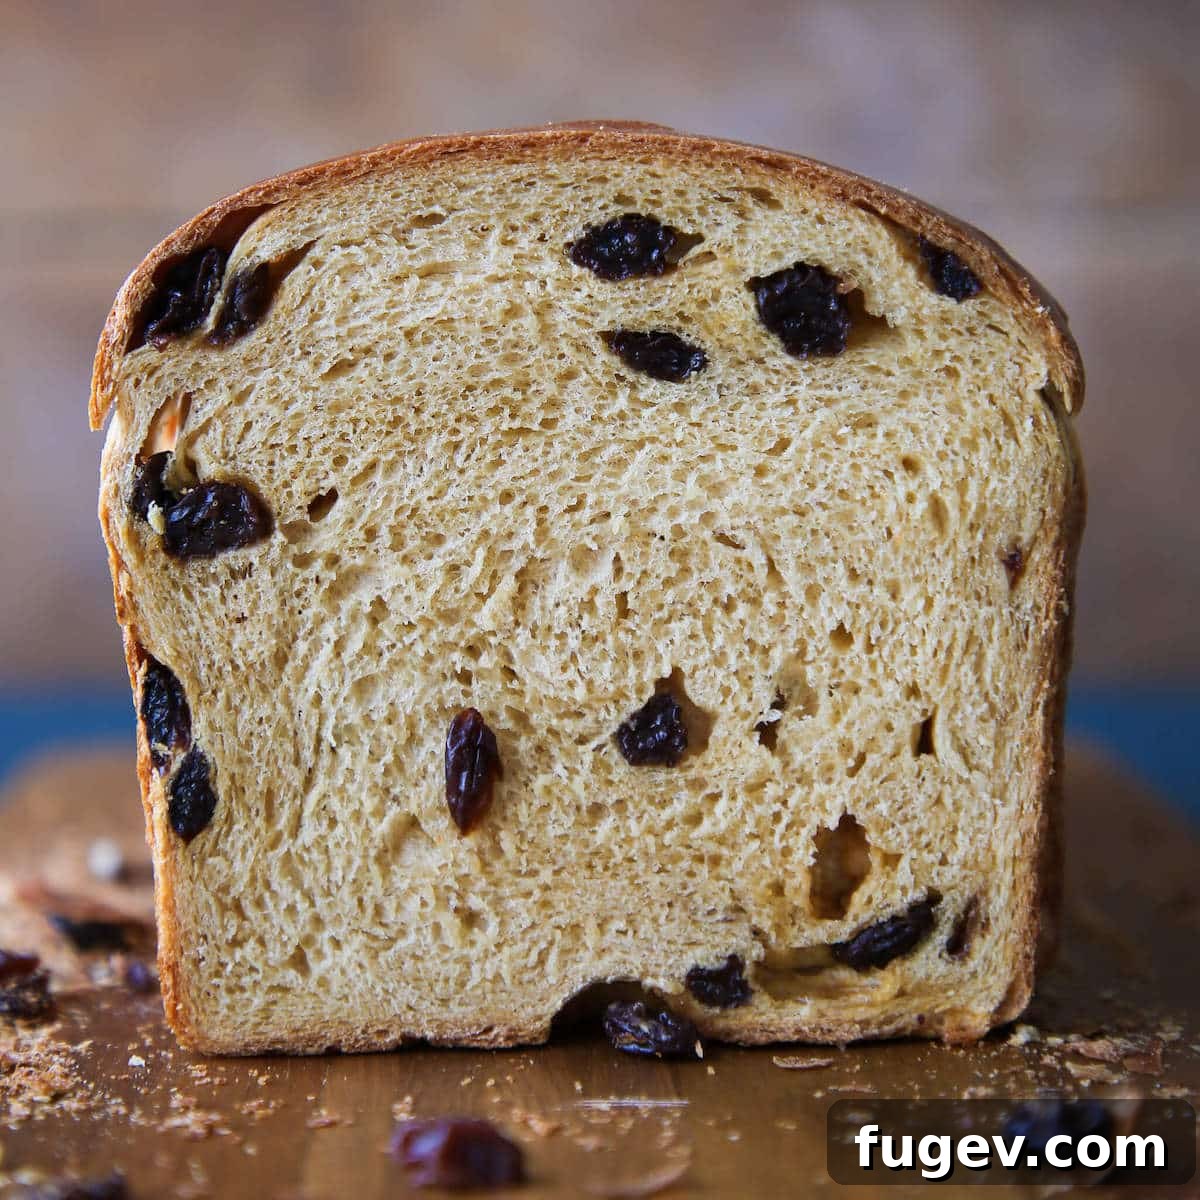
Prepare to fall in love with this incredible raisin bread recipe – a true classic reimagined for today’s baker. Each slice boasts a remarkably soft, delightfully chewy, and incredibly moist texture, enhanced by a subtle, comforting hint of molasses. This isn’t just bread; it’s an experience. Enjoy it simply by the slice, transform it into irresistible cinnamon sugar toast, or elevate your brunch with the most delicious French toast you’ve ever tasted!
Recipe at a Glance
A brief overview of what to expect. Jump to the full recipe card for all the detailed instructions and measurements.
Jump to Recipe
Prep Time
45 minutes
Cook Time
30 minutes
Proof Time
1 hour 30 minutes
Total Time
2 hours 45 minutes
Servings
24 slices (2 loaves)
Difficulty
Moderate (but with easy-to-follow steps!)
Calories *
163 kcal per serving
Technique
Mix dough, bulk proof, shape into loaves, final proof, and bake until golden brown and perfectly risen.
Flavor Profile
A soft, gently sweet bread with comforting molasses depth and succulent raisins evenly distributed throughout.
* Based on estimated nutrition panel
Why This Raisin Bread Will Become Your New Favorite
There’s something inherently comforting about homemade raisin bread, and this recipe takes that feeling to a whole new level. Here’s why you’ll find yourself making it again and again:
- Unrivaled Softness, Tenderness, and Moisture: This isn’t dry, crumbly bread. Our unique method of melting shortening and molasses directly into the milk before mixing is the secret to an exceptionally soft and moist crumb that stays fresh for days. The rich fats and sugars work together to keep the bread incredibly tender.
- Deeply Rich and Inviting Flavor: The combination of unsulphured molasses and plump raisins creates a complex, warm, and wonderfully fragrant bread. It strikes the perfect balance of sweetness without being overpowering, filling your home with an aroma that’s simply irresistible. Beyond its delicious taste, this bread maintains its delightful moisture for up to 3 days at room temperature, making it ideal for make-ahead baking.
- A Distinctive Old-Fashioned Recipe: Forget everything you know about typical raisin bread. This isn’t just another sweet bread. It stands apart with its innovative mixing method, its reliance on molasses for a unique depth of flavor, and the inclusion of shortening for an unparalleled soft and tender texture that harks back to traditional baking techniques. It’s a recipe that truly honors the past while delighting modern palates.
- Generous Yield – Two Loaves Every Time!: This easy-to-follow recipe is designed to produce two beautiful loaves. This means you can enjoy one immediately and save the other for later (it freezes wonderfully!), or share it as a thoughtful, delicious gift with friends and family. Doubling your delight is always a good idea!
Table of Contents
- Why You Will Love This
- Essential Ingredients & Smart Substitutions
- Creative Variations & Flavor Enhancements
- Professional Tips for Bread Baking Success
- Step-by-Step: How to Make This Raisin Bread Recipe
- Chef Lindsey’s Expert Tip
- Common Questions & Recipe FAQs
- More Delightful Raisin Bread Recipes
- The Full Raisin Bread Recipe Card
- Final Thoughts & More Bread Inspiration
While many of my cherished raisin-filled breads are often reserved for special holiday occasions, like the rich Stollen or the festive Panettone, this particular raisin bread recipe breaks free from seasonal constraints! It’s perfect for enjoying any time of the year, bringing a touch of homemade warmth to any day.
The moment I stumbled upon this recipe in my beloved American Woman’s Cookbook (the same treasure trove that gave us my fantastic 100% whole wheat bread recipe), I was captivated. Its unique blend of ingredients and intriguing mixing method absolutely demanded to be tried!
The result? Every bit as moist, chewy, and exquisitely flavorful as I had dared to hope! An added bonus is how wonderfully manageable the dough is, thanks to the harmonious blend of shortening and molasses. It truly makes the mixing and shaping process an absolute dream, even for novice bakers!
Essential Ingredients & Smart Substitutions
Crafting the perfect raisin bread begins with understanding the role of each ingredient. Here’s a detailed look at what you’ll need and how you can adapt the recipe:
- Whole Milk: More than just liquid, whole milk is crucial for the bread’s flavor, richness, and tender texture. Its higher fat content and lower water content compared to skim milk contribute to a wonderfully moist crumb and help inhibit excessive gluten development, resulting in a softer loaf. While whole milk is recommended for optimal results, you can certainly use other milk substitutes if that’s what you have on hand. Even buttermilk could work, imparting a slight tanginess, much like in my popular honey whole wheat buttermilk rolls.
- Shortening: Ingredients like Crisco are key here. Shortening is a pure fat that tenderizes the bread by coating flour proteins, thereby inhibiting gluten development. This results in an incredibly soft and fine crumb that truly sets this recipe apart. If you prefer, you can substitute unsalted butter for a richer flavor, or even coconut oil for a subtle tropical hint, though the texture might vary slightly.
- Molasses: I specifically use unsulphured molasses for this recipe. It offers a lighter, milder, and more nuanced flavor profile, infusing the bread with warm, cozy notes without the intense bitterness often associated with blackstrap molasses. Beyond its flavor contribution, molasses also acts as an excellent food source for the yeast, giving your proofing process a vibrant kickstart and contributing to a beautiful golden-brown crust.
- Dry Active Yeast: This variety of yeast requires an initial hydration step, allowing you to visually confirm its activity and ensuring a predictable rise. It’s reliable and easy to control. If active dry yeast isn’t available, you can substitute double the weight of fresh yeast or half the weight of instant yeast. When using fresh or instant yeast, you can typically add it directly to the dough mixture without the initial proofing step, as long as your liquid temperature is appropriate.
- All-Purpose Flour: The backbone of our bread, all-purpose flour provides the necessary structure and elasticity. Its moderate protein content is ideal for a bread that is both airy and tender. You can experiment with bread flour for a chewier texture or a mix of all-purpose and whole wheat for added nuttiness and fiber.
- Kosher Salt: More than just a flavor enhancer, kosher salt plays a critical role in controlling yeast activity and strengthening the gluten network. Its larger crystals mean a teaspoon weighs less than fine table salt, so precise measurement is important. It brings out the sweetness of the other ingredients and provides balance.
- Raisins: I typically use dark raisins for their classic flavor and chewiness, but feel free to explore! Golden raisins offer a brighter, tangier note, or you can use a delightful mix of both. If you’re a true raisin enthusiast, you can even increase the quantity up to 3 cups, as I often do in my sourdough raisin bread recipe (don’t forget to check out my sourdough starter recipe first!). My personal philosophy when it comes to raisins is simple: the more, the merrier!
Refer to the recipe card below for precise quantities and comprehensive instructions on all ingredients.
Creative Variations & Flavor Enhancements
This raisin bread recipe is wonderfully versatile, serving as a perfect canvas for your culinary creativity. Here are some delightful ways to customize your loaf:
- Unleash the Cinnamon Swirl! For an utterly irresistible cinnamon raisin bread, introduce a fragrant swirl! After the initial bulk proof and bench rest, gently roll each dough portion into an 8×12-inch rectangle. Lightly brush the surface with a touch of milk or water, then generously sprinkle a mixture of cinnamon and sugar over the entire dough, leaving a small margin clear along one long edge (just as you would when preparing sourdough cinnamon rolls). Tightly roll the dough lengthwise, pinch the seam securely closed, and place it seam-side down in your prepared loaf pan. Proceed with the final proof.
- Experiment with Different Mix-ins: Don’t limit yourself to just raisins! This bread welcomes a variety of dried fruits and nuts. Consider dried currants, which add a lovely tartness similar to those in sourdough hot cross buns. Dried cherries, like those in my cherry sourdough bread, freeze-dried strawberries, or even plump blueberries can offer exciting flavor bursts. For added texture and nutty flavor, try incorporating toasted pecans, walnuts, or even creamy white chocolate chips for a decadent treat.
- Swap Out the Sweetener: Molasses provides a distinct, warm flavor, but you can certainly change things up! Exchange the molasses for an equal amount of local honey for a lighter, floral sweetness. I’ve also successfully made this bread with dark brown sugar or light brown sugar, and the results were truly divine, offering a rich caramel-like undertone.
- Spice It Up! Introduce an aromatic kick with your favorite spices. This bread pairs beautifully with warming spice blends. Try adding a teaspoon or two of my homemade apple pie spice mix for a comforting, fruity warmth, or my rich pumpkin spice recipe for an autumnal twist. A pinch of nutmeg or cardamom can also add a delightful complexity.
Professional Tips for Bread Baking Success
Baking bread is a rewarding process, and a few expert insights can make all the difference. Follow these professional tips to ensure your raisin bread turns out perfectly every time:
- Temperature is Key – Let the Milk Cool! Yeast is a living organism, and its activity is highly sensitive to temperature. If your milk is too hot when you add the yeast, it will kill the yeast, preventing your bread from rising. The ideal “happy place” for yeast, where it thrives and ferments best, is between 90°F and 110°F (32°C and 43°C). Always use a thermometer to check your liquid temperature before adding yeast to ensure optimal fermentation and a robust rise.
- Patience Pays Off – Don’t Rush the Proofing. The bulk proof, or first rise, is one of the most crucial stages in bread making. During this time, the yeast works its magic, not only causing the dough to double in size but also developing the complex flavors and strengthening the gluten structure. Rushing this stage by using excessively warm temperatures or cutting the time short can lead to an underproofed dough. This often results in bland, yeasty-tasting bread that is dense, heavy, and can appear doughy even after being fully baked. Allow your dough to rise in a warm, draft-free spot until truly doubled, and trust the process.
- Embrace Precision – Grab Your Kitchen Scale! Baking bread is often described as both an art and a science, and for consistent, exceptional results, precision is paramount. The hydration level of your flour significantly impacts gluten development and the final texture of your bread. Measuring ingredients by weight using a digital kitchen scale is infinitely more accurate and consistent than using volumetric cups, which can vary wildly depending on how ingredients are scooped. Weighing ensures your dough always has the appropriate hydration for proper gluten development, making it easier to handle and guaranteeing a perfect loaf every time. It’s the simplest way to elevate your bread baking.
- The Windowpane Test: A Gluten Gauge: Mastering the windowpane test is a hallmark of good bread making. This test helps determine if your dough has been sufficiently kneaded and developed enough gluten. When you can stretch a small piece of dough (about the size of a golf ball) thin enough to see light through it without tearing, it means the gluten strands are well-developed and elastic. If it tears easily, keep kneading! This elasticity is what allows your bread to rise beautifully and create an airy, open crumb.
- Don’t Over-Flour Your Workspace: While it might seem intuitive to heavily flour your countertop when working with dough, particularly sticky ones, resist the urge with this recipe. This raisin bread dough is already moist enough that excess flour can actually make it harder to shape and alter the final texture. If you find the dough is sticking, a light spray of nonstick cooking spray on your work surface or hands is often more effective than dry flour, similar to how I handle my potato rolls.
Step-by-Step: How to Make This Irresistible Raisin Bread
Follow these detailed instructions to create two loaves of this scrumptious old-fashioned raisin bread. More precise measurements and additional details can be found in the comprehensive recipe card below.
Mix the Dough:
- Prepare the Liquid Base: In a medium saucepan, combine the shortening, molasses, and whole milk. Gently heat this mixture over low to medium heat, stirring occasionally, until all the shortening has completely melted and the ingredients are well combined. Remove from heat and allow the mixture to cool. It’s crucial that this liquid reaches a lukewarm temperature (between 100°F and 110°F or 38°C to 43°C) before proceeding. Using a thermometer here is highly recommended.
- Activate the Yeast: Once the liquid mixture has cooled to the proper temperature, whisk the active dry yeast into it. Let this mixture sit undisturbed for 10-15 minutes. During this time, you should observe the yeast bubbling and forming a frothy layer on the surface. This indicates that your yeast is alive and active! If, after 15 minutes, you see no bubbles or froth, your yeast may be old, improperly stored, or the milk was too hot, in which case it’s best to start over with fresh yeast to ensure a good rise.
- Combine Dry and Wet Ingredients: In the bowl of a stand mixer fitted with the paddle attachment, combine the salt and all-purpose flour. Pour in the activated yeast mixture. Mix on low speed until all the ingredients are just incorporated and a shaggy dough forms.
- Knead to Perfection: Switch from the paddle attachment to the dough hook attachment. Increase the mixer speed to medium and continue mixing for approximately 10-12 minutes (this may vary depending on your mixer). The dough is sufficiently kneaded when it becomes smooth, elastic, and passes the “windowpane test.” To perform this test, take a small portion of the dough and gently stretch it between your fingers. If you can stretch it thin enough to see light through it without tearing, the gluten is well-developed. If it tears, continue kneading for a few more minutes and re-test.
- Incorporate the Raisins: Once the dough has achieved the desired gluten development, reduce the mixer speed to low. Add the raisins and mix for an additional 1-2 minutes, ensuring they are evenly distributed throughout the dough without over-mixing.
Bulk Proof (First Rise):
- Prepare for Proofing: Lightly oil a large bowl with cooking spray or a neutral vegetable oil. Place the kneaded dough into the greased bowl. Turn the dough once to ensure it’s lightly coated in oil, which prevents it from drying out.
- Allow to Proof: Cover the bowl tightly with a damp kitchen towel or plastic wrap. Place the bowl in a warm, draft-free spot. Allow the dough to proof until it has doubled in size. In my kitchen, this usually takes about 1 hour, but proofing time can vary based on ambient temperature and humidity.
- Divide the Dough: Once the dough has doubled, gently turn it out onto a clean, lightly oiled countertop (avoiding excess flour as this dough is moist). Divide the dough into two equal portions. For precision, each portion should weigh approximately 730 grams.
Shape the Bread:
- Prepare Pans and Oven: While the dough is resting, preheat your oven to 350°F (175°C). Lightly spray two 9×5-inch (23×13 cm) loaf pans with cooking spray or grease them thoroughly with butter.
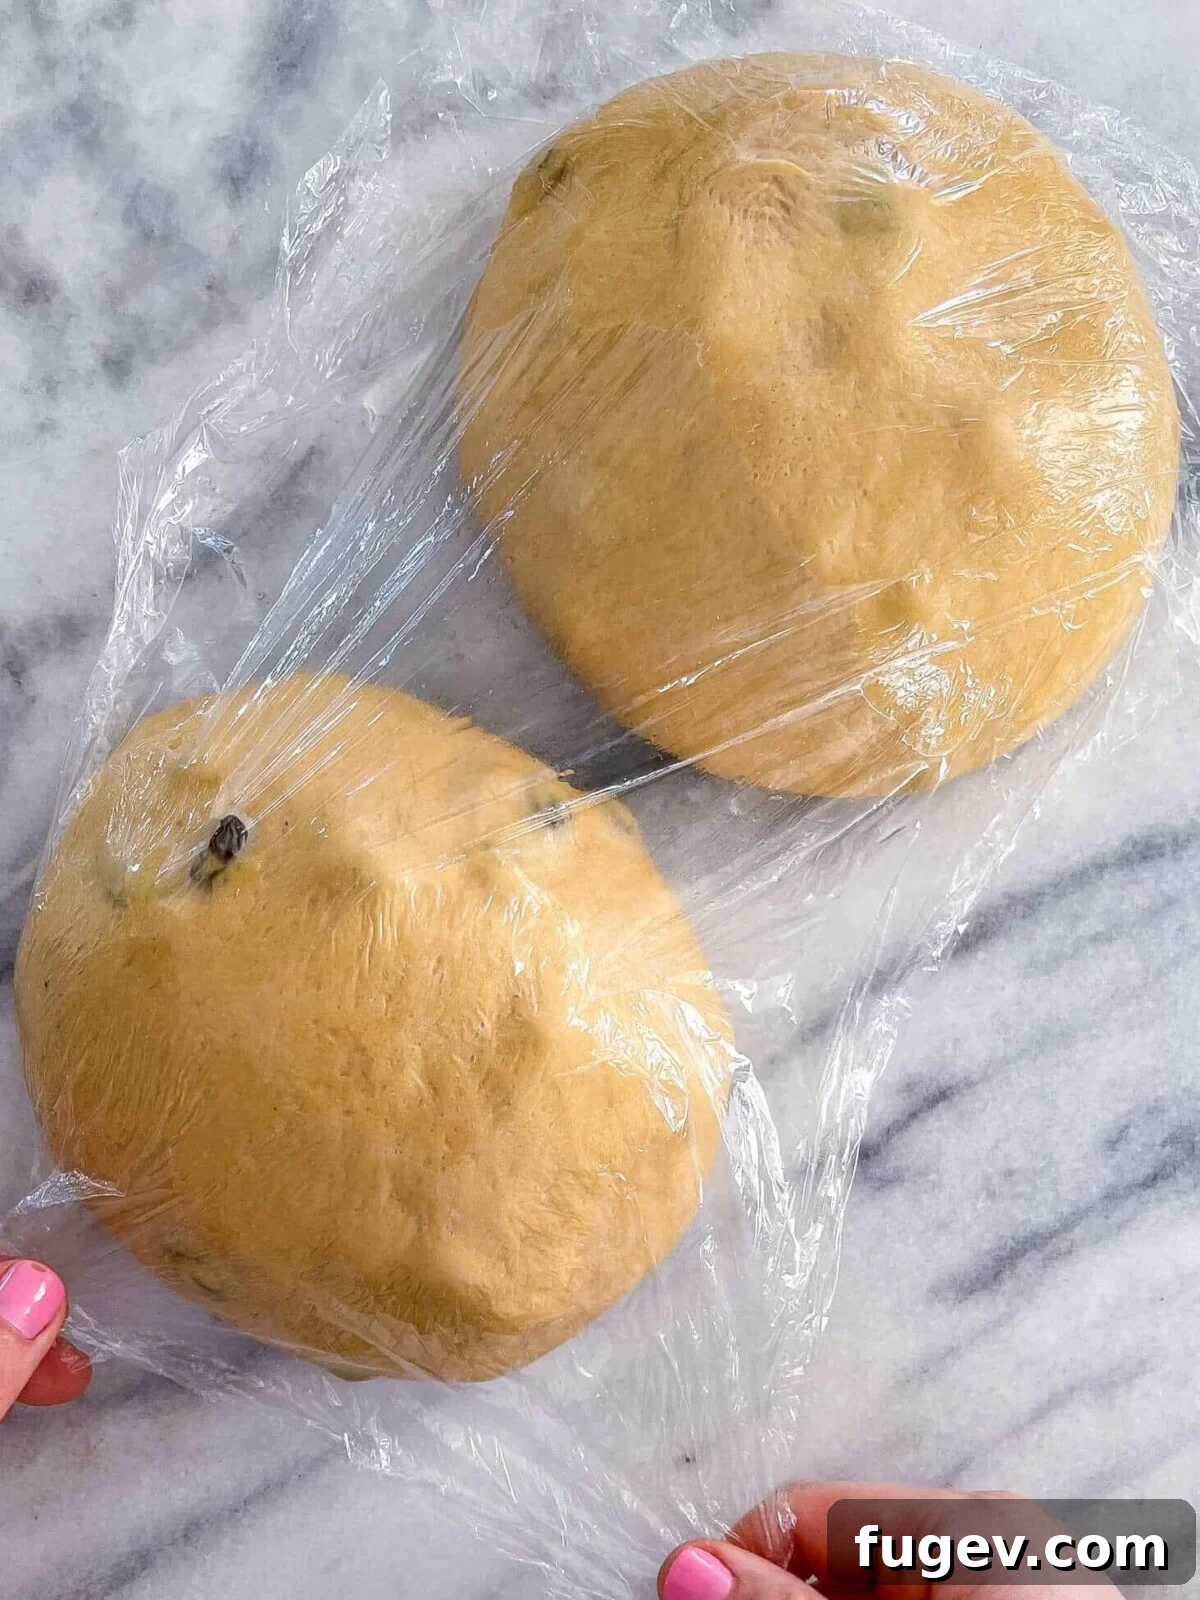
- Preshape the Dough: Take one portion of dough and preshape it into a boule (a round ball). To do this, gently fold each of the four sides of the dough towards the center, creating a somewhat square shape. Then, flip the dough over so the seam side is down. Using both hands, gently pull the dough towards yourself across the countertop, allowing the surface tension to tighten the top while pulling the dough underneath. Turn the dough a quarter turn and repeat this process until you have a smooth, tight round dough ball. Cover the preshaped dough with plastic wrap and let it bench rest (sit undisturbed) for 10 minutes. This allows the gluten to relax, making the dough easier to shape into a log.
- Final Shaping into Loaves: After the bench rest, take one preshaped boule. Flip the dough over so the seam is facing upwards. Gently pick it up by two corners and allow gravity to help stretch the dough into a rectangular shape. Place it back on the bench, with the seam still facing up. Fold the top third of the rectangle down towards the center and press firmly to seal. Rotate the dough 180 degrees, then repeat with the other side, folding the top third down towards the center and sealing. Now, using the heel of your right hand and the thumb on your left, grab the top part of the dough, starting from the right side, and fold it over your thumb. Press down with the heel of your right hand to firmly seal the seam you’ve just created. Repeat this rolling and sealing process along the entire length of the loaf. Adjust the length as you go to match your loaf pan; you want the dough log to be snug but not stretched too thin or too short. Repeat the thumb folding process if the dough log isn’t tight or long enough.
- Place in Pans: Carefully transfer each shaped dough log into its prepared loaf pan, ensuring the seam side is facing down. Cover the pans loosely with plastic wrap or a damp towel.
Final Proof and Bake:
- Final Rise: Place the covered loaf pans in a warm, humid environment. Allow them to proof until the dough has doubled in size once more and feels noticeably light and airy to the touch. This final proof typically takes less time than the bulk proof. If you desire a beautifully shiny, golden crust, gently brush the tops of the loaves with a beaten egg wash just before baking. A light, even coating is all you need.
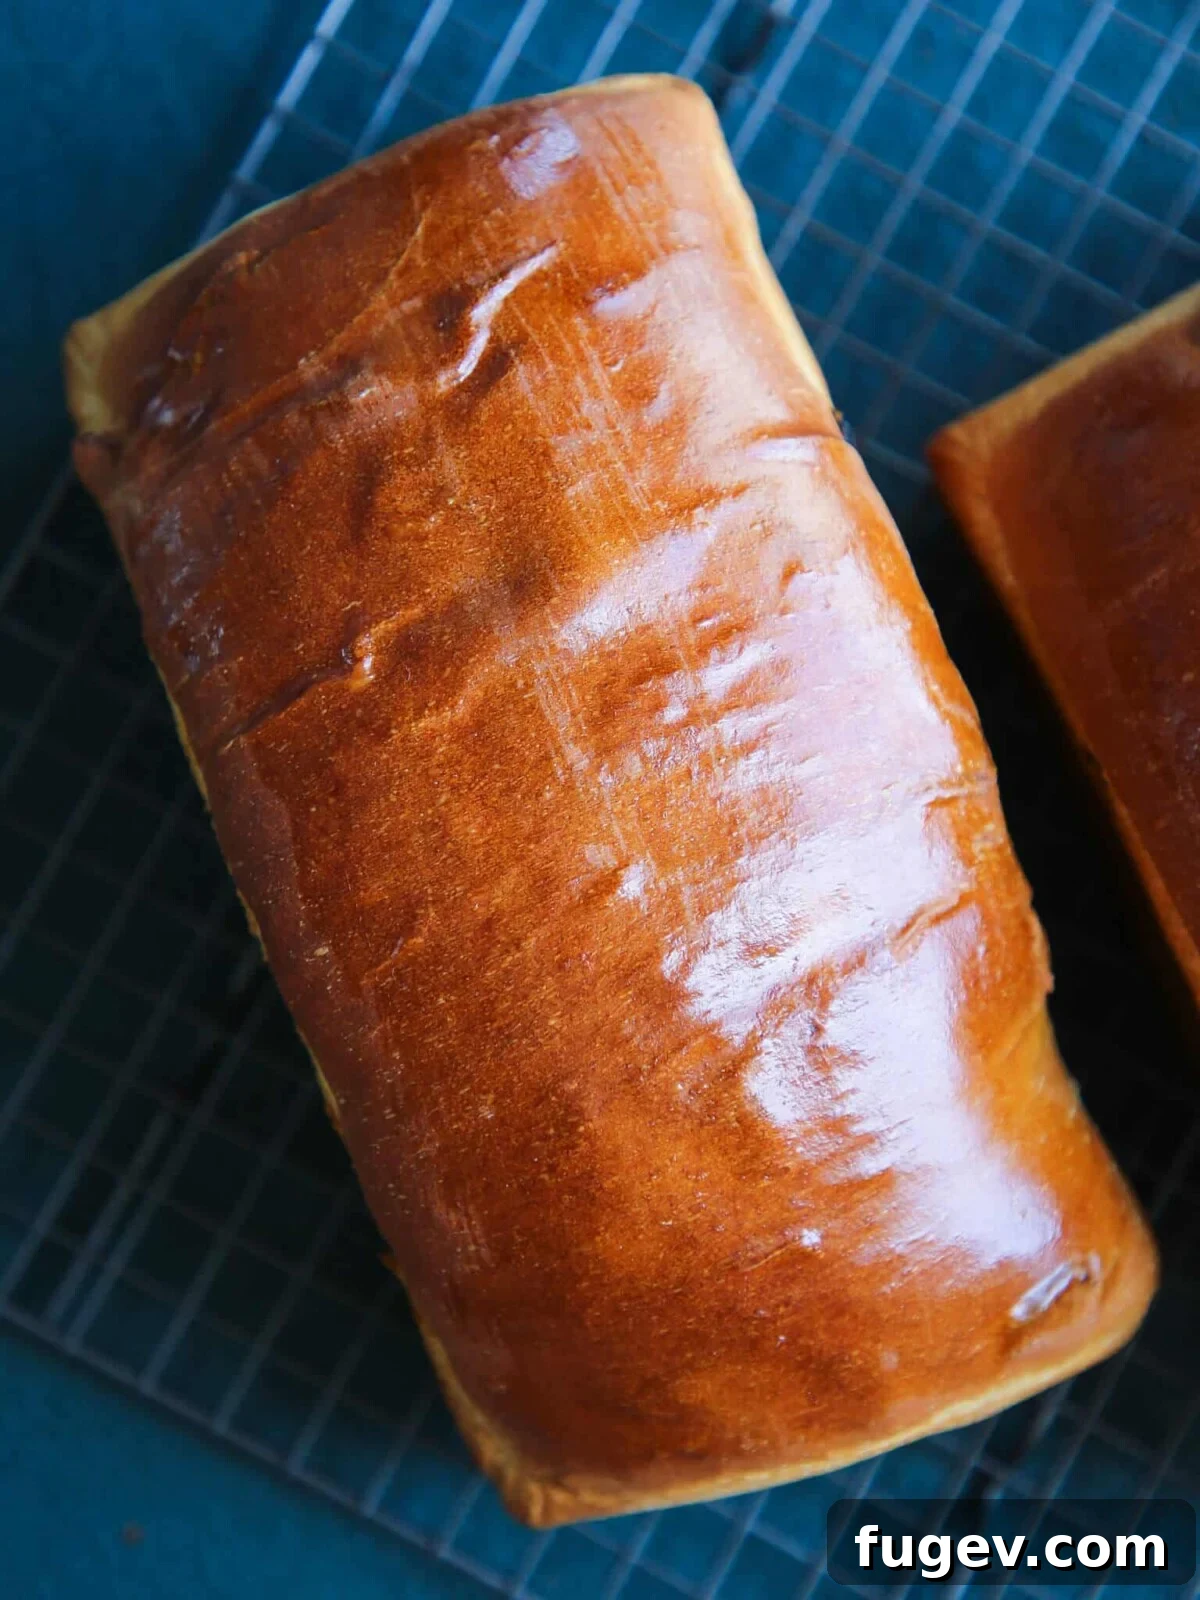
- Bake to Golden Perfection: Bake the loaves in your preheated 350°F (175°C) oven for 30-35 minutes, or until the internal temperature reaches 186°F (86°C) when measured with an instant-read thermometer inserted into the center of the loaf. Another reliable indicator is inserting a wooden skewer or toothpick into the center; if it comes out clean, the bread is done.
- Cool Completely: As soon as the loaves are baked, immediately turn them out of their pans onto a wire cooling rack. Allow them to cool completely before slicing. Slicing warm bread can compress the crumb and make it gummy.
Chef Lindsey’s Expert Tip: The Importance of Cooling
This tip is crucial for achieving the perfect texture: Remove the freshly baked bread from the pan immediately after taking it out of the oven. If you allow the bread to cool in the pan, the trapped steam will accumulate at the bottom, making the crust soggy. And nobody wants a soggy bottom! A wire rack ensures air circulation all around the loaf, allowing it to cool evenly and maintain its crisp crust.
Common Questions & Recipe FAQs
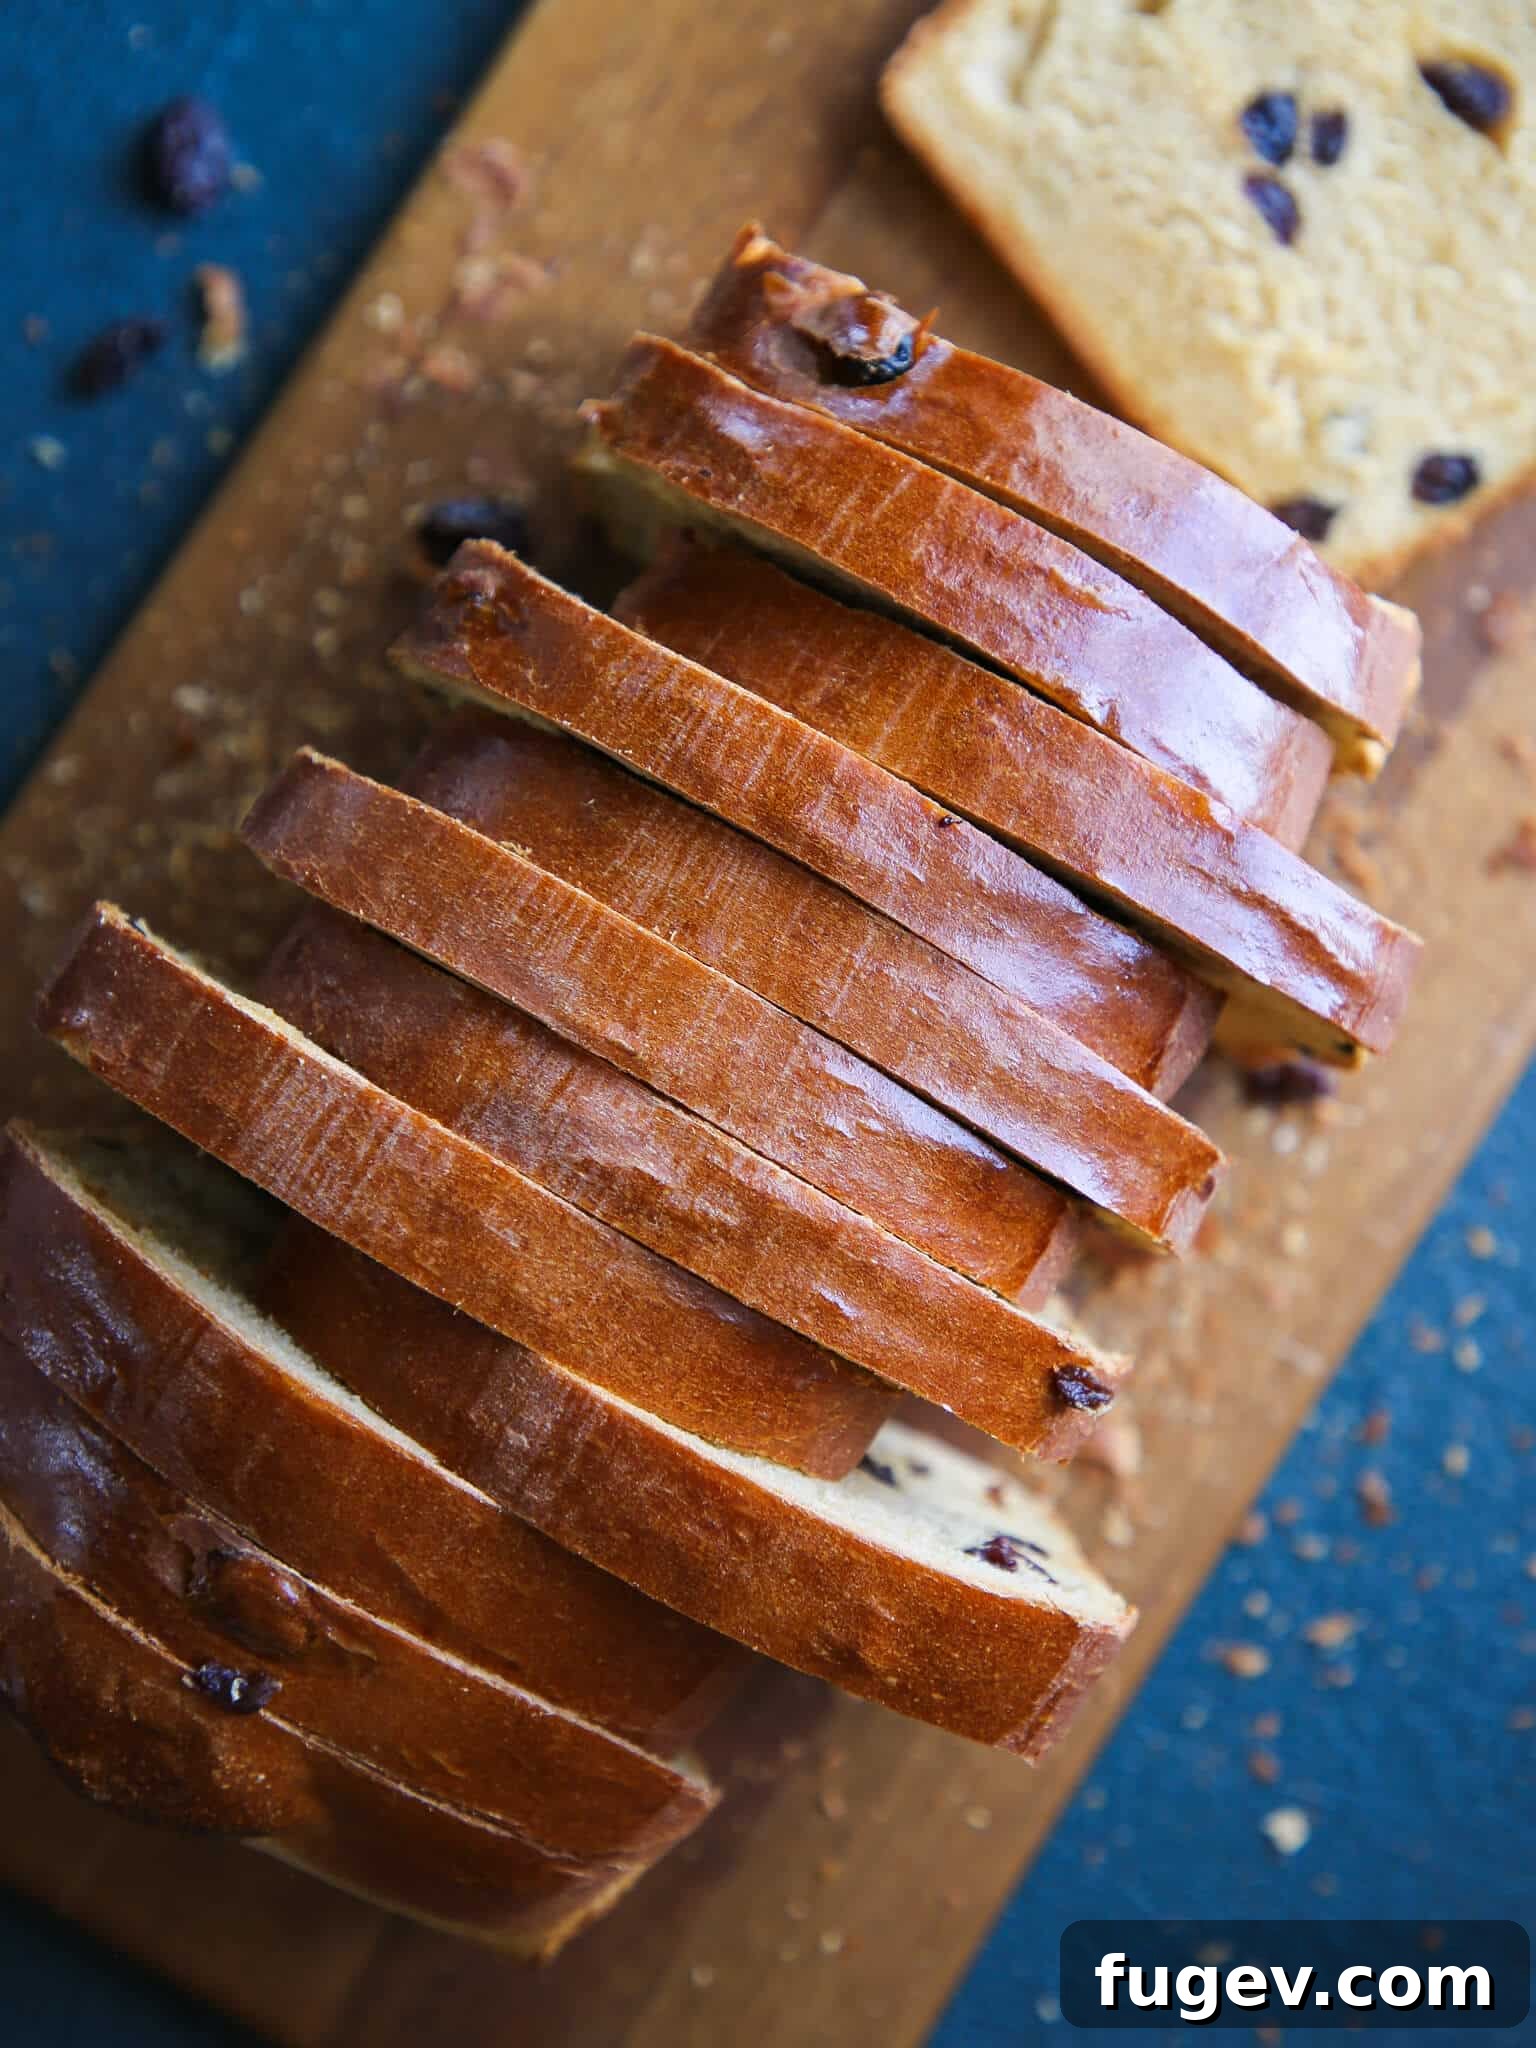
Thanks to the generous amounts of molasses, milk, and shortening in this recipe, your raisin bread will remain beautifully soft and moist at room temperature for up to 3 days before it starts to show signs of drying out. For longer storage, keep it well-wrapped in plastic film or in an airtight container at room temperature for up to 5 days. For extended freshness, freeze the bread immediately after it has cooled completely. It will keep well in the freezer for up to 2 months. I find it most convenient to pre-slice the loaf before wrapping and freezing, so you can easily grab just a few slices as needed! Avoid storing it in the refrigerator, as the cooler temperatures can actually accelerate the drying process for bread.
For this specific recipe, you generally do not need to soak the raisins before adding them to the bread dough, unless your raisins are exceptionally dry and hard. The moisture content in this dough is sufficient to plump them during baking. However, if you’re looking to infuse an extra layer of flavor, you can certainly soak your raisins in a liquid like brandy, rum (as I do in my rum raisin banana bread), or even warm tea. If you choose to soak them, be sure to drain them thoroughly and pat them dry before adding them to the dough to avoid introducing excess moisture, which could affect the dough consistency.
My absolute favorite way to enjoy raisin bread is toasted to a golden crisp, slathered with butter, and then sprinkled generously with cinnamon sugar – pure bliss! But the possibilities don’t stop there. It’s also fantastic served with a dollop of homemade maple butter, a smear of cream cheese, or your favorite fruit jam. For a more decadent treat, serve it alongside a warm cup of coffee or tea for a comforting breakfast or afternoon snack.
Leftover raisin bread is a gift that keeps on giving! It’s absolutely perfect for making indulgent breakfasts like cinnamon raisin French toast. It also forms the base of wonderful desserts such as easy bread pudding or a seasonal pumpkin bread pudding. Get creative by transforming it into sweet bread crumbs or croutons: simply toss cubes or crumbs of the bread with melted butter, a little sugar, and your preferred spices (like cinnamon or nutmeg), then toast them in the oven until golden brown and delightfully crunchy. These sweet crumbs or croutons are fantastic served over vanilla bean ice cream with a drizzle of salted caramel sauce!
More Delightful Raisin Bread Recipes You’ll Love
If you’ve enjoyed this old-fashioned raisin bread, you’ll surely love exploring these other fantastic recipes that feature the sweet, chewy goodness of raisins:
Easy Quick Bread Recipes
Traditional Irish Soda Bread with Raisins
A classic, no-knead quick bread, perfect for a fast and satisfying treat, studded with sweet raisins.
Sourdough Bread Recipes
Sourdough Raisin Bread
Experience the delightful tang of sourdough combined with sweet raisins in this hearty and flavorful loaf.
Yeasted Bread Recipes
The Best Stollen Recipe
A festive German Christmas bread, rich with fruits, nuts, and marzipan, perfect for holiday gatherings.
Easy Quick Bread Recipes
Brown Butter Rum Raisin Banana Bread
A decadent twist on classic banana bread, featuring the warm flavors of brown butter and rum-soaked raisins.
If you tried this recipe and loved it, please take a moment to leave a ★★★★★ star rating and share your experience in the comments below. Your feedback truly makes my day!
The Ultimate Old-Fashioned Raisin Bread
Chef Lindsey
45 mins
30 mins
1 hr
30 mins
2 hrs
45 mins
24 slices (2 loaves)
Comment
Print Recipe
Ingredients
- 2 cups whole milk warmed to 100-110°F (38-43°C)
- 2 tbsp shortening
- ¼ cup unsulphured molasses
- 2 ¼ teaspoons active dry yeast
- 6 cups all-purpose flour
- 1 ½ teaspoons kosher salt
- ¾ cup raisins
- Optional: 1 large egg for egg wash (for shiny crust)
Instructions
Mix the Dough:
-
In a medium saucepan, combine the shortening, molasses, and milk. Heat gently until the shortening has fully melted, stirring occasionally. Let this mixture cool until it is lukewarm (100°F – 110°F or 38-43°C).
-
Whisk the active dry yeast into the lukewarm liquid mixture. Let it sit undisturbed for 10-15 minutes, or until the yeast has foamed and looks frothy, indicating it’s active.
-
In the bowl of a stand mixer fitted with the paddle attachment, combine the all-purpose flour and kosher salt. Pour in the activated yeast mixture. Mix on low speed until all ingredients are just incorporated and a shaggy dough forms.
-
Switch to the dough hook attachment. Knead on medium speed for 10-12 minutes, or until a smooth, elastic dough has formed and it passes the windowpane test (stretch a small piece until it’s translucent without tearing).
-
Once optimal gluten development is achieved, add the raisins. Mix on low speed until the raisins are evenly distributed throughout the dough.
Bulk Proof:
-
Lightly oil a large bowl with cooking spray or vegetable oil. Place the dough in the greased bowl, turning it once to coat. Cover with a damp towel or plastic wrap.
-
Allow the dough to proof in a warm, draft-free spot until it has doubled in size, typically about 1 hour.
-
Gently turn the proofed dough out onto a clean, lightly oiled countertop. Divide the dough into two equal portions (approximately 730g each).
Shape the Bread:
-
Preheat your oven to 350°F (175°C). Lightly spray or butter two 9×5-inch (23×13 cm) loaf pans.
-
Preshape each dough portion into a boule (round). To do this, fold the four sides of the dough towards the center, then flip it seam-side down. Gently cup and pull the dough towards you on the countertop to create a tight, smooth surface. Cover with plastic wrap and bench rest for 10 minutes to relax the gluten.
-
Final shape into a log: Flip the rested dough seam-side up. Gently stretch it into a rectangle. Fold the top third towards the center and press to seal. Rotate 180 degrees and repeat. Then, starting from one end, use the heel of your hand and thumb to roll and seal the dough tightly, working your way down the length of the loaf. Ensure the log is snug and matches the length of your loaf pan.
-
Carefully place each shaped dough log, seam-side down, into its prepared loaf pan. Cover the pans loosely with plastic wrap.
Final Proof and Bake:
-
Proof the covered loaves in a warm, humid place until they have doubled in size and feel light and airy to the touch. For a shiny crust, brush lightly with a beaten egg wash before baking.
-
Bake in the preheated oven for 30-35 minutes, or until an internal thermometer reads 186°F (86°C) and a toothpick inserted into the center comes out clean.
-
Immediately turn the baked loaves out onto a wire cooling rack and allow them to cool completely before slicing. This prevents a soggy bottom and ensures the crumb sets properly.
Notes
Presentation – For an extra appealing, glossy, and golden-brown crust, lightly brush the tops of your loaves with a beaten egg wash just before they go into the oven.
Flavor Tips – Always taste your raisins before adding them to the dough. While raisins generally have a long shelf life, older ones can sometimes develop an off-flavor. You want to ensure your final bread is as delicious as possible!
Storage – Store well-wrapped or in an airtight container at room temperature for up to 5 days. For longer storage, freeze completely cooled loaves for up to 2 months. Pre-slicing before freezing makes it easy to grab individual servings!
Nutrition
Calories: 163kcal
|
Carbohydrates: 31g
|
Protein: 4g
|
Fat: 2g
|
Saturated Fat: 1g
|
Polyunsaturated Fat: 1g
|
Monounsaturated Fat: 1g
|
Trans Fat: 1g
|
Cholesterol: 2mg
|
Sodium: 157mg
|
Potassium: 163mg
|
Fiber: 1g
|
Sugar: 4g
|
Vitamin A: 33IU
|
Vitamin C: 1mg
|
Calcium: 39mg
|
Iron: 2mg
Bread, Breakfast
American
163
Enjoyed this recipe? Share your thoughts below!
Final Thoughts & More Bread Baking Inspiration
We truly hope you savored the experience of baking and tasting this easy, yet profoundly delicious, old-fashioned raisin bread recipe! There’s an unmatched satisfaction that comes with pulling a freshly baked loaf from your oven, and this recipe is designed to bring that joy straight to your kitchen.
If you’re eager to continue your baking journey and explore more delightful homemade breads, be sure to delve into our collection of yeasted bread recipes. Whether you’re looking for a wholesome everyday loaf or a special occasion treat, we have something for every baker.
We highly recommend trying our versatile whole wheat sandwich bread, a staple that’s perfect for everything from lunchtime sandwiches to morning toast. And for those moments when you crave something truly indulgent, don’t miss our famous cinnamon roll recipe with luscious cream cheese icing – it’s guaranteed to be a crowd-pleaser!
Happy baking, and may your kitchen always be filled with the wonderful aroma of fresh bread!