
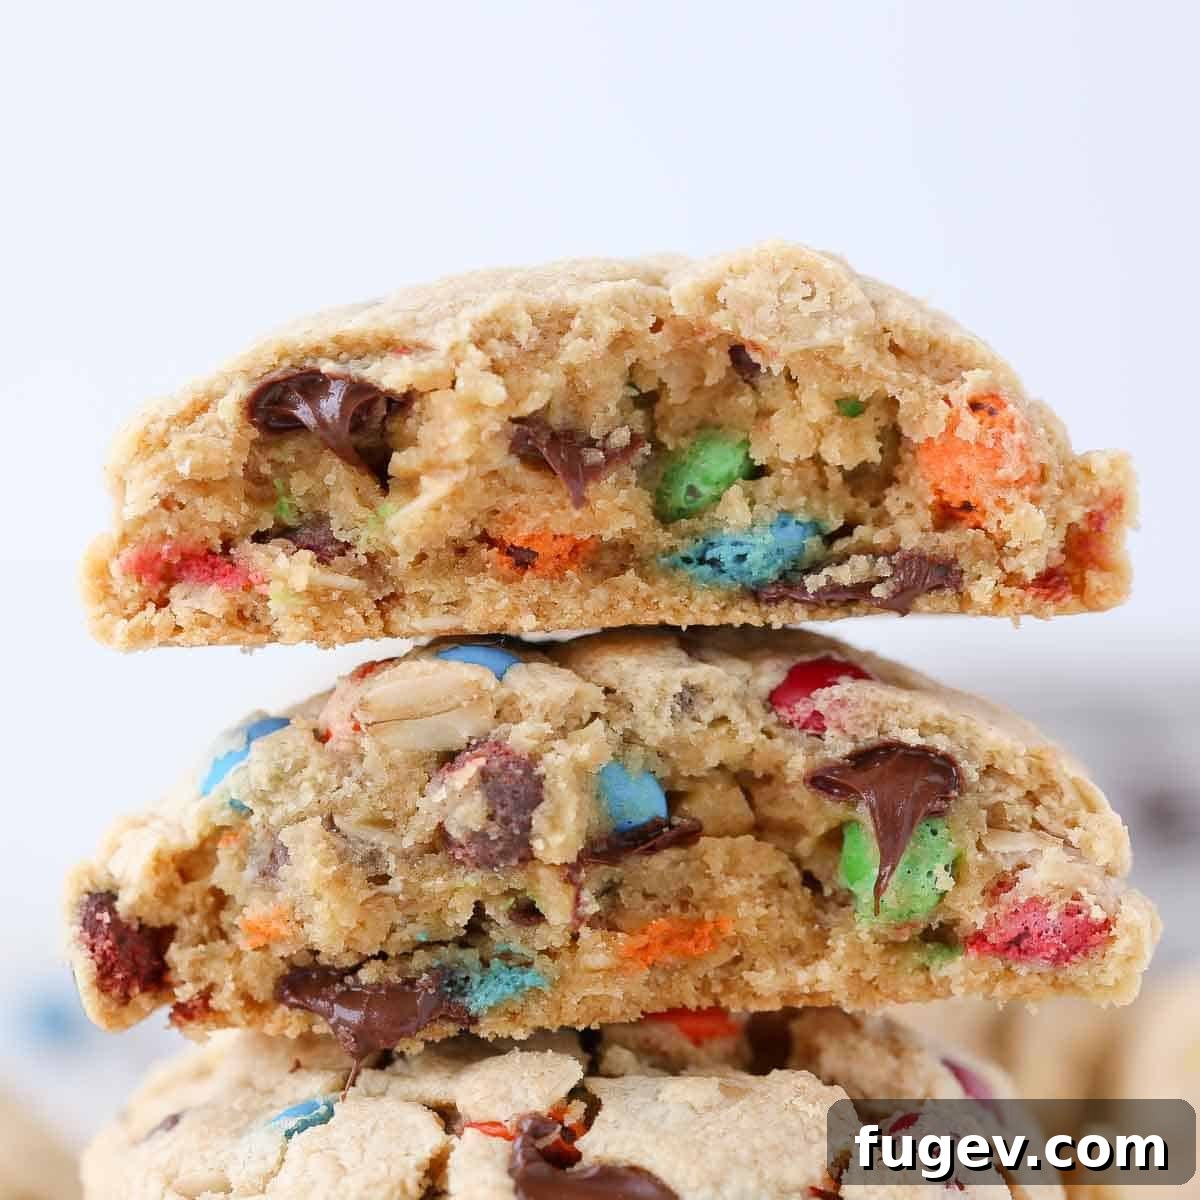
The Ultimate Monster Cookie Recipe: Thick, Chewy & Flavor-Packed
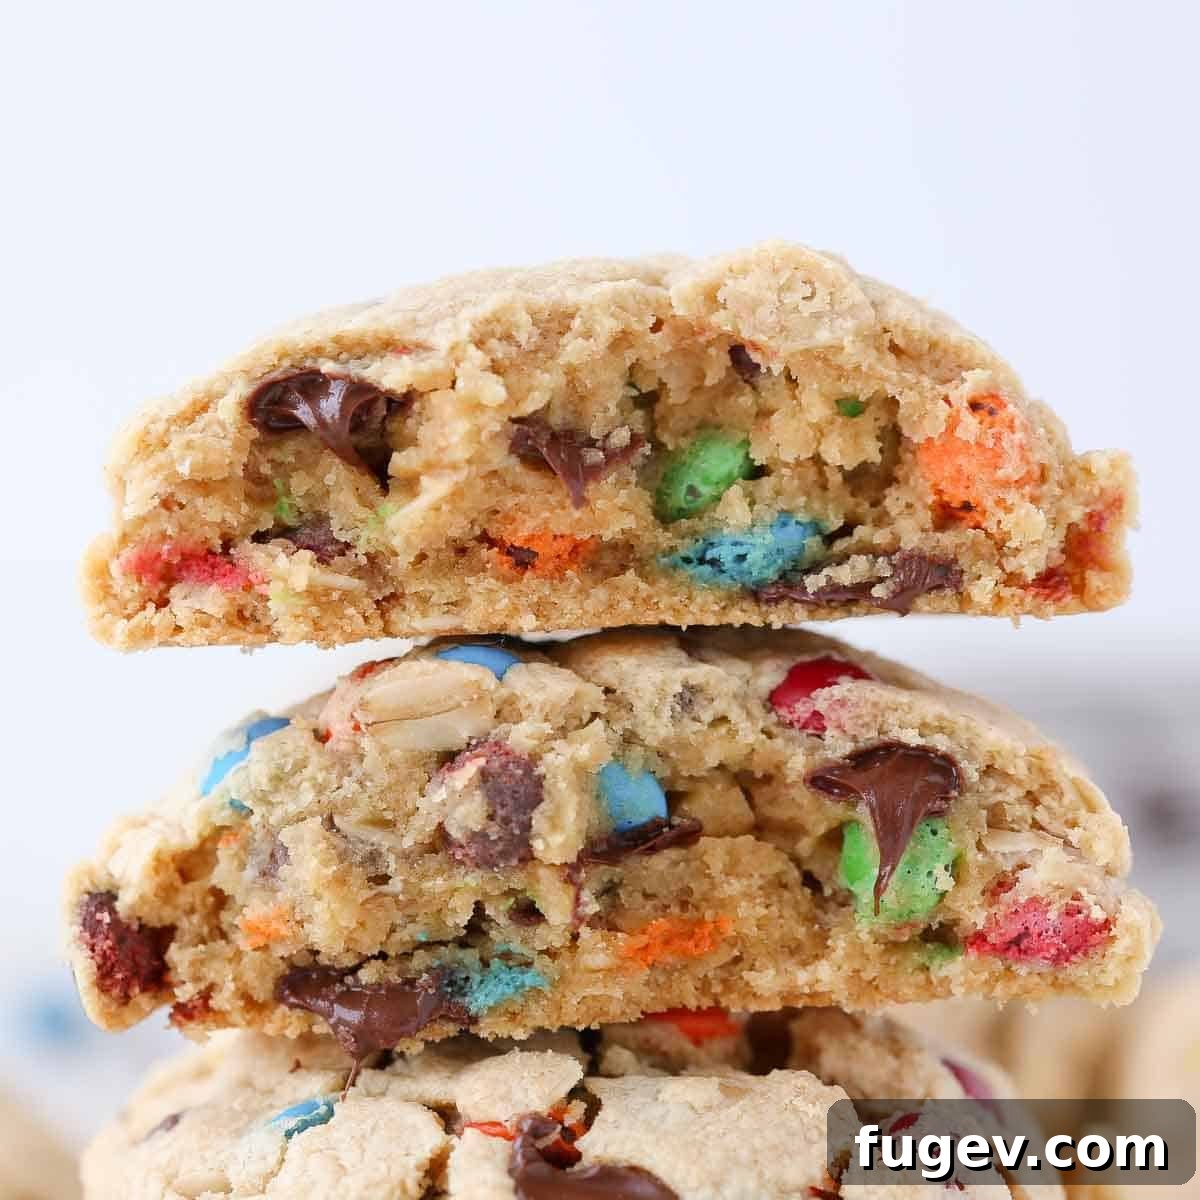
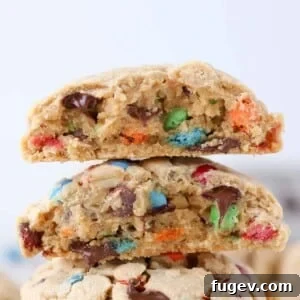
Prepare yourself for the **ultimate monster cookie experience**! This recipe delivers gloriously thick, irresistibly chewy, and intensely peanut butter-flavored cookies that are truly in a league of their own. Bursting with a delightful medley of chocolate chips, colorful M&M’s, and wholesome oats, these giant treats are so packed with mix-ins, it feels like there’s almost more goodness than dough! Perfect for peanut butter enthusiasts, chocolate lovers, and anyone seeking a truly satisfying, bakery-style cookie.
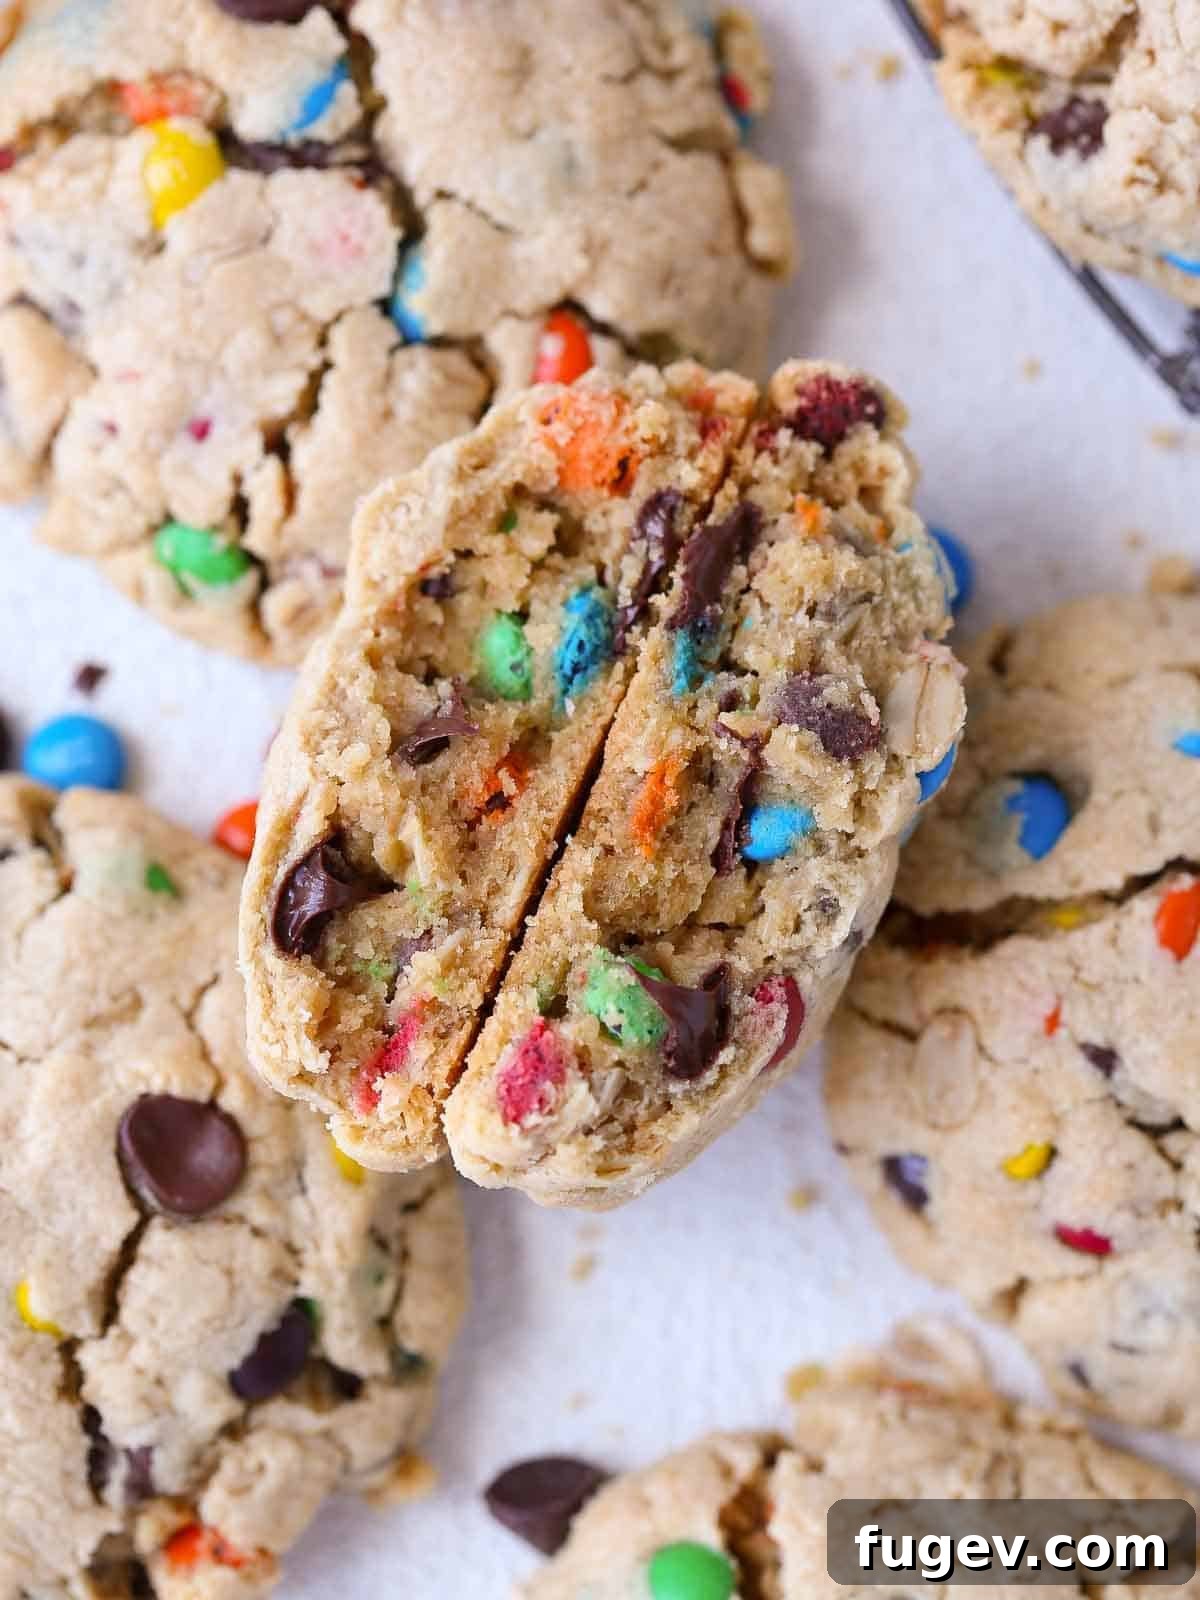
A Quick Look At The Recipe
This is a brief summary of the recipe. Jump to the full recipe below for complete details.
Jump to Recipe
Prep Time
15 minutes
Cook Time
10-15 minutes
Chill
30 minutes (recommended)
Total Time
55 minutes
Servings
13 generous cookies
Difficulty
Easy, with straightforward mixing and optional chilling for superior texture.
Calories *
383 kcal per serving
Technique
Cream butter and sugars minimally, then fold in creamy peanut butter and a plethora of mix-ins. Bake until golden and perfectly chewy.
Flavor Profile
Rich, bold peanut butter with layers of chocolate, crunchy oats, and candy-coated sweetness, creating a thick, chewy, bakery-style bite.
* Based on nutrition panel below
I made these because my nephew asked for “the cookies with everything in them” and would not let it go. I chilled the dough like you said and baked them straight from the fridge so they stayed thick. I brought them to a family movie night and they disappeared before the previews were over. Truly a crowd-pleaser! ⭐⭐⭐⭐⭐
Lauren
Why You Will Absolutely Love This Monster Cookie Recipe
These monster cookies aren’t just any cookies; they’re a carefully crafted culinary delight designed to bring maximum joy with every single bite. Here’s why this recipe will quickly become your new favorite:
- Unrivaled Softness, Chewiness, and Thickness: Forget flat, crumbly cookies! These monster cookies have been meticulously perfected from the mixing method to the precise ratio of ingredients, ensuring an incredibly soft interior, a satisfyingly chewy texture, and that coveted bakery-style thickness every single time. The slight chill time is our secret weapon for preventing excessive spreading and locking in moisture.
- Infinitely Customizable to Your Taste Buds: While our classic combination of creamy peanut butter, semi-sweet chocolate chips, vibrant M&M’s, and hearty oats is a guaranteed winner, this recipe is a playground for your creativity! Feel free to experiment with different mix-ins. Imagine peanut butter chips for an extra PB punch, rich butterscotch chips, or a decadent combination of milk and dark chocolate chips. The possibilities are endless, allowing you to tailor each batch to your specific cravings.
- Made for Sharing (or Savouring Solo): This recipe yields a baker’s dozen of truly giant, impressive cookies – perfect for sharing the love with friends, family, or colleagues. They’re an instant hit at potlucks, parties, or simply as a comforting treat for a cozy movie night. And if you happen to keep them all to yourself? We won’t judge! They store beautifully, allowing you to enjoy a taste of pure cookie bliss all week long.
Table of Contents
- Why You Will Absolutely Love This Monster Cookie Recipe
- What Exactly Are Monster Cookies?
- Essential Ingredients for Monster Cookies
- Delicious Variations and Serving Ideas
- Professional Baking Tips for Perfect Monster Cookies
- How to Serve Your Irresistible Monster Cookies
- Step-by-Step Guide to Making Monster Cookies
- Chef Lindsey’s Pro Tip
- Monster Cookie FAQs
- More Irresistible Cookie Recipes
- Monster Cookies Recipe Card
- Before You Go
What Exactly Are Monster Cookies?
The name “monster cookie” might conjure images of Cookie Monster, and while these colossal treats are certainly a favorite of his, their name truly reflects their impressive size and abundance of ingredients. Monster cookies are defined by their hearty, oversized nature, thick and chewy texture, and an unapologetic wealth of mix-ins. They’re a celebration of everything delicious crammed into one glorious cookie!
While their exact origins are debated, monster cookies are believed to have originated in the Midwest United States, potentially in Iowa, during the 1970s. This region is renowned for its love of wholesome, comforting, and generously portioned recipes, making it the perfect birthplace for such an indulgent cookie. They’re not just a cookie; they’re a testament to hearty, satisfying baking that never goes out of style. With every bite, you get a taste of nostalgic comfort, rich peanut butter, sweet chocolate, and chewy oats, making them truly monstrously good!
This super easy monster cookie recipe combines the best things in life: thick peanut butter cookies, classic chocolate chips, colorful M&M’s, and the satisfying texture of oatmeal cookies, all baked into giant, chewy, gooey masterpieces! It’s a dream come true for peanut butter lovers, chocolate lovers, and cookie lovers of all kinds—which, let’s be honest, covers just about everyone!
Now that you’re ready with your smooth peanut butter, consider exploring other delightful peanut butter creations from our kitchen, such as Reese’s Peanut Butter Blondies, classic Peanut Butter Blossoms, or our comforting Peanut Butter Banana Muffins!
Essential Ingredients for Monster Cookies
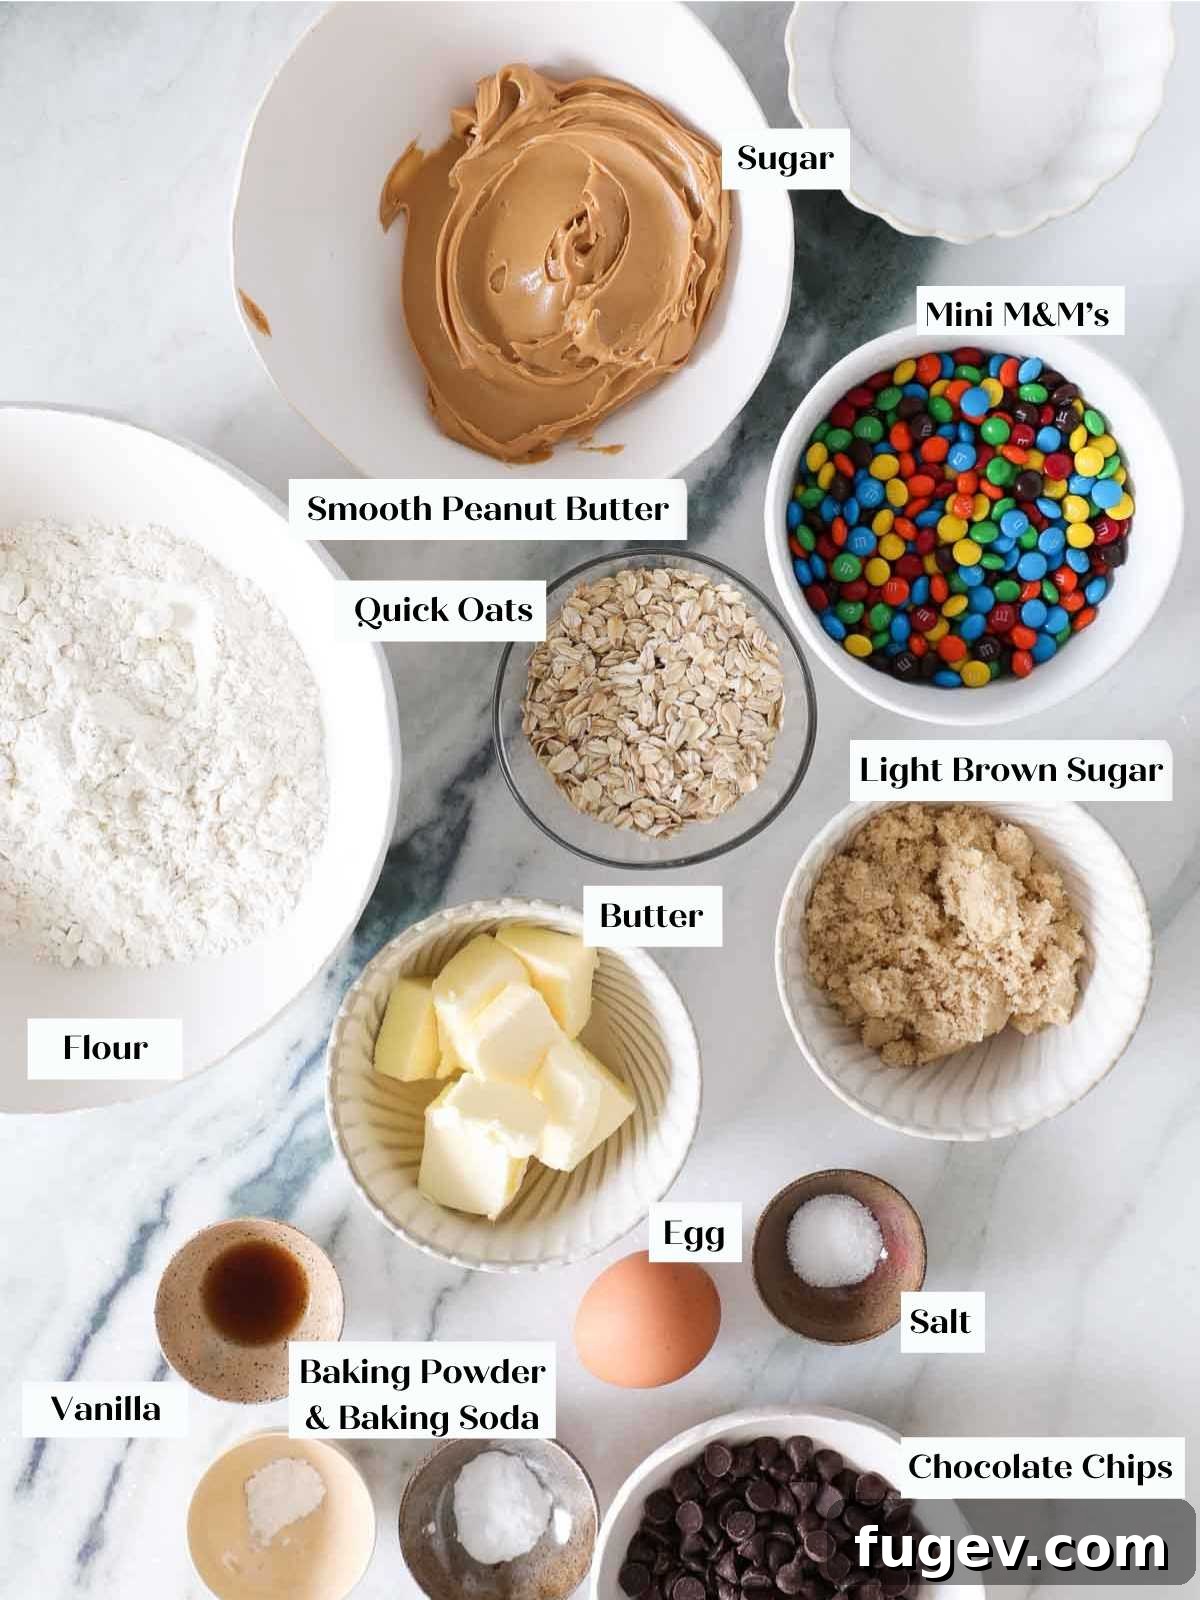
Every great cookie starts with quality ingredients. Here’s what you’ll need and why each component is crucial for crafting the perfect monster cookie:
- Light Brown Sugar: This isn’t just for sweetness; light brown sugar introduces a delightful caramel-like flavor and a crucial touch of moisture. Its molasses content reacts beautifully with baking soda, contributing to a softer, chewier cookie and preventing them from becoming dry or crumbly.
- Granulated Sugar: Providing a crisp sweetness, granulated sugar also plays a role in the cookie’s structure. When used in the right proportion to butter and flour, it helps the cookies spread slightly without becoming too thin, ensuring a thick, satisfying bite.
- Unsalted Butter: The foundation of any rich cookie, unsalted butter offers a pure, creamy base. We use it alongside peanut butter to achieve the perfect fat balance for flavor and texture. Using unsalted butter allows you to control the total salt content in your recipe. Make sure it’s softened but still cool to the touch – this is key for a thick cookie.
- Smooth Peanut Butter: The star of the show! Smooth peanut butter, like my personal favorite Jif, provides that intense, unmistakable flavor and helps create an incredibly chewy texture. Its oils contribute to the cookies’ richness and moisture. While natural peanut butter can work, ensure it’s well-stirred to prevent oil separation that could affect dough consistency.
- Whole Egg: Eggs serve multiple vital functions: they add fat from the yolk for richness and chewiness, moisture to keep the cookies tender, and act as a leavening agent. They also emulsify the batter, binding all the ingredients together for a cohesive, texturally perfect cookie.
- Vanilla Extract: A splash of high-quality vanilla extract is more than just a flavor enhancer; it boosts and harmonizes the flavors of other ingredients like chocolate and brown sugar, adding depth and warmth to the overall profile.
- All-Purpose Flour: The backbone of our cookies, all-purpose flour has just the right protein content to develop enough gluten for a soft, yet wonderfully chewy, bakery-style cookie. Proper mixing is crucial to avoid overdeveloping the gluten, which could lead to tough cookies.
- Baking Soda: This chemical leavening agent reacts with acidic ingredients, in this case, the molasses present in the light brown sugar, to produce carbon dioxide. This creates air pockets, giving the cookies a lovely lift and contributing to their soft interior.
- Baking Powder: Working in conjunction with baking soda, baking powder offers an additional lift, ensuring your monster cookies are robust and thick. It’s a double-action boost for maximum volume.
- Kosher Salt: A pinch of kosher salt is essential for balancing and enhancing all the sweet flavors, preventing the cookies from tasting overly sugary. It highlights the richness of the peanut butter and chocolate, creating a more complex and satisfying taste.
- Chocolate Chips: I prefer semi-sweet chocolate chips for a balanced sweetness, but feel free to use your favorite – milk chocolate, dark chocolate, or even a blend of different types work beautifully! They melt into delicious pockets throughout the cookie.
- Quick Oats: Quick oats add a wonderful chewiness and a wholesome, hearty texture that is characteristic of monster cookies. They absorb some moisture, contributing to the cookies’ thickness and density without making them dry.
- Mini M&M’s: These iconic candy-coated chocolates provide pops of vibrant color, a delightful crunch, and an extra layer of chocolatey sweetness. They make these cookies visually appealing and even more fun to eat!
See the recipe card below for full information on precise quantities and detailed instructions.
Delicious Variations and Serving Ideas
Part of the joy of monster cookies is their versatility. Get creative and customize your batch with these exciting variations and serving suggestions:
- Experiment with Different Mix-ins: Don’t limit yourself to just chocolate chips and M&M’s! Explore a world of flavors by adding:
- Other Chips: Butterscotch chips, peanut butter chips for an extra nutty kick, or creamy white chocolate chips.
- Candy Crush: Chopped Oreo’s for a cookies-and-cream twist, or melty peanut butter candies like chopped Reese’s Peanut Butter Cups or Reese’s Pieces, much like in our Peanut Butter Cup Cookies!
- Caramel Swirl: For an extra decadent treat, swirl in a generous dollop of our best salted caramel sauce into the dough before baking.
- Nuts: Chopped pecans, walnuts, or peanuts can add another layer of crunch and flavor.
- Transform into a Skillet Cookie (Pizookie): For a truly show-stopping dessert, press the room-temperature cookie dough into an 8-inch cast iron skillet and bake until the edges are golden brown and the center is set and matte. Serve warm, straight from the skillet! To elevate your skillet cookie dreams, top it with scoops of homemade vanilla bean ice cream, a drizzle of rich chocolate fudge sauce, and perhaps a sprinkle of sea salt for that irresistible sweet and salty contrast.
- Add Some Savory Crunch: Before baking, crush up some pretzels or finely chop some peanuts and sprinkle them generously on top of the dough balls. This adds a fantastic salty twist and an intriguing texture that complements the sweetness of the cookie.
Professional Baking Tips for Perfect Monster Cookies
Achieving that coveted bakery-style monster cookie isn’t hard, but a few professional tips can make all the difference. Follow these guidelines for the thickest, chewiest, and most flavorful cookies every time:
- Don’t Over-Cream Your Butter and Sugar: This is arguably the biggest secret to incredibly thick, chewy cookies, similar to what we aim for with our double chocolate chip cookies. The goal is to start with cold, yet pliable butter. It should be soft enough that you can easily press your finger into it, but still cool to the touch. Once you add your sugars, mix them until they are *just* combined into a uniform paste. Over-creaming incorporates too much air, which can cause cookies to spread excessively in the oven, leading to a thinner, crispier result.
- Choose the Right Peanut Butter: The type of peanut butter you use significantly impacts the cookie’s texture and flavor. I’m a die-hard fan of Jif creamy peanut butter for its consistent texture and rich, classic flavor. While you can use your preferred brand, stick with smooth, processed peanut butter (not natural-style where the oil separates) for the most reliable results. Natural peanut butter, with its varying oil content, can sometimes make cookies spread more or become crumbly. If you do use natural, make sure it’s very well-stirred and fully emulsified.
- Gradually Add Dry Ingredients: For the thickest, chewiest monster cookies possible, incorporate your dry ingredients into the wet mixture gradually and gently. This technique prevents the overdevelopment of gluten, which can lead to tough cookies. Mix until the flour is *just* incorporated before adding the next portion. Stop mixing as soon as no streaks of flour remain to ensure a tender crumb.
- Embrace the Chill Time: While it’s tempting to bake these beauties immediately, chilling the dough for at least 30 minutes (or longer!) is a game-changer. Chilling solidifies the butter and allows the flour to fully hydrate, resulting in less spreading, a thicker cookie, and a more pronounced flavor. For truly superior results, chill overnight or even bake from frozen dough balls.
- Measure Flour Correctly: For consistent results, it’s always best to measure your flour by weight using a kitchen scale (about 200g for 1 ⅔ cups). If measuring by volume, spoon the flour into your measuring cup and then level it off with a straight edge. Never scoop directly from the bag or pack it down, as this can add too much flour and lead to dry, crumbly cookies.
How to Serve Your Irresistible Monster Cookies
These monster cookies are incredibly indulgent and satisfying on their own, but they also lend themselves beautifully to various serving suggestions that elevate the experience:
- Classic Pairings: The ultimate comfort food calls for classic companions. Pair these rich cookies with a tall, frosty glass of cold milk for a timeless treat.
- Dessert Duo: Elevate them into a decadent dessert by serving them warm alongside a scoop of creamy vanilla bean ice cream or a luscious dollop of homemade crème anglaise.
- Ice Cream Sandwiches: Take them to the next level by making epic ice cream sandwiches! Place a generous scoop of your favorite ice cream between two room-temperature monster cookies. The slight softness of the cookies will provide the best contrast to the cold ice cream.
- Gourmet Toppings: Drizzle warm hot fudge sauce or a rich salted caramel sauce over a warm cookie. A scoop of chocolate ice cream or even a sprinkle of chopped nuts or extra M&M’s can add another layer of texture and flavor.
- Coffee Break Bliss: Enjoy one with your morning coffee or afternoon tea for a truly delightful pick-me-up. The sweetness of the cookie pairs wonderfully with the robust flavors of coffee.
Step-by-Step Guide to Making Monster Cookies
Ready to bake? Follow these detailed steps to create your own batch of perfectly thick and chewy monster cookies. Further details and precise measurements can be found in the recipe card below!
Step 1: Prepare Dry Ingredients. In a large bowl, combine the all-purpose flour, baking soda, baking powder, and kosher salt. Whisk these dry ingredients thoroughly to ensure they are evenly distributed and lump-free. This ensures proper leavening throughout your cookies. Set this mixture aside.
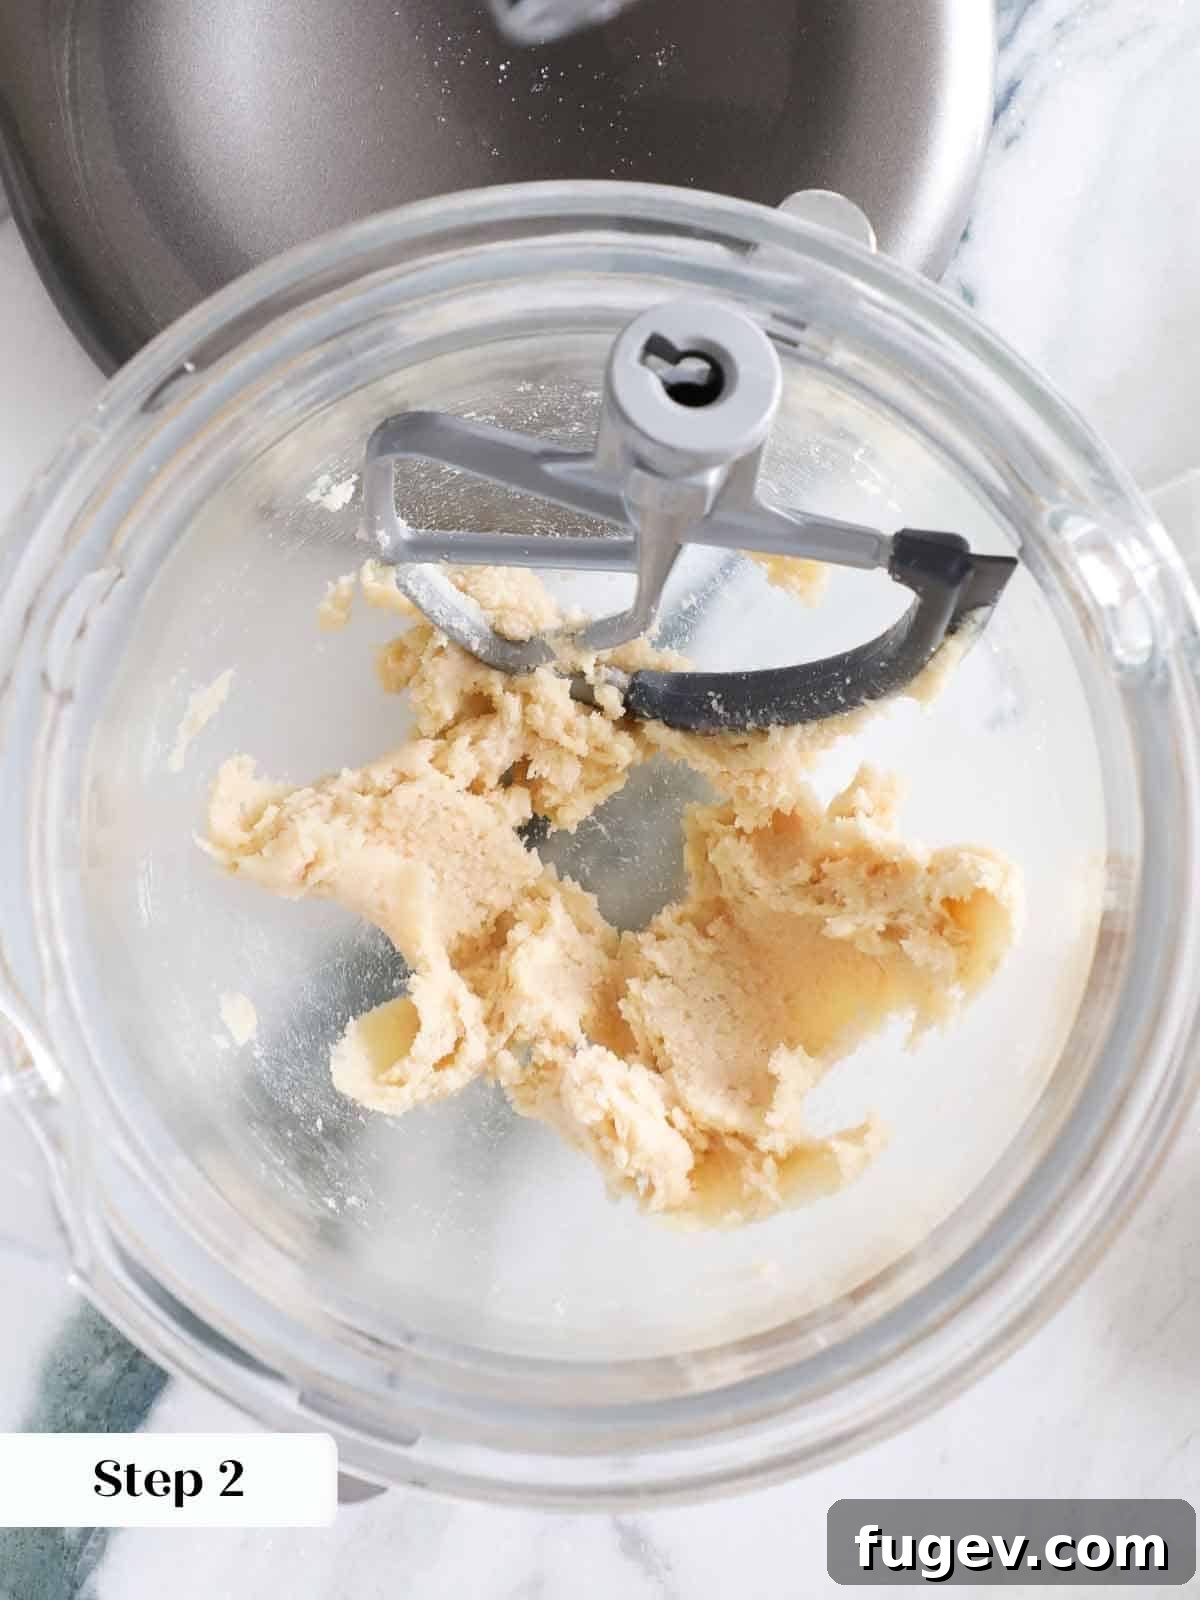
Step 2: Cream Butter and Sugars. In the bowl of a stand mixer fitted with a paddle attachment (or using an electric hand mixer), begin creaming the unsalted butter. Beat it on medium-high speed until it’s soft and pliable, but still cool. This is a crucial step for thick cookies, as over-creaming incorporates too much air. Add both the granulated sugar and light brown sugar to the butter and mix on medium-high until they are just combined and a paste forms. Scrape down the bottom and sides of the bowl with a rubber spatula to ensure everything is evenly incorporated, as butter tends to stick.
Pro Tip: Ensure your butter is softened but still cool to the touch. This helps prevent excessive spreading and creates a wonderfully thick cookie. Remember to frequently scrape down the sides and bottom of the bowl for an evenly mixed dough!
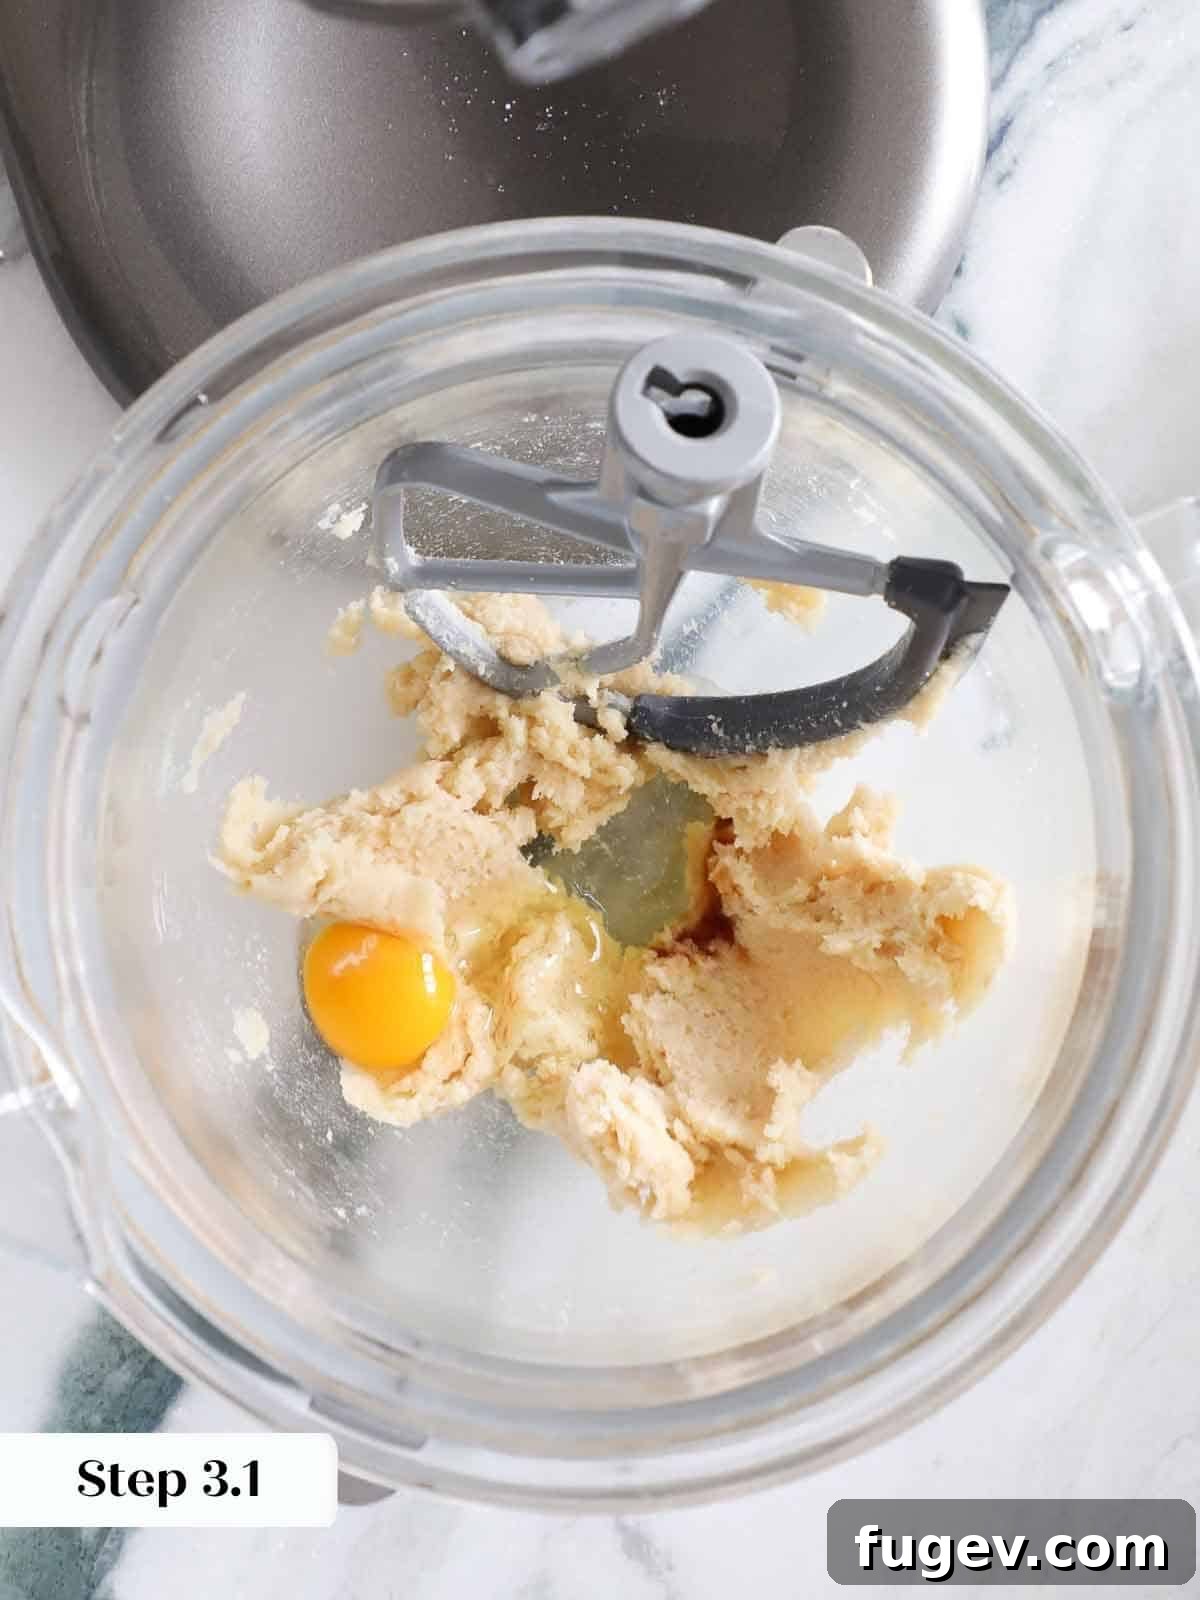
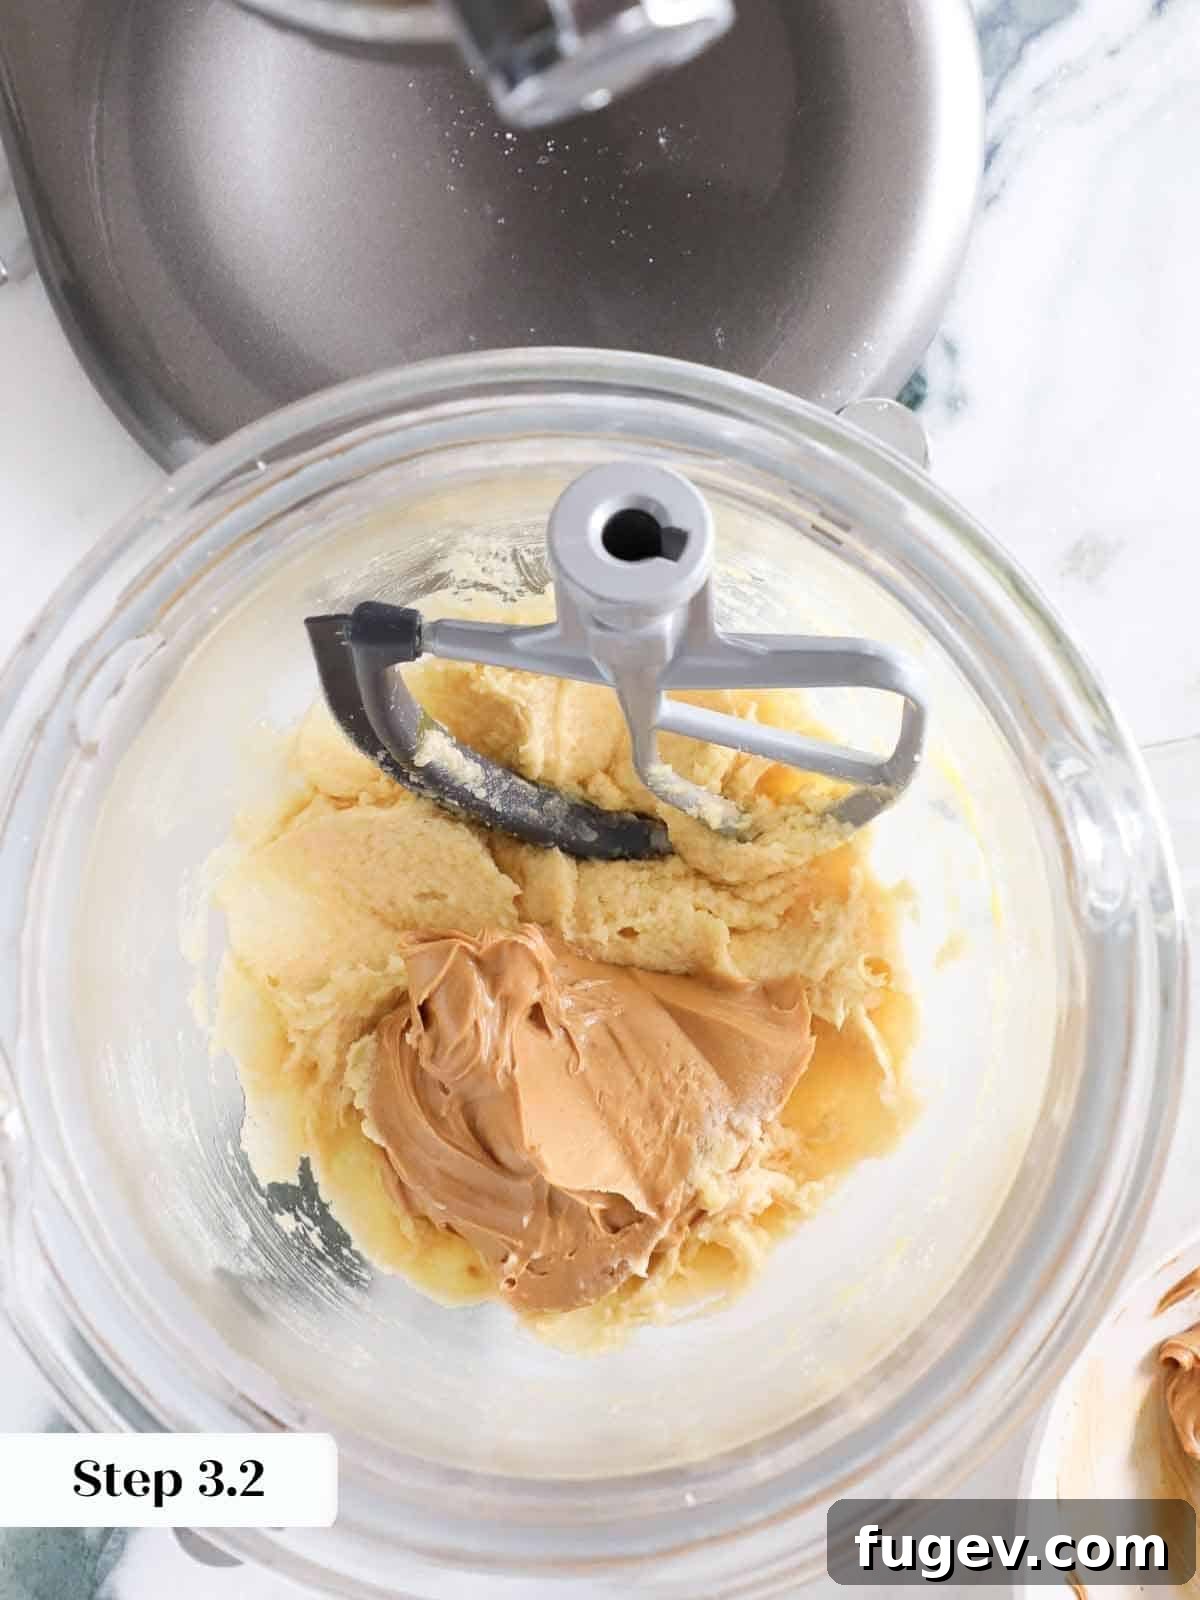
Step 3: Incorporate Egg and Flavor. Add the whole egg and vanilla extract to the creamed butter and sugar mixture. Beat until fully incorporated, scraping down the sides of the bowl as needed. Next, add the smooth peanut butter and beat on medium speed until the mixture is smooth and evenly combined.
Step 4: Gradually Add Dry Ingredients. Reduce the mixer speed to low. Gradually add the reserved dry ingredient mixture (flour, baking soda, baking powder, salt) to the wet ingredients. I typically add the flour mixture in about 4-5 additions. Mix until each addition is almost fully incorporated before adding the next. This gentle approach prevents overdeveloping the gluten, which keeps your monster cookies tender and chewy.
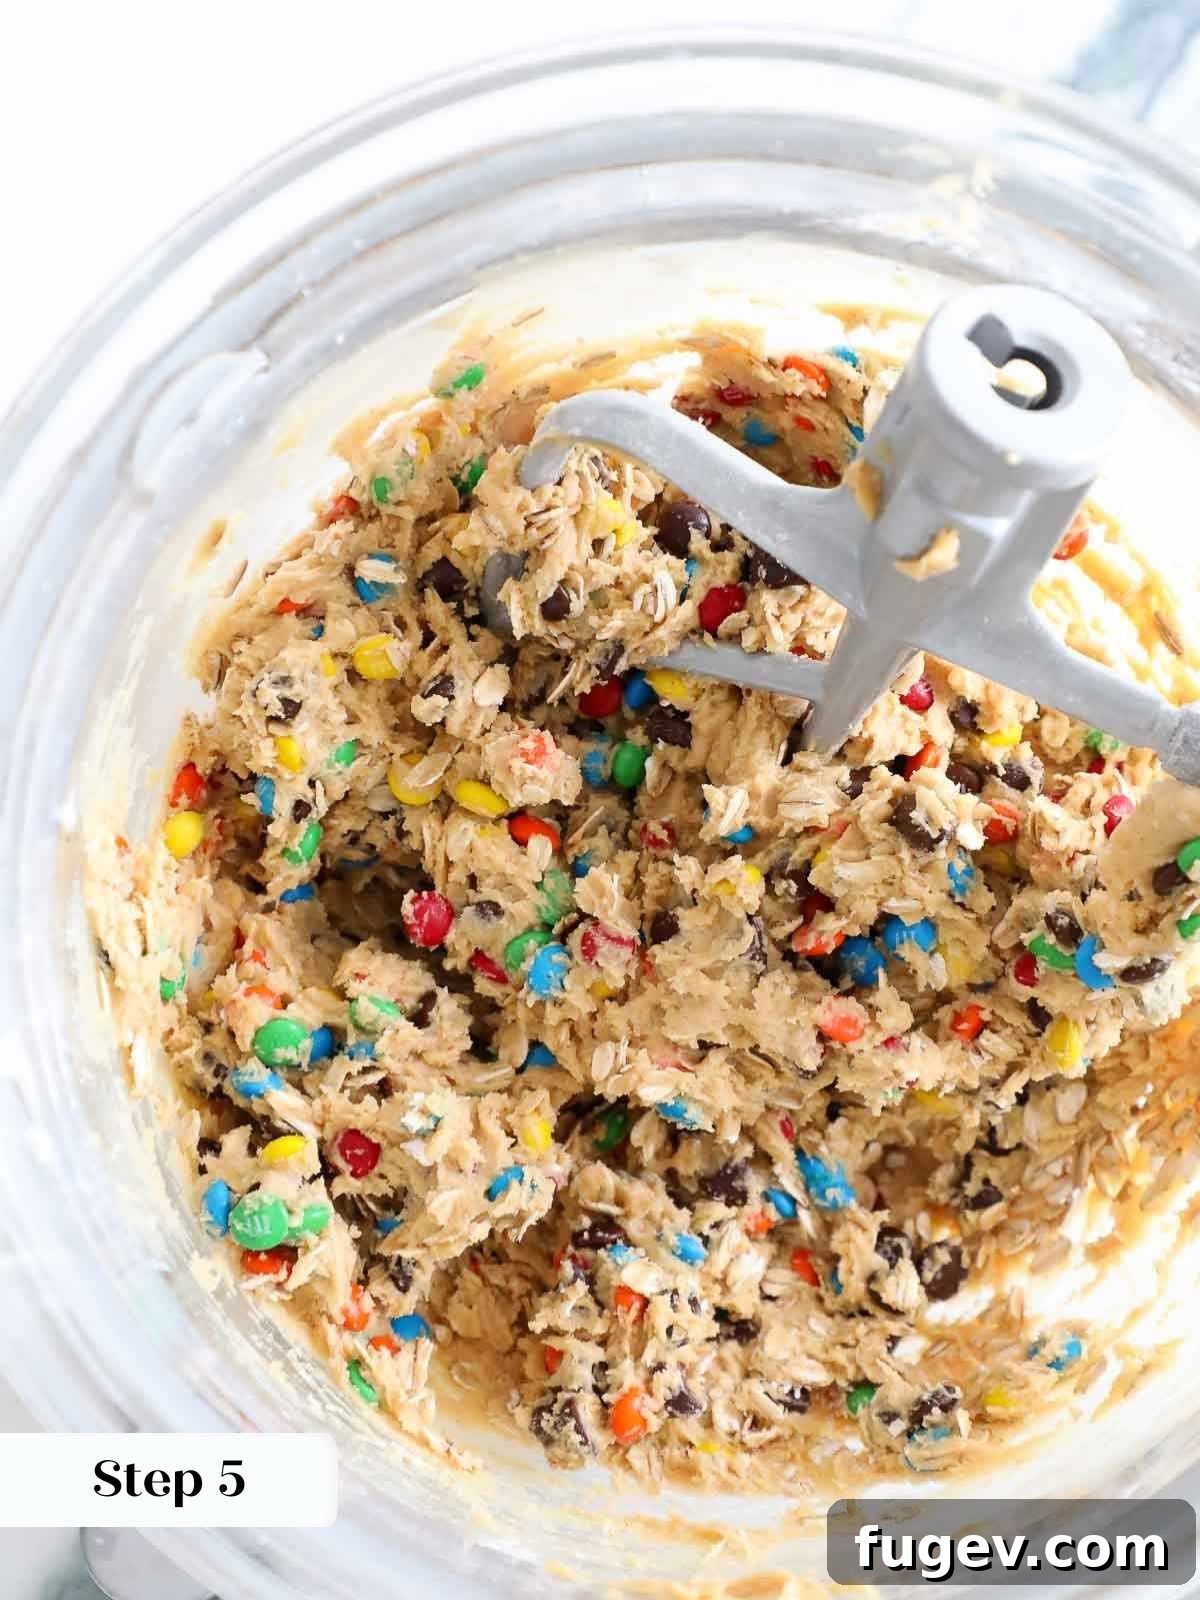
Step 5: Fold in the Mix-ins. Once the flour is fully incorporated and no dry streaks remain, it’s time for the fun part! Add the chocolate chips, quick oats, and mini M&M’s to the dough. Mix on low speed, or by hand with a spatula, until the mix-ins are just combined and evenly distributed throughout the dough. Be careful not to overmix at this stage.
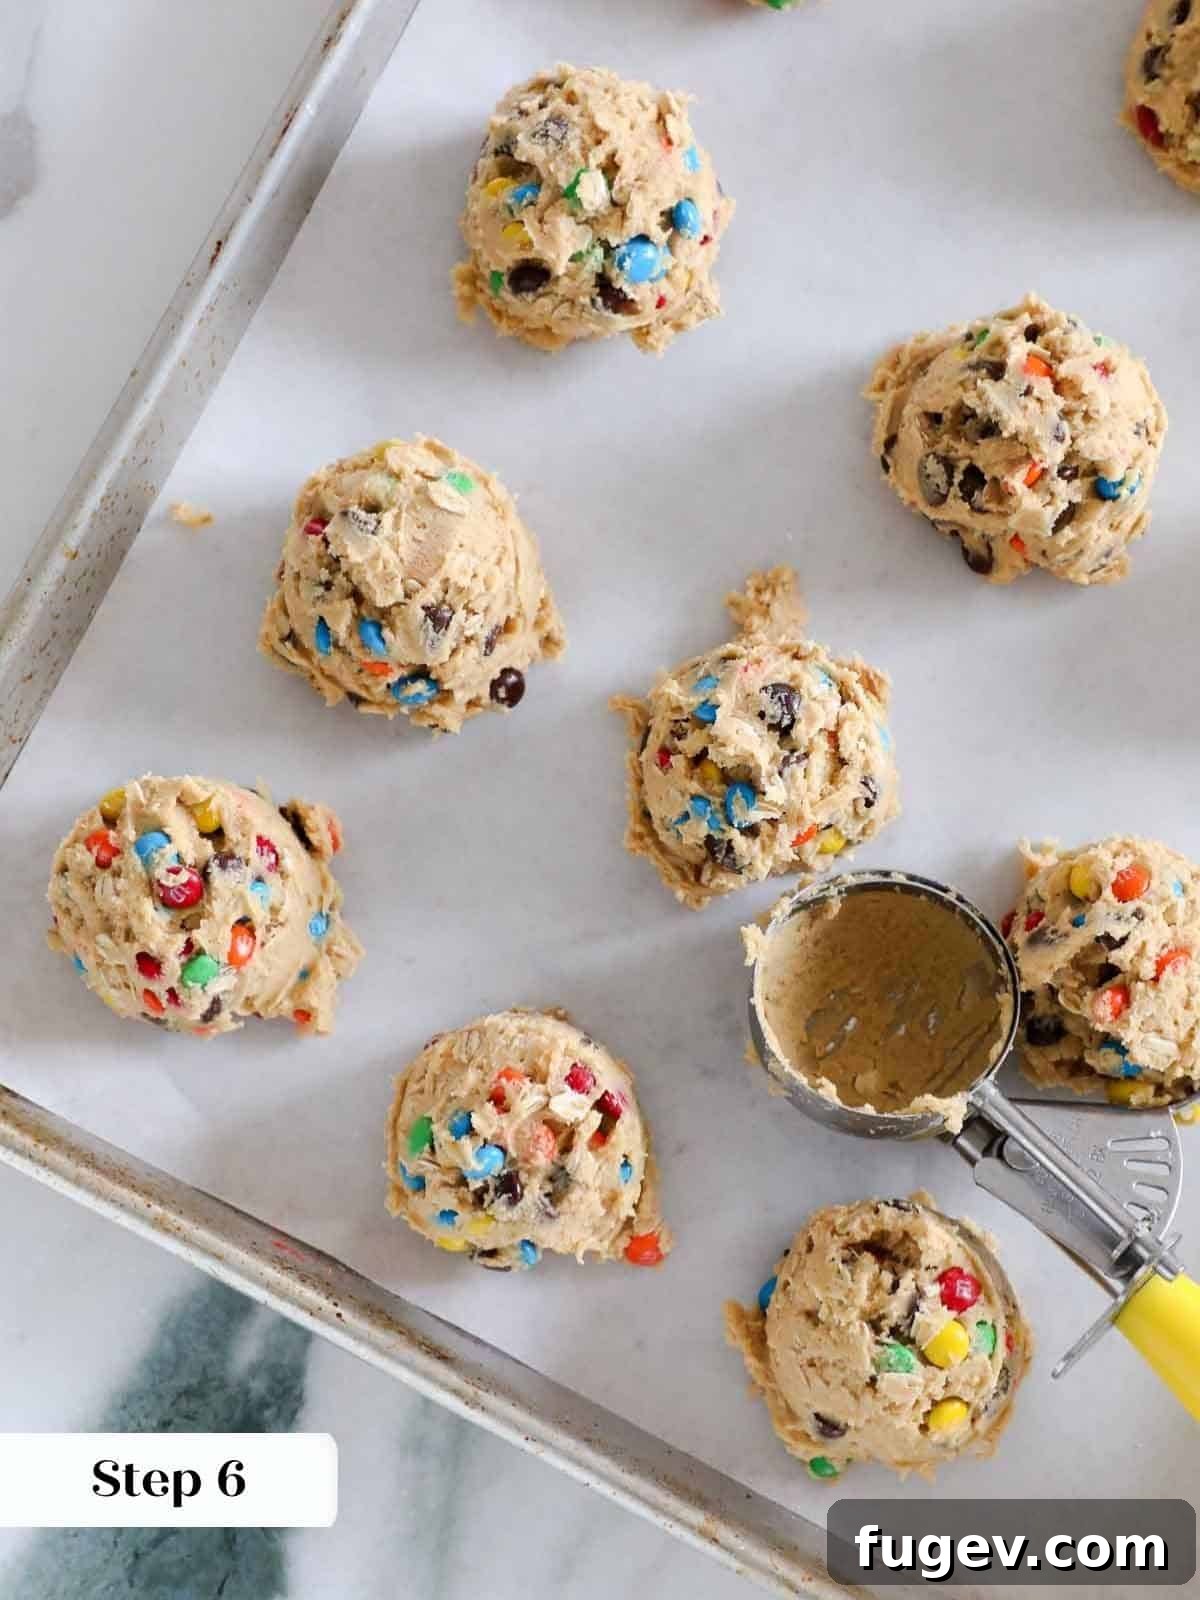
Step 6: Portion and Chill the Dough. Roll the cookie dough into generous 1 ½ inch balls, which should weigh approximately 70g each, or roughly half the size of a tennis ball. Alternatively, use a 2 oz cookie scoop for consistent sizing. Yes, these are meant to be really huge! This recipe offers flexibility: you can chill the dough completely before baking, or if the craving is too strong (we understand that chocolate peanut butter craving!), you can bake them immediately. They bake wonderfully from a chilled or even frozen state, yielding the best texture.
Important Note: The cookie dough needs to be rolled while at room temperature, or at least before it’s fully chilled. Pre-chilling the entire dough ball before scooping and rolling can cause it to become too stiff and dry out, making it very difficult to shape and potentially impacting the final texture and appearance of your cookies.
Step 7: Preheat Oven and Prepare Baking Sheets. Preheat your oven to 350°F (175°C) for conventional baking, or 325°F (160°C) for convection ovens. Line your baking sheets with parchment paper or silicone baking mats. This prevents sticking and ensures even baking and easy removal.
Step 8: Bake the Cookies. Place the chilled or frozen cookie dough balls about 2 inches apart on the prepared baking sheets. Bake for 10-12 minutes in a conventional oven, or until the edges are golden brown and the centers appear matte and set. For a convection oven at 325°F, mine typically bake for about 13 minutes when taken directly from the refrigerator, rotating the baking sheet halfway through (after about 8 minutes). If baking from frozen, expect them to take a solid 15 minutes or slightly longer. They might seem slightly underdone in the center, but they will continue to set as they cool, ensuring a chewy interior.
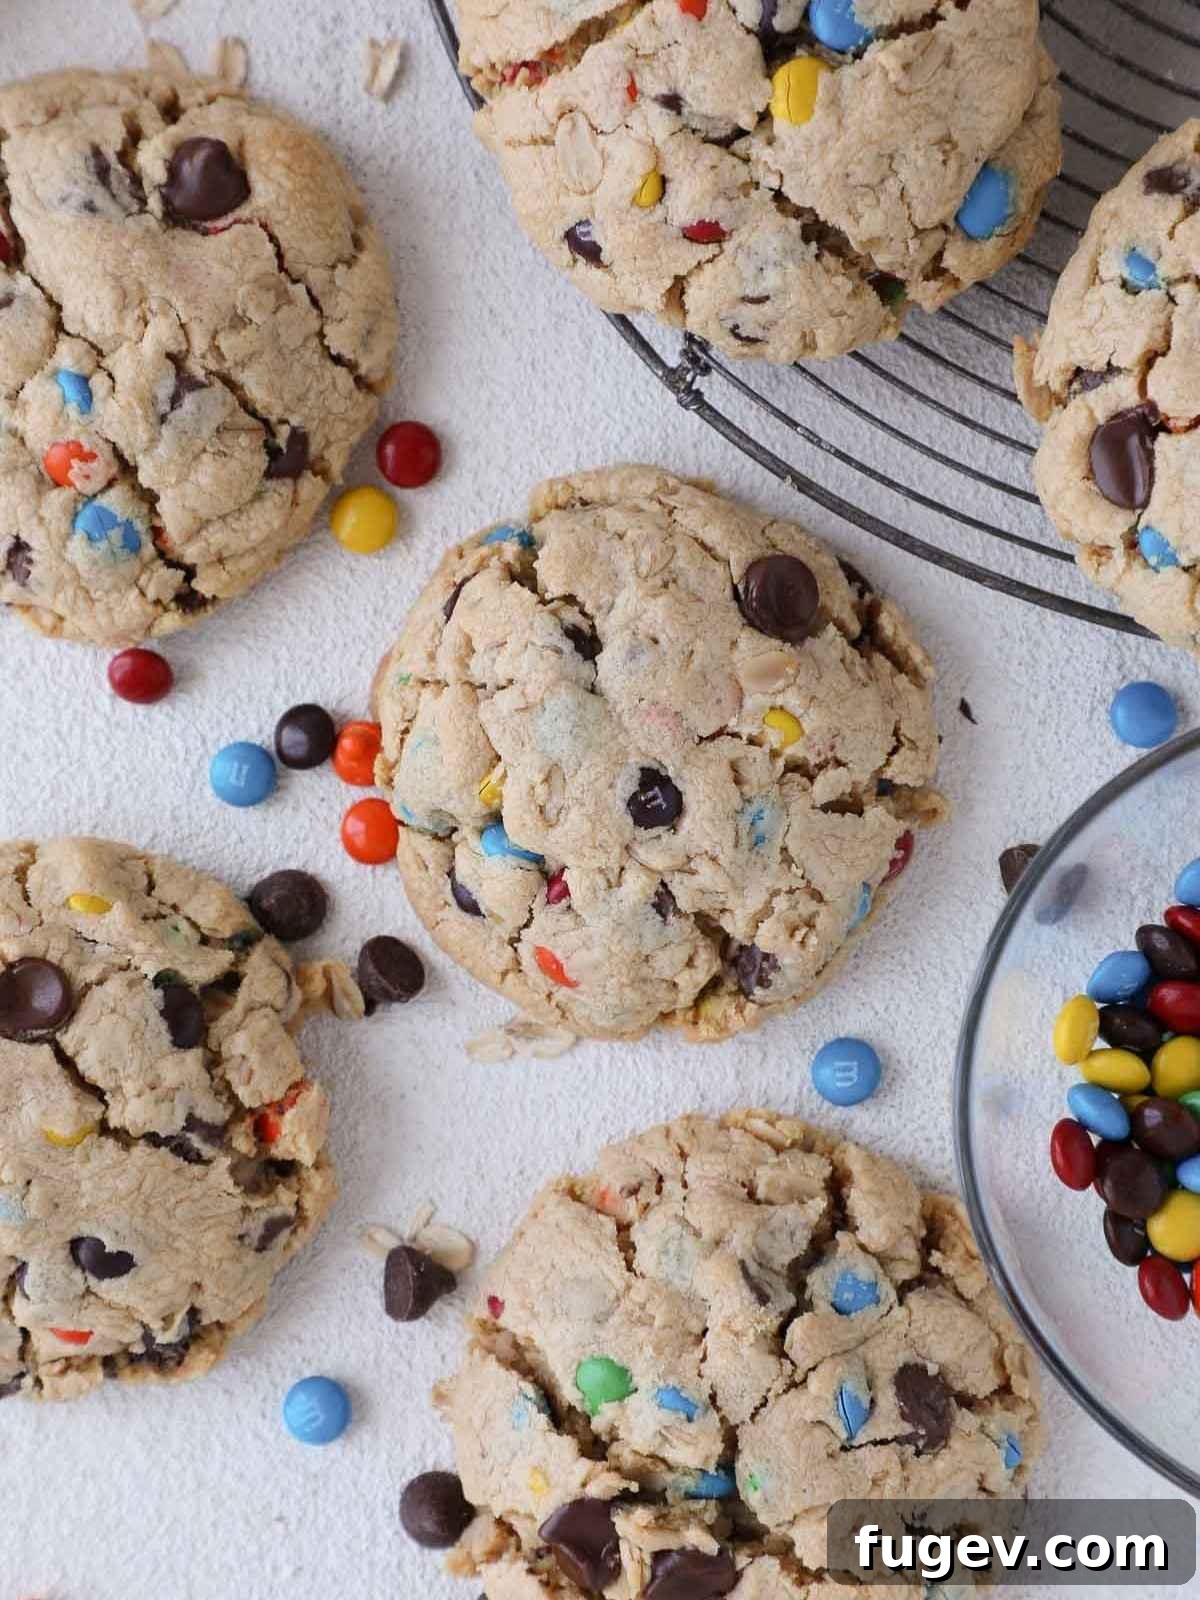
Step 9: Cool and Enjoy! Allow the freshly baked monster cookies to cool on the baking sheet for at least 5 minutes. This crucial resting period allows them to firm up and prevents them from breaking apart when transferred. After 5 minutes, carefully move them to a wire rack to cool completely. Or, if you simply can’t wait, dig in immediately – no judgment here!
Chef Lindsey’s Pro Tip
For the absolute best texture, bake these cookies from a chilled or even frozen state. I know, waiting when you’re craving cookies can be agonizing, but trust me on this – it makes all the difference. Chilled dough spreads less, resulting in a thicker, chewier cookie with a more concentrated flavor profile. Planning ahead means you can have warm, freshly baked monster cookies whenever the craving strikes!
Monster Cookie FAQs
Once baked, store your monster cookies in an airtight container at room temperature for up to 3 days. For longer storage, you can freeze baked cookies for up to 2 months. You can also freeze the raw cookie dough balls, allowing you to have fresh-baked cookies any day of the week!
Absolutely! Freezing cookie dough is a fantastic way to ensure fresh-baked cookies whenever you want them. Simply roll the dough into balls as instructed, then place them on a parchment-lined baking sheet and freeze until solid (about 1-2 hours). Transfer the frozen dough balls to an airtight freezer-safe bag or container and store for up to 2 months. Bake directly from frozen, adding a few extra minutes to the baking time (typically 15-18 minutes).
Several factors can lead to crumbly monster cookies. The most common culprit is mis-measuring flour, adding too much. Always spoon and level flour, or better yet, weigh it with a kitchen scale for accuracy. Overmixing the dough can also develop too much gluten, resulting in a tough, crumbly texture. Ensure you mix only until the flour is just incorporated. Additionally, not having enough butter or peanut butter (the fat content) in the recipe can make cookies dry and crumbly, so double-check your ingredient measurements!
Excessive spreading usually happens for a few reasons. Your butter might have been too warm or over-creamed, incorporating too much air. Ensure your butter is softened but still cool. Not chilling the dough is another common cause; chilling solidifies the fats, preventing excessive spread. Also, using natural peanut butter with separated oils can lead to more spreading, as can an oven that isn’t hot enough. Make sure your oven thermostat is accurate!
While the “monster” in monster cookies implies a large size, you can certainly make them smaller. Use a 1-ounce cookie scoop (or about 1-inch balls of dough). Adjust the baking time accordingly, likely to 8-10 minutes, keeping an eye on them for golden edges. Be aware that the texture might be slightly different, potentially leaning towards a crispier edge.
More Irresistible Cookie Recipes
Cookie Recipes
Monster Skillet Cookie (Pizookie)
Cookie Recipes
New York Times Chocolate Chip Cookies
Cookie Recipes
Old Fashioned Oatmeal Cookies
Christmas Cookie Recipes
Soft Nutella Chocolate Chip Cookies
If you tried this recipe and loved it, please leave a 🌟 star rating and let me know how it goes in the comments below. I love hearing from you; your comments make my day!
Monster Cookies
These monster cookies are incredibly thick, satisfyingly chewy, and bursting with intense peanut butter flavor. Loaded with chocolate chips, M&M’s, and oats, this easy recipe delivers a big, bold, bakery-style bite with almost more mix-ins than dough!
Comment
Print Recipe
Ingredients
- 1 ⅔ cup All-Purpose Flour
- ½ teaspoon Baking Soda
- ¼ teaspoon Baking Powder
- ½ teaspoon Kosher Salt
- ⅓ cup Granulated Sugar
- ⅓ cup Light Brown Sugar
- ½ cup Unsalted Butter (softened but cool)
- ¾ cup Smooth Peanut Butter (I recommend Jif)
- 1 large Egg
- ¼ teaspoon Vanilla Extract
- ½ cup Semi-Sweet Chocolate Chips
- ½ cup Quick Oats
- 1 cup Mini M&M’s
Instructions
-
In a large bowl, combine flour, baking soda, baking powder, and salt. Whisk well to ensure all leavening agents are evenly distributed and lump-free. Set aside.
-
In the bowl of a stand mixer fitted with a paddle attachment (or using an electric mixer), beat the unsalted butter on medium-high speed until it is softened but still cool and pliable. Add both sugars and mix on medium-high until just combined and a paste forms. Scrape down the sides and bottom of the bowl with a rubber spatula to ensure even mixing.
-
Add the egg and vanilla extract to the butter-sugar mixture, beating until well combined. Scrape down the sides of the bowl as needed. Next, add the smooth peanut butter and beat until the mixture is smooth and fully incorporated.
-
Reduce the mixer speed to low. Gradually add the dry ingredient mixture (flour, baking soda, baking powder, salt) in 4-5 additions. Mix until each addition is almost fully incorporated before adding the next. Stop mixing as soon as no dry streaks of flour remain to avoid overdeveloping gluten.
-
Once the flour is incorporated, stir in the chocolate chips, quick oats, and mini M&M’s. Mix on low speed (or by hand with a spatula) until all the mix-ins are evenly distributed throughout the dough.
-
Roll the cookie dough into 1 ½ inch balls (approximately 70g each or about half the size of a tennis ball). You can also use a 2 oz cookie scoop for consistent sizing. Place the dough balls on a plate and chill completely for at least 30 minutes, or up to 24 hours. Alternatively, you can bake immediately if desired, though chilling is recommended for a thicker cookie.
-
Preheat your oven to 350°F (175°C) for conventional ovens, or 325°F (160°C) for convection ovens. Line your baking sheets with parchment paper.
-
Place the chilled or frozen cookie dough balls 2 inches apart on the prepared baking sheets. Bake for 10-12 minutes (conventional) or until golden brown edges form and the centers appear matte and set. For chilled dough in a convection oven, baking usually takes around 13 minutes, with rotation after 8 minutes. If baking from frozen, expect about 15-18 minutes of baking time.
-
Allow the cookies to cool on the baking sheet for 5 minutes before carefully transferring them to a wire rack to cool completely. Or, enjoy them warm!
Notes
Yield: 13 large, 70g cookies.
Variations: For a Monster Skillet Cookie, press the entire batch of room-temperature dough into an 8-inch cast iron skillet. Bake for 20-22 minutes at 325°F (160°C) until golden and set.
Technique: For the thickest, chewiest cookies, do not over-cream the butter and sugars. Mix only until just combined into a paste.
Storage: Store baked cookies well-wrapped or in an airtight container for 3 days at room temperature. For longer storage, freeze baked cookies or raw dough balls for up to 2 months.
Nutrition
Carbohydrates: 44g |
Protein: 7g |
Fat: 21g |
Saturated Fat: 10g |
Polyunsaturated Fat: 2g |
Monounsaturated Fat: 6g |
Trans Fat: 0.3g |
Cholesterol: 34mg |
Sodium: 222mg |
Potassium: 147mg |
Fiber: 2g |
Sugar: 26g |
Vitamin A: 272IU |
Vitamin C: 0.1mg |
Calcium: 48mg |
Iron: 1mg
Enjoyed this recipe? Leave a comment below!
Before You Go
We hope you thoroughly enjoyed this professional chef-tested and perfected monster cookie recipe! It’s a true celebration of flavor, texture, and pure cookie joy. Don’t forget to explore our other delicious, chef-developed cookie recipes to expand your baking repertoire. Happy baking!