
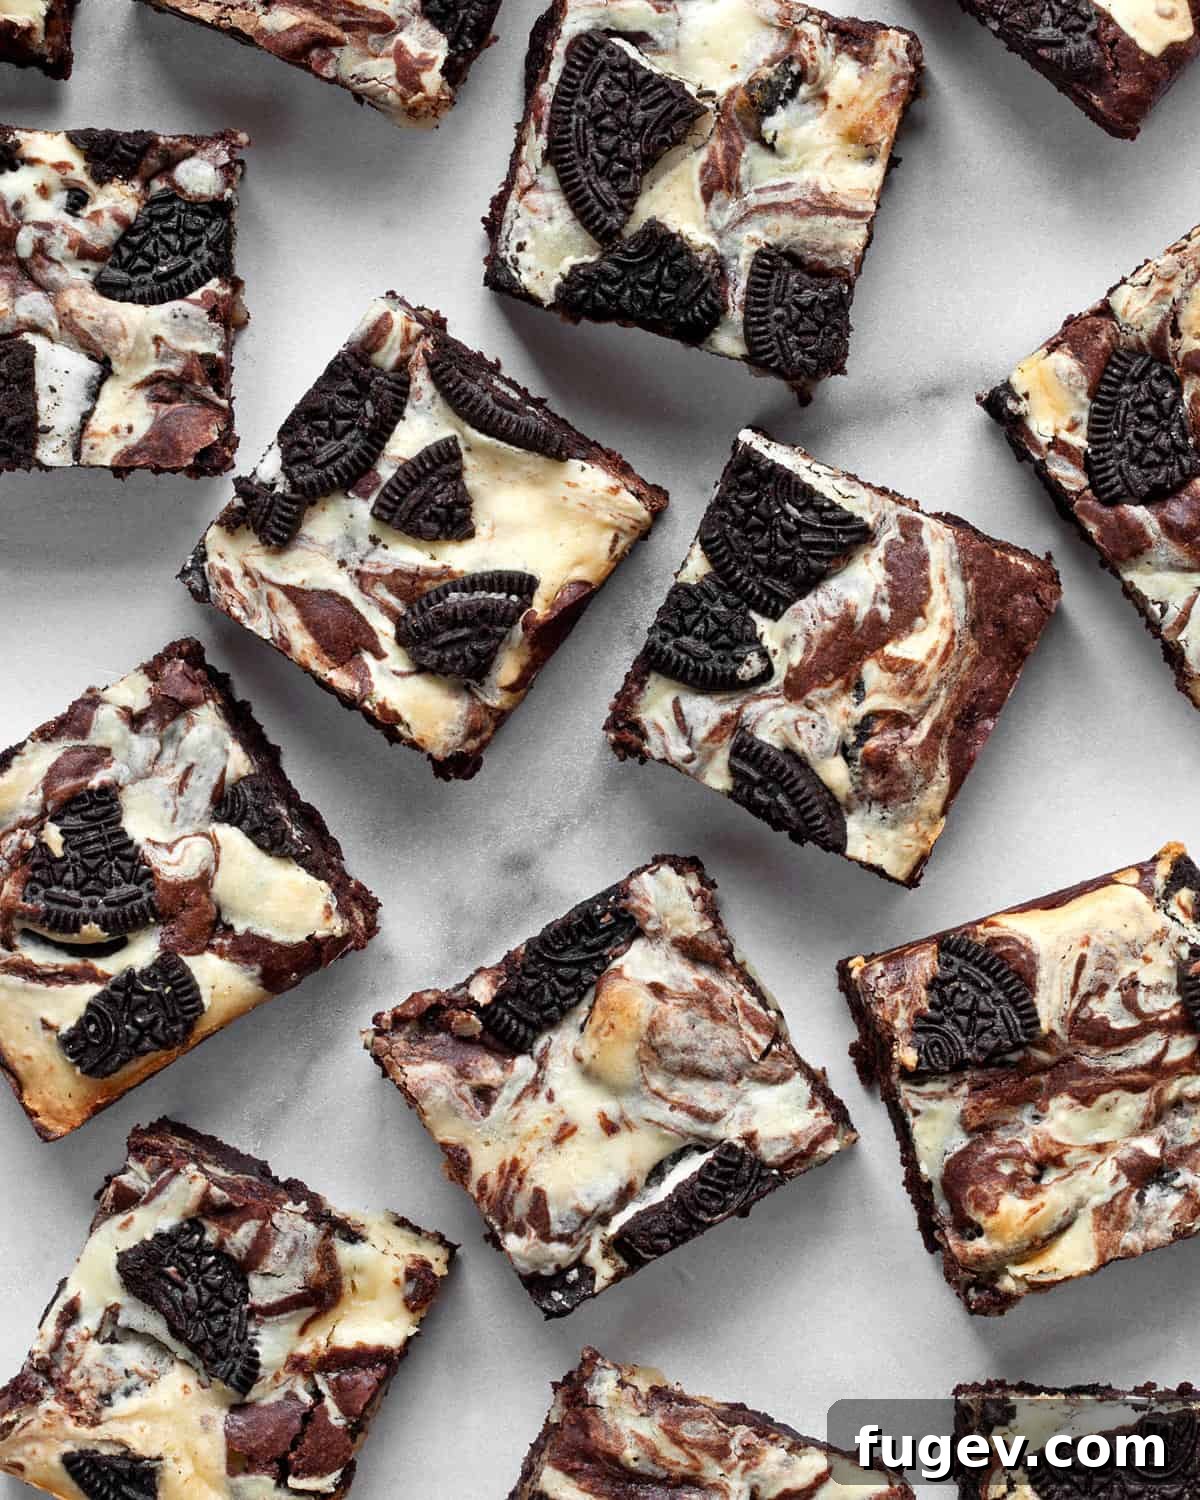
Prepare to be captivated by these exquisite cream cheese brownies, a perfect fusion of rich, fudgy chocolate and a tangy cheesecake swirl. Crafted with premium bittersweet chocolate and a hint of cocoa powder, these bar cookies boast an irresistible gooey texture. What sets them apart is the generous inclusion of crushed Oreo cookies, both mixed into the marbled batter and artfully decorating the tops. This recipe elevates the classic brownie experience, delivering a dessert that’s both decadent and surprisingly easy to make. Get ready to add this show-stopping treat to your baking repertoire!
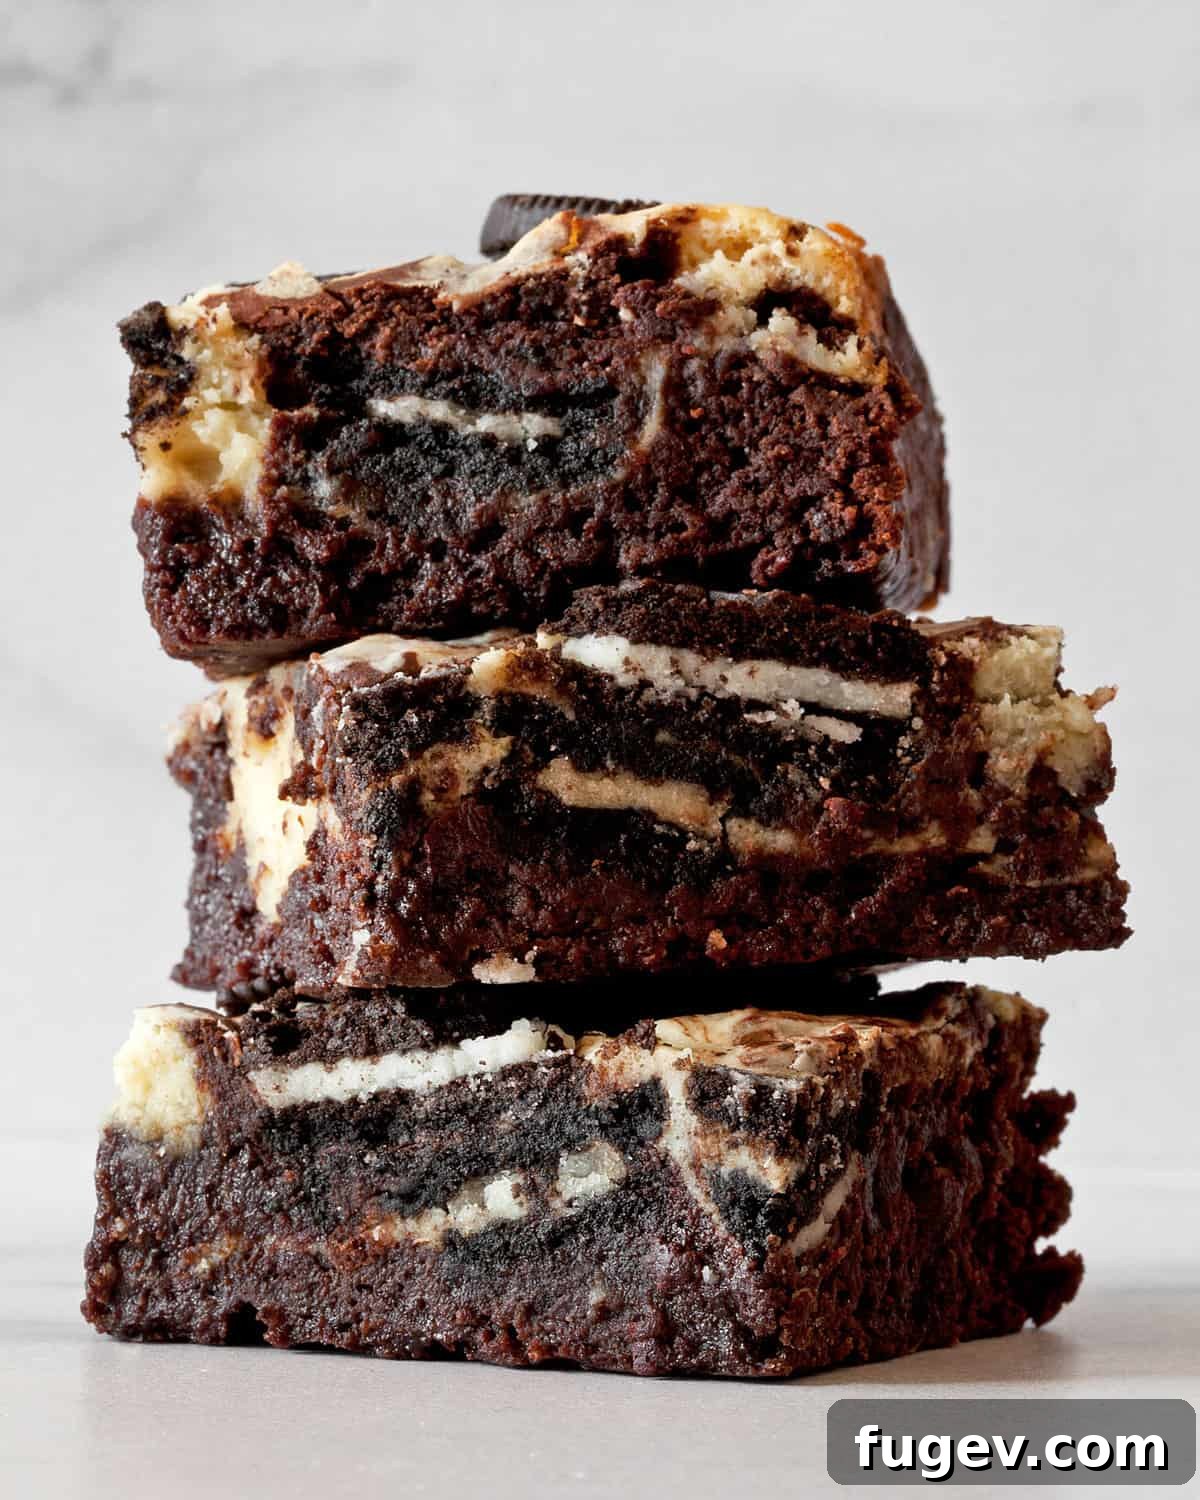
Table of Contents
- Why You’ll Love These Decadent Brownies
- The Essential Ingredients for Perfection
- Mastering How To Make Cream Cheese Brownies
- Achieving Perfect Brownie Slices
- Serving and Pairing Your Cheesecake Brownies
- Storage Tips for Leftovers & Freshness
- Expert Baking Tips for Best Results
- Frequently Asked Questions (FAQs)
- More Irresistible Bar Cookie Recipes
- Cream Cheese Brownies Full Recipe Card
Why You’ll Love These Decadent Cream Cheese Brownies
While a classic fudgy brownie is always a delightful treat, these cream cheese swirl brownies take indulgence to an entirely new level. The brilliant contrast of intensely rich, dark chocolate and a subtly tangy, creamy cheesecake swirl creates a flavor profile that is truly extraordinary. It’s a remarkably simple yet sophisticated way to elevate your standard brownie recipe, requiring just a few extra pantry staples and an additional mixing bowl.
Beyond their captivating flavor, these brownies are designed to be beautifully thick and wonderfully gooey. Baked in a standard 9-inch square pan, each brownie slice boasts a substantial 1-inch thickness. The elegant marbling of the dark chocolate and the pristine white cheesecake, often peeking through the rich brownie base, makes them look as if they came straight from a gourmet bakery display. You’ll be proud to share these impressive, thick-cut brownie bars with friends and family, instantly becoming the star of any potluck or gathering.
And as if the combination of fudgy brownie and creamy cheesecake wasn’t enough, we’ve added everyone’s favorite cookie: Oreos! Generous chunks of broken Oreo cookies are folded into the luscious batter, adding an exciting textural element and a beloved cookies-and-cream flavor. Before baking, we scatter even more Oreo pieces on top, creating a visually appealing and utterly delicious crunchy crust. Each bite offers a delightful interplay of textures and tastes, reminiscent of a sophisticated cookies and cream cheesecake, all within the comforting form of a brownie.
These cream cheese brownies are more than just a dessert; they are an experience. They are perfect for special occasions, holiday gatherings, potlucks, or simply when you crave an extra-special treat that truly stands out. The balance of flavors and textures ensures they are not overly sweet, allowing the quality of the chocolate and the tang of the cream cheese to shine through. This makes them universally appealing and a guaranteed crowd-pleaser for any chocolate and cheesecake enthusiast.
The Essential Ingredients for Cream Cheese Brownie Perfection
Crafting the perfect batch of cream cheese brownies begins with selecting high-quality ingredients. Each component plays a crucial role in achieving the desired fudgy texture, rich flavor, and beautiful cheesecake swirl. Here’s a closer look at what you’ll need and why:
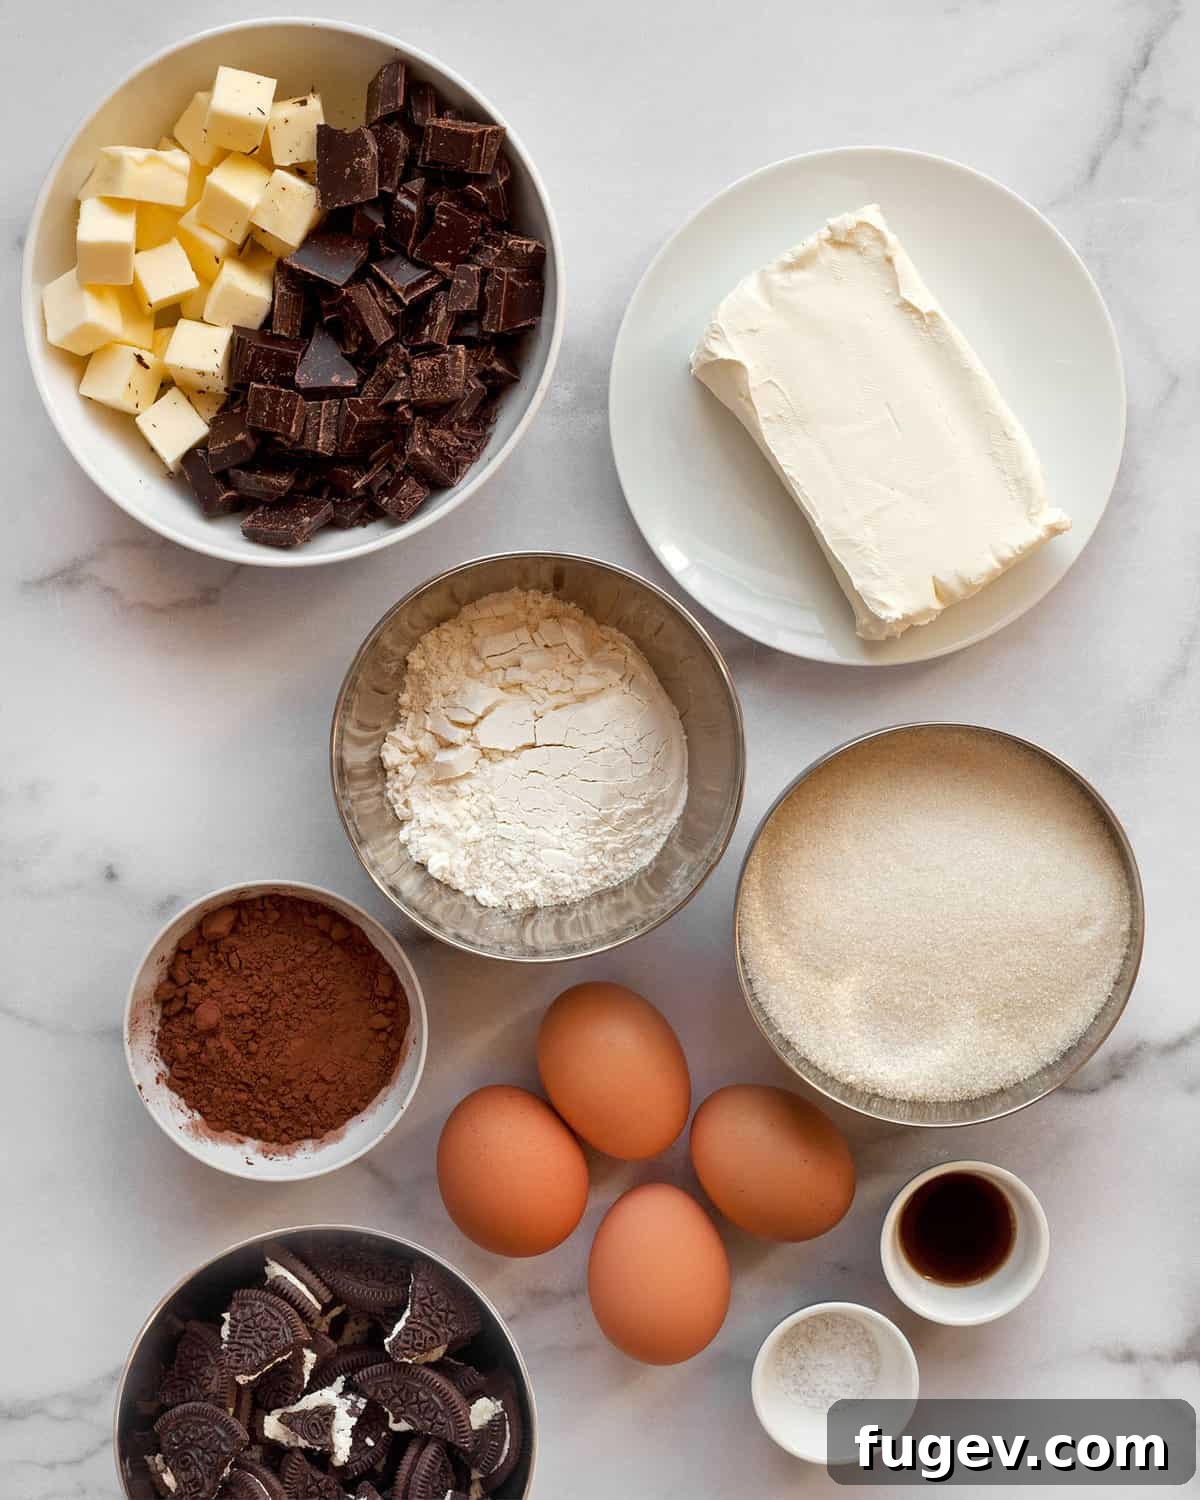
- Bittersweet Chocolate: This is the cornerstone of our rich brownies. Using bittersweet chocolate, which typically contains 60-70% cacao, ensures a deep, intense chocolate flavor that isn’t overly sweet. It provides the characteristic dark hue and robust taste that defines truly exceptional fudgy brownies. Avoid milk chocolate or semi-sweet if you want that deep, complex flavor; the higher cacao content is key here, contributing significantly to the luxurious mouthfeel.
- Unsalted Butter: Like most baking recipes, unsalted butter is preferred as it gives you control over the overall saltiness of the recipe. Cut it into small cubes before melting; this helps it melt more evenly and prevents the chocolate from scorching. Using good quality butter contributes to the moistness, richness, and overall delicate crumb of the brownie base, enhancing the fudgy texture.
- Full-Fat Cream Cheese: For the ultimate creamy and tangy cheesecake swirl, full-fat cream cheese is non-negotiable. Its higher fat content results in a richer, smoother, and more stable swirl that won’t melt away into the brownie batter. Remember to let it sit out at room temperature for at least an hour before you start baking. This softens it considerably, making it much easier to beat into a smooth, lump-free mixture, which is essential for that perfect, distinct swirl.
- Cocoa Powder: To intensify the chocolate flavor even further, we incorporate unsweetened cocoa powder into the brownie batter. It acts as a supporting player to the bittersweet chocolate, deepening the color and adding another layer of complex chocolate notes without making the brownies taste bitter. It adds to the overall “chocolatiness” in a way that solid chocolate alone cannot achieve.
- Granulated Sugar: Sugar sweetens both the brownie and cheesecake batters, balancing the bitterness of the chocolate and the tanginess of the cream cheese. It also plays a crucial role in the brownies’ tender crumb, helping to achieve that signature fudgy texture by attracting and retaining moisture.
- Large Eggs: Eggs are crucial for structure, moisture, and binding the ingredients together. This recipe calls for three large eggs in the brownie batter and one in the cheesecake swirl. For optimal mixing and consistency, try to bring your eggs to room temperature before incorporating them. This helps them emulsify better with other ingredients, leading to a smoother batter and a more uniform, tender bake.
- Vanilla Extract: A touch of pure vanilla extract, while subtle, enhances and rounds out the rich chocolate flavor of the brownies. It adds a warm, aromatic depth that makes a noticeable difference in the overall taste, bringing out the nuances of the chocolate. Don’t skip this essential flavoring!
- Kosher Salt: Salt is a flavor enhancer in baking. It balances the sweetness, amplifies the chocolate, and makes all the other flavors pop. A small amount of kosher salt is used for its clean taste and coarser grain, which dissolves well and distributes evenly, providing a perfect counterpoint to the sweetness.
- All-Purpose Flour: The recipe uses a minimal amount of all-purpose flour to provide just enough structure without making the brownies cakey. It’s important to fold it in gently and quickly; overmixing the flour can develop gluten, leading to tough brownies that lack the desired fudgy interior.
- Oreo Cookies: These iconic chocolate sandwich cookies are a fantastic addition, offering both texture and a beloved “cookies and cream” flavor. Breaking them into pieces ensures they are distributed throughout the batter and sprinkled on top, providing delightful crunchy pockets and visual appeal when you slice into the brownies. You can use classic Oreos or even try different flavors for a unique twist!
Mastering How To Make Fudgy Cream Cheese Brownies
Creating these sensational cream cheese brownies is a straightforward process, broken down into manageable steps. Pay attention to the details, and you’ll be rewarded with a batch of irresistible, bakery-quality treats that are sure to impress.
Before you begin your baking adventure, preheat your oven to a consistent 350 degrees F (175 degrees C). Proper oven temperature is vital for even baking. Next, prepare a 9-inch x 9-inch square baking pan by greasing it thoroughly with non-stick cooking spray, ensuring every corner is covered. Then, line the pan with parchment paper. It’s helpful to leave an overhang of parchment on two opposing sides; these will act as convenient “handles” to easily lift the cooled brownies out of the pan later, ensuring clean edges and an effortless transfer to your cutting board.
Part 1: Crafting the Fudgy Brownie Base
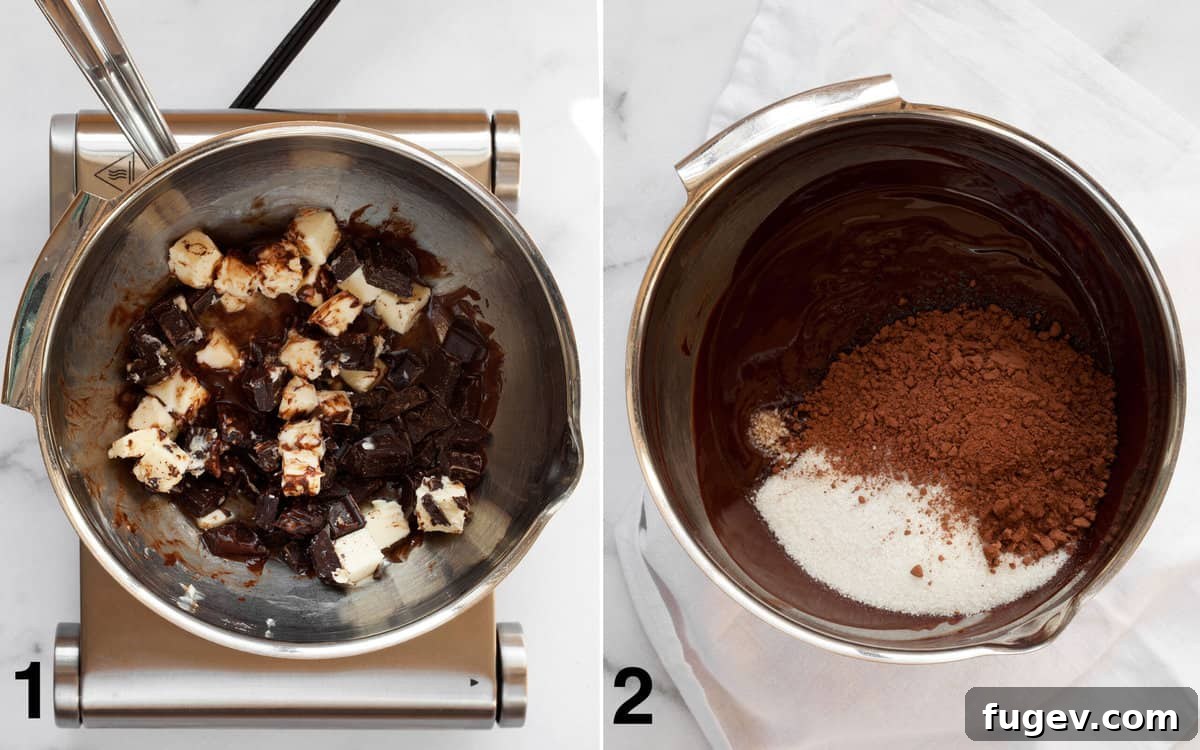
- Melt the Butter and Chocolate Gently: In a large, heatproof bowl, combine the accurately measured cubed unsalted butter and finely chopped bittersweet chocolate. Place this bowl carefully over a medium saucepan containing about 1 inch of gently simmering water, ensuring that the bottom of the bowl does not make direct contact with the water. This setup creates a double boiler, which is ideal for gently melting chocolate and butter without the risk of scorching or seizing the chocolate. Stir the mixture occasionally with a heat-resistant rubber spatula until it is completely smooth, glossy, and fully combined. Once melted to perfection, carefully remove the bowl from the heat and set it aside to cool slightly for a few minutes.
- Incorporate Dry Ingredients and Flavorings: To the slightly cooled chocolate mixture, add the granulated sugar, unsweetened cocoa powder, pure vanilla extract, and kosher salt. Stir these ingredients vigorously with a whisk or sturdy spatula until all components are thoroughly combined and the mixture appears uniform and thick. The sugar will begin to dissolve into the warm chocolate, and the cocoa powder will blend seamlessly, intensifying the chocolate aroma and color.
- Beat in the Eggs for Structure: Add the three large, room-temperature eggs to the brownie batter, incorporating them one at a time. After each egg addition, beat the mixture well until the egg is fully mixed in and no visible streaks remain. Continue beating until the batter appears smooth, cohesive, and slightly thickened. This step is crucial for incorporating air, contributing to the fudgy texture, and ensuring the overall structure of the brownies.
- Gently Fold in the Flour: Finally, add the precisely measured all-purpose flour to the batter. Using a rubber spatula, gently fold the flour into the mixture until it is just combined. The key here is to be careful not to overmix, as overdeveloping the gluten in the flour can lead to tough, dense, and cakey brownies, which is the opposite of the desired fudgy consistency. Stop mixing as soon as you no longer see any visible streaks of dry flour.
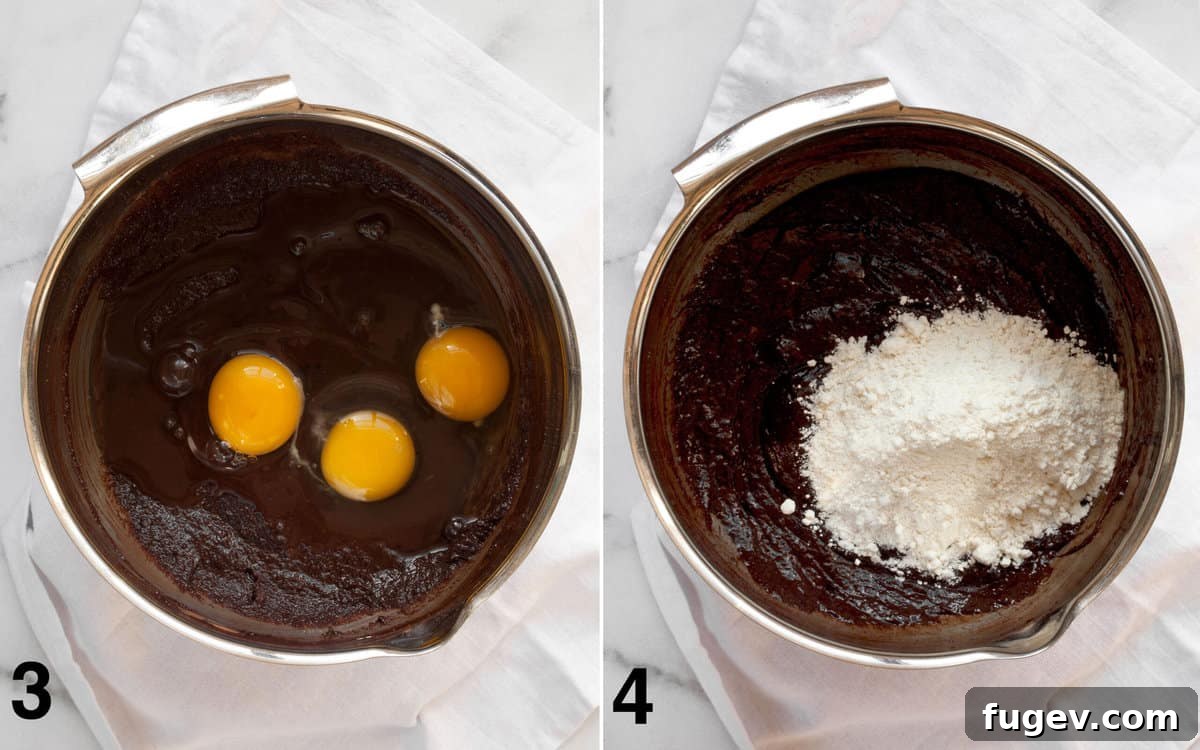
Part 2: Creating the Tangy Cheesecake Swirl & Assembly
- Prepare the Silky Cheesecake Swirl: In a separate large bowl, combine the softened full-fat cream cheese, ½ cup granulated sugar, 1 teaspoon vanilla extract, and one large, room-temperature egg. Using an electric mixer set to medium speed (or a sturdy whisk if your cream cheese is exceptionally soft), beat the ingredients together until the mixture is completely smooth, creamy, and free of any lumps. Ensure it’s well combined; a silky-smooth cream cheese mixture is essential for a perfect swirl.
- Assemble the Layers in the Pan: Begin by spooning alternating dollops of the rich chocolate brownie batter and the creamy cheesecake mixture into your prepared 9×9 inch pan. Try to distribute them somewhat evenly across the pan. As you layer, generously sprinkle about half of the broken Oreo cookie pieces over the batters. This ensures delightful crunchy pockets of Oreo throughout each brownie slice.
- Create the Perfect Swirl & Topping: Take a thin knife, a skewer, or even a chopstick and gently drag it through the batters in a figure-8 motion, or create random smaller swirls here and there. The goal is to marble the chocolate and cheesecake layers, not to completely combine them into a single color. You want distinct streaks and pockets of both batters for a beautiful visual and flavor contrast. Once swirled to your liking, press the remaining Oreo pieces evenly over the top of the batter, creating an enticing, crunchy crust.
- Bake to Fudgy Perfection: Carefully transfer the pan to your preheated oven. Bake for approximately 30-35 minutes. The key is to bake until the edges appear just set and slightly puffed, and the center still appears slightly soft or “jiggly” when the pan is gently shaken. A toothpick inserted into the center should come out with moist crumbs attached, but not wet batter. Crucially, avoid overbaking, as this will result in dry, cakey brownies. It’s always better to slightly underbake for maximum fudginess and a wonderfully gooey interior.
- Cool Completely for Best Results: This step is absolutely critical for the structure and clean cuts of your brownies. Allow the brownies to cool completely in the pan on a wire rack for at least 2-3 hours at room temperature. For even cleaner and firmer cuts, you can chill them in the refrigerator for an additional hour once they’ve reached room temperature. This firming-up process ensures that the fudgy chocolate and creamy cheesecake layers hold together beautifully when sliced.
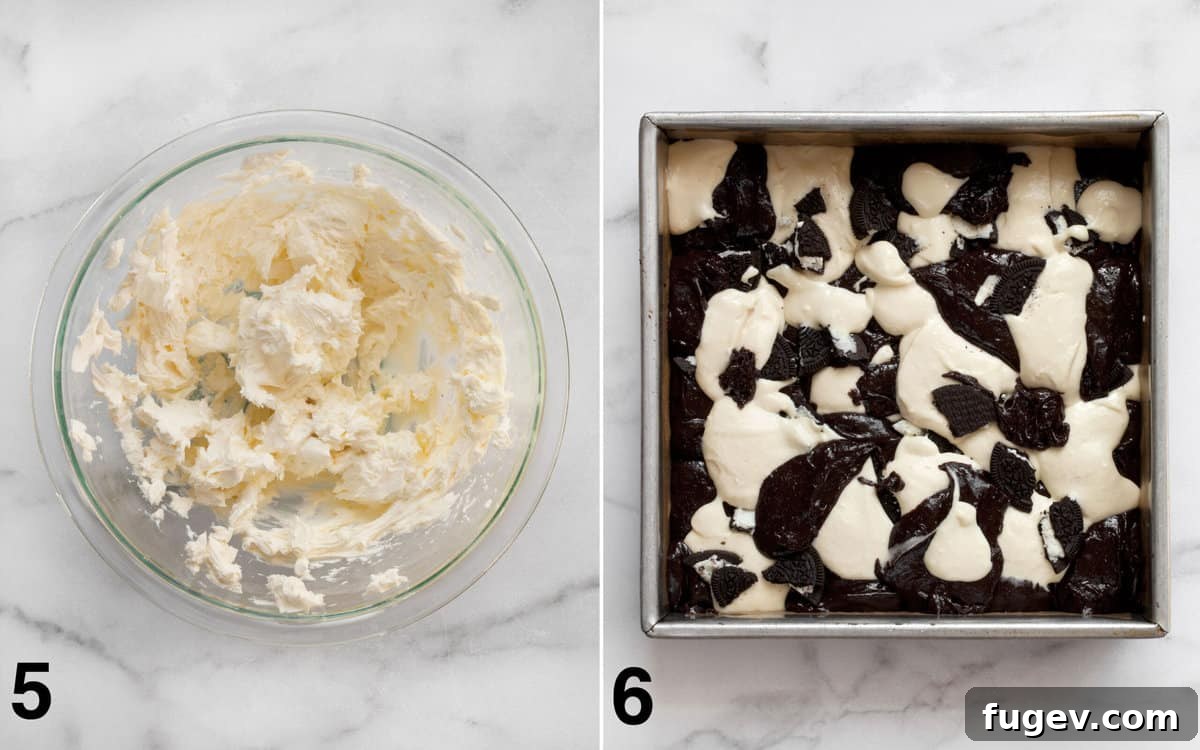
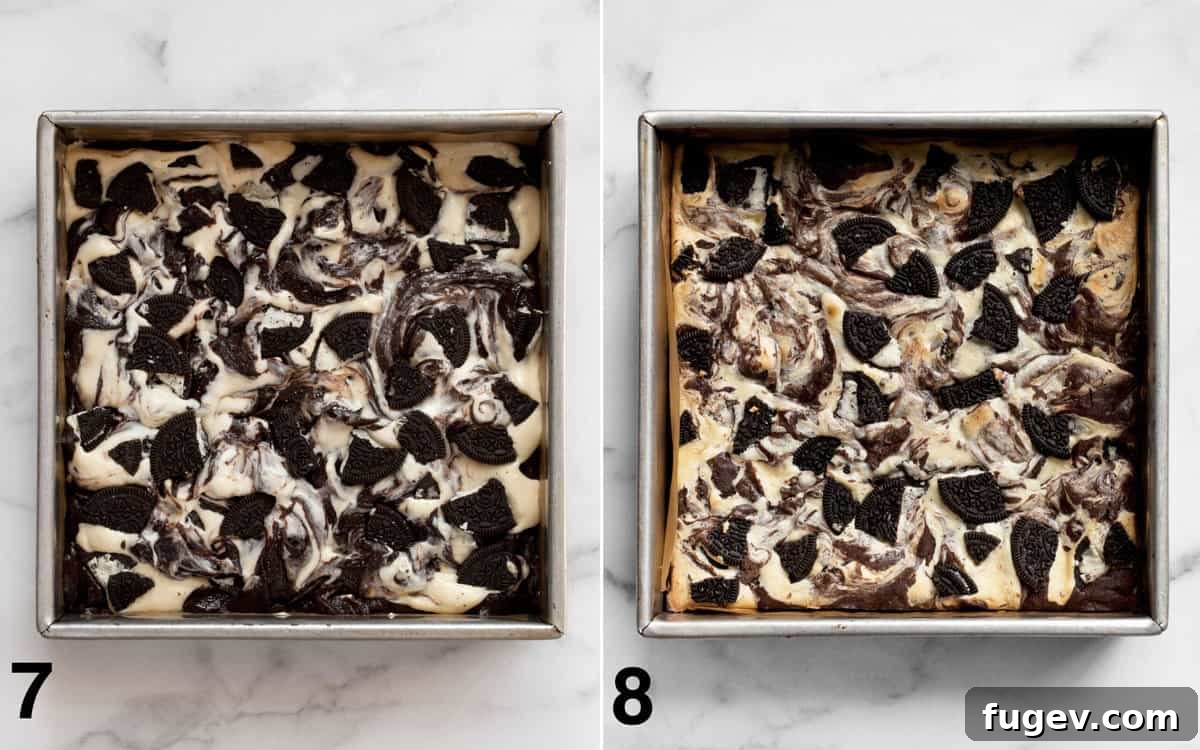
Achieving Perfect Brownie Slices: Tips for Clean Cuts
You’ve baked a masterpiece; now let’s ensure you cut it into perfect, Instagram-worthy squares! The secret to clean, non-messy brownie slices lies in a combination of patience and proper technique. Skipping these steps can lead to crumbly edges and a sticky knife, detracting from your hard work.
First and foremost, wait until your brownies have cooled completely. This cannot be stressed enough. Attempting to cut warm brownies will result in gooey, crumbly edges and a sticky mess where the layers meld together unattractively. For even cleaner cuts, consider chilling the cooled brownies in the refrigerator for 30-60 minutes before slicing. The colder they are, the firmer the chocolate and cream cheese layers will become, making them much easier to cut cleanly and precisely.
When you’re ready to cut, use a very sharp chef’s knife with a straight edge, not a serrated knife. A straight edge will give you the cleanest lines through the different textures of the brownie and cheesecake layers. Avoid a sawing motion, which can drag crumbs and distort the shape; instead, press straight down through the entire depth of the brownie with a firm, decisive motion. For exceptionally neat slices, wipe the knife clean with a damp paper towel or cloth between each cut. This simple trick prevents any sticky residue from one cut from transferring to the next, keeping your edges pristine and defined.
If you desire perfectly even squares, a metal ruler can be your best friend. Use it as a straightedge guide to mark and make your cuts. This level of precision is entirely up to you, but it’s a trick many professional bakers use for consistent presentation. Typically, cutting the 9×9 inch pan into a 4×4 grid will yield 16 generous squares. For smaller servings, especially for a large crowd or if you’re serving other desserts, you can opt to cut them into 20 or 25 smaller, bite-sized portions.
Serving and Pairing Your Decadent Cheesecake Brownies
These cream cheese brownies are a rich, satisfying treat all on their own. Their complex flavor profile of dark chocolate, tangy cheesecake, and crunchy Oreos means they require very little embellishment to be enjoyed. The pure indulgence they offer is often best appreciated in its simplest form, allowing the intricate flavors to take center stage.
Traditionally, a tall glass of cold milk is the perfect companion, as its coolness and creaminess beautifully cut through the richness of the brownies and provide a refreshing contrast. For coffee lovers, a hot cup of black coffee or an espresso can also beautifully complement the deep chocolate notes, enhancing the bittersweet character of the brownies. If you’re feeling a bit more adventurous, a scoop of premium vanilla bean ice cream or a dollop of lightly sweetened whipped cream can add an extra layer of creaminess and coolness, though they are certainly not necessary to enjoy this exquisite dessert.
I typically cut these into 16 generous squares, making them ideal for sharing at small gatherings, family desserts, or as a substantial personal treat for those truly indulgent moments. However, if you are serving them to a larger group, for a party buffet, or as part of a varied dessert spread, feel free to cut them into smaller, bite-sized portions (yielding 20 or 25 squares). This allows guests to sample other treats without feeling overwhelmed by the richness of a large brownie slice.
These versatile brownies are fantastic for a variety of occasions. They are a guaranteed crowd-pleaser for game day parties like Super Bowl Sunday, an excellent and always-popular addition to bake sales (they almost always sell out first!), or simply whenever you crave an exciting, easy-to-make dessert that feels incredibly special and gourmet. Their impressive marbled appearance and unforgettable taste make them a go-to recipe for any event that calls for a truly decadent and memorable treat.
Storage Tips for Leftovers & Maintaining Freshness
Proper storage is key to keeping your cream cheese brownies fresh, fudgy, and delicious for as long as possible. While they’re so good you might not have many leftovers, it’s always good to know how to store them to preserve their quality and extend their shelf life.
At Room Temperature: You can store these brownies in an airtight container at room temperature for up to 4 days. Place them in a single layer or separate layers with sheets of parchment paper to prevent them from sticking together. Be aware that the Oreo cookies on top will gradually soften over time due to moisture absorption, but the brownies themselves will remain wonderfully fudgy and moist. Ensure the container is truly airtight to prevent them from drying out.
In the Refrigerator: If you prefer your brownies slightly firmer or want to extend their freshness, you can store them in an airtight container in the refrigerator for up to a week. Chilling them can also enhance their fudgy, dense texture, making them feel even more decadent. Allow them to come to room temperature for about 15-30 minutes before serving for the best flavor and texture, as the cold can mute some of the chocolate notes. Alternatively, many enjoy them straight from the fridge – they are delicious either way!
Freezing for Longer Storage: These brownies freeze beautifully, making them an excellent make-ahead dessert for future cravings or unexpected guests. To freeze, ensure the brownies are completely cooled first, as freezing warm items can lead to condensation and ice crystals. Wrap individual squares tightly in plastic wrap, then place them in an airtight freezer-safe container or a heavy-duty freezer bag. This double-wrapping technique is crucial for preventing freezer burn and helps maintain their moisture, flavor, and texture. They can be frozen for up to 1 month without significant loss of quality.
To thaw, simply transfer the desired number of frozen brownies to the refrigerator and let them thaw slowly overnight. This gradual thawing helps maintain their texture. For a quicker thaw, you can leave them on the counter at room temperature for a few hours. Once thawed, they will be just as delicious as when they were freshly baked. Avoid microwaving to thaw, as it can unevenly heat the brownies and alter the delicate fudgy texture, potentially making them rubbery or dry in spots.
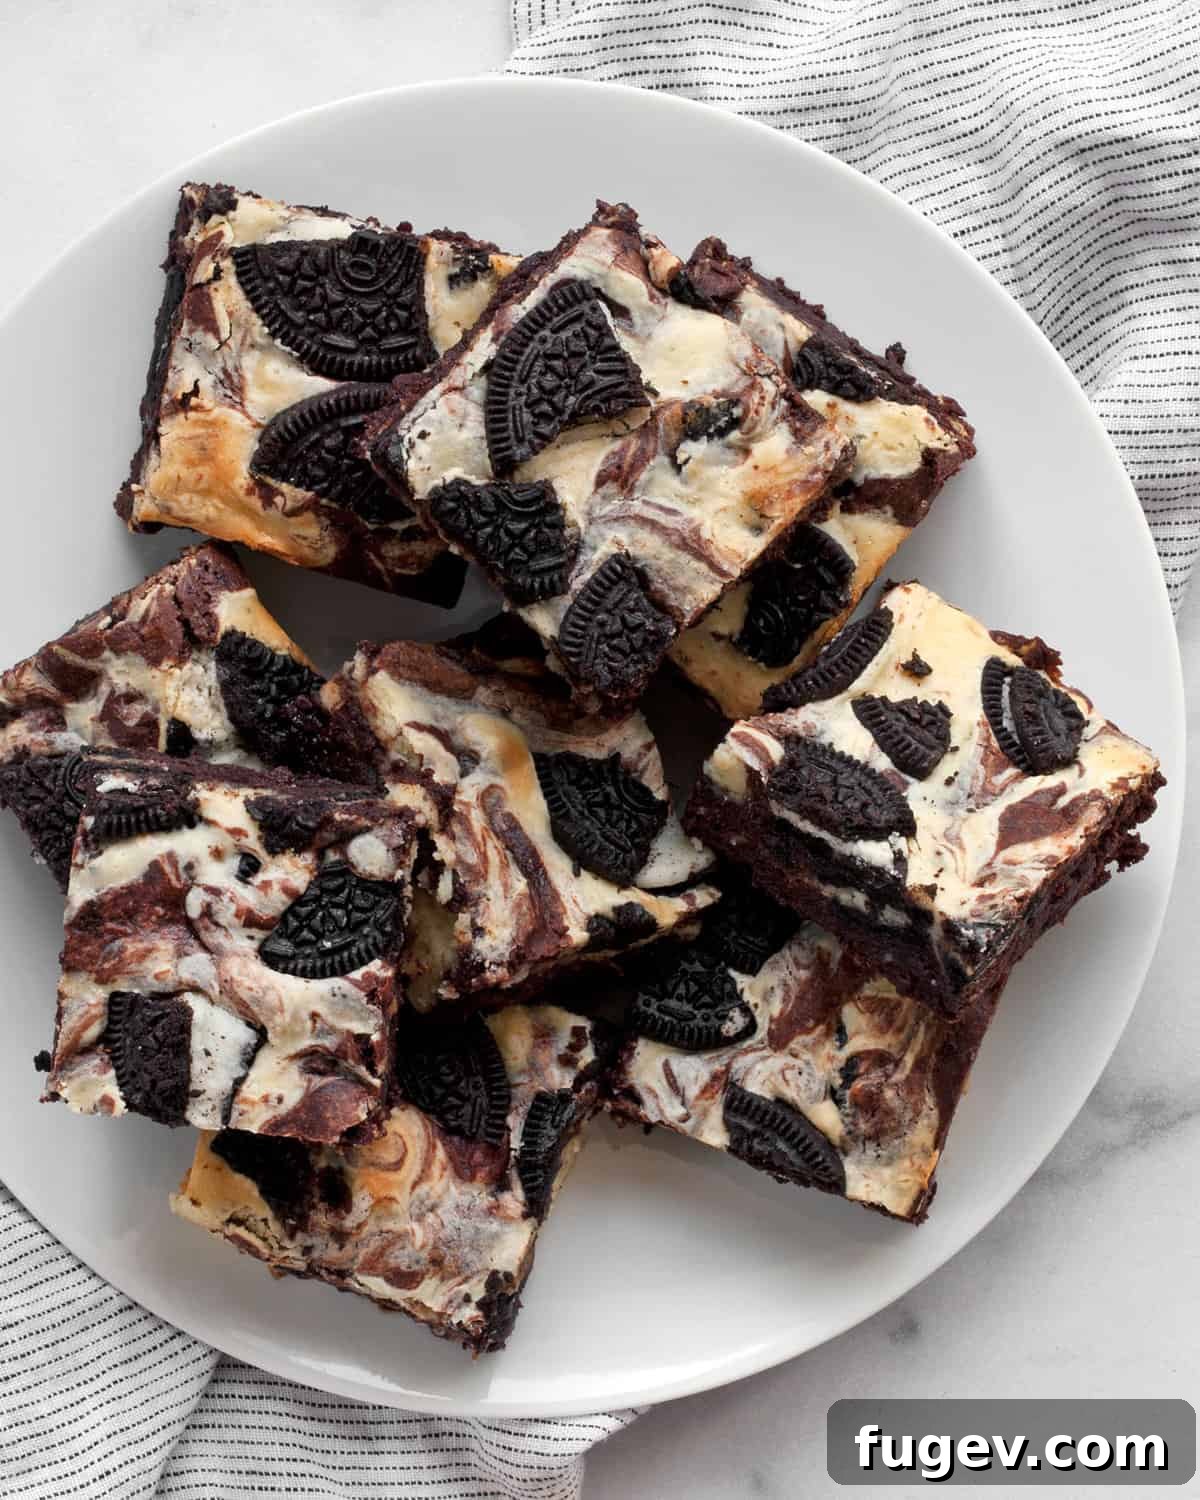
Expert Baking Tips for the Best Cream Cheese Brownies
Achieving bakery-quality cream cheese brownies isn’t difficult, but a few key tips can elevate your results from good to absolutely phenomenal. Keep these pointers in mind for your next baking adventure to ensure every batch is a success:
- Room Temperature Ingredients are Crucial: This is arguably the most important tip for both the brownie and cheesecake batters. Ensure your cream cheese and eggs are at room temperature (about 68-72°F / 20-22°C). Softened cream cheese will beat into a perfectly smooth, lump-free mixture, which is essential for a beautiful, unblemished swirl. Room temperature eggs emulsify better with other ingredients, leading to a smoother batter and a more consistent, tender bake. Plan ahead and take them out of the fridge at least an hour before you start mixing.
- Stick to Bittersweet Chocolate for Depth: This brownie recipe is specifically developed for bittersweet chocolate (typically 60-70% cacao). Substituting with milk chocolate will make the brownies overly sweet and less complex, while semi-sweet might not provide the same depth of rich chocolate flavor. If you prefer a milder chocolate taste, you can try a high-quality dark chocolate with a slightly lower cacao percentage (e.g., 50-60%), but avoid anything too sweet if you want that true “fudgy brownie” experience.
- Do Not Overbake Your Brownies: This is the golden rule for achieving truly fudgy brownies. The subtle difference between a fudgy, gooey brownie and a dry, cakey one is often just a matter of a few minutes in the oven. You want the brownies to be just set around the edges, with the center still looking slightly soft or “jiggly” when the pan is gently shaken. A toothpick inserted into the center should come out with moist crumbs attached, but definitely not wet batter, and ideally not perfectly clean. Trust your instincts, and remember: it’s always better to slightly underbake than to overbake for that irresistible gooey texture.
- Cool Completely Before Cutting: Patience truly is a virtue when it comes to cutting brownies. Allowing them to cool completely, preferably for several hours at room temperature or even chilled in the refrigerator, is vital for achieving clean, neat slices. Warm brownies will crumble, tear, and stick to your knife, making a messy presentation and often leading to uneven pieces. The cooling time allows the structure to set and the fudgy layers to firm up.
- Cut Just Before Serving for Optimal Freshness: To maintain the ultimate fudgy consistency and prevent the edges from drying out, it’s best to cut your brownies only when you are ready to serve them. Store the entire cooled slab in an airtight container, and slice off individual portions as needed. This simple practice helps preserve their freshness, keeps the interior wonderfully gooey, and ensures every bite is as good as the first.
- Don’t Overmix the Brownie Batter After Adding Flour: Once you add the all-purpose flour to the brownie batter, mix it just until no dry streaks of flour remain. Use a rubber spatula and a gentle folding motion. Overmixing develops gluten in the flour, which can lead to a tough, dense, and undesirably cakey brownie texture instead of the desired rich, fudgy chewiness.
- Achieve the Perfect Swirl with a Light Hand: When swirling the chocolate brownie batter and cream cheese mixture, remember you’re aiming for a beautiful marbled effect, not a homogeneous blend. Use a light hand and just a few passes with your knife or skewer. Too much swirling will cause the two batters to combine too much, diminishing the distinct contrast and visual appeal of the cheesecake swirl.
Frequently Asked Questions (FAQs) About Cream Cheese Brownies
Absolutely! While Oreos are a fantastic choice for their texture and classic cookies-and-cream flavor, you can easily substitute them to suit your preferences. For a traditional chocolate boost, you can swap the Oreos with 1/2 cup of dark chocolate chips – whether standard-sized or mini-sized. Mini chocolate chips tend to distribute more evenly throughout the brownies, ensuring a delightful burst of chocolate in every bite. Other great options for customization include chopped nuts like walnuts or pecans, white chocolate chunks for a different flavor contrast, or even a sprinkle of flaky sea salt over the top before baking for a sophisticated sweet and salty combination.
The best and safest method for melting chocolate and butter for brownies is using a double boiler. To set this up, fill a saucepan with about 1 inch of water and bring it to a gentle simmer over medium-low heat. Then, place a heatproof bowl (make sure it’s larger than the saucepan’s opening) containing your chopped chocolate and cubed butter on top of the saucepan. Crucially, ensure the bottom of the bowl does not touch the simmering water; the steam from the water will gently and indirectly heat the bowl. Stir occasionally with a spatula or whisk until the chocolate and butter are completely melted and smooth. This method prevents the chocolate from overheating, seizing, or burning, resulting in a perfectly smooth and shiny base for your brownie batter.
Determining the perfect doneness is key to achieving truly fudgy brownies and preventing them from becoming cakey. Bake the brownies until the edges appear set and slightly puffed, but the very center still looks a bit moist and might jiggle slightly when the pan is gently nudged. Insert a wooden toothpick or a thin skewer into the center of the brownies – it should come out with moist crumbs attached, but not with wet, liquid batter. If the toothpick comes out completely clean, your brownies are likely overbaked and will have a drier, more cakey texture. Remember, brownies continue to set and firm up as they cool, so removing them when they are slightly underdone in the center contributes to that desired rich, fudgy, and gooey texture.
While this recipe is specifically optimized for bittersweet chocolate due to its deep, intense flavor profile and balanced sweetness, you can experiment with other dark chocolates. A good quality dark chocolate with 50-60% cacao would also work well, yielding a slightly less intense but still rich chocolate flavor. We generally advise against using milk chocolate as it makes the brownies overly sweet, and its higher sugar content and different fat composition can sometimes affect the overall texture, potentially making them less fudgy. If you choose to use semi-sweet chocolate, be aware that the overall sweetness of the brownies might increase, and the depth of chocolate flavor might be less pronounced than with bittersweet.
More Irresistible Bar Cookie Recipes to Explore
If you’re a fan of easy-to-make, deliciously portable, and shareable bar cookies and brownies, you’ll love exploring these other fantastic recipes from our collection. They’re perfect for any occasion, from casual family desserts to elegant party platters and bake sales:
- Chewy Chocolate Chip Cookie Bars – All the classic flavor of your favorite chocolate chip cookies, made easy in a convenient bar format.
- Candy Bar Blondies – Sweet, buttery blondies loaded with chunks of your favorite chopped candy bars for an extra-indulgent treat.
- Milk Chocolate Almond Brownies – A softer, sweeter brownie experience enhanced with the delightful crunch of toasted almonds.
- Cinnamon Squares – Comforting and warmly spiced, these tender squares are perfect with a cup of coffee or tea.
- Salted Fudge Brownies – The ultimate rich and gooey brownie, elevated with a delicate sprinkle of flaky sea salt for a perfect sweet and savory balance.
- Ricotta Cheesecake Bars – A lighter, yet still incredibly creamy, cheesecake bar with a unique, tender texture from ricotta cheese.
- Pretzel Shortbread Bars – A delightful combination of sweet and salty, featuring a crunchy pretzel crust topped with a rich shortbread layer.
- No-Bake Cookies & Cream Cheesecake Bars – All the irresistible flavor of cookies and cream cheesecake without ever needing to turn on the oven!
- Rocky Road Bars – Chewy, intensely chocolatey bars packed with fluffy marshmallows and crunchy nuts for a delightful textural medley.
- Zucchini Brownies – A surprisingly moist, tender, and delicious way to use up fresh garden zucchini, adding extra richness without a strong vegetable flavor.
Did you make these incredible cream cheese brownies? We’d love to hear about it! Please leave a rating and comment below to share your experience and tips. Thank you for baking with us!
Cream Cheese Brownies Recipe
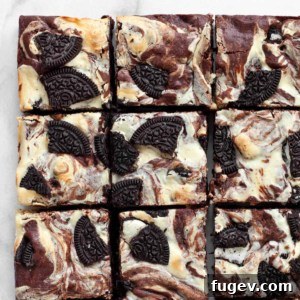
These ultimate cheesecake brownies combine rich, fudgy dark chocolate with a creamy, tangy cream cheese swirl. They’re studded with broken Oreo cookies, making every bite a delightful blend of textures and flavors. A truly irresistible treat, perfect for any occasion!
Ingredients
For the Prepared Pan
- Non-stick cooking spray
- Parchment paper
For the Fudgy Brownies
- 1/2 cup (113g) unsalted butter, cubed
- 6 ounces (170g) chopped bittersweet chocolate (60-70% cacao)
- 1-1/4 cups (250g) granulated sugar
- 1/4 cup (22g) unsweetened cocoa powder
- 1 teaspoon pure vanilla extract
- 1/2 teaspoon kosher salt
- 3 large eggs, at room temperature
- 1/2 cup (60g) all-purpose flour
For the Cream Cheese Swirl
- 8 ounces (226g) full-fat cream cheese, softened at room temperature
- 1/2 cup (100g) granulated sugar
- 1 teaspoon pure vanilla extract
- 1 large egg, at room temperature
- 10 Oreo cookies, broken into pieces
Instructions
- Prepare Pan & Oven: Preheat your oven to 350°F (175°C). Lightly grease a 9×9 inch square baking pan with non-stick cooking spray, then line it with parchment paper, leaving an overhang on two sides for easy removal later.
- Melt Chocolate & Butter: In a large heatproof bowl, combine the cubed butter and chopped bittersweet chocolate. Set the bowl over a saucepan with about 1 inch of simmering water (ensure the bowl does not touch the water). Stir occasionally until completely melted and smooth. Remove from heat and let cool slightly for about 5 minutes.
- Mix Brownie Base: Stir in 1-1/4 cups granulated sugar, cocoa powder, 1 teaspoon vanilla extract, and 1/2 teaspoon kosher salt into the chocolate mixture until well combined and smooth.
- Add Eggs: Beat in the 3 large eggs, one at a time, until fully incorporated and the brownie batter is smooth and cohesive.
- Fold in Flour: Gently fold in the 1/2 cup all-purpose flour with a rubber spatula until no streaks of dry flour remain. Be careful not to overmix, which can lead to tough brownies.
- Make Cheesecake Swirl: In a separate medium bowl, use an electric mixer to beat the softened 8 ounces cream cheese, 1/2 cup granulated sugar, 1 teaspoon vanilla extract, and 1 large egg until the mixture is completely smooth and lump-free.
- Layer Batters: Alternate spoonfuls of the chocolate brownie batter and the cream cheese mixture into the prepared pan, distributing them somewhat evenly. As you layer, sprinkle half of the broken Oreo cookies over the batters.
- Swirl & Top: Use a thin knife, a skewer, or a chopstick to gently swirl the two batters together, creating a marbled effect. Do not overmix. Press the remaining broken Oreo pieces evenly over the top of the swirled batter.
- Bake: Bake for 30-35 minutes. The brownies are done when the edges are set and slightly puffed, but the center still appears a bit moist and jiggles slightly. A toothpick inserted into the center should come out with moist crumbs attached, not wet batter. Avoid overbaking for maximum fudginess.
- Cool & Cut: Let the brownies cool completely in the pan on a wire rack for at least 2-3 hours. For the cleanest cuts, you can chill them in the refrigerator for an additional hour. Once fully cooled, use the parchment paper overhangs to lift the brownies from the pan. Slice them into 16 squares with a sharp chef’s knife, wiping the knife clean between cuts for perfect edges.
Notes
- Customizing Add-ins: If you’re not a fan of Oreos, you can omit them entirely or substitute them with 1/2 cup of dark chocolate chips. Mini chocolate chips tend to spread more consistently throughout the brownies.
- Storage: Store leftover brownies in an airtight container at room temperature for up to 4 days. For longer storage, or if you prefer a firmer brownie, refrigerate them in an airtight container for up to 1 week. Brownies can also be frozen for up to 1 month; wrap individual squares tightly in plastic wrap before placing them in a freezer-safe bag or container, then thaw slowly in the refrigerator.
Nutrition (per brownie, approximation)
- Calories: 267 kcal
- Carbohydrates: 25 g
- Protein: 4 g
- Fat: 17 g
- Saturated Fat: 10 g
- Polyunsaturated Fat: 1 g
- Monounsaturated Fat: 5 g
- Trans Fat: 0.2 g
- Cholesterol: 71 mg
- Sodium: 164 mg
- Potassium: 139 mg
- Fiber: 2 g
- Sugar: 17 g
- Vitamin A: 433 IU
- Calcium: 32 mg
- Iron: 2 mg
Nutrition information is automatically calculated and should be used as an approximation only. Actual values may vary based on specific ingredients and preparation methods.
Did you make this irresistible recipe? We’d love to see your delicious creations! Share your photos on Instagram and mention @lastingredient. Don’t forget to tag it with #lastingredient!
Originally published May 10, 2013. Last updated: February 09, 2023.