
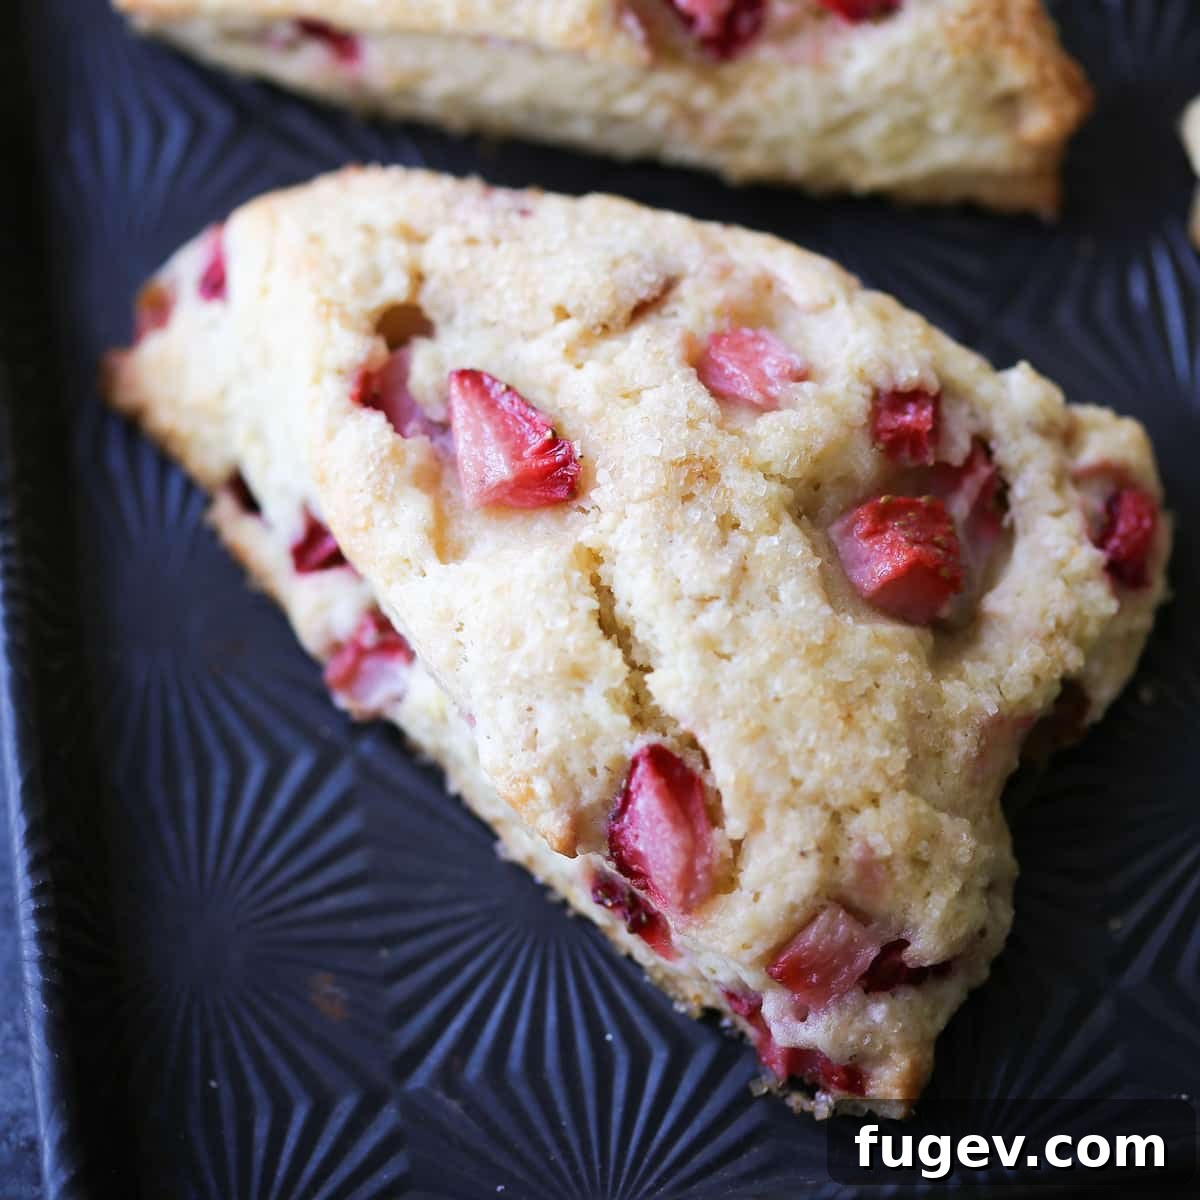
The Ultimate Strawberry Scones: Perfectly Tender & Flavorful
Prepare to bake the most delightful Strawberry Scones you’ve ever tasted! This easy-to-follow recipe, featuring vibrant fresh strawberries, promises a tender, moist texture that melts in your mouth, crowned with a shimmering turbinado sugar finish for that irresistible crunch and extra sweetness. Forget dry, crumbly pastries; these are the epitome of scone perfection.
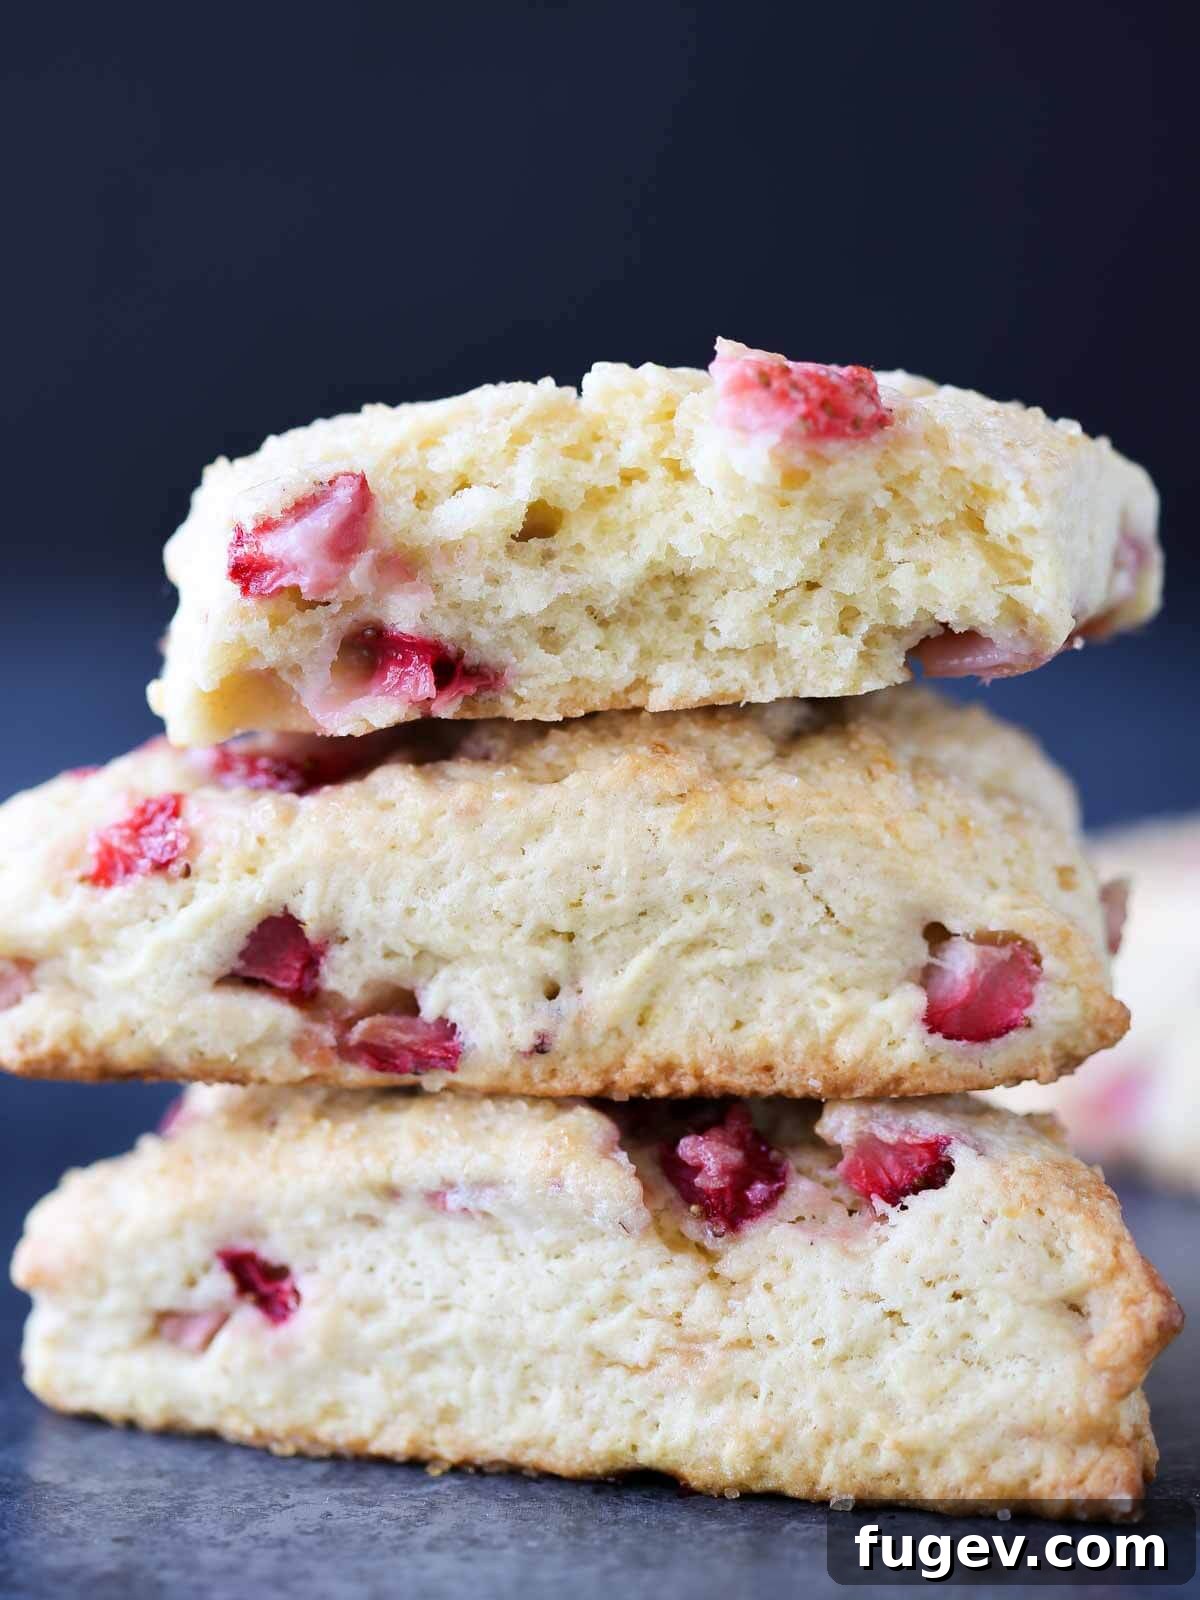
Inspired by the quintessential soft British scones I cherished in my youth, this recipe delivers an authentic experience. Each scone boasts a rich, buttery interior, a perfectly moist and crumbly texture, and bursts of sweet strawberries complemented by a subtle hint of lemon. The combination of rich heavy cream, a touch of vanilla, and a generous sprinkling of turbinado sugar transforms this breakfast staple into a truly decadent treat. They are thick, rich, and wonderfully chewy, offering a crisp top and a soft, flavorful heart in every bite.
A sweet, rich scone isn’t just for breakfast; it can effortlessly transition into a luxurious dessert, especially when paired with a scoop of homemade ice cream or a dollop of clotted cream. While these strawberry lemon scones hold a special place in my heart, I frequently rotate them with other favorites like my fluffy sourdough cinnamon rolls, comforting carrot cake scones, and the ever-classic Strawberry Shortcake with Whipped Cream. These strawberry scones truly capture the essence of spring and summer baking, making them a must-try for any home baker.
Table of Contents
- Why You Will Love These Strawberry Scones
- The Secret to Making Perfect Scones
- Essential Equipment for Scone Baking
- Key Ingredients for Strawberry Scones
- Exciting Variations to Try
- Step-by-Step: How to Make Strawberry Scones
- Chef Lindsey’s Expert Baking Tips
- Frequently Asked Questions About Scones
- Strawberry Scones Full Recipe Card
- Before You Go: Explore More Scone Recipes
Why You Will Absolutely Love These Strawberry Scones:
- Authentic British Scone Texture: Say goodbye to dry, cakey, or overly puffy scones. This recipe delivers a perfectly moist interior with a rich, buttery crumb that truly sets these scones apart. Every bite is an experience of sublime taste and texture, far exceeding expectations for a homemade treat.
- Vibrant, Refreshing Flavor Profile: The natural sweetness of sun-ripened strawberries beautifully intertwines with a bright, zesty hint of lemon. This combination creates an incredibly fresh and uplifting flavor that perfectly captures the essence of spring and summer, making these scones a seasonal delight.
- Reliable Professional-Grade Recipe: Crafted and rigorously tested by a pastry professional, you can trust these instructions to be detailed, clear, and consistent. This guarantees successful baking every time, providing you with picture-perfect, delicious scones worthy of a bakery.
- Effortless Elegance: Despite their sophisticated taste and appearance, these scones are surprisingly straightforward to make. With clear instructions, even novice bakers can achieve impressive results, making them an ideal choice for a special breakfast or brunch.
- Versatile Pairing Options: These scones are fantastic on their own, but they also serve as a perfect canvas for various accompaniments. Pair them with clotted cream, homemade jams, lemon curd, or even a simple pat of butter for an elevated culinary experience.
The Secret to Making Perfect, Tender Scones Every Time
Achieving light, flaky, and tender scones might seem daunting, but with a few professional secrets, you’ll master them in no time. These tips are crucial for preventing dense or tough scones and ensuring a wonderfully airy crumb:
- Thoroughly Blot Your Strawberries Dry: Fresh fruits, especially juicy ones like strawberries, introduce extra moisture into the dough. Excess moisture can lead to a gummy texture around the fruit and can impact the overall crumb. Obsessively blotting your diced strawberries dry with paper towels is a critical step. While some “gooeyness” around the fruit is natural, drying them significantly reduces it. If you’re highly sensitive to this, consider using blueberries or dried fruits as alternatives, which release less liquid during baking.
- Incorporate Ice-Cold Butter Completely into Dry Ingredients: This is arguably the most vital step for tender, moist scones. Years of baking large batches in professional kitchens have consistently shown that thoroughly cutting cold butter into the dry ingredients yields the best results. The small pieces of cold butter create pockets of steam during baking, leading to flaky layers and a tender interior. Ensure the butter is no longer visible, resembling coarse crumbs with the largest pieces no bigger than a pea. This method also means you’ll need less liquid to form a cohesive dough, minimizing gluten development and preventing tough scones.
- Whisk All Wet Ingredients Separately Before Adding: To ensure quick and even incorporation into the dry mixture, always whisk your heavy cream, eggs, and vanilla together in a separate bowl until smooth. For larger quantities, an immersion blender can be helpful, but a simple whisk works perfectly for home baking. Pre-mixing the wet ingredients prevents you from having to overmix the dough to incorporate them later, which, again, minimizes gluten development and guarantees a more tender scone.
- Don’t Skip the Heavy Cream Brush and Turbinado Sugar Topping: Just before baking, gently brush the tops of your scones with a little extra heavy cream. This simple step serves multiple purposes: it helps achieve a beautiful golden-brown finish, locks in moisture, and provides the perfect sticky surface for turbinado sugar to adhere. The turbinado sugar adds a delightful extra crunch and a subtle sweetness to the crust, elevating the overall sensory experience.
- Handle the Dough Gently: Overworking scone dough develops the gluten, resulting in tough scones. Mix and knead just until the ingredients are combined and the dough comes together. A light touch is key!

Essential Equipment for Scone Baking
Having the right tools can make all the difference in your scone-making journey. Here’s what you’ll need:
- Stand Mixer with Paddle Attachment (or Large Bowl): While a stand mixer simplifies the process of cutting in butter and mixing, you can easily make these scones by hand in a large mixing bowl.
- Whisk or Fork: For combining wet ingredients evenly.
- Pastry Blender or Two Knives: Crucial for cutting cold butter into the flour if you’re working by hand.
- Measuring Cups and Spoons: For accurate ingredient proportions.
- Rubber Spatula: For scraping down the bowl and gently folding ingredients.
- Bench Scraper or Sharp Knife: For cutting the scone dough into clean, even portions.
- Parchment Paper: Prevents sticking and makes cleanup a breeze.
- Baking Sheet: A sturdy, light-colored baking sheet promotes even baking.
- Pastry Brush: For applying the heavy cream wash and turbinado sugar.
- Cooling Rack: Essential for allowing scones to cool properly and prevent sogginess.
Key Ingredients for the Perfect Strawberry Scones
Each ingredient plays a crucial role in the taste, texture, and rise of these exquisite strawberry scones. Selecting high-quality ingredients ensures the best possible outcome:
- Fresh Strawberries: For the most vibrant flavor, choose fragrant, deeply red, and in-season strawberries. These are ideal for this recipe and other seasonal delights like my strawberry rhubarb crumble. Out-of-season strawberries tend to be less flavorful and contain more water, which can affect dough consistency. If fresh aren’t available, freeze-dried strawberries can offer a concentrated burst of flavor without adding excess moisture.
- Heavy Cream: Heavy cream is key to a rich, moist, and tender scone. Its high fat content contributes to the delicate crumb. If heavy cream isn’t on hand, a suitable substitute can be made with ⅓ cup Greek yogurt whisked with 2 tablespoons of milk, though the texture may vary slightly.
- Whole Eggs: Eggs provide structure, richness, and moisture, helping to bind the dough and create a soft interior. Ensure they are lightly beaten for easy incorporation.
- Vanilla Extract: High-quality vanilla extract doesn’t just add its own beautiful aroma and flavor; it also subtly enhances the sweetness of the strawberries and brightens the lemon notes, creating a more complex flavor profile.
- All-Purpose Flour: All-purpose flour provides the perfect balance of gluten content to create a flaky, tender texture without making the scones tough. For an even more delicate crumb, you could opt for pastry flour, which has a lower protein content, offering extra “cheap insurance” against toughness.
- Granulated Sugar: Beyond sweetness, sugar contributes to the scones’ golden-brown crust and aids in tenderness by interfering with gluten development.
- Baking Powder: We use double-acting baking powder, which reacts twice: once when mixed with liquid and again when exposed to heat in the oven. This provides a more consistent and stable rise compared to baking soda alone, giving your scones that beautiful lift and allowing you to prepare and freeze the dough ahead of time.
- Kosher Salt: A pinch of kosher salt is essential for balancing the sweetness and enhancing all the other flavors in the scone, preventing them from tasting flat.
- Unsalted Butter: Always use very cold, unsalted butter for baking, cut into small cubes. Using unsalted butter allows you to control the exact amount of salt in the recipe. The cold butter melts slowly during baking, creating steam that helps the scones rise and develop flaky layers. It also coats gluten strands, shortening them and preventing the formation of a strong, tough gluten network.
- Lemon Zest: The zest of a lemon adds a bright, aromatic, and tangy counterpoint to the sweet strawberries, elevating the overall flavor. Be sure to zest only the bright yellow part of the peel, avoiding the bitter white pith underneath for the purest lemon essence.
- Turbinado Sugar: This coarse sugar, sprinkled on top before baking, creates a beautiful glistening crust and adds a delightful textural crunch and extra sweetness, making the finished scones even more appealing.
For precise quantities and a complete nutritional breakdown, please refer to the recipe card below.
Exciting Variations to Try: Customize Your Scones
While these Strawberry Lemon Scones are divine on their own, don’t hesitate to get creative with flavors and toppings. Here are a few ideas to inspire your next batch:
- Spice or Chocolate Additions: Take your scones in a completely different direction by substituting the fresh strawberries with other delightful mix-ins. Consider adding fragrant cinnamon chips or rich chocolate chips, similar to my popular chocolate chip scones or comforting cinnamon chip scones. You can even create a custom mixture of fruit and chips! Don’t forget to share your creations and results in the comments!
- Add a Decadent Glaze: Elevate your scones with a simple, sweet glaze. A quick lemon glaze, made from powdered sugar and fresh lemon juice, provides a delightful tangy-sweet finish. For an extra special treat, I highly recommend drizzling on the luscious strawberry glaze from my Strawberry Lemon Cake Donuts recipe, crafted from a vibrant homemade strawberry jam. A classic vanilla glaze, similar to my Donut Glaze, is also an excellent choice.
- Seasonal Fruit Swaps: Embrace the seasons by rotating your scone recipes with whatever fresh fruit is abundant. In autumn, try warming Spiced Apple Scones, or celebrate summer with juicy Blueberry Scones. Peaches, raspberries, or even mixed berries can also make fantastic additions.
- Nutty Enhancements: For added texture and flavor, gently fold in about ½ cup of chopped toasted pecans, walnuts, or almonds with the strawberries.
- Herbaceous Twist: A small amount of finely minced fresh basil or mint can add an unexpected yet delightful aromatic note, complementing the strawberries beautifully.
Step-by-Step Guide: How to Make Irresistible Strawberry Scones
Follow these detailed instructions to create perfectly tender and flavorful strawberry scones. Remember, gentleness is key to a light and flaky texture!
Further details and precise measurements can be found in the recipe card below!
Phase 1: Prepare the Scone Dough
Step 1: Prepare the Strawberries. Begin by washing and hulling your fresh strawberries. Dice them into small, even pieces. Critically, place the diced strawberries on several layers of paper towel and gently blot them thoroughly dry. This step helps prevent excess moisture from making the dough gummy around the fruit.
Step 2: Combine Wet Ingredients. In a medium bowl, combine the heavy cream, lightly beaten eggs, and vanilla extract. Whisk these ingredients together until the mixture is smooth and fully homogeneous. Set this bowl aside, ready for later incorporation.
Step 3: Mix Dry Ingredients. In the bowl of a stand mixer fitted with the paddle attachment (or a large mixing bowl if working by hand), add the all-purpose flour, granulated sugar, kosher salt, and baking powder. Mix these dry ingredients on low speed, or by hand with a whisk, just enough to ensure they are evenly distributed. This usually takes only about 30 seconds.
Pro Tip for Enhanced Lemon Flavor: For a more pronounced lemon essence, zest your lemon directly into the granulated sugar during Step 3. Use your fingertips to rub the lemon zest into the sugar vigorously. This action releases the flavorful oils from the zest, infusing the sugar with bright citrus notes. If you choose this method, add the lemon-infused sugar along with the other dry ingredients in Step 3, not later in Step 5.
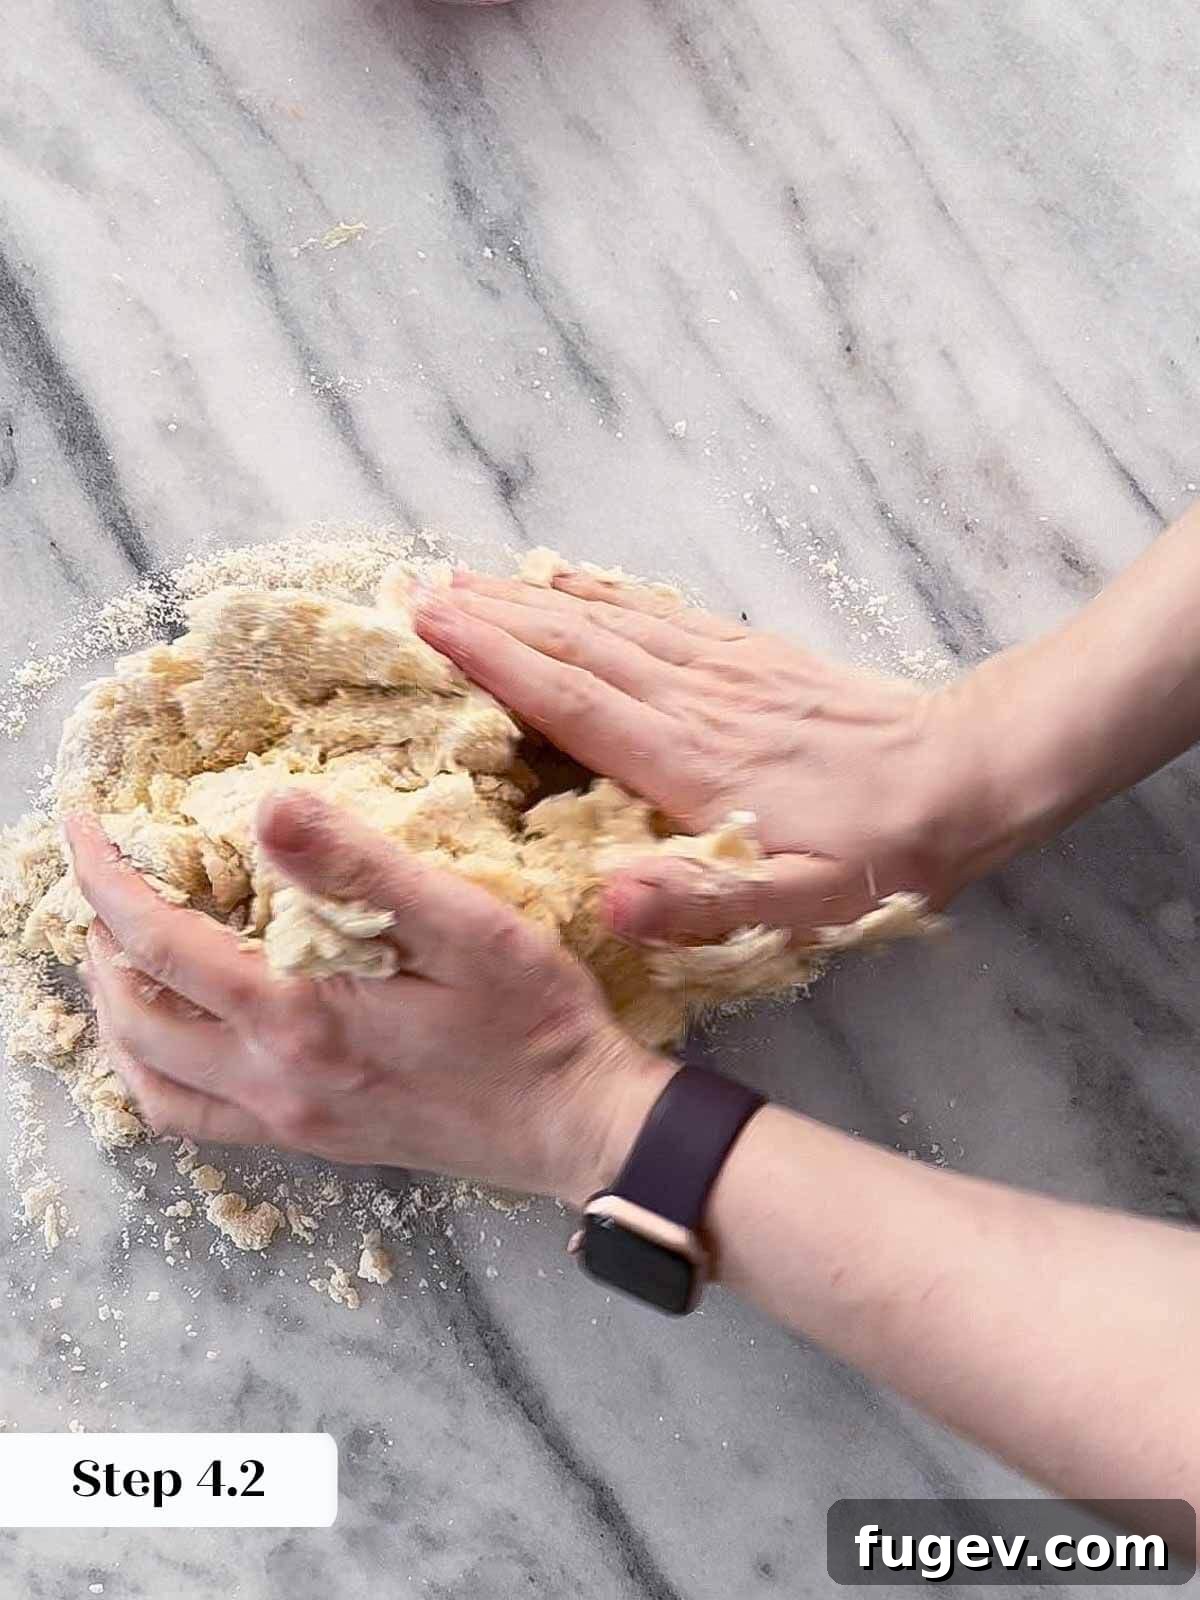
Step 4: Cut in the Cold Butter. Add the very cold, small-cubed unsalted butter to the dry ingredients in the stand mixer. Mix on low speed to gradually cut the butter into the flour mixture. Continue mixing until the butter is no longer visible as distinct cubes. The mixture should resemble coarse crumbs, with the largest butter chunks being no bigger than the size of a small pea. The goal here is to create many tiny pockets of butter, which will contribute to a flaky texture.
Helpful Tool Tip: If you’re mixing by hand, a pastry blender is an excellent tool for cutting in butter efficiently and effectively, as demonstrated in this pie crust tutorial!
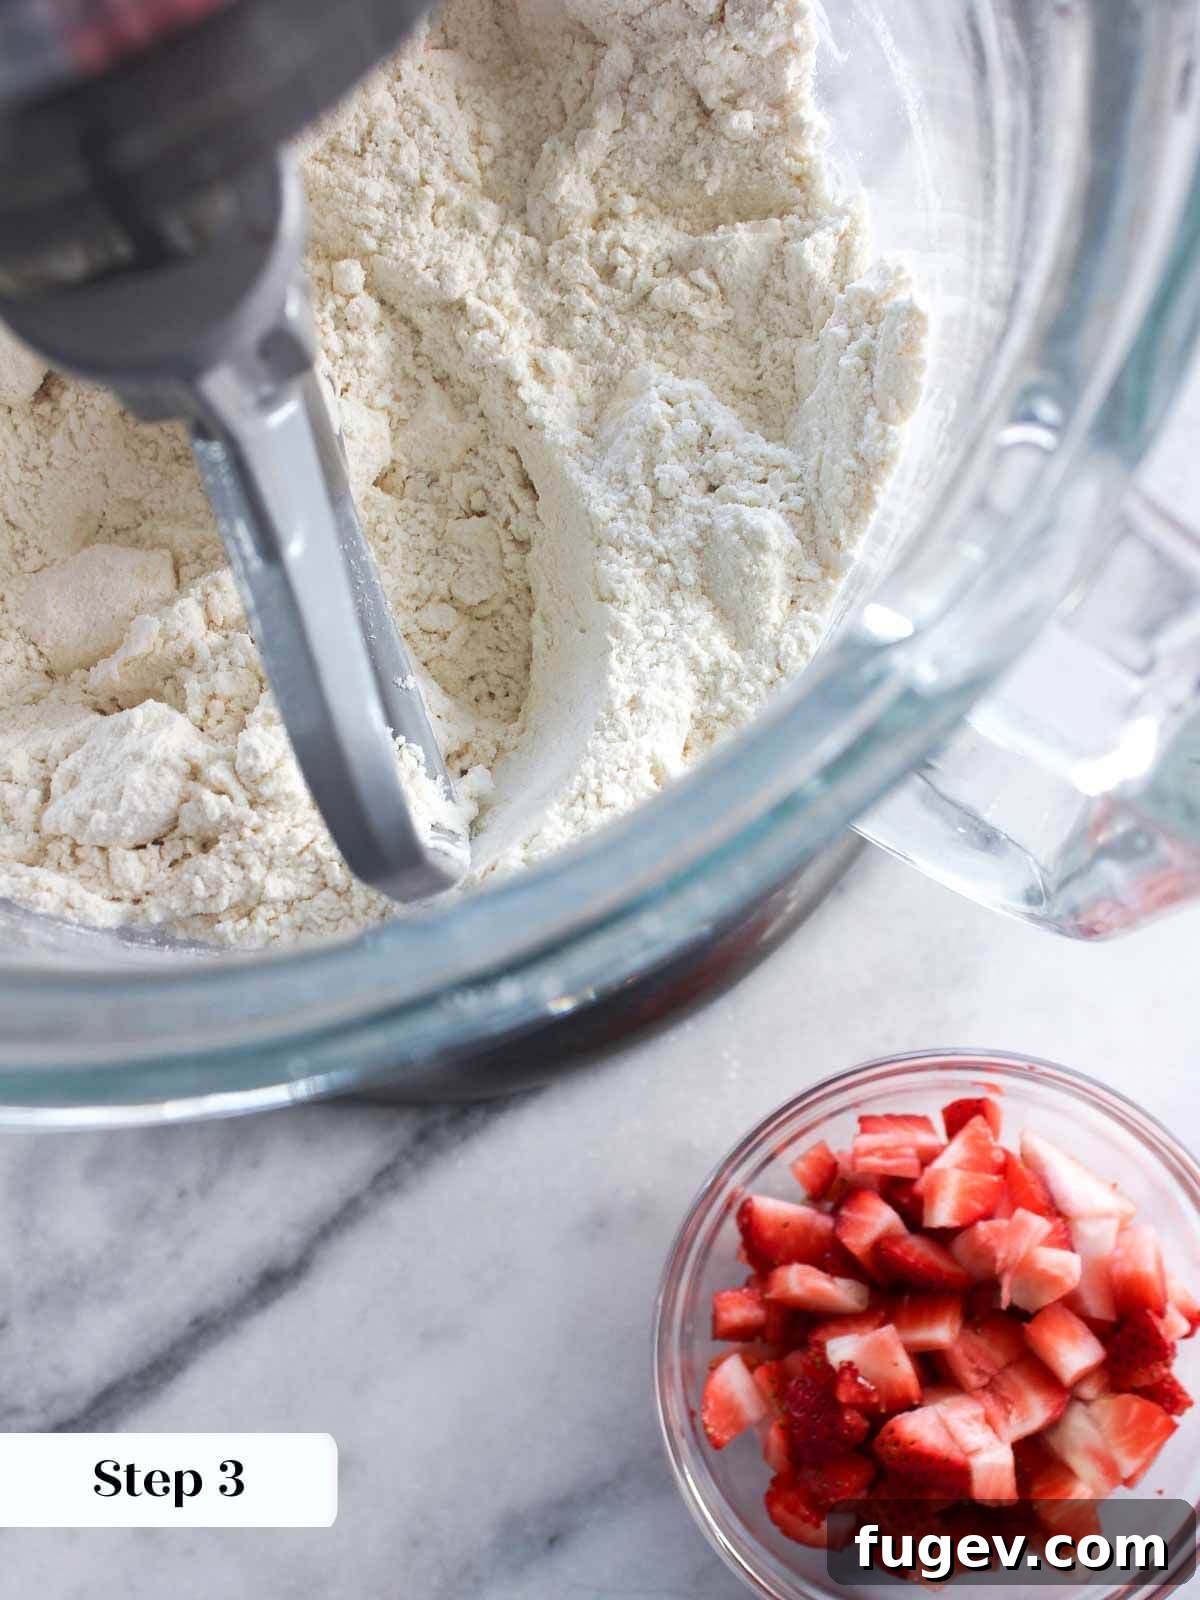
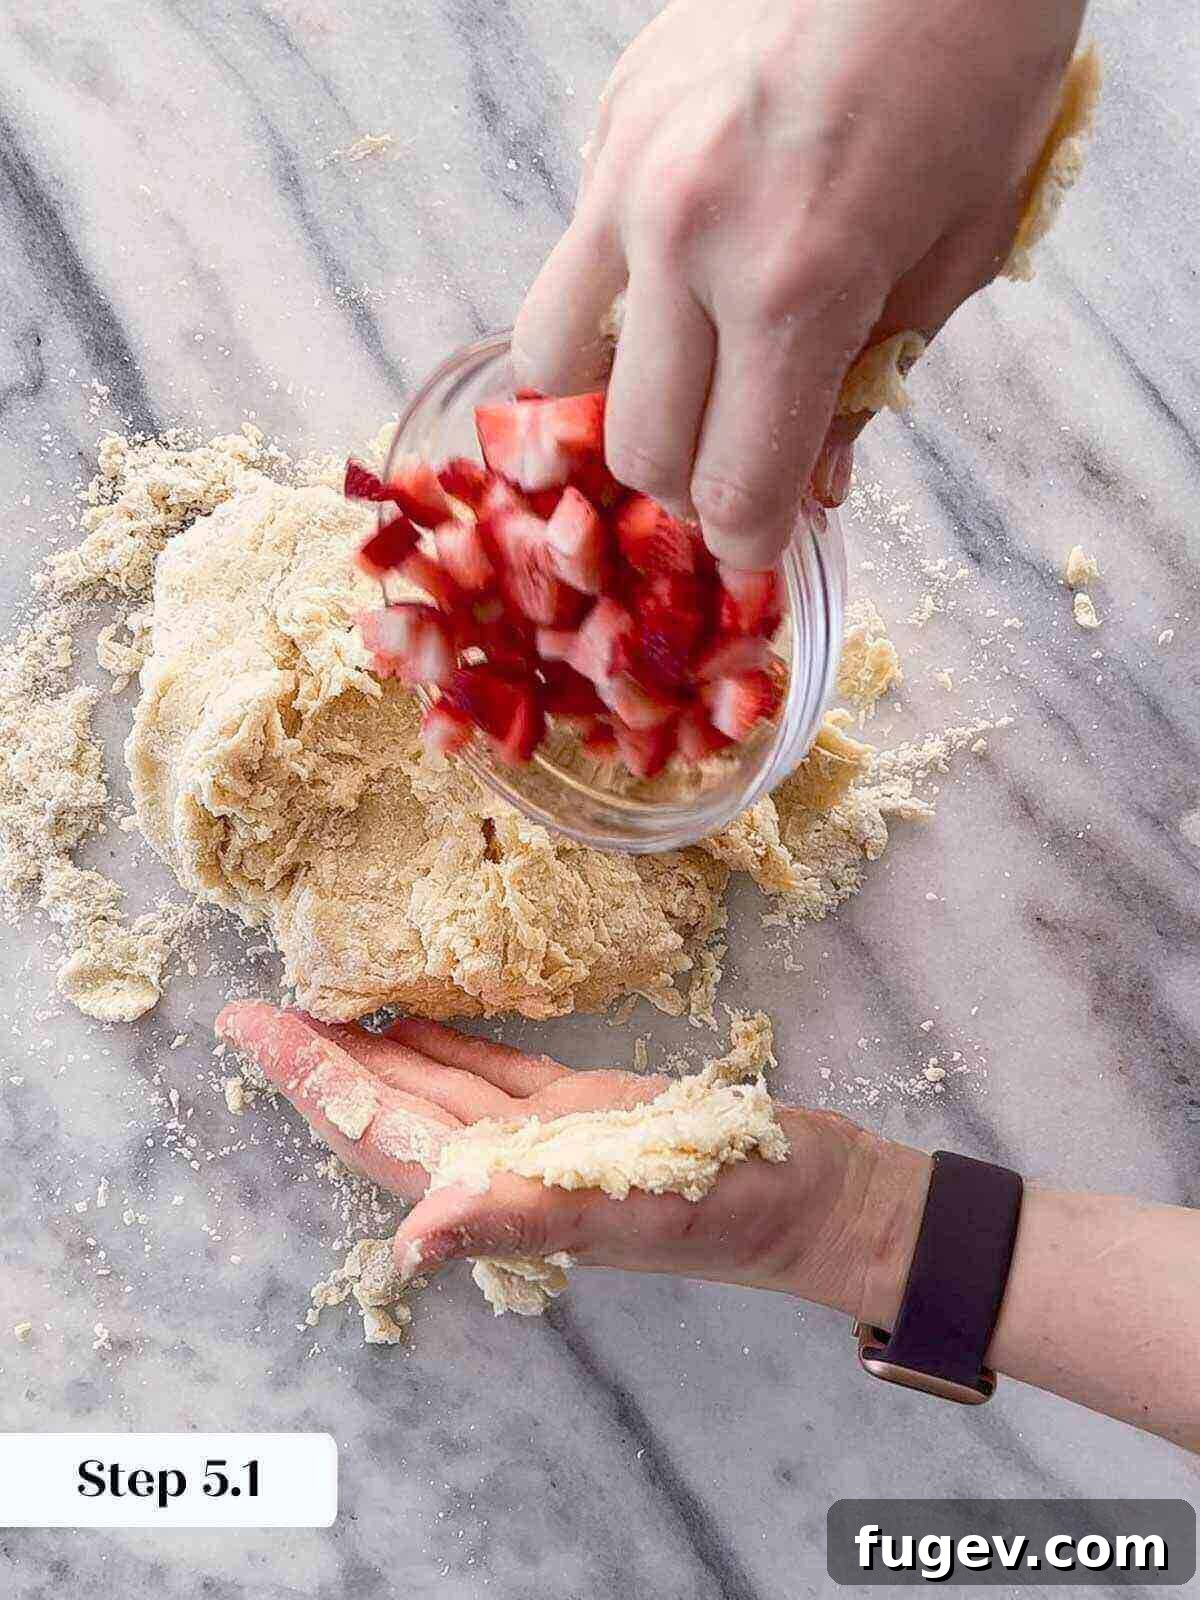
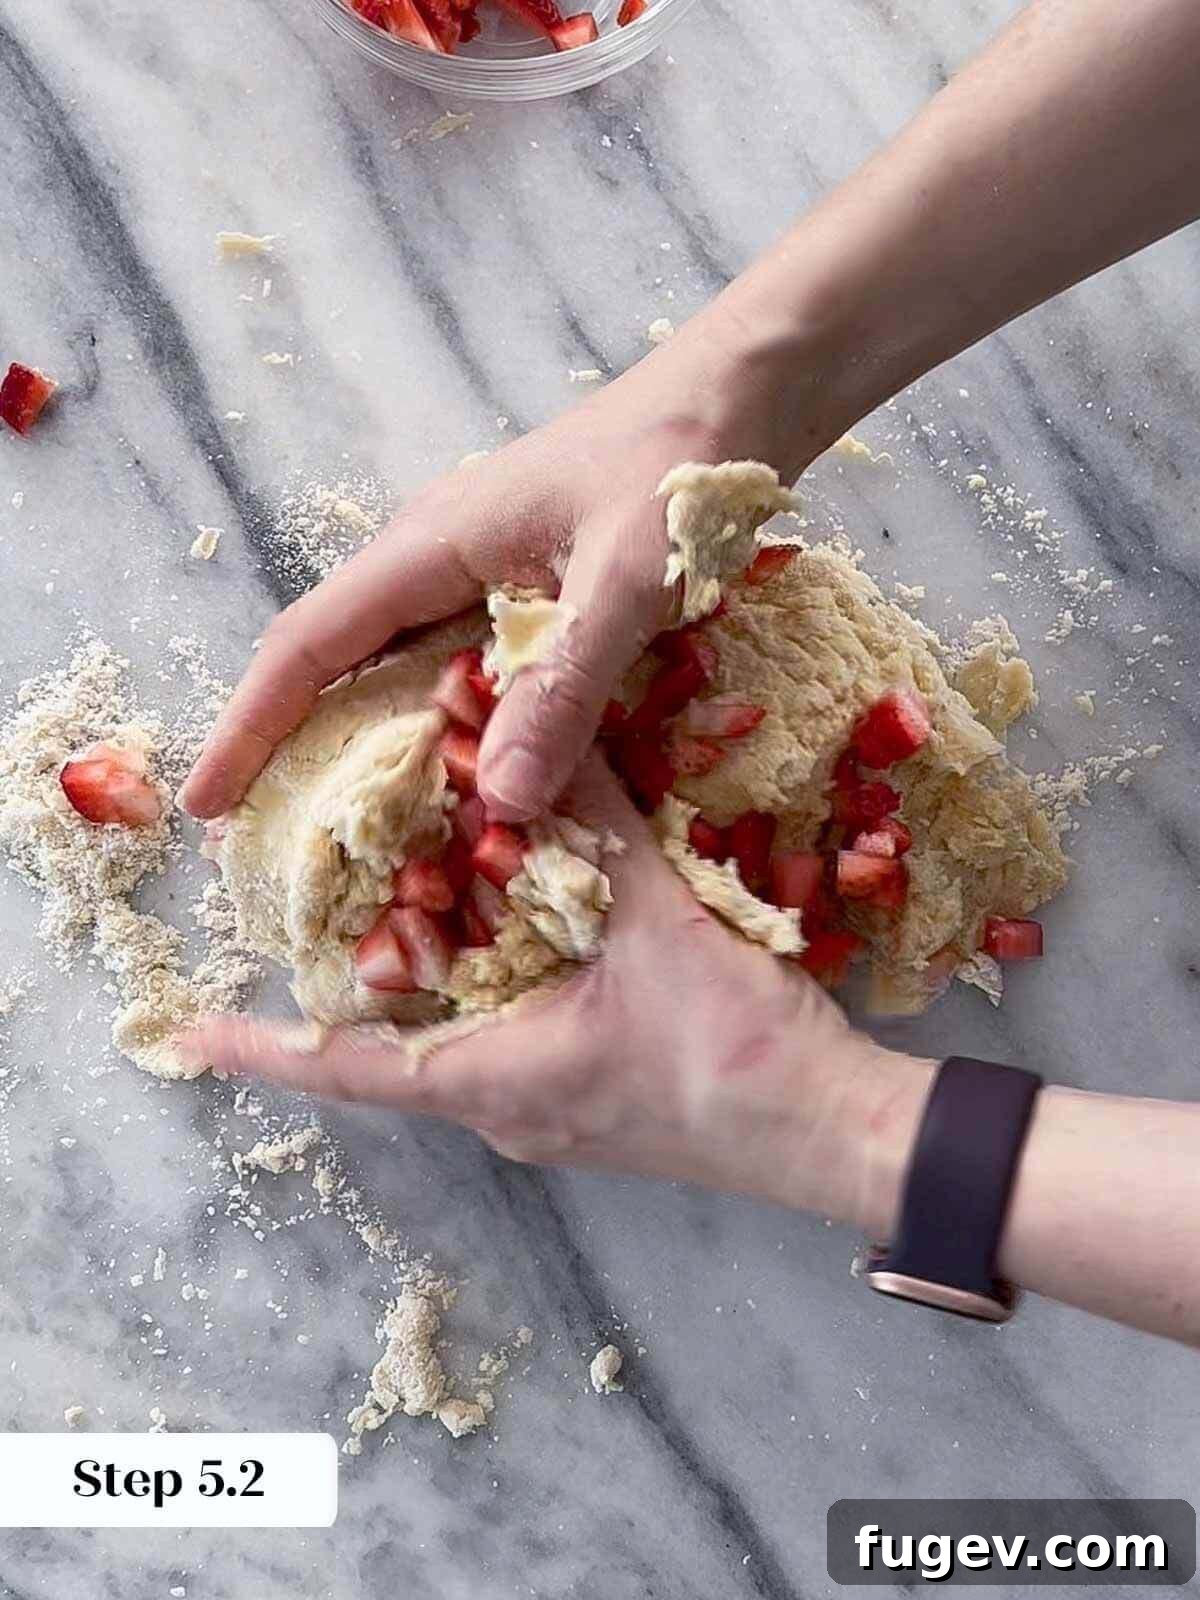
Step 5: Incorporate Strawberries and Lemon Zest. Add the blotted dry diced strawberries and the fresh lemon zest to the flour and butter mixture. Toss gently by hand or with the mixer on its lowest setting, just enough to coat the fruit and zest with flour and distribute them evenly throughout the mixture. This coating helps prevent the fruit from sinking to the bottom of the scones.
Step 6: Add Wet to Dry Ingredients. With the stand mixer running on its lowest speed, slowly and gradually pour the whisked cream mixture into the flour mixture. Mix only until the wet ingredients are almost incorporated into the dry ingredients. The dough will still appear shaggy and slightly crumbly; do not overmix at this stage.
Hand Mixing Alternative: If you’re mixing by hand, create a well in the center of your flour mixture. Pour the cream mixture into the well. Using a wooden spoon or spatula, gently mix from the center outwards, gradually incorporating the dry ingredients into the wet until the dough is mostly moistened. Don’t worry if there are some straggling flour/butter crumbs at the bottom; these will be incorporated in the next step.
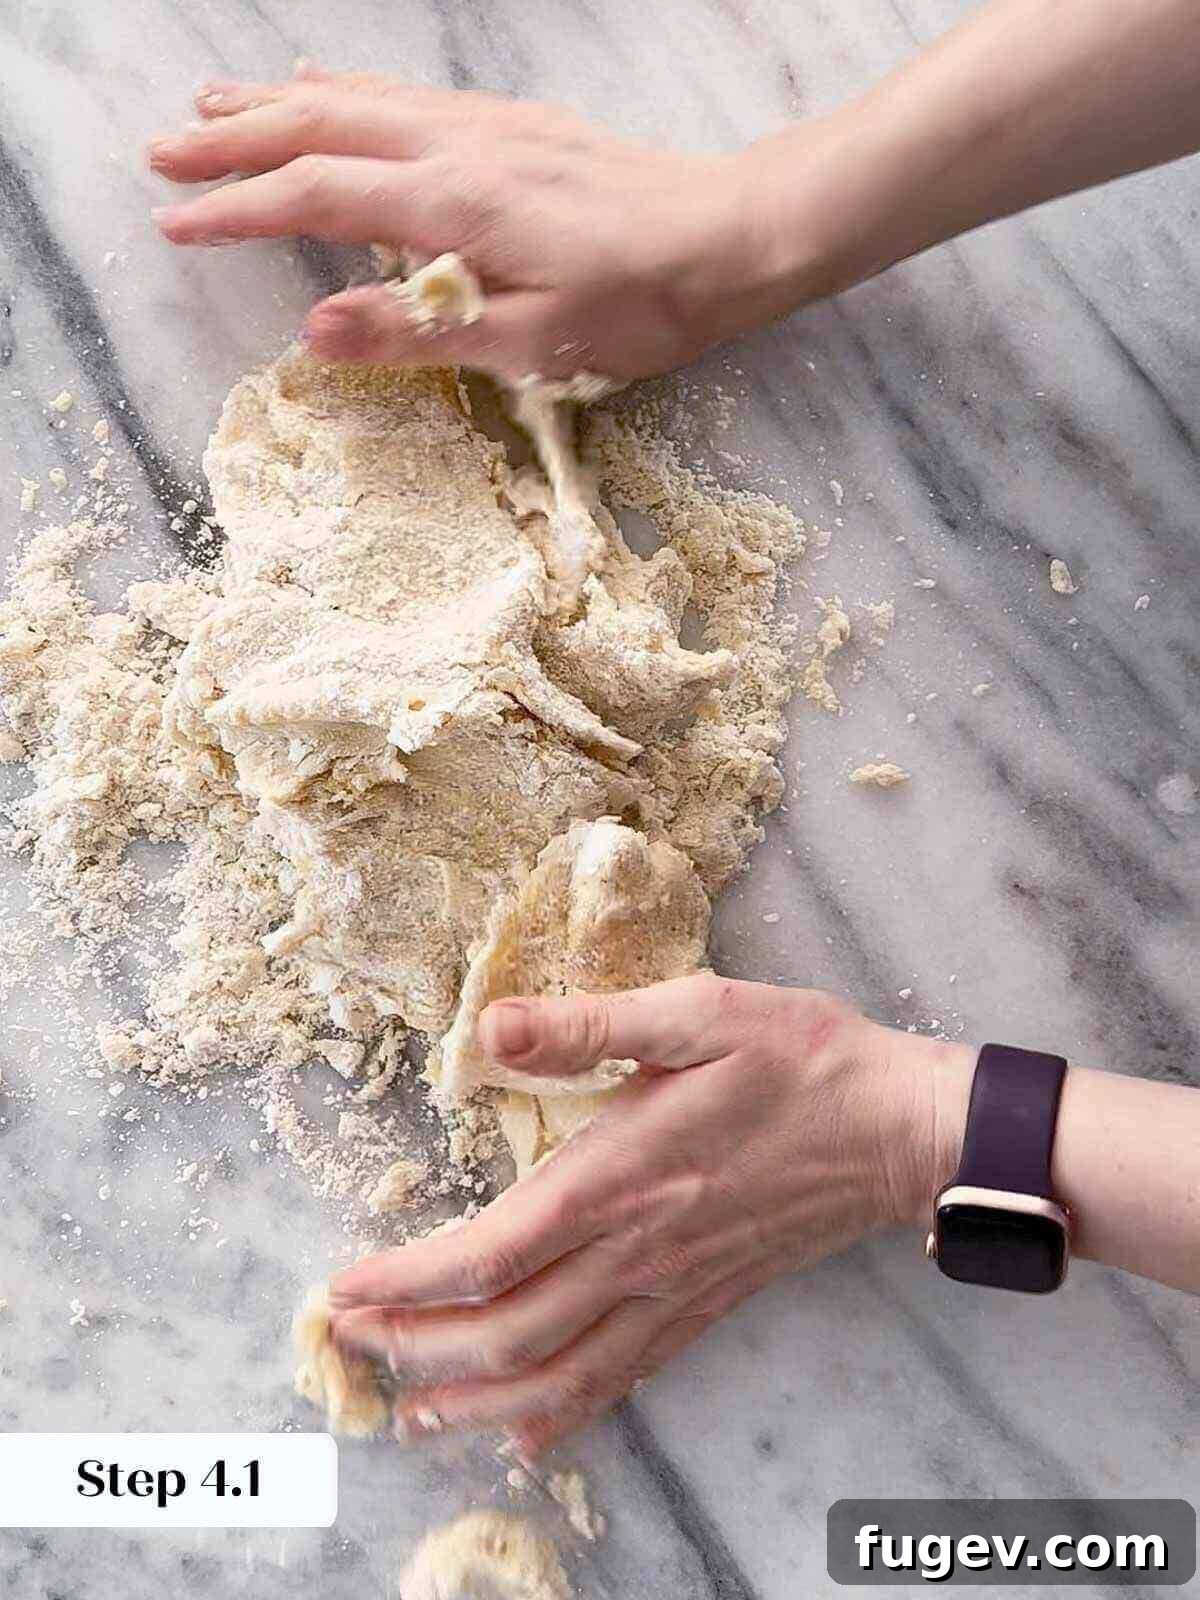
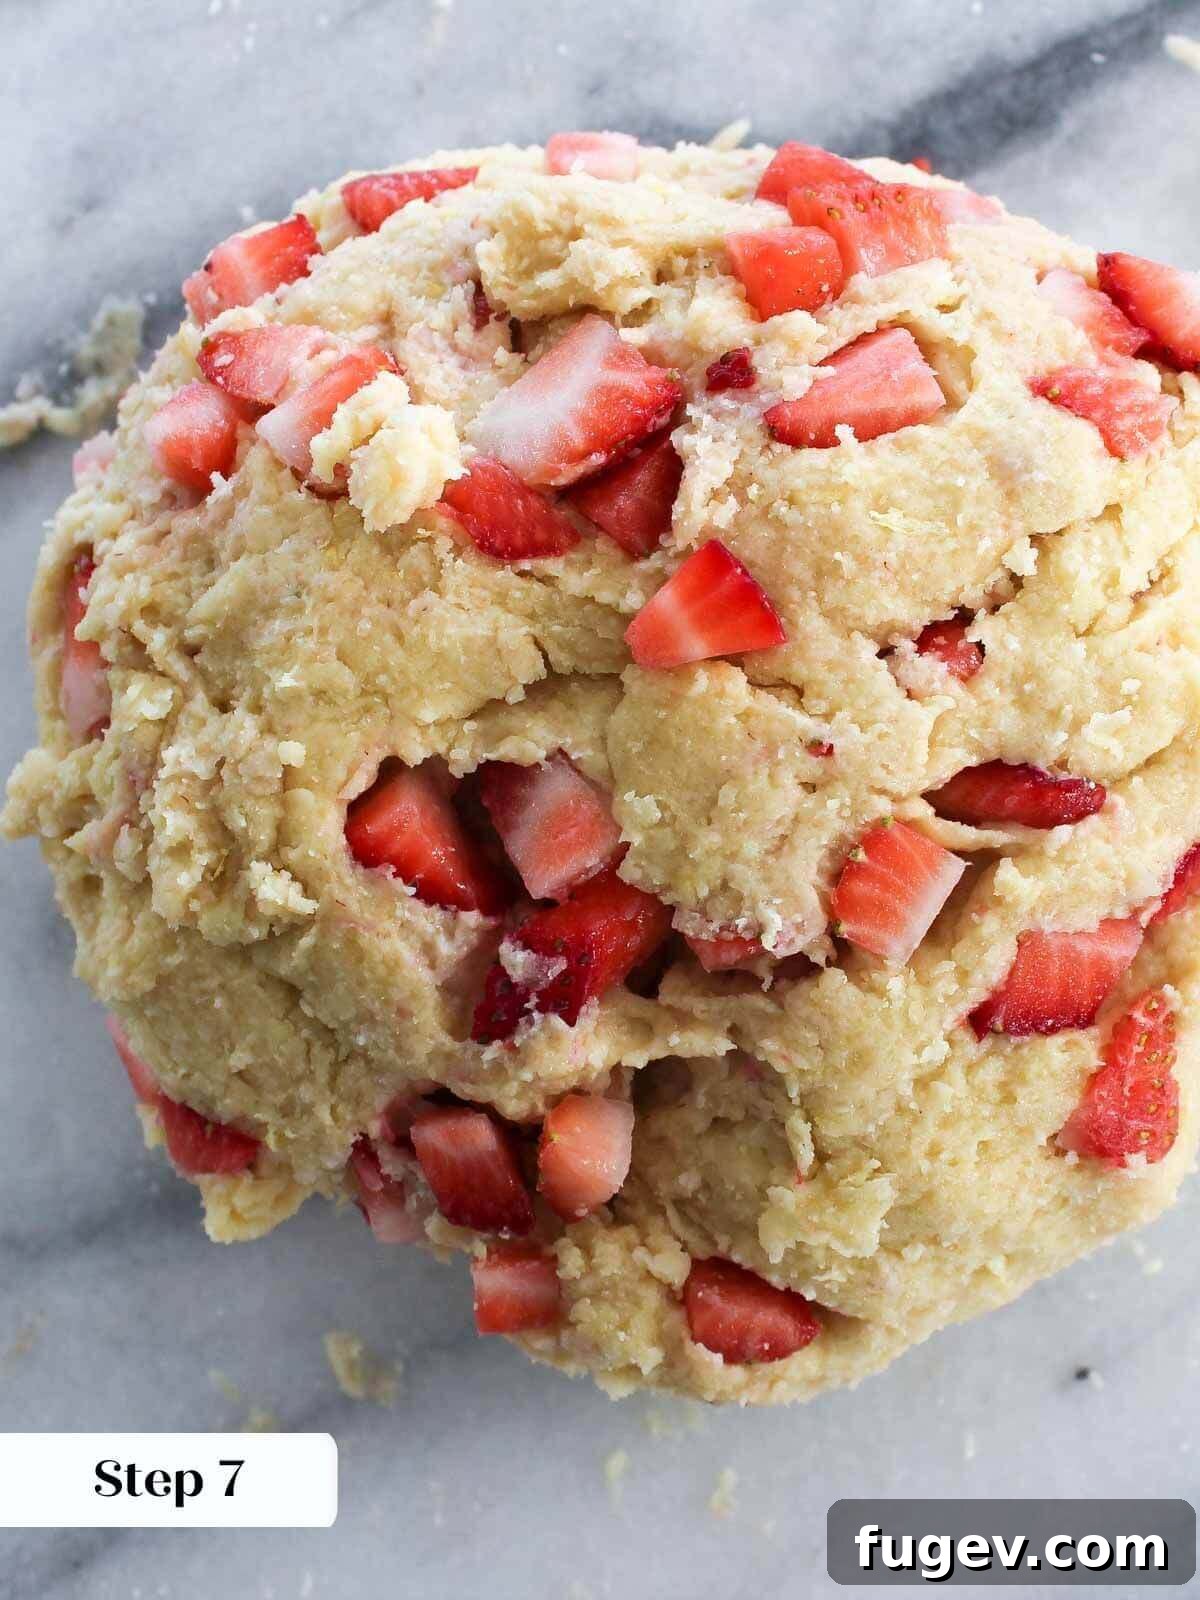
Step 7: Gently Knead the Dough. Lightly flour a clean work surface. Dump the shaggy scone dough out onto the floured surface. Gently gather the dough into a ball and begin to knead it together (gently, with love!). This isn’t like bread dough; you want to minimize gluten development. Knead by gently pressing the dough away from you with the heels of your hands, then folding it over itself. Repeat this process about 5-7 times, turning the dough a quarter turn after each fold, until it forms a cohesive ball. A few remaining crumbs are perfectly fine; overworking will lead to tough scones.
Phase 2: Portion and Bake the Scones
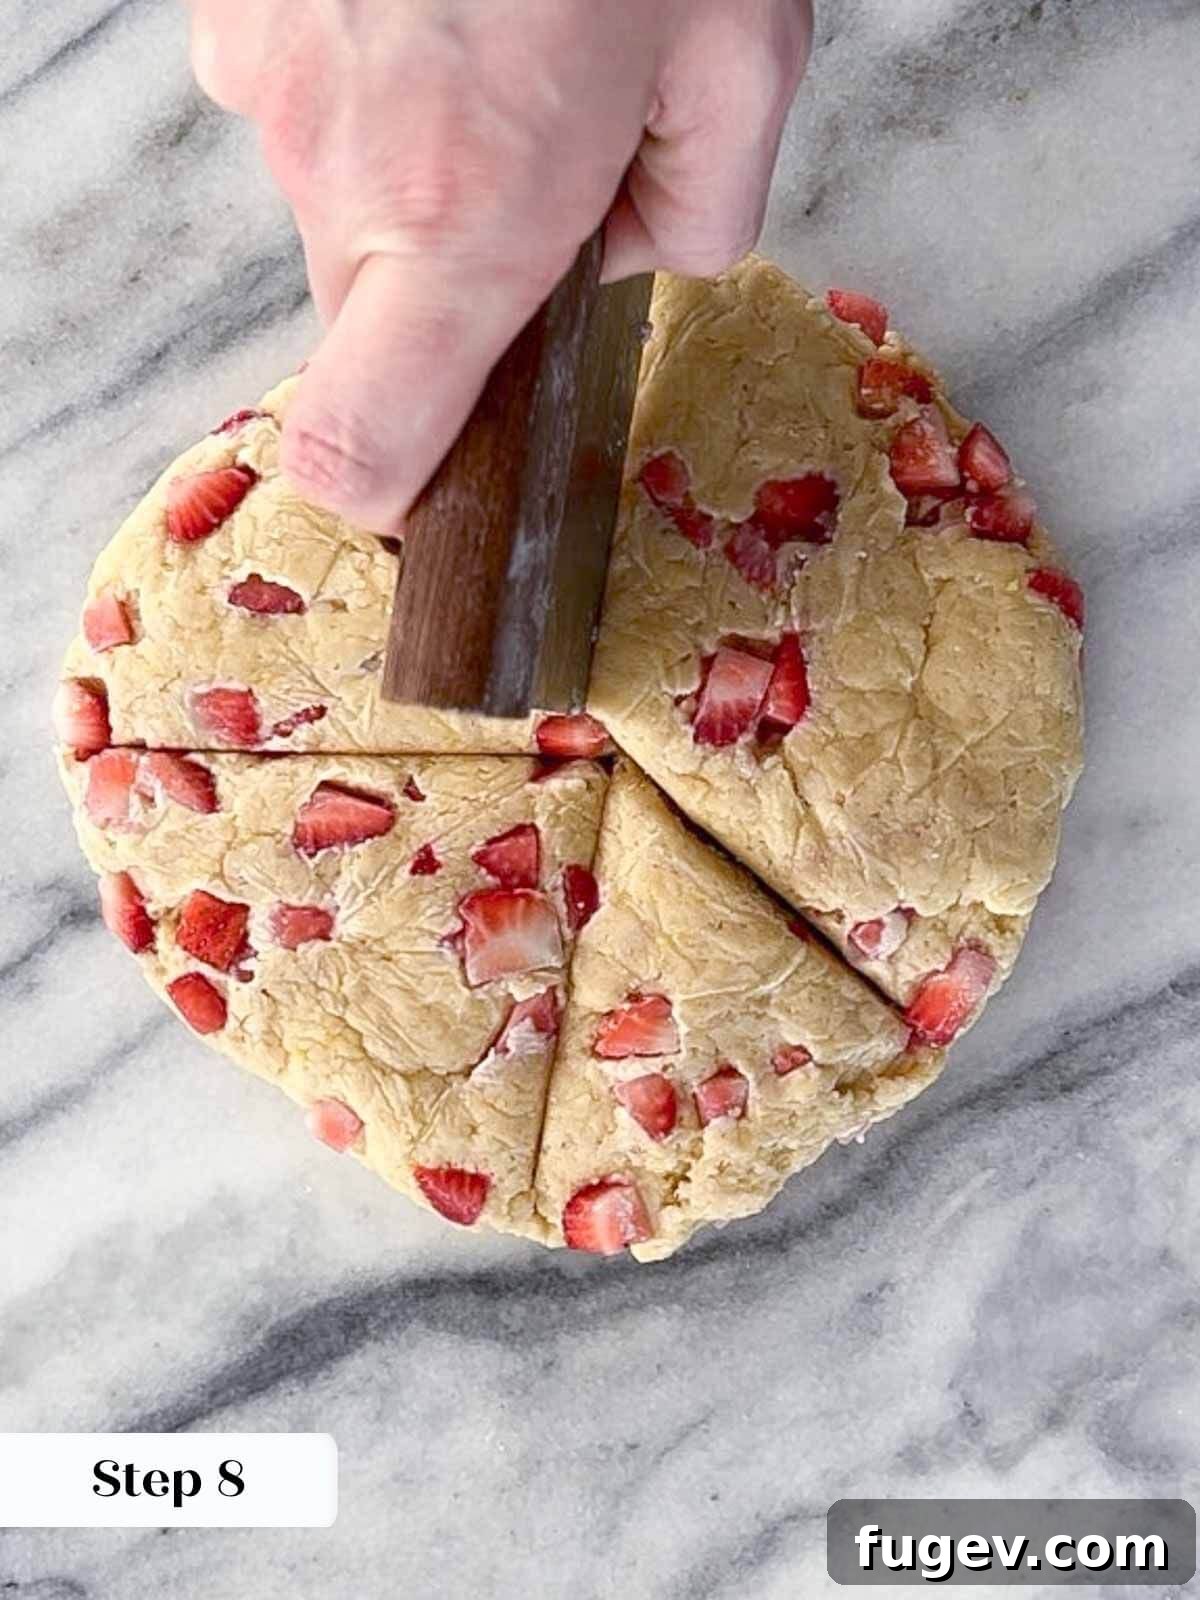
Step 8: Shape and Cut the Dough. On your lightly floured surface, gently press the dough out with your hands or a rolling pin to a uniform thickness of about 1 inch. Using a floured bench scraper, a sharp knife, or a pastry cutter, cut the dough into 6 equal triangles (or round shapes if you prefer). Carefully transfer the cut scone pieces to a parchment-lined baking sheet, spacing them about 1 inch apart to allow for proper air circulation and even baking.
Crucial Chilling Step for Best Texture: For truly professional-quality scones with the perfect rise and flakiness, do not skip chilling the dough completely before baking. This will take approximately 2 hours in the refrigerator. Chilling prevents the butter from melting too quickly in the oven, ensuring a better rise and a more tender texture. You can also wrap the dough very well in plastic wrap and freeze it for future baking. This scone recipe is robust enough to be baked directly from frozen (though you may need to add a few extra minutes to the baking time).
Step 9: Preheat the Oven. While your dough is chilling, preheat your oven to 325°F (160°C). This ensures the oven is at a consistent temperature when the scones go in, promoting an even rise and bake.
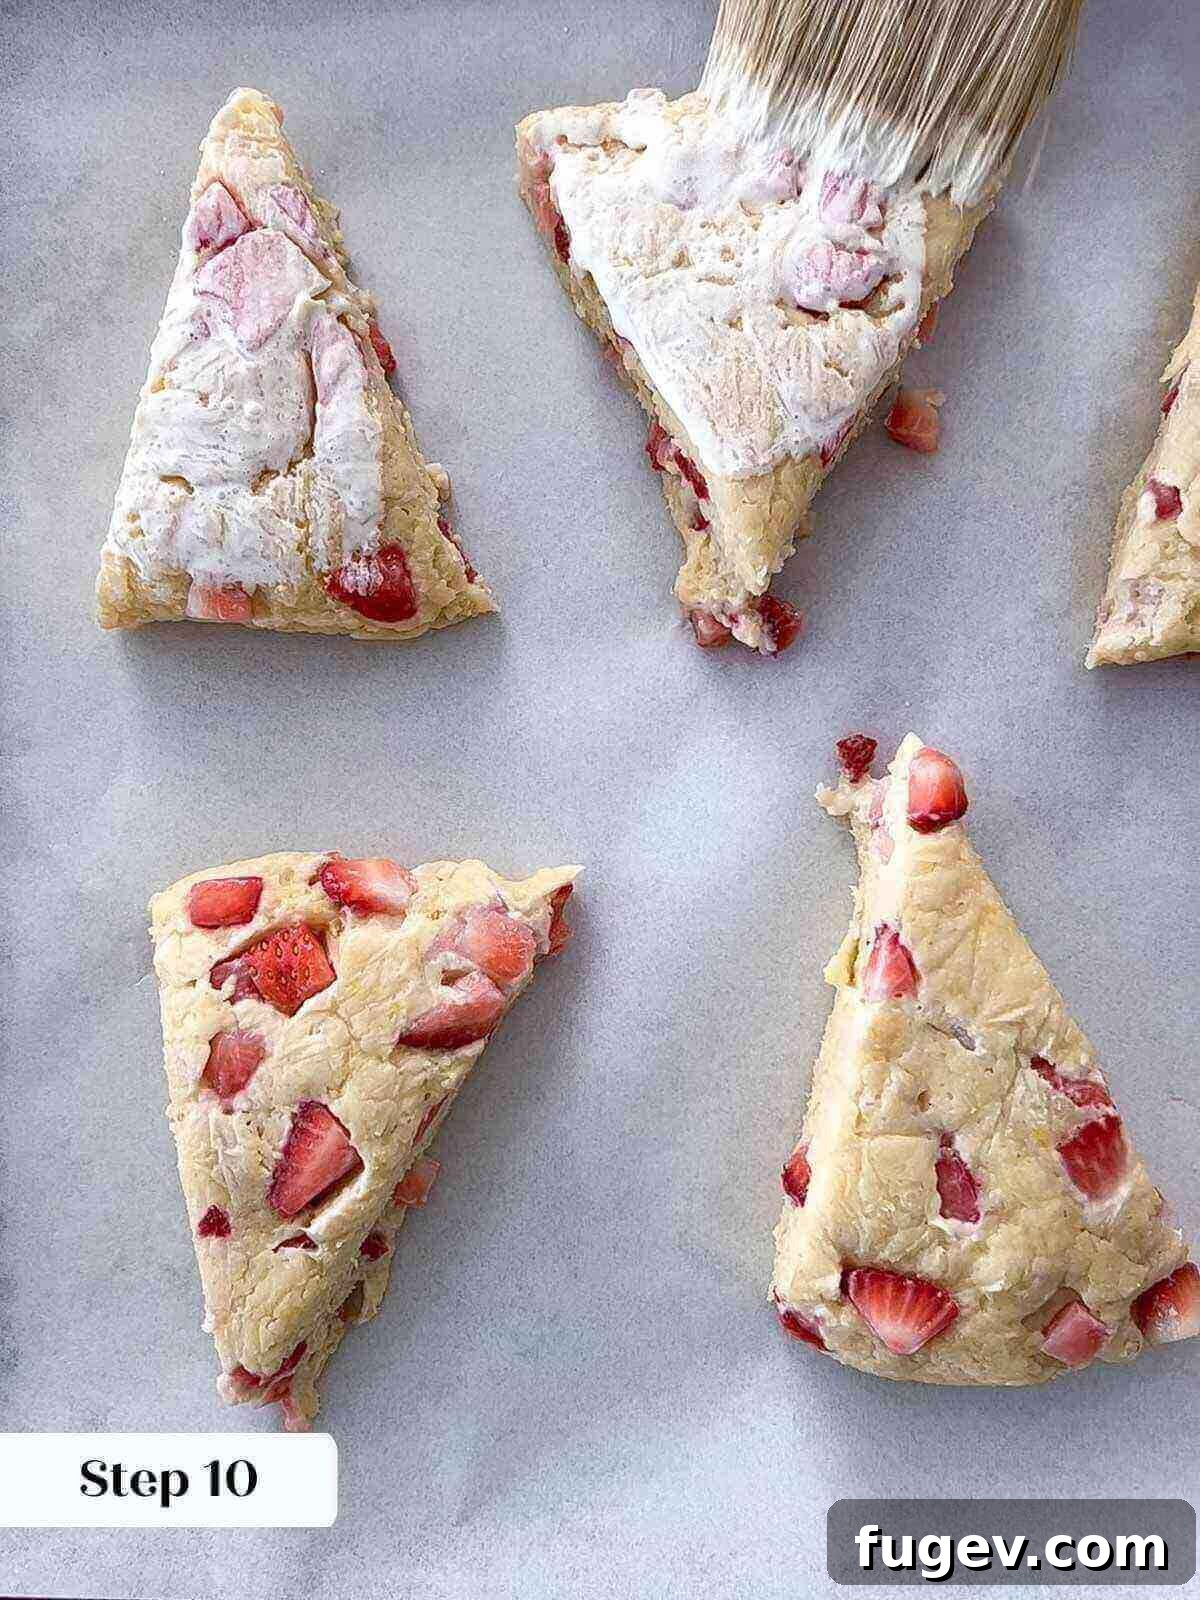
Step 10: Egg Wash and Sugar Topping. Just before placing the scones in the oven, brush the tops of each scone generously with a tablespoon of heavy cream. This cream wash promotes a beautiful golden-brown crust. Immediately sprinkle the tops with a generous amount of turbinado sugar; this adds a lovely sparkle, sweetness, and a delightful crunch.
Step 11: Bake to Golden Perfection. Place the prepared baking sheet with the scones into the preheated oven. Bake for approximately 18-22 minutes. Baking time can vary slightly depending on your oven, so keep an eye on them. The scones are done when they are beautifully golden brown around the edges, visibly puffed, and when gently touched in the center, they offer a slight resistance. A deep golden-brown color is what you’re looking for.
Determining Doneness: If the scones feel very firm to the touch, they are likely overdone and might be dry. For an accurate check, you can insert a cake tester into the center of a scone; it should come out clean when perfectly baked.
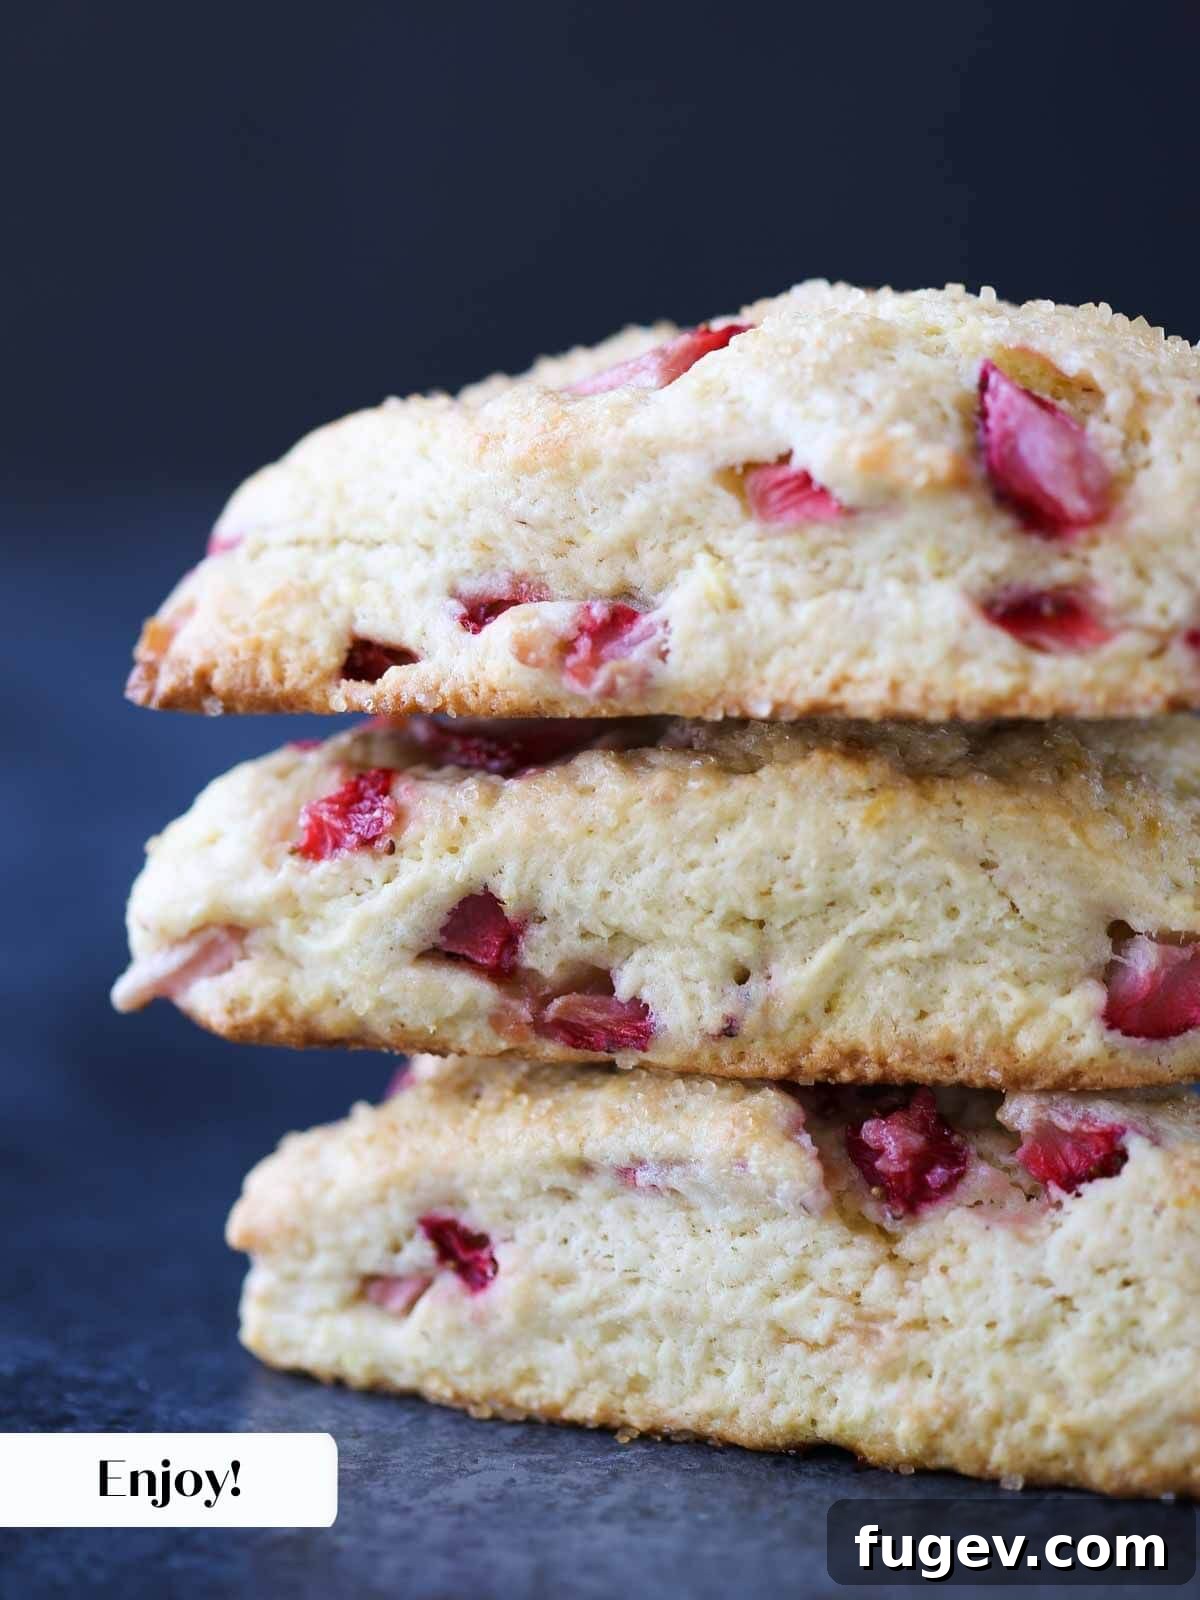
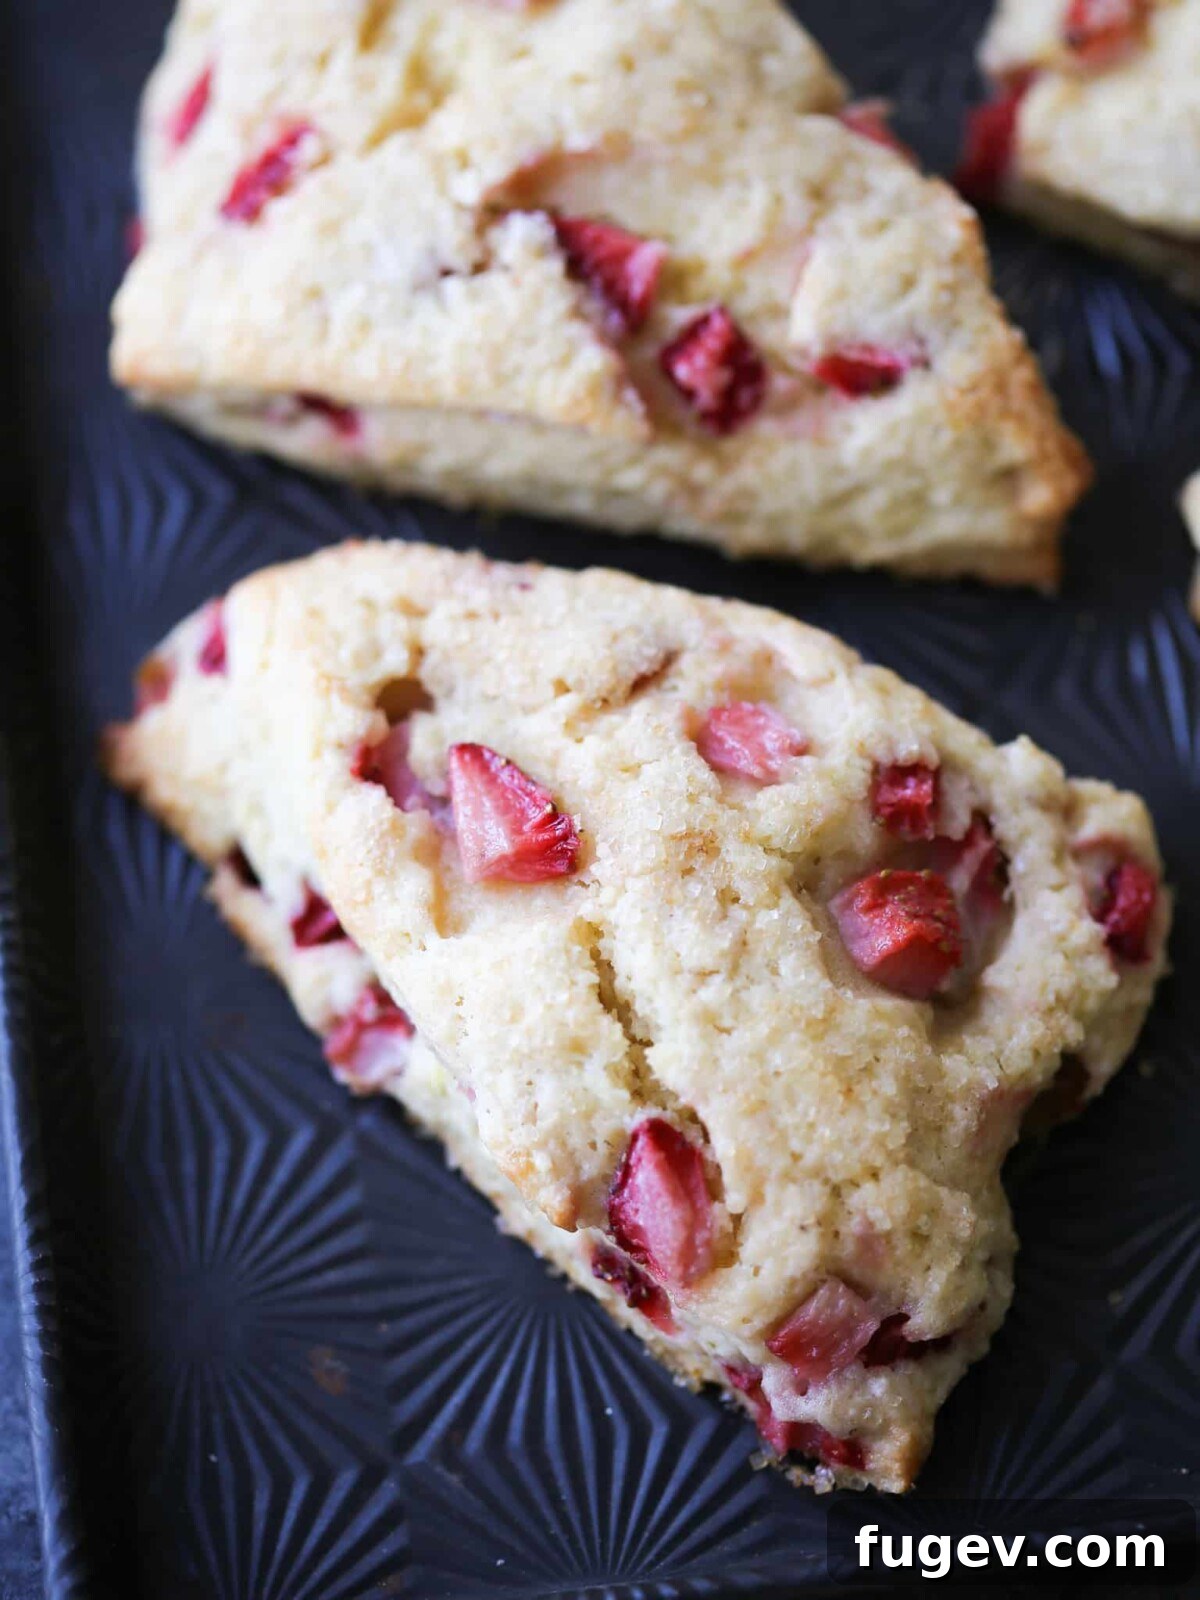
Step 12: Cool and Enjoy! Once baked, transfer the scones to a wire rack to cool completely. While they are undoubtedly delicious warm, allowing them to cool fully helps the internal structure set. Of course, eating one (or two!) warm from the oven with a cup of tea is one of life’s great pleasures!
Chef Lindsey’s Expert Baking Tip: The Art of Gentle Kneading
The way you knead your scone dough matters immensely! Unlike bread, where you develop strong gluten, scones require a delicate touch to achieve their signature tenderness. After combining your ingredients, gently gather the dough into a ball on a well-floured surface. Knead the dough by gently pressing it away from you with the heels of your hands, then folding it over itself. Repeat this process at least 5-7 times, turning the dough a quarter turn after each fold, until it just comes together into a cohesive ball. It’s okay if a few crumbs remain; this indicates you haven’t overmixed. Overworking the dough is the quickest way to develop too much gluten, which will result in tough, rather than tender, scones. Handle with love, and your scones will reward you with perfection!
Frequently Asked Questions About Strawberry Scones
Baked scones are best enjoyed on the day they are made for optimal freshness and texture. However, you can store leftover baked scones in an airtight container at room temperature for up to 3 days, or in the refrigerator for up to 7 days. For longer storage, I highly recommend freezing the cut (unbaked) dough or fully baked scones. Individually wrap each scone in plastic wrap, then place them in a freezer-safe bag or container. Unbaked scones can be frozen for up to 3 months and baked directly from frozen (adding a few extra minutes to the baking time). Pre-baked and frozen scones will keep for up to 3 months; simply thaw and warm gently in the oven.
To ensure tender, flaky scones, there are a few critical mistakes to avoid. Firstly, never overmix your dough. Overmixing develops gluten, leading to tough scones. Ensure your butter is ice-cold and cut it into the dry ingredients thoroughly; warm butter or large chunks will result in a less flaky texture. Also, avoid adding too much liquid, which can make the dough sticky and hard to handle, again leading to overmixing. Lastly, don’t overbake them! Scones should be golden brown and feel slightly soft in the center when gently pressed, not hard or rock-solid.
Several factors can contribute to scones not being soft. The most common culprit is overbaking; baking them for too long will dry them out and make them hard. Another reason is insufficient fat in the dough, or butter that wasn’t properly cut into the flour. The butter’s role is to coat the gluten strands, shortening them and preventing a tough network from forming. If the butter is too warm or not incorporated well, this effect is diminished. Lastly, overworking the dough, even gently, will develop too much gluten and result in a chewy, tough scone rather than a tender, crumbly one. Following the “cold butter, quick mix, gentle knead” mantra will help you avoid these common issues.
For a truly classic British strawberry scone pairing, nothing beats a generous dollop of clotted cream. The rich, thick cream perfectly complements the tender scone and sweet fruit. Other wonderful options include softened butter or a fragrant maple butter for a simple yet satisfying accompaniment. Enhance the strawberry flavor further with some easy homemade strawberry jam or switch it up with delightful easy peach preserves. For a zesty twist, add a dollop of bright easy lemon curd, which beautifully complements the lemon notes in the scone. Pair your scone with a hot mug of your favorite tea or coffee for the ultimate breakfast or afternoon treat.
Absolutely! Scone dough is excellent for make-ahead preparation. After you’ve cut the dough into individual scones (Step 8), arrange them on a parchment-lined baking sheet and chill them in the refrigerator for at least 2 hours or overnight. For longer storage, you can freeze the cut scones on the baking sheet until firm, then transfer them to a freezer-safe bag for up to 3 months. Bake them directly from frozen, adding about 5-10 minutes to the baking time, until golden brown and puffed.
If you tried this recipe and loved it, please leave a 🌟 star rating and share your experience in the comments below. I adore hearing from you; your feedback truly brightens my day!

Strawberry Scones
Chef Lindsey
18 minutes
15 minutes
1 hour
1 hour
33 minutes
12 Scones
Comment
Print Recipe
Ingredients
- 1 cup fresh strawberries washed, hulled, chopped and blotted dry
- ½ cup heavy cream
- 2 eggs lightly beaten
- 1 teaspoon vanilla extract
- 2 ½ cups all-purpose flour
- ½ cup granulated sugar
- 1 teaspoon baking powder
- ½ teaspoon kosher salt
- ½ cup unsalted butter cut in small cubes
- 1 tablespoon lemon zest from 1 large lemon, only the bright yellow parts!
- 1 tablespoon heavy cream for brushing tops
- Turbinado sugar for sprinkling
Instructions
Make the scone dough:
-
Dice strawberries into small pieces and thoroughly blot them dry with a paper towel.
-
In a separate bowl, combine the ½ cup heavy cream, eggs, and vanilla extract. Whisk until smooth and set aside.
-
In the bowl of a stand mixer fitted with the paddle attachment (or a large bowl), add the flour, granulated sugar, salt, and baking powder. Mix on low speed or by hand to just distribute the ingredients evenly.
-
Add the cold, cubed butter and mix on low speed until the butter is no longer visible and the mixture resembles coarse crumbs, with the largest butter chunks about the size of a pea.
-
Add the blotted strawberries and lemon zest to the flour mixture. Toss gently to coat with flour and distribute evenly.
-
With the mixer running on low, slowly pour the cream mixture into the flour mixture and mix until just almost incorporated. The dough will still look shaggy.
-
Dump the dough out onto a lightly floured surface. Gently gather and knead it together (with a light touch!) about 5-7 times until it forms a cohesive ball. Do not overwork.
Portion and bake:
-
Press the dough out to about a 1-inch thickness. Using a floured bench scraper, sharp knife, or pastry cutter, cut the dough into 6 equal triangles. Place them 1 inch apart on a parchment-lined baking sheet. Chill the cut scones for at least 2 hours.
-
Preheat your oven to 325°F (160°C).
-
Brush the tops of the chilled scones with the 1 tablespoon heavy cream and generously sprinkle with Turbinado sugar.
-
Bake scones in the preheated oven for about 18-22 minutes, or until golden brown around the edges, puffed, and the centers provide a little resistance when touched gently.
-
Cool completely on the baking sheets on a wire rack or serve them warm with your favorite accompaniments.
Notes
Flavor Tips – Just like any baked goods that use fresh strawberries, the dough around the strawberries will be a little moister than the rest of the scone. If that texture bothers you, consider using blueberries or dried fruit for less moisture.
Variations – Enhance these scones with a quick glaze made from milk, salt, powdered sugar, and a touch of vanilla extract (similar to my classic Donut Glaze) for an extra special treat.
Storage – Freshly baked scones are best on the day they are made. However, they will keep for up to 3 days at room temperature in an airtight container, 7 days in the refrigerator, or up to 3 months when pre-baked and frozen.
Nutrition
Calories: 248kcal
|
Carbohydrates: 30g
|
Protein: 4g
|
Fat: 13g
|
Saturated Fat: 8g
|
Polyunsaturated Fat: 1g
|
Monounsaturated Fat: 3g
|
Trans Fat: 1g
|
Cholesterol: 60mg
|
Sodium: 147mg
|
Potassium: 71mg
|
Fiber: 1g
|
Sugar: 9g
|
Vitamin A: 442IU
|
Vitamin C: 8mg
|
Calcium: 40mg
|
Iron: 1mg
Breakfast
British
248
Enjoyed this recipe? Share your thoughts below!
Before You Go: Explore More Scone Recipes!
We hope you thoroughly enjoyed this professionally tested and chef-developed Strawberry Scones recipe. Crafting perfect scones at home is a rewarding experience, and these tender, flavorful treats are sure to become a favorite in your kitchen.
If you’re eager to expand your baking repertoire, be sure to explore our extensive collection of other delicious, chef-developed scones recipes. From seasonal fruit variations to decadent chocolate options and savory delights, there’s a scone for every occasion and palate. Happy baking!