
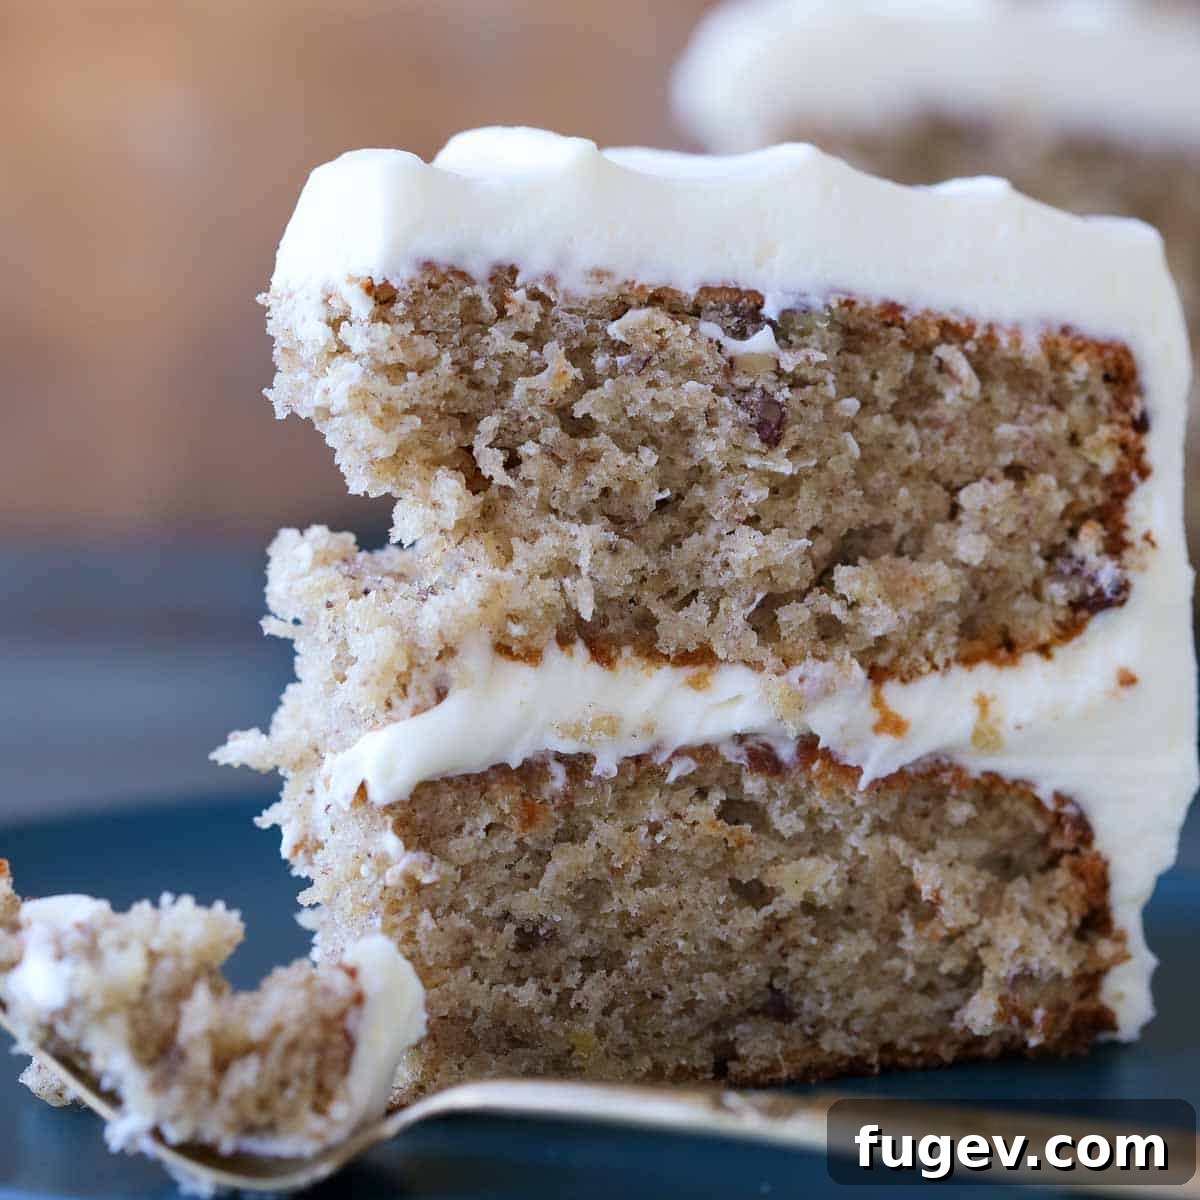
The Ultimate Classic Hummingbird Cake: A Southern Gem with a Tropical Twist
This classic Hummingbird Cake is a true delight, celebrated for its incredibly soft, moist, and tender crumb. It features the perfect balance of sweet, ripe bananas, juicy pineapples, and crunchy toasted pecans, all brought together with a delicate blend of warm, inviting spices. Each luscious layer is generously enveloped in the best cream cheese buttercream frosting, delivering a creamy, tangy finish that is simply irresistible and leaves a lasting impression.
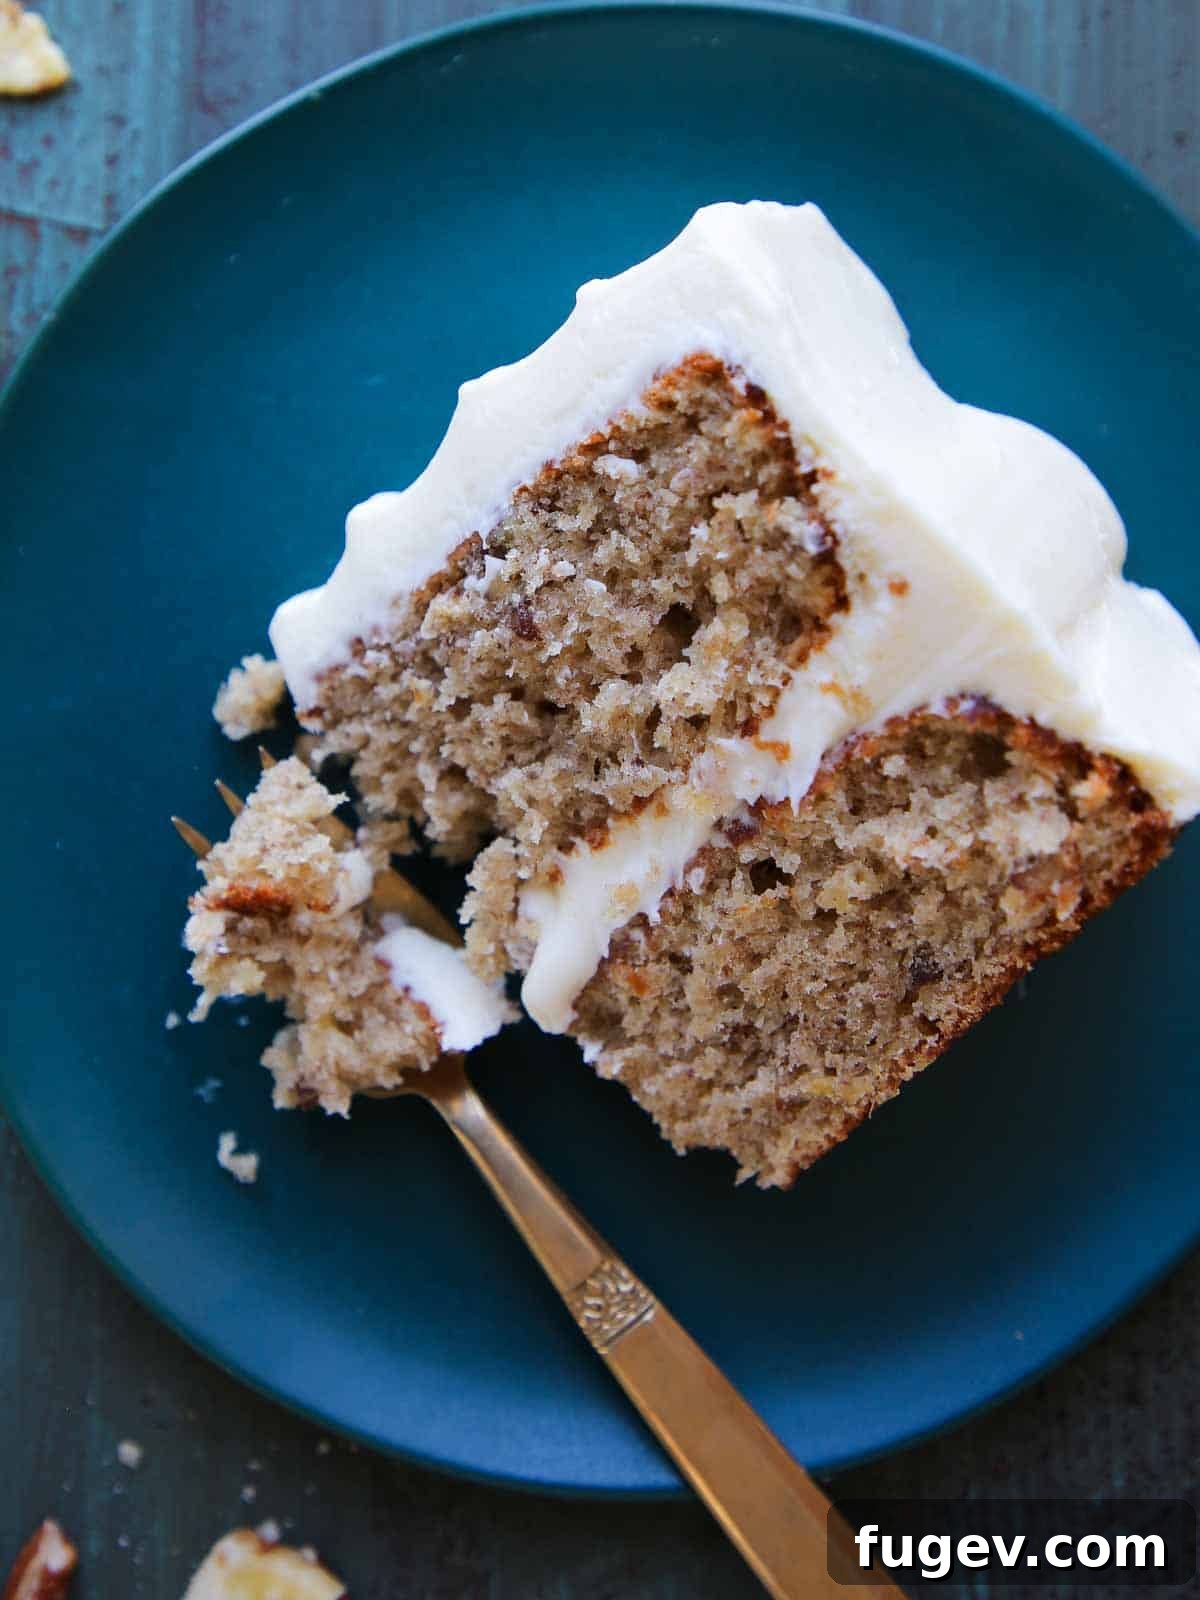
For many, including myself, Hummingbird Cake is the quintessential way to herald the arrival of Spring and Summer. Its vibrant flavors and comforting warmth perfectly capture the essence of these cheerful seasons. While it might often play second fiddle to its equally famous cousin, carrot cake, this tropical-inspired confection truly deserves its own moment in the spotlight. The harmonious combination of tender bananas and succulent pineapple infuses it with a delightful tropical vibe, reminiscent of other island-inspired treats that transport you to sunnier shores, such as a rich rum cake, a refreshing tropical trifle, or delightful coconut cupcakes with airy marshmallow fluff frosting.
However, it’s the comforting crunch of perfectly toasted pecans and the generous swirl of rich, tangy cream cheese buttercream frosting that firmly root this cake in Southern culinary tradition. This unique blend of tropical sweetness and Southern comfort makes it truly special. It stands proudly as one of my all-time favorite desserts, taking its esteemed place alongside other beloved Southern classics. Imagine the joy of indulging in decadent pecan pralines, savoring hearty Southern cornbread, enjoying flaky buttermilk biscuits, or delighting in charming pecan tassies – the Hummingbird Cake belongs right there, a testament to delicious Southern hospitality.
Table of Contents
- Why You Will Absolutely Love This Hummingbird Cake Recipe
- The Fascinating History of Hummingbird Cake: From Jamaica to Southern Stardom
- Professional Tips for Baking the Best Hummingbird Cake
- Essential Ingredients for Your Perfect Hummingbird Cake
- Creative Variations & Smart Substitutions
- How to Make Classic Hummingbird Cake: A Step-by-Step Guide
- Chef Lindsey’s Expert Recipe Tip for Baking
- Frequently Asked Questions About Hummingbird Cake
- Hummingbird Cake Recipe Card
- Before You Go: Explore More Delicious Cake Recipes
Why You Will Absolutely Love This Hummingbird Cake Recipe
This isn’t just another cake recipe; it’s a meticulously crafted experience designed to deliver the absolute best Hummingbird Cake you’ve ever tasted. Here’s why this particular recipe will quickly become your new favorite and a staple in your baking repertoire:
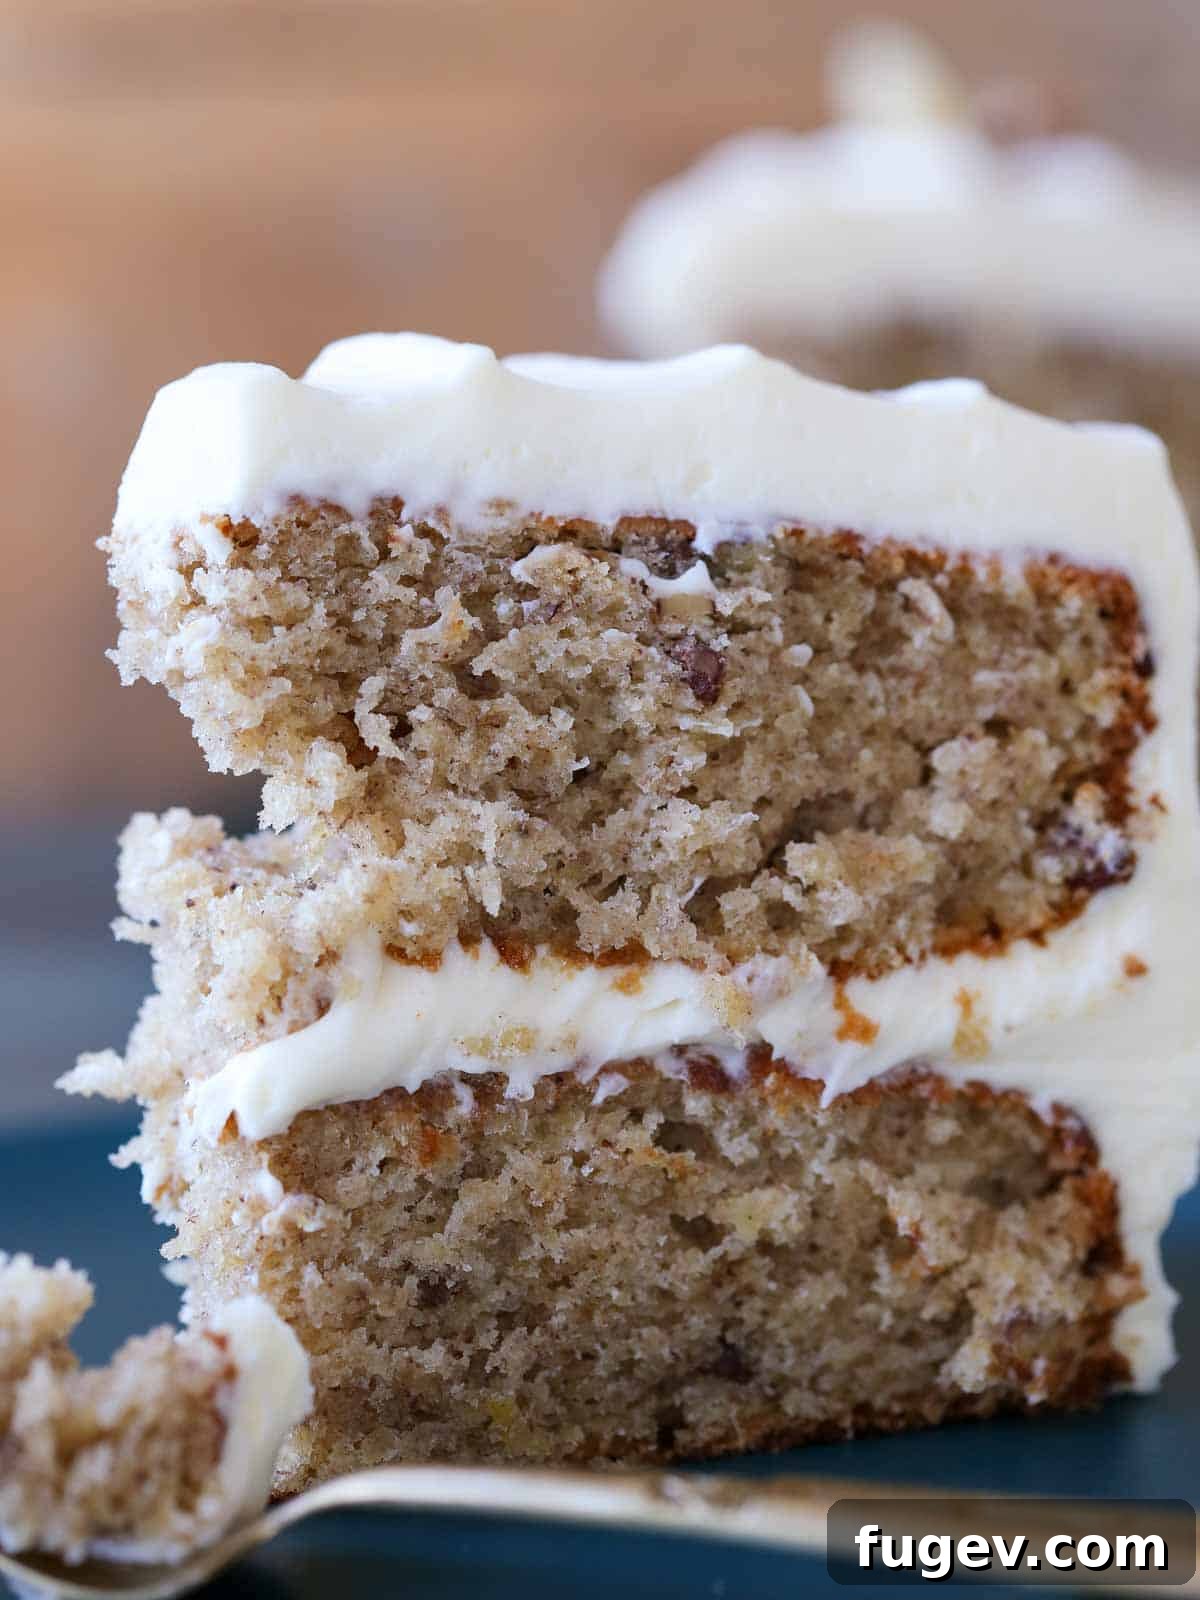
- Unrivaled Soft, Moist, and Gently Spiced Texture: Prepare yourself for a cake that truly melts in your mouth with every single bite. Our recipe creates a banana-pineapple cake that is exceptionally soft and incredibly moist, infused with just the right amount of warm cinnamon spice that awakens the palate without overpowering the delicate fruit flavors. Toasted pecans are generously studded throughout the batter, adding a delightful crunch and nutty depth that perfectly complements the tender, fluffy crumb. This cake strikes a flawless balance, offering a rich, satisfying experience without ever feeling heavy, and a sweet indulgence without being cloyingly sugary. It’s pure comfort in every forkful.
- A Southern Living Classic, Masterfully Adapted by a Pastry Chef: This recipe pays a respectful homage to the beloved original printed in Southern Living magazine, which brought this cake to national fame. However, it has been thoughtfully and expertly refined by a seasoned pastry chef to significantly enhance its qualities and baking performance. We’ve critically reduced the oil content by a third, ensuring a lighter cake that remains incredibly moist, a common concern with oil-based cakes. Crucially, we’ve increased the banana content to maximize flavor and moisture, and completely revolutionized the mixing method, leading to superior results that set this recipe apart from others you might encounter.
- Exceptional Lightness and Tenderness Through Innovative Technique: What truly makes this cake stand out and contribute to its ethereal texture is our unique approach to incorporating the fruits. Instead of simply mashing and folding, this recipe calls for pureeing the ripe bananas and canned pineapple (with its juice!) together in a blender or with an immersion blender. This smooth fruit puree is then added to the wet ingredients *before* the dry components. This method is a game-changer for moisture and lightness; it ensures an even distribution of natural sugars and liquids throughout the batter, preventing dry spots and infusing every single particle with tropical essence. Breaking down the fruit fibers also contributes to a remarkably smoother, more delicate cake crumb that will impress even the most discerning palates.
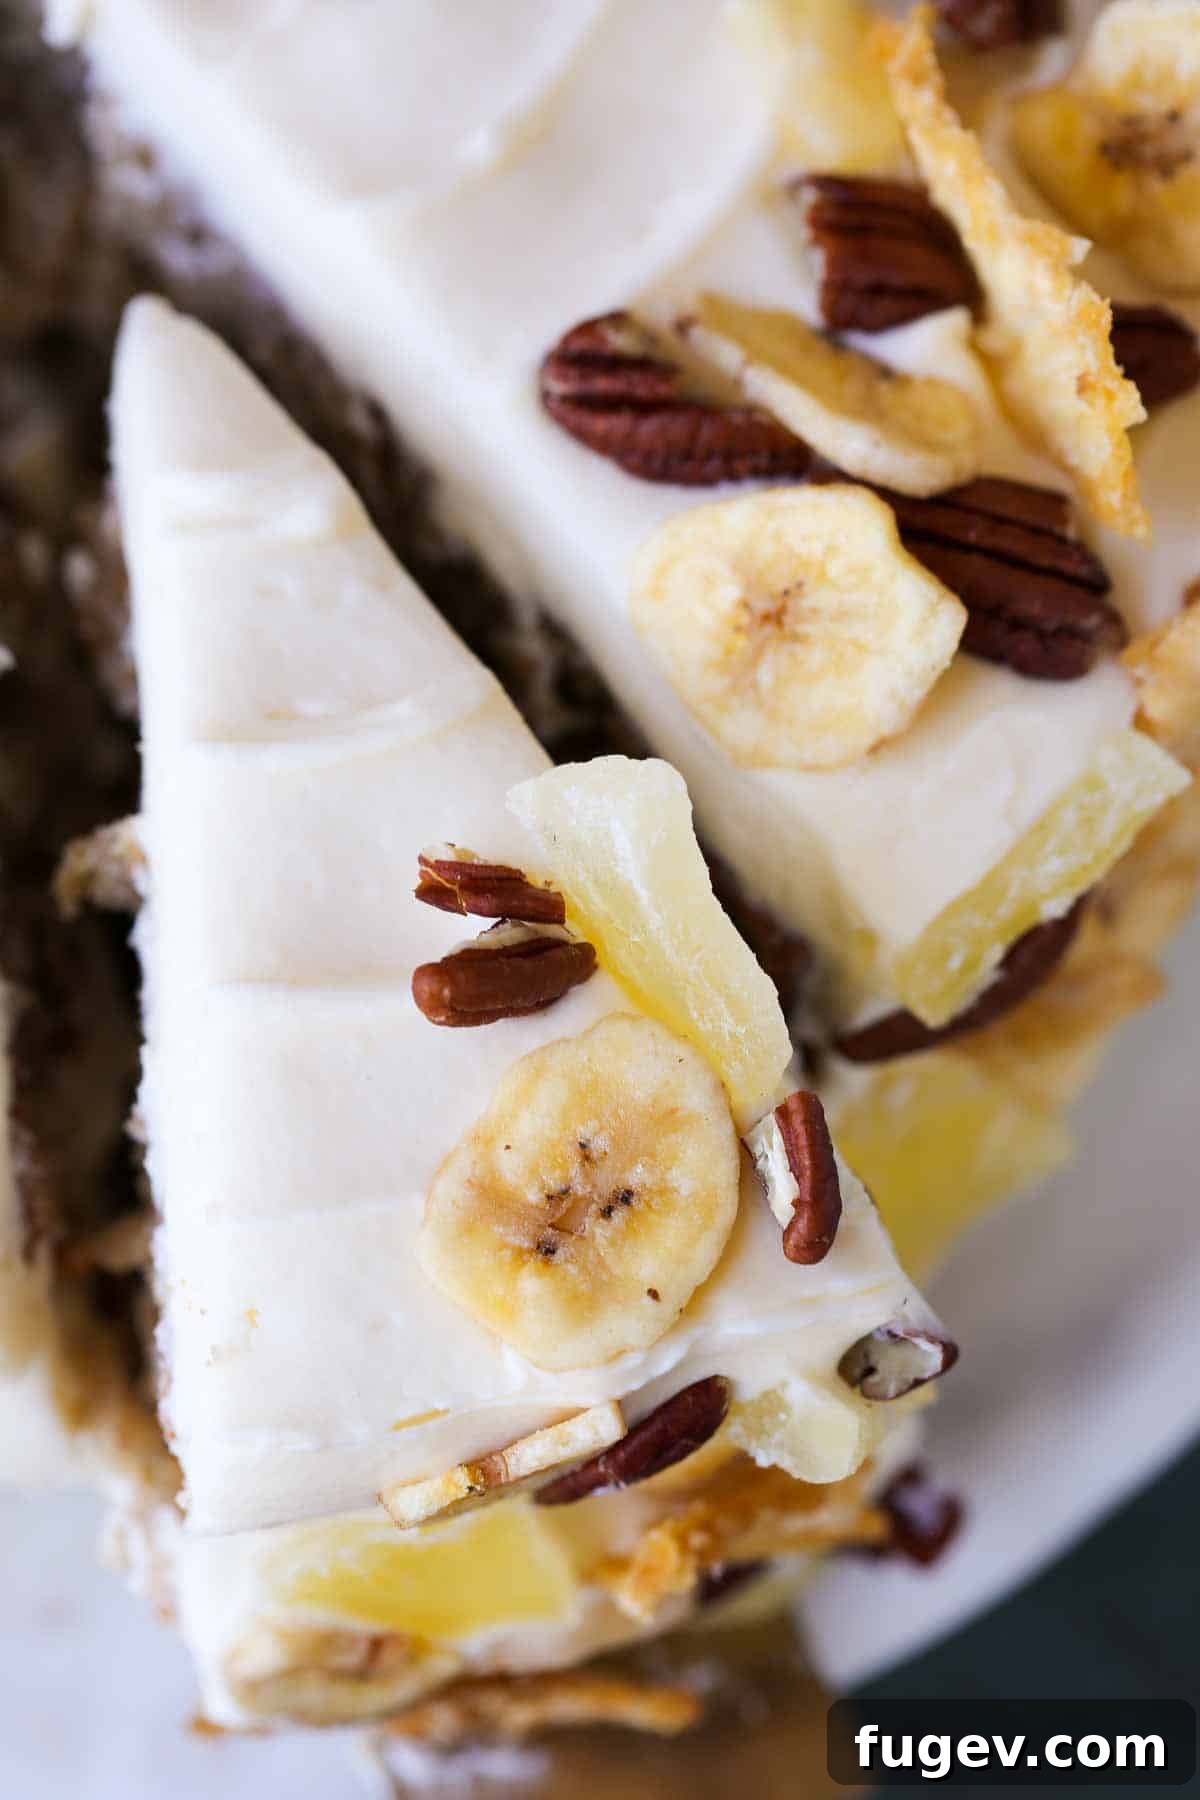
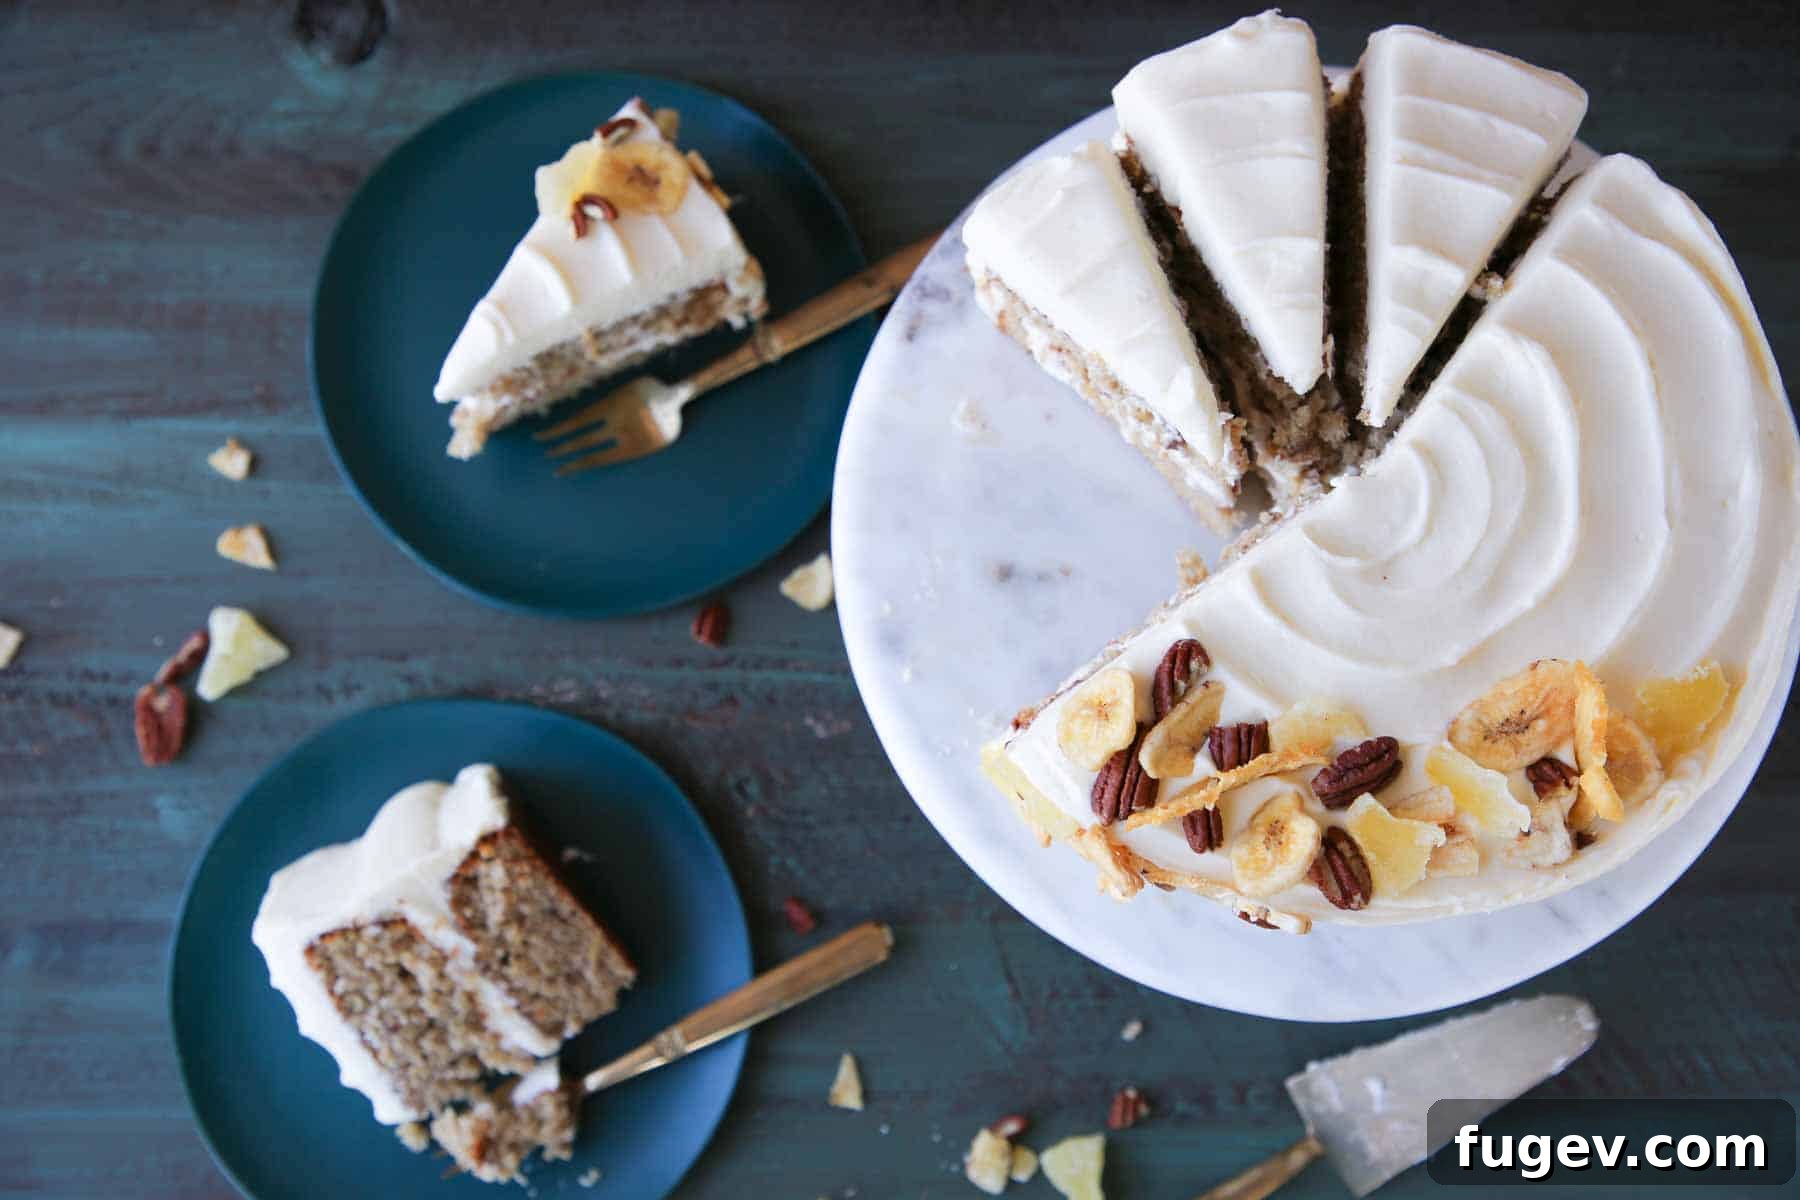
- Elevated Presentation with a Beautiful Mosaic Garnish: While classic Hummingbird Cakes are often garnished with a simple scattering of crushed or whole pecans, we believe this magnificent cake deserves an elevated touch of pizzazz! This recipe encourages you to unleash your creativity by crafting a fun and sophisticated mosaic pattern. This can be achieved using an array of complementary textures and colors, such as dried pineapples, dehydrated pineapple slices, crispy banana chips, and additional toasted pecans. This artistic flourish not only makes your cake visually stunning and worthy of any special occasion but also adds an exciting, textural dimension that will delight your guests.
The Fascinating History of Hummingbird Cake: From Jamaica to Southern Stardom
The origins of this beloved dessert are as rich and captivating as its flavor profile. Contrary to popular belief that places its birth exclusively in the American South, Hummingbird Cake actually hails from the vibrant culinary landscape of Jamaica. On this picturesque Caribbean island, it’s affectionately known as “Doctor Bird Cake,” a charming and poetic nod to Jamaica’s national bird, the distinctive scissor-tailed hummingbird. This particular species is locally referred to as the “Doctor Bird” due to its long, elegant bill that resembles a doctor’s instrument. The cake’s irresistible sweetness and abundance of tropical fruit are thought to be so alluring that they could attract hummingbirds – a delightful metaphor for its profound appeal to human taste buds.
The cake’s journey across continents and into American kitchens began in 1968. In an effort to promote tourism, the Jamaican Tourist Board exported a collection of their cherished local recipes to the United States. Among these authentic island delights was the recipe for this tropical fruit cake. However, it wasn’t until 1978 that the recipe truly soared to fame, making its pivotal appearance in the pages of Southern Living magazine. The publication of “The Cake That Doesn’t Last” by Mrs. L.H. Wiggins of Greensboro, North Carolina, quickly propelled the Hummingbird Cake into widespread national popularity. Its unique and delightful combination of mashed bananas, crushed pineapple, crunchy pecans, and warm spices struck an immediate and profound chord with home bakers across the Southern United States. By 1990, the Hummingbird Cake had earned the prestigious title of Southern Living’s most requested recipe, solidifying its place as a quintessential and beloved Southern dessert. And, as any connoisseur will tell you, this beloved cake is always, unequivocally, served with a generous, luscious, and perfectly tangy cream cheese frosting – a combination that has become legendary.
Professional Tips for Baking the Best Hummingbird Cake
Achieving a truly exceptional Hummingbird Cake goes beyond simply following the recipe steps; it involves understanding and applying key techniques that professional pastry chefs use to guarantee consistent, outstanding results. Here are my top tips to ensure your cake is always perfectly moist, wonderfully tender, and bursting with flavor:
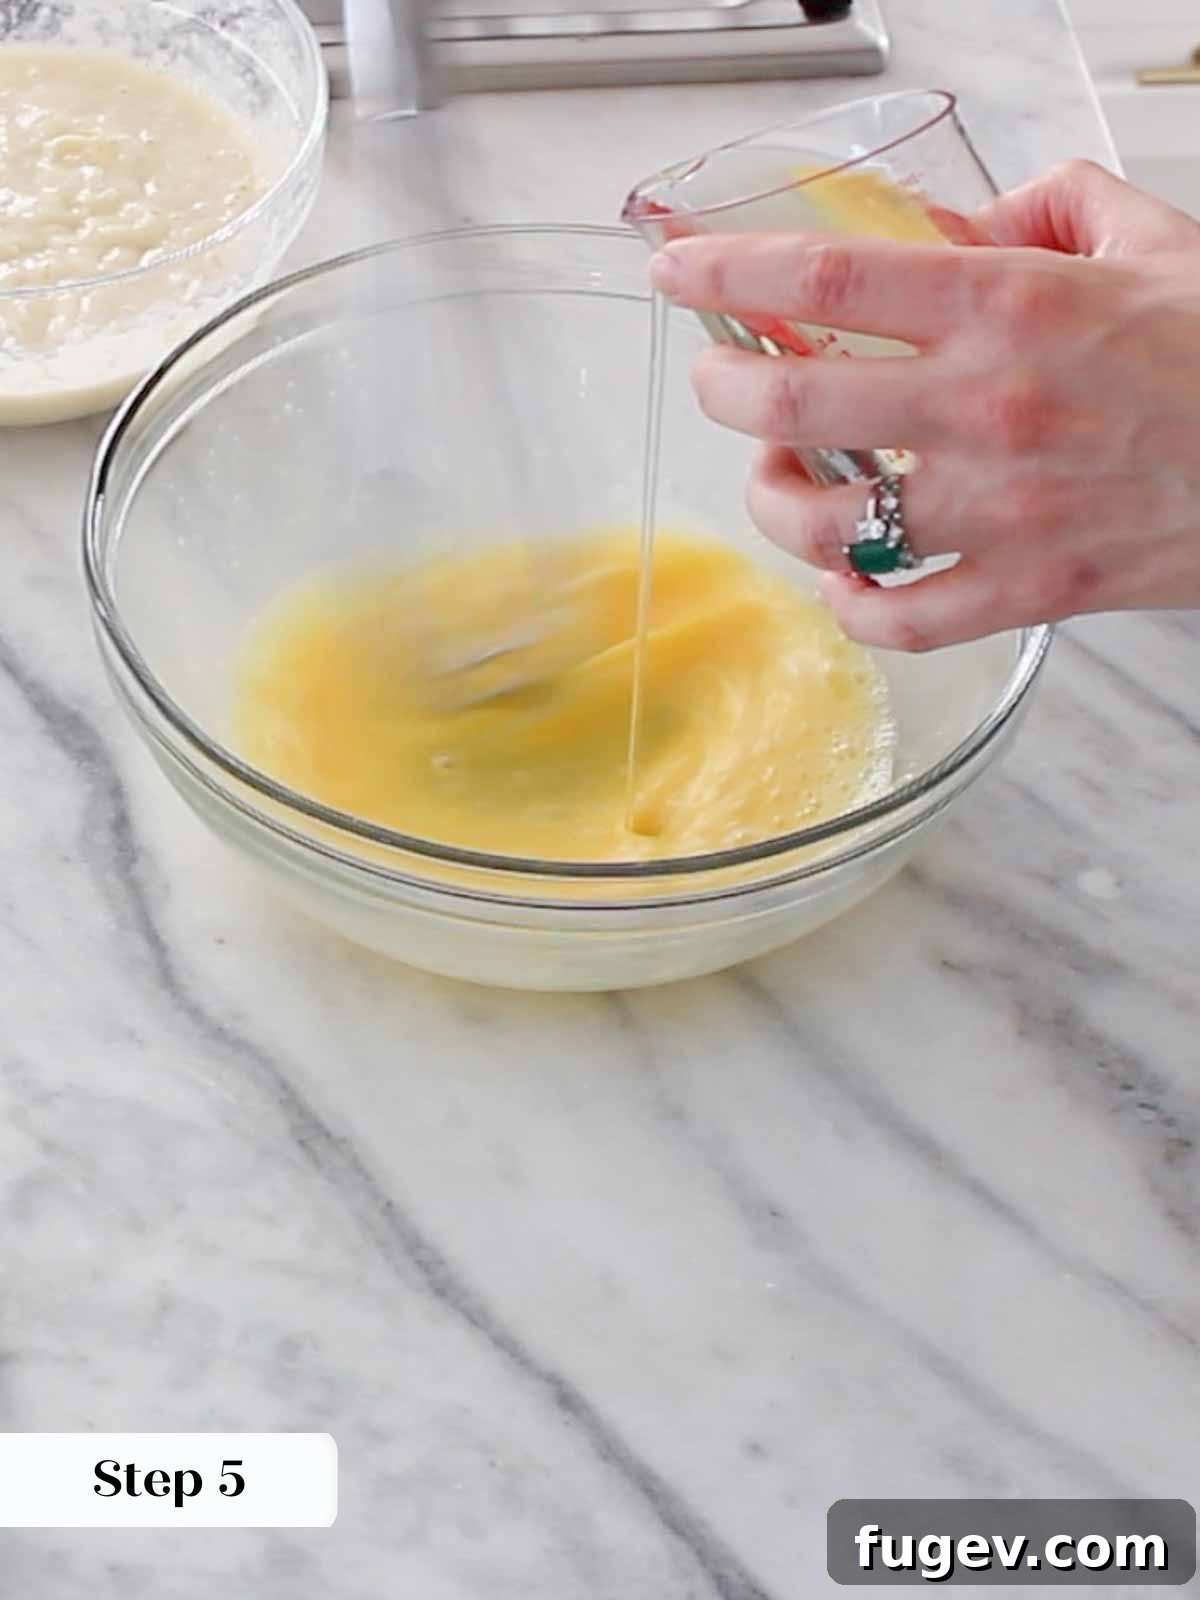
- Master the Liquid Fat Cake Mixing Method for Superior Texture: This recipe expertly employs a classic liquid fat method, a technique similar to the one I utilize for the carrot cake that famously beat Bobby Flay. The foundational secret lies in carefully emulsifying the oil into well-beaten whole eggs. This crucial step creates a stable and robust emulsion that effectively traps air, resulting in a cake that is remarkably moist, incredibly fluffy, and wonderfully tender with a fine, even crumb. Simply whisking all the wet ingredients together haphazardly, while seemingly easier, often leads to a denser, potentially oilier cake that sorely lacks that desirable light, airy quality. Take your time to properly emulsify the oil into the eggs for a noticeable and superior difference in the final cake texture.
- Prioritize Blending Bananas and Pineapple for Ultimate Moisture and Even Flavor: My recipe specifically calls for blending ripe bananas and canned crushed pineapple (with its juice!) together. You can achieve this perfectly smooth consistency using either a traditional stand blender or a convenient immersion blender. This fruit puree is then carefully incorporated into the wet ingredients before the dry components are added. This method is an absolute game-changer for moisture and lightness. By pureeing the fruits, you ensure an even and consistent distribution of their natural sugars, liquids, and vibrant flavors throughout the entire batter. This proactive step prevents any dry spots and guarantees that every single bite of your cake is infused with their delicious tropical essence. Furthermore, blending helps to break down any fibrous parts of the fruit, contributing to a smoother, more delicate, and uniform cake crumb.
- Always Toast Your Pecans for Enhanced Flavor and Texture: This is a non-negotiable step, and Southern Living magazine rightly championed it first! Toasting pecans is not merely an optional addition; it is absolutely essential for deeply enhancing their flavor profile. The gentle heat of toasting brings out their inherent nuttiness, transforming them into a rich, complex, and aromatic component that untoasted pecans simply cannot match. This intensified flavor adds a crucial layer of depth to the cake. Moreover, toasting helps the pecans maintain their delightful crunch and firm texture, even after they are baked into the incredibly moist cake batter, providing a welcome textural contrast in every bite. Spread them in a single layer on a baking sheet and toast gently in the oven until they become wonderfully fragrant and lightly golden brown. Ensure they cool completely before incorporating them into the batter.
- The Importance of Room Temperature Ingredients: This is a golden rule in the world of baking, especially for cakes that rely on fats like butter and cream cheese, and for frostings. Room temperature eggs, butter, and cream cheese emulsify far better than cold ingredients. When they are at room temperature, they combine more smoothly and uniformly with other ingredients, creating a more stable, well-aerated batter or a perfectly smooth, lump-free frosting. This ultimately leads to a more uniform cake structure, a finer crumb, and a consistently tender cake. Plan ahead and take these essential ingredients out of the refrigerator at least an hour, or even two, before you intend to begin your baking process.
Essential Ingredients for Your Perfect Hummingbird Cake
Crafting the perfect Hummingbird Cake starts with selecting the right, high-quality ingredients. Each component plays a vital role in achieving the cake’s characteristic flavor and moist, tender texture. Here’s a detailed look at what you’ll need and why each element is important:
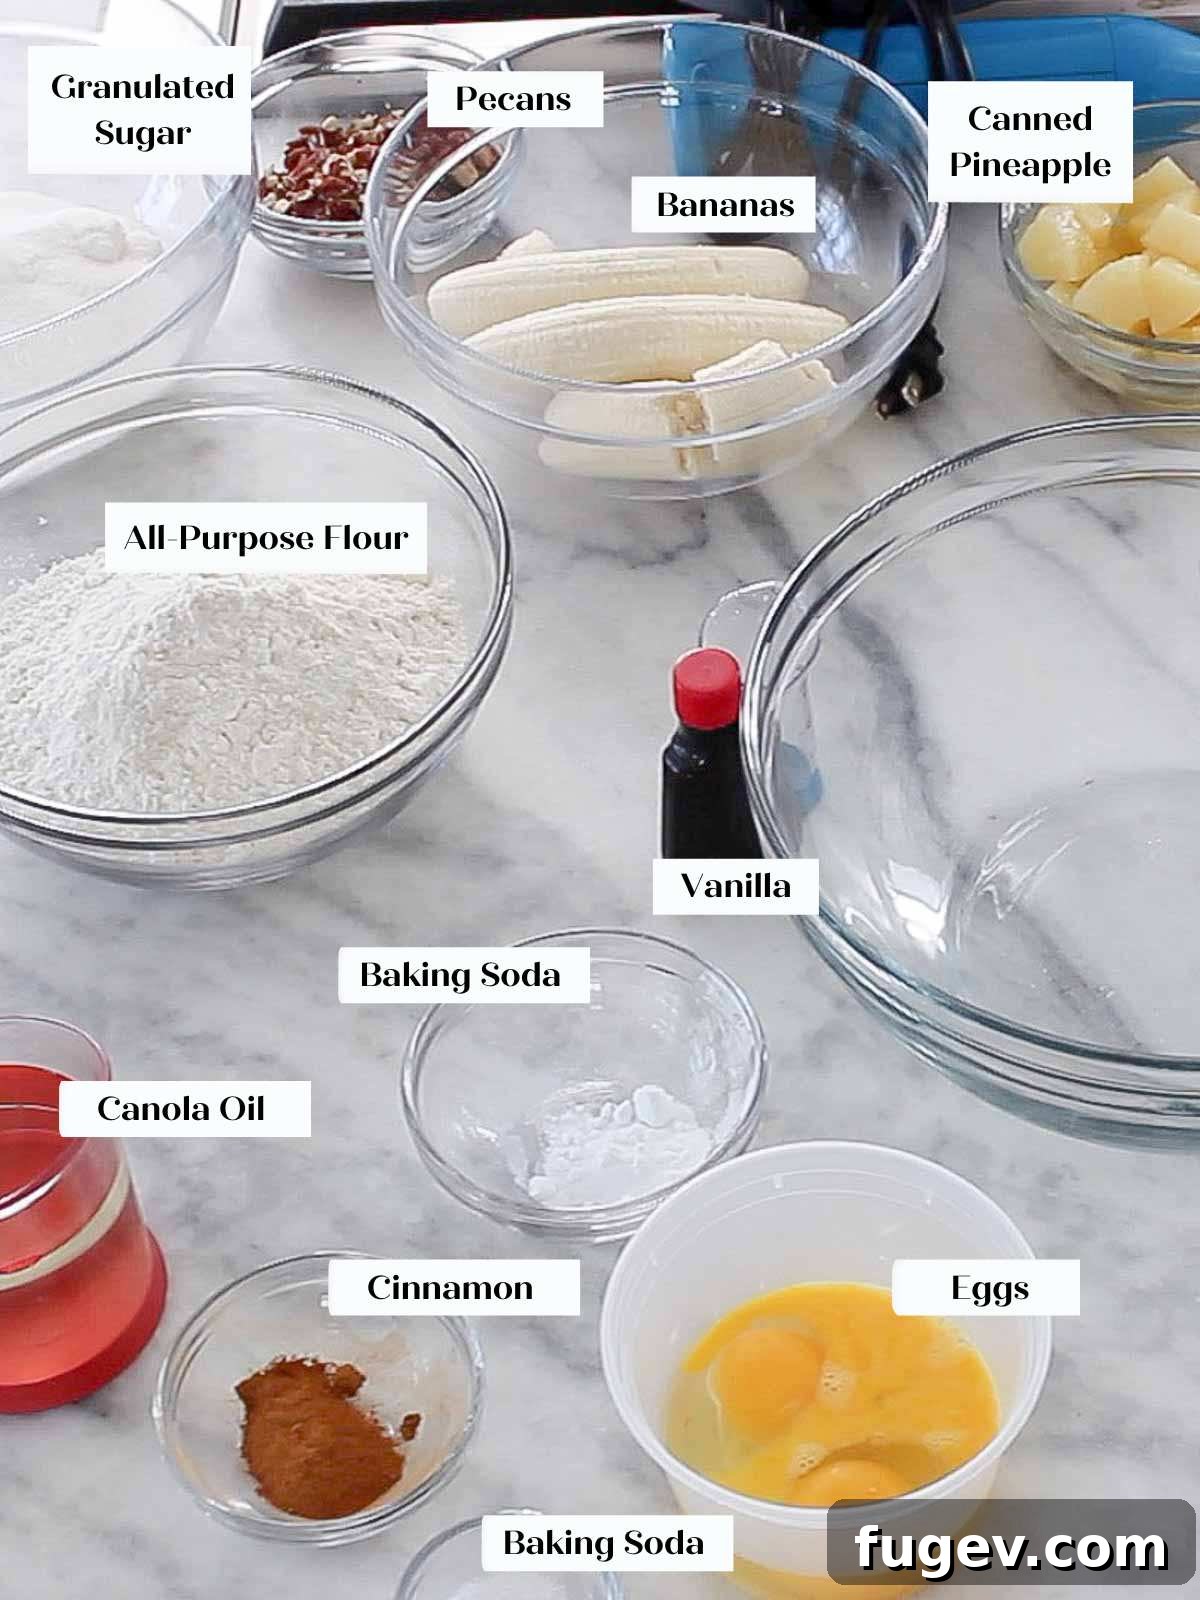
- All-purpose flour: This is our go-to choice because it’s a readily available pantry staple for most home bakers, providing an excellent balance of structure and tenderness to the cake. If you desire a slightly finer crumb and a lighter texture, you could opt for cake flour; however, remember that sifting it thoroughly is crucial for optimal results and preventing lumps.
- Ground Cinnamon: This warm, aromatic spice is a key player in the Hummingbird Cake’s distinct flavor profile. It adds a subtle yet inviting warmth and depth that beautifully complements and enhances the sweetness of the tropical fruits.
- Baking Soda: Essential for proper leavening, baking soda creates the necessary lift and contributes significantly to the cake’s tender texture. It reacts with the natural acidity present in the canned pineapple juice, producing carbon dioxide bubbles that expand during baking, resulting in a wonderfully fluffy cake. If you consider substituting baking powder, you would need to use double the amount (approximately 2 teaspoons) to achieve similar leavening power.
- Kosher Salt: A fundamental ingredient in almost all baking, a touch of kosher salt is essential. It doesn’t just add saltiness; it plays a critical role in enhancing and balancing the overall sweetness of the cake, bringing out the complex, nuanced flavors of the fruits and spices, and making everything taste brighter and more integrated.
- Whole Eggs: Eggs are multifunctional in this recipe: they act as a binder for all the ingredients, contribute vital moisture and richness, and are crucial for the cake’s structure and overall tenderness, especially when properly emulsified with the oil.
- Vegetable Oil: Canola oil is highly recommended for this particular cake because it consistently produces an exceptionally moist crumb that remains tender for days. Its neutral flavor ensures that the delicious notes of fruit and spice are allowed to shine through without any interference. While you could substitute with melted (but not hot) coconut oil for a subtle tropical hint and similar moist results, butter is not recommended in this specific liquid fat method. Butter’s higher water content can lead to a less moist cake texture.
- Vanilla Extract: A beloved staple in nearly all sweet baking recipes, high-quality vanilla extract deepens and rounds out the overall flavor profile of the cake, adding a layer of comforting aroma and taste.
- Granulated Sugar: Beyond simply providing sweetness, granulated sugar is crucial for aiding in moisture retention, contributing to the cake’s desirable moist texture, and ensuring a pleasant mouthfeel.
- Canned Crushed Pineapple (with juice): This ingredient is absolutely vital for its intense flavor, substantial moisture contribution, and natural acidity which reacts with the baking soda. You will use the entire 8-ounce can, including all of its juice, as it’s a significant liquid component in the batter. Since we’ll be blending it with the bananas, the specific cut of pineapple (crushed, rings, or chunks) doesn’t matter much. While fresh pineapple can be used, ensure it is very ripe and in season, and be mindful that it might alter the liquid content slightly, potentially requiring minor adjustments to the overall moisture balance of the batter.
- Ripe Large Bananas: The star of the show and a defining flavor of Hummingbird Cake! For the best possible flavor and texture, it is imperative to use spotty, ripe bananas – not quite mushy, but definitely well-speckled with brown spots on their peels. These ripened bananas offer intense natural sweetness and a significantly softer texture, making them ideal for blending into a smooth puree. A “large” banana typically measures between 6-7 inches in length and about an inch in diameter. Aim for approximately 1 ½ cups (around 250g) of mashed bananas for this recipe. Save your excessively overripe, almost black bananas for a classic old-fashioned banana bread or a comforting banana crumb bread.
- Pecans: These delicious, crunchy nuts add a delightful textural contrast and a rich, buttery flavor that is characteristic of a true Southern dessert. To save time and often money, I highly recommend buying pre-chopped pecan pieces, as they toast faster and are frequently more economical than whole pecans. Ensure they are properly toasted for maximum flavor and crunch.
- Cream Cheese (for frosting): Full-fat cream cheese is absolutely essential for creating a rich, tangy, and stable cream cheese buttercream. It’s crucial that it is softened to room temperature before mixing to ensure a perfectly smooth and lump-free frosting.
- Unsalted Butter (for frosting): Softened unsalted butter provides the necessary richness, creaminess, and structure for the decadent buttercream.
- Powdered Sugar (for frosting): Also widely known as confectioners’ sugar, this finely milled sugar dissolves effortlessly, creating a smooth, light, and lump-free frosting texture that is easy to spread and pipe.
- Lemon Juice (for frosting): A splash of fresh lemon juice is the secret ingredient for a perfectly tangy cream cheese buttercream. It beautifully balances the sweetness of the sugar and cream cheese, adding a bright, zesty note that elevates the entire cake experience.
- Vanilla Extract (for frosting): Just like in the cake batter, vanilla extract enhances the overall flavor of the buttercream, providing a comforting and complementary aroma that pairs exquisitely with the cake.
Please refer to the detailed recipe card below for precise measurements and quantities for both the cake and the irresistible cream cheese buttercream.
Creative Variations & Smart Substitutions for Your Hummingbird Cake
While the classic Hummingbird Cake recipe is absolutely perfect in its traditional form, there’s always room for personal touches and creative experimentation in the kitchen. Here are some delightful ideas for variations and smart substitutions to make this recipe truly your own, allowing you to tailor it to your taste or adapt it based on available ingredients:
- Exploring Alternative Oils for Unique Flavors: While canola oil offers a neutral backdrop that allows the fruit and spice flavors to shine, you can certainly experiment with other liquid fats for different nuances. Melted (but not hot) coconut oil makes an excellent substitute; it imparts a subtle tropical fragrance and flavor that beautifully enhances the cake’s inherent fruity notes, all while maintaining its incredible moist texture. It’s a fantastic choice if you want to lean further into the cake’s Caribbean origins. However, it’s important to note that using melted butter, while adding its own distinct richness, contains water and milk solids that behave differently than pure oil, and in this specific liquid fat mixing method, it can result in a less moist cake. Stick to oils for the best moisture!
- Elevate Moisture and Flavor with a Simple Syrup Soak: For an extra layer of luxurious moisture and an added burst of flavor, consider soaking your cooled cake layers. Preparing a simple syrup is incredibly easy: just boil equal parts water and granulated sugar until the sugar completely dissolves, then allow it to cool to room temperature (or even refrigerate it for later use). You can use this plain syrup as is, or you can infuse it with additional delightful flavors. Try adding a splash of rum for an even more pronounced tropical feel, a squeeze of lemon or orange juice for a vibrant, zesty kick, or even a few drops of your favorite liqueur. Brushing the cooled cake layers generously with this flavored syrup before you begin frosting will ensure an incredibly moist cake that stays fresh longer and delights with an amplified flavor in every bite.
- Infuse Your Cream Cheese Buttercream with Exciting Flavors: The classic cream cheese frosting is undeniably divine, but why not infuse it with extra character and complexity? For an indulgent adult twist, incorporate 1 to 2 tablespoons of your favorite liquor – bourbon would add a wonderful Southern warmth, rum would enhance the tropical notes, or even a fruit liqueur could add an unexpected burst of flavor. You could even take inspiration from our popular red velvet cake recipe and use a rich bourbon-infused cream cheese frosting. Alternatively, for a brighter citrus note, simply swap the lemon juice for fresh orange juice in the frosting, or experiment with a different extract like almond or coconut for unique aromatic profiles.
- Explore Different Buttercream Styles for Varied Textures: While cream cheese buttercream is traditional and beloved, don’t shy away from other delicious frosting options if you’re feeling adventurous or want to try something new! For a dramatically different experience, consider piling on a fluffy, light, and airy homemade marshmallow frosting and then giving it a quick toast with a kitchen torch for a delightful S’mores-like effect. A bright and refreshing lemon American buttercream would also complement the tropical fruit notes of the Hummingbird Cake beautifully, adding a zesty counterpoint. For a truly luxurious and sophisticated touch, consider a silky smooth Swiss meringue buttercream, perhaps delicately flavored with our homemade lemon curd for an elegant tang and glossy finish.
How to Make Classic Hummingbird Cake: A Step-by-Step Guide
Follow these detailed, easy-to-understand instructions to create a perfectly moist and flavorful Hummingbird Cake every single time. By paying attention to each step, you’ll achieve bakery-quality results right in your own kitchen. Further precise details and exact measurements for all ingredients are available in the comprehensive recipe card below.
Part 1: Preparing and Baking the Cake Layers
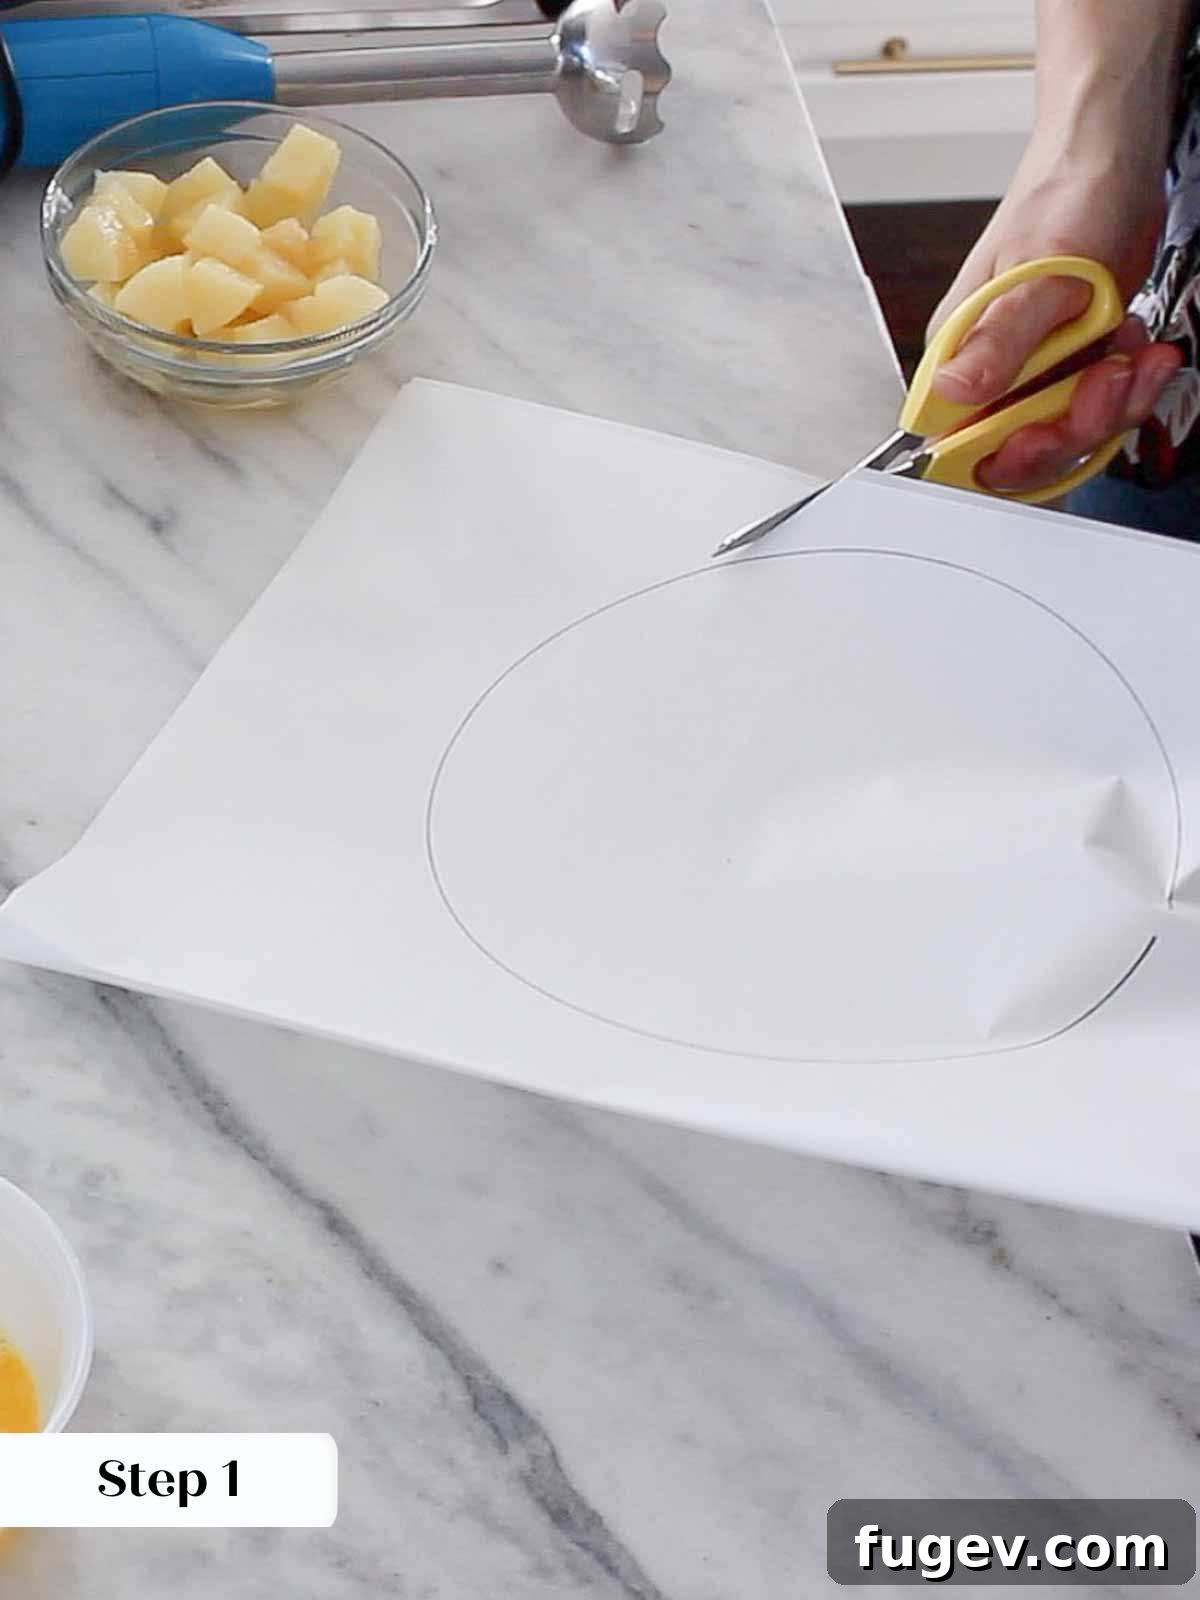
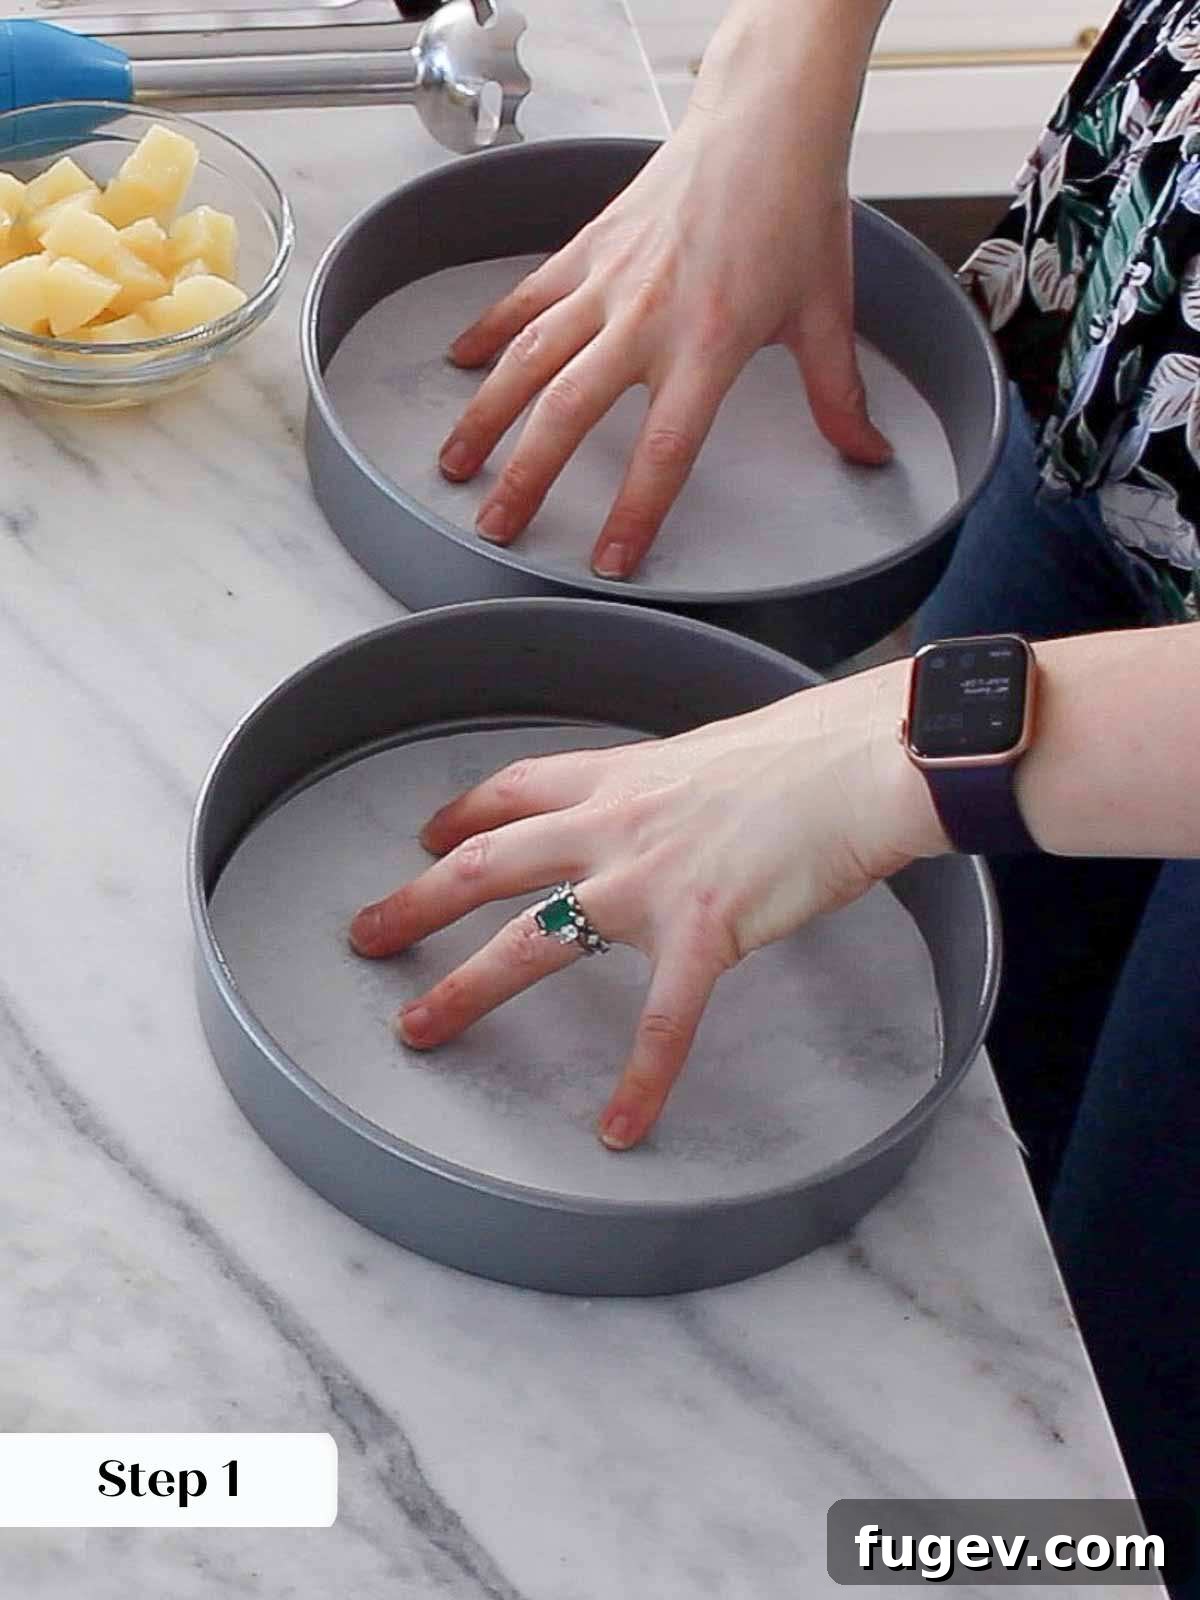
Step 1: Prepare Your Cake Pans and Preheat Oven. Begin by thoroughly spraying two 8 or 9-inch round cake pans with a high-quality non-stick baking spray (one that contains flour works exceptionally well). Line the bottoms of each pan with parchment paper circles. This is a critical step for easy release. Ensure you also lightly spray the sides of the pans to prevent any sticking. Preheat your oven to 350°F (175°C) in conventional mode. Proper oven temperature is vital for even baking.
Chef’s Tip: Achieving Perfect Parchment Circles. You can save time by purchasing pre-cut parchment cake rounds, which are readily available. Alternatively, for a perfect custom fit, simply trace the bottom of your cake pan onto parchment paper, then cut just inside the traced line. This ensures the paper fits snugly at the bottom of the pan.
Step 2: Toast and Prepare Pecans for Enhanced Flavor. Spread your pecans in a single, even layer on a clean baking sheet. Toast them in the preheated oven until they turn a beautiful golden brown and begin to release a wonderfully rich, nutty aroma. This usually takes approximately 5-7 minutes, but keep a very close eye on them to prevent burning, as nuts can go from perfectly toasted to burnt very quickly. Once perfectly toasted, immediately remove them from the oven and allow them to cool completely. If you started with whole pecans, chop them finely after cooling. To save precious time, I often opt for buying pre-chopped pecan pieces, which toast faster and eliminate this chopping step.
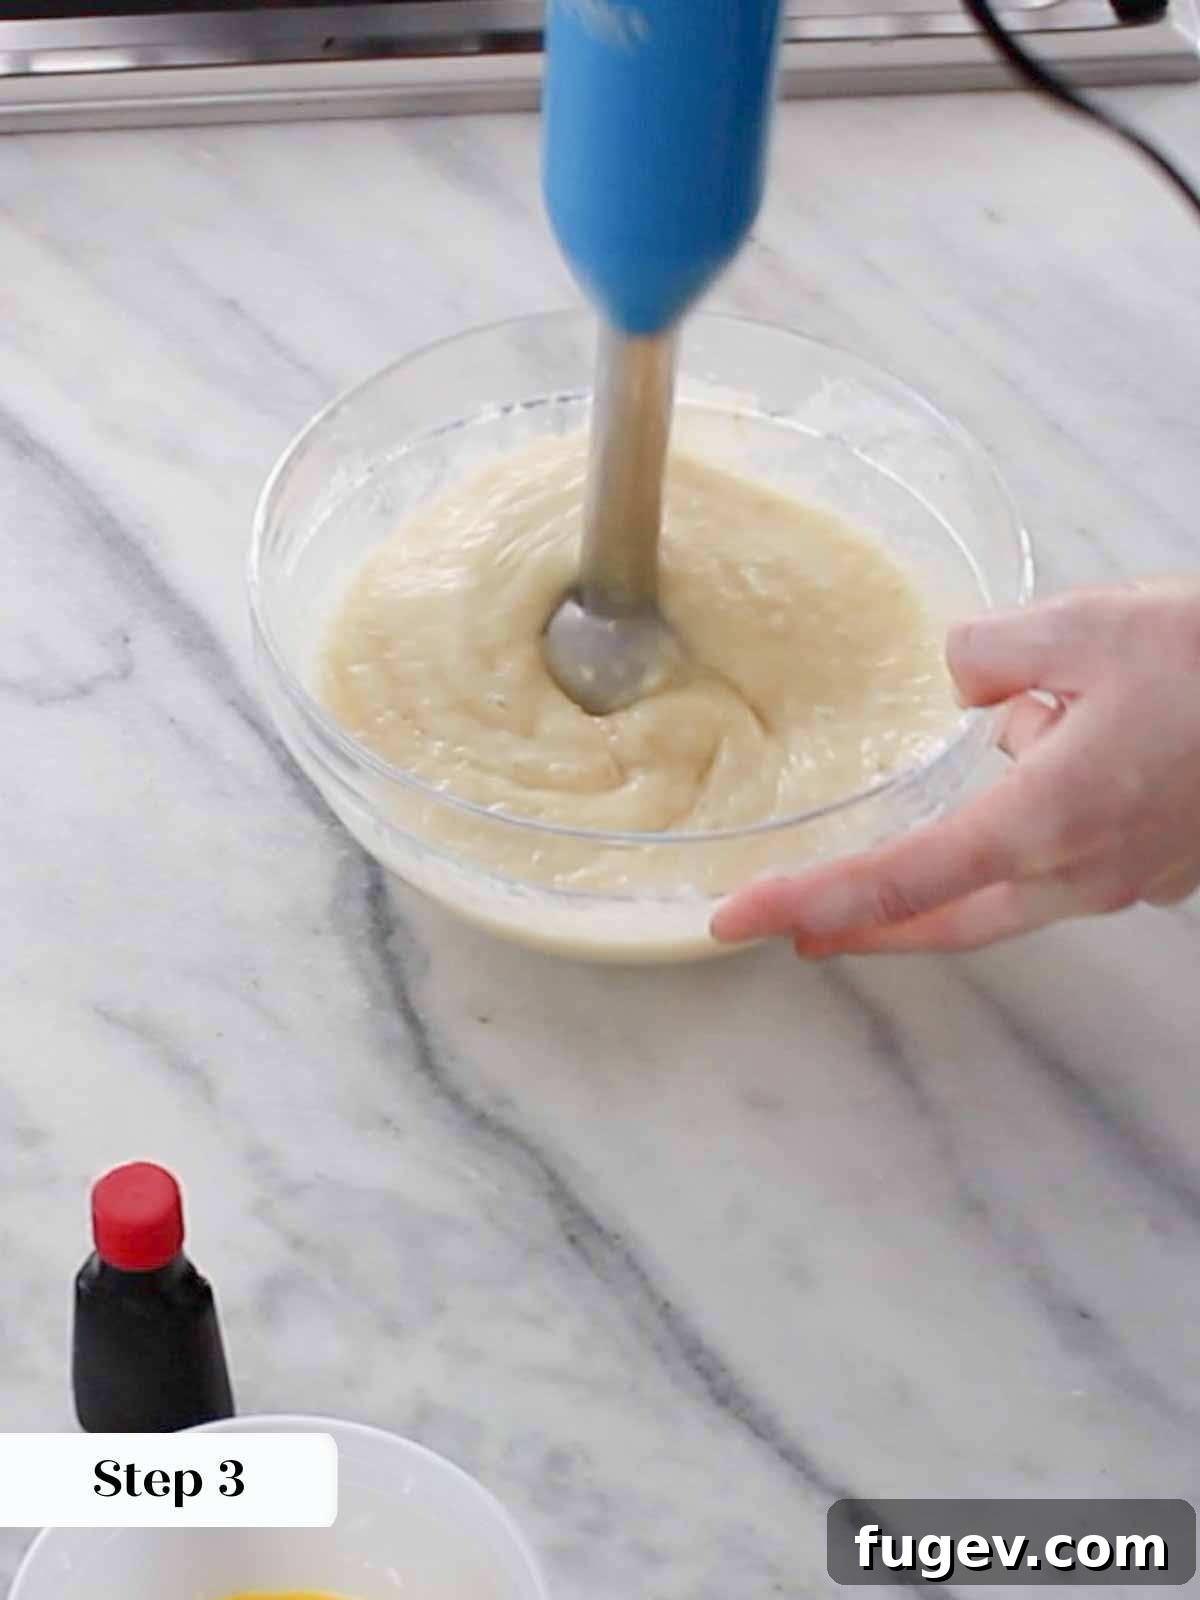
Step 3: Combine Dry Ingredients & Prepare Your Fruit Puree. In a medium-sized mixing bowl, thoroughly whisk together the all-purpose flour, ground cinnamon, baking soda, and kosher salt. Ensure these dry ingredients are well combined and set this mixture aside. In a separate medium bowl, or directly in your blender, combine the entire can of crushed pineapple (including its juice) and the ripe, spotty bananas. Use an immersion blender or a regular blender to process these fruits together until they form a completely smooth and uniform puree. This critical step is absolutely crucial for achieving the cake’s characteristic moist and tender texture, evenly distributing the fruit’s natural sweetness and moisture throughout the batter.
Step 4: Whisk Eggs to Incorporate Air. In the bowl of a stand mixer fitted with the whisk attachment (or in a large mixing bowl using a powerful hand mixer), whisk the whole eggs until they are well beaten and appear slightly frothy. This process incorporates essential air into the eggs, which plays a significant role in contributing to the cake’s light and airy structure.
Step 5: Emulsify Oil and Vanilla for a Stable Base. With the mixer running on a low speed, slowly and steadily drizzle in the vegetable oil and vanilla extract into the beaten eggs. Continue whisking until the mixture is fully emulsified and appears well combined and slightly thickened. This careful emulsification creates a stable and rich base for your cake batter, which is key to its moisture and tenderness.
Step 6: Incorporate Sugar and the Fruit Puree. Gradually whisk the granulated sugar into the egg-oil mixture until it is fully incorporated and the mixture looks smooth. Follow this by gently whisking in the smooth pineapple-banana puree until all ingredients are uniform and the mixture is fragrant with tropical notes. Do not overmix at this stage.
Step 7: Fold in Dry Ingredients and Pecans. Add the reserved flour mixture to the wet ingredients. Using a rubber spatula, gently fold them together until just combined. It’s crucial not to overmix the batter at this stage, as overmixing can develop the gluten in the flour, leading to a tough and dry cake. Finally, gently fold in the toasted, cooled chopped pecans. Once the batter is ready, divide it evenly between your two prepared cake pans.
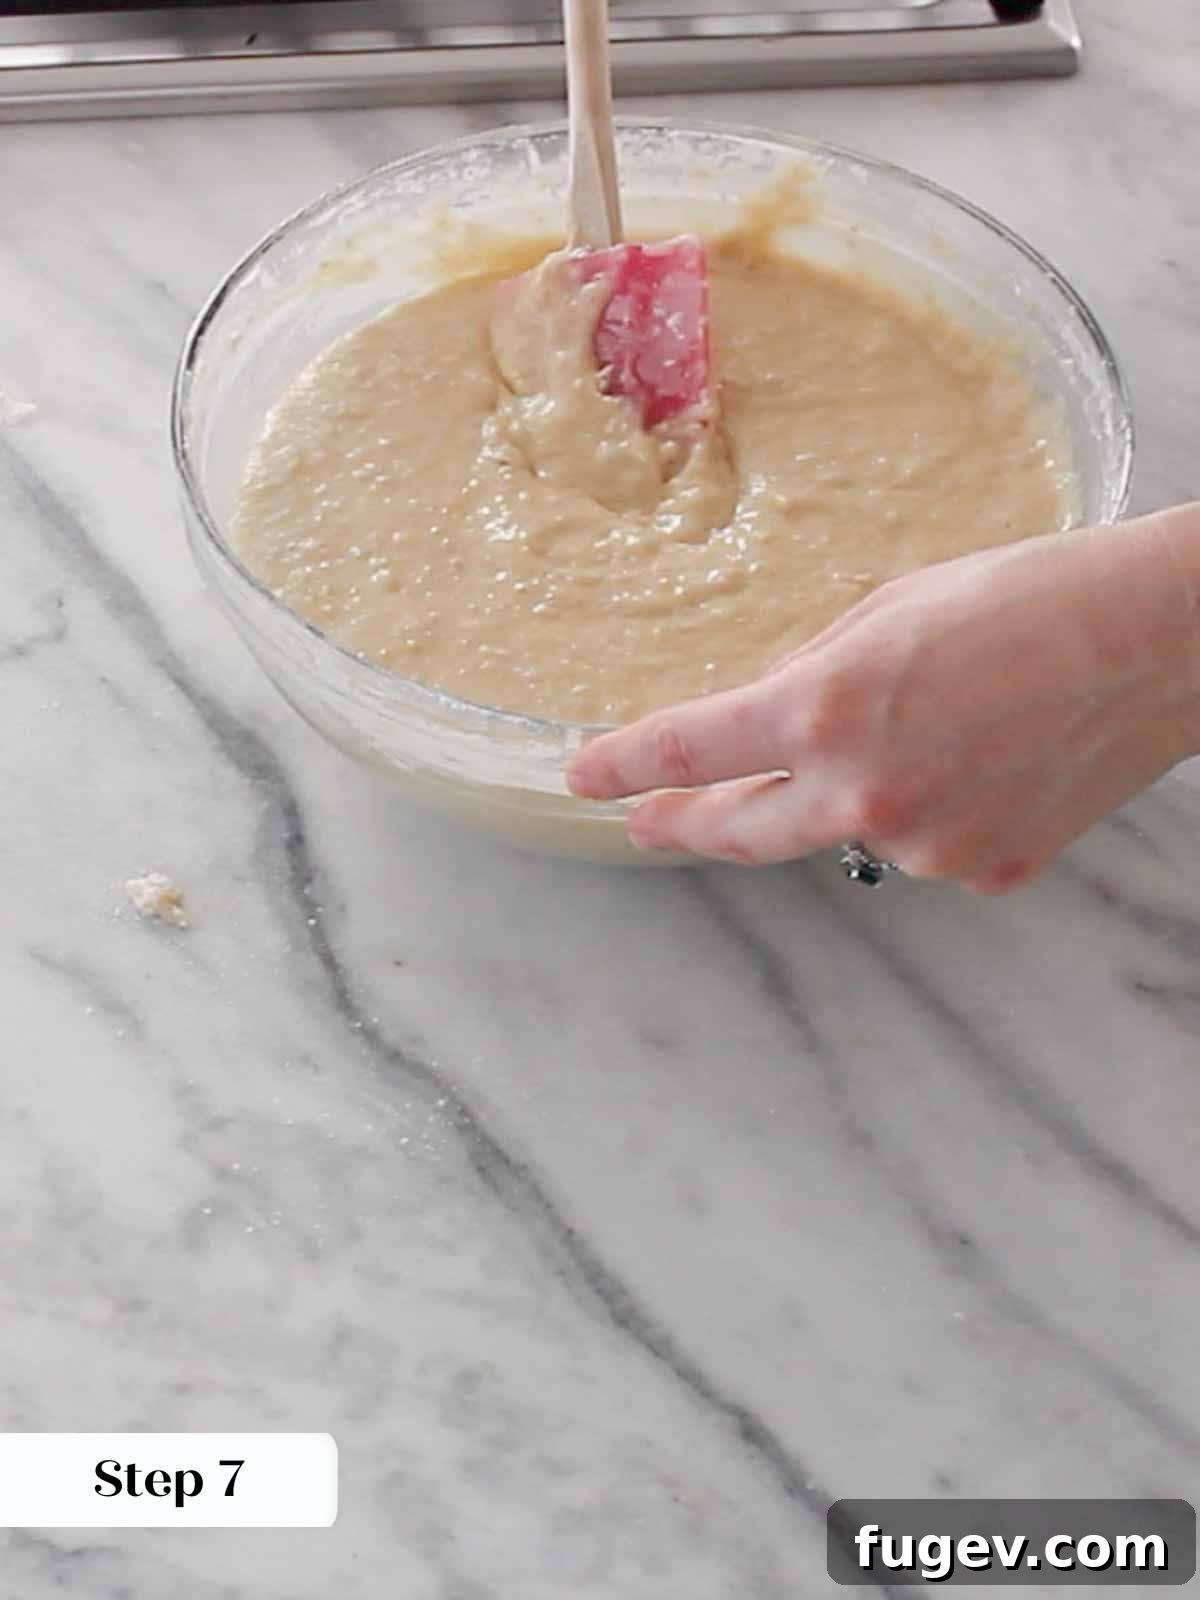
Chef’s Tip: Ensuring Perfectly Even Cake Layers. For truly symmetrical and professional-looking cake layers, use a kitchen scale to accurately weigh the batter in each pan. For two 8-inch or 9-inch pans, each should ideally hold approximately 950g of batter, ensuring consistent baking and level layers.
Step 8: Bake the Cake to Perfection. Transfer the filled cake pans to your preheated oven. Bake for approximately 25-30 minutes. The cake is done when a cake tester, toothpick, or thin bamboo skewer inserted into the very center comes out with only a few moist crumbs clinging to it, but no wet batter streaks. It’s vital to avoid overbaking, as this is the most common cause of a dry cake. Begin checking for doneness around the 22-minute mark.
Step 9: Cool the Cake Layers Properly. Allow the freshly baked cake layers to cool in their pans for about 10 minutes on a wire rack. This initial cooling helps the cakes set and firm up slightly. After 10 minutes, carefully invert them onto a wire cooling rack and allow them to cool completely upside down. Cooling upside down helps to flatten any slightly domed tops, making assembly much easier and resulting in perfectly level cake layers.
Part 2: Crafting the Luxurious Cream Cheese Buttercream Frosting
Step 1: Cream Softened Ingredients Until Smooth. In the bowl of a stand mixer fitted with the paddle attachment (or in a large mixing bowl using a powerful hand mixer), combine the softened full-fat cream cheese, softened unsalted butter, and powdered sugar. Beat on medium speed until the mixture is completely smooth, wonderfully light, fluffy, and entirely free of any lumps. This can take 3-5 minutes. Scrape down the sides of the bowl frequently to ensure everything is incorporated.
Step 2: Add Flavorings for a Tangy Finish. Add the fresh lemon juice and vanilla extract to the creamed mixture. Beat again on medium-high speed for another 1-2 minutes until all ingredients are thoroughly incorporated and the frosting is smooth, creamy, and wonderfully tangy. This burst of lemon juice is essential for balancing the richness and sweetness of the frosting.
Chef’s Tip: Rescuing Over-Softened Frosting. If your frosting becomes too warm or soft during the mixing process, or if you’re waiting for your cake layers to cool, don’t panic! Simply place the entire mixing bowl (along with the paddle attachment) into the refrigerator for 30-60 minutes. Once it has chilled sufficiently, re-beat it with the paddle attachment until it returns to a smooth, firm, and pipeable consistency. This trick works wonders!
Part 3: Assembling and Decorating Your Stunning Hummingbird Cake
Step 1: Place the First Layer of Cake and Frost. On your favorite cake stand, cake plate, or serving platter, carefully place the first cooled cake layer. Scoop approximately 1 cup of the prepared cream cheese buttercream onto the center of this layer. Using an offset spatula, gently and evenly spread the frosting out, extending almost to the very edges of the cake layer.
Step 2: Add the Second Layer and More Frosting. Carefully place the second cooled cake layer on top of the first. For a perfectly flat top and easier frosting, consider flipping the second layer upside down so that its flat bottom now becomes the top surface of the cake. This clever technique eliminates the need for leveling and prevents any wasted cake crumbs. Apply about half of the remaining buttercream to the top of this layer. Spread it outwards with a large offset spatula, allowing a small, rustic amount to gently cascade over the edges of the cake.
Chef’s Tip: The Upside-Down Advantage for a Flat Top. Flipping the top cake layer is a simple yet effective trick employed by many professional bakers. It capitalizes on the naturally flat bottom of the cake as its new top, ensuring a perfectly level surface for frosting without the need for trimming, thus saving you time and every precious cake crumb!
Step 3: Apply the Crumb Coat. With the remaining buttercream, spread a very thin, even layer over the entire cake, covering both the sides and the top. This essential “crumb coat” is designed to trap any loose crumbs from the cake, effectively preventing them from mixing into your final, pristine, and beautifully smooth layer of frosting. This step might feel a little challenging if the cake is particularly tender, so work gently. At this stage, you could serve it as a “naked cake” for a minimalist, trendy look. However, for a smoother, more refined finish, I recommend chilling the entire cake in the refrigerator for an hour or two until the crumb coat is completely set and firm to the touch.
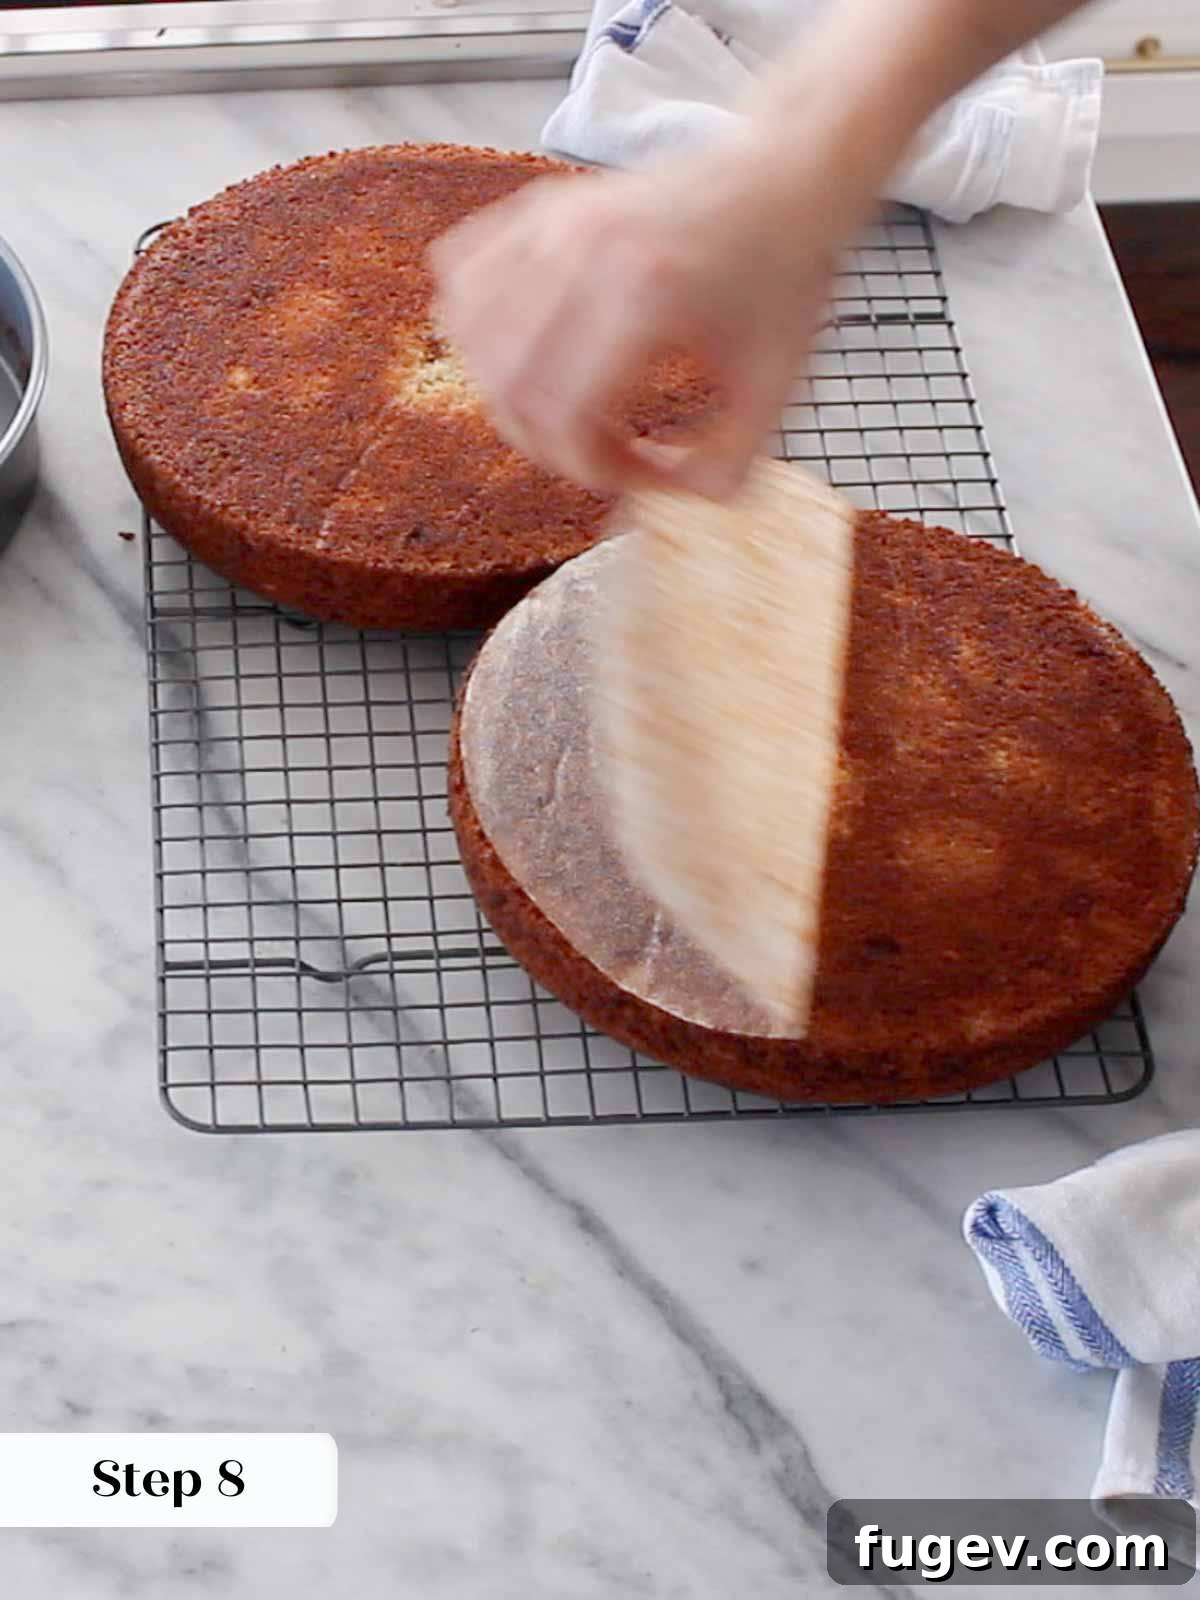
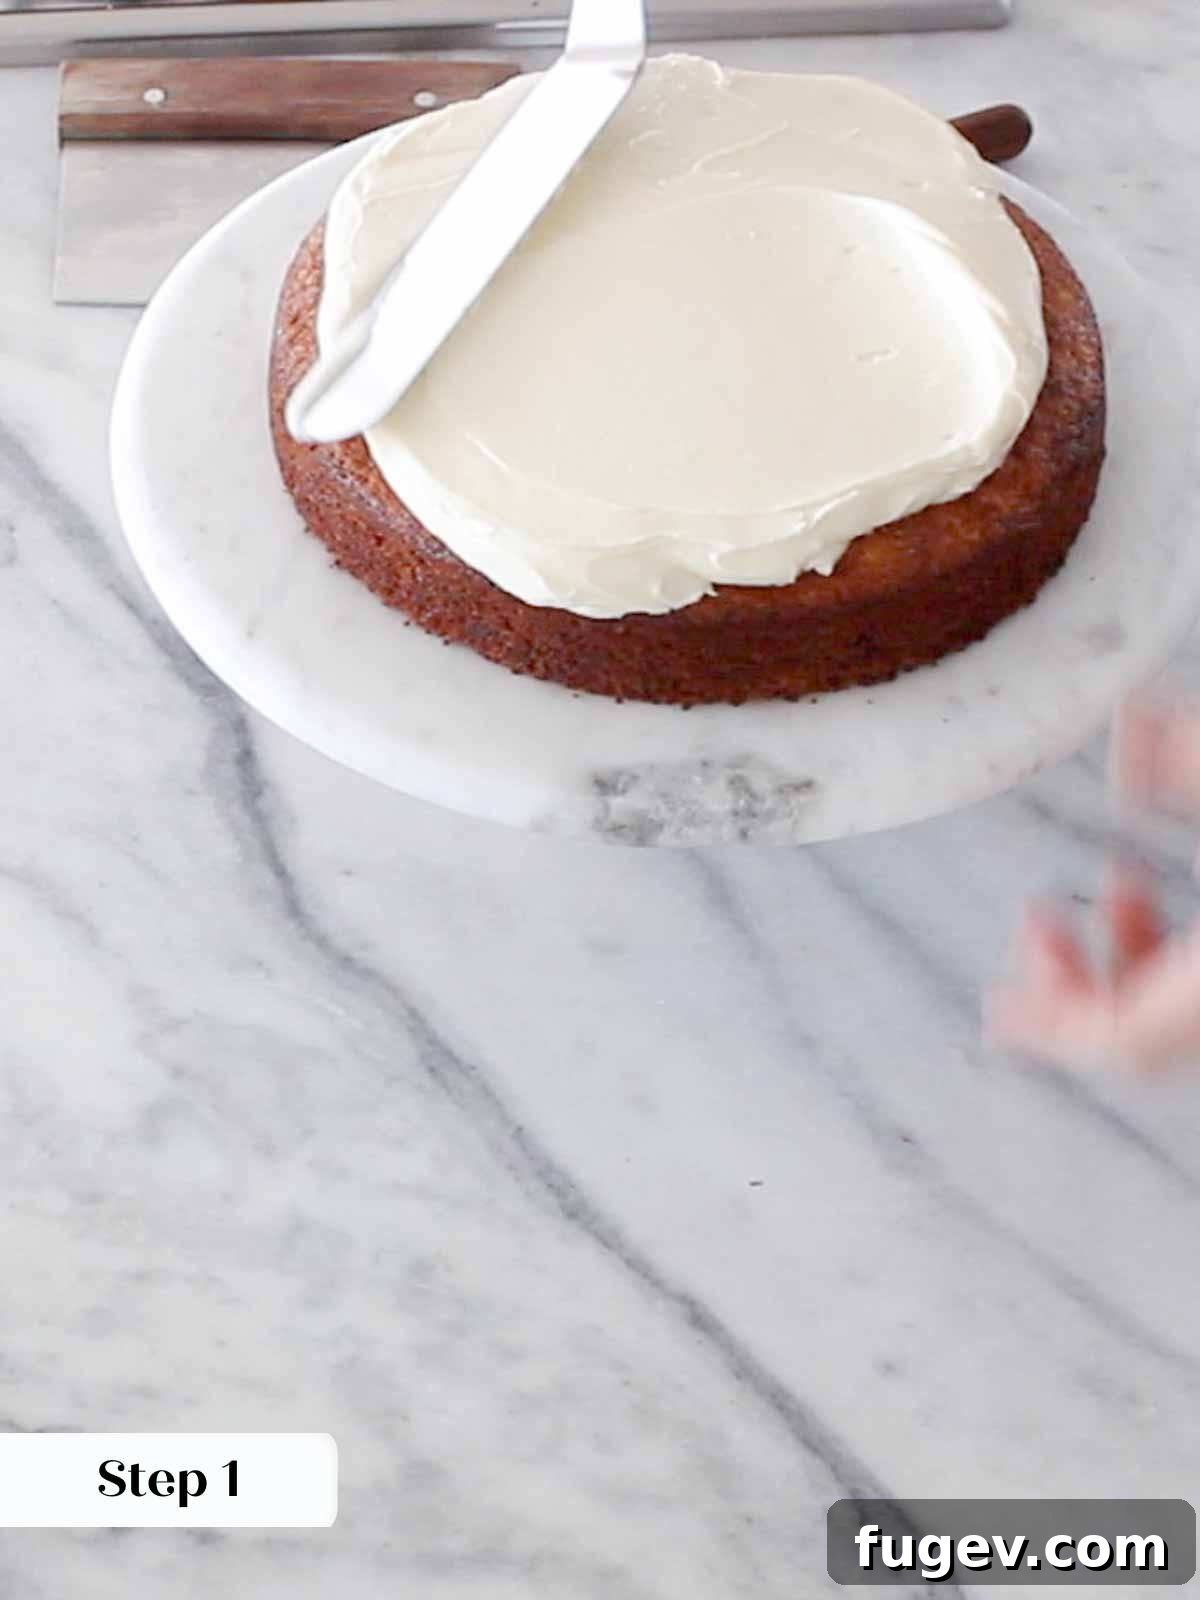
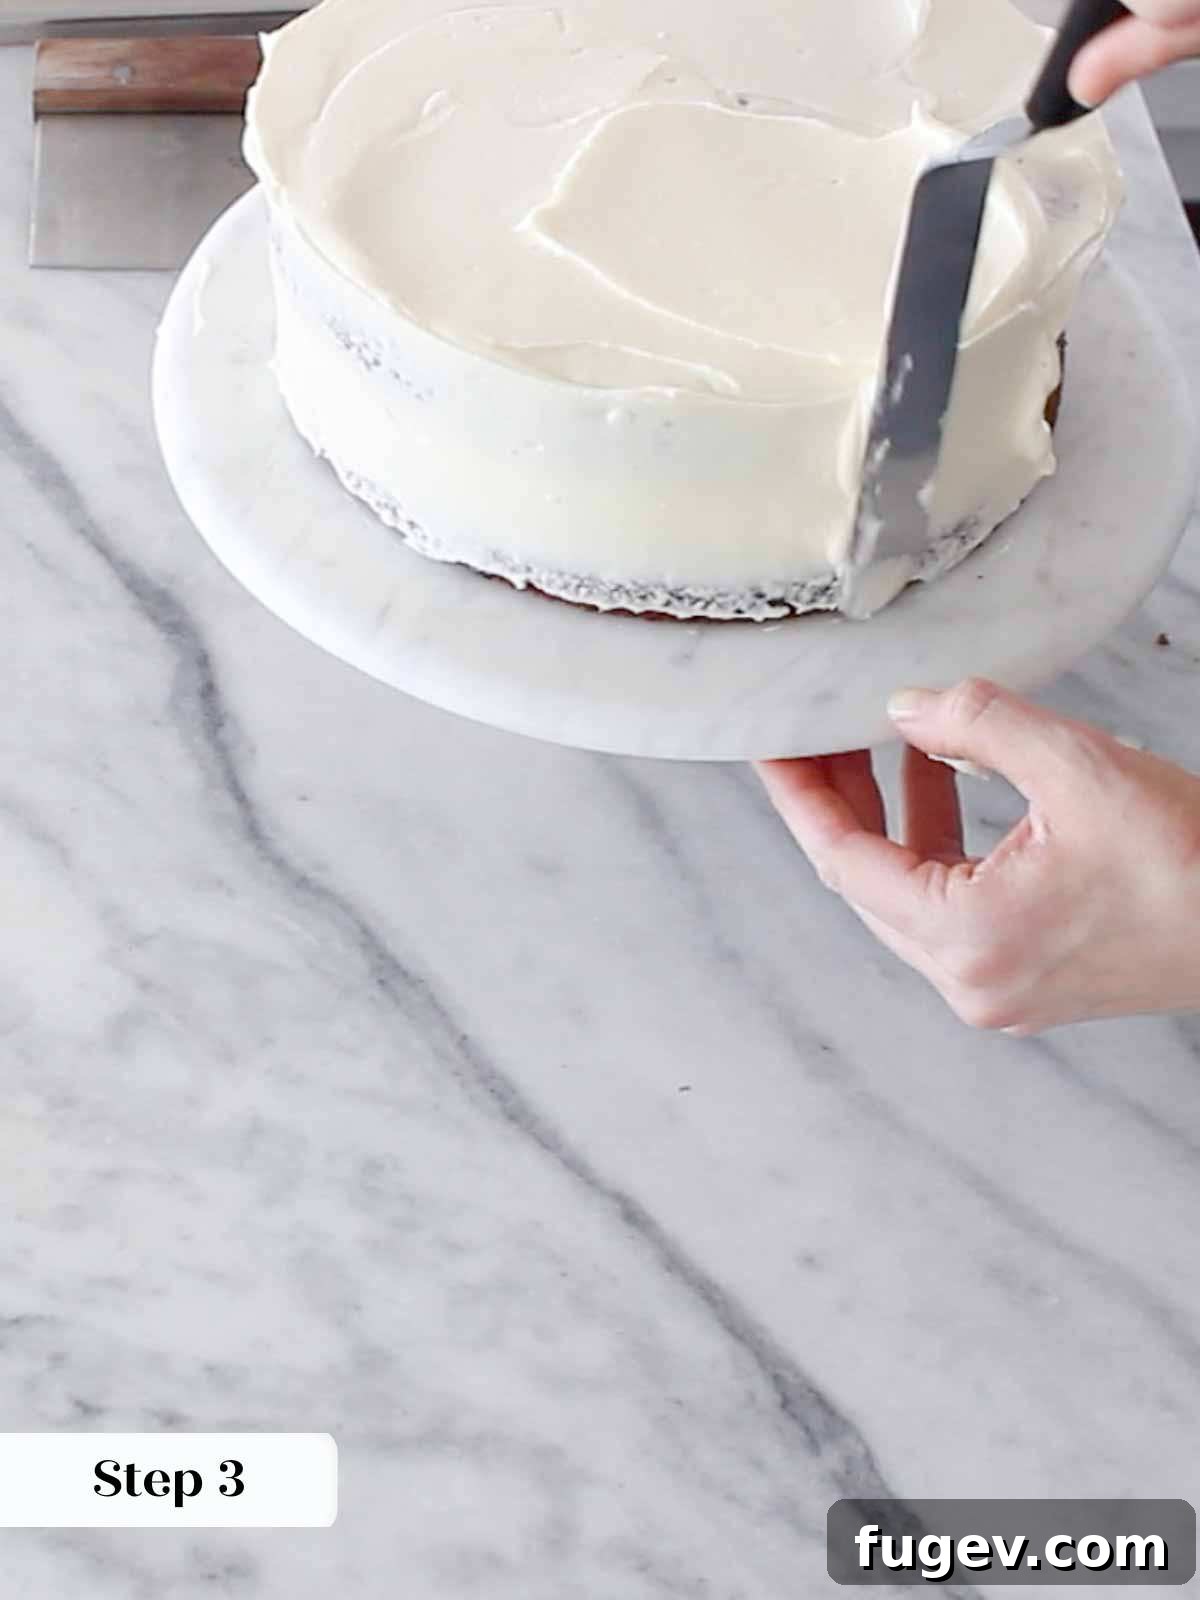
Why is a Crumb Coat So Important? This thin, preliminary layer of frosting is absolutely vital for achieving a professional and flawless finish. It effectively “locks in” all those tiny, pesky crumbs, ensuring that none of those unsightly pieces end up marring your final, decorative layer of beautiful buttercream! It’s the secret to a perfectly smooth exterior.
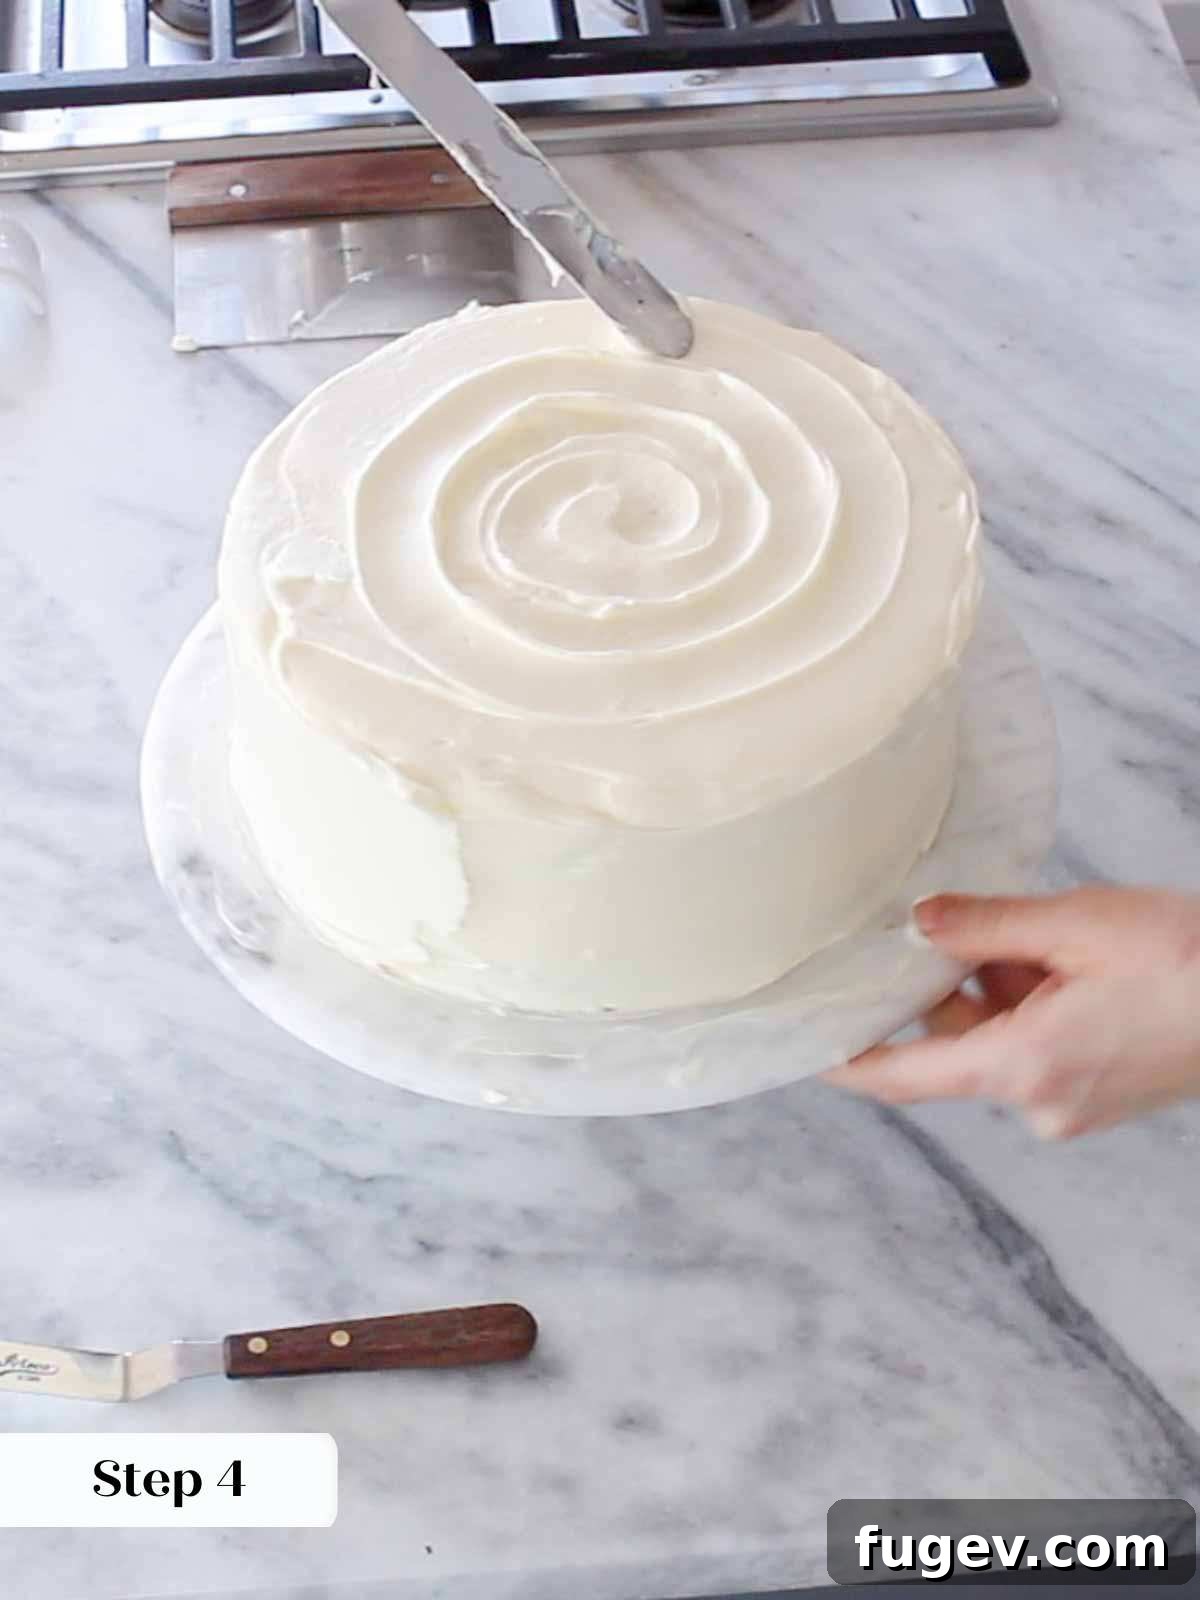
Step 4: The Final Frosting Layer for a Flawless Finish. Once your crumb-coated cake is firm from chilling, spread the remaining buttercream smoothly and evenly over the sides and top of the entire cake. For a particularly beautiful and professional finish, I like to create a subtle, elegant swirl pattern on the top using the tip of my large offset spatula while rotating the cake steadily on a turntable. Then, I use a bench scraper or a long, flat spatula to gently smooth the sides for sharp, clean edges, giving your cake a polished look.
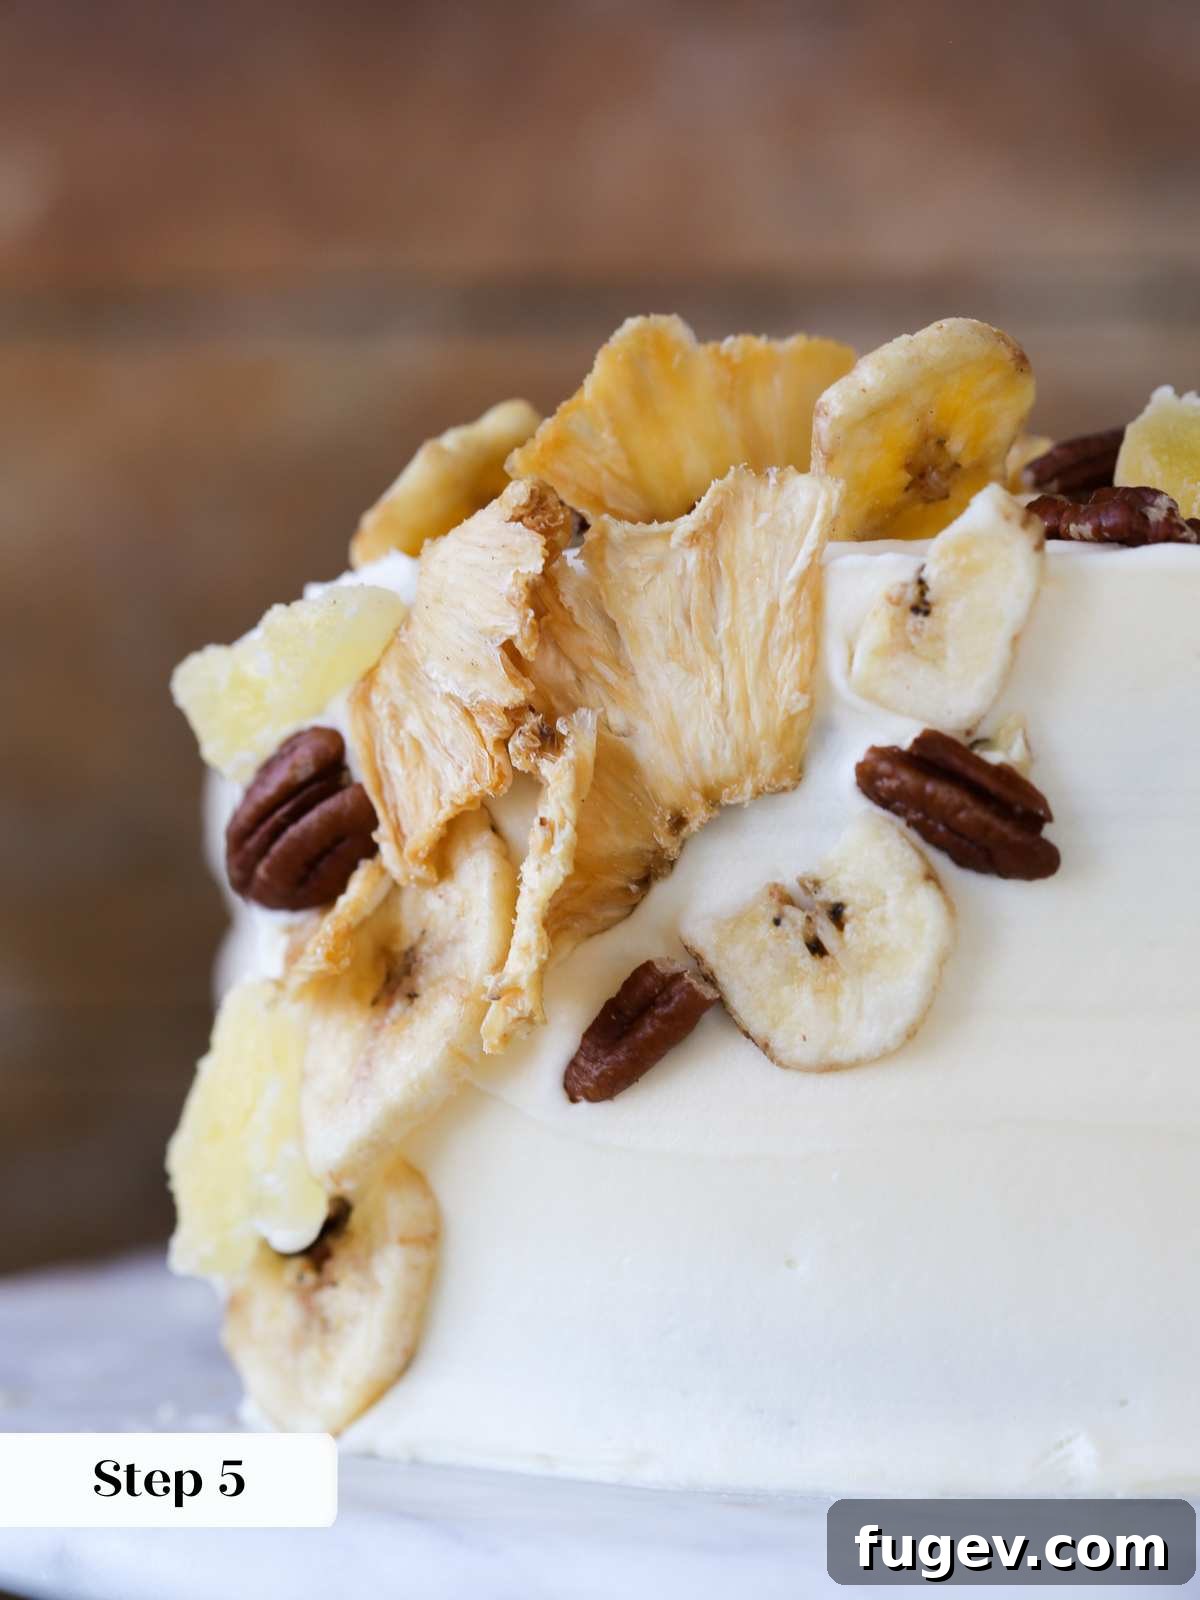
Step 5: Decorate with a Creative Mosaic Pattern. Now for the most enjoyable part – the decoration! Unleash your inner artist and arrange whole pecans, crispy banana chips, delicate pineapple chips, and colorful dried pineapple in an artistic mosaic pattern on top of your cake. This unique and thoughtful garnish not only adds incredible visual appeal but also introduces another delightful layer of texture that enhances the eating experience. You can refer to my video tutorial (link to be added in the final article) to see exactly how I created the pictured design. Alternatively, for a more traditional approach, you could simply cover the entire top of the cake with crushed pecans, or create a classic border around the edges.
Chef Lindsey’s Expert Recipe Tip for Baking
If you’re seeking a simpler presentation, or if you’re baking this glorious cake for a larger crowd, you have a fantastic alternative: you can absolutely bake the entire Hummingbird Cake batter in a single 9×13 inch rectangular baking pan. Once cooled, simply cover the top with an epic amount of our decadent cream cheese frosting. At this point, you can still spend all your creative energy crafting a massive, stunning mosaic decoration, or you can opt for a more straightforward, smooth frosting application. I must confess, I sometimes feel quite alone in my profound mosaic pastry obsession, but I heartily encourage you to unleash your inner artist and have fun with it!
Frequently Asked Questions About Hummingbird Cake
For short-term enjoyment, Hummingbird Cake can be stored in a closed container or covered cake stand at cool room temperature for up to 1 day. However, due to the delicate nature of the cream cheese buttercream, for longer storage and to ensure food safety, refrigeration is absolutely required. Store your cake, covered tightly, in the refrigerator for up to 1 week. For even longer preservation, the cake can be wrapped meticulously in plastic wrap and then foil, and frozen for up to 2 months. To thaw, simply transfer the frozen cake to the refrigerator overnight for the best texture and flavor recovery.
Hummingbird cake offers a truly delightful and complex symphony of flavors. It tastes primarily like a richly spiced banana cake, with prominent sweet and tangy hints of pineapple weaving throughout. The toasted pecans add a wonderful nutty depth and a pleasant, contrasting crunch, while a touch of vanilla rounds out the entire flavor profile. The cake is almost universally paired with a luxurious cream cheese frosting, which contributes a fantastic creaminess and a delightful, balancing tanginess that expertly prevents the cake from being overly sweet, creating a perfectly harmonious bite.
For optimal enjoyment and to truly savor all its nuanced flavors and textures, serve Hummingbird Cake at room temperature. While the cake layers themselves are undeniably delicious when slightly warm, the luscious cream cheese frosting tends to soften and melt if warmed up, compromising its structure and appeal. Therefore, always remember to remove the cake from the refrigerator at least 30-60 minutes before you plan to serve it. I particularly love to serve slices of this incredibly moist cake with a decadent drizzle of warm salted caramel sauce and a creamy scoop of classic vanilla ice cream. Alternatively, it’s also exquisitely served with a generous spoon of bright and zesty homemade lemon curd or a delicate and silky crème anglaise for an elevated and truly memorable dessert experience.
If you tried this wonderful recipe and absolutely loved it, please take a moment to leave a 🌟 star rating and share your thoughts in the comments section below. I genuinely love hearing from you and seeing your baking successes; your comments truly make my day!
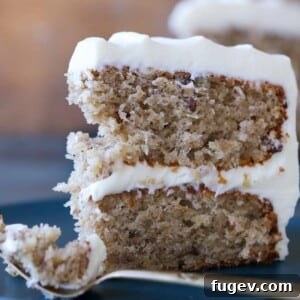
Hummingbird Cake Recipe
Chef Lindsey
This classic Hummingbird Cake is soft, moist, and tender with the perfect amount of bananas, pineapples, and pecans. This lightly spiced cake is layered with the best cream cheese buttercream for a creamy, tangy finish. An absolute Southern favorite!
25 mins
30 mins
55 mins
18 people
Comment
Print Recipe
Ingredients (US Customary)
For the Cake:
- 3 cups all-purpose flour
- 1 teaspoon cinnamon
- 1 teaspoon baking soda
- ½ teaspoon kosher salt
- 3 whole eggs
- 1 cup vegetable oil
- ½ tablespoon vanilla extract
- 2 cups granulated sugar
- 8 oz canned crushed pineapple in their own juice
- 3 large bananas ripe (brown spotted)
- ¾ cups pecans chopped and toasted
- dried fruit and extra pecans for garnish (optional)
For the Cream Cheese Buttercream:
- 21 oz cream cheese full-fat, softened
- 18 tablespoons unsalted butter softened
- 2 cups powdered sugar
- 2 tablespoons lemon juice (juice from 1 lemon)
- 1 teaspoon vanilla extract
Instructions
For the Cake:
- Spray and line two 8 or 9-inch round cake pans with parchment paper. Spray the sides of the pans. Preheat oven to 350°F (175°C).
- In a medium bowl, whisk together flour, cinnamon, baking soda, and salt; set aside.
- Blend the canned pineapple (with juice) and ripe bananas together using a hand blender or regular blender until smooth. Alternatively, mash them very well for a chunkier texture.
- In the bowl of a stand mixer fitted with the whisk attachment (or using a hand mixer in a large bowl), whisk the eggs until well beaten and slightly frothy.
- Slowly whisk in the vegetable oil and vanilla extract until the mixture is fully emulsified and smooth.
- Whisk in the granulated sugar, followed by the pineapple-banana mixture, until well combined.
- Gently fold in the flour mixture until just combined, being careful not to overmix. Then, gently fold in the toasted, chopped pecans.
- Divide the batter evenly between the two prepared pans. Bake for approximately 25-30 minutes, or until a cake tester inserted into the center comes out with only a few moist crumbs.
- Cool cakes in their pans for 10 minutes on a wire rack, then invert them onto the rack to cool completely upside down.
For the Cream Cheese Buttercream:
- In the bowl of a stand mixer fitted with the paddle attachment (or a large bowl with a hand mixer), cream together the softened full-fat cream cheese, softened unsalted butter, and powdered sugar until smooth, light, and fluffy, scraping down the bowl as needed.
- Add the lemon juice and vanilla extract. Beat until well combined and silky smooth. If the frosting becomes too soft, chill the bowl and attachment in the refrigerator for 30-60 minutes, then re-beat until it reaches a smooth, workable consistency.
To Assemble the Cake:
- Place the first cooled cake layer on your chosen serving platter. Spread about 1 cup of frosting evenly over the top with an offset spatula.
- Place the second cake layer on top (preferably upside down for a flat surface). Spread half of the remaining buttercream over the top, allowing some to softly drape over the sides.
- Apply a thin “crumb coat” of buttercream over the entire cake (sides and top) to trap any loose crumbs. Chill the cake in the refrigerator for 1-2 hours until the crumb coat is firm.
- Spread the remaining buttercream evenly over the sides and top of the chilled cake. Smooth the sides with a bench scraper and swirl the top decoratively with an offset spatula.
- Decorate the top with whole pecans, banana chips, pineapple chips, and dried pineapple in a pleasing mosaic pattern, or garnish as desired.
Video Tutorial
Notes
Yield: This recipe yields 1, 2-layer 9-inch cake. You can also bake 3, 8-inch layers, but be aware they will be thinner, and the bake time will need to be slightly reduced.
Presentation: For a truly stunning visual, decorate your Hummingbird Cake in a creative mosaic pattern using toasted pecans, banana chips, pineapple pieces, and dried pineapple slices.
Variations: To enhance moisture and add an extra layer of flavor, consider soaking your cooled cake layers with a flavored simple syrup (e.g., rum, lemon, or plain). You can also add up to 2 tablespoons of your favorite alcohol (like rum or bourbon) to the cream cheese buttercream for an extra kick.
Storage: Store the cake at cool room temperature for up to 1 day. For longer freshness, refrigerate the cake in an airtight container for up to 7 days. For extended storage, wrap the cake tightly in plastic wrap and then foil, and freeze for up to 2 months. Always thaw frozen cake overnight in the refrigerator before serving for best results.
This delightful recipe was originally adapted from a classic published in Southern Living magazine.
Nutrition Information (per serving)
Calories: 333kcal | Carbohydrates: 45g | Protein: 4g | Fat: 16g | Saturated Fat: 2g | Polyunsaturated Fat: 8g | Monounsaturated Fat: 5g | Trans Fat: 1g | Cholesterol: 27mg | Sodium: 137mg | Potassium: 135mg | Fiber: 2g | Sugar: 26g | Vitamin A: 62IU | Vitamin C: 8mg | Calcium: 14mg | Iron: 1mg
Dessert, Cake
Southern, American, Jamaican
333
Enjoy this delightful Hummingbird Cake, a true taste of the South with a tropical, irresistible twist!
Before You Go: Explore More Delicious Cake Recipes
If you’ve thoroughly enjoyed baking and savoring this classic Hummingbird Cake, we warmly invite you to explore more of our deliciously crafted cake recipes. Expand your baking repertoire and discover new favorites with our incredibly moist and flavorful Orange Upside Down Cake, the intensely rich and deeply satisfying Devil’s Food Cake, or our comforting and perfectly balanced Classic Yellow Cake recipe, a true staple for any occasion. For your next delightful baking project, why not try these charming and perfectly portioned Carrot Cake Cupcakes with Cream Cheese Frosting? Each recipe is meticulously crafted to bring immense joy to your kitchen and absolute delight to your taste buds!