
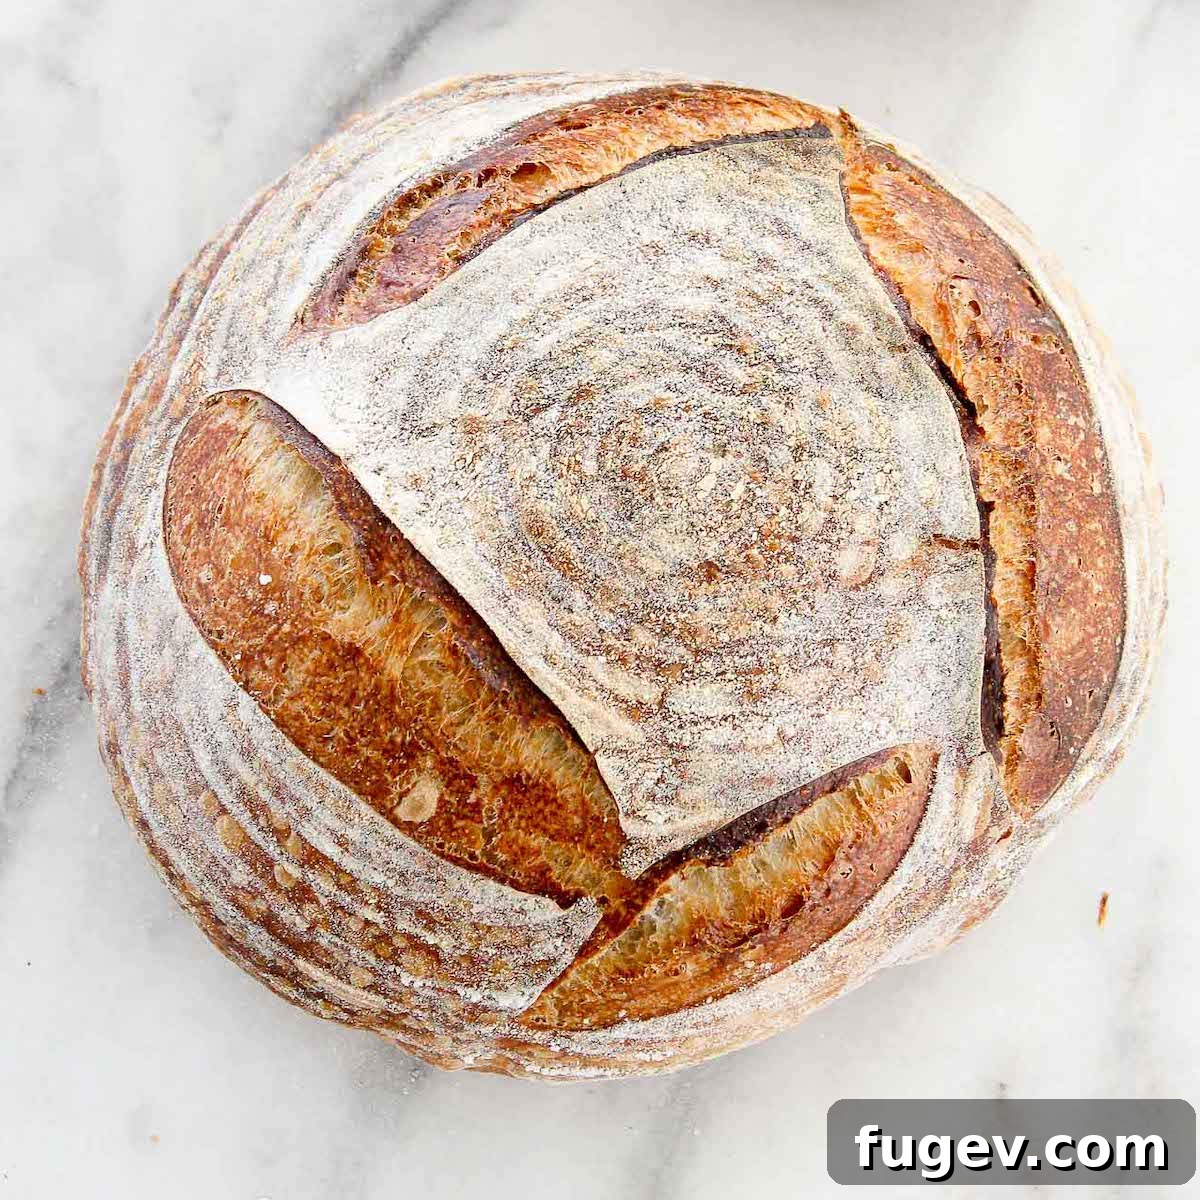
Effortless Sourdough: Your Go-To Beginner Sourdough Bread Recipe for a Perfect Loaf
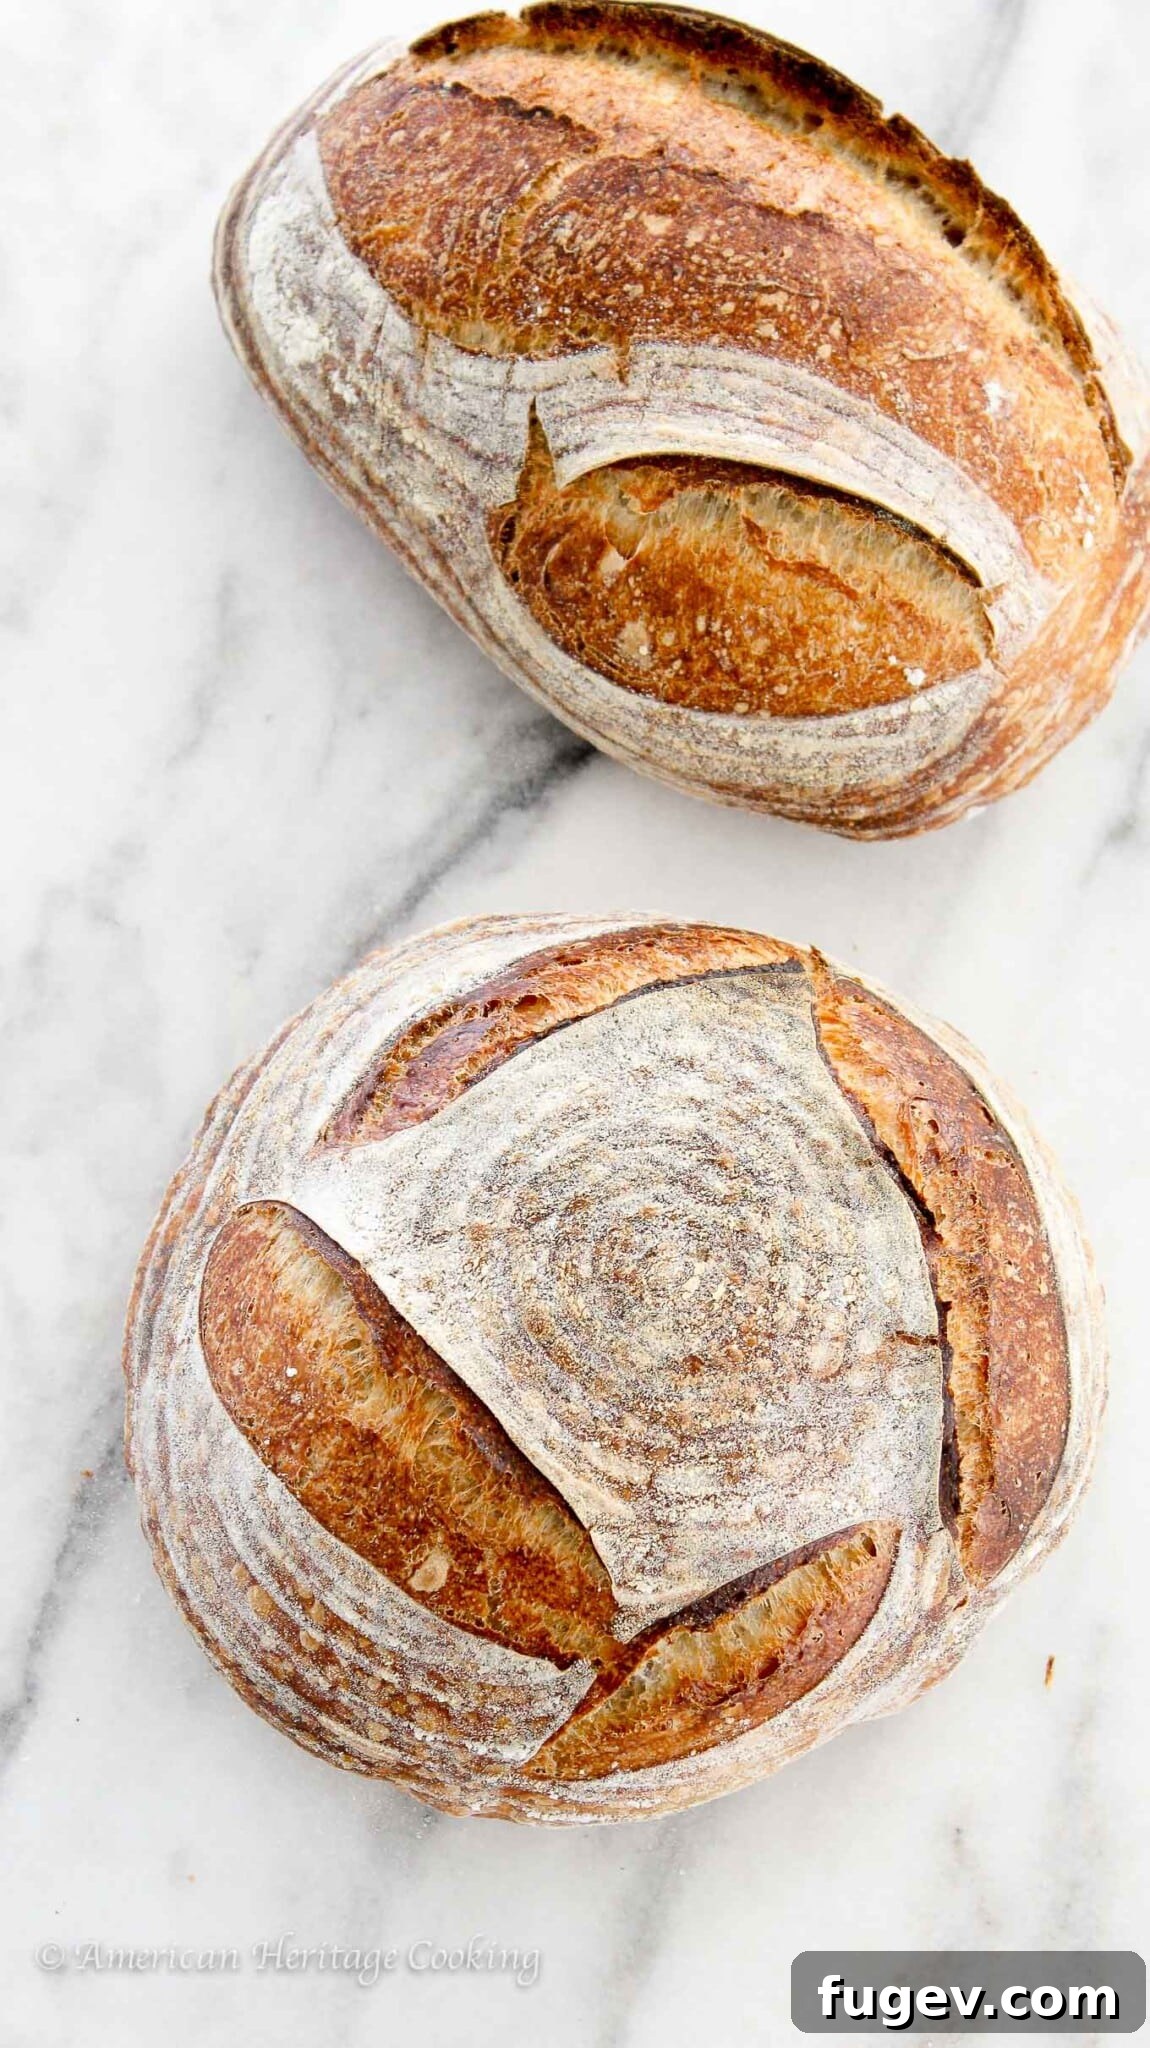
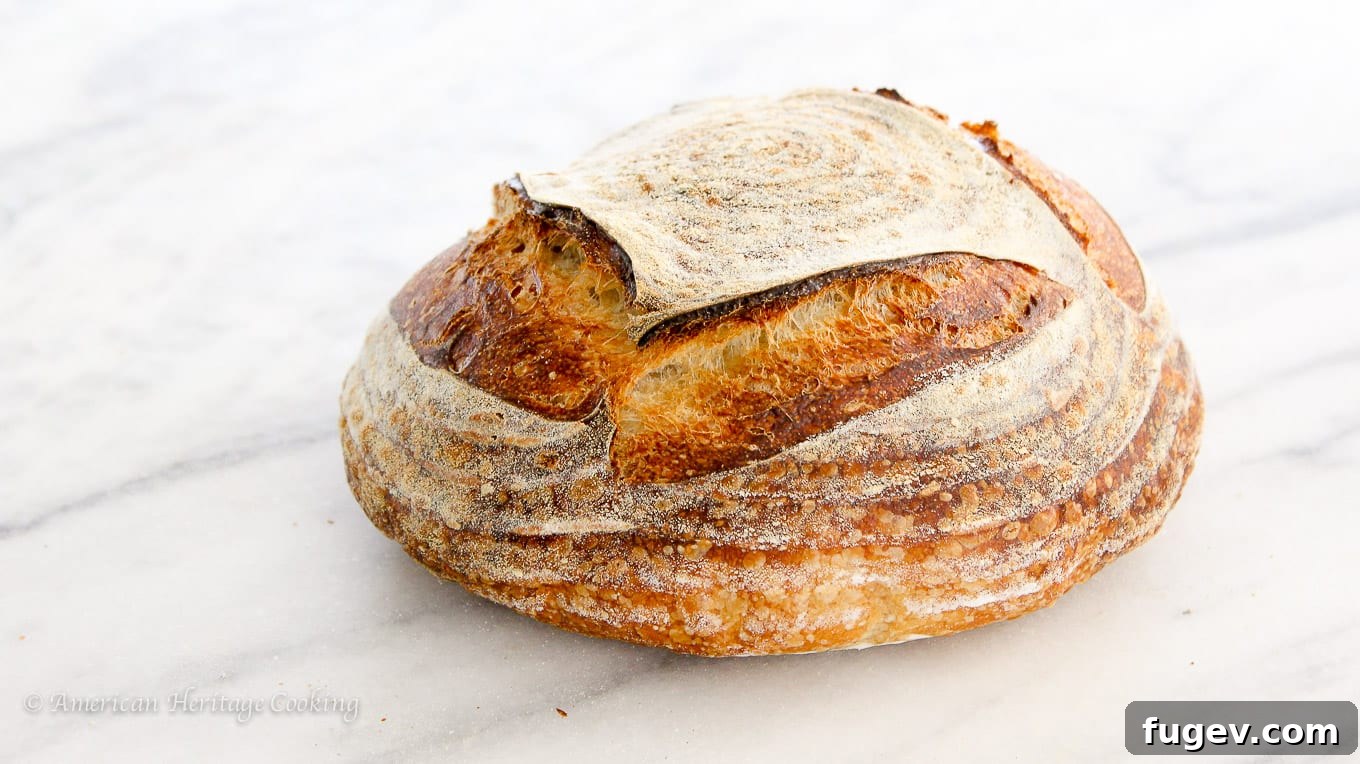
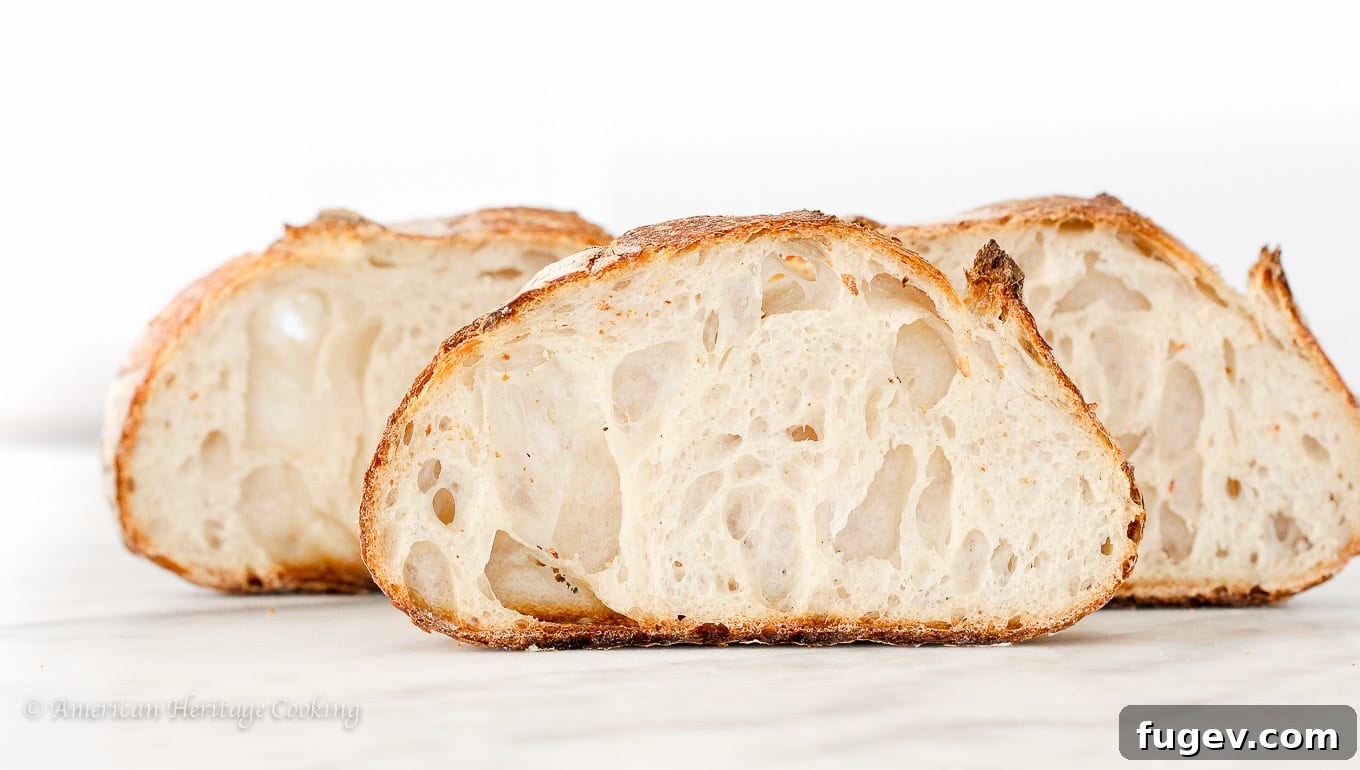
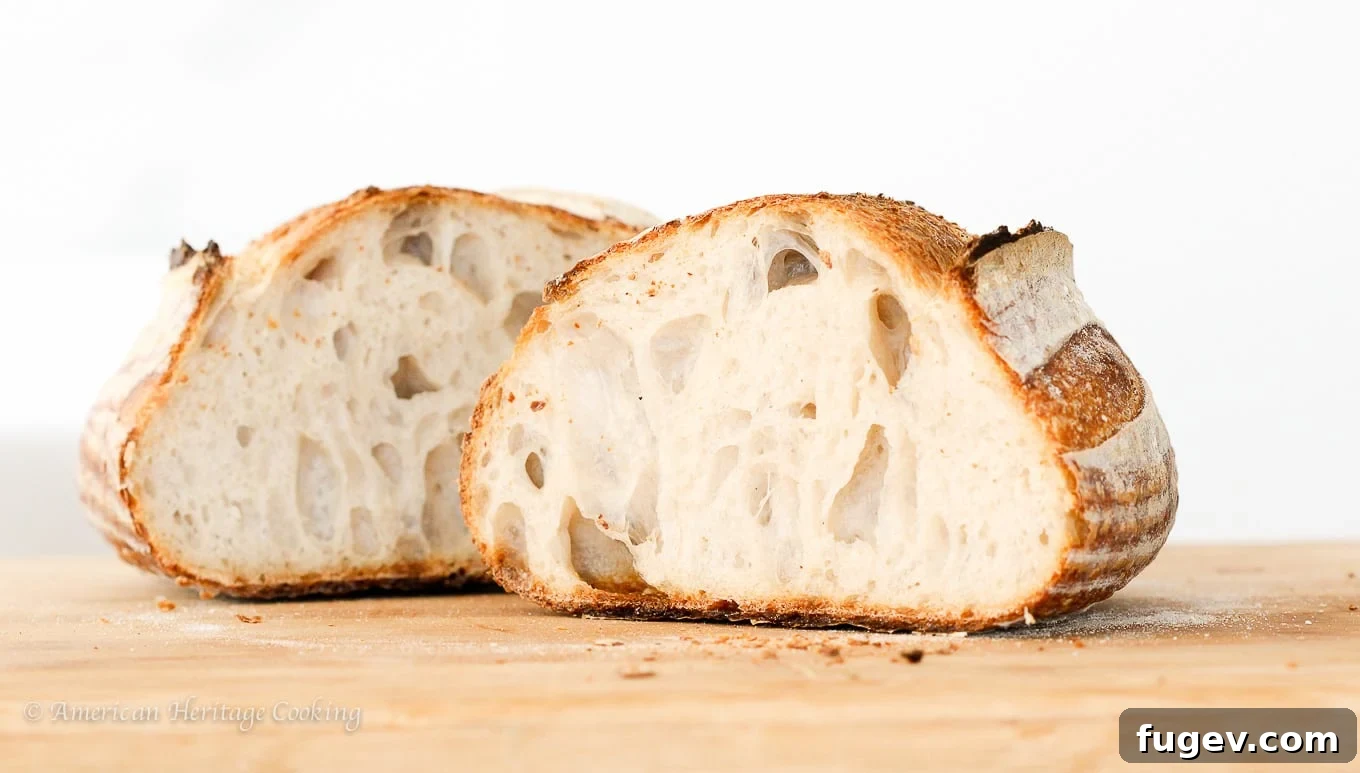
Embark on your sourdough journey with this incredibly simple and easy sourdough bread recipe. Designed specifically for beginners, this recipe proves that making exceptional, homemade sourdough doesn’t have to be complicated. With just 5 fundamental ingredients, you can achieve a loaf boasting a wonderfully crisp, golden crust and a pillowy soft, open crumb that’s truly anything but basic. Prepare to fall in love with the comforting aroma and incomparable taste of freshly baked sourdough.
A Quick Glance at Your Sourdough Journey
This section provides a summary of our easy sourdough bread recipe. For complete instructions and details, jump straight to the full recipe card.
Jump to Recipe
Prep Time
20 minutes
Cook Time
45 minutes
Proofing Time
Approx. 3 hours (plus optional overnight cold proof)
Total Time
Approx. 4 hours 5 minutes (active time)
Servings
12 slices (1 standard loaf)
Difficulty
Beginner-friendly with clear, flexible steps.
Calories *
139 kcal per serving
Technique
Levain build, gentle dough mixing & folding, shaping, Dutch oven bake.
Flavor Profile
Delightfully crisp crust, wonderfully chewy interior, and a subtle, balanced sourdough tang.
* Based on estimated nutrition panel
Have you tried this recipe? We’d love to hear from you!
First time I have ever made sour dough bread and it came out perfect very good instructions. And tasty too!! ⭐⭐⭐⭐⭐
Bob
Why This Easy Sourdough Bread Recipe Will Become Your Favorite
Baking sourdough can seem daunting, but this recipe strips away the complexities, offering a straightforward path to an artisanal loaf. Here’s why you’ll adore this **beginner sourdough** method:
- Achieve Exceptional Bread with Minimal Ingredients: Experience the magic of creating a light, airy loaf with a gloriously crisp crust and tender interior using only five core ingredients. This minimalist approach allows the natural flavors of the flour and sourdough starter to truly shine, making it ideal for sandwiches, toast, or simply enjoying with butter.
- Your Perfect Gateway to Sourdough Baking: Consider this your ultimate guide for an easy sourdough loaf. We provide clear, step-by-step instructions, complemented by a full video tutorial, ensuring you feel confident and supported throughout your entire sourdough journey. It’s the perfect foundation for developing your baking skills.
- Stress-Free Baking Without Constant Temperature Checks: While precise temperature control can lead to incredibly consistent results, we believe sourdough should be accessible to everyone. This recipe focuses on intuitive baking, emphasizing observation and flexible timing over rigid temperature monitoring. Learn to “read” your dough, allowing you to produce beautiful sourdough bread at home, regardless of your kitchen’s ambient temperature.
- A Truly Rewarding Culinary Experience: There’s immense satisfaction in pulling a warm, fragrant loaf of sourdough from your oven. This recipe delivers that reward consistently, building your confidence with each successful bake.
Table of Contents
- Why You Will Love This Recipe
- The Magic of Sourdough Baking
- Ingredients & Substitutions for the Perfect Loaf
- Exciting Variations for Your Easy Sourdough Bread
- Professional Sourdough Baking Tips for Success
- How to Make This Easy Sourdough Bread Recipe: Step-by-Step Guide
- Chef Lindsey’s Recipe Tip
- Sample Baker’s Schedule: Planning Your Sourdough
- Recipe FAQs: Your Sourdough Questions Answered
- Explore More Sourdough Recipes
- Easy Sourdough Bread Recipe (Full Card)
- Before You Go: Continue Your Sourdough Journey
The Magic of Sourdough Baking: A Labor of Love Rewarded
The journey of baking sourdough truly is a labor of love. From cultivating your vibrant sourdough starter to the patient process of fermentation, each step contributes to the incredible depth of flavor and unique texture that makes sourdough so cherished. While the entire process may begin a day or two before you finally slice into your masterpiece, the anticipation only heightens the reward.
Imagine that moment: slicing through the wonderfully crisp crust, hearing that satisfying crackle, and then inhaling the comforting, slightly tangy aroma emanating from its beautifully aerated, pillowy-soft center. It’s a sensory experience that makes every minute of waiting utterly worthwhile.
Once you’ve mastered this easy sourdough bread recipe and have your perfectly baked, naturally leavened loaf in hand, a world of culinary possibilities opens up. Enjoy it simply with butter, toast it for breakfast, or use it to elevate other dishes. Think of using slices to craft a hearty apple sausage stuffing, serving alongside a rich Dutch oven pot roast, or getting creative with sourdough discard for fun recipes like sourdough pizza dough or fluffy sourdough pancakes. The versatility of homemade sourdough is truly endless!
Ingredients & Substitutions for the Perfect Loaf
This beginner-friendly sourdough recipe relies on a few key ingredients to create its signature flavor and texture. Understanding each component will help you achieve the best results every time.
- All-Purpose Flour: Our go-to flour for both feeding your starter and crafting this beautiful loaf. All-purpose flour provides a balanced gluten structure, making it forgiving for beginners. For a chewier texture and faster gluten development, you can substitute bread flour due to its higher protein content.
- Water: Standard tap water works perfectly for this recipe, though filtered water can be used if you prefer or if your local tap water is particularly hard. Using warm water (around 80-90°F / 27-32°C) is beneficial as it helps to activate the yeast in your starter, promoting faster gluten development and a more robust rise in less time.
- Rye Flour: A small addition of rye flour contributes a delightful, subtle nutty flavor and a darker hue to your sourdough bread. While it doesn’t significantly contribute to the gluten structure, it enhances the overall complexity. We recommend not increasing the amount of rye flour without also incorporating bread flour to maintain adequate gluten development. For a simpler loaf, you can easily omit rye flour and substitute it 1:1 with all-purpose flour.
- Kosher Salt: Essential for flavor balance and controlling the fermentation rate. Always use a good quality kosher salt; the larger crystals dissolve more slowly, allowing for even distribution.
- Liquid Levain: The heart and soul of your sourdough! You’ll need an active sourdough starter that reliably doubles in volume within 12-14 hours (this timing can vary slightly based on your room temperature). If you’re new to sourdough, begin by creating your own with our comprehensive sourdough starter recipe. If your existing starter needs a boost, consult our guide on how to feed sourdough starter, which covers everything from feeding schedules to troubleshooting common issues.
- Rice Flour: Used primarily for dusting your proofing basket (banneton) to prevent the sticky dough from adhering during its final rise. This ensures a clean release and helps create beautiful patterns on your crust. It’s also excellent for lightly dusting the bottom of your shaped loaf before baking on parchment. Cornmeal can be used as an alternative.
Refer to the detailed recipe card below for precise ingredient quantities and measurements.
Exciting Variations for Your Easy Sourdough Bread
Once you’ve mastered the basic loaf, unleash your creativity! This versatile sourdough recipe serves as an excellent canvas for a myriad of flavor additions and shape modifications. Here are a few ideas to get you started:
- Infuse with Aromatic Herbs: Elevate your loaf by incorporating fresh or dried herbs. After the initial gluten development stage (during your folds), gently mix in finely chopped rosemary, thyme, oregano, or a blend of your favorites. For an international twist, consider adding Italian seasoning or a vibrant Cajun spice mix. The warmth of baking will release their incredible aromas and flavors.
- Mix in Delicious Flavors and Textures: Transform your plain sourdough into a specialty loaf! During the folding process or while the dough is in the mixer, you can fold in a variety of complementary ingredients. Try briny olives, crunchy toasted walnuts or pecans, spicy chopped jalapeños paired with sharp cheddar cheese (a personal favorite!), or even sweet dried fruits. For inspiration, explore our cherry pecan sourdough bread or this comforting cinnamon raisin sourdough bread.
- Experiment with Different Shapes: This recipe is adaptable to various shapes, allowing you to customize your bake to suit any occasion. Whether you desire classic dinner rolls, elegant tiny bâtards (short, oval loaves), a traditional sandwich loaf, or a majestic large boule (round), the shaping possibilities are endless. For specific guidance on creating rolls, follow the detailed shaping instructions in our rosemary sourdough rolls recipe.
Professional Sourdough Baking Tips for Success
Achieving a truly outstanding sourdough loaf goes beyond just following the steps; it involves understanding the subtle nuances of the baking process. These professional tips will help you consistently produce beautiful bread with the perfect crust and crumb.
- Always Preheat Your Dutch Oven Thoroughly: This step is non-negotiable for superior oven spring and the most desirable open crumb and crispy crust. Baking in a preheated Dutch oven or a Challenger bread pan ensures that the dough experiences an immediate burst of intense heat. A cold Dutch oven, on the other hand, will take too long to heat up, effectively “stealing” critical heat from your rising dough. This leads to a slower, less vigorous rise and can cause the crust to set prematurely, preventing your loaf from reaching its full volumetric potential.
- Master the Art of Steam Control: Steam is a crucial, yet often underestimated, element in sourdough baking.
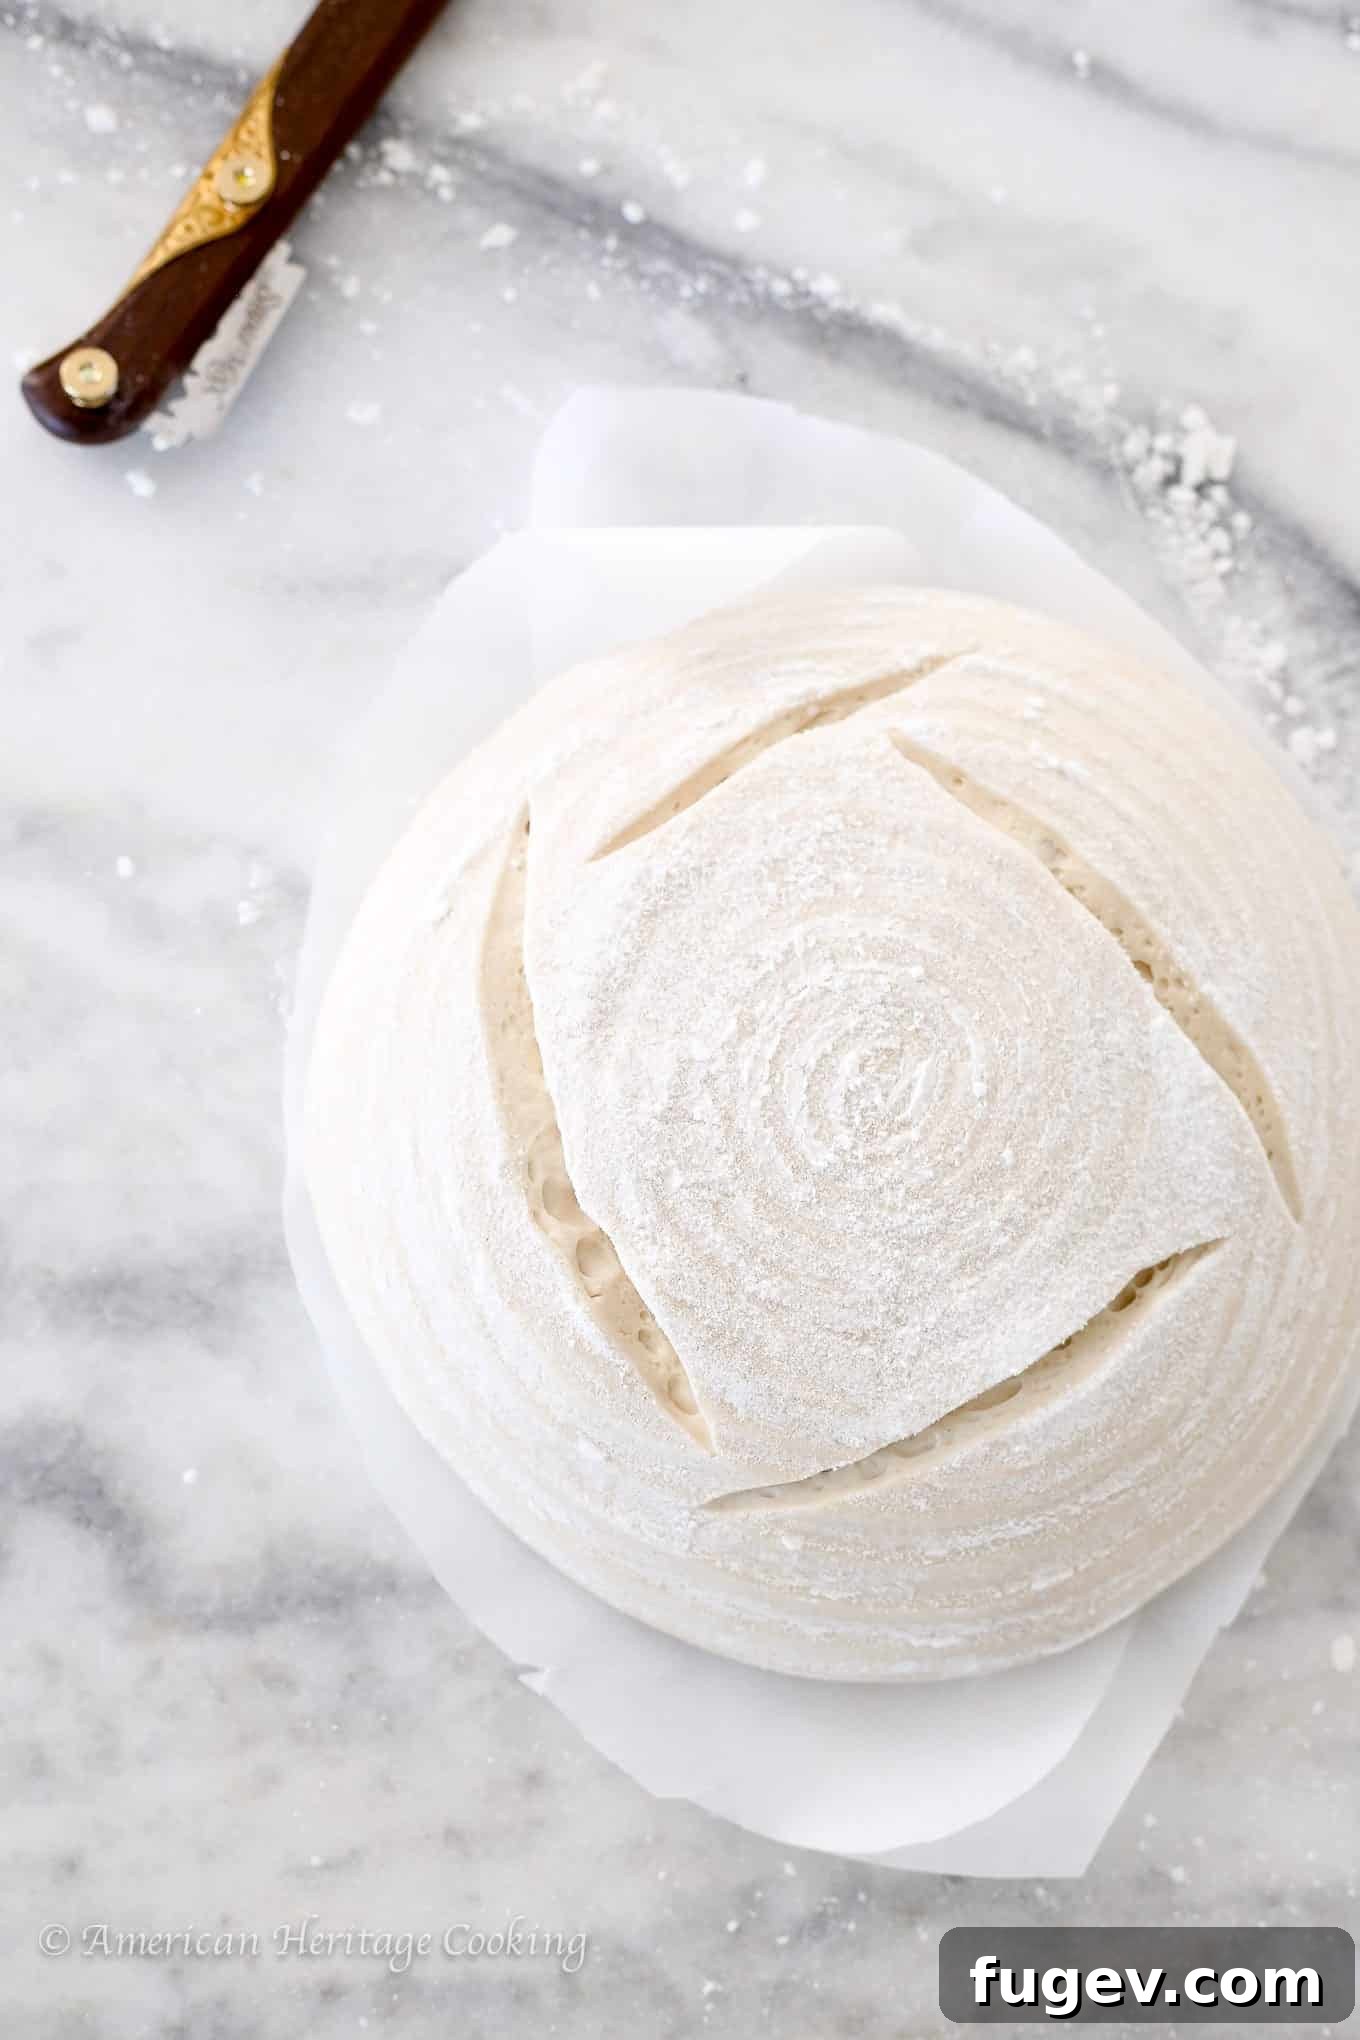
- Scoring for Directed Steam Release: The first aspect of steam control involves how it escapes from your bread. By precisely scoring the dough with a lame, razor blade, or sharp knife, you dictate where the steam will exit. Strategic cuts allow for maximum expansion and “oven spring,” creating those desirable large holes (alveoli) in the crumb. Your score should be deep enough to allow for significant expansion but not so deep as to compromise the dough’s structure.
- Creating Steam in the Oven: During the initial half of the baking process, steam is vital for keeping the crust pliable and soft. This allows the dough to expand as much as possible before the yeast becomes inactive due to heat. If the crust forms too quickly (in a dry oven), it will restrict the loaf’s expansion, resulting in a denser crumb and a less impressive rise. The Dutch oven effectively traps steam released by the dough itself, creating the perfect steamy environment.
- Never Skip the Preshape (and Bench Rest)! A well-structured, open crumb is highly dependent on the dough maintaining its intended shape throughout proofing and baking. The preshape is a critical step where you begin to organize the gluten strands, building tension that will later help trap gases produced by fermentation. Think of the preshape as gently guiding the dough towards its final form, allowing the gluten to “learn” its desired structure. Following the preshape with a short bench rest allows the gluten to relax, making the final shaping process much easier and preventing tearing or overworking the delicate gluten network.
- Invest in and Use a Kitchen Scale: Baking, especially sourdough, is a precise science where exact ratios matter. Flour, water, salt, and active sourdough starter must be balanced accurately for consistent results. Even a slight variation, such as an extra tablespoon of flour or water, can significantly alter the dough’s hydration and the final outcome of your loaf. For optimal precision and consistency, always measure your ingredients by weight using a reliable kitchen scale – this applies equally to feeding your starter!
How to Make This Easy Sourdough Bread Recipe: Step-by-Step Guide
Follow these detailed instructions to bake a perfect easy sourdough loaf every single time. Precise measurements and ingredient quantities are available in the comprehensive recipe card below.
Mix the Liquid Levain:
Step 1: Build Your Levain. Approximately 12 to 14 hours before you plan to mix your main dough, it’s time to build your levain. In a clean, medium-sized container, combine the specified amounts of flour, water, and a small portion of your active sourdough starter. Use a small spatula or fork to mix thoroughly until all the flour is fully hydrated and there are no dry spots. For convenience and to ensure you have enough, many bakers find it easier to double the levain build, leaving enough for your bread and to refresh your main starter. For a more in-depth visual guide, watch our tutorial on building a liquid levain.
Sourdough Starter Tip: If your sourdough starter has been stored in the refrigerator, remember to revive it! Take it out at least two days before you intend to bake. Let it sit at room temperature for about 12 hours before its first feeding. Then, feed it consistently (e.g., nightly) until it shows robust activity, consistently doubling in size, before you use it for this recipe. An active, vigorous starter is key to a successful loaf!
Make the Final Dough:
Step 2: Initial Mix (Autolyse Prep). In the bowl of a stand mixer fitted with a paddle attachment, combine all the ingredients for your final dough (flours, water, salt, and prepared liquid levain). Mix on low speed until all the flour is completely incorporated and no dry pockets remain. The dough will look shaggy and unrefined at this stage.
Step 3: Autolyse. Once the flour is fully integrated, cover the bowl and let the dough rest for 15 minutes. This resting period, known as autolyse, allows the flour to fully hydrate and enzymes to begin breaking down starches, which kick-starts gluten development even before kneading, making the dough easier to work with.
Step 4: Develop Gluten. Switch the paddle attachment to a dough hook. Increase the mixer speed to medium and continue mixing to develop the gluten. For a high-hydration dough like this, it’s typical for it not to form a perfectly smooth ball around the hook; it will remain quite wet. Mix until you observe strands of gluten forming on the surface and the dough starts to pull away from the sides of the bowl. This indicates sufficient gluten development.
Mixer Tip: Don’t be discouraged if your dough doesn’t form a neat ball in a home stand mixer, especially with a wetter dough. Focus on the visual cues: the dough should look more cohesive, and you’ll see gluten strands (like elastic threads) when you gently stretch a piece. The goal is elasticity, not necessarily a perfectly dry, firm ball.
Proofing and Folds (Bulk Fermentation):
Step 5: First Rest. Gently scoop the mixed dough into a large bowl that has been lightly oiled to prevent sticking. Cover the bowl tightly with plastic wrap or a clean kitchen towel. Place it in a warm spot, ideally around 75-80°F (24-27°C), for an initial 30-minute rest. Many ovens have a “proof” setting that works wonderfully for this.
Step 6: First Set of Folds. After 30 minutes, perform your first set of “stretch and folds.” With lightly oiled or wet hands, grab a section of the dough from one side, pull it upwards gently, and fold it over towards the center, allowing it to gently “smack” down on the remaining dough. Rotate the bowl a quarter turn and repeat this process on all four sides. This action further develops the gluten and builds strength. Re-cover the bowl and let the dough rest for another 15 minutes.
Step 7: Final Set of Folds (and assessment). Repeat the stretch and fold process as described in Step 6. By this second set of folds, your dough should feel noticeably stronger, more elastic, and hold together quite well, staying in a more compact ball in the center of the bowl. If, after these folds, the dough immediately relaxes and spreads out to the sides of the bowl, it indicates insufficient gluten development. Don’t worry! Simply let it rest for another 15 minutes and perform a third set of folds. The goal is to build just enough gluten structure to contain the gases produced by the yeast, resulting in a tender, open crumb.
Dough Strength: The process of folding is crucial. It’s like a gentle kneading that strengthens the gluten network without aggressively tearing it. A strong gluten structure is essential for trapping the carbon dioxide released by the yeast, which creates those beautiful air pockets in your sourdough. Don’t rush this part; patience is key to developing a resilient dough.
Step 8: Bulk Ferment. After the folds, cover the dough again and return it to your warm spot for the bulk fermentation (also known as the first rise). This stage typically takes about 2.5 hours, but the exact time can vary depending on your room temperature and starter activity. Check the dough every 45 minutes by lightly oiling or flouring your hand and gently feeling it. It should feel significantly lighter, airier, and slightly expanded, not dense or stiff. It should have increased in volume by about 30-50%.
Shaping:
Step 9: Pre-Shape & Bench Rest. Lightly dust the top of the dough in the bowl with a sprinkle of flour. Gently turn the dough out onto a lightly floured work surface. Carefully stretch each of the four sides of the dough outwards, then fold them inwards towards the center, creating a small packet or square. Flip the dough over so the seam is now on the counter. Using both hands, gently cup the dough and pull it towards you, rotating it slightly to create a tight, round ball with a smooth surface. This builds tension. Let this pre-shaped dough rest on the counter, uncovered, for 15 minutes – this is the “bench rest,” allowing the gluten to relax before the final shaping.
Step 10: Final Shape & Proof. Repeat the same shaping process as with the pre-shape, aiming for an even tighter, more robust round ball. This final shaping locks in the tension and prepares the dough for its final rise. Once shaped, you have two options for proofing:
- For baking the same day: Carefully place the dough, seam-side up, into a proofing basket (banneton) that has been generously dusted with rice flour (or into an oiled bowl lined with parchment paper). Cover it with plastic wrap and return it to your warm spot for another 2.5 to 3 hours, or until it feels light, airy, and appears to have nearly doubled in volume. If proofing on parchment, judging the volume can be tricky as the parchment doesn’t restrict the shape. Proceed directly to the baking steps below.
- For baking the next day (Cold Proof): Place the covered proofing basket (or parchment-lined bowl) into the refrigerator for an overnight cold proof. This process, known as retarding, significantly slows down yeast activity, allowing for a deeper flavor development and more flexibility in your baking schedule. You can bake your loaf 12-18 hours later, directly from the fridge.
Understanding the Cold Proof: Cold proofing is a fantastic technique for developing complex flavors and achieving a better oven spring. The extended, slow fermentation creates more organic acids, contributing to sourdough’s characteristic tang and improving its keeping quality. Plus, it makes for a much more convenient baking schedule!
Baking Your Sourdough:
Step 11: Preheat Oven & Dutch Oven. Place your Dutch oven or chosen baking vessel (with its lid) inside your oven. Preheat the oven to 450°F (232°C) if using convection, or 470°F (243°C) for a non-convection oven. Allow it to preheat for at least 30-45 minutes to ensure the Dutch oven is scorching hot. While the oven preheats, cut a piece of parchment paper slightly larger than your dough, which you’ll use to transfer the loaf.
Step 12: Score the Dough. Carefully remove your dough from the proofing basket onto the prepared parchment paper (if you proofed directly on parchment, skip this transfer). Dust the top of the dough with a light sprinkle of flour. Using a very sharp lame, razor blade, or paring knife, make your desired score. For a classic boule (round loaf), a single deep cut midway between the bottom and top allows for maximum upward expansion. You can also get creative with decorative scores, ensuring at least one primary deep cut. I often make a square cut on round loaves to encourage a strong, vertical rise and maintain its spherical shape.
Step 13: Covered Bake. Once your oven and Dutch oven are fully preheated, carefully remove the hot Dutch oven from the oven. Gently lower the dough, still on its parchment paper, into the hot pot. Immediately cover it with the lid. Return the covered Dutch oven to the oven and bake for 20 minutes. This initial covered bake traps steam, promoting incredible oven spring and a soft crust that can expand freely.
Step 14: Uncovered Bake for Golden Crust. After 20 minutes, carefully remove the lid from the Dutch oven. Continue baking the loaf uncovered for an additional 25 minutes, or until the crust develops a deep, rich golden-brown color and the internal temperature of the bread reaches 210°F (99°C). This phase develops the crunchy crust and rich flavors.
Step 15: Cool Completely. Once baked to perfection, carefully remove the loaf from the Dutch oven, lifting it out by the parchment paper. Transfer it to a wire rack. Gently remove the parchment paper and allow the loaf to cool completely (for at least 1-2 hours) before slicing. This crucial cooling period allows the internal crumb structure to set, preventing a gummy texture and ensuring the best flavor and texture.
Chef Lindsey’s Recipe Tip: Embracing the Slow Rise
One of the hallmarks of authentic sourdough is its slow, controlled fermentation. This extended rise time isn’t just about expansion; it’s where the magic of flavor development happens, and the complex gluten structure needed to support those beautiful open holes in the crumb is built. While you can add a touch of commercial yeast, as I sometimes do with my sourdough raisin bread to speed up the process, be aware that this often comes with a trade-off. You might achieve a faster rise, but you will invariably sacrifice some of the nuanced, deep sourdough flavor and those wonderfully large, airy pockets that are so characteristic of a truly traditional loaf. For the best flavor and texture, embrace the patience of a slow sourdough rise!
Sample Baker’s Schedule: Planning Your Easy Sourdough Bake
Sourdough baking offers incredible flexibility, allowing you to adapt the schedule to fit your life. Remember, there’s no single “right” time to make sourdough! Use this sample schedule as a guide, and feel free to adjust timings with a bit of simple math to align with your personal needs. Keep in mind that ambient room temperature will significantly influence proofing times; your dough might rise faster or slower than mine, and that’s perfectly normal—just observe your dough!
Day 1: Preparing Your Starter
9:30 PM: Prepare your liquid levain. Combine the ingredients as instructed and leave it in a warm spot (around 75-80°F / 24-27°C) to become active. It will typically take 10-12 hours to reach peak activity, ready for mixing your dough.
Day 2: Mixing, Folding, and Shaping
9:30 AM: Your levain should be active and bubbly! Combine all final dough ingredients (flours, water, salt, levain) in your mixer. Mix until just incorporated, then begin the 15-minute autolyse rest.
10:00 AM: Resume mixing with the dough hook to develop gluten. Once sufficiently developed, transfer the dough to an oiled bowl and place it in your warm proofing spot for 30 minutes.
10:30 AM: Perform the 1st set of stretch and folds. Cover the dough and return it to its warm spot for another 15 minutes of rest.
10:45 AM: Perform the 2nd set of stretch and folds. Check dough strength; if it needs more, perform additional folds after another 15-minute rest. Cover and return to the warm spot.
11:00 AM – 1:00 PM: Bulk Fermentation. This is your primary proofing time. Check the dough every 45-60 minutes. You’re looking for it to become light, airy, and show a noticeable increase in volume (30-50%). Adjust the total bulk ferment time based on your dough’s activity and room temperature.
1:00 PM: Once the dough passes the “light and airy” test, turn it out for preshaping. Form a round ball, and allow it to bench rest for 15 minutes. During this time, prepare your proofing basket (banneton) by dusting it thoroughly with rice flour.
1:15 PM: Perform the final shape. Create a tight, round boule. Transfer the shaped loaf, seam-side up, into the prepared proofing basket. Cover it well with plastic wrap. Transfer the basket to the refrigerator for an overnight cold proof (12-18 hours). This will slow down fermentation and deepen flavor.
Day 3: Baking Day!
7:30 AM: Begin preheating your oven to 450°F (convection) or 470°F (non-convection) with your Dutch oven or baking vessel inside. Allow ample time for it to get scorching hot.
8:00 AM: Carefully remove the cold dough from the fridge. Transfer the loaf onto a piece of parchment paper. Score your dough with your desired pattern. Gently lower the scored loaf (on its parchment) into the preheated Dutch oven. Replace the lid and immediately place it back into the hot oven. Bake covered for 20 minutes.
8:20 AM: Carefully remove the lid from the baking vessel. You can leave the lid in the oven to keep it warm for another loaf or remove it. Continue baking the uncovered loaf for an additional 25-30 minutes, or until it reaches a deep golden-brown color and an internal temperature of 210°F. Once done, remove it from the oven and transfer it to a wire rack to cool completely for at least 1-2 hours. Enjoy your beautiful, homemade sourdough!
Recipe FAQs: Your Sourdough Questions Answered
To preserve that wonderful crunchy crust, store your sourdough bread at room temperature, cut-side down, directly on a cutting board. While it will gradually lose some moisture, it will remain fresh and delicious for up to a week. If you prefer a softer crust, you can store it in a plastic bag or an airtight container, though the crust will soften almost immediately. For longer storage, slice the loaf and wrap individual pieces tightly in plastic wrap, then place them in an airtight freezer bag. It will keep well in the freezer for up to 3 months.
There are numerous benefits to making and consuming sourdough bread. Firstly, baking at home gives you complete control over the ingredients, ensuring you know exactly what goes into your bread – no hidden additives or preservatives. Secondly, the long fermentation process of sourdough helps to naturally break down complex carbohydrates and gluten proteins. This can make the bread easier to digest for many people compared to commercially produced, fast-risen breads. Sourdough also has a lower glycemic index, potentially leading to a slower rise in blood sugar.
Absolutely! While a Dutch oven is highly recommended for its steam-trapping abilities, you can still achieve a great loaf without one. Preheat your oven to the specified temperature with a baking sheet on the center rack and a large, heat-safe roasting pan (or a cast-iron skillet) on the bottom rack. When ready to bake, carefully place your scored loaf (on parchment paper) directly onto the hot baking sheet. Immediately pour at least 2 quarts of boiling water into the hot roasting pan on the bottom rack to create steam. Close the oven door as quickly as possible to trap the steam. After 30 minutes, carefully open the oven door to release the steam, then continue baking until golden brown.
Yes, this recipe was developed with the convenience of a stand mixer in mind, but hand-mixing is definitely an option! Developing gluten by hand requires more manual effort, often through techniques like “slap and fold” or extended stretch and folds. For detailed instructions on crafting a fantastic beginner sourdough bread recipe without a mixer, I recommend consulting resources like this sourdough bread recipe for beginners which guides you through the process effectively.
This versatile sourdough bread is perfect for a wide array of culinary delights! It shines simply toasted with butter or as part of an elegant cheese board. For hearty meals, it makes an excellent base for gourmet sandwiches like a savory roast beef melt or a classic deviled egg salad sandwich. It’s also the ideal foundation for truly indulgent creations like the best tuna melt recipe. Don’t forget to use any leftover slices for croutons or breadcrumbs!
An active starter is crucial for successful sourdough. A healthy, ready-to-use starter should pass the “float test”: drop a small spoonful into a glass of water. If it floats, it’s ready! Visually, it should be bubbly, have increased significantly in volume (at least doubled) since its last feeding, and smell pleasantly yeasty and slightly acidic, not overwhelmingly sour or vinegary. Use your starter when it’s at its peak, usually a few hours after feeding, when it’s most vigorous.
Some common beginner mistakes include: 1) Using an inactive starter. Always check for peak activity! 2) Not developing enough gluten. Don’t skip the mixing and folding steps. 3) Under-proofing or over-proofing. Learn to “read” your dough for signs of lightness and airiness. 4) Impatience. Sourdough takes time, especially for bulk fermentation and cold proofing, which build flavor. 5) Not preheating the Dutch oven enough, leading to poor oven spring. Patience and observation are your best allies!
Explore More Sourdough Recipes from Chef Lindsey
Sourdough Bread Recipes
Sourdough Starter Recipe
Sourdough Bread Recipes
Cherry Sourdough Bread
Sourdough Bread Recipes
Sourdough Raisin Bread
Dinner Roll Recipes
Sourdough Rolls
If you tried this easy sourdough bread recipe and loved it, please consider leaving a 🌟 star rating and sharing your experience in the comments below. Your feedback truly brightens my day!
Easy Sourdough Bread
Chef Lindsey
Comment
Print Recipe
Ingredients
Levain Build:
- ½ cup all purpose flour
- 3 oz water
- ½ tablespoon yesterday’s starter (refer to our Sourdough Starter Recipe)
Final Dough:
- 2 ¾ cups all purpose flour
- ½ cup rye flour
- 8 oz water
- ⅓ oz kosher salt
- 5 ½ oz liquid levain (prepared above)
Additional Ingredients:
- rice flour (for dusting the proof basket, if using)
Instructions
Mix the Liquid Levain:
-
12 to 14 hours before mixing your main dough, prepare the levain. In a clean container, thoroughly combine the flour, water, and starter. Stir until the flour is fully hydrated. It’s often easier to double the levain build amount to ensure you have enough for your dough and to feed your main starter. For a visual guide, see our liquid levain tutorial.
Make the Final Dough:
-
Combine all ingredients for the final dough in the bowl of a stand mixer fitted with a paddle attachment. Mix on low speed until the flour is fully incorporated and no dry spots remain.
-
Once incorporated, cover the bowl and let the dough rest for 15 minutes (autolyze). This allows the flour to hydrate and gluten to begin developing.
-
Switch to the dough hook attachment. Increase mixer speed to medium and mix to develop the gluten. Note that this high-hydration dough will remain quite wet and may not form a ball around the hook. Mix until you see gluten strands forming and the dough starts to pull away from the bowl sides.
Proofing and Folds:
-
Scoop the dough into a lightly oiled bowl and cover with plastic wrap. Place in a warm spot (e.g., oven’s proof setting) for 30 minutes.
-
First Set of Folds: With wet hands, gently stretch a section of dough upwards and fold it over to the center. Rotate the bowl and repeat on all four sides to form a packet. This builds gluten strength. Cover and proof for an additional 15 minutes.
-
Final Set of Folds: Repeat the stretch and fold process. By now, the dough should feel stronger and hold its shape better. If it relaxes immediately, perform another set of folds after a 15-minute rest. The goal is enough gluten structure to support the loaf and trap gas.
-
Bulk Fermentation: Cover the dough and return it to a warm spot for bulk proofing, approximately 2.5 hours. Check every 45 minutes; the dough should feel light, airy, and increased by 30-50% in volume.
Shaping:
-
Pre-shape: Lightly flour the dough in the bowl, then turn it onto a lightly floured surface. Fold each of the four sides towards the center to create a packet. Flip it seam-side down. Using cupped hands, pull the dough towards you, rotating to form a round ball with a smooth top. Bench rest for 15 minutes.
-
Final Shape: Repeat the preshaping process to form a tight, round ball. Place the dough onto a piece of parchment paper or transfer it seam-side up into a rice-floured proofing basket. Cover with plastic wrap.
-
Proofing Options:
To bake the same day: Place the covered basket in a warm spot for another 2.5 to 3 hours, or until light, airy, and doubled in volume. Proceed to baking.
To bake the next day: Place the covered basket into the refrigerator for 12-18 hours to cold proof overnight. This enhances flavor and fits flexible schedules.
Baking:
-
Preheat your oven to 450°F (convection) or 470°F (non-convection) with your Dutch oven inside. Allow at least 30-45 minutes for thorough preheating. Cut a piece of parchment paper slightly larger than your loaf.
-
Once the oven is ready, carefully remove your proofed dough from the basket onto the parchment paper (if not already proofed on it). Lightly flour the top and score the dough with a lame or sharp knife. Aim for a deep cut midway between the top and bottom.
-
Carefully take the preheated Dutch oven from the oven. Gently lower the dough (on parchment) into the pot, cover with the lid, and place it back in the oven. Bake for 20 minutes.
-
Remove the lid and continue baking for 25 minutes, or until the loaf is a dark golden-brown and the internal temperature registers 210°F (99°C).
-
Carefully remove the loaf from the Dutch oven and transfer it to a wire rack. Remove the parchment and allow the bread to cool completely for at least 1-2 hours. This critical step allows the crumb to set properly.
Video
Notes
Presentation — Achieve stunning oven spring and a beautiful crust by scoring the bread with a sharp lame, razor blade, or knife. Use quick, confident pressure for a deep primary cut and any additional decorative cuts.
Flavor — This simple recipe emphasizes the natural flavors of the flour and active starter. The autolyze rest is key as it helps preserve flour flavonoids, contributing to a nuanced flavor profile and avoiding any ‘overheated’ notes in the dough.
Technique — This recipe utilizes a liquid levain, which is essentially a sourdough starter maintained at a higher hydration ratio. This method often eliminates the need for a separate, distinct “maintained” starter, simplifying the process for many home bakers.
Storage — To maintain its signature crisp crust, store the sourdough loaf cut-side down at room temperature. For longer preservation, slice the bread, wrap individual pieces, and freeze them for future use. This allows you to enjoy fresh-tasting sourdough whenever you desire.
Nutrition
Carbohydrates: 29g |
Protein: 4g |
Fat: 0.4g |
Saturated Fat: 0.1g |
Polyunsaturated Fat: 0.2g |
Monounsaturated Fat: 0.04g |
Sodium: 307mg |
Potassium: 52mg |
Fiber: 1g |
Sugar: 0.1g |
Calcium: 7mg |
Iron: 2mg
Enjoy this recipe? Share your thoughts below!
Before You Go: Continue Your Sourdough Journey
We truly hope you enjoyed baking this easy sourdough bread recipe and found it to be the perfect introduction to the rewarding world of sourdough. Once you’ve mastered this basic loaf, we invite you to explore our wider collection of sourdough bread recipes. Expand your baking repertoire with delightful treats like fluffy sourdough cinnamon rolls for a decadent breakfast, or festive sourdough hot cross buns for a touch of tradition. Happy baking, and may your kitchen always be filled with the wonderful aroma of fresh bread!