
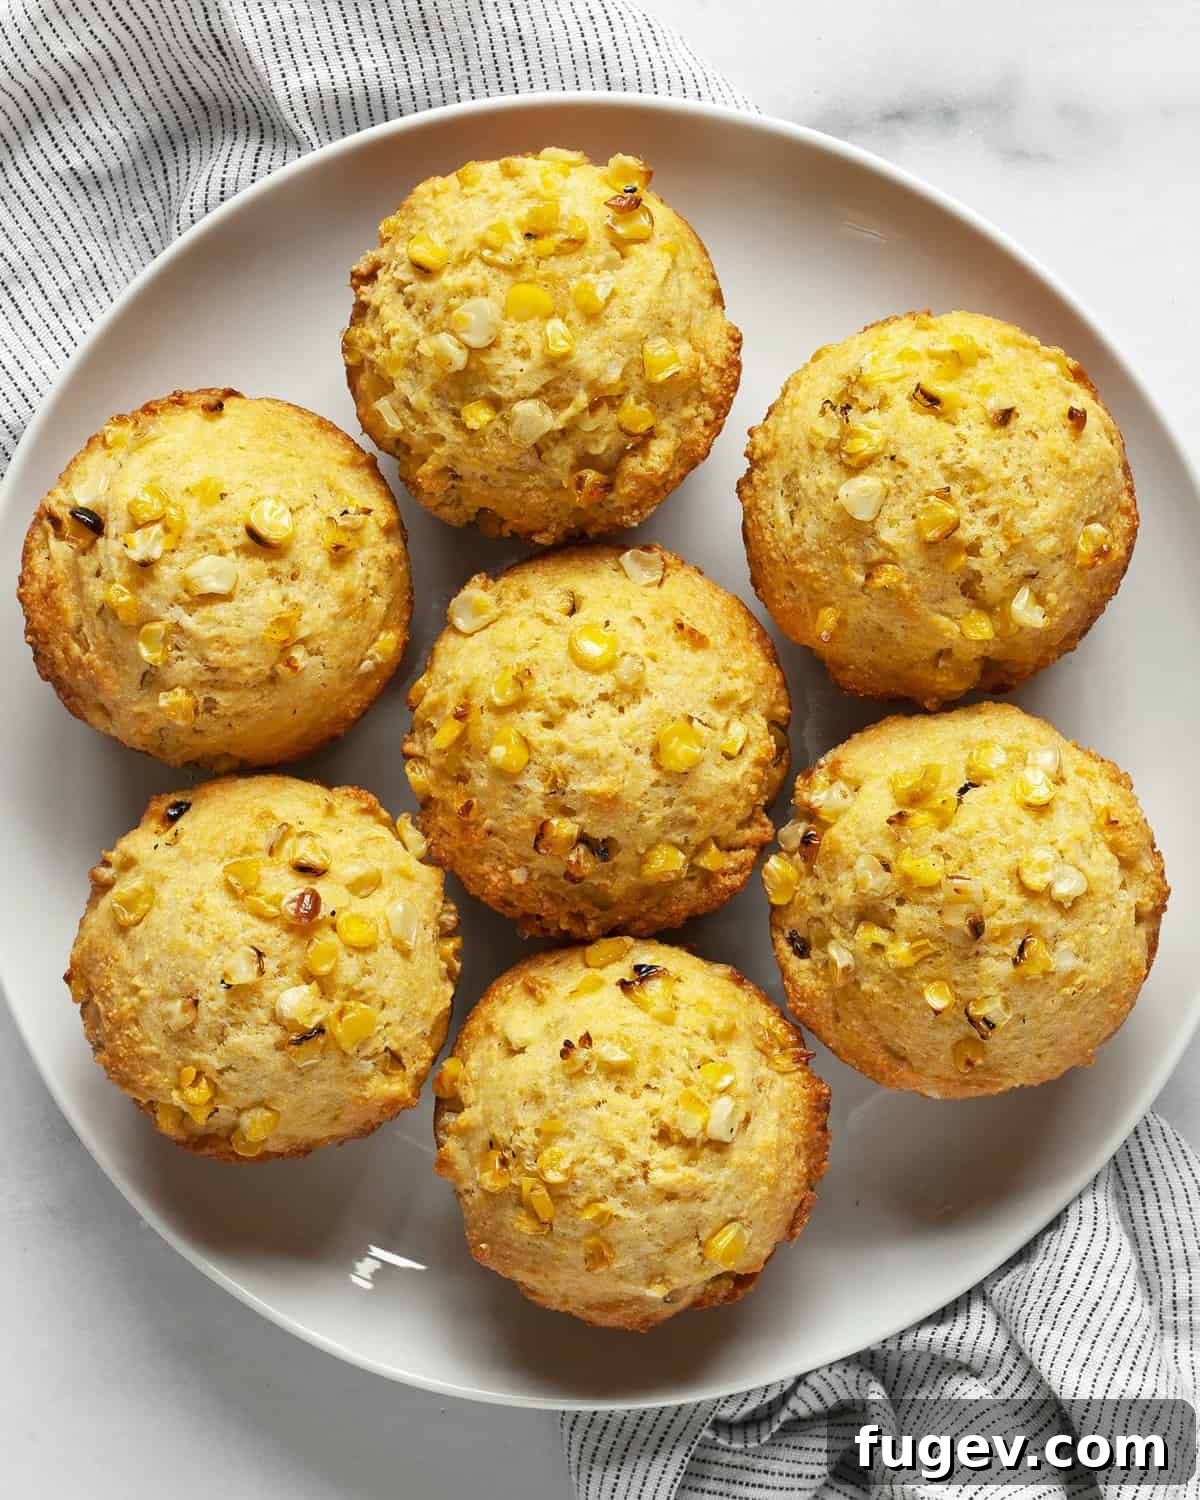
The Best Grilled or Roasted Corn Cornbread Muffins: A Flavorful Twist on a Classic
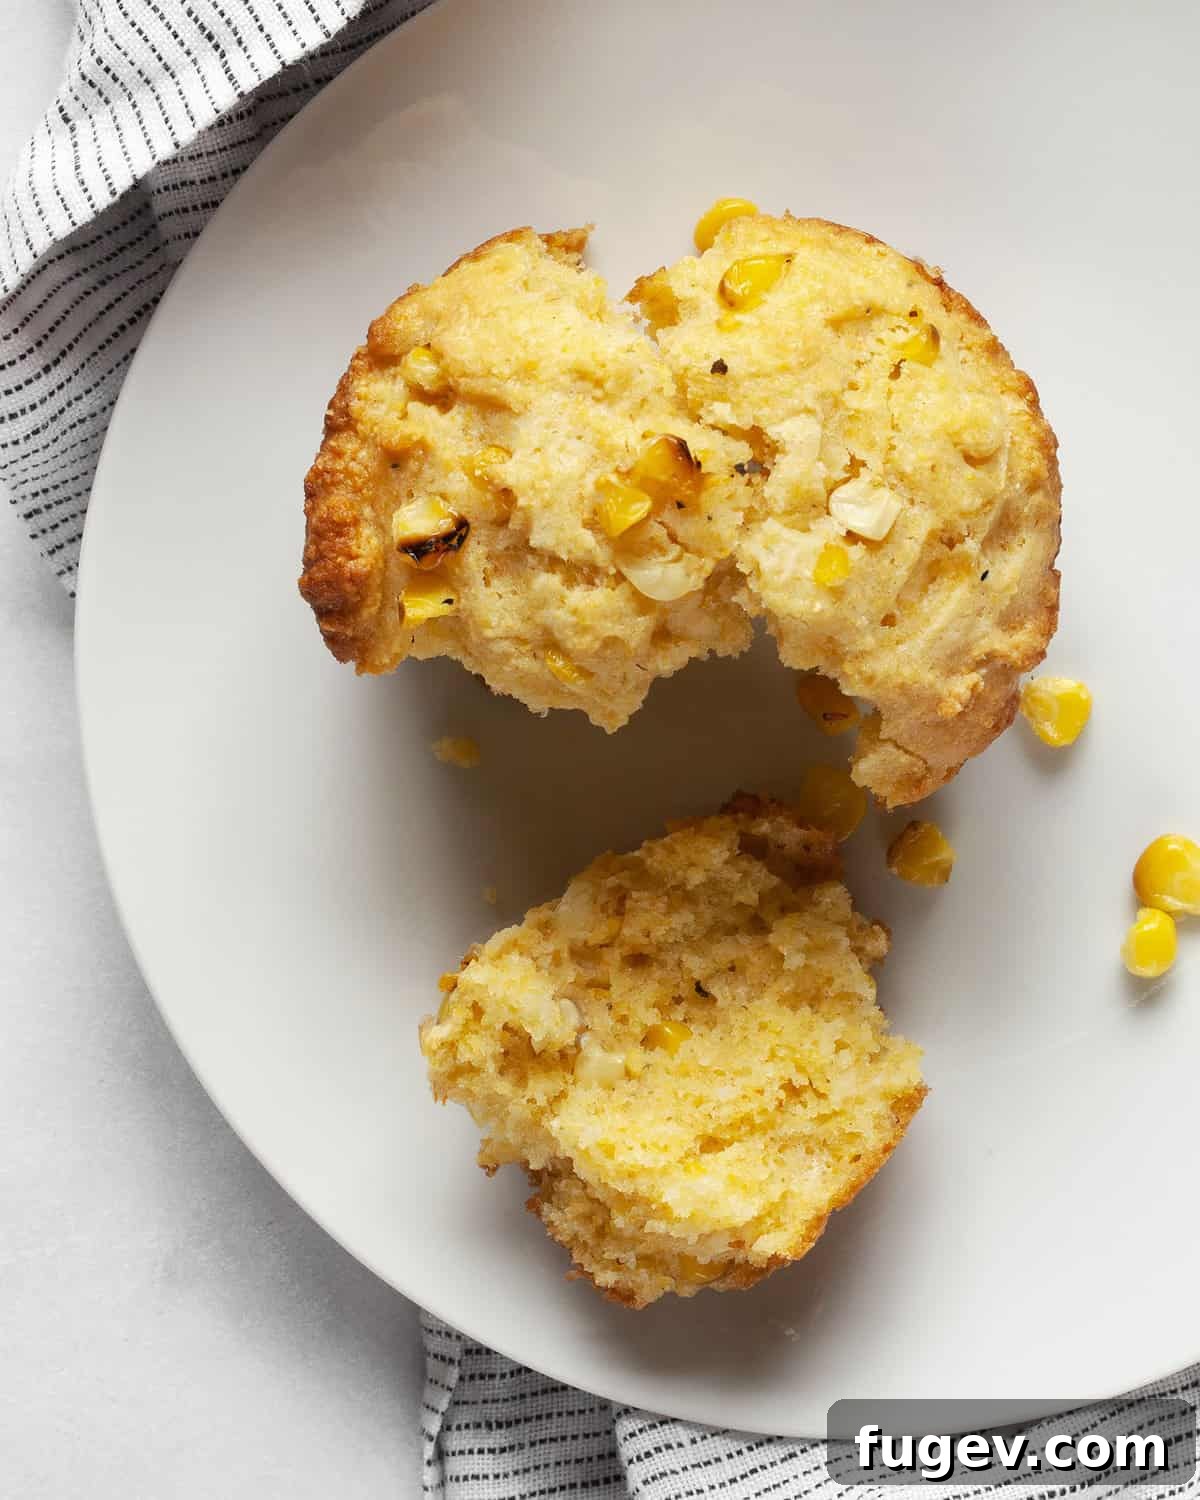
Prepare to elevate your muffin game with these incredibly tender and buttery **cornbread muffins**, uniquely enhanced with the deep, smoky flavor of grilled or roasted corn kernels folded right into the batter. This extra step of grilling or roasting the corn isn’t just a fancy flourish; it’s a game-changer that imbues the muffins with an unparalleled depth of corn flavor and a wonderfully interesting bite. Forget bland, dry cornbread – this recipe delivers moist, flavorful muffins that will quickly become a household favorite.
For those who love a traditional approach, you might also enjoy our classic buttermilk cornbread, perfect for baking in a square pan.
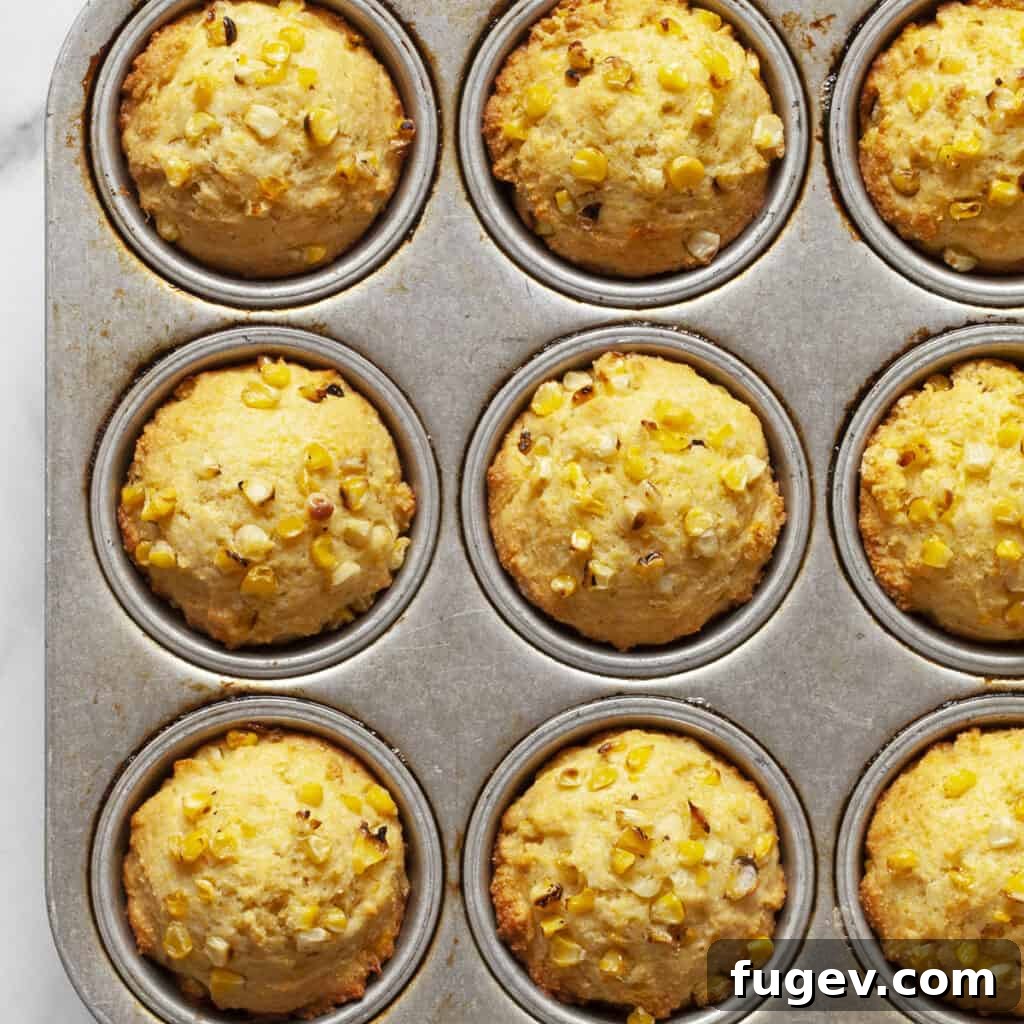
Table of Contents
- Why These Cornbread Muffins Are a Must-Try
- The Magic of Grilled and Roasted Corn
- Essential Ingredients for Perfect Muffins
- Step-by-Step: How To Make These Cornbread Muffins
- Serving Suggestions
- Leftovers & Storage Tips
- Expert Baking Tips for Flawless Muffins
- Frequently Asked Questions (FAQ)
- Variations to Explore
- More Muffin Recipes
- Printable Recipe Card: Grilled or Roasted Corn Cornbread Muffins
Why These Cornbread Muffins Are a Must-Try
If you’re searching for a cornbread recipe that stands out from the rest, look no further. These muffins are truly a love letter to corn, celebrating its versatile flavor and texture in every bite. They incorporate not only fine cornmeal for that classic cornbread structure but also actual corn kernels, which significantly enhance the overall taste and provide a delightful textural dimension to the soft, buttery crumb. This dual-corn approach creates a more complex and satisfying experience than traditional recipes.
Unlike many overly sweet cornbread varieties that sometimes taste more like cake, this recipe strikes the perfect balance. The muffins are delicately sweet, ensuring they pair beautifully with a wide array of savory dishes, yet they are also delightful enough to enjoy as a standalone snack or breakfast item. Their inherent buttery richness means they’re flavorful even before you consider adding extra butter or jam, making them a versatile addition to any meal.
Another key advantage of this recipe is its flexibility with corn types. While fresh corn in season offers an unbeatable flavor, you’re not limited to it. This recipe provides guidance on using canned or frozen corn effectively, ensuring you can enjoy these fantastic muffins year-round. The crucial element, regardless of the corn’s origin, is the simple yet transformative step of grilling or roasting it, which we’ll delve into next.
The Magic of Grilled and Roasted Corn
The secret to the exceptional flavor of these cornbread muffins lies in an extra step that is absolutely worth the effort: charring the corn. Whether you choose to grill it or roast it, this process fundamentally transforms the corn, deepening its natural sweetness and introducing complex, nutty, and sometimes smoky notes that elevate the entire muffin.
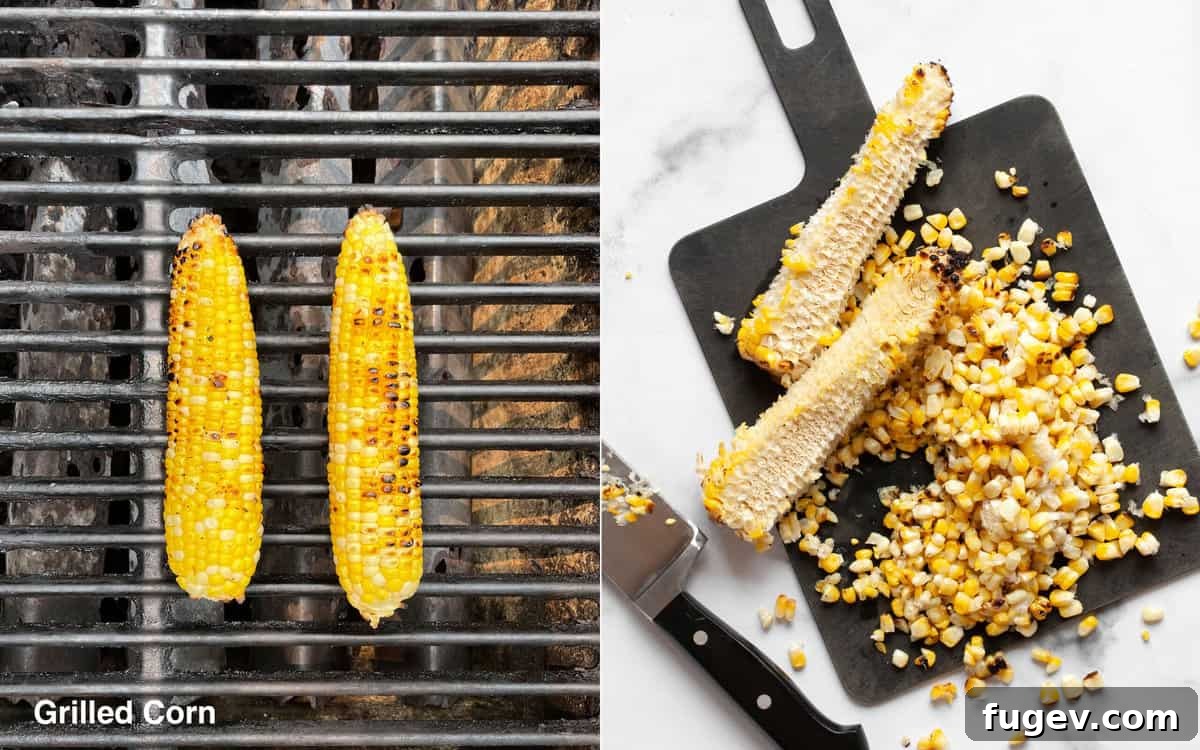
**Grilling the Corn:** Grilling corn on the cob until it develops a light char adds an incredible smoky depth that can’t be replicated. The high heat of the grill caramelizes the sugars in the corn, creating a sweet, smoky flavor profile. This method works best with fresh corn on the cob. Once grilled, the kernels are sliced off, ready to be incorporated into your muffin batter. The slight crunch from the char adds another layer of texture to the soft muffins.
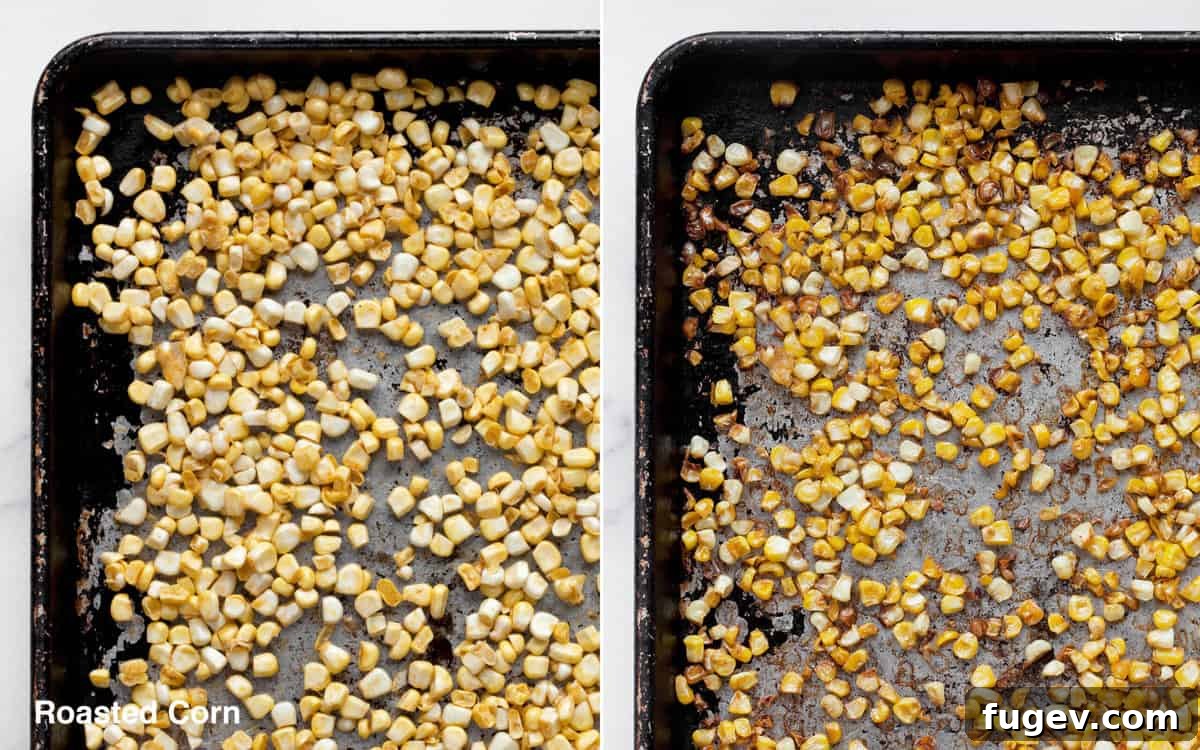
**Roasting the Corn:** If grilling isn’t an option or you’re using off-the-cob kernels (fresh, frozen, or canned), roasting in the oven is a fantastic alternative. Spreading the corn kernels on a sheet pan and roasting them at a high temperature achieves a similar caramelization, developing a rich, sweet, and slightly nutty flavor. Roasted corn tends to have a more uniform browning and a satisfying crunch. For frozen or canned corn, roasting is particularly beneficial as it removes excess moisture, preventing your muffins from becoming soggy and enhancing their flavor significantly.
Think of this step like toasting nuts before adding them to a recipe – it brings out their inherent flavors and adds textural interest. This simple technique takes these cornbread muffins from good to extraordinary, providing a flavorful dimension that you won’t find in standard recipes.
Essential Ingredients for Perfect Muffins
Crafting these delectable cornbread muffins requires a thoughtful selection of ingredients, each playing a crucial role in achieving that ideal tender, moist, and flavorful outcome. Here’s a closer look at what you’ll need and why:
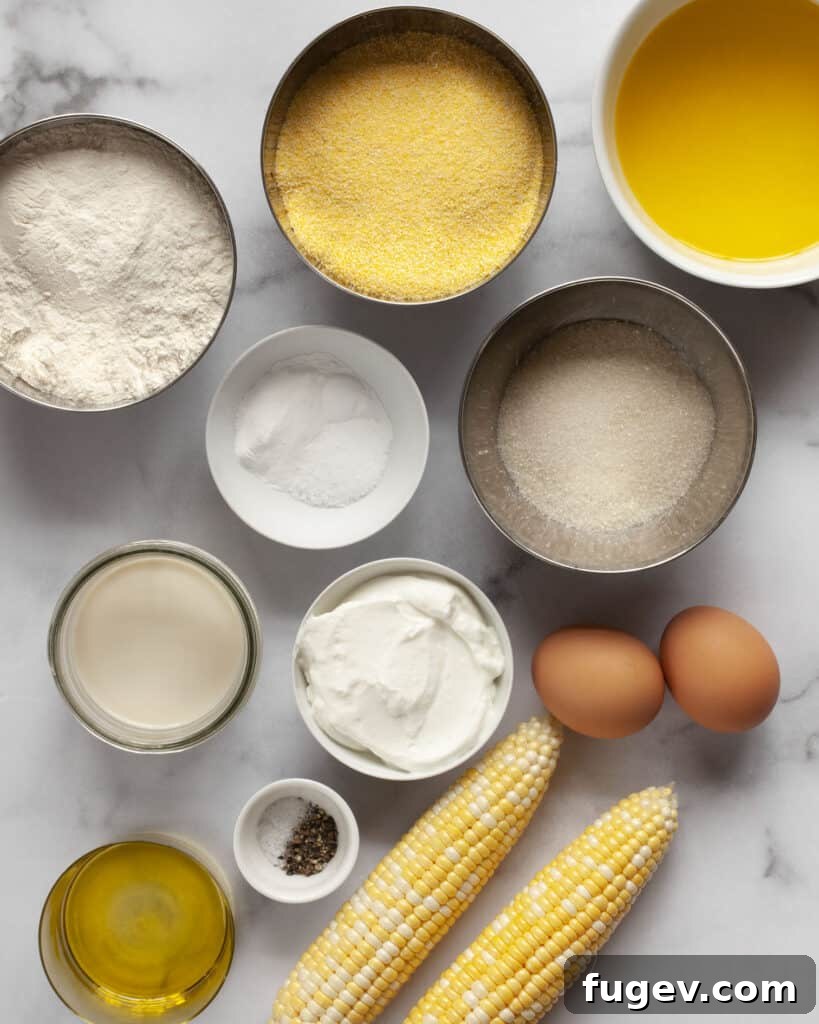
- Corn: As highlighted, this is the star of the show. While fresh ears of corn are fantastic during peak season for grilling or roasting, don’t hesitate to use frozen or canned corn when fresh isn’t available. Remember to thaw frozen corn thoroughly and drain/rinse canned corn well. Patting them dry with a towel before roasting is essential to achieve proper caramelization and prevent a watery batter.
- Cornmeal: We recommend using a medium grind cornmeal. This type provides a pleasing texture that isn’t too coarse or gritty, contributing to the muffins’ tender crumb without making them dense. Yellow cornmeal will also give your muffins a lovely golden hue.
- All-Purpose Flour: The backbone of most muffin recipes, all-purpose flour provides the necessary structure. Ensure it’s fresh for optimal results.
- Granulated Sugar: A modest 1/3 cup of granulated sugar ensures these muffins have just a subtle hint of sweetness. This careful balance makes them versatile enough to accompany savory meals or to be enjoyed with sweeter toppings like jam or honey, without being overly dessert-like.
- Baking Powder & Baking Soda: These leavening agents work in harmony to give the muffins their characteristic rise and light, airy texture. Baking powder acts independently, while baking soda reacts with the acidic Greek yogurt to create a fluffy crumb.
- Eggs: Two large eggs contribute to the muffins’ structure, moisture, and richness. They act as a binder, holding the ingredients together and preventing a crumbly texture. Ensure they are at room temperature for easier incorporation into the batter.
- Milk: Using whole or 2% milk adds essential moisture and richness to the muffins. The fat content contributes to a softer, more tender result. Room temperature milk mixes more smoothly with other ingredients.
- Greek Yogurt: This is a brilliant substitute for sour cream or buttermilk. Greek yogurt lends a subtle tang that complements the corn flavor beautifully and is key to keeping the muffins wonderfully moist and tender. Its acidity also activates the baking soda, aiding in rise. Plus, it’s a common fridge staple for many!
- Melted Butter: Butter imparts a rich, comforting flavor and contributes to the muffins’ moistness. It’s crucial to melt the butter and then allow it a few minutes to cool slightly before combining it with the eggs and yogurt, preventing any unwanted cooking of the eggs.
- Olive Oil: A small amount of olive oil is used to coat the corn kernels before grilling or roasting. It helps promote even charring or browning and adds a subtle background flavor.
- Salt & Pepper: Seasoning the corn with a pinch of salt and pepper before cooking enhances its natural flavors. Additionally, a teaspoon of kosher salt in the dry muffin ingredients balances the sweetness and brings out the overall taste profile.
Step-by-Step: How To Make These Cornbread Muffins
Follow these detailed instructions to create your batch of irresistible cornbread muffins. Precision and gentle handling are key to achieving perfect results.
Preparation: Grilling or Roasting the Corn
This initial step is where the magic truly begins, infusing your muffins with an extraordinary depth of flavor.
To grill the corn:
Preheat your gas or charcoal grill to high heat. Carefully rub the corn on the cob with 2 teaspoons of olive oil and season generously with a pinch of salt and pepper. Place the seasoned cobs directly on the hot grill grates. Grill, turning occasionally, until the corn is lightly charred and tender on all sides, typically about 5-7 minutes. Once cooled enough to handle, carefully slice the flavorful kernels off the cobs using a sharp knife.
To roast the corn:
Preheat your oven to 400 degrees F (200 degrees C). If using fresh corn on the cob, slice the kernels off first. If using frozen or canned corn (ensure it’s thawed/drained and patted dry), place the kernels on a large baking sheet. Toss the corn evenly with 2 teaspoons of olive oil, a pinch of salt, and pepper. Spread the corn into a single, even layer to ensure maximum contact with the hot pan. Roast in the preheated oven until the corn is lightly browned and slightly caramelized, which usually takes about 20 minutes. Stir halfway through for even cooking.
Making the Cornbread Muffins
Now that your corn is perfectly prepared, it’s time to assemble the muffin batter.
Preheat your oven to 400 degrees F (200 degrees C). Thoroughly grease a 12-cup muffin pan with non-stick cooking spray or a little extra melted butter. This ensures easy removal and contributes to a nicely browned exterior.
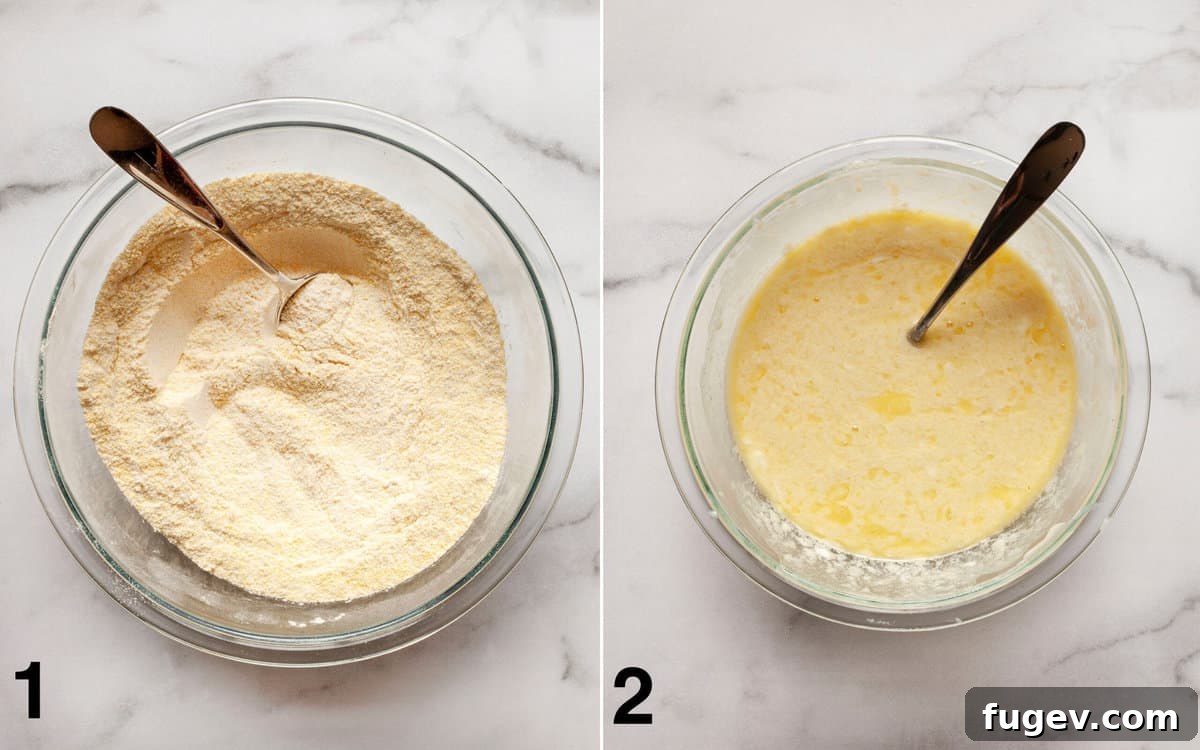
- Combine the dry ingredients: In a large mixing bowl, whisk together the 1-1/4 cups all-purpose flour, 1 cup cornmeal, 1/3 cup granulated sugar, 2 teaspoons baking powder, 1/2 teaspoon baking soda, and 1 teaspoon kosher salt until well combined and lump-free.
- Whisk together the wet ingredients: In a separate medium bowl, whisk vigorously until smooth the 1/2 cup Greek yogurt, 1/2 cup milk, 2 large eggs, and 1/2 cup melted butter (cooled slightly). Ensure all wet ingredients are at room temperature for best results.
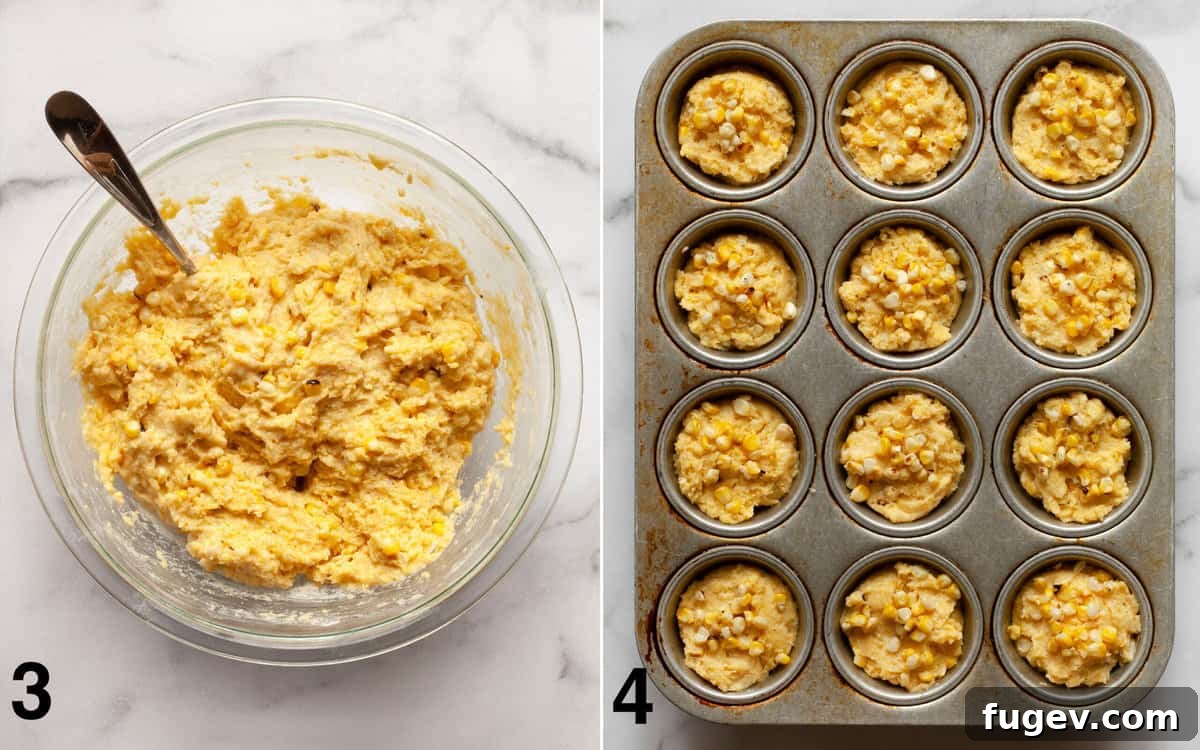
- Gently fold wet into dry, adding corn: Pour the wet ingredients into the dry ingredients. Using a spatula, fold them together with big, slow, and gentle motions. As soon as the ingredients are about halfway combined and still a bit streaky, add the majority of your grilled or roasted corn kernels (reserving about 1/4 cup for topping). Continue folding just until the flour streaks disappear. **Do not overmix!** Overmixing will lead to tough, dense muffins.
- Divide batter and top with corn: Distribute the batter evenly among the 12 greased muffin cups. An ice cream scoop works perfectly for this, ensuring consistent muffin sizes. Sprinkle the remaining 1/4 cup of grilled or roasted corn kernels over the tops of the filled muffin cups.
- Bake to golden perfection: Transfer the muffin pan to the preheated oven. Bake for approximately 18-20 minutes, or until the muffins are beautifully golden brown on top and a toothpick inserted into the center of a muffin comes out clean. Gently pressing down on a muffin should also result in it springing back immediately.
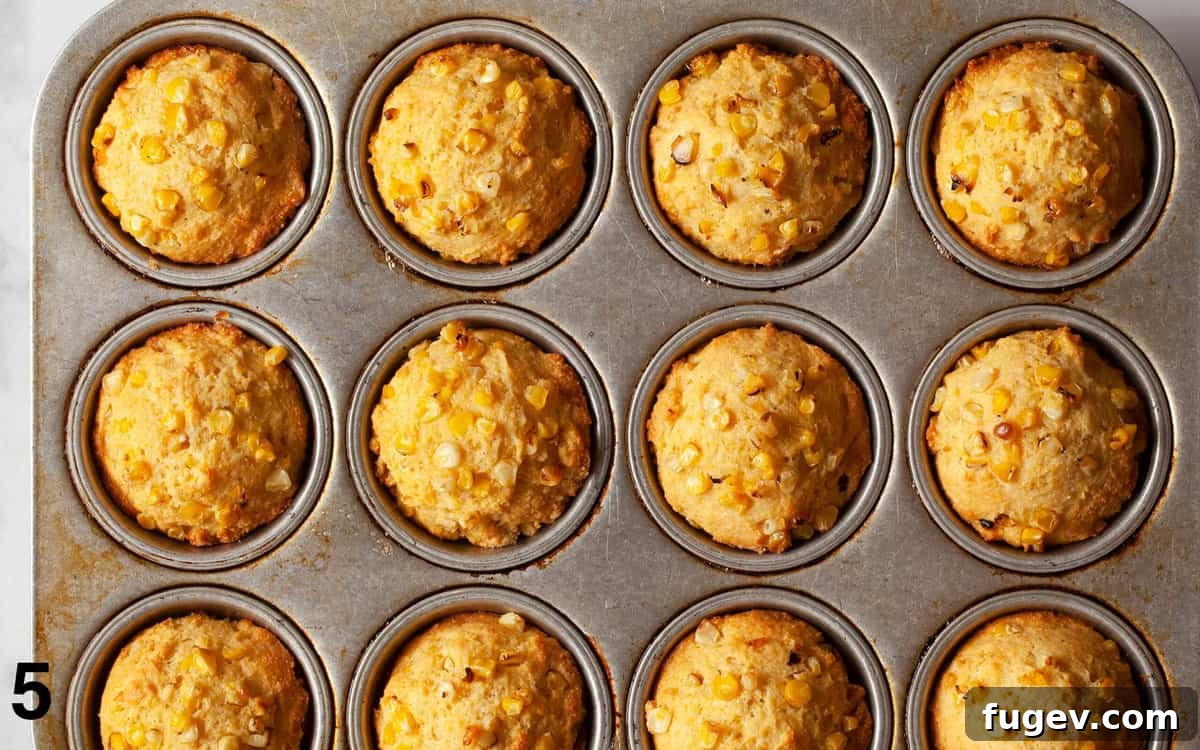
Allow the muffins to cool in the pan for a few minutes before transferring them to a wire rack to cool completely. They are best enjoyed warm!
Serving Suggestions
These versatile cornbread muffins are more than just a side dish; they can be a star in their own right. Their savory-sweet profile makes them incredibly adaptable to a variety of meals and occasions. Think of them as a delightful alternative to traditional bread or dinner rolls, adding a unique texture and flavor dimension.
Perfect Pairings:
- Hearty Meals: They are an ideal companion for robust dishes like our Quinoa Chili, classic barbecue, smoked brisket, pulled pork, or any grilled meats. The subtle sweetness and corn flavor beautifully complement the richness of these meals.
- Soups & Stews: Serve them alongside a steaming bowl of your favorite soup or stew, like a comforting chicken noodle or a rustic beef stew. They’re perfect for soaking up every last drop.
- Breakfast & Brunch: Don’t limit these to dinner! Enjoy them warm for breakfast or brunch, much like you would any other muffin.
- Light Lunches: Pair them with a fresh green salad topped with grilled chicken for a satisfying and flavorful lunch.
Toppings & Enhancements:
- Classic Butter: A dollop of softened butter, plain or whipped with a touch of honey, is always a winning choice.
- Sweet Drizzles: A drizzle of golden honey or maple syrup enhances their inherent sweetness, making them feel more indulgent.
- Fruity Spreads: Serve them with your favorite jam or fruit preserves for a delightful contrast of flavors.
- Savory Twists: For an extra kick, a smear of hot pepper jelly or a drizzle of your favorite hot sauce can be surprisingly delicious.
- Flavored Butters: Consider making a compound butter with herbs like chives or a hint of smoked paprika for an extra layer of flavor.
Whether you’re enjoying them plain or dressed up, these muffins are guaranteed to be a crowd-pleaser.
Leftovers & Storage Tips
These cornbread muffins are undoubtedly at their absolute best when enjoyed warm, fresh from the oven. However, if you find yourself with leftovers (a rare but possible occurrence!), proper storage ensures they remain delicious for later enjoyment.
Room Temperature Storage:
For short-term storage, allow the muffins to cool completely before placing them in an airtight container. Store them at room temperature for up to 2 days. Keeping them sealed prevents them from drying out and maintains their tender texture. To revive their warmth and tenderness, reheat them in a preheated 300-degree F (150 degrees C) oven for about 10 minutes before serving.
Freezing for Longer Preservation:
These muffins freeze exceptionally well, making them perfect for meal prepping or having a quick snack on hand. Once completely cooled, place the muffins in a single layer in a freezer-safe bag or an airtight container. They can be frozen for up to 1 month. To enjoy, thaw them at room temperature for a few hours, then warm them in a 300-degree F (150 degrees C) oven for 10-15 minutes until heated through. This gentle reheating process helps restore their original texture.
Avoid the Microwave:
A crucial tip: resist the temptation to reheat your cornbread muffins in the microwave. While convenient, microwaving will often result in a dense, chewy, and less appealing texture, completely diminishing their light and tender qualities.
Expert Baking Tips for Flawless Muffins
Achieving bakery-quality cornbread muffins is simple when you follow a few key guidelines. These tips will help ensure your muffins are perfectly moist, tender, and beautifully baked every time.
- Do Not Use Paper Liners: While convenient for cleanup, skipping paper liners is highly recommended for these muffins. Greasing the muffin pan directly with non-stick cooking spray or a little extra melted butter allows the muffins to brown beautifully on the sides and bottom. This creates a slightly crisp and chewy exterior that perfectly contrasts with the soft interior, enhancing the overall textural experience.
- Room Temperature Ingredients are a Must: Ensure your eggs, milk, and Greek yogurt are at room temperature before you begin mixing. This is a critical step because room temperature ingredients emulsify much more easily and evenly with the melted butter, creating a smooth, homogenous batter. A well-emulsified batter bakes more uniformly, resulting in a more tender and consistent muffin texture. Cold ingredients can cause the melted butter to seize up, leading to lumps and a less desirable crumb.
- Avoid Overmixing the Batter at All Costs: This is arguably the most important rule for tender muffins. When combining the wet and dry ingredients, use a spatula and fold them together gently with big, slow motions, rotating the bowl as you go. Mix only until the dry streaks of flour have just disappeared. A few lumps are perfectly fine! Overmixing develops the gluten in the flour, which leads to tough, chewy muffins with an undesirable texture, often characterized by tunnels or holes in the center.
- Don’t Overfill Muffin Cups: For perfect domes and even baking, fill each muffin cup about two-thirds full. Overfilling can lead to muffins that spill over or bake unevenly. An ice cream scoop is a great tool for consistent portioning.
- Check Your Leavening Agents: Always ensure your baking powder and baking soda are fresh and active. Expired leavening agents can result in flat, dense muffins. You can test baking soda by adding a small amount to vinegar (it should bubble vigorously) and baking powder by adding it to hot water (it should also bubble).
- Let Them Cool Slightly: While tempting to dive in immediately, allow the muffins to cool in the pan for 5-10 minutes before transferring them to a wire rack. This allows them to set properly and prevents them from falling apart when removed.
Frequently Asked Questions (FAQ)
Here are some common questions you might have about making these delicious cornbread muffins:
- Can I make these gluten-free? While this recipe uses all-purpose flour, you can experiment with a 1:1 gluten-free baking flour blend. Ensure your chosen blend contains xanthan gum for structure. The texture might vary slightly.
- Can I add other ingredients? Absolutely! For a savory twist, try adding shredded cheddar cheese, diced jalapeños, or crumbled cooked bacon to the batter. For a sweeter version, a touch of honey or maple syrup can be folded in with the wet ingredients.
- What kind of cornmeal should I use? We recommend medium-ground yellow cornmeal for a good balance of texture and classic color. Fine-ground cornmeal will yield a smoother, more cake-like muffin, while coarse-ground might result in a grittier texture.
- Can I make this as a loaf or in a cast iron skillet? Yes, you can. Adjust baking time accordingly. For a loaf, it might take 40-50 minutes. For a cast iron skillet, ensure it’s well-greased and preheated, baking for about 25-30 minutes, or until a toothpick comes out clean.
Variations to Explore
Once you master the basic recipe, feel free to get creative with these delicious cornbread muffins. Here are a few ideas to inspire your culinary adventures:
- Spicy Kick: Fold in a quarter cup of finely diced fresh or pickled jalapeños (or other mild chili peppers) for a delightful heat.
- Cheesy Goodness: Add half a cup of shredded sharp cheddar, Monterey Jack, or a Mexican cheese blend to the batter for a savory, gooey treat.
- Herbal Freshness: Incorporate a tablespoon of fresh chopped chives, cilantro, or parsley for an aromatic twist.
- Bacon Bliss: Crumble 1/4 cup of crispy cooked bacon into the batter for an irresistible smoky and salty addition.
- Sweet & Savory: Drizzle a tablespoon of honey or maple syrup into the batter for an extra layer of sweetness that complements the corn.
More Muffin Recipes You’ll Love
If you’re a fan of baking and enjoying delicious muffins, be sure to check out some of our other popular recipes:
- Chocolate Chip Zucchini Muffins
- Vegan Apple Cinnamon Muffins
- Blueberry Chia Muffins
Did you make this fantastic cornbread muffin recipe? Please consider leaving a rating and comment below to share your experience! We appreciate your feedback.
Printable Recipe Card: Grilled or Roasted Corn Cornbread Muffins
Cornbread Muffins with Grilled Corn or Roasted Corn
Paige Adams

Print Recipe
5 mins
20 mins
20 mins
45 mins
12 muffins
These easy cornbread muffins are tender and buttery, featuring the unique flavor of grilled or roasted corn folded into the batter. A delightful twist on a classic!
Ingredients
For the Corn
- 2 ears fresh corn (or 2 cups frozen/canned corn, thawed and drained)
- 2 teaspoons olive oil
- Pinch of kosher salt
- Pinch of black pepper
For the Muffins
- Non-stick cooking spray (or extra melted butter for greasing pan)
- 1-1/4 cups all-purpose flour
- 1 cup medium grind cornmeal
- 1/3 cup granulated sugar
- 2 teaspoons baking powder
- 1/2 teaspoon baking soda
- 1 teaspoon kosher salt
- 1/2 cup Greek yogurt (at room temperature)
- 1/2 cup milk (whole or 2%, at room temperature)
- 2 large eggs (at room temperature)
- 1/2 cup melted butter (cooled slightly)
For Serving
- Butter (at room temperature)
- Honey
- Jam
Instructions
- To grill the corn: Preheat a gas or charcoal grill on high heat. Rub corn with olive oil and season with salt and pepper. Grill until lightly charred on all sides, about 5-7 minutes. Slice kernels off cobs.
- To roast the corn: Preheat oven to 400°F (200°C). Slice kernels off fresh corn. On a sheet pan, toss corn (fresh, thawed frozen, or drained canned) with olive oil, salt, and pepper. Spread into a single layer. Roast until lightly browned, about 20 minutes.
- To make the muffins: Preheat oven to 400°F (200°C). Grease a 12-cup muffin pan with non-stick cooking spray.
- In a large bowl, combine the flour, cornmeal, sugar, baking powder, baking soda, and salt. Whisk well.
- In a medium bowl, whisk together the yogurt, milk, eggs, and cooled melted butter until smooth.
- Pour the wet ingredients into the dry ingredients. Fold gently until about halfway combined. Add the cooked corn, reserving 1/4 cup of kernels for topping. Continue folding just until no dry streaks of flour remain. Do not overmix.
- Divide the batter evenly into the greased muffin cups. Sprinkle the tops with the reserved corn kernels.
- Bake for 18-20 minutes, or until lightly golden on top and a toothpick inserted into the center comes out clean. Muffins should spring back when gently pressed.
- Serve the muffins warm with butter, honey, or jam.
Video
Notes
If using frozen or canned corn, you will need approximately 2 cups. Thaw frozen corn and rinse/drain canned corn thoroughly. For both, pat dry with a towel to remove excess moisture before roasting for best results.
Muffins are best eaten warm. Store leftovers in an airtight container at room temperature for up to 2 days. Reheat in a 300°F (150°C) oven for 10 minutes.
These muffins can be frozen for up to 1 month in a freezer bag or airtight container. Thaw at room temperature, then warm in a 300°F (150°C) oven for 10-15 minutes. Avoid reheating in the microwave to prevent a dense, chewy texture.
Nutrition
Calories:
192kcal
|
Carbohydrates:
21g
|
Protein:
4g
|
Fat:
11g
|
Saturated Fat:
6g
|
Polyunsaturated Fat:
1g
|
Monounsaturated Fat:
3g
|
Trans Fat:
0.3g
|
Cholesterol:
49mg
|
Sodium:
392mg
|
Potassium:
114mg
|
Fiber:
2g
|
Sugar:
8g
|
Vitamin A:
326IU
|
Vitamin C:
1mg
|
Calcium:
71mg
|
Iron:
1mg
Nutrition information is automatically calculated and should be used as an approximation.
Additional Info
Quick Breads & Muffins
American
Did you make this recipe?
Mention @lastingredient on Instagram and tag it #lastingredient!