
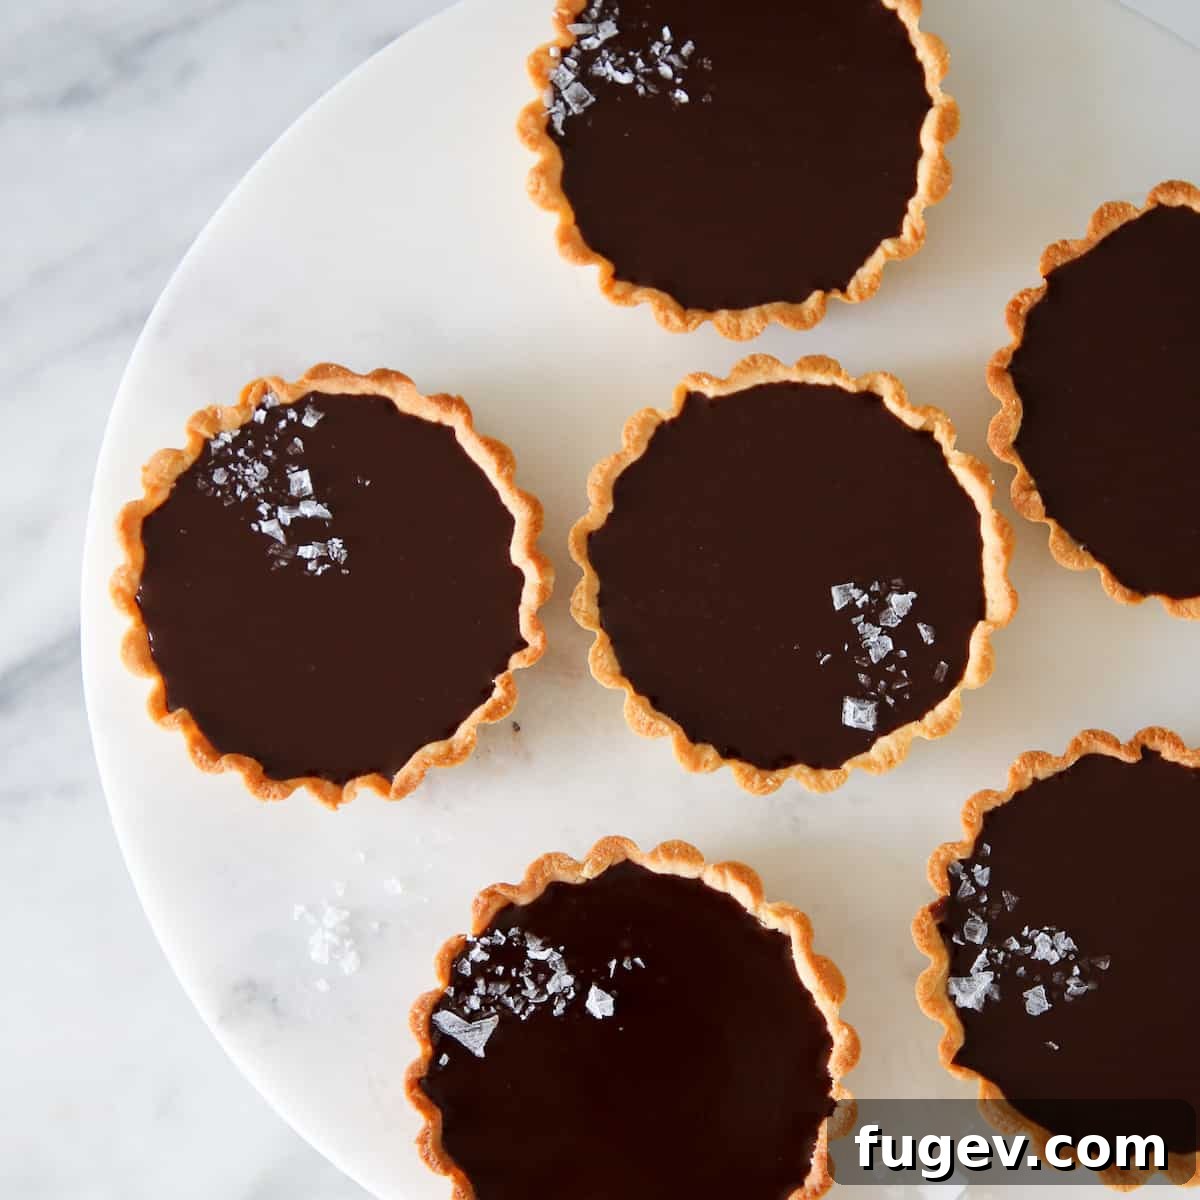
Irresistible Mini Salted Chocolate Tarts: Your Go-To Recipe for Elegant Entertaining
Prepare to impress with these remarkably easy yet exquisitely elegant mini salted chocolate tarts. Featuring a tender, buttery almond crust cradling an irresistibly silky chocolate ganache, these individual desserts are perfect for any gathering or simply elevating a weeknight treat.
Why These Mini Salted Chocolate Tarts Are a Must-Try
In a world that often feels chaotic, sometimes a small, perfect indulgence is all you need. These mini salted chocolate tarts offer just that—a moment of pure bliss that can transform an ordinary evening into something special. Forget the daily grind; these tarts evoke the cozy, festive feeling of Christmas morning, making any occasion feel like a celebration.
Their individual size makes them inherently charming and incredibly practical for entertaining. No need for messy slicing or serving; each guest gets their own perfectly portioned dessert. Yet, despite their gourmet appearance, they are surprisingly simple to prepare, making them a fantastic choice for both novice bakers and seasoned pastry enthusiasts alike.
The Perfect Pairing: Tender Almond Crust & Silky Chocolate Ganache
The magic of these tarts lies in the exquisite balance between their two primary components: the delicate almond crust and the rich, velvety chocolate ganache. Each element plays a crucial role in creating a dessert that is both sophisticated and deeply satisfying.
Crafting the Tender Almond Tart Crust
While you could use any of your favorite pie crust recipes, I highly recommend an almond tart crust (pâte sucrée). The subtle nutty flavor of the almond adds a beautiful depth and a delightful contrast to the intense richness of the chocolate ganache. This crust isn’t just a container; it’s an integral part of the flavor profile, offering a slight crispness and a tender crumb that melts in your mouth.
Blind baking is key to achieving a perfectly crisp, fully cooked crust that won’t become soggy once filled. This process ensures the base is golden brown and structurally sound, providing the ideal foundation for your luscious ganache. If you’re new to blind baking, don’t worry—it’s a straightforward technique that yields professional results every time. We’ll briefly cover the steps here, but for a more in-depth guide, feel free to explore our dedicated article on how to blind bake pie crust.
Achieving Silky Perfection: The Chocolate Ganache Filling
The star of these tarts is undoubtedly the chocolate ganache. Its smooth, luxurious texture and deep chocolate flavor are utterly irresistible. For the chocolate, I typically reach for a 54% semi-sweet variety, simply because it’s what I usually have on hand. However, feel free to use your preferred semi-sweet chocolate. Whether it’s a gourmet bar or a trusty brand from your baking stash, the quality of your chocolate will directly influence the final taste of your ganache.
A small but significant ingredient in this ganache is corn syrup. While some might be tempted to omit it, I strongly advise against it. Just a touch of corn syrup plays a vital role in giving the ganache that desirable soft texture and a stunning, glossy sheen. It’s the secret to achieving that “oh hello, gorgeous!” luster that makes these tarts look as incredible as they taste.
Remember, ganache is essentially an emulsion—a delicate balance of fat and liquid. While it’s simple to make, it requires a gentle hand to prevent it from breaking. A properly emulsified ganache will be perfectly smooth and shiny, a true testament to its quality.
A Chocoholic’s Confession: The Importance of a Chocolate Stash

You cannot truly claim the title of a card-carrying chocoholic without at least one dedicated chocolate drawer. As the daughter of a seasoned chocolate connoisseur, I grew up with an intricate system of chocolate stashes, each serving its own unique purpose.
First, there was the everyday kitchen chocolate drawer. This was the workhorse of our chocolate supply, housing baking chocolates for spontaneous culinary creations and the occasional impulse-purchased snacking bars. It was reliable, accessible, and always ready for action.
Then, there was the much-coveted chocolate truffle drawer. This was my personal favorite, a treasure trove of the good stuff. Here, you’d find artisanal truffles, imported pralines, and luxurious single-origin bars—chocolates meant for savoring, for special moments, or for when an ordinary chocolate simply wouldn’t do.
And finally, the legendary “break in case of emergency” chocolate stash. This wasn’t about gourmet quality; it was about sheer survival. This stash—often relegated to the depths of the basement freezer (which, as a pastry chef, I now know is the least ideal storage location for chocolate, but desperation knows no bounds!)—was reserved for those dire situations when all other stashes were depleted and a chocolate fix was an absolute necessity. If you found yourself raiding this particular reserve, it meant things had reached a critical level of chocolate craving.
My hope is that these mini salted chocolate tarts will become a staple in your own chocolate repertoire, eliminating the need for any emergency stashes, simply because you’ll always have a delightful treat readily available to bring joy to your day.
Expert Tips for Flawless Chocolate Tarts
While these tarts are designed for ease, a few expert tips can ensure your results are truly divine. From mastering the ganache to perfecting your crust, these insights will help you achieve bakery-quality desserts right in your own kitchen.
Mastering the Ganache: Troubleshooting and Techniques
Ganache, at its core, is a simple mixture of chocolate and cream, but it is also a delicate emulsion. This means the fat (from the chocolate and cream) and water need to be perfectly integrated. If the cream is too hot, or you whisk too aggressively, the emulsion can “break,” resulting in a greasy, separated texture instead of a smooth, homogenous one. This isn’t sadness we want here; we aim for pure delight!
Should your ganache appear broken, don’t despair! It’s easily remedied. The trick is to re-emulsify it. Simply pour a small amount of cold heavy cream (starting with about a tablespoon) into the broken ganache and whisk gently and slowly from the center outwards. The cold cream helps to bring the mixture back together. Continue to add cold cream in small increments, whisking gently, until the ganache becomes smooth and shiny again. This isn’t a hail-Mary; it’s a proven technique that works wonders.
After whisking, gently tap your bowl on a folded towel a few times. This helps any large air bubbles rise to the surface and dissipate, ensuring your ganache filling is perfectly smooth and free of unsightly pockets once set.
Blind Baking Your Tart Crust Like a Pro
As mentioned, blind baking is non-negotiable for a crisp tart shell. Here’s a quick reminder of the key steps:
- **Chill:** Always chill your rolled-out, fitted tart dough before baking. This helps prevent shrinkage.
- **Weight It:** Line the dough with parchment paper and fill with pie weights, dried beans, or rice. This keeps the sides from collapsing and the bottom from puffing up.
- **Bake Until Golden:** Bake with weights until the dough no longer looks raw, then remove the weights and parchment and continue baking until the bottom is beautifully golden brown. A well-baked crust is essential for texture and flavor.
For a detailed walkthrough, including common pitfalls and solutions, be sure to check out my comprehensive guide on how to blind bake pie crust.
Mini Salted Chocolate Tarts
Chef Lindsey
30 mins
20 mins
50 mins
10
Tarts
Comment
Print Recipe
Ingredients
For the Ganache:
- 200 g 54% Chocolate
- 20 g Corn Syrup
- 2 g Salt
- 260 g Heavy Cream
- 4 g Vanilla Extract
- 56 g Butter room temperature
Almond Tart Crust Recipe (enough for 10 mini tarts)
Instructions
For the Crusts:
-
Preheat oven to 350°F convection or 375°F standard.
-
Roll out chilled dough to about 1/8 inch thick. Using a ring cutter or a glass slightly larger than your mini tart shells, cut out circles.
-
Carefully place each dough circle into a mini tart shell. Gently press the dough into the mold, being careful not to stretch it excessively, which can lead to shrinkage.
-
Chill the lined tart shells for at least 15-30 minutes. This helps the butter firm up and prevents shrinkage during baking.
-
Line each chilled crust with a small piece of parchment paper and fill with pie weights, dried beans, or rice. This is crucial for blind baking.
-
Bake in the preheated oven for approximately 15 minutes, or until the bottom of the crusts appear dry and no longer look like raw dough.
-
Carefully remove the parchment paper and pie weights. Continue baking for another 5-10 minutes, or until the crust bottoms are a light golden brown. Let cool completely on a wire rack before filling.
For the Ganache Filling:
-
In a medium heat-proof bowl, combine the chopped chocolate, corn syrup, and salt. Set aside.
-
Pour the heavy cream into a small saucepan and heat it gently over medium heat until it just reaches a boil. Watch it carefully to prevent scorching.
-
Immediately pour the hot cream over the chocolate mixture. Allow it to sit undisturbed for about one minute to soften the chocolate. Then, starting from the center of the bowl, begin whisking gently and slowly in small circles. As an emulsion begins to form (the chocolate will start looking shiny and smooth), gradually expand your whisking circles outward, incorporating all the chocolate and cream until the mixture is completely smooth and homogenous.
-
Once smooth, whisk in the vanilla extract. Then, add the room temperature butter, one piece at a time, whisking until fully incorporated and the ganache is glossy and luxurious.
-
If, by chance, the ganache appears broken or separated, do not panic. Pour a small amount (start with 1-2 tablespoons) of cold whipping cream into the ganache and whisk very gently to re-emulsify. You can continue to add small amounts of cold cream, up to about ¼ cup, if necessary, until it returns to a smooth consistency.
-
Gently tap the bowl of ganache on a folded towel or kitchen counter a few times to release any large air bubbles that might have formed during whisking.
-
Carefully pour the silky ganache into your pre-baked and cooled tart shells. If desired, you can use a kitchen torch to quickly pass over the surface of the ganache to remove any lingering tiny surface bubbles, leaving a perfectly smooth finish.
-
Refrigerate the filled tarts until the ganache is fully set, usually a few hours or overnight. Before serving, garnish with a sprinkle of flaky sea salt for that perfect sweet and salty counterpoint, if desired.
Video
Notes
Nutrition
Calories: 251kcal
|
Carbohydrates: 13g
|
Protein: 2g
|
Fat: 22g
|
Saturated Fat: 13g
|
Polyunsaturated Fat: 1g
|
Monounsaturated Fat: 6g
|
Trans Fat: 1g
|
Cholesterol: 43mg
|
Sodium: 124mg
|
Potassium: 140mg
|
Fiber: 2g
|
Sugar: 10g
|
Vitamin A: 532IU
|
Vitamin C: 1mg
|
Calcium: 31mg
|
Iron: 1mg
Dessert
French
251
Like this? Leave a comment below!
Serving Suggestions and Variations
These mini salted chocolate tarts are already showstoppers, but a few simple additions can elevate them even further. A sprinkle of flaky sea salt is almost mandatory, enhancing the chocolate’s depth and providing a delightful textural contrast. Consider garnishing with fresh raspberries or a dollop of lightly sweetened whipped cream for an added touch of elegance and freshness. A dusting of cocoa powder or finely grated orange zest can also add a sophisticated finish.
Feeling adventurous? Experiment with different types of chocolate. A darker chocolate (70% or higher) will yield a more intense, less sweet ganache, perfect for true dark chocolate lovers. For a milder flavor, milk chocolate can be used, though you might want to adjust the corn syrup slightly to maintain the desired set. You can also infuse your cream with flavors like mint, chili, or coffee before making the ganache for a unique twist.
While designed as mini tarts, this recipe is incredibly versatile. You can easily make one large, stunning chocolate tart by using a 9 or 10-inch tart pan and adjusting the baking time for the crust accordingly. The individual servings, however, truly make them a hit for parties, brunches, or even a thoughtful homemade gift.
Frequently Asked Questions (FAQs) About Mini Chocolate Tarts
- Can I make these chocolate tarts ahead of time?
- Absolutely! These tarts are an excellent make-ahead dessert. You can bake the tart shells up to 2-3 days in advance and store them in an airtight container at room temperature. The ganache can also be made a day or two in advance and stored in the refrigerator; gently reheat it over a double boiler or in short bursts in the microwave, stirring frequently, until pourable again, then fill your shells. Once assembled, the tarts can be refrigerated for up to 3 days. For best results, add the flaky sea salt just before serving.
- What’s the best way to store leftover chocolate tarts?
- Store any leftover tarts in an airtight container in the refrigerator. They will remain fresh and delicious for 3-4 days. For optimal enjoyment, allow them to come to room temperature for about 15-20 minutes before serving, as this enhances the texture and flavor of the ganache.
- Can I freeze these mini chocolate tarts?
- Yes, you can! Once the ganache is fully set, place the tarts on a baking sheet and freeze until solid. Then, transfer them to an airtight freezer-safe container or wrap them individually in plastic wrap and foil. They can be frozen for up to 2-3 weeks. Thaw them overnight in the refrigerator before serving, and let them come to room temperature for the best experience.
- Is corn syrup necessary in the ganache?
- While you can omit corn syrup, it’s highly recommended for two key reasons: it contributes to a smoother, softer ganache texture, preventing it from becoming too firm when chilled, and it provides that beautiful, glossy sheen. If you prefer not to use corn syrup, you can substitute it with an equal amount of honey or liquid glucose, though these may impart a slight flavor difference.
- My ganache looks greasy and separated. What went wrong?
- This is a common issue known as “breaking” the ganache, usually caused by over-whisking or the cream being too hot, causing the fats to separate from the liquids. Don’t worry, it’s fixable! Simply add a small amount (start with 1-2 tablespoons) of cold heavy cream to the ganache and whisk very gently from the center outwards until it comes back together into a smooth, emulsified state. Repeat if necessary with tiny additions of cold cream.