
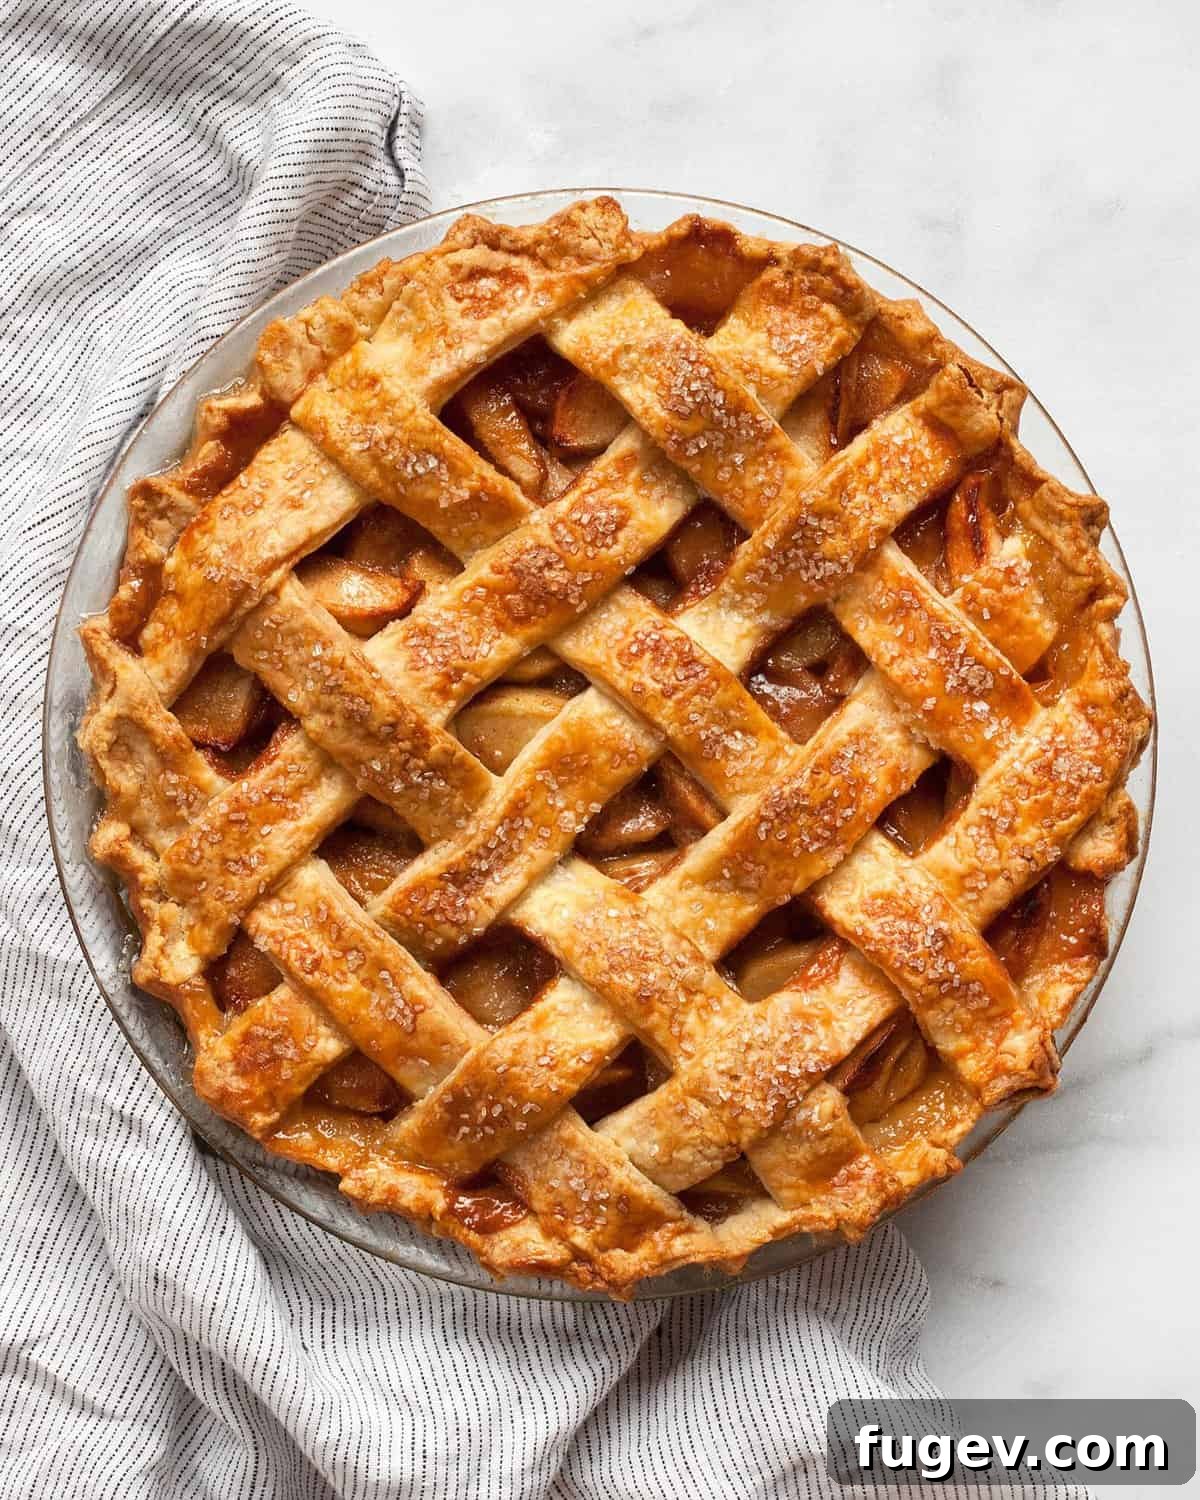
If you’re searching for a show-stopping dessert for your holiday table, perhaps for Thanksgiving, or simply craving a comforting homemade fall treat, look no further than this exquisite Salted Caramel Apple Pie recipe. This creation harmoniously blends the crisp, tart notes of Granny Smith apples with the sweet, aromatic flavor of Honeycrisp apples, all enveloped in a rich, buttery crust and elevated by a luscious salted caramel swirl. This comprehensive guide provides clear, step-by-step instructions, ensuring your journey from preparing the perfect flaky dough to crafting a beautiful lattice top and baking a golden-brown masterpiece is smooth and enjoyable.
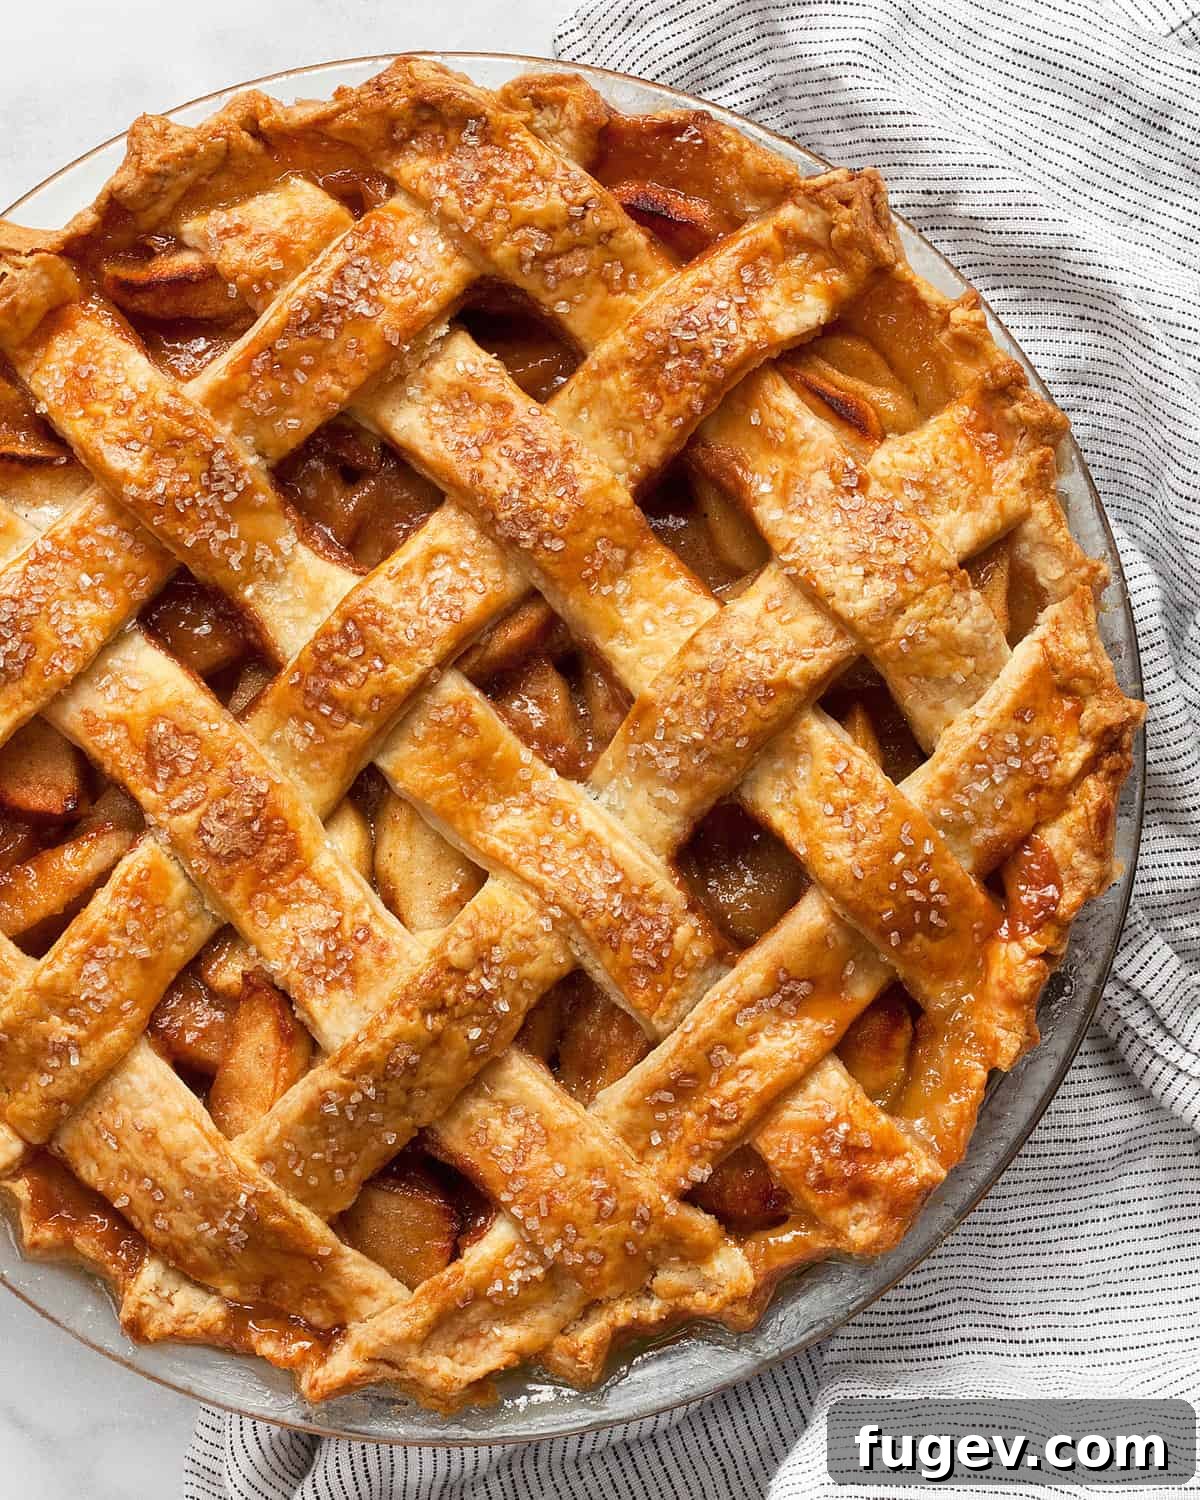
Table of Contents
- Why This Salted Caramel Apple Pie Recipe Works
- Choosing the Best Apples for Your Pie
- Essential Tips for a Flaky Pie Crust
- Understanding How to Cut Butter into Flour
- Key Ingredients for Your Perfect Pie
- How to Make Salted Caramel Apple Pie: Step-by-Step
- Crafting the Flaky Pie Dough
- Preparing the Decadent Salted Caramel
- Assembling the Aromatic Apple Pie Filling
- Building Your Pie with a Lattice Top
- Baking Your Apple Pie to Golden Perfection
- Mastering the Art of Lattice Pie Crust
- Serving Suggestions for Your Apple Pie
- Storing and Enjoying Leftover Pie
- Frequently Asked Questions About Apple Pie
- More Irresistible Fall Dessert Recipes
- Full Salted Caramel Apple Pie Recipe Card
Why This Salted Caramel Apple Pie Recipe Works
This isn’t just another apple pie recipe; it’s a carefully crafted experience designed to deliver everything you desire in a classic dessert, with an irresistible twist. Here’s why this recipe consistently yields a perfect pie:
- Unrivaled Flaky, Buttery Crust: Our crust recipe focuses on simplicity and cold ingredients, guaranteeing a tender, delicate texture that practically melts in your mouth. The generous use of butter ensures a rich flavor that perfectly complements the filling.
- Perfectly Balanced Sweet & Tart Apple Filling: By combining specific apple varieties, we achieve a filling that is neither too sweet nor too tart. The apples hold their shape beautifully, offering delightful texture in every bite.
- The Magic of Salted Caramel: The addition of homemade salted caramel transforms this pie from simply delicious to absolutely unforgettable. A touch of salt in any dessert acts as a flavor enhancer, amplifying the sweetness and adding a sophisticated depth that creates a wonderful counterpoint to the apples. This caramel swirls through the filling, adding an extra layer of moisture and richness.
Every element of this pie, from the meticulously prepared crust to the carefully selected apples and the decadent caramel, works in harmony to create a truly exceptional dessert that will impress both your family and friends.
Choosing the Best Apples for Your Pie
The secret to a truly outstanding apple pie lies in selecting the right apples. With countless varieties available, it’s essential to understand which ones perform best under heat. My tried-and-true strategy for pie making involves a thoughtful combination of tart and sweet apples, creating a complex and balanced flavor profile in the filling. I typically opt for a 50-50 split between two distinct types, ensuring both flavor and structural integrity.
For the essential tart component, I always reach for Granny Smith apples. These vibrant green apples are renowned for their firm texture and bright, acidic flavor, which cuts through the sweetness of the caramel and sugar. Crucially, Granny Smiths maintain their structure exceptionally well during baking, preventing your filling from becoming a mushy, unappetizing mess. You want to see distinct apple slices in your baked pie, and Granny Smiths reliably deliver that desirable texture.
To complement the tartness, I use Honeycrisp apples for their delightful sweetness and crisp, juicy flesh. Honeycrisps boast a more pronounced “apple-y” flavor compared to Granny Smiths, adding a nuanced depth that enhances the overall taste. While not as firm as Granny Smiths, their texture softens beautifully, contributing to a more interesting and varied filling consistency. If Honeycrisps aren’t readily available, excellent substitutes include Pink Lady or Braeburn apples, both of which offer a good balance of sweetness and firmness.
Experimenting with apple combinations can be fun, but always ensure you have a firm, tart apple as your base. Other varieties like Golden Delicious can add sweetness, while Northern Spy or Rome Beauty are also good baking apples known for holding their shape. A blend ensures a filling that’s flavorful, textured, and structurally sound, making every slice a delight.
Essential Tips for a Flaky Pie Crust
Achieving a truly great pie crust is simpler than many believe, yet it requires adherence to a few fundamental principles. The goal is a crust that is rich and buttery, yet miraculously light and flaky. Here’s how to master it:
Keep It Simple
Forget complex tricks or unnecessary additions. The most reliable and delicious pie dough relies on just a handful of basic ingredients: flour, fat, a touch of sugar, salt, and ice water. By sticking to these core components and focusing on technique, you’ll consistently achieve superior results without overcomplicating the process. This minimalist approach ensures the pure flavor of the butter shines through.
Embrace Butter as Your Fat of Choice
While lard can yield an incredibly flaky crust, it often falls short on flavor. Shortening, with its high melting point, is easy to work with but lacks the rich, nuanced taste that butter provides. Butter is the superior choice for a truly flavorful crust. The key is in how you handle it: when cold butter is incorporated into the flour and then bakes, the water content in the butter rapidly turns to steam, creating pockets that result in those coveted flaky layers. Once you get the hang of cutting cold butter into flour, you’ll unlock a world of buttery, tender, and beautifully flaky crusts.
The Golden Rule: Keep Your Ingredients Cold
This is perhaps the most critical tip for a flaky pie crust. Both your butter and water must be as cold as possible. Resist the urge to take the butter out of the fridge until you are literally ready to cube it and mix it into the flour. For the water, I take “ice water” literally – I’ll use water chilled in the fridge and even add a few ice cubes to ensure it stays frosty. Cold butter prevents premature melting and mixing with the flour, which would lead to a tough, bready crust instead of flaky layers. Cold water also helps keep the butter solid and minimizes gluten development, which is essential for tenderness.
Prevent a Soggy Bottom: Manage Excess Juices
A soggy bottom crust is the bane of any pie baker’s existence. When you’re spooning the delicious apple filling into your bottom crust, it’s vital to leave any accumulated excess juices in the mixing bowl. As apples sit with sugar and spices, they naturally release their liquids. These juices, while flavorful, will make your bottom crust wet and prevent it from crisping up. The easiest way to avoid this is to use a slotted spoon to transfer the apple slices, allowing the liquid to drain back into the bowl before adding the filling to the pie shell.
Understanding How to Cut Butter into Flour
If you’re new to pie making, the instruction “cut butter into dry ingredients” might sound a bit mysterious. It’s a fundamental technique that differs significantly from how you might combine butter and sugar for cookies. Instead of beating soft, room-temperature butter until light and fluffy, pie crust requires the opposite: cold, firm butter.
Start with butter that is thoroughly chilled, ideally straight from the refrigerator. Cut it into small, uniform cubes, roughly 1/2-inch in size. A simple method is to take a stick of butter, halve it lengthwise, then halve those halves lengthwise again. With these four long sections stacked together, slice the butter crosswise into about 8 equal sections. This will yield approximately 32 cubes from each stick of butter, ensuring consistent pieces that are easier to work with.
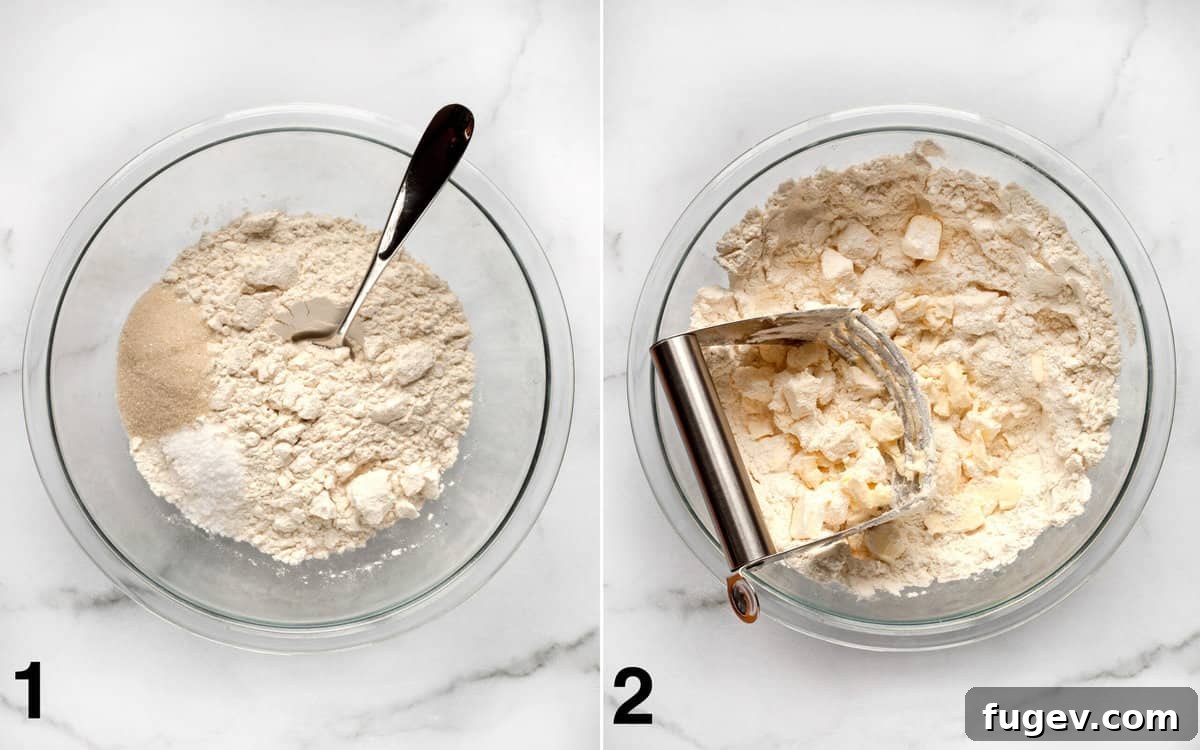
Once your butter is cubed, you’ll incorporate it into your dry ingredients (flour, sugar, salt). You can use a fork, your fingertips, or a dedicated pastry blender (also known as a pastry cutter). The goal is to break down the cold butter into the flour mixture until it forms pea-sized clumps, with some pieces even a bit larger, resembling small flakes. This process coats the butter in flour, preventing it from melting too quickly.
The crucial reason for keeping the butter cold and creating these small pieces is scientific: during baking, the cold butter slowly melts, releasing steam that pushes apart the layers of dough. This steam is what creates the wonderful, airy, and undeniably flaky texture that defines a perfect pie crust. If the butter is too warm or overworked, it melts into the flour prematurely, leading to a tough, dense crust instead of the desired flaky result.
Key Ingredients for Your Perfect Pie
Crafting this incredible Salted Caramel Apple Pie requires a selection of fresh, high-quality ingredients. Each component plays a vital role in achieving the perfect balance of flavor and texture. Here’s a breakdown of what you’ll need:
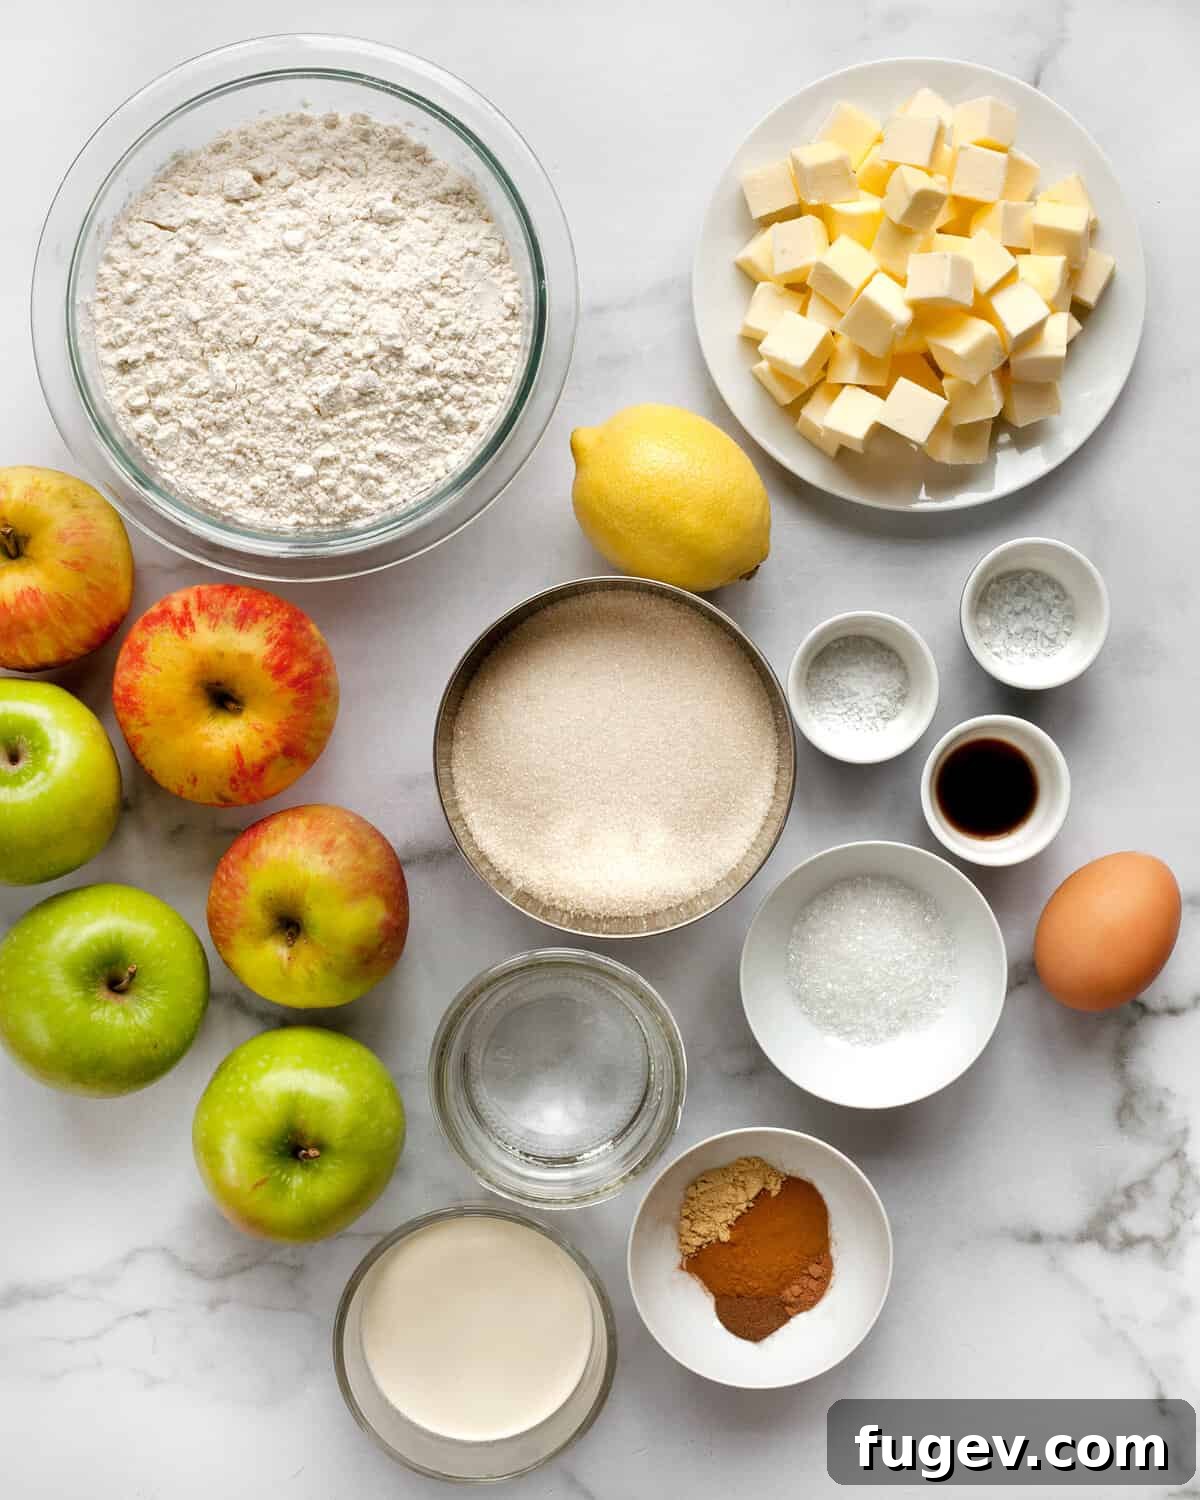
Gather these essentials for a truly spectacular pie:
- Apples: A balanced mix of Granny Smith (for tartness and structure) and Honeycrisp (for sweetness and robust apple flavor).
- All-purpose flour: The foundation for your flaky pie crust, providing structure and texture.
- Unsalted butter: Essential for a rich, buttery flavor and incredibly flaky crust. Using unsalted butter allows you to control the overall salt content in the recipe.
- Granulated sugar: Sweetens both the pie dough, the caramel, and the apple filling.
- Spices: A warm blend of ground cinnamon, ginger, cloves, and nutmeg to infuse the apples with quintessential fall flavors.
- Kosher salt: A crucial ingredient that enhances all the sweet flavors in the dough and filling, and forms the “salted” part of the caramel.
- Vanilla extract: Adds a layer of aromatic warmth to the caramel sauce, complementing its richness.
- Lemon juice: A splash brightens the apple filling, prevents browning, and balances the sweetness.
- Heavy cream: The secret to a smooth, luxurious, and truly decadent salted caramel sauce.
- Egg: Used to create an egg wash, giving your pie crust a beautiful golden sheen.
- Sanding sugar: Sprinkled over the egg wash, it adds a delightful sparkle and a pleasant crunch to the crust.
- Sea salt: A final touch for the caramel, providing that perfect salty kick.
How to Make Salted Caramel Apple Pie: Step-by-Step
Crafting the Flaky Pie Dough
The foundation of any great pie is its crust. This simple yet effective method ensures a flaky, tender, and buttery dough.
- Combine Dry Ingredients: In a large mixing bowl, whisk together the all-purpose flour, granulated sugar, and kosher salt. This ensures even distribution of flavors.
- Incorporate Cold Butter: Add the cubed, chilled unsalted butter to the dry mixture. Using a fork or a pastry blender, work the butter into the flour until the mixture resembles coarse meal with visible pea-sized clumps of butter. This step is critical for flakiness.
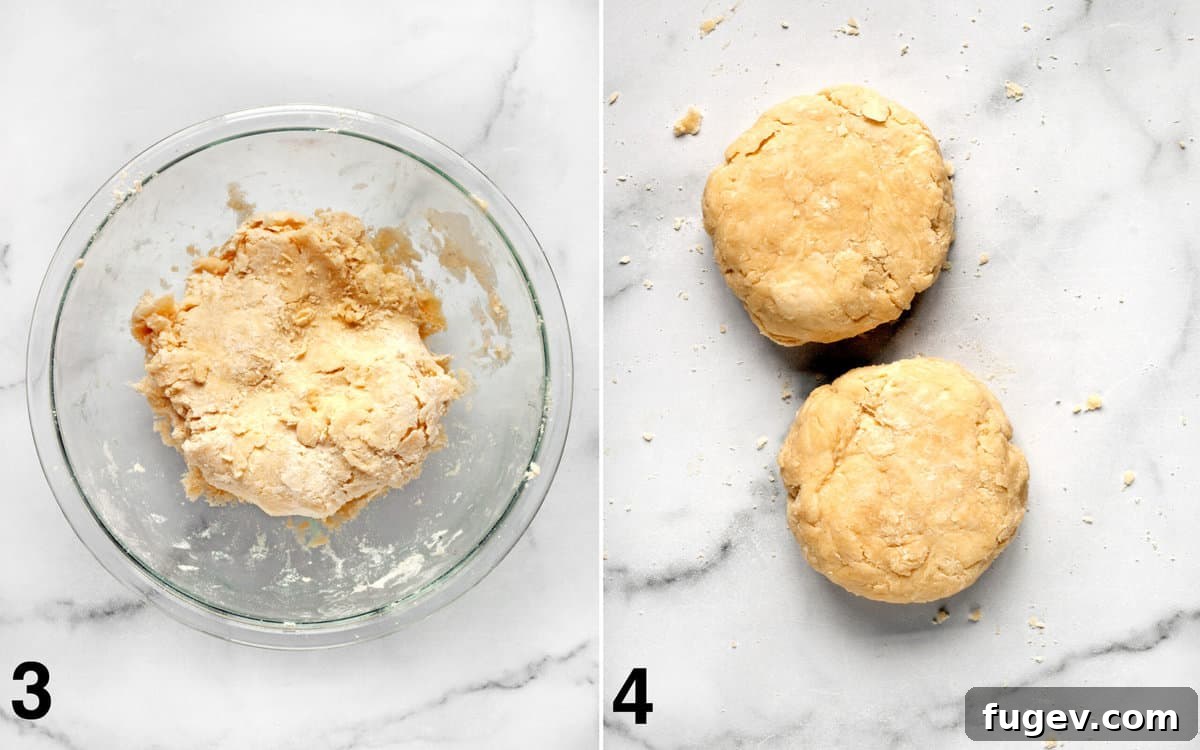
- Add Ice Water: Gradually stir in 4 to 6 tablespoons of ice water, one tablespoon at a time. The mixture will initially look shaggy. Once it starts to come together, use your hands to gently press and knead it into a cohesive dough. Be careful not to overmix; you should still see visible streaks of butter, which are key to flakiness.
- Chill the Dough: Divide the dough into two equal halves. Form each half into a flat disk, wrap them tightly in plastic wrap, and refrigerate for at least 1 hour, or up to 2-3 days. Chilling the dough allows the gluten to relax and the butter to firm up, making it easier to roll and ensuring a tender crust. Making the dough a day in advance is a great way to spread out your baking tasks.
Preparing the Decadent Salted Caramel
This homemade salted caramel sauce adds a rich, gooey depth to your apple pie.
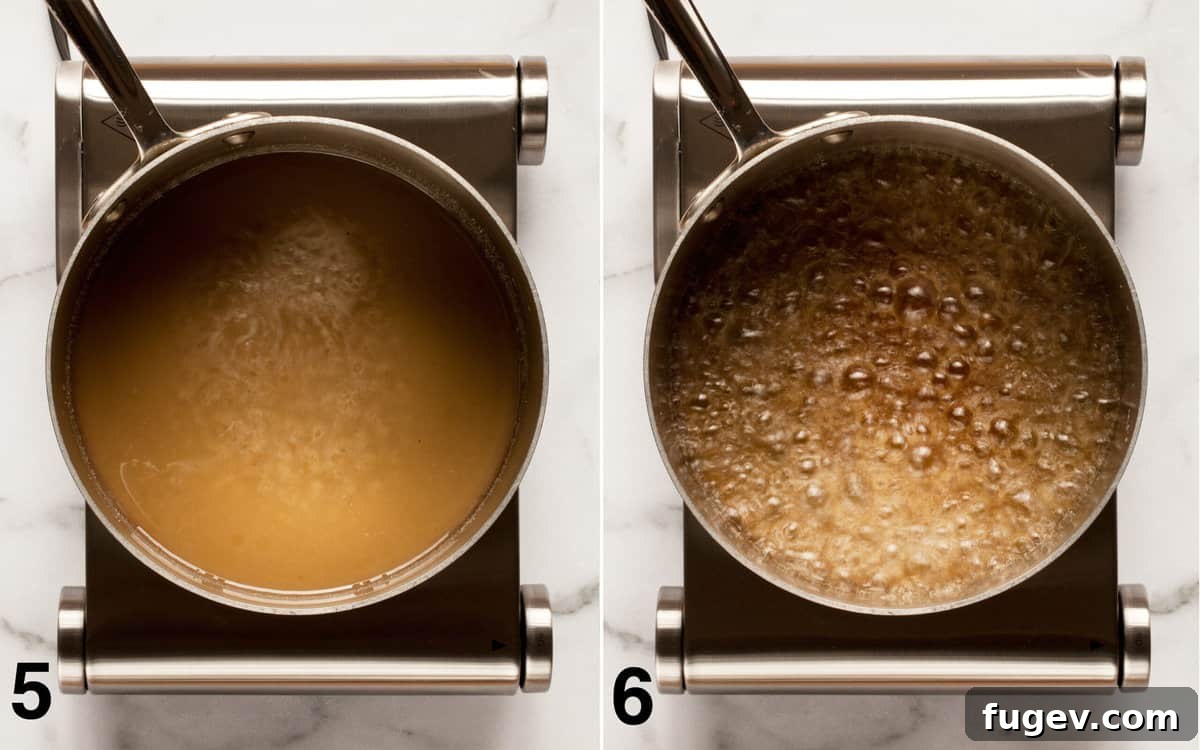
- Dissolve Sugar and Water: In a large, heavy-bottomed saucepan, combine the granulated sugar and water. Place over medium-low heat and stir gently until the sugar completely dissolves. Once the sugar has dissolved and the mixture is clear, stop stirring. Stirring after this point can cause the sugar to crystallize.
- Cook to Amber: Increase the heat to medium and allow the sugar mixture to boil without stirring. Be patient; this process can take some time. Use a pastry brush dipped in water to gently wash down any sugar crystals that may form on the sides of the pot, preventing crystallization. Continue cooking until the caramel transforms into a deep, rich amber color. This indicates it has developed its full flavor.
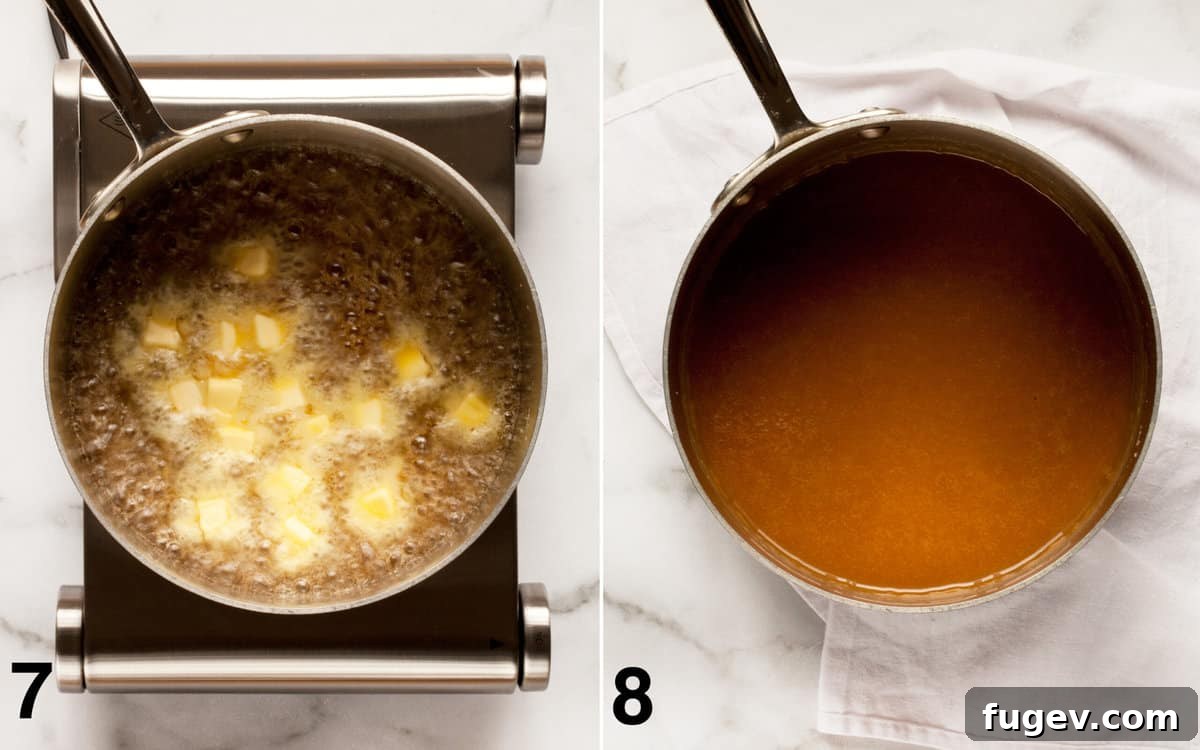
- Add Butter: Once the caramel reaches the desired color, carefully add the cubed unsalted butter. Stir continuously until the butter has fully melted and is incorporated into the hot sugar mixture. This will happen quickly due to the high temperature.
- Finish with Cream, Vanilla, and Salt: Immediately remove the saucepan from the heat. Slowly and carefully whisk in the heavy cream. The mixture will bubble up vigorously, so be cautious. Continue whisking until smooth. Finally, stir in the vanilla extract and sea salt. Set the caramel aside to cool slightly; it will thicken as it cools.
Assembling the Aromatic Apple Pie Filling
This simple filling ensures maximum apple flavor with a hint of spice.
- Combine Ingredients: In a large bowl, combine the peeled, cored, and thinly sliced apples with the fresh lemon juice, granulated sugar, all-purpose flour (which helps absorb excess moisture and thicken the filling), ground cinnamon, ground ginger, a pinch of ground cloves, and a pinch of ground nutmeg. Toss gently until the apples are evenly coated.
Building Your Pie with a Lattice Top
Now, let’s bring all the elements together to create your stunning pie.
- Prepare Bottom Crust: On a lightly floured surface, roll out one of the chilled dough disks into an 11-inch diameter circle, approximately 1/8-inch thick. Carefully transfer the rolled dough into a 9-inch pie dish, allowing the excess dough to overhang the edges.
- Create Lattice Strips: Roll out the remaining dough disk into another 11-inch diameter circle. Using a ruler and a sharp knife or a pizza cutter, cut the dough into even strips, typically 3/4 to 1 inch wide, for your lattice crust top.
- Add Filling and Caramel: Using a slotted spoon, transfer the apple filling into the prepared bottom crust, leaving any excess juices that have collected in the bowl behind. Distribute the apples evenly. Then, generously pour the prepared salted caramel sauce over the apples.
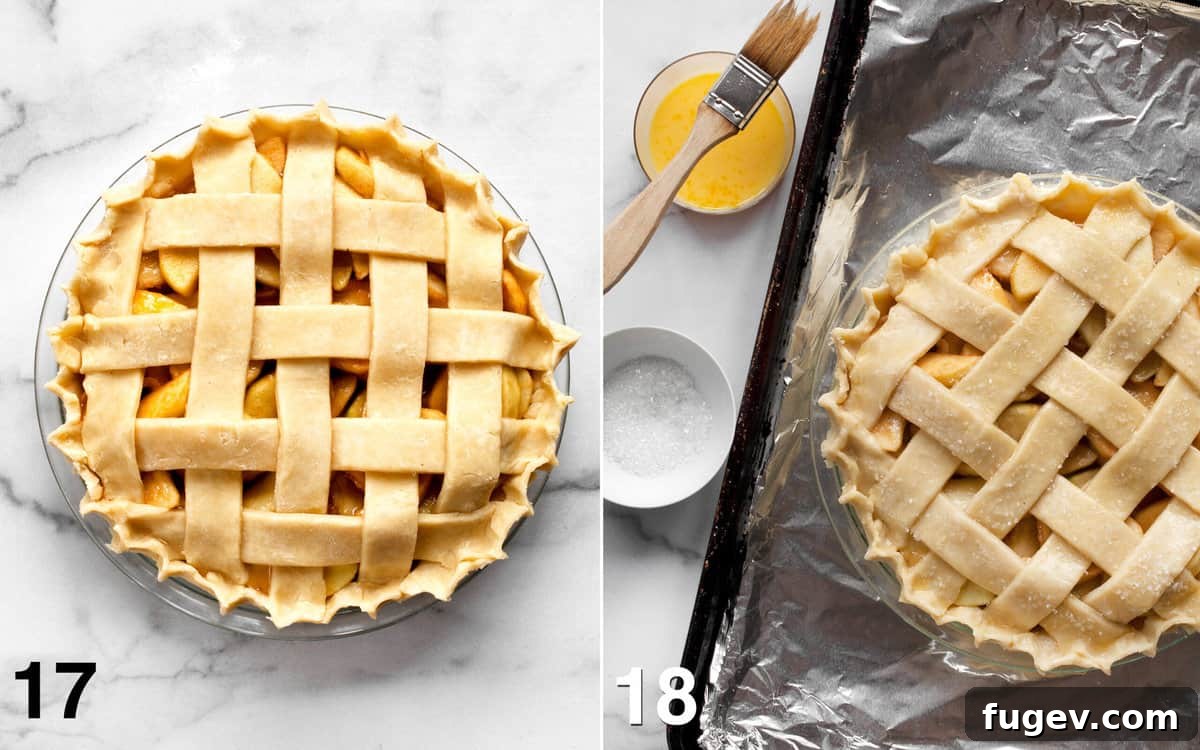
- Begin Lattice Weaving: Lay half of the dough strips across the pie in one direction, spacing them evenly. Ensure the strips extend past the pie dish edges.
- Weave the Lattice: Gently fold back every other strip from the first set. Place a new dough strip perpendicularly over the unfolded strips. Fold the previously folded strips back down over the new strip. Repeat this weaving pattern with the remaining dough strips, alternating which strips you fold back to create the classic woven lattice effect.
- Trim Edges: Once the lattice is complete, use a sharp paring knife or kitchen shears to carefully trim the overhanging edges of both the bottom crust and the lattice strips, leaving about a 1/2-inch overhang.
- Crimp Edges: Crimp the edges of the pie to seal the top and bottom crusts together and create a decorative border. You can do this by pressing a fork all the way around the rim, or by using your thumb and forefinger to create a fluted edge.
- Apply Egg Wash and Sugar: In a small bowl, whisk together one egg with a tablespoon of water to create an egg wash. Brush this mixture generously over the entire surface of the lattice crust. Finally, sprinkle the crust with coarse sanding sugar for a beautiful sparkle and added crunch.
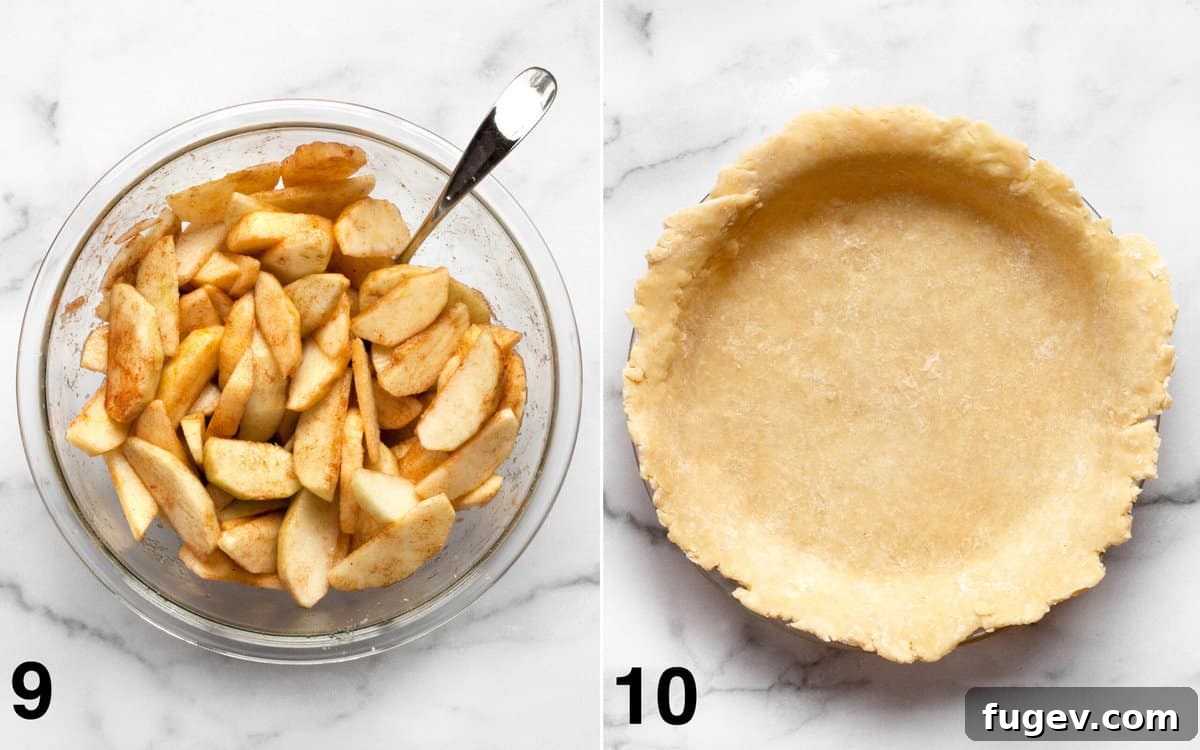
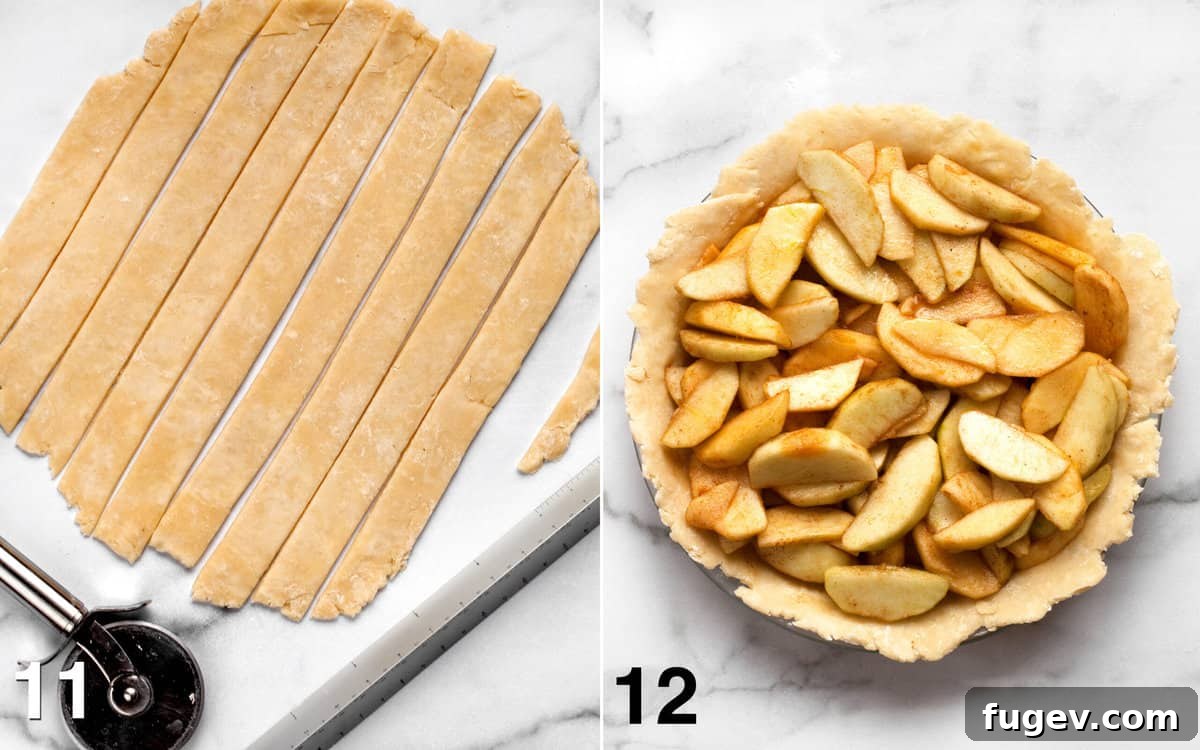
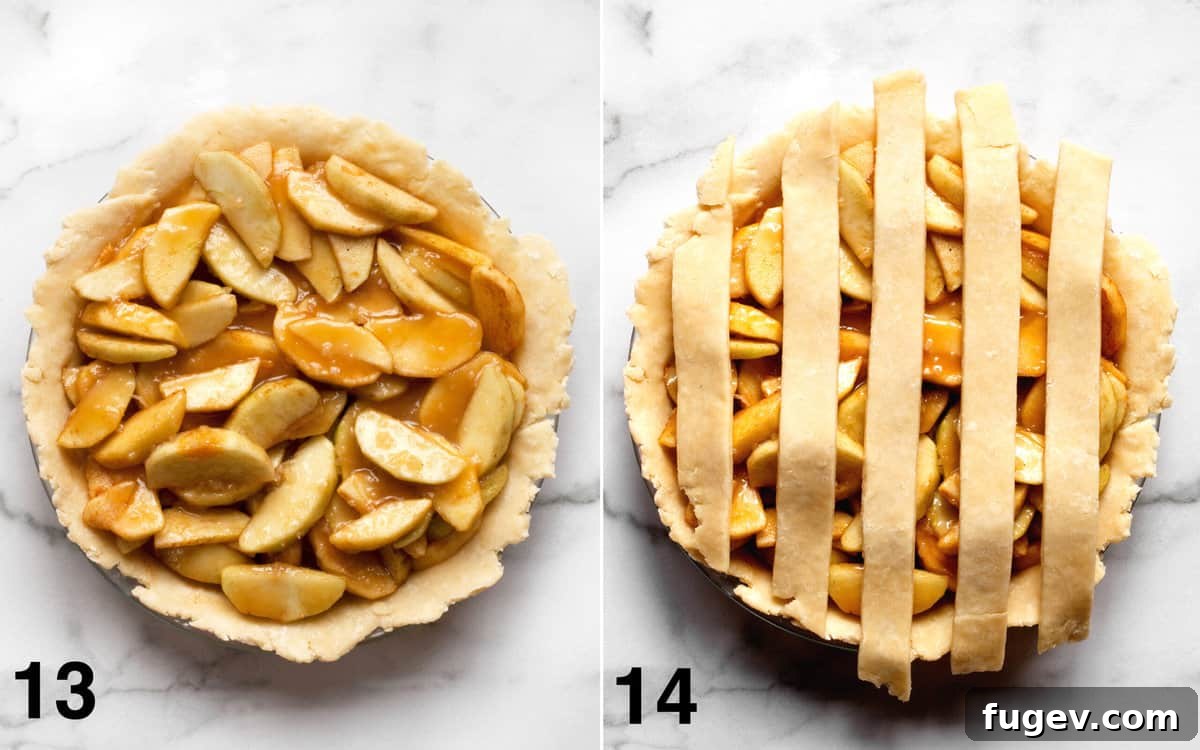
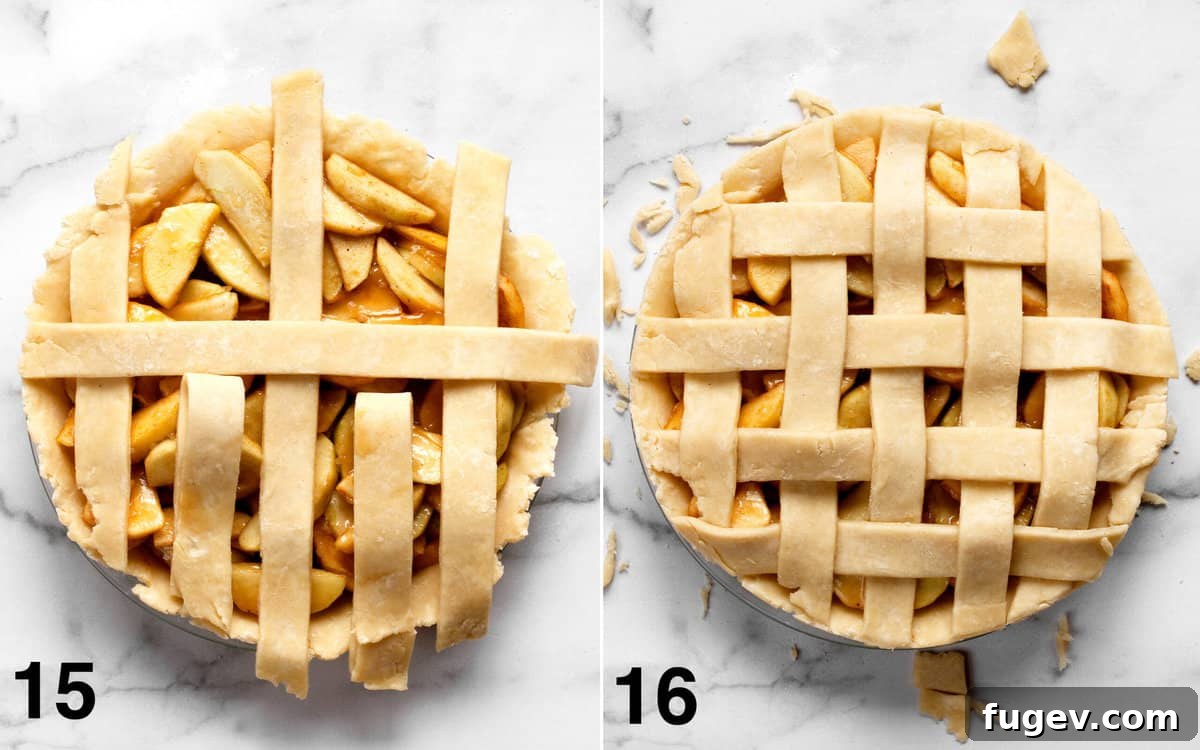
Baking Your Apple Pie to Golden Perfection
The final step brings all your hard work to fruition: baking!
- Prepare for Baking: Preheat your oven to 375 degrees F (190 degrees C). Place the assembled pie on a foil-lined baking sheet before putting it into the oven. This crucial step will catch any caramel that might bubble over or ooze out during baking, saving you from a messy oven cleanup.
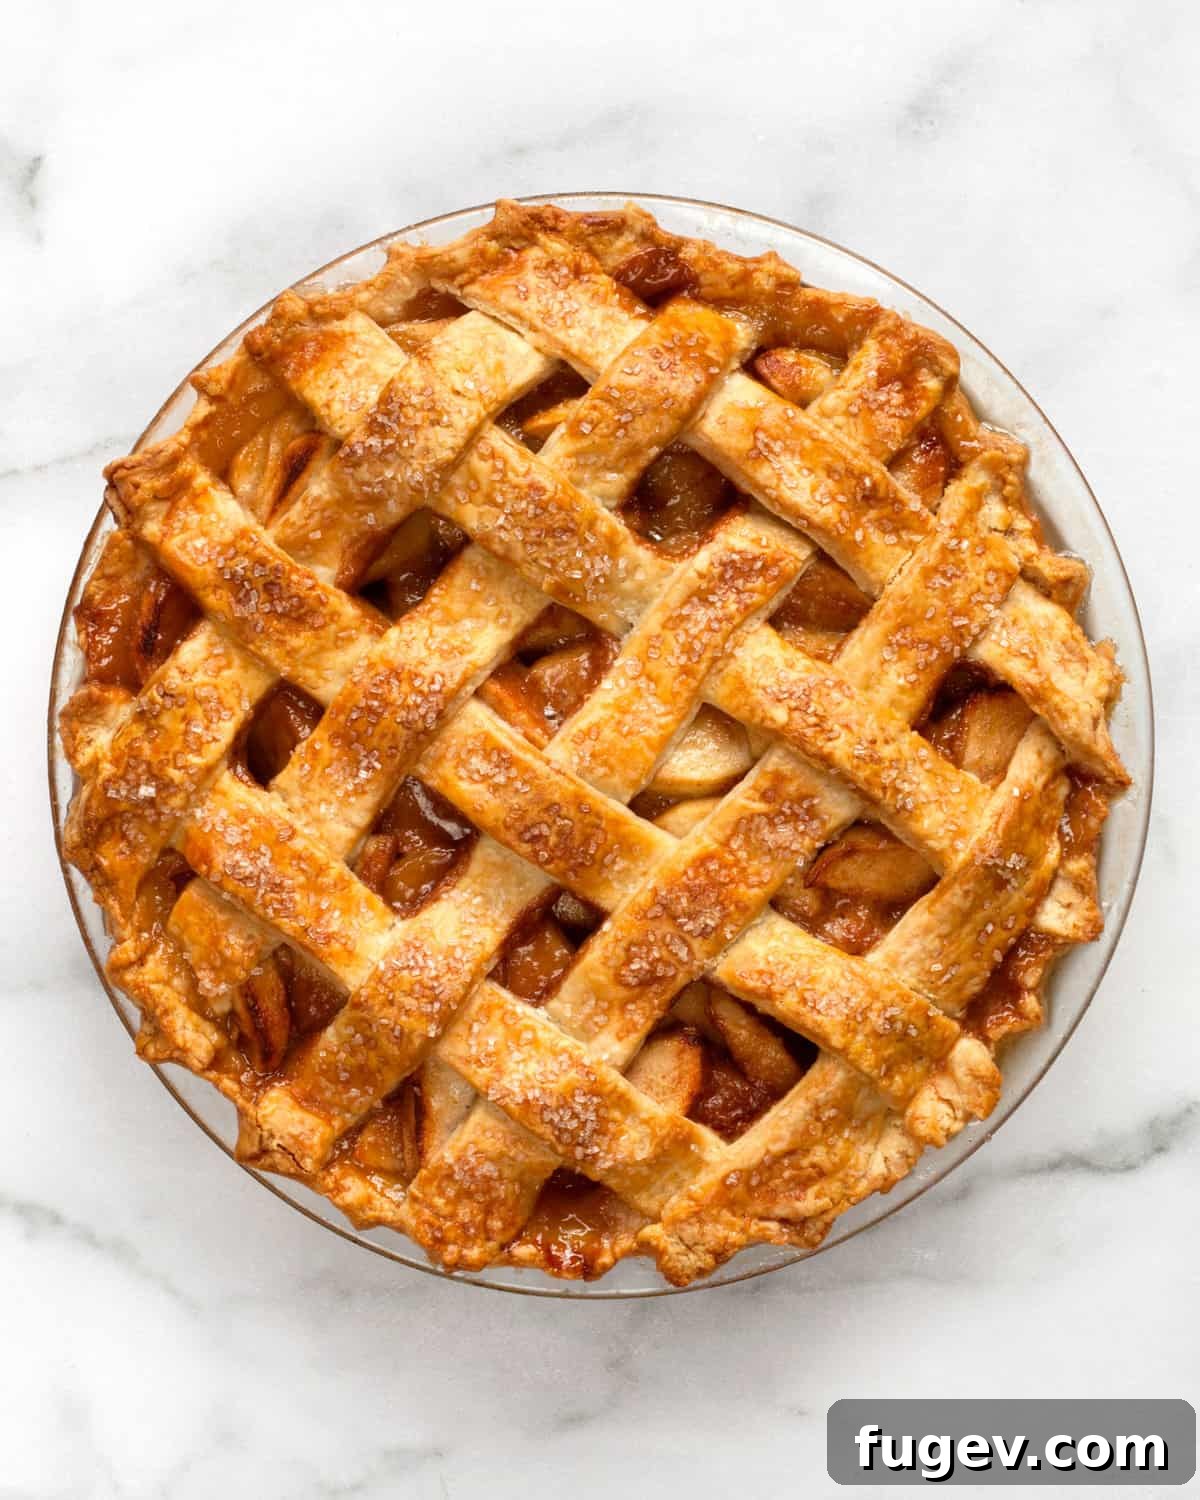
- Bake Until Golden: Bake the pie for 1 hour to 1 hour and 15 minutes, or until the crust is a rich, golden brown and the apple filling is visibly bubbling through the lattice openings. This bubbling indicates that the apples are tender and the caramel is hot and gooey. If you notice the crust browning too quickly during baking, loosely cover the edges or the entire pie with aluminum foil to prevent burning.
- Cool Before Serving: Once baked, remove the pie from the oven and let it cool on a wire rack for at least 2-3 hours before slicing and serving. This cooling time allows the caramel and apple filling to set properly. Slicing too early will result in a runny pie, as the caramel will be extremely hot and fluid.
Mastering the Art of Lattice Pie Crust
A lattice pie crust might appear intricate and challenging, but with a few simple tools and techniques, it’s surprisingly achievable and incredibly rewarding. It adds a beautiful, professional touch to any pie.
Essential Tools
To ensure clean, straight cuts and uniform strip widths, the essential tools are a sturdy metal ruler and a sharp knife, or even a pizza roller. The ruler acts as your guide, helping you cut consistent strips. If you’re not keen on precise measuring, a clever shortcut is to simply cut the strips the width of your ruler, which often yields perfectly suitable and attractive results.
Handling Sticky Dough
One common challenge when working with pie dough, especially for a lattice, is when it becomes too warm and sticky. This can happen during rolling or handling, making it difficult to achieve clean cuts and transfer strips. The solution is simple: at any point when the dough feels too soft or sticky, don’t hesitate to place it back into the refrigerator to chill. A quick 5-10 minute chill can make all the difference. For easy transfer of your rolled dough or cut strips to and from the fridge, a rimless baking sheet lightly dusted with flour works wonders. This keeps the dough cool and manageable.
Alternative Designs
If a full woven lattice feels too daunting for your first attempt, consider simpler decorative tops. You can create a partial lattice, or simply cut out shapes (like leaves or apples) with cookie cutters and arrange them decoratively on top of the filling, then brush with egg wash and sugar. Practice makes perfect, and even a simple top crust can be beautiful!
Serving Suggestions for Your Apple Pie
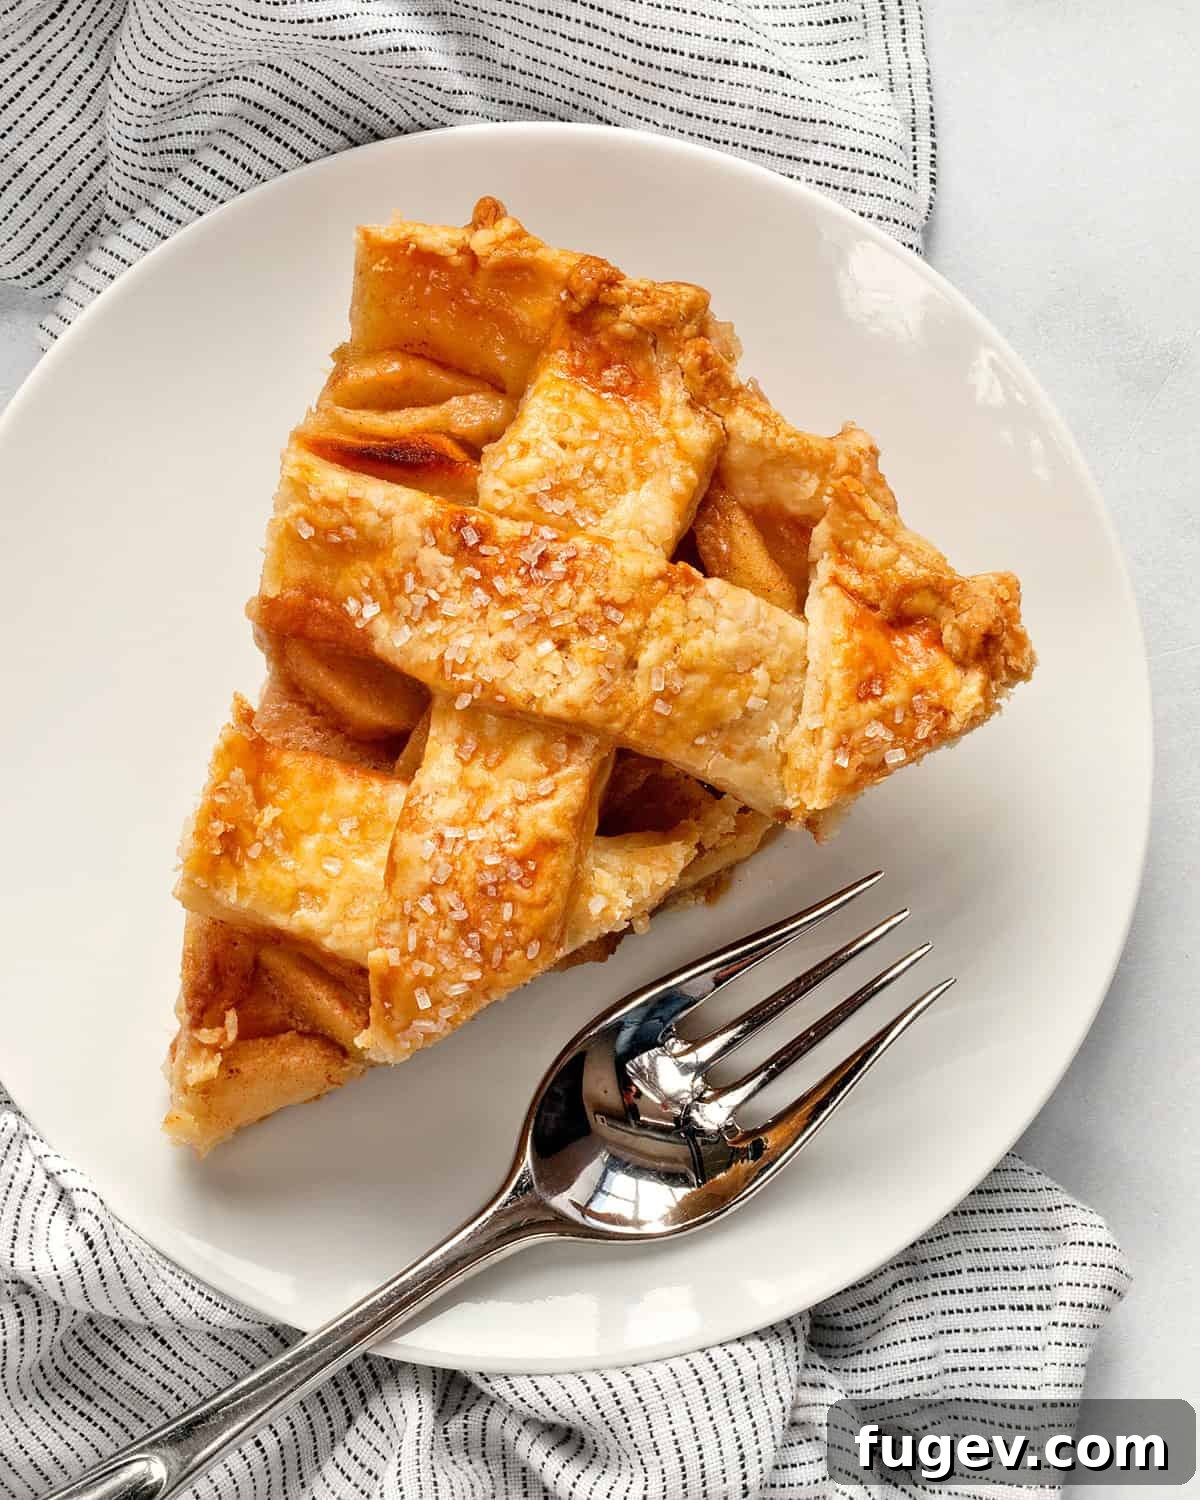
After all your hard work, the moment to enjoy your magnificent Salted Caramel Apple Pie has arrived! It’s crucial to give the pie adequate time to cool before serving. The caramel filling will be extremely hot and fluid right out of the oven, and it needs time to set properly. Allowing it to cool for at least 2-3 hours will ensure neat slices and a stable, gooey filling.
You can serve this pie warm, which enhances its comforting aromas and gooey texture, or at room temperature, where the flavors have a chance to fully meld. For an extra touch of indulgence, go “a la mode” by topping your slice with a generous scoop of premium vanilla bean ice cream. The cold, creamy ice cream is a perfect counterpoint to the warm, spiced apples and rich caramel. Alternatively, a dollop of freshly whipped cream can add a light, airy finish.
Storing and Enjoying Leftover Pie
While this pie is undeniably at its peak on the day it’s baked, any leftovers are still a delightful treat. For optimal freshness and flavor, store leftover pie in an airtight container at room temperature for up to 2 days. For longer storage, you can refrigerate it for up to 4-5 days, though the crust may lose some of its crispness.
To enjoy refrigerated slices, you can gently warm them in a 300-degree F (150 degrees C) oven for about 10-15 minutes, or until just heated through. This helps revive the crust and warm the filling, bringing back some of that freshly baked goodness. Avoid microwaving, as it can make the crust soggy.
Frequently Asked Questions About Apple Pie
What are the best apples to use for apple pie?
For the best apple pie, always use a combination of varieties. Incorporate Granny Smith apples for their tartness and firm texture, which ensures they hold their shape during baking and prevent a mushy filling. Pair them with sweeter, more aromatic apples like Honeycrisp, Pink Lady, or Braeburn to add a complex sweetness and depth of flavor. A half-and-half ratio of tart to sweet apples typically yields the most balanced and delicious results.
Do you cook apples before putting them in a pie?
No, for most traditional apple pie recipes, you do not need to cook the apples beforehand. Simply peel, core, and slice the raw apples thinly. They will cook perfectly inside the pie as it bakes, softening and releasing their juices to create a tender, flavorful filling. Pre-cooking can sometimes lead to an overly soft or mushy filling once baked.
How do I prevent my apple pie crust from getting soggy?
To prevent a soggy bottom crust, there are several key steps: first, ensure your pie dough is properly chilled and has enough fat (butter) for flakiness. Second, when adding the apple filling, use a slotted spoon to leave any excess liquid from the apple mixture in the bowl. Third, bake the pie on the lowest rack of your oven to ensure direct heat to the bottom crust, and consider baking on a preheated baking stone or heavy-duty sheet pan. Finally, don’t underbake the pie; a golden-brown bottom crust is key.
More Irresistible Fall Dessert Recipes
If you’re still in the mood for cozy fall flavors, explore some of our other delightful dessert recipes:
- Vegan Cinnamon-Spiced Chocolate Chip Cookies
- Cinnamon Squares
- Cinnamon Shortbread Owl Cookies
- Caramel Nut Tart
Salted Caramel Apple Pie
Cook: 1 hr 15 mins
Chilling Time: 1 hr
Total: 3 hrs
With a perfect blend of tart and sweet apple varieties, this salted caramel apple pie honors the classic while introducing the decadent richness of homemade salted caramel sauce for a truly fantastic and memorable pie filling.
Ingredients
For the Dough:
- 2-1/2 cups all-purpose flour, plus more for work surface
- 1 tablespoon granulated sugar
- 1 teaspoon kosher salt
- 1 cup unsalted butter, chilled and cut into cubes
- 4-6 tablespoons ice water
For the Caramel:
- 1 cup granulated sugar
- 1/4 cup water
- 1/4 cup heavy cream
- 4 tablespoons unsalted butter, cubed
- 1 teaspoon vanilla extract
- 1 teaspoon sea salt
For the Filling:
- 6 large apples (3 Honeycrisp and 3 Granny Smith), peeled, cored, and sliced thinly
- Juice of 1 lemon
- 1/2 cup granulated sugar
- 2 teaspoons ground cinnamon
- 1/4 teaspoon ground ginger
- Pinch of ground cloves
- Pinch of ground nutmeg
For the Pie Assembly:
- 1 egg, lightly beaten (for egg wash)
- 1 tablespoon sanding sugar
Instructions
- For the dough: In a large bowl, combine the flour, sugar, and salt. Add the chilled, cubed butter and use a pastry blender or fork to cut it into the flour mixture until pea-sized clumps form. Gradually stir in 4-6 tablespoons of ice water until a shaggy dough forms, then use your hands to gently press it together. Divide the dough in half, form into two disks, wrap in plastic, and chill in the refrigerator for at least 1 hour (up to 2-3 days).
- Preheat the oven to 375°F (190°C). Line a baking sheet with foil.
- To make the caramel: In a medium saucepan over medium-low heat, combine granulated sugar and water, stirring until sugar dissolves. Stop stirring, increase heat to medium, and bring to a boil. Use a wet pastry brush to dissolve any sugar crystals on the sides. Cook until the caramel turns a deep amber color. Remove from heat and stir in the cubed butter until melted. Slowly whisk in the heavy cream, followed by vanilla extract and sea salt. Set aside.
- For the filling: In a large bowl, combine the sliced apples, lemon juice, sugar, cinnamon, ginger, cloves, and nutmeg. Toss to coat evenly.
- On a lightly floured surface, roll out one dough disk into an 11-inch diameter circle (about 1/8-inch thick). Carefully transfer to a 9-inch pie plate, letting the excess dough overhang the edges.
- Roll out the second dough disk into another 11-inch circle and cut into even strips (3/4 to 1 inch wide) for the lattice top.
- Using a slotted spoon, transfer the apple filling into the bottom crust, leaving any excess juices in the bowl. Pour the prepared salted caramel evenly over the apples.
- Arrange half the dough strips over the pie, spaced evenly. Fold back every other strip and lay a new strip perpendicularly. Fold the initial strips back down. Repeat this weaving process with the remaining strips to create a lattice pattern.
- Trim the edges of the dough with a paring knife or kitchen shears, leaving about a 1/2-inch overhang. Crimp the edges decoratively using a fork or your fingers.
- Place the pie on the prepared baking sheet. Whisk the beaten egg with a tablespoon of water for an egg wash and brush it over the entire lattice crust. Sprinkle with sanding sugar.
- Bake for 1 hour to 1 hour 15 minutes, or until the crust is golden brown and the filling is bubbling. If the crust browns too quickly, loosely cover with foil.
- Allow the pie to cool on a wire rack for at least 2-3 hours before slicing and serving warm or at room temperature.
Notes
You can substitute Honeycrisp apples with Pink Lady or Braeburn apples for similar results.
The pie dough can be prepared up to 3 days in advance. Store it tightly wrapped in the refrigerator. Before rolling, let it sit at room temperature for about 15-20 minutes to warm up slightly, making it more pliable.
Store leftover pie in an airtight container at room temperature for up to 2 days, or in the refrigerator for up to 4-5 days. Warm slices gently in a 300°F (150°C) oven for 10-15 minutes.
Nutrition (per serving, estimated)
- Calories: 441 kcal
- Carbohydrates: 60g
- Protein: 4g
- Fat: 22g
- Saturated Fat: 13g
- Polyunsaturated Fat: 1g
- Monounsaturated Fat: 6g
- Trans Fat: 1g
- Cholesterol: 70mg
- Sodium: 399mg
- Potassium: 150mg
- Fiber: 3g
- Sugar: 37g
- Vitamin A: 734IU
- Vitamin C: 7mg
- Calcium: 26mg
- Iron: 1mg
Nutrition information is automatically calculated and should be used as an approximation.
Additional Info
Course: Dessert, Pie
Cuisine: American
Originally published November 15, 2018. Updated: November 9, 2022, and now expanded and refined for this publication.