
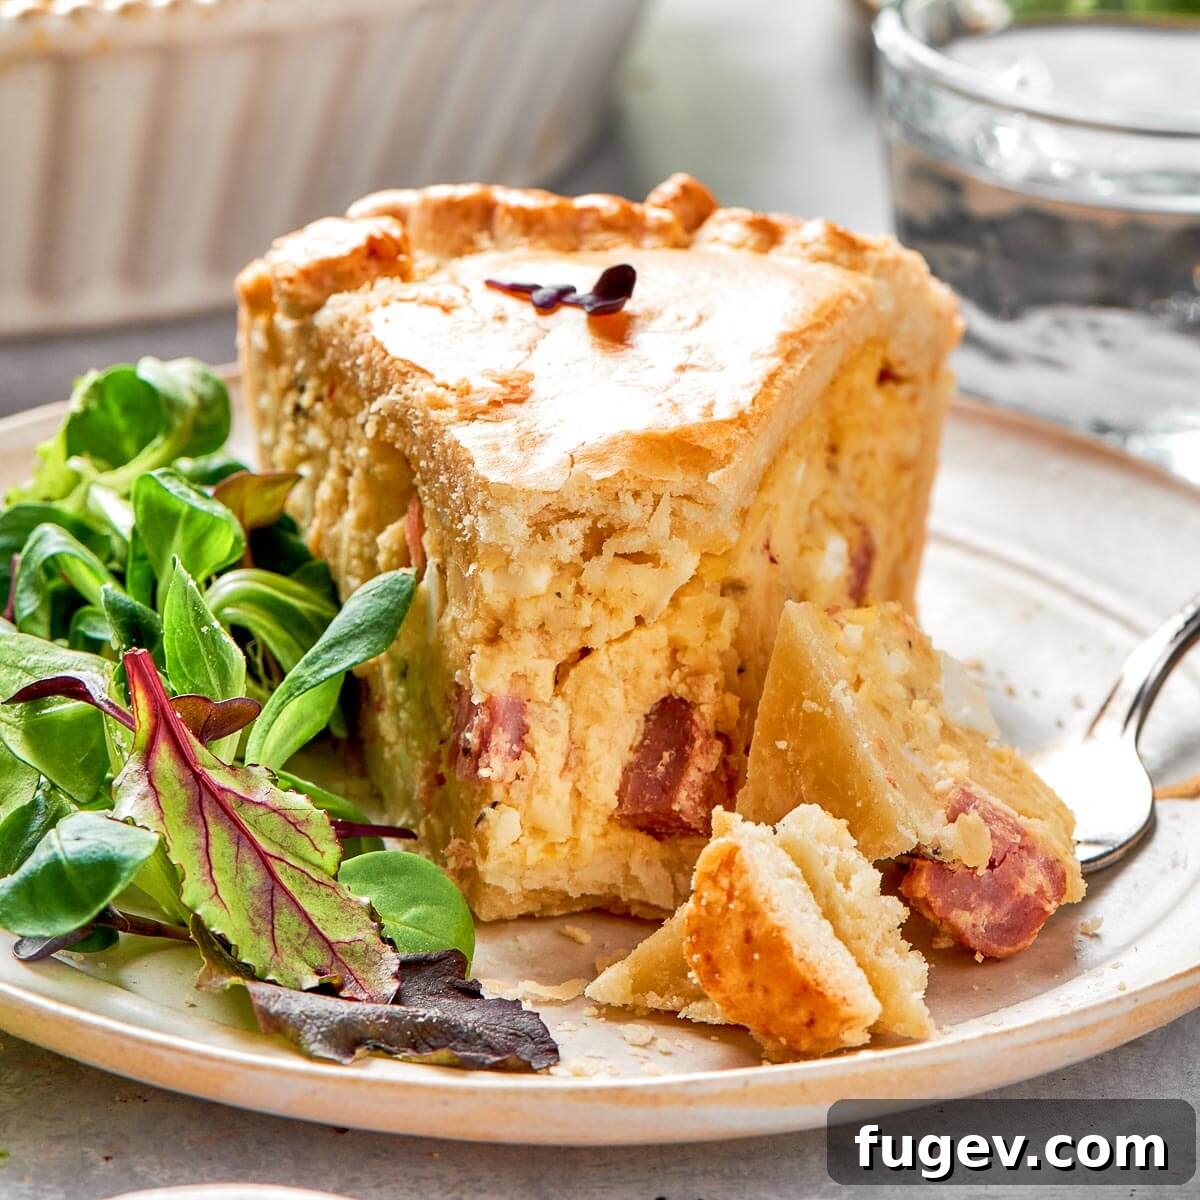
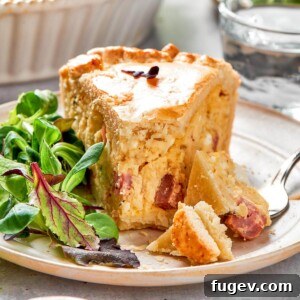
Dive into the heart of Italian culinary tradition with this exquisite Pizza Rustica recipe. Often celebrated as a centerpiece of Easter feasts, this savory pie, also known as Italian Easter Pie, Torta Rustica, or Pizza Chiena, offers an unforgettable blend of rich flavors and comforting textures. Crafted with a delicate, all-butter pie crust, it cradles a deeply satisfying filling of creamy ricotta cheese, fresh mozzarella, and a delightful medley of cured meats. Baked to golden perfection in a springform pan, its impressive deep-dish appearance makes it a true showstopper, ideal for holiday gatherings or any occasion that calls for a taste of authentic Italy.
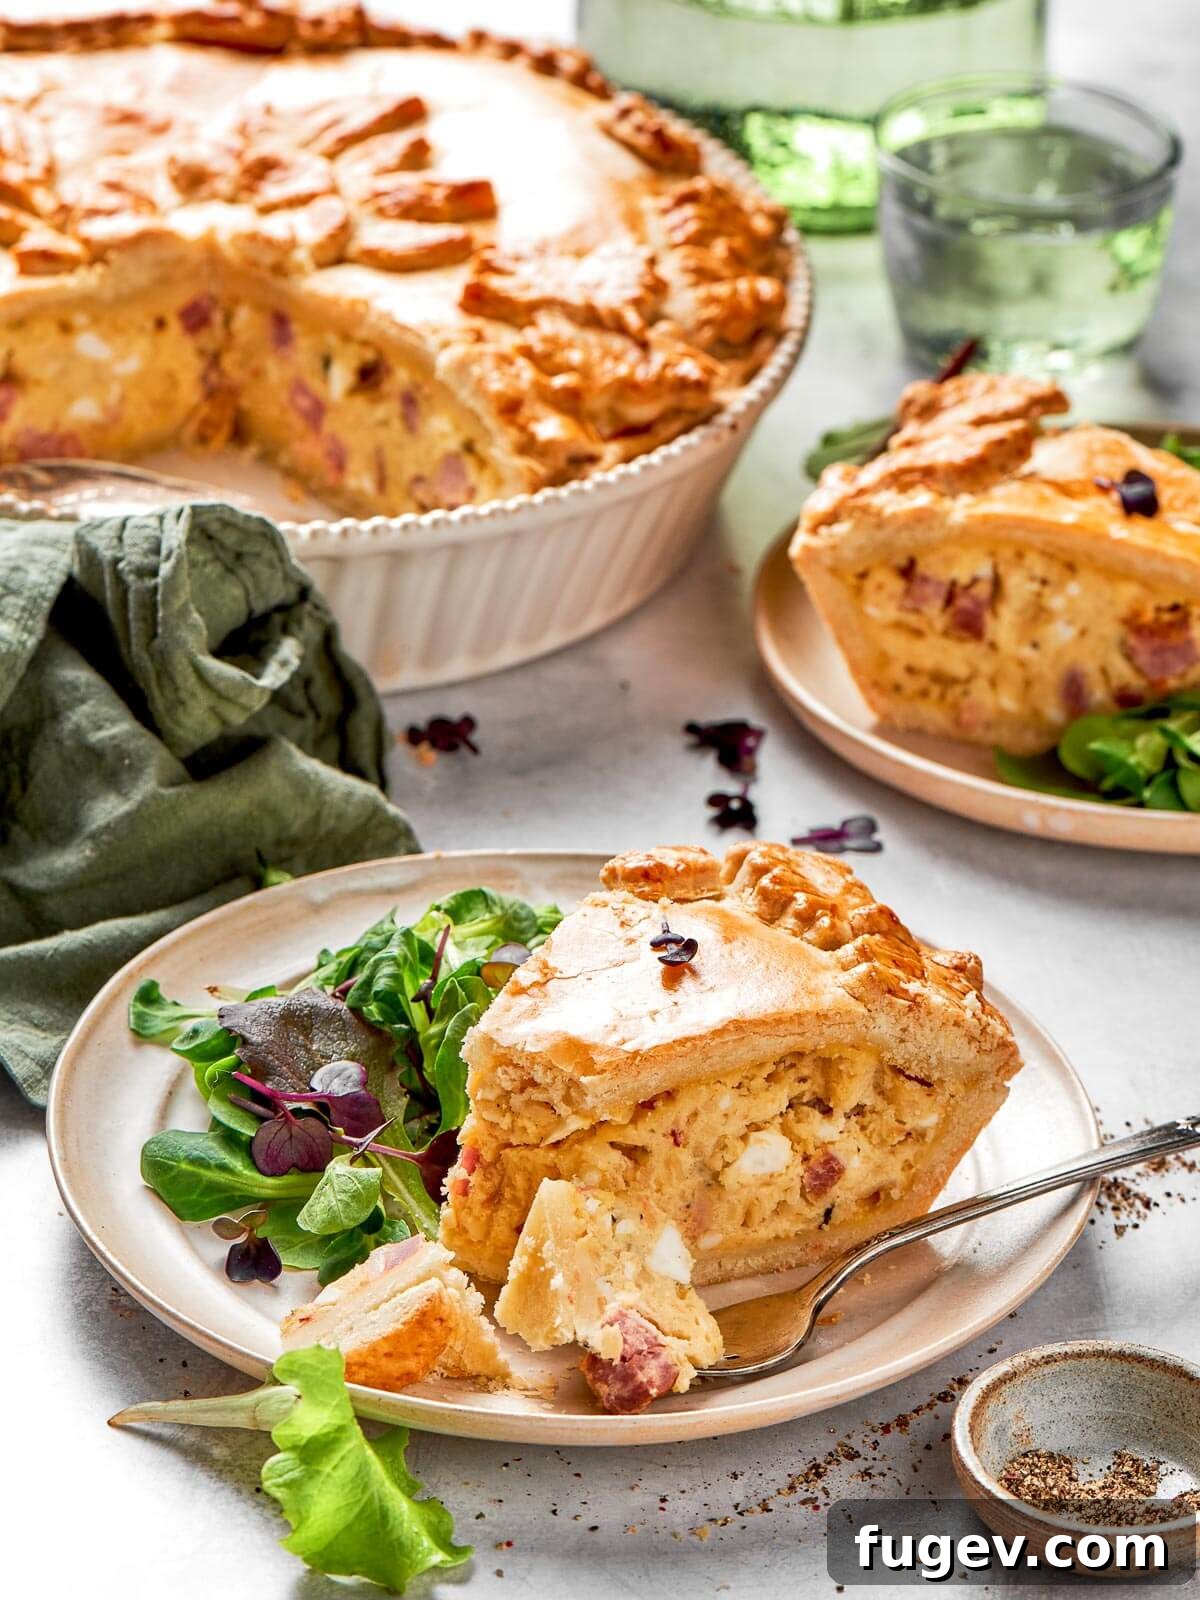
This Pizza Rustica is more than just a dish; it’s a culinary journey rooted in authentic Italian heritage, especially cherished during the Easter season. The flaky, golden pastry encases a luscious filling where the tang of creamy ricotta harmonizes beautifully with the stretch of melted mozzarella and the robust, savory notes of carefully selected cured meats. As it bakes, these ingredients meld into a symphony of flavors that is both deeply traditional and utterly delicious, making it a treat you’ll crave far beyond the Easter festivities. Its versatility also means you can enjoy this hearty pie for brunch, lunch, or even a light dinner.
My passion for authentic Italian cooking and baking runs deep, and I love sharing recipes that bring the true essence of Italy into your kitchen. If you share this culinary affection, I highly recommend exploring other beloved Italian recipes. Start with my authentic Italian meatballs for a taste of classic comfort. For a sweet conclusion, delight in my delicate pignoli cookies or these wonderfully soft amaretti cookies. To embrace more Italian holiday traditions, don’t miss out on baking this festive panettone bread, a sweet treat that perfectly complements any celebration.
Why You Will Love This Authentic Pizza Rustica Recipe
- A Taste of True Italian Tradition: This recipe isn’t just a collection of ingredients; it’s a culmination of years of culinary refinement. Developed during my time as an executive pastry chef in an esteemed Italian restaurant, I painstakingly perfected this Pizza Rustica to achieve the optimal balance of flavor, texture, and authenticity. It embodies the rich heritage of Italian Easter pies, promising a genuine experience with every bite.
- Exquisitely Seasoned Savory Filling: The heart of this Easter Pie lies in its perfectly balanced filling. From the bright freshness of herbs like basil and oregano to the zesty kick of lemon and a subtle warmth from red pepper flakes, every element is meticulously chosen to create a harmonious flavor profile. The result is a filling that is rich, complex, and utterly irresistible, making this savory pie truly stand out.
- Impressive, Delicious, and Effortlessly Achievable: Despite its grand appearance, this double-crust savory pie is surprisingly straightforward to make. I’ve distilled years of professional experience into clear, easy-to-follow instructions, accompanied by expert tips and tricks. You’ll be guided through each step, ensuring a smooth baking process and a stunning, delicious result that will undoubtedly impress your family and friends. It’s a show-stopping dish that’s well within reach for any home baker.
Table of Contents
- Why You Will Love This Authentic Pizza Rustica Recipe
- Essential Ingredients & Smart Substitutions
- Creative Variations for Your Savory Pie
- Chef’s Professional Tips for Perfect Pizza Rustica
- Step-by-Step Guide: How to Make Pizza Rustica
- Chef Lindsey’s Expert Recipe Tip
- Pizza Rustica Recipe FAQs
- Explore More Savory & Sweet Pie Recipes
- Pizza Rustica Recipe Details
- Before You Go: More Culinary Adventures Await
Essential Ingredients & Smart Substitutions for Pizza Rustica
Crafting the perfect Pizza Rustica starts with high-quality ingredients. Here’s a breakdown of what you’ll need and some helpful tips for substitutions.
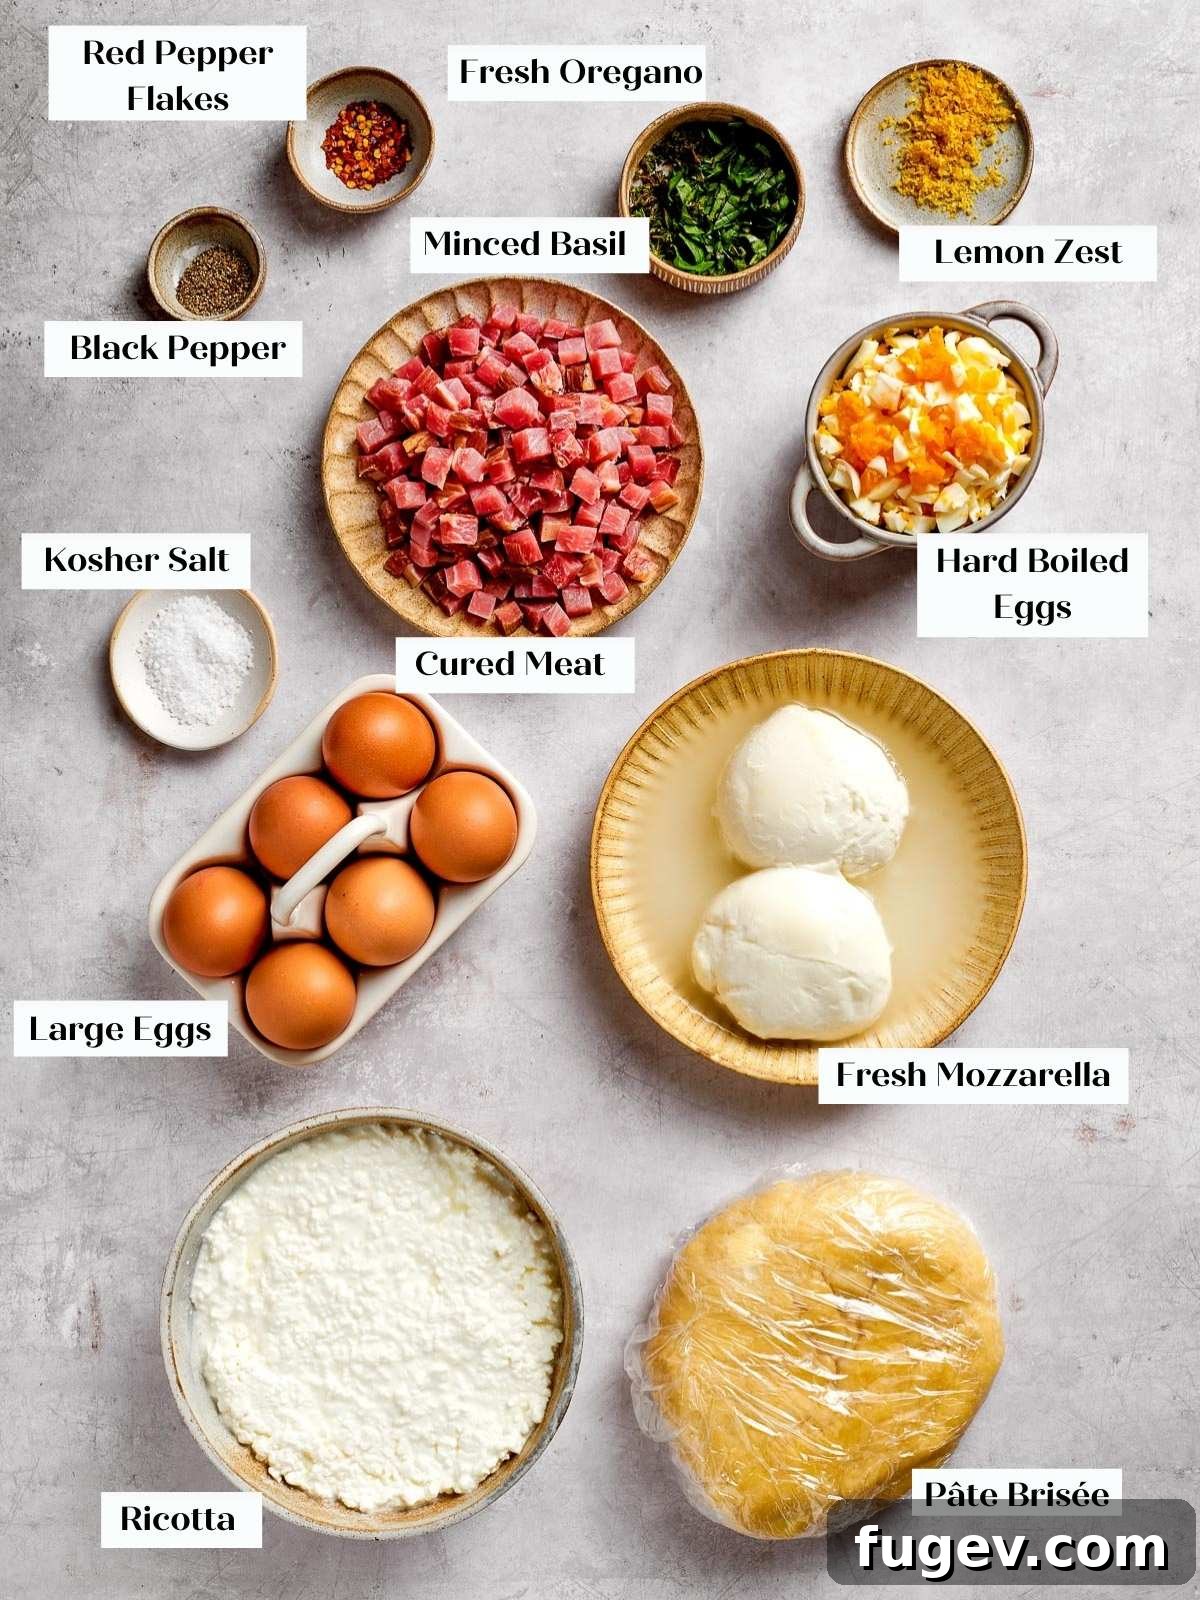
- Pâte Brisée (Pie Crust Dough): For this substantial pie, you’ll need a double batch of a reliable all-butter pie crust. I highly recommend my all-butter pie crust recipe or my vodka pie crust for a wonderfully flaky texture. This amount provides enough dough for four single-crust pies, which is perfect for covering the generous dimensions of a springform pan with extra for decorations. Don’t be shy about making a bit extra; it’s always better to have more than not enough. Any leftover dough can be transformed into delightful pie crust cookies or frozen for future baking projects.
- Ricotta Cheese: Opt for whole milk ricotta cheese for an irresistibly creamy and rich filling. This recipe calls for approximately 2 pounds, or two 15-ounce containers. While precision is good, don’t fret if your containers are slightly under or over; the overall texture will remain excellent. The higher fat content of whole milk ricotta contributes significantly to the pie’s luxurious mouthfeel.
- Fresh Mozzarella: For the absolute best melt and texture, always shred your own fresh mozzarella cheese. Pre-grated cheeses often contain anti-caking agents that can hinder their ability to melt smoothly, resulting in a less desirable texture. Freshly grated mozzarella ensures a gooey, satisfying cheese layer throughout the filling.
- Large Eggs (for Filling): Eggs serve as the essential binder in our filling, holding all the delicious ingredients together to create a cohesive and sliceable pie. Use large eggs, well-beaten, to ensure they integrate seamlessly into the ricotta mixture.
- Hard-Boiled Eggs: Chopped hard-boiled eggs add a unique textural element and subtle richness to the filling, a classic touch in traditional Pizza Rustica. If you need a perfect method, follow my guide on how to hard boil an egg.
- Cured Meats: The selection of cured meats is crucial, as they contribute significantly to the dish’s overall saltiness, umami, and hint of spice. A varied blend is ideal, such as soppressata, salami, and salame. Aim for a balance where about one-third of your chosen meats offer a spicy kick and two-thirds are on the sweeter, milder side. Save the intensely spicy meats for something like a pepperoni pizza to avoid overpowering the delicate balance of the pie. Ensure all paper or casings are removed and the meats are diced evenly.
- Kosher Salt: Essential for seasoning, kosher salt enhances the flavors of all the ingredients without making the dish overly salty, especially given the cured meats.
- Black Pepper: While optional, freshly ground black pepper adds a wonderful complementary aroma and a subtle peppery bite. I highly recommend using a pepper mill with whole kernels for superior flavor compared to pre-ground pepper.
- Fresh Basil: Fresh basil is non-negotiable for its earthy, fragrant, and slightly sweet notes that are far superior to dried basil. If fresh isn’t available, a prepared basil paste from the refrigerated section is a much better substitute than dried.
- Fresh Oregano: A cornerstone of Italian cooking, fresh oregano introduces a robust, peppery, and herbaceous depth that is indispensable to this savory pie.
- Lemon Zest: The bright, aromatic zest of a lemon provides a crucial lift, cutting through the richness of the cheeses and meats with a refreshing citrus note.
- Red Pepper Flakes: For those who appreciate a touch of heat, red pepper flakes offer a gentle warmth that complements the savory profile. Adjust the quantity to your personal spice preference, or omit them entirely if you prefer the spice to come solely from your cured meats.
- Egg (for Egg Wash): A single egg, beaten, will create a beautiful golden-brown, glossy finish on your pie crust, making the final presentation even more appealing.
For precise quantities and a comprehensive list, please refer to the detailed recipe card at the end of this article.
Creative Variations for Your Savory Pie
While the classic Pizza Rustica is undeniably delicious, feel free to experiment with these variations to tailor it to your taste or dietary preferences:
- Incorporate Fresh Greens: To add a nutritious boost and a touch of earthiness, sauté some kale, spinach, collard greens, or Swiss chard until wilted, then gently fold them into the savory filling. This not only enhances the flavor profile but also introduces vibrant color. Alternatively, for a lighter touch, serve a crisp chopped kale salad alongside your pie.
- Experiment with Meats and Cheeses: The beauty of Pizza Rustica lies in its adaptability. You can swap out or combine various cheeses with the mozzarella, such as sharp Parmesan, firm Caciocavallo, or creamy Provolone. For the meats, explore options like delicate capicola, salty prosciutto, classic Virginia ham, or spicy Italian sausage (ensure it’s fully cooked before adding). Each alteration will lend a unique character to your pie.
- Embrace Pizza Dough: For a different texture and a more “pizza-like” experience, consider using a double batch of my sourdough pizza dough recipe as a substitute for the traditional pie dough. This will yield a chewier crust with a distinctive tangy flavor, offering a delightful twist on the classic.
Chef’s Professional Tips for Perfect Pizza Rustica
Achieving a truly magnificent Pizza Rustica is simple with these expert tips, refined over years in professional kitchens:
- Customize the Spice Level: Your taste buds are the ultimate guide here. The recipe includes red pepper flakes for a hint of heat. If you prefer a milder pie, reduce or omit them entirely. Conversely, if you enjoy a bolder kick, feel free to increase the amount. Remember that the spice from cured meats will also contribute to the overall heat, so consider your meat choices when adjusting the flakes.
- Ensure Pliable Dough for Easy Handling: Before you attempt to line your springform pan, allow your pastry dough to sit out at room temperature for just a few minutes. While the dough should remain cold, it needs to be pliable enough to handle without cracking. This crucial step ensures a seamless lining of the pan, allowing you to achieve beautifully sharp edges and prevent any tears that could lead to filling leaks during baking.
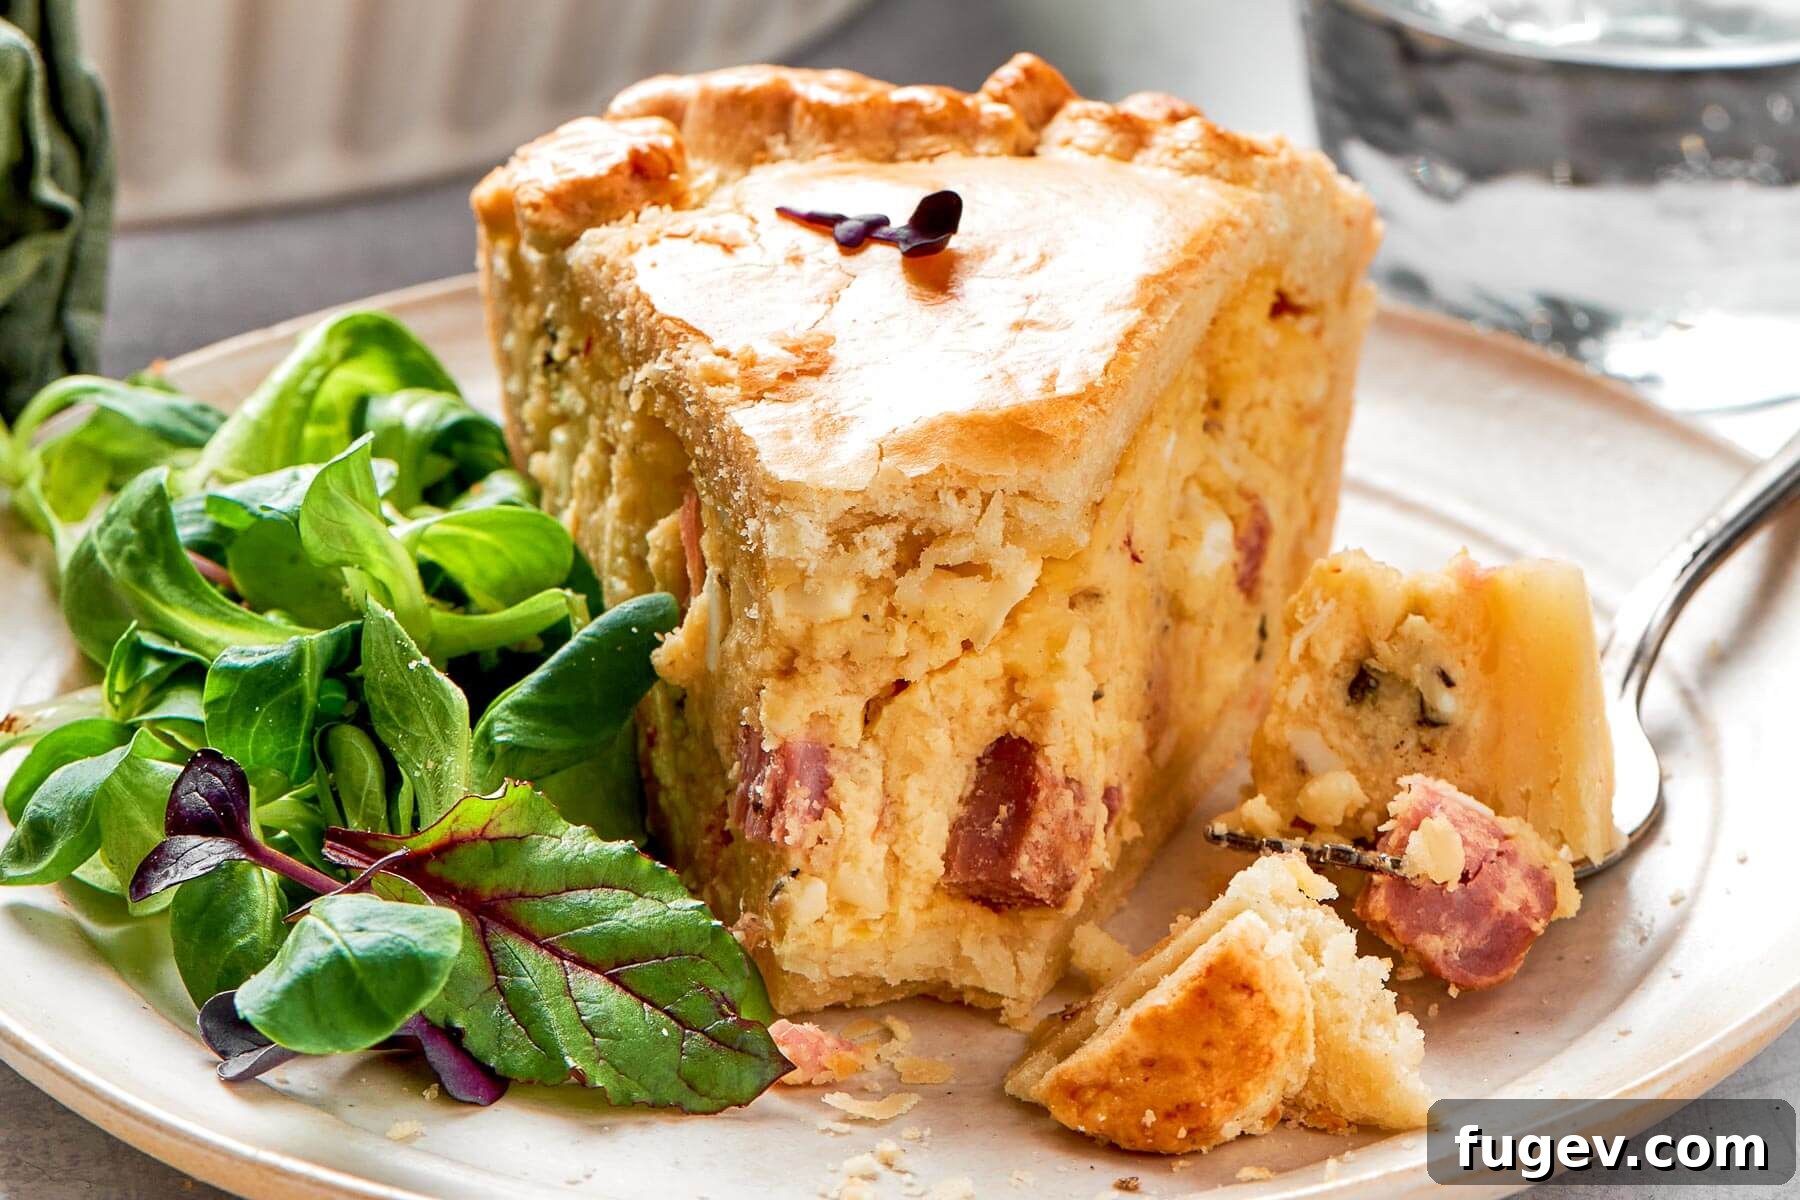
- The Secret to Picture-Perfect Slices: Chill Overnight: This is arguably the most important professional tip for Pizza Rustica. While tempting to slice and serve immediately, allowing the pie to chill overnight after baking makes an enormous difference. The filling needs ample time to fully set, resulting in clean, elegant slices that hold their shape beautifully. My practice in the restaurant was to bake the pies the day before, let them cool completely at room temperature, then wrap and refrigerate them overnight. The next day, I would slice them cold and allow the individual slices to come to room temperature before serving. Skipping this step often results in a “hot mess” with a runny, unappealing interior.
Step-by-Step Guide: How to Make Pizza Rustica
Follow these detailed instructions to craft your own festive and flavorful Pizza Rustica. More precise measurements and ingredient specifics can be found in the comprehensive recipe card below.
Preparing Your Pizza Rustica:
Step 1: Prepare Your Pastry Dough. Begin by making a double batch of your chosen pie crust. I highly recommend either my all-butter pie crust recipe for a rich, tender base or my vodka pie crust recipe for an exceptionally flaky texture. The double batch ensures you have plenty of dough for the deep springform pan and any decorative elements.
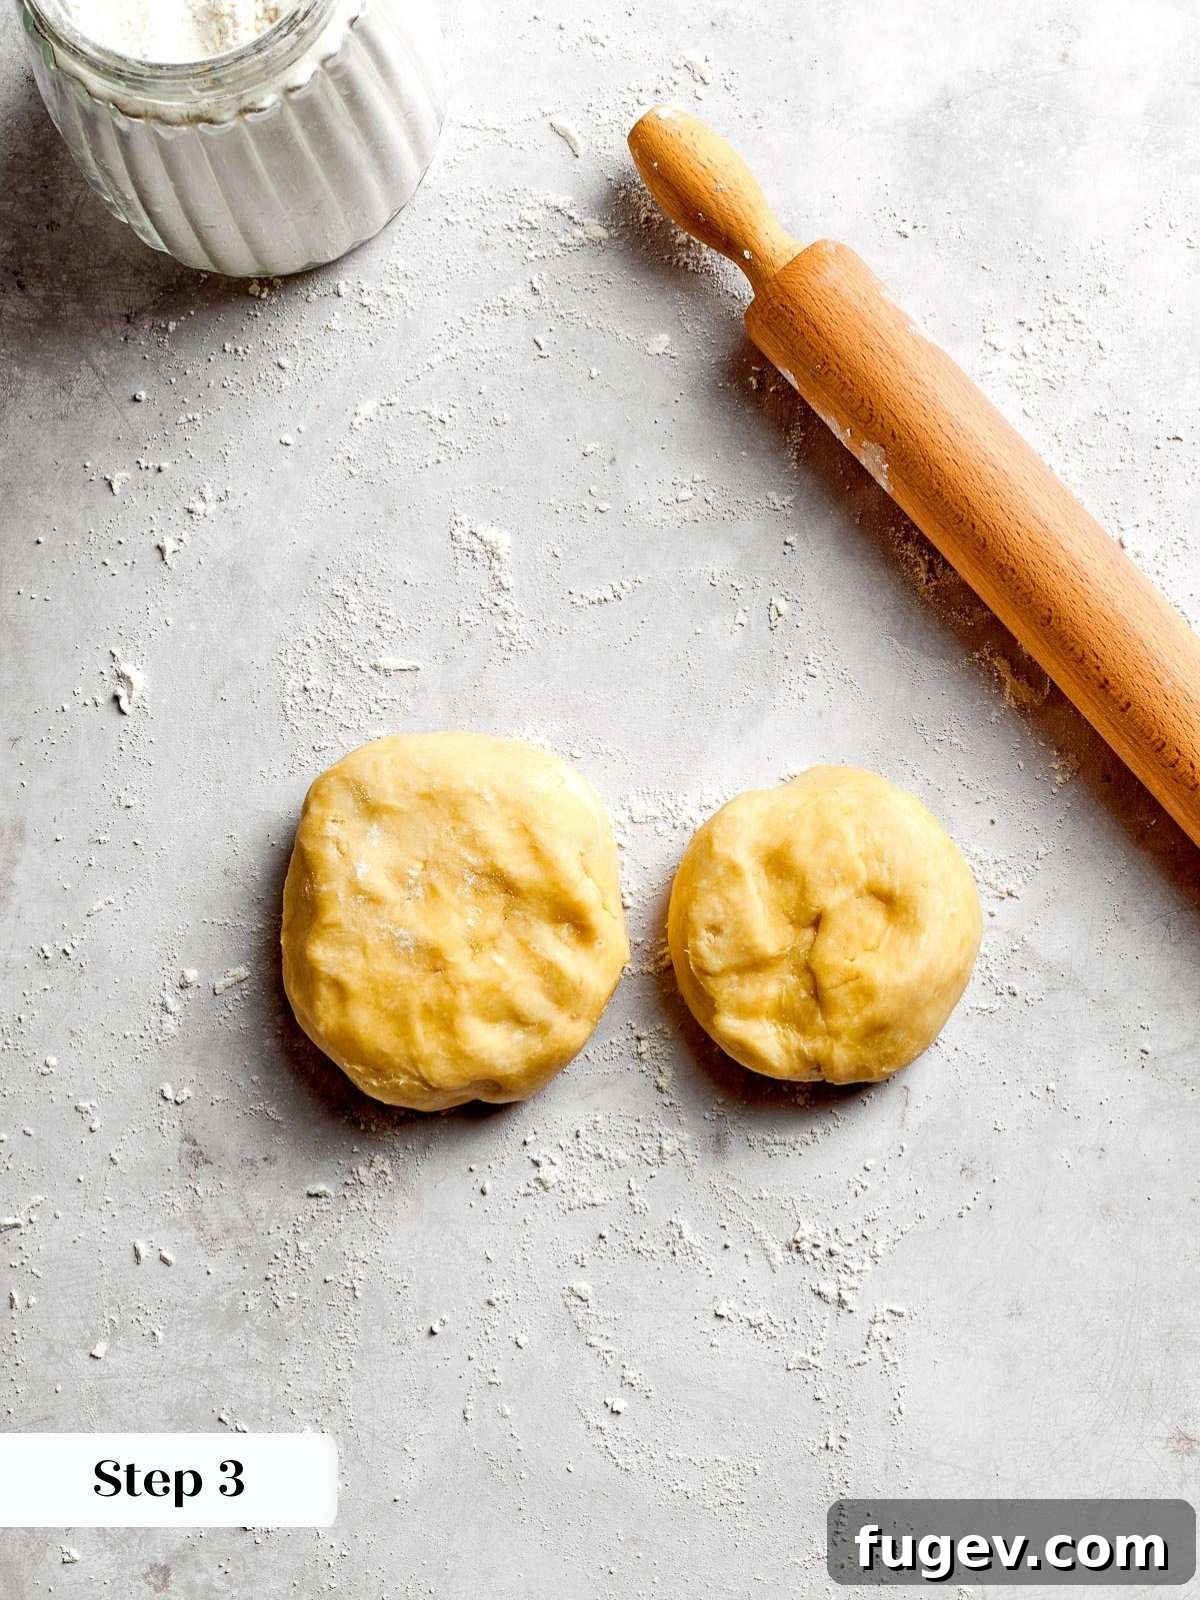
Step 2: Divide and Chill the Dough. Once your pastry dough is prepared, divide it into two unequal portions. Aim for a 2:1 ratio, meaning approximately two-thirds of the dough will be used for the bottom crust and sides, and the remaining one-third for the top crust. Wrap each portion tightly in plastic wrap and chill in the refrigerator for at least 2 hours. This chilling period is crucial for relaxing the gluten, which prevents shrinkage during baking and makes the dough easier to roll.
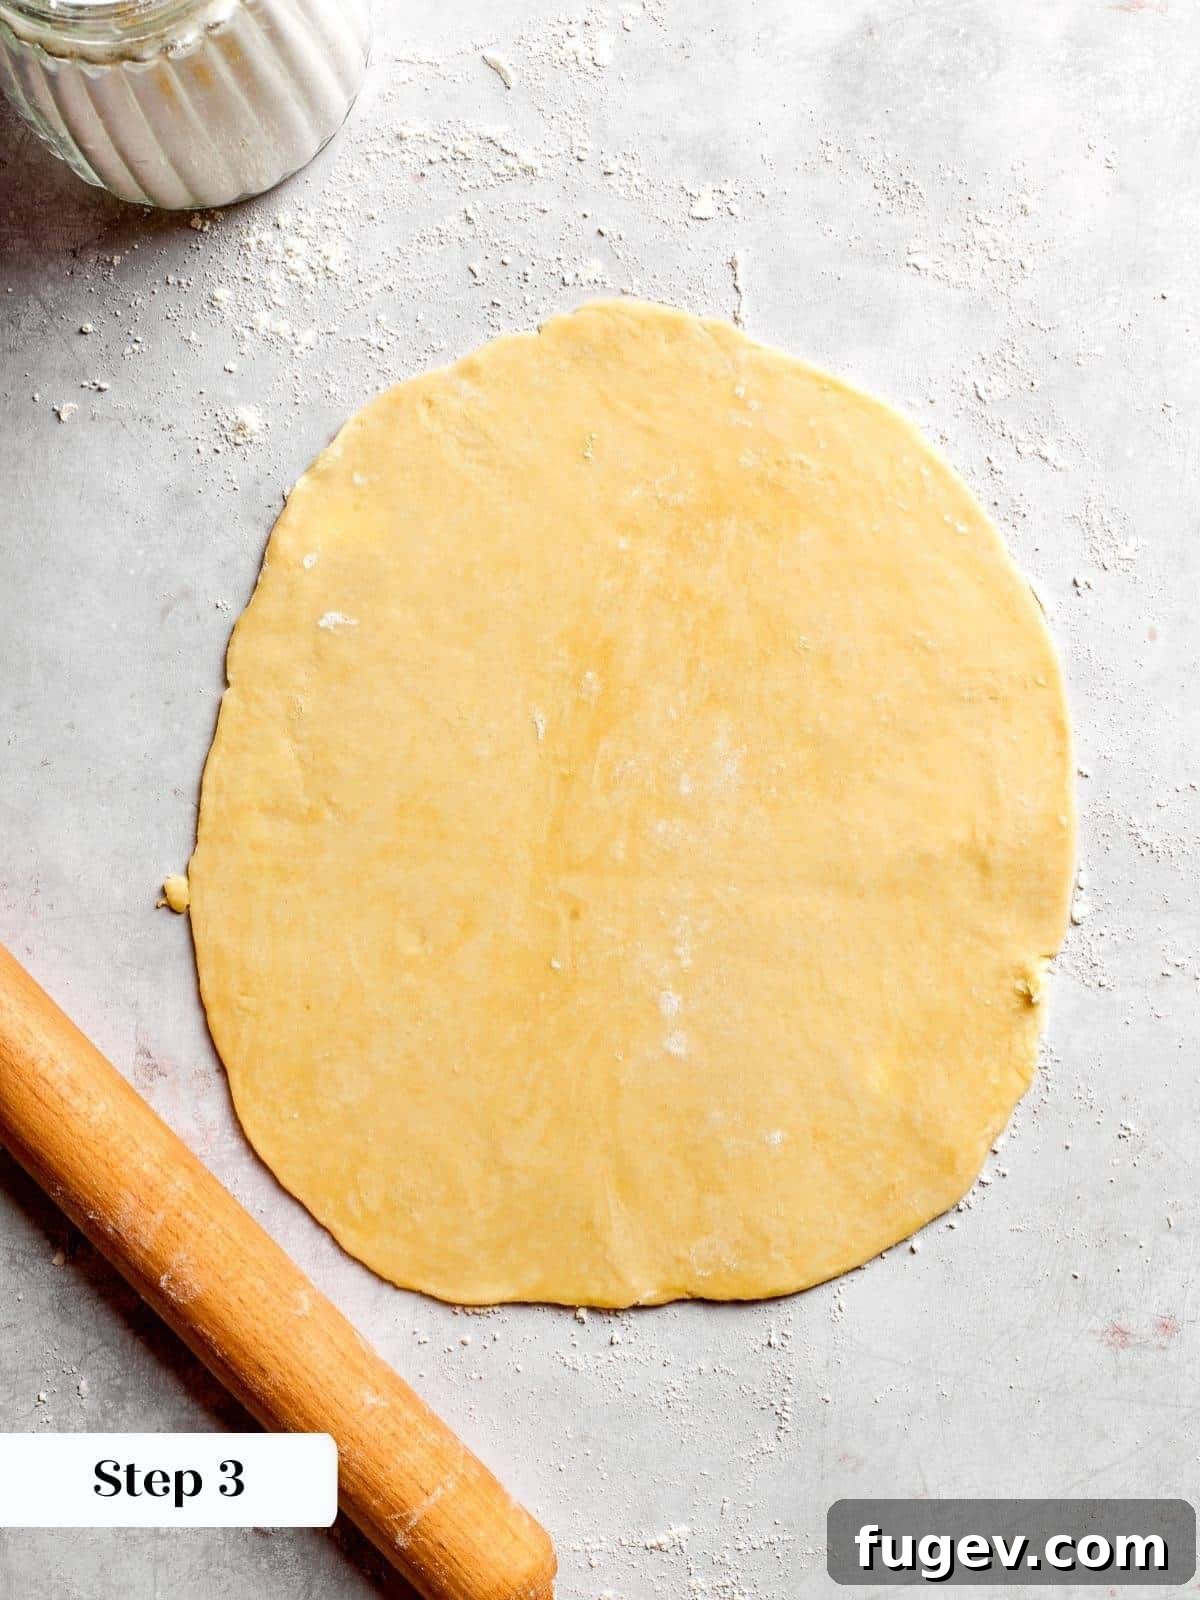
Step 3: Roll Out the Dough. When you’re ready to assemble your pie, remove the dough from the refrigerator. On a lightly floured work surface, roll out each section of dough. Strive for a consistent thickness of approximately 1/8 inch. Once rolled, carefully transfer the dough sheets between layers of parchment paper and refrigerate them for another 30 minutes. This second chill helps the dough firm up, making it easier to handle and reducing the risk of tearing when lining the pan.
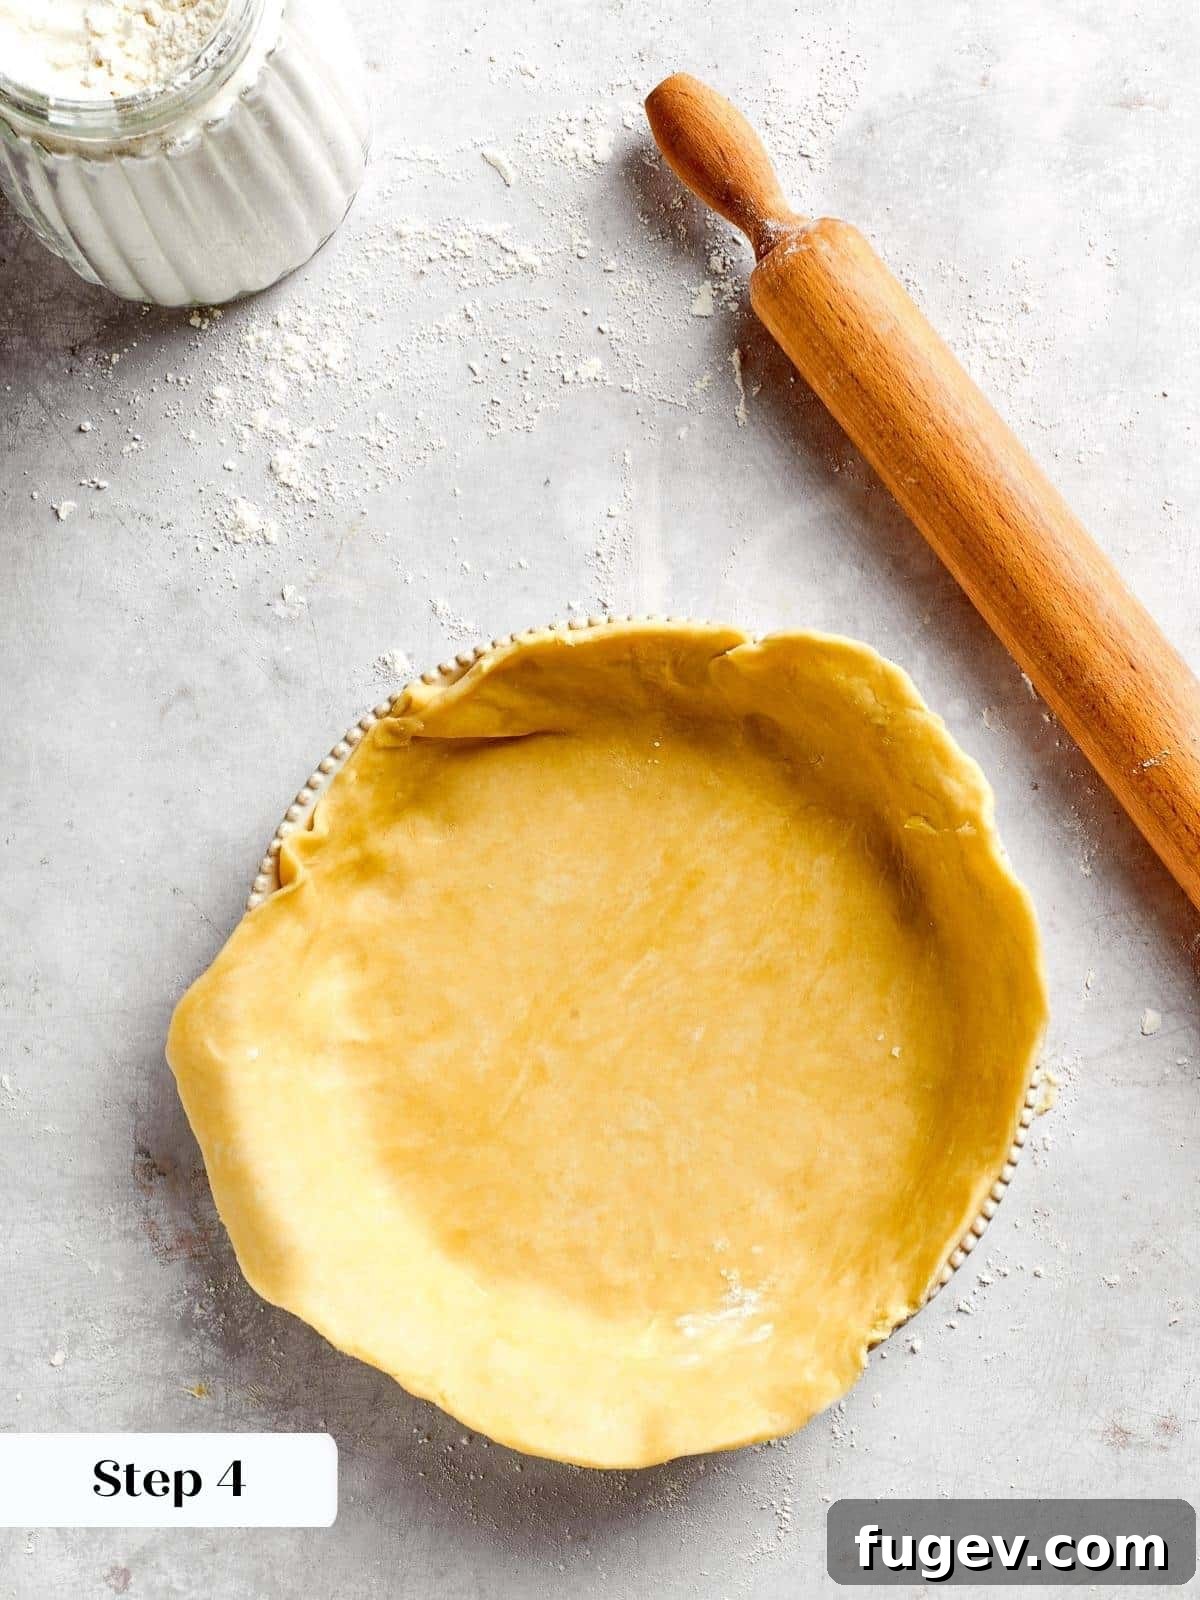
Step 4: Line the Springform Pan. Take the larger piece of chilled dough and allow it to warm up slightly at room temperature for a few minutes until it is pliable but still cold. Carefully drape it into your springform pan, pressing it gently against the bottom and up the sides. Ensure the dough overlaps the edge of the pan by about ½ inch. This overlap is important for sealing the top crust later. Trim off any significant excess dough; these scraps can be saved for decorative touches on the top of your pie.
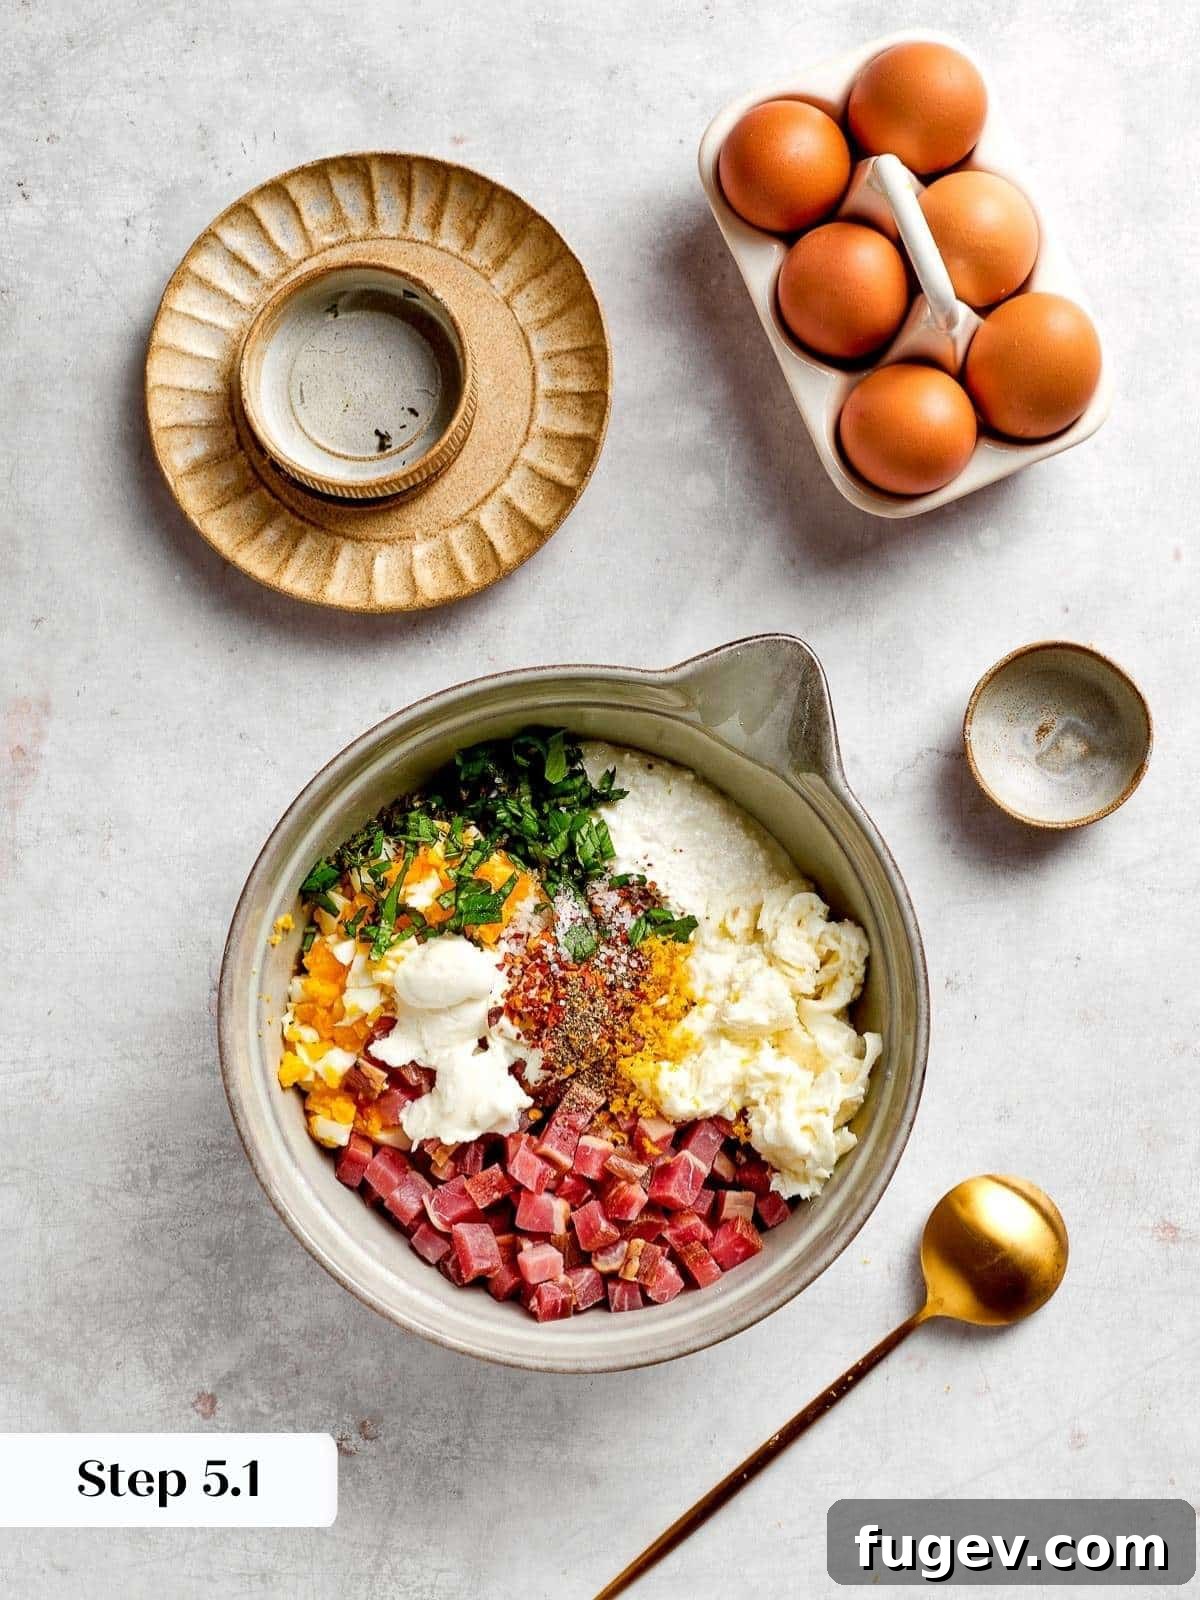
Step 5: Prepare and Add the Filling. In a large mixing bowl, combine all the ingredients for your savory filling: ricotta, mozzarella, well-beaten large eggs, chopped hard-boiled eggs, diced cured meats, kosher salt, black pepper, fresh basil, fresh oregano, lemon zest, and red pepper flakes (if using). Mix everything thoroughly until well combined. Once mixed, spoon this rich filling evenly into the pie crust-lined springform pan.
Chef’s Flavor Tip: Before incorporating the beaten eggs, taste a small portion of your filling mixture and adjust seasonings as needed. This allows you to fine-tune the saltiness and spice to your preference. Remember that the overall spiciness will intensify slightly during the baking process, so account for that potential amplification.
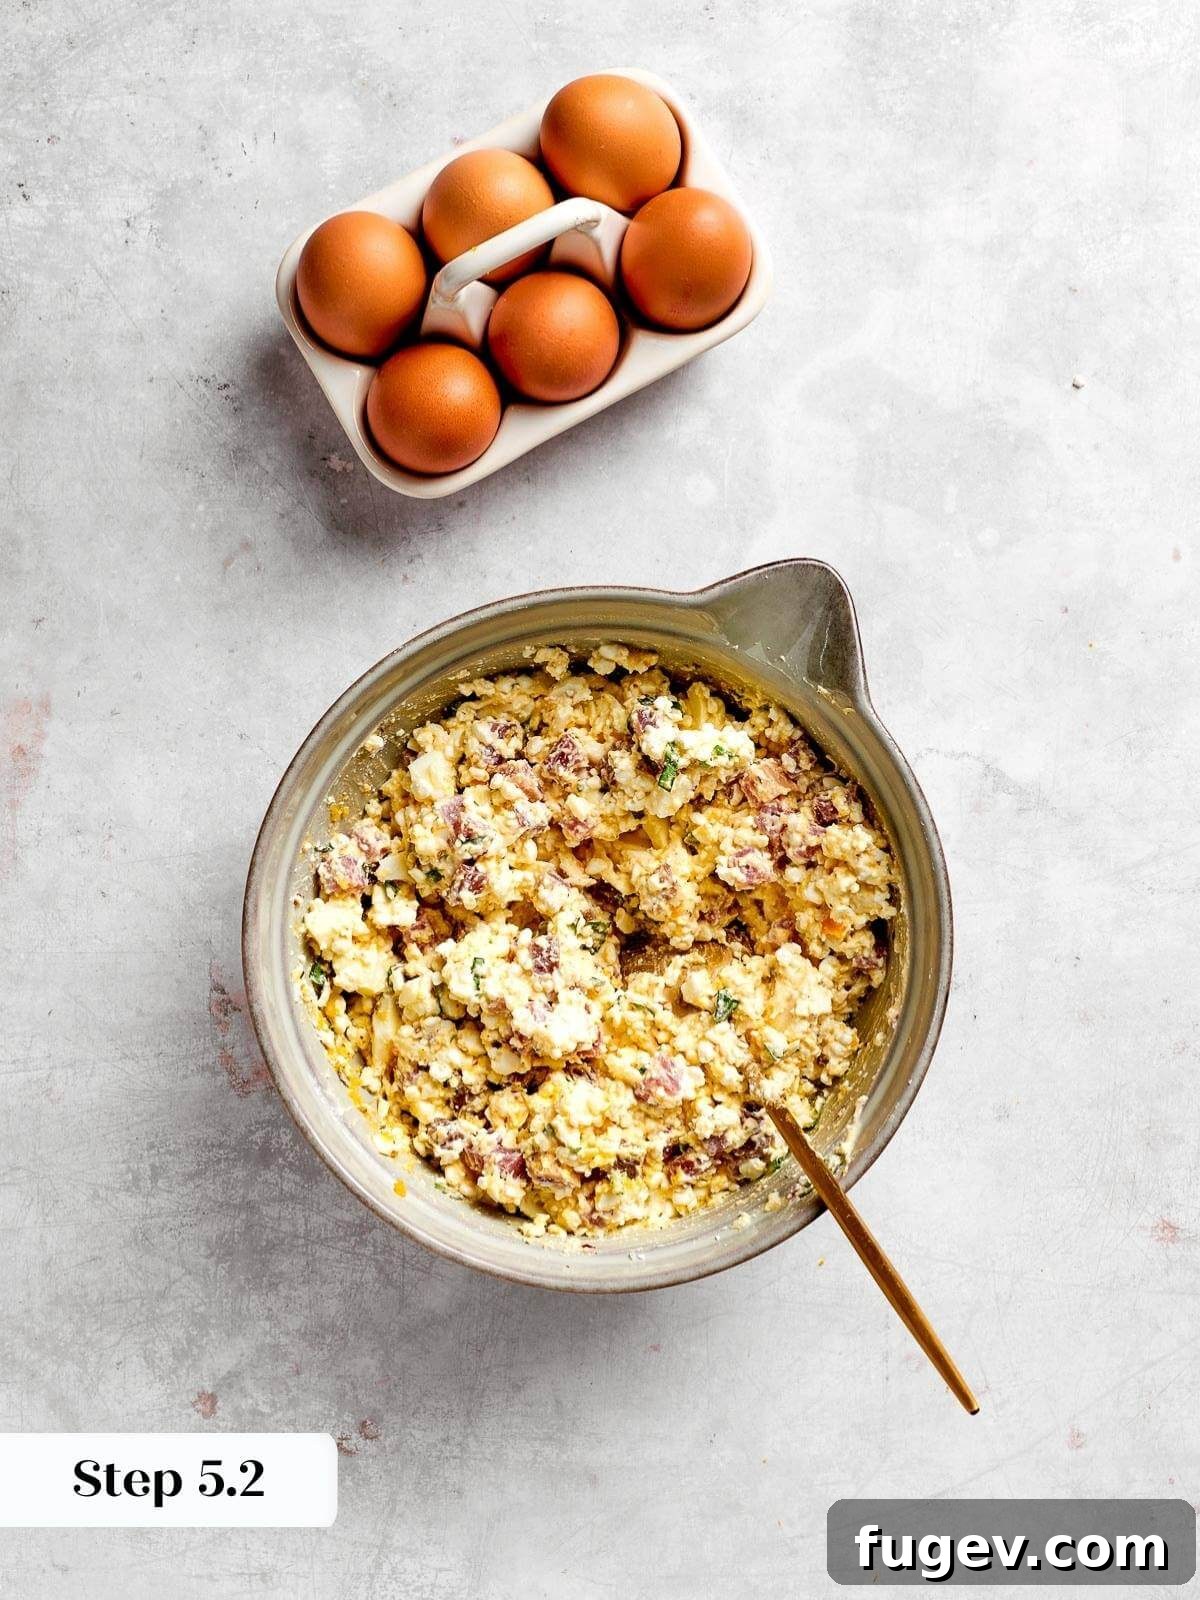
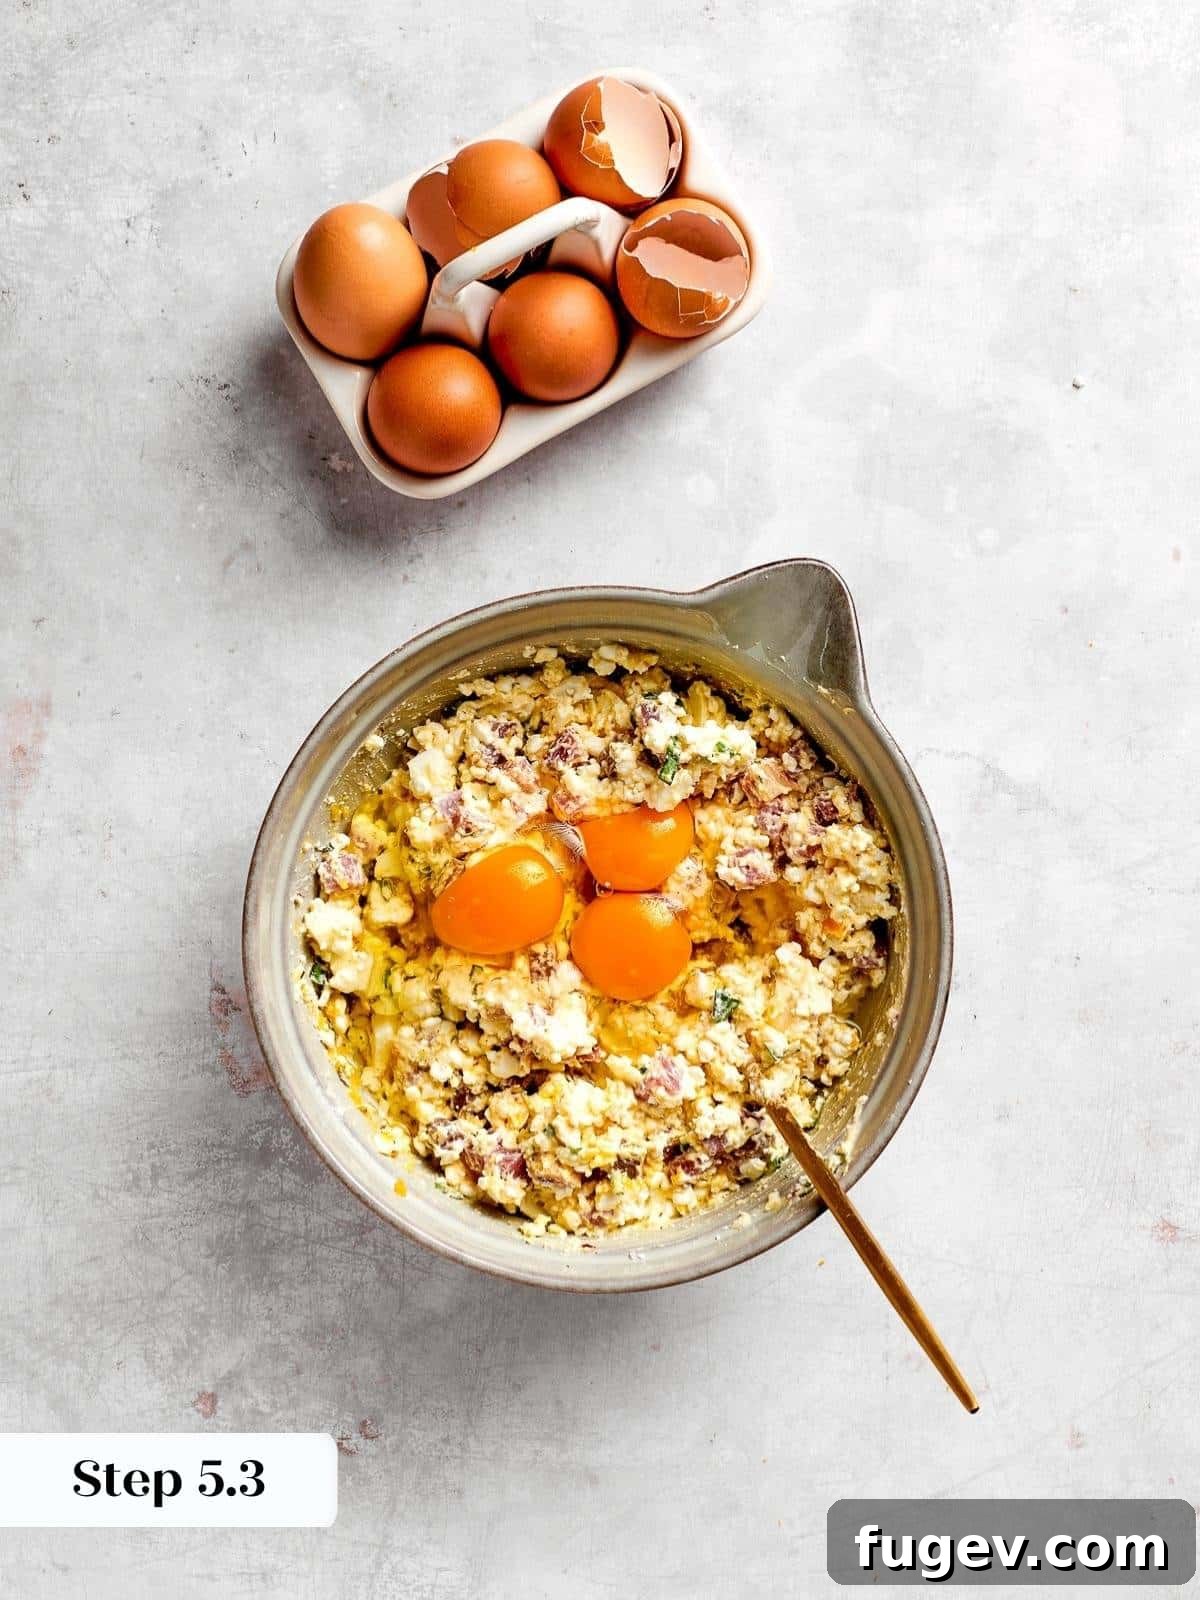
Step 6: Smooth the Filling. Once the filling is in the pan, use the back of a spoon or a small offset spatula to gently smooth the top surface. This ensures an even layer and a beautiful, professional appearance once the pie is baked.
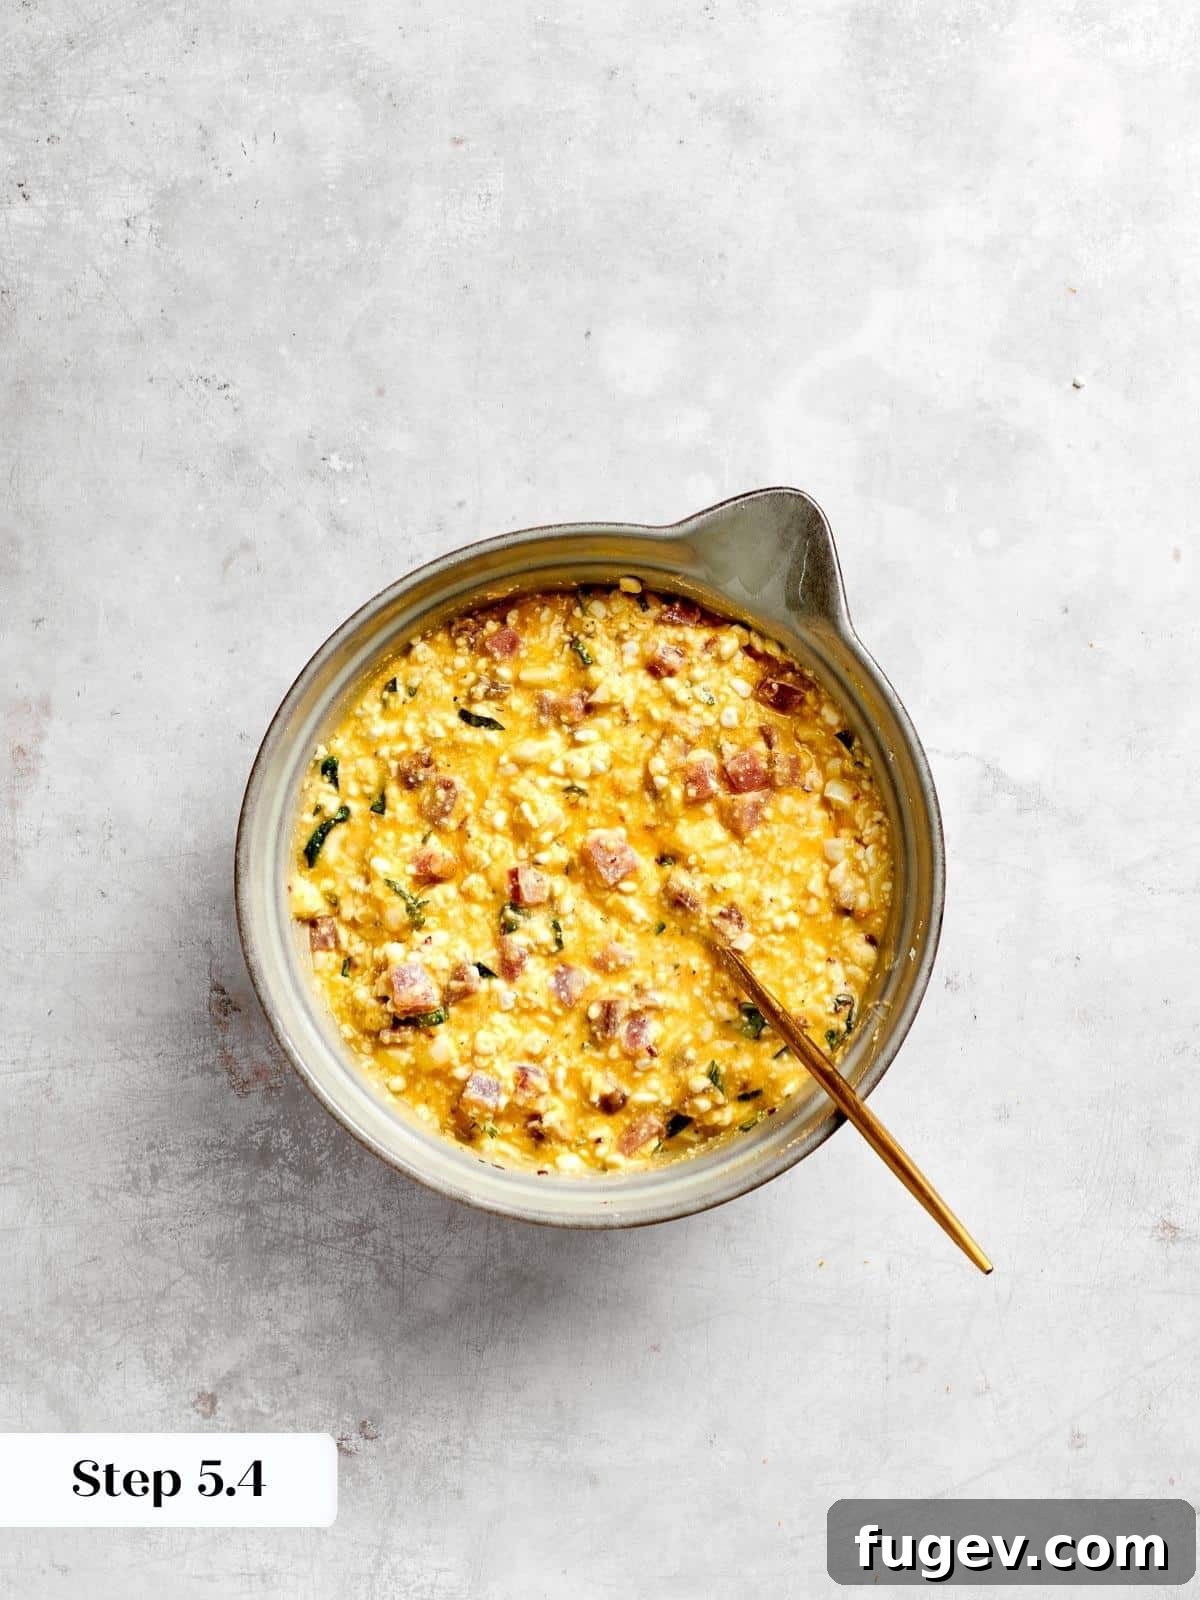
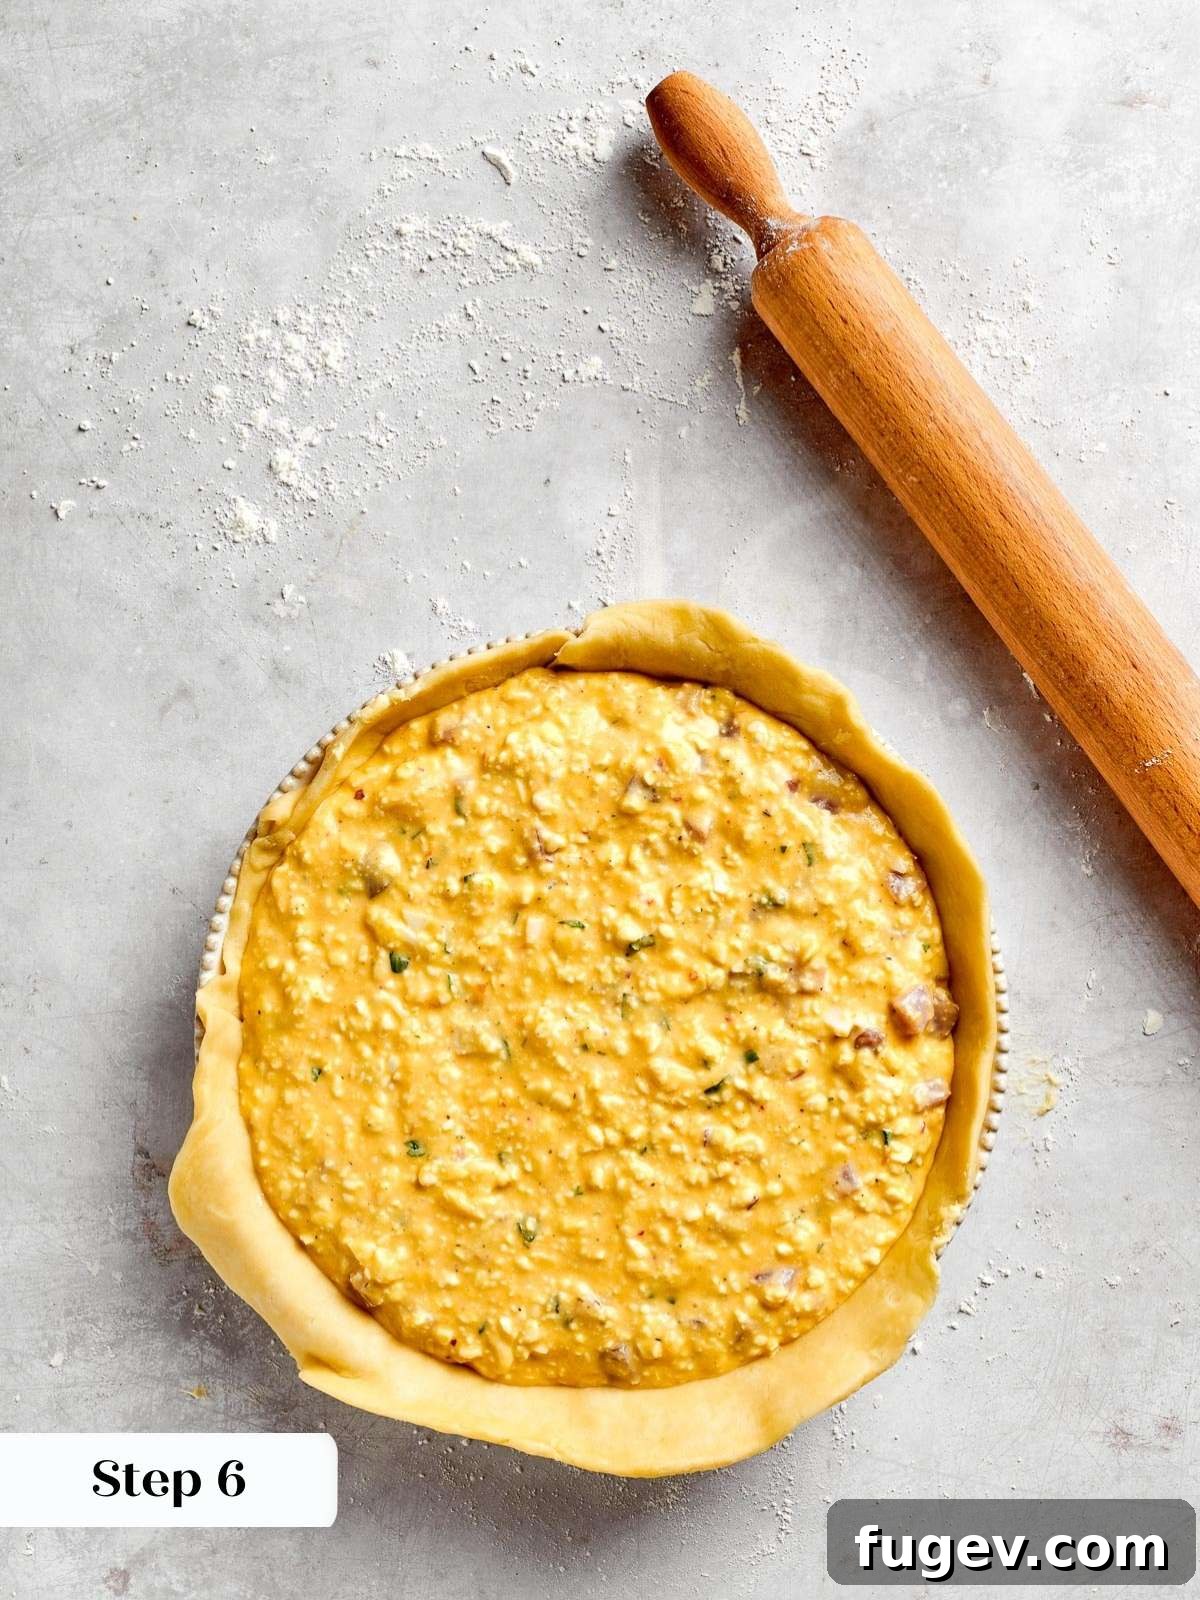
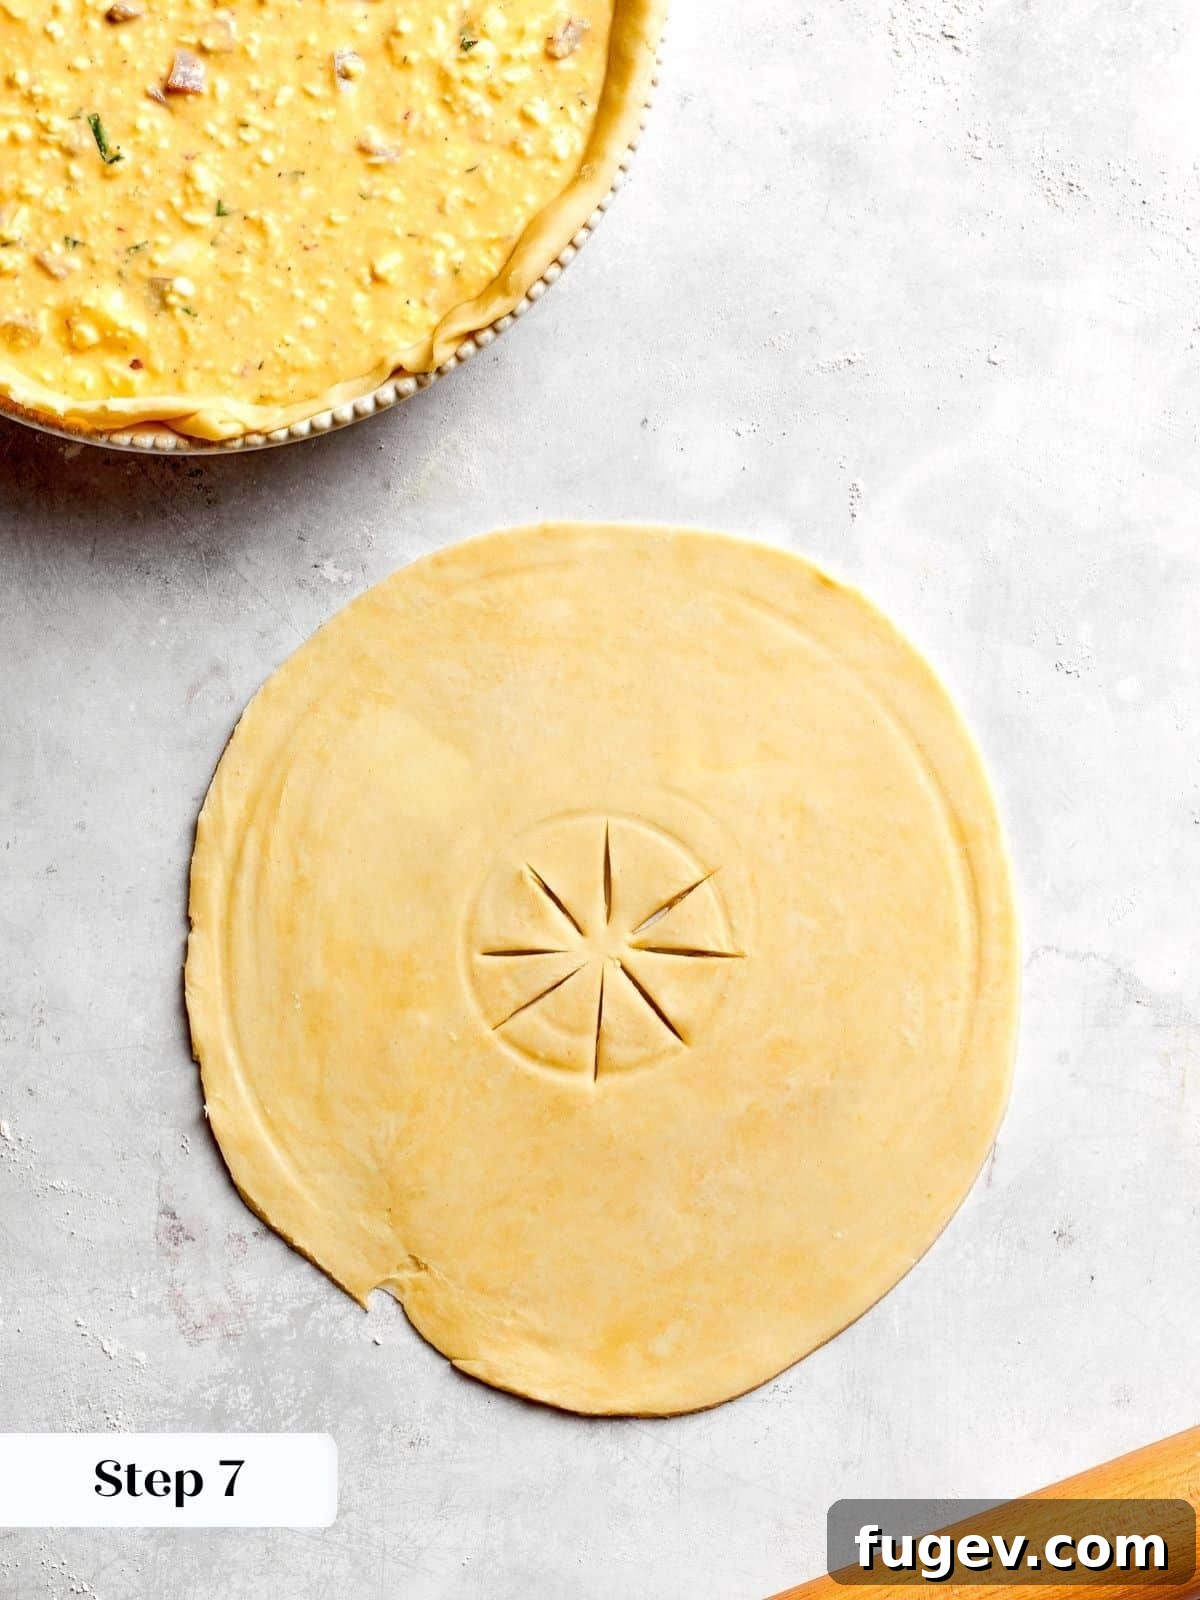
Step 7: Add the Top Crust and Vent. If you desire, use a small knife or cookie cutters to cut decorative vents into the smaller, remaining portion of pastry dough. These vents are essential as they allow steam to escape during baking, preventing the crust from puffing up excessively and ensuring a crisp, flaky result. Carefully place this smaller round of pastry on top of the filling, aligning it neatly.
Step 8: Seal the Edges. To create a strong seal and a beautiful crust, take the overlapping edge of the bottom dough and gently fold it inwards over the edge of the top crust. Pinch and roll the two pieces of dough together tightly. This inward roll creates a secure crimp, which is vital for preventing the dough from unrolling during baking. I like to use my fingers to further crimp and flute the edges, adding both extra security and an aesthetically pleasing finish to the pie.
Pro Tip for a Secure Seal: Roll and press the dough together very firmly. A tight seal is critical to prevent the crust from separating or unrolling while the pie bakes, which could lead to a messy interior.
Step 9: Chill for Decorations. Once the pie is assembled and sealed, place the entire springform pan in the refrigerator. Chill it while you prepare any desired decorative elements from your leftover dough scraps. This chilling period helps the crust firm up again, ensuring it holds its shape as you apply decorations.
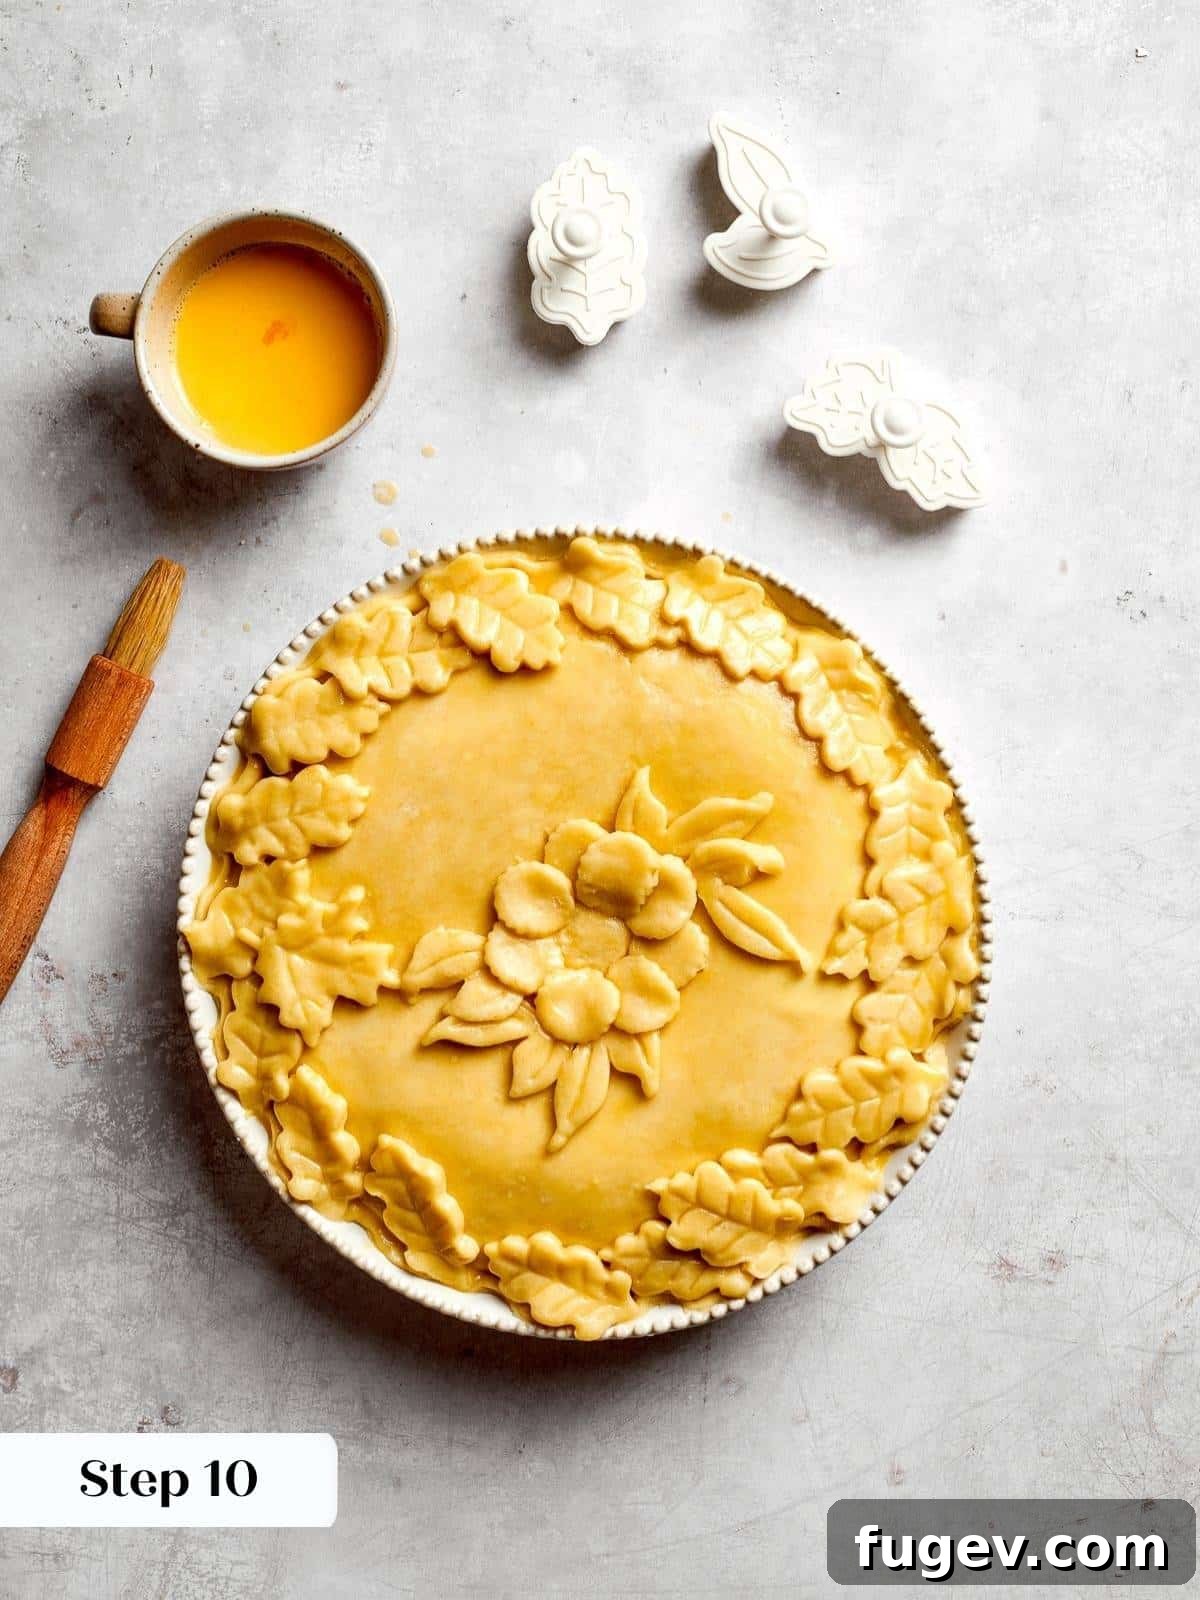
Step 10: Apply Egg Wash and Decorations. In a small mixing bowl, beat the remaining egg to create an egg wash. Lightly brush the entire top surface of the Pizza Rustica with this egg wash. This will give your baked pie a beautiful golden, glossy sheen. Now, use the egg wash as an adhesive to carefully attach any pie dough decorations you’ve created (braids, twists, cut-outs, leaves, etc.). Get creative and layer them to enhance the visual appeal of your festive pie!
Step 11: Final Chill. After applying the egg wash and decorations, return the entire dish to the refrigerator for a final chill of 30 minutes to an hour. This last chilling step helps to set the dough, prevents excessive spreading, and contributes to a flakier crust.
Step 12: Preheat Your Oven. While the pie is chilling, preheat your oven. If you have a convection oven (with a fan), set it to 350°F (175°C). If you’re using a conventional oven (no fan), preheat it to 375°F (190°C). Proper oven temperature is key for even baking and a perfectly golden crust.
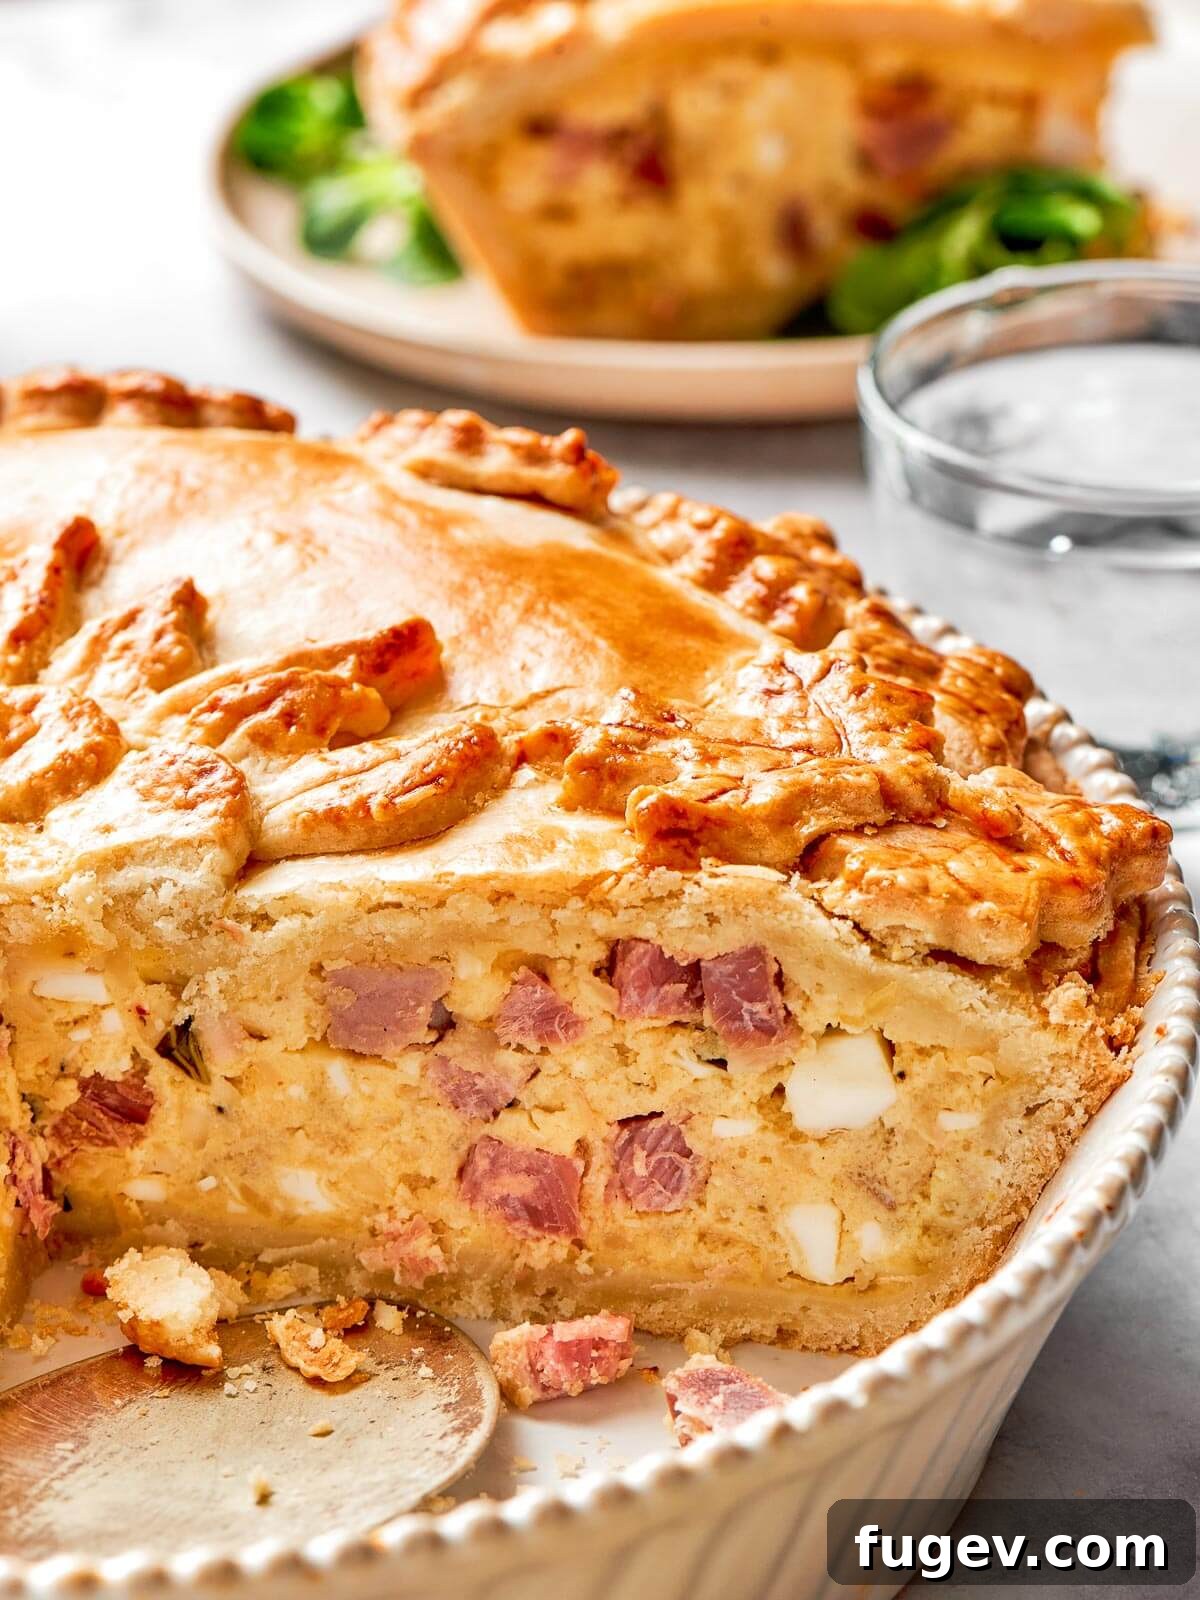
Step 13: Bake and Serve. Place the chilled Pizza Rustica in the preheated oven and bake for approximately 45 minutes to 1 hour. The baking time can vary slightly depending on your oven, so watch for visual cues. The pie is done when a cake tester inserted into the center of the filling comes out clean, and the top crust has achieved a beautiful, rich golden-brown color. A raw crust is never desirable! Once baked, remove the pie from the oven and let it cool completely at room temperature before serving. As mentioned in our professional tips, chilling overnight is highly recommended for the cleanest slices. Serve at room temperature for the best flavor and texture experience.
Chef Lindsey’s Expert Recipe Tip: Understanding Spice Amplification
It’s important to note that the perceived spiciness of your Pizza Rustica filling will tend to increase as the ricotta mixture rests and bakes. While tasting the mixture for seasoning before adding the eggs is a good practice, be aware that the flavors, particularly the heat from red pepper flakes or spicy cured meats, will become more pronounced in the final baked product. Therefore, when initially seasoning, you might aim for a slightly milder spice level than your ideal, expecting it to amplify during the cooking process.
Pizza Rustica Recipe FAQs
Once baked and completely cooled to room temperature, your Pizza Rustica can be stored effectively in several ways. For short-term enjoyment, wrap it well and keep it at room temperature for up to 3 days. If you wish to extend its freshness, refrigerate it, tightly wrapped, for up to a week. For longer storage, the pie freezes beautifully for up to 3 months. When reheating from the refrigerator or freezer, preheat your oven to 350°F (175°C) and bake until the center is thoroughly warmed through.
Pizza Rustica, also known by names such as Torta Rustica, Pizza Chiena, or Pizza Ripiena, has its roots deeply embedded in the culinary traditions of Southern Italy. This cherished dish dates back as far as the 17th century, particularly prominent in the Naples region. Historically, it was prepared as a significant part of Easter celebrations, marking the joyous end of Lent and the arrival of spring, a time for rich and celebratory foods after a period of fasting.
The key indicators for a perfectly baked Pizza Rustica are a beautiful golden-brown color on the top crust and a clean cake tester. Insert a thin cake tester or a skewer into the center of the pie. If it comes out clean, without any wet filling clinging to it, your pie is fully cooked. The golden hue of the crust also signifies that the pastry is cooked through and delightfully flaky.
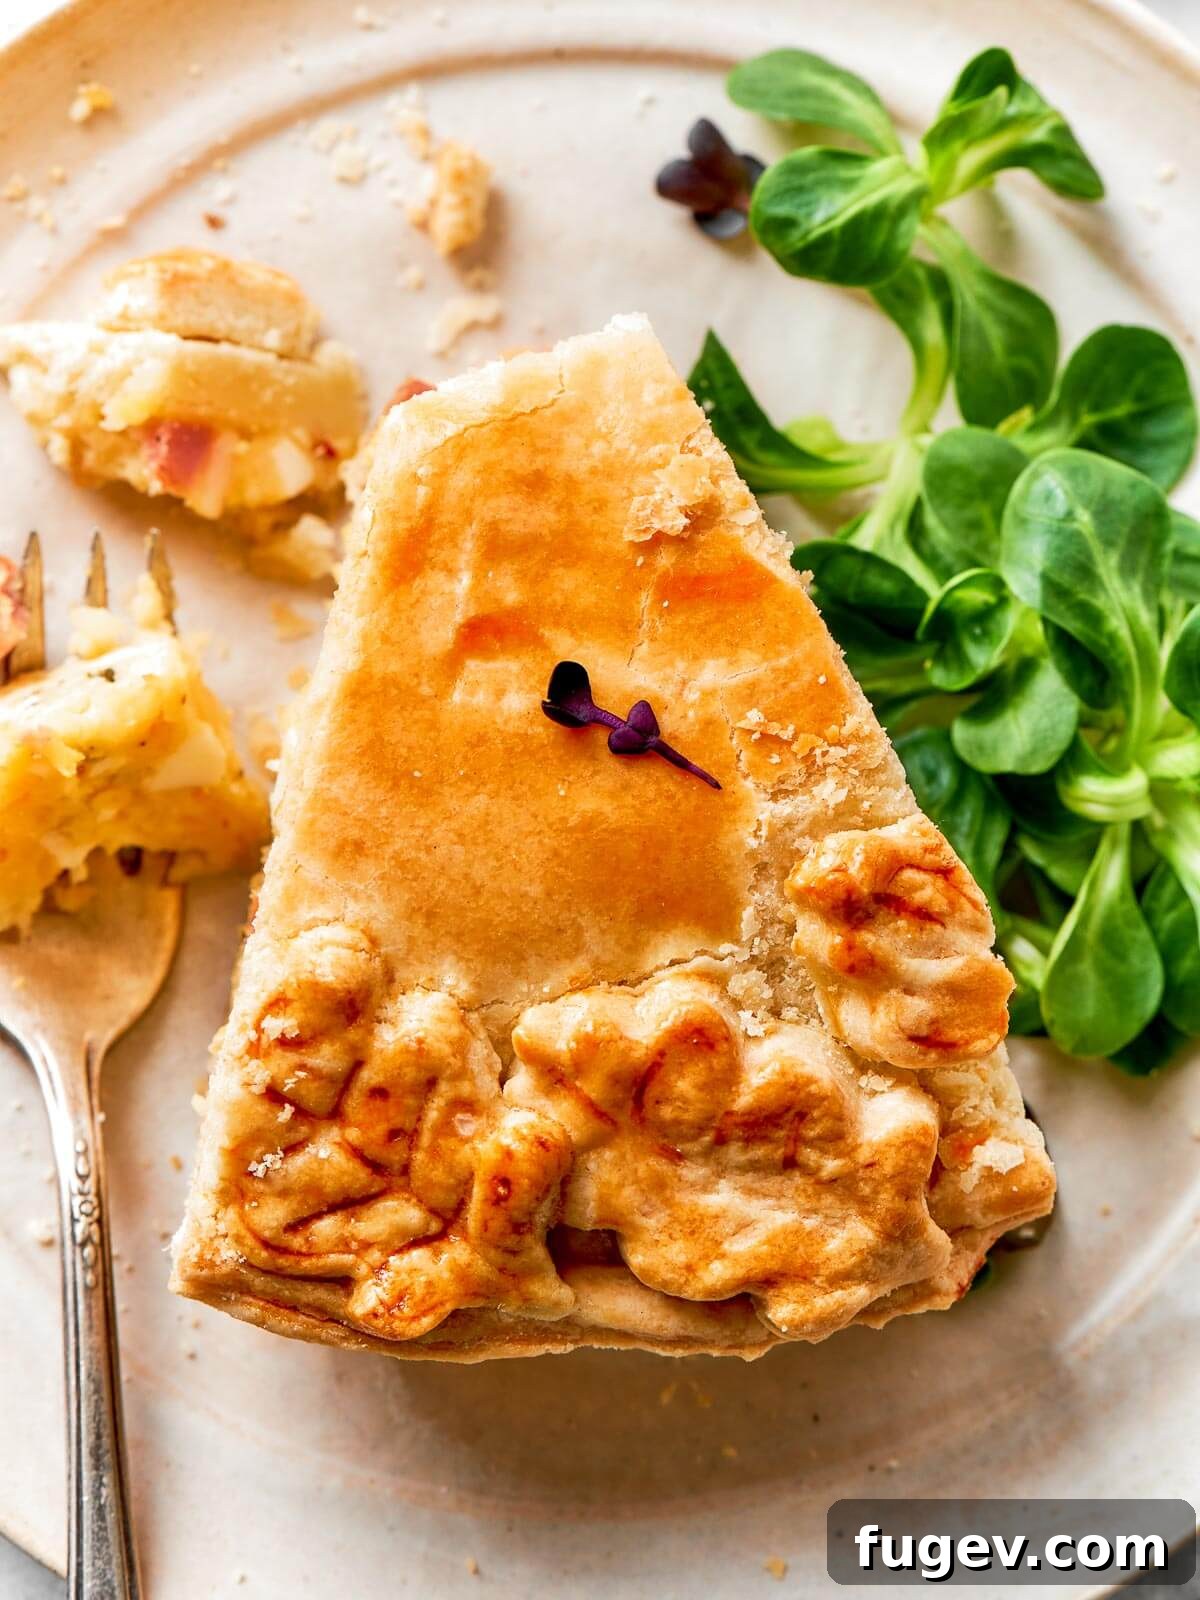
Pizza Rustica is a hearty and flavorful dish that can be enjoyed wonderfully on its own, served at room temperature. However, it also pairs beautifully with a simple, refreshing side. Consider serving it with a crisp green salad, perhaps with a light vinaigrette, to balance its richness. For an extra touch, you could include homemade rosemary sourdough rolls on the side. Other excellent pairings include my rosemary lemon roasted cauliflower or a vibrant big Italian salad, which both offer contrasting textures and flavors that complement the pie splendidly.
Explore More Savory & Sweet Pie Recipes from Chef Lindsey
Dinner Recipes
Classic Pepperoni Pizza
Sauces & Condiment Recipes
Homemade Best Pizza Sauce Recipe
Sourdough Bread Recipes
Artisan Sourdough Pizza Dough Recipe
Date Night
Elegant Tomato Goat Cheese Galette
If you tried this wonderful Pizza Rustica recipe and loved it, please consider leaving a ⭐ star rating and share your thoughts in the comments section below. Your feedback truly makes my day!
Pizza Rustica Recipe Details
This traditional Italian Pizza Rustica recipe delivers a rich, savory, and incredibly flavorful ricotta filling baked within a tender, all-butter pie crust. This iconic Easter dish, prepared in a springform pan, presents a visually stunning deep-dish pie perfect for any celebratory table.
Prep time: 30 minutes
Cook time: 45 minutes
Chill time: 3 hours
Total time: 4 hours 15 minutes
Servings: 10 slices
Ingredients
- 2 crusts pâte brisée (use a double batch of this all-butter pie crust recipe or vodka pie crust recipe)
- 30 ounces ricotta (or two 15 oz containers, preferably whole milk ricotta for best creaminess)
- 6 ounces fresh mozzarella (smashed or freshly shredded for optimal melt)
- 6 large eggs (well-beaten, for the filling)
- 3 hard-boiled eggs (finely chopped)
- 3/4 pound cured meat (e.g., soppressata, salami, salame; ensure paper/casings are removed and diced evenly)
- 3/4 teaspoon kosher salt
- 2 teaspoons black pepper (freshly ground is recommended)
- 1 1/2 tablespoons fresh basil (minced)
- 1 1/2 teaspoons fresh oregano (finely chopped)
- 1 tablespoon lemon zest
- 2 teaspoons red pepper flakes (adjust to taste or omit)
- 1 egg (for egg wash)
Instructions
- Prepare Pie Crust: Make a double batch of either the all-butter pie crust recipe or the vodka pie crust recipe.
- Divide and Chill Dough: Divide the prepared pastry dough into two unequal portions (roughly 2/3 for the bottom/sides and 1/3 for the top). Wrap securely in plastic wrap and chill for at least 2 hours.
- Roll Out Dough: When ready to assemble, roll out each dough section on a lightly floured surface to approximately 1/8 inch thick. Refrigerate between parchment paper for at least 30 minutes to firm up.
- Line Springform Pan: Allow the larger dough piece to warm slightly until pliable. Use it to line a springform pan, ensuring it overlaps the sides by about ½ inch. Trim excess dough, saving scraps for decoration.
- Prepare and Fill: In a large mixing bowl, combine all filling ingredients (ricotta, mozzarella, well-beaten eggs, chopped hard-boiled eggs, diced cured meat, salt, pepper, basil, oregano, lemon zest, red pepper flakes). Mix well and spoon evenly into the lined pan.
- Smooth Filling: Use the back of a spoon or small offset spatula to smooth the top of the filling.
- Add Top Crust: If desired, cut decorative vents into the smaller pastry round. Carefully place this top crust over the filling.
- Seal Edges: Pinch and roll the lower and upper pieces of dough inwards towards the top of the pizza rustica, pressing them tightly together to create a secure, decorative seal.
- Chill for Decorations: Chill the entire pizza while you prepare any additional decorative elements from dough scraps.
- Egg Wash and Decorate: Beat the remaining egg for an egg wash. Brush the top of the pizza rustica. Use the egg wash to adhere any pie dough decorations (braids, twists, cut-outs) onto the top crust, getting creative with layering.
- Final Chill: Chill the entire assembled dish for an additional 30 minutes to an hour.
- Preheat Oven: Preheat your oven to 350°F (175°C) for convection (with fan) or 375°F (190°C) for conventional (no fan).
- Bake and Serve: Bake for 45 minutes to 1 hour, or until a cake tester comes out clean and the top crust is beautifully golden brown. Serve at room temperature. For cleanest slices, chilling overnight is highly recommended.
Notes
- Yield: This recipe yields 1, 9-inch Springform pan pie.
- Presentation: For optimal slicing and a clean presentation, Pizza Rustica should ideally sit at least two hours at room temperature after baking, allowing the filling to set. Chilling overnight in the refrigerator is even better for achieving perfect slices.
- Flavor Tips: While dried spices can be used in a pinch, fresh herbs significantly elevate the flavor profile of this dish. Fresh basil, in particular, offers an earthy, fragrant, and sweet taste that dried basil often lacks, which can sometimes be bitter. If fresh basil is unavailable or you prefer convenience, using a prepared basil paste from the refrigerated produce aisle of most supermarkets is a far superior alternative to dried.
- Storage: Store baked and completely cooled Pizza Rustica, tightly wrapped, at room temperature for up to 3 days. It can also be refrigerated for up to a week or frozen for up to 3 months. To reheat, warm in an oven preheated to 350°F (175°C) until heated through.
Nutrition Information (per serving)
Serving: 1 slice | Calories: 409kcal | Carbohydrates: 5g | Protein: 27g | Fat: 31g | Saturated Fat: 15g | Polyunsaturated Fat: 3g | Monounsaturated Fat: 11g | Trans Fat: 0.01g | Cholesterol: 254mg | Sodium: 1191mg | Potassium: 311mg | Fiber: 0.4g | Sugar: 1g | Vitamin A: 880IU | Vitamin C: 1mg | Calcium: 300mg | Iron: 2mg
Course: Lunch | Cuisine: Italian | Calories: 409
Before You Go: More Culinary Adventures Await
I genuinely hope you enjoyed mastering this professional chef’s recipe for Pizza Rustica and that it brings a taste of Italian tradition to your table. If you’re eager to explore more delightful baked goods, particularly other savory and sweet pies, I invite you to delve into my collection of pie and tart recipes. Perhaps you’ll find your next favorite in the tangy perfection of this easy key lime pie, or indulge in the decadent richness of my French silk pie. Happy baking!