
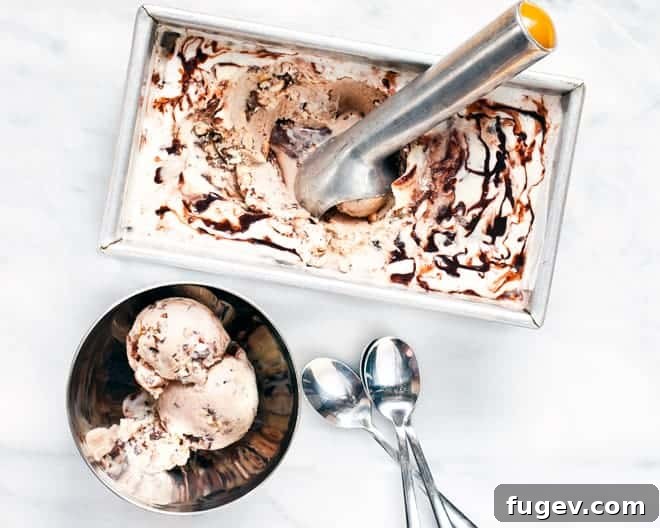
Homemade Tin Roof Ice Cream: A Classic Vanilla Treat with Fudge & Chocolate-Covered Peanuts
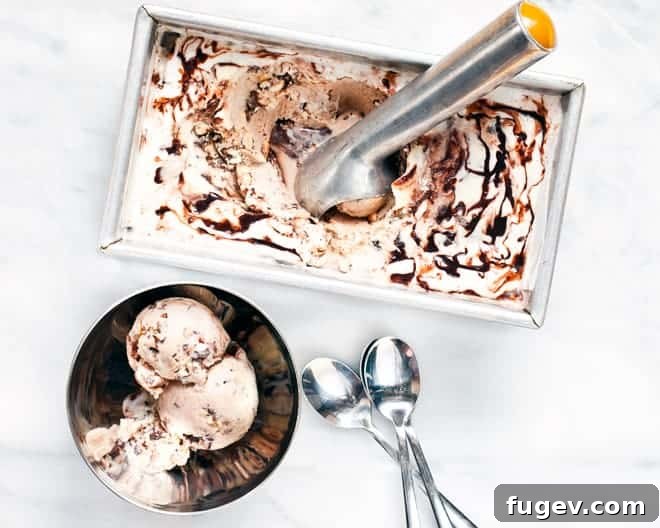
Prepare to delight your taste buds with this incredible homemade Tin Roof Ice Cream. Imagine a velvety vanilla ice cream base, generously swirled with a rich, decadent fudge ripple, and studded with irresistible chunks of crunchy, chocolate-covered peanuts. Every spoonful offers a perfect harmony of creamy, sweet, and salty, making it an instant classic for any dessert lover.
The Charm of Homemade Ice Cream: A Sweet Solution
As a passionate home cook, I find immense joy in crafting delicious treats from scratch, and sometimes, that means finding creative ways to use up ingredients. My freezer, for instance, often holds a treasure trove of “odds and ends” – from leftover pie crust scraps to a collection of frozen egg yolks. This resourceful approach ensures nothing goes to waste, and it often sparks inspiration for new culinary adventures.
One such inspiration led me to these frozen egg yolks. They are perfect for enriching a classic custard-based ice cream, creating a luxuriously smooth and creamy texture that store-bought versions often can’t match. When it came time to decide on a flavor, the irresistible combination of chocolate and peanuts immediately came to mind. This led to the glorious creation of a homemade Tin Roof Ice Cream – a delightful way to transform simple ingredients into a gourmet dessert.
What Exactly is Tin Roof Ice Cream?
For those unfamiliar, Tin Roof Ice Cream is a beloved American classic, typically featuring a vanilla ice cream base with a generous ripple of chocolate fudge and crunchy, chocolate-covered peanuts. The name “Tin Roof” is thought to have originated from an old candy bar, or perhaps from the visual resemblance of the chocolate and peanuts scattered over the ice cream to a rustic tin roof. Regardless of its exact origins, it’s a flavor profile that evokes nostalgia and pure indulgence.
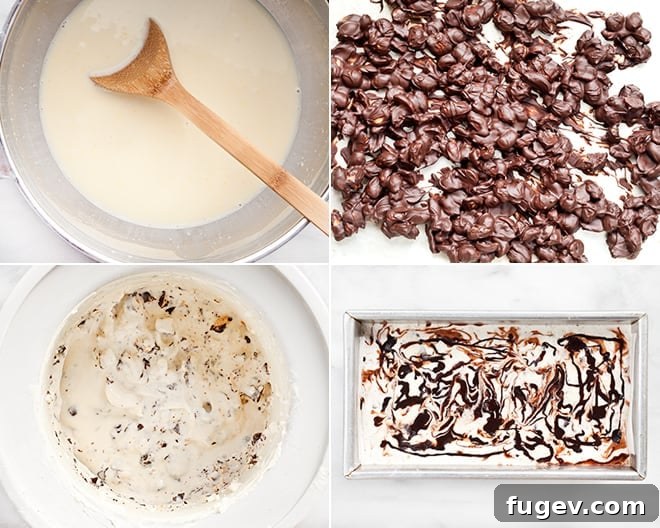
Making it at home allows for unparalleled freshness and quality. You control the richness of the vanilla base, the intensity of the fudge, and the crunchiness of the peanuts. This recipe focuses on creating these three distinct components – a silky vanilla custard, a luscious chocolate fudge ripple, and perfectly coated chocolate peanuts – and then combining them to create an extraordinary frozen dessert.
Tin Roof Ice Cream
Paige Adams
30
8
8
30
8
Ingredients
- For ice cream
-
1-1/2
cups
heavy cream -
4
large egg yolks -
3/4
cup
whole milk -
3/4
cup
granulated sugar -
Pinch
of salt -
1
teaspoon
vanilla extract - For chocolate covered peanuts
-
4
ounces
bittersweet chocolate -
1
cup
salted roasted peanuts - For fudge ripple
-
1/2
cup
granulated sugar -
1/3
cup
light corn syrup -
1/2
cup
water -
6
tablespoons
unsweetened Dutch-process cocoa powder -
1/2
teaspoon
vanilla extract
Instructions
-
Prepare the Ice Cream Base: Pour 1 cup of heavy cream into a large bowl and set aside. In a separate small bowl, whisk the egg yolks until they are light yellow and slightly thickened.
-
Cook the Custard: Combine the milk, sugar, salt, and the remaining heavy cream in a medium saucepan over medium heat. Stir constantly until the sugar completely dissolves and the mixture just begins to simmer, but do not boil. Carefully temper the egg yolks by slowly whisking about half of the warm milk mixture into them. This gradually raises the temperature of the yolks without scrambling them. Then, pour the tempered yolk mixture back into the saucepan with the remaining milk mixture. Continue stirring continuously with a wooden spoon or spatula over medium-low heat until the mixture thickens enough to coat the back of the spoon (reaching about 175-180°F or 80-82°C). Do not let it boil. Immediately remove from heat. Pour the custard through a fine-mesh strainer into the bowl with the reserved heavy cream to remove any potential cooked egg bits and ensure a silky smooth texture. Stir in the vanilla extract. Cover the bowl and chill the mixture completely in the refrigerator, preferably overnight, or for at least 4-6 hours, until very cold.
-
Make the Chocolate-Covered Peanuts: Melt the bittersweet chocolate in a small saucepan over very low heat, or use a double boiler method to prevent scorching. Stir occasionally until smooth. Once melted, remove from heat and stir in the salted roasted peanuts, ensuring they are evenly coated in chocolate. Spread the coated peanuts out in a single layer on a parchment-lined plate or baking sheet. Chill them in the refrigerator until the chocolate hardens completely, which usually takes about 15-30 minutes. Once firm, roughly chop the chocolate-covered peanuts into smaller, bite-sized pieces.
-
Prepare the Fudge Ripple: In a medium saucepan, combine the granulated sugar, light corn syrup, water, and unsweetened Dutch-process cocoa powder. Whisk the mixture constantly over medium heat until it just starts to simmer and all ingredients are well combined. Continue whisking and simmering gently for 1 minute to ensure a smooth, thick consistency. Remove the saucepan from the heat. Stir in the vanilla extract. Allow the fudge ripple to cool completely to room temperature. For best results, chill it thoroughly in the refrigerator until very cold and slightly thickened, which will help it create a beautiful ripple effect in the ice cream.
-
Churn and Assemble: Churn the chilled ice cream mixture in your ice cream maker according to the manufacturer’s instructions. This typically takes 20-30 minutes, resulting in a soft-serve consistency. Once churned, gently fold in the chopped chocolate-covered peanuts by hand. To assemble, spoon a layer of the chilled fudge ripple into a quart-sized container. Follow with a layer of the ice cream mixture. Alternate layers of fudge and ice cream, starting with fudge and ending with ice cream, using a knife or spoon to create swirls as you layer. Cover the container tightly and freeze until firm, at least 8 hours or preferably overnight, to allow the ice cream to harden to a scoopable consistency.
Notes
Adapted from The Perfect Scoop by David Lebovitz
Nutrition
|
Carbohydrates: 58g
|
Protein: 10g
|
Fat: 34g
|
Saturated Fat: 16g
|
Polyunsaturated Fat: 4g
|
Monounsaturated Fat: 11g
|
Trans Fat: 0.01g
|
Cholesterol: 151mg
|
Sodium: 116mg
|
Potassium: 367mg
|
Fiber: 4g
|
Sugar: 50g
|
Vitamin A: 830IU
|
Vitamin C: 0.3mg
|
Calcium: 104mg
|
Iron: 2mg
Nutrition information is automatically calculated, so should only be used as an approximation.
Additional Info
Ice Cream
American
Did you make this recipe?
Mention @lastingredient on Instagram and tag it #lastingredient!
Tips for Crafting the Perfect Tin Roof Ice Cream
Making homemade ice cream is a rewarding experience, but a few key tips can elevate your results from good to absolutely outstanding:
- Chill Thoroughly: The most crucial step for any custard-based ice cream is chilling the base completely. The colder your base is before churning, the creamier and smoother your final ice cream will be. Rushing this step can lead to an icy texture. Aim for at least 4-6 hours, but overnight is ideal.
- Temper Your Egg Yolks Carefully: When adding the warm milk mixture to the egg yolks, do so slowly and whisk continuously. This prevents the eggs from scrambling and ensures a smooth custard. If you notice any small lumps, straining the custard is essential.
- Don’t Overcook the Custard: Cook the custard until it just coats the back of a spoon. Overcooking can lead to a lumpy texture and a custardy, rather than icy, final product. A thermometer (175-180°F or 80-82°C) is your best friend here.
- Quality Ingredients Matter: Since there are only a few main components, the quality of each shines through. Use good quality heavy cream, whole milk for richness, and a bittersweet chocolate that you enjoy eating on its own. Fresh vanilla extract makes a significant difference.
- Cool Fudge Ripple: Ensure your fudge ripple is completely cooled and chilled before layering. If it’s warm, it will melt the churned ice cream and won’t create distinct ripples.
- Evenly Coat Peanuts: When making the chocolate-covered peanuts, make sure each peanut is well coated. This creates that delightful crunch and chocolatey burst in every bite. Chopping them after they harden ensures they are distributed well and easy to eat.
- Freezing Time is Key: While the ice cream will be soft after churning, it needs several hours in the freezer to firm up to the perfect scoopable consistency. Patience is a virtue when it comes to homemade ice cream!
Variations to Customize Your Tin Roof Ice Cream
While the classic Tin Roof combination is undeniably delicious, don’t hesitate to get creative and customize your batch:
- Nut Alternatives: Instead of peanuts, try chocolate-covered almonds, cashews, or even pecans for a different flavor profile.
- Chocolate Choices: Experiment with milk chocolate or dark chocolate for your peanuts or even for the fudge ripple to adjust the sweetness level. A swirl of white chocolate fudge could also be an interesting twist.
- Add a Caramel Swirl: For an extra layer of decadence, add a salted caramel ripple in addition to or instead of some of the fudge.
- Espresso Kick: A teaspoon of instant espresso powder added to the fudge ripple can deepen the chocolate flavor beautifully.
- Crunchy Toppings: Sprinkle a few extra chopped chocolate-covered peanuts on top when serving for added visual appeal and crunch.
Serving and Storage Suggestions
Homemade Tin Roof Ice Cream is best enjoyed fresh, but it stores beautifully for several weeks. For optimal flavor and texture, let the ice cream sit at room temperature for 5-10 minutes before scooping. This allows it to soften slightly, making it easier to serve and enhancing its creamy consistency.
Store your homemade ice cream in an airtight container in the coldest part of your freezer. This prevents freezer burn and helps maintain its texture. Properly stored, it should last for up to 2-3 weeks, though it’s so good, it likely won’t last that long!
Frequently Asked Questions About Tin Roof Ice Cream
Q: Why is it called Tin Roof Ice Cream?
A: The exact origin is debated, but one popular theory suggests it’s named after a candy bar from the early 20th century that featured chocolate and peanuts. Another idea is that the scattered chocolate and peanuts on top of the vanilla ice cream visually resemble a “tin roof.”
Q: Do I need an ice cream maker?
A: Yes, for the best results with this recipe, an ice cream maker is highly recommended. It churns the mixture, incorporating air and preventing large ice crystals from forming, resulting in a smooth, creamy texture. While no-churn recipes exist, they often yield a different consistency.
Q: Can I use store-bought chocolate-covered peanuts and fudge?
A: Absolutely! While this recipe provides instructions for making them from scratch for ultimate freshness and flavor control, you can certainly use good quality store-bought chocolate-covered peanuts and hot fudge sauce to save time. Just ensure the fudge is chilled for the ripple effect.
Q: My ice cream is too hard. What went wrong?
A: Several factors can contribute to hard ice cream:
- Not enough fat or sugar in the recipe.
- Over-churning, which incorporates too much air.
- Storing it in a container that isn’t airtight, leading to freezer burn.
- The freezer temperature might be too cold.
Letting it sit at room temperature for a few minutes before serving usually helps, or ensure your recipe and storage methods are followed precisely.
Q: Can I make this dairy-free or vegan?
A: This particular recipe relies on heavy cream, milk, and egg yolks for its rich texture. Converting it to be dairy-free or vegan would require significant substitutions for all dairy products and eggs, effectively creating a different recipe. It’s best to look for a dedicated dairy-free or vegan tin roof ice cream recipe if those are your dietary needs.
Conclusion: Indulge in a Timeless Treat
Creating your own Tin Roof Ice Cream at home is a labor of love that is incredibly rewarding. The layers of rich vanilla, sweet fudge, and salty, crunchy chocolate-covered peanuts come together to form a symphony of flavors and textures that will transport you to a state of pure dessert bliss. Whether you’re making it for a special occasion or simply to satisfy a craving, this recipe promises a decadent and unforgettable frozen treat. So, grab your ice cream maker, gather your ingredients, and prepare to scoop up a batch of pure happiness!