
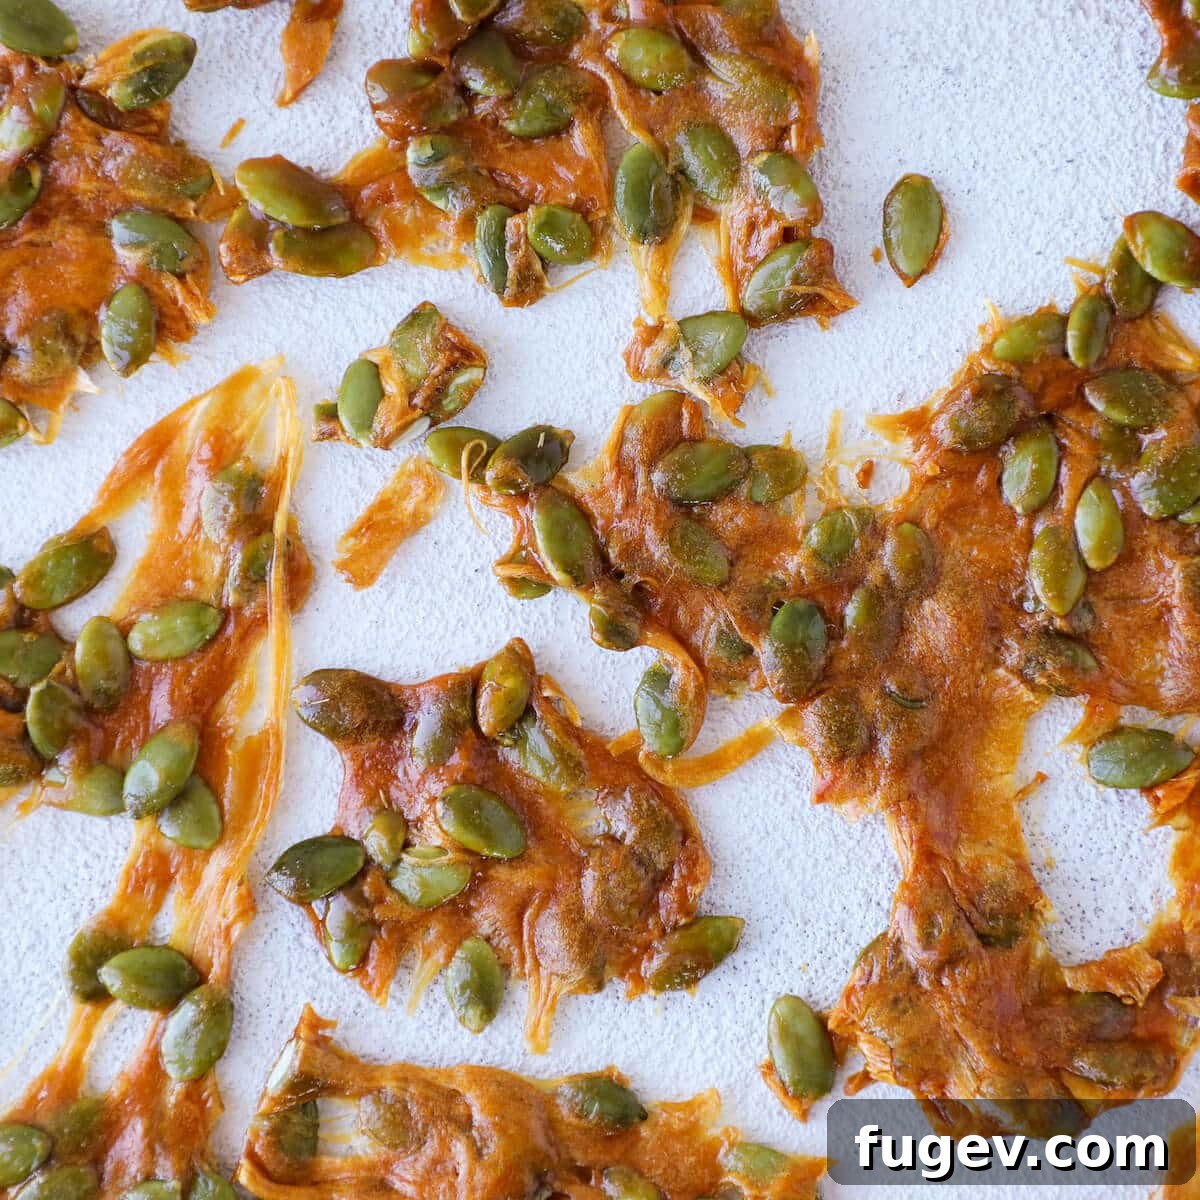
Exquisite Pumpkin Seed Brittle: Your Ultimate Guide to a Crunchy, Salty-Sweet Fall Delight
Unleash the irresistible flavors of autumn with this exquisite **Pumpkin Seed Brittle**, a treasured recipe straight from my professional pastry chef’s notebook. This brittle isn’t just a snack; it’s a culinary masterpiece – perfectly crunchy, beautifully balanced between salty and sweet, and the quintessential garnish for all your Fall baking endeavors. Whether you call them pumpkin seeds or pepitas, this brittle recipe will transform them into a dazzling treat. I’m thrilled to share all my insider tips and tricks, ensuring you achieve perfectly thin, crisp pepita brittle every single time, ready to elevate any dessert to gourmet status.
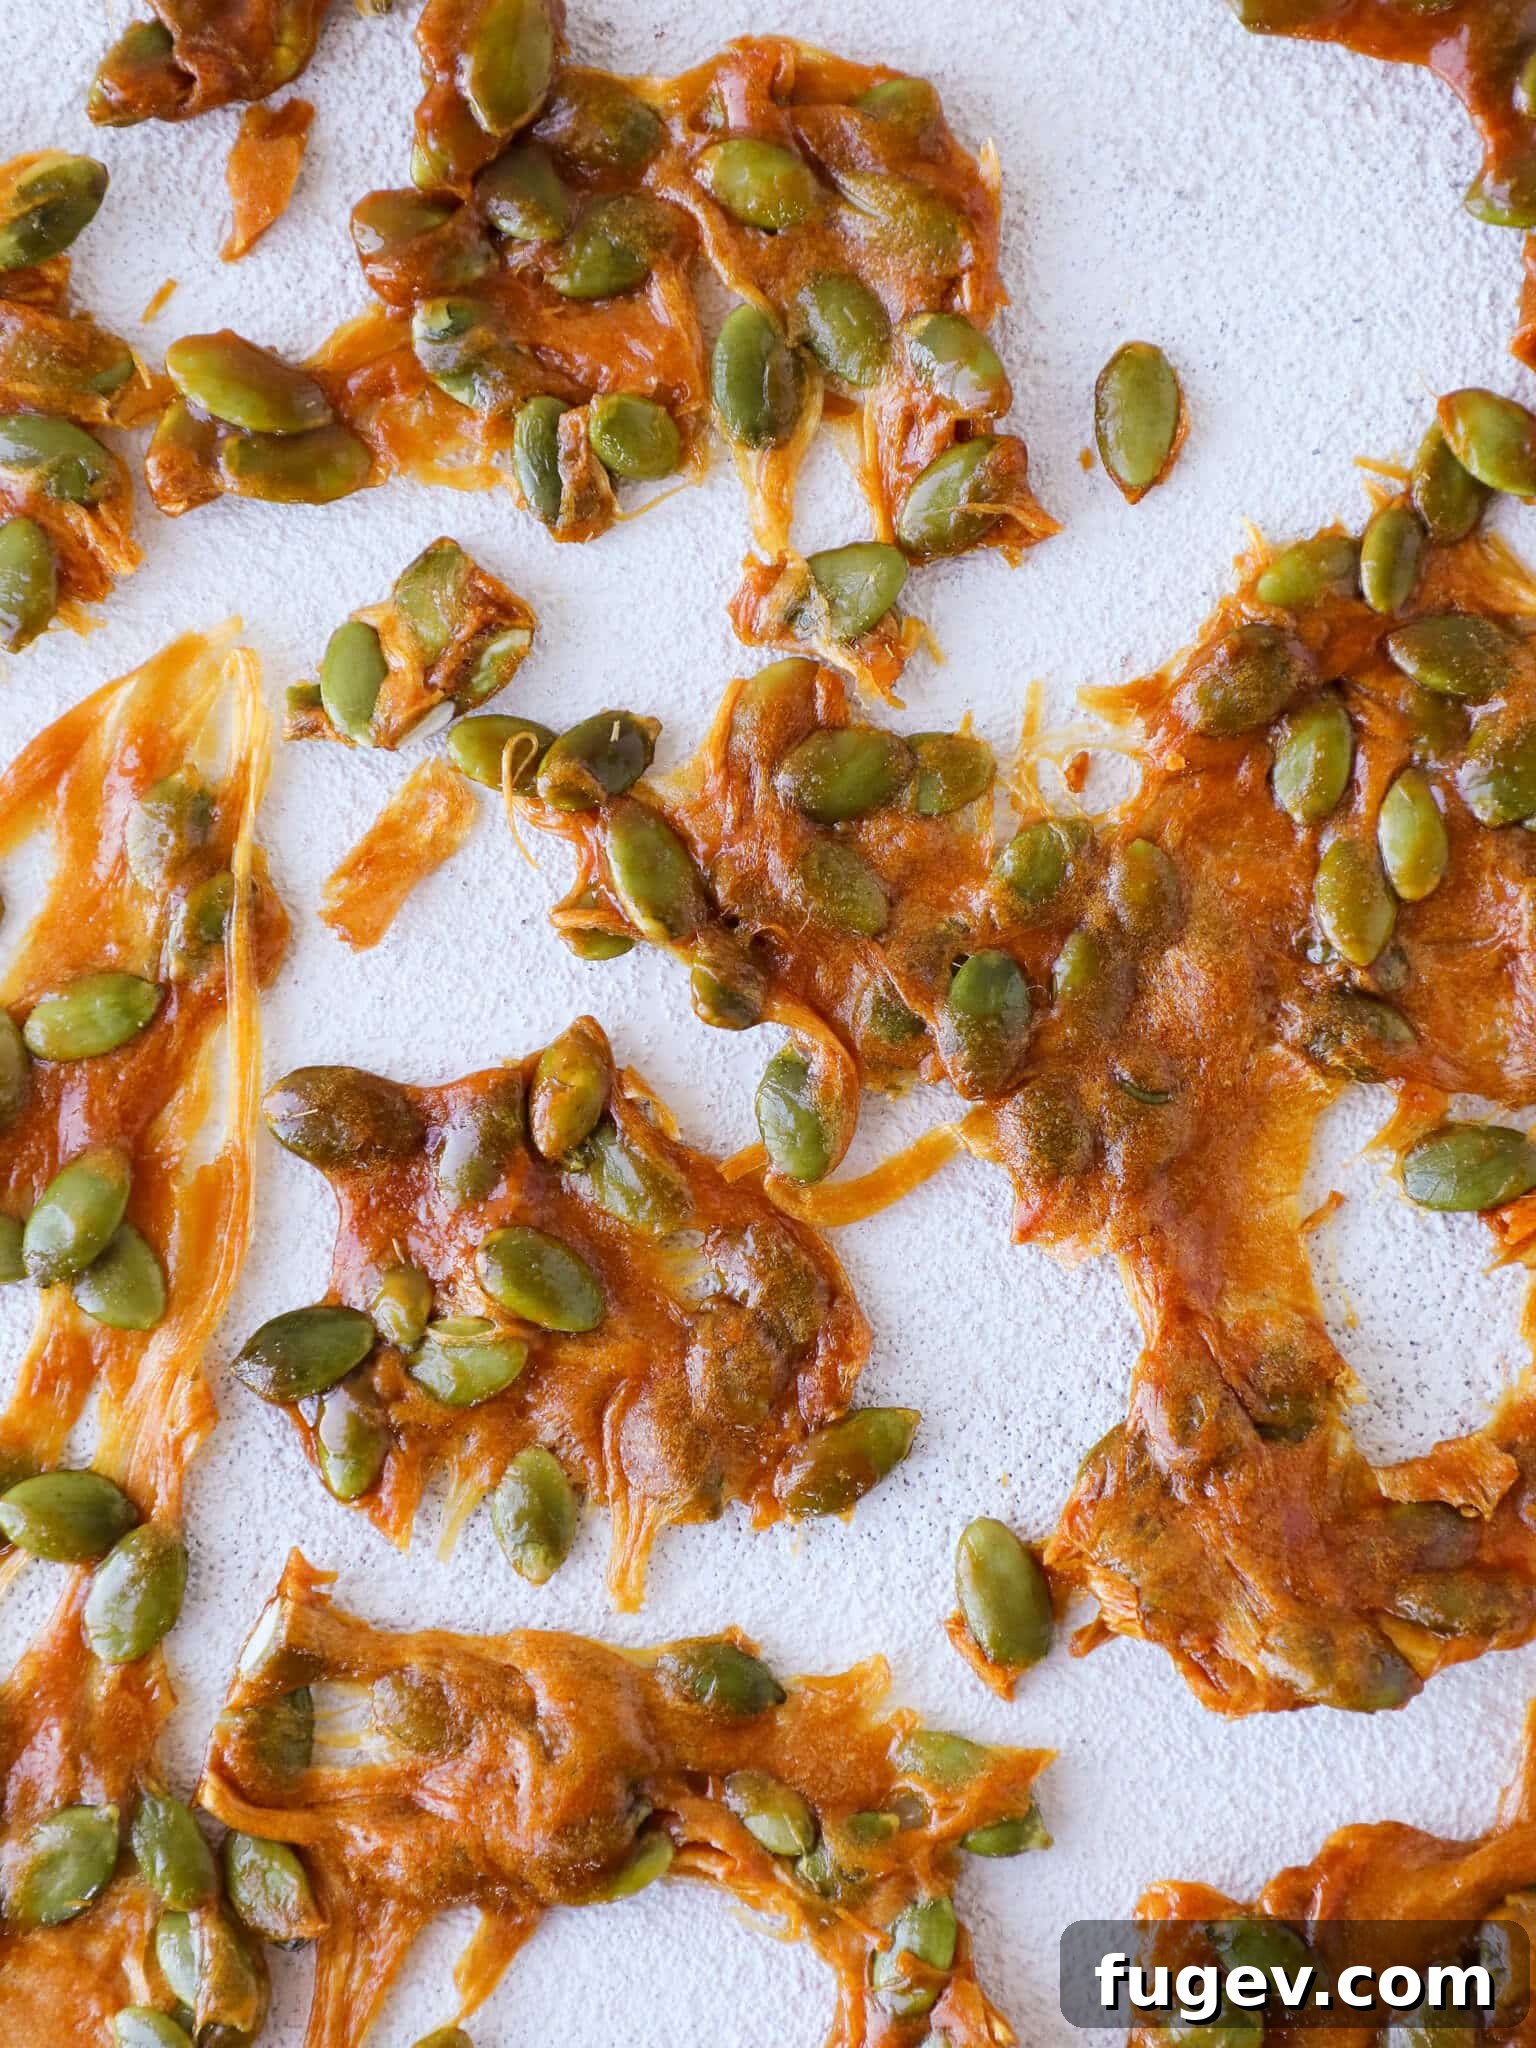
Pumpkin Seed Brittle serves as the ultimate Fall dessert garnish, a true symphony for the senses. It strikes every right note with precision. The sugar is expertly caramelized, imparting a deep, complex sweetness that avoids being cloying. A delicate touch of salt enhances and elevates all the underlying flavors, creating a harmonious balance. Its texture is irresistibly crunchy, delivering a satisfying snap with every bite, and its golden hue makes it visually stunning. What more could a luxurious slice of classic pumpkin pie or a decadent pumpkin spice layer cake desire than a delicate shower of this homemade pepita brittle? Beyond these beloved classics, this brittle is a fantastic addition to almost every recipe featured in my curated list of the 25 Best Pumpkin Recipes for Fall, promising to add that extra special touch.
Throughout my extensive career as a professional pastry chef, I’ve had the pleasure of incorporating pepita brittle into a wide array of exquisite dishes, far beyond the ordinary. Naturally, it perfectly complements familiar favorites like fluffy pumpkin cupcakes adorned with a dollop of lightly sweetened whipped cream. However, my true joy comes from employing it in more unexpected and innovative ways. Some of my most cherished applications include serving it alongside a silky pumpkin panna cotta, where its crunch provides a delightful contrast to the creamy dessert. Another favorite technique involves pulling the brittle incredibly thin to delicately cover an entire baked pumpkin custard, offering a sophisticated and textural twist on the traditional crème brûlée. This versatility truly underscores the potential of this simple yet elegant confection.
Table of Contents
- Why You Will Love This Pumpkin Seed Brittle
- What Exactly is Pumpkin Seed Brittle?
- Achieving Perfectly Thin Pumpkin Seed Brittle
- Essential Ingredients for Your Brittle
- Smart Substitutions for Your Brittle
- Frequently Asked Questions About Brittle Making
- Pumpkin Seed Brittle Recipe Card
- Before You Go! Explore More Fall Desserts
Why You Will Absolutely Love This Pumpkin Seed Brittle: A Chef’s Secret Weapon
There are countless reasons why this particular pumpkin seed brittle recipe has become a staple in my kitchen and will undoubtedly become one in yours. It’s not just a recipe; it’s a method honed through years of professional experience, designed to give you flawless results every time.
- Master the Art with My Video Guide: Crafting the perfect caramel for brittle can be daunting, but I make it simple. In my comprehensive pumpkin seed brittle video tutorial, I demonstrate the precise moment to remove the caramel from the heat – that critical stage just before it becomes too dark or bitter. Furthermore, I unveil my technique for pulling those stunningly thin, abstract, and utterly unique pieces of brittle that are not only delicious but also visually captivating. You’ll gain the confidence to achieve that perfect golden amber color and delicate texture that truly sets this brittle apart.
- A Championship-Winning Recipe: This isn’t just any recipe; it’s a version of the very brittle recipe that helped me win the coveted first round of *Beat Bobby Flay*! The challenge required creativity and adaptability, especially since one of the esteemed judges had an allergy to nuts and seeds. Demonstrating the versatility of brittle, I masterfully substituted the pumpkin seeds with perfectly toasted coconut, showcasing how this fundamental technique can be adapted to various dietary needs and flavor profiles without compromising on crunch or caramel richness. This recipe truly is a testament to culinary excellence and ingenuity.
- Perfectly Balanced Flavor Profile: Unlike many brittle recipes that can be overly sweet, mine achieves a sublime balance. The deep caramelization of sugar provides a rich, warm sweetness, perfectly offset by a hint of salt. This creates a complex flavor that is incredibly satisfying and never overwhelming. The subtle nuttiness of the pumpkin seeds adds another layer of depth, making each bite an unforgettable experience.
- Impressive Versatility: As a professional pastry chef, I value ingredients that offer flexibility. This pumpkin seed brittle is incredibly versatile. It’s magnificent as a stand-alone candy, a sophisticated garnish for seasonal desserts, a crunchy addition to yogurt or ice cream, or even crumbled over a salad for an unexpected textural element. Its unique appeal makes it suitable for both casual indulgence and elegant entertaining.
- Simple Yet Sophisticated: While the results are undeniably gourmet, the process of making this brittle is surprisingly straightforward. With my clear, step-by-step instructions and practical advice, even novice candy makers can achieve professional-quality brittle. It’s a wonderful project for a cozy fall afternoon, yielding impressive results that will delight friends and family.
What Exactly is Pumpkin Seed Brittle? Unpacking This Classic Confection
Pumpkin seed brittle, often referred to as pepita brittle, is a delightful type of hard candy characterized by its crisp, delicate texture and the inclusion of toasted or untoasted pumpkin seeds. At its core, brittle is a form of spun or poured sugar candy, typically made by heating sugar to its caramelization point. The magic, however, truly happens with the addition of a few key ingredients: a touch of butter and, most importantly, baking soda.
The process begins with creating a “wet caramel,” where sugar is dissolved in water (and sometimes corn syrup for stability) and cooked to a beautiful golden-amber hue. Once this molten sugar reaches the precise temperature, butter is whisked in, adding a luscious richness and a hint of dairy complexity to the caramel. The star ingredient for texture, baking soda, is then rapidly incorporated. This humble leavening agent reacts with the hot caramel, producing tiny bubbles of carbon dioxide. These bubbles become trapped within the candy as it cools, creating the signature light, airy, and delicately crisp texture that defines brittle, preventing it from becoming a solid, rock-hard slab of caramel.
Finally, the pumpkin seeds (pepitas) are folded into this effervescent caramel mixture. You have the flexibility to choose between toasted or untoasted pumpkin seeds, depending on your personal preference. Toasted seeds will offer a deeper, nuttier flavor and an enhanced crunch, while untoasted seeds will provide a milder, fresher taste. The entire mixture is then poured onto a prepared surface and spread thinly, allowing it to cool and harden into shimmering, glass-like sheets of candy studded with verdant pepitas. The result is a truly enchanting confection that balances intense caramel flavor with a satisfying crunch and the wholesome goodness of pumpkin seeds.
Mastering the Art: Achieving Perfectly Thin Pumpkin Seed Brittle
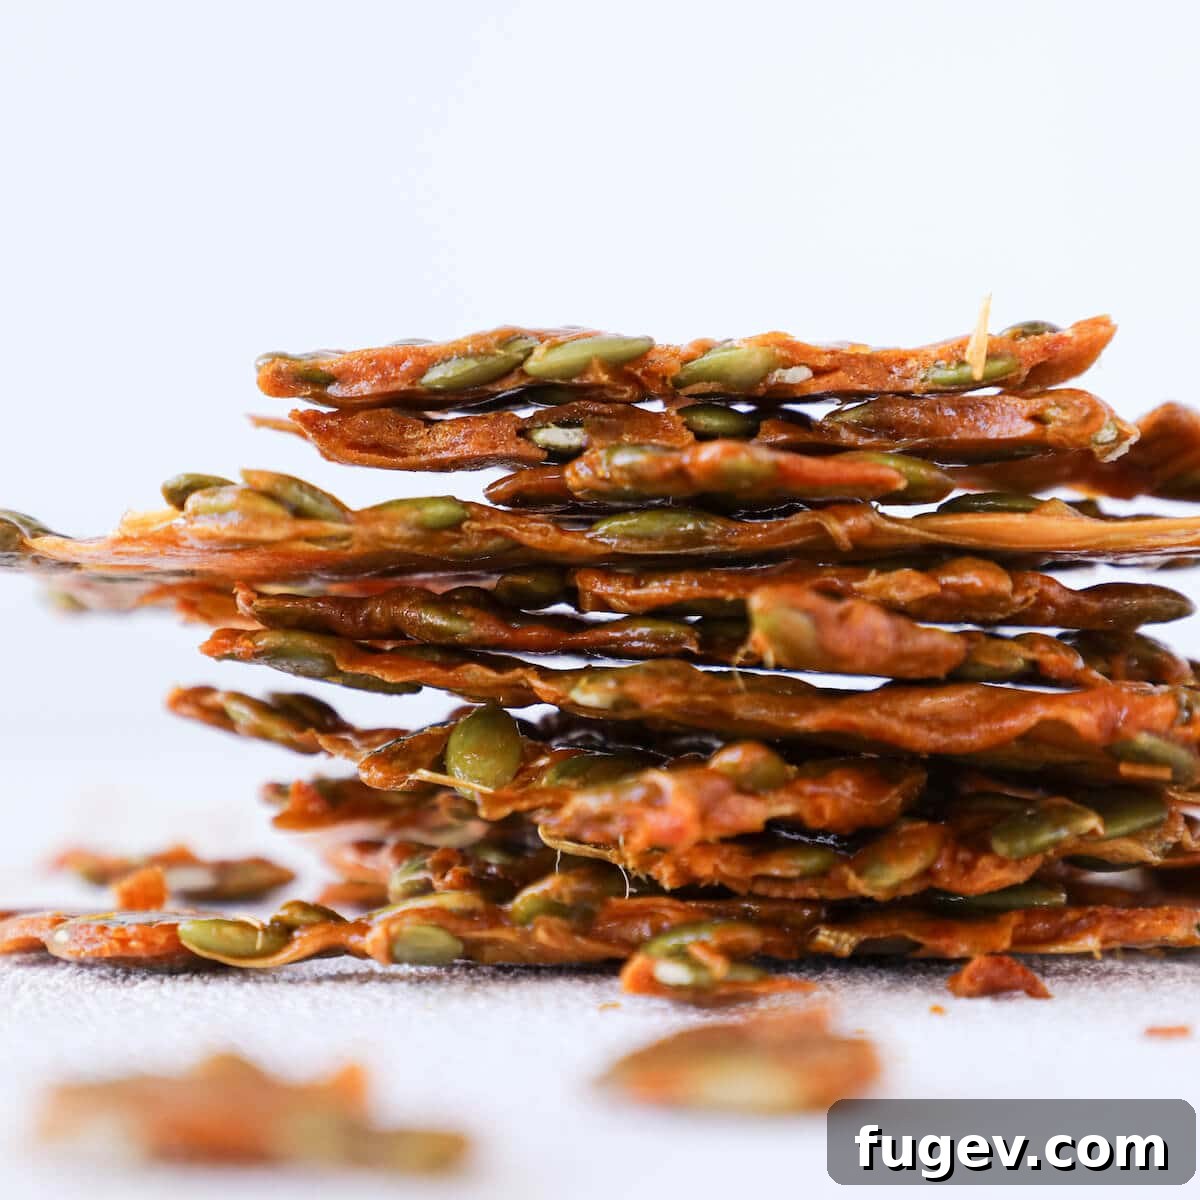
The elegance of brittle often lies in its delicate thinness, allowing it to shatter beautifully and melt in your mouth. Achieving this can seem tricky, but with the right technique, it’s entirely within reach. I’ll guide you through three distinct methods, each offering a slightly different aesthetic and level of ease, so you can choose the one that best suits your style and desired outcome.
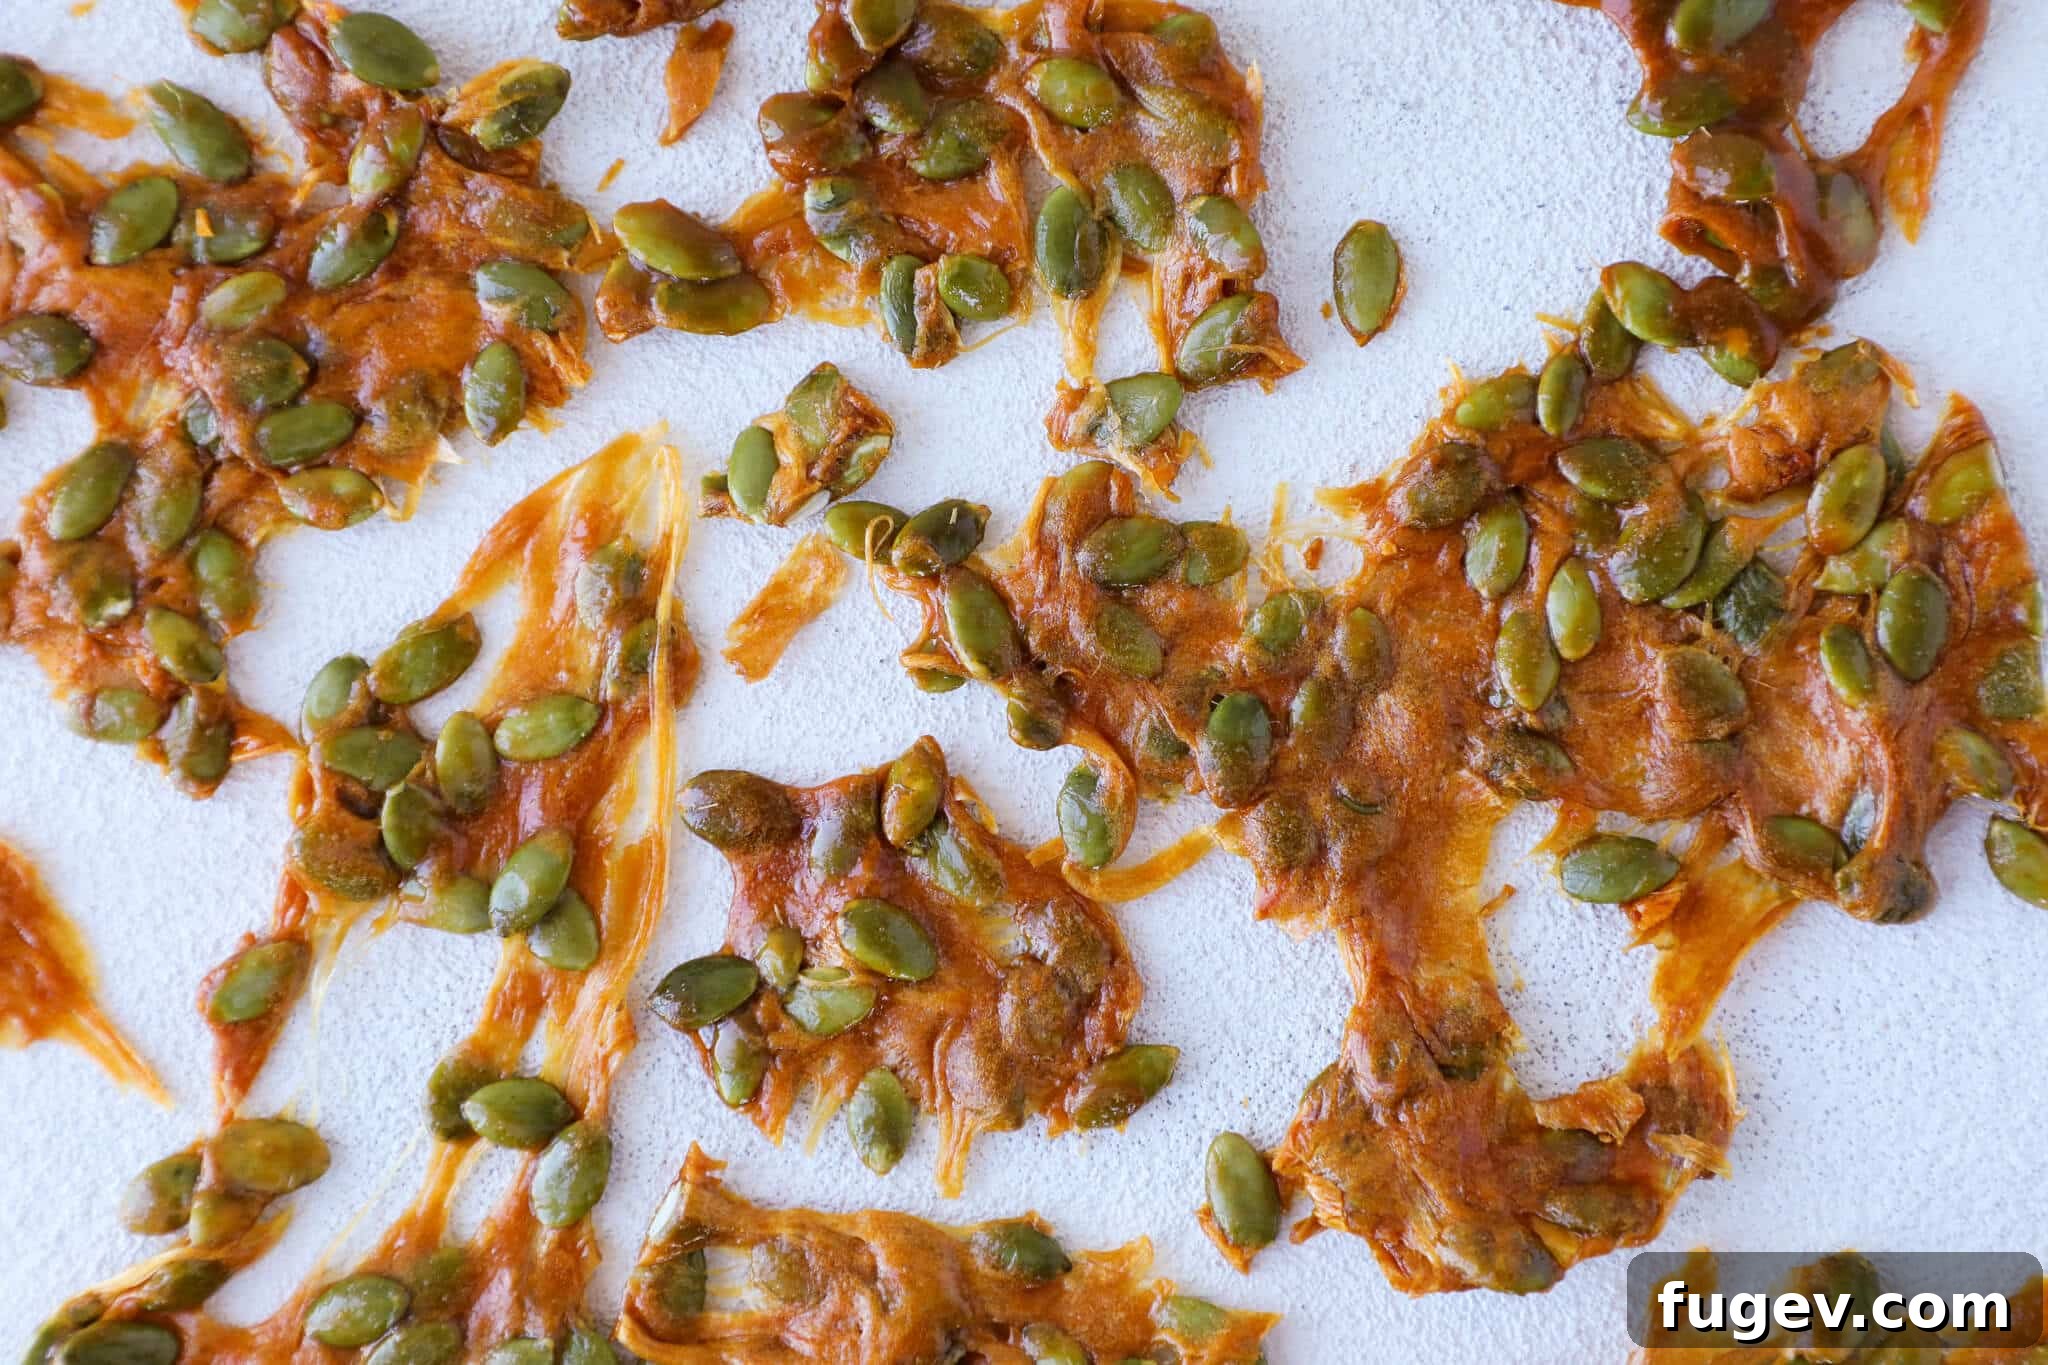
- The Art of Pulled Brittle (For Abstract, Delicate Shapes): This is the method responsible for the exquisitely thin, artistic brittle pieces you often see in high-end pastry shops and in my own demonstrations. It requires a bit of courage and specialized equipment but yields truly stunning results. You’ll need heat-resistant gloves to protect your hands. The technique involves pouring the hot, prepared sugar mixture onto a non-stick baking mat, typically in a concentrated pool. The trick is to work quickly but carefully, using your gloved hands to gently pull and stretch the warm, pliable sugar mixture into thin, abstract strands and delicate sheets before it fully sets. This method creates unique, organic shapes and an incredibly fine, almost glass-like texture. It demands swift action, as the sugar hardens rapidly, but the payoff in terms of visual appeal and delicate crunch is absolutely worth the effort.
- The Efficiency of Rolled Brittle (For Uniform Thinness): If you prefer a more uniform and consistently thin brittle, the rolling method is an excellent choice. After pouring your hot brittle mixture onto a non-stick baking mat, immediately place a second silicone baking mat directly on top. Working swiftly, use a rolling pin to roll the brittle mixture out evenly between the two mats. This sandwiching technique helps to achieve an incredibly thin and consistent thickness across the entire sheet. Be mindful to roll carefully, ensuring no hot sugar spills out from the sides, which can be a burn hazard. This method will leave both the top and bottom surfaces of your brittle with the subtle, slightly bumpy texture characteristic of silicone mats, adding a pleasant visual and tactile dimension. This is a fantastic option for a beautiful and consistent brittle sheet that can then be broken into pieces.
- The Simplicity of Spread Brittle (For Rustic Charm): For a more laid-back approach that still results in delicious, thin brittle, simply pouring and spreading is your best bet. Pour the hot brittle mixture as thinly as possible onto a silicone mat. Then, using an offset spatula that has been lightly sprayed with non-stick cooking spray (this prevents sticking and allows for smoother spreading), quickly and carefully spread the mixture outwards. Don’t aim for absolute perfection here; a slightly irregular or rustic appearance is part of its charm. While this method might be a little more imperfect and perhaps a tad messier than rolling, the end result is always beautiful in its own right, offering a delightful crunch and satisfying sweetness. The key is to work quickly before the sugar cools too much to spread effectively.
Essential Ingredients for Your Perfect Pumpkin Seed Brittle
Crafting exceptional pumpkin seed brittle relies on a precise understanding of each ingredient’s role. While the list might seem simple, the quality and function of each component are crucial for achieving that ideal crunchy, salty-sweet perfection. Here’s a detailed look at what you’ll need and why it matters:
- Granulated Sugar: This is the foundation of any caramel or brittle. I highly recommend using extra-fine granulated sugar if possible. Its smaller crystal size ensures a more even and rapid melting process, which is vital for preventing crystallization – a common pitfall in candy making. Even melting leads to a smoother, more consistent caramel. However, don’t stress if you only have regular granulated sugar; it will still work beautifully, just be a bit more diligent with your stirring and cleaning the pot sides.
- Water: Far from just a filler, water plays a critical role in the initial stages of brittle making. It helps to dissolve the granulated sugar crystals evenly, forming a sugar syrup. This controlled dissolution is essential for a slow and steady heating process, preventing the sugar from scorching prematurely and allowing for a more stable caramel development. Regular tap water is perfectly suitable; I often use cold water to ensure a gentle start to the heating, giving me more control over the caramelization.
- Light Corn Syrup: This ingredient is a secret weapon for any candy maker. Light corn syrup acts as an anti-crystallization agent. It’s an invert sugar that prevents the sucrose molecules in granulated sugar from re-forming into crystals as the syrup cooks and cools. Without it, you run a significantly higher risk of your caramel turning grainy and ruining the smooth texture of your brittle. While you can substitute it with glucose syrup or even omit it (as discussed in substitutions), for consistent, foolproof results, I strongly advise including it.
- Pumpkin Seeds (Pepitas): These are the star of our brittle! I typically opt for untoasted, unsalted pumpkin seeds (pepitas) for this recipe. This allows me to control the salt level precisely and decide if I want to toast them myself for a fresher flavor. If you choose to use salted pumpkin seeds, remember to significantly reduce or omit the additional kosher salt in the recipe to prevent an overly salty end product. If you’re harvesting your own seeds from a pumpkin, ensure you remove the tough outer shell to get to the tender, green pepita inside.
- Kosher Salt: A good quality kosher salt is indispensable here. It’s less concentrated than table salt, meaning a teaspoon weighs less and provides a milder, more balanced salinity. The salt acts as a flavor enhancer, cutting through the sweetness of the caramel and preventing the brittle from tasting one-dimensional or cloyingly sugary. It sharpens and brightens all the other flavors, creating that addictive salty-sweet contrast that makes brittle so compelling.
- Unsalted Butter: I always reach for unsalted butter in baking and candy making. This allows for complete control over the total salt content in the recipe. In candy applications like caramel, pralines, and brittle, butter contributes a luxurious richness, a smooth mouthfeel, and a subtle creamy flavor that rounds out the sharp sweetness of the sugar. It also helps to emulsify the mixture and slightly soften the brittle’s texture, making it more pleasant to eat.
- Baking Soda: This is the magical ingredient responsible for brittle’s characteristic airy, crisp texture. It’s crucial to ensure your baking soda is fresh and potent, as it loses efficacy over time. Test its freshness by mixing a little with vinegar; if it fizzes vigorously, it’s good to go. When added to the hot caramel, baking soda reacts with the acids naturally present in the sugar (or created during caramelization), releasing carbon dioxide gas. These bubbles create a porous structure within the cooling candy, giving brittle its distinctive light crunch rather than a hard, dense chew. If your baking soda isn’t fresh, it won’t react properly, resulting in dense, hard brittle. Don’t discard old baking soda, though – it’s excellent for absorbing refrigerator odors or cleaning countertops!
Smart Substitutions for Your Pumpkin Seed Brittle: Customizing Your Crunch
While this recipe is perfected for pumpkin seed brittle, understanding how to make intelligent substitutions can open up a world of culinary possibilities, allowing you to tailor the brittle to your preferences or accommodate dietary needs. Here are some thoughtful alternatives:
- Corn Syrup Alternatives: As mentioned, light corn syrup is primarily used as an anti-crystallization agent. You can confidently substitute it with an equal amount of glucose syrup, which serves the same purpose effectively. However, if you prefer to avoid corn syrup or glucose entirely, you can omit it. Be aware that this choice comes with a significantly increased risk of caramel crystallization. To mitigate this, be extra diligent: ensure your pot is impeccably clean, avoid stirring once the sugar dissolves, and use a pastry brush dipped in water to wash down any sugar crystals that cling to the sides of the pot as the syrup cooks.
- Exploring Other Nuts, Seeds, and Dried Fruits: This recipe is incredibly adaptable! Feel free to experiment with a variety of other seeds, nuts, or even dried fruits. For a different flavor profile, consider using almonds, pecans, cashews, or even sesame seeds. If you’re looking to add a delightful tartness that beautifully cuts through the sweetness of the caramel, I highly recommend incorporating dried cherries or dried cranberries. The vibrant color and tangy chewiness of dried cranberries, for instance, create a fantastic contrast. When using dried fruits, ensure they are finely chopped to distribute evenly throughout the brittle.
- Using Salted Pumpkin Seeds: If you have roasted and salted pumpkin seeds on hand and wish to use them, you absolutely can! Simply substitute them for the plain pepitas in the recipe. The crucial adjustment here is to **omit any additional salt** that would typically be added to the caramel. Adding extra salt would result in an overly saline brittle, masking the delicate caramel and pumpkin seed flavors. Always taste your ingredients and adjust accordingly for the best balance.
Frequently Asked Questions About Making Pumpkin Seed Brittle
Making brittle can seem intimidating, but many common issues have simple solutions. Here are some of the most frequently asked questions I receive about crafting perfect pumpkin seed brittle:
Knowing the exact moment to remove your brittle from the heat is paramount for success. The process of making perfect brittle is all about precise timing and observation. You’re looking for a beautiful amber color, akin to a rich honey or light maple syrup, but not yet a deep mahogany like a very dark caramel sauce. Crucially, the addition of baking soda in the final step will rapidly accelerate the caramelization process. Keeping this in mind, I always remove my brittle from the heat when it has just achieved a lovely, clear amber hue. The residual heat from the pot, combined with the quick addition of butter and then baking soda, will carry the caramel to that ideal, slightly darker, perfect amber in the blink of an eye. If it still looks distinctly yellow, it’s not ready. If it starts to smoke, it’s likely overcooked.
Bitterness in your pepita brittle typically stems from one of two common issues related to the baking soda. The first cause is adding too much baking soda. While essential for texture, an excess can lead to an unpleasant soapy or bitter taste. The second, and perhaps more common, reason is that the baking soda did not have sufficient time to fully react with the hot caramel. This often happens if it’s not incorporated quickly and thoroughly. The bitterness you’re tasting is unreacted baking soda. To prevent this, ensure you whisk in the baking soda very vigorously and quickly to distribute it evenly and allow it to fully react with the hot sugar. If you notice any small clumps of unreacted baking soda in your finished brittle, try to pick them out or discard those specific pieces to avoid the bitter taste. Thorough whisking is your best defense against this problem.
If your pumpkin seed brittle turns out soft or chewy rather than delightfully crisp, it’s generally due to one of two main factors. Firstly, a highly humid environment can cause brittle to absorb moisture from the air, losing its snap. Secondly, and more commonly, the caramel was likely not cooked long enough or to a sufficiently high temperature. For a truly crisp brittle, the caramel needs to reach a hard crack stage, which is indicated by that clear amber color just before it begins to smoke. If the brittle appears too light in color, it means the sugar didn’t cook enough. This undercooked caramel will be excessively sweet and, more importantly, it will be much more prone to absorbing moisture from the air, leading to a soft, sticky, and disappointing texture. Ensure you cook the caramel to that perfect amber hue to guarantee a firm, snappy brittle.
Proper storage is essential to maintain the crispness and quality of your pumpkin seed brittle. The ideal method is to store it at room temperature in an airtight container. To prevent pieces from sticking together and to protect them from moisture, arrange the brittle in layers separated by sheets of parchment paper or waxed paper. While this method is highly effective, it’s important to note that even the best storage can be challenged by extremely humid conditions. Humidity is brittle’s nemesis, so try to make and store it during drier months if possible. Additionally, avoid storing brittle near heat sources like the stove or oven, as warmth can encourage it to soften and become sticky. Following these guidelines will ensure your brittle remains wonderfully crunchy for as long as possible.
When stored correctly in an airtight container at room temperature, your homemade pumpkin seed brittle can maintain its quality and crunch for an impressively long time – typically up to a month. This makes it an excellent candidate for making ahead, gifting, or enjoying over several weeks. However, as previously mentioned, the primary enemy of brittle is humidity. In a humid environment, regardless of how well it’s stored, the brittle will begin to absorb moisture from the air. This process will cause it to lose its characteristic crunch and become soft or sticky well before the month-long shelf life, potentially within just a few days. For optimal enjoyment, try to consume it within a couple of weeks, especially if your climate is prone to humidity.
Absolutely! You can certainly substitute roasted and salted pumpkin seeds for the plain pepitas specified in this recipe if that’s what you have on hand or prefer the flavor. The key adjustment when using salted pumpkin seeds is to **omit the additional kosher salt** that is called for in the caramel mixture. If you were to add extra salt with already salted seeds, your brittle would likely turn out far too salty, overwhelming the sweet and nutty flavors. By omitting the separate salt addition, you allow the seasoning on the pumpkin seeds to provide the perfect salty balance to the sweet caramel, resulting in a delicious and well-seasoned brittle.
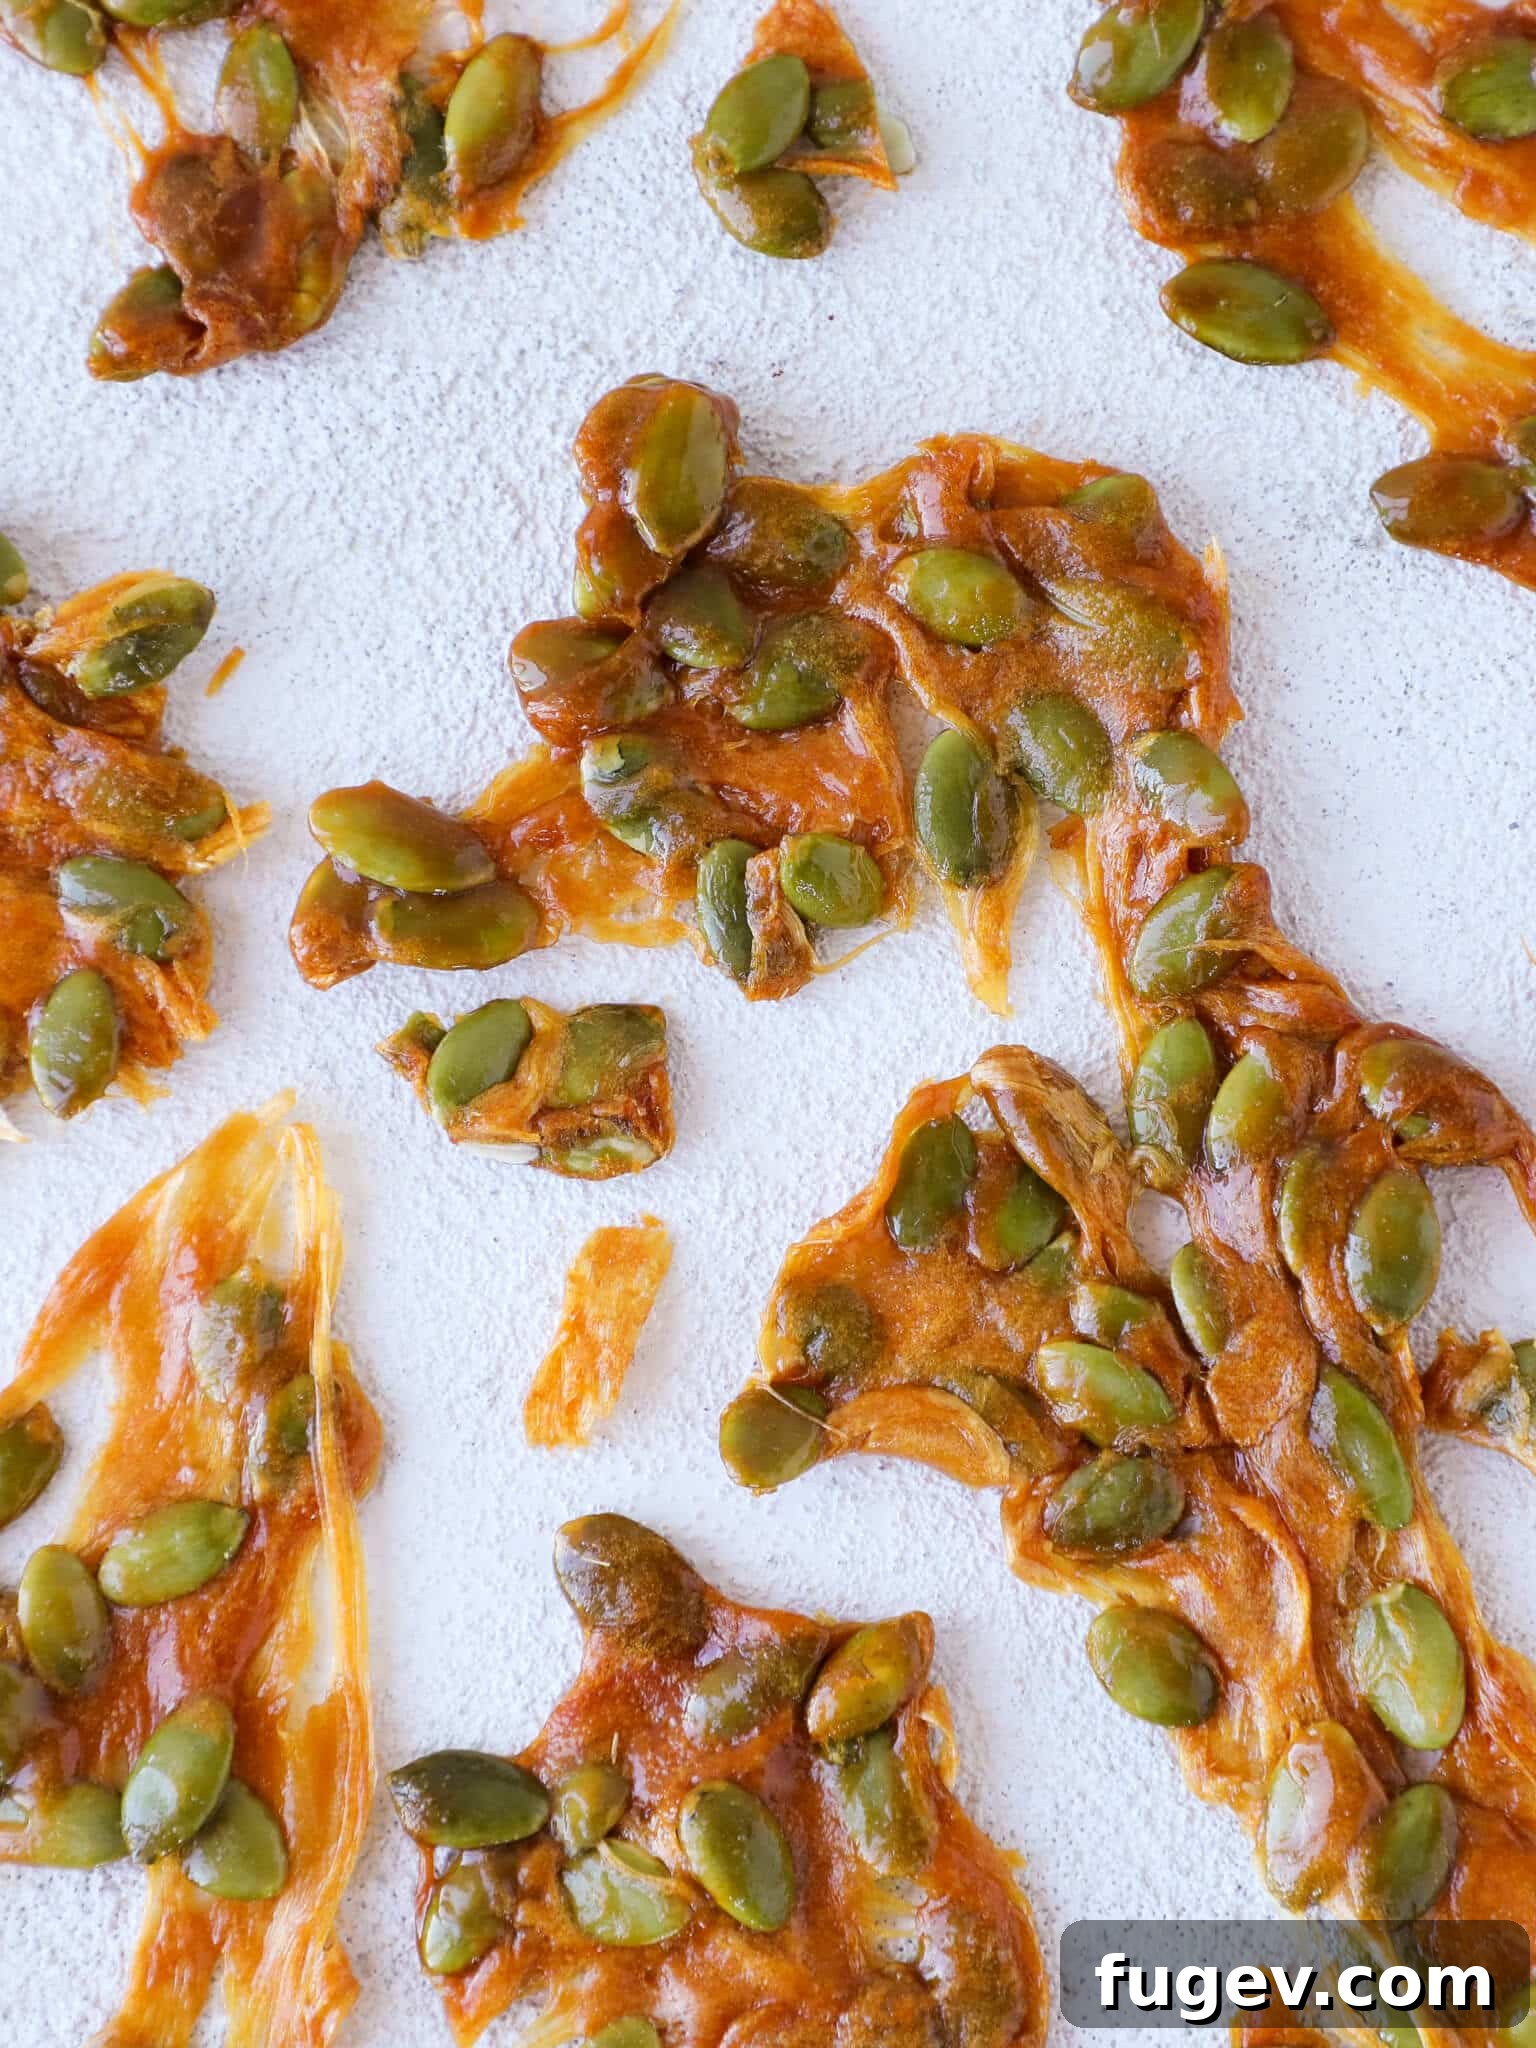
If you tried this recipe and absolutely loved it, please take a moment to leave a 🌟 star rating and share your thoughts in the comments below. I genuinely love hearing from you; your feedback and comments truly brighten my day and help others discover fantastic recipes!
Pumpkin Seed Brittle
Comment
Print Recipe
Equipment
-
Silpat Premium Non-Stick Silicone Baking Mat
Ingredients (US Customary)
- ¾ cup sugar
- ½ cup water
- 10 tablespoons light corn syrup
- ½ teaspoon salt
- 1 cup raw pumpkin seeds
- 1 tablespoon unsalted butter
- ¾ teaspoon baking soda
Instructions
-
In a medium, heavy-bottomed pot, combine the granulated sugar, water, light corn syrup, and kosher salt. Stir these ingredients gently to combine, being careful not to splash the mixture up the sides of the pot. Bring the mixture to a rolling boil over medium-high heat. As it heats, if any sugar crystals adhere to the sides of the pot, use a clean pastry brush or a paper towel dipped in cold water to carefully wash them down into the boiling sugar mixture. This crucial step prevents crystallization of the entire batch. Be sure to perform this action gently and only when the mixture is simmering or just coming to a boil.
-
Continue to cook the sugar mixture without stirring until it reaches a beautiful golden-brown caramel color. This is typically around 300-310°F (149-154°C) on a candy thermometer, but visual cues are key. It should be a clear, deep amber, not merely yellow. It’s important to achieve this rich color, but stop before it becomes a dark mahogany, which would taste bitter.
-
Once the ideal amber color is reached, immediately remove the pot from the heat. Swiftly whisk in the unsalted butter until fully incorporated, followed by the baking soda. The mixture will foam up significantly as the baking soda reacts – this is normal and desired! Finally, quickly fold in the pumpkin seeds until they are evenly distributed throughout the airy caramel.
-
Without delay, pour the hot brittle mixture onto a non-stick silicone baking mat. A sheet of parchment paper laid on a baking sheet can also be used, but a silicone mat offers superior non-stick properties and heat distribution.
-
Now, quickly shape your brittle using your preferred method: either carefully pull the hot brittle thin using heat-resistant gloves for abstract shapes, roll it out thinly between two silicone mats for uniform sheets, or spread it as thinly as possible with an offset spatula lightly sprayed with nonstick cooking spray for a rustic finish. Allow the brittle to cool completely at room temperature until it is hard and crisp, then break it into desired pieces.
Video Tutorial
Nutrition Information (per piece)
Before You Go! Explore More Fall Dessert Recipes
Now that you’ve mastered this delightful pumpkin seed brittle, why not continue your culinary adventure with other seasonal treats? Explore our extensive collection of chef-developed Fall Dessert Recipes. You’ll find a wealth of inspiration for everything from pies and cakes to cookies and custards, all designed to bring the warm, comforting flavors of autumn right into your home. Happy baking!