
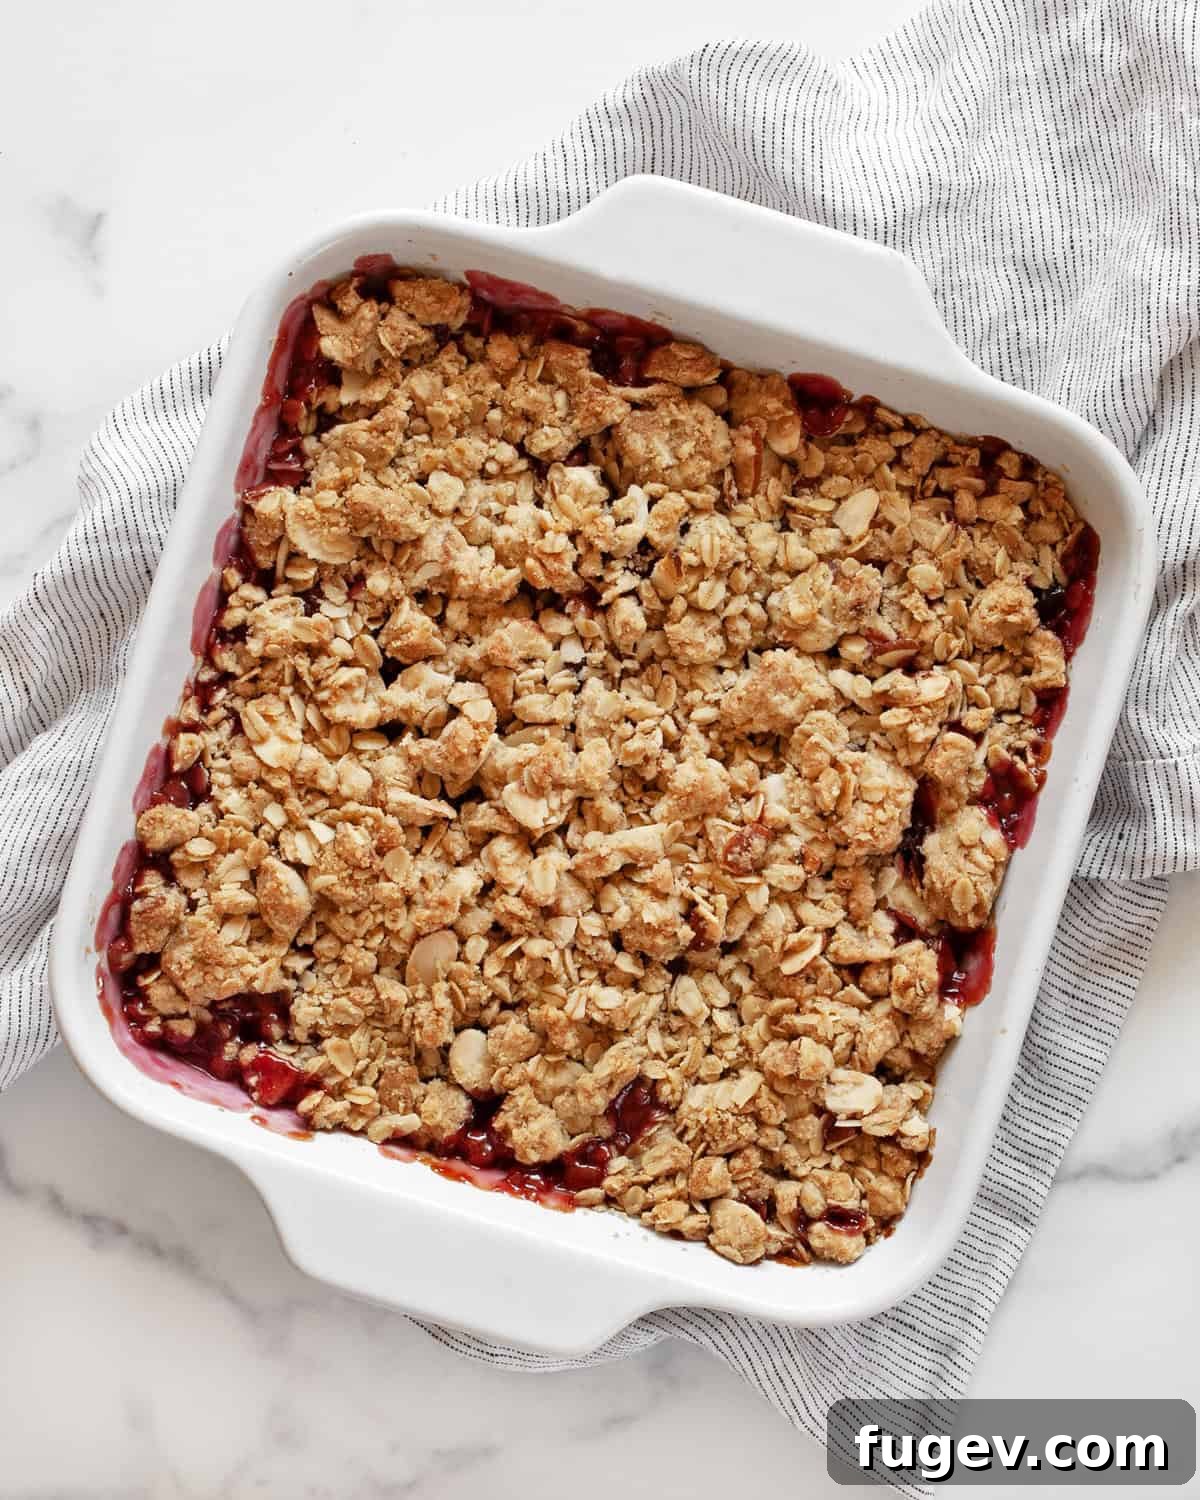
If you’re searching for an effortlessly delicious dessert that bursts with vibrant fruit flavor and offers a delightful textural contrast, then this **cherry crumble recipe** is exactly what you need. Imagine tender, sweet-tart cherries nestled under a golden, crunchy oat and almond topping, all baked to perfection. This rustic dessert is not only incredibly easy to assemble but also promises a mouth-watering experience with minimal effort, allowing your oven to do most of the work. Once you’ve quickly pitted the fresh cherries, simply combine them with a few staple filling ingredients. The crumble topping, featuring hearty oats and crunchy sliced almonds, comes together with another quick stir. As it bakes, the topping achieves a beautiful golden-brown hue, while the cherries transform into a luscious, bubbling, sweet-tart fruit filling that’s truly irresistible.
For another delightful variation, be sure to try this triple berry crumble, elevated with the unique spice of gingersnaps and a hint of zesty lime.
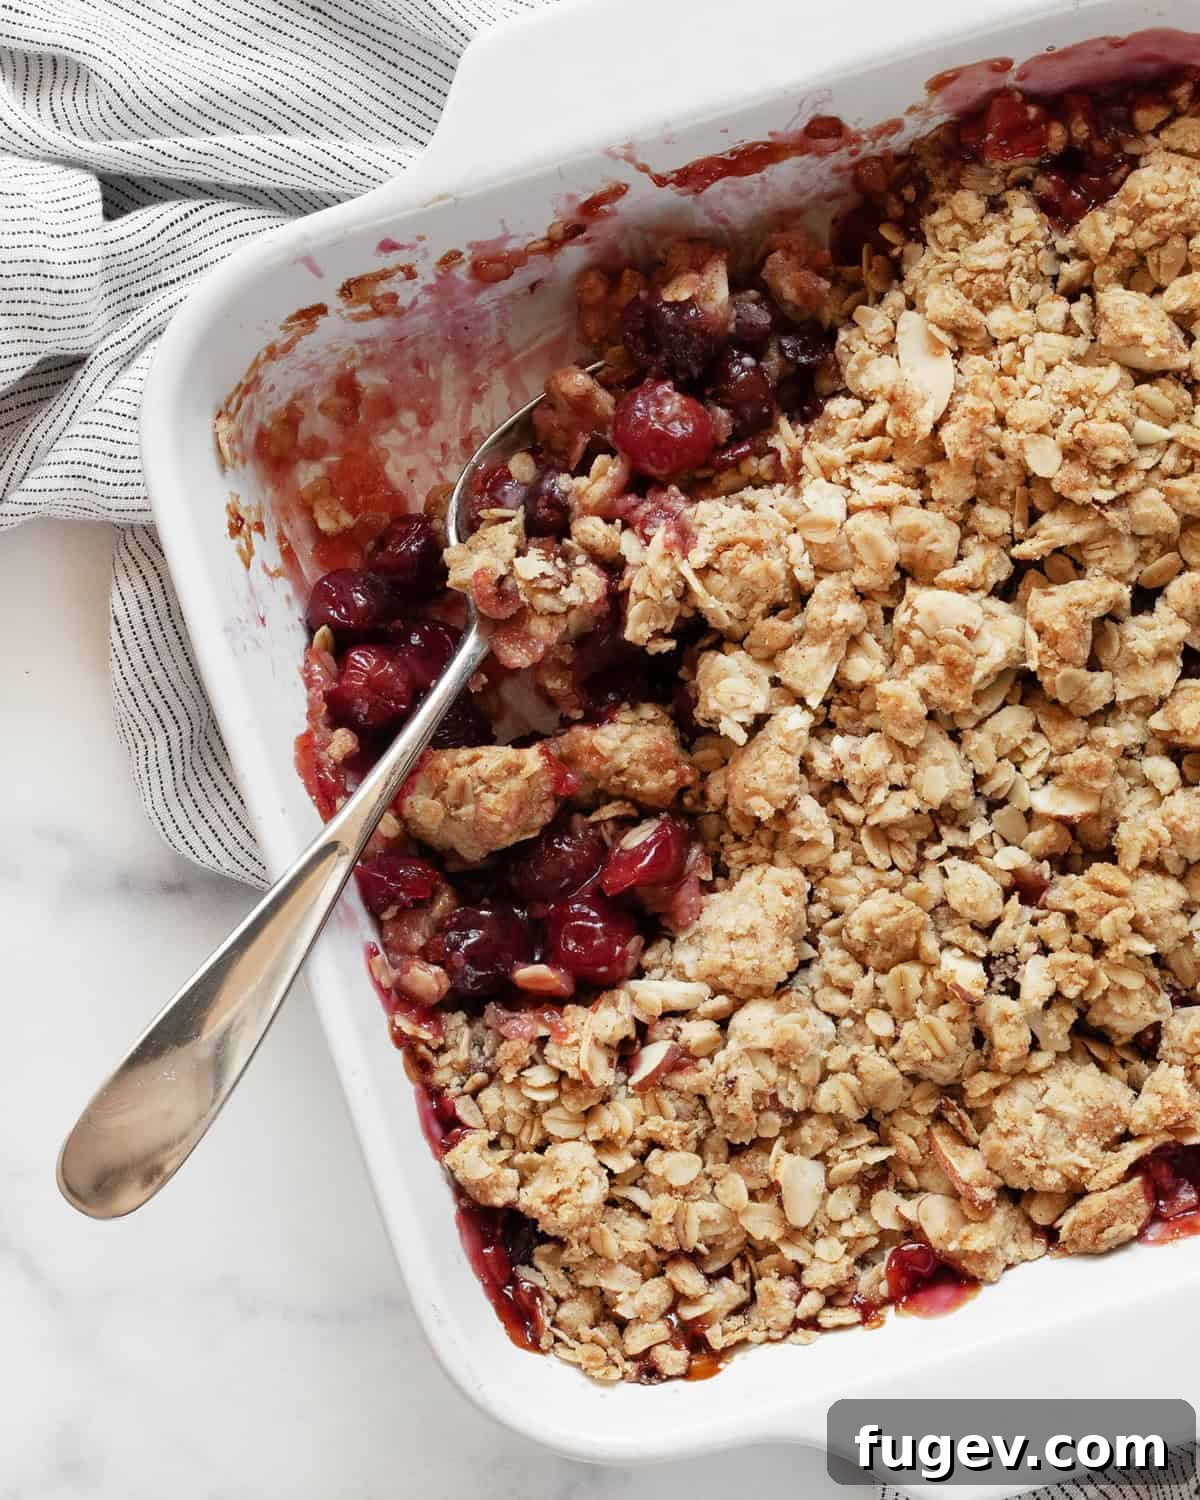
Table of Contents
- Why You’ll Adore This Cherry Crumble
- The Essential Ingredients
- How To Master This Easy Cherry Crumble Recipe
- Serving Suggestions
- Leftovers & Storage Tips
- Cherry Crumble FAQs
- More Delectable Fruit Dessert Recipes
- Easy Cherry Crumble Recipe
Why You’ll Adore This Cherry Crumble
Preparing a fruit crumble might just be the easiest way to create a stunning dessert that will undoubtedly impress your family and friends. There’s an undeniable allure to the rustic, comforting charm of a perfectly baked crumble. When made with peak-season fruit, like succulent cherries, the depth of flavor is simply unparalleled, creating a homemade treat that feels both elegant and down-to-earth.
We believe in celebrating the beauty of unfussy desserts. As an avid baking enthusiast, I often emphasize that delicious baking doesn’t always require elaborate decorations or intricate dough shaping. And that’s perfectly fine! Many home bakers share this sentiment. This cherry crumble proves that you can achieve a visually appealing and incredibly flavorful dessert without needing to pipe frosting or sculpt dough into complex forms. Its natural beauty speaks for itself, making it a go-to for anyone who loves baking but prefers simplicity.
One of the best-kept secrets of fruit crumbles is how wonderfully the leftovers can transform into your new favorite breakfast. Seriously! Imagine starting your day with a spoonful of cold cherry crumble, perhaps paired with a dollop of creamy Greek yogurt for a satisfying and slightly indulgent morning meal. Very few dessert recipes offer such versatility, making this crumble a practical and delightful treat that you can enjoy at any time of day.
Beyond its simplicity, this cherry crumble stands out for its perfect balance of sweet and tart, ensuring that every bite is a delightful exploration of flavors. The warm fruit, combined with the buttery, textured topping, creates a comforting experience that’s ideal for any occasion – from a casual weeknight treat to an impressive centerpiece for a dinner party. It’s a dessert that invites coziness and celebration in equal measure.
The Essential Ingredients
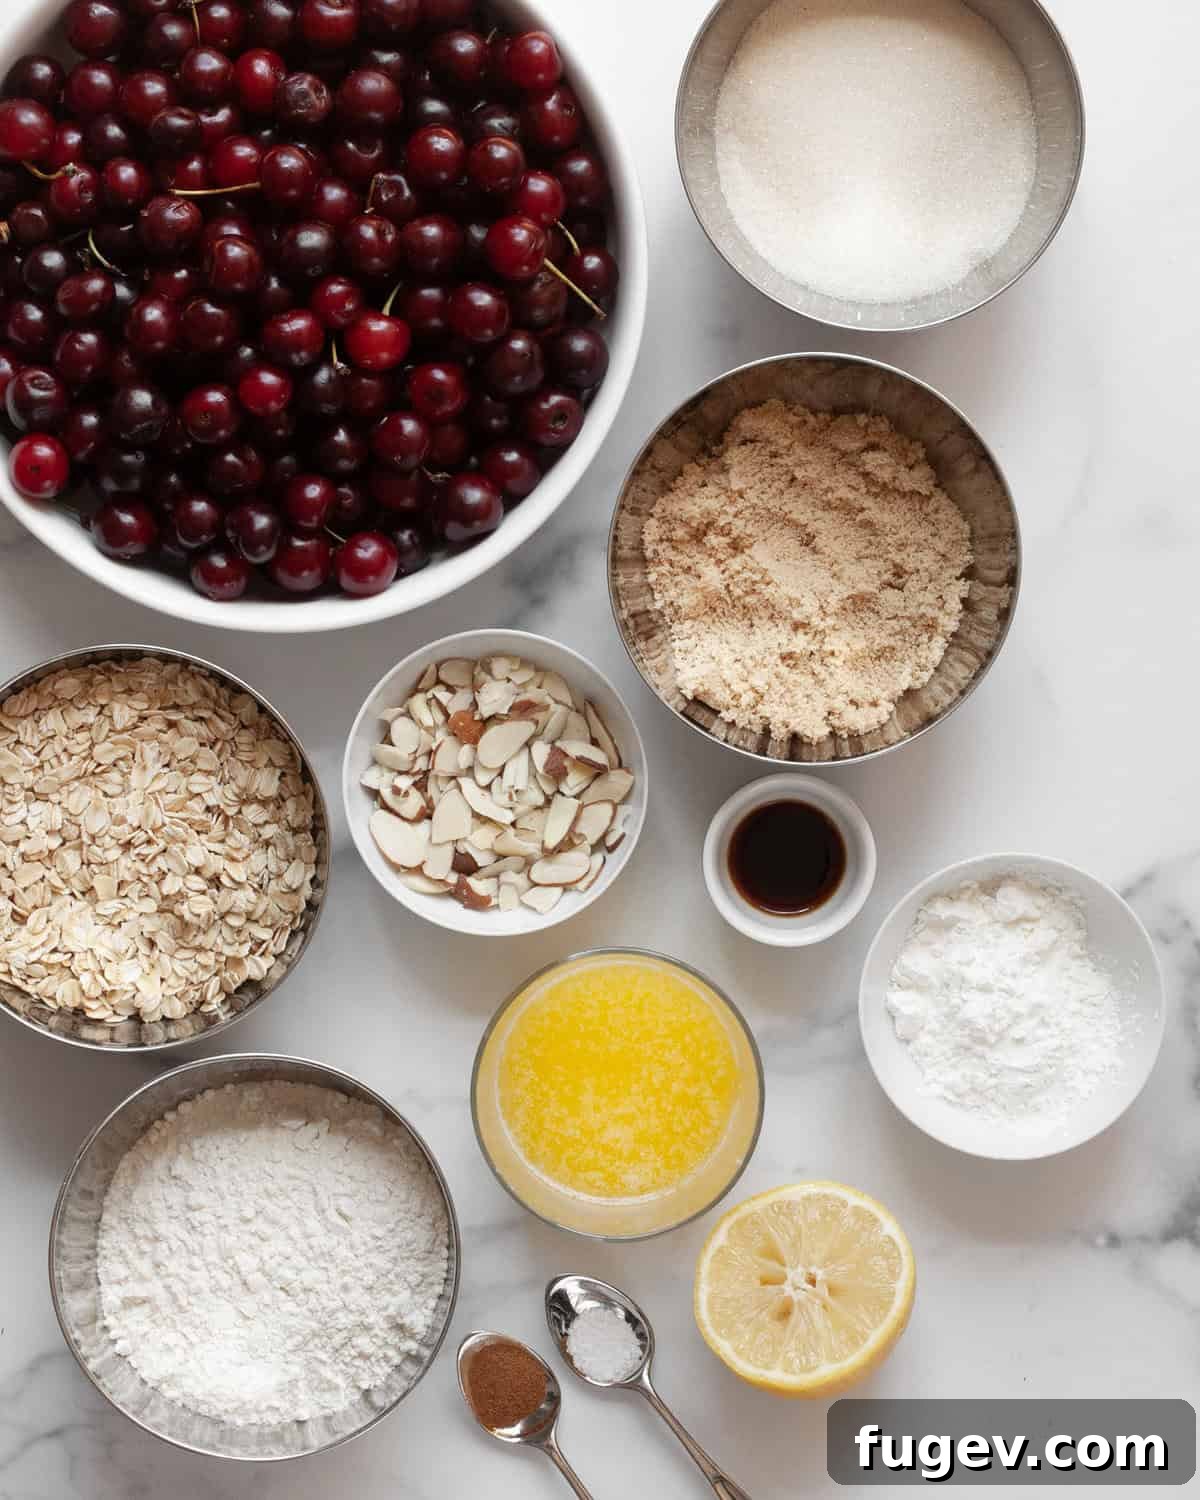
Crafting the perfect cherry crumble starts with understanding the role of each ingredient. Here’s a detailed look at what you’ll need to create this delectable dessert, ensuring every component contributes to a harmonious and flavorful outcome:
For the Irresistible Cherry Filling:
- Cherries: My top recommendation is tart cherries, also known as sour cherries, for their unparalleled bright flavor that beautifully balances the sweetness of the crumble. However, their fresh season can be fleeting, often requiring a visit to a local farmers market. If sour cherries are hard to come by, sweet cherries like Bing varieties, readily available at most grocery stores, are a fantastic alternative. Don’t hesitate to use a mix of both types for a complex flavor profile, or even frozen cherries (thawed) if fresh aren’t available. You’ll need about 5 cups of pitted cherries.
- Granulated Sugar: This essential sweetener contributes to the overall sweetness of the filling. Rest assured, the balance of ingredients ensures the filling isn’t overly sweet but rather a delightful complement to the tartness of the cherries, creating a truly enjoyable dessert experience.
- Cornstarch: A vital thickening agent for the fruit filling. As the cherries bake with the sugar, they release their natural juices through a process called maceration. Cornstarch works its magic by absorbing this liquid, preventing a watery filling and instead creating a beautifully thick, glossy, and spoonable consistency that coats each cherry perfectly.
- Lemon Juice: While you might not detect a distinctly lemony flavor in the final product, the fresh lemon juice plays a crucial role. It introduces acidity that brilliantly balances the sweetness of the sugar and cherries, enhancing the overall fruit flavor and making it taste fresher and more vibrant. It’s all about layering flavors that work together seamlessly.
- Vanilla Extract: Just like in many beloved baked goods, a touch of pure vanilla extract rounds out the flavor profile of the cherry filling. Its warm, aromatic notes complement the fruit and sugar, adding a subtle depth that elevates the entire dessert from good to truly exceptional.
For the Perfect Crumble Topping:
- Old-Fashioned Rolled Oats: These form the heart of our crumble, providing a delightful chewiness and hearty texture. It’s crucial to use old-fashioned rolled oats, not quick-cooking oats, as quick oats can become mushy during baking and won’t offer the desired textural integrity that makes a crumble so satisfying.
- All-Purpose Flour: The backbone of the crumble, all-purpose flour provides the necessary structure, holding the oats and other ingredients together. Think of it as the quiet hero, its fine grains binding everything with the help of melted butter to create those signature crumbly clusters.
- Light Brown Sugar: Unlike granulated sugar, brown sugar introduces a wonderful molasses flavor and added moisture to the topping. This not only deepens the taste but also contributes to the characteristic tender-crisp texture and golden color of the crumble as it bakes.
- Sliced Almonds: Cherries and almonds are a classic culinary pairing, and for good reason. The sliced almonds impart a lovely nutty flavor and a delicate bite to the crumble. While not overtly crunchy, they provide a textural contrast that enhances the overall eating experience. Feel free to toast them lightly before adding for an even richer nutty note.
- Ground Cinnamon: For me, a fruit crumble feels incomplete without the warm, comforting spice of ground cinnamon. It perfectly complements the natural sweetness of the fruit and the richness of the butter, adding an inviting aroma and depth of flavor that defines classic dessert comfort.
- Melted Unsalted Butter: This is the magic ingredient that creates those wonderful clumps we all adore in a good crumble. Melted butter, when stirred into the dry ingredients, helps them bind together into varied sizes of clusters – small, medium, and gloriously large. These clumps are what give the crumble its signature irregular, irresistible texture, baking up to a beautiful golden crispness.
- Kosher Salt: Often overlooked, a pinch of kosher salt is vital for enhancing all the other flavors in both the filling and the topping. It doesn’t make the crumble taste salty; instead, it brightens the sweetness of the fruit and the richness of the butter, proving that even small additions of pantry staples can make an uncomplicated dessert truly fantastic.
How To Master This Easy Cherry Crumble Recipe
Creating this delicious cherry crumble is surprisingly straightforward, involving just a few simple steps. Follow these instructions to ensure your crumble bakes up perfectly every time, delivering a dessert that tastes like it took hours, but only requires minutes of active prep!
Step 1: Prepare Your Oven and Baking Dish. Begin by preheating your oven to 350 degrees F (175 degrees C). While the oven heats, take a 9-inch square baking dish (or an equivalent oven-safe dish) and generously grease it with butter. This ensures your beautiful crumble won’t stick and will be easy to serve.
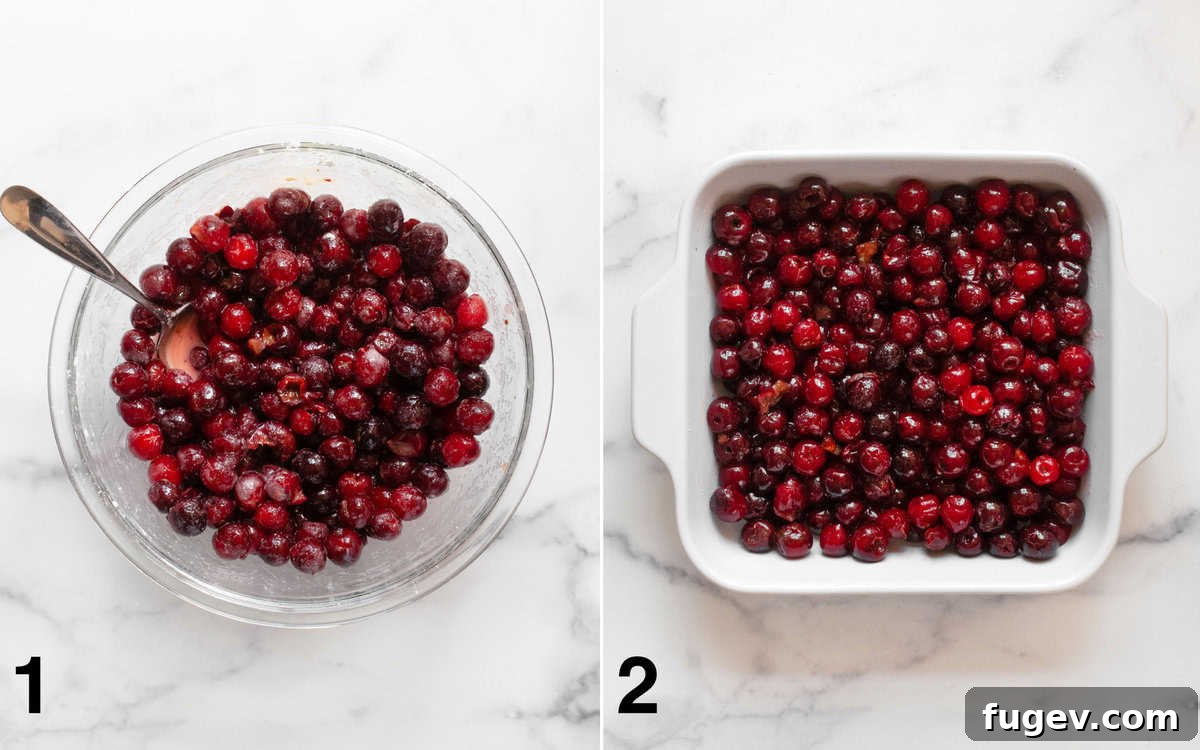
1. Craft the Luscious Cherry Filling. In a large mixing bowl, combine your pre-pitted cherries, granulated sugar, cornstarch, the fresh juice of half a lemon, and vanilla extract. Stir these ingredients thoroughly until the cherries are evenly coated. The cornstarch will look like a white powder at first, but it will dissolve and work its magic as the crumble bakes, ensuring a perfectly thickened fruit layer.
2. Transfer the Filling. Carefully spoon the cherry mixture into your prepared and greased baking dish, spreading it out evenly to form a single layer. This ensures consistent baking and that every scoop gets a good mix of fruit.
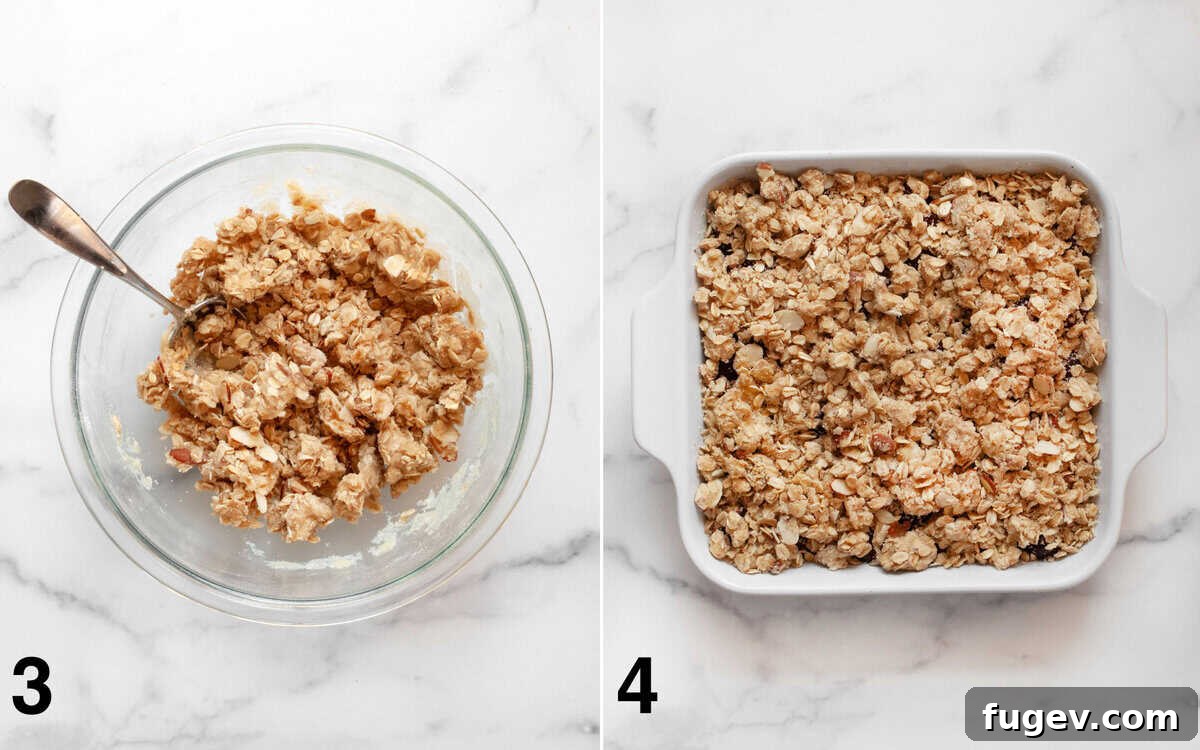
3. Assemble the Perfect Crumble Topping. In a separate large bowl, combine the dry ingredients for the topping: old-fashioned rolled oats, all-purpose flour, packed light brown sugar, sliced almonds, ground cinnamon, and kosher salt. Give these a good whisk to ensure they are well-mixed. Next, pour in the melted and slightly cooled unsalted butter. Using a fork or your fingertips, gently stir and combine until the mixture is crumbly and you see different sized clumps forming. Avoid overmixing; the goal is distinct clusters of oats and flour, not a uniform paste.
4. Crown Your Cherries with Crumble. Generously sprinkle the prepared crumble topping over the cherry filling in the baking dish. Aim for an even distribution, ensuring the cherries are mostly covered by the delightful oat and almond mixture. Don’t press it down; let it sit loosely to allow for maximum crispness during baking.
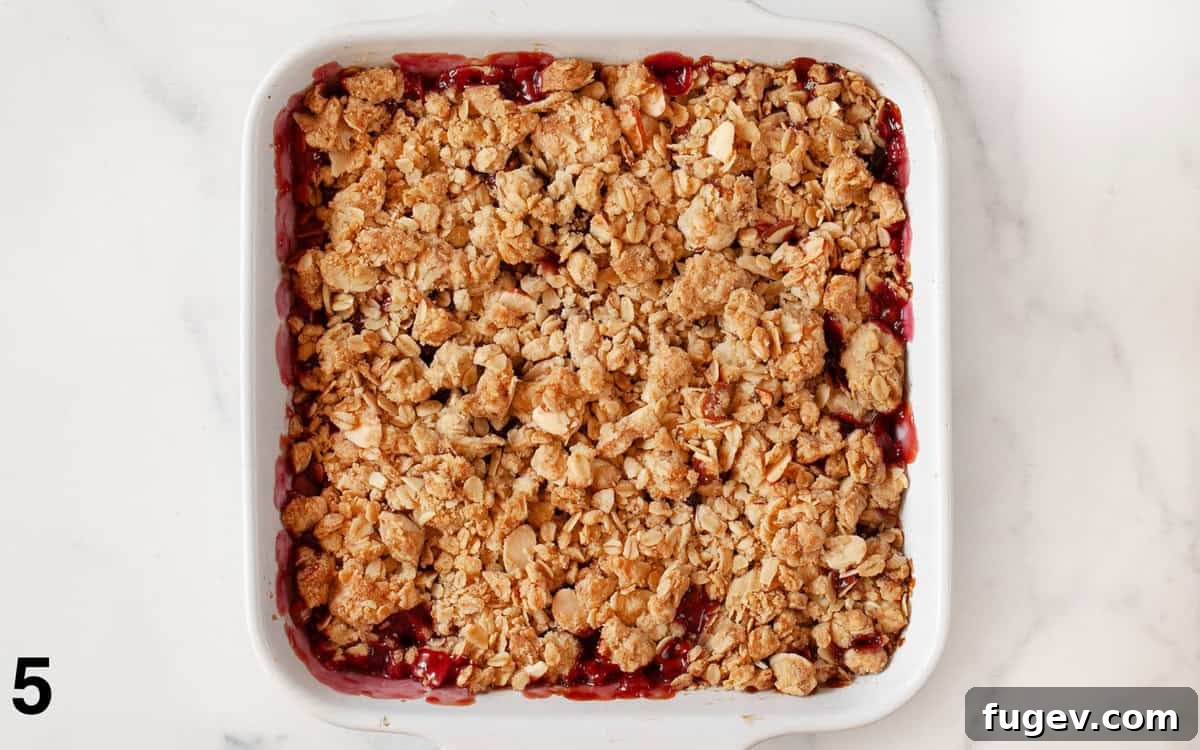
5. Bake to Golden Perfection. Place the baking dish into your preheated oven and bake for approximately 40-45 minutes. You’ll know it’s ready when the crumble topping is beautifully golden brown and the cherry filling beneath is visibly bubbling around the edges. This bubbling indicates that the fruit juices have thickened properly. If your topping is browning too quickly, you can loosely tent the dish with aluminum foil for the last 10-15 minutes of baking.
Serving Suggestions
Patience is a virtue, especially when it comes to serving a freshly baked fruit crumble. I highly recommend allowing your cherry crumble to cool for at least 20-30 minutes before serving. When any fruit-based dessert, be it a salted caramel apple pie or this delightful crumble, emerges from the oven, its fruit filling will be incredibly hot, almost like molten lava. Allowing it to cool not only prevents burns but also gives the cornstarch in the filling time to fully set, resulting in a perfectly thick and spoonable consistency. You can lightly test its temperature by carefully dipping a knife or spoon into the center and touching it. Serve it warm for a comforting treat, or at room temperature; just be sure to avoid plating it when it’s piping hot and runny.
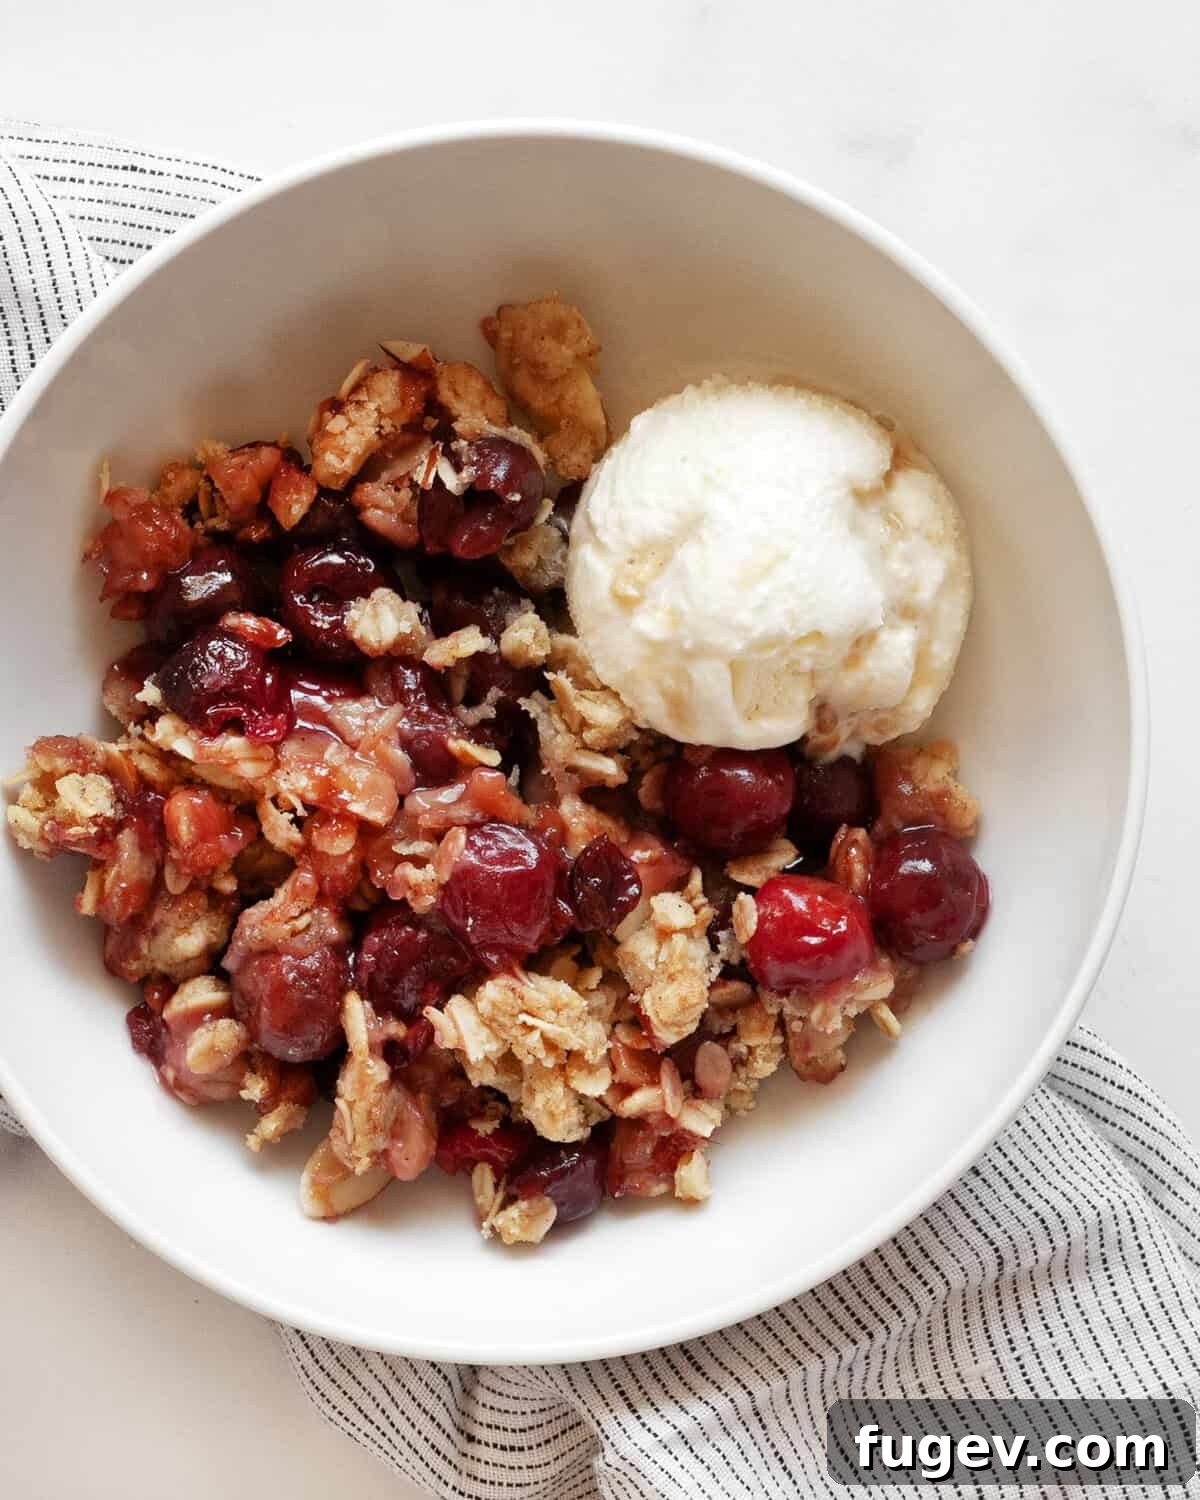
Of course, a warm cherry crumble is truly wonderful “a la mode,” topped with a generous scoop of classic vanilla ice cream. The cold, creamy ice cream melting into the warm, fruity goodness is a match made in dessert heaven. However, it’s equally delightful on its own, simply scooped into a bowl, allowing the pure flavors of the cherry and the satisfying texture of the crumble to shine through. For a lighter touch, consider pairing it with a dollop of freshly whipped cream or a swirl of plain Greek yogurt. No matter how you choose to serve it, this cherry crumble promises to be a memorable end to any meal.
Leftovers & Storage Tips
One of the many joys of this cherry crumble is how well it keeps, allowing you to savor its deliciousness for days after baking. To store leftovers, simply cover the baking dish tightly with plastic wrap or aluminum foil once it has completely cooled to room temperature. Place it in the refrigerator, where it will remain fresh and delightful for up to 3 days. As previously mentioned, a personal favorite way to enjoy leftover crumble is cold for breakfast, especially when paired with creamy Greek yogurt for a satisfying start to the day. If you prefer to reheat a portion, simply scoop it onto a foil-lined sheet pan and warm it in a 300-degree F (150-degree C) oven until heated through and the topping regains some of its crispness.
For longer storage, this cherry crumble freezes beautifully for up to 1 month. Instead of freezing the entire dish, which can be bulky and harder to thaw evenly, I recommend portioning out individual servings into freezer-safe containers or wrapping them tightly in plastic wrap and then foil. This way, you can easily grab a single serving whenever a craving strikes. When ready to enjoy, thaw the frozen portions in the refrigerator overnight. Once thawed, you can reheat them in a 300-degree F oven until warm, restoring much of their freshly baked appeal. This makes it an excellent make-ahead dessert for future enjoyment.
Cherry Crumble FAQs
While a multi-cherry pitter is an incredibly handy tool, especially during cherry season, it’s not strictly necessary. I’ve owned one for years, and despite only using it in the summer, it’s proven to be a worthwhile investment for its speed. However, you can easily pit cherries without a specialized tool using common kitchen items like a paper clip, a chopstick, or even a pastry tip. For detailed instructions, this helpful article provides several methods on how to pit cherries without a cherry pitter.
Absolutely, using frozen cherries is a perfectly good option and can save you significant time since they are typically pre-pitted. Just be aware that frozen cherries have a higher water content than fresh ones, which means the filling might turn out a bit looser with more liquid. To mitigate this, thaw the frozen cherries completely before preparing the filling and drain any excess liquid. You might also consider adding an extra half-tablespoon of cornstarch to ensure the filling reaches the desired thick consistency.
Yes, this crumble recipe is wonderfully adaptable to various fruits! Peaches and plums are particularly delicious when combined with cherries, or even used on their own. You can simply slice them; no peeling is generally required for these fruits in a crumble. The key is to maintain a total of approximately 5 cups of fruit. Other great options include mixed berries, apples (sliced thinly), or even rhubarb for a delightful tartness. Feel free to experiment with your favorite seasonal fruits!
Making this crumble gluten-free is quite simple. The easiest substitution is to use almond flour in place of regular all-purpose flour in the crumble topping. This not only makes it gluten-free but also boosts that wonderful nutty flavor, complementing the cherries beautifully. Ensure your oats are certified gluten-free if you have severe sensitivities. You could also use a gluten-free all-purpose flour blend for a more neutral flavor.
Yes, you can assemble the crumble ahead of time! Prepare both the cherry filling and the crumble topping as directed. Assemble the crumble in the baking dish, cover it tightly with plastic wrap, and refrigerate for up to 24 hours before baking. When ready to bake, you might need to add an extra 5-10 minutes to the baking time since it will be starting from a colder temperature. Alternatively, you can prepare the components separately and combine just before baking.
The best indicators are visual and auditory. The crumble topping should be a rich golden brown, and you should see the cherry filling bubbling vigorously around the edges of the dish and even through the topping. This bubbling confirms that the fruit is cooked through and the thickener (cornstarch) has activated properly. If the topping is getting too dark but the filling isn’t bubbling, loosely tent it with foil and continue baking.
More Delectable Fruit Dessert Recipes
If you’ve fallen in love with the simplicity and fresh flavors of this cherry crumble, you’ll be thrilled to explore more of our fruit-filled dessert creations. These recipes celebrate seasonal ingredients and deliver homemade deliciousness with every bite:
Raspberry Buttermilk Cake
Blackberry Lemon Yogurt Cake
Cherry Pistachio Cake
Salted Caramel Apple Pie
Black Raspberry Chocolate Chip Ice Cream
Easy Cherry Crumble
Ingredients
For cherry filling
- 5 cups pitted cherries (tart cherries, sweet cherries or a mix)
- 1/2 cup granulated sugar
- 3 tablespoons cornstarch
- Juice of 1/2 lemon
- 1 teaspoon vanilla extract
For crumble topping
- 1 cup old fashioned rolled oats
- 3/4 cup all-purpose flour
- 1/3 cup packed light brown sugar
- 1/4 cup sliced almonds
- 1/4 teaspoon ground cinnamon
- 1/4 teaspoon kosher salt
- 1/2 cup unsalted butter, melted and cooled
Instructions
-
Preheat the oven to 350 degrees F (175 C). Grease a 9-inch square baking dish with butter.
-
In a large bowl, combine the pitted cherries, granulated sugar, cornstarch, lemon juice, and vanilla extract. Stir well to coat all the cherries.
-
Transfer the cherry filling evenly into the prepared baking dish.
-
To make the crumble topping, stir the oats, all-purpose flour, light brown sugar, sliced almonds, cinnamon, and kosher salt in a separate large bowl. Pour in the melted and cooled butter and stir until well combined and various sized clumps form.
-
Evenly scatter the crumble topping over the cherry filling, ensuring most of the cherries are covered.
-
Bake for 40-45 minutes, or until the crumble topping is golden brown and the cherry filling is visibly bubbling around the edges.
-
Allow the crumble to cool for at least 20-30 minutes before serving. It can be served warm or at room temperature.
Notes
To make the recipe gluten-free, use almond flour instead of all-purpose flour for the crumble topping, and ensure your oats are certified gluten-free.
For leftovers, cover the baking dish with plastic wrap or aluminum foil once cooled and store it in the refrigerator for up to 3 days. Leftover crumble is delicious cold with Greek yogurt, or you can reheat a portion on a foil-lined sheet pan in a 300-degree F (150-degree C) oven until warm.
To keep the crumble longer, you can freeze it for up to 1 month. Portion it out into individual servings before freezing. Thaw in the fridge and reheat in the oven as desired for best results.
Nutrition
Nutrition information is automatically calculated and should only be used as an approximation.