
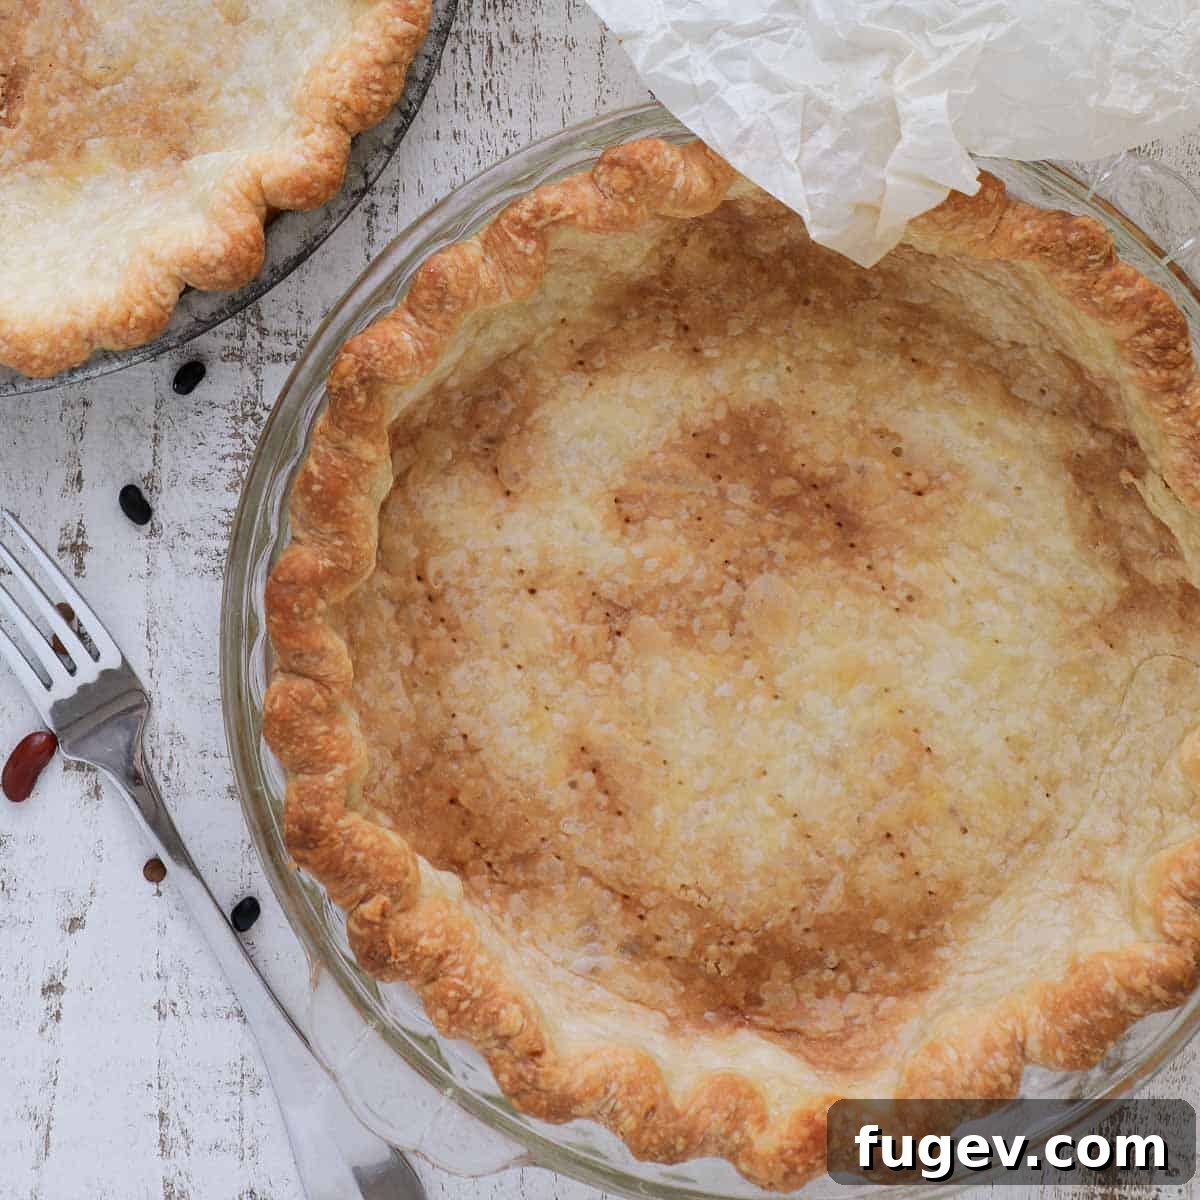
Mastering Pie Crust: Your Guide to Blind Baking and Par Baking for Perfect Pies
Ever dreamed of creating a pie with a flawlessly flaky, golden-brown crust that stands up to even the most luscious fillings? The key to achieving such culinary perfection lies in understanding and mastering the techniques of blind baking and par baking. As a pastry chef, I’m thrilled to share my professional insights and a comprehensive guide to these essential pie crust preparation methods. This article will walk you through the precise steps to blind bake a pie crust, explain the crucial differences between partial and full pre-baking, offer invaluable tips to prevent common pitfalls like shrinkage, and help you determine exactly when to use each method for your beloved sweet and savory pies. Prepare to transform your pie-making skills and consistently deliver stunning, delicious results!
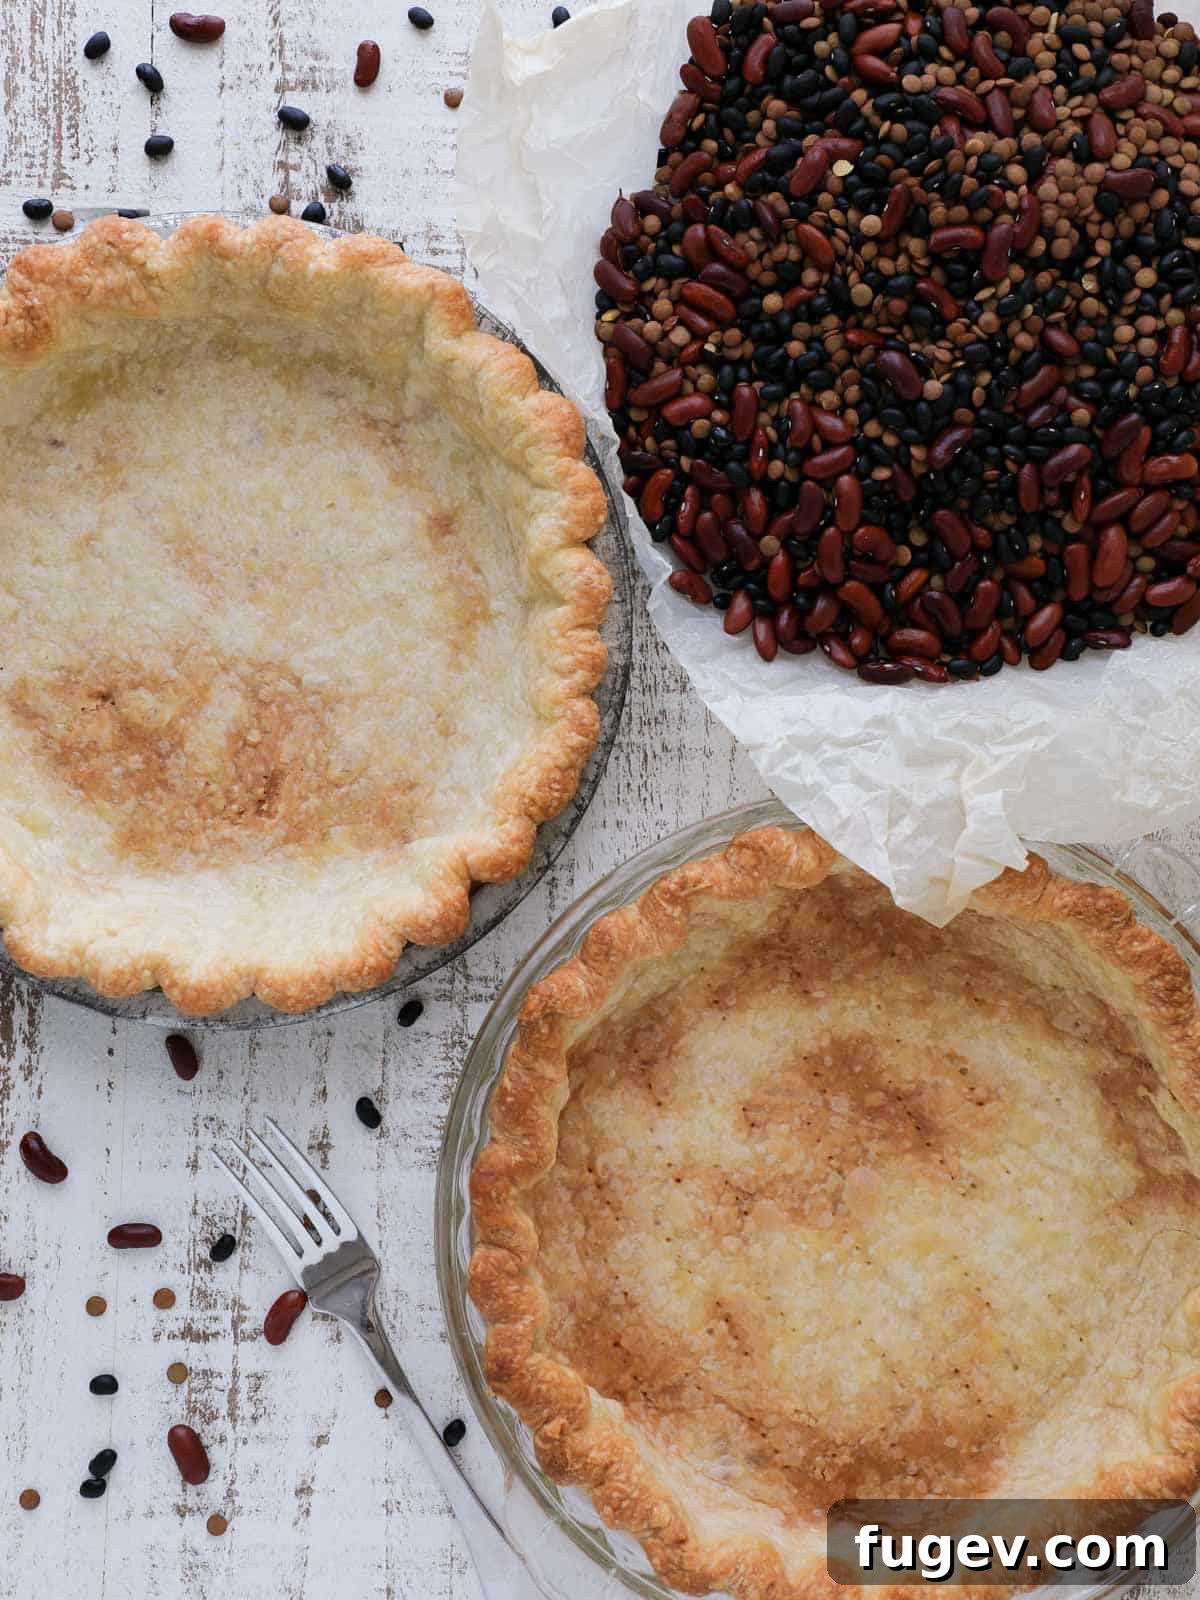
The strategic act of partially or fully pre-baking your pie crust is absolutely fundamental for crafting exceptional single-crust pies. This preparatory step is your ultimate defense against the dreaded “soggy bottom,” guaranteeing a delightfully flaky texture and a beautiful golden-brown finish that will elevate any pie. Choosing the correct pre-baking method is paramount for pie perfection:
Understanding Par Baking (Partial Blind Baking)
Par baking, or partial blind baking, is the technique you’ll employ when your pie’s filling also requires baking and will complete its cooking process alongside the crust. This method provides a crucial head start for the crust, ensuring it develops a firm, lightly golden structure before it’s combined with a potentially wet or moisture-rich filling. Par baking is particularly advantageous when the pie filling benefits from a lower baking temperature or has a shorter baking duration than what a raw crust would need to fully cook. The crust becomes no longer doughy but is only lightly set and pale, preventing it from becoming soggy during the second bake. Classic examples where par baking shines include luscious lemon meringue pie, where the meringue needs careful attention, and comforting easy pumpkin pie, allowing the custardy filling to set beautifully without overcooking the crust.
Understanding Blind Baking (Full Blind Baking)
Conversely, a full blind bake is an indispensable step for pies and tarts featuring no-bake fillings, or specific types of custard pies where the filling is either cooked separately or requires minimal time in the oven. In these instances, the crust must be entirely cooked through, firm, and a rich golden brown before any filling is introduced, as it will not undergo further significant baking. A fully blind-baked crust provides the sturdy, crisp, and perfectly cooked foundation that these magnificent, often delicate, fillings demand. Imagine the structural integrity needed for a classic banana cream pie, the decadent layers of a coconut cream pie, or the luxurious texture of a French silk pie – all rely on a completely blind-baked crust to hold their shape and deliver a satisfying textural contrast.
Professional Bakers’ Tips for Prebaking Pie Crusts
- Strategic Docking of the Pie Crust: Docking is the simple act of piercing small holes across the bottom of your pie crust with a fork before blind baking. This allows steam to escape during baking, effectively preventing the crust from puffing up into a dome. However, it’s a technique to use judiciously. For pies with liquid fillings, such as a traditional pecan pie, it’s generally advised *not* to dock the crust. The holes could act as conduits, allowing the filling to seep through and create an undesirably soggy bottom. For detailed guidance, explore when & how to dock pie crust.
- Timely Removal of Pie Weights: One of the most common mistakes is removing pie weights too soon. It’s crucial to keep your pie weights in place until the bottom of the crust has just begun to show signs of browning. This critical timing ensures that the crust’s structure is sufficiently set, preventing it from collapsing or puffing up uncontrollably once the weights are gone. Moreover, it actively supports the sides of the pie crust, keeping them upright and preventing them from sliding unattractively down the pie plate, thus preserving your pie’s perfect form.
- Master the Art of Advance Preparation: Planning ahead can significantly streamline your baking process. Both fully blind-baked and par-baked pie crusts are incredibly versatile for make-ahead purposes. You can bake and store them at room temperature, meticulously wrapped to maintain freshness, for up to 3 days. For even longer convenience, freeze them for up to 2 months! Simply ensure they are thoroughly cooled before wrapping and freezing. This foresight makes preparing for holidays, gatherings, or simply having a homemade dessert on hand incredibly easy and stress-free.
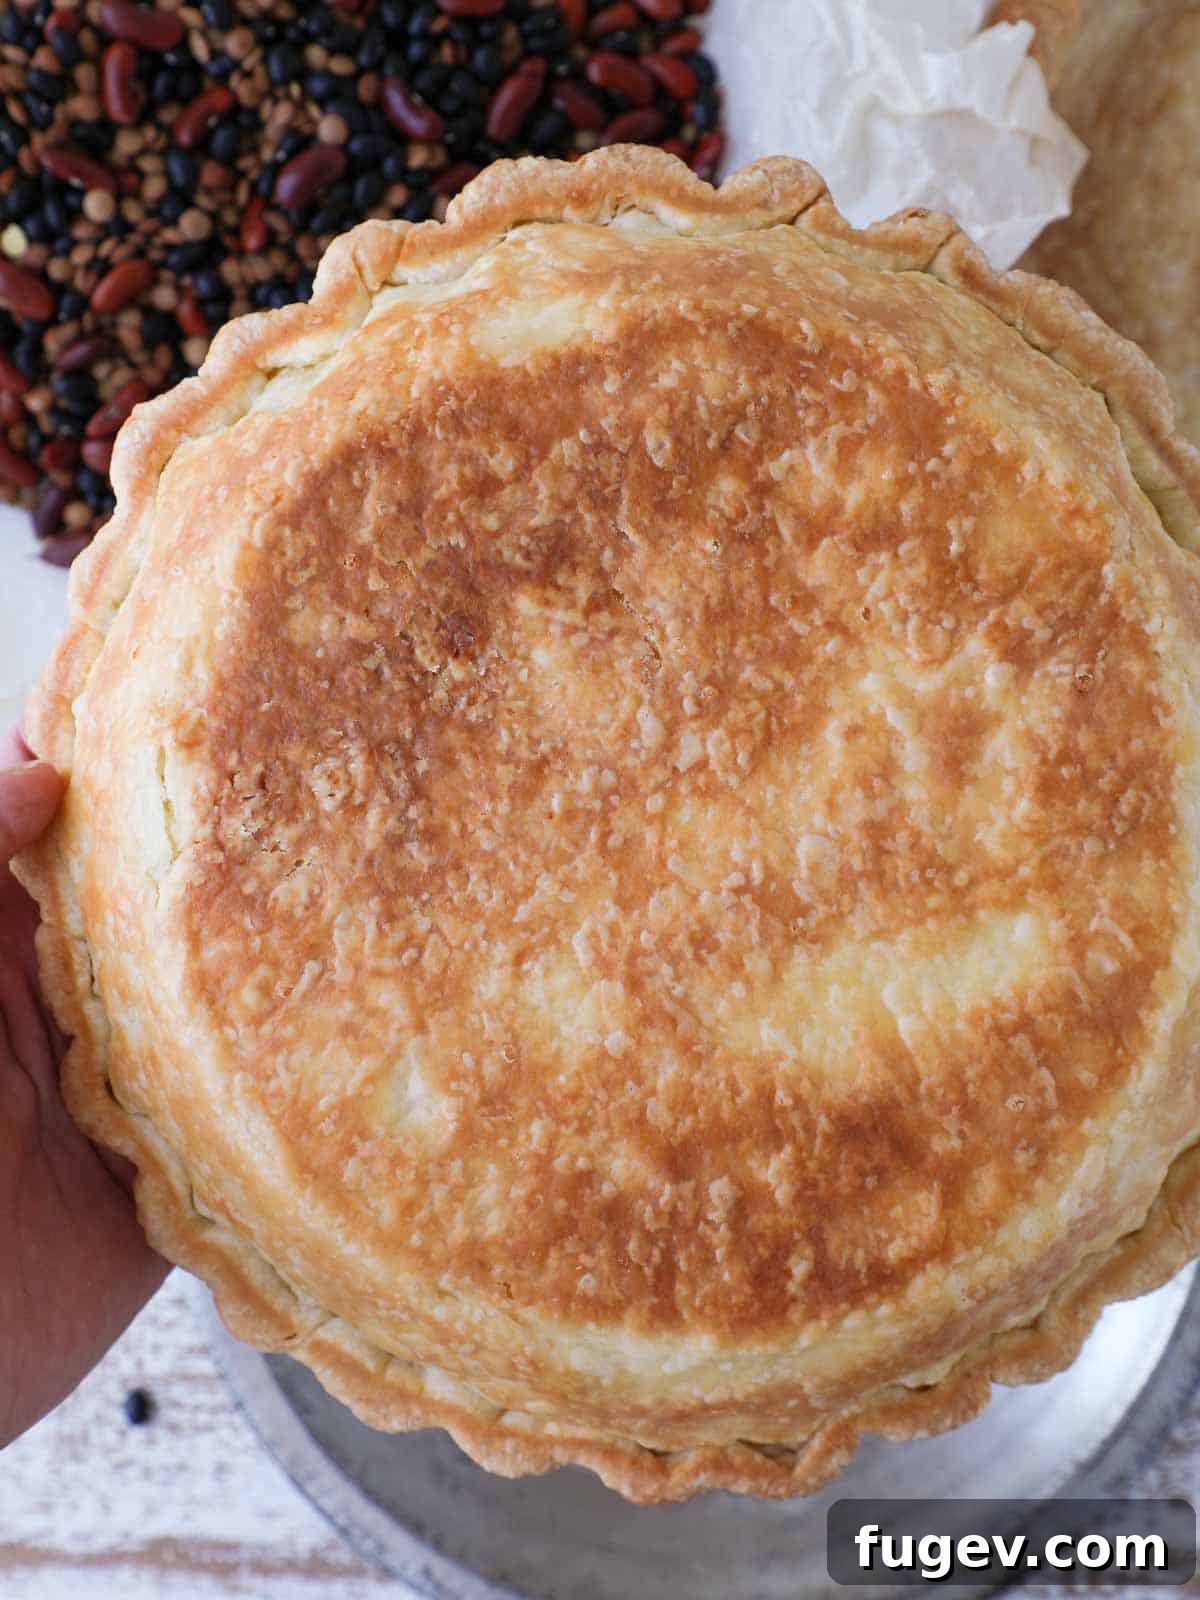
What is Blind Baking? The Full Pre-Bake Explained
Blind baking, sometimes referred to simply as pre-baking, is a pastry technique where a pie or tart crust is baked completely without any filling. This method is employed when the filling itself is unbaked (like a fresh fruit or cream filling), requires minimal cooking, or is too wet to allow the crust to fully cook and crisp up during the main bake. To execute a blind bake, you first line your pie dish with your prepared raw pie crust. Then, a barrier of parchment paper or aluminum foil is placed over the dough, followed by a layer of pie weights, dried beans, or rice to weigh it down. These weights prevent the crust from bubbling up or shrinking excessively. The crust is then baked until it is thoroughly cooked, achieving a firm, golden-brown hue, resulting in a stable and crisp base perfectly suited for its unbaked or delicate filling.
What is Par Baking? The Partial Pre-Bake Explained
Par baking is a variant of blind baking, meaning “partially baked.” In this technique, the pie crust is only partially baked before the main filling is added, differentiating it from a full blind bake. The initial steps are identical: a pie shell is lined with dough, weighted down with parchment and pie weights, and placed in the oven. However, the baking process is stopped earlier, typically when the dough is no longer raw or “doughy” but has only just begun to set and turn a very light, pale gold. At this point, the weights and parchment are removed. The partially baked crust is then filled, and both the filling and the crust continue to bake together until the pie is fully cooked. This method is ideal for pies with wet fillings (like quiches or some fruit pies) that need to cook for a significant amount of time, preventing the bottom crust from becoming soggy while ensuring it finishes baking to a beautiful golden perfection alongside its filling.
Essential Tools and Ingredients for Perfect Pie Crust
Equipping yourself with the right tools and selecting quality ingredients are the foundational steps toward blind baking success. Here’s a detailed look at what you’ll need to achieve that coveted flaky, golden crust:
- High-Quality Pie Dough: The crust itself is the star of many pies. Any well-made pie crust can be successfully par-baked or fully blind-baked! The key is to choose a dough that not only has good texture but also complements the flavor profile of your chosen filling. Consider a rich, all-butter pastry for its superior flavor and flakiness, such as my popular vodka pie crust (the vodka helps inhibit gluten development for an incredibly tender result), a sturdy Crisco pie crust for a classic texture, or even a specialized almond flour pie crust for gluten-free options. And don’t hesitate to use a good quality store-bought crust for convenience – just be prepared to adjust baking times as they are often thinner.
- Reliable Rolling Pin: An indispensable tool for achieving a uniformly thin pie crust. I personally advocate for a French rolling pin. Its design, tapering at the ends, offers exceptional control, allowing you to apply consistent pressure across the entire dough initially. This precision also enables you to target and thin out specific areas later on, which is crucial for avoiding thick spots that can bake unevenly and result in a raw, doughy texture.
- Sharp Kitchen Shears: While a knife can certainly trim dough, dedicated kitchen shears offer unparalleled ease and precision for tidying up the edges of your pie dish. For optimal hygiene and to prevent cross-contamination, I strongly recommend having a pair of kitchen shears reserved specifically for baking. This ensures your tools are always clean and sharp for delicate pastry work, avoiding flavors transferring from other kitchen tasks.
- Ideal Pie Dish: The material of your pie dish significantly influences the heat transfer and, consequently, the browning of your crust. For best results, choose a metal or glass dish. These materials are superior heat conductors compared to ceramic, ensuring much more efficient and even heat distribution to the crust, especially the bottom. This leads to a quicker, crisper, and more evenly golden-brown crust, reducing the risk of a pale or undercooked base.
- Versatile Parchment Paper: An absolute necessity for separating your delicate dough from the pie weights during the blind baking process. My personal trick for preparing parchment paper is to crumple it tightly into a ball, then gently unfurl it. This simple action significantly increases its pliability, allowing it to conform much more easily and snugly to the curved shape of the pie dish without tearing the dough or creating awkward creases.
- Effective Pie Weights or Beans: To counteract the natural tendency of pie dough to puff up and shrink during baking, you must weigh it down. Options include specialized ceramic pie weights, dried legumes like dried beans, or even uncooked rice. While rice can work, I often find it isn’t quite heavy enough for consistent results. To ensure maximum effectiveness and prevent any premature puffing or sliding, resist the urge to remove the parchment and weights until the bottom crust has just started to visibly brown. I prefer dried beans as they offer an ideal balance of weight – sufficient to prevent puffing but not so heavy as to inhibit the delicate rise needed for a flaky texture. Plus, they can be cooled and reused indefinitely.
How to Blind Bake Pie Crust: A Step-by-Step Guide for Perfection
Follow these detailed, chef-approved instructions to achieve a perfectly blind-baked or par-baked pie crust every single time. Precision in each step ensures a tender, flaky, and beautifully shaped foundation for your pies.
-
Step 1: Prepare Your Work Surface and Dough
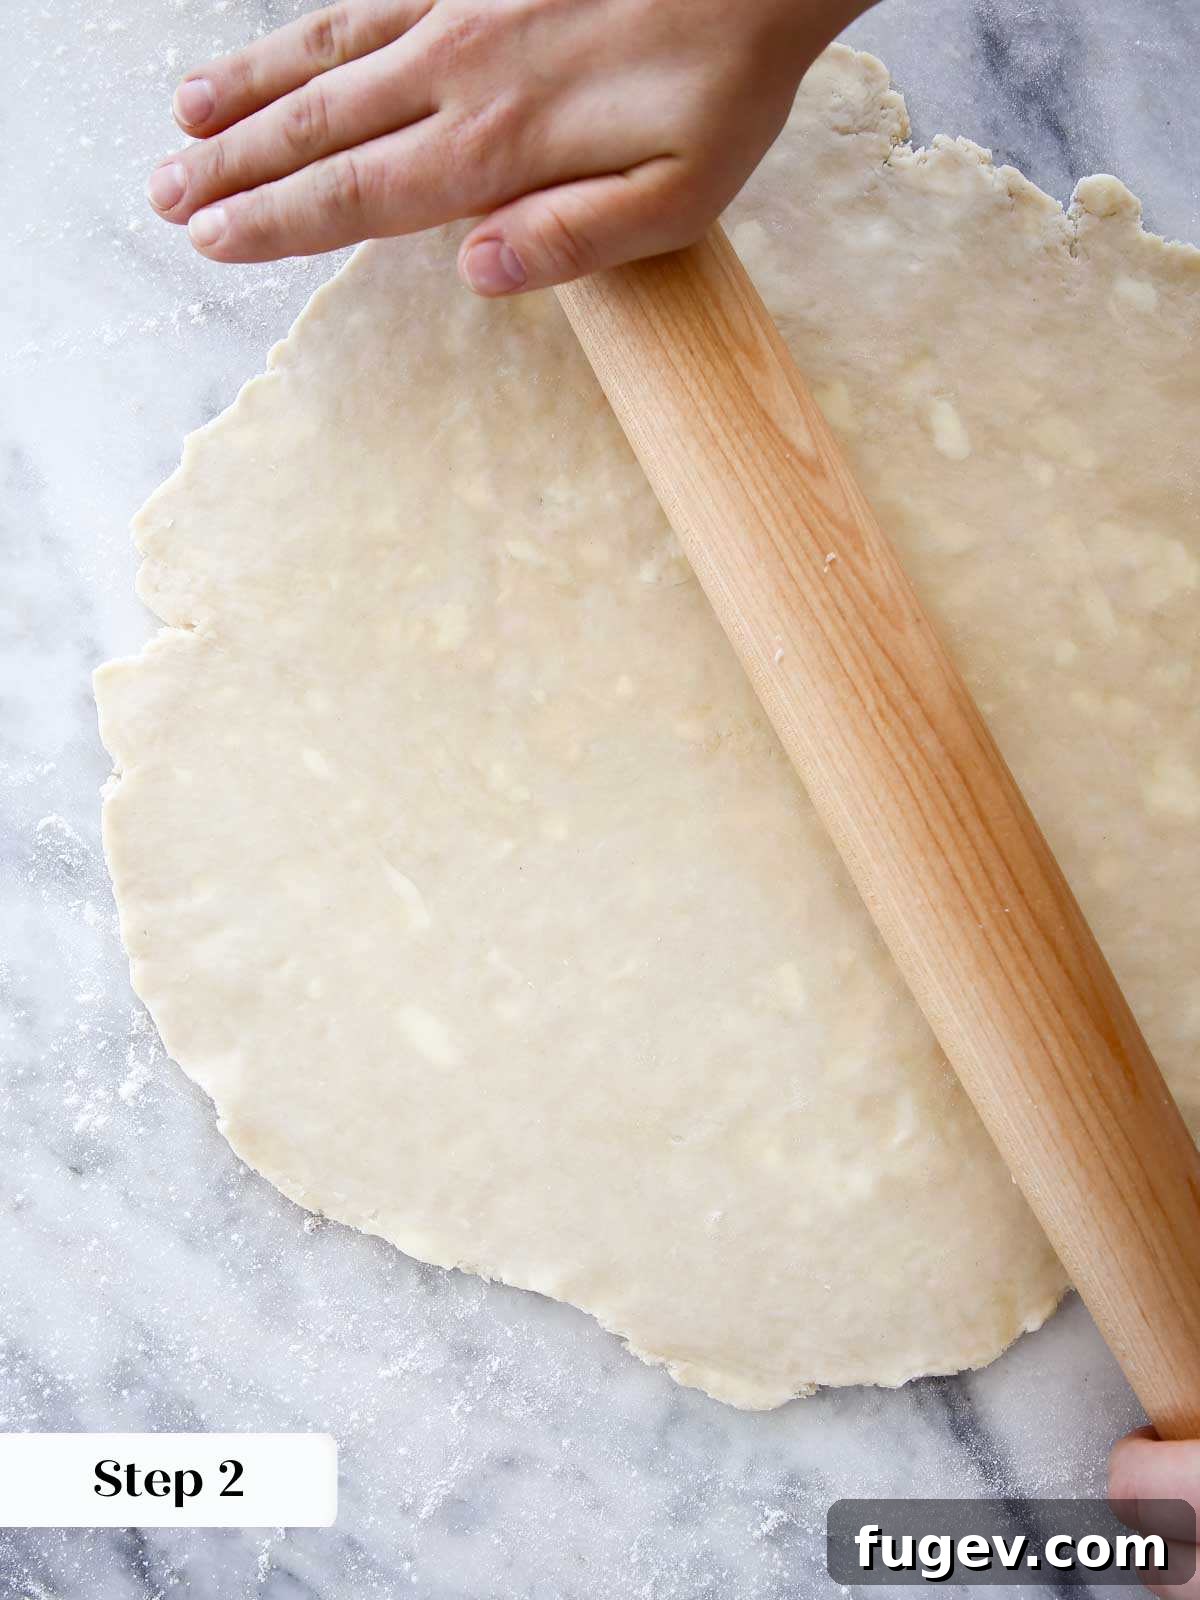
Begin by lightly dusting a clean, flat work surface with all-purpose flour. Equally, dust the top of your prepared pie dough and your rolling pin with a small amount of flour. This initial dusting is crucial as it prevents the dough from sticking to your work surface and rolling pin, ensuring a smooth and effortless rolling process.
-
Step 2: Roll Out the Dough and Initiate Chilling
Carefully roll the pie dough out to an approximate thickness of 1/8-inch (about 3 millimeters). Strive for a shape as close to a perfect circle as possible; consistency in thickness is paramount for even baking. Once rolled, gently transfer the dough onto a baking sheet and place it in the refrigerator to chill for a minimum of 30 minutes. This vital chilling period serves a dual purpose: it allows the gluten strands in the dough to relax, which is key to preventing excessive shrinkage during baking, and it solidifies the fat, contributing significantly to a supremely flaky crust. While your dough is chilling, preheat your oven to 350°F (175°C) if using convection, or 375°F (190°C) for a conventional oven.
-
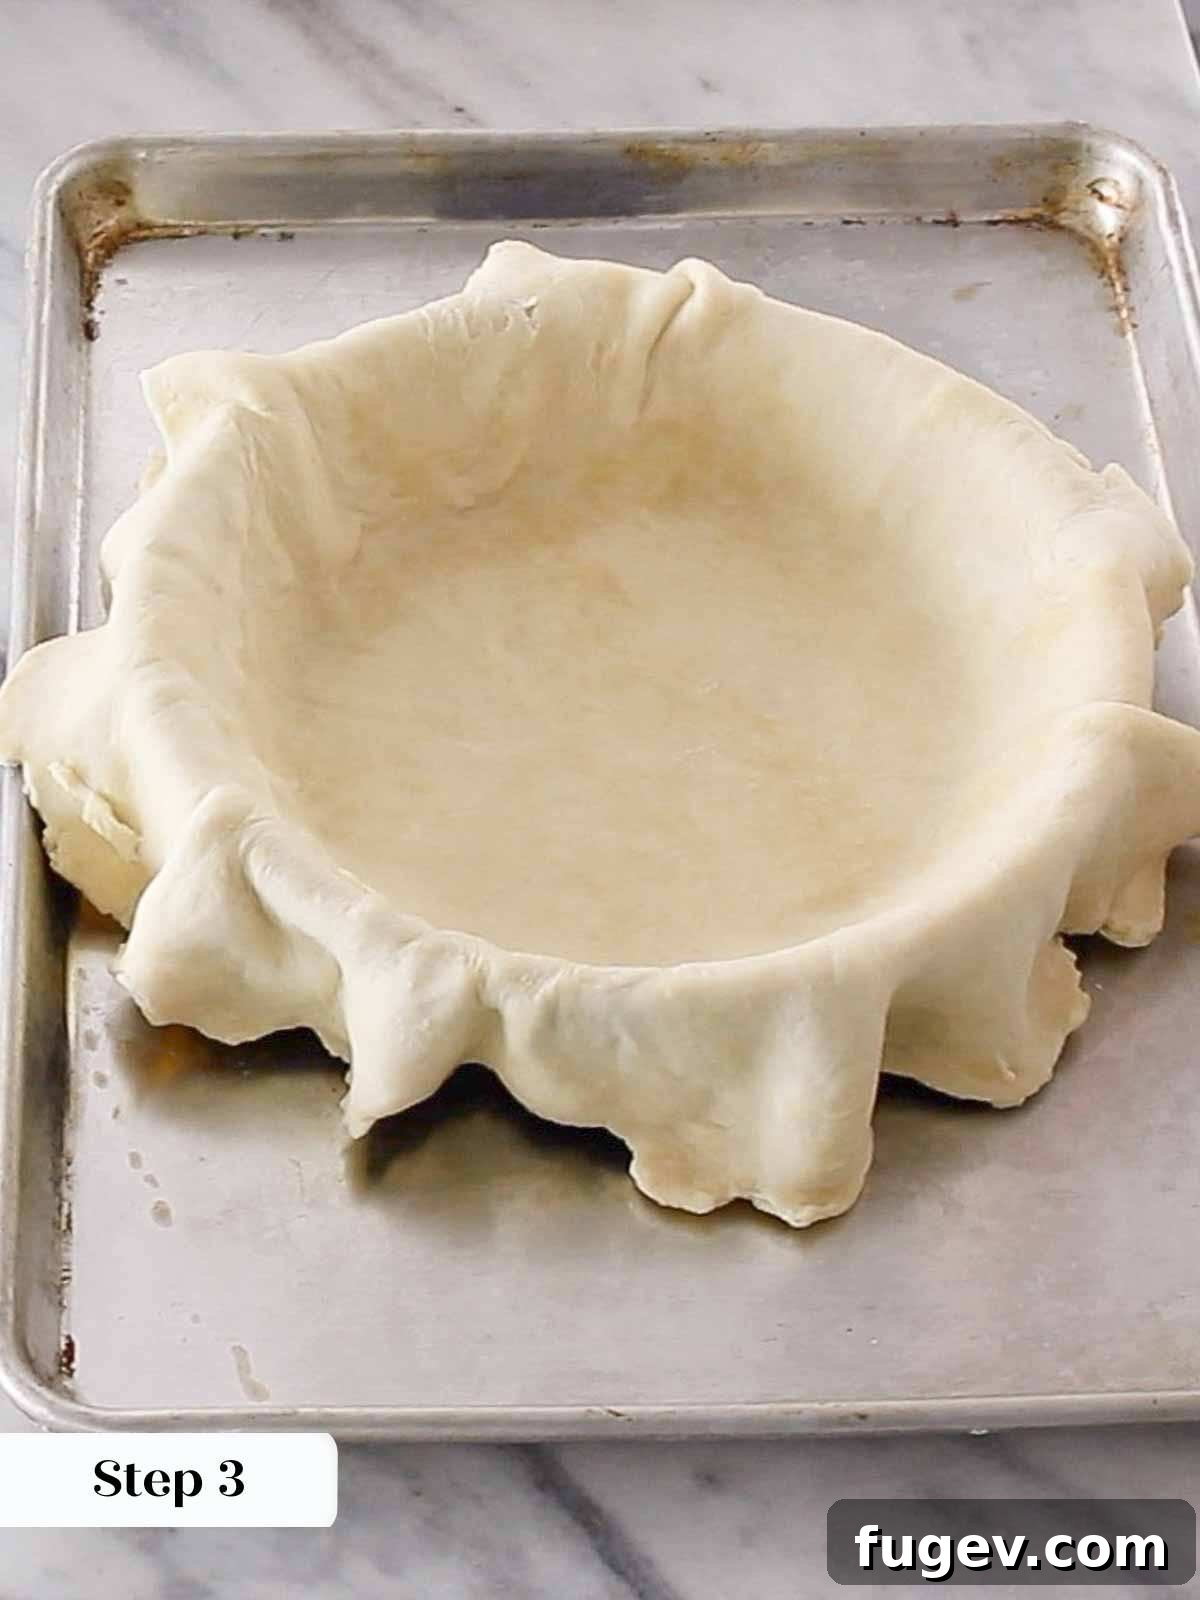
Step 3: Fit the Dough into the Pie Dish and Chill Again
Once sufficiently chilled, gently drape the cold pie dough into your chosen pie dish. Carefully work the dough, folding and pressing it meticulously to ensure it fits snugly and flush against the bottom and sides of the dish, taking care not to stretch the dough. Allow a generous amount of excess dough (at least 1 inch or 2.5 cm) to overhang the edges of the pie plate. For optimal results, return the pie dish with the dough to the refrigerator for another 30 minutes of chilling. This second chilling phase, though optional, is highly recommended. It allows the butter to firm up completely and any remaining gluten to relax further, which significantly enhances the flakiness of the crust and helps it maintain its shape during baking.

Carefully fitting the dough ensures it adheres perfectly to the contours of the dish. Allowing ample excess dough to overhang ensures clean, accurate trimming. While skipping this chilling stage is possible for expedience, consistently achieving the flakiest, most tender pie crust that holds its structure beautifully relies heavily on adequate chilling. Patience truly yields superior results.
-
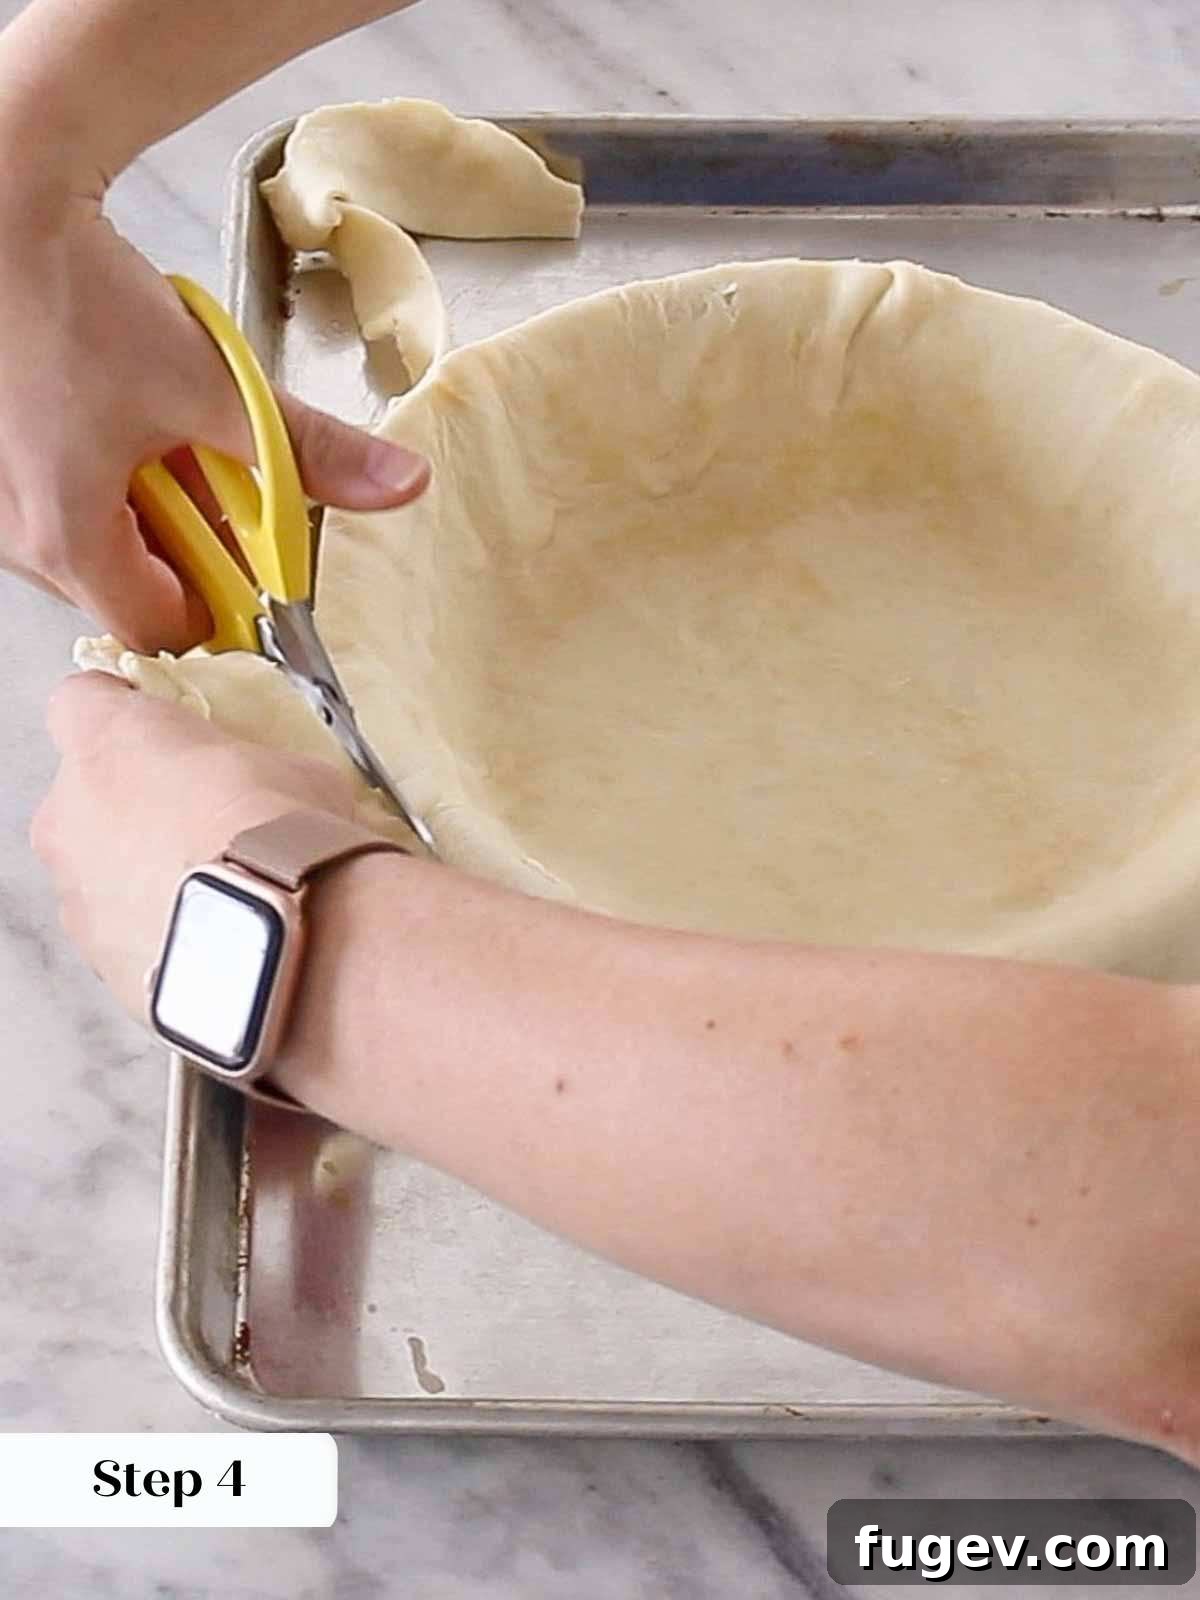
Step 4: Trim Excess Dough and Create a Sturdy Edge
Using your dedicated kitchen shears, meticulously trim any dough that extends more than 1 inch (approximately 2.5 cm) beyond the edge of the pie dish. Once trimmed, carefully roll the excess dough underneath itself, pressing and sealing it firmly between your thumb and first two fingers. This action creates a neat, robust, and beautifully finished edge. It’s crucial to roll and seal the dough tightly to prevent it from unfurling or popping open during the baking process, which can detract from both the final appearance and structural integrity of your crust.
A common mistake is leaving too much dough around the edges. This creates an overly thick crust rim that will inevitably bake at a slower rate than the thinner parts of the pie, often resulting in a disappointingly doughy or underbaked center in the crust’s rim.
-
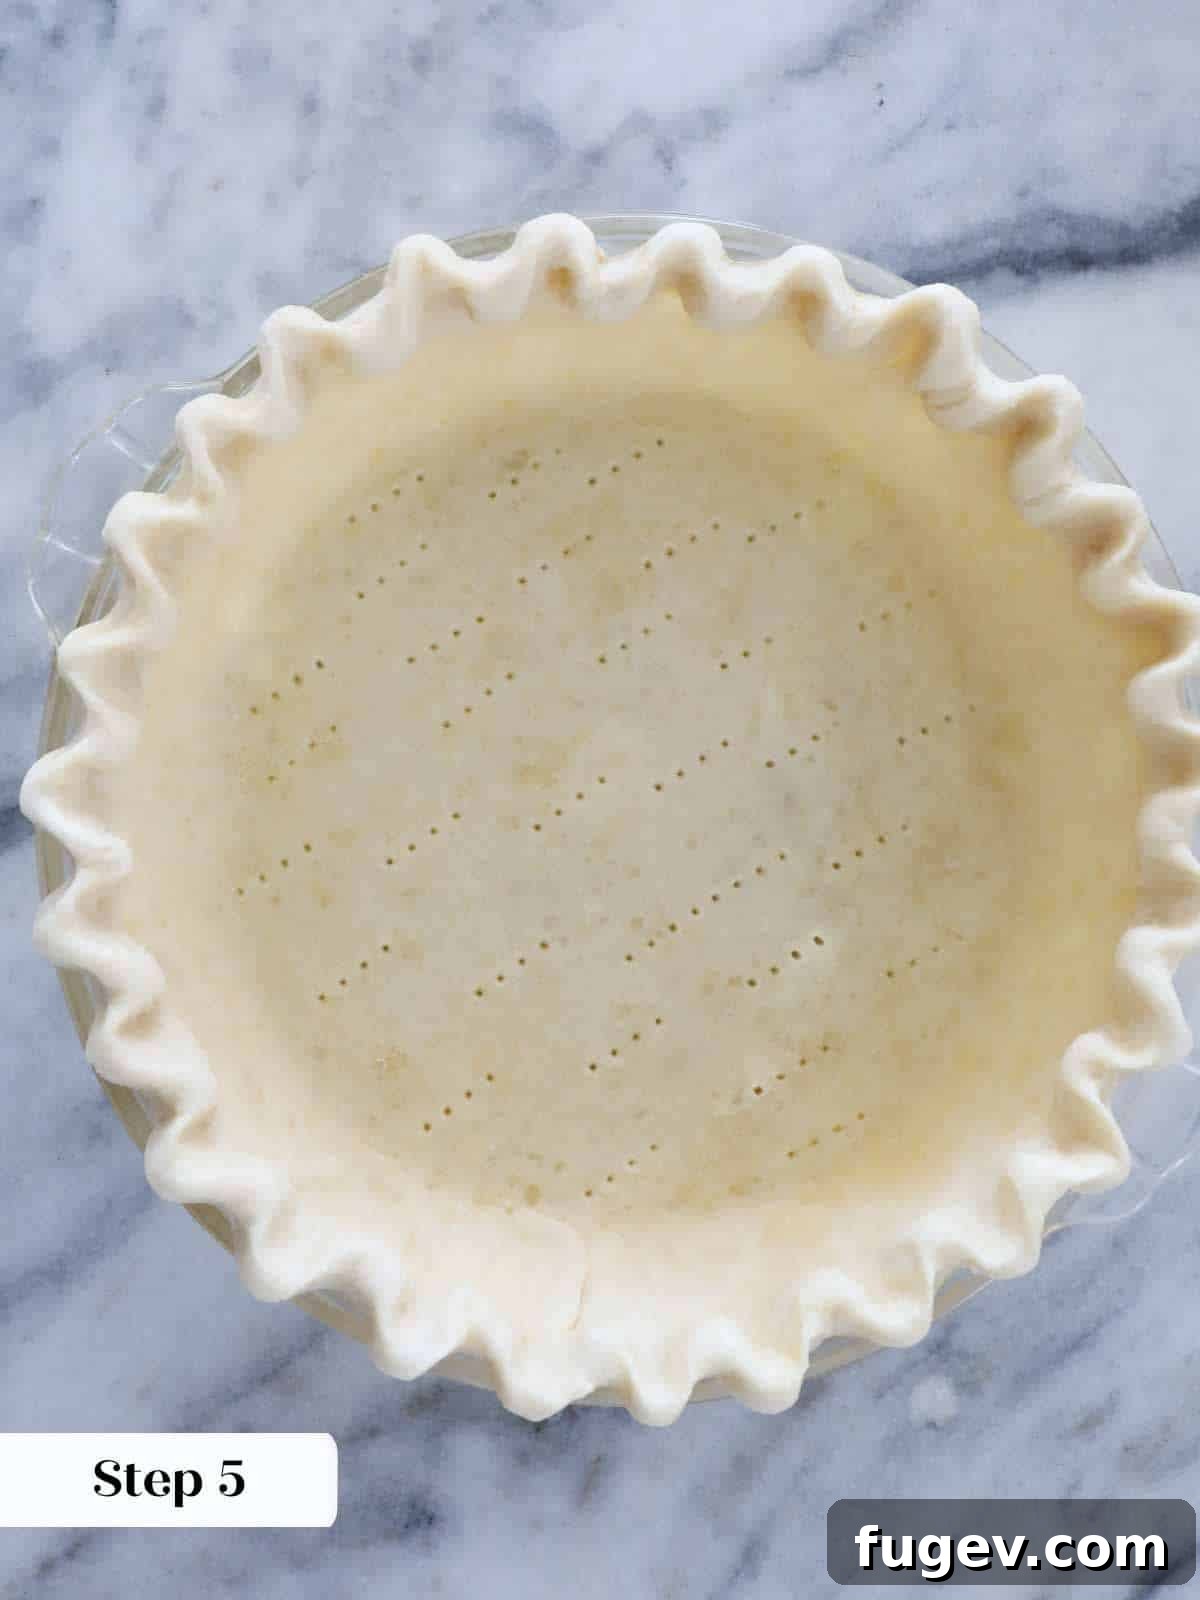
Step 5: Crimp or Flute the Edges and Re-Chill if Needed
With your edges securely rolled, it’s time for the decorative finish. Crimp or flute the edges using your fingers for an elegant, traditional look, or use the tines of a fork to create a simpler, rustic pattern around the rim. This step not only adds visual appeal but also further secures and stabilizes the edge. If at any point during this process the dough has warmed significantly and no longer feels cool to the touch, it is highly advisable to return it to the refrigerator for an additional 15-30 minutes of chilling. This ensures that the butter remains firm and the gluten fully relaxed, both of which are critical for preventing shrinkage and maintaining the beautifully crimped shape during baking.
Trimming excess dough with precision is key for a clean, even crust edge. The beautifully crimped edge and docked bottom of an unbaked pie crust, ready for baking. -
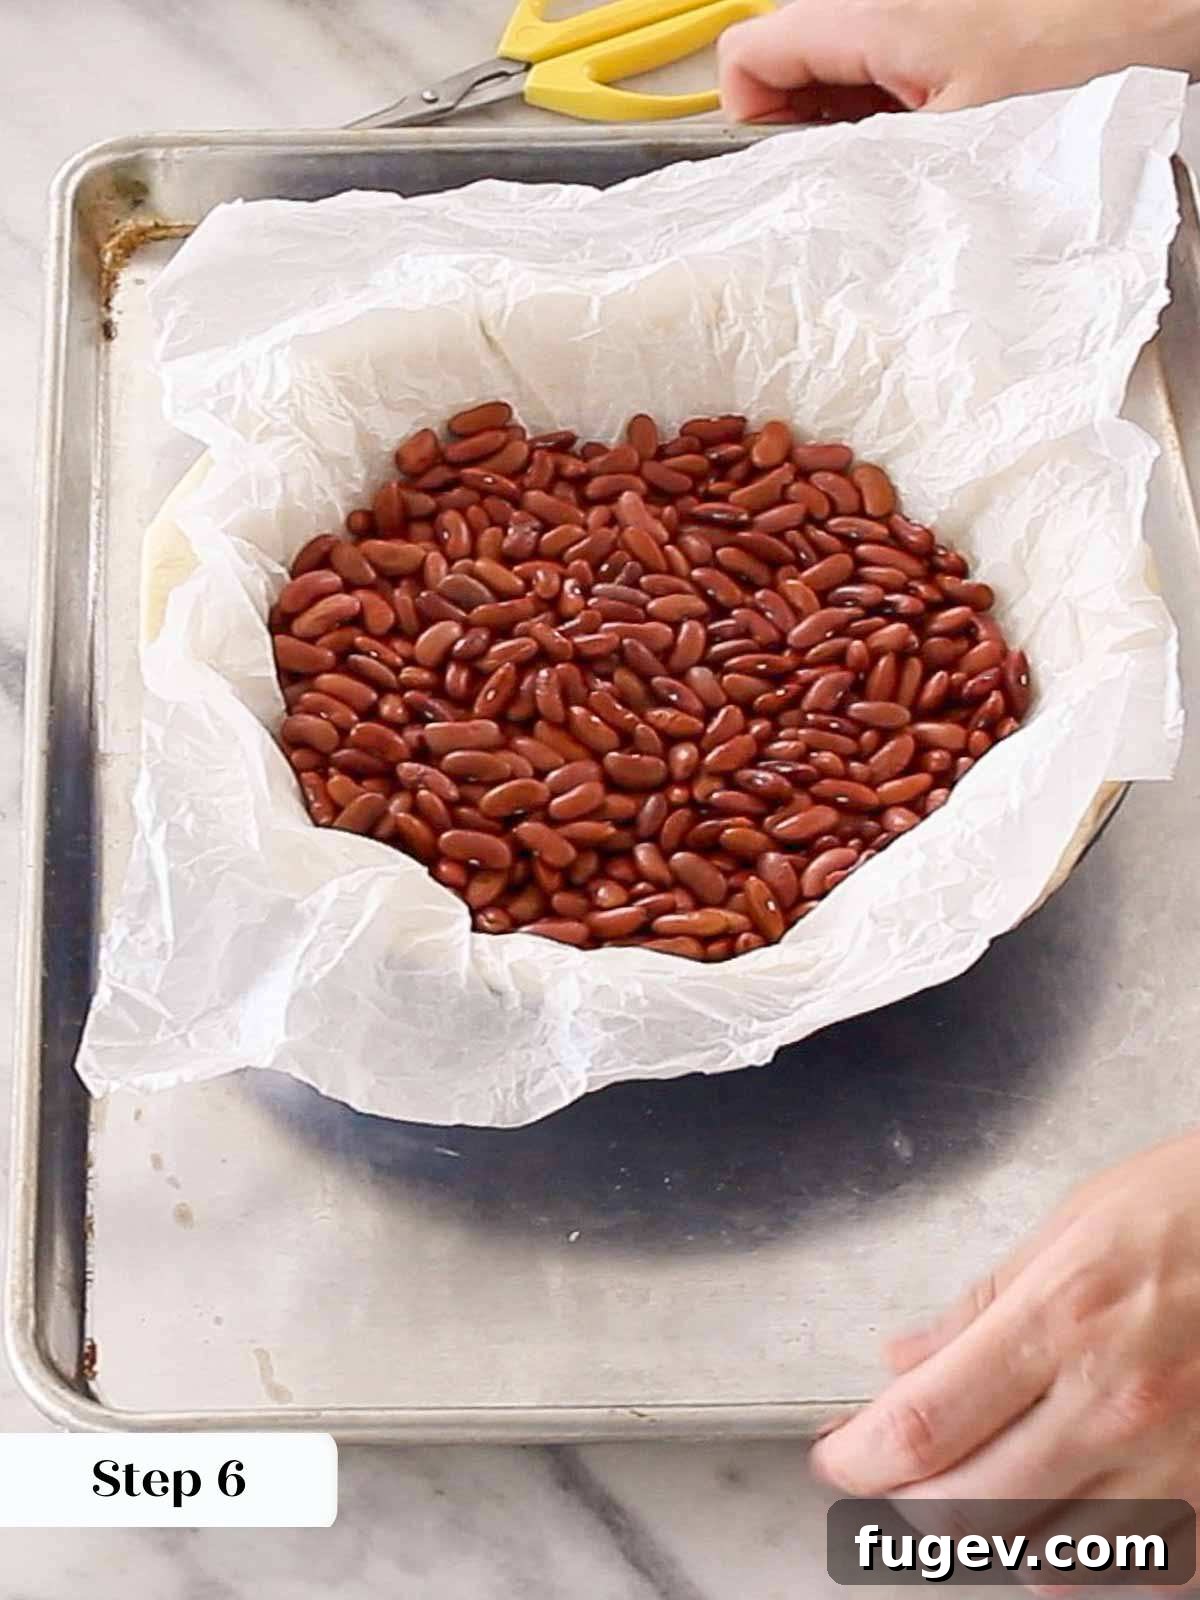
Step 6: Line with Parchment Paper and Fill with Pie Weights
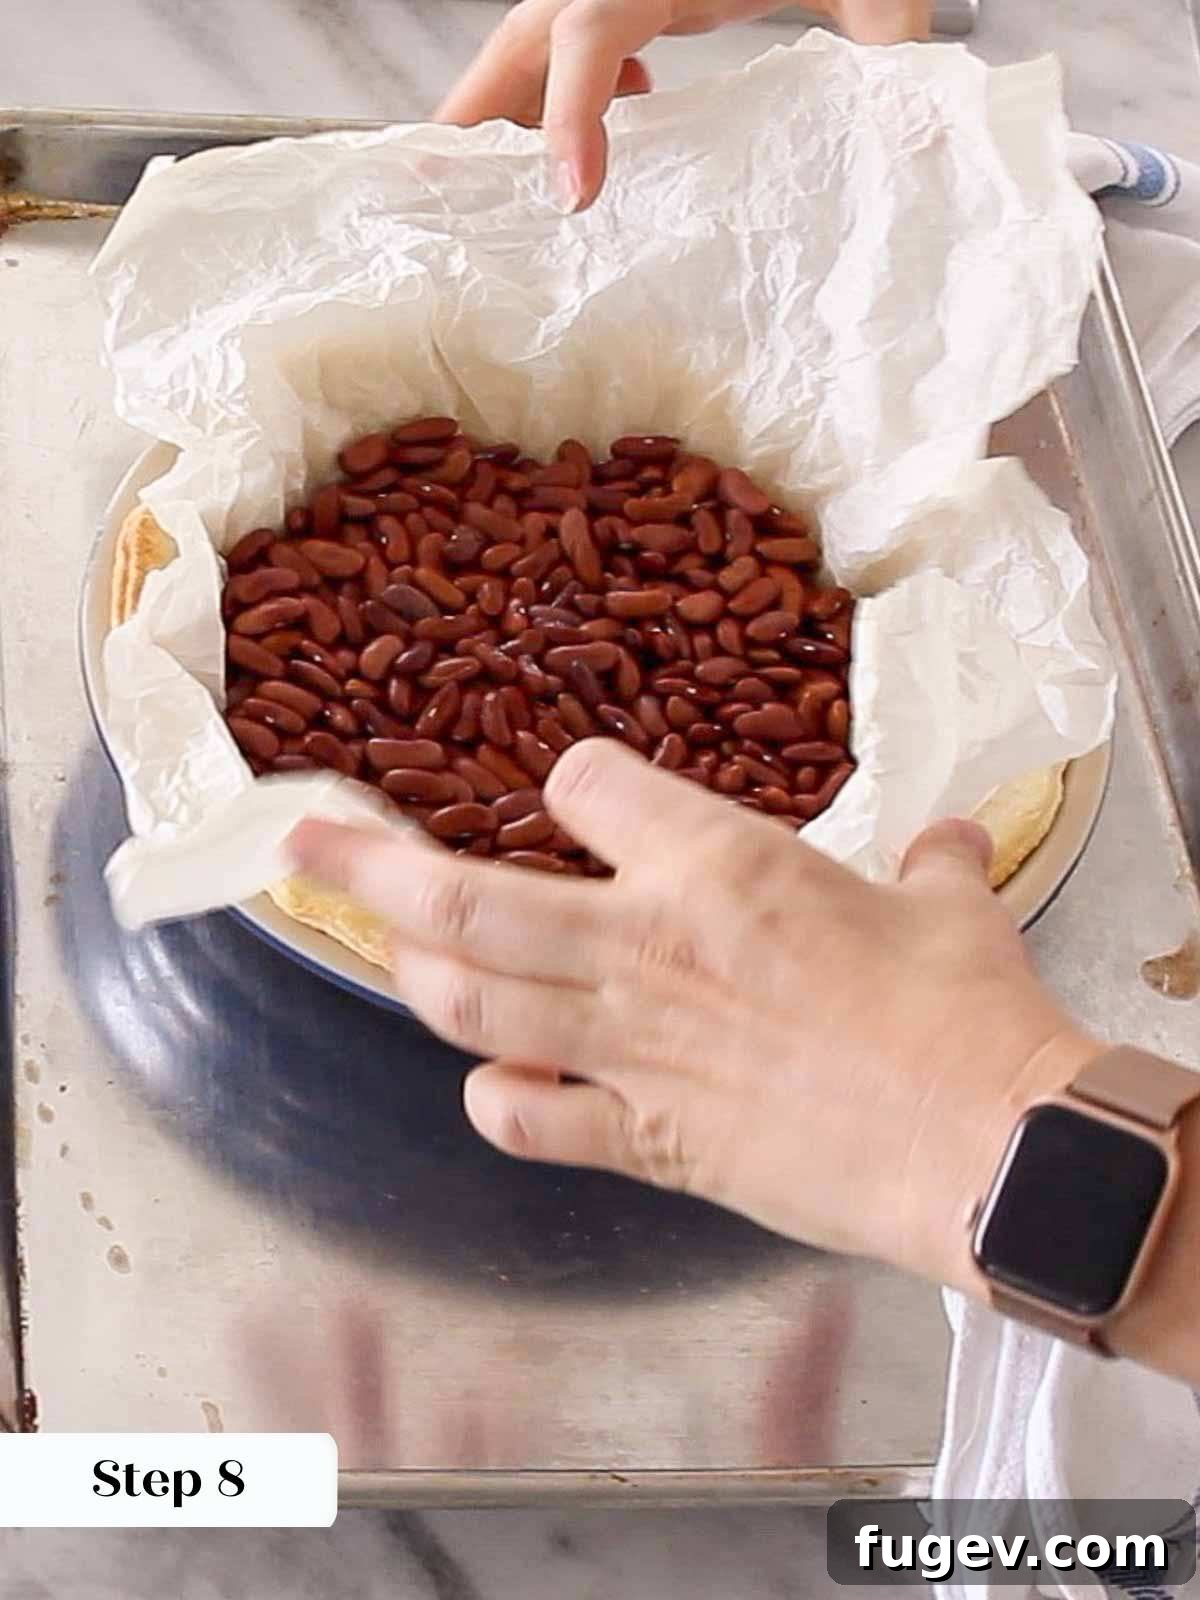
Carefully line the chilled and crimped pie crust with a sheet of crumpled parchment paper (refer to the “Essential Tools and Ingredients” section for a tip on how to best crumple it for a perfect fit). Once the parchment is in place, fill the crust completely and evenly with your chosen pie weights, dried beans, or rice. These weights are absolutely essential; they act as a physical barrier, preventing the pie dough from puffing up unevenly or shrinking dramatically down the sides of the dish during the intense heat of the oven. Ensure the weights are distributed uniformly and extend up the sides of the crust to provide maximum support for its shape.
From extensive experience, I’ve observed that uncooked rice often lacks the necessary heft to completely prevent the crust from developing small bubbles or puffing in localized spots. Conversely, some ceramic pie weights can be excessively heavy, potentially compacting the dough too much and inhibiting the delicate rise required for a truly flaky texture. For an ideal balance, I consistently recommend dried beans. They provide sufficient weight without undue pressure, and importantly, can be cooled and reused indefinitely for countless future pies. Any variety of dried bean will perform admirably.
-
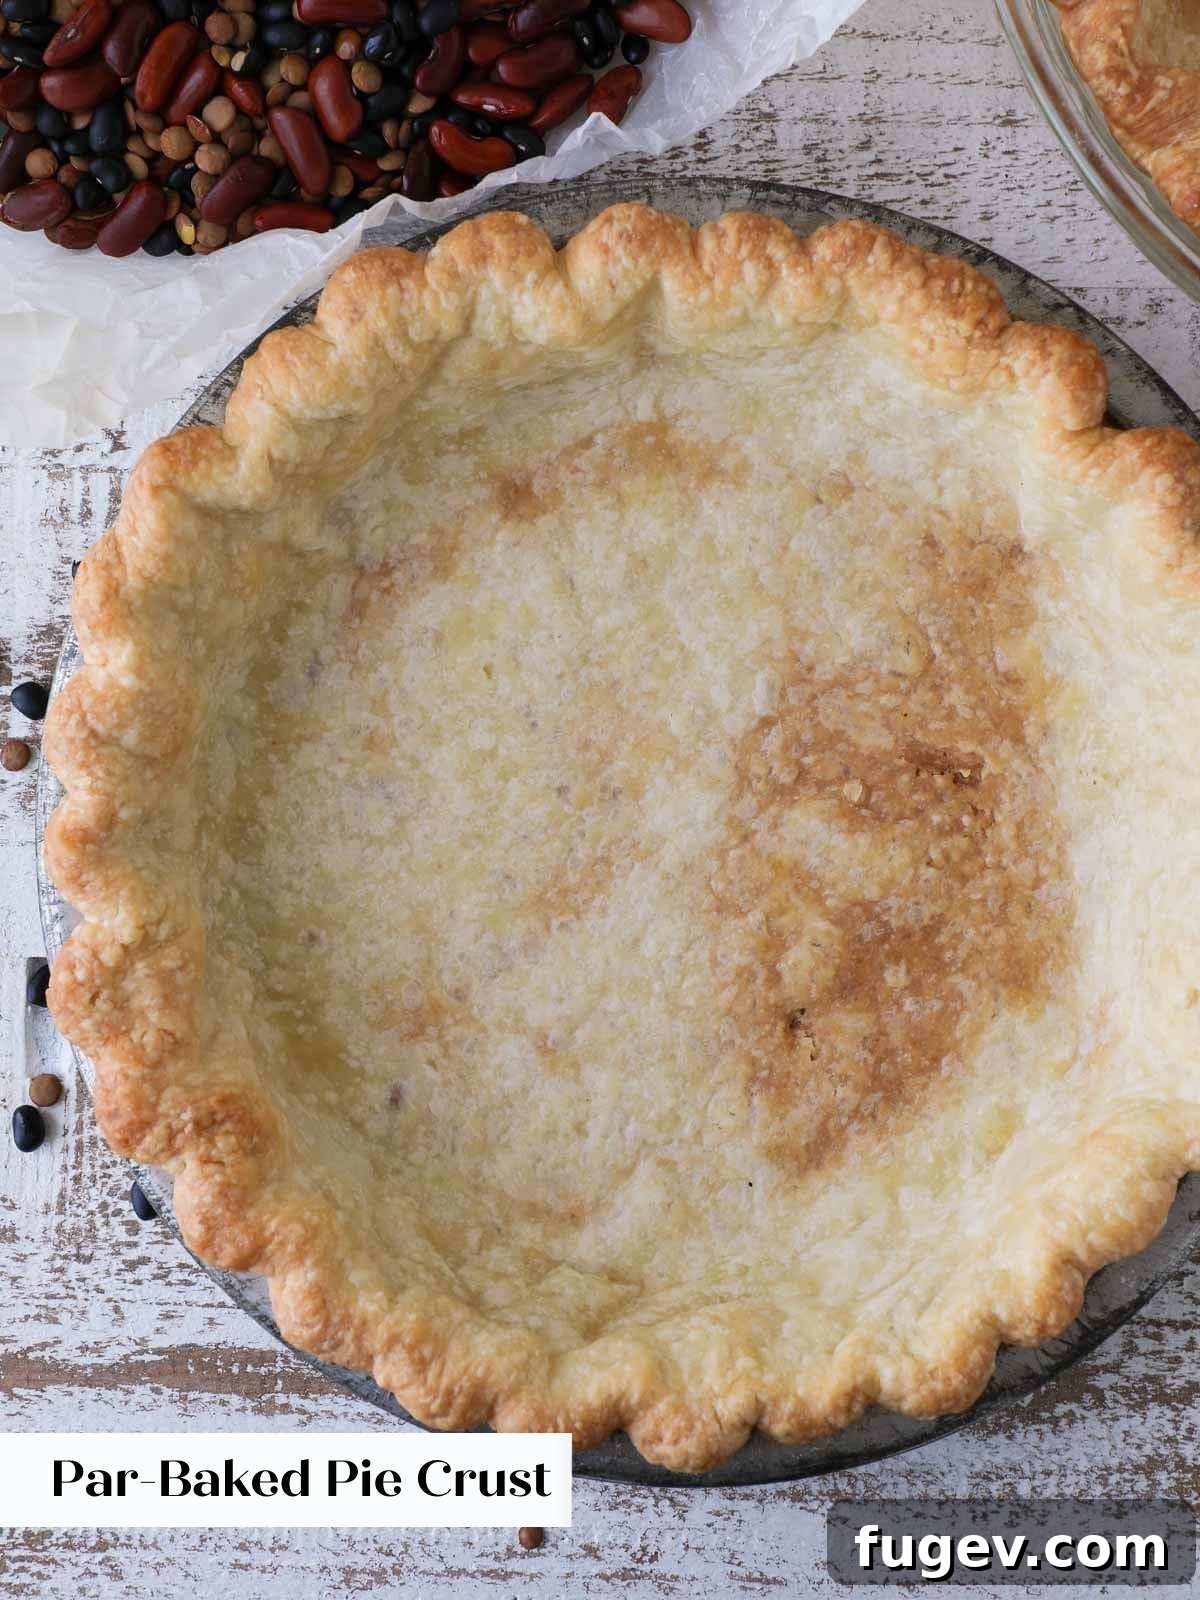
Step 7: Achieve the Par-Baked Stage (Partial Blind Bake)
Carefully place the weighted pie crust into your preheated oven. Bake for approximately 12 to 20 minutes, keeping a close watch until you observe the bottom of the crust just beginning to turn a light golden brown. This subtle coloration signifies that your crust has officially reached the **par-baked stage**! If your recipe requires you to add a filling and continue baking the pie, then you have completed this step. Depending on the nature of your filling (e.g., hot vs. cold), you can either proceed immediately with filling the crust or allow the par-baked crust to cool completely on a wire rack before introducing the filling.
The crust at the perfect par-baked stage, ready for further baking with its delicious filling. Removing weights is a delicate step to preserve the crust’s meticulously set shape. -
Step 8: Completing the Full Blind Bake
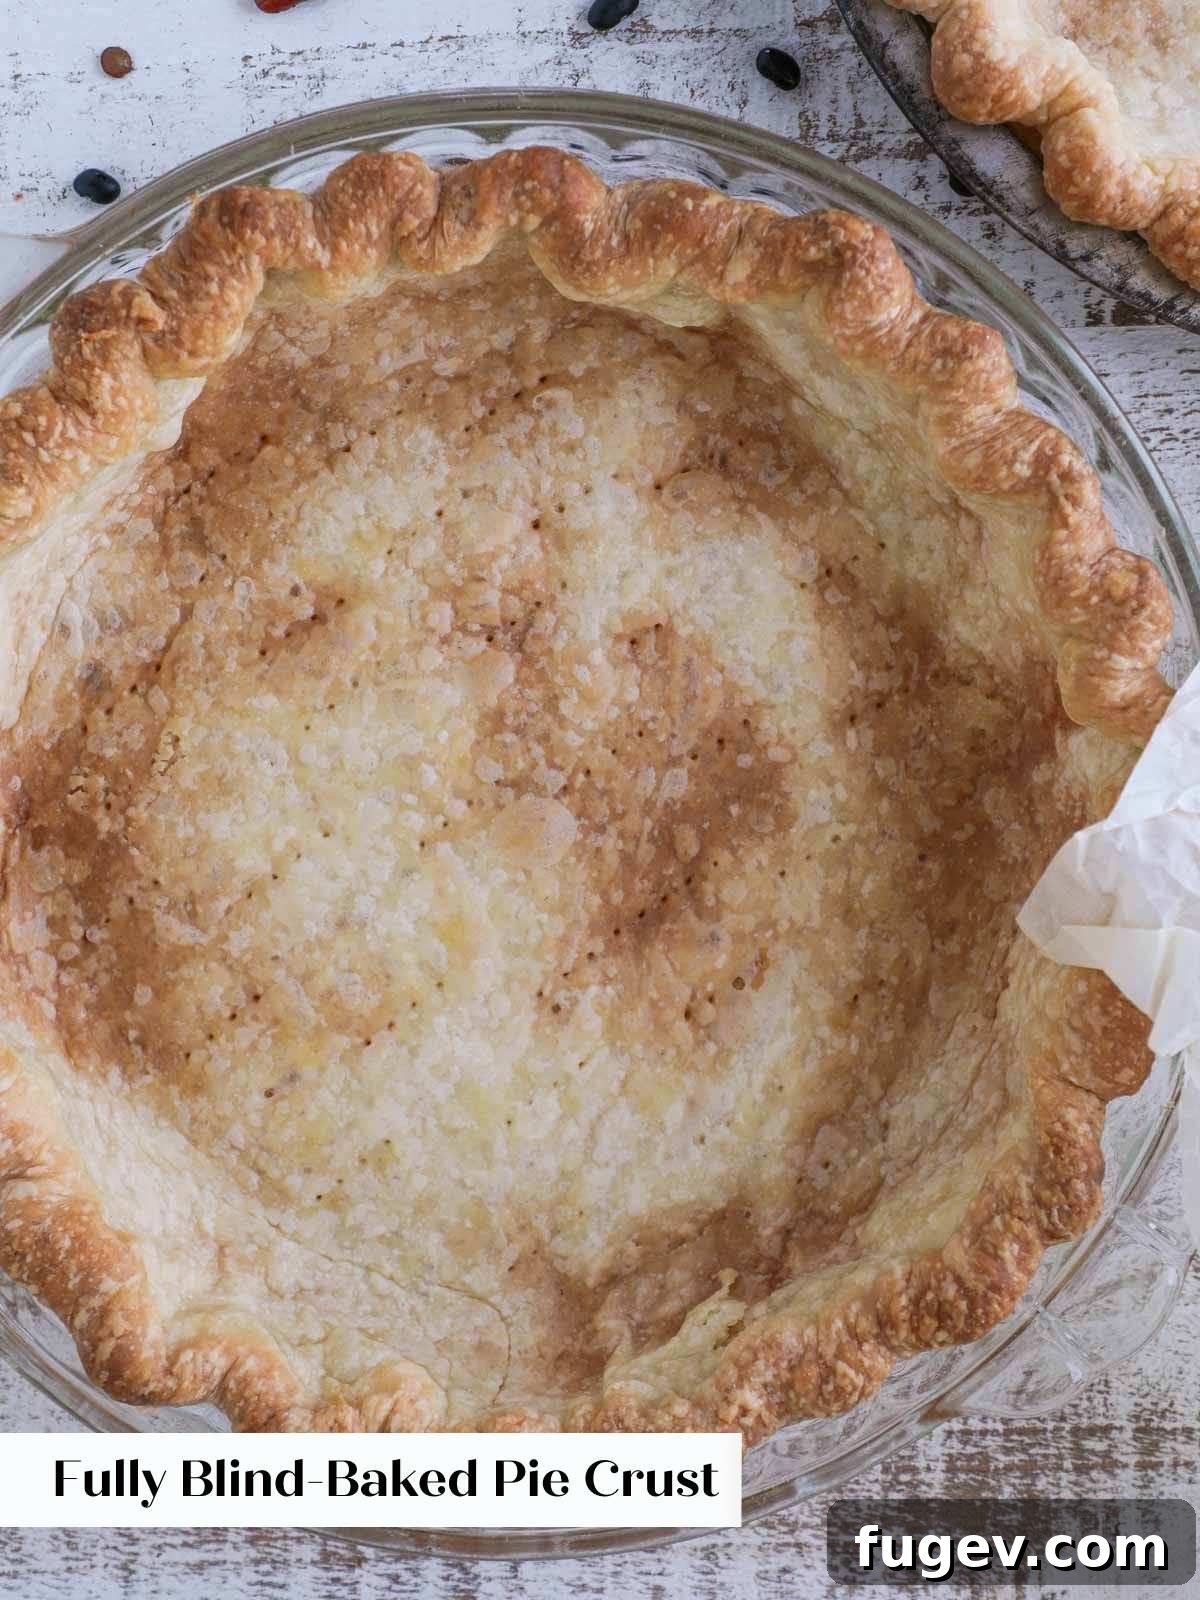
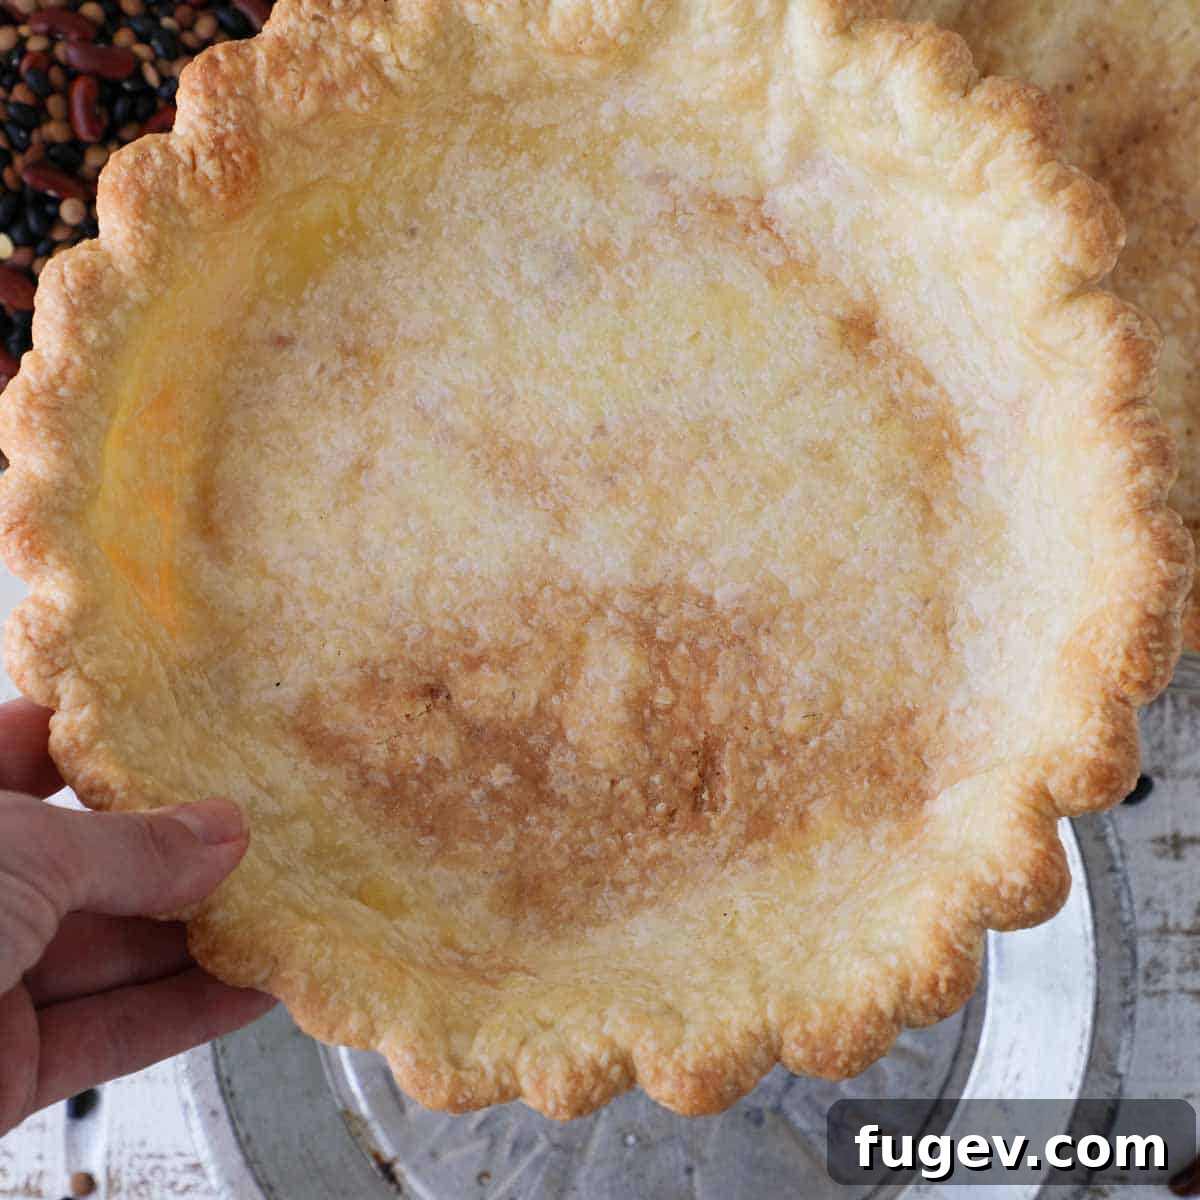
To achieve a fully blind-baked pie crust, which is essential for no-bake or minimally baked fillings, carefully remove the parchment paper and all of the pie weights (beans or rice) from the partially baked crust. Return the now empty crust to the oven and continue baking for an additional 8 to 15 minutes. During this crucial final stage, maintain a vigilant eye on the crust until both its bottom and edges have transformed into a beautiful, even, and rich golden brown color. This vibrant hue indicates full doneness and ensures a crisp, sturdy base. Once achieved, promptly remove the crust from the oven and transfer it to a wire rack to cool completely before adding any filling. A fully cooled crust is vital to prevent delicate fillings from melting or becoming too warm and losing their texture.
A perfectly par-baked crust, awaiting its final bake or luscious filling. The finished product: a stunning, fully blind-baked pie crust, ready for any filling. Chef’s Insight: On occasion, you might discover that your pie crust has completely baked through even with the parchment paper and weights still in place. While this isn’t the ideal scenario for perfectly even bottom browning (which usually benefits from direct heat exposure in the final minutes), there’s no need to stress! Simply remove the parchment and weights, and consider your crust fully blind-baked. It will still be perfectly functional and delicious, ready to be filled with your favorite recipe.
Chef Lindsey’s Expert Tip for Store-Bought Dough
If you’re embracing the convenience of store-bought pie dough, it’s important to remember that these commercially prepared crusts are typically much thinner than homemade varieties. Consequently, the baking times outlined in this guide will need to be significantly reduced. I highly recommend performing an initial check on your pie crust after just 5 minutes in the oven to ensure it doesn’t burn. Adjust the subsequent baking time as needed, keeping a close eye for that perfect golden hue.
How to Keep Pie Crust from Shrinking: Essential Tricks for Success
Pie crust shrinkage is a pervasive and often frustrating challenge for many home bakers. Fortunately, by adopting a few key practices throughout the entire pie-making process, you can effectively combat this issue and ensure your crust retains its intended shape and size:
- Avoid Overworking the Dough at All Costs: The journey to a perfectly stable, non-shrinking crust begins right at the dough-making stage. Excessive mixing or vigorous kneading of pie dough activates and develops the gluten strands within the flour. While gluten is desirable in bread for chewiness, in pie crusts, strong gluten networks cause the dough to become elastic. This elasticity makes the crust prone to significant shrinkage when exposed to the heat of the oven. Aim for minimal handling – mix just enough to bring the ingredients together, keeping the dough tender and pliable.
- Embrace the Power of Chilling: Chilling is arguably your most powerful ally in pie making. After every significant step—whether you’ve just mixed the dough, rolled it out, or fitted it into the pie dish—place your dough in the refrigerator for at least 30 minutes. This crucial resting period allows the activated gluten strands to relax and provides ample time for the butter or other fats to re-solidify. A cold, relaxed dough is a cooperative dough; it will roll out more easily, handle better, and most importantly, will resist shrinking during baking, yielding a flakier and more tender crust.
- Select the Right Pie Dish Material: The material of your pie dish plays a more significant role than you might think. Always opt for glass or metal pie dishes over ceramic for blind baking. These materials are superior heat conductors, which not only promotes efficient, even browning and a consistent bake rate (especially on the bottom of the crust) but also creates more friction. This increased surface friction helps the raw pie crust adhere more effectively to the sides of the pan, significantly preventing it from sliding down or slumping during baking, a common issue particularly with some smoother ceramic surfaces.
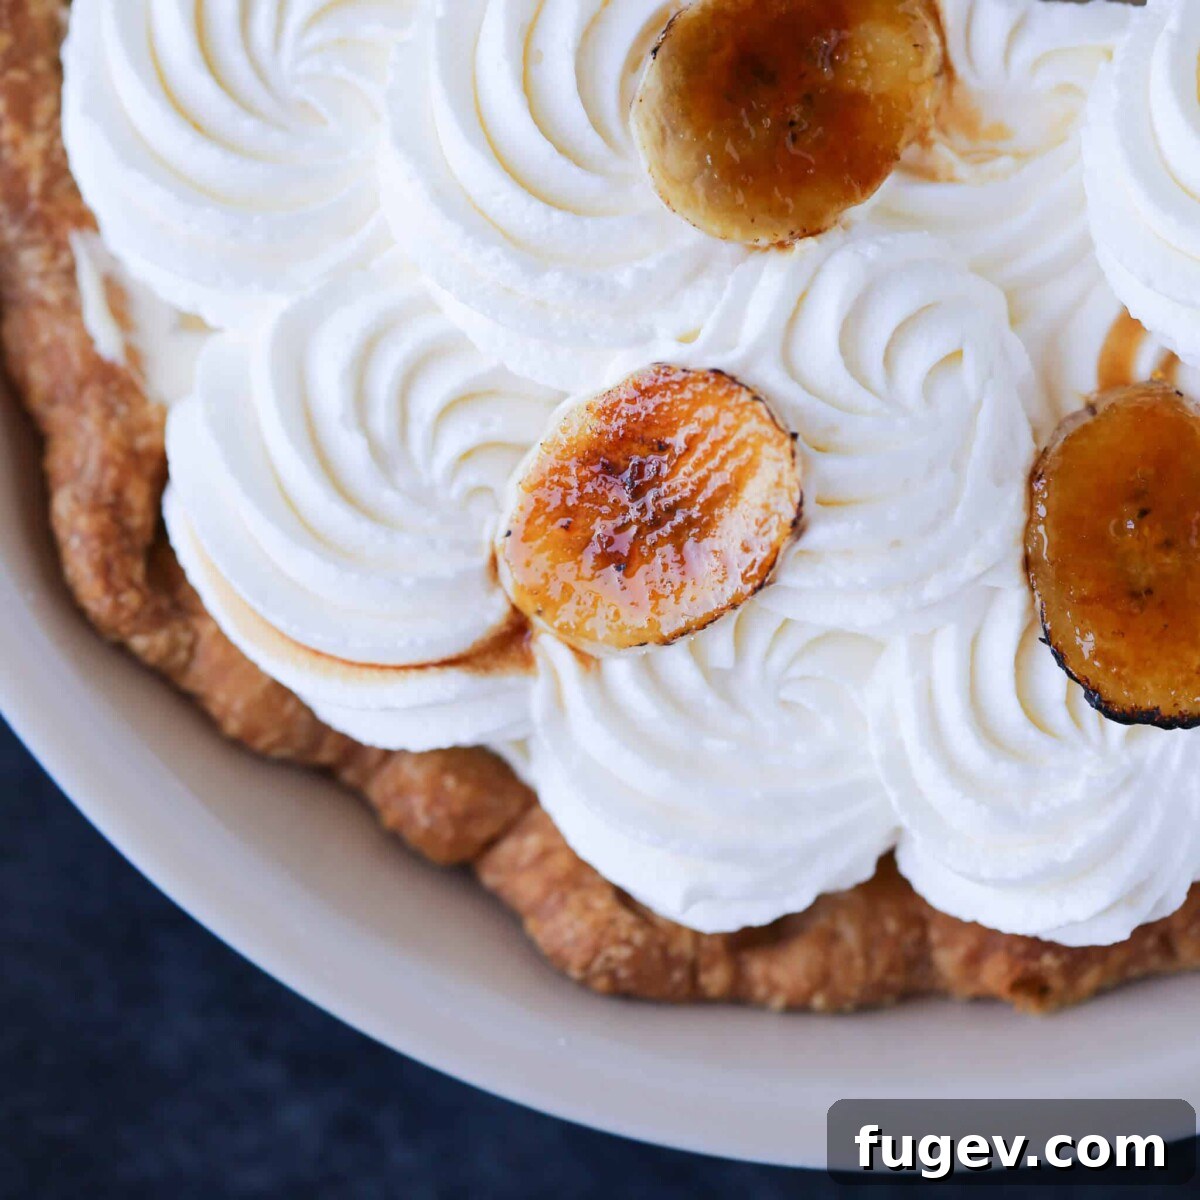
- Blind Bake with Sufficient Weights for an Adequate Duration: When blind baking, it is absolutely imperative to use enough pie weights and to keep them in place for the appropriate amount of time. The weights serve as a critical physical support system, literally holding the raw crust in its desired shape against the forces of heat and steam. This practice is especially important for preventing the crust’s sides from collapsing or shrinking inwards, a phenomenon I’ve personally encountered, even with excellent dough, especially when using less grippy ceramic dishes, as seen with my beloved classic banana cream pie! Ensure the weights are distributed evenly and reach up the sides to support the rim.
Frequently Asked Questions About Blind Baking Pie Crust
How do you store fully or partially prebaked pie crust?
For optimal freshness and texture, partially or fully prebaked pie crusts should be stored carefully. Once completely cooled, wrap them tightly in plastic wrap or aluminum foil. They can be kept at room temperature for up to 3 days. For longer storage, they freeze exceptionally well; wrap them securely and freeze for up to 2 months. It’s generally not recommended to refrigerate prebaked pie crusts, as the moist environment of a refrigerator can cause the crust to soften and potentially absorb unwanted flavors from other foods.
How long ahead can you prebake pie crust?
Prebaking pie crusts significantly in advance is a fantastic time-saving strategy. You can prebake pie crusts up to 3 days ahead of time if you plan to store them at room temperature. For even longer preparation, you can bake multiple crusts, allow them to cool completely, then carefully stack and wrap them to store in the freezer for up to 2 months. This makes holiday baking or meal prep much more manageable.
How long do you bake a pie crust unfilled?
The baking time for an unfilled pie crust depends on whether you’re using homemade or store-bought dough, and whether you’re par baking or fully blind baking. For store-bought pie crust, bake at 375°F (190°C) for approximately 8 minutes with pie weights before carefully removing them. For homemade pie crust, bake for about 12 minutes with weights. In both scenarios, remove the weights when the bottom of the crust just begins to show a light golden hue. If you are par-baking, you can then add your filling and continue baking according to your recipe’s instructions. If you are aiming for a full blind bake, continue baking the empty crust for an additional 8-10 minutes, or until both the edges and the entire bottom are a rich, even golden brown. Always allow the crust to cool completely before filling.
When do you blind bake pie crust?
You should fully blind bake a pie crust when the filling you intend to use is unbaked, requires minimal cooking, or is particularly delicate. This ensures that the crust is completely cooked, crisp, and robust enough to support the filling without becoming soggy. Prime examples include creamy desserts like banana cream pie, the luxurious French silk pie, or individual chocolate tarts, where the crust won’t undergo any further significant baking after it’s filled.
When do you partially bake pie crust?
Partially blind bake (par bake) your pie crust whenever your chosen filling will be baked alongside the crust in the oven. This method is critical for giving the crust a necessary head start, preventing it from becoming raw or soggy while the filling cooks through. It is the ideal technique for popular, moisture-rich pies such as pumpkin pie, heartwarming sweet potato pie, or classic chocolate pie. Additionally, par baking is highly beneficial when the filling ideally bakes at a lower temperature or requires a shorter oven time compared to what a completely raw crust would need to achieve full doneness, such as in many fruit pies or a traditional pecan pie.
If you tried this recipe and loved it, please take a moment to leave a 🌟 star rating and share your experience in the comments below. Your feedback truly brightens my day!
How to Blind Bake Pie Crust
by Chef Lindsey
A professional pastry chef provides comprehensive guidance on blind baking and par baking pie crusts, offering step-by-step instructions and crucial tips for achieving a flaky, golden-brown crust every time.
Comment
Print Recipe
Ingredients (US Customary)
- 1 cup all-purpose flour
- ½ teaspoon kosher salt
- ½ teaspoon granulated sugar
- 4 ½ tablespoons unsalted butter cubed, cold
- 1 ¼ oz cold water as much or as little as needed
Instructions
- To begin, prepare your chosen pie crust. You can follow any of the five methods detailed in this all-butter pie crust recipe tutorial, utilize one of these other recommended pie crust recipes, or for convenience, use a store-bought option.
- Lightly dust your clean, flat work surface, the top of the pie dough, and your rolling pin with all-purpose flour to prevent any sticking during the rolling process.
- Carefully roll the dough out to approximately 1/8th inch (3mm) thickness, aiming for as close to a circular shape as possible. Once rolled, transfer the dough to a baking sheet and chill it in the refrigerator for 30 minutes. While chilling, preheat your oven to 350°F (175°C) for convection or 375°F (190°C) for conventional baking.
- Gently place the chilled pie dough into your pie dish. Carefully fold and press the dough to ensure it fits snugly against the bottom and sides, allowing about 1 inch (2.5 cm) of excess dough to generously overhang the edges. Return the pie dish to the refrigerator for another 30 minutes of chilling.
- Trim any dough that hangs more than 1 inch (2.5 cm) over the edge of the dish. Tightly roll the trimmed excess dough underneath itself, pressing and sealing it firmly between your thumb and first two fingers. Ensure a tight roll to prevent it from unfurling during baking.
- Crimp or flute the edges decoratively, or mark them with the tines of a fork. If the dough has lost its coolness to the touch, chill it again in the refrigerator for 15-30 minutes.
- Line the crimped crust with crumpled parchment paper and fill it completely with pie weights, dried beans, or rice, distributing them evenly.
- Bake the weighted crust in the preheated oven for 12-20 minutes, or until the bottom crust just begins to turn a light golden brown. This is the par-baked stage! If your recipe requires you to continue baking the crust with a filling, you are done. Depending on your filling, you can use it immediately or allow the crust to cool before filling.
- To finish blind baking the pie crust completely, carefully remove the parchment paper and all pie weights. Return the empty crust to the oven and continue baking for an additional 8-15 minutes, or until both the bottom and the edges have achieved a beautiful, even golden brown. Allow the crust to cool completely on a wire rack before adding your filling.
Video Tutorial
Notes from Chef Lindsey
- Yield: The recipe as provided above yields enough dough for a single pie crust. Please note that this is my personal all-butter pie crust recipe; you can find more in-depth instructions and details in its dedicated blog post.
- Presentation: Pay close attention to the trimming of your dough edges. Leaving an excessive amount of dough around the rim can result in an overly thick edge that will not bake at the same rate as the rest of the crust, leading to a potentially doughy, underbaked center in the crust’s rim.
- Technique: When selecting pie weights, I’ve found dried beans to be superior. Rice often isn’t heavy enough to prevent puffing entirely, while some ceramic pie weights can be too heavy, inhibiting the delicate rise needed for a truly flaky crust. I cool and reuse the same batch of beans every time; any type of dried bean will work perfectly.
- Storage: Both partially and fully blind-baked pie crusts can be stored efficiently. Once completely cooled, wrap them tightly and keep at room temperature for up to 3 days, or freeze for up to 2 months.
Nutrition Information (Per Serving)
Calories: 76kcal | Carbohydrates: 8g | Protein: 1g | Fat: 4g | Saturated Fat: 3g | Polyunsaturated Fat: 0.2g | Monounsaturated Fat: 1g | Trans Fat: 0.2g | Cholesterol: 11mg | Sodium: 98mg | Potassium: 12mg | Fiber: 0.3g | Sugar: 0.2g | Vitamin A: 131IU | Calcium: 3mg | Iron: 0.5mg
Course: Dessert
Cuisine: American
Calories per serving: 76
Liked this recipe? Share your thoughts in the comments!
Further Your Pie-Making Journey
Congratulations! You are now fully equipped with the knowledge and expertise to bake truly exceptional pie crusts. But don’t let your culinary exploration end here – there’s a whole world of delicious pies waiting to be discovered! I encourage you to delve into our extensive collection of pie recipes, which features everything from rich, comforting custard pies to vibrant, seasonal fruit pies. These recipes are perfect for showcasing your newly acquired crust-baking prowess. Additionally, be sure to explore my dedicated section for various pie crust recipes to find new variations, and refine your technique even further by revisiting the tutorial on when to dock a pie crust. Mastering these nuanced skills will truly elevate your pie-making to a professional level. Happy baking!