
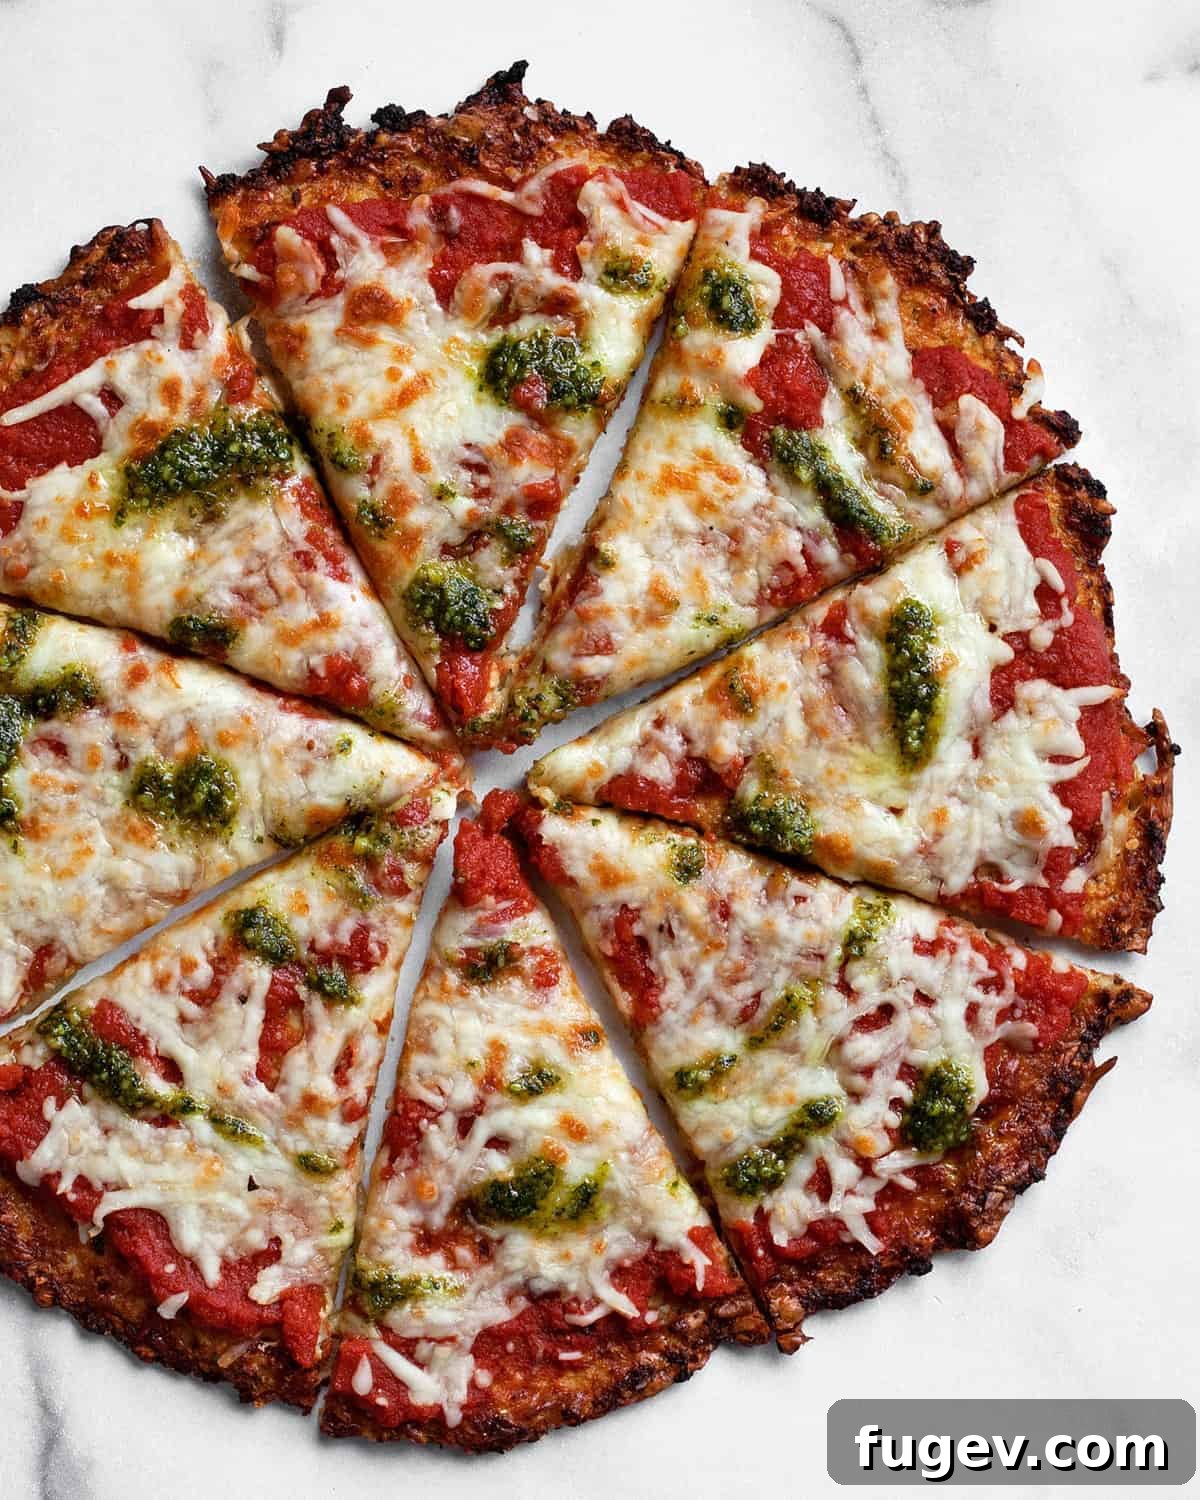
Cauliflower Pizza Crust: Your Ultimate Guide to a Delicious Low-Carb, Gluten-Free Pizza
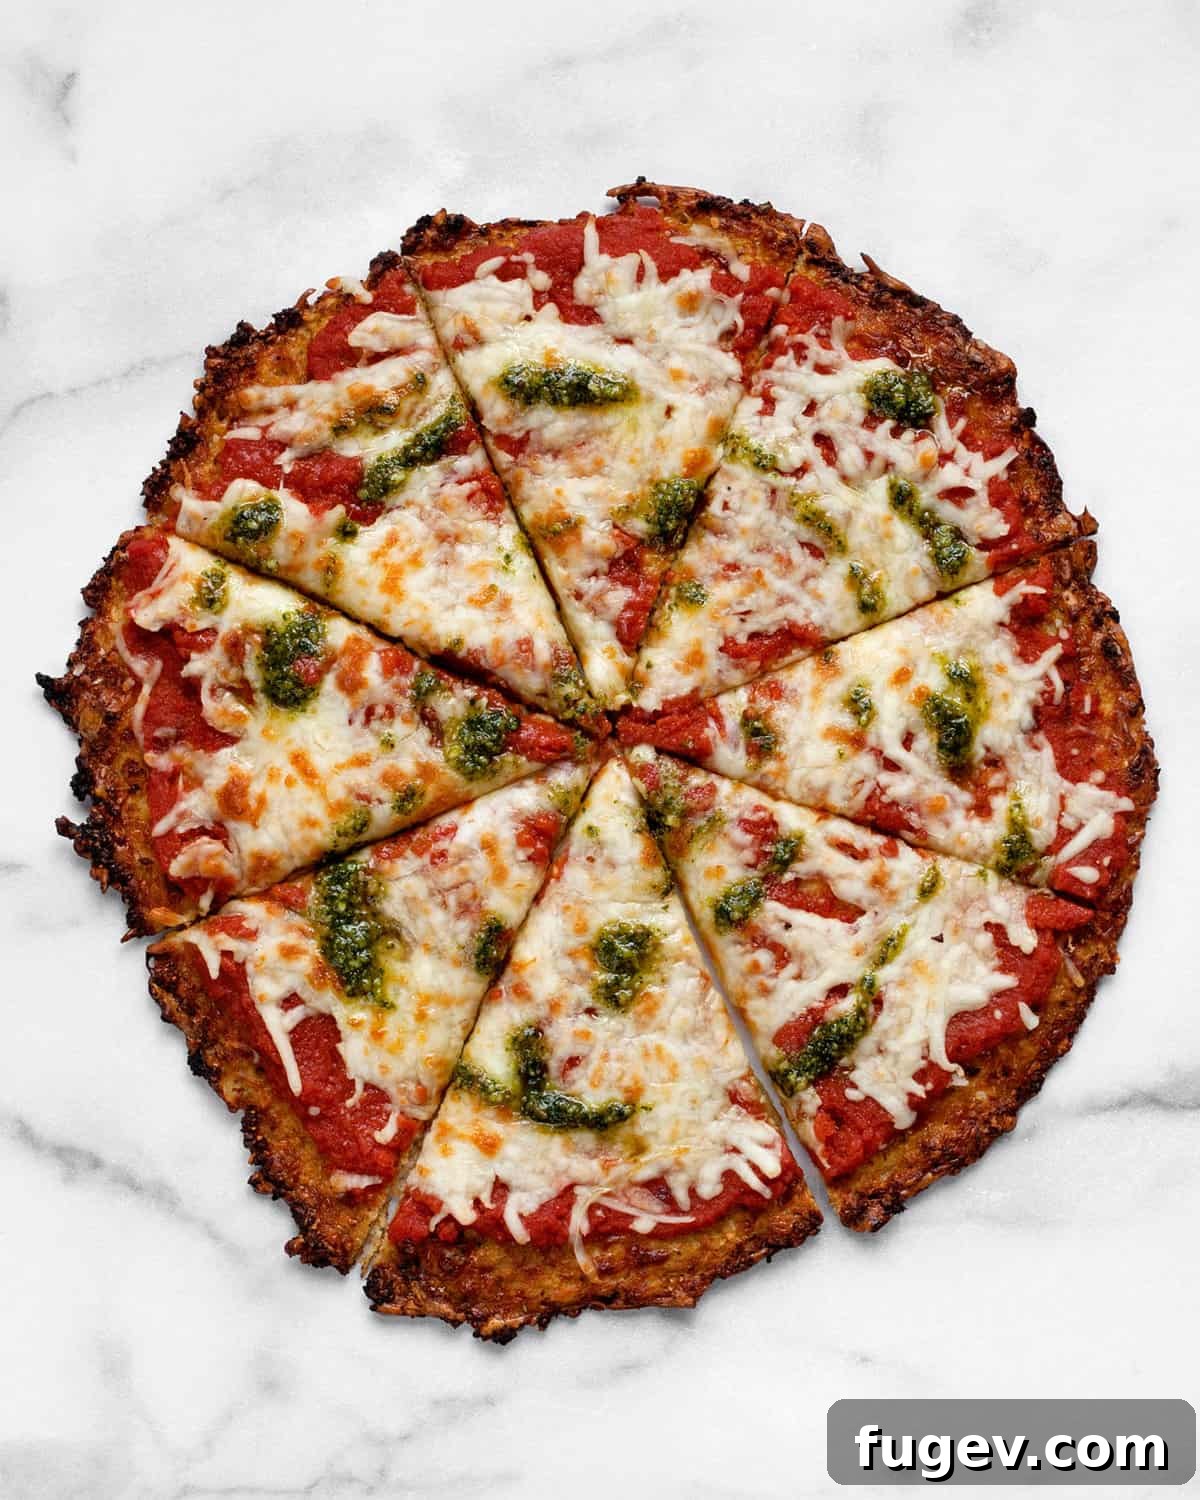
Forget everything you thought you knew about healthy eating because this homemade cauliflower pizza crust is here to revolutionize your pizza nights! While roasted cauliflower is undeniably delicious, this versatile vegetable has so much more to offer, especially as a fantastic foundation for a low-carb, gluten-free, and incredibly tasty pizza. Perfect for satisfying those intense pizza cravings without the guilt, this recipe will quickly become a household favorite.
Crafting your own cauliflower crust from scratch is a rewarding experience, requiring just a handful of simple ingredients – typically around nine. While pre-made crusts are available in stores, taking the time to prepare your own ensures the freshest taste, superior texture, and complete control over what goes into your meal. Get ready to embark on a culinary journey that’s both healthy and utterly delicious.
Looking for topping inspiration? You might love our easy Mediterranean pizza for vibrant flavor ideas that pair wonderfully with a light crust!
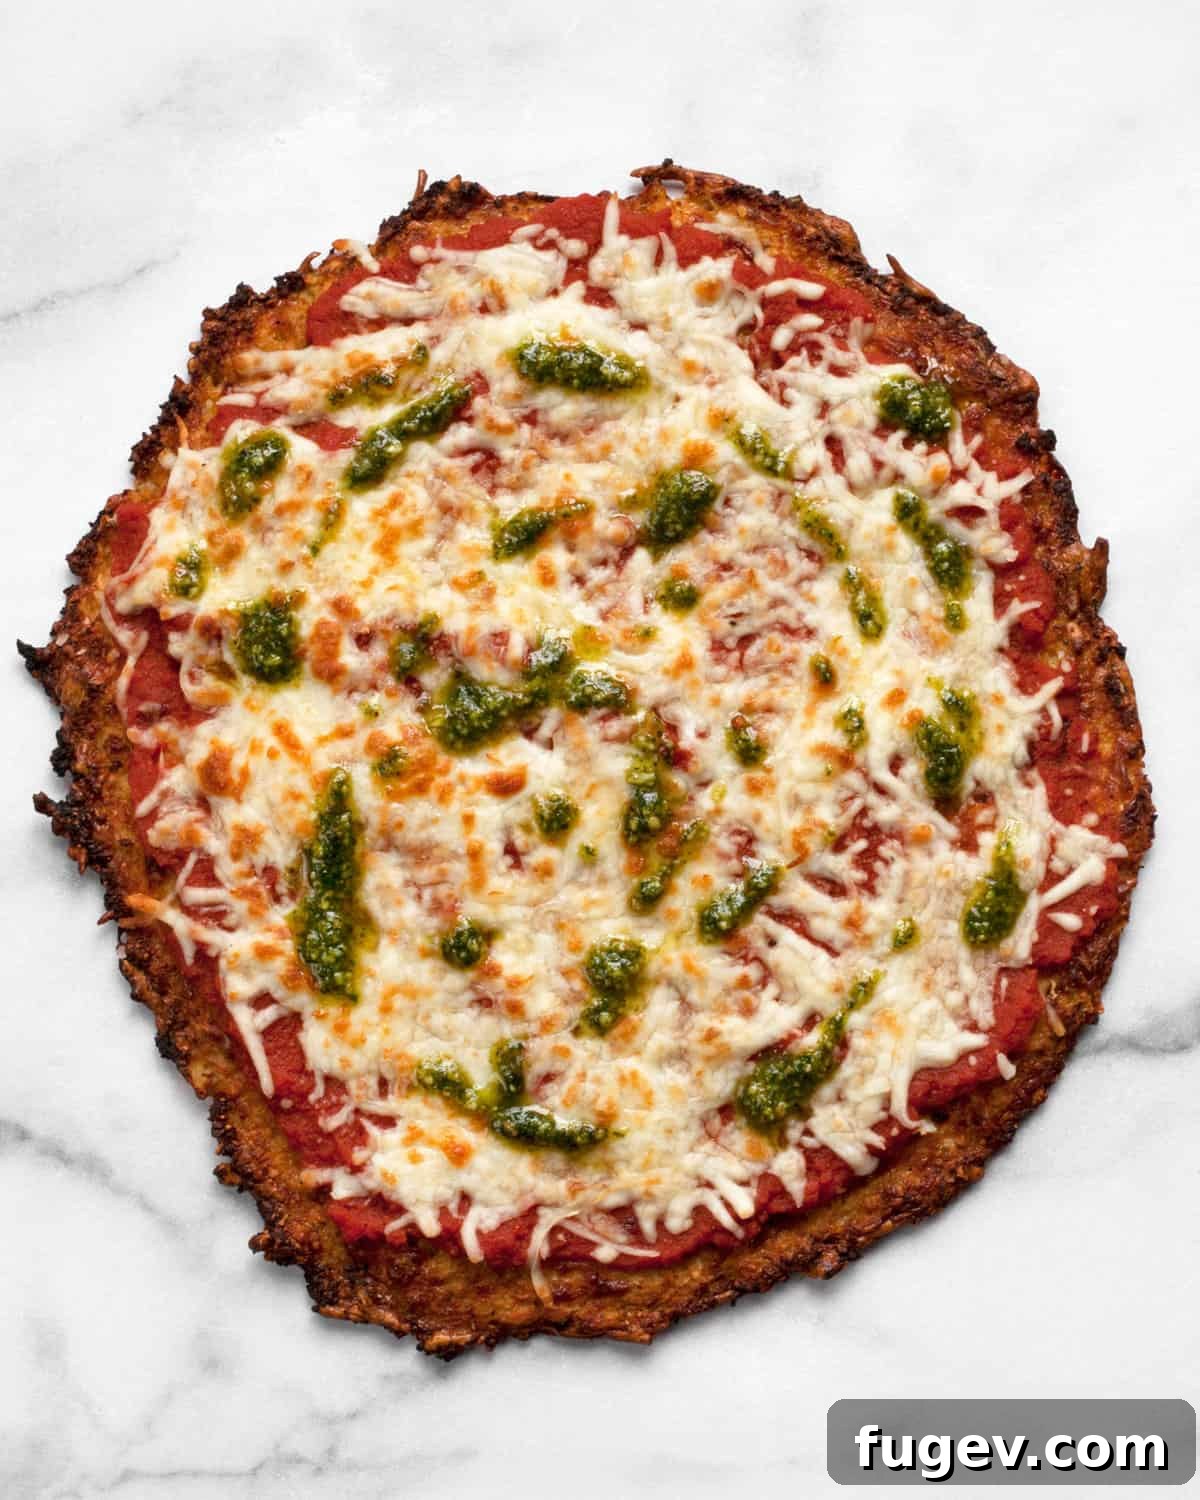
Table of Contents
- Why You’ll Love This Healthy Pizza Crust
- Essential Ingredients for Your Cauliflower Pizza
- Creative & Light Pizza Toppings
- Mastering the Art of Ricing Cauliflower
- Step-by-Step Guide: How to Make Cauliflower Pizza Crust
- Alternate Method for Preparing Cauliflower Rice
- Perfect Pairings: What to Serve with Cauliflower Pizza
- Storing Your Delicious Leftovers
- Make Ahead & Freezing Tips for Convenience
- Expert Tips for the Best Cauliflower Pizza Crust
- More Amazing Cauliflower Recipes to Explore
- Printable Cauliflower Pizza Crust Recipe Card
Why You’ll Love This Healthy Pizza Crust
Choosing a cauliflower pizza crust isn’t just a trend; it’s a smart, delicious, and adaptable way to enjoy one of your favorite meals. Here’s why this recipe deserves a prime spot in your culinary repertoire:
- A Fantastic Grain-Free & Low-Carb Alternative: Whether you’re actively managing carbohydrate intake, avoiding gluten, or simply seeking a lighter meal option, this recipe delivers. It offers all the satisfaction of pizza without the heavy grains, making it an excellent choice for a variety of dietary preferences. It’s a game-changer for anyone looking to reduce their carb consumption without sacrificing flavor.
- Packed with Nutrition: Cauliflower, the star ingredient, is a nutritional powerhouse. This crust provides an easy and delicious way to increase your vegetable intake. It’s rich in essential vitamins like Vitamin C and K, packed with fiber for digestive health, and loaded with antioxidants that support overall well-being. Eating more veggies has never tasted so good!
- Convenient & Freezer-Friendly: Life gets busy, but that shouldn’t stop you from enjoying homemade goodness. This cauliflower pizza crust can be prepared and baked in advance, making weeknight meals a breeze. You can bake the crust one day and then simply add your toppings and finish baking the next. Even better, it’s remarkably freezer-friendly, allowing you to stash a few crusts away for future pizza emergencies, with or without toppings. This flexibility makes healthy eating incredibly convenient.
- Deliciously Unique Texture and Flavor: While it won’t mimic traditional dough exactly, this cauliflower crust boasts its own delightful character. It offers a slightly tender interior with wonderfully crispy, golden-brown edges that caramelize during baking, providing an incredible depth of flavor that complements a wide array of toppings.
Essential Ingredients for Your Cauliflower Pizza
Creating this flavorful cauliflower pizza crust requires a careful selection of ingredients that bind together to form a sturdy yet tender base. Here’s a closer look at what you’ll need and why each component is crucial:
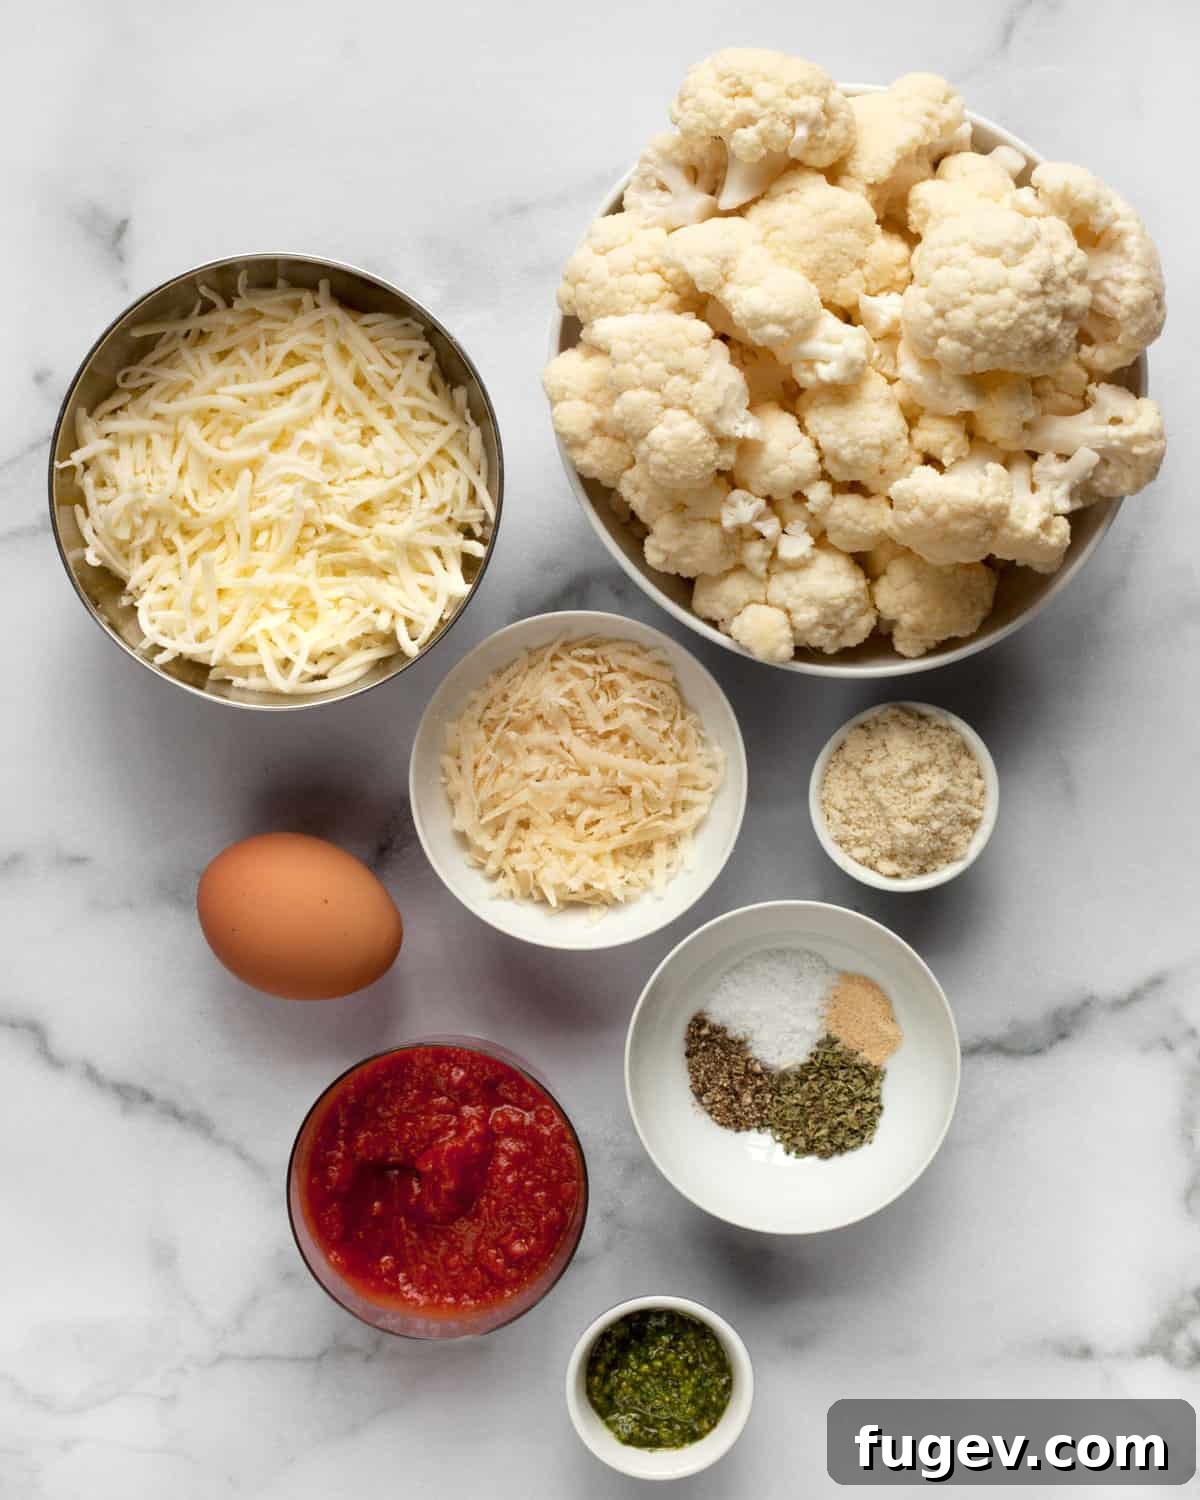
- Cauliflower: The foundation of our crust! When selecting cauliflower, opt for a firm, white head free from any brown spots or soft areas, which indicate spoilage. You’ll break it down into small to medium florets for easier processing. While a food processor makes ricing quick and effortless, you can also purchase fresh riced cauliflower for a convenient shortcut. It’s crucial to use fresh cauliflower, not frozen, as frozen cauliflower retains too much moisture, which can lead to a soggy crust.
- Egg: This acts as the essential binding agent, holding the riced cauliflower and other crust ingredients together. Without it, your crust would crumble. A large egg provides the perfect amount of liquid and protein to ensure cohesion.
- Almond Flour: Adding structure and a subtle nutty flavor, almond flour is an excellent gluten-free alternative to traditional wheat flour. It helps create a crust that holds its shape and contributes to a pleasant texture, balancing the moisture from the cauliflower. Ensure you use blanched, finely ground almond flour for the best results.
- Cheese (Parmesan & Mozzarella): We use a powerful duo of cheeses in the crust itself. Grated Parmesan cheese brings a sharp, salty depth of flavor, while shredded mozzarella cheese melts beautifully, contributing to the crust’s binding and creating a chewy, golden-brown edge when baked. The cheese is critical for both flavor and structural integrity.
- Dried Spices (Oregano, Garlic Powder, Salt, Pepper): Cauliflower on its own has a mild flavor, which is why proper seasoning is vital. Oregano adds classic Italian herbal notes, garlic powder provides an aromatic kick, and salt and black pepper enhance all the flavors, transforming the crust into a savory base that perfectly complements your toppings.
Creative & Light Pizza Toppings
Once your perfect cauliflower crust is ready, the fun begins with toppings! The key is not to overload the crust, as it’s lighter than traditional dough. Aim for a balanced selection that adds flavor without weighing it down. Here are some fantastic suggestions:
- Shredded Mozzarella Cheese: You can never go wrong with a generous layer of shredded mozzarella. It melts into a gooey, irresistible blanket, forming the classic pizza experience. For best results, use a low-moisture mozzarella.
- Smooth Tomato Sauce: For this type of crust, a smooth pizza sauce works best. It prevents the crust from becoming overly moist and allows the other flavors to shine through. Opt for a high-quality marinara or pizza sauce for the most authentic taste.
- Pesto: A drizzle of vibrant, herbaceous, and garlicky pesto after the pizza comes out of the oven is a finishing touch that elevates the flavor immensely. The fresh, bright notes cut through the richness of the cheese. You can also scatter fresh basil leaves for an extra burst of freshness.
Beyond the classics, consider these delightful additions:
- Sautéed Mushrooms: Earthy and savory, lightly sautéed mushrooms add a wonderful umami depth. Ensure they are cooked until most of their moisture has evaporated to prevent a soggy pizza.
- Pitted Olives: Briny Kalamata olives or milder black olives provide a salty, tangy counterpoint. Slice them thinly or chop them for even distribution.
- Thinly Sliced Red Onions: A small amount of thinly sliced red onion adds a sharp, fresh crunch and a beautiful pop of color.
- Roasted Red Peppers: Sweet and smoky roasted red peppers, either from a jar (pat them dry) or freshly roasted, offer a burst of Mediterranean flavor.
- Roasted Tomatoes: Halved cherry tomatoes or thinly sliced Roma tomatoes, roasted until slightly caramelized, intensify their sweetness and add a juicy burst to each bite.
- Lean Protein: Cooked and crumbled lean ground turkey or chicken sausage, or even thinly sliced prosciutto, can add a satisfying protein element without being too heavy.
- Fresh Arugula: A scattering of fresh arugula after baking adds a peppery, fresh bite and a beautiful green garnish.
Mastering the Art of Ricing Cauliflower
The success of your cauliflower pizza crust hinges on properly riced cauliflower. “Ricing” means transforming the florets into small, grain-like pieces that mimic rice, providing the right texture for the crust. Here’s how to achieve it:
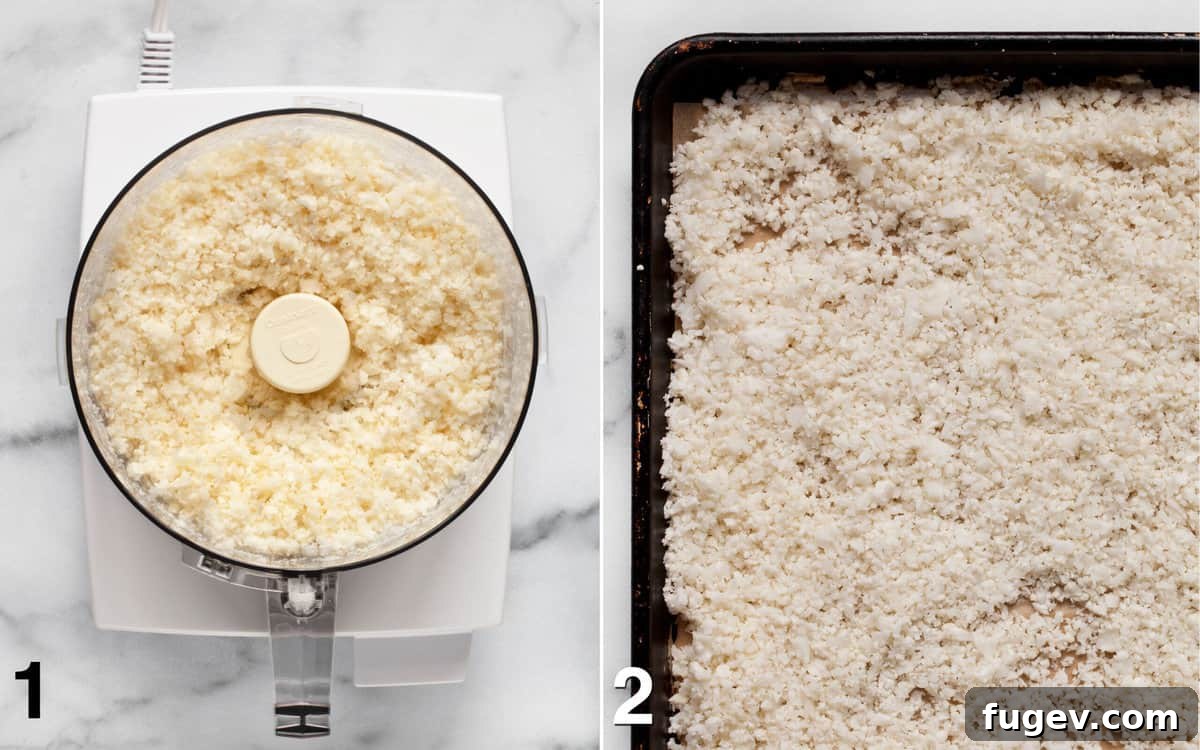
The most efficient method is using a food processor. Start by breaking your cauliflower head into small to medium florets. Place them in the food processor, being careful not to overcrowd the bowl; you may need to work in batches depending on your processor’s capacity. Use the pulse button rather than continuous blending to control the chop. This prevents over-processing, which can quickly turn your cauliflower into mush. You want a texture similar to couscous or fine rice, with no large chunks remaining. Keep a close eye on it, as it processes very quickly!
If you don’t have a food processor, a standard box grater can also do the trick. Use the medium-sized holes to grate the cauliflower florets. This method takes a bit more time and effort, and the resulting “rice” might be slightly coarser, but it’s a perfectly viable alternative. Be mindful of your knuckles!
For the ultimate shortcut, many grocery stores now offer pre-riced cauliflower in the refrigerated produce section. This is a fantastic option if you’re short on time or lack the necessary equipment. However, a crucial tip: always choose *fresh* riced cauliflower and avoid frozen varieties. Frozen cauliflower contains significantly more moisture, which will make it much harder to achieve a firm, non-soggy crust, even after squeezing.
Step-by-Step Guide: How to Make Cauliflower Pizza Crust
Follow these detailed steps to create a perfect, golden-brown cauliflower pizza crust that’s ready for your favorite toppings. Precision in each step, especially moisture removal, is key for the best results.
Begin by preheating your oven to 425 degrees F (220 degrees C). Line two large baking sheets with parchment paper. This prevents sticking and makes cleanup a breeze.
- Prepare the Cauliflower: Start by removing the leaves from the head of cauliflower and cutting it into small to medium florets.
- Rice the Cauliflower: Finely chop the cauliflower florets in a food processor until the texture resembles rice or couscous. Ensure there are no large chunks. If your food processor is small, work in batches to avoid overloading it and achieve an even chop.
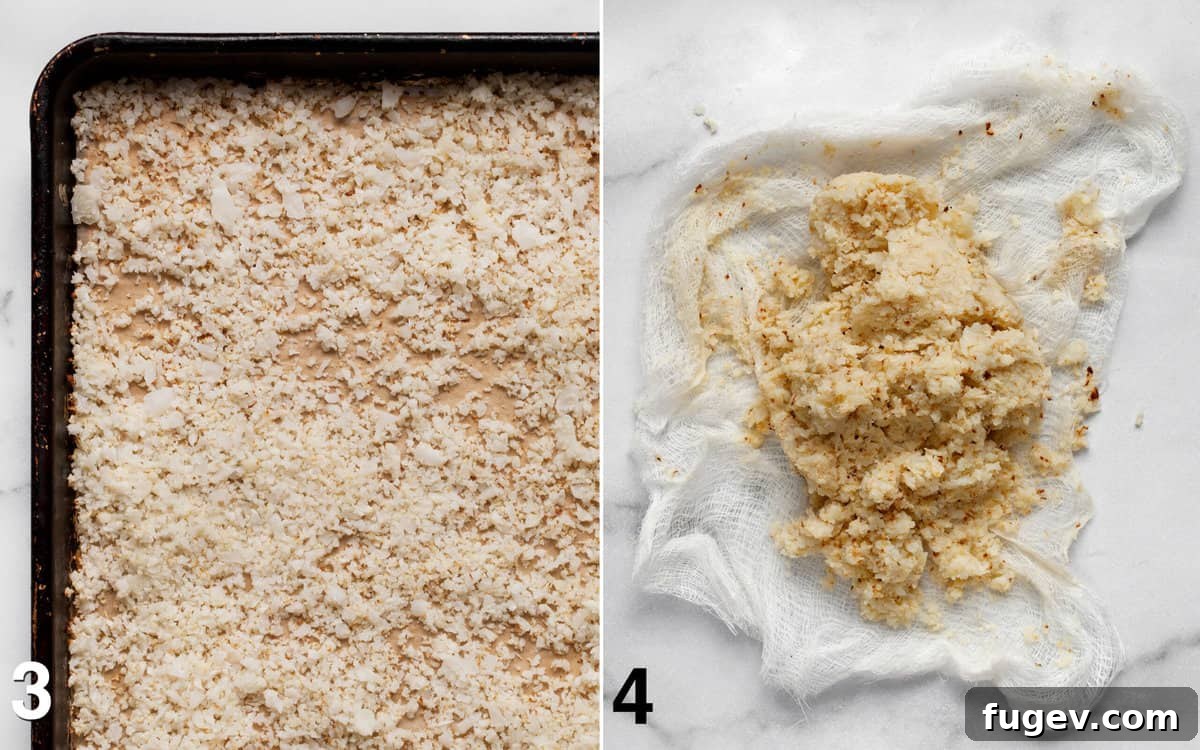
- Spread and Bake the Cauliflower: Spread the riced cauliflower evenly across one of the parchment-lined baking sheets. Bake it for 15 minutes, stirring the cauliflower halfway through to ensure even cooking. The goal is for the cauliflower grains to become tender but not mushy. Some light browning at the edges is perfectly fine and adds to the flavor. Once baked, allow the cauliflower to cool slightly so it’s comfortable to handle.
- Crucial Step: Squeeze Out Moisture: This is arguably the most important step for a non-soggy crust! Transfer the slightly cooled, baked cauliflower rice into a clean cheesecloth or a thin, clean kitchen towel. Gather the ends of the cloth to form a tight pouch and squeeze out as much liquid as humanly possible. You’ll be surprised by how much water comes out. The dryer your cauliflower, the crispier your crust will be.
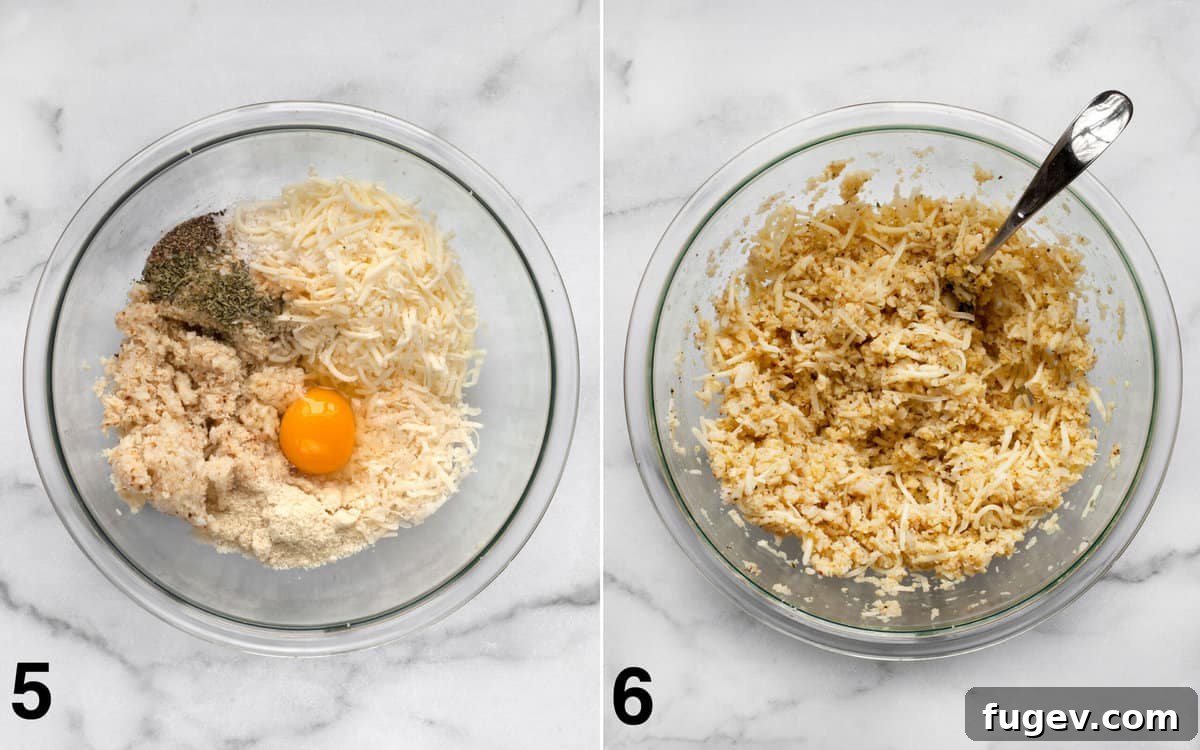
- Combine Crust Ingredients: In a large mixing bowl, combine the thoroughly squeezed cauliflower, the large egg, almond flour, grated Parmesan cheese, shredded mozzarella cheese, garlic powder, oregano, kosher salt, and black pepper.
- Form the Dough: Stir all the ingredients together vigorously until a damp, shaggy dough forms. It should be cohesive enough that you can press it into a loose ball, but don’t expect it to behave like traditional elastic pizza dough.
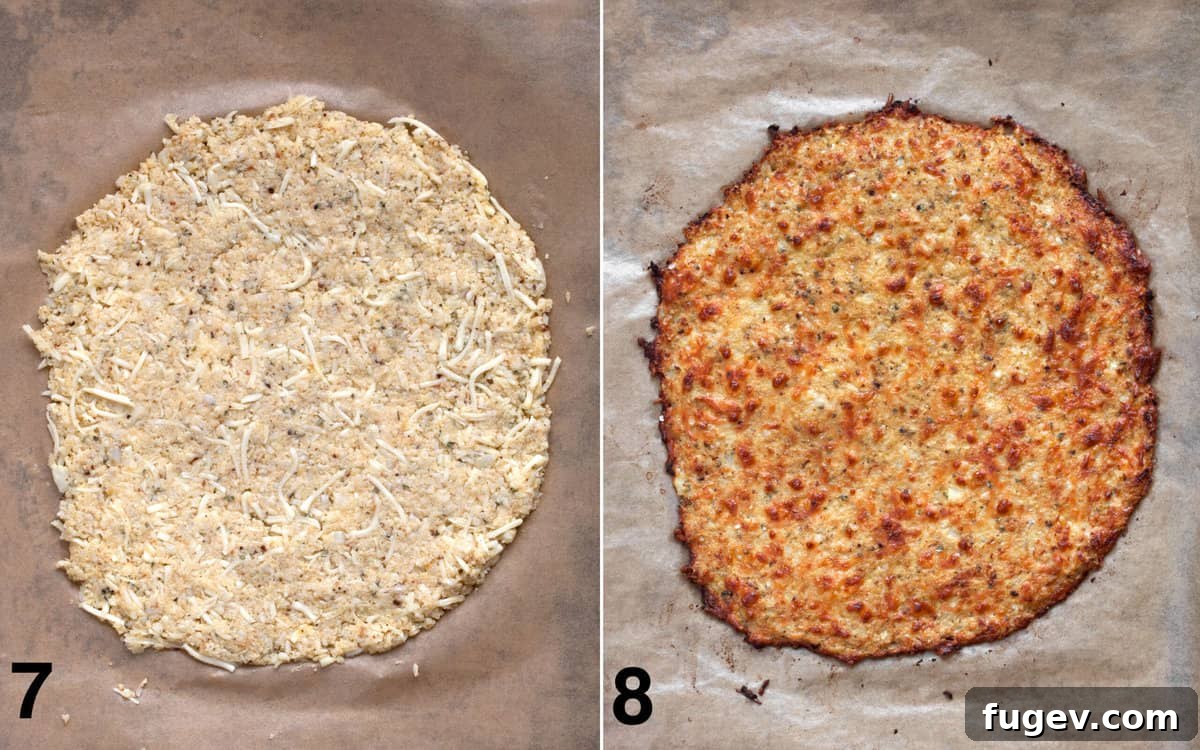
- Shape the Crust: Transfer the cauliflower dough to the second parchment-lined baking sheet. Using your hands, firmly press the mixture into a uniform 10-12-inch diameter circle, aiming for an even thickness of about 1/8-inch. Pay attention to the edges to create a slightly raised rim, similar to a traditional pizza crust.
- Bake the Crust: Bake the shaped crust for 20-25 minutes, or until it turns a beautiful golden brown and appears firm. This par-baking step is crucial for achieving a sturdy base.
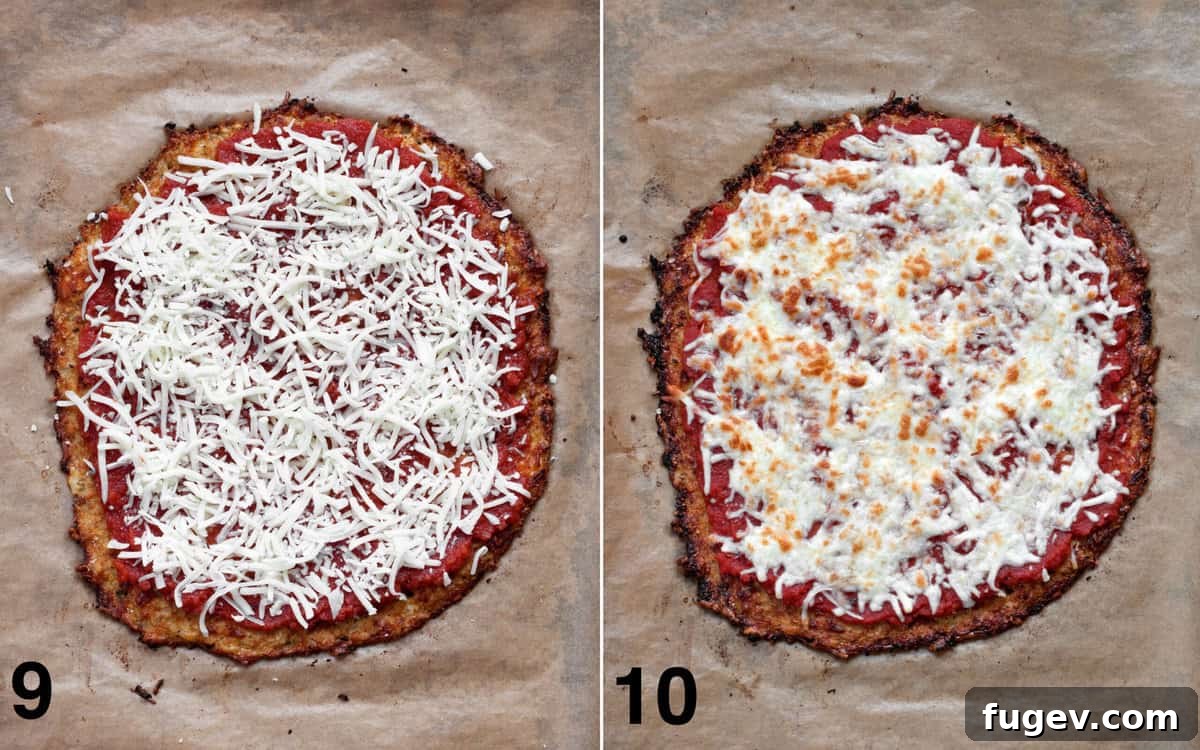
- Assemble Your Pizza: Once the crust is par-baked, carefully spread your chosen tomato sauce over the surface, leaving a 1-inch border for the crust. Generously sprinkle with shredded mozzarella cheese and arrange your desired toppings.
- Finish Under the Broiler: Turn your oven’s broiler to high. Place the assembled pizza under the broiler for 2-3 minutes, watching it very carefully. The goal is to melt the cheese and get it slightly bubbly and golden. The cheese can brown quickly, so do not walk away!
- Serve with Pesto: Remove the pizza from the oven, drizzle with fresh pesto (if using), slice, and serve warm. Enjoy your homemade, healthy, and delicious cauliflower pizza!
Alternate Method for Preparing Cauliflower Rice
While roasting the cauliflower rice in the oven is my preferred method for effectively drying it out and developing a slight nutty flavor, there’s also a quicker alternative if you’re pressed for time or prefer not to use your oven for this initial step. You can cook the riced cauliflower in the microwave.
To do this, place the finely riced cauliflower in a microwave-safe bowl. Cover the bowl with a microwave-safe lid or plastic wrap, leaving a small vent. Microwave on high for approximately 5 minutes. After cooking, let the cauliflower sit, covered, for 1 minute before carefully uncovering the bowl. This steaming helps to tenderize it. Regardless of the cooking method, remember that the most crucial step, squeezing out as much moisture as possible, remains paramount for a firm crust.
Perfect Pairings: What to Serve with Cauliflower Pizza
Cauliflower pizza makes for a satisfying lunch or dinner on its own, but it also pairs wonderfully with a variety of side dishes to complete your meal. Here are some ideas to complement the light and fresh flavors of your pizza:
- Fresh Salads: A crisp, refreshing salad is the perfect counterpoint to pizza. Consider a vibrant Italian chopped salad for classic flavors, a simple classic house salad with a light vinaigrette, or an arugula salad with lemon vinaigrette for a peppery kick. These add fresh greens and complementary textures.
- Hearty Soups: For a more substantial meal, a side of soup can be incredibly comforting. A rich roasted tomato soup offers a familiar pairing, while a comforting bowl of Pasta e Fagioli Soup adds a rustic Italian touch. Opt for lighter broths if you want to keep the meal on the healthier side.
- Roasted Vegetables: If you’re looking to further boost your vegetable intake, a simple side of roasted asparagus, broccoli, or bell peppers would be fantastic. Tossed with a little olive oil, salt, and pepper, they provide natural sweetness and a tender-crisp texture.
Storing Your Delicious Leftovers
Properly storing your cauliflower pizza leftovers ensures you can enjoy them for days to come. Always allow the pizza to cool completely to room temperature before storing it. Storing warm pizza can create condensation, leading to a soggy crust.
Once cooled, place any leftover slices in an airtight container. They will keep fresh in the refrigerator for up to 3 days. When you’re ready to enjoy them, you have a few options for reheating:
- Oven Reheating: For the best texture, reheat slices in an oven preheated to 375 degrees F (190 degrees C) for 8-10 minutes, or until the cheese is bubbly and the crust is warmed through. This method helps restore some of the original crispiness.
- Skillet Reheating: For a crispy bottom, place a slice in a non-stick skillet over medium heat, cover, and cook for a few minutes until the bottom is crispy and the cheese is melted.
- Microwave: While convenient, microwaving will result in a softer crust. If using this method, heat in short intervals until warm.
Be aware that reheated cauliflower pizza crust will generally be softer than when it was first baked, but it will still be incredibly flavorful!
Make Ahead & Freezing Tips for Convenience
One of the fantastic benefits of this cauliflower pizza crust is its versatility for meal prep and future enjoyment. Whether you want to get a head start on dinner or stock your freezer, these tips will help:
Preparing the Crust in Advance (Refrigeration):
You can bake the crust completely (up to step 8 in the instructions) and then let it cool to room temperature before refrigerating it. Wrap it tightly in plastic wrap or foil, or store it in an airtight container. It will keep well in the fridge for up to 2-3 days. When you’re ready to make pizza, place the pre-baked crust on a parchment-lined baking pan and warm it in a 375-degree F (190 degrees C) oven for 8-10 minutes. This helps to re-crisp it slightly before you add your toppings and broil to melt the cheese.
Freezing the Baked Crust:
For longer storage, you can freeze the par-baked or fully baked crust. Once completely cooled, wrap the crust tightly in foil, then place it in a freezer-safe bag or container. It can be stored in the freezer for up to 1-2 months. When you’re ready to bake, place the frozen crust directly on a baking sheet (no need to thaw) and bake in a 425-degree F (220 degrees C) oven for 20-25 minutes, or until heated through and crisp. Then, add your toppings and broil for 1-2 minutes to melt the cheese and brown it slightly.
Freezing the Baked Crust with Uncooked Toppings:
For ultimate convenience, you can assemble the pizza with your desired uncooked toppings (up to step 9, *before* broiling) and then freeze it. Ensure the pizza is fully cooled if you’ve par-baked the crust. Wrap the entire pizza tightly in several layers of foil and freeze for up to 1 month. When baking, place the frozen, assembled pizza directly into a preheated 425-degree F (220 degrees C) oven for 25-30 minutes. This extended baking time allows both the crust to warm and crisp, and the toppings to cook through and the cheese to melt. You can finish it with a quick minute under the broiler for extra browning on the cheese, watching carefully.
Remember, while freezing is a great option, the crust will always have its best, crispiest texture when freshly baked. Reheated or frozen crusts may be slightly softer, but still incredibly delicious.
Expert Tips for the Best Cauliflower Pizza Crust
Achieving a perfect cauliflower pizza crust involves a few key considerations. Keep these expert tips in mind to ensure your homemade creation is a resounding success every time:
- Set Realistic Expectations: It’s important to understand that a cauliflower pizza crust will not replicate the exact texture, consistency, or chewiness of traditional pizza crust made with wheat flour and yeast. It has its own unique and delicious character. Expect a slightly softer interior and a more delicate structure, but with a surprisingly rich and savory flavor profile that stands on its own. Embrace its individuality!
- Don’t Skip Roasting and Squeezing the Moisture: These two steps are non-negotiable for a successful crust. Roasting the riced cauliflower helps to dry it out further and begins the cooking process, intensifying its flavor. The subsequent step of squeezing out as much moisture as possible is critical. If you leave too much water in, your crust will be dense, soggy, and prone to falling apart. Use a strong cheesecloth or a sturdy, clean kitchen towel and apply firm pressure to extract every last drop.
- Always Use Fresh Cauliflower: Opt for fresh cauliflower over frozen varieties. Frozen cauliflower typically contains a higher moisture content, even after being riced and squeezed, which makes it incredibly challenging to achieve a firm crust with those desirable chewy, golden-brown edges. Fresh cauliflower offers the best starting point for a sturdy and delicious base.
- Keep Your Toppings Light and Balanced: Because this crust has a different structure than traditional pizza dough, it’s best not to overwhelm it with too many heavy or watery toppings. Overloading can make the crust soggy or cause it to break. Focus on quality over quantity, selecting a few complementary toppings. Even if you plan to eat your pizza with a fork and knife, a lighter hand with toppings will yield a much better overall experience.
- Bake on Parchment Paper: Always use parchment paper for both baking the riced cauliflower and the crust itself. This prevents sticking, especially with a delicate crust like cauliflower, and ensures easy transfer and cleanup.
- Achieve a Golden-Brown Crust: Don’t be afraid to let your crust bake until it’s truly golden brown. This indicates that much of the remaining moisture has evaporated, contributing to a crispier texture and deeper flavor. A pale crust will likely be soft and less satisfying.
More Amazing Cauliflower Recipes to Explore
If you’ve fallen in love with cauliflower through this pizza crust, you’ll be delighted to discover its incredible versatility in other dishes. Explore these additional cauliflower recipes:
- Roasted Cauliflower Kale Salad: A vibrant, healthy salad bursting with flavor and texture.
- Tahini Roasted Broccoli and Cauliflower: A simple yet elegant side dish with rich, nutty tahini.
- Cauliflower White Bean Soup: A creamy, comforting soup that’s surprisingly light.
- Roasted Cauliflower and Chickpeas with Herby Tahini: A fantastic plant-based meal or side dish.
- Harissa Roasted Cauliflower Couscous: A spicy and aromatic dish perfect for a flavorful weeknight.
- Roasted Curried Cauliflower: Infused with warm spices for an exotic twist.
- Cauliflower Spinach Pesto Pasta: A creative way to incorporate more vegetables into your pasta.
- Purple Cauliflower with Cilantro Peanut Pesto: A stunning dish that’s as beautiful as it is delicious.
- Roasted Cauliflower Rice with Sun Dried Tomatoes & Olives: A Mediterranean-inspired low-carb rice alternative.
We hope you enjoy this healthy and flavorful cauliflower pizza crust recipe! If you make it, we’d love to hear your thoughts.
Cauliflower Pizza Crust Recipe
By: Paige Adams
Prep Time: 15 mins
Cook Time: 25 mins
Total Time: 40 mins
Yields: 4 servings
This low-carb and gluten-free cauliflower pizza crust offers a healthier way to enjoy homemade pizza. It’s incredibly satisfying with all your favorite toppings!
Ingredients
For the Crust:
- 1 head cauliflower (about 1 pound), fresh, not frozen
- 1 large egg
- 2 tablespoons almond flour
- 1/4 cup grated Parmesan cheese
- 1 cup shredded mozzarella cheese
- 1/2 teaspoon dried oregano
- 1/4 teaspoon garlic powder
- 1/2 teaspoon kosher salt
- 1/2 teaspoon black pepper
For the Pizza:
- 1/2 cup smooth tomato sauce
- 1 cup shredded mozzarella cheese
- 2 tablespoons fresh pesto (for drizzling, optional)
- Additional toppings of choice (see suggestions above)
Instructions
- Preheat oven to 425°F (220°C). Line two large baking sheets with parchment paper.
- Trim leaves from cauliflower and cut into small to medium florets.
- Finely chop cauliflower in a food processor until it resembles rice. Work in batches if necessary.
- Spread riced cauliflower on one lined baking sheet. Bake for 15 minutes, stirring halfway through. It should be tender but not mushy, with some browned edges. Let cool slightly.
- Once cool enough to handle, transfer cauliflower to a cheesecloth or clean kitchen towel. Squeeze out as much moisture as possible – this is crucial!
- In a large bowl, combine the squeezed cauliflower, egg, almond flour, Parmesan, mozzarella, oregano, garlic powder, salt, and pepper. Mix until fully combined and a rough dough forms.
- On the second lined baking sheet, press the mixture into a 10-12-inch diameter circle, about 1/8-inch thick, forming a slight rim.
- Bake the crust for 20-25 minutes, until golden brown and firm.
- To assemble, spread tomato sauce over the baked crust, leaving a 1-inch border. Sprinkle with mozzarella and your chosen toppings.
- Switch oven to broiler on high. Broil pizza for 2-3 minutes, watching constantly, until cheese is melted and bubbly. Be careful not to burn it.
- Drizzle with pesto if desired, slice, and serve warm.
Notes
- No food processor? Use a box grater for ricing, or buy fresh (not frozen) riced cauliflower.
- For an alternative to oven roasting, microwave riced cauliflower: place in a covered microwave-safe dish, microwave on high for 5 minutes, then let stand 1 minute. Still, squeeze out moisture thoroughly.
- Store leftover pizza in an airtight container in the fridge for up to 3 days. Reheat in a 375°F (190°C) oven for 8-10 minutes for best texture. Always cool completely before storing.
- Baked crust can be refrigerated for 2-3 days or frozen for 1-2 months. Reheat before topping.
- To freeze an assembled pizza (with uncooked toppings), wrap tightly in foil. Bake frozen at 425°F (220°C) for 25-30 minutes, then broil for a minute for browning.
Nutrition (per serving)
Calories: 318 kcal |
Carbohydrates: 12g |
Protein: 20g |
Fat: 22g |
Saturated Fat: 10g |
Polyunsaturated Fat: 1g |
Monounsaturated Fat: 5g |
Trans Fat: 0.01g |
Cholesterol: 91mg |
Sodium: 1016mg |
Potassium: 508mg |
Fiber: 4g |
Sugar: 4g |
Vitamin A: 781IU |
Vitamin C: 57mg |
Calcium: 406mg |
Iron: 2mg
Nutrition information is automatically calculated and should only be used as an approximation.
Additional Info
Course: Pizza
Cuisine: Italian
Did you make this recipe?
Mention @lastingredient on Instagram and tag it #lastingredient!