
The Best Homemade Potato Bread Recipe: Soft, Fluffy & Foolproof
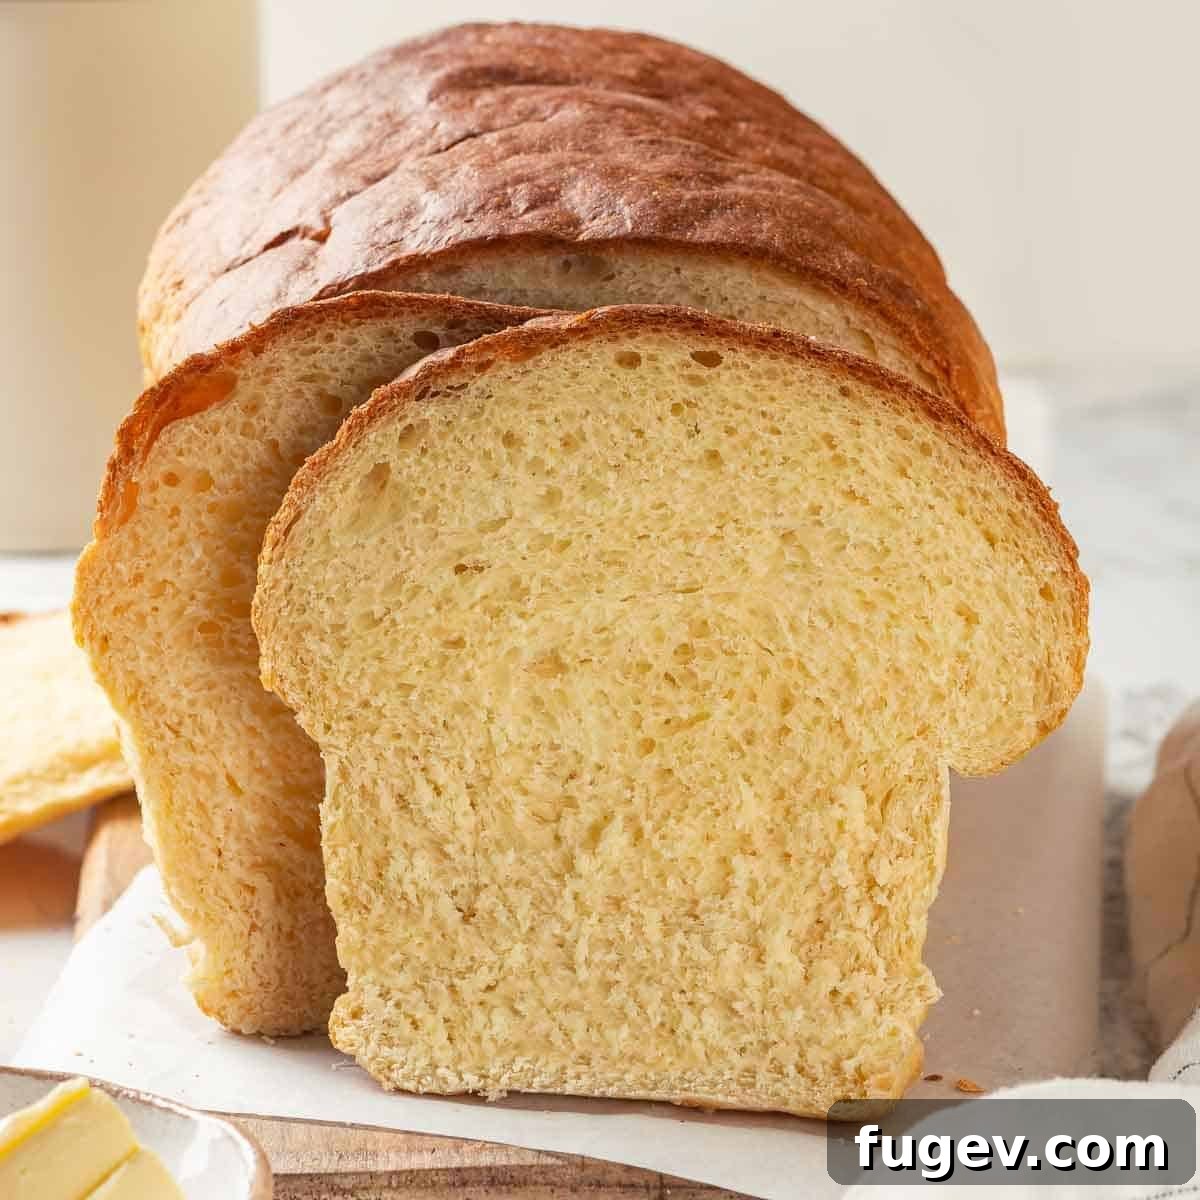
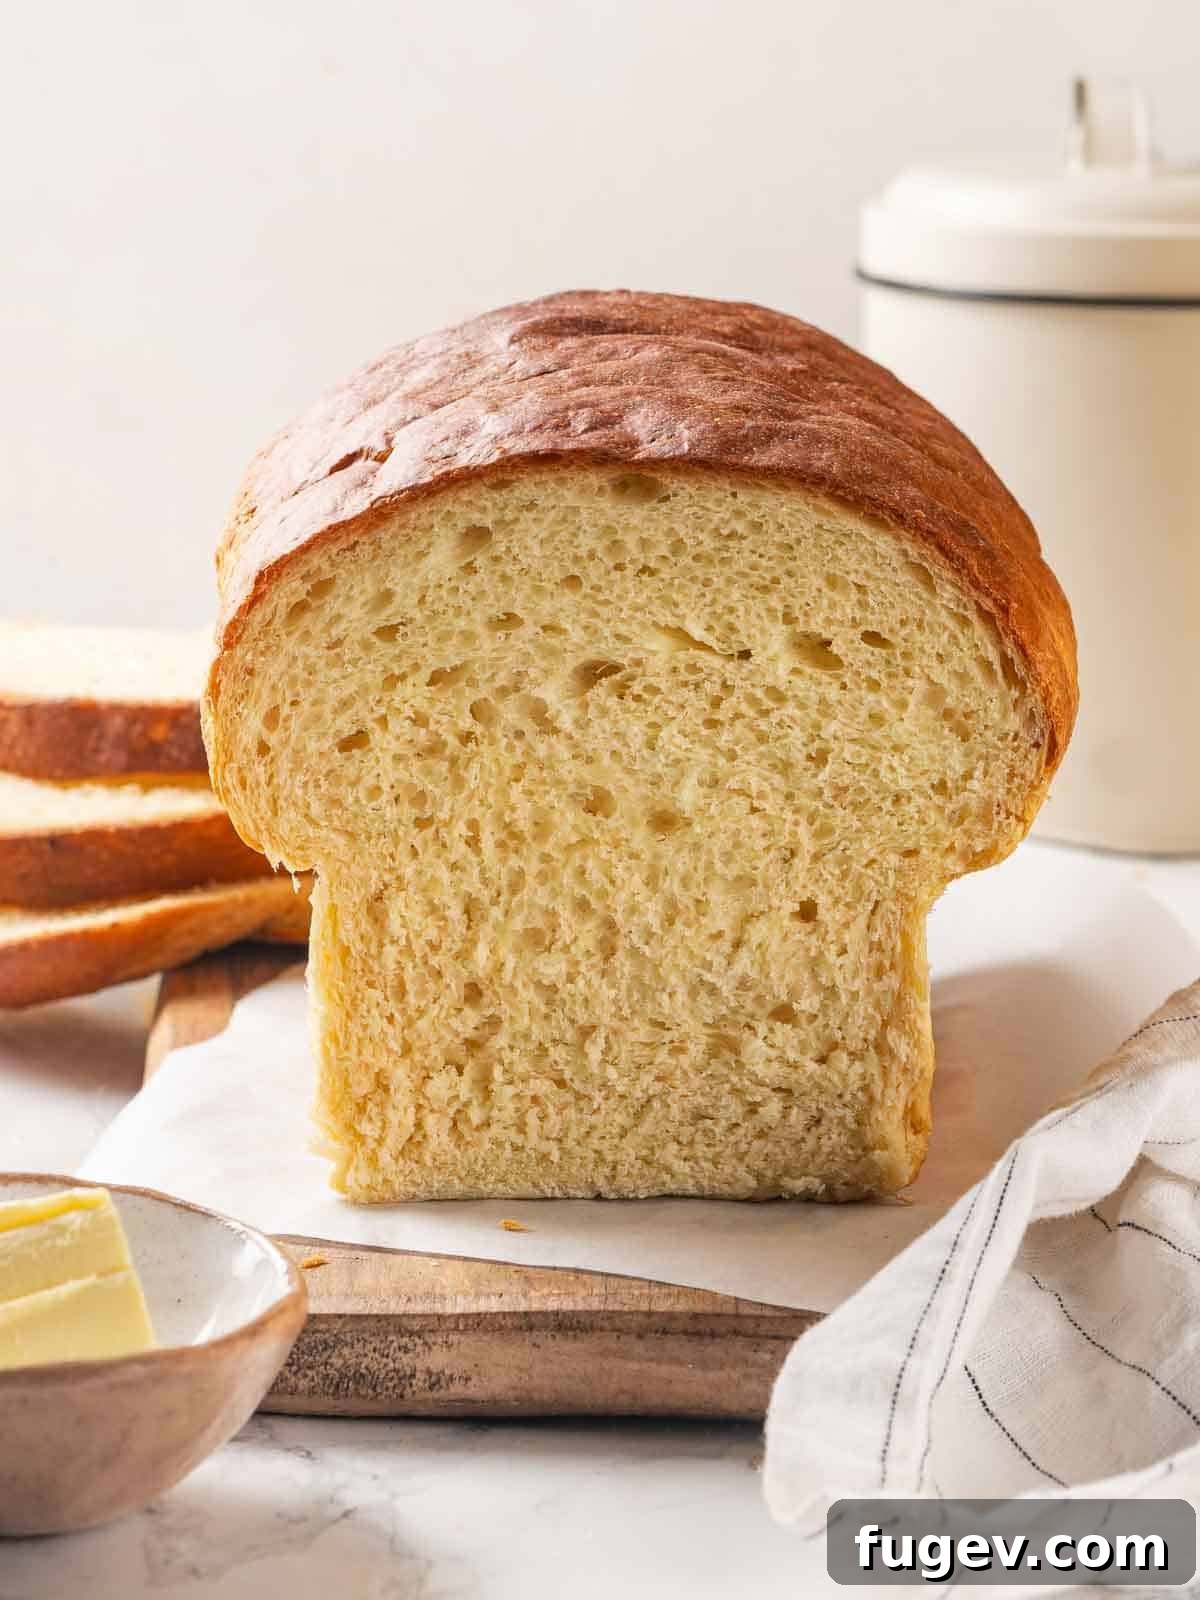
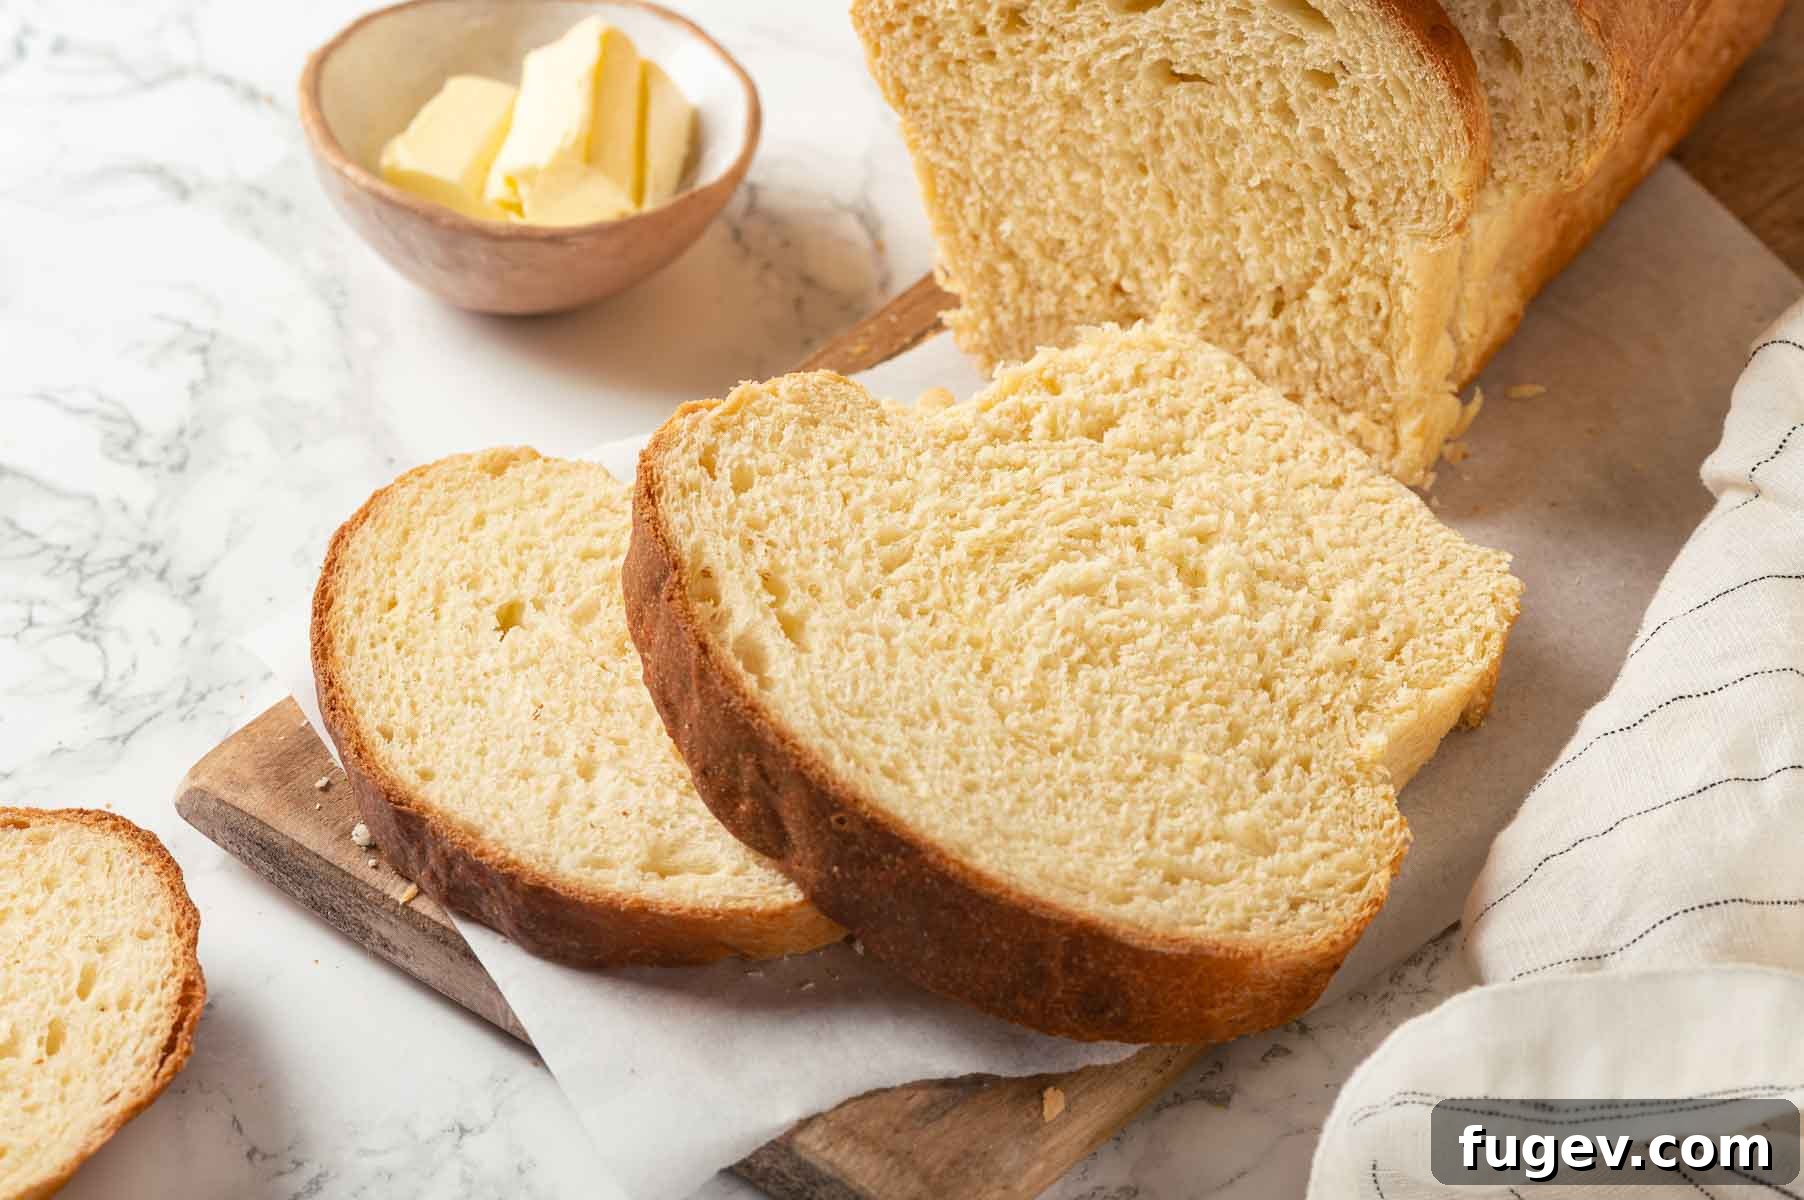
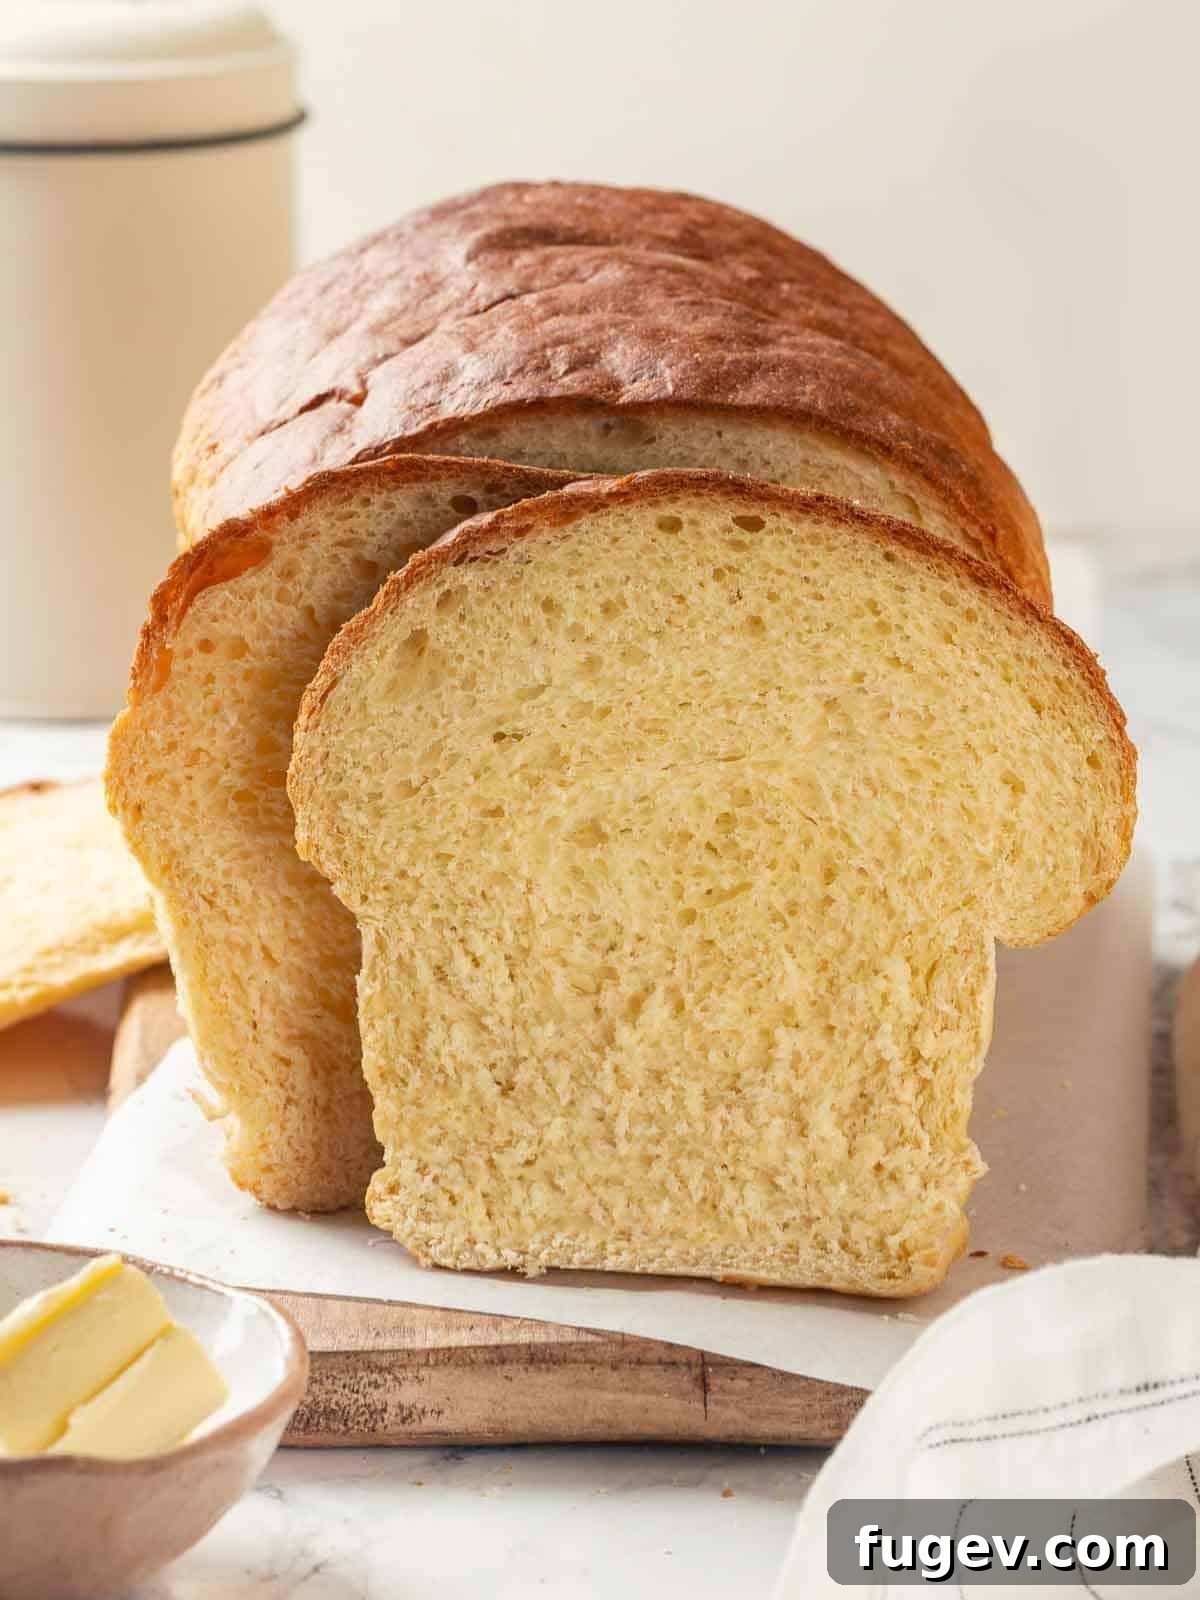
Prepare to fall in love with this absolutely foolproof homemade potato bread! Each slice boasts an irresistibly soft, delightfully fluffy texture, encased in a perfectly golden, crispy crust. Enriched with real mashed potatoes, creamy butter, and wholesome eggs, this recipe transforms into a rich, flavorful, and truly delicious sandwich bread that will quickly become a family favorite. Say goodbye to store-bought loaves and embrace the comforting aroma and taste of freshly baked potato bread!
A Quick Look At The Recipe
This is a brief summary of the recipe. Jump to the full recipe details for complete instructions and measurements.
Jump to Recipe
Prep Time
30 minutes
Cook Time
30 minutes
Proof
1 hour 30 minutes
Total Time
3 hours
Servings
12 people
Difficulty
Moderate (easy steps!)
Calories *
251 kcal per serving
Technique
Mix mashed potatoes with eggs and yeast, add flour, proof, shape, and bake.
Flavor Profile
Soft, rich, and slightly sweet with a tender crumb and buttery crust.
* Based on nutrition panel
Summarize & Save this content for later
Pin to Pinterest
Featured Comment
⭐⭐⭐⭐⭐”Adding potatoes to bread, at first, I wasn’t sure if I would like it, but my husband told me to try it, and I must say, this bread is unreal! I have used it for egg in bread, French toast, and for sandwiches. I have completely converted to potato bread.” –Mara
Why You’ll Adore This Potato Bread Recipe
This isn’t just another bread recipe; it’s an experience that delivers unmatched flavor and texture. Here’s why this homemade potato bread will quickly become a cherished favorite in your kitchen:
- The Ultimate Beginner-Friendly Dough: This potato bread recipe is a testament to simplicity and success. Rooted in the acclaimed potato rolls I perfected in professional kitchens, this dough has been taught to countless aspiring bakers. It was foolproof then, and it remains absolutely foolproof now, making it perfect for anyone venturing into homemade bread. Its forgiving nature allows for easy handling and beautiful results every time.
- Achieve Light, Airy Pockets with a Perfect Crust: The magic lies in the humble potato! The natural starches released from the mashed potatoes are key to creating that wonderfully light, airy texture and delicate crumb that melts in your mouth. Additionally, a touch of granulated sugar not only enhances the flavor with a subtle sweetness but also acts as a vital food source for the yeast, ensuring maximum activity and a spectacular rise. This harmonious interaction results in a crust that’s beautifully golden and crisp, much like the rich molasses in my old-fashioned raisin bread.
- A Classic Sandwich Bread, Elevated: This enriched potato bread offers a delightful twist on your everyday sandwich loaf. While it provides the familiar comfort of classic white bread, the inclusion of potatoes introduces a host of benefits. Just like my whole wheat sandwich bread, incorporating potatoes adds beneficial fiber and valuable vitamins and minerals, boosting the nutritional profile of your daily slice. It’s the perfect blend of indulgence and wholesome goodness.
- Incredible Versatility for Any Meal: From morning toast to hearty sandwiches, this potato bread excels in every role. Its robust structure and delicate flavor make it an ideal foundation for savory fillings, while its slight sweetness complements jams and spreads beautifully. You’ll find yourself reaching for it again and again!
Table of Contents
- Why You’ll Adore This Potato Bread Recipe
- Essential Ingredients & Smart Substitutions
- Delicious Variations to Try
- Professional Tips for Perfect Potato Bread
- How to Make Homemade Potato Bread: Step-by-Step Guide
- Chef Lindsey’s Expert Baking Tip
- Common Potato Bread Questions Answered
- More Recommended Yeasted Bread Recipes
- Detailed Potato Bread Recipe Card
- Before You Go: Explore More Chef-Tested Recipes
This remarkable homemade potato bread truly stands apart, blending the earthy goodness of real mashed potatoes with the rich flavors of butter and eggs. The result is an incredibly soft, tender crumb that makes every bite a delight. The dough itself is a dream to work with – magnificent, pliable, and surprisingly easy to shape, proof, and bake, even for novice bakers. Forget bland white bread; this flavorful potato bread is here to elevate your everyday meals and become a staple in your kitchen!
Once you master this potato bread, a whole world of exciting bread-making possibilities opens up. Expand your baking repertoire with my fragrant pumpkin spice dinner rolls, perfect for festive occasions. Or, dive into the rewarding world of sourdough using my comprehensive sourdough starter recipe, which can then be used to create artisanal loaves like my savory rosemary sourdough rolls or the delectable cherry pecan sourdough. At Chef Lindsey Farr, your bread options are truly endless!
Essential Ingredients & Smart Substitutions for Potato Bread
Crafting the perfect loaf of homemade potato bread begins with understanding the role of each ingredient. Here’s a detailed look at what you’ll need and how to make smart substitutions:
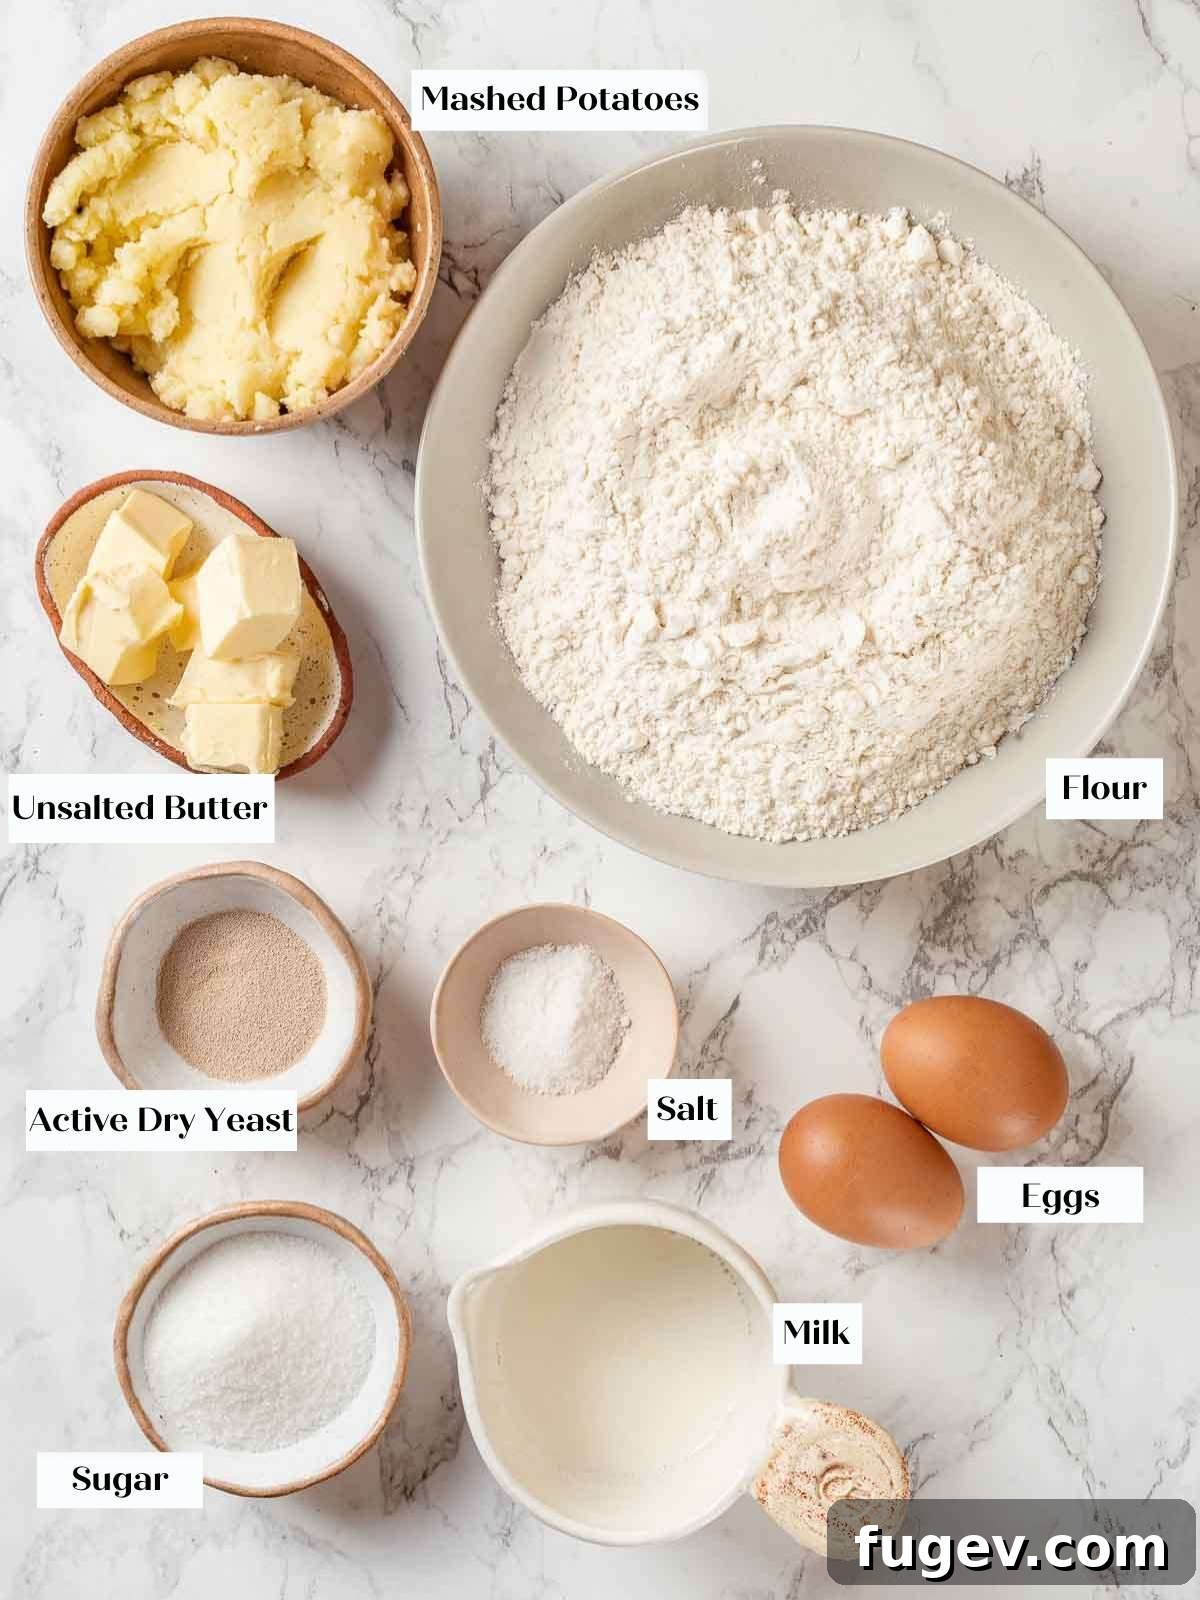
- All-purpose Flour: I consistently choose all-purpose flour for the majority of my bread recipes. Its balanced gluten content provides the ideal structure for developing a strong, elastic network in the dough, while still ensuring the finished bread remains incredibly tender and soft. For a slightly chewier crumb, you could experiment with bread flour, though it might require a touch more liquid.
- Kosher Salt: Essential for enhancing flavor and regulating yeast activity. Always use kosher salt for consistent seasoning. If using table salt, reduce the amount by half as it is finer and more potent.
- Granulated Sugar: A small amount of granulated sugar plays a dual role in this recipe. Firstly, it contributes a subtle sweetness and promotes beautiful caramelization, giving your potato bread a golden, appealing crust. Secondly, and critically, it provides a readily accessible food source for the yeast, kickstarting the fermentation process and ensuring a robust rise for that perfect light and airy texture.
- Whole Egg: Eggs are a vital enriching agent in this dough. They contribute essential fat and moisture, which results in a richer flavor and helps keep the soft potato bread moist and tender over time. The yolk’s fat also adds a lovely golden hue to the crumb. If you don’t have whole eggs, you could substitute with 2 egg yolks for extra richness (adding a tablespoon or two of milk for moisture balance) or a flax egg for a vegan alternative, though the texture will be slightly different.
- Whole Milk: I generally opt for whole milk in yeasted bread recipes because its higher fat content and lower water content significantly contribute to a tender, moist, and flavorful loaf. The fat helps tenderize the gluten, resulting in a more delicate crumb. While whole milk is preferred, feel free to substitute with any of your favorite milk alternatives (like almond or soy milk), though this might slightly alter the richness and crumb structure.
- Active Dry Yeast: Active dry yeast is my preferred choice for its reliable performance and controllable fermentation speed. It requires an initial hydration step (blooming) to activate, which is a great way to ensure your yeast is fresh and active before mixing. If you only have fresh yeast, use double the weight, adding it directly to the liquid ingredients. For instant yeast, use half the weight and it can be mixed directly with the dry ingredients, though blooming it can still jumpstart fermentation and gluten development.
- Mashed Potatoes: The star of our homemade potato bread! You can conveniently use leftover mashed potatoes from your refrigerator, making this recipe excellent for reducing food waste. Just be mindful if they are pre-seasoned; if so, significantly reduce or omit the salt from the dough to prevent an overly salty loaf. Similar to my potato rolls, you can leave the peel on for a rustic texture, but ensure the potatoes are very finely mashed to avoid any unwanted lumps in the dough, which could affect the final texture. Russet or Yukon Gold potatoes are ideal for their starch content.
- Unsalted Butter: Using unsalted butter is crucial as it gives you complete control over the overall saltiness and flavor profile of your dough. It’s incorporated later in the mixing process to add incredible richness, tenderness, and that unmistakable buttery goodness to your fluffy potato bread. If only salted butter is available, reduce the added kosher salt by at least ¼ to ½ teaspoon per stick of butter used.
See the recipe card below for full information on specific quantities and detailed instructions.
Delicious Variations to Try for Your Potato Bread
Once you’ve mastered the classic homemade potato bread, unleash your creativity with these exciting variations:
- Infuse with Aromatic Herbs: Elevate the savory profile of your potato bread by incorporating fresh or dried herbs. Experiment with a few teaspoons of finely chopped rosemary, thyme, chives, or oregano. Fresh herbs offer the most vibrant flavor, but dried herbs are a convenient alternative. Imagine a rosemary and sea salt potato bread alongside your evening meal!
- Create a Cheesy Potato Loaf: For an irresistible savory twist, introduce cheese to your dough. Once the dough has developed its gluten structure (after the butter has been fully incorporated), mix in about 1 cup of shredded cheddar, Swiss, or Parmesan cheese. This makes an incredible accompaniment to soups or as a gourmet grilled cheese base.
- Adjust the Size for Any Occasion: This versatile dough can be adapted to various shapes and sizes.
- Two Smaller Loaves: Divide the dough in half and shape it into two smaller loaves. They will bake faster, typically requiring only 20-25 minutes.
- Soft Dinner Rolls: Divide the dough into 14 equal pieces and shape them into round dinner rolls.
- Gourmet Hamburger Buns: For elevated burgers, divide the dough into 7 equal pieces and shape them into plump hamburger buns.
- Discover the Depth of Brown Butter: For an extra layer of nutty, complex flavor, try browning your butter before adding it to the dough. As demonstrated in my pumpkin herb dinner rolls, simply brown the butter until it reaches an amber color and nutty aroma, then cool it completely before incorporating it into the dough. The result is a brown butter potato bread that’s truly unforgettable!
- Sweet Potato Bread: For a sweeter, slightly orange-hued loaf, substitute regular mashed potatoes with an equal amount of mashed sweet potatoes. This variation pairs wonderfully with cinnamon and nutmeg for a holiday-inspired bread.
Professional Tips for Baking Perfect Potato Bread
Achieving a bakery-quality loaf of homemade potato bread is within reach with these expert tips:
- Opt for a Metal Loaf Pan: While ceramic or glass pans can work, a metal loaf pan is superior for baking bread. Metal conducts heat more efficiently and evenly, promoting faster baking and a superior crust development. This minimizes the risk of accidental underbaking in the center or excessive browning on the top, ensuring your potato bread bakes beautifully and consistently.
- Use Cold, Unsalted Mashed Potatoes for Optimal Flavor: For the best results, prepare your mashed potatoes in advance and allow them to cool completely in the refrigerator. The great advantage here is that you can make them days ahead, streamlining your bread-making day. Crucially, avoid salting the potatoes during their initial preparation. Salted potatoes, when combined with the salt in the dough, can lead to an overly salty loaf that masks the delicate potato flavor. Unsalted potatoes give you full control over the final seasoning.
- Embrace Thorough Gluten Development: This enriched dough requires a significant amount of mixing time in your stand mixer. Because enriched doughs (those containing fat like butter and eggs) develop gluten more slowly, it’s vital not to cut short the mixing process. Give your stand mixer a pep talk – it’s up to the challenge! Proper gluten development is essential for the elastic structure that traps air, resulting in that wonderfully light and airy texture characteristic of the best potato bread recipe. Don’t be afraid to let it mix until the dough passes the windowpane test, where a small piece of dough can be stretched thin enough to see light through without tearing.
- Temperature Control is Key for Yeast: Yeast is a living organism, and its activity is highly dependent on temperature. Ensure your milk is warmed to the ideal range of 100-110°F (38-43°C) for activating active dry yeast. Too cold, and the yeast won’t activate; too hot, and you risk killing it. A thermometer is your best friend here!
- Don’t Flour Your Work Surface Too Much: When shaping this dough, resist the urge to heavily flour your countertop. This enriched dough can be slightly sticky, but excess flour can make it tougher to achieve a smooth, tight surface tension during shaping, leading to a less even crumb. A very light dusting or a spritz of nonstick spray on your hands or surface is usually sufficient.
How to Make Homemade Potato Bread: A Step-by-Step Guide
Follow these detailed instructions to bake a perfect loaf of homemade potato bread every single time! Full measurements and additional tips are provided in the comprehensive recipe card below.
Phase 1: Preparing the Mashed Potatoes
Creating your mashed potatoes for the bread is a simple but important first step. Remember, the potatoes can be prepared days in advance, making your baking day much easier.
Step 1: Thoroughly wash your chosen potatoes (Russet or Yukon Gold work best). You can leave them whole or chop them into smaller, uniform pieces for quicker cooking.
Step 2: Place the washed potatoes into a large pot. Just cover them with cold water. Avoid overfilling the pot with water, as this helps prevent the potatoes from absorbing excessive moisture, which could make your dough too wet.
Step 3: Bring the pot to a rolling boil over high heat, then reduce heat to medium and cook until the potatoes are completely fork-tender. This usually takes 15-20 minutes for chopped potatoes. Drain the liquid thoroughly and mash the potatoes immediately while they are still warm. Ensure there are no lumps for a smooth dough.
Step 4: Allow the mashed potatoes to cool completely at room temperature. Once cooled, place them in an airtight container or wrap them well in plastic wrap and refrigerate. Cold potatoes are easier to incorporate into the dough and prevent over-activating the yeast too early.
Chef’s Tip: The mashed potatoes can be made 1-3 days in advance and stored in the refrigerator, saving you time on baking day. Just ensure they are unsalted!
Phase 2: Crafting the Potato Bread Dough
This is where the magic happens! Pay attention to temperatures and mixing times for the best results in your soft potato bread.
Step 5: In a small bowl, measure out your active dry yeast. Set it aside temporarily.
Step 6: Gently warm the whole milk in a small saucepan over low heat or in a microwave. The goal is a temperature between 100-110°F (38-43°C). If you overheat it, add a splash of cold milk to bring it down to the ideal temperature. Use a kitchen thermometer for accuracy – this is crucial for yeast activation.
Pro Tip: By warming slightly more milk than you need and then tempering it with cold milk, you ensure you have the exact amount at the perfect temperature without waste.
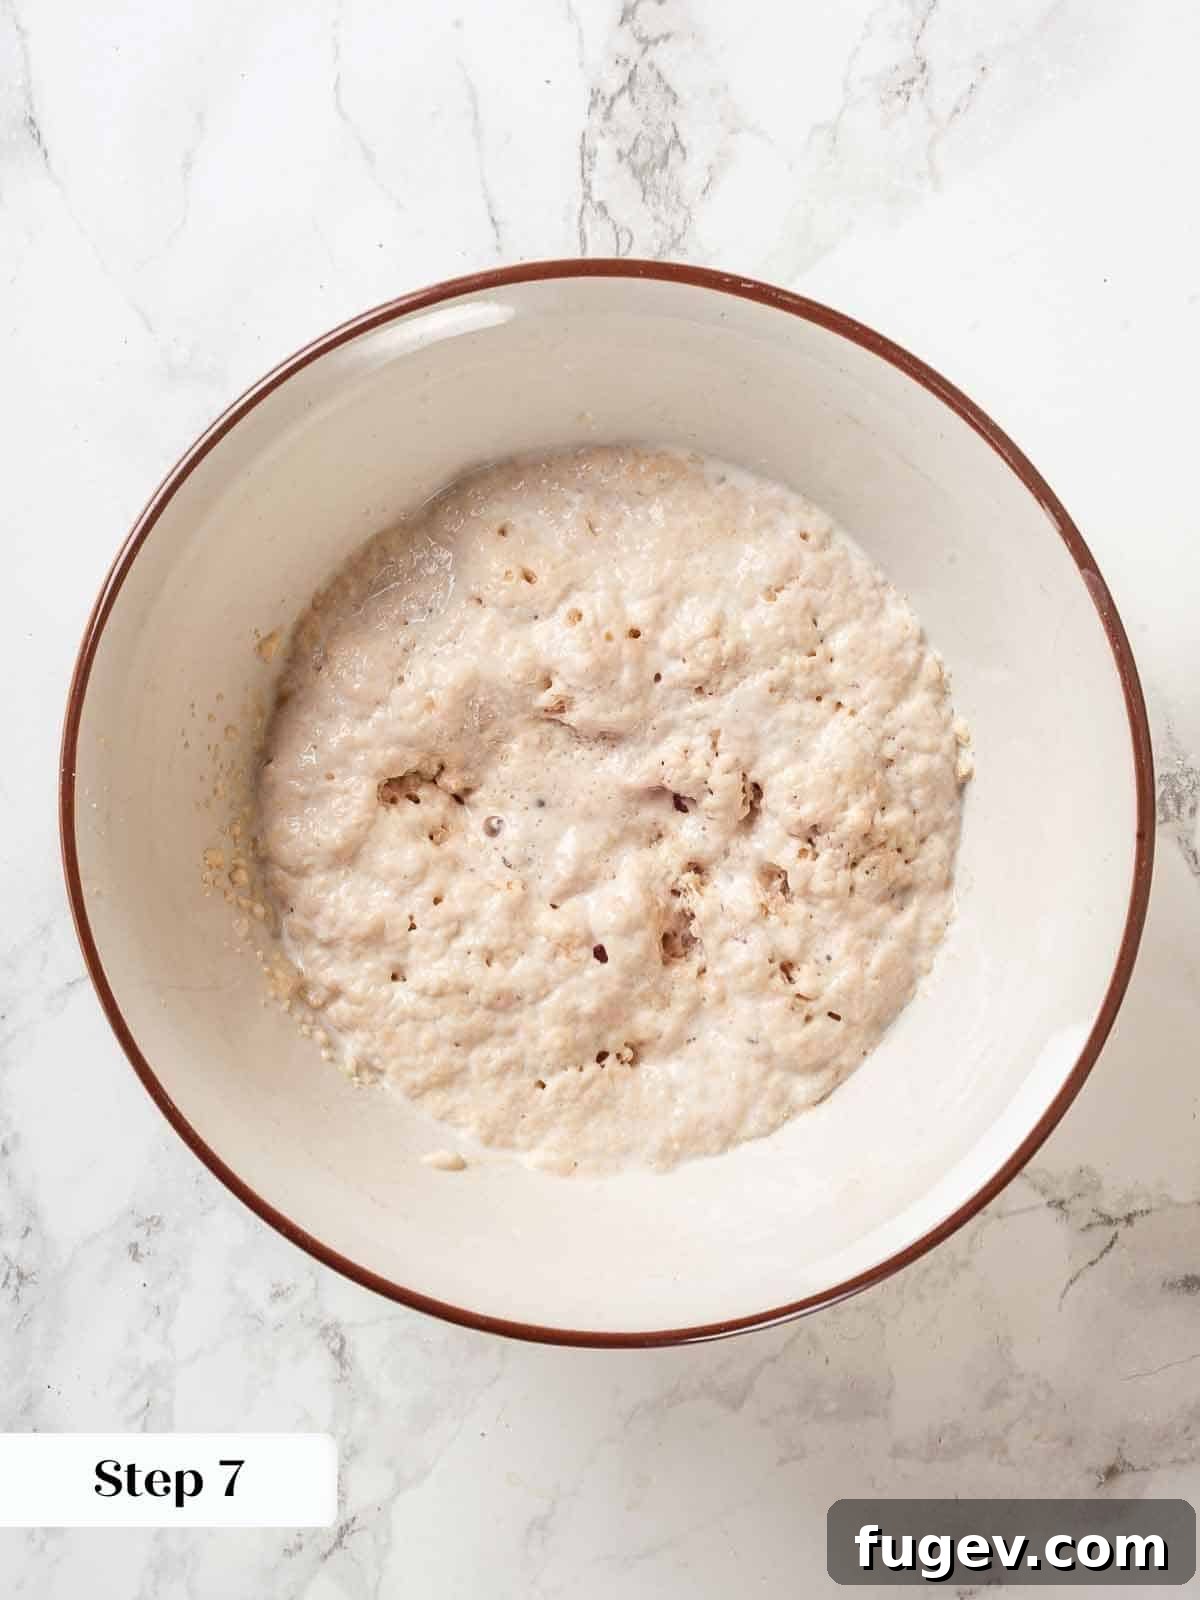
Step 7: Measure a ¼ cup of your perfectly warmed milk into the bowl with the active dry yeast. Stir gently to combine. Allow this yeast mixture to bloom for approximately 10 minutes. You’ll know it’s ready when it becomes foamy and bubbly, indicating the yeast is active and eager to work its magic.
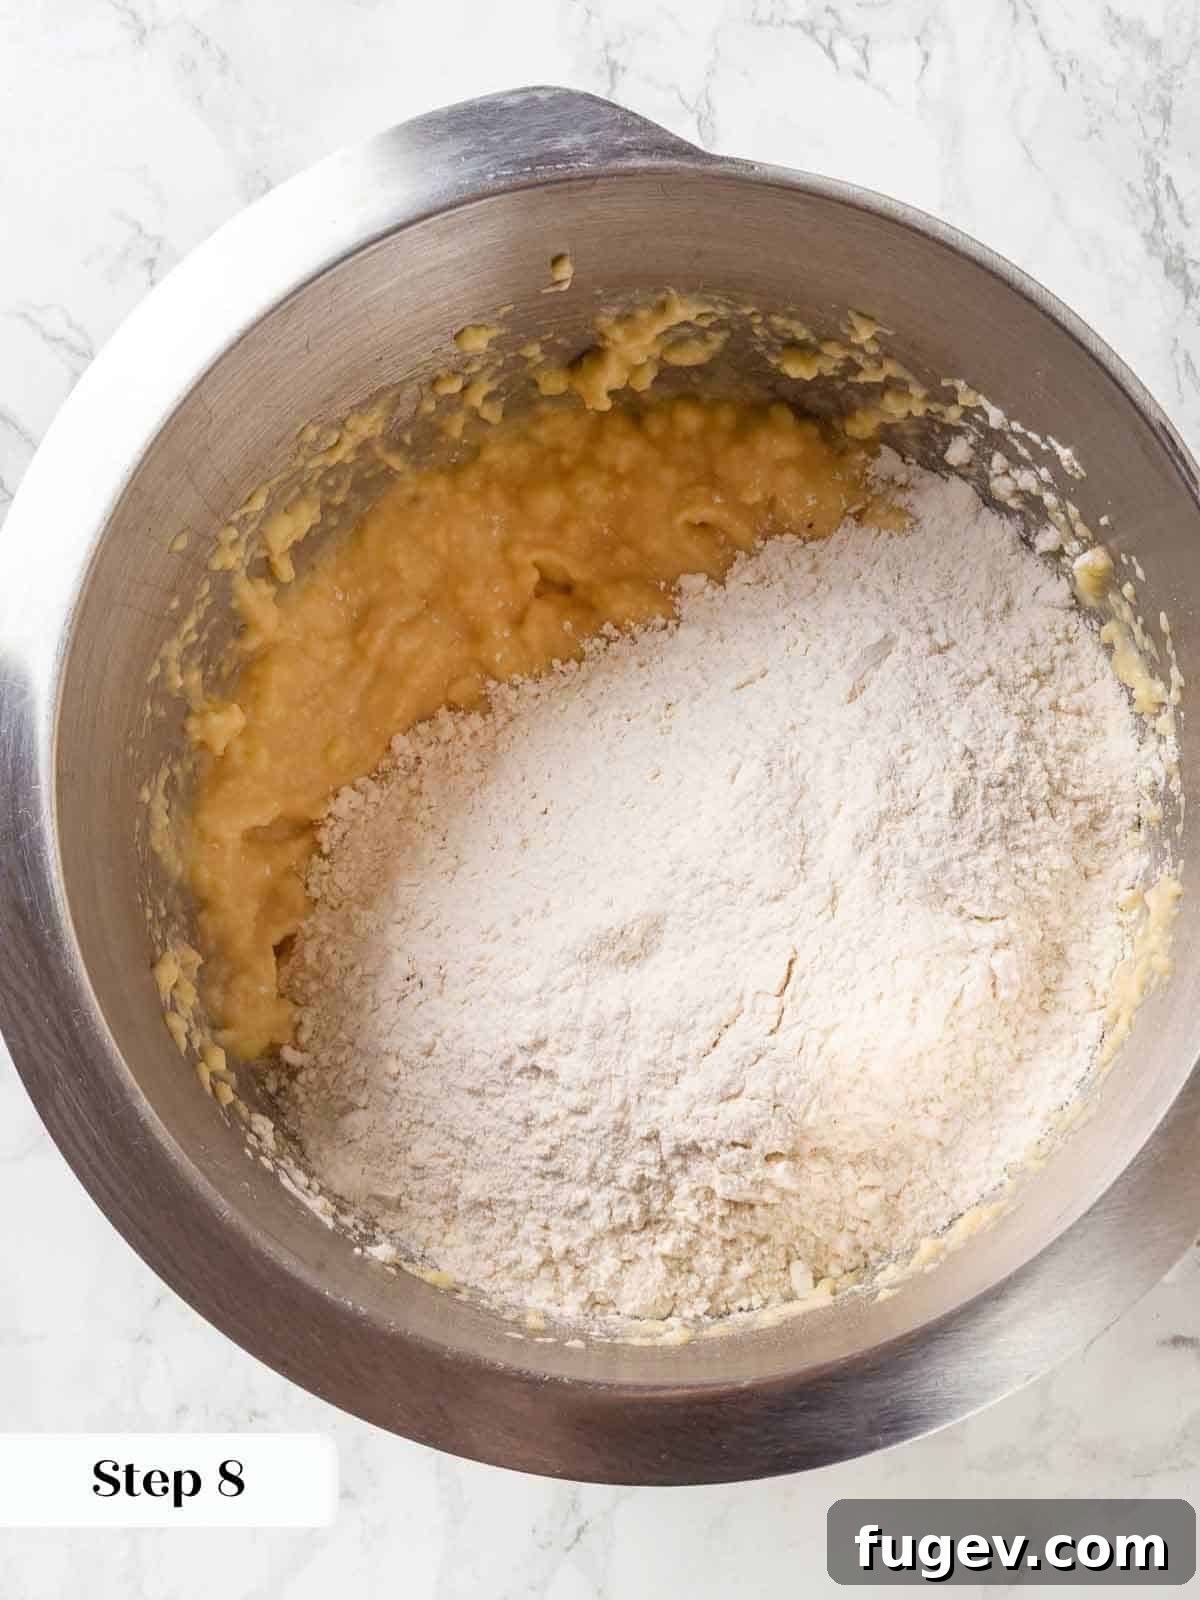
Step 8: While the yeast is blooming, prepare your dry ingredients. In a separate medium mixing bowl, whisk together the all-purpose flour, kosher salt, and granulated sugar until well combined. Set this mixture aside.
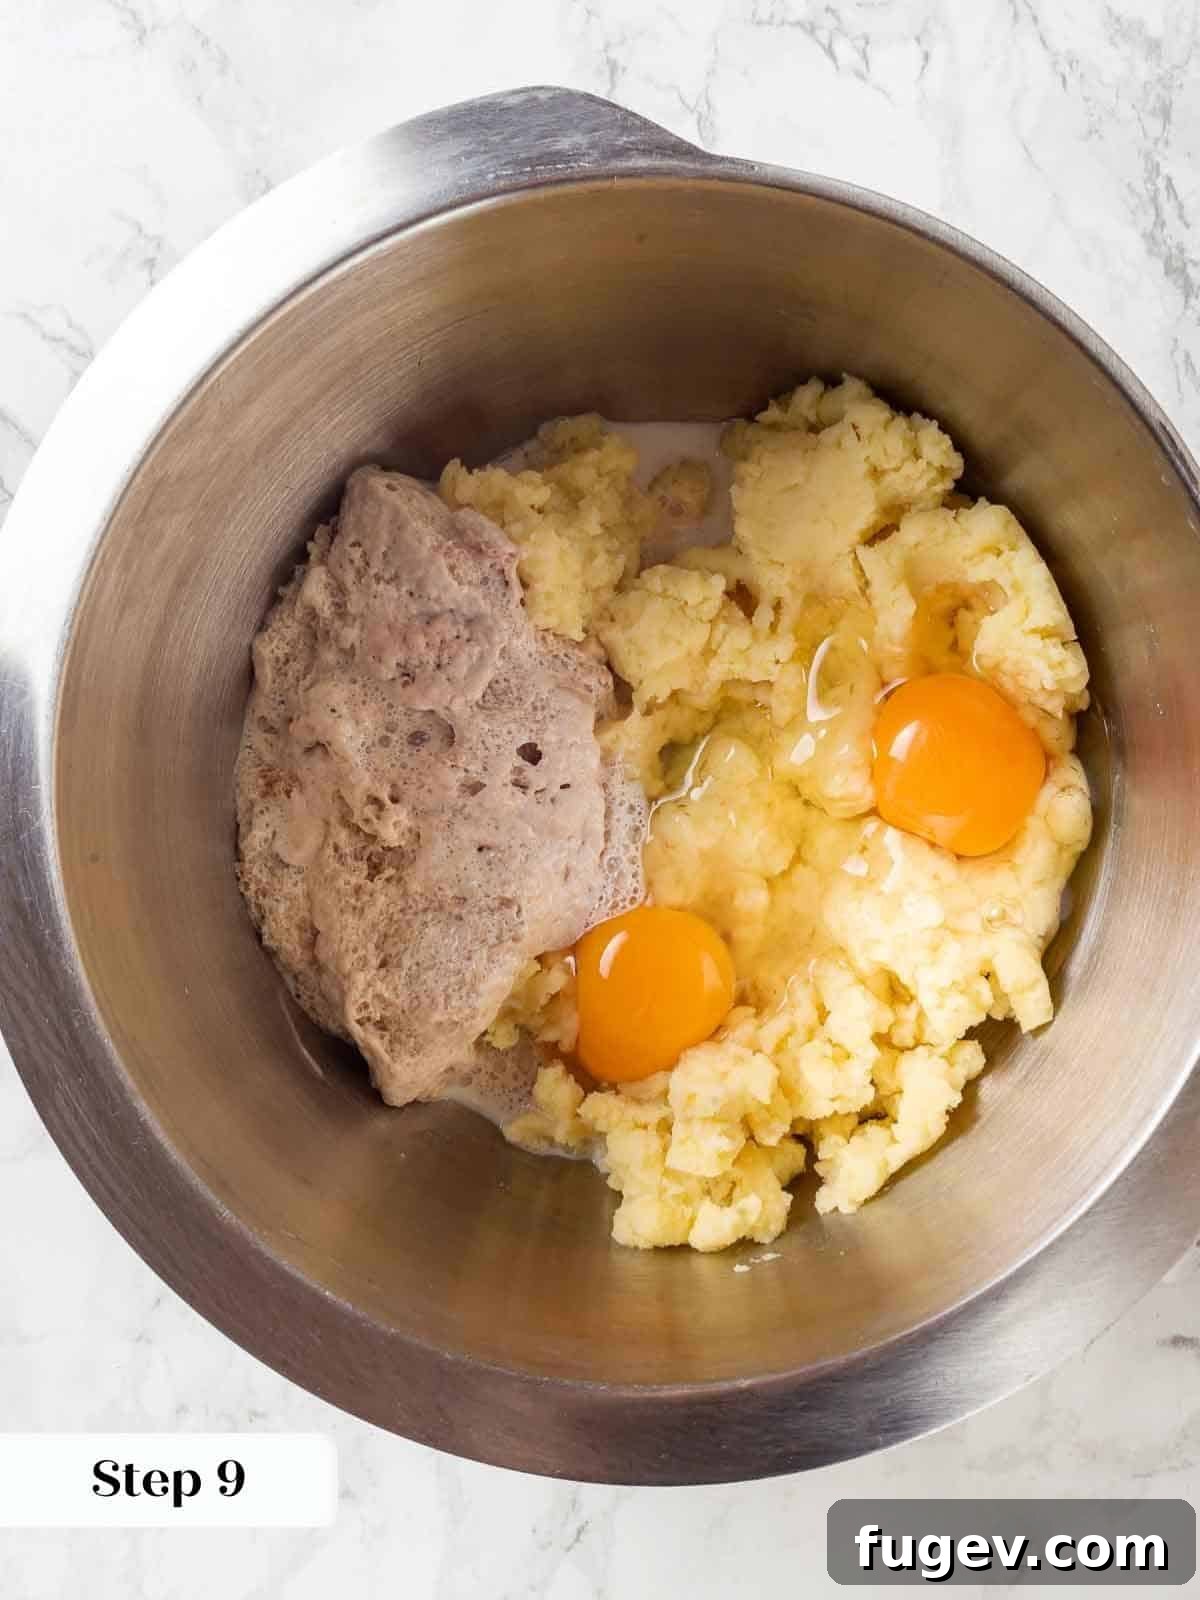
Step 9: In the bowl of your stand mixer (fitted with the paddle attachment), combine the large eggs and the completely cooled mashed potatoes. Once your yeast mixture is visibly bubbly and active, add it to the stand mixer bowl as well.
Step 10: Mix the wet ingredients on low speed using the paddle attachment until a smooth, uniform paste forms. Scrape down the sides of the bowl as needed to ensure everything is thoroughly combined.
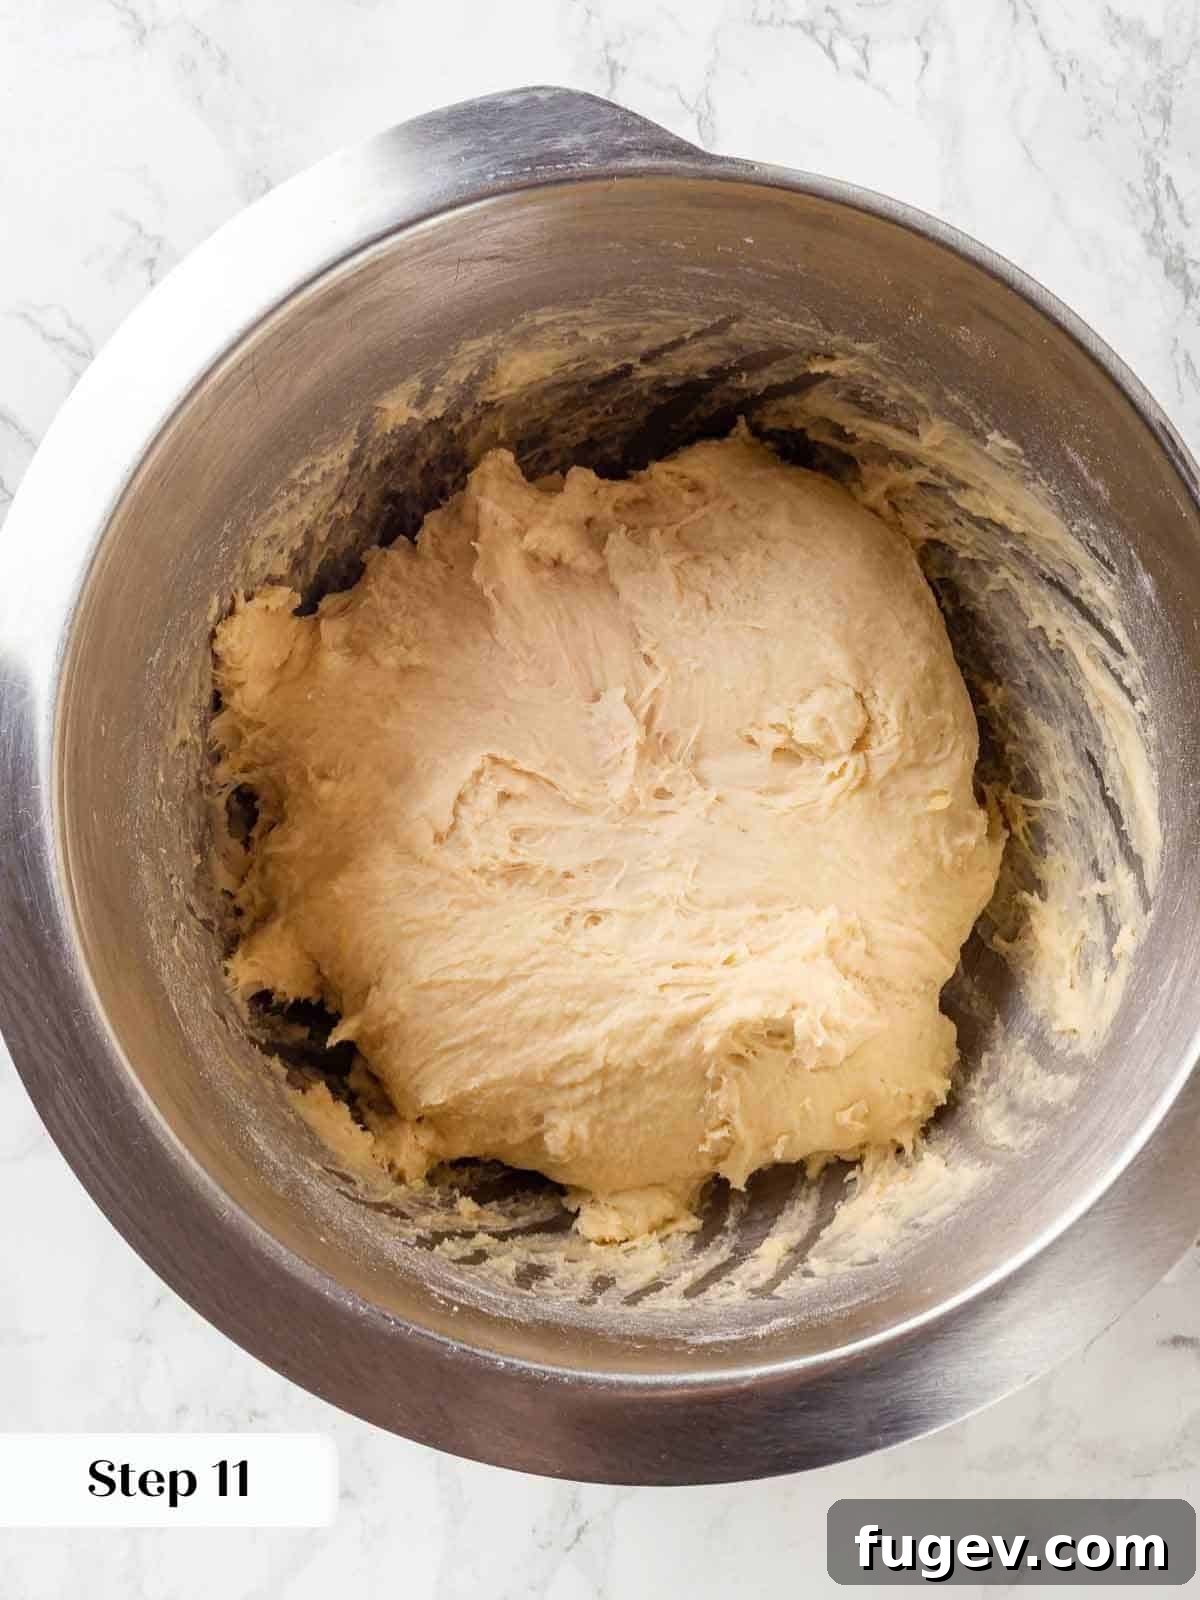
Step 11: Add all of the prepared dry ingredients to the stand mixer bowl. Switch to the dough hook attachment. Mix on low speed for a full 15 minutes. During this time, the dough will start to come together, becoming smooth but thick. This initial mixing is crucial for developing the gluten structure before adding fat.
Critical Step: Set a timer for 15 minutes. This dedicated mixing time is essential for proper gluten development in this enriched dough, preparing it for the butter addition.
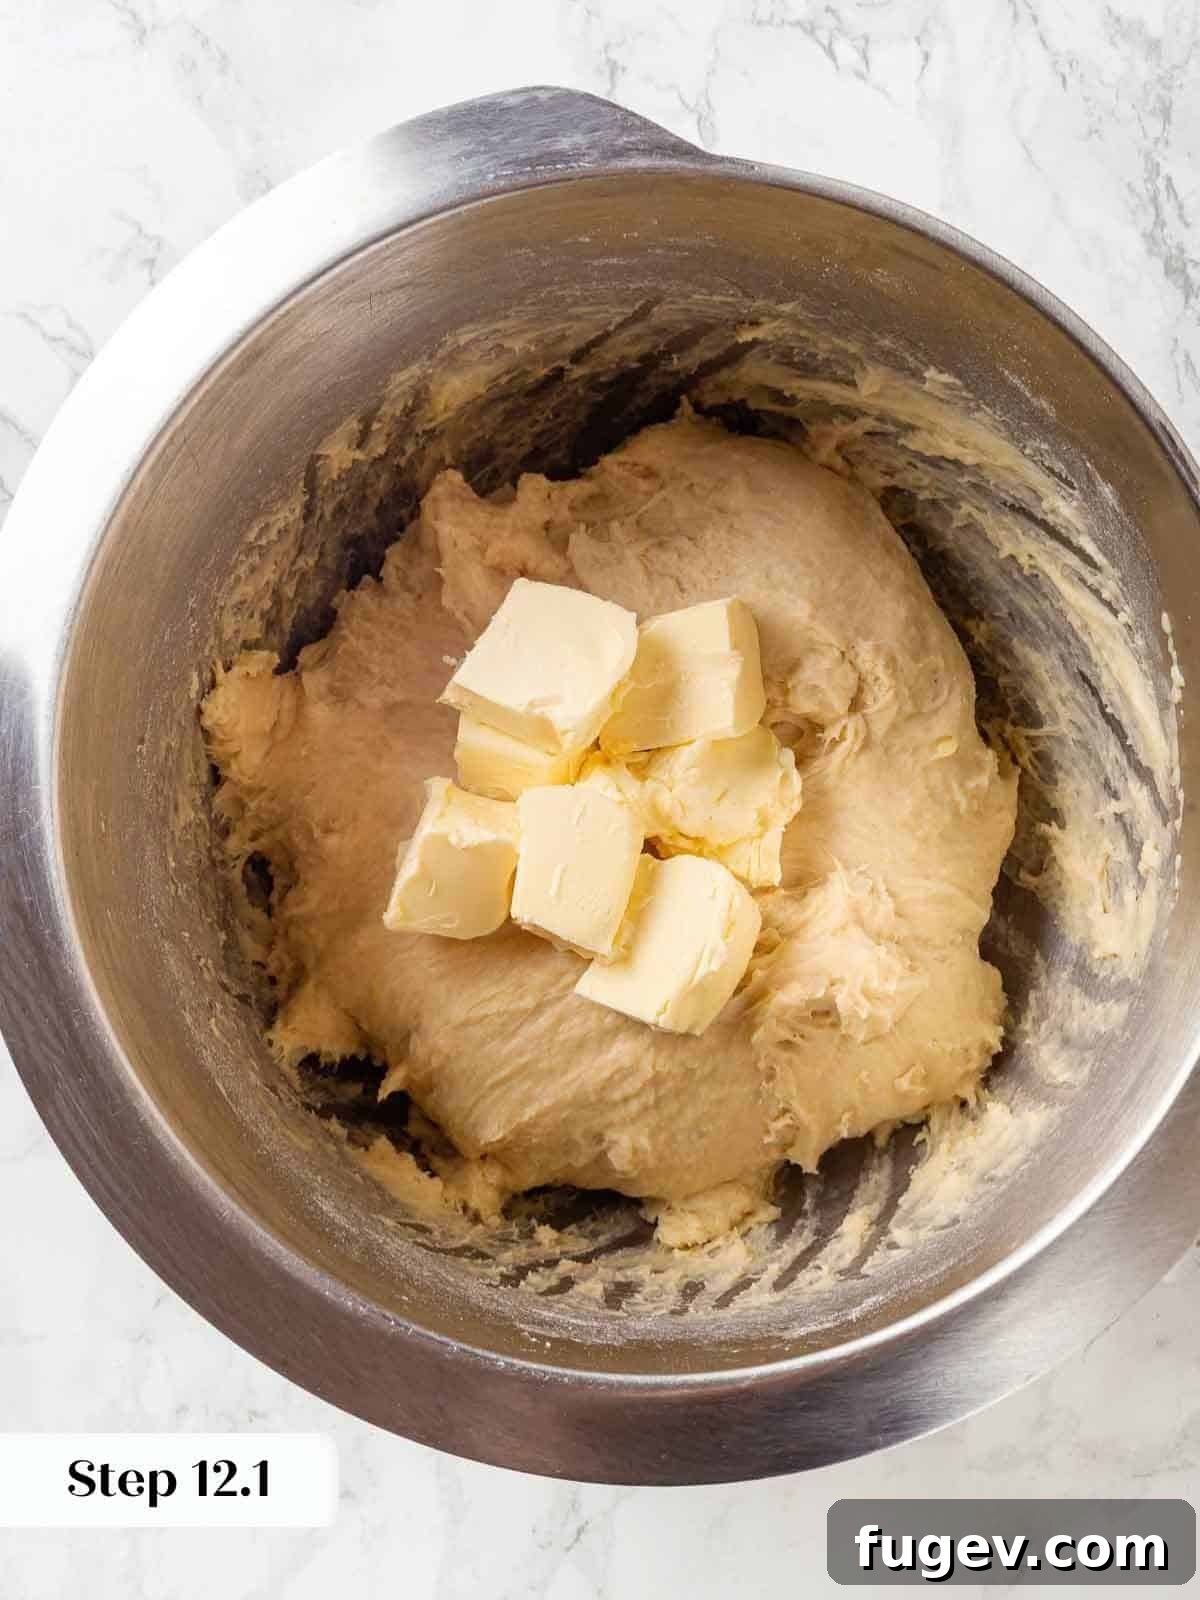
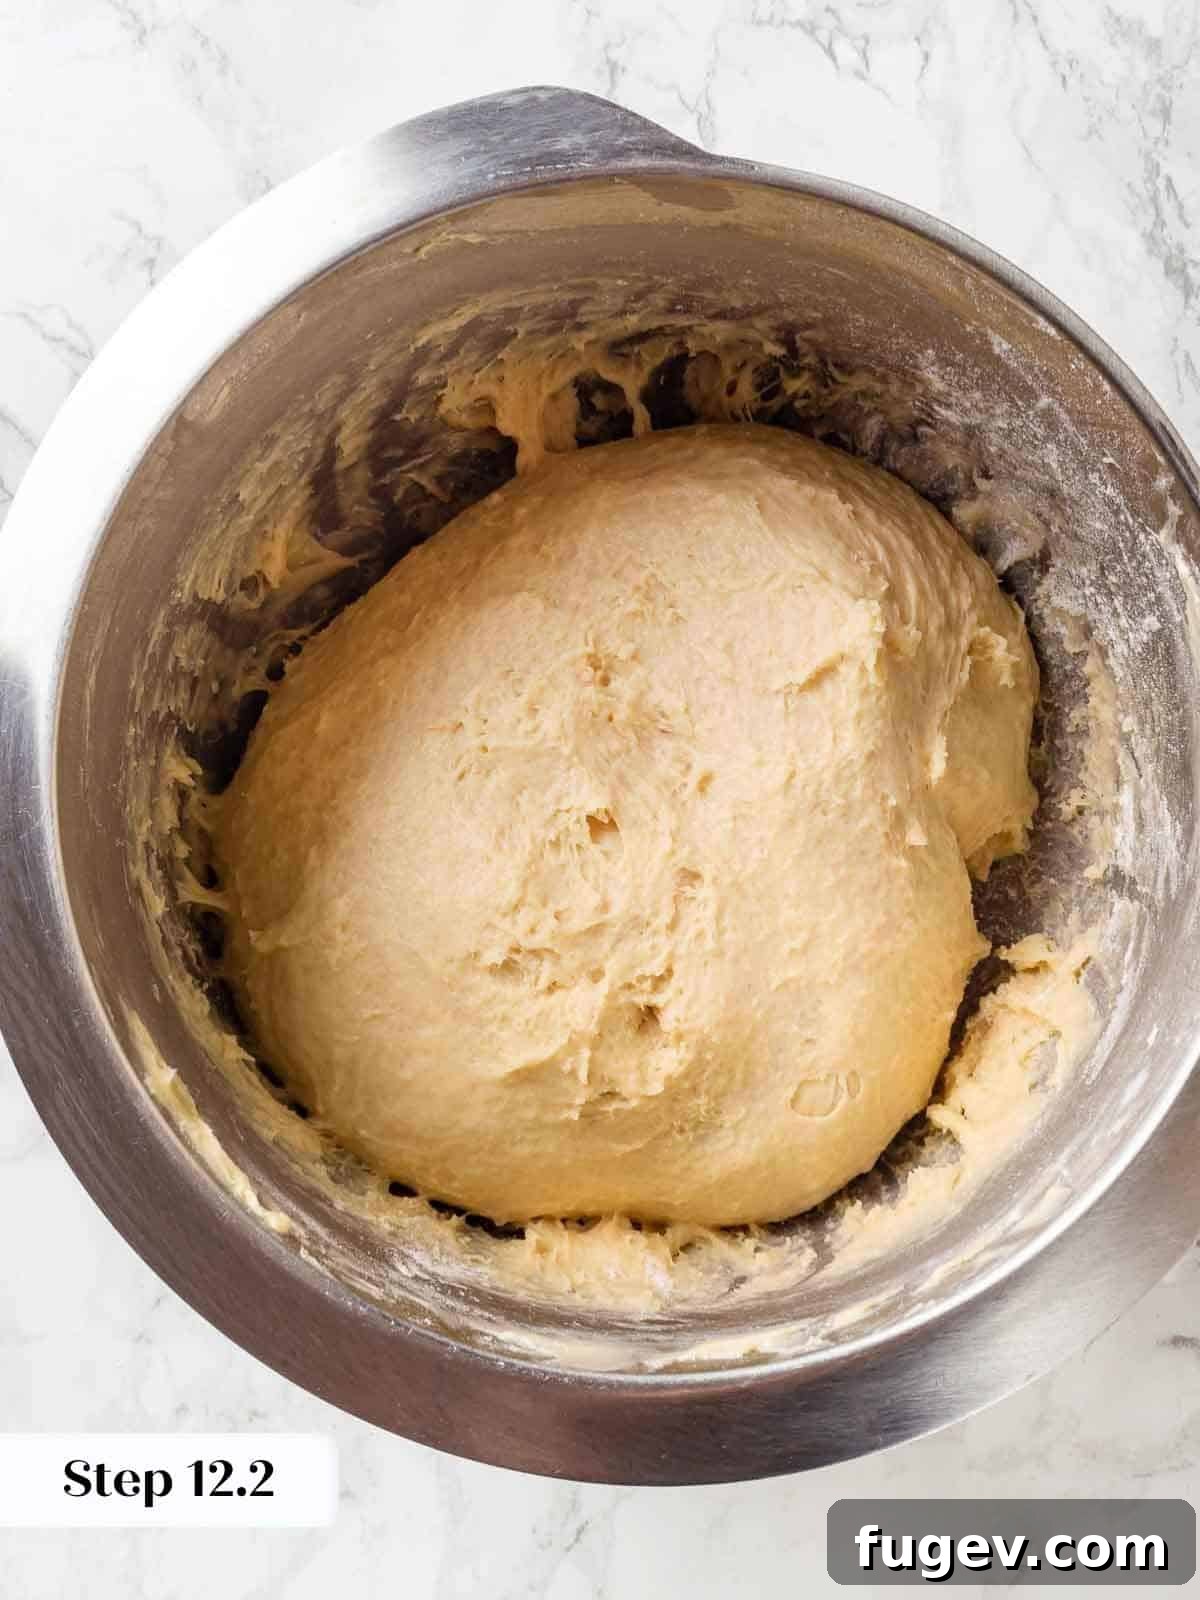
Step 12: Once the dough has mixed for 15 minutes, add the cubed unsalted butter all at once. Continue mixing on medium speed for another 10 minutes, or for as long as your stand mixer can comfortably handle. The dough will appear shaggy at first, but it will eventually become smooth, elastic, and pull away from the sides of the bowl. This extensive mixing ensures the butter is fully incorporated and helps develop the rich, tender crumb of your fluffy potato bread.
Professional Insight: This recipe was originally developed for a busy restaurant, where a powerful 30-quart commercial mixer handled this dough with absolute ease. Don’t be shy about letting your home stand mixer work!
Phase 3: Proofing and Shaping Your Potato Bread
Careful proofing and precise shaping are key to a beautiful, evenly risen loaf of homemade potato bread.
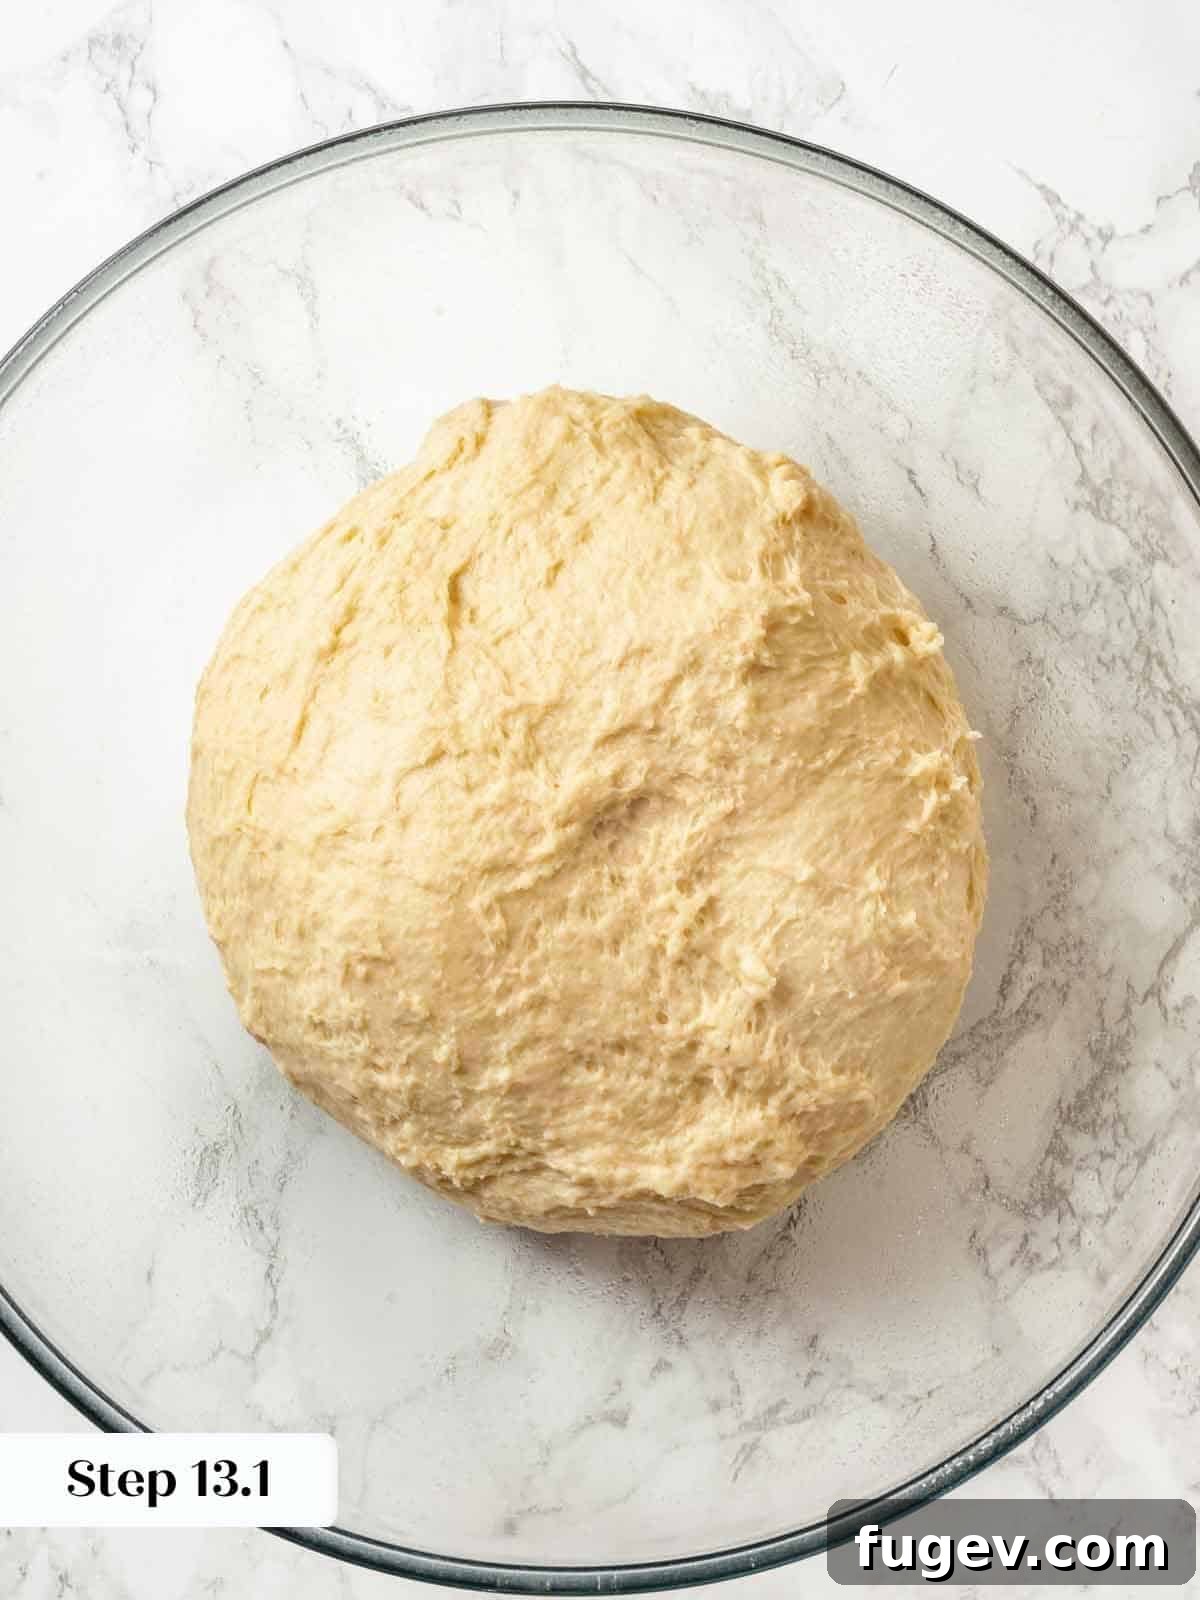
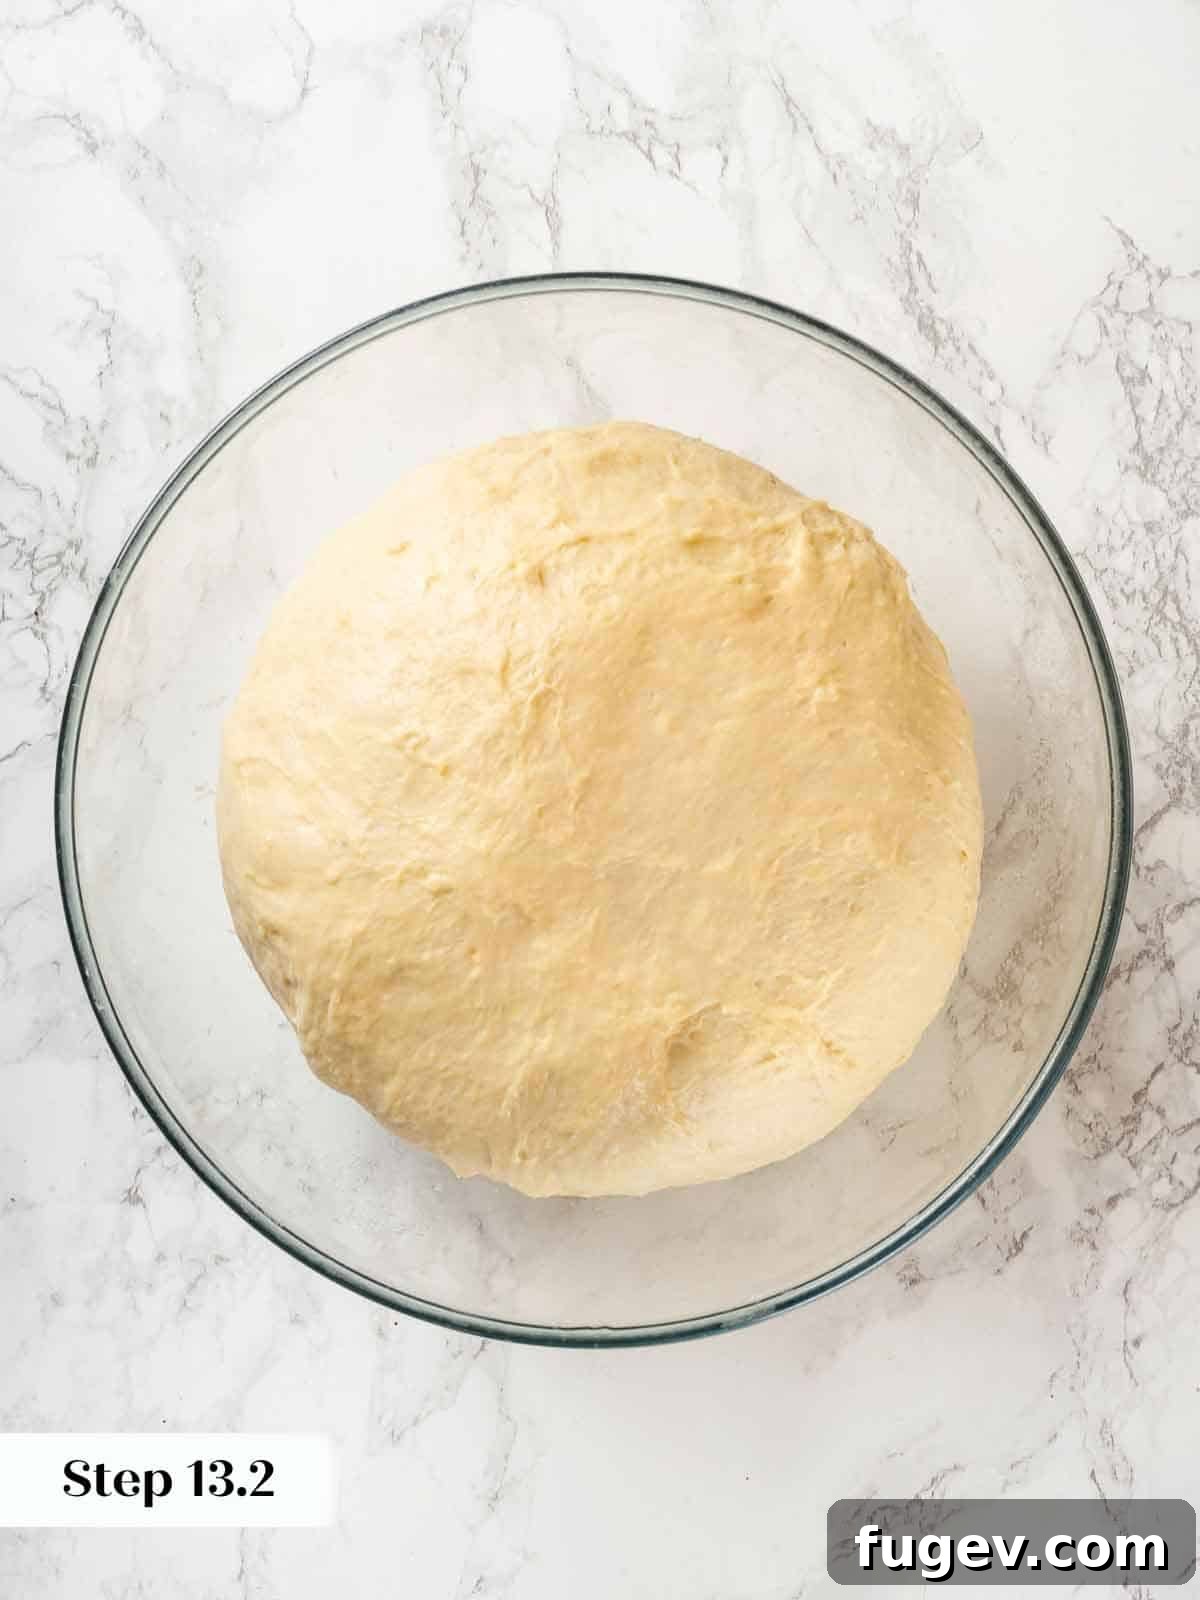
Step 13: Lightly oil a large bowl. Turn the dough out into the prepared bowl and cover it tightly with plastic wrap. Unlike some single-rise recipes, this potato bread benefits significantly from a bulk proof, especially with active dry yeast. If your kitchen is cool, you can create a warm environment: preheat your oven to its lowest setting (around 100°F/38°C), then turn it off. Place your covered dough bowl inside. My dough doubled in size in about an hour in this warm, off-oven environment.
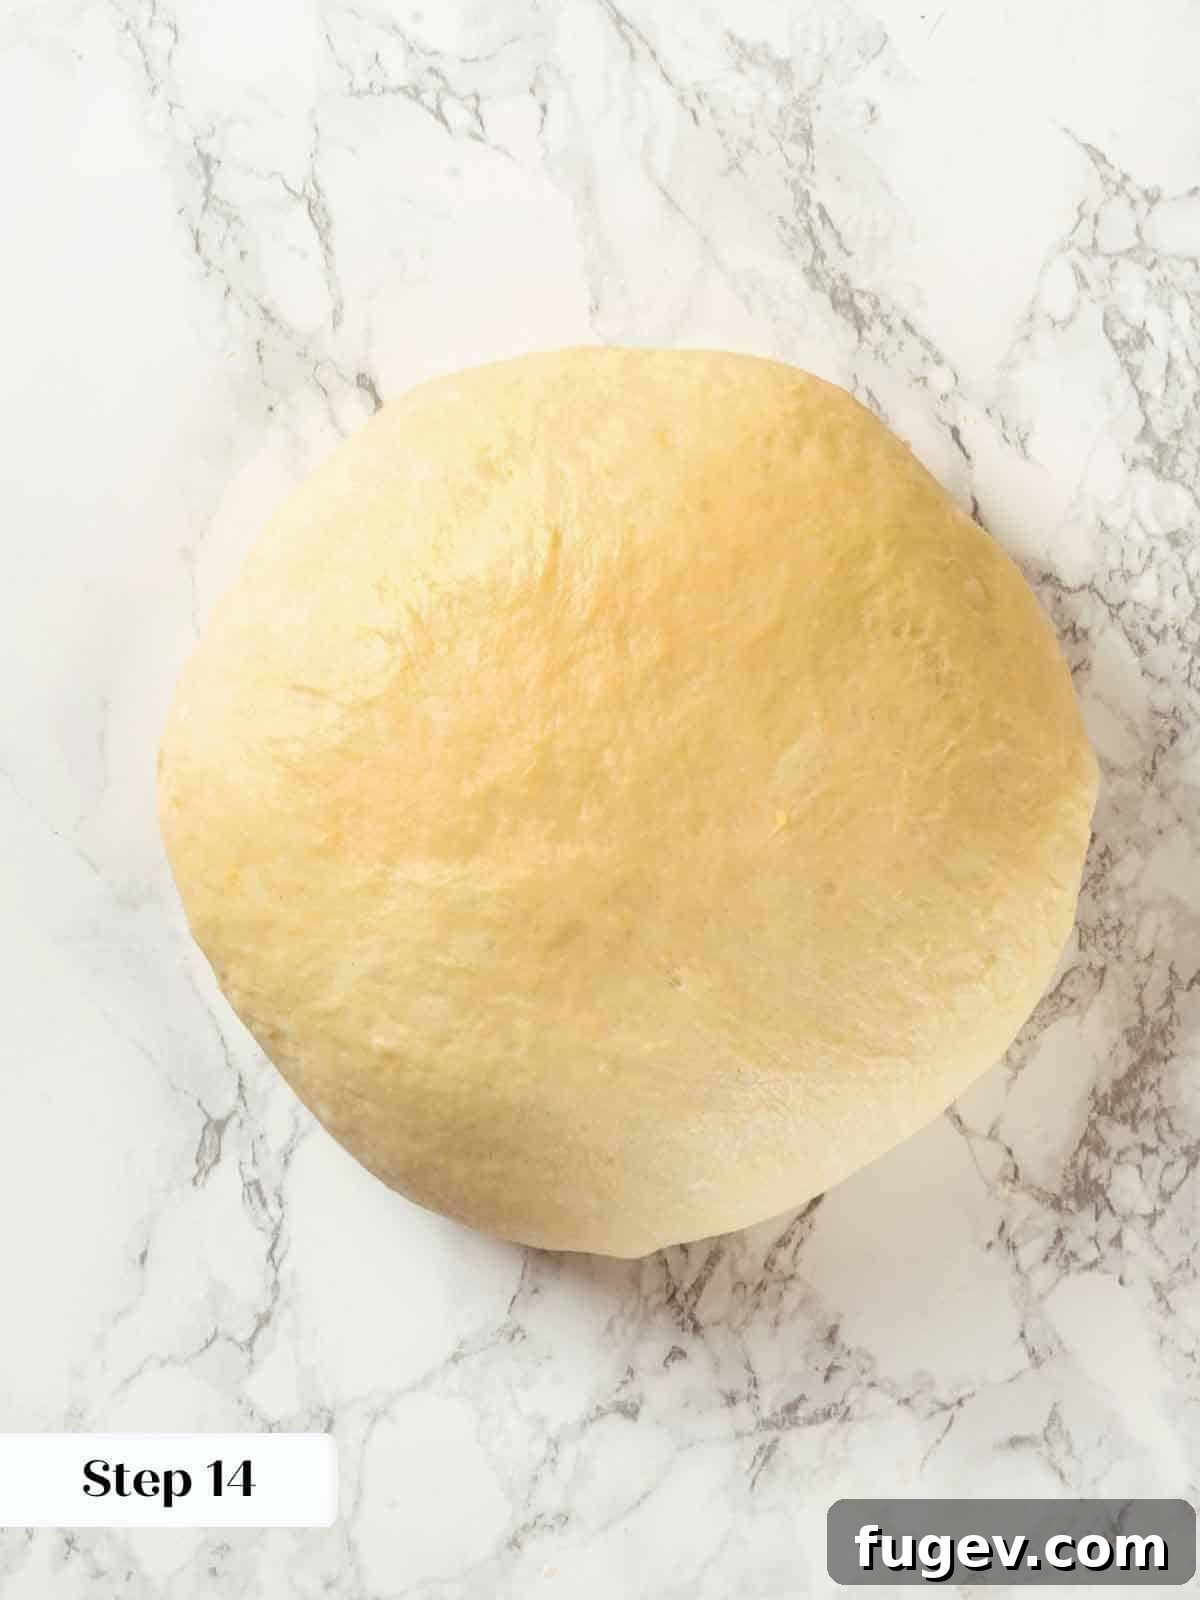
Step 14: Gently turn the proofed dough out onto a clean, unfloured surface. Carefully pre-shape it into a round. Allow the dough to bench rest for 10 minutes. This resting period allows the gluten to relax, making the dough easier to handle for final shaping.
Shaping Guidance: Depending on the dough’s stickiness and your work surface, you might need a very light spray of nonstick cooking oil. Avoid using bench flour with this particular dough, as it can make achieving a tight, smooth shape more challenging.
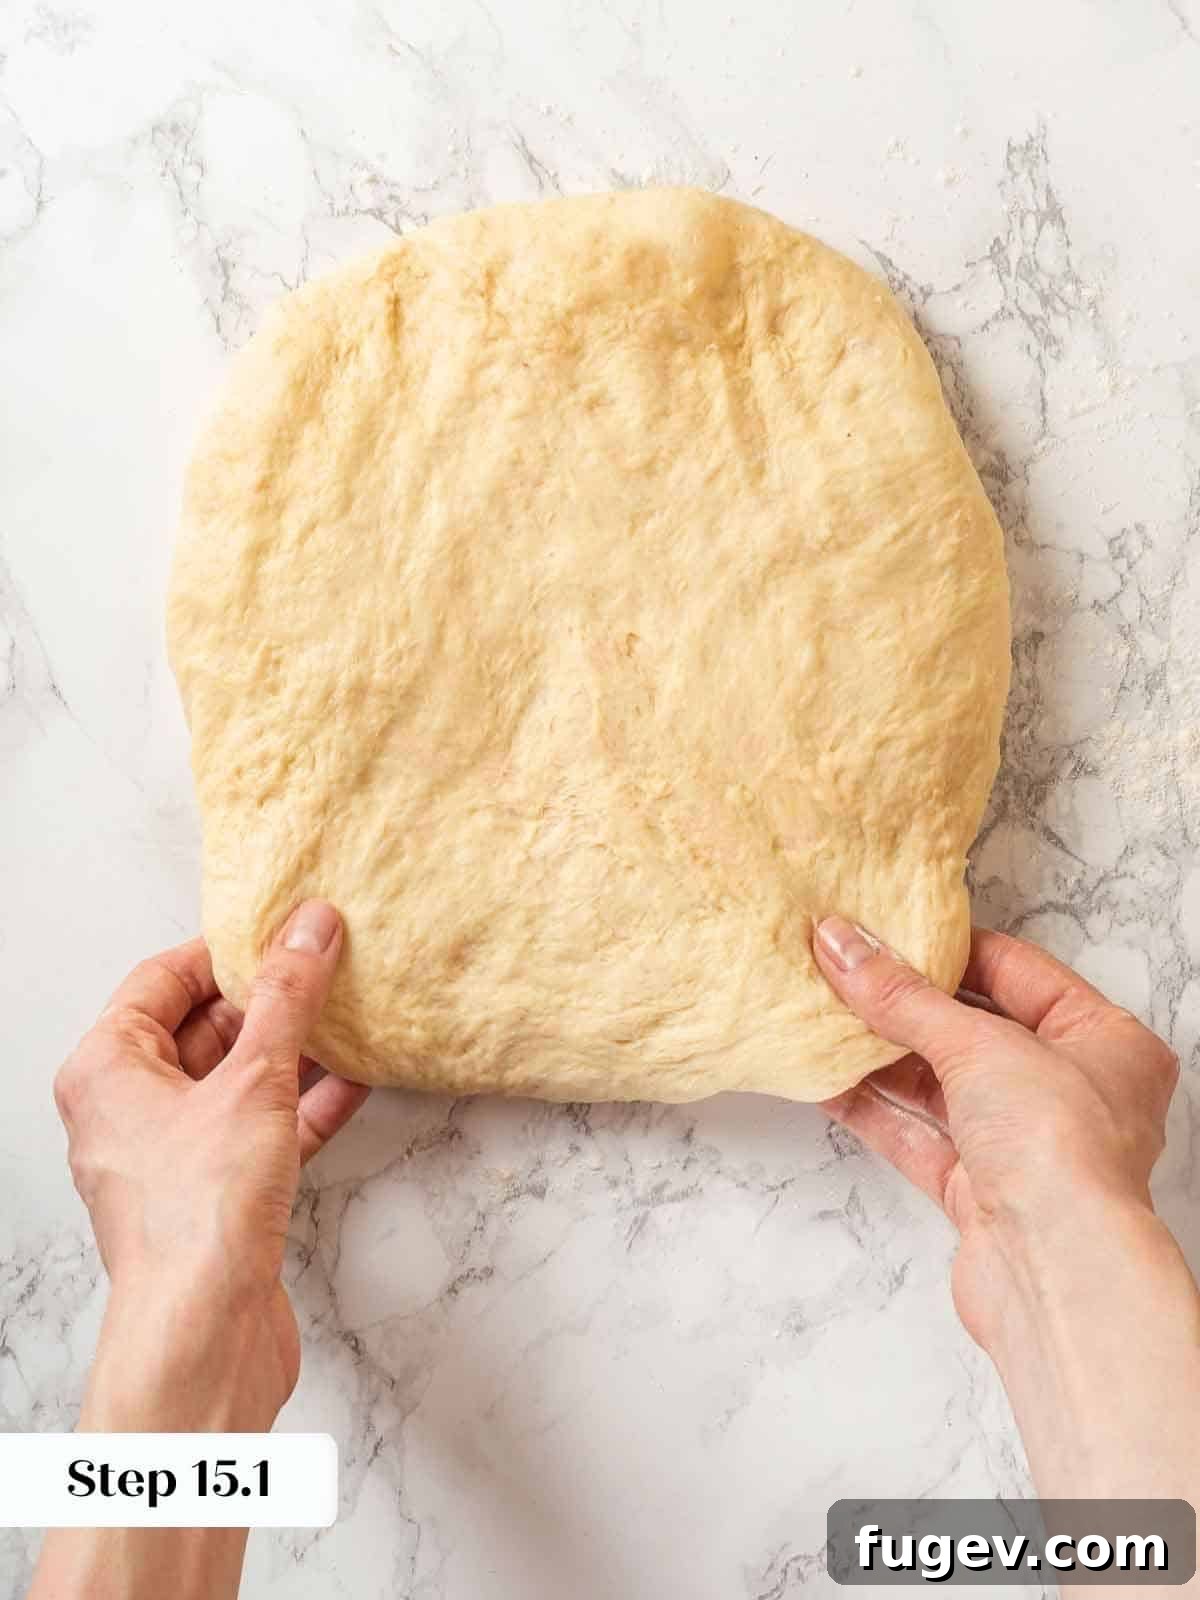
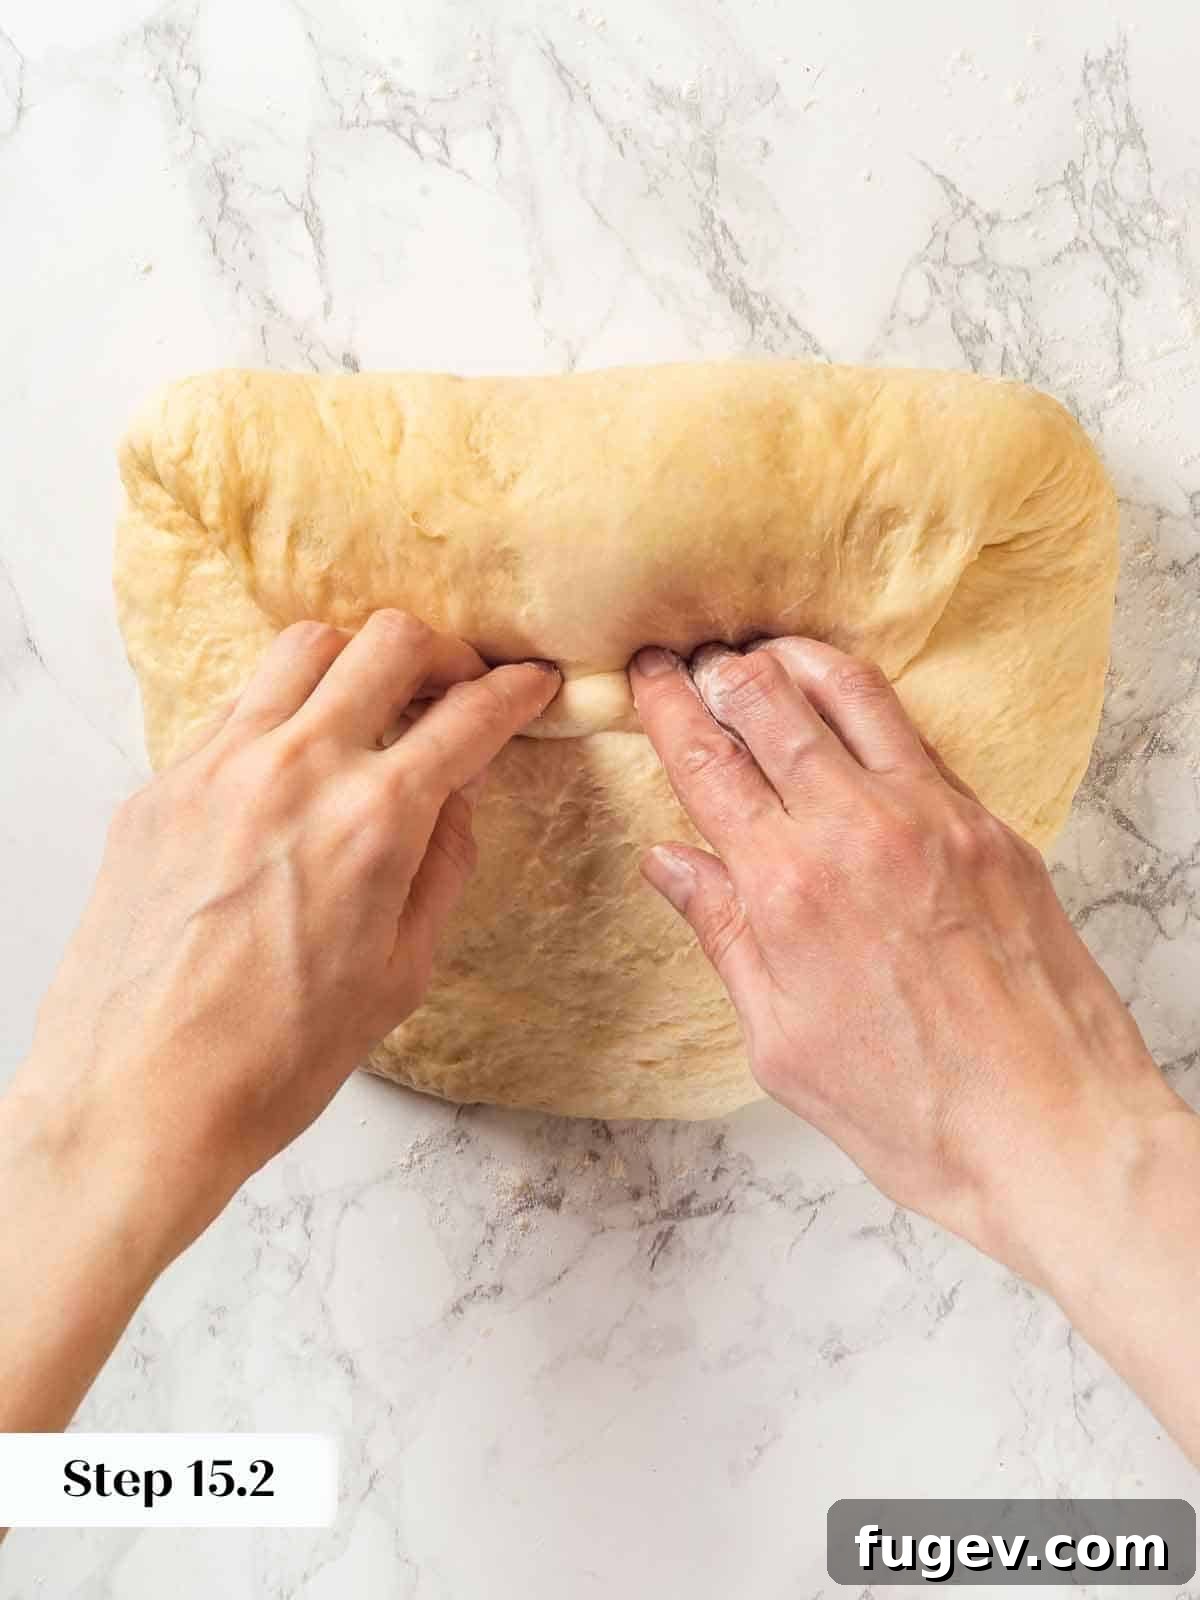
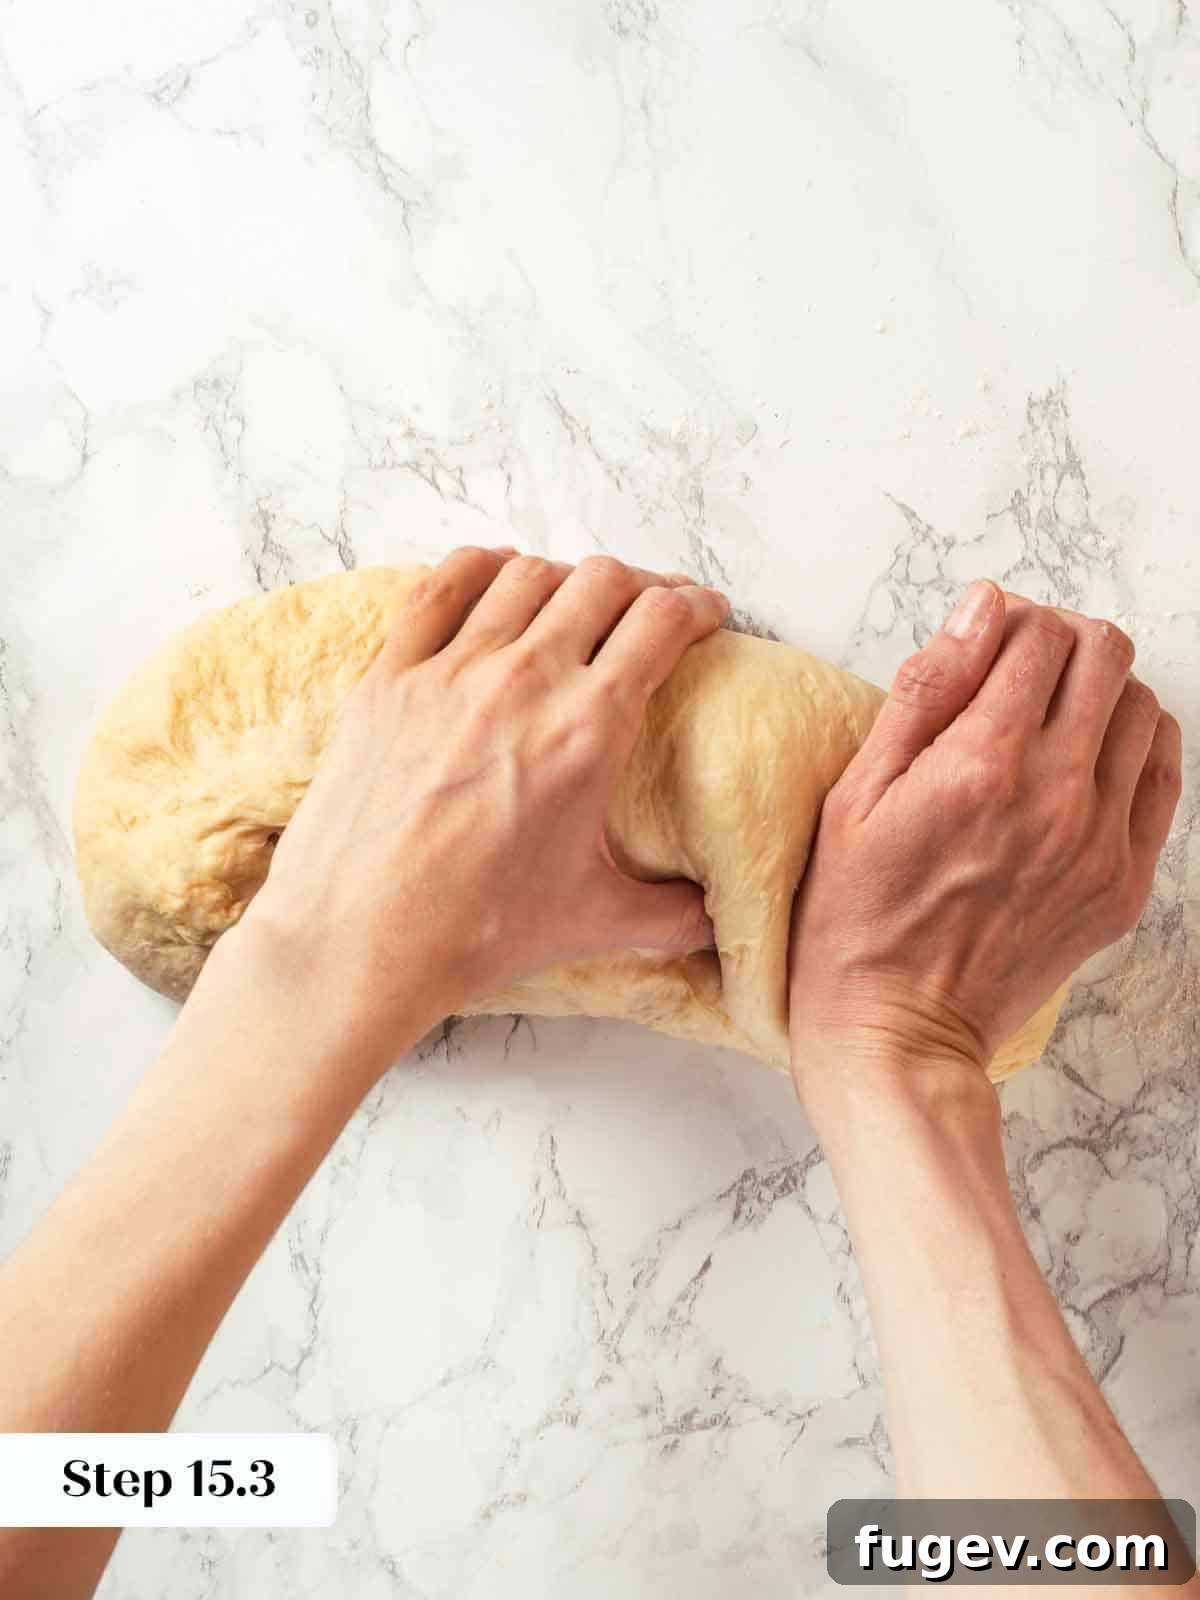
Step 15: Now, for the final shaping into a loaf. Gently pull the dough into a rectangular shape. Take the top half of the rectangle and fold it down towards the center. Rotate the dough 180 degrees, then fold the other side down, pressing gently to seal. Perform two “thumb folds”: starting from the right side, roll the dough around your left thumb, then seal the seam firmly with the heel of your right hand as you move across to the left side of the log.
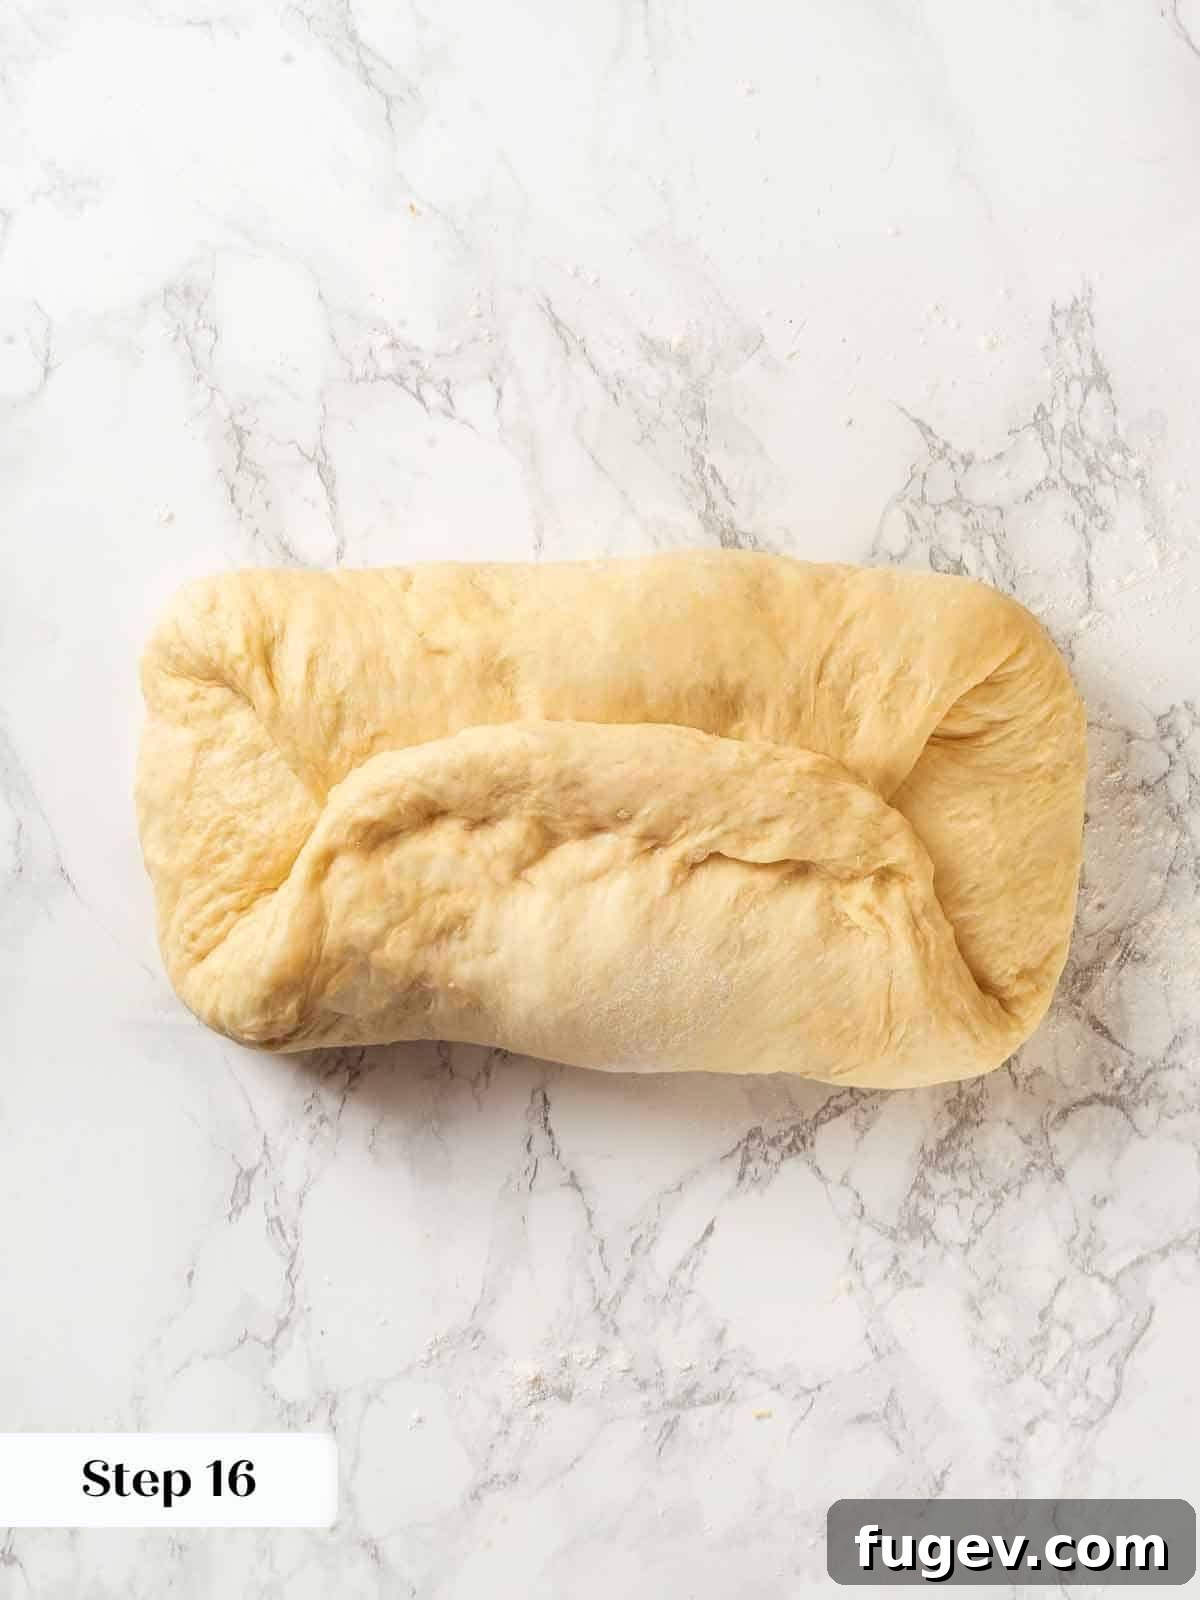
Step 16: Repeat the thumb-fold process once more. This dough is quite elastic and stretches easily, so you can gently scrunch the log shorter while performing the second thumb fold to ensure it fits perfectly into your loaf pan without becoming too long.
Handy Hint: If your hands start to stick to the dough during shaping, lightly spray them with a bit of nonstick cooking spray or olive oil, rather than adding more flour to the surface.
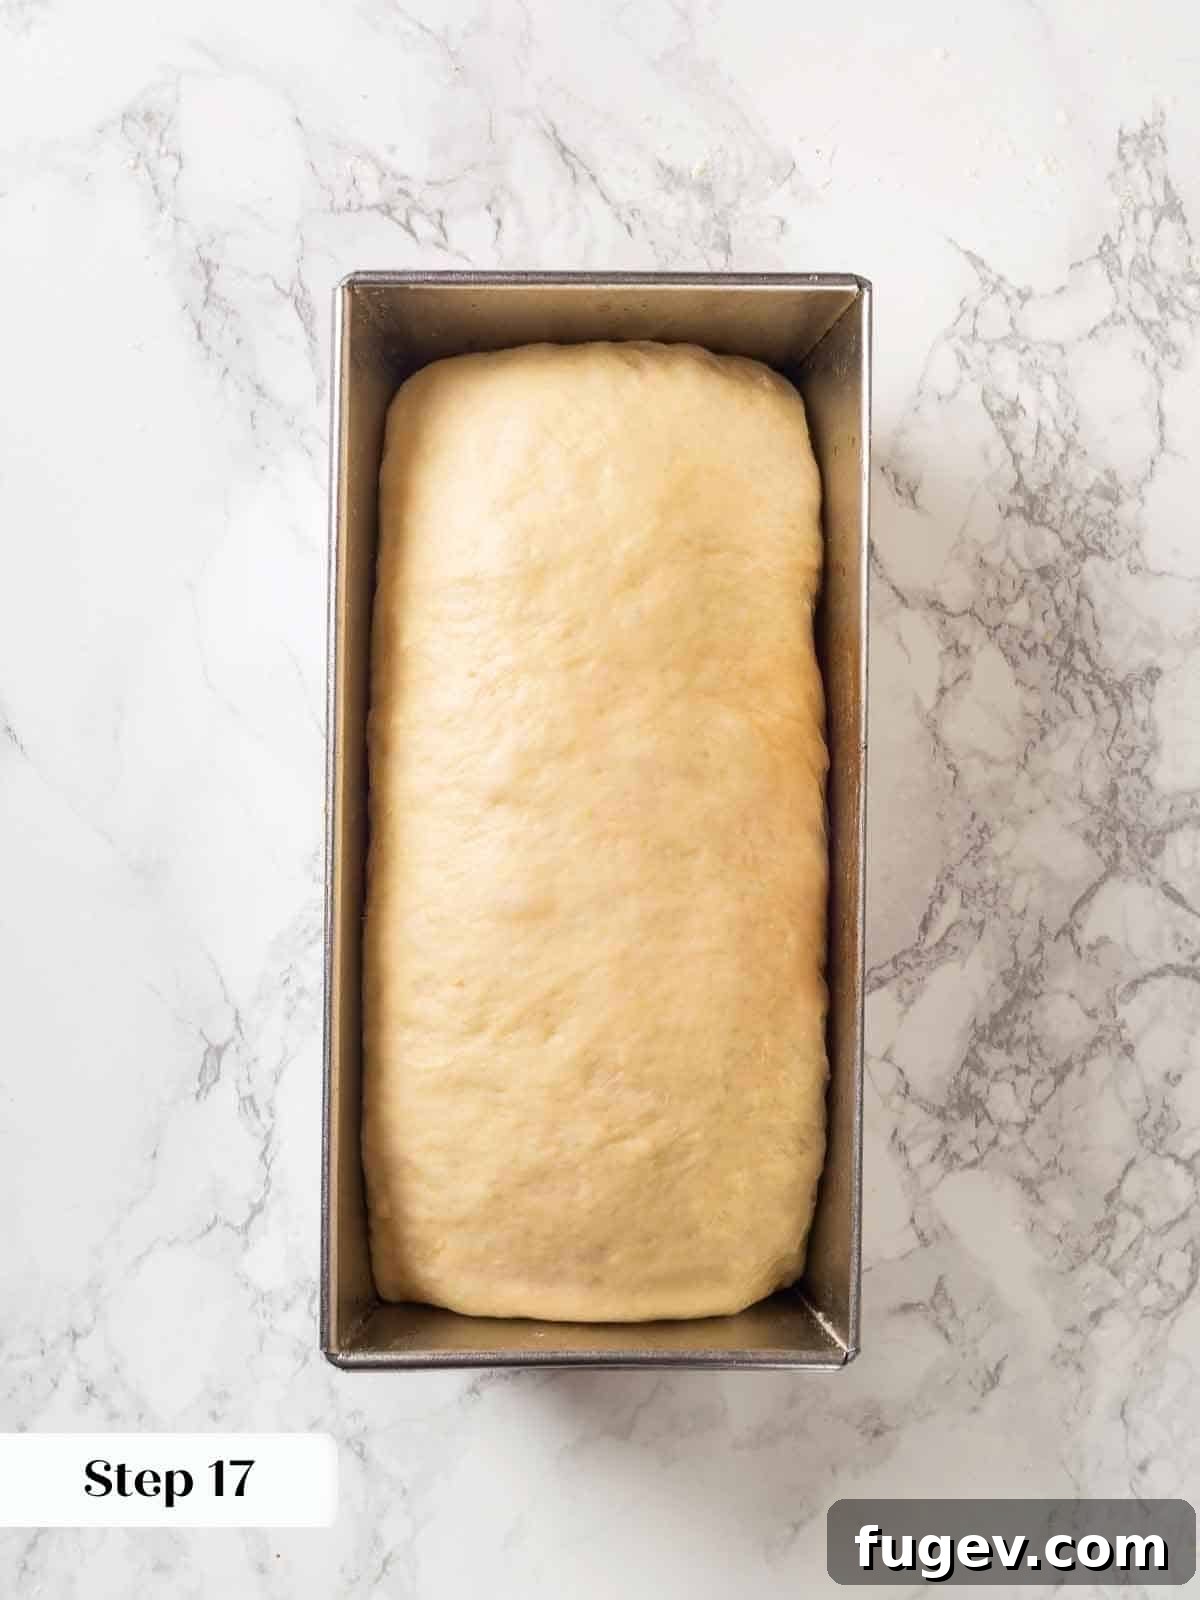
Step 17: Carefully place the shaped dough, seam-side down, into a 9×5 inch loaf pan that has been generously sprayed with nonstick cooking spray or thoroughly buttered. This prevents sticking and ensures a clean release after baking.
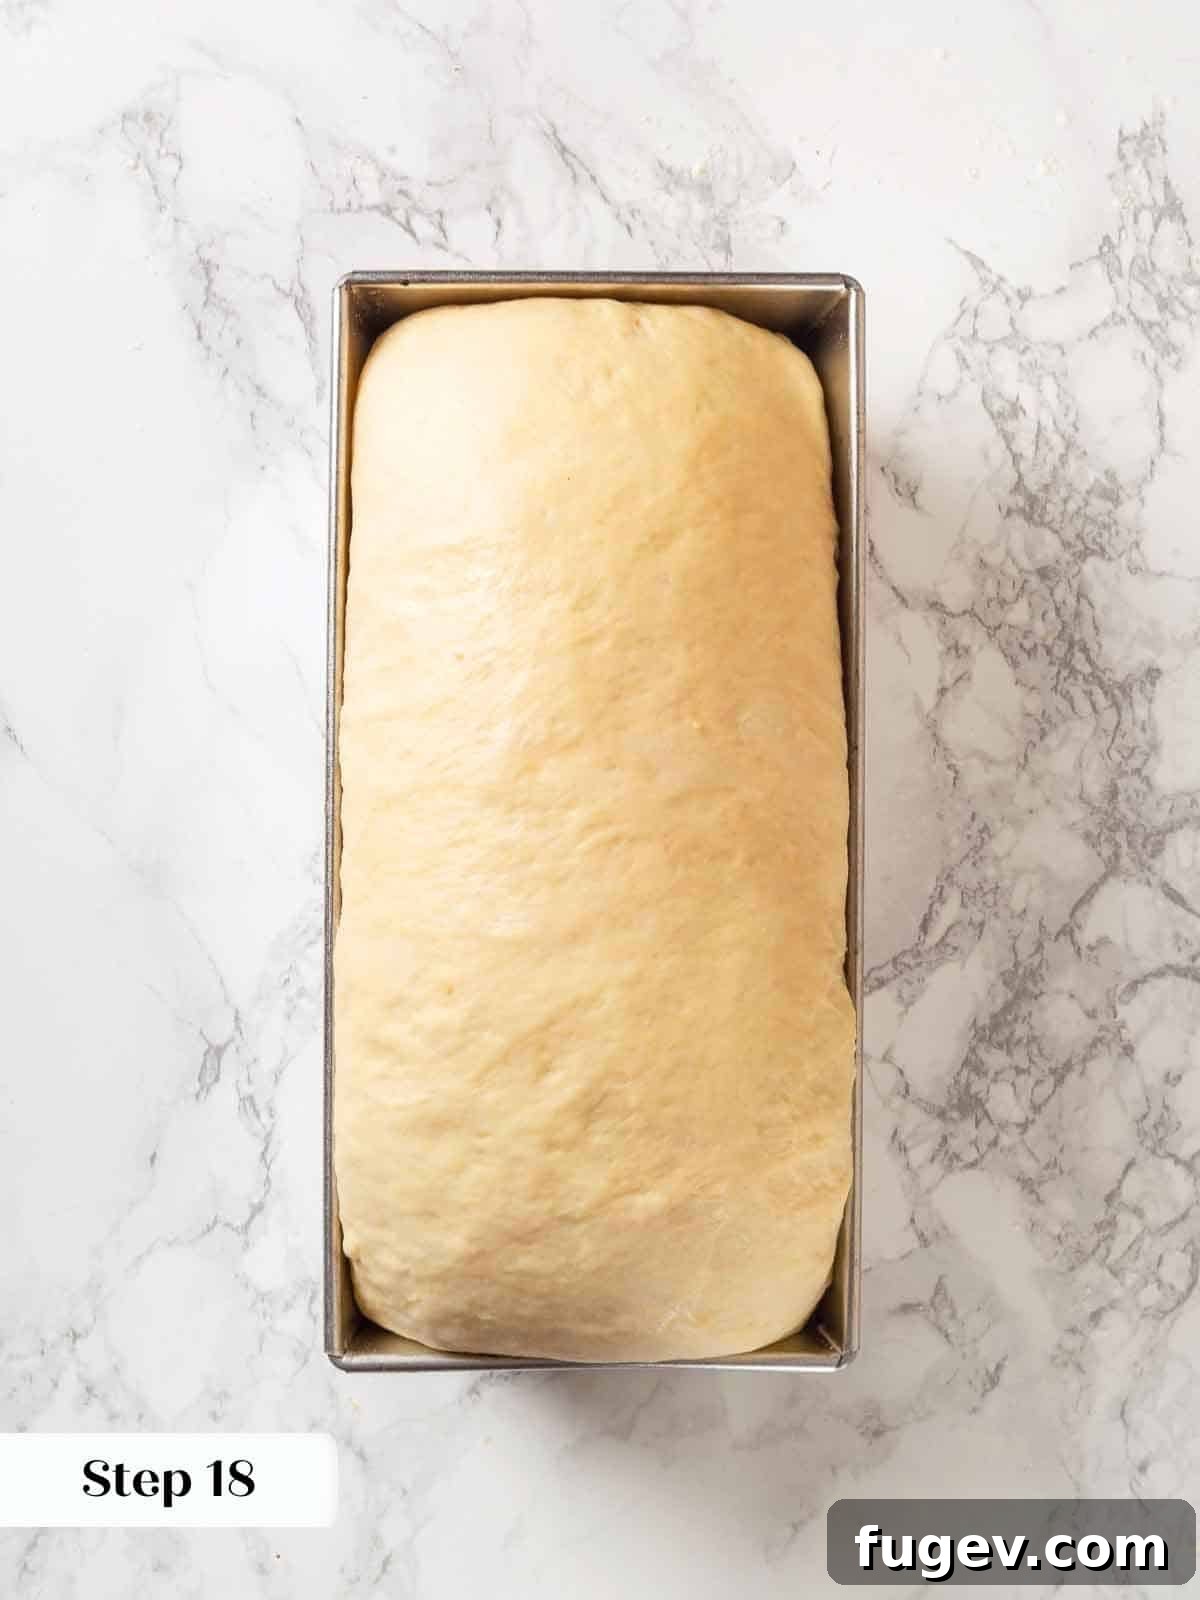
Step 18: Cover the loaf pan with plastic wrap, creating a loose dome to prevent sticking. Place it in a warm spot for its final proof. Allow the dough to proof until it has risen beautifully above the top edge of the pan and feels noticeably light and airy to the touch. This typically takes about 30-45 minutes, depending on the warmth of your environment.
Proofing Observation: My dough often rises impressively quickly. If it rises over the top in about 30 minutes, I might carefully loosen the plastic, remove it from the warm oven, and let it continue proofing at room temperature for another 15 minutes while the oven preheats. This helps prevent over-proofing and ensures a controlled final rise.
Phase 4: Time to Bake Your Golden Loaf!
The final step to achieving your perfect homemade potato bread!
Step 19: Preheat your oven to 350°F (175°C) if using convection, or 375°F (190°C) for a conventional oven (no fan). Ensure the oven is fully preheated before placing the bread inside for even baking.
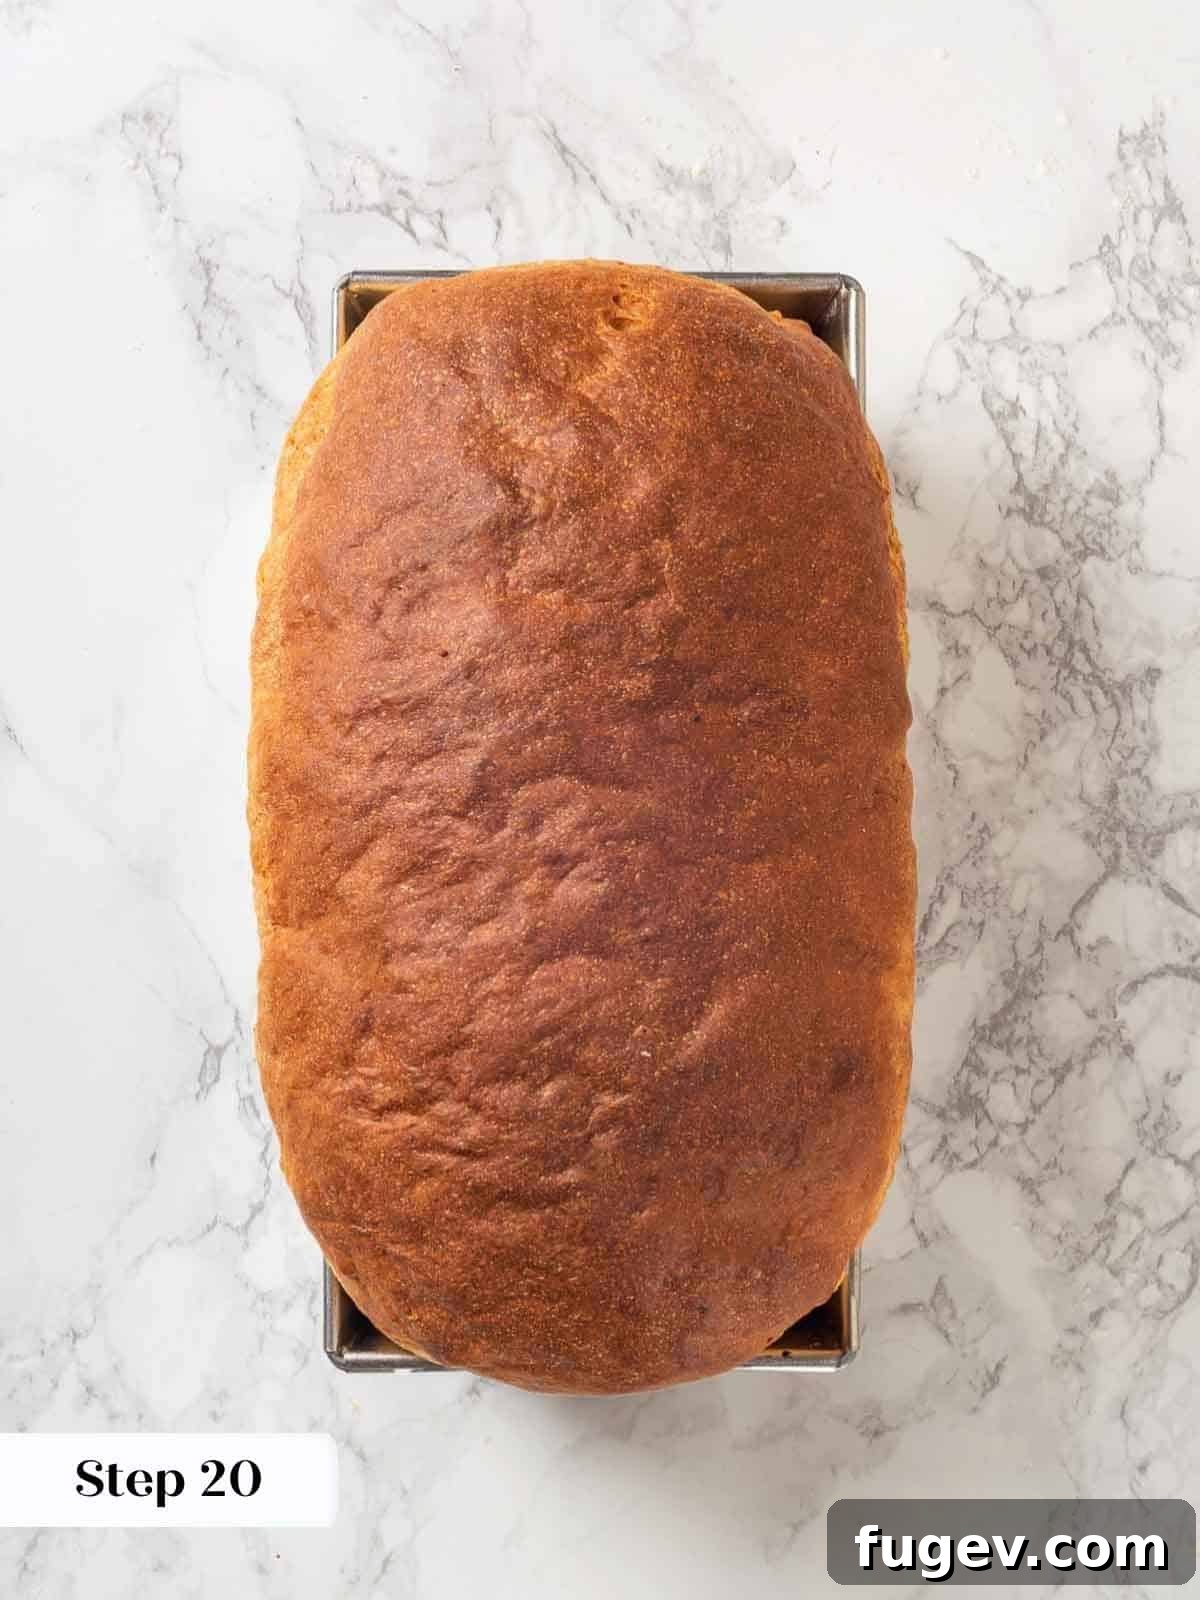
Step 20: Carefully remove the plastic wrap from the proofed dough. Bake for 30-35 minutes. To confirm doneness, the internal temperature should reach 185°F (85°C) when measured with an instant-read thermometer inserted into the center of the loaf. The crust should also be a beautiful deep golden brown.
Gleaming Crust Secret: For an extra shiny, golden-brown crust, lightly brush the top of the hot loaf with a bit of melted unsalted butter immediately after removing it from the oven.
Step 21: As soon as the bread is baked, turn it out onto a wire cooling rack immediately. Allow it to cool completely before slicing and serving. This cooling process is crucial; slicing hot bread can lead to a gummy texture. Exercise patience, even if your little ones are eager for a piece!
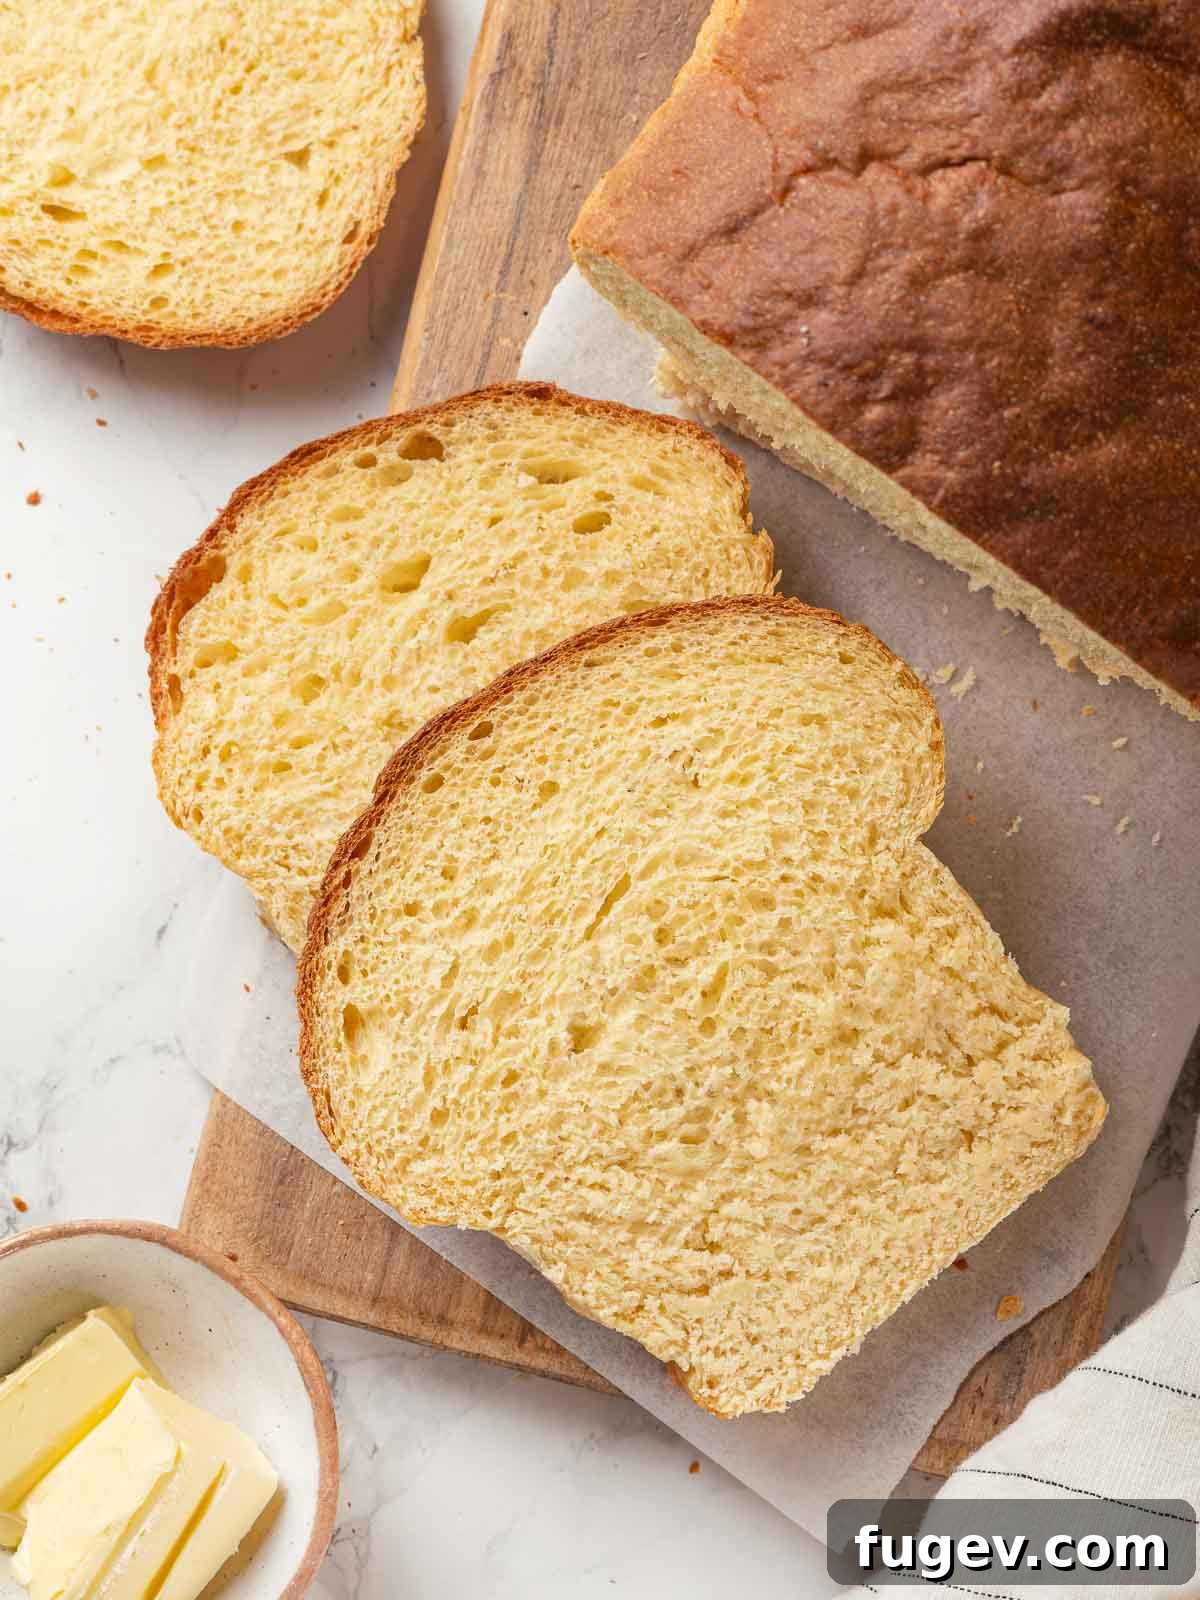
Step 22: Once cooled, slice your incredible fluffy potato bread and serve. It makes phenomenal sandwiches – I especially love using it for pesto chicken salad sandwiches; they’re absolutely bomb!
Chef Lindsey’s Expert Baking Tip: Managing Dough Stickiness
The unique properties of potato bread, particularly the humidity from the mashed potatoes and varying moisture retention, can significantly impact the stickiness of the dough. While this truly is a foolproof dough designed for success, the potatoes represent a natural variable.
If you find your dough to be exceptionally sticky, you have a couple of options. You can add a very small amount of all-purpose flour to it, a tablespoon at a time, just before incorporating the butter. However, for the absolute best flavor, tender crumb, and overall texture, my professional recommendation is to simply “roll with the stickiness.” A slightly stickier dough often yields a more moist and airy final product. Trust the process, and rely on nonstick spray for your hands during shaping rather than excessive flour, to maintain the ideal dough consistency.
Common Potato Bread Questions Answered
Store your potato bread well-wrapped in an airtight container or plastic wrap at room temperature for up to 5 days. For longer storage, it can be frozen for up to 2 months. As this bread contains no preservatives, its peak texture and freshness are best enjoyed within 2-3 days. For ultimate convenience, pre-slice the bread before freezing, so you can easily grab a slice or two to defrost and enjoy.
For the finest fluffy potato bread, I highly recommend using high-starch potatoes like Russet, Yukon Gold, or Idaho potatoes. Their higher starch content helps create a lighter, more tender crumb and contributes significantly to the characteristic airy texture of this bread.
While you technically *can* use instant mashed potatoes, I strongly advise against it for this best potato bread recipe. Instant potatoes are often pre-seasoned and can hold more moisture than fresh mashed potatoes, potentially making your dough excessively sticky and leading to an overly seasoned, unbalanced flavor profile in your finished loaf. For optimal results, stick to fresh, unsalted mashed potatoes.
Yes, you can knead potato bread dough by hand! Begin mixing the dough in a large bowl until it becomes less sticky and more cohesive. Then, transfer it to a lightly floured surface for kneading. To speed up the process and aid gluten development, consider an “autolyse” step: after the initial mixing of flour and water (and yeast), let the dough rest, covered, for 20-30 minutes before adding other ingredients like butter and eggs. This allows the flour to fully hydrate and gluten to begin developing naturally. You can also follow the autolyse with a series of “stretch and folds” rather than continuous kneading.
Leftover homemade potato bread is a treasure! My top recommendation is always French toast – its rich, tender crumb soaks up the custard beautifully. It’s also superb for making gourmet grilled cheese sandwiches or transforming into my comforting easy bread pudding. Don’t let a single slice go to waste!
Thick slices of soft potato bread are an exceptional accompaniment to hearty, rich dishes such as a savory rosemary lamb stew or my robust Dutch oven beef stew. However, its versatility extends far beyond stews; serve it alongside a fresh salad for a lighter lunch, or use it as the perfect base for classic comfort food like tuna melts or delightful deviled egg salad sandwiches. And for a truly indulgent finish, a generous slice of Guinness chocolate cake for dessert never disappoints!
More Recommended Yeasted Bread Recipes
Loved this homemade potato bread? Explore more of our chef-tested yeasted bread recipes to expand your baking skills and delight your palate!
Dinner Roll Recipes
The Best Potato Rolls
Sourdough Bread Recipes
Sweet Sourdough Raisin Bread
Yeasted Bread Recipes
The Best Stollen Recipe
Yeasted Bread Recipes
100% Whole Wheat Bread
If you tried this homemade potato bread recipe and absolutely loved it, please take a moment to leave a 🌟 star rating and share your thoughts in the comments below. Your feedback truly makes my day!
Ultimate Homemade Potato Bread
Comment
Print Recipe
Ingredients
US Customary
Metric
Metric
- 3 ¾ cups all-purpose flour
- 1 ½ teaspoons kosher salt
- 3 tablespoons granulated sugar
- 2 large eggs
- ¼ cup whole milk
- 2 ½ teaspoons active dry yeast 1 package
- 1 ¾ cups mashed potatoes cooled, unsalted
- 6 tablespoons unsalted butter cubed, room temperature
Instructions
Make the potatoes:
-
Place your washed potatoes in a pot. They can be whole or chopped.
-
Just cover the potatoes in water. This will help prevent the potatoes from absorbing too much moisture.
-
Bring to a boil and cook until fork tender. Drain the liquid and mash the potatoes while still warm.
-
Cool the potatoes at room temperature and place them well-wrapped in the fridge.
Make the dough:
-
In a small bowl, add active dry yeast. Set aside.
-
Warm milk in a small saucepan or microwave. Add a little cold milk to the warm milk until it reaches 100-110°F.
-
Measure a ¼ cup of the milk into the bowl with the yeast. Stir the yeast mixture gently and allow it to bloom for 10 minutes before adding it to the dough.
-
While you wait for the yeast to bloom, combine the all-purpose flour, salt, and sugar in a medium mixing bowl and set aside.
-
In the bowl of a stand mixer, add the eggs and the cooled mashed potatoes. Once the yeast is bubbly, add the yeast as well.
-
Mix on low with the paddle attachment to create a smooth paste.
-
Add all the dry ingredients, switch to the dough hook attachment, and then mix on low for 15 minutes until a smooth but thick dough forms.
-
Add the butter all at once and mix on medium for 10 minutes—or as long as your stand mixer can handle!
Proof and shape:
-
Turn out the dough into a lightly oiled large bowl and cover with plastic wrap. Unlike the potato rolls, I bulk-proof this bread, especially with dry active yeast. My dough was absurdly cold, so I preheated my oven to 100°F, turned it off and then popped my dough bowl in. It warmed and doubled in about an hour.
-
Turn dough out onto an unfloured surface and pre-shape into a round. Bench rest for 10 minutes.
-
Final shape into a loaf by pulling it into a rectangular shape. Fold the top half of the dough down toward the center, rotate 180°, then fold the other side down, pressing. Perform 2 thumb folds by rolling the dough around the thumb of your left and then sealing the dough with the heel of the right hand. Start on the right side of the log and move across to the left.
-
Repeat once more. This dough stretches fairly easily, so you can scrunch the log shorter while performing the second thumb fold to keep it from getting too long for your pan.
-
Place seam side down in a 9×5 inch loaf pan sprayed with nonstick cooking spray or buttered.
-
Cover with plastic wrap and place in a warm spot. Let it proof until the dough has risen above the pan and feels light and airy.
Time to bake:
-
Preheat the oven to 350°F convection or 375°F conventional (no fan).
-
Remove plastic from the surface and bake for 30-35 minutes or until the internal temperature reaches 185°F.
-
Turn out onto a wire cooling rack immediately and let cool completely before serving. Try not to let your toddler sneak a piece!
-
Slice and serve. I used it to make pesto chicken salad sandwiches. They were pretty bomb!
Notes
Presentation – For a gorgeous, shiny golden brown crust, lightly brush the top of the potato bread with melted butter immediately after it comes out of the oven.
Technique – When boiling your potatoes for this recipe, absolutely do not salt the water. Combining salted water with an already salted dough will result in an overly salty loaf of potato bread.
Variations – When it comes to mashed potatoes, there’s always the great debate of skin or no skin. The wonderful thing about this homemade potato bread is that you can use either for a delicious loaf. Leaving the skin on will give it a slightly more rustic texture and added fiber.
Storage – Store your freshly baked potato bread well-wrapped at room temperature for up to 5 days, or freeze it for up to 2 months. Since it contains no preservatives, it will have the best texture and flavor if consumed within 2-3 days of baking.
Nutrition
Calories: 251kcal |
Carbohydrates: 40g |
Protein: 6g |
Fat: 7g |
Saturated Fat: 4g |
Polyunsaturated Fat: 1g |
Monounsaturated Fat: 2g |
Trans Fat: 0.2g |
Cholesterol: 43mg |
Sodium: 314mg |
Potassium: 164mg |
Fiber: 2g |
Sugar: 4g |
Vitamin A: 224IU |
Vitamin C: 7mg |
Calcium: 21mg |
Iron: 2mg
Before You Go: Explore More Chef-Tested Recipes
I hope you thoroughly enjoyed baking and tasting this professional chef-tested homemade potato bread recipe. It’s a true staple that brings comfort and deliciousness to any table!
If you’re eager to continue your culinary journey and explore more delectable dishes, be sure to check out our other chef-developed side dish recipes, many of which feature the versatile potato. Discover new favorites like our elegant scalloped potatoes, the ultimate comfort of loaded mashed potatoes, or the simple yet irresistible flavor of easy roasted rosemary potatoes. Happy cooking!