
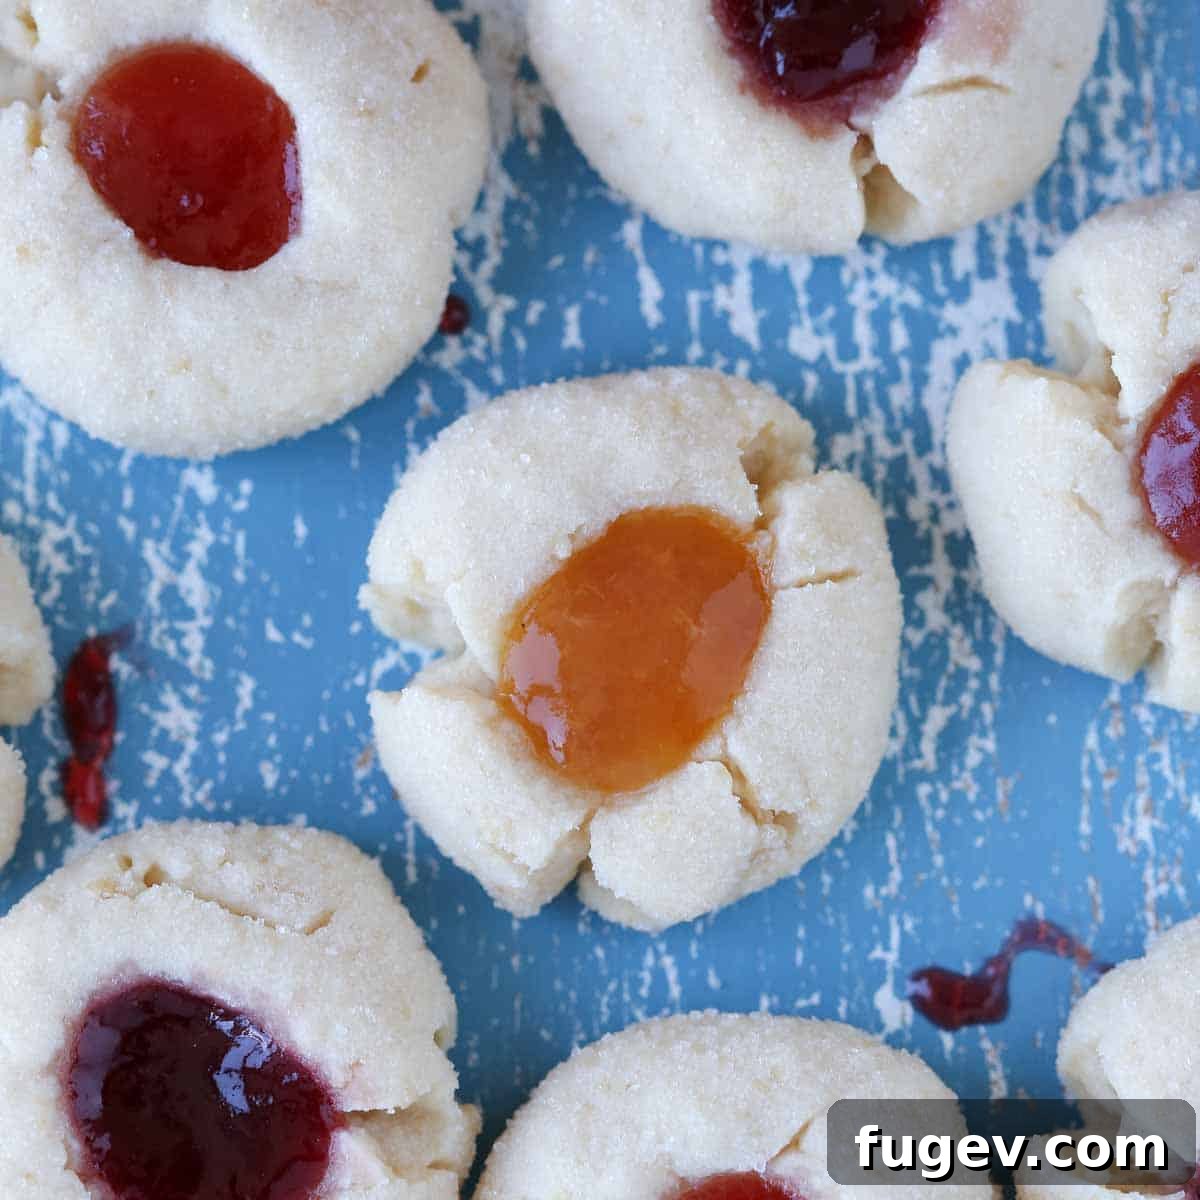
Welcome to the ultimate guide for crafting the most delightful thumbprint cookies. These tender vanilla cookies, elegantly rolled in sugar and generously filled with your favorite jam, are a true classic for a reason. Imagine a perfect balance of soft, buttery crumb and vibrant fruit flavor in every bite. This exceptional recipe demands only a handful of ingredients and comes together in under 30 minutes, making it incredibly accessible for bakers of all skill levels. What’s more, these charming treats boast an impressive shelf life, staying wonderfully fresh for up to 10 days at room temperature, making them an ideal candidate for preparing in advance for any special occasion.
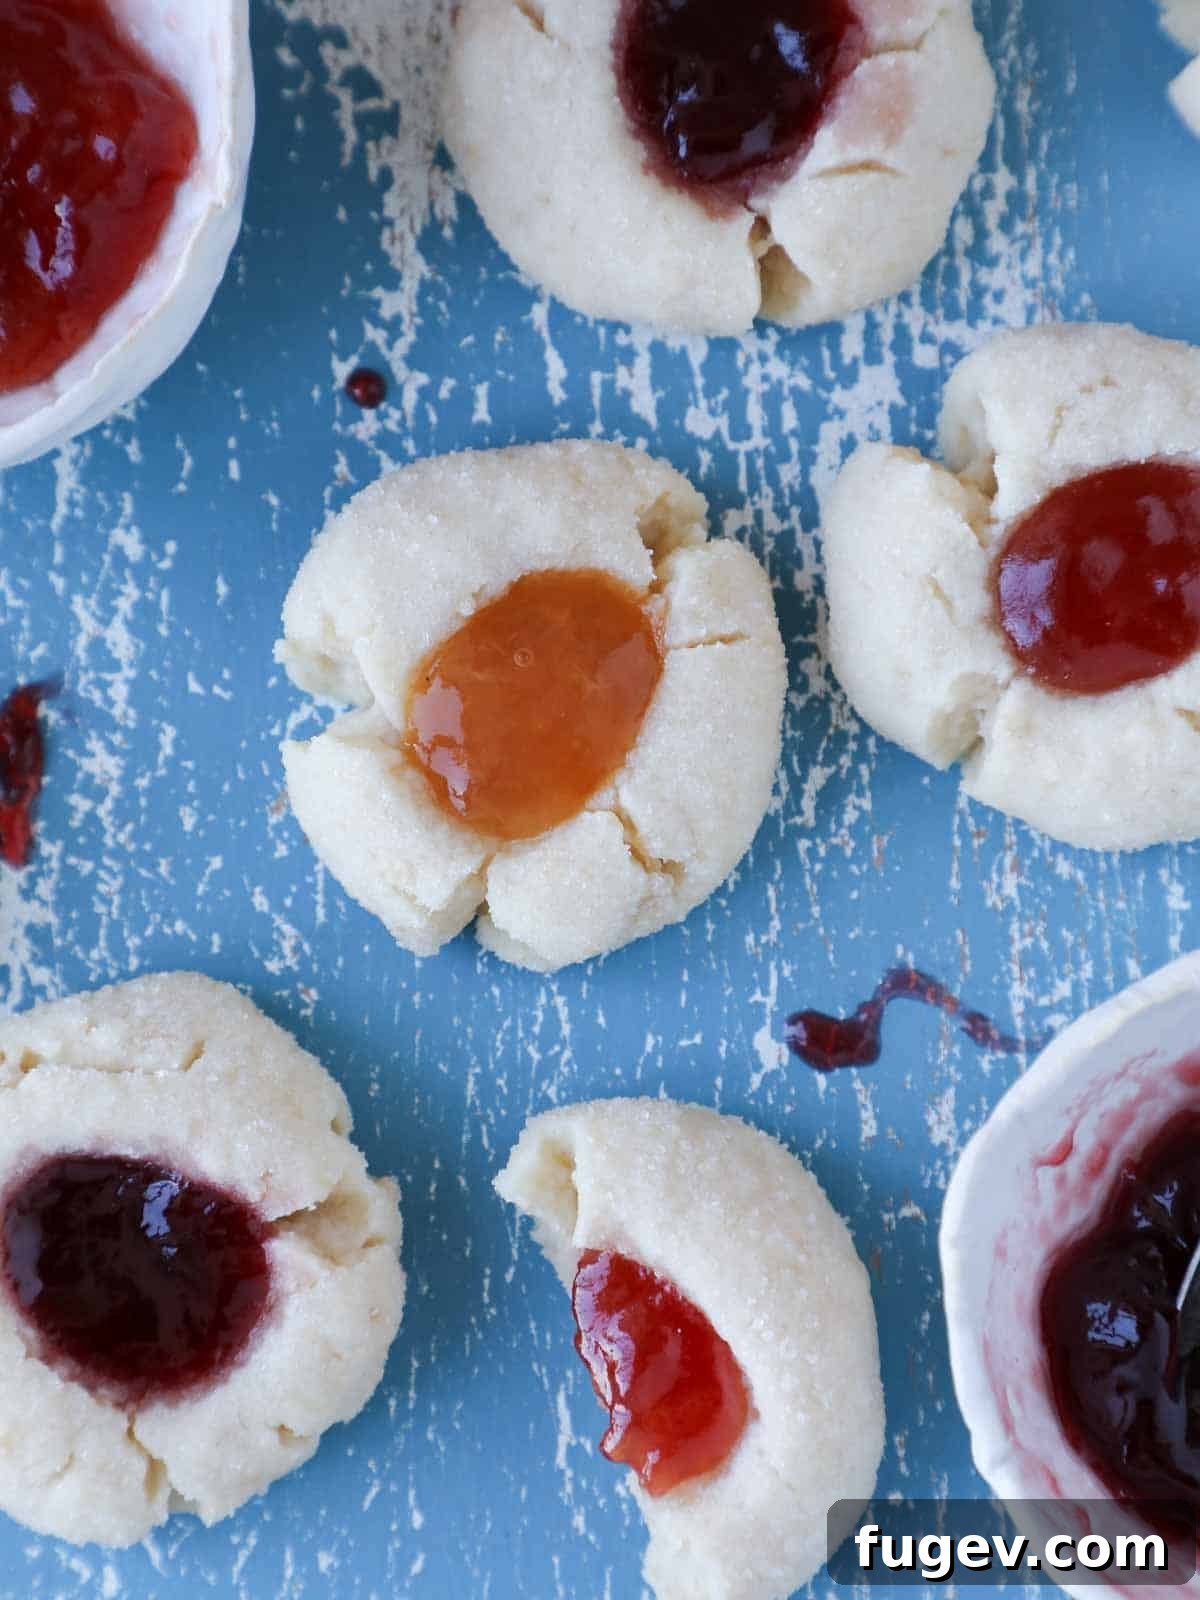
These tempting two-bite cookies are renowned for their irresistibly soft, tender, and subtly crumbly texture. The secret to their prolonged freshness lies in the jam filling, which acts as a natural moisturizer, keeping them soft for well over a week. This quality makes them the perfect make-ahead cookie for festive holidays like Christmas, romantic occasions such as Valentine’s Day, celebratory events like Mother’s Day, or even for contributing to a bake sale. Their versatility extends beyond just jam; you can get creative by rolling them in colorful sprinkles for a lively birthday party, or to enhance their festive appeal on a Christmas cookie tray. They pair wonderfully with other holiday favorites such as soft and chewy gingerbread cookies, delicate Pfeffernusse, or traditional Mexican wedding cookies. For those seeking alternative fillings, consider forgoing the jam entirely and instead spooning in luscious lemon curd, rich salted caramel sauce, or a simple yet decadent chocolate ganache for an entirely different flavor profile.
Table of Contents
- Why This is the Best Thumbprint Cookie Recipe
- Professional Tips for Making Thumbprint Cookies
- Essential Ingredients for Perfect Thumbprint Cookies
- Possible Variations to Customize Your Thumbprint Cookies
- How to Make Classic Thumbprints: Step-by-Step
- Chef Lindsey’s Expert Tip
- Frequently Asked Questions
- Thumbprint Cookies Recipe Card
- Before You Go: More Cookie Inspiration
Why This is the Best Thumbprint Cookie Recipe
- Flavor Perfected by a Professional Pastry Chef: This recipe isn’t just good; it’s designed for perfection. The cookie dough contains precisely the right amount of sugar to create a lightly sweetened base. This thoughtful balance ensures that even after rolling the cookies in granulated sugar before baking and adding a sweet jam filling, the end result is never overwhelmingly sweet. It’s a harmonious interplay of flavors where the buttery cookie and the fruity jam shine without competing. This nuanced approach to sweetness is what sets a professionally developed recipe apart.
- Unique Mixing Method for the Most Tender Cookies: Forget traditional creaming methods for this recipe. We utilize a special technique where softened butter is cut into all the dry ingredients until a smooth, cohesive dough forms. This innovative mixing approach eliminates the need for any liquid ingredients in the dough, which in turn minimizes gluten development. The result is an exceptionally tender, delicate, and delightfully crumbly cookie that practically melts in your mouth. This method is key to achieving the signature melt-in-your-mouth texture that makes these thumbprints so irresistible.
- Quick & Easy Recipe with No Chilling Required: In today’s fast-paced world, convenience is key. This recipe delivers on that promise with no complicated steps or lengthy waiting times. You won’t need to chill the dough before baking, allowing you to go from craving to fresh-baked cookies in a remarkably short amount of time. This makes it perfect for impromptu baking sessions, busy holiday seasons, or whenever a sweet treat is desired without the fuss.
Professional Tips for Making Thumbprint Cookies
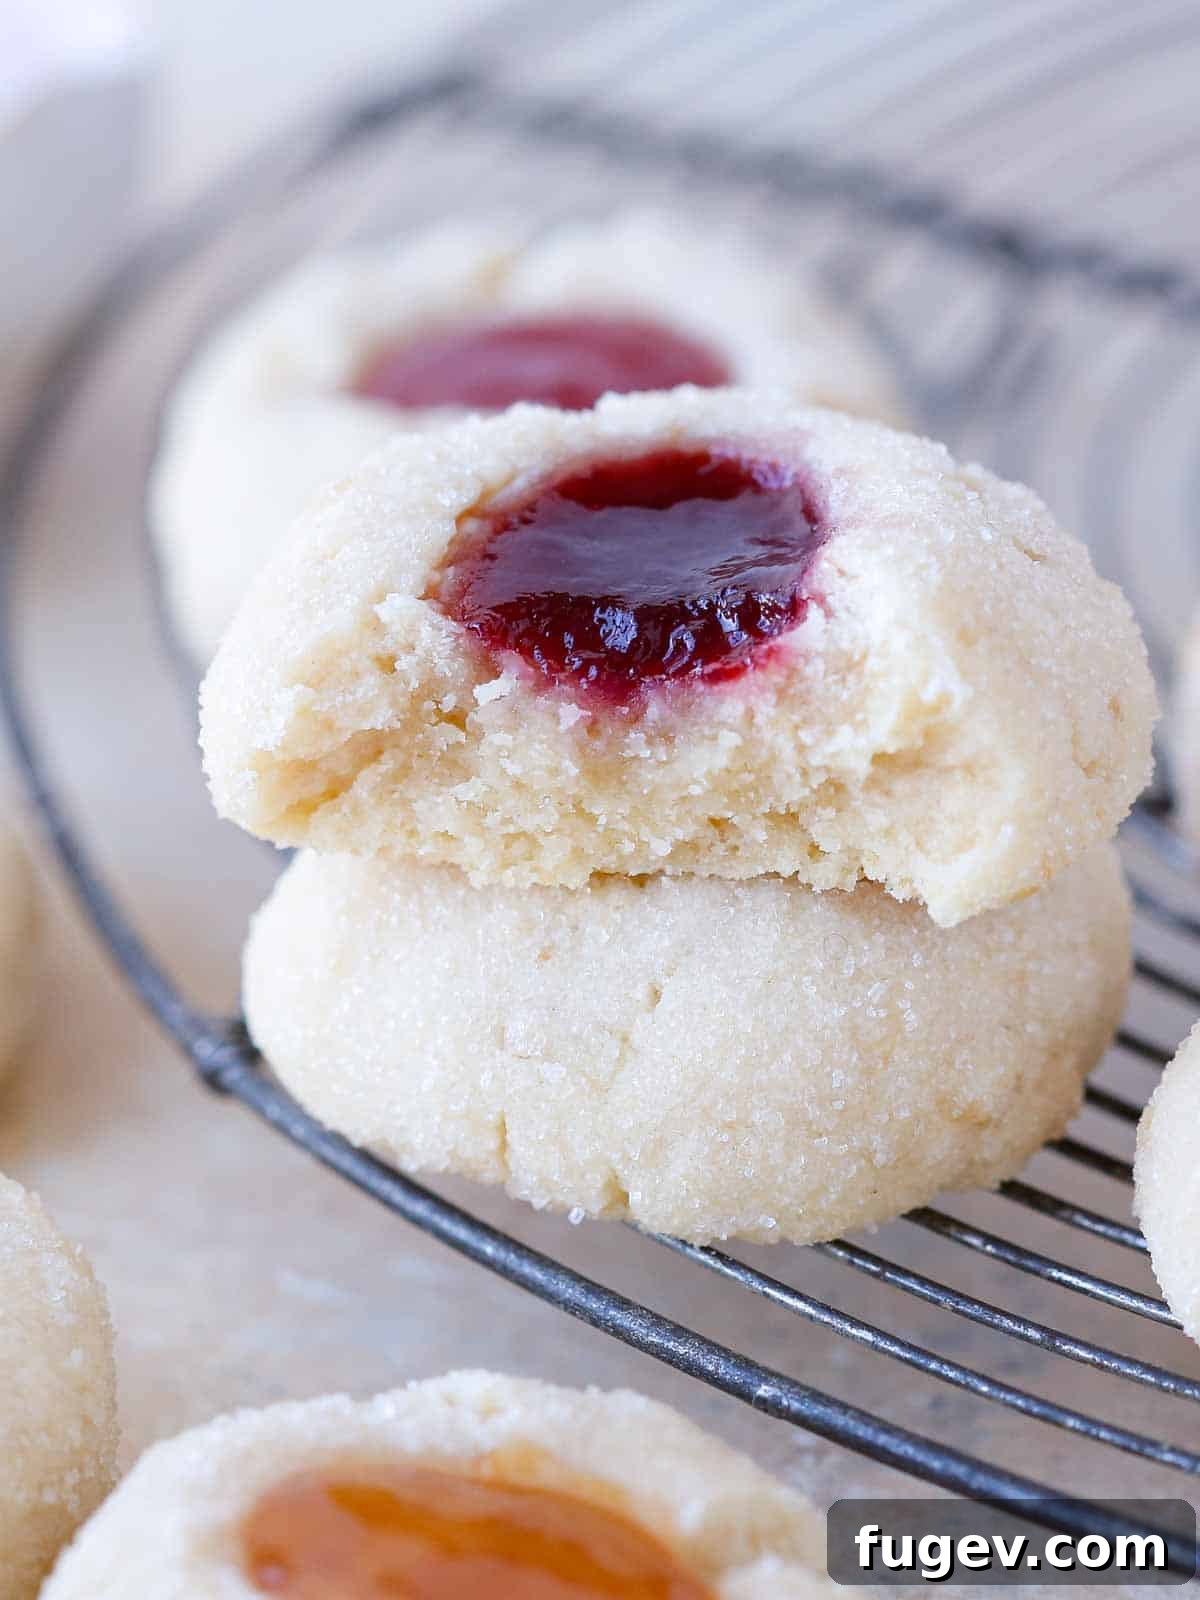
- Press Gently to Avoid Cracking: The delicate nature of this dough means a gentle touch is crucial when creating the indentation. While they are called “thumbprint” cookies, many find their forefinger is actually better suited for this task as it often creates a smaller, more even depression and reduces the likelihood of cracks forming. Regardless of which finger you choose, apply firm, even pressure and gradually deepen the indentation. Should any small cracks appear, simply gently press the dough back together around the edge of the indentation. This minor fix prevents the jam from seeping out during baking, ensuring a perfectly contained filling.
- Fill with Jam Before Baking: One common mistake is to fill thumbprints after baking. However, for these cookies, it’s essential to fill them with jam *before* they go into the oven. The heat of the oven causes the jam to thicken slightly and further activates its natural pectin, helping it set beautifully within the cookie. More importantly, baking the jam directly into the cookie helps to lock in moisture, contributing to the cookies’ exceptional softness and extending their fresh, tender texture for days. This step is key to both structural integrity and a moist final product.
- Choose a Thick Jam for Best Results: The type of jam you select makes a significant difference. This is not the ideal recipe for thin, runny fruit spreads or quick, homemade strawberry or peach preserves that lack body. Thin jams, jellies, or preserves are prone to boiling over and running out of the cookie during baking, rather than thickening and staying neatly in the centers. Opt for a high-quality, thick-set jam. If your chosen jam seems a bit too firm to easily spoon into the indentations, a vigorous stir with a spoon will often loosen it just enough without compromising its thickness. For homemade options, consider using a mixed berry jam specifically made with pectin to ensure a robust, thick consistency.
- Use a Conventional Oven Setting: While convection ovens can be great for even heating, for these delicate thumbprint cookies, a conventional oven setting (without the fan) is highly recommended. The circulating air in a convection oven can sometimes dry out the cookies too quickly or cause uneven baking, leading to a less tender result. A conventional oven provides a gentler, more consistent heat that allows the cookies to bake perfectly and maintain their soft texture.
Essential Ingredients for Perfect Thumbprint Cookies
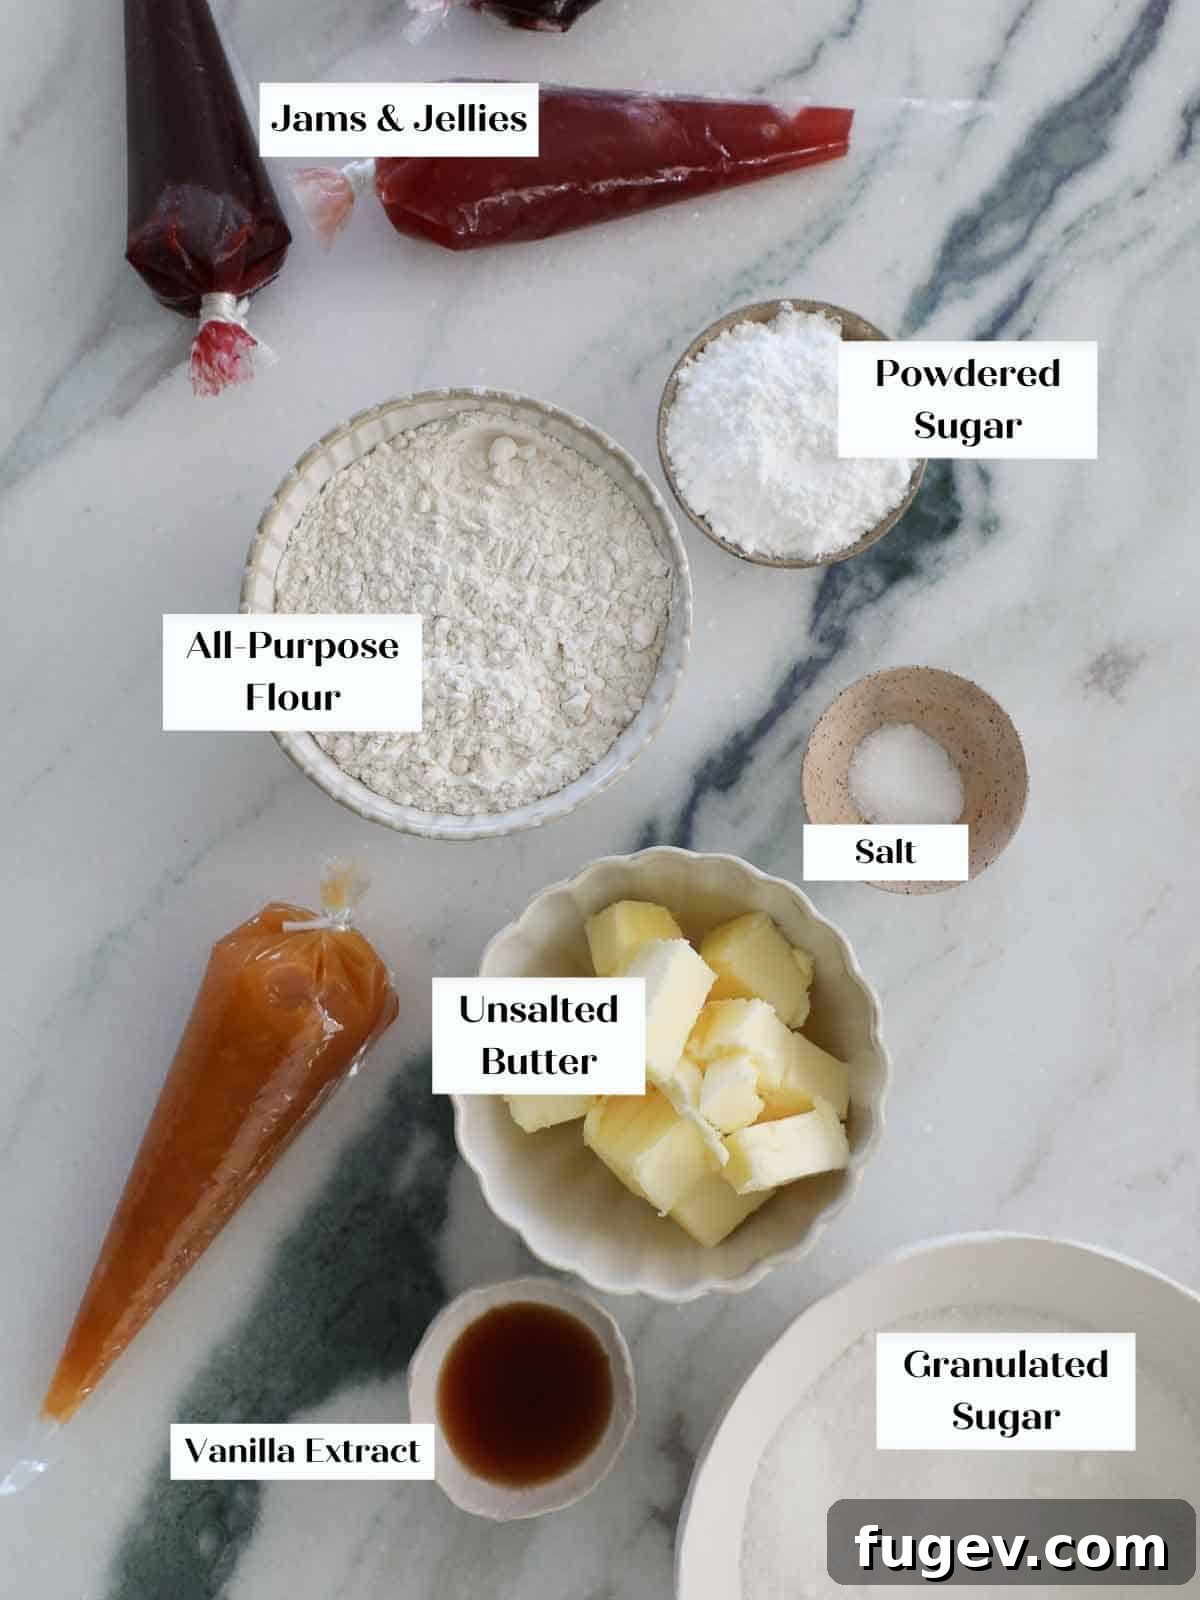
- Unsalted Butter: The quality of your butter directly impacts the flavor and texture of these cookies. For optimal dough formation and the most tender results, it’s crucial that your unsalted butter is properly softened. Unlike recipes for chewy cookies, where slightly firm room temperature butter might be preferred, here you want the butter to be very soft and pliable, almost spreadable. This allows it to be cut into the dry ingredients effectively, creating that signature delicate crumb.
- Powdered Sugar: Also known as confectioners’ sugar, powdered sugar is chosen for a specific reason. Its incredibly fine texture blends seamlessly into the dough, creating a smoother, more uniform consistency compared to granulated sugar. Furthermore, powdered sugar is inherently sweeter by volume than granulated sugar, allowing for a balanced sweetness without requiring an excessive amount.
- All-purpose Flour: The structural backbone of our cookies. Standard all-purpose flour provides the necessary framework for these delicate treats, ensuring they hold their shape while maintaining that tender crumb.
- Kosher Salt: Far from just a seasoning, kosher salt is an indispensable ingredient in these cookies. It plays a vital role in balancing the sweetness, adding depth to the vanilla flavor, and bringing out the rich, buttery notes of the cookie. Don’t skip it; a pinch of salt can elevate a good cookie to a great one.
- Vanilla Extract: Vanilla extract is much more than just a flavoring agent here; it’s a foundation of taste. It imparts that classic warm, inviting aroma and flavor, enhancing the overall profile of the cookie. Like in a rich devil’s food cake, vanilla can surprisingly deepen other flavors, and in this dough, it also contributes a touch of moisture essential for its texture.
- Granulated Sugar (for rolling): This ingredient is exclusively for the exterior coating of the cookie. Rolling the dough balls in granulated sugar before baking provides a delightful textural contrast—a subtle crunch that complements the soft interior. It also adds a delicate shimmer and an extra hint of sweetness, making each bite even more satisfying. This simple trick is also used in many other beloved cookie recipes, such as chewy sugar cookies and chewy molasses cookies.
- Jam: The star of the show! A good quality, thick jam is paramount for the filling. I personally love the classic combination of strawberry, apricot, and raspberry jams for their vibrant flavors and colors. Remember the earlier tip: ensure your jam is thick. If it’s too viscous to easily spoon into the indentations, simply stir it vigorously to loosen it up slightly without making it watery. The quality and consistency of your jam will truly define the “thumbprint” experience.
For precise measurements and detailed quantities, please refer to the comprehensive recipe card below.
Possible Variations to Customize Your Thumbprint Cookies
- Roll in Chopped Nuts or Festive Sprinkles: For an added layer of texture and flavor, consider replacing the granulated sugar coating with finely chopped nuts. Walnuts or pecans offer a delightful crunch and nutty aroma that beautifully complements the jam. Alternatively, for a truly celebratory look, especially during holidays or birthdays, roll the cookie dough balls in vibrant holiday sprinkles. This simple swap is a fantastic way to introduce color and fun to any dessert tray.
- Flavor the Dough for a Unique Twist: While vanilla is a timeless classic, don’t hesitate to experiment with different extracts to create new flavor profiles. A dash of lemon, orange, or almond extract can transform these cookies entirely. Imagine lemon-scented cookies with a bright raspberry jam, or almond cookies with an apricot filling! For chocolate lovers, instead of adapting this recipe, I highly recommend exploring dedicated chocolate thumbprint cookies for a truly rich experience. If you’re feeling minty, find inspiration in my peppermint triple chocolate brownies for festive flavor ideas.
- Infuse Granulated Sugar with Citrus Zest: Take your sugar coating to the next level by infusing it with fresh citrus zest. Simply zest about ⅓ of an orange or 1 whole lemon directly into your granulated sugar before you even start mixing the cookie dough. Gently rub the zest into the sugar with your fingertips to release its fragrant oils. The longer the zest sits with the sugar, the more pronounced the flavor will become. You can even prepare this flavored sugar the night before for maximum aromatic impact, adding a beautiful, subtle citrus note to the exterior of your cookies.
- Experiment with Diverse Fillings: Beyond traditional jams, the possibilities for fillings are endless! As mentioned in the introduction, consider rich lemon curd for a tangy counterpoint, luxurious salted caramel sauce for a decadent twist, or a simple homemade chocolate ganache for an indulgent treat. Nut butters, like almond or peanut butter, can also be used for a savory-sweet profile, especially if paired with a contrasting jam. Just ensure any alternative filling is thick enough to hold its shape during baking.
How to Make Classic Thumbprints: Step-by-Step
Follow these detailed instructions carefully to ensure you bake the best, most consistently perfect thumbprint cookies every time. Further precise details and exact measurements can be found in the comprehensive recipe card located below this section.
Make & Bake the Cookies:
Step 1: Prepare Your Baking Environment
Begin by preheating your oven to 325°F (160°C) using the conventional setting (ensure no fan is active). It is highly recommended to avoid the convection setting for these cookies, as the circulating air can affect their delicate texture. Line one standard baking sheet with parchment paper. Parchment paper is essential here as it prevents sticking and ensures even baking, making cleanup a breeze.
Step 2: Combine Ingredients for the Dough
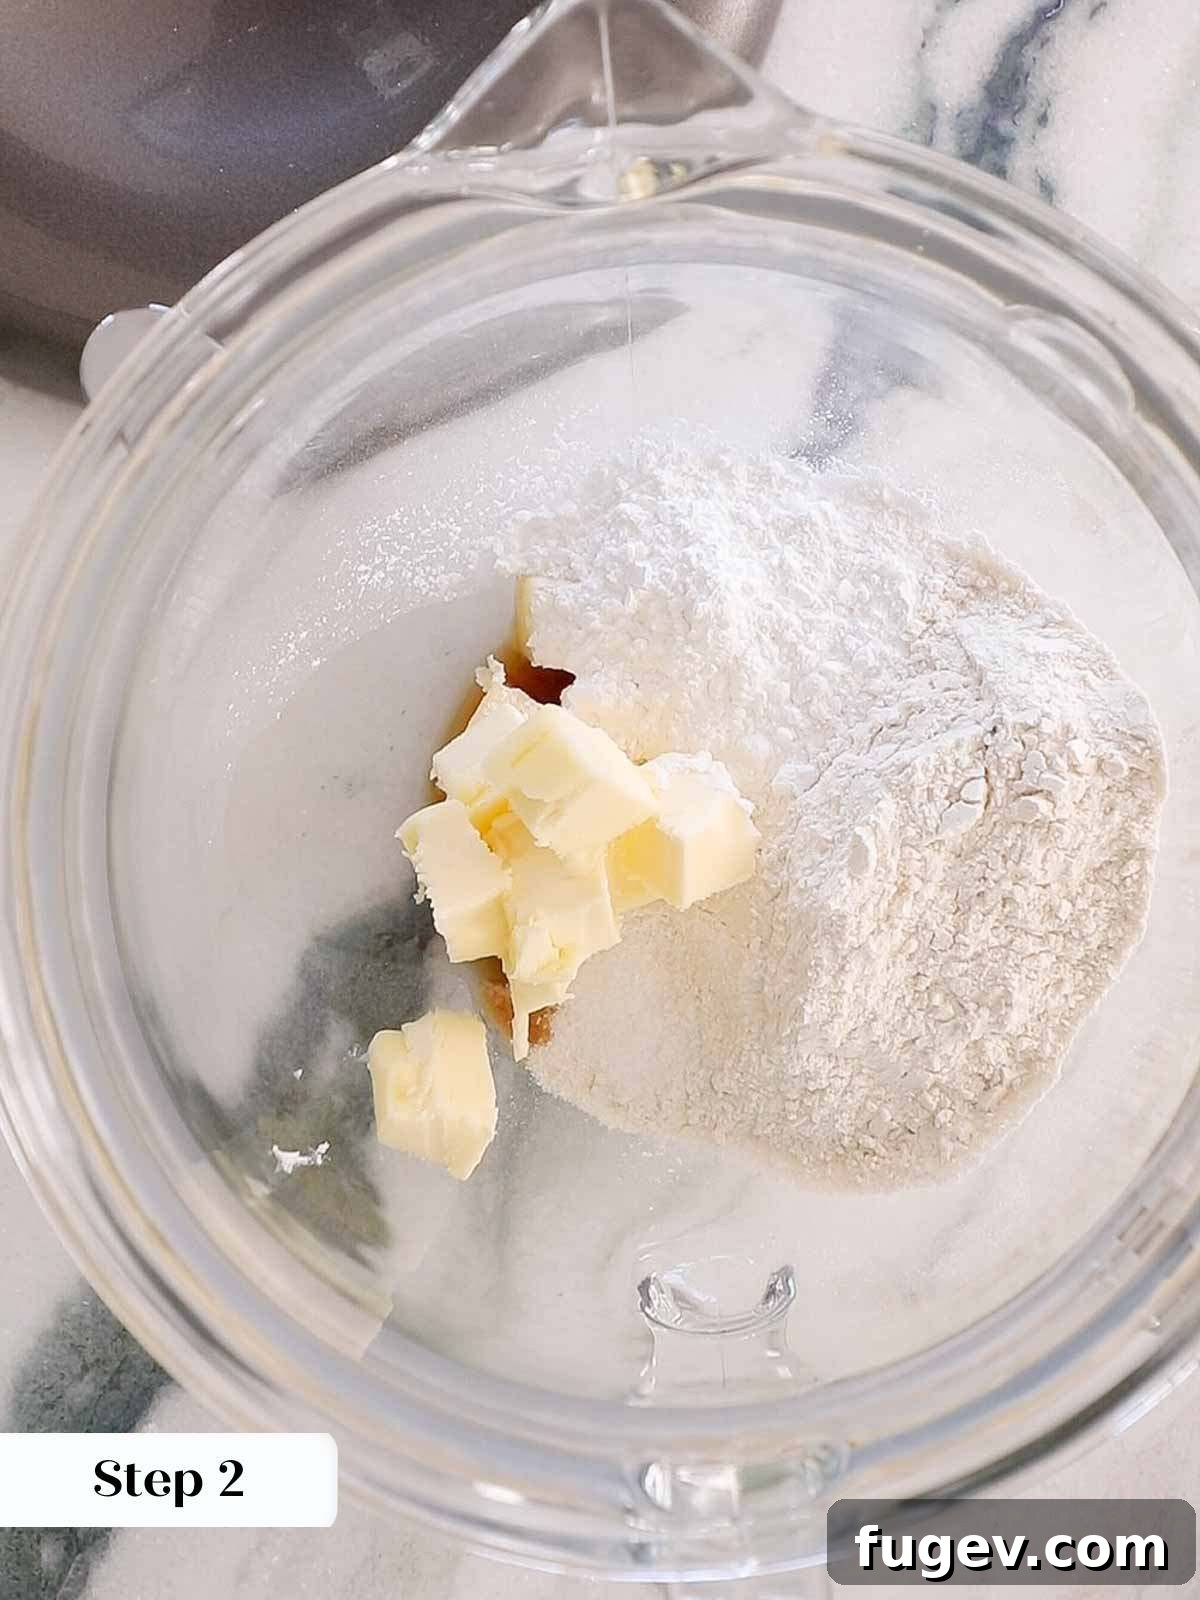
In the bowl of your stand mixer, fitted with the paddle attachment, add all the core ingredients: the softened unsalted butter, powdered sugar, all-purpose flour, kosher salt, and vanilla extract. Turn the mixer on to a medium-low speed and allow it to mix continuously until a completely smooth, uniform dough forms. This unique “cutting butter” method, where the butter is integrated directly into the dry ingredients, is key to the cookie’s tender crumb. It may initially seem like the ingredients won’t come together, but with patience, they will transform into a perfect dough.
This mixing process can sometimes feel like it takes an eternity, making you question if the dough will ever coalesce. Rest assured, it absolutely will. Patience is a virtue in baking!
Step 3: Shape and Coat the Cookie Dough
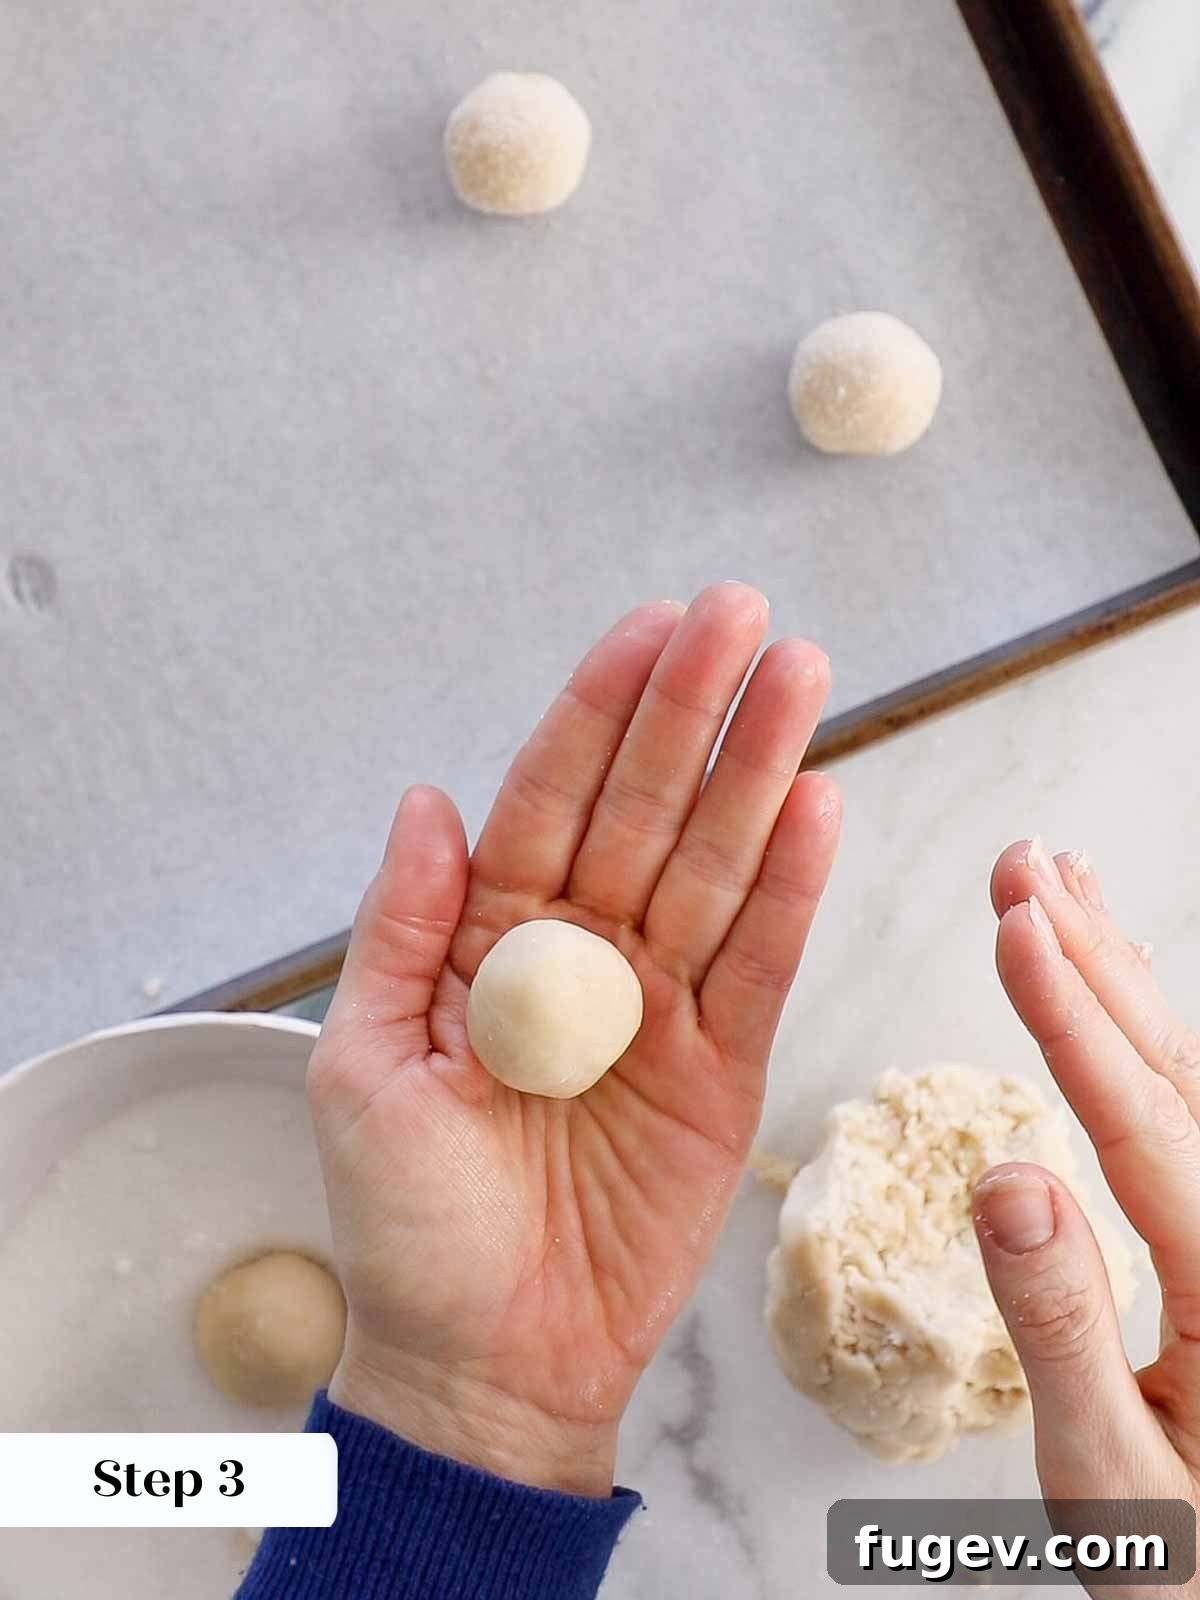
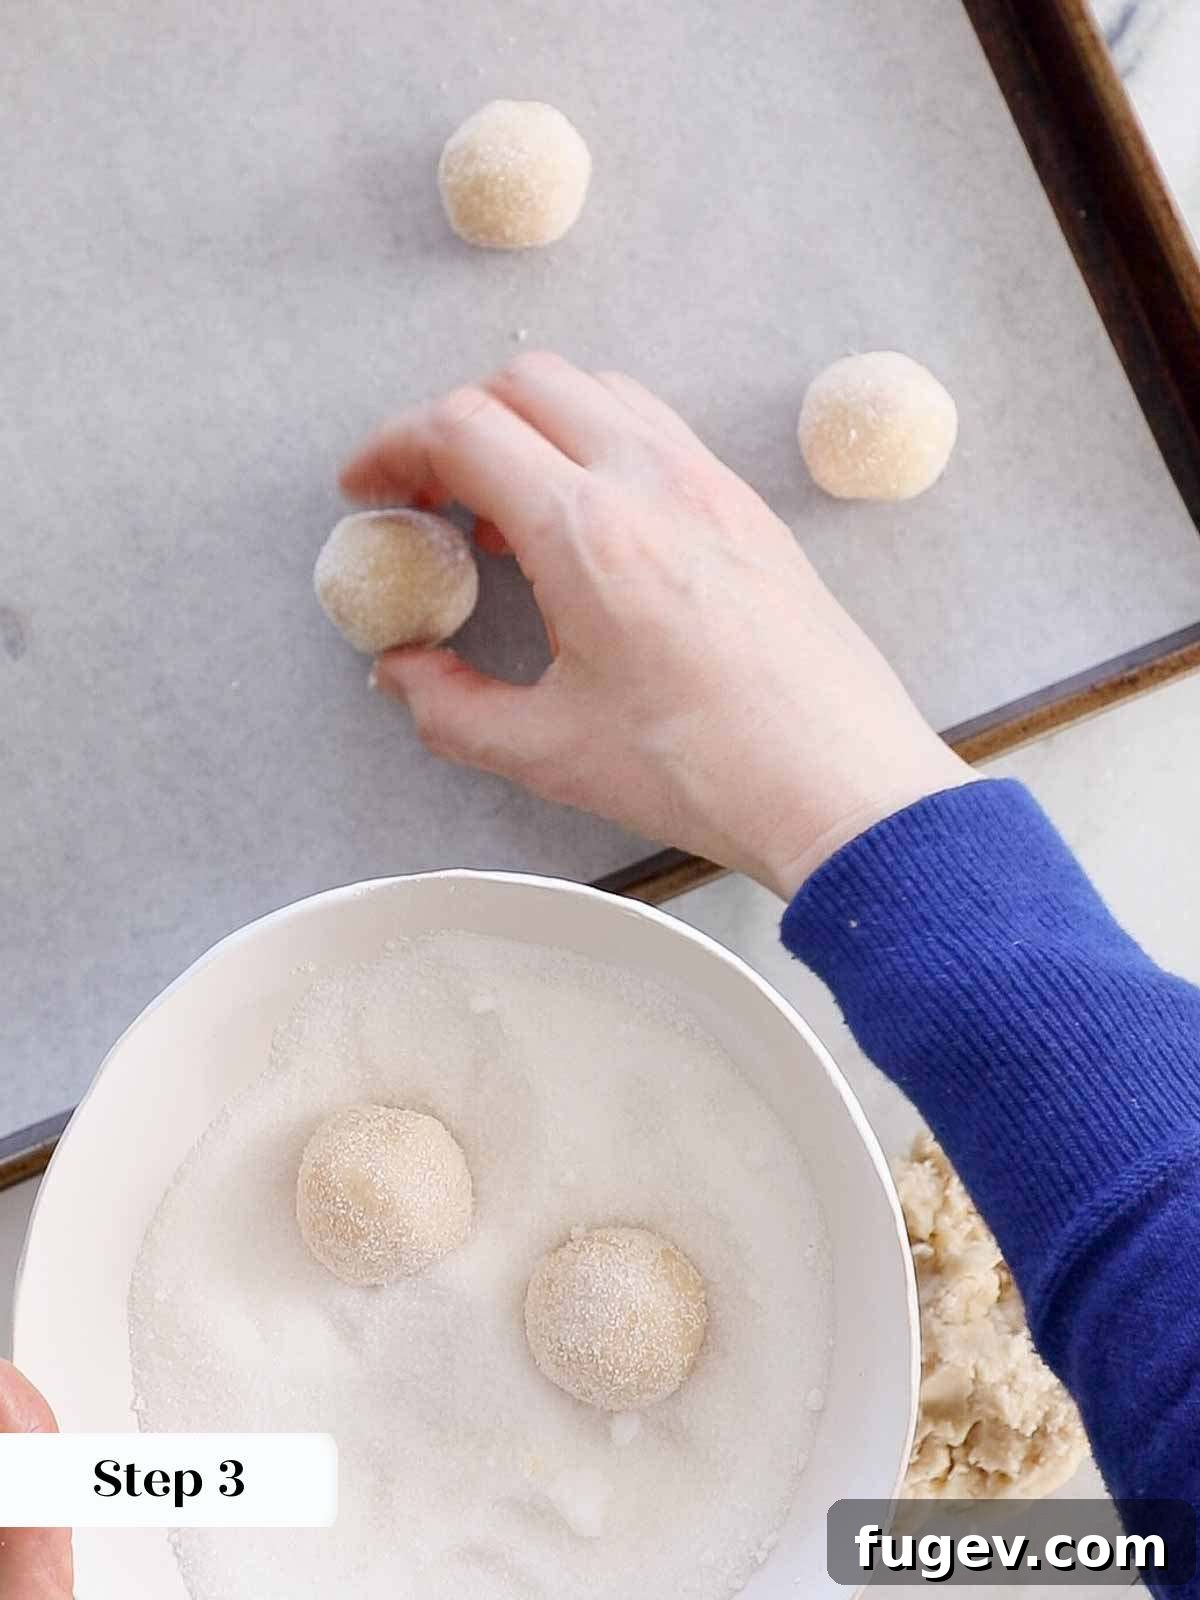
Once your dough is ready, pinch off small pieces, each roughly an inch (2.5 cm) in diameter. Roll each piece between your palms to form a smooth, uniform ball. Immediately after forming, roll these cookie dough balls generously in granulated sugar, ensuring they are evenly coated on all sides. You should yield approximately 15 cookies from this recipe, perfect for a modest batch or doubling for larger gatherings.
Step 4: Create the Indentations
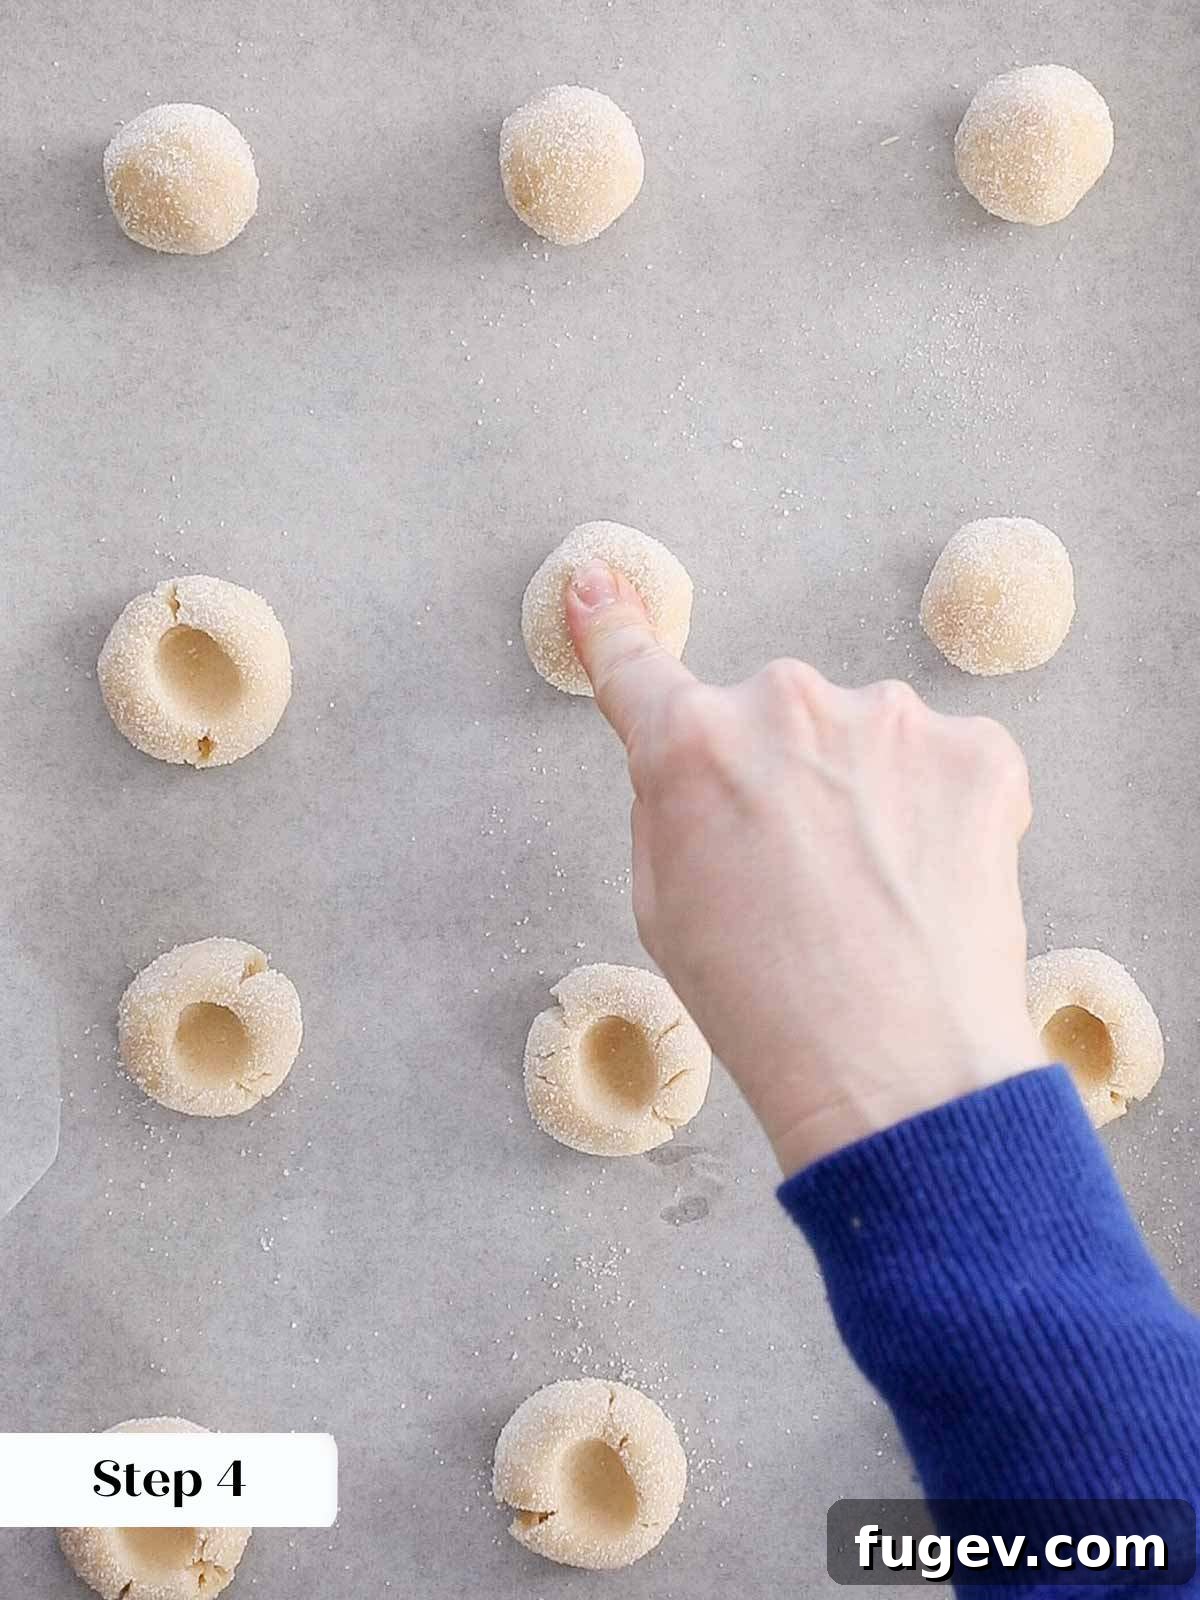
Carefully place the sugar-coated dough balls onto your parchment-lined baking sheet, spacing them about an inch apart and staggering them slightly. Now, using your forefinger (or thumb, if preferred, but forefinger often works better to prevent cracking), gently but firmly press into the center of each cookie to create an indentation. Aim for the indentation to go about halfway into the cookie’s depth. If any small cracks appear around the edges of the depression, gently press the dough back together. This step is crucial to prevent the jam from flowing out during baking.
For a perfectly round and neat center, a small round teaspoon measuring spoon can be used to create or refine the indentation.
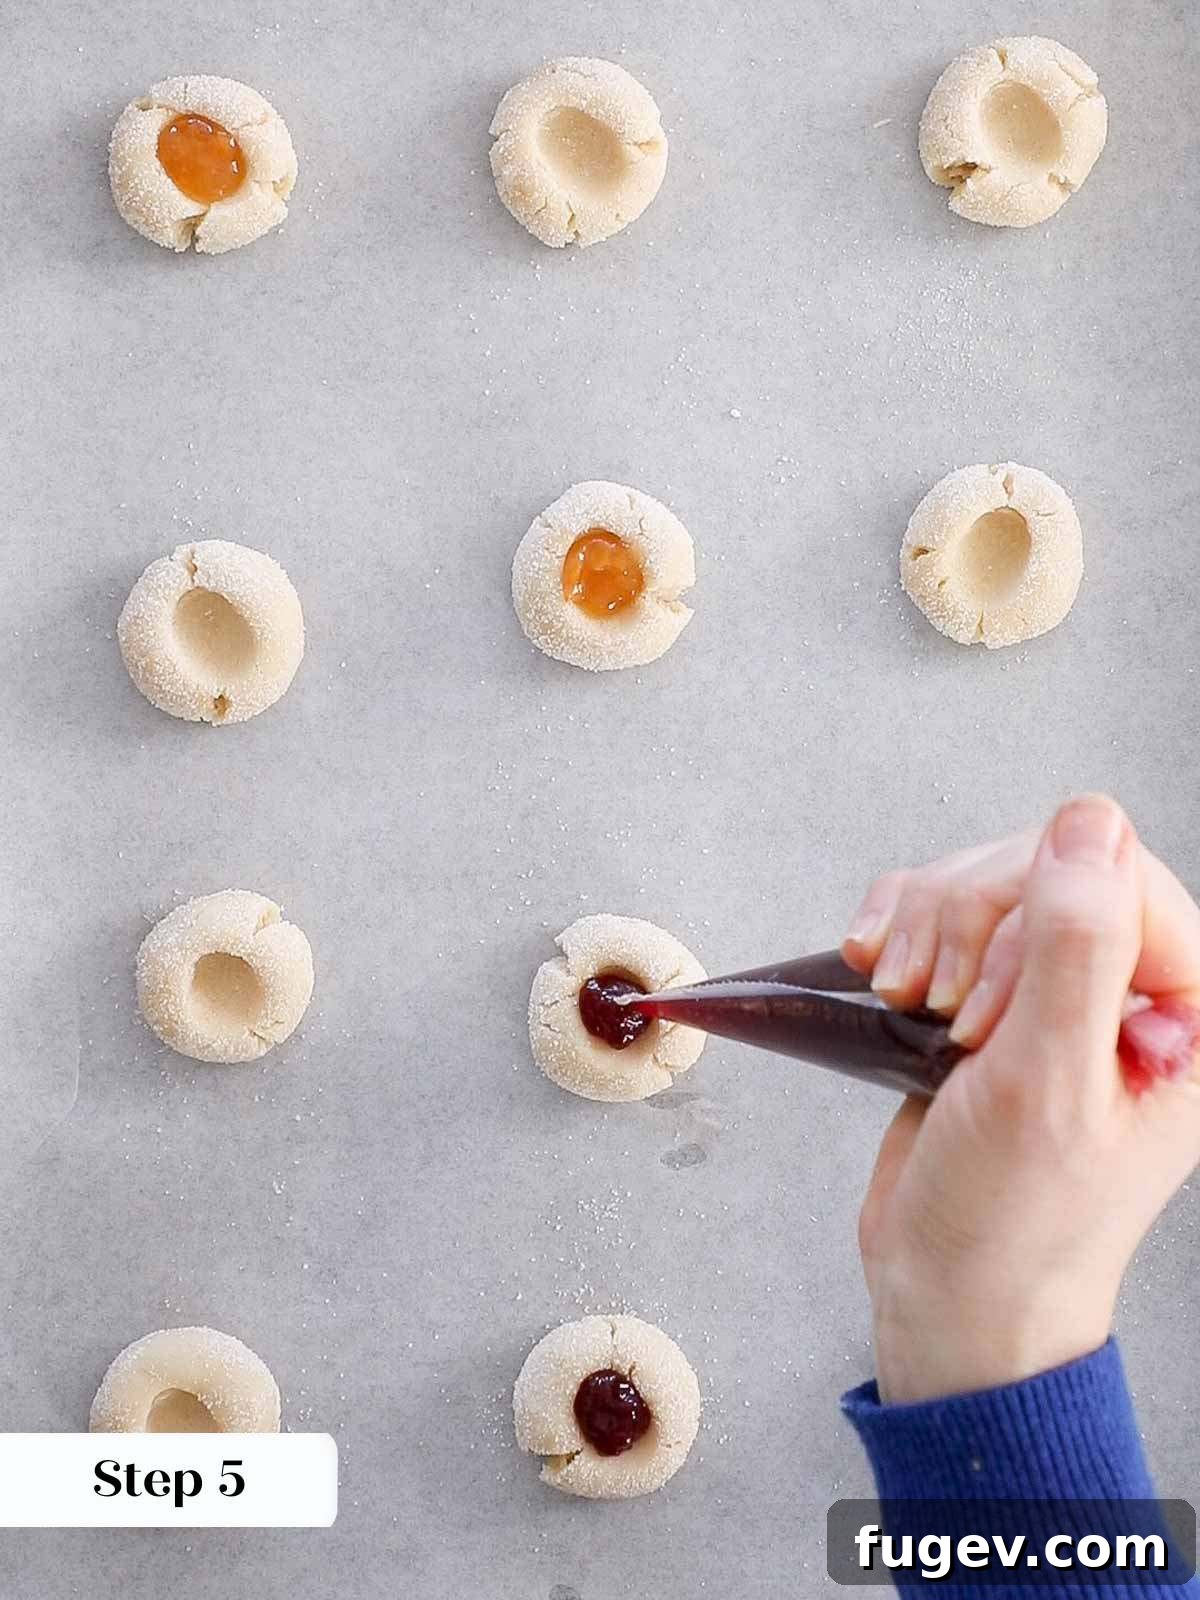
Step 5: Fill with Jam
Before baking, carefully pipe or spoon your chosen jam into the center of each cookie’s indentation. The amount will vary slightly depending on the depth of your thumbprint, but generally, about ½ teaspoon per cookie is sufficient. Remember to use a thick jam to ensure it stays in place and sets nicely.
It’s vital to choose a thick, good-quality jam for the filling and absolutely avoid low or no-sugar jams. From personal experience, these varieties tend to liquefy during baking and will unfortunately run right out of your cookies, creating a sticky mess!
Step 6: Bake to Golden Perfection
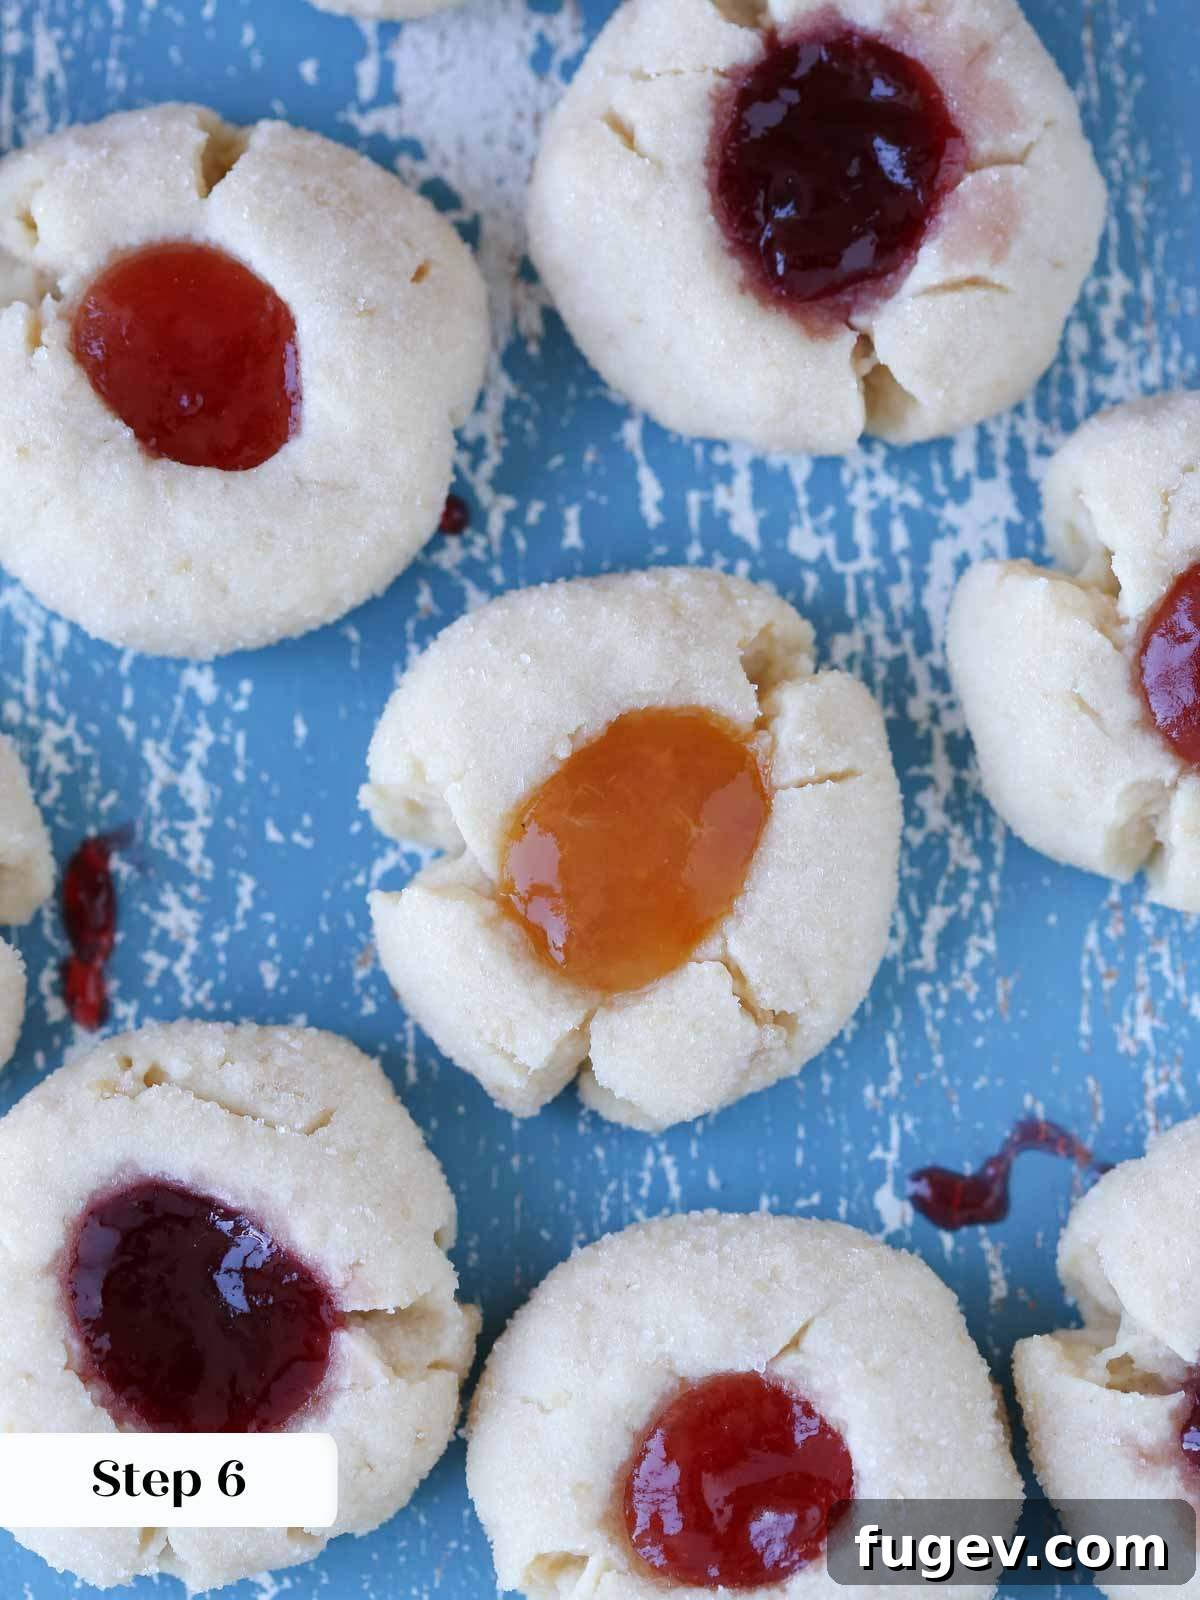
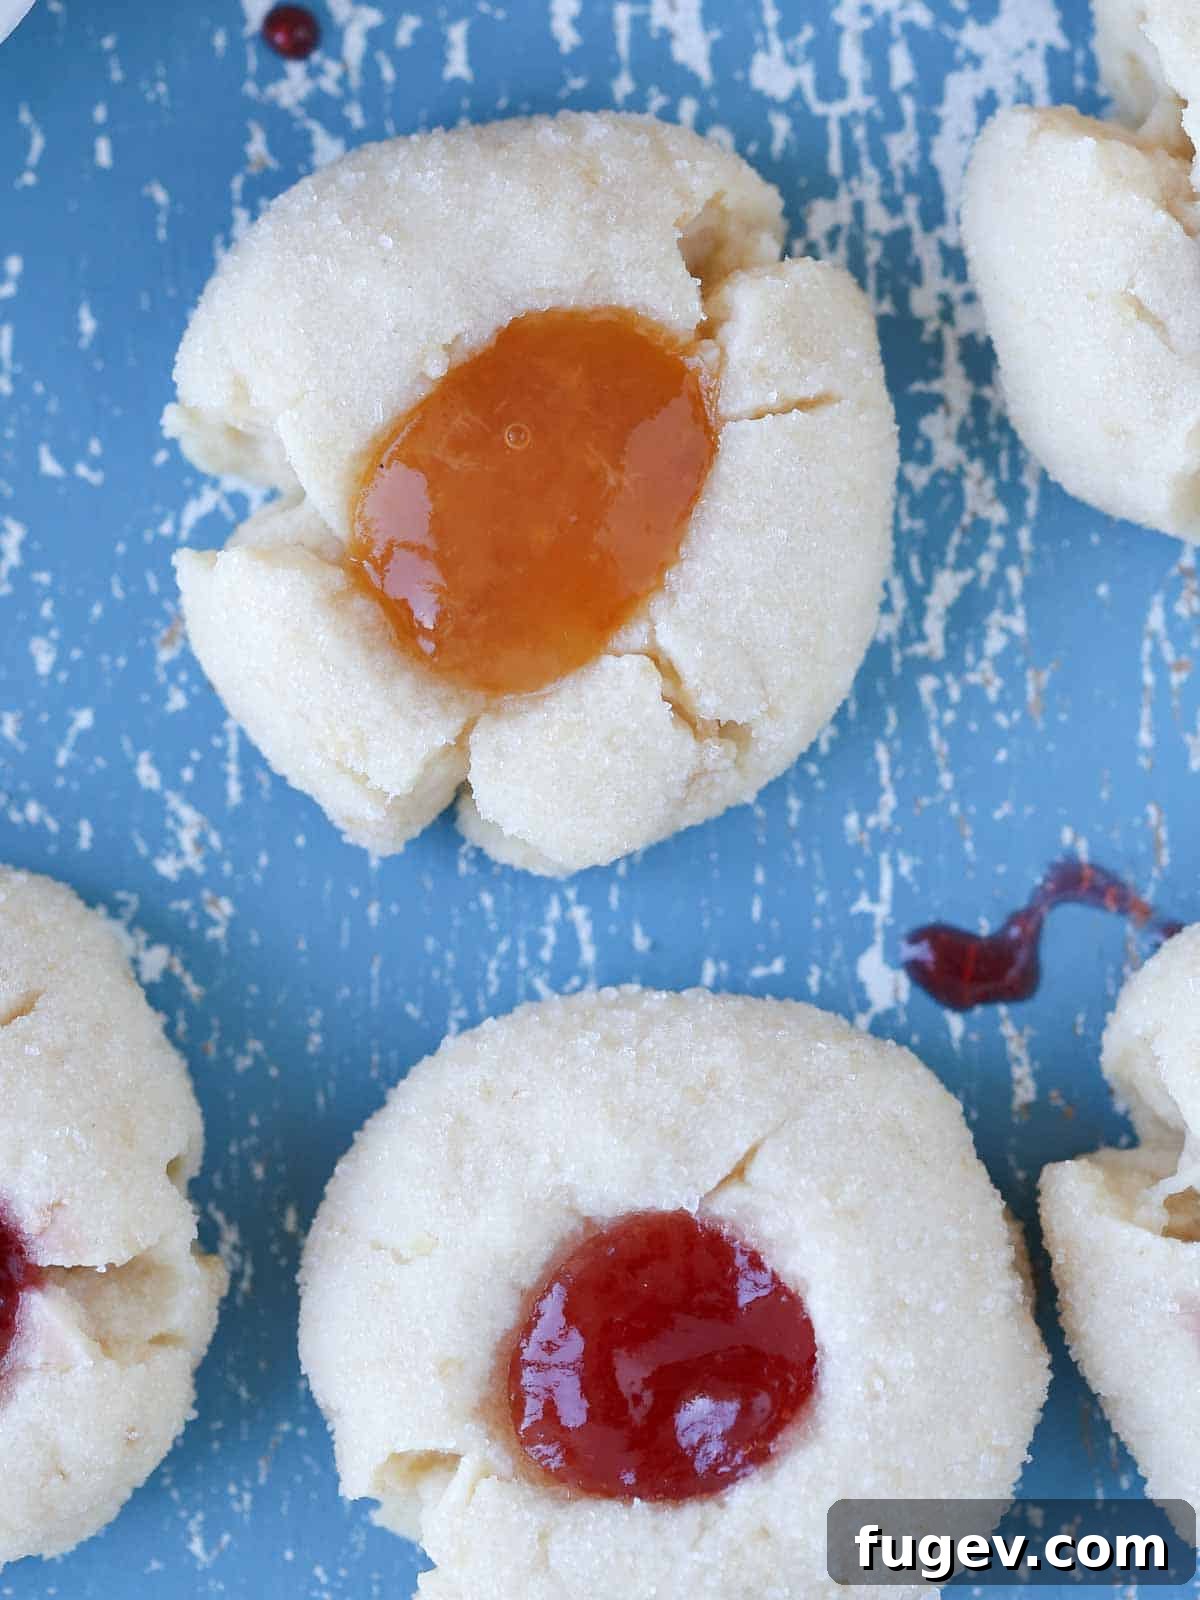
Transfer the baking sheet to your preheated oven. Bake for approximately 12-15 minutes, or until the surface of the cookies appears matte and no longer glossy. The edges should be lightly golden. To ensure even baking, I recommend rotating your baking trays halfway through the baking time, typically after about 6-7 minutes.
Step 7: Cool Completely
Once baked, carefully transfer the cookies from the baking sheet to a wire rack. Allow them to cool completely before serving or storing. Cooling on a wire rack allows air circulation, preventing the bottoms from becoming soggy and ensuring the cookies retain their crisp outer texture and tender interior.
Chef Lindsey’s Expert Tip
Don’t fret if your thumbprints were over-filled, under-filled, or if a little jam escaped through a crack during baking! These things happen. The beauty of these cookies is their forgiving nature. Simply add a little more jam to the centers once they have cooled. They will still taste absolutely delicious and look just as beautiful, ready to impress.
Frequently Asked Questions About Thumbprint Cookies
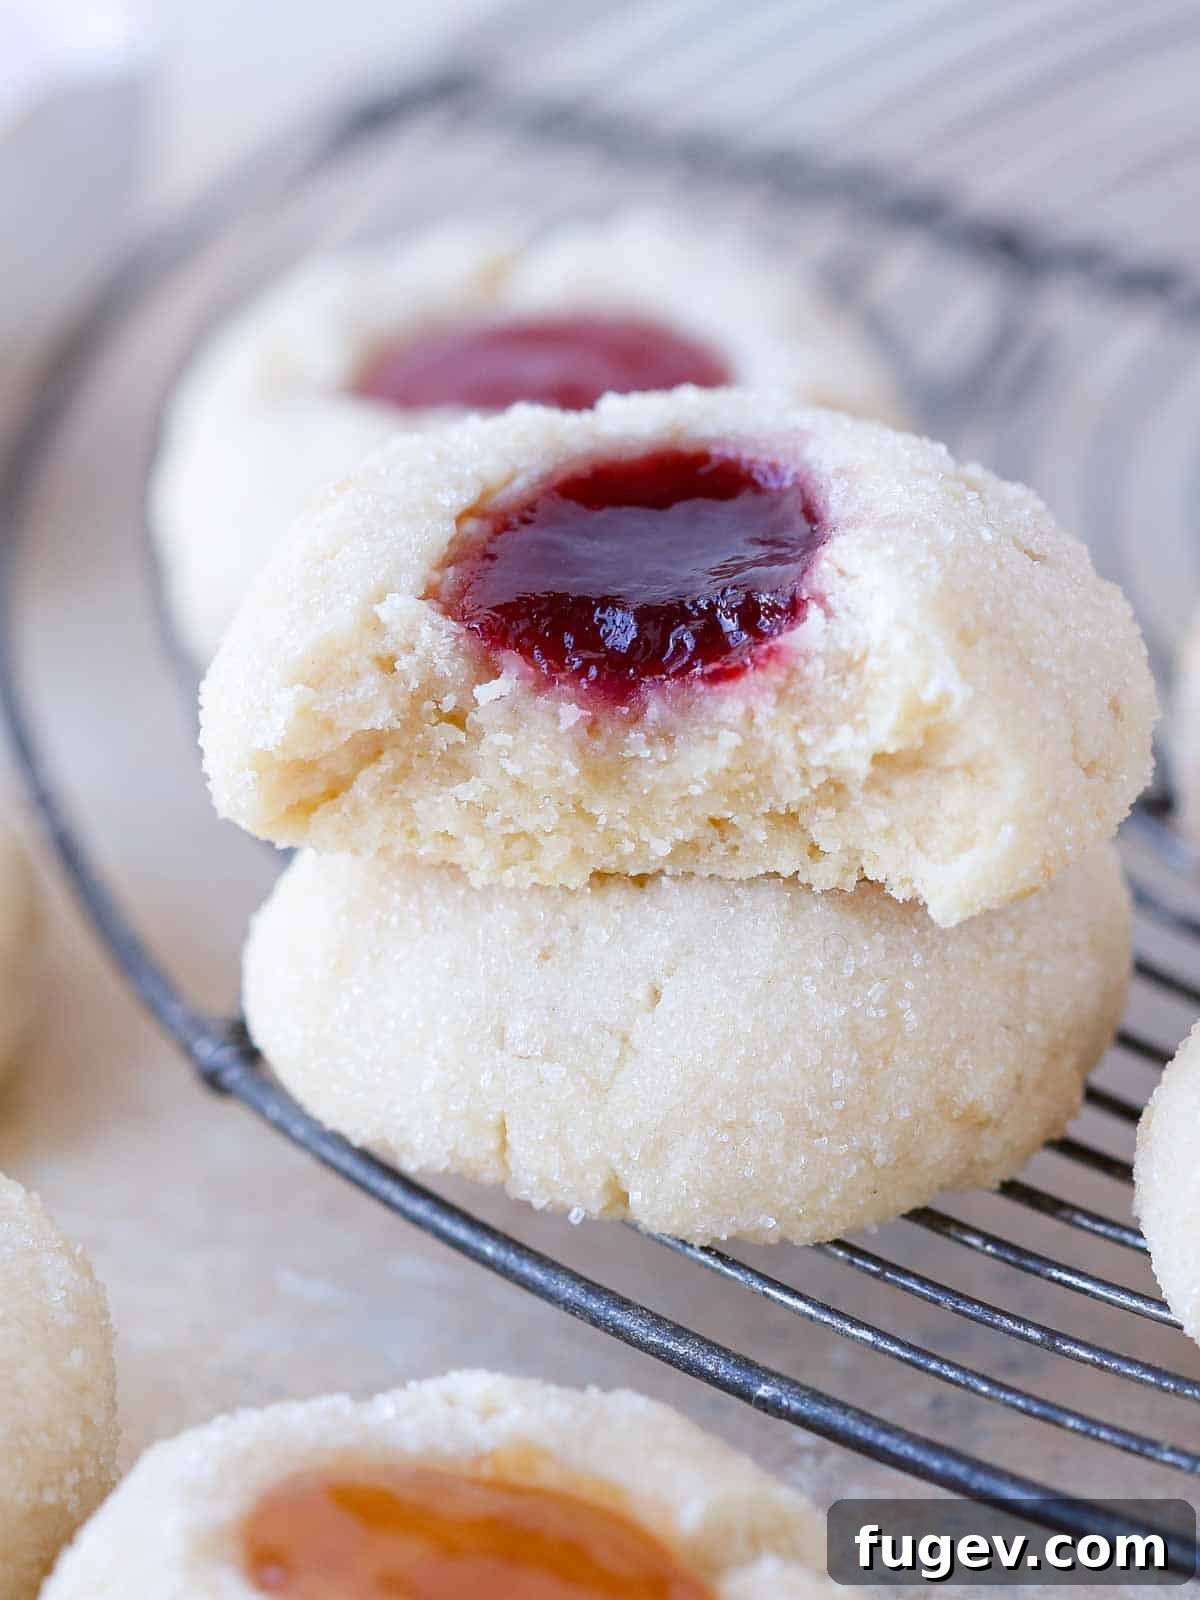
To keep your thumbprint cookies at their absolute best, store them in an airtight container at room temperature. This method will keep them wonderfully fresh and tender for up to 10 days. While they are delightful for the full 10 days, their peak flavor and texture are typically enjoyed within the first 5 days. Importantly, the jam filling acts as a natural humectant, helping the cookies remain soft and moist for an extended period. There is no need to refrigerate thumbprint cookies; in fact, refrigeration can sometimes dry them out or alter their texture. Room temperature storage is always preferred for the best eating experience.
Yes, you can certainly freeze baked thumbprint cookies! They will maintain their quality in an airtight, freezer-safe container or bag for up to 3 months. To enjoy, simply thaw them at room temperature. However, it’s generally not recommended to freeze the unbaked cookie dough. Freezing the raw dough can cause the butter to solidify too much, leading to cracks when you try to shape or indent the cookies after thawing. The dough may also not spread as nicely during baking, resulting in a less appealing final product.
Cracking in thumbprint cookies is a common issue that usually stems from two main causes: either the cookie dough is too cold, or it’s being pressed too aggressively. To prevent this, ensure your dough is at a good room temperature – soft and pliable, but not greasy. When making the indentation, I highly recommend using your index finger (forefinger) instead of your thumb. Most people’s thumbs are simply too large for the task and tend to exert too much pressure, causing the dough to split. Press firmly, but make the indent slowly and gradually. If cracks do form, don’t worry! Simply use your fingertips to gently press the dough back together around the edge of the indentation before filling with jam. It’s an easy fix and won’t affect the final taste or appearance.
If your thumbprint cookies are crumbling excessively or falling apart, the most likely culprit is dough temperature. It is absolutely crucial that you do not chill this particular cookie dough. When the butter in the dough solidifies from chilling, it loses its pliability. This makes the dough very stiff and brittle, causing it to crack and fall apart when you attempt to shape it into balls and press the indentations. For the best results, shape and bake the cookies immediately after mixing the dough. If, by accident, your dough did get chilled, allow it ample time to come back to a soft, pliable room temperature before proceeding with shaping and baking. Warm, soft dough is key to preventing them from falling apart.
If you tried this fantastic recipe and absolutely loved it, please consider leaving a 🌟 star rating and sharing your experience in the comments section below. Your feedback truly makes my day and helps other bakers!

Thumbprint Cookies
Chef Lindsey
10 minutes
12 minutes
22 minutes
15 Cookies
Ingredients
- ½ cup unsalted butter softened
- ⅓ cup powdered sugar
- 1 ⅓ cup all-purpose flour
- ½ teaspoon kosher salt
- 1 teaspoon vanilla extract
- ¼ cup granulated sugar for rolling
- ⅓ cup jam any flavor
Instructions
-
Preheat the oven to 325°F (160°C) conventional (no fan) and line one baking sheet with parchment paper. I do not recommend using the convection setting for these cookies.
-
In the bowl of a stand mixer fitted with the paddle attachment, add all the ingredients. (Butter, powdered sugar, all-purpose flour, kosher salt, and vanilla extract.) Mix on medium-low speed until a smooth dough forms.
-
Pinch off pieces of dough about an inch (2.5 cm) across. Roll into a ball and then roll in granulated sugar. You will have approximately 15 cookies.
-
Place on parchment lined baking sheet about an inch apart, offset slightly. Press your thumb or forefinger into the center of each cookie gently, making an indentation. It should go about halfway into the cookie. Fill with jam before baking.
-
Bake in preheated oven for 12-15 minutes or until the surface looks matte and no longer glossy. I rotated my trays after 6 minutes.
-
Cool completely on a wire rack.
Notes
Variations – Try orange, coffee, peppermint or lemon extract in place of the vanilla. Roll in chopped pecans or walnuts for added texture and flavor. Consider filling with lemon curd, salted caramel, or chocolate ganache for delicious alternatives.
Storage – Store these delightful cookies in an airtight container at room temperature for up to 10 days. For the best flavor and texture, aim to consume them within 5 days. However, the jam filling ensures they remain wonderfully soft and moist for the entire 10-day period!
Nutrition
Carbohydrates: 20g |
Protein: 1g |
Fat: 6g |
Saturated Fat: 4g |
Polyunsaturated Fat: 0.3g |
Monounsaturated Fat: 2g |
Trans Fat: 0.2g |
Cholesterol: 16mg |
Sodium: 81mg |
Potassium: 20mg |
Fiber: 0.4g |
Sugar: 10g |
Vitamin A: 189IU |
Vitamin C: 1mg |
Calcium: 5mg |
Iron: 1mg
Dessert
American
140
Before You Go: More Cookie Inspiration
I genuinely hope you enjoyed perfecting this professional chef-tested thumbprint cookie recipe. These timeless treats are a wonderful addition to any baking repertoire, offering both simplicity and impressive results. If you’ve loved creating these jam-filled delights, I encourage you to explore our extensive collection of other cookie recipes for more delicious inspiration. You might also find particular joy in trying these charming Neapolitan thumbprint cookies for a colorful variation, or the delicate, almond-infused Amaretti cookies for a different kind of sweet indulgence. Happy baking!