
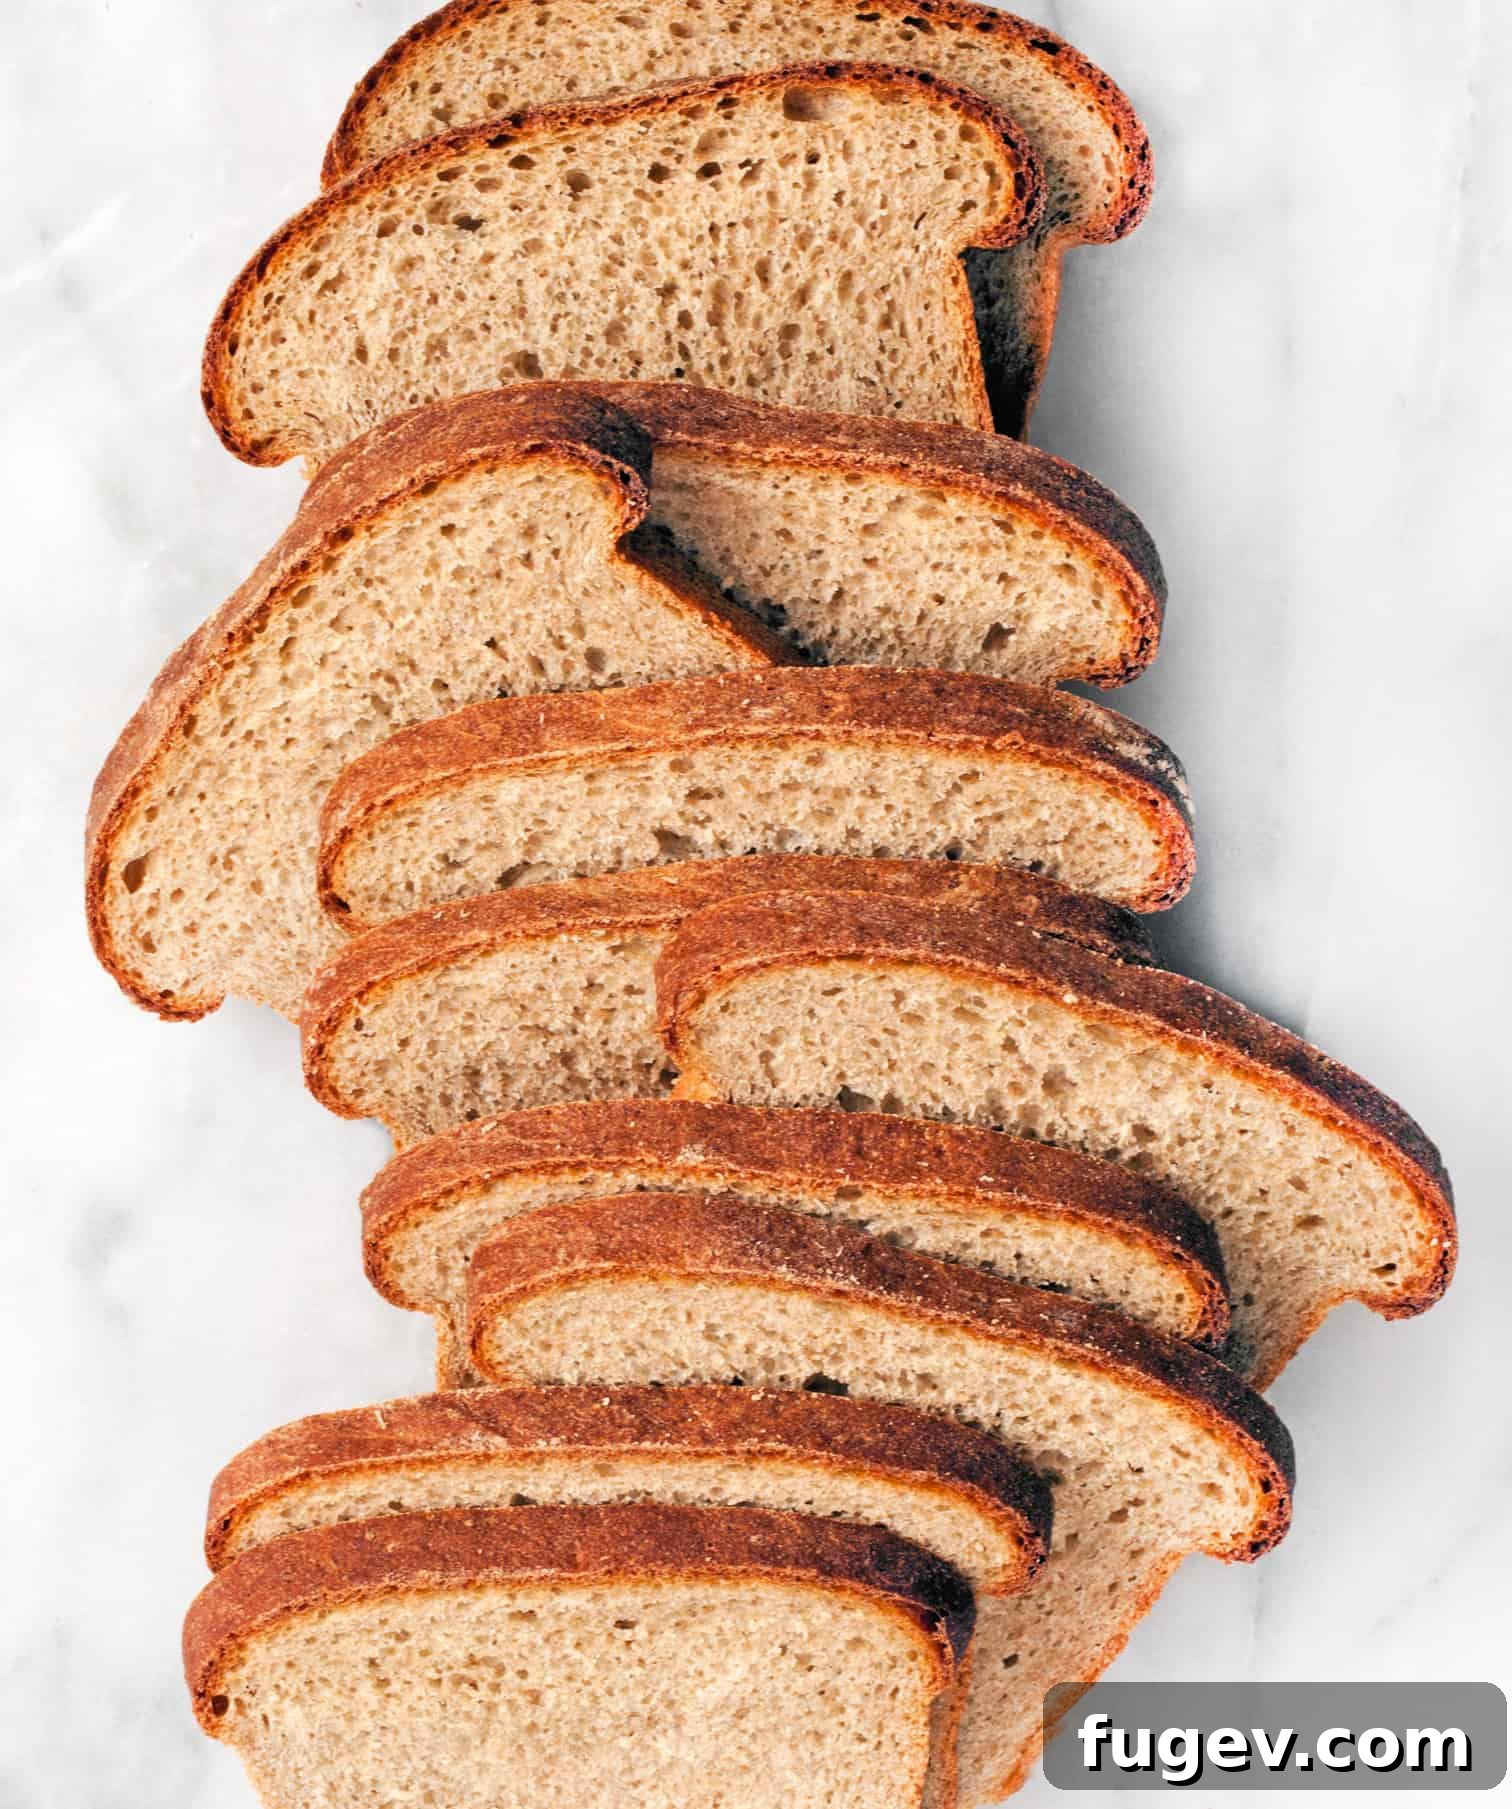
The Ultimate Guide to Baking Wholesome Homemade Whole Wheat Bread
There’s an unparalleled satisfaction that comes from baking your own bread from scratch. Especially when that bread is a beautifully wholesome loaf of whole wheat, its aroma filling your kitchen and promising pure, unadulterated goodness. Forget the uninspired, often questionable ingredients of store-bought loaves; this recipe celebrates simple, natural ingredients like golden honey, robust bread flour, hearty whole wheat flour, and nutrient-rich wheat germ to create a bread that’s not just food, but a labor of love and a cornerstone of wholesome living.
A Timeless Tradition: The Beloved Peanut Butter and Jelly Sandwich
For as long as I can remember, the humble peanut butter and jelly sandwich has been a constant in my life. A comforting culinary companion since my kindergarten days, it’s more than just a meal; it’s a taste of nostalgia, a warm hug from childhood. Every Sunday evening, a ritual unfolds in my kitchen: I meticulously line up stacks of bread, ready to assemble the week’s supply of PB&J sandwiches. This simple tradition, carried into adulthood, speaks volumes about the enduring appeal of classic comfort food.
My mother, undoubtedly the unsung hero of countless weekly sandwich assemblies, might recall this ritual with slightly less enthusiasm than I do. Looking back, my brother and I probably should have taken over the task once we were old enough to confidently wield a butter knife. After all, crafting a classic PB&J requires little more than love and a few basic spreading skills. While I know she didn’t truly mind the lunch-making, I’m certain she would have appreciated a task being taken off her plate.
The system is tried and true: once assembled, the sandwiches find their neat home in a designated shelf in the freezer. This clever trick serves a dual purpose. In the morning, I grab one on my way to work, and my husband follows suit. The frozen sandwich acts as its own protective casing, ensuring it thaws perfectly by lunchtime, avoiding the dreaded fate of a squashed, unappealing meal. This simple solution makes healthy, homemade lunches a breeze, even on the busiest weekdays.
Yet, despite my earnest efforts to embrace a from-scratch lifestyle in other areas of cooking, my cherished PB&Js often ended up on rather uninspired, squishy supermarket bread. That shelf-stable bread, a testament to modern food science, often defies the natural odds of freshness, thanks to a lengthy list of added ingredients. This realization sparked a renewed desire for something truly wholesome, something that would elevate my everyday sandwich ritual.
Why Choose Homemade? The Benefits of Baking Your Own Whole Wheat Bread
The journey from a few simple ingredients to a warm, fragrant loaf of bread is incredibly rewarding. Baking your own whole wheat bread offers a myriad of benefits that extend far beyond just satisfying a craving. Firstly, it gives you complete control over what goes into your food. You can choose high-quality flours, natural sweeteners like honey, and avoid the preservatives, artificial flavors, and excessive sodium often found in commercial breads. This makes homemade whole wheat bread a significantly healthier option for you and your family.
Nutritionally, whole wheat bread is a powerhouse. It retains the bran and germ of the wheat kernel, which are rich in fiber, vitamins (especially B vitamins), minerals (iron, magnesium, zinc), and antioxidants. The fiber content aids in digestion, helps regulate blood sugar levels, and contributes to a feeling of fullness, which can be beneficial for weight management. By incorporating wheat germ into your recipe, you further boost the nutritional profile, adding essential fatty acids and even more vitamins and minerals.
Beyond the health aspects, there’s the unparalleled taste and texture. Homemade whole wheat bread has a depth of flavor and a satisfying chewiness that mass-produced bread simply cannot replicate. The subtle sweetness of honey complements the nutty notes of whole wheat, creating a loaf that is delicious on its own, toasted, or as the foundation for your favorite sandwiches. The aroma alone is enough to transform your kitchen into a welcoming haven, creating a comforting atmosphere that store-bought products can never truly capture.
Furthermore, baking bread can be a wonderfully mindful and therapeutic activity. The process of kneading the dough, watching it rise, and finally pulling golden loaves from the oven is deeply satisfying. It’s a skill that connects you to generations of home bakers and offers a tangible sense of accomplishment. It’s also an excellent way to involve children in the kitchen, teaching them about food, patience, and the joy of creating something delicious from scratch.
Homemade Whole Wheat Bread: The Ingredients Unveiled
Driven by a craving for something truly wholesome and a spark of ambition, I decided it was time to bake two glorious loaves of whole wheat bread from scratch. This particular recipe focuses on a blend of flours and a touch of sweetness that creates a perfect balance of texture and flavor.
Flour Power: Bread Flour vs. Whole Wheat
Many homemade whole wheat bread recipes can be dense. To achieve a lighter, yet still hearty crumb, this recipe cleverly combines **bread flour** with **whole wheat flour**. Bread flour has a higher protein content, which translates to more gluten development during kneading. This gluten network is what gives bread its structure and elasticity, resulting in a chewier, more satisfying texture and a better rise. The whole wheat flour, on the other hand, brings all the nutritional benefits and the distinctive nutty flavor we love.
The Sweetness of Honey and the Magic of Yeast
A touch of **honey** not only sweetens the bread but also helps to activate the yeast and adds a beautiful golden hue to the crust. Honey is a natural humectant, meaning it helps to retain moisture, resulting in a bread that stays fresh longer. The **dry active yeast** is the magical leavening agent that makes our bread rise, creating its airy texture. Proper activation of yeast is crucial for a successful loaf, transforming simple ingredients into a living, breathing dough.
The Goodness of Wheat Germ
To further enhance the nutritional value and add another layer of wholesome flavor, this recipe includes **wheat germ**. Wheat germ is the embryo of the wheat kernel, packed with nutrients like B vitamins, Vitamin E, protein, fiber, and healthy fats. It adds a subtle nutty flavor and contributes to the bread’s overall texture and richness. Its inclusion is a simple way to boost the health quotient of your homemade loaf.
The anticipation of cutting into those first slices for the ultimate PB&J was almost unbearable. The rich aroma wafting through the kitchen was a promise fulfilled. Next time, I’ll be sure to have homemade peanut butter and jam ready to truly complete the experience. It was such an absolute treat to enjoy my favorite sandwich on bread I had crafted with my own hands. The difference was truly incomparable, a testament to the simple pleasure of baking.
Homemade Whole Wheat Bread Recipe
Bake wholesome whole wheat bread from scratch for an unmatched flavor and nutritional boost. This recipe yields two loaves of delicious, honey-sweetened bread, perfect for sandwiches or simply enjoying with butter.
Author: Paige Adams
Prep Time: 25 mins
Cook Time: 1 hr
Rising Time: 2 hrs
Total Time: 3 hrs 25 mins
Servings: 16 (per two loaves)
Ingredients
- 3-1/2 cups warm water (105-115°F / 40-46°C)
- 3 tablespoons honey
- 2 packets dry active yeast (about 4.5 teaspoons or 14g)
- 4 cups bread flour, plus more for dusting
- 3 cups whole-wheat flour
- 1 cup wheat germ
- 2 tablespoons kosher salt
- Canola oil for bowls, plastic wrap, and pans
Instructions
- In the bowl of a stand mixer fitted with the dough hook, combine the warm water, honey, and dry active yeast. Let this mixture stand for 10 minutes, allowing the yeast to bloom and become foamy. This indicates your yeast is active and ready to work.
- In a separate large bowl, whisk together the bread flour, whole-wheat flour, wheat germ, and kosher salt. Once the yeast mixture is foamy, gradually add the dry ingredients to the wet ingredients in the stand mixer. Mix on medium speed, kneading the dough until it becomes smooth and elastic, which typically takes about 5-7 minutes. If kneading by hand, this process will take a bit longer, approximately 10-12 minutes, ensuring the dough is well-developed.
- Lightly oil a large clean bowl. Shape the kneaded dough into a smooth ball and transfer it to the oiled bowl, turning once to coat. Cover the bowl tightly with oiled plastic wrap. Place it in a warm, draft-free spot and let it rise for 1-1/2 to 2 hours, or until the dough has visibly doubled in size.
- While the dough is rising for the second time, preheat your oven to 400 degrees F (200 degrees C). Generously grease two standard 9-inch by 5-inch loaf pans with canola oil, ensuring all inside surfaces are covered to prevent sticking.
- Once the dough has doubled, gently punch it down to release the air. Transfer the dough to a lightly floured work surface. Divide the dough into two equal pieces. For each piece, pat it gently into an oval shape, then roll it up lengthwise into a tight log. Place each shaped dough log into the prepared loaf pans, seam-side down. Cover the pans with fresh, oiled plastic wrap and let them rise again for another 30-45 minutes, or until the dough has nearly doubled in size within the pans.
- Remove the plastic wrap from the loaf pans. Carefully transfer the pans to the preheated oven. Bake the loaves for 50-60 minutes, or until they are deep golden brown on top and sound hollow when tapped on the bottom. An instant-read thermometer inserted into the center should register around 200-210 degrees F (93-99 degrees C).
- Once baked, remove the loaves from the oven and let them cool in their pans for about 5 minutes. Then, carefully invert them onto a wire rack to cool completely before slicing. This allows steam to escape and prevents the bread from becoming gummy.
Baker’s Notes
- This recipe yields 2 delicious loaves of whole wheat bread, perfect for freezing one or sharing with loved ones.
- Recipe adapted from Martha Stewart Living, November 2009 edition (original source).
Nutrition Information (per serving)
Please note: Nutrition information is an approximation and can vary based on ingredients and preparation.
- Calories: 228 kcal
- Carbohydrates: 46g
- Protein: 8g
- Fat: 2g
- Saturated Fat: 0.3g
- Polyunsaturated Fat: 1g
- Monounsaturated Fat: 0.2g
- Sodium: 877mg
- Potassium: 180mg
- Fiber: 4g
- Sugar: 3g
- Vitamin A: 3 IU
- Vitamin C: 0.02mg
- Calcium: 18mg
- Iron: 2mg
Additional Info
- Course: Bread
- Cuisine: American
Tips for Baking Success and Customization
Baking bread, while seemingly complex, becomes incredibly rewarding with a few simple tips. Always ensure your water temperature for yeast activation is just right – too hot will kill the yeast, too cold won’t activate it. Invest in a good kitchen thermometer if you’re unsure. Don’t rush the rising process; patience is paramount for a light, airy crumb. A warm, draft-free environment (like a slightly warmed, then turned off, oven) is ideal for dough to rise. If your kitchen is cool, it might take a little longer than stated in the recipe.
For an even richer flavor and texture, consider adding a handful of rolled oats, sunflower seeds, or flaxseeds to your dough during the kneading stage. You can also experiment with different types of honey or even a touch of molasses for a deeper, more complex sweetness. A sprinkle of oats or sesame seeds on top of the loaves before the final rise adds a lovely visual appeal and a slight crunch. Baking your own bread opens up a world of customization, allowing you to tailor each loaf to your exact preferences.
Finally, storing your homemade bread properly will help maintain its freshness. Once completely cooled, store your loaves in an airtight container or bread bag at room temperature for a few days. For longer storage, slice the cooled bread and freeze it in an airtight freezer bag. This way, you can pull out slices as needed, ready to be toasted or thawed for sandwiches, ensuring you always have wholesome homemade goodness at hand.
Embrace the Rewarding Journey of Homemade Whole Wheat Bread
Baking your own whole wheat bread from scratch is more than just following a recipe; it’s an experience that nourishes the body and soul. From the simple, pure ingredients to the comforting aroma that fills your home, every step is a testament to the joy of creating something truly special. This wholesome bread, with its perfect balance of honey, whole wheat, and the gentle touch of yeast, is not just a healthier alternative to store-bought options, but a cornerstone for delicious meals and cherished memories.
Whether you’re making nostalgic peanut butter and jelly sandwiches, enjoying a slice with your morning coffee, or sharing a warm loaf with friends, the effort put into baking this bread is returned tenfold in flavor, health, and satisfaction. So, next time you’re craving something truly wholesome, roll up your sleeves, embrace the process, and embark on the wonderfully rewarding journey of baking your very own homemade whole wheat bread. Your taste buds, and your family, will thank you.
Did you make this recipe?
Mention @lastingredient on Instagram and tag it #lastingredient!