

Warm up your soul with a hearty bowl of our incredibly easy and satisfying three-bean chili! This recipe brings together the robust flavors and varied textures of black beans, pinto beans, and kidney beans, all simmered in a rich, spiced tomato base with fresh jalapeños and garlic. Complemented by crisp red bell peppers and a blend of pantry-staple dried spices like cumin, paprika, and chili powder, this chili is a true culinary delight. Whether you’re planning a cozy weeknight dinner, preparing for a festive game day gathering, or simply craving a nourishing and flavorful lunch, this make-ahead recipe is a perfect choice. With simple adjustments to your toppings, you can effortlessly make this delicious vegetarian chili recipe fully vegan and entirely gluten-free, catering to a variety of dietary needs.

Table of Contents
- Why You’ll Love This Hearty Three-Bean Chili
- The Power of Beans: Choosing the Best for Your Chili
- Essential Ingredients & Clever Substitutions
- Irresistible Toppings for Your Three-Bean Chili
- How To Make The Perfect Three-Bean Chili
- What To Serve With Your Flavorful Chili
- Leftovers & Freezing: Enjoying Chili Anytime
- Expert Recipe Tips for the Best Chili
- Frequently Asked Questions (FAQ)
- More Hearty Chili and Soup Recipes
- Three-Bean Chili Recipe Card
Why You’ll Love This Hearty Three-Bean Chili
This delightful veggie chili isn’t just a meal; it’s an experience, especially for anyone who truly appreciates the versatility and nutritional punch of legumes. I confess, when it comes to chili, I can’t pick just one bean! That’s why this recipe celebrates a trio of varieties, each adding its unique character to the pot. I believe a good chili should be more than just a soup; it should be a fulfilling, standalone meal that’s brimming with wholesome ingredients, offering a fantastic blend of plant-based protein and dietary fiber to keep you satisfied.
Beyond its incredible flavor, this three-bean chili offers unparalleled convenience and comfort. It’s the ultimate antidote to chilly days, satisfying those deep cravings for a warm, savory, soup-based dish. What makes it even better is that it relies heavily on ingredients you likely already have stocked in your pantry, making it the perfect spur-of-the-moment meal without extensive planning. For those busy schedules, this chili truly shines as a make-ahead marvel. Prepare it in advance, let the flavors meld and deepen overnight, and simply reheat it on the stove when you’re ready to serve. That extra time allows the spices and vegetables to harmonize, creating an even richer and more complex taste profile.
This isn’t just healthy comfort food; it’s comfort food with a vibrant personality. We’ve carefully balanced the seasonings – a dynamic quartet of cumin, paprika, chili powder, and oregano, perfectly complemented by fragrant garlic powder. Freshly minced jalapeños and garlic are sautéed to release their aromatic essence, infusing the chili with just the right level of warmth and a subtle kick, without being overly spicy. The result is a profoundly satisfying dish that feels both indulgent and incredibly nourishing.
The Power of Beans: Choosing the Best for Your Chili
When it comes to chili, the debate between dried and canned beans often arises. While there’s a certain satisfaction in cooking dried beans from scratch, the undeniable convenience of canned beans is a game-changer, especially on busy days. Don’t let the thought of soaking and simmering be the barrier to a delicious homemade meal! Opting for canned beans is a perfectly acceptable and smart choice, allowing you to enjoy a wholesome, flavorful chili without the extra time commitment.
For this specific recipe, my chosen trio of black, pinto, and kidney beans isn’t just about taste; it’s a strategic selection for both visual appeal and textural diversity. Let’s talk about why these three are stars:
- Kidney Beans: With their vibrant red hue and mild, earthy flavor, kidney beans are practically synonymous with classic chili. They hold their shape beautifully during simmering, contributing a pleasant chewiness to each spoonful.
- Black Beans: These deep, dark beans are beloved for their smooth, almost creamy texture when cooked. They have a slightly sweet and robust flavor that beautifully absorbs the spices in the chili, adding a luxurious mouthfeel.
- Pinto Beans: Bringing a lovely speckled appearance and a distinctly earthy, nutty flavor, pinto beans are often used in Mexican and Southwestern cuisine. Their softer texture breaks down slightly, helping to thicken the chili and add a comforting, wholesome quality.
The combination of these three creates a dynamic eating experience, where each bite offers a different visual, textural, and flavor note. This variety ensures that every spoonful of your three-bean chili is interesting and deeply satisfying.
Essential Ingredients & Clever Substitutions
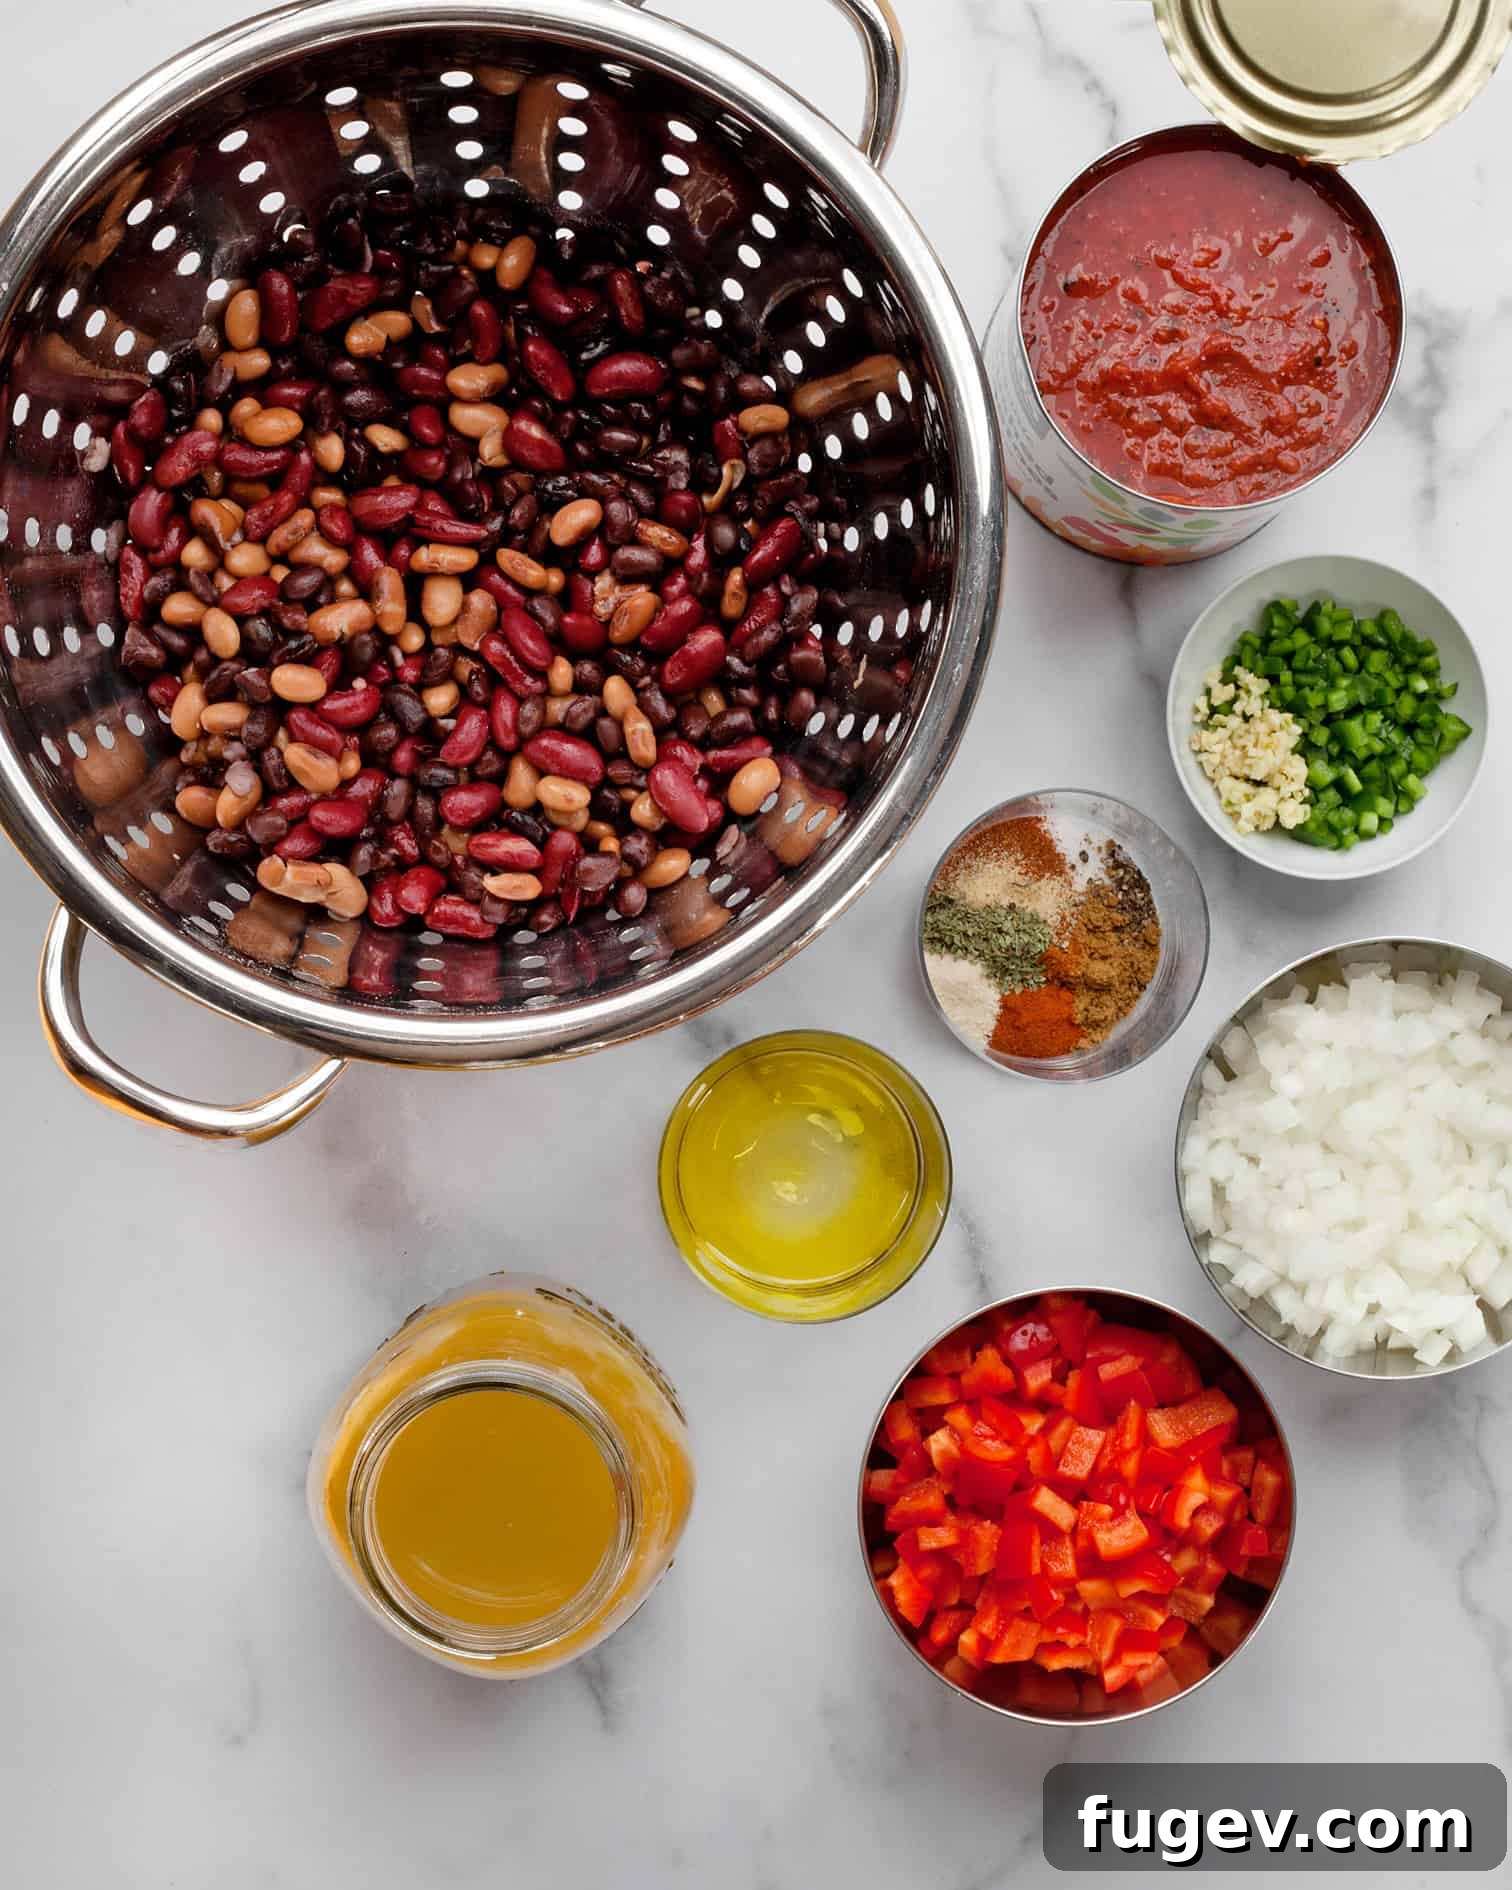
Crafting this delicious three-bean chili requires a blend of fresh produce and pantry staples. Here’s a closer look at what you’ll need, along with some smart substitution ideas to keep your cooking flexible:
- Beans: The core of this recipe relies on three 15-ounce cans of beans. While our signature blend features black, pinto, and kidney beans, feel free to experiment. Cannellini beans (white kidney beans) make an excellent substitute for traditional kidney beans if you prefer a milder flavor or have them on hand. If your pantry only yields one or two varieties, don’t fret! Simply use three 15-ounce cans in total, mixing and matching what you have to create your unique chili. Just be sure to rinse and drain all canned beans thoroughly before adding them.
- Onions: A medium onion forms the aromatic foundation of our chili. White, yellow, or red onions will all work beautifully, each offering a slightly different flavor profile. Yellow onions are a classic choice for their balanced sweetness when sautéed, while red onions can add a bit more pungency.
- Bell Peppers: These vibrant vegetables contribute a crucial crispness and a touch of sweetness that contrasts wonderfully with the rich beans and tomatoes. I personally prefer red, orange, or yellow bell peppers for their vibrant color and sweeter notes, but a green bell pepper would also provide a more assertive, earthy flavor.
- Jalapeños: Fresh jalapeños are key for introducing a bright, clean heat that layers perfectly with the warmth of the chili powder. For a milder chili, you can remove the seeds and membranes, where most of the capsaicin resides. For extra heat, leave them in!
- Garlic: An indispensable aromatic, fresh minced garlic infuses the chili with its distinctive, pungent flavor. It’s sautéed alongside the onions and jalapeños, building a deep flavor base.
- Spices: The heart and soul of any chili lie in its spice blend. We use a carefully balanced combination of:
- Cumin: Earthy and warm, a chili essential.
- Paprika: Adds a sweet, smoky depth and beautiful color. Use regular or smoked paprika for an extra layer of flavor.
- Chili Powder: The quintessential chili spice, typically a blend of ground chiles, cumin, and oregano.
- Oregano: Adds a classic, savory herbaceous note.
- Garlic Powder: Reinforces the fresh garlic flavor, adding a mellow, roasted depth.
- Salt & Pepper: Essential for seasoning and bringing all the flavors to life. Adjust to your taste.
- Tomatoes: A 28-ounce can of crushed fire-roasted tomatoes is my top recommendation. The fire-roasting process imparts a smoky depth that elevates the entire chili. If unavailable, regular crushed tomatoes or diced tomatoes (fire-roasted or not) can be used, though you might miss a subtle smoky note.
- Vegetable Broth: Using low-sodium vegetable broth is crucial. It allows you to control the overall saltiness of the chili, ensuring it’s perfectly seasoned to your preference. If you don’t have low-sodium, reduce the amount of added salt initially and adjust at the end.
- Olive Oil: Used for sautéing the onions, bell peppers, and other aromatics, olive oil helps to develop their flavors before the liquid ingredients are added. Any neutral oil can be substituted.
Irresistible Toppings for Your Three-Bean Chili
At its core, this three-bean chili is a versatile vegan delight. Its transformation into a vegetarian dish, or a more decadent experience, truly happens with the toppings you choose. Serving a crowd? Set up a DIY chili bar with various bowls of toppings, allowing everyone to customize their perfect bowl. Here are some of my favorite ways to crown your chili:
- Shredded Cheese: Classic cheddar cheese or a zesty Mexican cheese blend melts beautifully and adds a creamy, savory counterpoint. For a vegan option, use your favorite plant-based shredded cheese.
- Sliced Jalapeños: Freshly sliced jalapeños offer a burst of vibrant heat and a satisfying crunch.
- Crunchy Tortilla Chips: Crushed or whole tortilla chips provide an essential textural element and a salty contrast.
- Fresh Cilantro: A sprinkle of chopped fresh cilantro adds a bright, herbaceous, and refreshing finish.
- Finely Chopped Red Onions: A small amount of raw red onion provides a sharp, pungent bite that cuts through the richness of the chili.
- Avocado: Sliced or diced avocado offers a creamy, cooling contrast and healthy fats.
- Sour Cream or Greek Yogurt: A dollop of sour cream or plain Greek yogurt adds a luxurious creaminess and tangy flavor that balances the spice. For a vegan alternative, use a plant-based sour cream or dairy-free plain yogurt.
- Lime Wedges: A squeeze of fresh lime juice can brighten all the flavors and add a zesty kick.
- Hot Sauce: For those who crave extra heat, a dash of your favorite hot sauce is always a welcome addition.
- Scallions (Green Onions): Thinly sliced scallions provide a mild oniony flavor and a pop of green color.
Don’t be afraid to mix and match! A combination of creamy, crunchy, and fresh toppings truly takes this chili to the next level.
How To Make The Perfect Three-Bean Chili
Crafting this flavorful three-bean chili is a straightforward process, designed for maximum flavor with minimal fuss. Follow these simple steps to bring your hearty chili to life:
1. Sauté Aromatics: Begin by heating the olive oil in a large, heavy-bottomed saucepan or Dutch oven over medium heat. Once shimmering, add the roughly chopped onions and sauté them for about 5 minutes, stirring occasionally, until they soften and become beautifully translucent. This step is crucial for building the foundational flavor of your chili.
2. Infuse with Spices: Next, stir in the minced jalapeños and garlic, along with the entire dried spice blend: cumin, paprika, chili powder, oregano, garlic powder, salt, and pepper. Cook for an additional 1-2 minutes, stirring constantly. You’ll notice the kitchen filling with incredibly fragrant aromas as the spices toast and release their full potential.
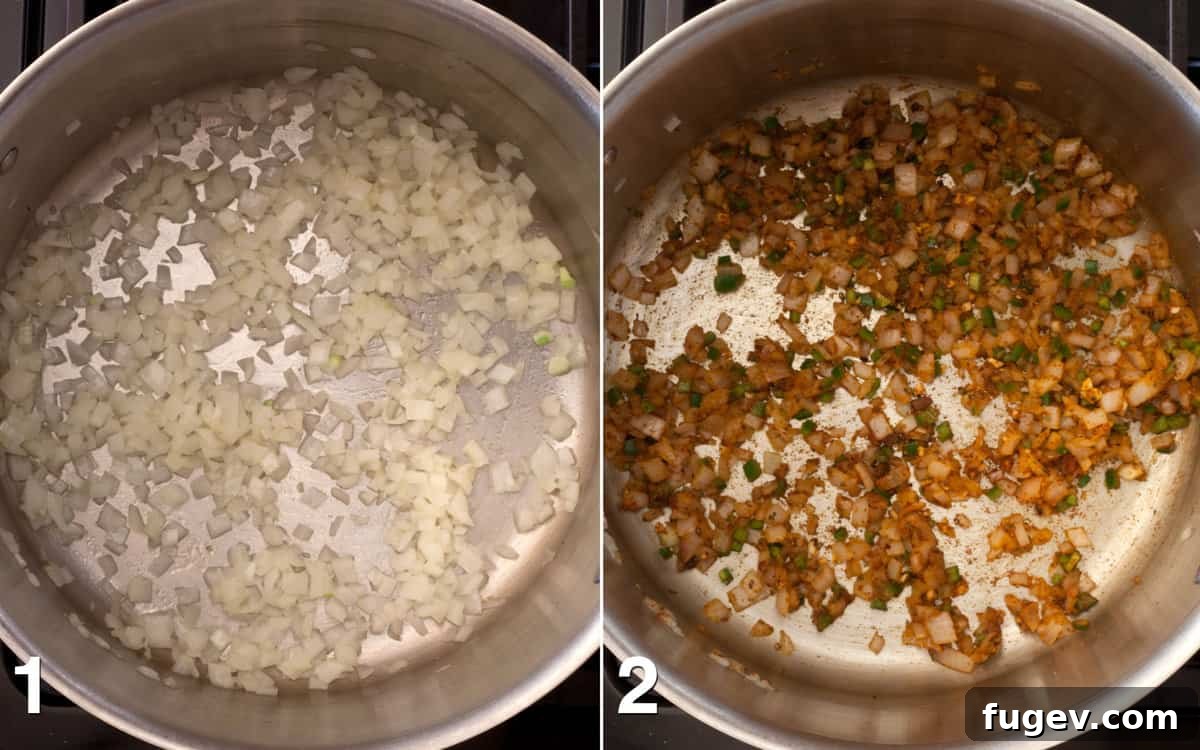
3. Add Bell Peppers: Introduce the diced bell peppers to the pot and sauté them for another 3-5 minutes, allowing them to slightly soften while still retaining a bit of their crispness. This adds another layer of texture and sweetness.
4. Combine and Simmer: Pour in the crushed fire-roasted tomatoes and vegetable broth. Then, add the rinsed and drained black, pinto, and kidney beans. Stir everything well to combine. Bring the chili to a gentle boil, then immediately reduce the heat to low. Allow the chili to simmer uncovered for 20-25 minutes, or until it has thickened slightly to your desired consistency. The longer it simmers, the more the flavors will meld and deepen.
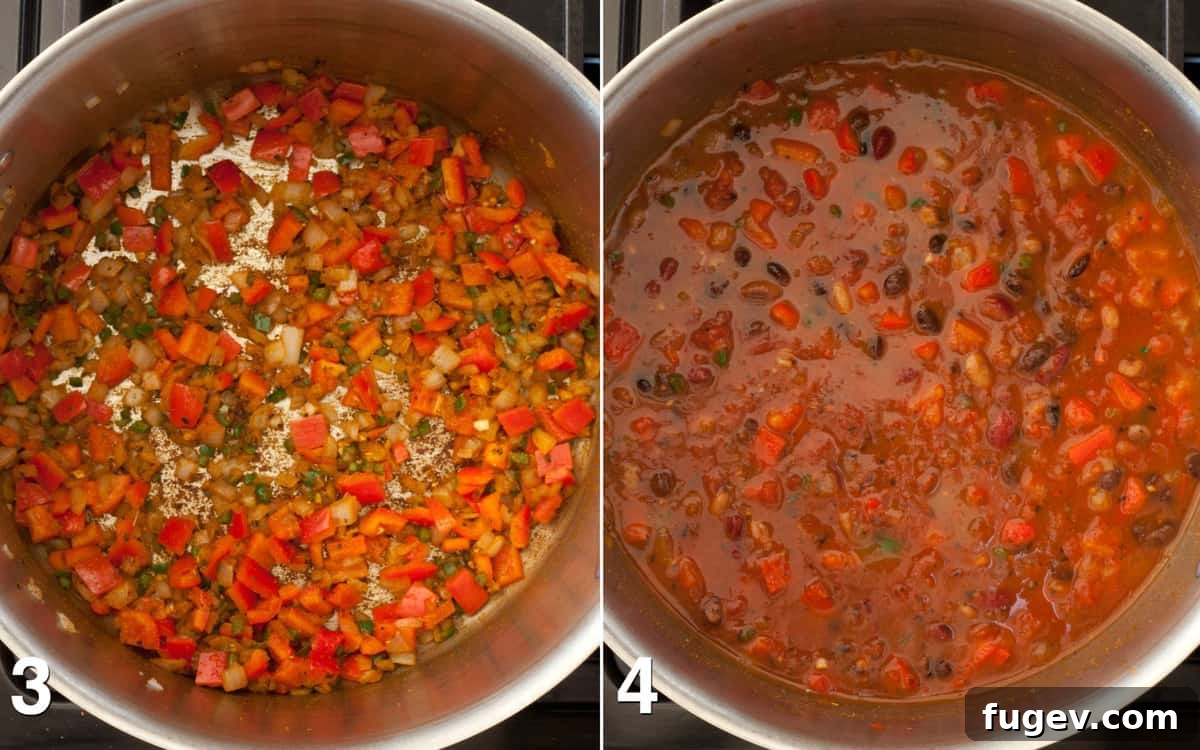
5. Serve and Garnish: Once the chili has reached its perfect texture and flavor, ladle it into individual bowls. Now comes the fun part: garnish generously with your favorite toppings to add a final flourish of flavor and texture. Enjoy immediately!
What To Serve With Your Flavorful Chili
A comforting bowl of three-bean chili is a meal in itself, but a few thoughtfully chosen sides can truly elevate the experience. Here are some perfect pairings to accompany your homemade chili:
- Classic Cornbread: Few things pair as perfectly with chili as a warm, tender slice of buttermilk cornbread. Its slightly sweet and crumbly texture is ideal for soaking up every last drop of flavorful broth. A good crusty bread or garlic bread also works wonders for dunking.
- Tortilla Chips or Warm Tortillas: For a simple yet satisfying crunch, serve with a generous bowl of tortilla chips. Alternatively, warm flour or corn tortillas can be used for scooping or making mini chili wraps.
- Hearty Nachos: Embrace the bean theme by serving your chili alongside sheet pan nachos. The chili can even be used as a topping for an extra layer of flavor and protein.
- Quesadillas: Sweet potato black bean quesadillas make a fantastic side, offering another dimension of flavor and texture that complements the chili beautifully.
- Fresh Salads: To balance the richness of the chili, a light and refreshing salad is an excellent choice. Consider a vibrant quinoa black bean salad for an extra protein boost, or a refreshing mango avocado salad for a cool, fruity contrast. A simple green salad with a zesty vinaigrette would also be lovely.
- Rice: A bed of fluffy white or brown rice can stretch your chili further and add another layer of comforting carbs.
- Baked Potatoes or Sweet Potatoes: For a heartier meal, serve your chili spooned generously over a perfectly baked potato or sweet potato. It makes for a complete and satisfying dish.
No matter your choice, these accompaniments will turn your chili night into a truly memorable feast.
Leftovers & Freezing: Enjoying Chili Anytime
One of the many virtues of this three-bean chili is how wonderfully it keeps, making it an ideal candidate for meal prep or saving for future cravings. In fact, chili often tastes even better the next day as the flavors have more time to meld and deepen.
Refrigeration: Allow the chili to cool completely to room temperature before transferring it to an airtight container. It will keep beautifully in the refrigerator for up to 4 days. When ready to enjoy, simply reheat it on the stove over low to medium heat, stirring occasionally, or warm individual portions in the microwave until heated through.
Freezing: For longer storage, this chili freezes exceptionally well. You can store it in the freezer for up to 1 month. To make future meal times even easier, I highly recommend portioning the chili into individual servings before freezing. This way, you can thaw and reheat only what you need, avoiding the hassle of defrosting a large batch all at once. Use freezer-safe containers or heavy-duty freezer bags (laying them flat for easier stacking). Ensure there’s about an inch of headspace in containers to allow for expansion. Thaw frozen chili in the refrigerator overnight before reheating, or gently reheat from frozen on the stove with a little extra broth or water, if needed, stirring frequently.
Having a stash of this delicious chili in your fridge or freezer means a healthy, satisfying meal is always just minutes away!

Expert Recipe Tips for the Best Chili
Achieving a perfectly flavorful and satisfying three-bean chili is simple with a few key tips in mind:
- Choose the Right Pot: Always cook your chili in a large soup pot or a spacious Dutch oven. As you’re working with a generous volume of ingredients and liquids, you need ample room for everything to simmer comfortably. A pot that’s too small will lead to spills and uneven cooking, and you want at least a couple of inches of clearance from the top rim for safe bubbling and simmering.
- Adjust Consistency to Your Liking: Chili consistency is a matter of personal preference. If you prefer a thicker, stew-like chili, simply let it simmer uncovered for a longer period, allowing more liquid to evaporate. Keep an eye on it and stir occasionally to prevent sticking. If, on the other hand, your chili becomes too thick for your taste, you can easily thin it out by stirring in a little extra water or vegetable broth until it reaches your desired texture.
- Taste and Adjust Seasoning: This is perhaps the most important tip for any recipe! Always taste your chili before serving and adjust the seasonings as needed. Salt is particularly crucial for bringing out all the other flavors. You might find it needs a little more salt, a dash of extra black pepper, or even a pinch more chili powder or cumin to activate and balance all the ingredients. Don’t be afraid to trust your palate.
- Don’t Skimp on Sautéing: The initial sautéing of onions, garlic, and jalapeños, along with toasting the dry spices, is fundamental for building a deep flavor base. Give these ingredients enough time to soften and become fragrant – rushing this step will compromise the final taste.
- Rinse Canned Beans Thoroughly: Always rinse canned beans under cold running water before adding them to your chili. This removes excess sodium and any starchy liquid that can affect the flavor and consistency of your dish.
- Let it Rest (Optional but Recommended): Like many stew-like dishes, chili often benefits from a brief rest off the heat before serving. Even 10-15 minutes allows the flavors to settle and intensify, making for an even more delicious bowl.
Frequently Asked Questions (FAQ)
- Can I make this chili in a slow cooker?
Yes, absolutely! To adapt this recipe for a slow cooker, follow steps 1-3 (sautéing the onions, spices, bell peppers) in a skillet on the stovetop first. This step is crucial for developing deep flavors. Then, transfer the sautéed mixture to your slow cooker along with all the remaining ingredients (beans, tomatoes, broth). Cook on low for 6-8 hours or on high for 3-4 hours, or until the chili is heated through and flavors have melded. Stir occasionally if possible.
- How can I make this chili spicier?
There are several ways to kick up the heat! You can leave the seeds and membranes in the jalapeño, or even add an extra one. A pinch of cayenne pepper or red pepper flakes added with the other dried spices will also increase the spice level. For a deep, smoky heat, consider adding a dash of chipotle powder. Serving with a good hot sauce is also a great option.
- Can I add other vegetables?
Absolutely! This chili is very adaptable. Diced carrots, celery, zucchini, or corn would all be excellent additions. Add harder vegetables like carrots and celery with the onions to give them enough time to soften. Softer vegetables like zucchini or corn can be added during the last 10-15 minutes of simmering.
- Is this chili naturally gluten-free?
Yes, this three-bean chili recipe is naturally gluten-free as long as you use gluten-free vegetable broth. All other ingredients (beans, vegetables, spices) are typically gluten-free. Always double-check ingredient labels for any hidden gluten if you have a severe allergy.
- What if my chili is too thin?
If your chili is thinner than you’d like, simply continue to simmer it uncovered for a longer period. This will allow more liquid to evaporate and the chili to thicken naturally. You can also mash a small portion of the beans against the side of the pot to release some of their starch, which will help to thicken the consistency. Alternatively, mix 1 tablespoon of cornstarch with 1 tablespoon of cold water, then stir the slurry into the simmering chili and cook for a few more minutes until thickened.
More Hearty Chili and Soup Recipes
If you loved this three-bean chili, explore these other comforting and flavorful soup and chili recipes:
- Black Bean Chili
- Pumpkin Chili
- Sweet Potato Chili
- Chile Verde with White Beans and Corn
- Vegan Poblano White Bean Chili
- Slow Cooker Lentil Tortilla Soup
- One Pot Quinoa Chili
- White Bean Sweet Potato Tomato Kale Soup
- Smoky Butter Bean Soup
Three-Bean Chili Recipe
★
★
★
★
★
Paige Adams
5 minutes
30 minutes
35 minutes
6

Ingredients
Servings:
1x | 2x | 3x
Servings:
1x | 2x | 3x
- 1 tablespoon olive oil
- 1 medium onion, roughly chopped
- 1 jalapeno, minced (seeds removed for less heat)
- 2 garlic cloves, minced
- 1 teaspoon cumin
- 1 teaspoon paprika (sweet or smoked)
- 1 teaspoon chili powder
- 1/2 teaspoon oregano
- 1/2 teaspoon garlic powder
- 1 teaspoon kosher salt
- 1/2 teaspoon black pepper
- 2 red bell peppers, diced (or orange/yellow)
- 15 ounce can black beans, rinsed and drained
- 15 ounce can pinto beans, rinsed and drained
- 15 ounce can kidney beans, rinsed and drained
- 28 ounce can crushed fire-roasted tomatoes
- 4 cups low sodium vegetable broth
- For serving: assorted toppings (e.g., shredded cheese, sour cream, chopped cilantro, sliced jalapeños, crumbled tortilla chips, scallions)
Save this recipe
Get it sent to your inbox plus new recipes every week.
Enter your email below to receive this recipe and weekly updates.
Instructions
-
Heat the olive oil in a large saucepan or Dutch oven over medium heat. Add the chopped onions and sauté for about 5 minutes until they are soft and translucent. Stir in the minced jalapeños, garlic, cumin, paprika, chili powder, oregano, garlic powder, salt, and pepper. Continue cooking for 1-2 minutes, stirring frequently, until the spices are fragrant.
-
Add the diced bell peppers to the pot and sauté for a few minutes until they begin to soften, about 3-5 minutes.
-
Stir in the rinsed and drained black, pinto, and kidney beans, along with the crushed fire-roasted tomatoes and vegetable broth. Bring the chili to a boil, then reduce the heat to low. Let it simmer gently, uncovered, for 20-25 minutes, or longer if you prefer a thicker consistency, stirring occasionally to prevent sticking and ensure even cooking.
-
Ladle the warm chili into individual bowls. Garnish generously with your chosen toppings and serve immediately.
Notes
Nutritional information provided is an approximation and does not include optional chili toppings.
Nutrition
Carbohydrates: 50g |
Protein: 15g |
Fat: 4g |
Saturated Fat: 1g |
Polyunsaturated Fat: 1g |
Monounsaturated Fat: 2g |
Sodium: 1215mg |
Potassium: 1134mg |
Fiber: 17g |
Sugar: 11g |
Vitamin A: 1826IU |
Vitamin C: 70mg |
Calcium: 142mg |
Iron: 6mg
Nutrition information is automatically calculated, so should only be used as an approximation.
Additional Info
Soup, Main Dish
American, Tex-Mex
Did you make this recipe?
Share your culinary creation! Mention @lastingredient on Instagram and tag it #lastingredient! We’d love to see your delicious chili!