
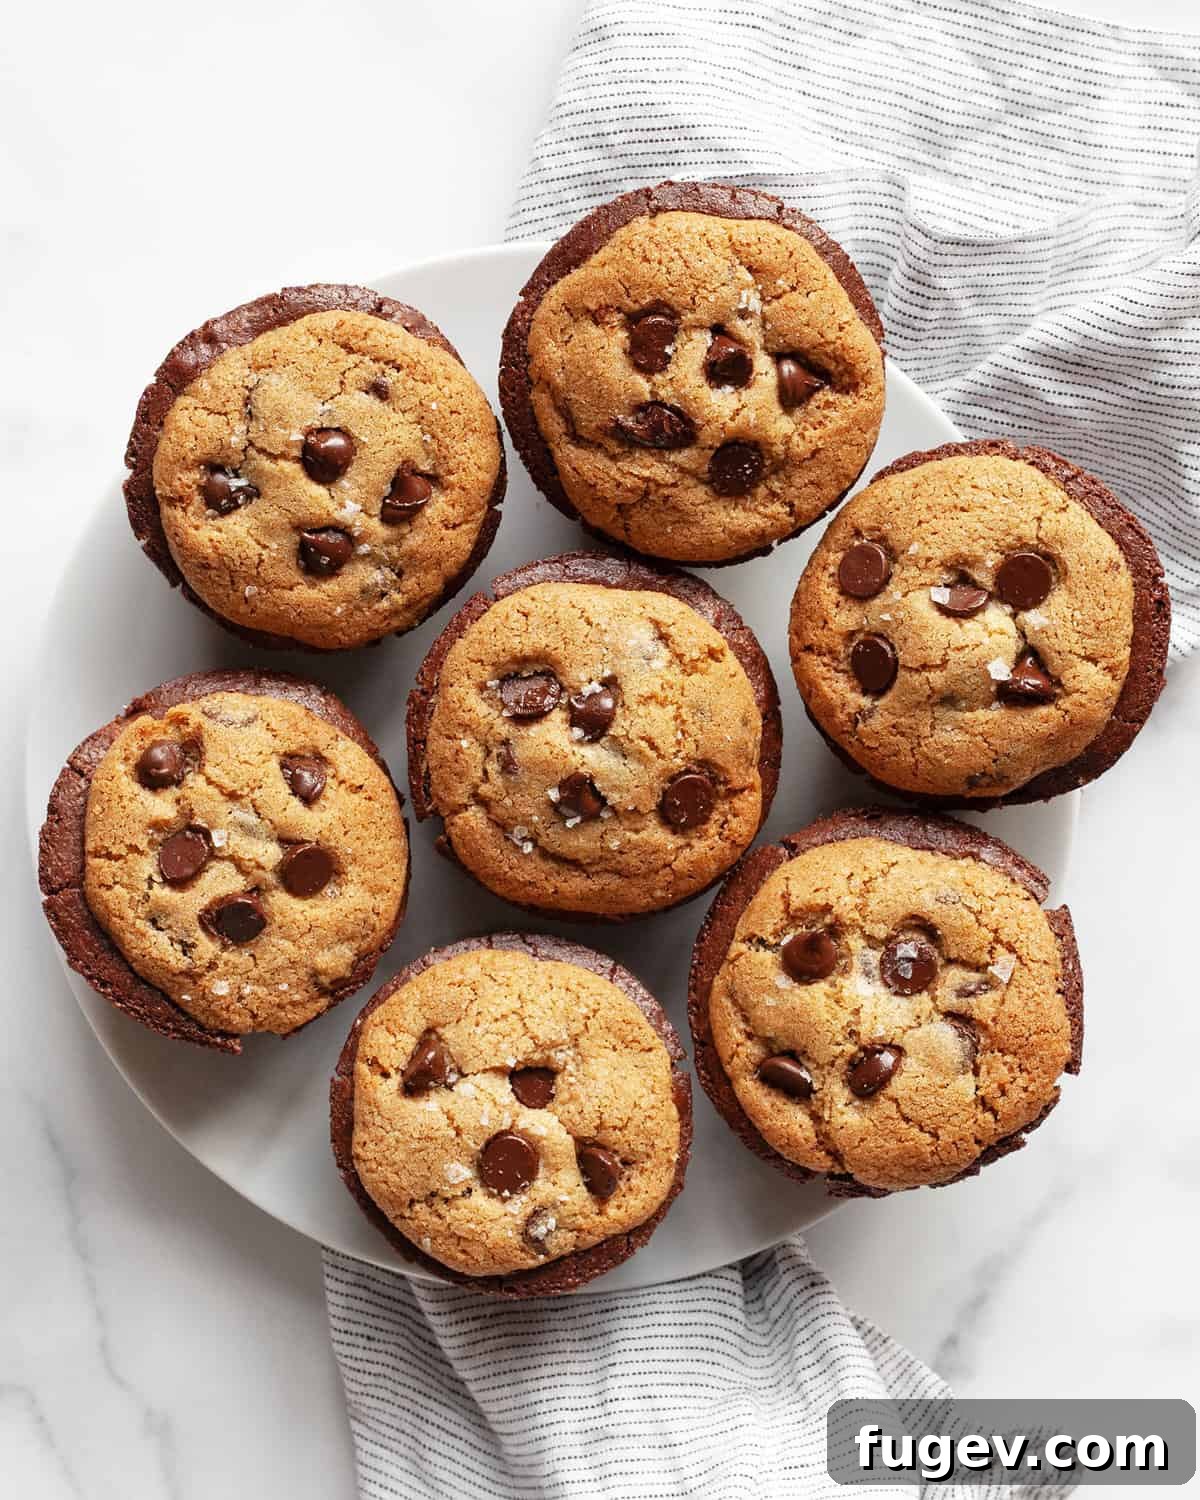
Prepare to delight your taste buds with **brookies**, the sensational dessert that flawlessly merges the rich, fudgy goodness of brownies with the beloved chewiness of chocolate chip cookies. This recipe guides you through creating individual brookies, baked conveniently in a muffin pan, ensuring every bite delivers the ultimate pairing of two classic baking recipes. Finished with a delicate sprinkle of flaky sea salt, these treats are not just a dessert; they’re a show-stopping experience.
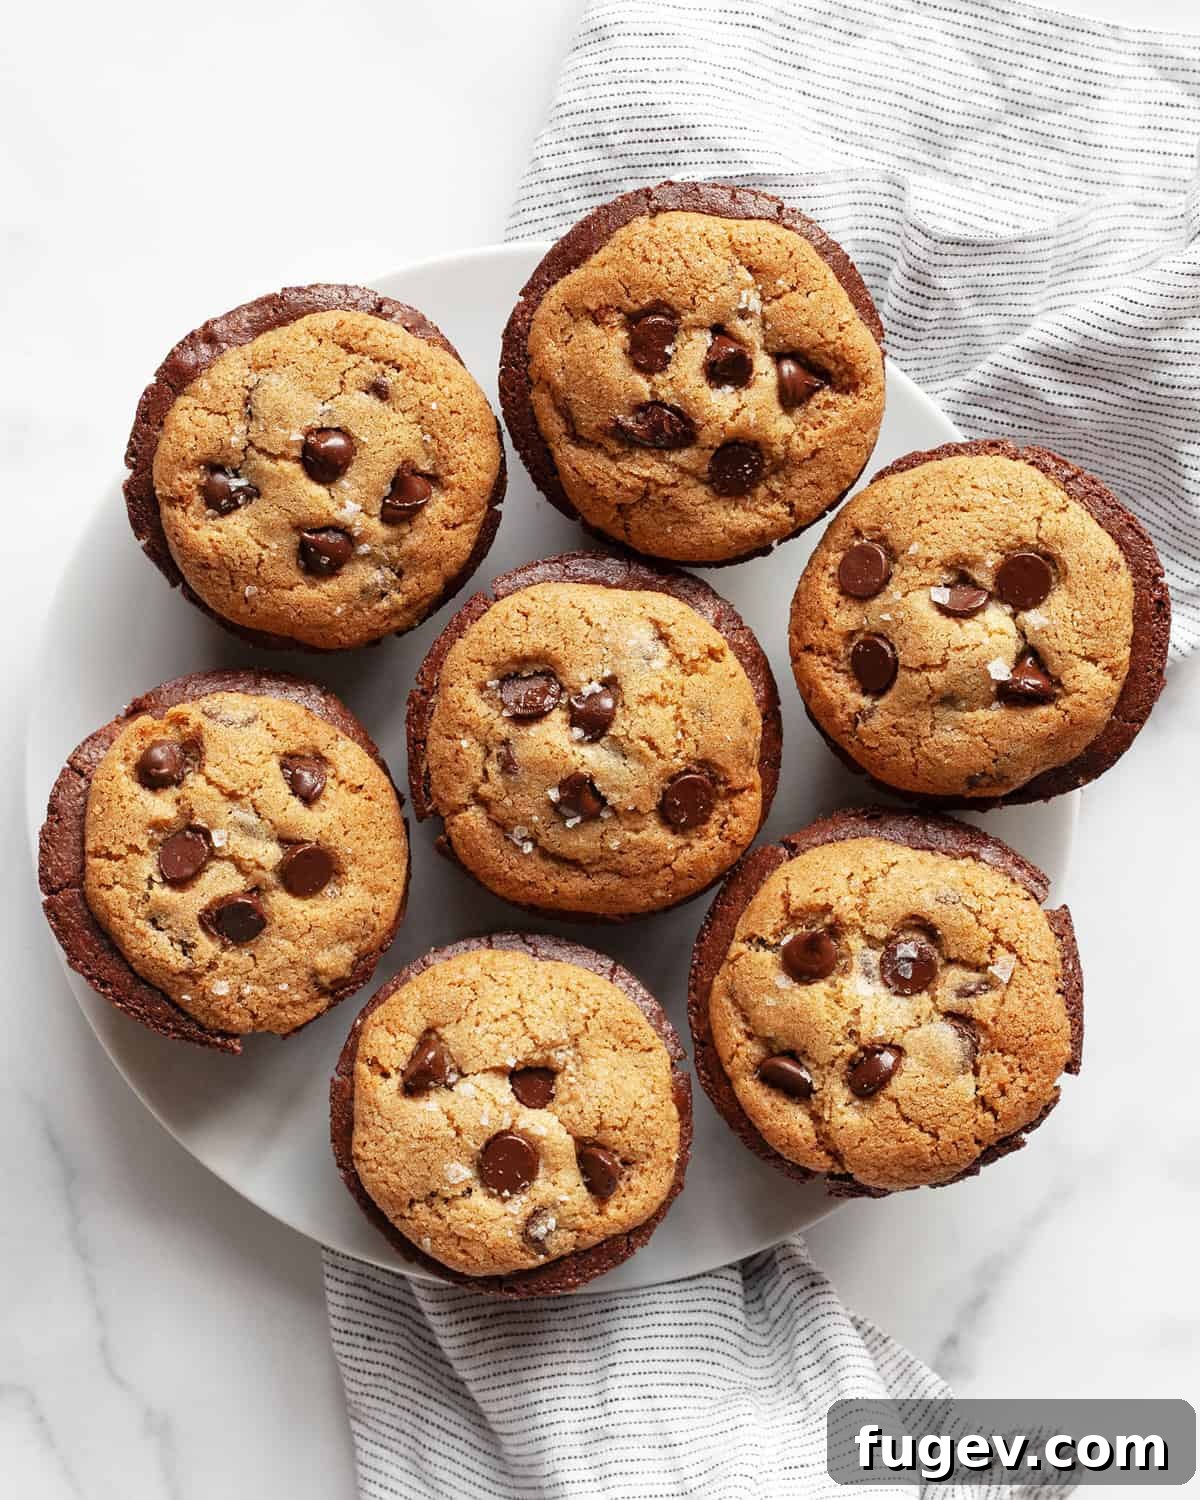
Table of Contents
- Why You’ll Love This Ultimate Brookies Recipe
- The Essential Ingredients for Brookies
- Step-by-Step Guide: How to Make Brookies in Muffin Cups
- Serving Your Delicious Brookies
- Storing and Freezing Brookies for Later
- Expert Recipe Tips for Perfect Brookies
- Brookies Recipe FAQs
- More Delightful Cookie & Brownie Recipes
- Brookies (Brownie Cookies) Recipe Card
Why You’ll Love This Ultimate Brookies Recipe
If you’ve ever found yourself caught between the irresistible allure of a rich, gooey brownie and the comforting chewiness of a classic chocolate chip cookie, then this **brookies recipe** is tailor-made for you. It eliminates the need to choose, offering a harmonious fusion where a decadent, fudgy brownie base perfectly supports a golden, chewy chocolate chip cookie layer. This combination dessert isn’t just a treat; it’s a brilliant solution for any baking indecision, delivering a symphony of textures and flavors in every single bite.
Despite its impressive appearance and dual-layered nature, preparing these brownie-cookie mash-ups is surprisingly straightforward. We’ve meticulously designed this recipe to be easy to follow, ensuring a seamless baking experience for both novice and experienced bakers. While it does involve a few distinct steps for each component, the process is logical and manageable. Just dedicate enough time for preparation and baking, and you’ll be rewarded with a dessert that looks and tastes far more complicated than it actually is.
One of the key advantages of this recipe is the use of a muffin pan. Baking your brookies in individual muffin cups guarantees consistent size and shape for every single piece, making them not only beautiful but also perfect for sharing or portion control. The muffin cups act as a reliable guide, especially helpful when working with both brownie batter and cookie dough, ensuring each brookie bakes evenly and maintains its exquisite structure. This method results in beautifully uniform desserts that are as pleasing to the eye as they are to the palate.
The Essential Ingredients for Brookies
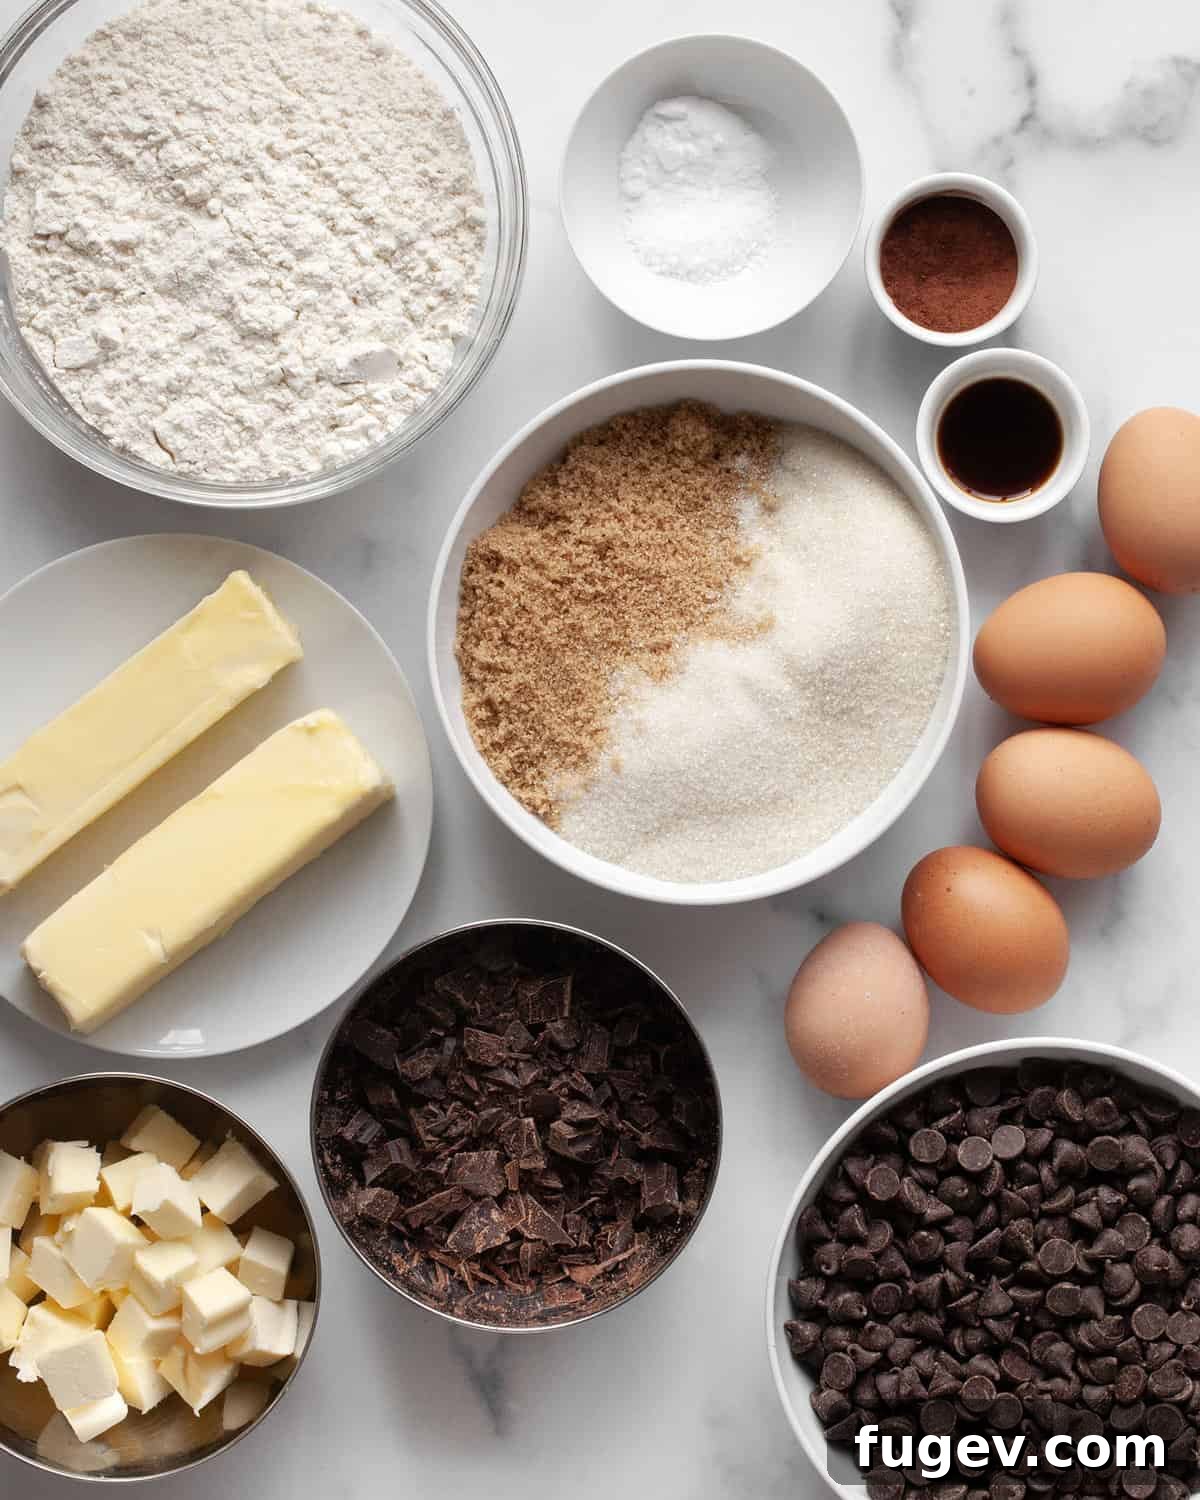
Unsurprisingly, there’s a delightful overlap in ingredients between the brownie and cookie layers, making this recipe efficient and well-integrated. Here’s a detailed list of what you’ll need to create these irresistible brookies:
- **All-purpose flour:** The foundational structure for both layers.
- **Kosher salt:** Essential for balancing sweetness and enhancing chocolate flavor.
- **Baking soda:** Gives the chocolate chip cookies their perfect lift and chew.
- **Unsalted butter:** Adds richness and moisture to both the brownie and cookie dough. Using unsalted butter allows for precise control over the salt content.
- **Light brown sugar:** Contributes to the chewy texture of the cookies and the fudgy depth of the brownies.
- **Granulated sugar:** Provides sweetness and helps achieve a crisp edge in the cookies and a delicate crust on the brownies.
- **Large eggs:** Act as a binder, adding structure and richness to both components.
- **Vanilla extract:** A crucial flavor enhancer that complements the chocolate beautifully.
- **Semi-sweet chocolate chips:** The star of the cookie layer, providing pockets of melted chocolate.
- **Flaky sea salt:** An optional but highly recommended finishing touch that elevates the flavor profile and adds a textural crunch.
- **Unsweetened cocoa powder:** Gives the brownies their deep chocolate color and intense flavor. Choose a high-quality brand for best results.
- **Bittersweet chocolate:** Provides a complex, rich chocolate flavor to the brownie base. Chopping it ensures even melting.
Ensure all your cold ingredients, like butter and eggs, are at room temperature unless otherwise specified. This allows for better emulsification and a smoother batter/dough, contributing to the overall success of your brookies.
Step-by-Step Guide: How To Make Brookies in Muffin Cups
Preparing the Dough for the Chocolate Chip Cookies:
The cookie layer provides that classic chewy texture and familiar chocolate chip goodness. Follow these steps carefully to ensure your cookie dough is perfect for layering.
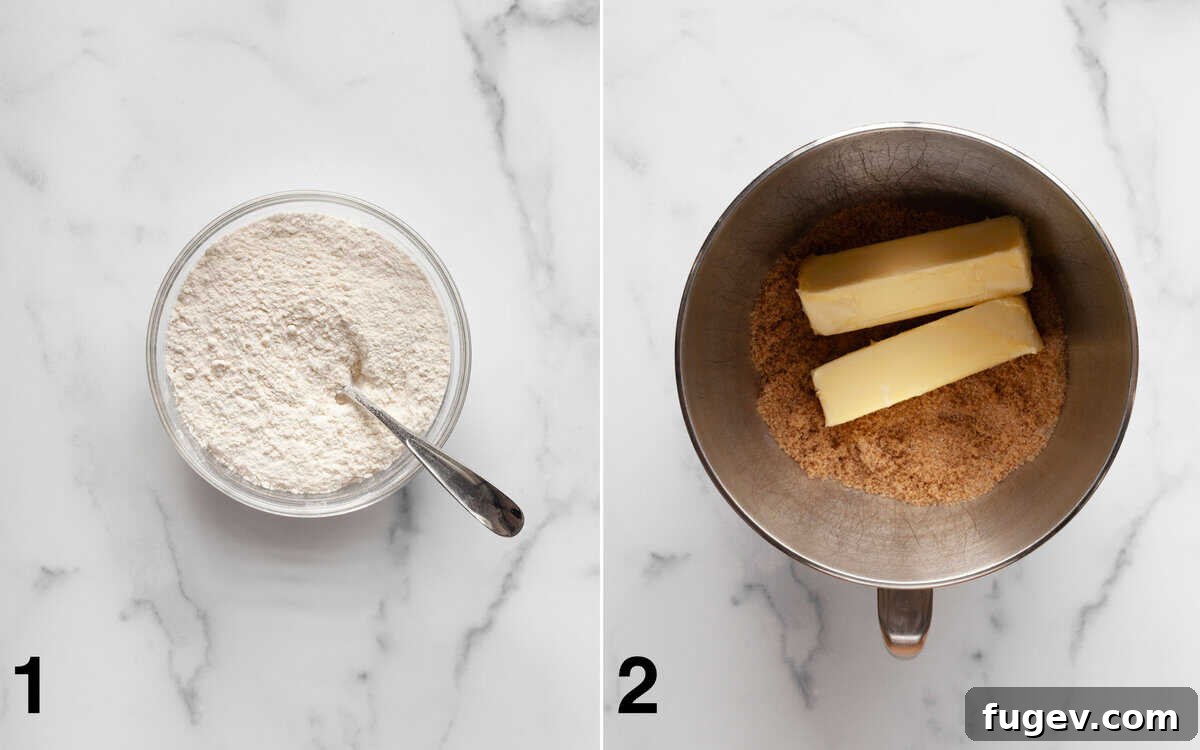
1. **Combine the Dry Ingredients:** In a medium-sized mixing bowl, whisk together the all-purpose flour, kosher salt, and baking soda. This ensures they are evenly distributed throughout the dough.
2. **Cream Butter and Sugars:** In a large bowl, using an electric hand mixer or a stand mixer fitted with the paddle attachment, cream together the softened unsalted butter and both the light brown and granulated sugars. Beat on medium-high speed for about 4 minutes until the mixture becomes light, fluffy, and pale in color. This step incorporates air, contributing to the cookie’s texture.
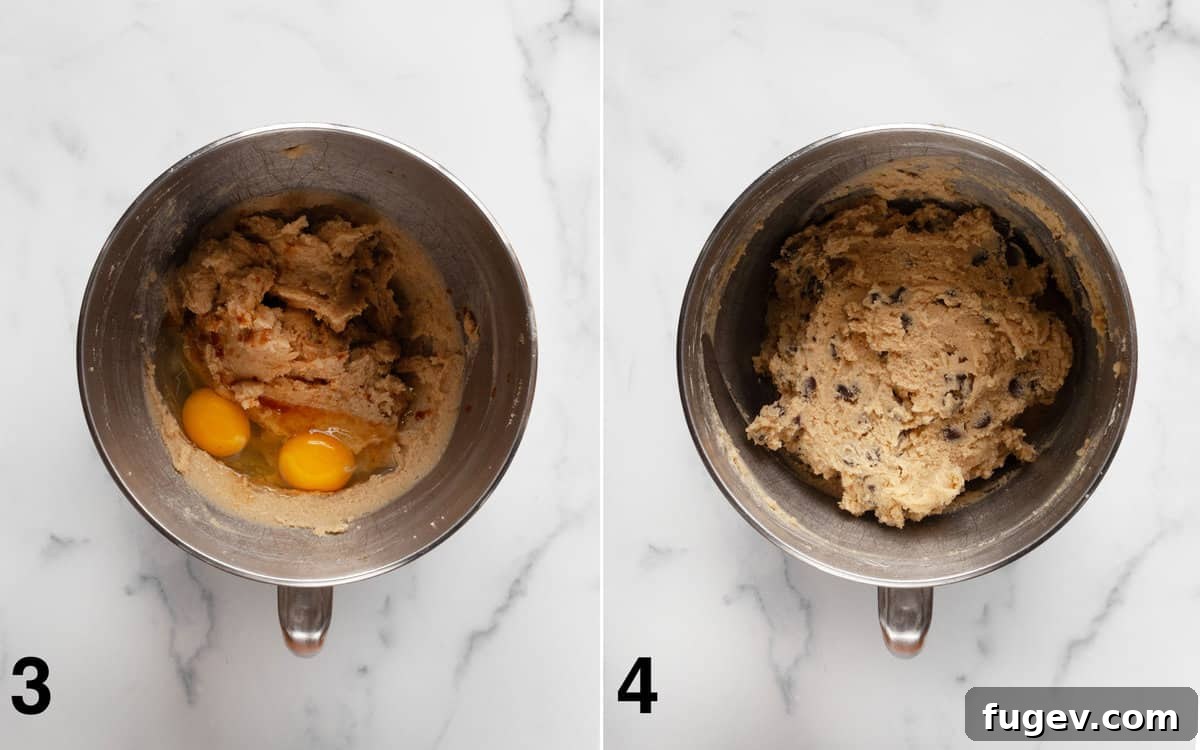
3. **Incorporate Wet Ingredients:** Add the eggs one at a time, beating well after each addition until fully incorporated. Stir in the vanilla extract, mixing until just combined. Scrape down the sides of the bowl as needed to ensure everything is thoroughly mixed.
4. **Add Dry Ingredients and Chocolate Chips:** Gradually add the combined dry ingredients to the wet mixture, mixing on low speed only until just combined. Be careful not to overmix, as this can lead to tough cookies. Once the dry ingredients are mostly incorporated, gently fold in 1-1/4 cups of the semi-sweet chocolate chips using a spatula.
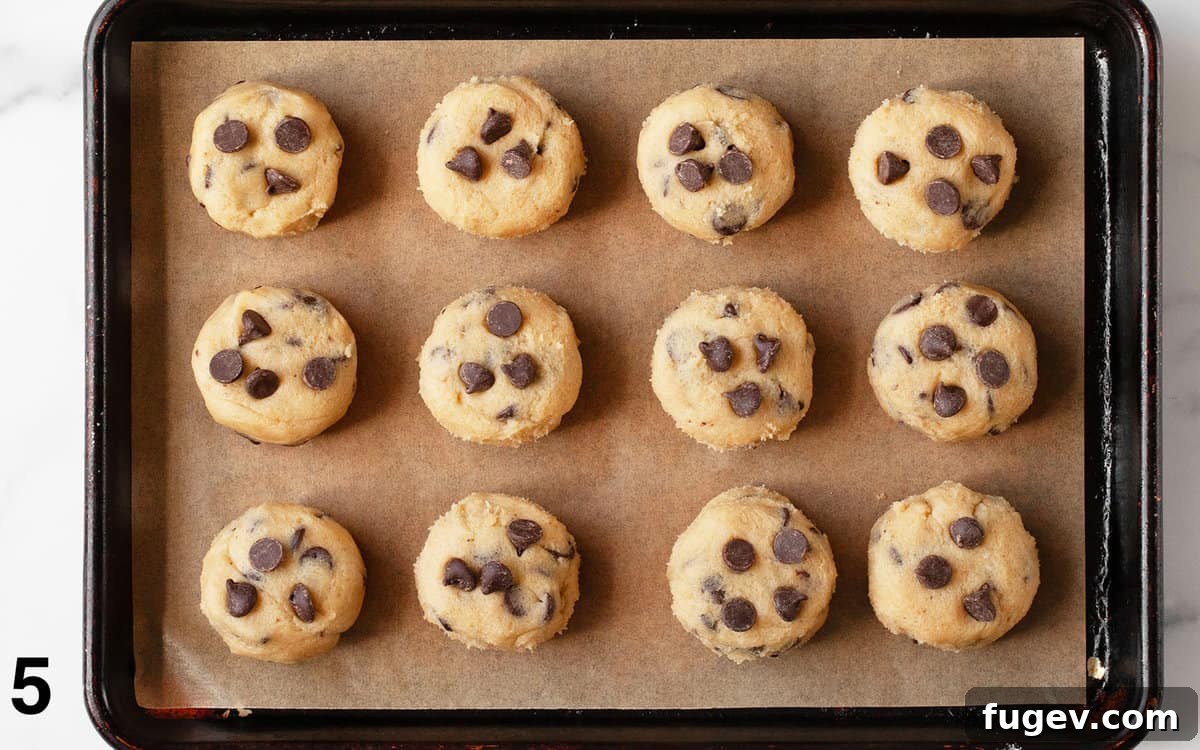
5. **Shape and Freeze Cookie Disks:** Scoop the cookie dough into approximate 3-tablespoon balls. Then, gently press each ball into a disk shape, ensuring they are slightly narrower than the diameter of your muffin cups. This prevents the cookie layer from overflowing the muffin pan during baking. Press a few extra chocolate chips onto the top of each disk for an appealing finish. Repeat this process until you have 12 cookie dough disks. Place these disks on a parchment paper-lined pan or plate, cover them tightly, and freeze until firm. *You will likely have extra cookie dough; see our “Recipe Tips” for what to do with it!* Freezing the cookie dough is crucial for maintaining its shape and preventing it from spreading too much during baking, ensuring a distinct cookie layer in your brookies.
Preparing the Rich Brownie Batter:
The brownie layer is all about deep chocolate flavor and a wonderfully fudgy texture. Precision in melting the chocolate and incorporating ingredients will lead to the best results.
**Prepare the Muffin Pan:** Begin by greasing a standard 12-cup muffin pan thoroughly with nonstick cooking spray. This will ensure your brookies release easily after baking.
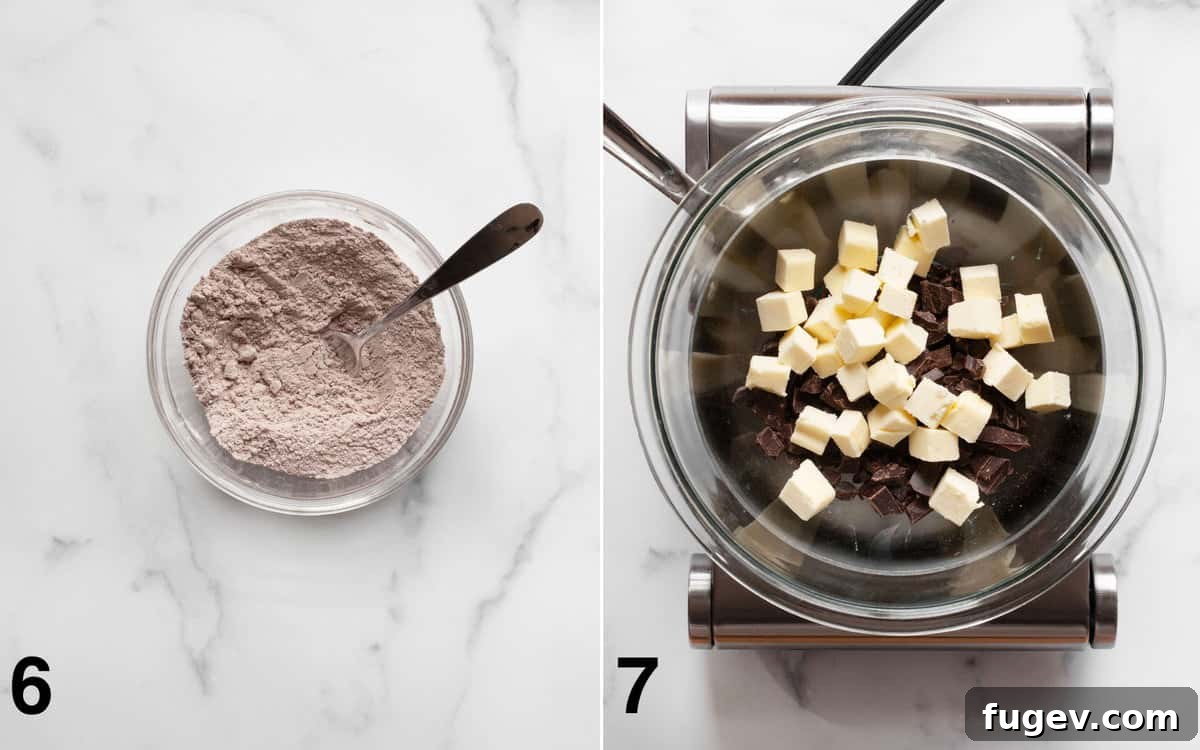
6. **Combine Dry Ingredients for Brownies:** In a separate medium bowl, whisk together the all-purpose flour, unsweetened cocoa powder, and kosher salt until well combined. This ensures even distribution and flavor in your brownies.
7. **Melt Butter and Chocolate:** Place the roughly chopped bittersweet chocolate and cubed unsalted butter in a large heatproof bowl. Set this bowl over a saucepan containing about 1 inch of simmering water (creating a double boiler setup). Stir occasionally with a spatula until both the butter and chocolate are completely melted and smooth. This gentle melting process prevents the chocolate from seizing or burning, guaranteeing a silky smooth brownie batter.
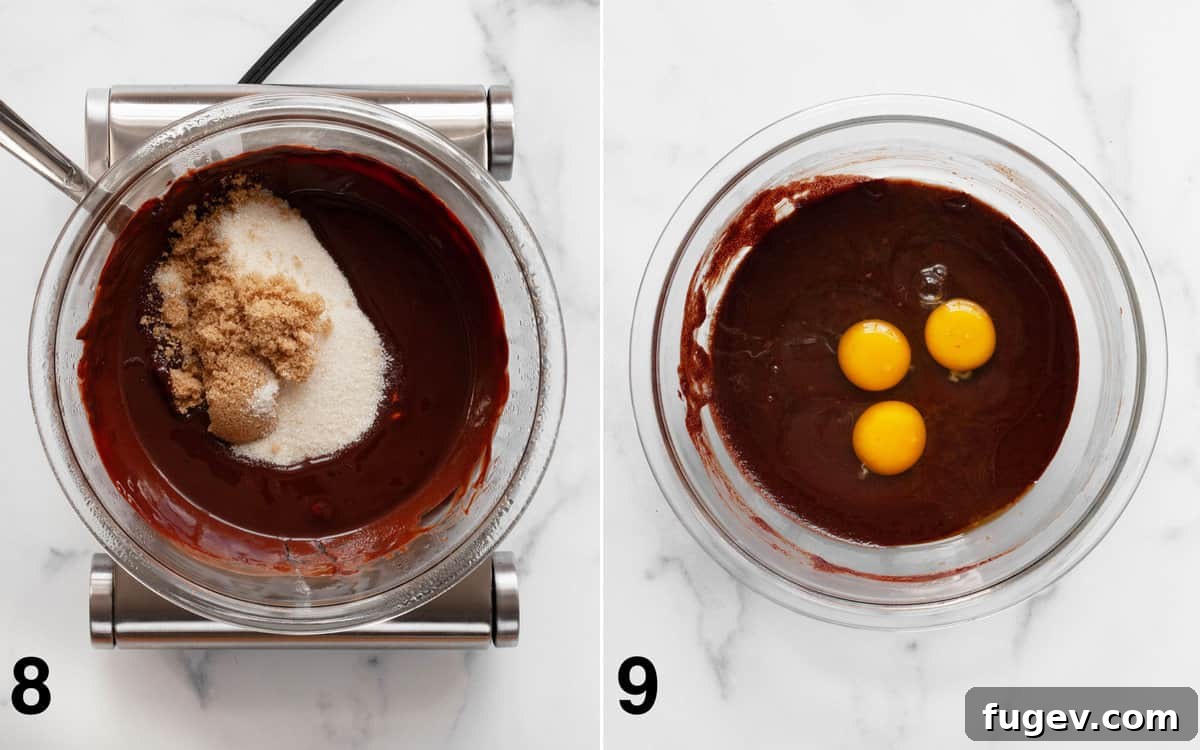
8. **Whisk in Sugars:** Remove the bowl from the heat. Whisk both the granulated sugar and light brown sugar into the melted chocolate-butter mixture until they are fully combined. Allow the mixture to sit for about 10 minutes; this helps the sugars dissolve slightly and contributes to the signature crackly top on the brownies.
9. **Beat in Eggs and Vanilla:** Add the large eggs, one at a time, beating vigorously after each addition to incorporate them completely. Finish by beating in the vanilla extract. Continue to beat for another minute or two, until the mixture is glossy and smooth. This step is key for achieving a truly fudgy brownie texture.
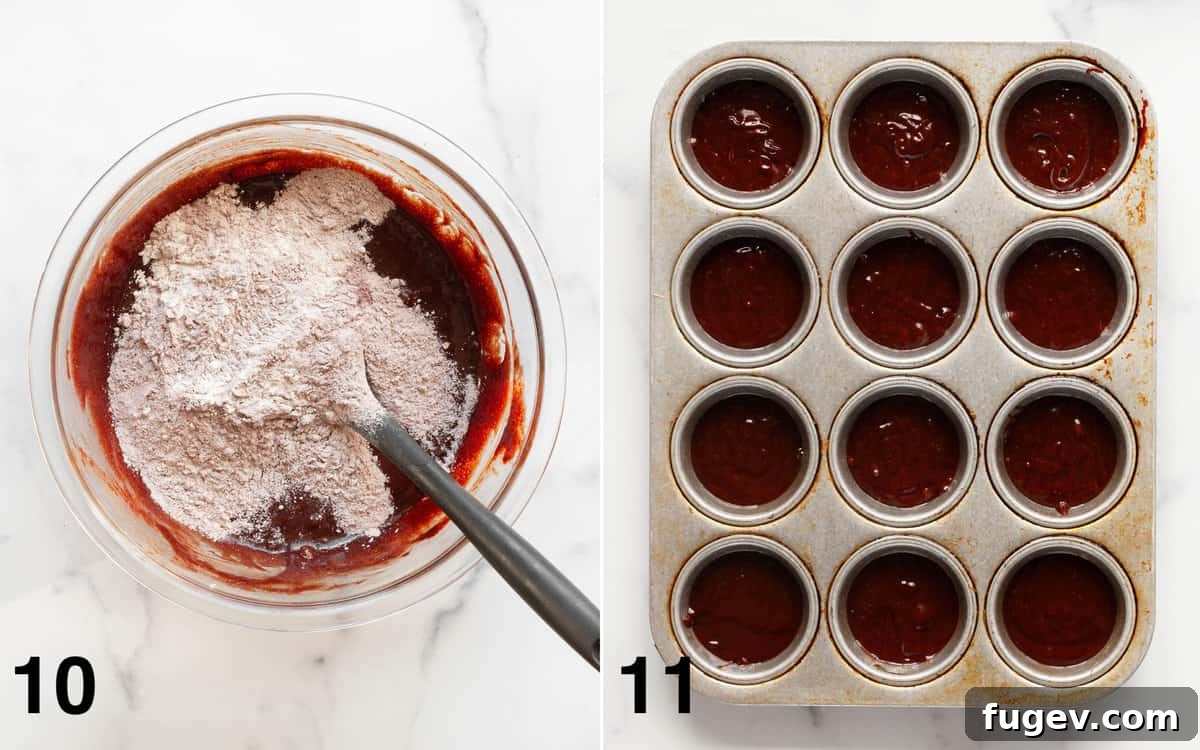
10. **Fold in Dry Ingredients:** Gently fold the prepared dry ingredients into the wet chocolate mixture using a spatula. Mix only until just combined and no streaks of flour remain. Be careful not to overmix, as overdeveloping the gluten can lead to tough brownies.
11. **Portion and Chill Brownie Batter:** Evenly spoon the brownie batter into the prepared 12-cup muffin pan, filling each cup just under halfway. Cover the muffin pan and chill it in the refrigerator for a minimum of 3 hours. This chilling step is absolutely essential; it allows the flavors to meld, the batter to firm up, and ensures the brookies bake properly, preventing the cookie layer from sinking into the brownie base. Do not skip this critical step!
Assembling and Baking Your Perfect Brookies:
Now comes the exciting part – bringing both delicious layers together and baking them to golden perfection!
**Preheat Your Oven:** Before you begin assembly, preheat your oven to 350 degrees F (175 degrees C). This ensures the oven is at the correct temperature for even baking once the brookies go in.
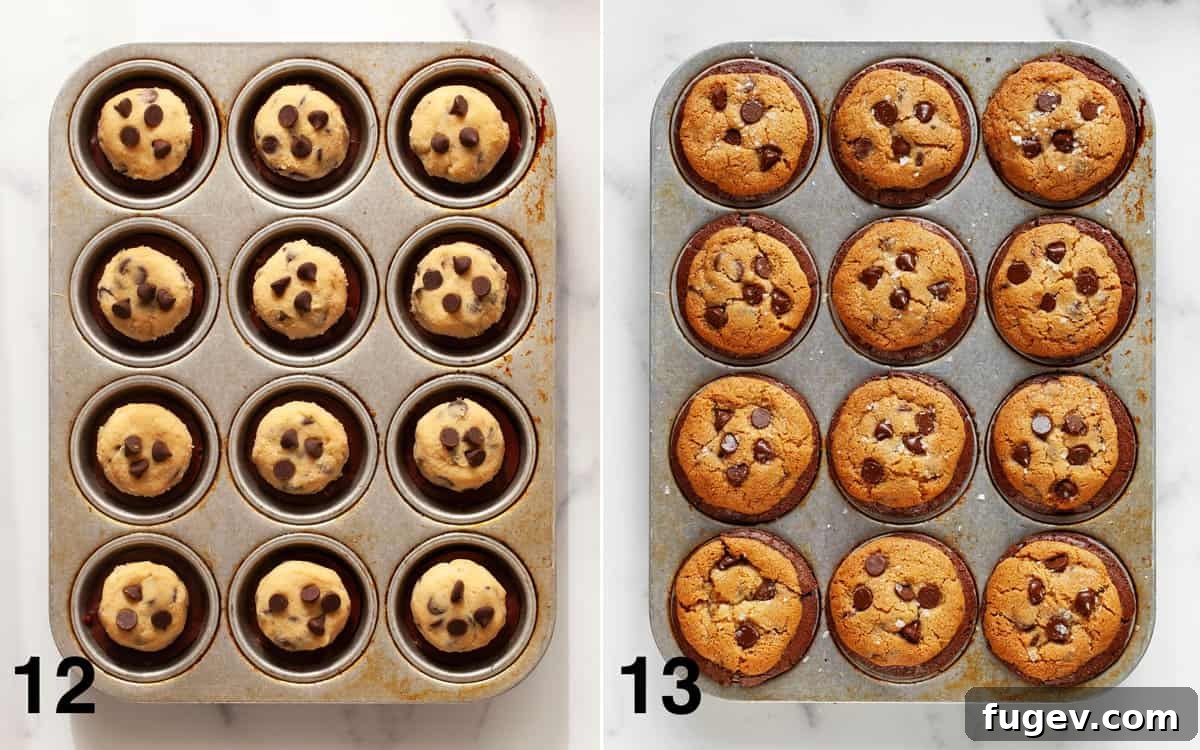
12. **Combine Layers:** Take your chilled muffin pan with brownie batter and your frozen cookie dough disks from the freezer. Gently press one frozen cookie dough disc into the center of the brownie batter in each muffin cup. The frozen cookie dough will sit on top of the chilled brownie batter, creating distinct layers.
13. **Bake to Perfection:** Place the muffin pan in the preheated oven and bake for 30-35 minutes. You’ll know they are ready when the chocolate chip cookies turn a beautiful golden brown color and you start to see some cracks appearing on their surface. To ensure even baking, make sure to rotate the pan halfway through the baking time. Immediately after pulling the brookies out of the oven, sprinkle them generously with flaky sea salt. The salt not only adds a delightful crunch but also perfectly balances the sweetness of the chocolate. Allow the brookies to cool in the muffin pan for at least 15-20 minutes before attempting to remove them. This cooling time is crucial for them to set properly and prevent crumbling.
Serving Your Delicious Brookies
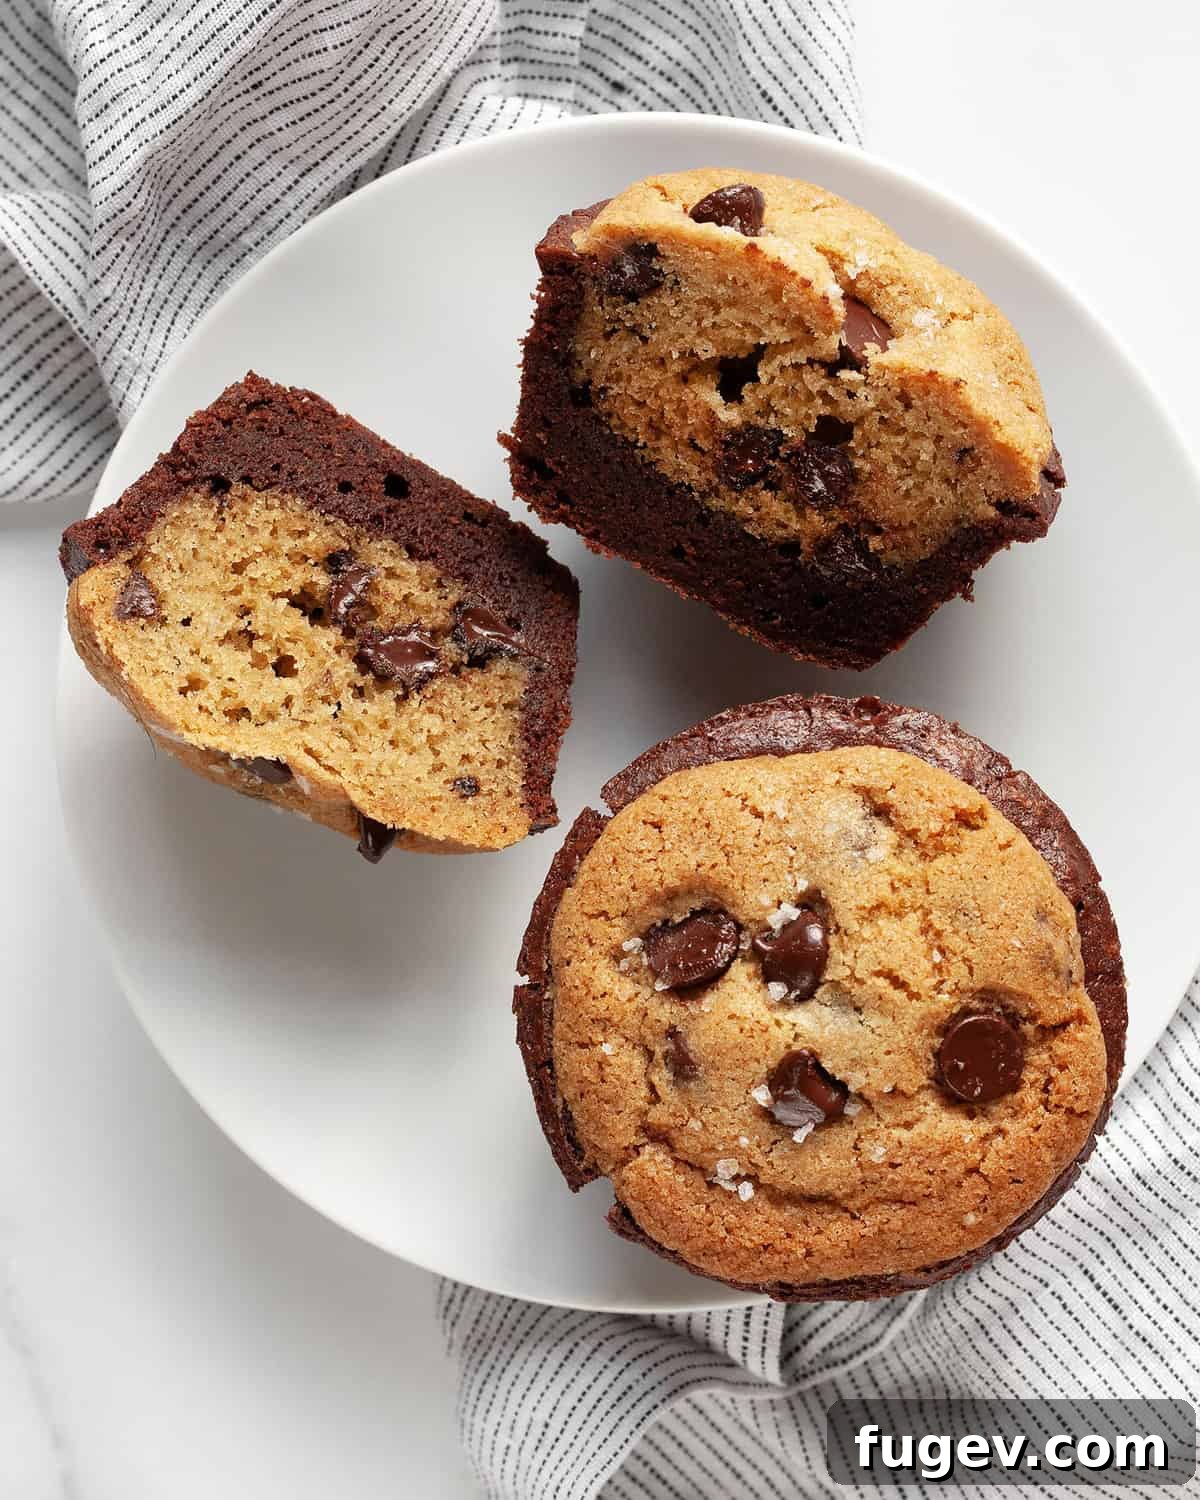
These magnificent brookies are a substantial and incredibly satisfying dessert on their own. Their rich flavor and dual texture make them a complete treat. However, if you’re looking to elevate the experience, they are absolutely divine when served warm with a generous scoop of creamy vanilla ice cream. The contrast of the warm, fudgy brookie and the cold, smooth ice cream is simply heavenly. Given their generous size and richness, feel free to slice them in half before serving, making them perfect for sharing or for enjoying a slightly smaller indulgence. They are an ideal dessert for gatherings, parties, or simply as a luxurious treat after a meal.
Storing and Freezing Brookies for Later
Proper storage ensures your brookies remain delicious and fresh for as long as possible. Here’s how to handle leftovers:
**Room Temperature Storage:** You can store your baked brookies in an airtight container at room temperature for up to 3 days. While they will still be tasty, keep in mind that the longer they sit, the more they may start to lose some of their initial moisture and become slightly drier. For the best experience, try to enjoy them within the first day or two.
**Freezing for Longer Freshness:** If you wish to extend their shelf life significantly, brookies freeze exceptionally well. Place them in an airtight freezer-safe container or freezer bags, and they will keep fresh for up to 1 month. When you’re ready to enjoy them, simply thaw them at room temperature. For quicker thawing, especially if you’re planning ahead, consider cutting the brookies into halves or quarters before freezing them. This reduces the thawing time and makes them ready to eat sooner. You can even gently reheat them in a microwave for a few seconds or in a warm oven for a few minutes to bring back some of that freshly baked warmth and fudginess.
Expert Recipe Tips for Perfect Brookies
**Follow Chilling Times Carefully:** The success of these brookies largely depends on patience and precision. It’s crucial to carefully follow all recipe instructions, especially regarding the chilling and freezing times. The prep time for these layered cookies is indeed longer than average, but this is because both the brownie batter in the muffin cups and the cookie dough disks need to be adequately chilled and frozen, respectively. This firming up is essential for them to bake properly, maintain their distinct layers, and prevent the cookie from melting too quickly into the brownie. Do not skip these crucial steps!
**Utilize Extra Cookie Dough:** This chocolate chip cookie dough recipe yields more than you’ll need for just 12 brookies. After shaping the 12 disks for your brookies, go ahead and shape the remaining dough into additional disks or balls. Freeze these extra portions on a lined pan, then transfer them to an airtight container. You’ll have a wonderful bonus dessert to bake another time! Simply bake the frozen cookie dough at 350 degrees F for 17-19 minutes whenever you crave fresh cookies.
**Embrace Their Generous Size:** These brookies are truly a big dessert. They are wonderfully rich with decadent chocolate and luscious butter, making them incredibly satisfying. Don’t hesitate to cut them in half before serving, especially if you’re serving them after a meal or to a crowd. They are fantastic for sharing and still provide an ample, delightful treat.
**Troubleshooting Sinking Centers:** If you notice the centers of your brookies starting to sink slightly after you take them out of the oven, it’s a clear indication that they need to bake a little longer. Don’t worry, they are salvageable! Simply place them back in the oven for an additional 5 minutes at a time, checking for doneness until the centers are set. A slight jiggle is okay, but a noticeable sink means more baking time is required. The cookie tops should be golden brown with visible cracks.
Brookies Recipe FAQs
Absolutely! Adding chopped pecans or walnuts to the chocolate chip cookie dough can introduce a wonderful crunch and nutty flavor. If you choose to add nuts, we recommend slightly reducing the amount of chocolate chips to maintain a balanced texture and flavor profile.
While the flaky sea salt is listed as an optional finishing touch, it is highly recommended. The salt flakes truly enhance the deep chocolate flavors in both the brownie and cookie layers, providing a delightful contrast and a subtle textural crunch. It elevates the entire dessert, transforming it from delicious to extraordinary.
Yes, you can adapt this recipe to bake in a larger pan, such as an 8×8 or 9×13 inch baking dish for brookie bars. However, baking times and chilling requirements will vary. You would layer the brownie batter first, chill it, then spread the cookie dough on top before baking. It’s a different approach, but equally delicious!
For the brownie layer, bittersweet chocolate (around 60-70% cocoa) is ideal as it provides a deep, complex flavor that isn’t overly sweet. For the cookie layer, semi-sweet chocolate chips are perfect. Using high-quality chocolate for both layers will significantly impact the overall taste and richness of your brookies.
More Delightful Cookie & Brownie Recipes
If you’ve enjoyed making these brookies, you’ll love exploring these other irresistible cookie and brownie creations:
- Peanut Butter M&M Cookies
- Classic Chocolate Crinkle Cookies
- Zesty Blood Orange Almond Icebox Cookies
- Extra Chewy Chocolate Chip Cookie Bars
- Nostalgic Cornflake Cookies
- Rich Chocolate Chip Peanut Butter Cookies
- Decadent Milk Chocolate Almond Brownies
- Gourmet Sea Salt Fudge Brownies
Brookies (Brownie Cookies)
Paige Adams
35 mins
35 mins
3 hrs
4 hrs 10 mins
12 brookies
With a fudgy brownie base and a chocolate chip cookie layered on top, these brookies (brownie cookies), a combo dessert, are perfect for baking indecision.
Ingredients
For the Chocolate Chip Cookie Layer
- 2 1/4 cups all-purpose flour
- 1 teaspoon kosher salt
- 1 teaspoon baking soda
- 8 ounces unsalted butter, at room temperature
- 1 cup packed light brown sugar
- 1/2 cup granulated sugar
- 2 large eggs
- 2 teaspoons vanilla extract
- 1-1/2 cups semisweet chocolate chips
- Flaky sea salt (for finishing)
For the Fudgy Brownie Layer
- Nonstick cooking spray
- 3/4 cup all-purpose flour
- 1 tablespoon unsweetened cocoa powder
- 1/2 teaspoon kosher salt
- 5 ounces bittersweet chocolate, roughly chopped
- 4 ounces unsalted butter, cut into 1-inch cubes
- 3/4 cup granulated sugar
- 1/4 cup packed light brown sugar
- 3 large eggs
- 1 teaspoon vanilla extract
Instructions
For the Chocolate Chip Cookie Layer:
- In a medium bowl, combine the flour, salt, and baking soda.
- In a large bowl, using an electric mixer, cream the butter and both sugars until light and fluffy, about 4 minutes.
- Beat in the eggs and vanilla extract until well combined.
- On low speed, mix in the dry ingredients until just combined.
- Gently fold in 1-1/4 cup of the chocolate chips.
- Scoop the dough into approximately 3-tablespoon balls. Then shape them into disks slightly narrower than the muffin cups. Press a few chocolate chips on top. Repeat for 12 cookie dough disks. Place them on a parchment paper-lined pan or plate, cover, and freeze until firm.
For the Fudgy Brownie Layer:
- Grease a 12-cup muffin pan with nonstick cooking spray.
- In a medium bowl, combine the flour, cocoa powder, and salt.
- Place the butter and chocolate in a large heatproof bowl over a saucepan with 1 inch of simmering water. Stir occasionally until melted and smooth.
- Remove the bowl from heat and stir in both sugars until fully combined. Let it sit for 10 minutes.
- Beat in the eggs and vanilla extract until glossy.
- Fold the dry ingredients into the wet ingredients until just combined.
- Spoon the brownie batter into the prepared muffin pan, filling each cup just under halfway. Cover and chill in the refrigerator for 3 hours.
To Assemble and Bake:
- Preheat the oven to 350 degrees F (175 degrees C).
- Press one frozen cookie dough disc into the brownie batter in each muffin cup.
- Bake for 30-35 minutes, rotating the pan halfway through, until the cookies are golden brown and cracked on top.
- Immediately after removing from the oven, sprinkle with flaky sea salt. Let them cool in the pan before carefully removing.
Notes
*You will have extra chocolate chip cookie dough (about 7 cookies worth). Freeze these on a lined pan or plate, then transfer to an airtight container. Bake frozen dough at 350°F (175°C) for 17-19 minutes.
Store baked brookies in an airtight container at room temperature for up to 3 days. For longer storage, freeze them for up to 1 month. Thaw at room temperature; cutting them into halves or quarters before freezing will speed up thawing.
Adapted from Baked Elements by Matt Lewis & Renato Poliafito
Nutrition
Nutrition information is automatically calculated and should only be used as an approximation.
Additional Info
Cookies & Bars
American
Did you make this recipe?
Mention @lastingredient on Instagram and tag it #lastingredient!