
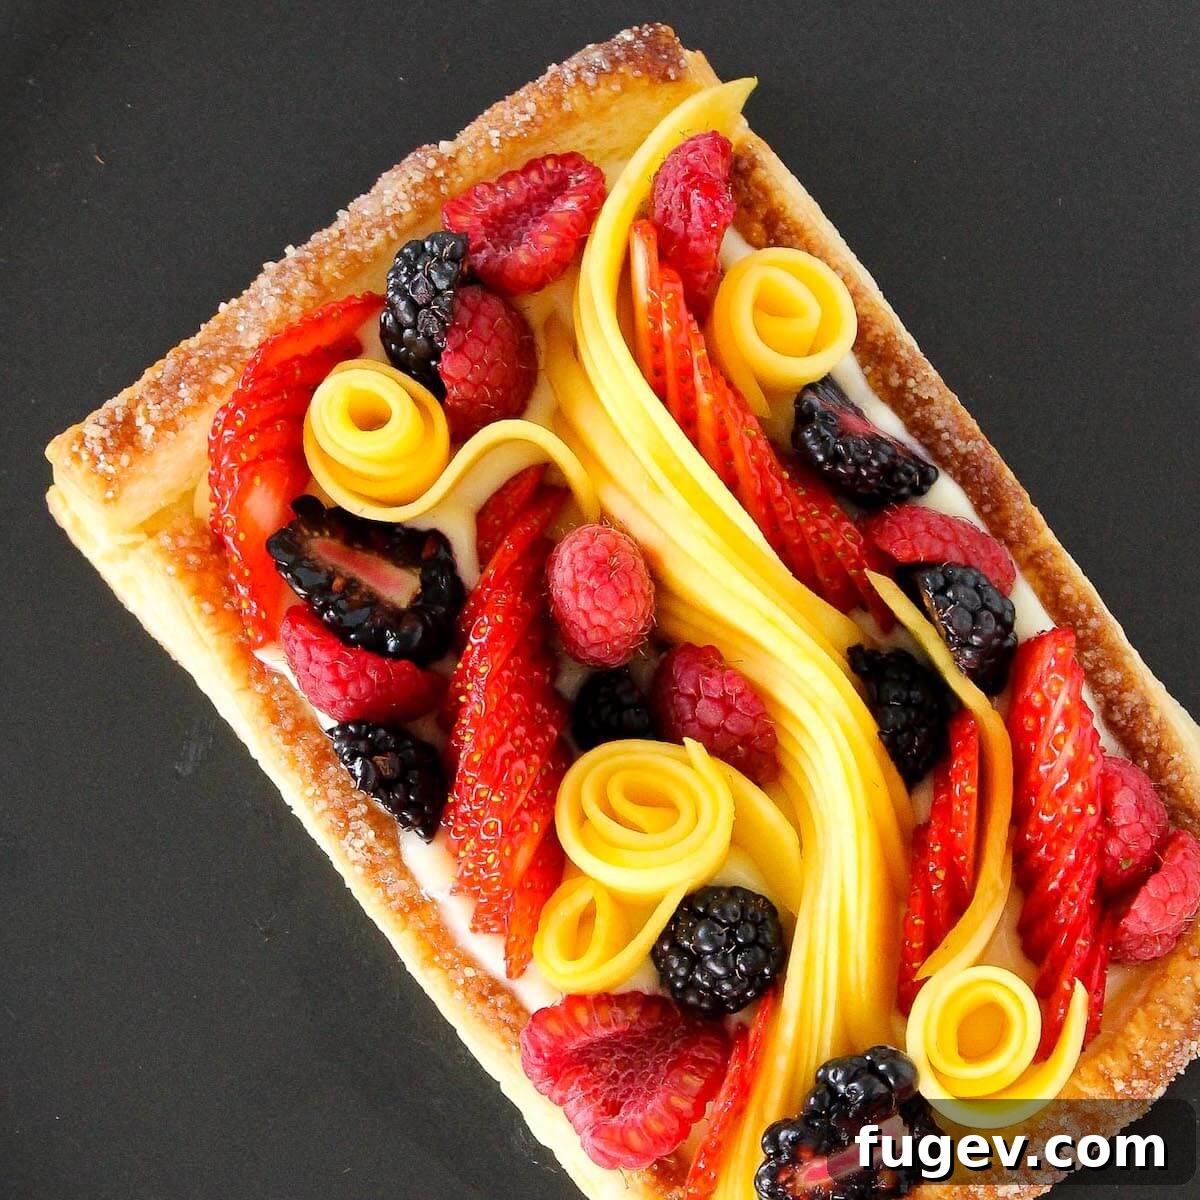
Elegant Puff Pastry Fruit Tart: Your Ultimate Easy Dessert Guide
Discover the secret to a show-stopping dessert that’s as effortless as it is impressive: the Puff Pastry Fruit Tart. This recipe guides you through creating a magnificent tart using either convenient store-bought or rich homemade puff pastry, generously filled with luxurious pastry cream, and crowned with a vibrant selection of your freshest fruits. It’s the perfect sweet finale for any meal, promising an experience of both ease and culinary delight!
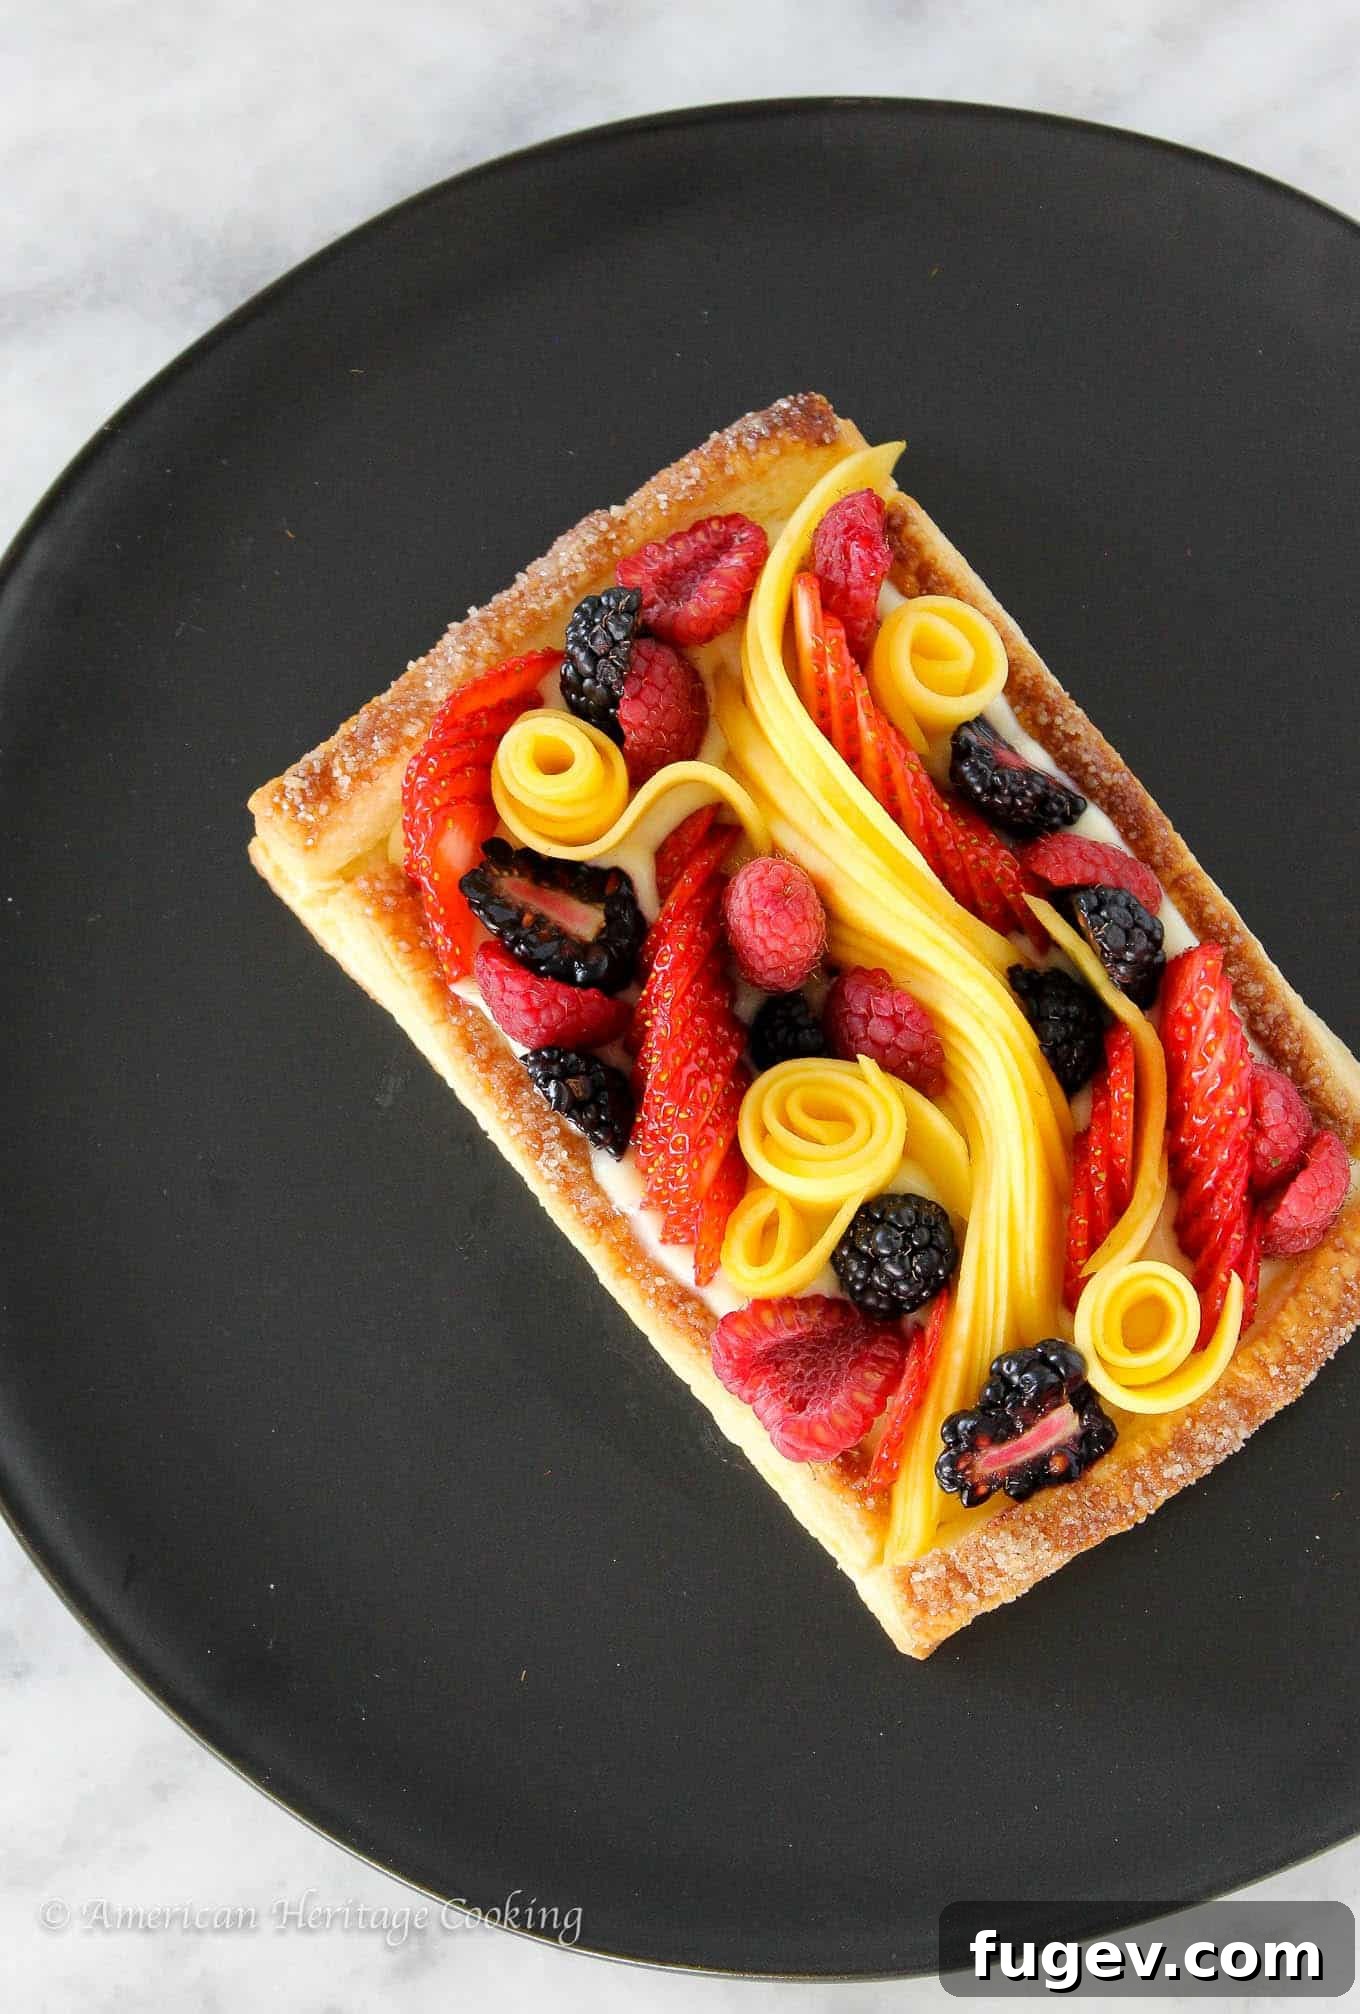
Are you searching for a dessert that marries sophistication with simplicity? Look no further! This exquisite Puff Pastry Fruit Tart is designed to impress, making it an ideal grand finale for any dinner party or a delightful treat for a casual gathering. With just a few key components like flaky puff pastry and creamy vanilla bean pastry cream, you’re well on your way to a culinary masterpiece. For an elevated twist, consider infusing your pastry cream with a hint of bourbon, though the beauty of this recipe lies in its adaptability—feel free to customize it to your heart’s content. Finish it with an artful display of your favorite seasonal fruits, and voilà, a breathtaking dessert is served!
Table of Contents
- Why You’ll Adore This Easy Fruit Tart
- Essential Tips for a Flawless Puff Pastry Tart
- Key Ingredients for Your Perfect Fruit Tart
- Creative Variations to Personalize Your Tart
- Smart Substitutions for Every Home Baker
- Step-by-Step Guide: How to Craft Your Puff Pastry Fruit Tart
- Chef Lindsey’s Recipe Tip
- Clever Uses for Leftover Puff Pastry Scraps
- Frequently Asked Questions About Fruit Tarts
- Puff Pastry Fruit Tart Recipe
- Before You Go!
Why You’ll Adore This Easy Fruit Tart:
- Effortless Elegance: This tart delivers maximum impact with minimal fuss. While it appears to be a labor of love, requiring hours of intricate work, the process is surprisingly straightforward. It’s perfect for those moments when you want a breathtaking dessert without the complicated steps—your secret is safe with us!
- Customizable Perfection: This recipe is a blank canvas for your culinary creativity. Whether you desire a specific size, a unique flavor profile, or a particular array of fruits, you have full control. We provide all the guidance you need to craft a flawless creation that perfectly matches your preferences, ensuring every tart is uniquely yours.
- Harmonious Flavors and Textures: Every bite of this delightful tart offers a symphony of fresh fruit and wonderfully flaky puff pastry. The thoughtful balance of textures and flavors prevents the tart from being overly sweet, creating a perfectly harmonious eating experience that is “just right,” as Goldilocks would say.
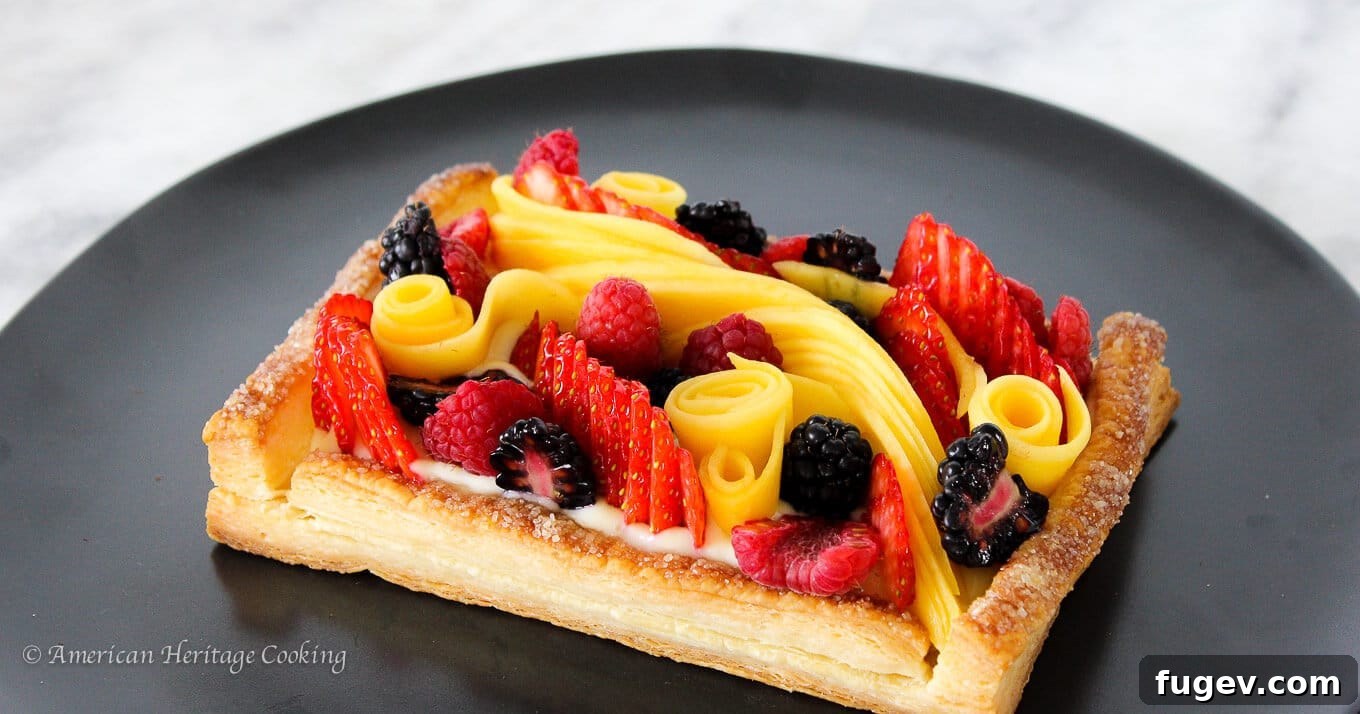
Essential Tips for a Flawless Puff Pastry Tart:
- Maintain Cold Puff Pastry: The key to achieving those irresistible, airy layers is to keep your puff pastry chilled at all times during handling. Warm pastry can cause the butter to melt, leading to a less flaky, denser crust. Work quickly and return it to the refrigerator if it starts to soften.
- Constructing Pastry Walls: The foundation of this tart’s structure lies in creating sturdy puff pastry walls. These walls aren’t just decorative; they form a crucial “boat” that perfectly contains the luscious pastry cream filling, preventing any delightful overflow.
- The Magic of Egg Wash: For securely adhering two pieces of puff pastry together, an egg wash is your best friend. A simple beaten egg creates a strong bond and also imparts a beautiful golden sheen during baking. Just crack an egg, whisk it until smooth, and it’s ready. For a visual guide, check out our Egg Wash Video Tutorial!
- Mastering Dough Docking: Docking is the simple act of piercing holes in your puff pastry, typically with a fork, at regular intervals. This step is vital for ensuring an even rise. The small perforations allow steam to escape during baking, preventing the crust from puffing up excessively and creating a flat, consistent base for your filling. If you’re curious about this technique, my comprehensive post on When to Dock a Pie Crust delves into all the details!
Pro Tip: Don’t let leftover egg wash go to waste! Stir it into your morning egg scramble for an extra boost of flavor and richness.
Key Ingredients for Your Perfect Fruit Tart:
- Whole Milk: As the primary liquid in our pastry cream, whole milk contributes to a creamy texture and subtle richness. While its fat content adds flavor, pastry cream is forgiving; feel free to use your preferred alternative milk or a lower-fat option without compromising the integrity of the custard.
- Granulated Sugar: Beyond its role in sweetening, sugar performs a critical function. When whisked with eggs, it protects them from curdling when introduced to heat, while also contributing to the pastry cream’s overall structure and a hint of leavening. Find high-quality granulated sugar here.
- Whole Egg: Essential for thickening the custard, the whole egg (along with the yolk) provides structure. Whisking it with sugar prior to tempering safeguards it against heat, ensuring a smooth, luscious cream. Stock up on fresh eggs for baking.
- Egg Yolk: Egg yolks are powerful thickeners, adding richness and a beautiful golden hue to the pastry cream without the extra moisture from egg whites. This results in an incredibly thick, velvety, and luxurious custard.
- Vanilla Bean: Though a premium ingredient, the distinctive, aromatic notes of vanilla beans are unparalleled, elevating this tart with an unmistakable depth of flavor. You’ll use the fragrant seeds for the pastry cream. Don’t discard the spent pods—they’re perfect for infusing in vanilla ice cream, crème anglaise, puddings, or even vanilla sugar.
- Cornstarch: Working in conjunction with eggs, cornstarch acts as a stabilizer and thickener, preventing the eggs from overcooking and clumping as the custard boils. It ensures a silky-smooth finish.
- Puff Pastry Sheets: The foundation of our tart! For a truly exceptional experience, consider making your own with our guides on homemade puff pastry or inverse puff pastry. However, for convenience without sacrificing beauty, high-quality store-bought puff pastry works wonderfully for these stunning fruit desserts.
- Bourbon: An optional but highly recommended addition, bourbon lends a sophisticated depth to the pastry cream. Choose a brand you genuinely enjoy, as its flavor will shine through. If whiskey isn’t to your taste, feel free to substitute with another complementary liqueur or omit it entirely.
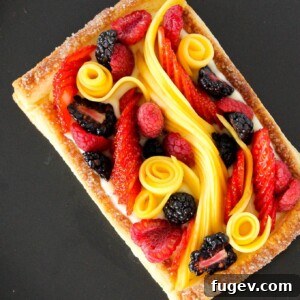
- Fresh Fruits: The crowning glory of your tart! My tart features a vibrant medley of fresh mangoes, sweet strawberries, juicy raspberries, and plump blackberries. The best choice is always your favorite combination of fresh, in-season fruits. Imagine the autumnal charm of thinly sliced apples!
Shopping Tip: Store-bought puff pastry is typically found in the freezer aisle of your grocery store, but sometimes you might find refrigerated versions alongside pre-made doughs and cinnamon rolls.
Creative Variations to Personalize Your Tart:
- Artful Styling: While I resisted the urge to go overboard with tweezers for photo styling, don’t let that stop your inner pastry chef! Embrace elaborate designs with your fresh fruit. Consider incorporating elements like elegant red wine poached pears or swirls of vibrant mixed berry jam for striking color contrasts and enhanced visual appeal.
- Diverse Fillings: This recipe was perfected with my signature vanilla bean pastry cream, but your options don’t end there! I heartily recommend trying my caramel pastry cream, which offers a delicate caramel flavor with slightly less sweetness. Alternatively, for a nutty twist, explore almond cream or hazelnut cream, but remember these require pre-baking.
- Endless Flavor Horizons: Unleash your imagination with flavor combinations! Transport yourself to a tropical paradise with a medley of mango, papaya, and pineapple, perhaps sprinkled with toasted coconut for an exquisite crunch. For a classic favorite, a generous mound of mixed berries is always welcome. In the colder months, create a bright, citrusy tart using oranges, blood oranges, and grapefruit to bring a pop of sunshine to your table.
- Adjustable Sizes: The tart pictured is ideal for two, but this recipe is incredibly adaptable! You can easily create charming individual tartlets for a party or scale up to a larger tart to feed a crowd. Just ensure you have enough puff pastry and adjust your baking time accordingly for smaller or larger sizes to ensure even cooking.
Important Note for Nut Creams: To use almond or hazelnut cream in this tart, you’ll need a two-stage baking process. First, bake your puff pastry shell until golden brown. Then, carefully pipe or gently spread the softened nut cream into the warm shell and continue baking until the cream is golden and set, offering slight resistance when gently touched. This ensures proper cooking and a delicious result.
Smart Substitutions for Every Home Baker:
- Vanilla Bean Alternatives: If genuine vanilla beans are not accessible for this recipe, you can certainly use vanilla extract as a substitute. While you may notice a slight reduction in flavor complexity and depth, your tart will remain wonderfully delicious. For one full batch of vanilla pastry cream, replace ½ a vanilla bean with ¾ teaspoon of quality vanilla extract. To preserve its delicate flavor, add the extract at the same time you would add the bourbon, or just before the pastry cream cools completely. Boiling vanilla extract can diminish its aromatic qualities.
- Fruit Options: While fresh fruit is highly recommended for its superior texture and vibrant flavor, avoid using frozen fruit if possible. Even when thawed, frozen fruit often releases excess moisture, which can make your tart soggy. If fresh fruit isn’t an option, consider using dried fruits or various nuts for a different, yet still enjoyable, textural experience. However, be aware that these alternatives may alter the tart’s visual appeal and the balanced freshness it’s known for.
- Egg Wash Alternatives: My personal preference for egg wash is a simple beaten egg, forgoing additions like salt or milk to keep it pure and effective. However, if you’re looking for an alternative to adhere puff pastry pieces, milk or even heavy cream can be used to create a satisfactory bond, though they may not provide the same rich golden finish as an egg wash.
Step-by-Step Guide: How to Craft Your Puff Pastry Fruit Tart
Follow these detailed instructions to create a perfectly executed puff pastry fruit tart every single time. More precise measurements and additional details can be found in the comprehensive recipe card below!
Make the pastry cream:
Note: This recipe calls for the smallest batch of pastry cream I recommend. Any less can make it challenging to prevent clumping or burning during cooking. Even this size requires careful attention. For an easier and more forgiving process, consider doubling the recipe. Any extra pastry cream can be deliciously repurposed for other desserts, such as fillings for banana cream pie, éclairs, profiteroles, or numerous other delightful treats.
Step 1: Carefully split a quarter of a vanilla bean pod lengthwise and scrape out the fragrant seeds. You can either save the spent pod for infusing other recipes or add it directly to the pot for extra flavor during the heating process, removing it before tempering.
Step 2: In a medium-sized saucepan, combine the milk, granulated sugar, and vanilla bean seeds (and pod, if using). Bring this mixture to a gentle boil over medium heat, stirring occasionally to dissolve the sugar.
Step 3: While the milk mixture heats, prepare your egg mixture. In a separate bowl, whisk together the whole egg, egg yolk, and cornstarch until completely smooth and pale. This process, known as ‘blanchir,’ ensures no lumps. Next, gradually temper the hot milk mixture into the egg mixture. Slowly ladle small amounts of the hot milk into the egg bowl while continuously whisking vigorously. This gentle warming prevents the eggs from scrambling and allows them to gradually reach the temperature of the milk.
Step 4: Once fully tempered, return the entire mixture to the same pot over medium heat. Continue whisking constantly and diligently until the cream thickens significantly. Once it begins to visibly thicken, boil the mixture for precisely 1 minute while maintaining constant whisking to ensure it reaches the correct consistency and cooks out any starchy flavor from the cornstarch.
Step 5: Immediately pour your freshly made pastry cream onto a baking pan lined with plastic wrap. Cover the surface of the cream directly with another sheet of plastic wrap to prevent a skin from forming. Poke a few small holes in the top plastic wrap to allow it to cool efficiently, then chill it completely in the refrigerator. Properly stored, it will keep for up to 7 days.
Assemble the tart base:
Step 6: If your puff pastry is frozen, allow it to thaw on the counter until it is just pliable enough to lay flat and be worked with, but still very cold to the touch. This preserves its delicate layers.
Crucial Reminder: Always ensure your puff pastry remains cold while you are handling it. This is paramount for maintaining its distinct, flaky layers and achieving that characteristic rise during baking.
Step 7: Using a ruler and a pizza cutter for precision, cut the base of your tart from the puff pastry sheet. The exact dimensions are flexible; the tart shown in the pictures is 4×6 inches, but you can create adorable tiny tartlets or a grander, larger tart. Crucially, ensure you reserve enough puff pastry to cut strips for the 2cm-wide walls that will form the tart’s border.
Step 8: Now, prepare the strips that will form the elevated border of your tart, creating a “boat” to hold the luscious filling. Cut four individual strips of puff pastry, each approximately 2cm (about ¾ inch) wide, one for each side of your tart base.
Step 9: Using a pastry brush or even your fingertips, lightly brush egg wash onto the edges of your puff pastry base. Carefully adhere the previously cut strips onto these egg-washed edges, forming a neat border. Remember, egg wash is simply one beaten egg—no fancy additions needed! You can use the remaining half of the egg you might have saved from making the pastry cream.
Chill and bake the puff pastry:
Step 10: Gently dock your dough. Use a fork to poke several small holes across the entire base of the puff pastry. This vital step ensures that steam has controlled exit points during baking, allowing the pastry to rise evenly and preventing unwanted large air pockets.
Step 11: Place the assembled tart base in the refrigerator and chill it completely for at least 45 minutes. This chilling period is crucial for firming up the butter in the pastry, which is essential for maximum flakiness and structure during baking.
Step 12: After chilling, very quickly and lightly brush the top edge of the puff pastry border with a little more egg wash or a dab of water. Exercise extreme caution to prevent any egg wash or water from dripping down the cut edges of the pastry. If the layers become glued together, your puff pastry will not achieve its magnificent, airy puff! Finally, sprinkle the top border generously with raw sugar for a beautiful caramelized crunch.
Re-chill if needed: Always check your dough! If your puff pastry no longer feels thoroughly cold to the touch and has started to soften, don’t hesitate to pop it back into the refrigerator for a bit longer. A cold start is key to success!
Step 13: Preheat your oven to 375°F (190°C) convection. Prepare a baking sheet by lightly spraying it with nonstick cooking spray and lining it with a sheet of parchment paper. Carefully transfer your puff pastry “boat” onto the prepared sheet. Bake for 12-20 minutes, with the exact bake time depending on the size of your tart. You’re looking for beautifully golden brown edges and clearly visible, distinct puff pastry layers along the sides, indicating a perfect bake.
Step 14: Once baked, remove the tart shell from the oven and allow it to cool completely on a wire rack before proceeding to assembly. This prevents the pastry cream from melting and ensures the crust maintains its crispness.
Assemble the tart:
Step 15: Retrieve your chilled pastry cream. To restore its smooth, spreadable consistency, beat it again either in the bowl of a stand mixer fitted with the paddle attachment or vigorously by hand with a rubber spatula. This is also the perfect moment to incorporate the bourbon, if using, mixing it in until fully combined and the cream is silky smooth.
Step 16: Spoon a generous dollop of the refreshed pastry cream into your completely cooled tart shell. Using an offset spatula, gently and evenly spread the cream to cover the entire base of the tart, ensuring it reaches just below the top edge of the pastry walls. Be careful not to overfill, as adding the fruit later will cause the cream to spill over.
Step 17: Now for the artistic part! Wash, cut, and arrange your fresh fruits in any design that inspires you. Whether you prefer a meticulously dainty pattern, as I did, or a vibrant, towering mound of mixed berries, the choice is yours. Select the berries you love most or whatever seasonal fruits are at their peak for the freshest flavor and visual appeal!
Step 18: Refrigerate the assembled tart for at least 30 minutes before serving. For optimal flavor and texture, this Puff Pastry Fruit Tart is truly at its best when enjoyed on the day it is assembled.
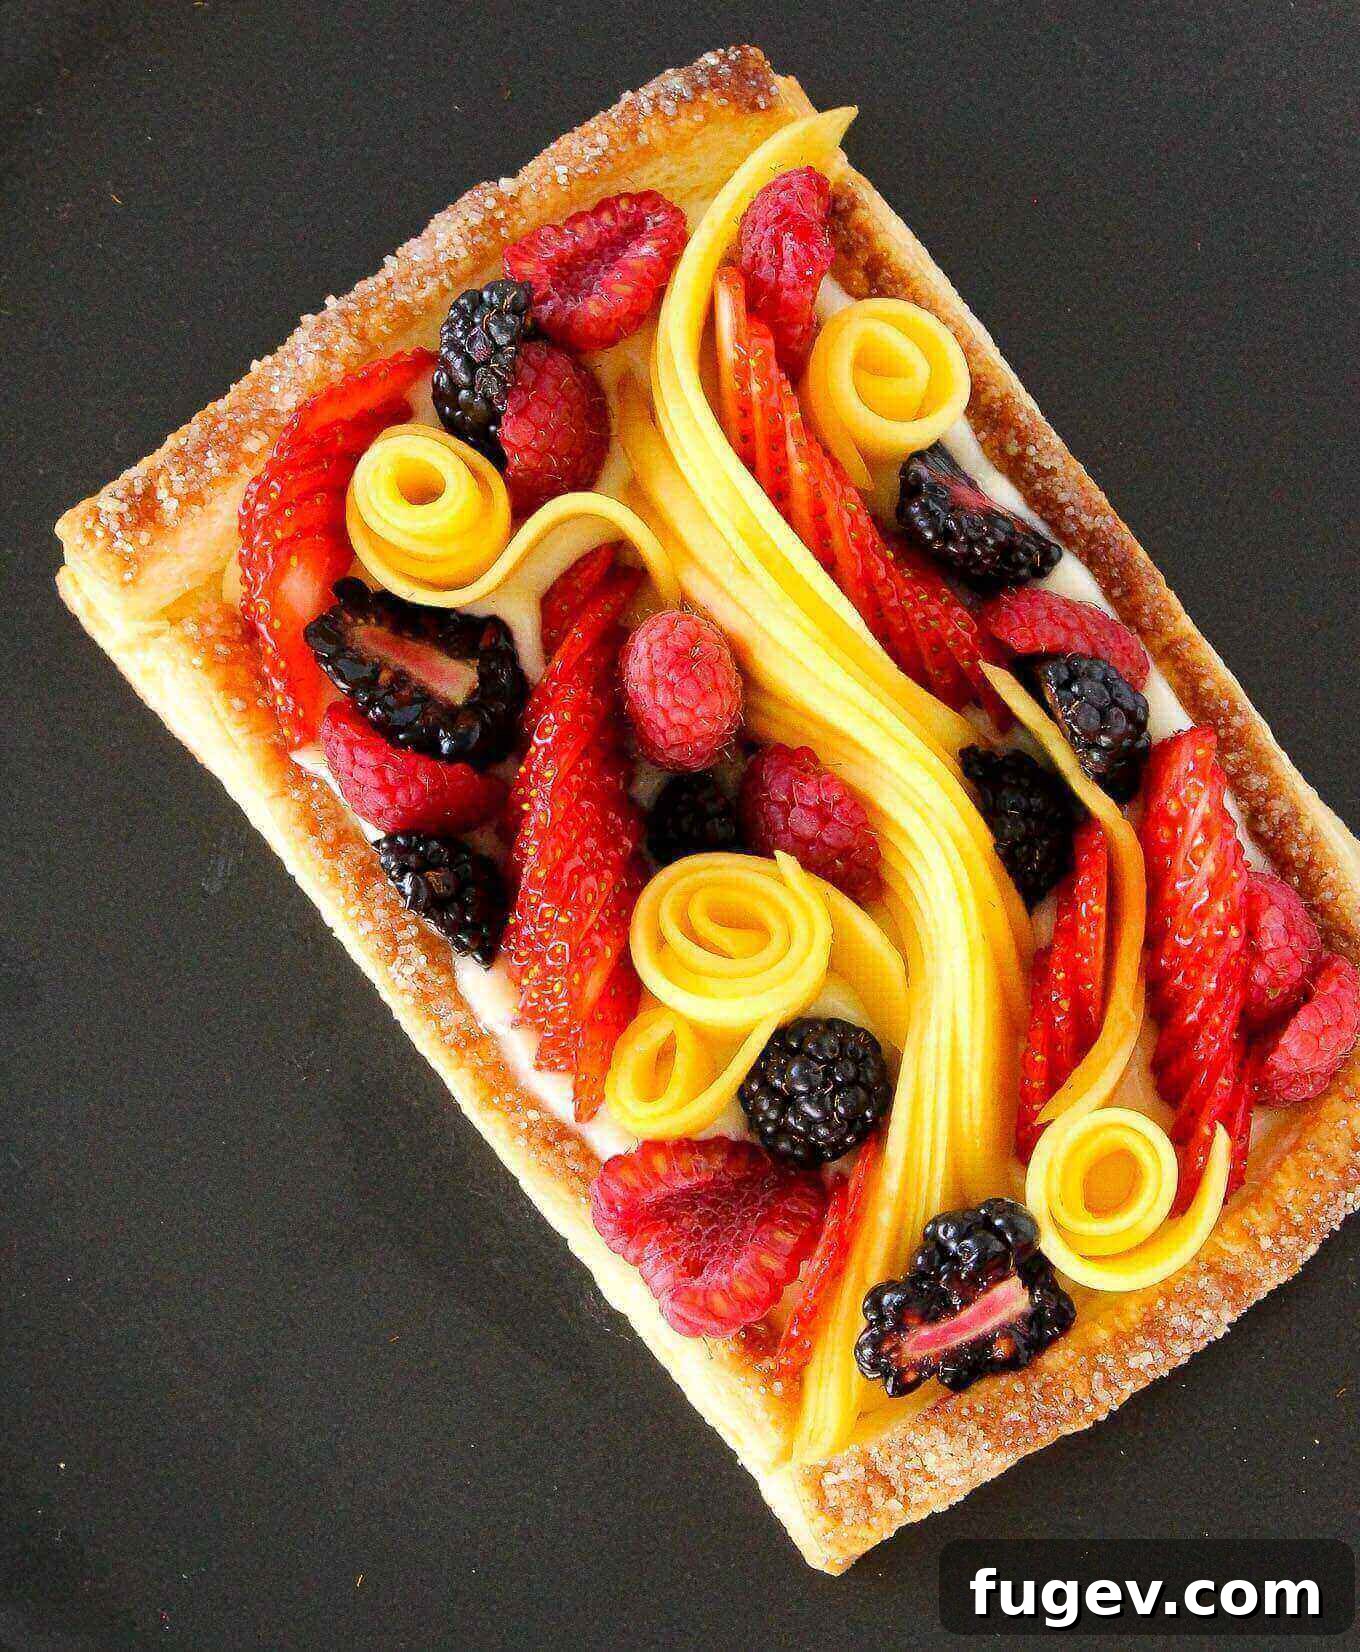
Chef Lindsey’s Recipe Tip
Precision is key: always use a ruler when cutting your puff pastry! This simple tool ensures perfectly straight lines and an impeccably even border, which are crucial for a chic, professional-looking finish. Attention to these small details truly elevates your dessert!
Clever Uses for Leftover Puff Pastry Scraps:
It’s almost inevitable to have some leftover puff pastry scraps when crafting savory dishes or sweet desserts. Don’t let these precious bits go to waste! Here are some creative ideas to utilize them:
- Re-roll and Repurpose: Gather your puff pastry scraps, gently press them together, and re-roll them just one time. Overworking the dough can compromise its flakiness, so be mindful. Thoroughly chill your newly formed sheet. This re-rolled pastry is ideal for creations where an absolutely perfect “puff” isn’t the primary concern. My video tutorial for palmiers offers an excellent example of how to make delicious treats with these pieces.
- Sweet or Savory Twists: Transform scraps into delightful twists! For a sweet indulgence, sprinkle them with cinnamon and sugar to bake irresistible cinnamon sugar twists. If you lean towards savory, consider making these flavorful cayenne-dusted cheese straws for a quick snack or appetizer.
- Decorative Elements: Unleash your inner artist! Use small cookie cutters to create charming leaves, flowers, or other shapes from your puff pastry scraps. Brush them with egg wash, sprinkle with a touch of sugar, and bake until golden. These elegant puff pastry garnishes are perfect for adorning a rich dark chocolate pudding, a vibrant tropical trifle, or a classic strawberry triumph pie. You can even use them to add an extra touch of flair to your next puff pastry tart! Share your creative uses in the comments below—we love to see what you come up with!
Frequently Asked Questions About Fruit Tarts:
While a freshly assembled fruit tart with puff pastry is truly at its peak right after preparation, if you absolutely must store it, place it in an airtight container in the refrigerator. Be aware that after approximately 8 hours, the baked puff pastry will begin to absorb moisture, gradually losing its characteristic crisp and flaky texture. For optimal freshness, it’s actually best to store the components separately: keep the baked puff pastry in an airtight container at room temperature, and the prepared pastry cream refrigerated.
Absolutely! With laminated doughs like puff pastry, chilling before baking is a critical step. This ensures that the layers of butter and dough remain distinct and cold, preventing the butter from melting too quickly in the oven and allowing for maximum lift and the desired flaky texture. You can even bake it directly from frozen if time is of the essence.
Yes, this tart is quite friendly to advance preparation! The puff pastry tart shell can be baked up to a day in advance, stored at room temperature once cooled. The pastry cream is even more robust and can be made up to seven days ahead and stored in the refrigerator, ready for assembly when you are.
Indeed! This recipe is incredibly scalable. You can easily multiply the ingredients for both the pastry cream and the puff pastry base to accommodate as many tarts as you wish to create, limited only by the amount of puff pastry you have on hand.
While unbaked puff pastry freezes exceptionally well, I generally do not recommend freezing assembled tarts with pastry cream. The texture of the pastry cream can become grainy upon thawing, and the fruit may release too much moisture. For best results, freeze only the unbaked puff pastry components.
Yes, docking the puff pastry shell before baking is absolutely essential! This simple technique of poking holes ensures that the pastry rises evenly and prevents large, uncontrolled bubbles from forming, providing a flat and stable base for your delicious filling.
The “best” fruit for this recipe is truly a matter of personal preference and what’s in season! I enjoy using a colorful mixture of fruits, always considering which flavors will harmonize beautifully with the specific pastry cream I’ve chosen. Beyond taste, I also envision the final aesthetic: do I want a refined and chic appearance, or a more rustic and bountiful look? What colors do I want to stand out? How much fruit do I desire in each bite? Ultimately, it’s your tart—so fill it with the fruits you adore most!
If you tried this recipe and loved it, please leave a 🌟 star rating and let me know how it goes in the comments below. I love hearing from you; your comments make my day!
⭐
⭐
⭐
⭐
Puff Pastry Fruit Tart
Chef Lindsey
15
30
45
4 people
Comment
Print Recipe
Ingredients
Vanilla Bean Pastry Cream
- 1 egg yolk
- 1 cup milk
- 2 tablespoons cornstarch
- ¼ cup sugar
- ½ whole egg Whisk an egg until completely smooth with no egg white streaks and eyeball half. Save the other half for your egg wash.
- ¼ vanilla bean seeded
Tart Shell
- 1 sheet puff pastry homemade or store-bought
- 2 teaspoons Bourbon optional
- fresh fruits
Instructions
Make the pastry cream:
-
Split and scrape the seeds from half a vanilla bean pod. Save the pod for another use or throw it in!
-
Heat the milk, sugar and vanilla beans in a medium pot and bring to a boil.
-
Blanchir (whisk) the eggs and yolks in a bowl with cornstarch. Next, add the milk to the whisked eggs with a process called ‘tempering’. Temper your milk into the eggs by slowly adding the hot milk mixture while whisking. This allows the eggs to come up to the temperature of the milk without cooking them.
-
Return the newly tempered mixture to the pot and turn the heat to medium. Whisk until it begins to thicken. Boil this mixture for 1 minute while constantly whisking.
-
Pour out your newly made pastry cream onto a plastic-wrap lined baking pan. Cover it with another sheet of plastic wrap, poke holes in the top, and cool it completely. You can store it for up to 7 days in the refrigerator.
Assemble the tart base:
-
If your puff pastry is frozen, allow it to warm up by placing it on the counter. You want it only warm enough to lay flat and be pliable. It should still be cold. Always keep your puff cold while you are working with it to preserve the layers!
-
Using a ruler or a pizza cutter, cut the base of your pastry. It really isn’t important what size you make it. The one I made in the picture is 4×6 inches for reference, but you could make tiny tartlets if you like or large ones. Be sure you have enough puff pastry to cut strips for the 2cm-wide walls.
-
Next, cut the strips to place on top to create a little puff pastry boat which will hold the filling. Cut 4 individual strips of puff about 2cm wide, one for each side.
-
Using a pastry brush or your fingers, adhere the strips to the top of the base with egg wash like a border. Egg wash is just one beaten egg, nothing fancy! You can also use half the egg left over from the pastry cream.
Chill and bake the puff pastry:
-
Dock your dough by using a fork to poke holes in the puff pastry base. This ensures it rises evenly by giving the steam specific exit-points.
-
Chill the dough completely, which will take at least 45 minutes.
-
After chilling the dough, quickly brush the top edge of the border with egg wash or a little water. Be careful that the egg wash or water doesn’t drip down the edges of the puff pastry, which would glue the layers together. {If these layers glue together, your puff pastry won’t puff!} Sprinkle the top with raw sugar.
-
Chill again if necessary. If your puff no longer feels cold to the touch and has softened, pop it back in the fridge for a little bit longer!
-
Preheat the oven to 375°F convection. Prepare a baking sheet by spraying with nonstick spray and placing a piece of parchment paper on top. Bake your puff pastry boat on the prepared sheet for 12-20 minutes. The bake-time will depend on the size of the tart. You want your pastry edges to be golden brown, and your puff pastry layers visible on the sides.
-
Allow the tart to cool completely.
Assemble the tart:
-
Refresh your pastry cream by beating it again in the bowl of a stand mixer fitted with the paddle attachment or by hand with a rubber spatula. This is when you would mix the bourbon in to taste. You want to beat the pastry cream until it is smooth and more easily spreadable.
-
Dollop some of the pastry cream into your completely cooled tart shell. Spread the cream with an offset spatula until it covers the whole base of the tart and comes just below the top of the sides. You don’t want to overfill it or when you add the fruit, the cream will squish out.
-
Cut and arrange the fruit however you like! I chose to arrange it more daintily, but a towering pile of mixed berries would also be beautiful. Use the berries you like the best, or any fruit that is in season!
-
Refrigerate before serving. It is best served the day it is assembled!
Video
Notes
Storage – This tart is best consumed the day it is made. If needed, it’s best to store the components separately!
Nutrition
Carbohydrates: 55g |
Protein: 8g |
Fat: 27g |
Saturated Fat: 8g |
Polyunsaturated Fat: 3g |
Monounsaturated Fat: 14g |
Trans Fat: 0.003g |
Cholesterol: 76mg |
Sodium: 189mg |
Potassium: 195mg |
Fiber: 2g |
Sugar: 23g |
Vitamin A: 373IU |
Vitamin C: 1mg |
Calcium: 93mg |
Iron: 2mg
Breakfast, Dessert
American, French
500
Like this? Leave a comment below!
Before You Go!
We sincerely hope you enjoyed creating and savoring this professionally chef-tested Puff Pastry Fruit Tart recipe. It’s designed to bring a touch of gourmet elegance to your home kitchen with minimal effort. Don’t stop here—explore our other delightful, chef-developed tart recipes to continue your culinary journey and discover more sweet inspirations!