
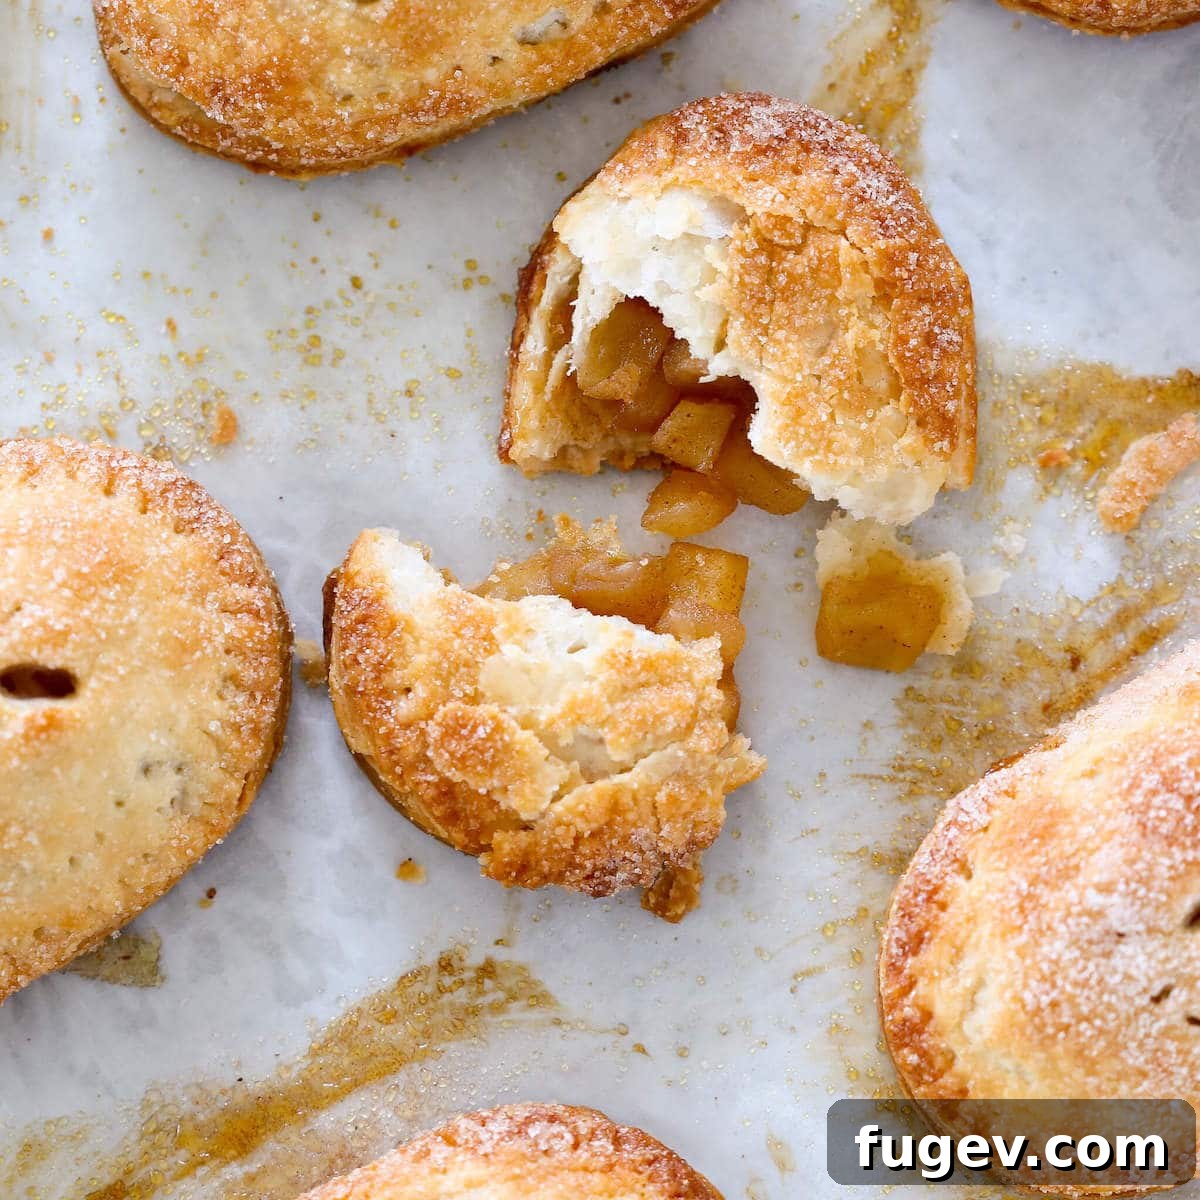
Ultimate Flaky Apple Hand Pies: Your Perfect Portable Dessert
Indulge in the nostalgic comfort of these easy-to-make Apple Hand Pies, featuring an irresistibly flaky, all-butter pie crust generously filled with a luscious homemade cinnamon apple compote, crowned with a sparkling cinnamon sugar topping. This chef-tested recipe delivers all the classic flavor of a traditional apple pie in a convenient, hand-held format. Perfect for on-the-go enjoyment, these delightful pastries bake to golden perfection in under 20 minutes, making them an ideal treat for any occasion.
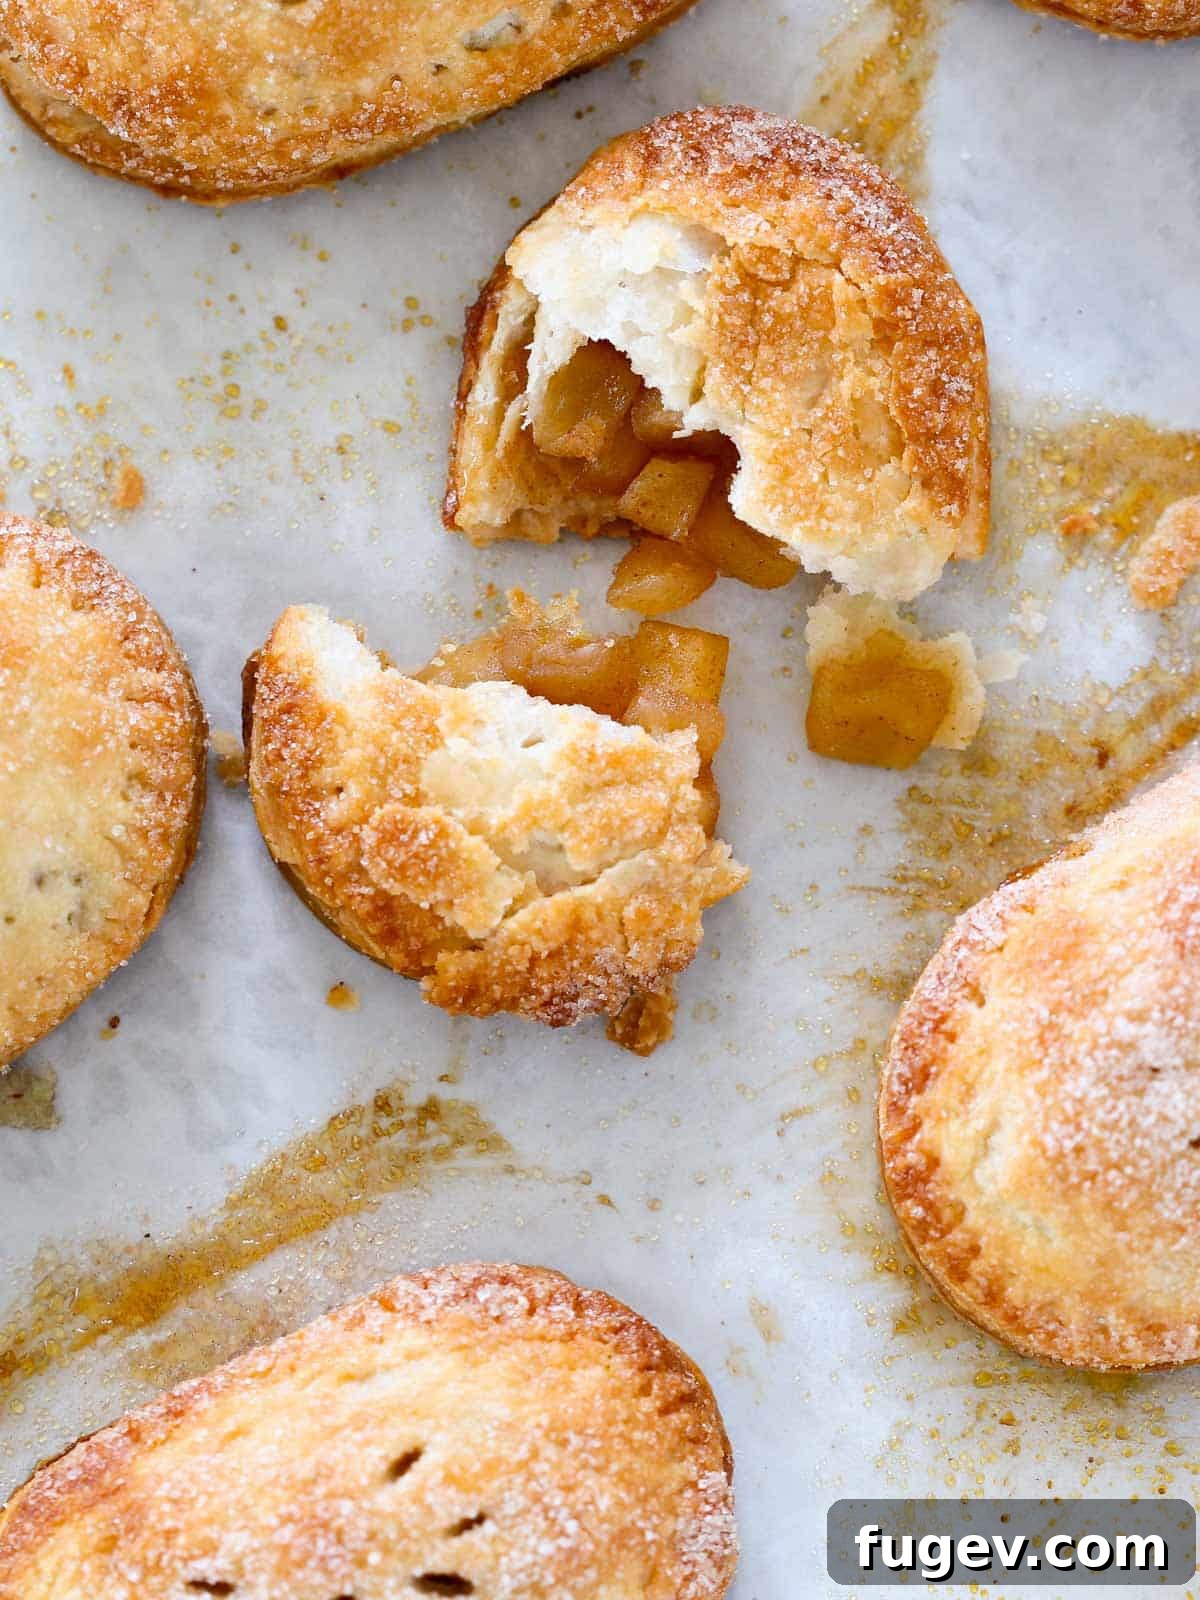
Recipe at a Glance: Essential Details for Your Apple Hand Pies
Get ready to bake with a quick overview of what to expect from this delightful recipe:
- Prep Time: 30 minutes. This includes preparing our signature pie dough (or unwrapping store-bought) and crafting the homemade cinnamon apple filling. Efficient mise en place ensures a smooth baking experience.
- Cook Time: 20 minutes. These individual pies bake quickly to a beautiful golden brown, with the filling bubbling enticingly.
- Chill Time: 30 minutes. A vital step for achieving that coveted flaky crust and preventing any leakage. Don’t be tempted to skip this!
- Total Time: Approximately 1 hour 20 minutes. This comprehensive estimate includes all active preparation, cooking, and crucial chilling times, leading to baking success.
- Servings: Yields 9 delightful hand pies. Perfect for sharing with family and friends, or for enjoying as a thoughtful treat throughout the week.
- Calories: ~268 kcal per pie (based on nutrition panel). A satisfying and delicious indulgence.
- Technique Highlight: This recipe guides you through creating an exemplary all-butter vodka pie crust, carefully filling it with a perfectly spiced and pre-cooked apple compote, mastering the art of sealing, chilling for structural integrity, and baking until golden and fragrant.
- Flavor Profile: Experience the exquisite harmony of a crisp, rich, and incredibly flaky pastry encasing a warm, tender, and intensely aromatic cinnamon-spiced apple filling. Each bite is complemented by a sweet, caramelized sugared crust, offering a delightful textural contrast.
- Difficulty: Intermediate. While the individual steps are straightforward, achieving the optimal flaky dough texture and ensuring proper sealing requires a keen eye and a bit of careful handling. Maintaining a consistently cold dough throughout the process is paramount, but with our detailed tips, you’ll find the process manageable and rewarding.
Featured Testimonial for Apple Hand Pies
⭐⭐⭐⭐⭐ “The pie dough really makes these hand pies stand out! It is crispy, flaky, and tastes amazing! I made the pie dough one day, then the filling the next, and assembled it on the third day. It really made the whole process seem really easy.” – Mara
Why You’ll Fall in Love with This Apple Hand Pie Recipe
These individual apple pies are more than just a dessert; they are a versatile, convenient, and crowd-pleasing treat that brings joy with every bite. Here’s why this recipe is sure to become a new favorite in your kitchen:
- Effortlessly Easy & Perfectly Portable: Say goodbye to forks and plates! These hand pies are designed for ultimate convenience. Their individual size makes them the ideal grab-and-go dessert, perfect for lunchboxes, picnics, road trips, backyard barbecues, or simply enjoying a sweet treat on your couch without any fuss. The straightforward preparation mirrors their easy consumption, proving that delicious doesn’t have to mean complicated.
- A Surprisingly Versatile Dessert for Any Occasion: One of the greatest charms of apple hand pies is their remarkable adaptability. Enjoy them chilled on a warm summer day for a refreshing bite, at room temperature for a casual snack, or lovingly warmed up for a cozy evening indulgence. Serve them solo for a quick, satisfying treat, or elevate the experience with delightful accompaniments. Pair them with a rich, velvety salted caramel sauce for dipping, a generous scoop of creamy vanilla bean ice cream for a classic pairing, or a delicate pour of luxurious crème anglaise for a sophisticated plated dessert experience.
- An Easy & Smart Way to Feed a Crowd: Planning for a party, holiday gathering, or a large family meal? Apple hand pies are your secret weapon for stress-free entertaining. They simplify serving dessert to numerous guests, eliminating the need for slicing and painstakingly plating a large pie. Furthermore, their incredible make-ahead capabilities are a true lifesaver: you can assemble them in advance, freeze them solid, and then bake them straight from frozen whenever you’re ready to impress. This flexibility makes entertaining a breeze and ensures a freshly baked treat is always within reach.
These delightful apple hand pies encapsulate all the heartwarming flavors of classic apple pie in a charming, convenient, individual serving. Our recipe features an easy-to-prepare cinnamon apple filling, expertly crafted from just six simple ingredients in under 30 minutes. This yields the same rich, aromatic taste as a traditional cinnamon apple pie or a grand, impressive mile-high apple pie, but with significantly less time and effort required. For an even quicker dessert solution without compromising on quality, feel free to use your favorite high-quality store-bought pie dough.
While their inherent portability makes them ideal for enjoying on the go, I often find myself savoring them with a luxurious scoop of creamy vanilla bean ice cream, a generous drizzle of homemade salted caramel sauce, or a delicate pour of velvety vanilla crème anglaise. Each pairing elevates the experience, transforming a simple hand pie into an unforgettable dessert that speaks to both comfort and sophistication.
Dive into the Ingredients: Crafting Your Perfect Apple Hand Pies
The magic of these exceptional hand pies begins with a careful selection of fresh, high-quality ingredients. Each component plays a vital role in achieving that perfect balance of flavor, texture, and visual appeal:
- For the Flaky Pie Crust: The very foundation of any truly great pie is its crust. I highly recommend utilizing my signature easy vodka pie crust, renowned for its exceptional flakiness, tenderness, and ease of handling—the vodka helps inhibit gluten development, leading to a more tender result. Alternatively, a classic all-butter pie crust will yield fantastic results with its rich flavor. For those seeking a vegan option or a more crumbly, tender texture that’s very forgiving, a shortening-based pie crust is also a wonderful choice. Whichever crust you choose, remember that a consistently cold dough is the absolute secret to achieving those coveted flaky layers.
- Egg (for Egg Wash): A single beaten egg serves a crucial dual purpose in our hand pies. Firstly, it acts as a powerful, natural adhesive, ensuring a strong, impenetrable seal between the top and bottom crusts. This barrier is essential for preventing any precious, bubbling apple filling from escaping during baking. Secondly, the egg wash contributes significantly to the beautiful golden-brown sheen and adds a delicate crispness to the exterior of your baked hand pies. If dietary restrictions preclude egg, a simple brush of water can be used for sealing, though it won’t offer the same browning benefits.
- Heavy Cream (for Crust Browning): A light brush of heavy cream applied to the tops of your hand pies just before baking does wonders for both their appearance and taste. It actively promotes even, deep browning, creating a rich, inviting golden hue. More importantly, it provides the perfect sticky surface for your cinnamon sugar topping to adhere, allowing the sugar to caramelize beautifully in the oven. This creates that irresistible, crunchy, sugary crust that adds another layer of texture and sweetness. Without the cream, the sugar would simply fall off during baking.
- Cinnamon Sugar (for Topping): This simple yet utterly essential topping delivers a final, irresistible layer of sweetness and spice. While you can easily purchase pre-made cinnamon sugar for convenience, for a truly homemade touch and customizable flavor, consider using the perfect blend from my popular snickerdoodle cookie recipe. This sprinkle is absolutely key to achieving that signature caramelized, crunchy finish on top of your hand pies.
- Apples (The Heart of the Filling): The selection of apples is perhaps the most critical decision for a well-structured, flavorful, and textured filling. I strongly advocate for using a blend of varieties to achieve a dynamic texture and a complex sweet-tart flavor profile. My personal go-to combination often includes Honeycrisp for its delightful sweetness and crispness, Granny Smith for its essential tartness and firm texture that holds up well to cooking, and Cripps Pink (Pink Lady) for its balanced sweet-tart flavor and robust flesh. The overarching key is to select apples that are firm and hold their shape well during the cooking process. Absolutely avoid softer, mealier varieties like Macintosh, which tend to break down into a mushy consistency when baked twice.
- Sugar (Granulated and Brown): A thoughtful combination of both granulated sugar and light brown sugar is employed to create the perfect nuanced sweetness for our apple filling. Granulated sugar provides a straightforward, pure sweetness that highlights the apples’ natural flavors. In contrast, light brown sugar introduces delightful molasses notes, adding depth, complexity, and a subtle caramel undertone that beautifully complements the apples and warm spices. This blend creates a more rounded and intriguing flavor.
- Ground Spices (Cinnamon and Ginger): These warm, aromatic spices are truly the soul of our apple filling, infusing it with comforting and inviting flavors. Ground cinnamon is a classic, indispensable partner to apples, offering its familiar comforting aroma and taste that evokes home baking. A touch of ground ginger adds an unexpected yet incredibly welcome warmth and subtle zest, elevating the overall spice profile beyond just cinnamon. For an alternative, you could use a pre-made apple pie spice mix, or simply refer to my foundational easy apple compote recipe for a perfectly spiced base. Better yet, double the compote recipe and use the extra to make delicious apple cinnamon rolls, extending your culinary adventure!
- Lemon (Freshly Juiced): Do not underestimate the transformative power of fresh lemon juice in this recipe! It is a culinary hero, serving multiple vital functions. Firstly, it brilliantly tempers and balances the sweetness from the sugars, preventing the filling from becoming cloying or overly sugary. Secondly, it masterfully brightens and draws out the natural, vibrant flavor of the apples, making them taste even more “apple-y.” Finally, its acidity helps to prevent the diced apples from browning (oxidizing) as you prepare them, maintaining their fresh and appealing appearance before cooking.
Troubleshooting: Preventing Leaky Hand Pies for a Perfect Finish
There’s nothing more disheartening than a beautiful hand pie that leaks its delicious filling during baking, creating a sticky mess. While it’s a common issue, it’s easily avoidable with these expert tips and understanding the common culprits:
- The Dough Shrunk, Releasing the Filling: This is a classic and frequent culprit behind leaky pies. Pie dough demands proper chilling time at various stages. If the dough isn’t adequately chilled before rolling, assembly, or crucially, again before it enters the hot oven, the butter within the crust warms up too quickly. This causes the gluten strands to relax and contract, leading the dough to shrink significantly in the oven. As it shrinks, it pulls away from the edges, creating gaps for the precious filling to escape. Ensure you allow sufficient chill time between each major step to keep the dough stable and prevent this frustrating shrinkage.
- They Were Overfilled: While the idea of a generously stuffed hand pie is undeniably tempting, overfilling is a direct and guaranteed path to leakage. Too much filling inside the delicate pastry shell places immense undue pressure on the seams. As the filling heats, expands, and bubbles in the oven, this pressure causes the seams to burst open, releasing the contents. Aim for a generous but manageable amount—typically about 2 tablespoons for a standard 3-4 inch hand pie—ensuring you leave ample space (at least a ½-inch border) around the edges for a strong, secure seal. Think “just right,” not “double stuffed.”
- The Dough Wasn’t Sealed Properly: A weak or incomplete seal is a primary reason for a messy, leaky pie. I always advocate for using a thin, even layer of beaten egg (egg wash) on one half of the dough before folding and pressing. This egg acts as a powerful, edible “glue.” After pressing the edges firmly together with your fingers to expel any air, further secure and reinforce the seal by firmly pressing the tines of a fork around the entire perimeter of the pie. This not only creates a beautiful, rustic crimped edge but also ensures a robust, leak-proof bond that will hold strong through the baking process. While water can be used as an alternative adhesive in a pinch, egg wash provides a superior and more reliable bond.
- Too Much Egg Wash Was Used: Paradoxically, while egg wash is essential for sealing, an excessive amount can be detrimental. Applying too much egg wash or even too much water can make the dough edges excessively wet and slippery. This prevents the two crusts from adhering properly, causing them to slide rather than stick together effectively. Consequently, the seams may pop open during baking. The key is to use just enough to lightly moisten the dough along the intended seal line, and critically, only apply it to *one* of the two surfaces you’re joining, not both, to facilitate a clean bond.
- You Forgot to Vent Them! Steam buildup inside your hand pies is a powerful and often underestimated force. As the apple filling cooks and heats in the oven, it releases significant amounts of steam. If there’s nowhere for this steam to escape gracefully, it will inevitably find the weakest point in your pastry—which is usually your carefully crafted seam—and push its way out forcefully, resulting in an unsightly burst and a leaky pie. Always remember to cut a few small slits or decorative vents into the top crust of each hand pie before baking. This simple step allows the steam to escape without resistance, preventing explosions and ensuring perfectly contained pies.
- The Dough Was Handled Too Perfectly (Rare but Possible): In very rare instances, if your pie dough is exceptionally well-developed, with perfectly laminated layers achieved through expert handling—almost resembling puff pastry—the edges might expand and separate in a way that *appears* to be leakage, rather than a structural flaw. If your edges look beautifully layered, airy, and flaky, almost like a croissant, congratulate yourself on your advanced dough-making skills! Your pies will still taste absolutely incredible, even if their expansion pattern is a little unconventional. This is a sign of expertly made dough.
To mitigate stress and reduce the chances of leakage, especially for beginner bakers, you might consider opting for a shortening-based pie crust. These crusts tend to be more forgiving, less prone to shrinkage, and easier to handle, though their texture will be more crumbly and tender compared to the distinct, shatteringly flaky layers of an all-butter crust.
Creative Variations to Try: Customize Your Apple Hand Pies
One of the true joys of baking is the freedom to experiment with flavors and forms, transforming a beloved recipe into something uniquely yours. These apple hand pies serve as a fantastic, versatile canvas for your culinary creativity. Here are some inspiring variations to make them perfectly suited to your taste and occasion:
- Explore Different Filling Flavors: While our classic cinnamon apple filling is a winner for a reason, don’t hesitate to venture into other delicious fruit territories! You can easily substitute the apple filling with a variety of other homemade fruit compotes or even high-quality store-bought pie fillings. Consider the vibrant tartness of a cherry pie filling, the juicy sweetness of blueberry pie filling, the summery delight of a peach pie filling, or the rich, complex flavors of a mixed berry pie filling. Pears also make an excellent and complementary substitute for apples, offering a slightly different texture and a subtle, sophisticated sweetness.
- Elevate to a Caramel Apple Hand Pie: Caramel and apples are undeniably a match made in culinary heaven, a pairing as iconic and beloved as peanut butter and chocolate. To transform your apple hand pies into a decadent caramel apple sensation, simply stir a tablespoon or two of luscious homemade salted caramel sauce or even a delightful salted maple caramel sauce directly into your cooled apple filling just before assembly. The caramel will gently melt and meld with the apples during baking, creating an incredibly rich, gooey, and decadent treat that’s impossible to resist.
- Get Creative with Shapes: While classic circles, ovals, or rectangles are undeniably charming and efficient, the individual nature of hand pies invites playful and creative shapes! I often opt for oval cookie cutters myself, simply because I enjoy their elegant aesthetic. Feel free to use any cookie cutter that sparks joy and has enough surface area to accommodate a generous amount of filling while still providing sufficient space to crimp and seal the edges securely. It’s wise to avoid overly intricate or small cutters, such as a delicate snowflake, as they can make sealing quite challenging and prone to leakage. Excellent choices that offer both appeal and practicality include stars, charming apple shapes, fluted circles, hearts, or even elegant diamonds. If you’re looking for a completely different format that still captures the beloved essence of apple pie, consider making these adorable apple pie cookies next for a fun twist!
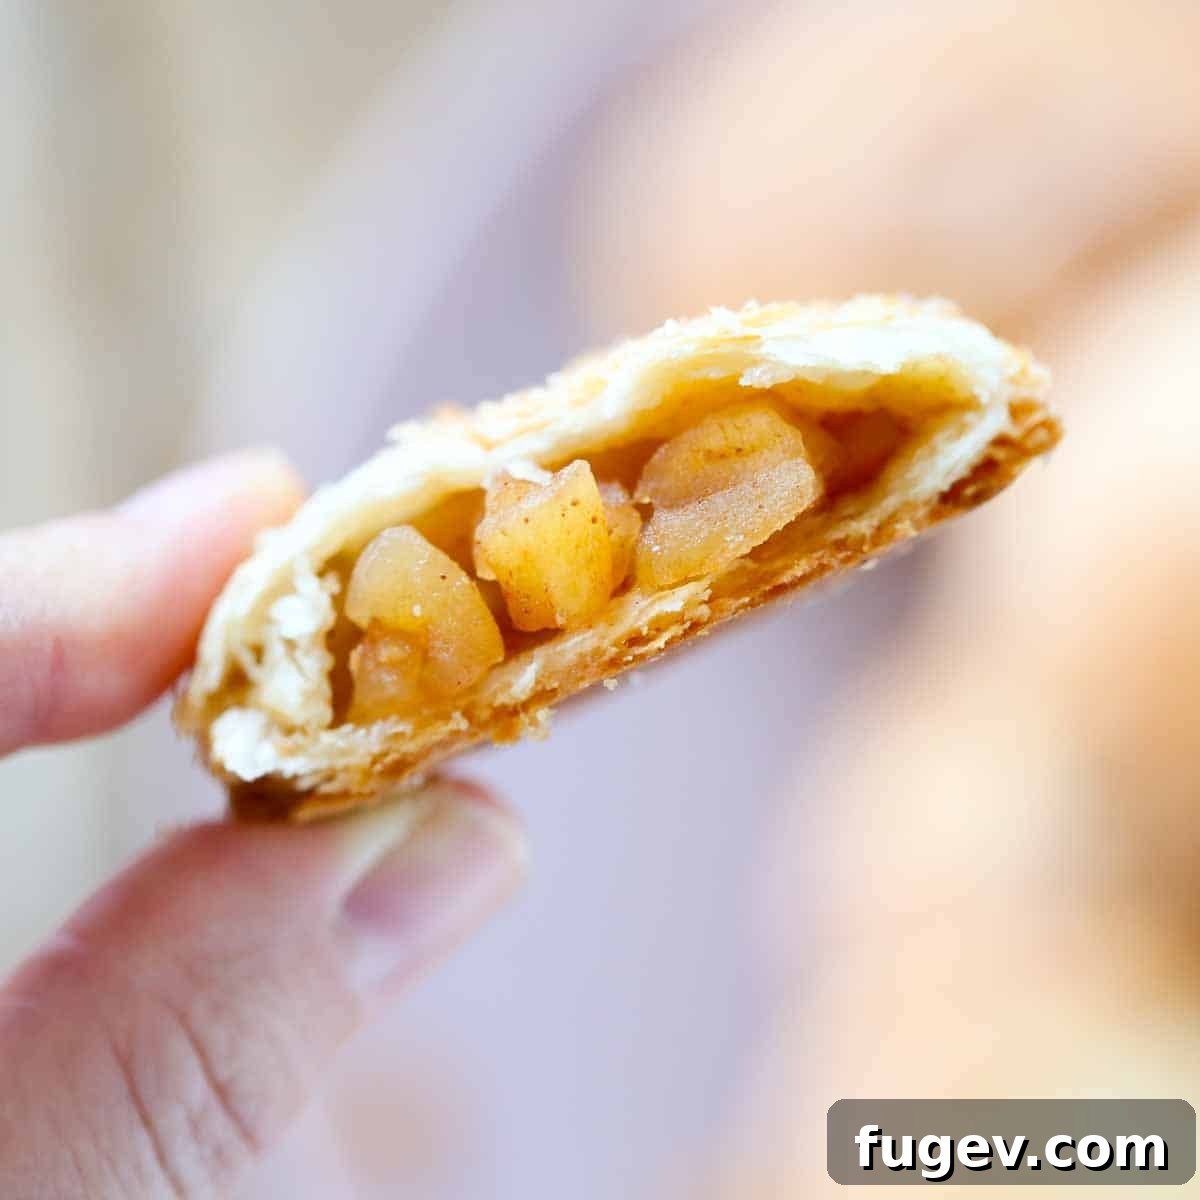
Pro Tips for Perfect Hand Pies: Achieve Bakery-Quality Results
Achieving truly outstanding hand pies goes beyond just following the recipe steps; it involves understanding the nuances of baking. These professional insights will help you elevate your baking and ensure every bite is a triumph, delivering that coveted flaky crust and perfectly contained filling:
- Maintain a Consistently Cold Pie Dough: This is arguably the most critical tip for producing a tender, incredibly flaky, and crispy pie crust. Cold dough is essential because it prevents the butter from melting too quickly before it hits the hot oven. When cold butter suddenly meets high heat, the water content in the butter rapidly turns to steam, which then pushes apart the layers of dough, creating those desirable pockets of flakiness. Furthermore, keeping the dough cold restricts gluten development, preventing a tough, chewy crust and significantly minimizing shrinkage during baking. Work quickly, use cold hands, and don’t hesitate to pop the dough back into the refrigerator or even the freezer for a few minutes if it starts to warm up and become difficult to handle during rolling or assembly.
- Master the Art of Filling Quantity: The perfect amount of filling in a hand pie is a delicate balance, a sweet spot you must find. Underfilling a hand pie can be genuinely disappointing, leaving you with too much crust and not enough of that delicious, spiced apple goodness. However, overfilling is a much more common culprit for baking disasters. Too much filling will place undue and irresistible pressure on the pastry seams, making it incredibly difficult to properly seal the edges. As the filling heats, expands, and bubbles vigorously in the oven, it will inevitably burst through any weak points, leading to unsightly leaks. Aim for a generous but manageable dollop (approximately 2 tablespoons for a 3-4 inch pie), ensuring you have at least a ½-inch border of clean, unfilled dough around the perimeter of the filling to create a strong, secure seal.
- Ensure Edges are Sealed with Precision: A robust and meticulous seal is your absolute best defense against leaky hand pies. After placing the cooled filling onto one dough shape and covering it with another, gently but firmly press the edges together with your fingertips to expel any trapped air and create an initial bond. This preliminary seal is important. Then, for added security and a beautifully decorative finish, take a fork and press its tines firmly and consistently around the entire perimeter of the pie. This action not only creates a charming crimped edge but, more importantly, fuses the two layers of dough together, establishing a secure barrier that will hold strong and prevent the filling from escaping during the rigorous heat of baking. For an extra layer of insurance, a light brush of egg wash on the bottom crust’s edge before applying the top crust works wonders as an edible, powerful glue.
How to Make Apple Hand Pies: Step-by-Step Guide for Flawless Results
Follow these detailed, chef-tested instructions to craft perfect, golden-brown hand pies every single time. For precise measurements and ingredient quantities, please refer to the comprehensive recipe card located further down the page.
Prepare the Apple Filling:
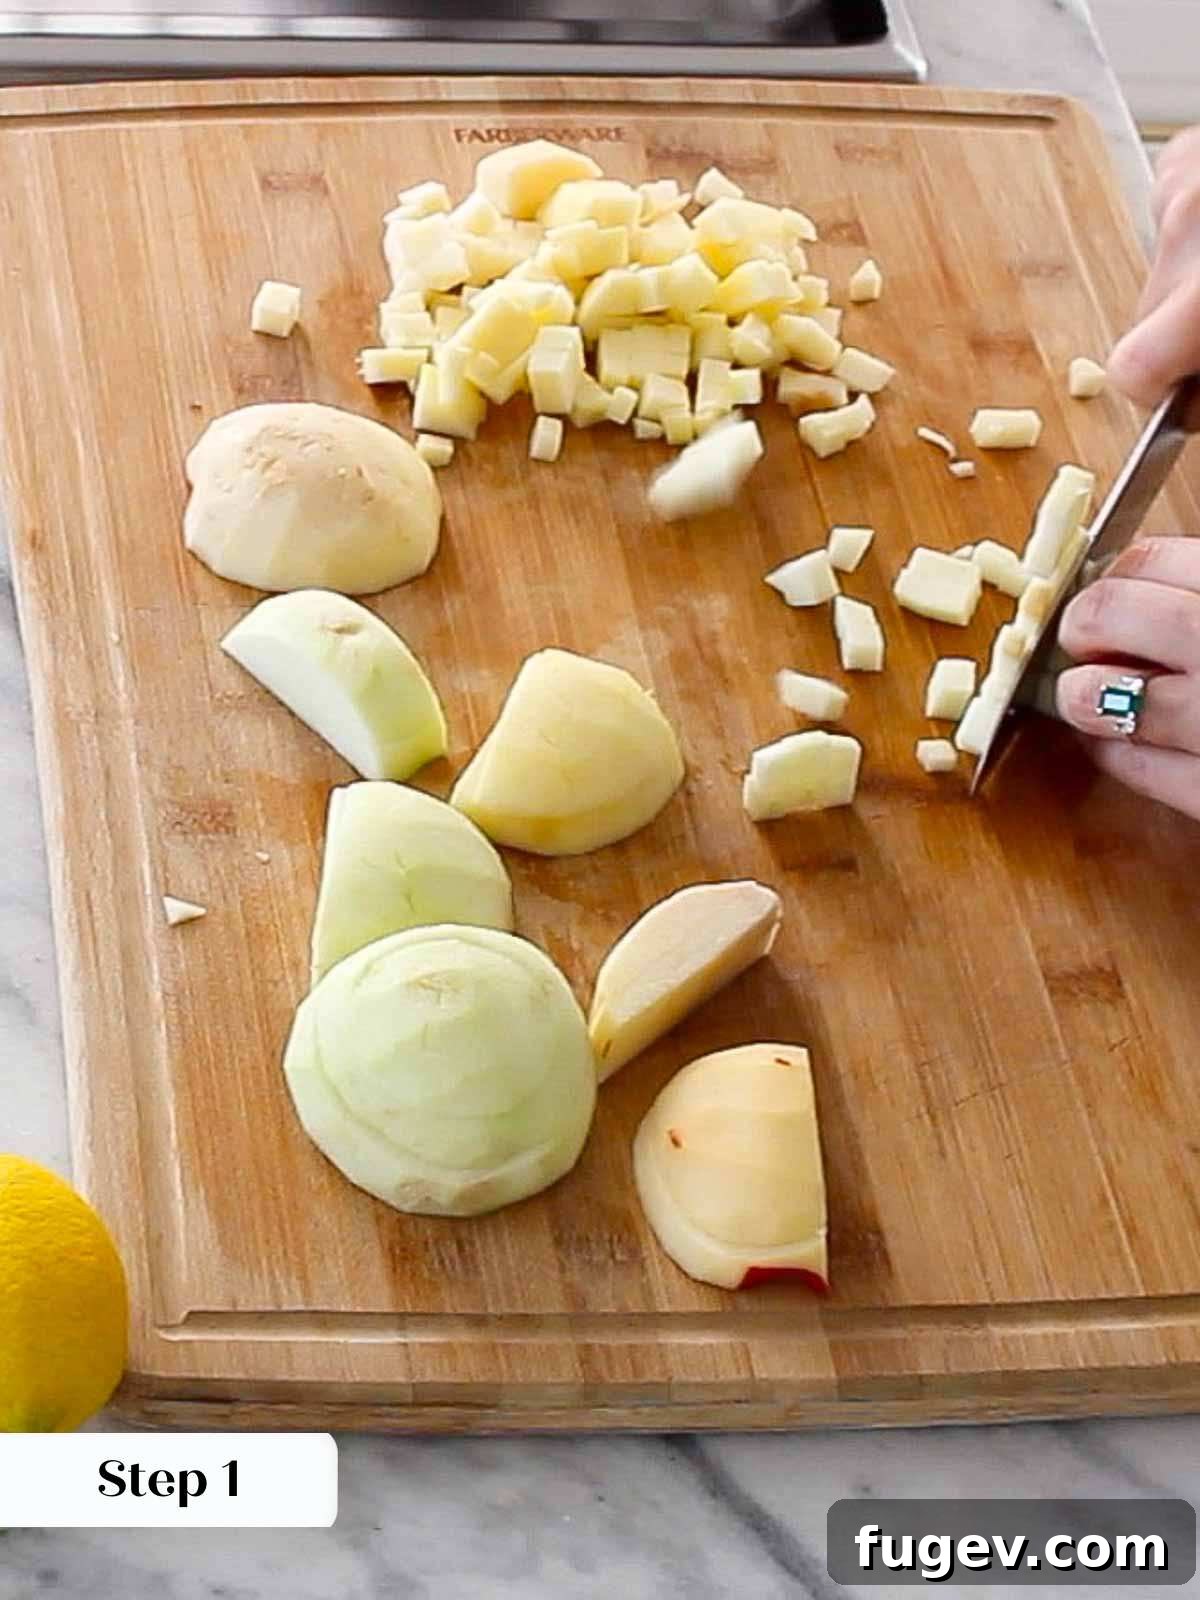
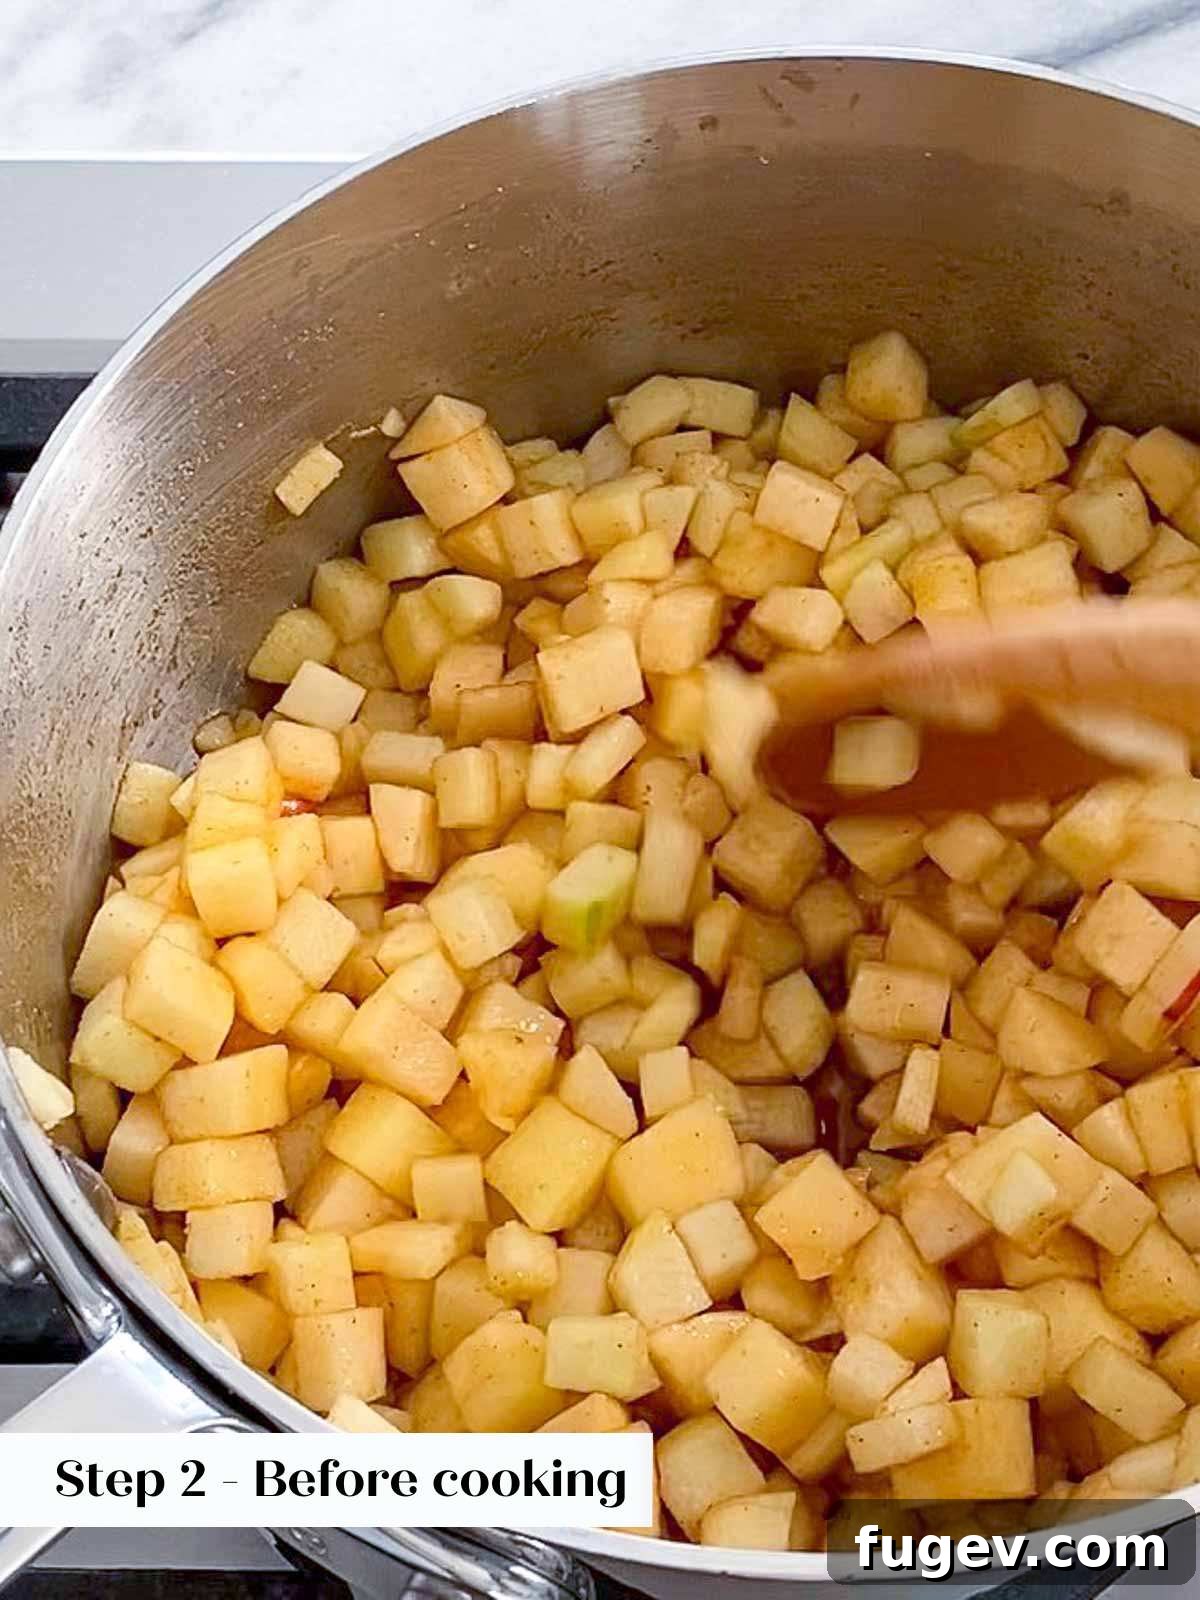
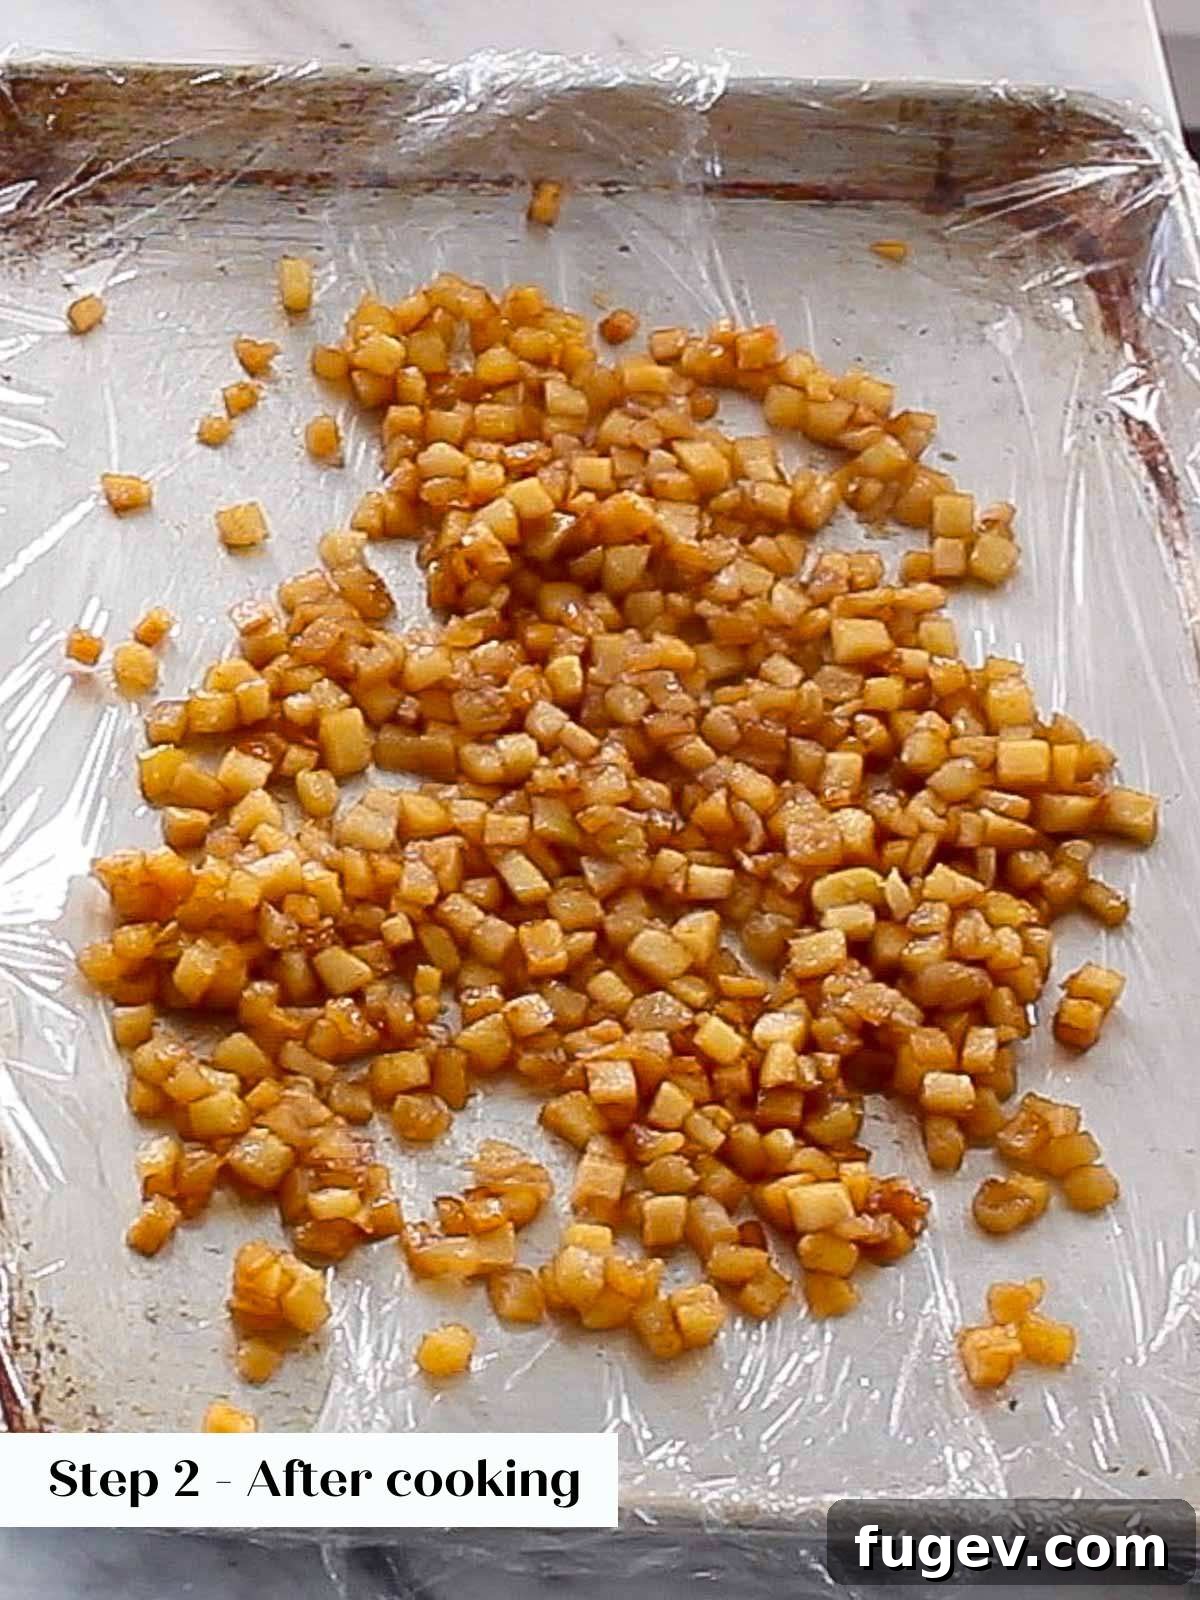
- Step 1: Peel and Dice the Apples. Begin by thoroughly peeling, coring, and dicing your chosen apple varieties into small, uniform pieces. Aim for a size of approximately ½ to 1 centimeter (¼ to ½ inch) in diameter. Consistency in dice size is crucial for ensuring even cooking and a pleasant texture in your finished filling.
- Step 2: Cook the Apple Filling. In a small saucepan or pot, combine the diced apples, granulated sugar, light brown sugar, ground ginger, cinnamon, and fresh lemon juice. Stir gently but thoroughly to ensure all the apple pieces are well coated with the spice and sugar mixture. Place the pot over medium-low heat and cook, stirring occasionally, until the apples begin to soften slightly and actively release their natural juices. Once juices are visible, increase the heat to medium-high and continue cooking, stirring more frequently, until the juices thicken into a syrupy consistency and the apples are tender-crisp, but not mushy. It’s important to achieve a thickened sauce. Once cooked, immediately remove the filling from the heat and allow it to cool completely before proceeding to the assembly stage.
Assemble & Bake:
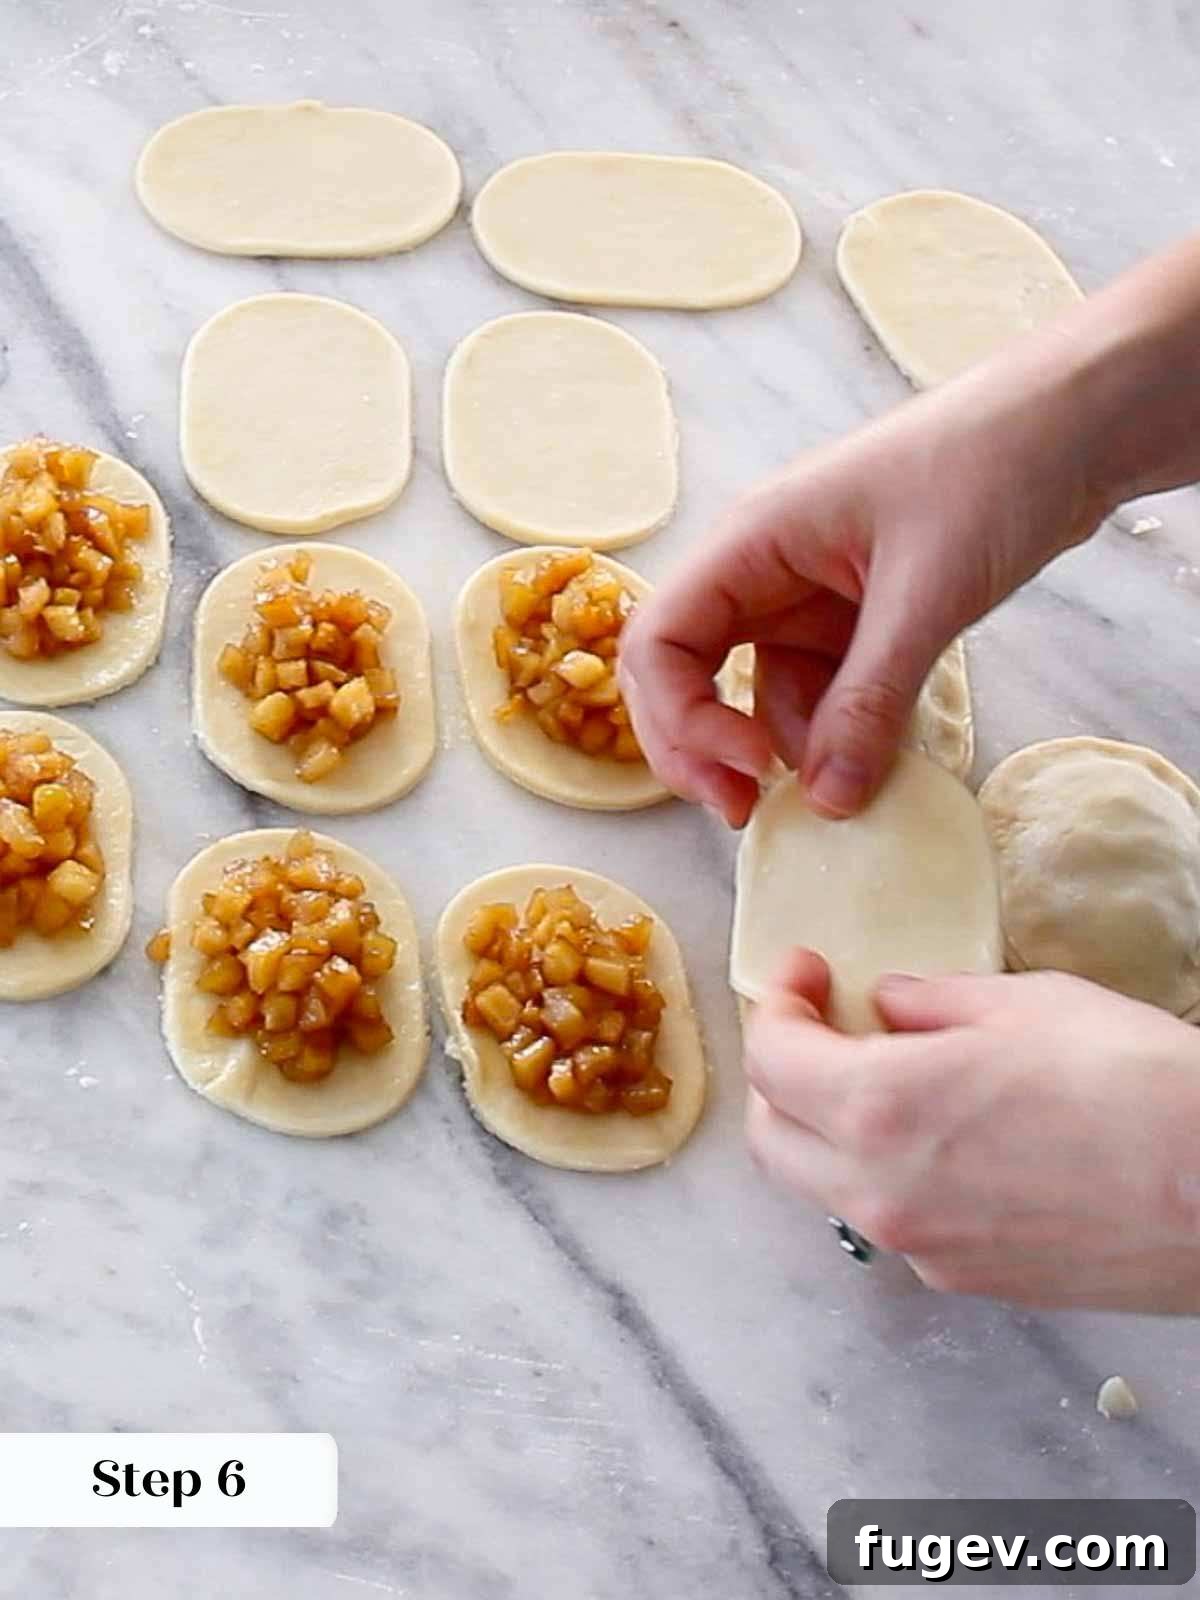
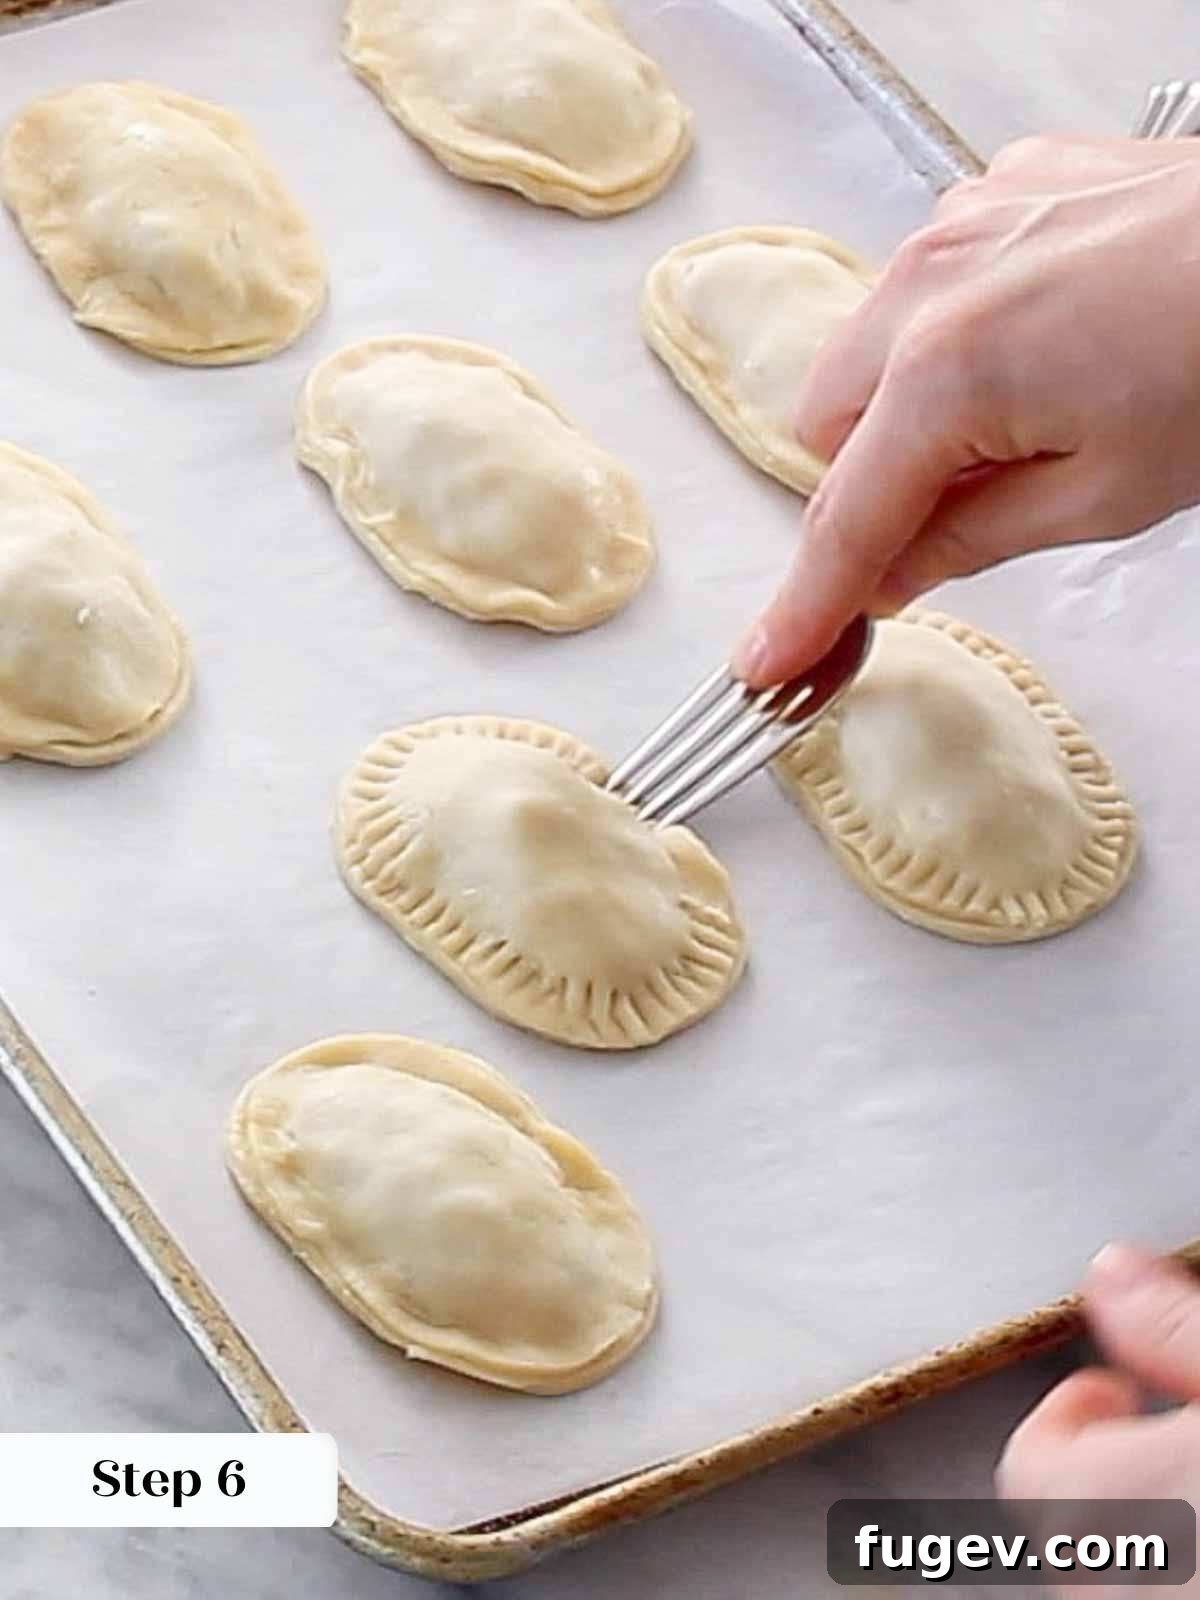
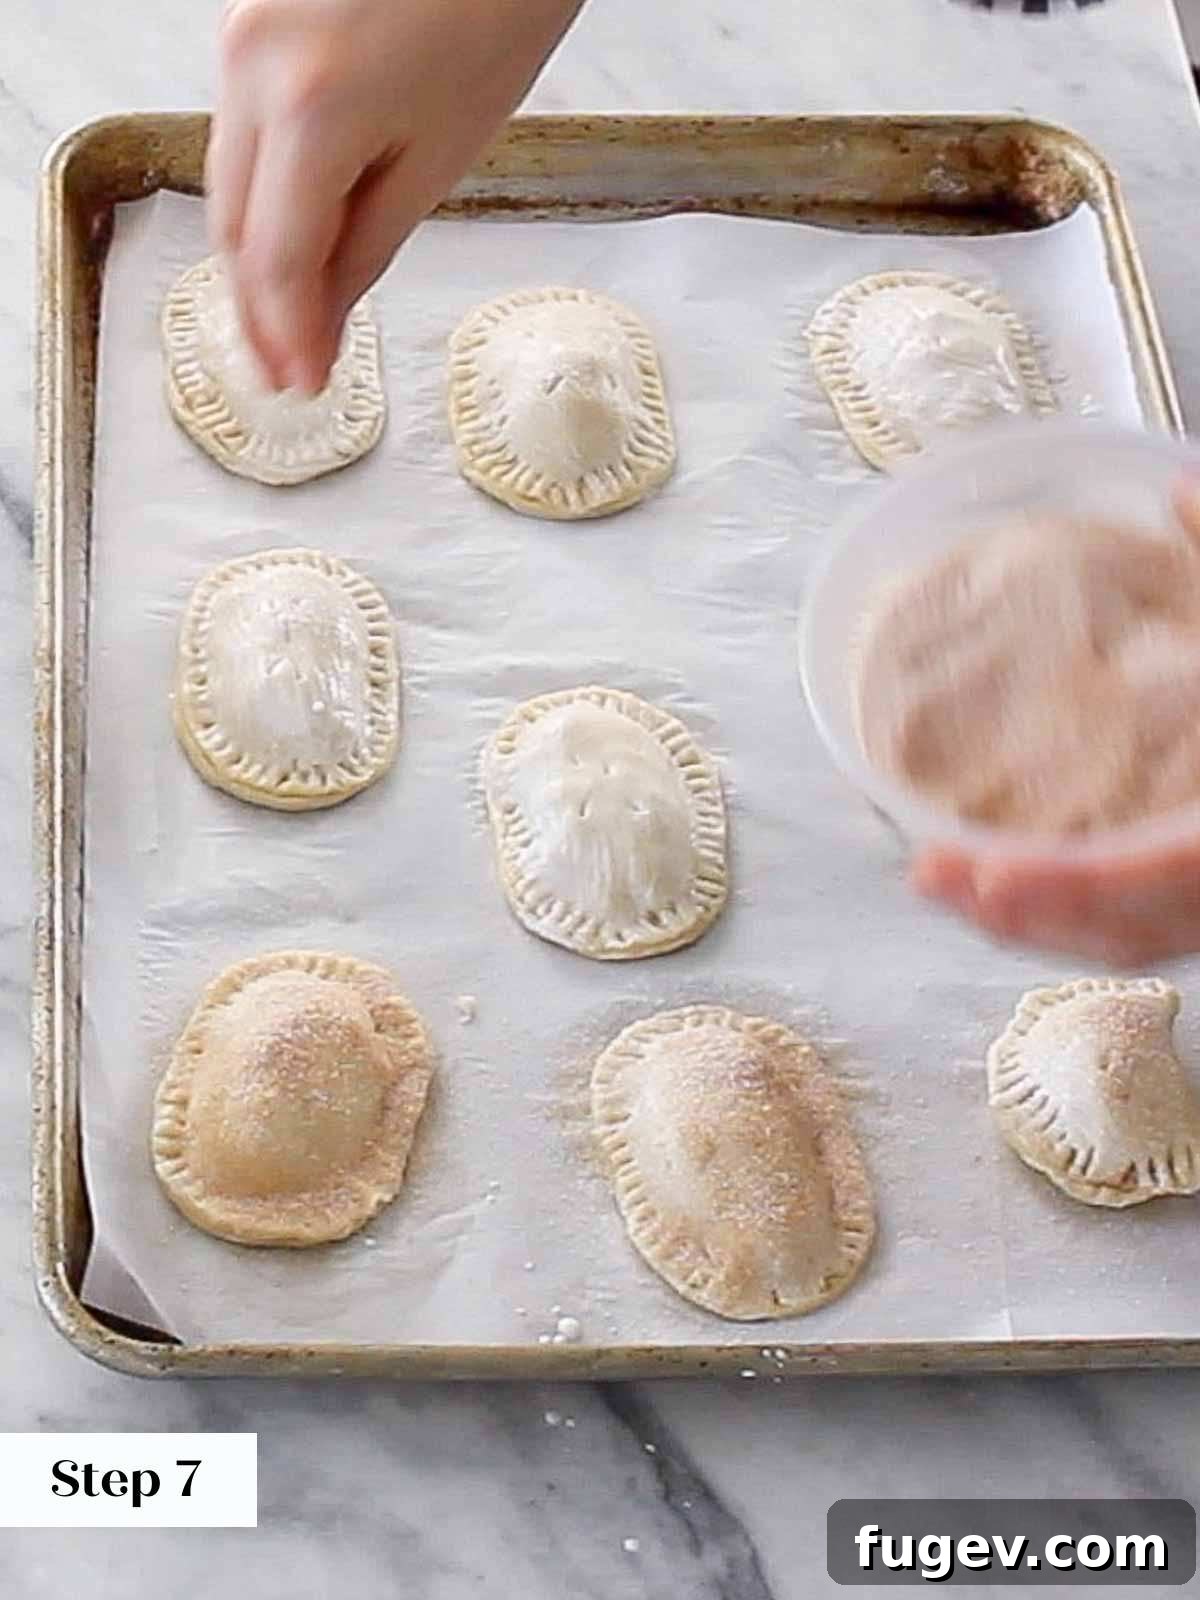
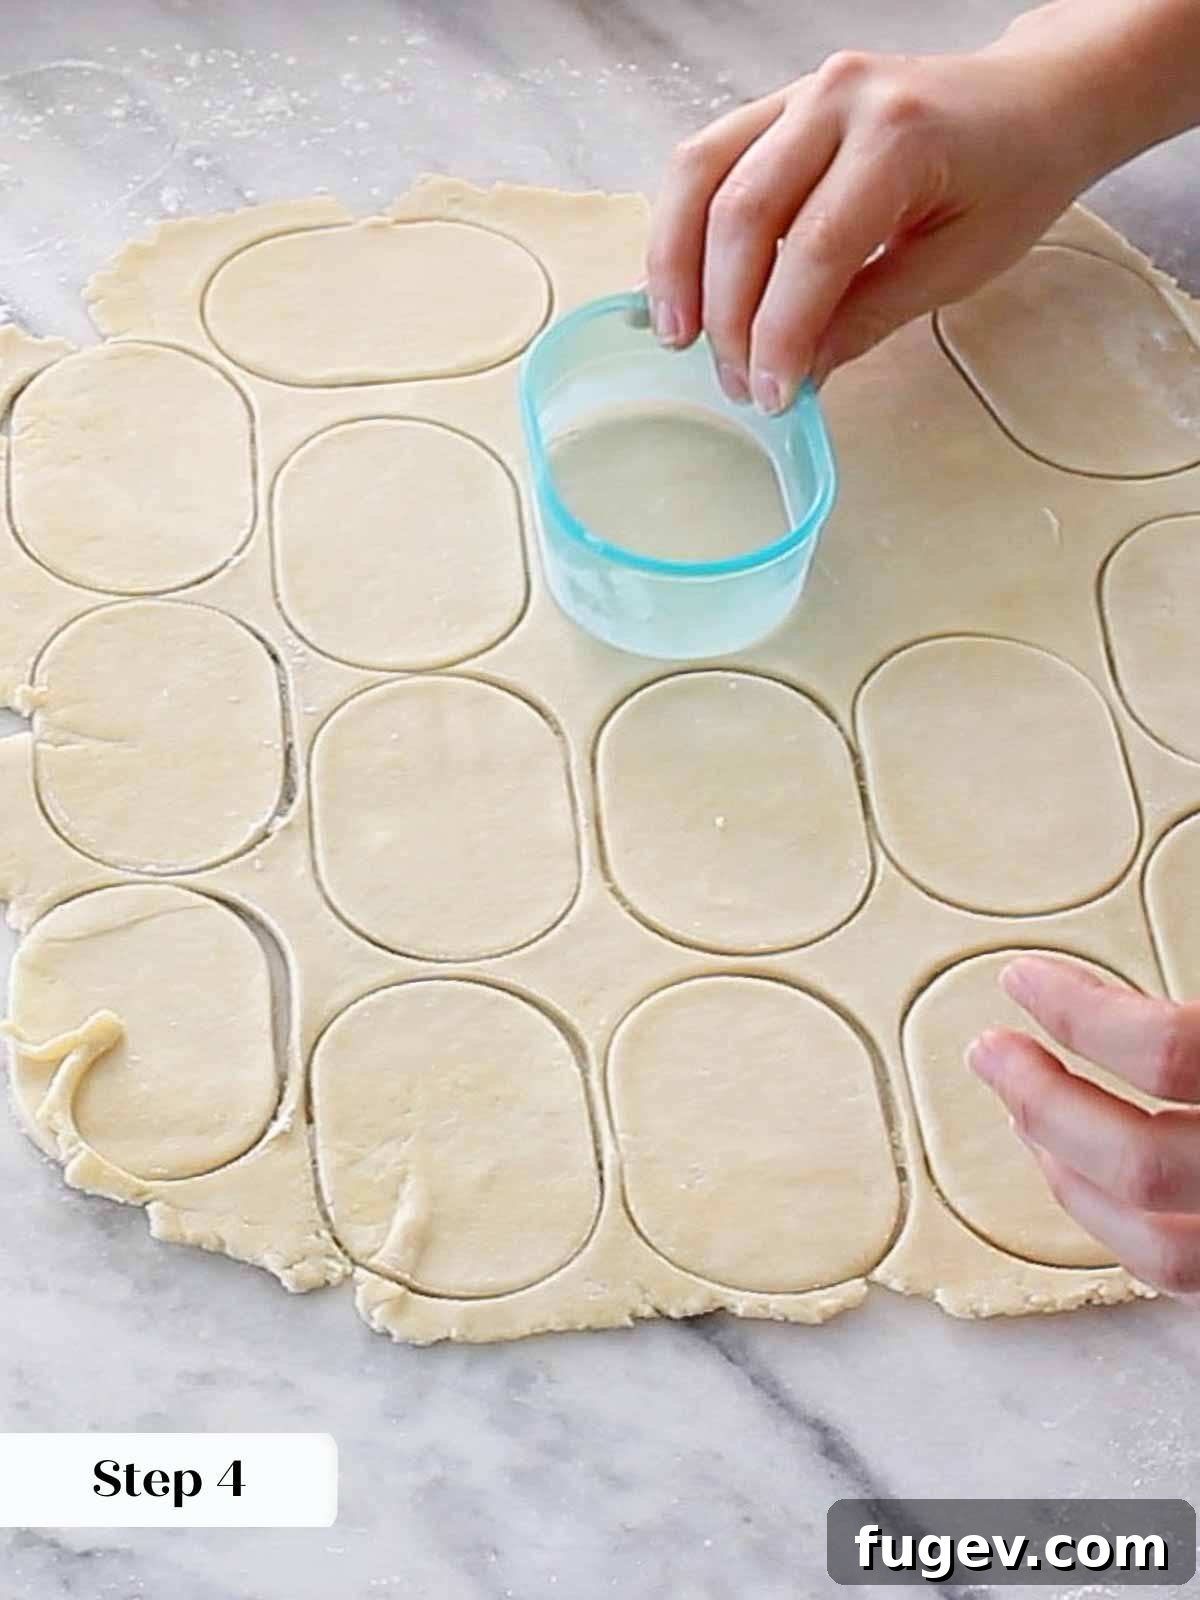
- Step 3: Preheat Oven and Prepare Dough. Preheat your oven to 375°F (190°C). Meanwhile, on a lightly floured, clean surface, roll out your chilled pie crust dough to an even thickness of about ⅛th inch (approximately 3mm). Using your desired cookie cutter (or simply a knife for neat squares or rectangles with a fluted edge cutter), cut out an even number of dough shapes. Be sure to select a cutter size that allows for adequate filling and sufficient space for a proper seal. Gather and re-roll any dough scraps once, chilling them briefly if they become too warm and soft.
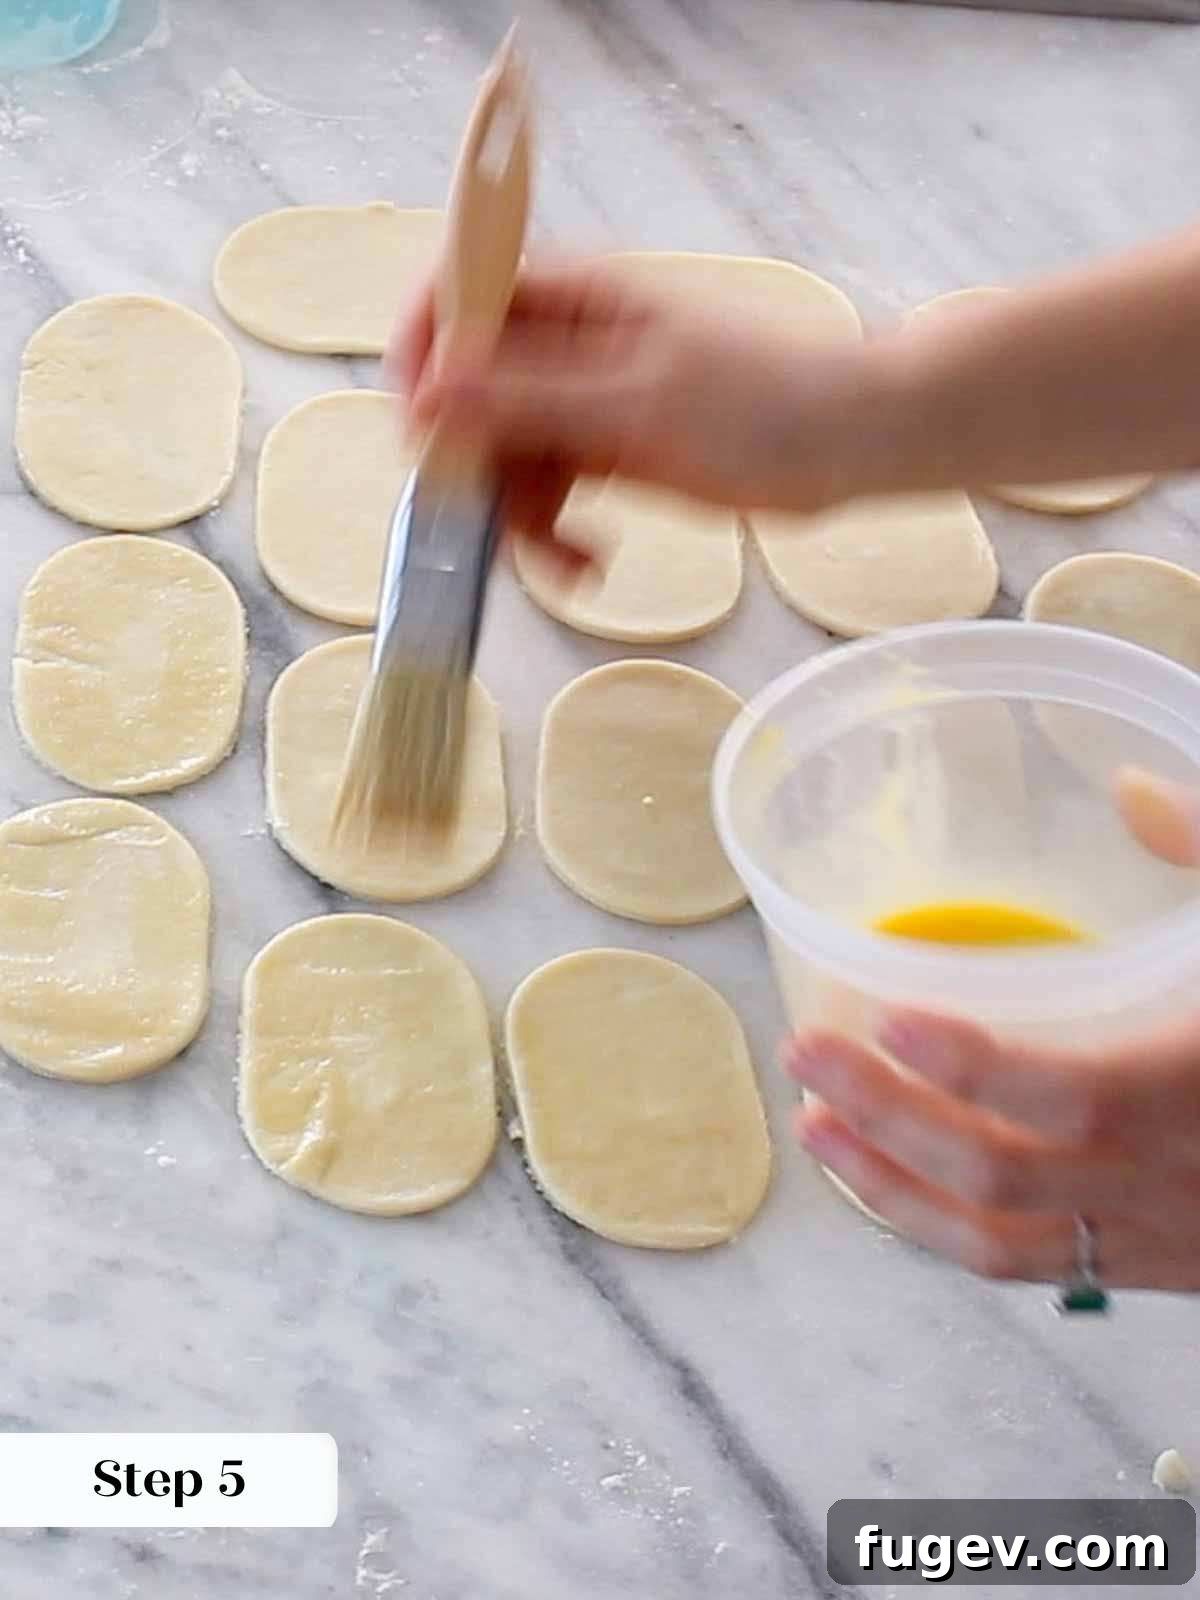
- Step 4: Fill the Pies. Take half of your cut-out dough shapes and arrange them on your prepared baking sheet. Lightly brush the perimeter edges of these shapes with a thin, even layer of the beaten egg (egg wash). Then, dollop about 2 tablespoons of the completely cooled apple filling into the center of each brushed dough shape. It’s important to be generous with the filling, but ensure you leave at least a ½-inch clean border of dough around the filling; this space is vital for creating a strong, secure seal.
- Step 5: Seal and Chill. Carefully place an un-filled dough shape directly on top of each filled shape, aligning the edges perfectly. Gently but firmly press around the perimeter with your fingers to seal the two layers of dough together, simultaneously expelling any trapped air bubbles. For a decorative and extra-secure seal, take the tines of a fork and firmly press them around the entire edge of each hand pie. Once all hand pies are assembled, transfer them back to the parchment-lined baking sheet and chill them in the refrigerator for at least 30 minutes. This re-chilling step is absolutely vital for preventing dough shrinkage and maintaining maximum flakiness during the baking process. You also have the option to freeze them at this stage for convenient future baking!
- Step 6: Vent and Top. Before placing your hand pies into the oven, use a small, sharp knife to cut a few decorative slits (vents) into the top crust of each hand pie. These vents are crucial; they allow steam to escape during baking, preventing the pies from bursting and ensuring a beautifully intact pastry. Next, lightly brush the tops of the vented hand pies with a little heavy cream, and then generously sprinkle them with your prepared cinnamon sugar mixture (or turbinado sugar for an extra crunchy, sparkling finish).
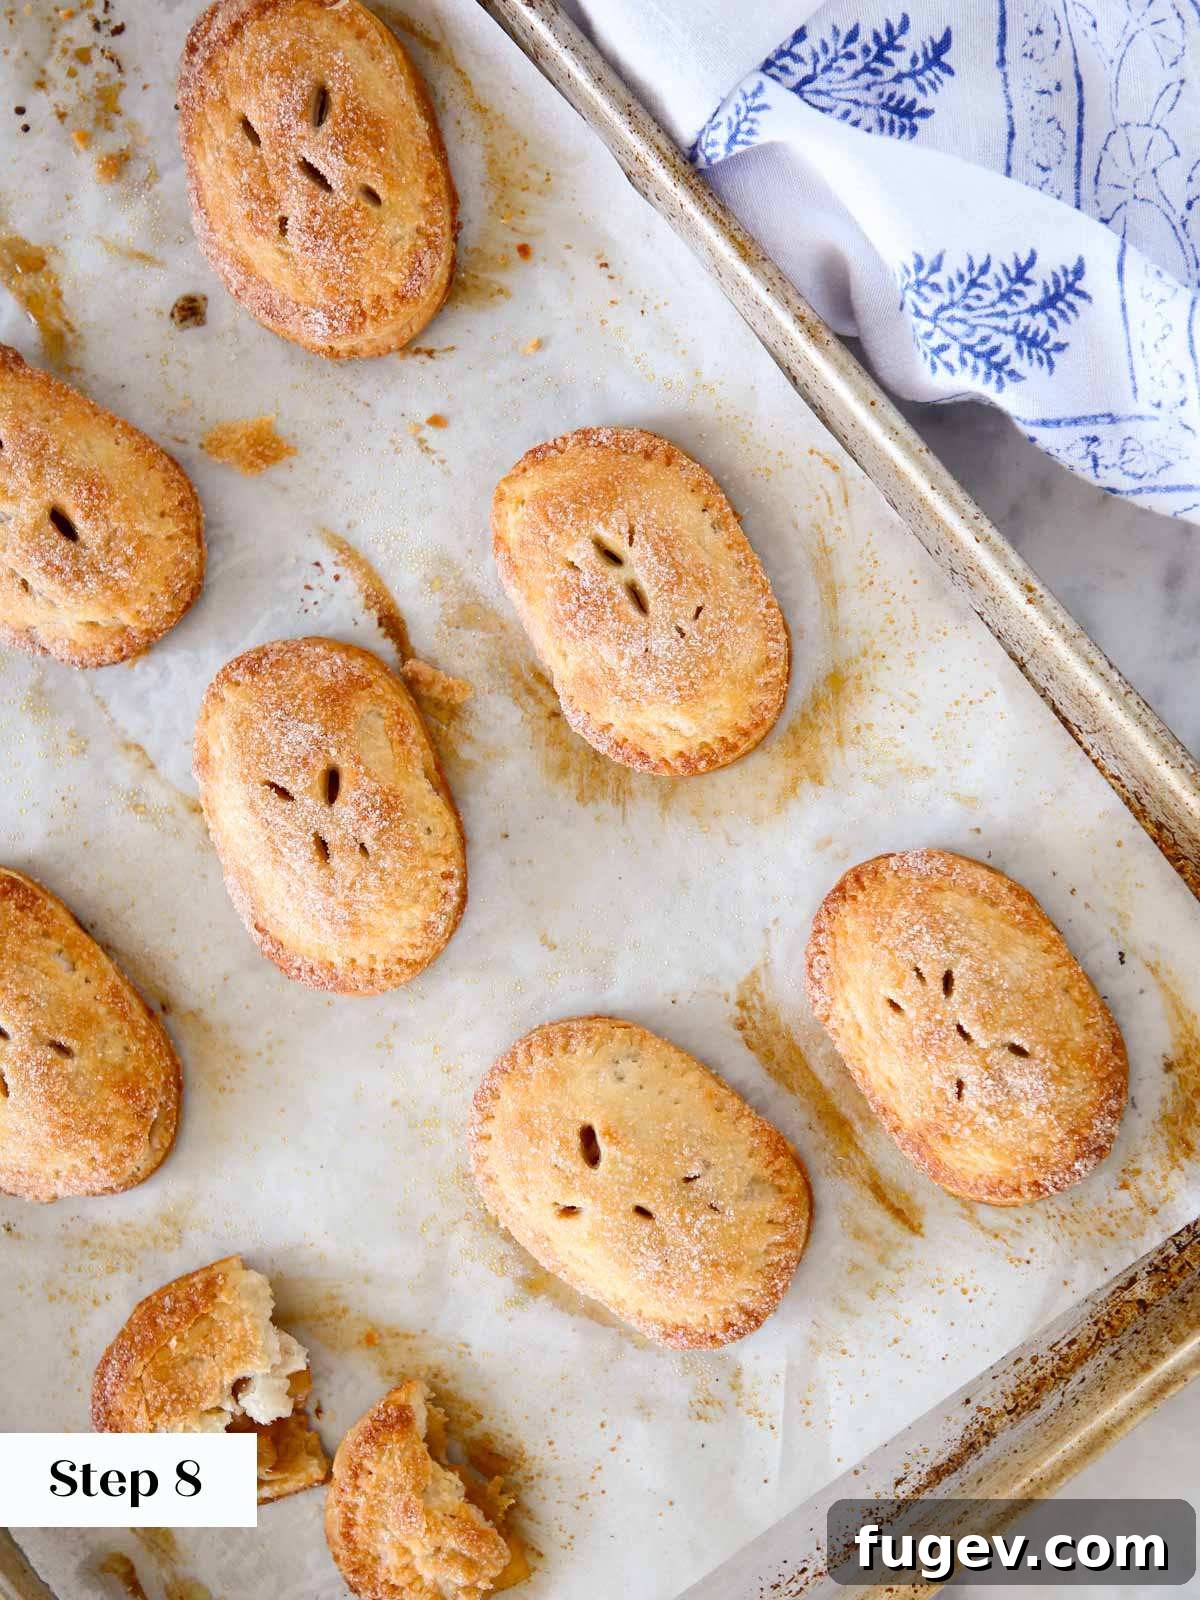
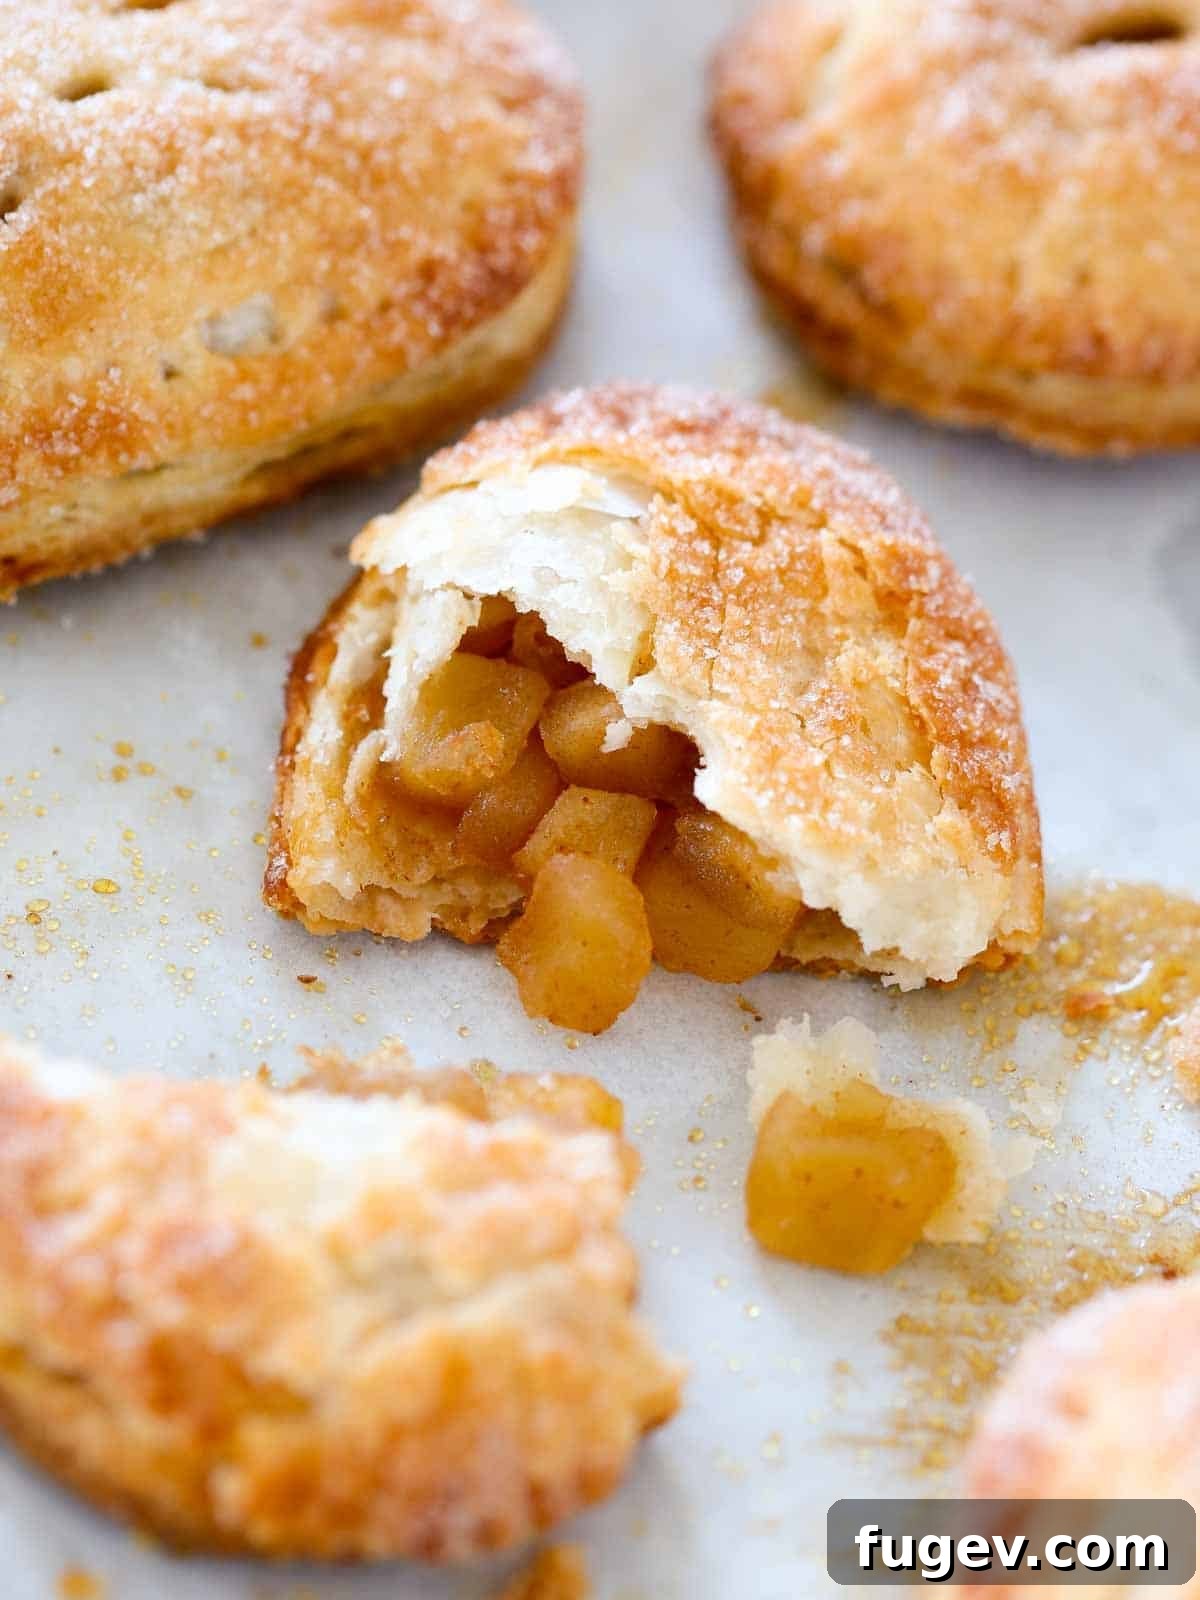
- Step 7: Bake to Golden Perfection. Carefully place the baking sheet containing the prepared hand pies into your preheated oven. Bake for approximately 20 minutes, or until the crusts are a rich, appealing golden brown, and you can visibly see the delicious apple filling gently bubbling through the vents. This bubbling is a key indicator that the filling is hot, fully integrated, and ready to be enjoyed.
Frequently Asked Questions (FAQs) About Apple Hand Pies
How do I store apple hand pies?
Unbaked Hand Pies: You can prepare and assemble unbaked hand pies and freeze them for convenient baking later. Arrange them in a single layer on a baking sheet until completely solid (this prevents them from sticking together), then transfer them to a freezer-safe zip-top bag or an airtight container. They will keep well in the freezer for up to 2 months. When ready to bake, you can place them directly from frozen into the preheated oven; simply add an extra 5-10 minutes to the baking time.
Baked Hand Pies: Once baked and completely cooled to room temperature, store your hand pies in an airtight container. They will last for up to 5 days at room temperature. For longer storage, you can refrigerate them for up to 10 days, or freeze them for up to 2 months. For best results and to revive that fresh-baked crispness and warmth, I highly recommend briefly reheating frozen or refrigerated pies in a warm oven (around 300°F / 150°C) for 10-15 minutes before serving.
What’s the best way to serve apple hand pies?
Part of the undeniable charm of hand pies is their self-contained, portable nature – they genuinely need nothing else to be utterly delicious and satisfying straight from your hand! However, as a pastry chef, my philosophy is always to enhance and elevate the dining experience. In professional settings, I might serve a trio of mini hand pies with an array of complementary dipping sauces, such as a rich bourbon caramel sauce, a delicate orange crème anglaise, or a tangy raspberry coulis. They are also simply divine when paired with a scoop of classic vanilla ice cream or a luxurious caramel ice cream, creating a delightful contrast of warm and cold, crisp and creamy textures that tantalizes the palate.
What is the difference between a turnover and a hand pie?
While the terms “turnover” and “hand pie” are often used interchangeably in casual conversation, there are distinct differences primarily in the type of pastry crust used and their traditional shape. Turnovers are typically made with puff pastry, a delicate, laminated dough that creates many thin, airy, and buttery layers when baked. They are commonly cut into larger squares, with the filling placed in the center before the square is folded diagonally to form a characteristic triangular shape. Hand pies, on the other hand, are traditionally made with a more robust pie crust (like an all-butter or shortening-based crust), yielding a flakier yet more substantial and tender texture. Hand pies can be crafted into various shapes, though circles, ovals, and rectangles are the most common, offering greater flexibility in presentation and portioning.
How do I stop my hand pies from leaking during baking?
Preventing leaks is a combination of several crucial best practices throughout the assembly process. First and foremost, keep your pie dough cold throughout every step; this is paramount for preventing dough shrinkage in the oven. Secondly, ensure you are not overfilling the pies, leaving a clear ½-inch border of dough around the filling for sealing. Thirdly, create a firm and complete seal around the edges. I recommend using a thin brush of egg wash (beaten egg) between the top and bottom crusts to act as a glue, then reinforcing this bond by firmly pressing the tines of a fork all around the perimeter – this creates both a pretty, crimped finish and an incredibly strong, functional seal. Finally, and very importantly, always remember to cut vent holes (small slits) in the top crust before baking to allow steam to escape, preventing internal pressure from forcing the filling out through the seams.
Can I use frozen apples for the filling?
Yes, you can absolutely use frozen sliced apples for your filling, but a few preparatory steps are essential for the best results. Be sure to thaw the frozen apples completely before using them. Once thawed, thoroughly drain off any excess liquid that has accumulated. This prevents the filling from becoming watery and ensures it thickens properly during cooking. You might find that thawed apples require a slightly shorter cooking time, so adjust accordingly to achieve the desired tender-crisp texture and thickened juices.
Can these hand pies be made gluten-free or vegan?
Gluten-Free: Yes, this recipe is adaptable for gluten-free diets. You can achieve delicious gluten-free apple hand pies by using a high-quality gluten-free pie crust mix or your favorite homemade gluten-free pie dough recipe. Ensure all other ingredients, such as spices and sugars, are naturally gluten-free.
Vegan: Absolutely! To make these hand pies completely vegan, you’ll need to make a few substitutions. Opt for a plant-based pie crust (such as a shortening-based crust without butter, or one made with a good quality vegan butter). Replace the egg wash with a plant-based milk wash (e.g., almond milk, soy milk, or oat milk) or a flax egg wash (1 tbsp ground flaxseed + 3 tbsp water, let sit for 5 mins) for both sealing and achieving a golden-brown finish. For the heavy cream brushed on top, use a full-fat canned coconut milk or a commercial vegan cream alternative.
More Apple Dessert Inspiration: Recipes You’ll Love
Fall Dessert Recipes
21 Best Apple Dessert Recipes
Pies and Tart Recipes
Mile High Apple Pie
Crisps & Crumble Recipes
Easy Apple Cobbler Recipe
Christmas Cookie Recipes
Mini Apple Pies
If you tried this recipe and absolutely loved it, please take a moment to leave a 🌟 star rating and share your experience in the comments section below. I genuinely love hearing from you; your feedback and comments truly make my day!
Complete Apple Hand Pies Recipe Card

Apple Hand Pies
by Chef Lindsey
These easy Apple Hand Pies feature an incredibly flaky all-butter pie crust filled with a luscious homemade cinnamon apple filling and a delightful cinnamon sugar topping! They are surprisingly easy to make and bake to golden perfection in under 20 minutes, making them the ultimate portable, hand-held treat!
Prep Time: 30 mins
Cook Time: 20 mins
Chill Time: 30 mins
Total Time: 1 hr 20 mins
Servings: 9 Pies
Ingredients
For the Pie Crust:
- 1 ¼ cups all-purpose flour
- ½ teaspoon kosher salt
- 1 tablespoon granulated sugar
- ½ cup unsalted butter, cubed and very cold
- 2 tablespoons vodka, frozen (helps with flakiness)
- 2 tablespoons ice water
For the Filling:
- 3 apples (I recommend a mix like Honeycrisp, Granny Smith & Cripps Pink for best flavor and texture)
- 3 tablespoons granulated sugar
- 3 tablespoons light brown sugar
- ½ teaspoon ground ginger
- 1 teaspoon ground cinnamon
- 1 lemon, juiced (about 1-2 tablespoons, to balance sweetness and brighten flavor)
For the Assembly:
- 1 egg, beaten (for egg wash, for sealing and browning)
- 1 tablespoon heavy cream (for rich browning and sugar adhesion)
- ¼ cup granulated sugar (for topping)
- 1 teaspoon ground cinnamon (for topping, combined with sugar)
Instructions
Make the pie crust:
- In the bowl of a stand mixer fitted with the paddle attachment (or a large bowl with a pastry blender or your fingertips), combine the flour, kosher salt, 1 tablespoon granulated sugar, and the very cold cubed unsalted butter. Mix on low speed, cutting the butter into the flour until you have a mixture with some larger pea-sized butter pieces and most of the butter has been worked into the flour. The flour mixture will visibly change color and appear slightly darker.
- Stop the mixer and pour the frozen vodka evenly over the flour mixture. Turn the mixer back on low speed and slowly drizzle the ice water over the crust mixture. Mix just until the flour is hydrated and clumps begin to form, but a fully cohesive dough has not yet formed. Avoid overmixing to prevent gluten development.
- Turn the shaggy dough mixture out onto a clean countertop. Gently press the mixture together with your hands until a cohesive dough forms. It will feel a little wet and sticky initially, but this is the correct consistency. Divide the dough evenly in half. Gently press each half into a flat disk shape and wrap each disk tightly in plastic wrap.
- Refrigerate the dough disks until thoroughly cold and firm, for at least 2 hours, and ideally up to 3 days. Alternatively, you can freeze the dough for up to 2 months. If frozen, remember to thaw it completely in the refrigerator before using. It is crucial to keep the dough cold throughout the entire process for optimal flakiness.
Make the filling:
- Peel, core, and dice the apples into uniform pieces, approximately ½ to 1 centimeter (¼ to ½ inch) in diameter. Consistent sizing ensures even cooking.
- In a small pot, combine all the ingredients for the filling: the diced apples, 3 tablespoons granulated sugar, light brown sugar, ground ginger, cinnamon, and fresh lemon juice. Stir well to thoroughly coat the apples with the spice and sugar mixture.
- Heat the mixture on medium-low heat until the apples begin to soften slightly and actively release their juices. Increase the heat to medium-high and continue cooking, stirring occasionally, until the juices thicken into a syrupy consistency and the apples are tender-crisp. Pour the cooked filling immediately onto a parchment-lined baking sheet or dish and spread it in a single layer to cool completely. Chilling the filling quickly is essential.
Assembling the Hand Pies:
- Preheat your oven to 375°F (190°C). Prepare a large baking sheet by lining it with parchment paper for easy removal and cleanup.
- On a lightly floured surface, roll out one disk of your chilled pie crust dough to an even thickness of about ⅛th inch (approximately 3mm). Using your desired cookie cutter (such as an oval, circle, or a square with a fluted edge cutter), cut out an even number of dough shapes. Re-roll any dough scraps once if needed, chilling them briefly if they become too warm and soft before re-rolling.
- Take half of your cut dough shapes and arrange them on your prepared baking sheet. Lightly brush the perimeter edges of these shapes with a thin, even layer of the beaten egg wash. Place approximately 2 tablespoons of the completely cooled apple filling into the center of each brushed dough shape. Ensure you leave a clear ½-inch border of clean dough around the filling; this space is vital for creating a strong, secure seal.
- Place an unfilled dough shape directly on top of each filled shape, carefully aligning the edges perfectly. Gently press around the perimeter with your fingers to firmly seal the two layers of dough together, expelling any trapped air bubbles. For a decorative and extra-secure seal, use the tines of a fork to firmly crimp and press around the entire edge of each hand pie.
- Transfer the assembled hand pies to your prepared baking sheet. Chill them in the refrigerator for at least 30 minutes before baking. This crucial re-chilling step is vital for maintaining the dough’s flakiness, preventing shrinkage, and ensuring proper sealing during baking. You also have the option to freeze them at this point for convenient future baking.
- Just before baking, use a small, sharp knife to cut a few decorative slits (vents) into the top crust of each hand pie. These vents are essential for allowing steam to escape during baking, preventing the pies from bursting. Next, lightly brush the tops of the vented hand pies with a little heavy cream, and then generously sprinkle them with the cinnamon sugar mixture (combining ¼ cup granulated sugar and 1 teaspoon cinnamon).
- Bake the hand pies in the preheated oven for about 20 minutes, or until the crusts are beautifully rich, golden brown, and you can visibly see the delicious apple filling gently bubbling through the vents. This bubbling is a key indicator that the filling is hot, fully integrated, and ready to be enjoyed.
Video: Watch How to Make Apple Hand Pies
Notes
Presentation & Leak Prevention: To prevent hand pies from leaking, it’s essential to diligently chill the dough between each step, avoid overfilling the pastries, use a thin layer of egg wash for effective sealing, firmly press the edges with a fork, and always remember to cut vent holes in the top crust before baking.
Variations: This recipe is incredibly versatile! Feel free to experiment by using any variety of homemade or quality store-bought fruit pie fillings. The pie crust recipe provided above is for 1 single crust, which is equivalent to half of my full vodka pie crust recipe. You can easily make the full recipe and freeze the second piece of dough for future baking projects.
Storage: Baked hand pies should be cooled completely to room temperature before storing. They will last for up to 5 days in an airtight container at room temperature, up to 10 days if refrigerated, or 2 months if frozen. Unbaked, assembled hand pies can also be frozen for up to 2 months and then baked directly from frozen (adding a few extra minutes to the baking time). For optimal enjoyment, I recommend refreshing refrigerated or frozen pies in a preheated oven to restore their crispness.
Yield: This recipe typically yields 9 delicious 3-inch oval hand pies, depending on the size of your cutter.
Nutrition Information (Approximate per pie)
Calories: 268 kcal
Carbohydrates: 38g
Protein: 3g
Fat: 12g
Saturated Fat: 7g
Polyunsaturated Fat: 1g
Monounsaturated Fat: 3g
Trans Fat: 0.4g
Cholesterol: 47mg
Sodium: 141mg
Potassium: 120mg
Fiber: 3g
Sugar: 21g
Vitamin A: 403 IU
Vitamin C: 9mg
Calcium: 24mg
Iron: 1mg
Course: Dessert
Cuisine: American
Calories: 268
Loved this recipe? Your feedback is incredibly valuable! Please feel free to leave a comment or rating below to share your experience and thoughts.
Before You Bake: More Delicious Recipes Await!
I sincerely hope you thoroughly enjoyed preparing and tasting this professional chef-tested recipe for Apple Hand Pies. Baking is a delightful journey, and there’s always something new and delicious to discover in the culinary world! Don’t forget to explore our other fantastic, chef-developed pie recipes for more inspiration. Or, for those who simply can’t get enough of apple-infused delights, dive deeper into the world of apple desserts with our curated list of the 21 Best Apple Dessert Recipes. Happy baking and bon appétit!