
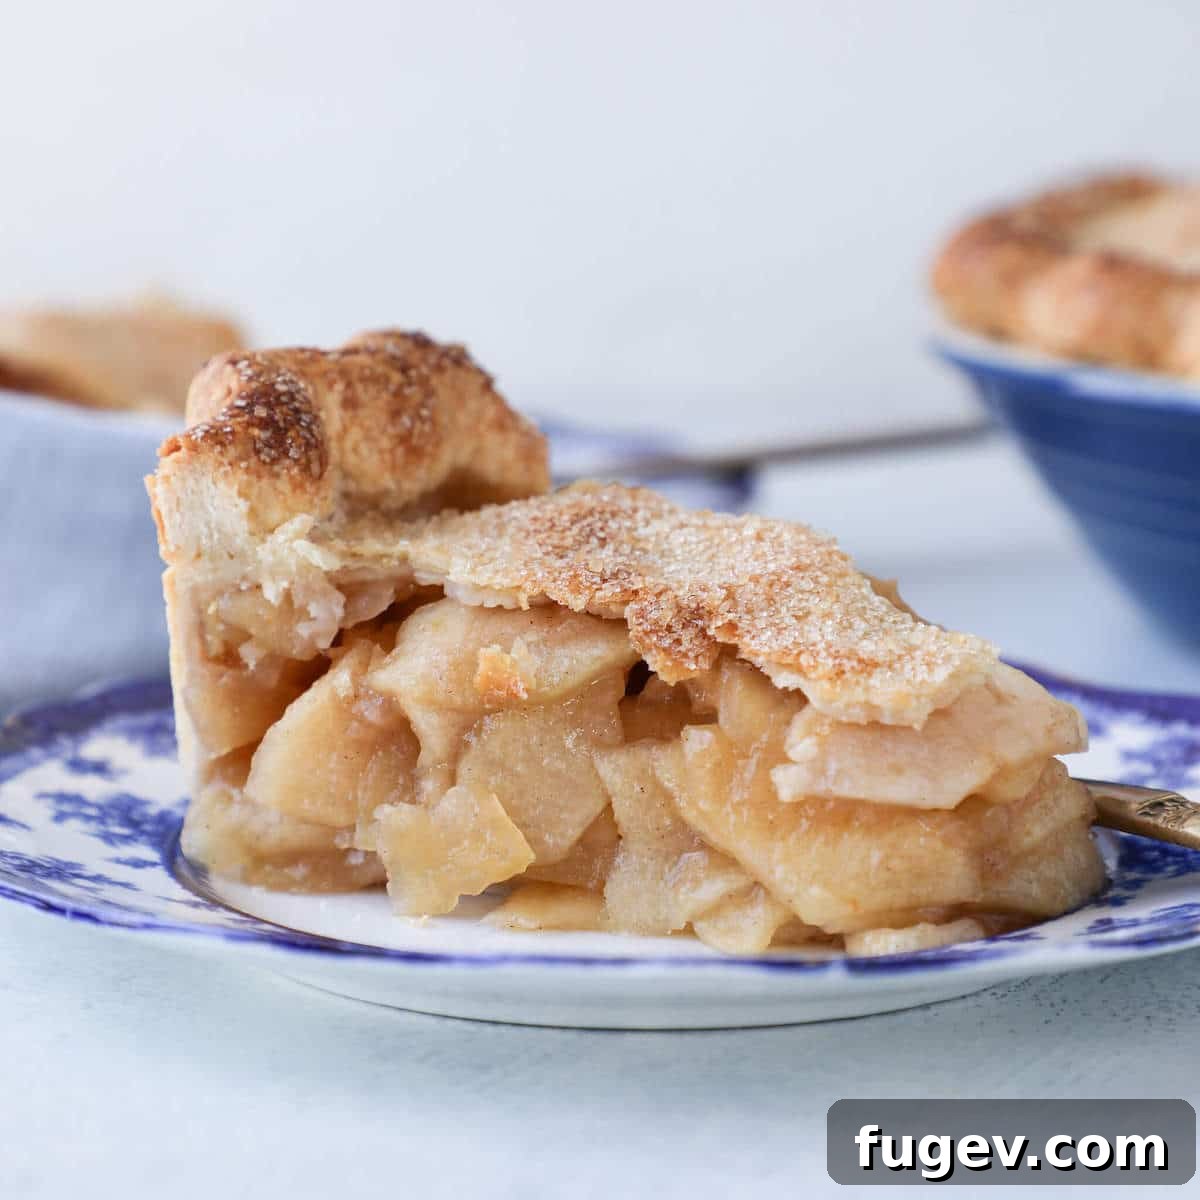
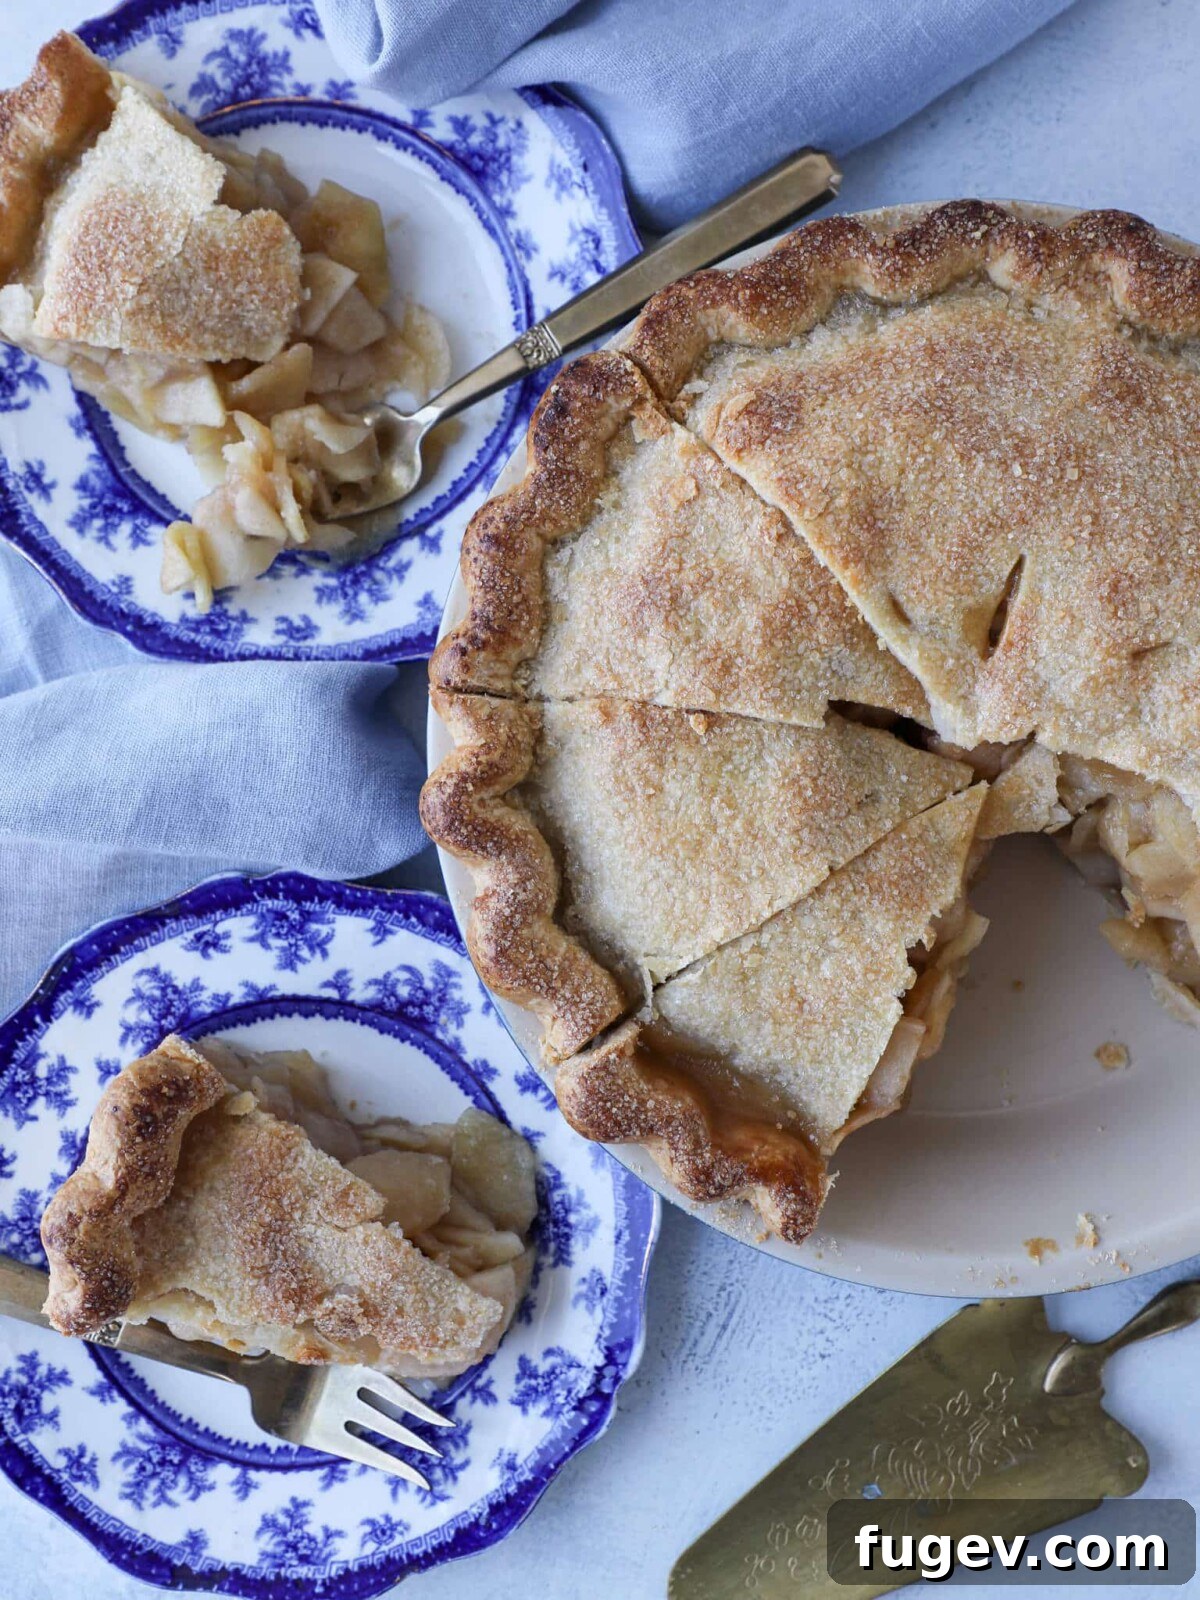
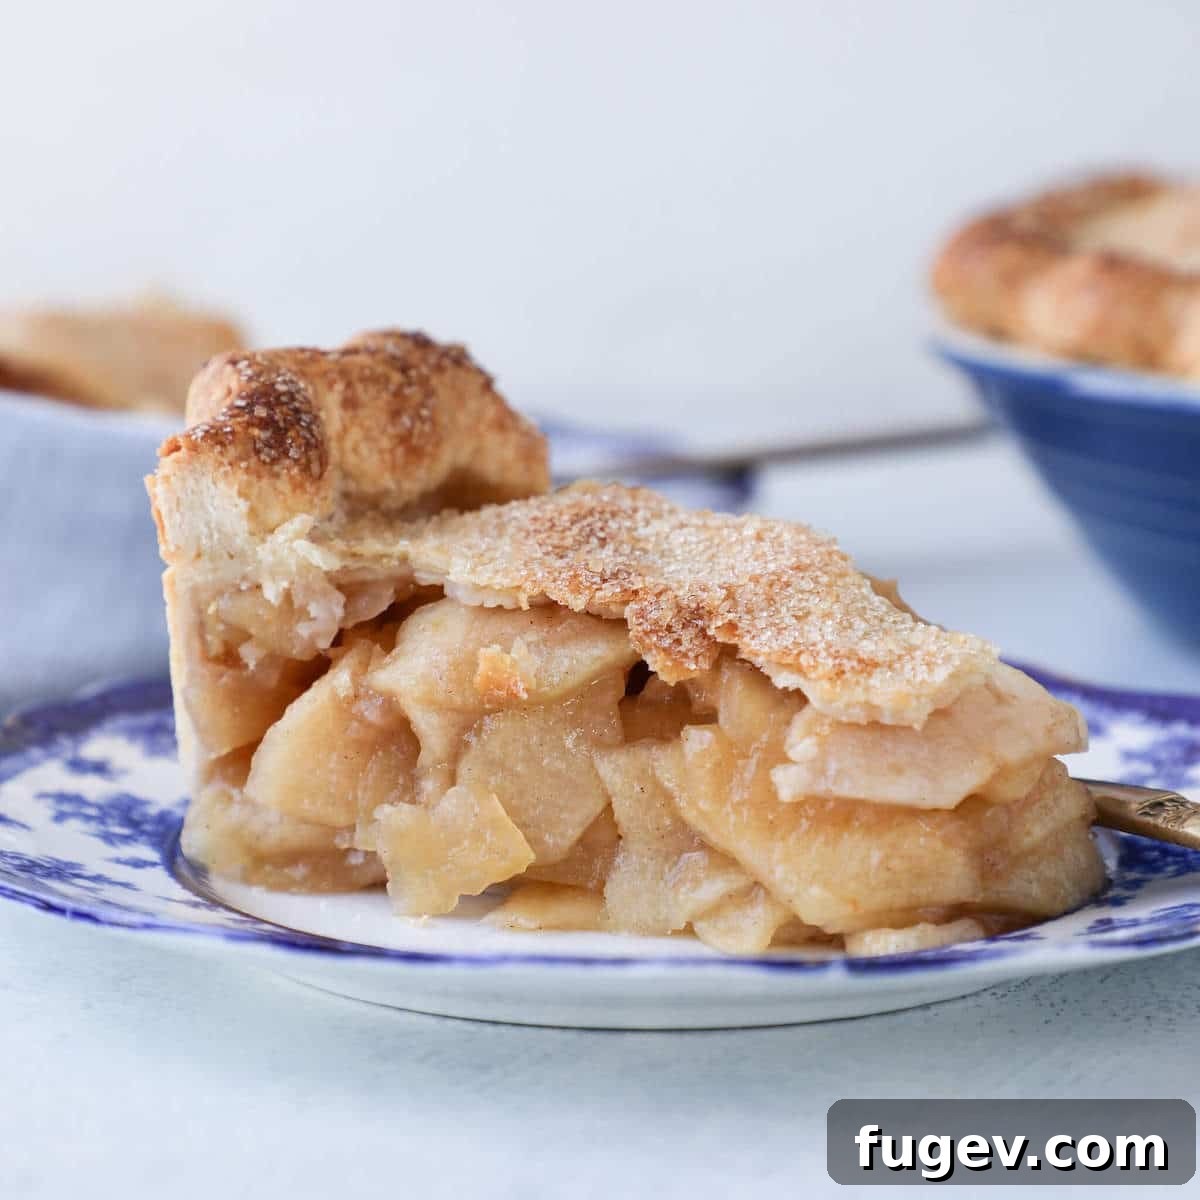
Indulge in a slice of pure comfort with this phenomenal Mile High Apple Pie, a towering masterpiece boasting an impressive five pounds of tender, flavorful apples encased in an irresistibly buttery, flaky pie crust. What truly sets this recipe apart is its ingenious secret: a pre-cooked apple filling. This crucial step not only eliminates the dreaded gap often found between the pie crust and the apples but also infuses each bite with deep, caramelized flavors that are simply unmatched by traditional methods. Prepare to elevate your apple pie experience from delightful to absolutely legendary.
A Quick Look At The Recipe
This is a brief summary of the recipe’s key details and characteristics. For comprehensive instructions and exact measurements, please navigate directly to the full recipe card below.
Jump to Recipe
Prep Time:
45 minutes
Cook Time:
1 hour
Total Time:
1 hour 45 minutes
Servings:
12 generous slices
Difficulty:
Intermediate
Calories *:
343 kcal per serving
Technique Highlights:
Craft a flawless pie crust, master the pre-cooked filling technique, achieve rapid cooling, assemble with precision, and bake to golden perfection!
Flavor Profile:
A harmonious blend of warm cinnamon, rich brown sugar, and zesty lemon notes complementing tender apples, all embraced by a sumptuously buttery, exquisitely flaky pie crust.
* Based on approximate nutrition panel calculations
Summarize & Save this content on your preferred AI platform:
Google AI
Perplexity
Grok
“Pre-cooking the apple filling is an absolute game-changer! The texture of this apple pie was simply amazing. I believe the filling achieves the perfect consistency, and that pie crust is truly my favorite. I made sure to generously top the pie with turbinado sugar, and honestly, I could eat the top crust all by itself – it’s that good! ⭐⭐⭐⭐⭐”
Mara, an enthusiastic baker
Why This Mile High Apple Pie Will Be Your New Favorite
This isn’t just another apple pie; it’s a culinary experience meticulously crafted to deliver perfection in every bite. Here’s why you’ll fall in love with this recipe:
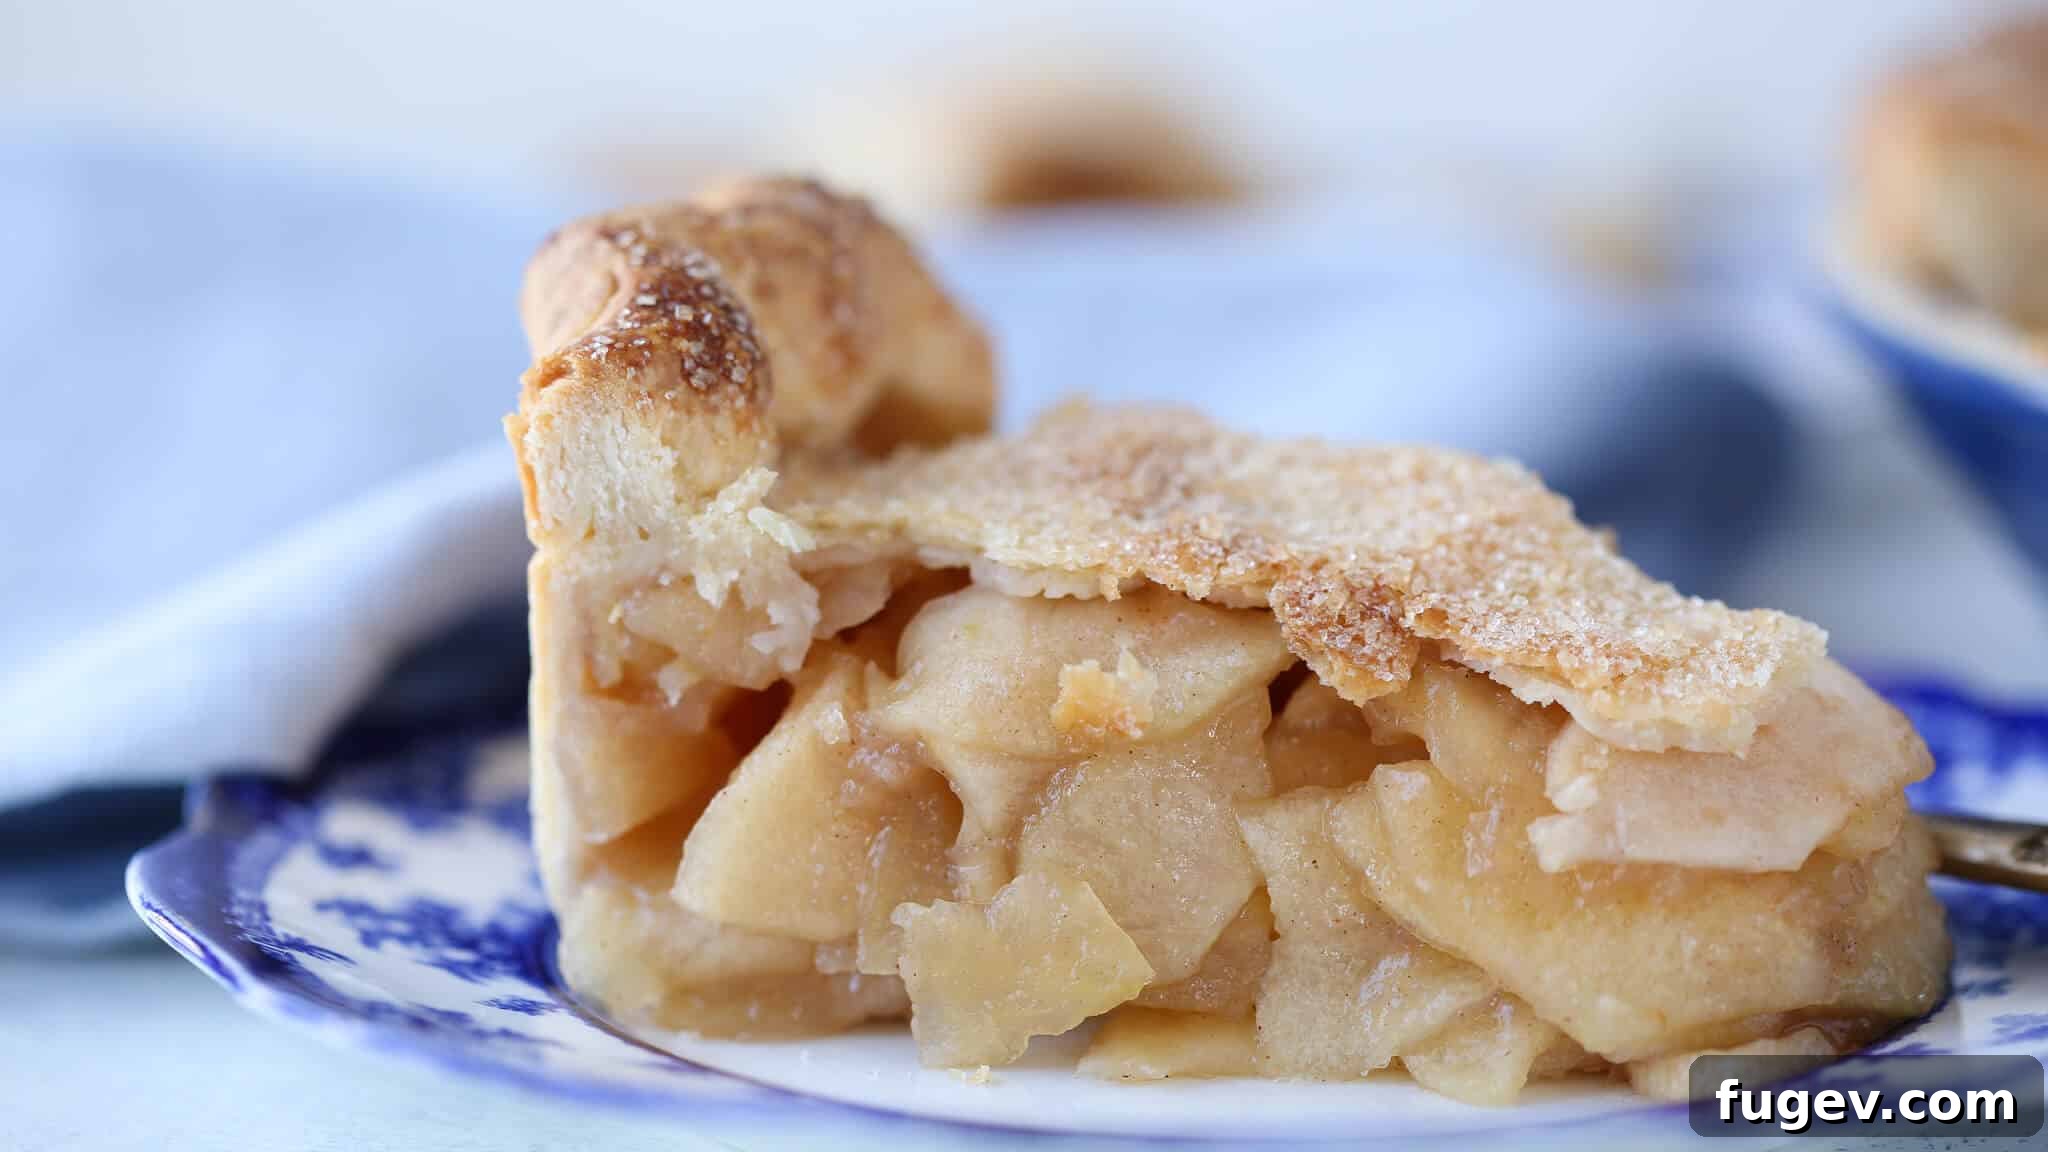
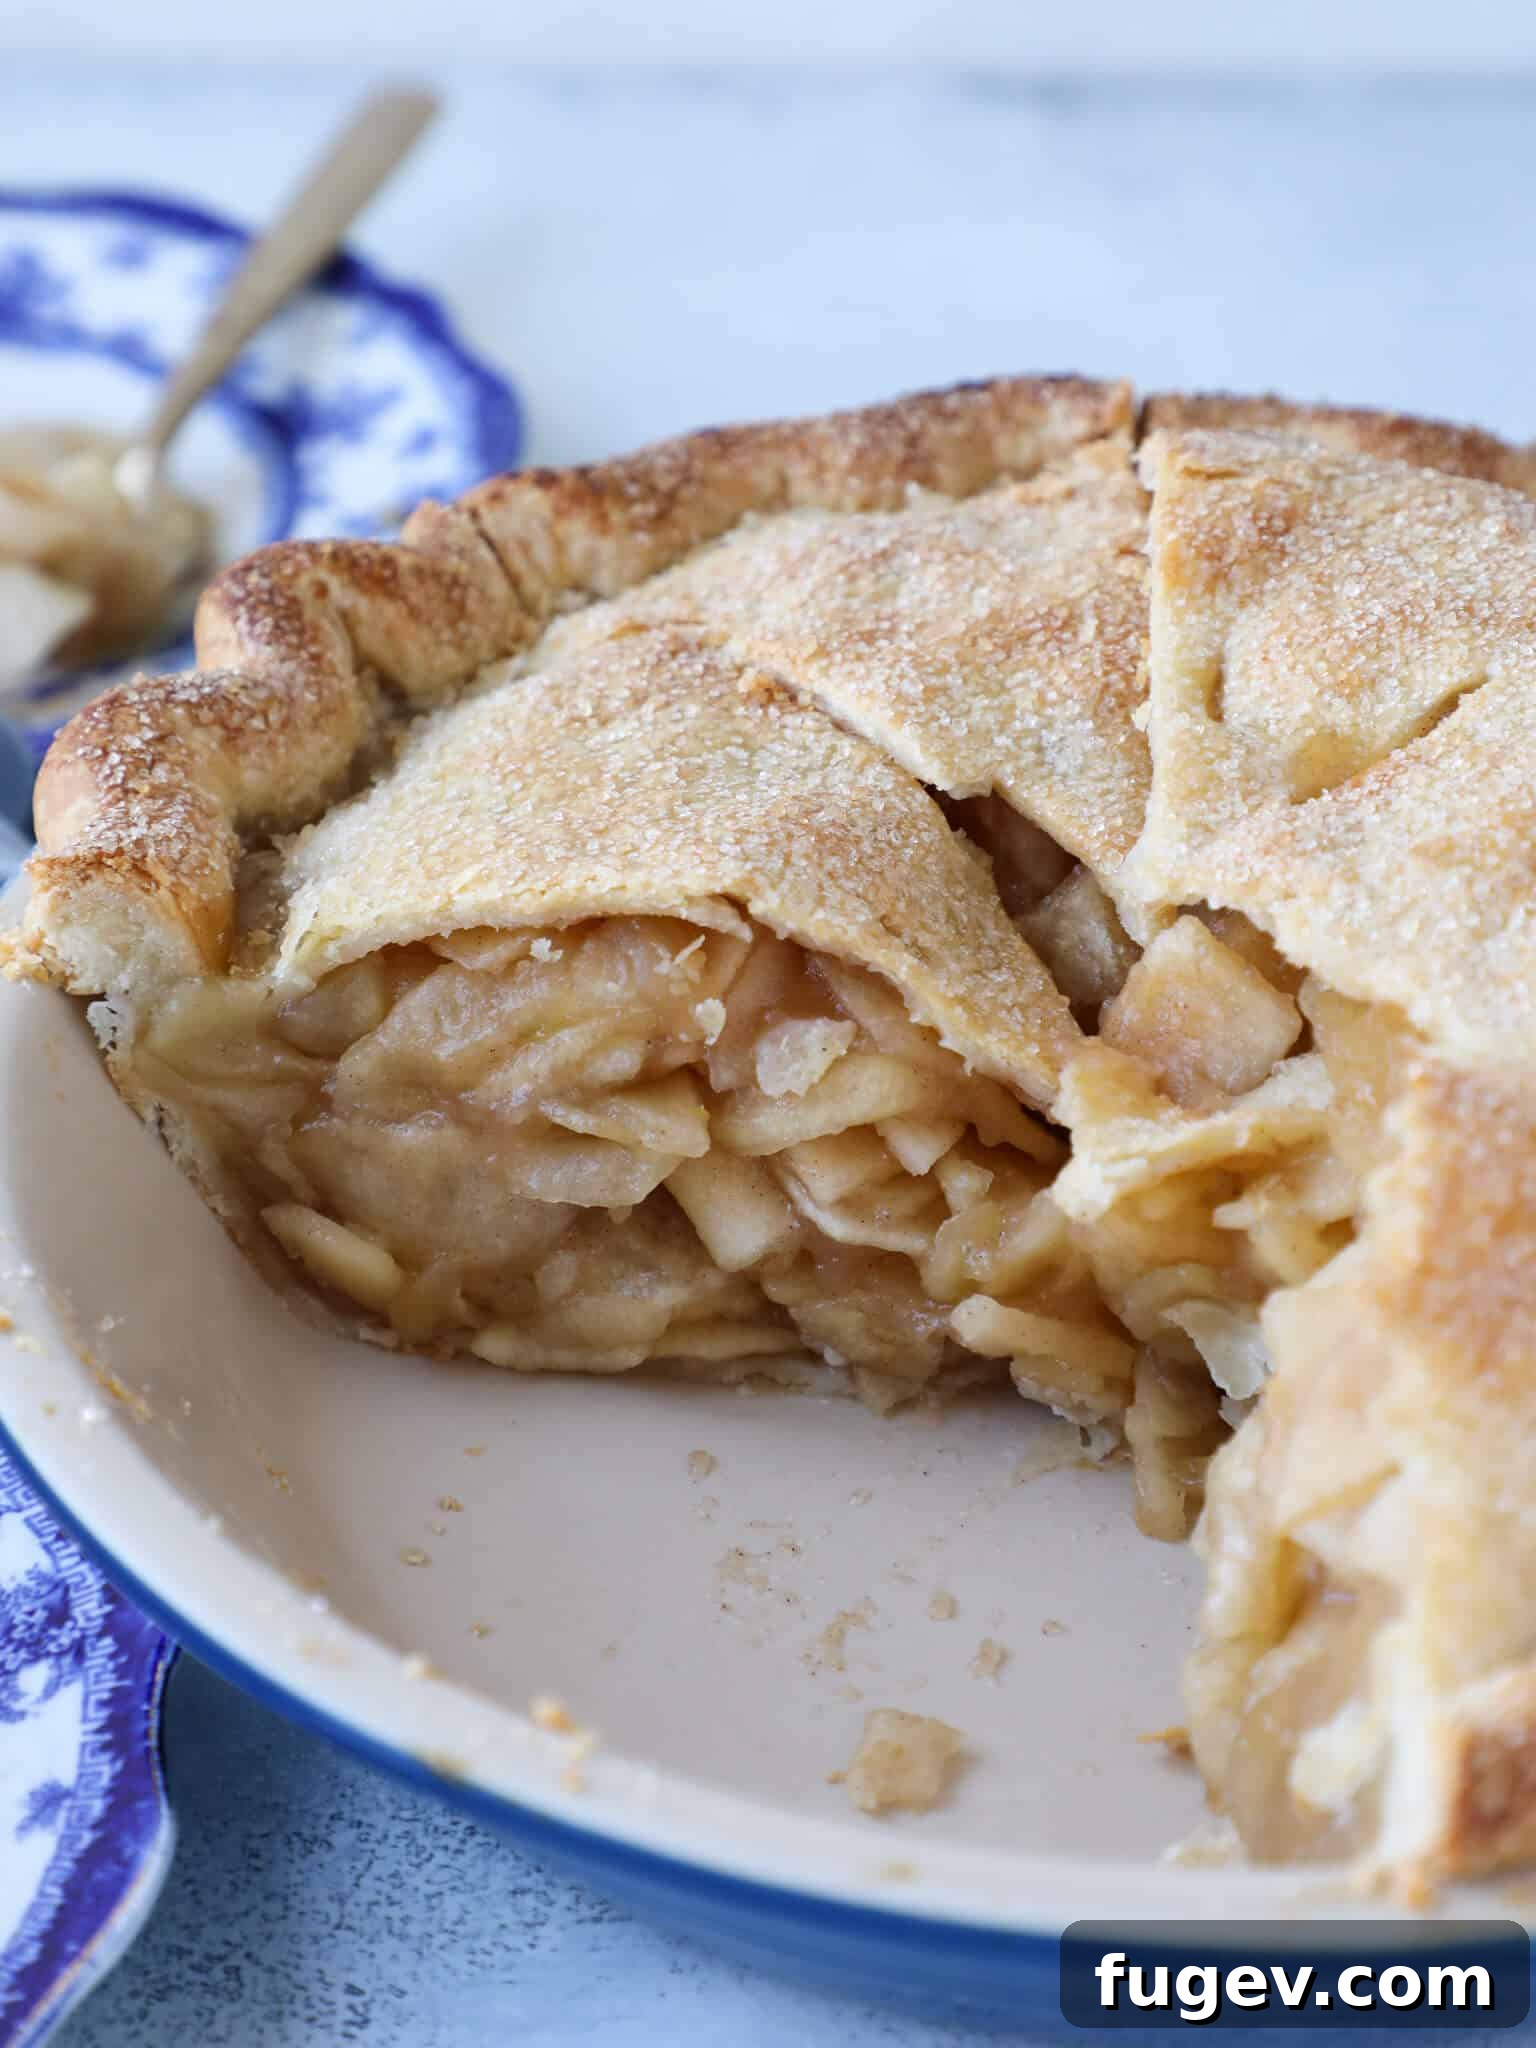
- Experience a Flawless Fill with No Gap Between Filling and Crust: Say farewell to the sunken, hollow look of traditional apple pies. By pre-cooking the apple filling, we ensure that the apples retain their volume and structure throughout the baking process. This means your pie bakes evenly, and there’s absolutely zero space between the luscious, tender apples and the gloriously golden top crust. The result is a pie that looks as magnificent as it tastes, boasting a perfectly domed surface and consistent texture from edge to center.
- A Truly Generous, Fruit-Packed Delight with 5 Pounds of Apples: Forget about skimpy, lackluster pies. This recipe calls for a whopping five pounds of fresh apples, creating a seriously tall, impressive filling that’s bursting with tender, perfectly flavored fruit. Each slice offers an abundance of apple goodness, making this a substantial and satisfying dessert that truly lives up to its “mile high” name. It’s an apple lover’s dream come true, providing a rich, deep fruit experience without compromise.
- Achieve the Ultimate Flaky All-Butter Pie Crust: A pie is only as good as its crust, and this recipe features my absolute favorite, perfected all-butter pie crust. Crafted with cold, high-quality butter and icy water, this crust achieves an unparalleled tenderness, crispness, and extraordinary flakiness. The butter creates delicate pockets of steam during baking, separating the layers to give you that coveted melt-in-your-mouth texture that is the hallmark of a truly great homemade pie. It perfectly complements the robust apple filling, providing a rich, savory counterpoint to the sweet fruit.
- Deep, Caramelized Flavor Beyond Compare: The pre-cooking step isn’t just for aesthetics; it’s a flavor powerhouse. Gently simmering the apples with sugar and spices allows their natural sugars to caramelize slightly, developing complex, deeper notes that you simply can’t achieve by baking raw apples. This process concentrates the flavors, creating a more intense and satisfying apple experience with hints of toffee and warmth.
- No More Soggy Bottoms, Guaranteed: One of the most common woes of pie baking is a soggy bottom crust. Pre-cooking the filling addresses this directly. By removing excess moisture from the apples before they even enter the pie, we prevent the bottom crust from becoming saturated and ensure it bakes up beautifully crisp and golden, providing the perfect foundation for your towering apple creation.
Table of Contents
- Why This Mile High Apple Pie Will Be Your New Favorite
- Mastering the Mile High Method: Why Pre-Cooking is Key
- Ingredients & Expert Substitutions for Your Apple Pie
- Creative Variations for Your Mile High Apple Pie
- Professional Baking Tips for Pie Perfection
- Step-by-Step Guide: How to Make Mile High Apple Pie
- Chef Lindsey’s Secret to Perfect Apple Filling
- Frequently Asked Questions (FAQs) About Mile High Apple Pie
- Recommended Pie Recipes
- Mile High Apple Pie Full Recipe
- Before You Go: More Sweet Treats!
Mastering the Mile High Method: Why Pre-Cooking is Key
Crafting the absolute best mile high apple pie does involve a few additional steps compared to simpler recipes, but I assure you, these extra efforts are profoundly worthwhile. The secret to its unparalleled success lies in a technique that many shy away from: pre-cooking the apple pie filling.
This method ensures that both the filling and the crust bake to absolute perfection simultaneously! You’ll never again encounter undercooked or crunchy apples, a dreaded soggy bottom crust, or that unsightly gap where the filling mysteriously shrinks away from the top crust. Pre-cooking gently softens the apples, allowing them to release their moisture and begin their caramelization journey before baking in the pie shell. This stabilization of the filling’s volume guarantees a beautifully full and stable pie with a consistent texture from top to bottom.
If you’re looking for a delightful apple dessert that requires a quicker approach and doesn’t necessitate this pre-cooking step, consider trying my easy apple crisp recipe or a more straightforward classic apple pie. For a charming, hand-held treat with similar incredible flavors, these adorable apple hand pies are always a hit!
Ingredients & Expert Substitutions for Your Apple Pie
Creating an extraordinary apple pie begins with selecting the finest ingredients and understanding how each component contributes to the final masterpiece. Here’s a breakdown of what you’ll need and smart substitutions:
- Apples: The Heart of the Pie: For the most complex and delicious apple pie, I always recommend using a diverse mix of apple varieties. This blend ensures a multi-dimensional flavor profile and varying textures, preventing the pie from being one-note. Choose apples that bravely retain their flavor and shape when cooked, such as crisp Gala, sweet Honeycrisp, tart Pink Lady, or firm Braeburn. Since this recipe calls for a generous 5 pounds of apples, embrace the opportunity to create a truly unique flavor symphony by combining several types. Avoid apples that turn mushy quickly like Red Delicious.
- Lemon Juice: The Brightener: Freshly squeezed lemon juice is essential. It provides a bright, acidic counterpoint to the sweetness of the apples and sugars, enhancing the overall flavor without making the pie taste lemony. It also helps prevent the apples from browning. If fresh lemons are unavailable, a good quality bottled lemon juice can be used in a pinch, though fresh is always superior.
- Lemon Zest: Aromatic Lift: The zest from one lemon adds an aromatic, concentrated citrus oil that elevates the entire flavor profile. Ensure you only zest the bright yellow outer layer, avoiding the bitter white pith. This small addition makes a big difference.
- Cinnamon: The Warm Spice: I personally prefer Saigon cinnamon for its robust, sweet, and slightly spicy notes, but any ground cinnamon you have on hand will work wonderfully. For an extra layer of warmth and complexity, you could substitute the plain cinnamon with a few pinches of a homemade apple pie spice mix. Feeling decadent? Consider stirring in up to 3/4 cup of my best salted caramel sauce for an unforgettable caramel apple pie twist!
- Light Brown Sugar: Depth and Moisture: The molasses content in light brown sugar not only contributes a rich, complex sweetness but also adds a subtle depth of flavor and crucial moisture to the apple filling, resulting in a more tender and flavorful outcome. Dark brown sugar can be used for an even more intense molasses flavor, if desired.
- Granulated Sugar: Balanced Sweetness: White granulated sugar plays a vital role in balancing the tartness of the lemon and the richness of the brown sugar. It also assists in retaining moisture within the filling and contributes to a desirable texture without overpowering the natural apple taste.
- Cornstarch: The Perfect Thickener: Cornstarch is your best friend for achieving a perfectly thick, glossy filling that holds its shape when sliced. It acts as a reliable thickening agent and helps bind all the delicious ingredients together, providing stability to the filling both before and during baking. As an excellent alternative, tapioca starch can be used in the same quantity, offering a slightly clearer finish.
- Butter: Richness and Mouthfeel: A small amount of butter added to the filling melts into the apples, contributing a luxurious richness and a silky mouthfeel, enhancing the overall indulgence of the pie.
- All-Butter Pie Crust: The Golden Foundation: The foundation of this magnificent pie is my meticulously crafted all-butter pie crust. I often make it using the stand mixer method for convenience and consistency, but you could also opt for my equally flaky vodka all-butter pie crust for an extra tender result. If time is of the essence, a high-quality store-bought double pie crust can be a suitable shortcut, though homemade always yields superior flavor and texture.
Creative Variations for Your Mile High Apple Pie
While this classic Mile High Apple Pie is perfect as is, it also serves as a fantastic canvas for culinary creativity. Don’t hesitate to experiment with these delightful variations to personalize your pie:
- Embrace More Fruits: Expand the fruit profile beyond just apples!
- Cranberry Apple Pie: Transform this into a festive cranberry apple pie by adding 1-2 cups of fresh or frozen cranberries to the filling. For an even more Christmassy touch, substitute the lemon juice with fresh orange juice and a touch of orange zest. The tartness of the cranberries beautifully complements the sweet apples.
- Mixed Berry Apple Pie: For a vibrant summer rendition, fold in 1-2 cups of your favorite mixed berries (raspberries, blueberries, blackberries) with the apples. The berries will add a burst of color and a delightful tart-sweet complexity.
- Pear Apple Pie: Substitute 1-2 pounds of the apples with firm, ripe pears (such as Bosc or Anjou) for a subtle, elegant flavor variation.
- Experiment with Different Crusts: The crust can dramatically change the pie’s character.
- Crisco or Shortening Crust: For a more traditional, super-flaky crust that’s often easier to work with, consider swapping out the all-butter crust for this reliable Crisco pie crust recipe.
- Almond Flour Crust: For a gluten-free option or a nutty flavor, try an almond flour pie crust. It adds a wonderful depth and unique texture.
- “Easy” Crust Alternatives: Explore other simple crust recipes like this easy pie crust recipe if you’re looking for a less intensive dough-making process.
- Charming Mini Pies: Who can resist individual pies?
- Individual Apple Pies: Invest in some mini pie tins and create adorable individual apple pies. These are perfect for entertaining, portion control, or just a delightful personal treat. Baking times will need to be adjusted, typically shorter.
- Mini Apple Pecan Crumble Pies: For an even more unique mini pie experience, make these mini apple pies with a delectable brown sugar pecan crumble topping, baked in mini muffin pans for bite-sized perfection.
- Elevate with a Decorative Top: Impress your guests (and yourself!) with a stunning pie top.
- Lattice Top: Follow my detailed guide on how to lattice pie crust to create an elegant woven top that showcases the filling beautifully.
- Creative Vent Holes: Instead of simple slits, use small cookie cutters (like mini leaves, stars, or hearts) to create charming and functional vent holes in your top crust. These little details add a touch of artistry.
- Cutout Decorations: Utilize pie crust scraps to cut out decorative shapes (leaves, apples, braids) and adorn the top of your pie before baking. A little egg wash will help them adhere and brown beautifully.
Professional Baking Tips for Pie Perfection
Achieving a truly professional-quality pie involves more than just following steps; it’s about understanding the nuances. These expert tips will help you bake a Mile High Apple Pie that rivals any bakery:
- Cook the Apples Until “Crisp-Tender”: This term is crucial for the pre-cooked filling. Think of it as the sweet equivalent of “al dente” pasta. You want the apples to be tender and mostly cooked, but still possess a slight firmness and resistance when bitten into – a delicate “snap.” Some slices will appear more translucent than others, which is perfectly normal. The goal is to avoid overcooking them at this stage, as they will continue to soften during the final bake in the oven. This crisp-tender stage ensures your final pie filling has a delightful texture, not a mushy one.
- Crucial: Always Cool Your Filling Completely! Just as with my renowned blueberry pie recipe and mixed berry pie, it is absolutely imperative to cool the filling thoroughly before you even think about assembling the pie. Introducing a hot or warm filling to a chilled pie crust is a recipe for disaster: the heat will prematurely melt the butter in your crust, destroying those precious, delicate layers that give an all-butter crust its signature flakiness. A properly cooled filling ensures your crust remains cold and firm, allowing it to bake up into those beautiful, airy, and flaky layers you crave.
- Avoid Chilling the Crust Directly in Ceramic or Glass Pie Dishes: This is a lesser-known but vital tip for a perfectly baked bottom crust. Ceramic or glass pie dishes absorb and retain heat differently than metal ones; they take significantly longer to heat up in the oven. If you chill your pie dough directly in these dishes, the prolonged cold can cause the bottom crust to cook too slowly, preventing the butter from properly steaming and often leading to a dreaded soggy bottom. Instead, roll out your bottom crust, fit it into the ceramic or glass dish, then immediately add your *cold* filling and top crust. Alternatively, if you need to pre-chill the bottom crust, do so on a parchment-lined baking sheet before transferring it to the dish just prior to assembly.
- Mastering the Dough: Don’t Overwork It! When preparing your pie crust, mix the dough just until it comes together. Overworking the dough develops too much gluten, which will result in a tough, chewy crust instead of the desired tender and flaky texture. Minimal handling is key to pie crust perfection.
- Even Apple Slices are Essential: For uniform cooking and a consistent texture throughout your pie, aim for even ¼-inch thick apple slices. A mandoline slicer is a fantastic tool for this, ensuring precision and speeding up the prep process significantly. If slicing by hand, take your time to make them as consistent as possible.
Step-by-Step Guide: How to Make Mile High Apple Pie
Follow these detailed instructions to craft a flawless Mile High Apple Pie every single time. For precise measurements and ingredient quantities, please refer to the comprehensive recipe card located further down the page.
Phase 1: Prepare the All-Butter Pie Crusts
Creating a truly exceptional pie starts with a perfect crust. This method ensures a tender, flaky foundation for your magnificent apple filling.
Step 1: Combine Dry Ingredients. In the bowl of your stand mixer, thoroughly combine the pastry flour, a pinch of salt, and granulated sugar. Whisk lightly to ensure they are well distributed.
Step 2: Cut in Cold Butter. Add the cold, cubed unsalted butter to the dry ingredients. Using your stand mixer fitted with a paddle attachment, mix on low speed until the butter is cut into pieces slightly larger than peas. This creates pockets of butter crucial for flakiness.
Step 3: Gradually Add Ice Water. With the mixer running on low, slowly add ice water, one tablespoon at a time. Be exceedingly cautious with the amount of water; the dough may require only a little more than the initial recommendation. The exact quantity will vary depending on factors like flour type and humidity. Stop adding water as soon as a shaggy dough begins to form.
Pro Tip: The amount of water needed is highly dependent on how much you cut in the butter and the ambient humidity. Err on the side of less water; you can always add more, but you can’t take it out!
Step 4: Bring Dough Together. Once a shaggy dough has formed and you still see some loose flour, turn the mixture out onto a clean, lightly floured work surface. Gently gather the dough and, using the heel of your hand, lightly press and push it away from you in short motions. Do this JUST until the dough comes together into a cohesive mass. If it crumbles excessively, lightly dip your hand in a bit of ice water and pat it onto the pastry dough to add minimal moisture. Remember, minimal handling is key to a tender crust – don’t overwork the gluten!
Important Note on Gluten: Work the dough just enough for it to come together. Excessive kneading develops gluten, which leads to a tough pie crust. Be gentle!
Step 5: Chill the Dough. Divide the assembled dough in half and gently press each half into a flat, round disk. Wrap each disk tightly in plastic wrap and refrigerate for at least 2 hours, or ideally, overnight. If chilling overnight, allow the dough to rest at room temperature for about 15-20 minutes before attempting to roll it out; otherwise, it will be too cold and prone to cracking.
Phase 2: Prepare the Caramelized Apple Filling
This is where the “mile high” magic happens, preventing gaps and building incredible flavor.
Step 6: Prepare Baking Sheets for Rapid Cooling. Place two rimmed baking sheets in your freezer. These will be essential for rapidly cooling your cooked apple filling, a critical step for perfect pie texture.
Step 7: Slice Apples Evenly. Peel, core, and quarter all your apples. Then, slice them uniformly to about ¼ inch thick. Using a mandoline slicer will significantly speed up this process and ensure consistent slices, which is vital for even cooking and a beautiful presentation. Consistency is key for uniform tenderness in the finished pie.
Step 8: Combine Filling Ingredients. In a large, heavy-bottomed pot, combine the sliced apples, fresh lemon juice, lemon zest, cinnamon, both light brown and granulated sugars, cornstarch, and cubed butter. Stir everything gently to ensure the apples are evenly coated.
Chef’s Flavor Check: Before adding the cornstarch, taste a small amount of the apple mixture. This is your chance to adjust the sweetness or tartness. Depending on the inherent sweetness of your chosen apples, you might wish to add a bit more lemon juice for brightness or a touch more sugar.
Step 9: Cook Until Crisp-Tender. Place the pot over low heat and simmer gently, allowing the apples to begin releasing their natural juices. Once you see some liquid forming, increase the heat to medium and continue to cook, stirring occasionally, until the filling has visibly thickened and the apples have reached that perfect “crisp-tender” stage (refer back to the “Professional Tips” for details). Remember, they will cook more in the oven.
Step 10: Rapidly Cool the Filling. This step is non-negotiable for a perfect Mile High Pie. Carefully pour the hot apple filling in a single, even layer onto the two frozen baking sheets that you lined with parchment paper. Ensure the filling is spread thinly to maximize surface area for cooling. Cover the filling loosely with plastic wrap, poking a few small ventilation holes to allow steam to escape. Immediately transfer the baking sheets to the refrigerator until the filling is completely cold. This rapid cooling process halts the cooking, preventing the apples from becoming mushy, and ensures the filling sets beautifully.
Phase 3: Mile High Apple Pie Assembly and Baking
With your crust chilled and filling cooled, it’s time to bring it all together for its grand transformation in the oven.
Step 11: Preheat Your Oven. Preheat your oven to 375°F (190°C) if using convection, or 400°F (200°C) for a conventional oven. This initial high heat helps set the crust quickly.
Step 12: Roll Out Crusts. On a lightly floured surface, roll out one disk of chilled pie dough into a circle that is approximately 2 inches larger in diameter than your pie dish, aiming for a thickness just slightly more than ⅛th of an inch. Repeat with the second disk for the top crust.
Step 13: Line the Pie Dish. Carefully transfer one rolled-out pie crust to an ungreased 9-inch pie dish, allowing the excess dough to hang over the edges. Place the lined pie dish onto a sturdy sheet pan (this will catch any drips and make transferring easier), cover it lightly, and chill in the refrigerator while you prepare the top crust. This helps maintain the crust’s coldness.
Note for Ceramic/Glass Dishes: If you are using a ceramic or glass pie dish, it’s best to roll and chill both the bottom and top crusts on separate parchment-lined sheet trays. Only transfer the bottom crust to the dish just before filling to avoid a soggy bottom, as these materials heat slowly.
Step 14: Chill the Top Crust. Place the second rolled-out crust (for the top) on a parchment-lined baking sheet, cover it with plastic wrap, and chill it until you are ready for assembly. Keeping both crusts very cold is vital for flakiness.
Step 15: Mound and Seal the Pie. Retrieve your chilled pie dish with the bottom crust. Pour the completely cooled apple filling into the pastry-lined pie plate, artfully mounding the apples generously in the center to achieve that impressive “mile high” stature. Carefully drape the chilled top crust over the filling. Trim all but about ½ inch of excess dough from around the edges. Press the top and bottom crusts together firmly to seal. Then, fold the excess dough under and create a decorative edge. You can flute the edges with your fingers, press with a fork for a rustic look, or even use small decorative cutouts from your dough scraps.
Step 16: Cut Vent Holes. Using a sharp knife or small cookie cutters, cut several vent holes into the top crust. These allow steam to escape during baking, preventing the crust from puffing up and ensuring a beautifully baked interior. Get creative with your cutouts for a personalized touch!
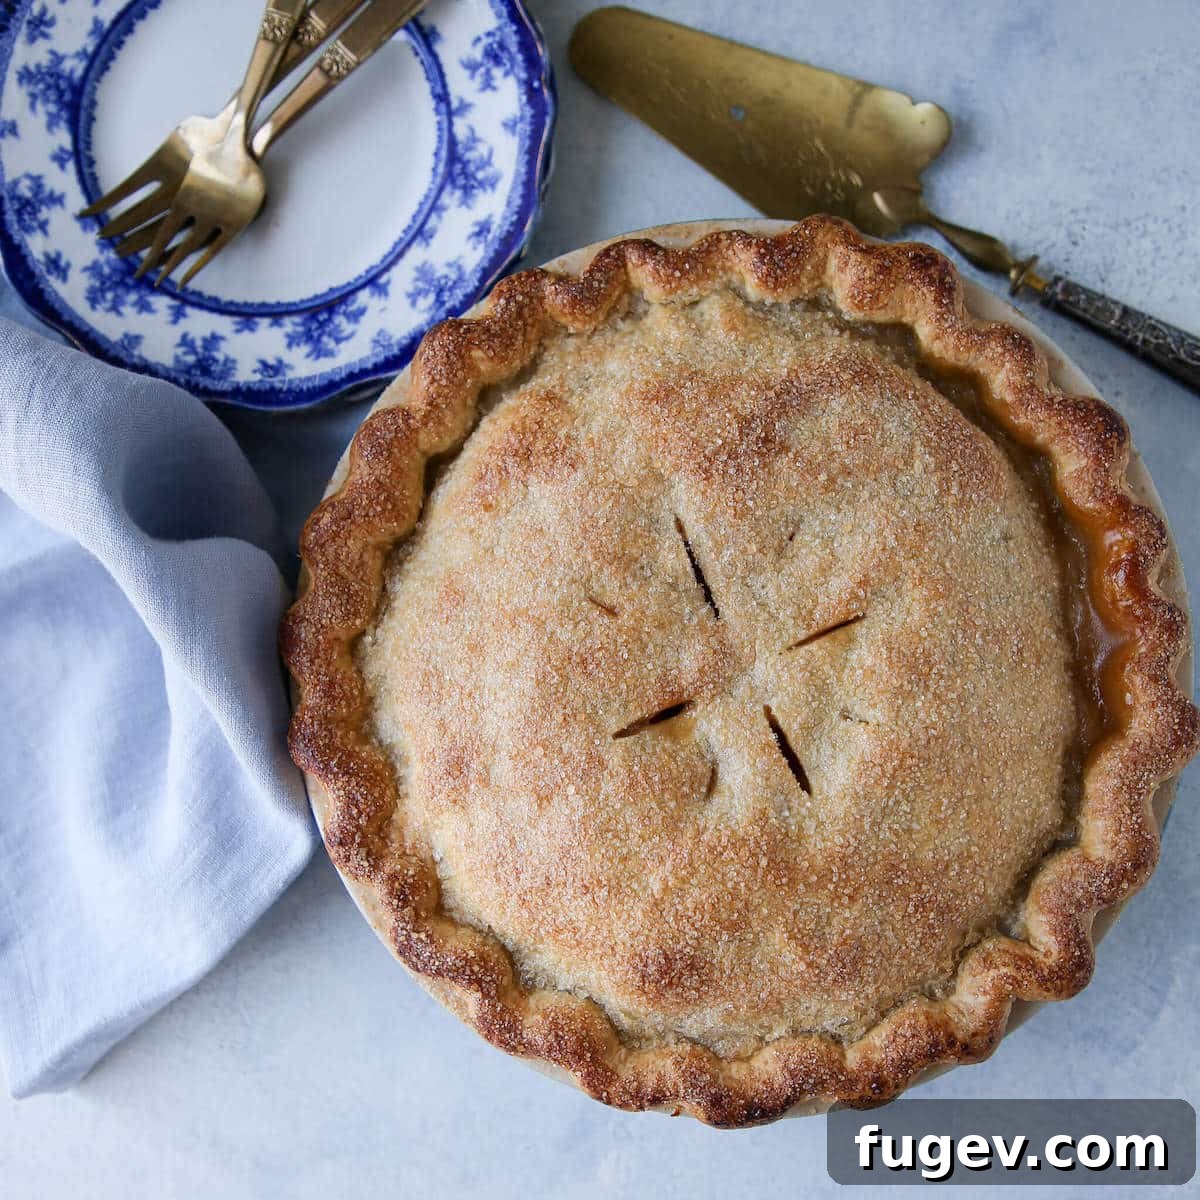
Step 17: Egg Wash & Sugar Sprinkle. For a beautiful golden-brown, glistening crust, lightly brush the entire top surface of the pie with heavy cream. Then, generously sprinkle granulated sugar or turbinado sugar over the cream. The sugar will caramelize, adding a delightful crunch and sparkle.
Step 18: Bake Until Bubbling. Place the pie (still on its sheet pan) into the preheated oven. Bake at 375°F (190°C) / 400°F (200°C) for the initial 15 minutes. This high heat helps to set the crust rapidly. After 15 minutes, reduce the oven temperature to 350°F (175°C) and continue to bake for an additional 45-60 minutes, or until the filling is visibly bubbling through the vent holes and the crust is deeply golden brown. If the crust begins to brown too quickly, you can loosely tent the edges with aluminum foil.
Step 19: Cool and Serve. The most challenging part is the wait! Allow the freshly baked pie to cool and chill for at least 2 hours before attempting to slice it. This cooling time allows the filling to fully set, ensuring clean, beautiful slices. Serve your magnificent Mile High Apple Pie at room temperature or gently warmed for ultimate enjoyment. It pairs wonderfully with a scoop of vanilla bean ice cream or a dollop of fresh whipped cream.
Chef Lindsey’s Secret to Perfect Apple Filling
My top trick for an apple pie that consistently avoids mushy apples and a sunken top? Rapidly cooling the pre-cooked filling. I always keep two rimmed baking sheets lined with parchment paper in the freezer. Once the apples are perfectly crisp-tender, I pour the hot filling onto these frozen sheets, spreading it into a single layer. A quick cover with plastic wrap and a few ventilation holes, then into the refrigerator it goes. This immediate chill stops the cooking process dead in its tracks, preserving that ideal apple texture and vibrant flavor.
Frequently Asked Questions (FAQs) About Mile High Apple Pie
Got questions about mastering your apple pie? Here are answers to some common queries:
The primary reason for a gap is that apples shrink significantly as they bake. When raw apples are added to a pie, they release a considerable amount of moisture and steam during cooking, causing them to collapse and settle. This reduction in volume creates the unsightly void between the filling and the top crust. Pre-cooking the apple filling, as done in this Mile High Apple Pie recipe, prevents this shrinkage by allowing the apples to release moisture and settle before the final bake, ensuring a full, beautiful pie.
Absolutely! This Mile High Apple Pie is fantastic for making in advance. You can fully bake the pie, allow it to cool completely, then wrap it tightly in plastic wrap and aluminum foil. It can be stored at room temperature for up to 2 days or refrigerated for up to 5 days. For the best serving experience, bring it to room temperature before slicing, or gently rewarm individual slices in a low oven (around 275°F / 135°C) until warm through.
For the most outstanding apple pie, I wholeheartedly recommend using a combination of apple varieties. This approach provides a more complex flavor profile and varied textures that hold up beautifully during baking. Excellent choices include Gala, Honeycrisp, Pink Lady, Braeburn, Granny Smith (for tartness), Jonagold, and Cortland. Using a mix ensures some apples break down slightly to create a cohesive filling, while others retain their shape and provide delightful bites of tender fruit.
Yes, pie crust dough is perfect for making ahead! You can prepare the dough disks, wrap them tightly in plastic wrap, and refrigerate them for up to 2-3 days. For longer storage, the dough can be frozen for up to 1 month. Thaw frozen dough in the refrigerator overnight before rolling. This preparation allows you to break up the workload and makes pie day much less stressful.
While the pie needs to cool completely for at least 2 hours to allow the filling to set for clean slicing, how you serve it is entirely up to personal preference! Many enjoy apple pie at room temperature, while others prefer it gently warmed, especially with a scoop of vanilla ice cream or a dollop of whipped cream. A slightly warm pie often brings out the fragrant spices and tender apples beautifully.
More Delicious Pie Recipes to Explore
If you’ve loved mastering this Mile High Apple Pie, you’re in for a treat! Discover more delectable pie recipes from my collection, perfect for any season or occasion. Each recipe is crafted with care to bring you delicious results every time.
Pies and Tart Recipes
Amazing Blueberry Pie Recipe
Pies and Tart Recipes
Irresistible Mixed Berry Pie
Summer Dessert Recipes
Effortless Easy Apple Pie
Pies and Tart Recipes
Delicious Cherry Pie with Almond Crust
If you tried this incredible Mile High Apple Pie recipe and loved it, please take a moment to leave a 🌟 star rating and share your experience in the comments below. I truly value your feedback and love hearing how my recipes brighten your day!
Rated 5 out of 5 stars by 3 users
Mile High Apple Pie
Chef Lindsey
45 mins
1 hr
1 hr 45 mins
12 slices
Comment
Print Recipe
Ingredients (US Customary)
For the All-Butter Pie Crust (yields 2 crusts, you could also use 2 store-bought crusts instead):
- 2 ¼ cups pastry flour (measured by fluffing the flour then spooning it in)
- 1 teaspoon kosher salt
- 1 teaspoon granulated sugar
- 9 tablespoons unsalted butter (cold, cut into ½ inch cubes)
- 2 ¼ oz cold water (or as much or as little as needed)
For the Pie Filling:
- 11 cups apples (peeled, cored, and cut into ¼ inch slices, from approximately 5 lbs of whole apples)
- 2 tablespoons fresh lemon juice (freshly squeezed from about 1 lemon)
- 1 lemon (zested, bright yellow parts only!)
- 1 teaspoon cinnamon
- ¾ cup light brown sugar
- ¾ cup granulated sugar
- ¼ cup cornstarch
- 2 tablespoons butter (cubed)
- Heavy cream & granulated or turbinado sugar (for sprinkling on top crust)
Instructions
Prepare the Pie Crusts:
-
Combine the pastry flour, salt, and sugar together in the bowl of your stand mixer.
-
Using your stand mixer with a paddle attachment, cut in the cold, cubed butter until you have slightly larger than pea-sized pieces.
-
Slowly add your ice water, a tablespoon at a time, until a shaggy dough forms.
-
When a shaggy dough has formed and there is still some loose flour, turn it out onto your work surface. Gather it and gently press away from you with the heel of your hand, just until it comes together. If it is crumbling, dip your hand in a bit of ice water and pat it onto the pastry dough sparingly. Remember to work it minimally to avoid developing too much gluten.
-
Divide the dough in half and press each half into a flat disk. Wrap each disk tightly in plastic wrap and chill for at least 2 hours or overnight. If chilled overnight, let it rest at room temperature for a bit before rolling to prevent cracking.
Prepare the Filling:
-
Freeze two rimmed baking sheets, lined with parchment paper.
-
Peel, core, and quarter the apples. Slice them about ¼ inch thick, either by hand or with a mandoline for consistency and speed.
-
Combine the sliced apples, lemon juice, lemon zest, cinnamon, both sugars, cornstarch, and cubed butter in a large pot.
-
Simmer over low heat until the apples begin to release their juices. Increase the heat to medium and cook, stirring occasionally, until the filling has thickened and the apples are crisp-tender.
-
Pour the hot filling between the two frozen baking sheets, spreading it into a single layer. Cover with plastic wrap, poke a few ventilation holes, and refrigerate until completely cold. This rapidly cools the filling and stops the cooking process, ensuring perfect apple texture.
Mile High Apple Pie Assembly:
-
Preheat the oven to 375°F (convection) or 400°F (conventional).
-
On a lightly floured surface, roll out each chilled pie crust into a circle roughly 2 inches larger in diameter than your pie dish, to a thickness just over ⅛th of an inch.
-
Line an ungreased pie dish with one of the crusts, allowing the excess to hang over the edges. Place the dish on a sheet pan, cover, and chill again briefly.
-
Place the second rolled top crust on a parchment-lined sheet pan, cover with plastic, and chill until ready to use.
-
Pour the completely cooled apple filling into the pastry-lined pie dish, mounding the apples generously in the center for that “mile high” effect. Carefully place the chilled top crust over the filling. Trim all but ½ inch of excess dough from around the edges. Press the top and bottom crusts together firmly, then fold under and create a decorative edge (e.g., flute with your fingers, press with a fork, or use decorative cutouts from scraps).
-
Cut several vent holes into the top crust (or make cute cutouts before placing it over the filling) to allow steam to escape during baking.
-
Brush the top crust evenly with heavy cream, then generously sprinkle with granulated or turbinado sugar for a beautiful golden, crunchy finish.
-
Bake in the preheated oven for 15 minutes. Then, reduce the oven temperature to 350℉ (175°C) and continue baking for approximately 45-60 minutes longer, or until the filling is visibly bubbling through the vents and the crust is a rich golden brown. If the edges brown too quickly, loosely cover them with aluminum foil.
-
Allow the pie to cool and chill for at least 2 hours before slicing and serving. This is crucial for the filling to set properly. Serve at room temperature or gently warmed.
Video
Notes
Presentation – For the cleanest, most beautiful slices, ensure the pie is completely cold before cutting. Individual slices can then be gently warmed in the oven if desired.
Flavor Tips – To achieve a truly complex and dynamic flavor, always use a variety of apples. Some excellent choices include Honeycrisp, Braeburn, Jonagold, Cortland, Cripps Pink, Gala, Granny Smith, and Pink Lady. Each variety offers a unique balance of sweetness, tartness, and texture that contributes to a superior pie.
Technique Insight – While you technically don’t have to precook the apples for an apple pie, this “mile high” method strongly advocates for it. Pre-cooking the filling is the guaranteed way to prevent an undercooked, watery, or mushy filling and ensures your crust bakes perfectly without becoming overbaked or soggy.
Storage – Store a baked and completely cooled pie tightly wrapped at room temperature for up to 3 days. For longer freshness, refrigerate for up to 1 week. This pie also freezes beautifully: wrap it securely in plastic wrap and then in foil, and it will keep well in the freezer for up to 2 months. Thaw in the refrigerator overnight before warming and serving.
Nutrition
Calories: 343kcal
|
Carbohydrates: 62g
|
Protein: 4g
|
Fat: 11g
|
Saturated Fat: 7g
|
Polyunsaturated Fat: 1g
|
Monounsaturated Fat: 3g
|
Trans Fat: 0.4g
|
Cholesterol: 28mg
|
Sodium: 216mg
|
Potassium: 242mg
|
Fiber: 6g
|
Sugar: 38g
|
Vitamin A: 387IU
|
Vitamin C: 11mg
|
Calcium: 34mg
|
Iron: 1mg
Dessert
American
343
Enjoyed this recipe? Leave a comment below!
Before You Go: More Sweet Treats!
I genuinely hope you cherish making and enjoying this magnificent Mile High Apple Pie as much as I do. It’s a recipe that truly stands out, delivering on both impressive height and incredible flavor.
If you have a passion for classic desserts and baking, I invite you to explore more of my delightful creations. You can discover a wide array of comforting and creative pie recipes, each with its own unique charm and expert tips. Alternatively, feel free to browse my full collection of dessert recipes for inspiration, whether you’re craving something fruity, chocolatey, or light and airy. Happy baking!