
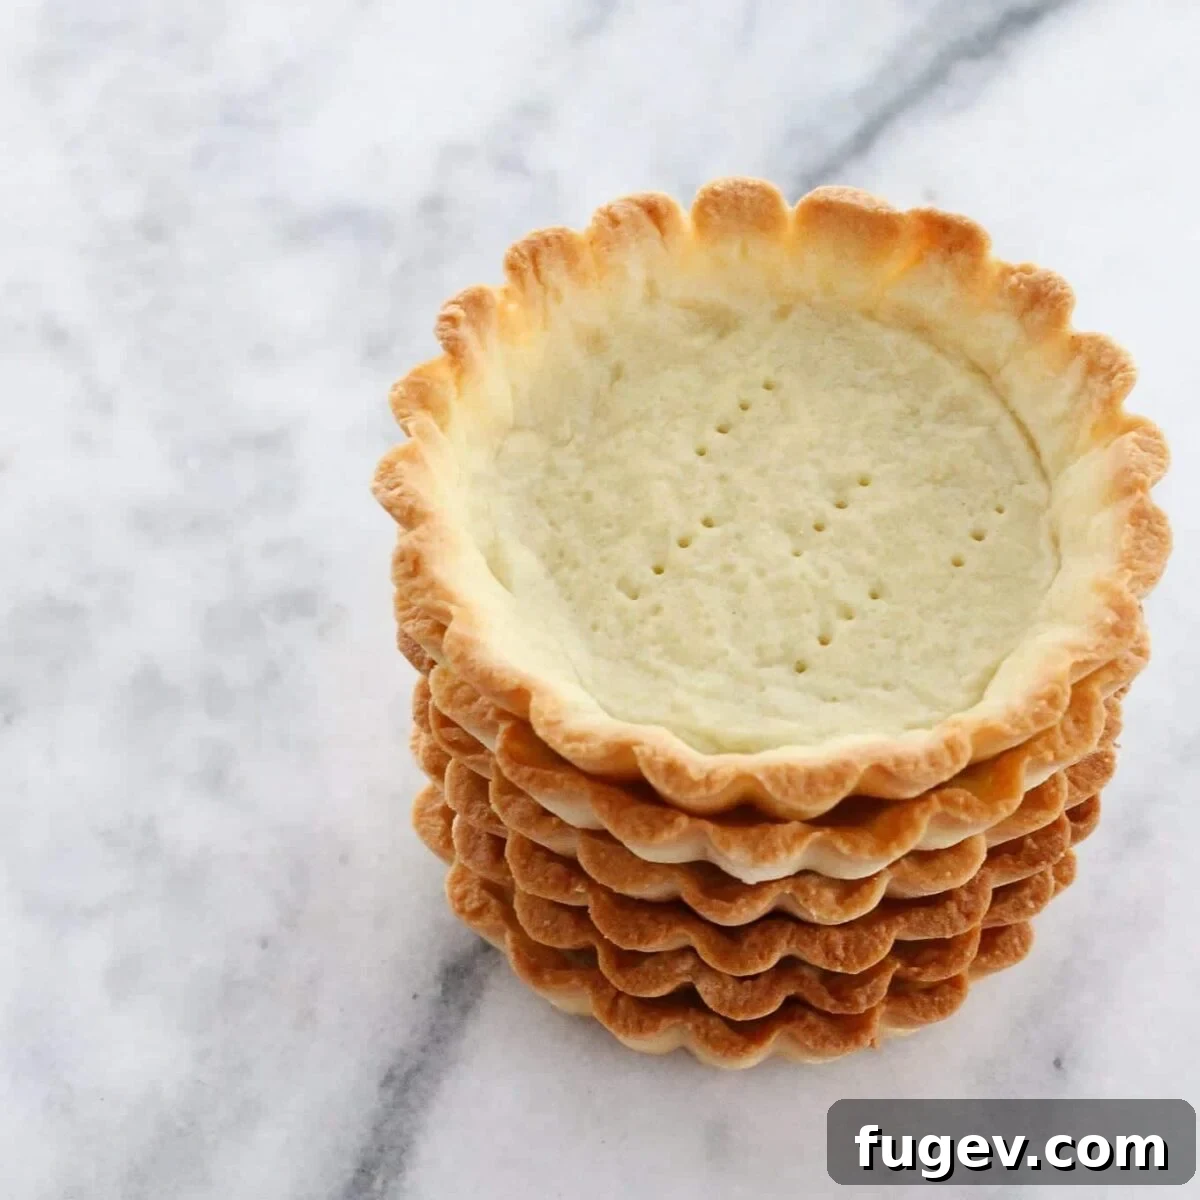
The Ultimate Almond Flour Tart Crust (Almond Pâte Sucrée)

Discover the secret to a perfectly tender, exquisitely buttery, and undeniably versatile tart crust with our definitive guide to crafting the Almond Flour Tart Crust, also known as almond pâte sucrée. This delicate yet robust dough is the foundation for countless dessert masterpieces, from elegant mini tarts and classic frangipane fruit tarts to rich chocolate creations and zesty lemon curd delights. Forget soggy bottoms and crumbly edges; this recipe guarantees a consistently crisp, flavorful, and easy-to-handle crust that will elevate your baking to professional levels.
Whether you’re a seasoned pastry chef or a home baker looking to impress, mastering this almond tart dough is a game-changer. Its unique composition, combining the richness of butter with the delicate texture of almond flour, results in a crust that is both structurally sound and melts in your mouth. We’ll walk you through every step, sharing essential tips and techniques to ensure your tart crusts are always a triumph.
Why Choose Almond Flour for Your Tart Crust?
Traditional pâte sucrée is renowned for its short, crumbly texture, but incorporating almond flour introduces several benefits that make this version truly exceptional:
- Enhanced Flavor Profile: Almond flour imparts a subtle, nutty sweetness that complements a wide array of fillings, from fresh berries to rich custards and chocolates.
- Superior Texture: The fine grind of almond flour contributes to an incredibly tender, almost melt-in-your-mouth texture that is less prone to toughness compared to all-purpose flour alone.
- Reduced Gluten Development: Almond flour contains no gluten, meaning less gluten development during mixing. This is key to achieving that desirable delicate and short texture, preventing a chewy or tough crust.
- Easier Handling: While it might seem counterintuitive, properly prepared almond pâte sucrée is often more forgiving and easier to roll out without excessive shrinking, especially when kept cold.
- Gluten-Friendly Option: For those seeking alternatives to traditional wheat-based crusts, this recipe naturally leans into a more gluten-friendly profile without sacrificing taste or texture.
This almond flour tart crust isn’t just a substitute; it’s an enhancement, offering a refined taste and texture that will make your tarts truly stand out.

Mastering Almond Tart Dough: Essential Techniques and Tips
Working with any pastry dough requires a bit of finesse, and this almond pâte sucrée is no exception. However, with a few key pieces of knowledge, you’ll be rolling out perfect tart shells with confidence. These techniques are designed to ensure your dough is manageable, flavorful, and achieves the ideal tender-crisp texture every time.
-
Understand the Mixing Method for Ultimate Tenderness
This dough uniquely blends elements of the creaming method and the cut-in method, moistened solely with eggs. Begin by creaming the butter and sugar thoroughly until light and fluffy. This incorporates air and creates a tender base. Next, add the dry ingredients, mixing until they resemble coarse crumbs and the butter is fully incorporated. Finally, add the beaten eggs all at once and mix just until incorporated. The minimal liquid (only eggs) and the fine almond flour ensure a low-gluten, incredibly tender crust. Should you find any lingering dry bits after mixing, gently work them in by hand, squishing the dough between your fingers until uniform.
-
The Importance of Proper Chilling
Chilling is perhaps the most crucial step for any tart dough. After mixing, flatten the dough into a disc or rectangle on plastic wrap before chilling. This significantly speeds up the cooling process, allowing the butter to solidify and the gluten to relax. A well-chilled dough is less sticky, easier to roll, and less prone to shrinking during baking. Aim for at least one to two hours, or even overnight, for optimal results. You can also freeze these flattened dough packets for up to a month, making impromptu tart baking a breeze!
-
Navigating Warm Kitchens: Rolling with Parchment
If you find yourself baking in a warm environment, rolling dough directly on a floured countertop can quickly lead to a sticky, unmanageable mess. The solution? Roll your dough between two sheets of parchment paper. This method not only prevents sticking but also limits the amount of additional flour needed, preserving the dough’s rich flavor and delicate texture. The parchment acts as a barrier against heat and helps you transfer the dough effortlessly to your tart pan without tearing.
-
Seamless Transfer with Chilled Parchment Layers
For even easier handling and transfer, chill your rolled-out dough directly between layers of parchment paper. Once firm, you can easily peel off one layer, invert the dough into your tart pan, and then remove the second layer. This minimizes handling and ensures the dough remains cold and pliable for lining.
-
Cold Dough is Happy Dough: Preventing Shrinkage
Just like other pastry doughs, maintaining a cold temperature throughout the preparation process is paramount. Baking a warm dough can cause it to shrink excessively in the oven, leading to an unsightly and often thicker-than-desired crust. Cold dough also allows the gluten (even minimal gluten from all-purpose flour if you’re using a blend) to relax, contributing to a tender final product. While this specific almond pâte sucrée is more forgiving than a finicky pâte brisée, keeping it cold is still the golden rule for success.
-
The Art of Lining Tart Shells
Lining tart shells can seem daunting, but it becomes second nature with practice. For mini tarts, roll the dough slightly thicker than for a large tart. Use a ring mold or cutter slightly larger than your tart pan to cut out circles. Gently drape each dough circle over the mold and press it into the creases, ensuring good contact with the sides and bottom. For larger tarts, roll out the dough to a consistent thickness, then carefully transfer it to the pan. Press firmly into the fluted edges and trim any excess. A clean, even trim ensures a beautiful finish. Don’t worry if it’s not perfect; chilled dough is remarkably easy to patch and repair.
Adhering to these principles will transform your tart-making experience, enabling you to create consistently beautiful and delicious crusts that are the envy of any baker.
Almond Flour Tart Crust
Chef Lindsey
20 mins
10 mins
30 mins
1 hr
10 Individual Tarts
Comment
Print Recipe
Ingredients
- 150 g Butter Room temperature
- 120 g Confectioner’s Sugar
- 300 g Pastry Flour or all purpose *see note
- ¼ t Baking powder
- 45 g Almond Flour
- 75 g Eggs beaten
Instructions
-
In the bowl of a stand mixer fitted with the paddle attachment, cream butter and confectioner’s sugar until light and smooth. Scrape down the sides of the bowl as needed to ensure even mixing.
-
Add the pastry flour (or all-purpose), baking powder, and almond flour to the creamed mixture. Mix on low speed until the mixture becomes crumbly and the butter is completely incorporated, resembling fine breadcrumbs. Be careful not to overmix at this stage.
-
With the mixer still on low, slowly add the beaten eggs all at once. Mix only until the eggs are fully incorporated and the dough just comes together. Avoid overmixing once the eggs are added to prevent developing too much gluten.
-
Turn the dough out onto a piece of plastic wrap. Gently pat and shape it into a flat disk or rectangle, approximately 1-inch thick. This shape helps the dough chill faster and makes it easier to roll out later. Wrap tightly in plastic wrap and chill thoroughly in the refrigerator for at least 1-2 hours, or ideally overnight. The dough can also be frozen for up to one month.
-
If your recipe does not require a pre-baked crust (e.g., for recipes like quiche where the filling bakes with the raw crust), stop here. You can now roll out and use your chilled dough as needed.
To Par Bake (or Blind Bake) Tart Shells
-
Preheat your oven to 350°F (175°C).
-
Remove the chilled dough from the refrigerator. On a lightly floured surface or, preferably, between two sheets of parchment paper, roll the dough to a uniform thickness of approximately 3mm (about 1/8 inch). Once rolled, chill the dough again for at least 30 minutes. This step is crucial for preventing shrinkage.
-
Carefully transfer the chilled, rolled-out dough to line your tart pan(s). For a large tart (up to 12 inches in diameter), gently drape the dough over the pan and press it into the fluted edges. For mini tarts, cut circles slightly larger than your tart molds and place each over a mold, pressing gently to line. Ensure the dough is pressed firmly into all crevices. Trim any excess dough from the edges using a sharp knife or by rolling a rolling pin over the top of the pan. Chill the lined tart shells again if they have become warm during handling.
-
Cut pieces of parchment paper that will fit inside your lined tart shells. Crumple each piece into a ball and then unfold it; this makes the parchment more pliable and easier to fit snugly into the tart shell.
-
Place the crumpled parchment paper inside each tart shell and fill it with pie weights, dried beans, or uncooked rice. Medium-sized beans tend to work better than rice for consistent weight distribution. Make sure the weights fill the shell and reach up the sides to prevent the dough from puffing up or shrinking. Chill the weighted tart shells again for at least 15-20 minutes, especially if they have warmed up.
-
Bake in the preheated oven for 8-11 minutes with the pie weights (or beans/rice). The crust should begin to set, and the edges should start to brown slightly. Carefully remove the tart shells from the oven, lift out the parchment paper and weights, and set them aside to cool (both the parchment and weights can be reused!).
-
Return the tart shells to the oven and continue baking for another 5-10 minutes, or until the crust is golden brown and appears fully baked through. The exact time will depend on your oven and the size of your tart shells.
-
Allow the par-baked tart shells to cool completely on a wire rack before filling. Cooled shells can be stored in an airtight container at room temperature for up to 5 days, or used immediately.
Video Tutorial
Notes
*When using pastry flour or all-purpose flour, the volume conversion generally rounds up to 2 ½ cups. Remember to fluff the flour before measuring to avoid over-compressing it, which can result in too much flour and a tougher crust.
In the accompanying video, a double batch of dough was made, which was then divided. For this specific recipe, you will not need to divide the dough.
This recipe yields approximately 6-10 mini tarts (2 ½ inches each). To achieve 10 tarts, you will need to re-roll any dough scraps. Alternatively, this recipe is perfectly suited for making one large tart, up to 12 inches in diameter.
Nutrition Information (per serving)
Carbohydrates: 1g |
Protein: 2g |
Fat: 15g |
Saturated Fat: 8g |
Polyunsaturated Fat: 1g |
Monounsaturated Fat: 3g |
Trans Fat: 1g |
Cholesterol: 60mg |
Sodium: 118mg |
Potassium: 14mg |
Fiber: 1g |
Sugar: 1g |
Vitamin A: 415IU |
Calcium: 23mg |
Iron: 1mg
Enjoyed this recipe? Leave a comment below!
With its delicate texture and rich, nutty flavor, this almond flour tart crust is truly one of the most versatile and delightful tart doughs you’ll encounter. It’s a bold statement, but one we stand by! The careful balance of ingredients and precise techniques outlined above ensure a stable, flavorful crust that holds up beautifully to a myriad of fillings.
Creative Ways to Use Your Almond Pâte Sucrée
Once you’ve mastered this incredible almond tart crust, the possibilities are endless! Here are some inspiring ideas to put your new skill to delicious use:
- Classic Fruit Tarts: Fill par-baked shells with a creamy vanilla pastry cream, then top generously with fresh seasonal fruits like berries, kiwi, or peaches. A light glaze of apricot jam adds shine.
- Decadent Chocolate Tarts: Pour a rich chocolate ganache into a blind-baked crust for an intensely satisfying dessert. A sprinkle of sea salt or a dollop of whipped cream takes it to the next level.
- Tangy Lemon Curd Tarts: The nutty notes of the almond crust perfectly complement the bright, zesty flavor of homemade lemon curd. Top with torched meringue for a dramatic finish.
- Frangipane Tarts: A timeless choice, fill the unbaked crust with almond frangipane, then arrange sliced fruit (like pears or apricots) on top before baking. The frangipane bakes into a soft, almondy custard within the crisp crust.
- Miniature Delights: Use small tartlet molds for individual servings. These are perfect for parties, dessert platters, or simply portion control.
- Savory Applications: Don’t limit yourself to sweets! This crust can also be adapted for savory tarts. Reduce the sugar slightly and fill with quiche mixtures, caramelized onions and goat cheese, or roasted vegetables.
Storage and Make-Ahead Tips
Planning ahead makes baking even more enjoyable. Here’s how you can prepare and store your almond pâte sucrée:
- Unbaked Dough: The wrapped dough can be stored in the refrigerator for up to 3-4 days. For longer storage, freeze the flattened dough for up to a month. Thaw in the refrigerator overnight before rolling.
- Par-baked Crusts: Fully cooled, blind-baked tart shells can be stored in an airtight container at room temperature for up to 5 days. They can also be frozen for up to 2 weeks; simply thaw at room temperature before filling.
- Finished Tarts: Storage depends on the filling. Fruit tarts with pastry cream are best eaten within 1-2 days and should be refrigerated. Chocolate ganache tarts can often be stored at cool room temperature for a few days. Always check specific filling instructions.
Armed with these techniques and tips, you’re ready to create stunning and delicious almond flour tart crusts that will be the star of any dessert table. Happy baking!