
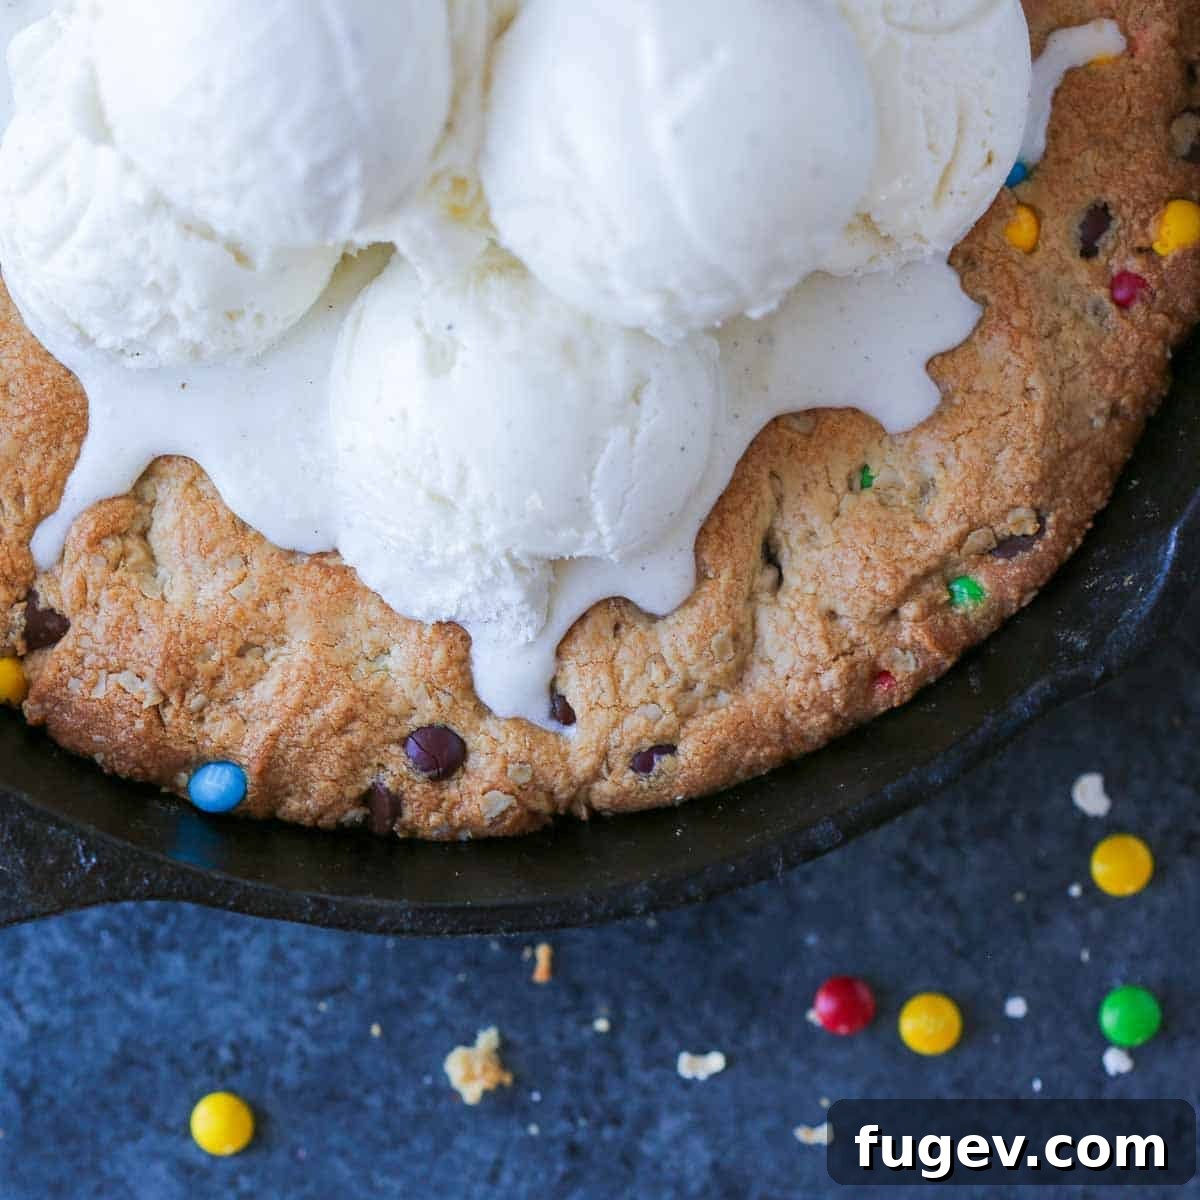
The Ultimate Peanut Butter Chocolate Chip Pizookie Recipe: No Chilling Required!
Prepare yourself for the best **Pizookie** experience you’ll ever have! This sensational recipe delivers a warm, gooey, and chewy peanut butter chocolate chip cookie, perfectly baked in a cast iron skillet, and crowned with generous scoops of melting vanilla bean ice cream. Forget waiting around—this incredible dessert comes together in under 30 minutes and miraculously requires absolutely no chilling of the dough! We’ve taken this classic skillet cookie to the next level by incorporating a delightful medley of M&M’s and rolled oats, adding layers of flavor and irresistible texture. Get ready to fall in love with this monster pizookie!
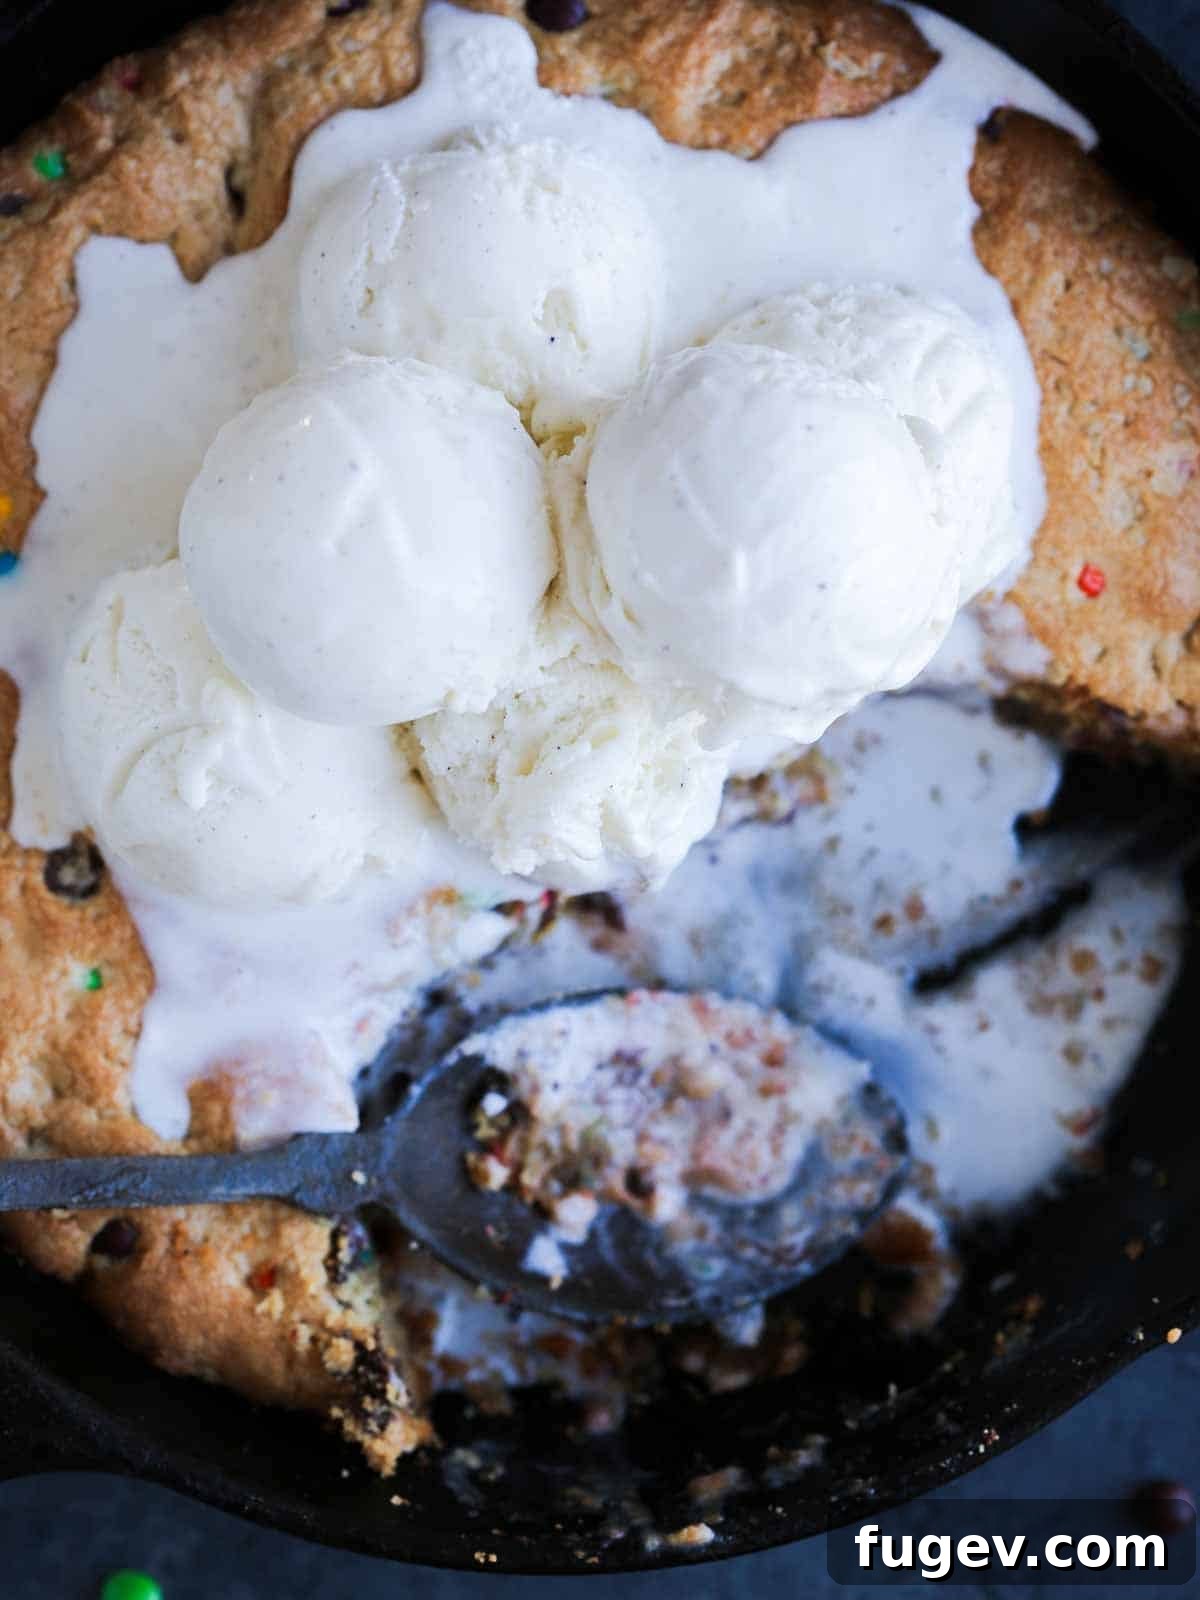
This easy-to-follow pizookie recipe brilliantly marries some of our all-time favorite dessert elements: the irresistible chewiness of peanut butter chocolate chip cookies, the satisfying thickness of classic chocolate chip cookies, and the rustic charm of a sizzling cast iron skillet. The result is an ooey-gooey dessert that’s astonishingly simple to make – just one giant cookie baked to perfection in a single pan! It’s a dessert that truly epitomizes comfort and indulgence without any fuss.
Our recipe offers a delightful twist on the beloved skillet cookie often served at popular restaurants like BJ’s. If you’re a passionate fan of the chocolate and peanut butter combination, this is an absolute must-try! For those who adore this classic pairing, don’t miss out on these decadent peanut butter stuffed chocolate cupcakes or, for a slightly lighter option, these scrumptious healthy chocolate peanut butter muffins.
Table of Contents
- Why You Will Love This Pizookie Recipe
- Expert Tips for the Perfect Pizookie
- Key Ingredients & Savvy Substitutions
- Exciting Pizookie Variations
- The Origin of “Pizookie”
- Step-by-Step Guide to Your Best Pizookie
- Serving Your Pizookie
- Frequently Asked Questions About Pizookies
- Peanut Butter Chocolate Chip Pizookie Recipe
- Before You Go
Why You Will Love This Pizookie Recipe
- Unbelievably Quick & Easy: Life is busy, but dessert shouldn’t be a chore! This recipe is a dream come true, taking less than 30 minutes from start to finish. You’ll simply whip up a delectable cookie dough, press it into your trusty cast iron skillet, and bake it to a state of perfectly chewy, gooey bliss. It’s ideal for impromptu gatherings or a spontaneous sweet craving!
- Irresistible Peanut Butter Chocolate Chip Flavors: While traditional pizookies often feature a classic chocolate chip base, we’ve added an exciting dimension with our rich and nutty peanut butter chocolate chip cookie dough. The combination of sweet chocolate and savory peanut butter creates a depth of flavor that is truly addictive. If you prefer a pure chocolate chip experience, this recipe can easily be adapted using our tried-and-true chewy chocolate chip cookie recipe.
- Endlessly Customizable to Your Taste: This pizookie is a blank canvas for your culinary creativity! We’ve infused ours with a playful mix of colorful M&M’s and hearty rolled oats for an extra layer of texture and fun. But the possibilities are limitless: try adding peanut butter chips, butterscotch chips, white chocolate chunks, or a sophisticated blend of milk and dark chocolate chips. You can even bake individual-sized pizookies in smaller skillets for personalized treats, or stick with one large “monster” cookie to feed a whole crowd!
Expert Tips for the Perfect Pizookie
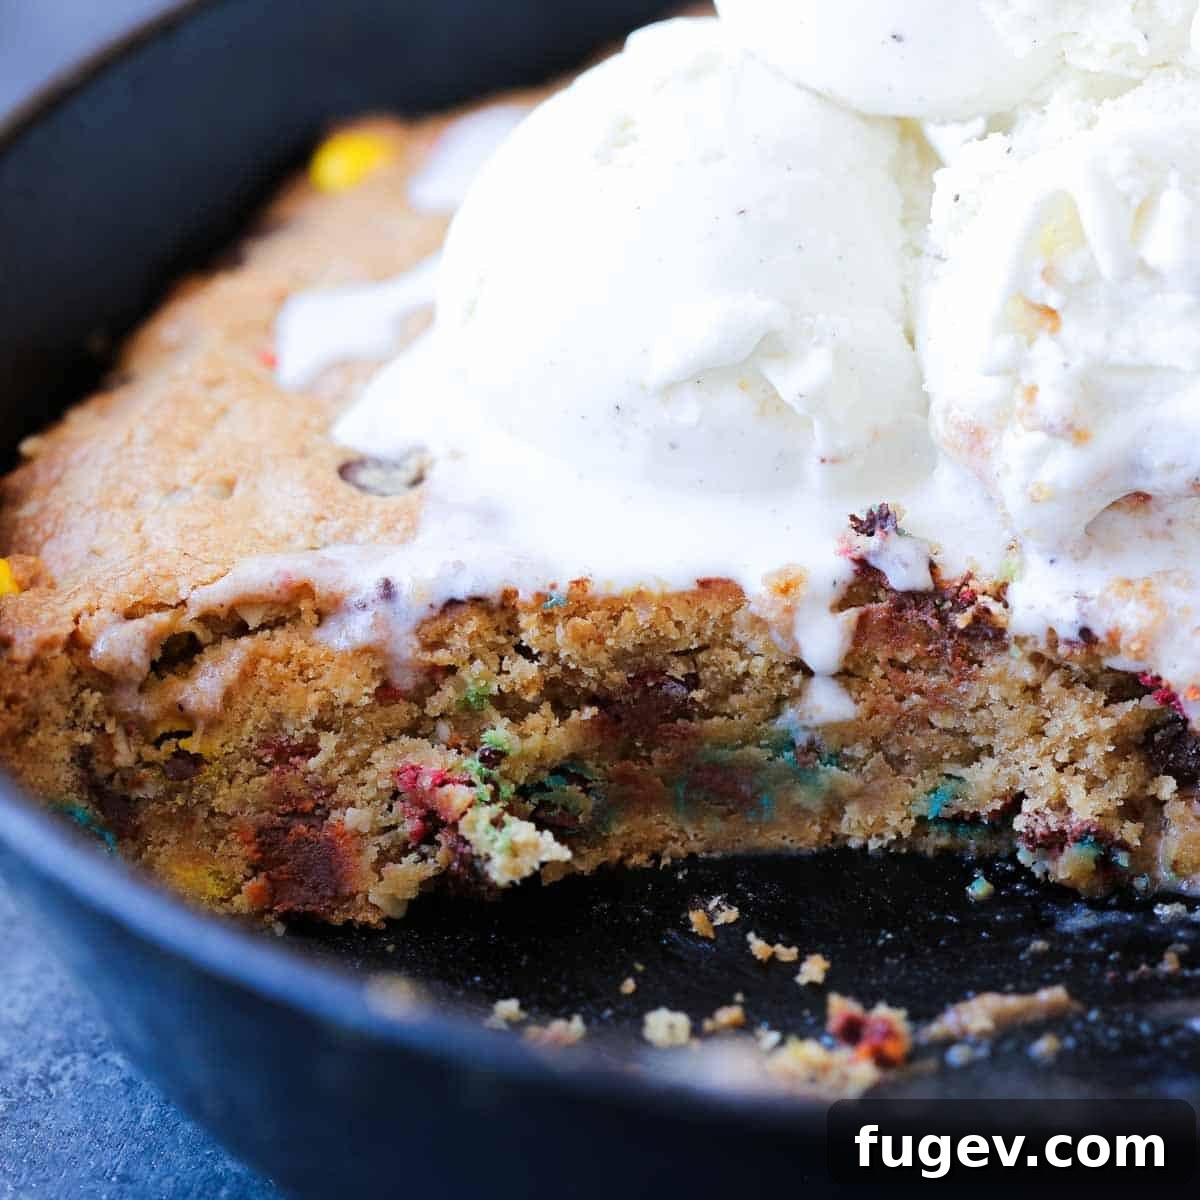
- Master the Bake Time: Cast iron skillets are renowned for their exceptional heat retention and even cooking, which means your skillet cookie will bake faster than you might anticipate. For a perfectly golden-brown pizookie with a tender center, aim for 20-22 minutes of baking. If you prefer a slightly more under-baked, extra-gooey interior, reduce the baking time to 18-20 minutes. Keep a close eye on it, as oven temperatures can vary!
- No Chilling, No Problem: Unlike traditional drop cookies that benefit from chilling to prevent spreading, our pizookie dough requires absolutely no refrigeration. The sturdy walls of the cast iron skillet naturally contain the cookie dough, ensuring it bakes up wonderfully thick, chewy, and perfectly formed every time. This shortcut saves you precious time without compromising on texture or flavor, making it a fantastic alternative to bakery-style chocolate chip cookies when you need a quick dessert.
- The Essential Ice Cream Topping: While our personal favorite pairing is classic vanilla bean ice cream, don’t feel limited! The contrast of cold, creamy ice cream against the warm, soft cookie is simply divine. Feel free to experiment with other toppings: a drizzle of luxurious vanilla crème anglaise can elevate the experience, or for a true flavor adventure, dive into a scoop of rich chocolate caramel ice cream. The possibilities are endless for creating your signature pizookie masterpiece!
- Embrace Your Skillet: The beauty of a pizookie lies in its skillet presentation. If your cast iron skillet is well-seasoned, it’s naturally non-stick, and you may not even need cooking spray. For newer skillets or if you’re unsure, a light spritz of nonstick spray provides peace of mind and easy serving. A properly cared-for cast iron skillet will become your best friend for many desserts to come!
Key Ingredients & Savvy Substitutions
- All-Purpose Flour: The foundational structure of our cookie. For best results, measure by weight (using a kitchen scale) or by spooning flour into a measuring cup and leveling off, rather than scooping directly.
- Baking Soda & Baking Powder: These leavening agents work in harmony to give the pizookie its perfect rise and chewy texture. Ensure they are fresh for optimal effectiveness.
- Kosher Salt: A pinch of salt is crucial for balancing the sweetness and enhancing the rich flavors of the chocolate and peanut butter. Don’t skip it!
- Granulated Sugar: Provides sweetness and contributes to the cookie’s crispy edges.
- Light Brown Sugar: This is key for adding moisture, chewiness, and a subtle molasses flavor. We use light brown sugar, but for a deeper, richer caramel note, dark brown sugar would also be absolutely delightful.
- Unsalted Butter: Softened unsalted butter is essential for achieving the perfect creamy texture when creamed with the sugars. The fat content contributes to the cookie’s richness and tenderness. If you’re not keen on the peanut butter flavor, we highly recommend switching to our thick chocolate chip cookie recipe as the base, which does not require peanut butter.
- Smooth Peanut Butter: The star of our peanut butter pizookie! We are lifelong devotees of Jif peanut butter for its consistent texture and classic flavor. Feel free to use your preferred brand, but ensure it’s smooth for a consistent dough. Natural peanut butter (the kind that separates) can also work, just be sure to stir it very well to recombine the oils before measuring.
- Large Egg: The egg acts as a binder, adding structure and richness to the cookie. Fun pastry chef secret: because this pizookie bakes as one large unit in a skillet rather than individual cookies, you can actually omit the egg with minimal effect on the final texture. This is a great tip for those with egg allergies or if you simply find yourself short one egg!
- Vanilla Extract: A splash of high-quality vanilla extract is a must for enhancing all the other flavors in the cookie dough.
- Chocolate Chips: We typically use classic semi-sweet chocolate chips for their balanced sweetness, but feel free to use milk chocolate, dark chocolate, or a mix of your favorites. Chocolate chunks can also be used for an even meltier experience.
- Optional Add-ins: For an authentic “monster cookie” vibe, we love adding quick oats for texture and Mini M&M’s for a burst of color and candy coating. These additions make the pizookie extra special and fun!
- (For precise measurements, refer to the detailed recipe card below.)
Exciting Pizookie Variations to Try
- Individual Pizookies for Everyone: This recipe can easily be scaled down or divided to create delightful individual pizookies. You’ll need 4-6 small 6-inch cast iron skillets or oven-safe ramekins. Prepare the dough as directed, then press it evenly into the smaller pans. Bake for approximately 8-10 minutes, keeping a close watch as baking times will vary significantly based on the size and material of your chosen dish. For a bakery-sized individual cookie, consider trying our popular monster cookie recipe.
- Explore Different Mix-ins: While our recipe features a fantastic monster cookie dough base with M&M’s and oats, the world of mix-ins is your oyster! Unleash your creativity with:
- **Chips & Chunks:** Butterscotch chips, white chocolate chips, dark chocolate chunks, or even a blend of different chocolate varieties.
- **Candy & Cookies:** Crushed Oreo’s, chopped Reese’s Peanut Butter Cups, Reese’s Pieces, Heath bar bits, or snickers pieces.
- **Nuts & Dried Fruits:** Chopped pecans, walnuts, dried cranberries, or shredded coconut.
For an extra touch of decadence, swirl in a generous amount of homemade salted caramel sauce just before baking, or drizzle it on top when serving.
- Experiment with Different Cookie Dough Bases: Here’s a secret every dessert lover needs to know: you can bake *almost any cookie dough* into a pizookie! This opens up a world of possibilities. Imagine:
- **Snickerdoodle Pizookie:** Simply use a snickerdoodle dough, then generously sprinkle the entire warm skillet cookie with an obscene amount of cinnamon sugar immediately after baking.
- **Chewy Sugar Cookie Pizookie:** A chewy sugar cookie dough base offers a simple yet satisfying canvas, perfect for colorful sprinkles or fruit toppings.
- **Nutella Swirl Pizookie:** Bake your favorite Nutella cookie dough for a rich, hazelnut-chocolate delight.
- **Double (or Triple) Chocolate Pizookie:** For the ultimate chocolate lover, a double chocolate chip cookie dough (or even triple!) will create an intensely rich and fudgy experience.
Don’t hesitate to tell your friends – the pizookie universe is vast and delicious!
The Origin of “Pizookie”
The name “Pizookie” is a clever and playful portmanteau, a combination of the two delicious words: **pizza** and **cookie**! It perfectly describes this dessert’s unique form – a giant cookie baked flat, often in a circular pan, much like a pizza. Pizookies are typically baked and served piping hot in a cast iron skillet, and while there are many flavor variations, the most iconic and beloved version remains the irresistibly gooey chocolate chip cookie, often served with a scoop of ice cream on top, resembling a sweet, dessert pizza.
Step-by-Step Guide to Your Best Pizookie
Creating this incredible peanut butter chocolate chip pizookie is surprisingly straightforward. Follow these steps for a warm, gooey dessert that will impress everyone!
Step 1: Prepare Your Oven and Skillet
Preheat your oven to 325°F (160°C). While the oven heats, lightly spray your cast iron skillet with nonstick cooking spray. A well-seasoned cast iron skillet often doesn’t need to be sprayed, but if you’re unsure or your skillet is new, a quick spritz provides extra insurance against sticking and makes serving even easier. The goal is to ensure a flawless release of your delicious cookie!
Step 2: Combine Dry Ingredients
In a medium-sized bowl, whisk together the all-purpose flour, baking soda, baking powder, and kosher salt. Whisking ensures that these dry ingredients are evenly distributed, preventing pockets of leavening agents or salt in your final cookie. Set this bowl aside for later use.
Step 3: Cream Butter and Sugars
In the bowl of a stand mixer fitted with the paddle attachment (or a large mixing bowl with a hand mixer), cream together the softened unsalted butter and both granulated and light brown sugars. Beat them together on medium speed until they form a smooth, creamy paste. This step is absolutely critical for achieving thick, chewy, and perfectly textured cookies. Don’t over-aerate, just get it smooth. Next, beat in the large egg, making sure to scrape down the sides of the bowl thoroughly to ensure it is fully incorporated into the mixture. Finally, add the smooth peanut butter and continue to beat until the mixture is uniform and creamy, free of any streaks.
Step 4: Incorporate Dry Ingredients
Reduce the mixer speed to low. Gradually add the dry ingredient mixture (from Step 2) into the wet ingredients, a little bit at a time. It’s important not to overwhelm the batter; take your time and allow each addition to mostly incorporate before adding the next. Mixing on low speed helps prevent overdeveloping the gluten in the flour, which can lead to a tough cookie. Mix only until just combined – overmixing at this stage will result in a less tender pizookie.
Step 5: Fold in the Mix-ins & Press into Skillet
Once all the flour has been just incorporated into the dough, gently fold in your chosen mix-ins: the chocolate chips, quick oats, and mini M&M’s. You can do this by hand with a sturdy spatula to avoid overmixing. Once evenly distributed, transfer the entire cookie dough mixture into your prepared cast iron skillet. Using your hands or the back of a spatula, gently press the dough evenly into the bottom of the skillet, ensuring it fills the pan from edge to edge.
Step 6: Bake to Golden Perfection
Carefully place the skillet into your preheated oven. Bake for 20-22 minutes. You’ll know it’s ready when the edges are beautifully golden brown and the center appears set but still slightly soft – indicating that delightful gooeyness. Remember, cast iron conducts heat efficiently, so it will cook faster than a regular baking pan.
Step 7: Serve and Enjoy Immediately!
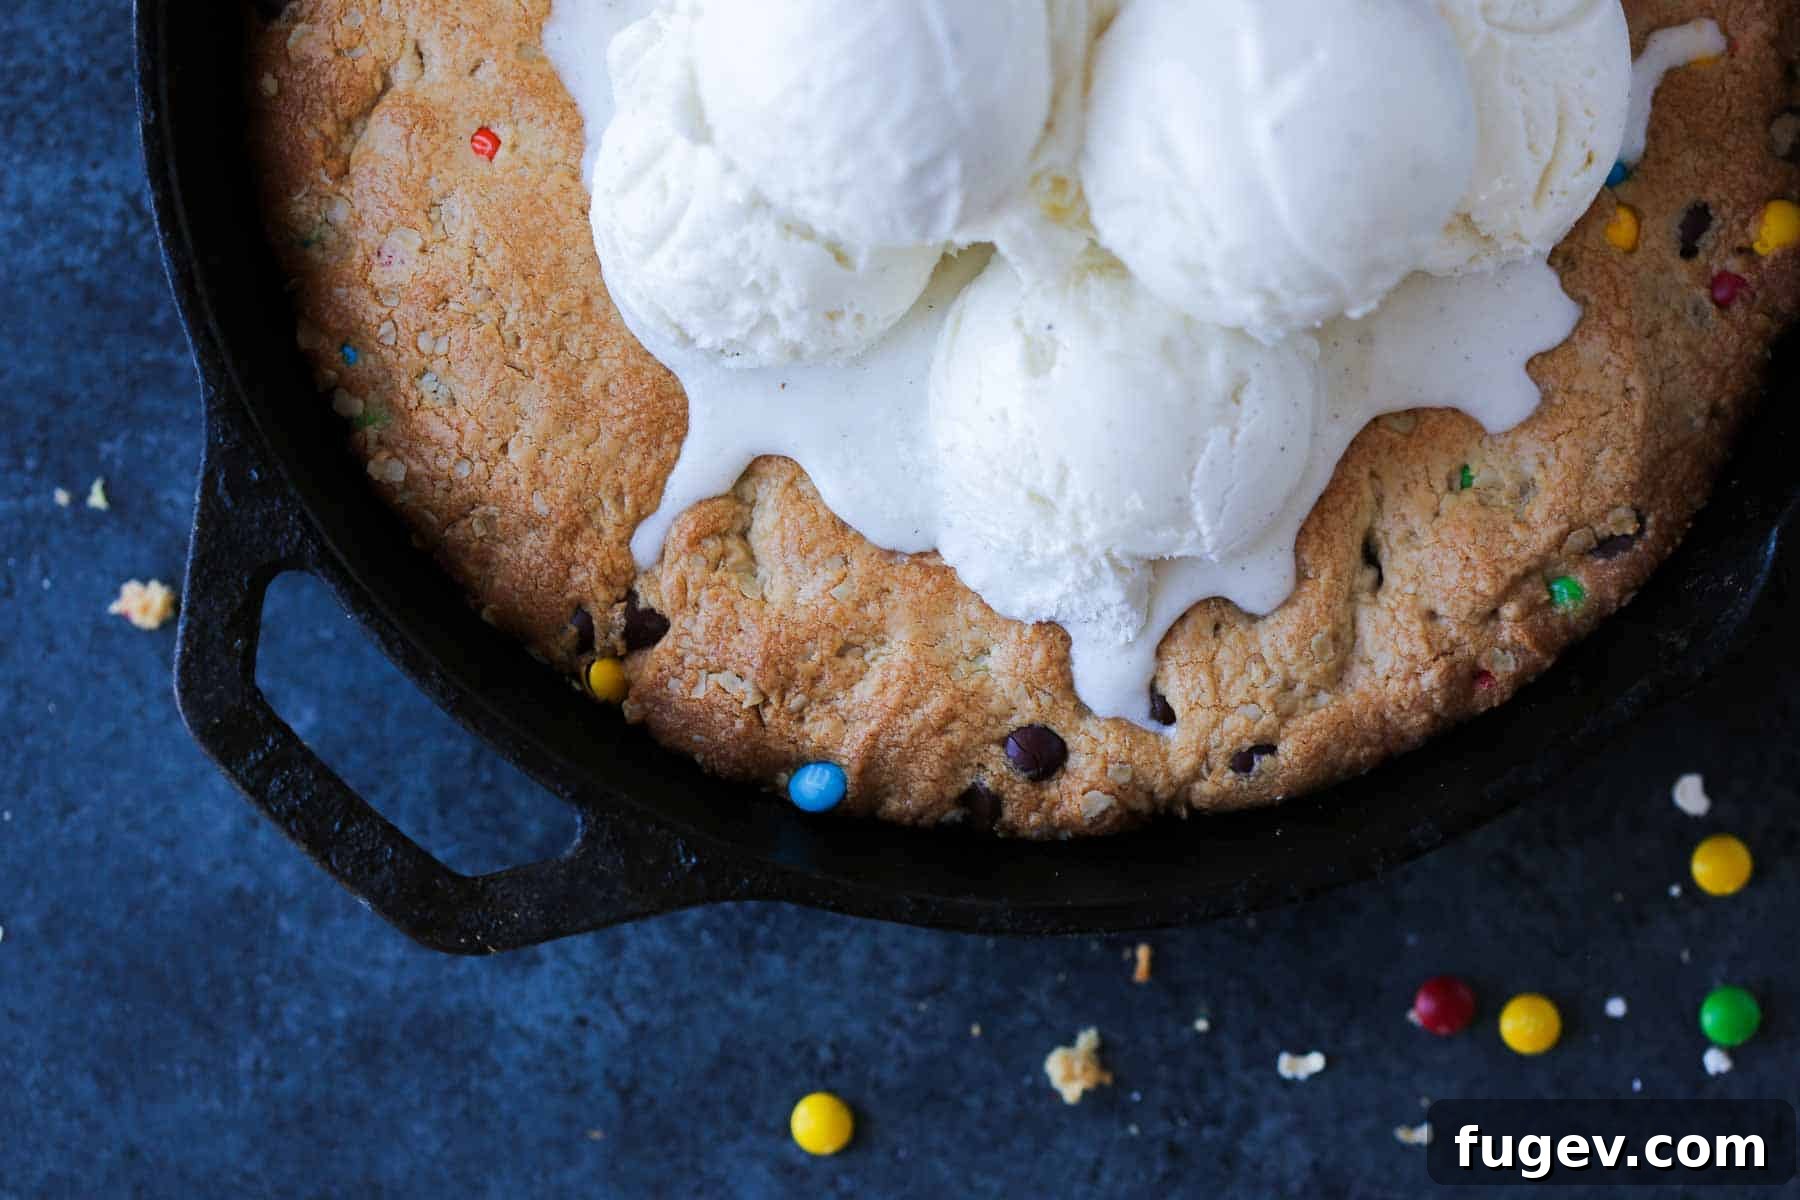
Once baked, remove the skillet from the oven. You can let it cool for a few minutes before slicing into wedges and serving. Or, for the ultimate experience, gather your friends and family, pull the sizzling pizookie directly from the oven, pile it high with scoops of vanilla bean ice cream (or your favorite flavor!), and let everyone dig in with spoons straight from the skillet. The melting ice cream cascading over the warm cookie is pure bliss!
How to Serve Your Pizookie
- Warm is Best: While pizookies can certainly be enjoyed at room temperature, they truly shine when served warm, especially right out of the oven. The warmth helps the chocolate chips stay deliciously melted and creates that signature gooey texture.
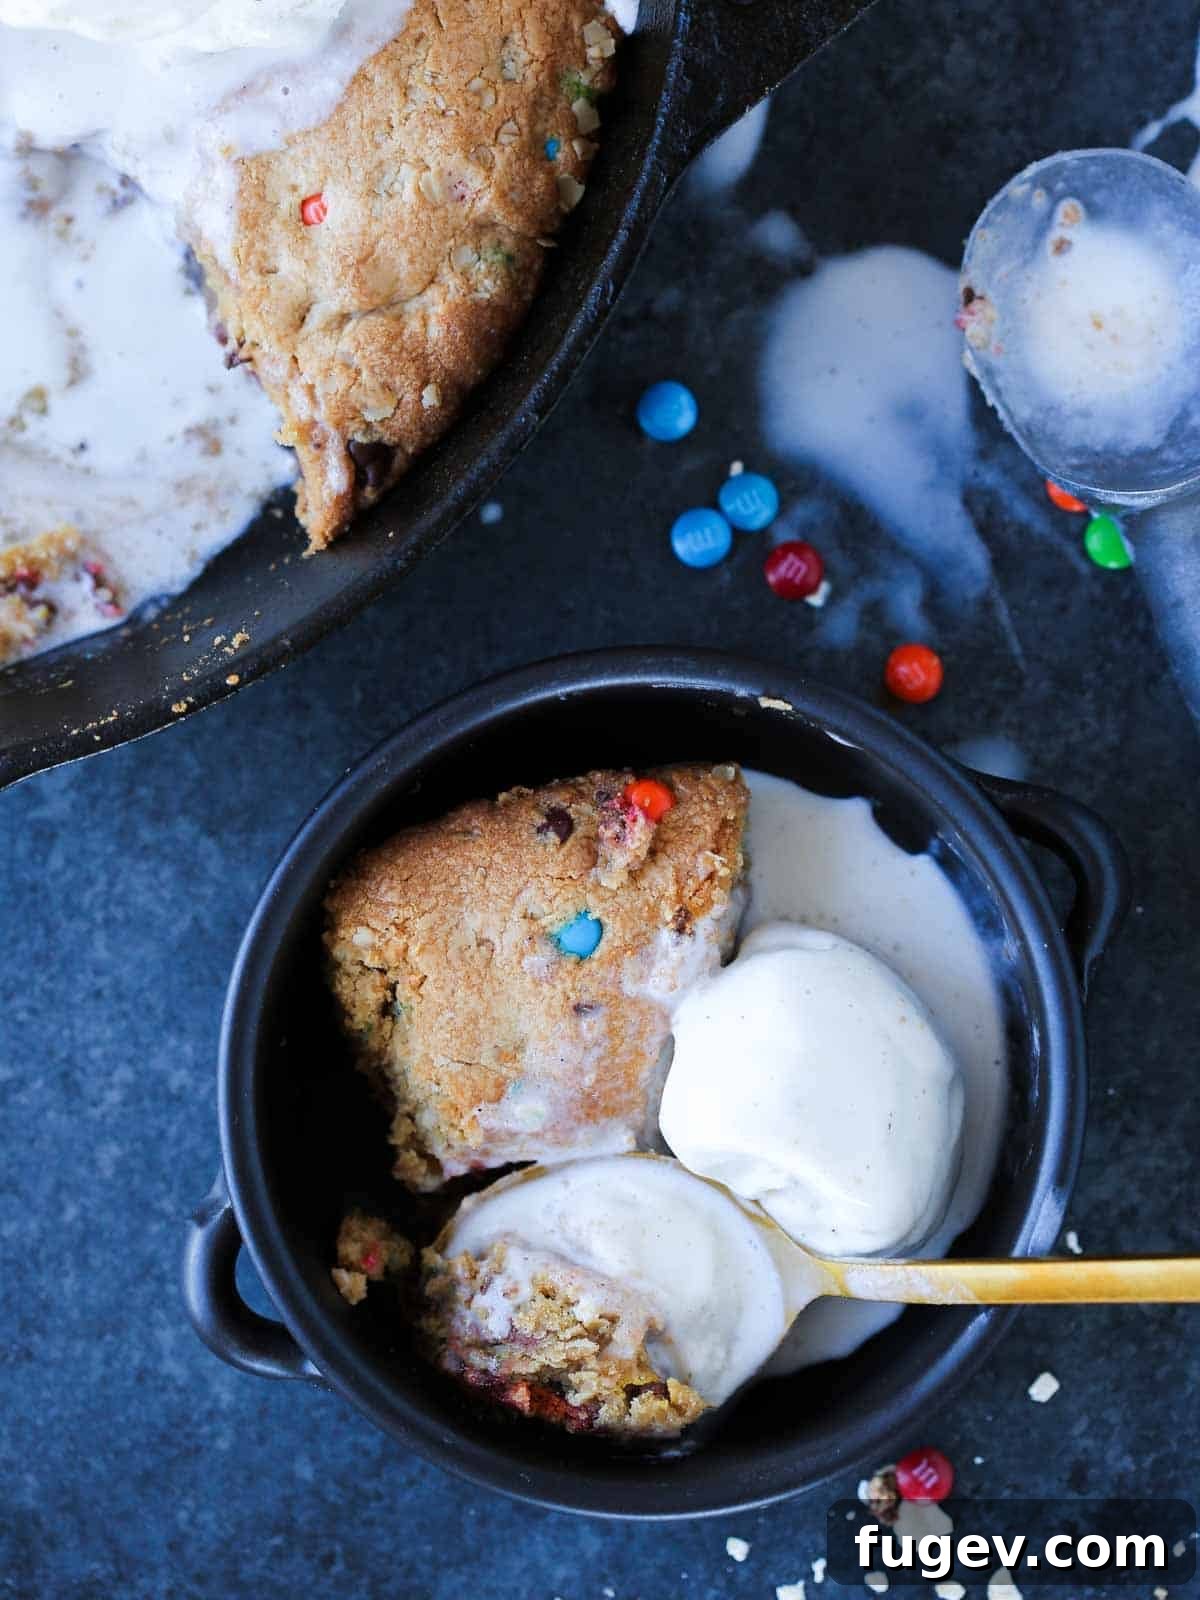
- Classic Skillet Presentation: The traditional and most delightful way to serve a pizookie is directly in the cast iron skillet it was baked in! Top it generously with scoops of your favorite vanilla bean ice cream immediately before serving. For a communal dessert, place the hot skillet in the center of the table and let everyone grab a spoon and dig in! For a more refined presentation, you can scoop individual portions onto plates.
- Elevate with Toppings: Don’t stop at just ice cream! Enhance your pizookie with additional toppings for an even more decadent experience. Consider a rich drizzle of warm hot fudge sauce, a luxurious swirl of homemade salted caramel sauce, a dollop of whipped cream, or even a different flavored ice cream like chocolate ice cream or strawberry. Sprinkles, chopped nuts, or extra M&M’s also make fun garnishes.
Frequently Asked Questions About Pizookies
You have a few options for storage! The unbaked cookie dough can be prepared in advance and stored tightly wrapped in plastic in the refrigerator for up to 1 week. When you’re ready to bake, simply press it into your skillet and follow the baking instructions. For a baked and cooled pizookie, store it well-wrapped at room temperature for up to 5 days, or in the refrigerator for up to 1 week. If you plan to freeze it for longer storage (up to 2 months), we recommend refrigerating the pizookie first to firm it up, then carefully removing it from the skillet before wrapping it tightly in plastic wrap and then foil. This prevents freezer burn and allows you to use your skillet for other purposes.
Absolutely! While a cast iron skillet is traditional and offers superior heat retention and a rustic presentation, you can certainly bake this cookie in other oven-safe dishes. An 8-inch square or oval baking dish, a pie pan, a gratin dish, or even individual ramekins or a 9-inch cake pan would work beautifully. Just remember that changing the dish will likely alter the baking time. Thinner pans might cook faster, and thicker ceramic dishes might take longer. Always keep a close eye on your pizookie, looking for golden edges and a set center, and adjust baking time as needed.
Reheating leftover pizookie is simple! Preheat your oven to 325°F (160°C). If reheating in the skillet, cover it loosely with aluminum foil to prevent the edges from over-browning. Bake until the center is warm and gooey again, usually about 10-15 minutes. If reheating individual slices, you can also warm them gently in the microwave for 15-30 seconds, though the oven method provides a better texture by re-crisping the edges slightly.
This recipe is designed for a standard 8-inch or 9-inch cast iron skillet. An 8-inch skillet will produce a slightly thicker cookie, while a 9-inch skillet will yield a slightly thinner but still wonderfully gooey pizookie. Both sizes work perfectly, so use what you have on hand!
While this specific recipe is not formulated to be gluten-free or vegan, you can adapt it. For gluten-free, substitute the all-purpose flour with a 1:1 gluten-free baking flour blend that contains xanthan gum. For vegan, replace the butter with a plant-based butter alternative, the egg with a flax egg (1 tbsp ground flaxseed + 3 tbsp water, let sit for 5 minutes), and ensure your chocolate chips and M&M’s are vegan-friendly. Adjustments may be needed for texture and bake time, so experiment carefully!
If you tried this recipe and loved it, please consider leaving a 🌟 star rating and share your experience in the comments below. Your feedback truly brightens our day and helps others discover this fantastic dessert!
Peanut Butter Chocolate Chip Pizookie
Chef Lindsey
10
20
30
8-10 people
Comment
Print Recipe
Ingredients
- 1 ⅔ cup All-Purpose Flour
- ½ teaspoon Baking Soda
- ¼ teaspoon Baking Powder
- ½ teaspoon Kosher Salt
- ⅓ cup Granulated Sugar
- ⅓ cup Light Brown Sugar
- ½ cup Unsalted Butter, softened
- ¾ cup Smooth Peanut Butter (Jif recommended)
- 1 large Egg
- ¼ teaspoon Vanilla Extract
- ½ cup Semi-Sweet Chocolate Chips
- ½ cup Quick Oats (optional)
- 1 cup Mini M&M’s (optional)
Instructions
-
Preheat the oven to 325°F (160°C). Lightly spray a cast iron skillet with nonstick cooking spray if it’s not well-seasoned.
-
In a medium bowl, whisk together the flour, baking soda, baking powder, and salt. Set aside.
-
In a stand mixer (or with a hand mixer), cream softened butter and both sugars until just a smooth paste forms. This is key for chewy cookies.
-
Beat in the egg, scraping down the sides of the bowl to ensure full incorporation. Add the peanut butter and beat until the mixture is smooth.
-
Reduce mixer speed to low and slowly add the dry ingredients in small batches. Mix only until just combined; do not overmix.
-
Once the flour is mixed in, fold in the chocolate chips, oats, and mini M&M’s until evenly distributed.
-
Press the cookie dough evenly into your prepared cast iron skillet.
-
Bake in the preheated oven for 20-22 minutes, or until the edges are golden brown and the top is set but still soft in the center.
-
Remove from oven. Serve warm with scoops of ice cream directly from the skillet, or let cool slightly before slicing. Enjoy!
Video
Notes
Presentation: For the ultimate dessert experience, top with generous scoops of vanilla ice cream while the pizookie is still warm, right before serving.
Variations: Beyond our monster cookie dough, feel free to experiment with other mix-ins like butterscotch chips, peanut butter chips, chocolate chunks, chopped Oreos, or Reese’s Pieces.
Storage for Dough: The unbaked dough can be stored, well-wrapped, in the refrigerator for up to 1 week. Simply press into the skillet and bake when ready.
Storage for Baked Pizookie: A baked and cooled pizookie can be stored, well-wrapped, at room temperature for up to 5 days, or refrigerated for 1 week. For longer storage, freeze for up to 2 months after removing from the skillet.
Reheating: Reheat leftover baked pizookie in an oven preheated to 325°F (160°C). Cover with foil and bake until warm in the center.
Nutrition
Carbohydrates: 27g |
Protein: 4g |
Fat: 13g |
Saturated Fat: 6g |
Polyunsaturated Fat: 1g |
Monounsaturated Fat: 4g |
Trans Fat: 1g |
Cholesterol: 24mg |
Sodium: 184mg |
Potassium: 81mg |
Fiber: 1g |
Sugar: 16g |
Vitamin A: 178IU |
Vitamin C: 1mg |
Calcium: 28mg |
Iron: 1mg
Love this recipe? Share your thoughts below!
Before You Go
We hope you thoroughly enjoyed this professional chef-tested recipe for the ultimate Peanut Butter Chocolate Chip Pizookie! It’s a dessert that truly delivers on flavor, texture, and ease. Be sure to explore our collection of other delicious, chef-developed Cookie Recipes for more sweet inspiration. Or, if you’re ready for a savory adventure, why not try our robust and satisfying Pizza Rustica recipe next? Happy baking, and enjoy every last bite!