

Celebrate the season of love with these enchanting Valentine’s Day Cookies. These delightful treats feature a classic cut-out sugar cookie base, meticulously crafted to maintain its shape while baking, and finished with a shimmering, easy royal icing. Our signature cut-out sugar cookie recipe uses just seven pantry staples, mixed effortlessly in a single bowl, making it perfect for bakers of all skill levels. Whether you prefer a minimalist icing design or wish to adorn them with dehydrated strawberries for an elegant touch, this guide will walk you through every step to create stunning, delicious heart-shaped cookies that will impress everyone.

Why You’ll Fall in Love with These Valentine’s Day Cookies
These Valentine’s Day cut-out sugar cookies aren’t just pretty faces; they are a delightful fusion of flavor, texture, and convenience. Here’s why this recipe will become your go-to for spreading sweetness and cheer:
- Unforgettable Flavor and Irresistible Softness: Forget sacrificing taste for aesthetics! These cookies offer the best of both worlds. The vanilla sugar cookie base is incredibly delicious on its own, boasting a soft, chewy texture that’s never tough or dry. When paired with our vibrant lemon royal icing, the flavors dance together, creating a truly outstanding treat that stands out from typical decorated cookies.
- Endlessly Versatile Decorations: Unleash your inner artist! These heart-shaped cookies provide a perfect canvas for your creativity. A simple flood of icing creates an elegant, classic look, or you can try your hand at intricate wet-on-wet designs like tiny hearts. Elevate your cookies further with a sprinkle of colorful jimmies, sparkling sanding sugar, or delicate dehydrated berries for a vibrant pop of color and texture. The possibilities are truly limitless!
- Effortless Make-Ahead Convenience: Life gets busy, and sometimes Valentine’s Day catches us mid-week! Thankfully, these decorated Valentine’s Day cookies are perfect for preparing in advance. They remain wonderfully fresh and soft at room temperature for over a week, meaning you can bake and decorate at your leisure without compromising on quality or taste. This makes them ideal for gifting, parties, or simply enjoying throughout the week.
Table of Contents
- Why You’ll Fall in Love with These Valentine’s Day Cookies
- The Essentials: Ingredients for Perfect Valentine’s Cookies
- Creative Variations for Your Heart-Shaped Delights
- Professional Tips for Crafting Flawless Valentine’s Cookies
- Mastering Valentine’s Day Cookies: A Step-by-Step Guide
- Chef Lindsey’s Expert Decorating Tip
- Recipe FAQs: Your Questions Answered
- More Romantic Cookie Recipes You’ll Adore
- Valentine’s Day Cookies Recipe Card
- Before You Go: Sweet Endings
Adorning your cookies for Valentine’s Day or Galentine’s Day is an absolute joy with this recipe! Whether you opt for elegant royal icing, a rustic touch of crushed strawberries, playful white sprinkles, or sophisticated rose petals, these cookies are designed to impress. The simple sugar cookie recipe utilizes melted butter and can be effortlessly mixed by hand in just one bowl, streamlining your baking process. For best results, roll out the dough immediately after mixing, before chilling, which also helps achieve a quicker chill time and ensures perfect shape retention.
For these charming heart-shaped sugar cookies, I typically reach for my reliable royal icing made with meringue powder, known for its beautiful sheen and firm set. However, if you prefer an even simpler approach, this easy cookie icing works wonderfully too. Feel free to skip the food dye for a pristine white canvas, then embellish your plain white icing with delicate rose petals, vibrant dehydrated strawberries, or classic white sprinkles for a touch of refined elegance.
The Essentials: Ingredients for Perfect Valentine’s Cookies
Crafting the perfect cut-out sugar cookie starts with understanding the role of each ingredient. Here’s what you’ll need to create these delicious, shape-holding cookies:
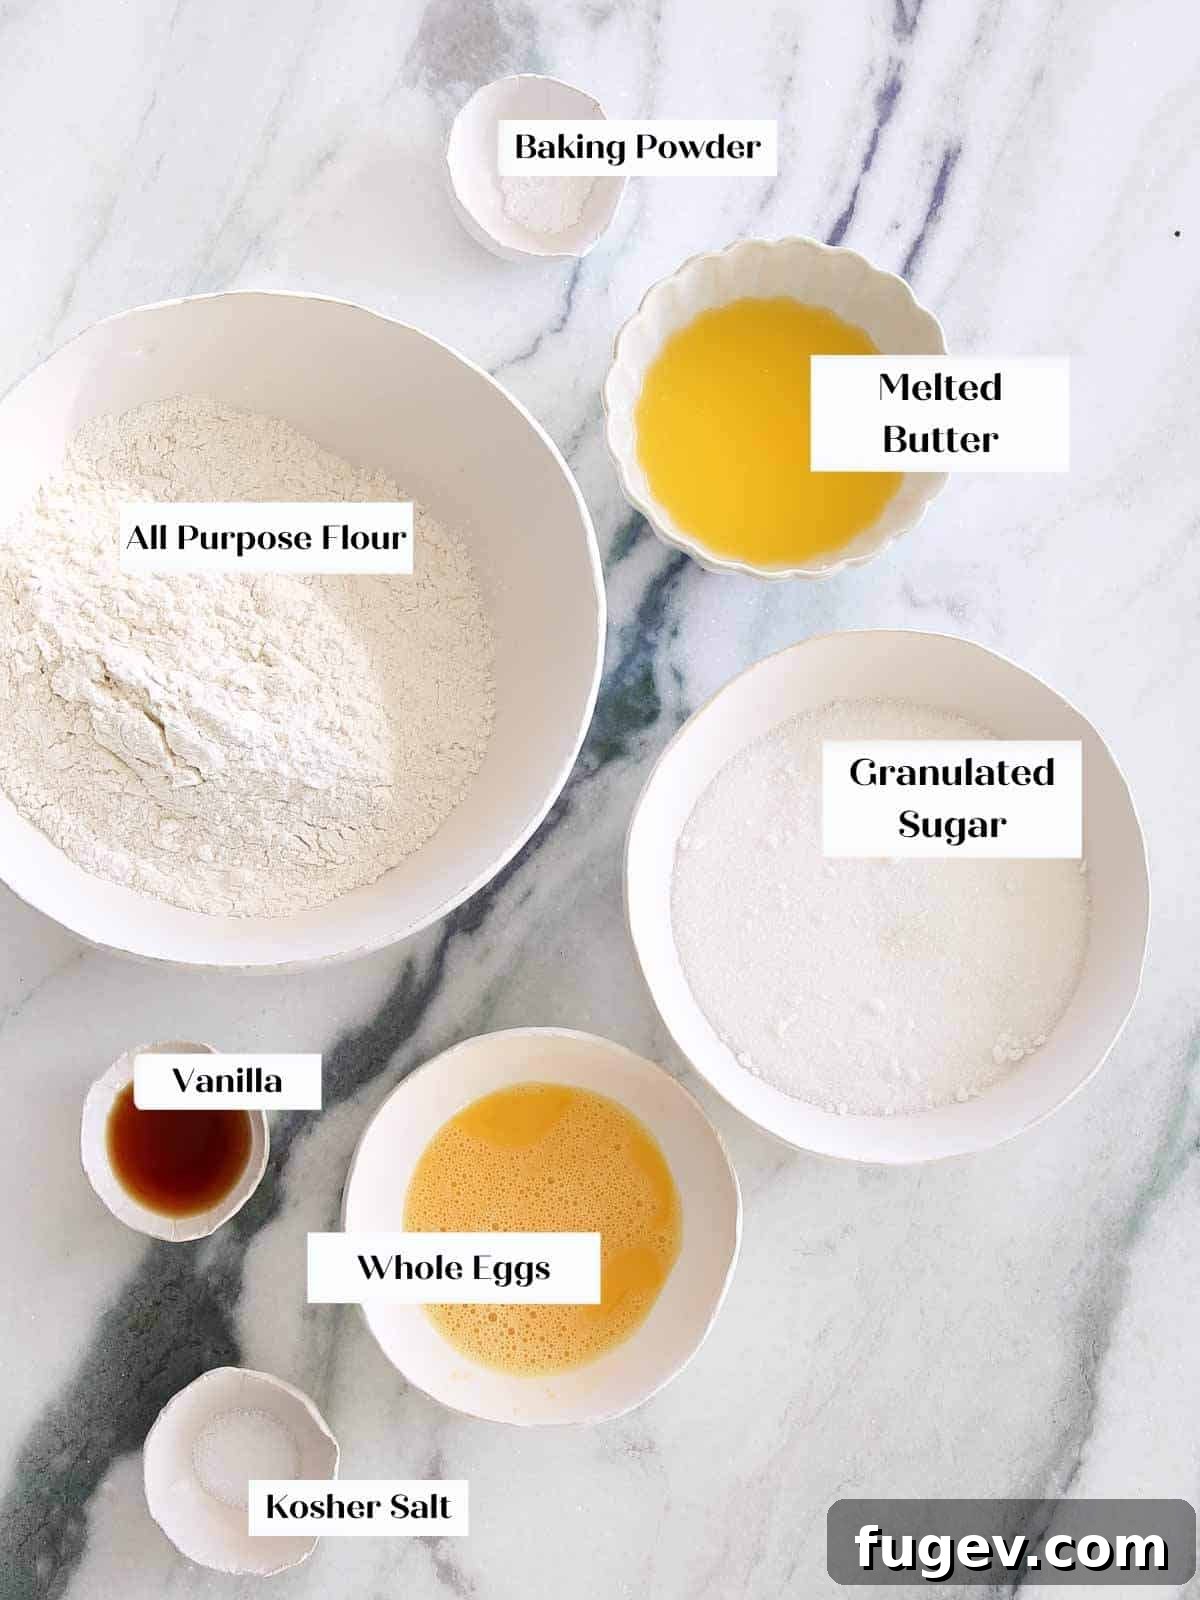
- All-Purpose Flour: This forms the structural backbone of our cookies. Both all-purpose and pastry flour are suitable, providing just enough gluten to create a firm, yet tender cookie that holds its shape beautifully without becoming tough or dense. Steer clear of bread flour, as its higher protein content would result in an undesirable chewy texture for cut-out cookies.
- Baking Powder: A small amount of baking powder is crucial for a slight lift, preventing the cookies from being too flat, but not so much that they puff up excessively and lose their defined edges. The goal is a perfectly flat surface for decorating.
- Kosher Salt: Salt is a flavor enhancer, balancing the sweetness and bringing out the rich vanilla notes in the cookie dough. Always use kosher salt for its pure flavor and easy dissolving properties.
- Unsalted Butter (Melted): Using unsalted butter gives you complete control over the salt content in your recipe. Melting the butter adds a luxurious richness and moisture to the dough, resulting in deliciously soft and chewy cookies. Ensure it’s melted but not hot, to avoid scrambling the egg.
- Granulated Sugar: Beyond providing sweetness, granulated sugar contributes to the cookie’s texture and prevents excessive spreading. Unlike chewy sugar cookies designed to spread, these soft sugar cookies are formulated to maintain their intricate cut-out shapes.
- Whole Egg: The egg plays multiple roles: it adds essential fat for richness and chewiness, moisture for a tender crumb, and acts as an emulsifier to bind all the ingredients smoothly into a cohesive dough. The yolk’s fat content is particularly important for that desirable soft texture.
- Vanilla Extract: High-quality vanilla extract is paramount here. It infuses the cookies with a warm, comforting aroma and a classic, universally loved flavor that is the hallmark of a great sugar cookie. Don’t skimp on good vanilla!
For precise measurements and detailed quantities, please refer to the comprehensive recipe card located at the end of this article.
Creative Variations for Your Heart-Shaped Delights
While the classic vanilla sugar cookie with royal icing is unbeatable, don’t hesitate to experiment and customize your Valentine’s Day cookies! Here are some exciting variations to inspire your baking:
- Experiment with Icing Flavors and Styles: Beyond traditional royal icing, the options are plentiful. Try a rich cream cheese icing for cookies for a tangy, softer topping. For a rustic, sparkly finish, simply brush your baked cookies with a beaten egg white and dip them into sanding sugar or your favorite sprinkles before baking or while still warm. For more inspiration, explore our spritz cookie recipe, which offers fantastic ideas for decorative finishes!
- Infuse the Dough with Different Flavors: If you’re looking to venture beyond classic vanilla, the cookie dough itself is a fantastic canvas for flavor. Introduce a hint of almond with almond extract, or add texture and depth with some almond meal, similar to our exquisite linzer cookies. For a bright, aromatic twist, zest fresh lemon, orange, or lime directly into the granulated sugar and rub it together before mixing. This method deeply infuses the sugar with citrus oils, resulting in wonderfully fragrant cookies. Craving chocolate? Try my chocolate sugar cookies for a rich, soft, and equally delightful variation.
- Incorporate Sprinkles, Chocolate Chips, or Other Mix-ins: Absolutely! Adding fun mix-ins to your dough before rolling can elevate both the flavor and visual appeal. Opt for finely chopped nuts like pecans or walnuts, mini chocolate chips (white, dark, or milk), or any small, sturdy sprinkles that won’t melt or bleed excessively during baking. The key is to choose additions that are small enough to allow for smooth rolling and cutting of the dough.
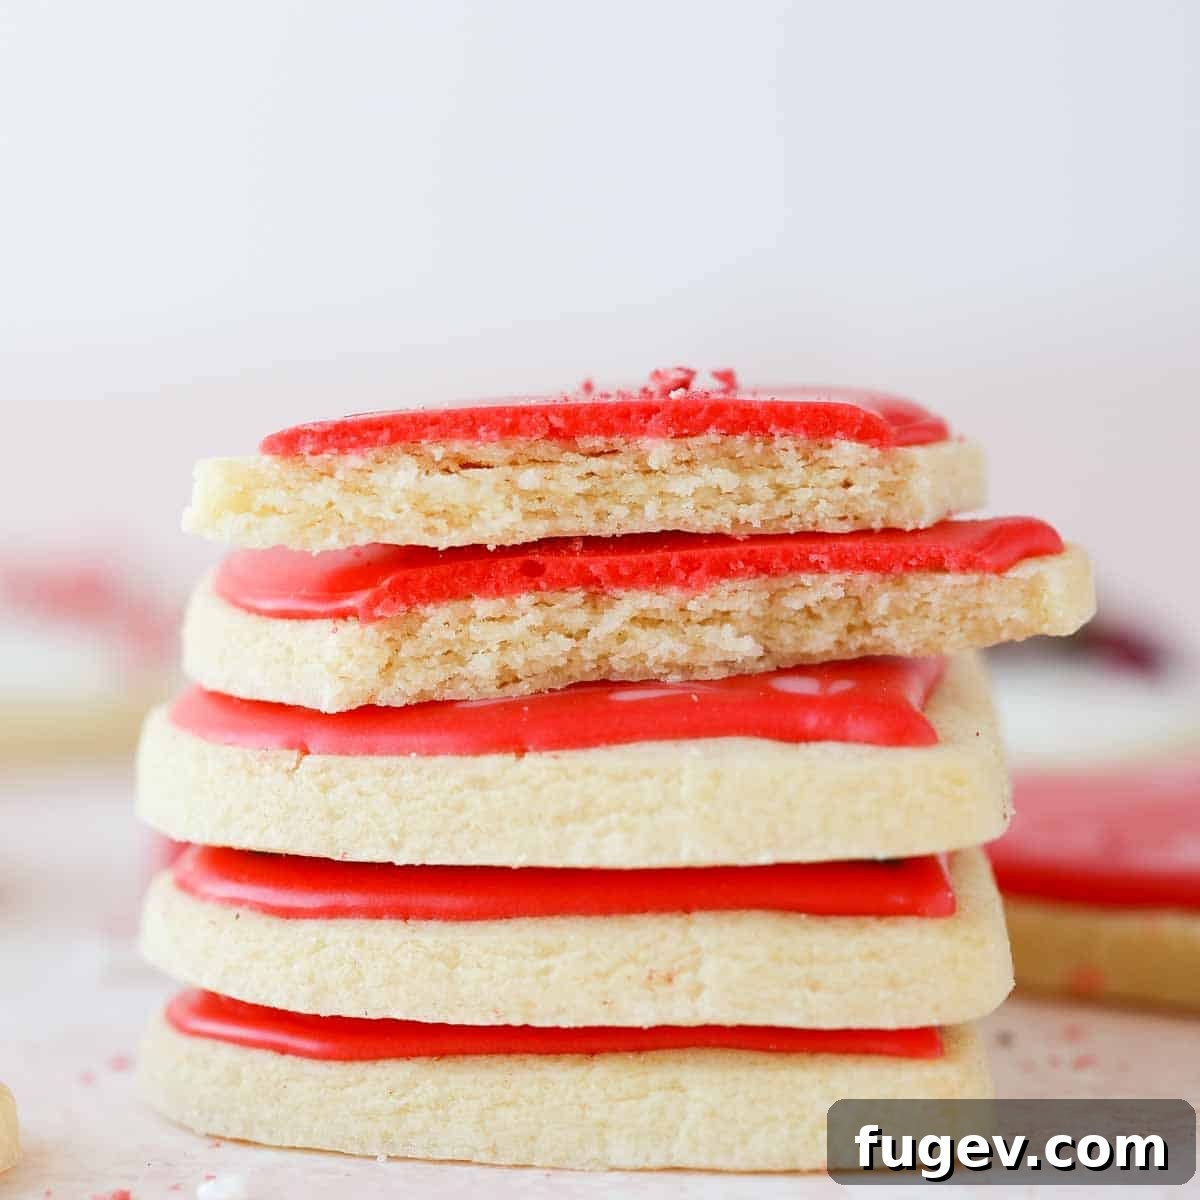
Professional Tips for Crafting Flawless Valentine’s Cookies
Achieving bakery-quality Valentine’s Day cookies is easier than you think with a few expert insights. Here are my top professional tips to ensure your cookies are perfect every time:
- Roll the Dough Immediately After Mixing: This is a game-changer! Our dough recipe is designed to be rolled out as soon as it’s mixed, while it’s still at room temperature and pliable. As the dough chills, it firms up considerably, making rolling much more challenging. By rolling immediately, you not only save effort but also ensure a perfectly even thickness. This also leads to a significantly faster chill time before cutting and baking, getting you to the decorating stage quicker!
- Efficiently Reroll and Cut Scraps: Don’t waste a single bit of that delicious dough! This recipe shines when rolled between two pieces of parchment paper. This ingenious method means you can effortlessly gather all the dough scraps, press them gently back together, and reroll them again and again without adding any extra flour. Using parchment paper eliminates the need for bench flour, which can toughen subsequent batches of cookies. This way, your third round of cut-outs will taste just as tender and delightful as the very first.
- Decorate with Your Favorite Icing: While I personally adore the crisp snap and vibrant flavor of royal icing, remember that the choice of decoration is entirely yours! Our simple and versatile easy cookie icing is another excellent choice for a less formal, softer finish. For a truly indulgent and unique twist, consider using this rich cream cheese frosting for cookies. Each icing offers a different texture and flavor profile, allowing you to tailor your Valentine’s cookies to your personal preference and artistic vision.

Mastering Valentine’s Day Cookies: A Step-by-Step Guide
Let’s dive into creating these beautifully decorated heart cookies! This tutorial will focus specifically on the exciting art of cookie decorating. For more comprehensive and detailed instructions on making the perfect cut-out sugar cookies from scratch, you can refer to my dedicated post. And if you’re eager to learn more about royal icing than you ever thought possible, that specific post is your ultimate resource!
Phase 1: Making & Baking the Cookies
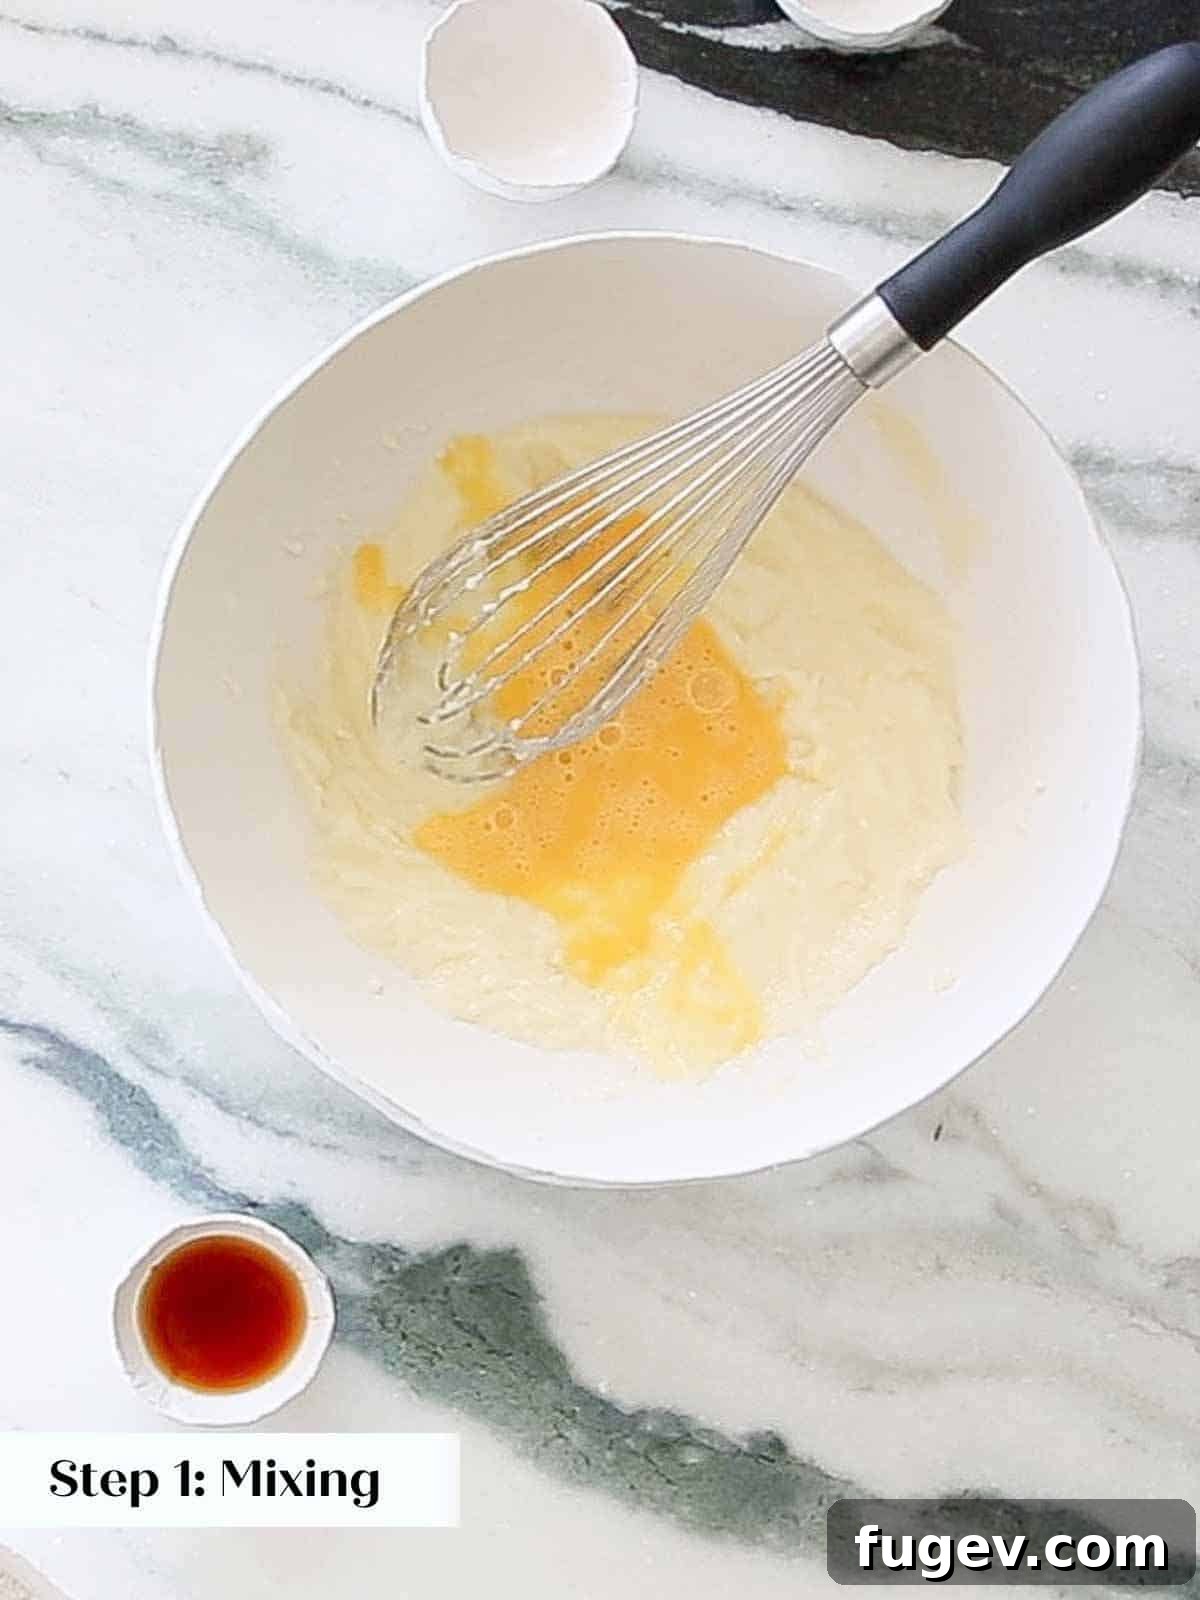
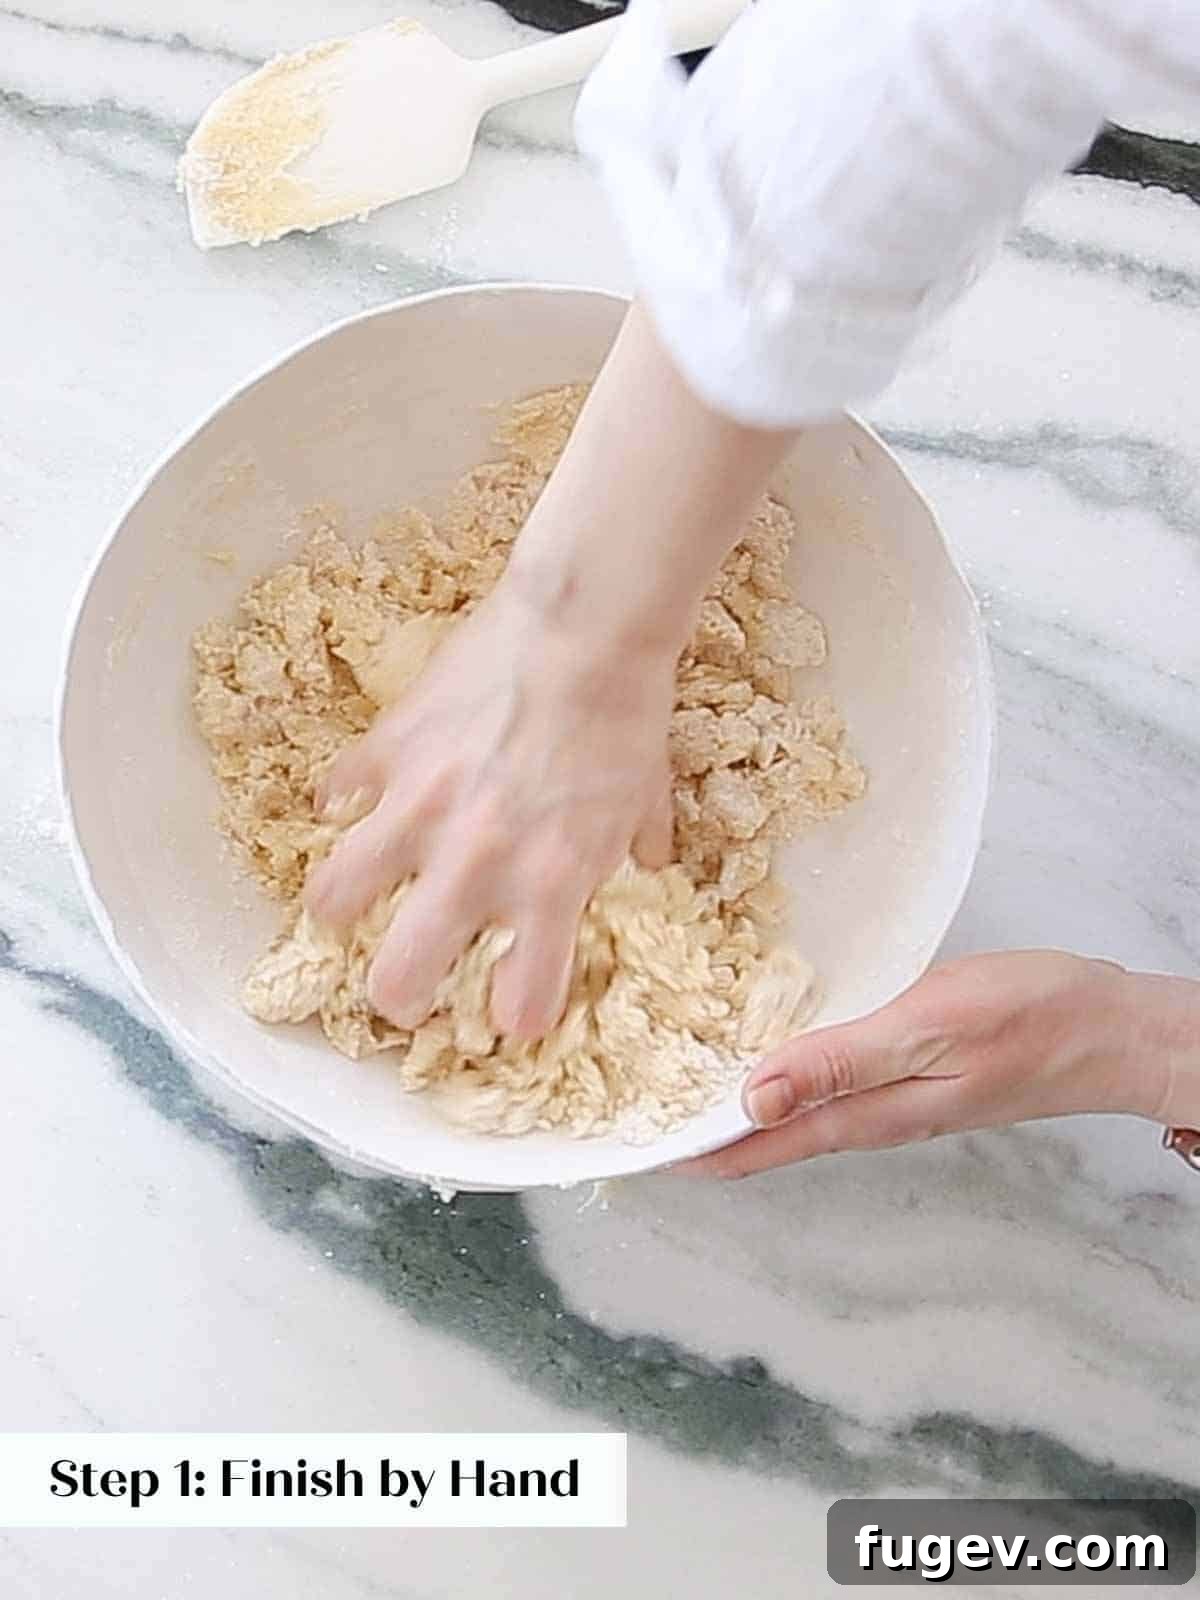
Step 1: Prepare the Dough. In a large mixing bowl, thoroughly whisk together your dry ingredients: the all-purpose flour, baking powder, and kosher salt. Set this aside. In a separate large bowl, gently melt the butter until just liquid, ensuring it’s not hot. Whisk in the granulated sugar until well combined. Then, incorporate the whole egg and vanilla extract. Vigorously whisk the mixture until it is completely emulsified and smooth, with no visible streaks of butter or egg. Finally, gradually add the dry flour mixture to the wet ingredients, stirring slowly until just combined.
The dough might appear a bit dry initially. I find it easiest to finish combining the ingredients by hand, gently squeezing the dough together. This method helps incorporate the flour quickly and efficiently without overdeveloping the gluten, which is key to keeping your cookies tender.
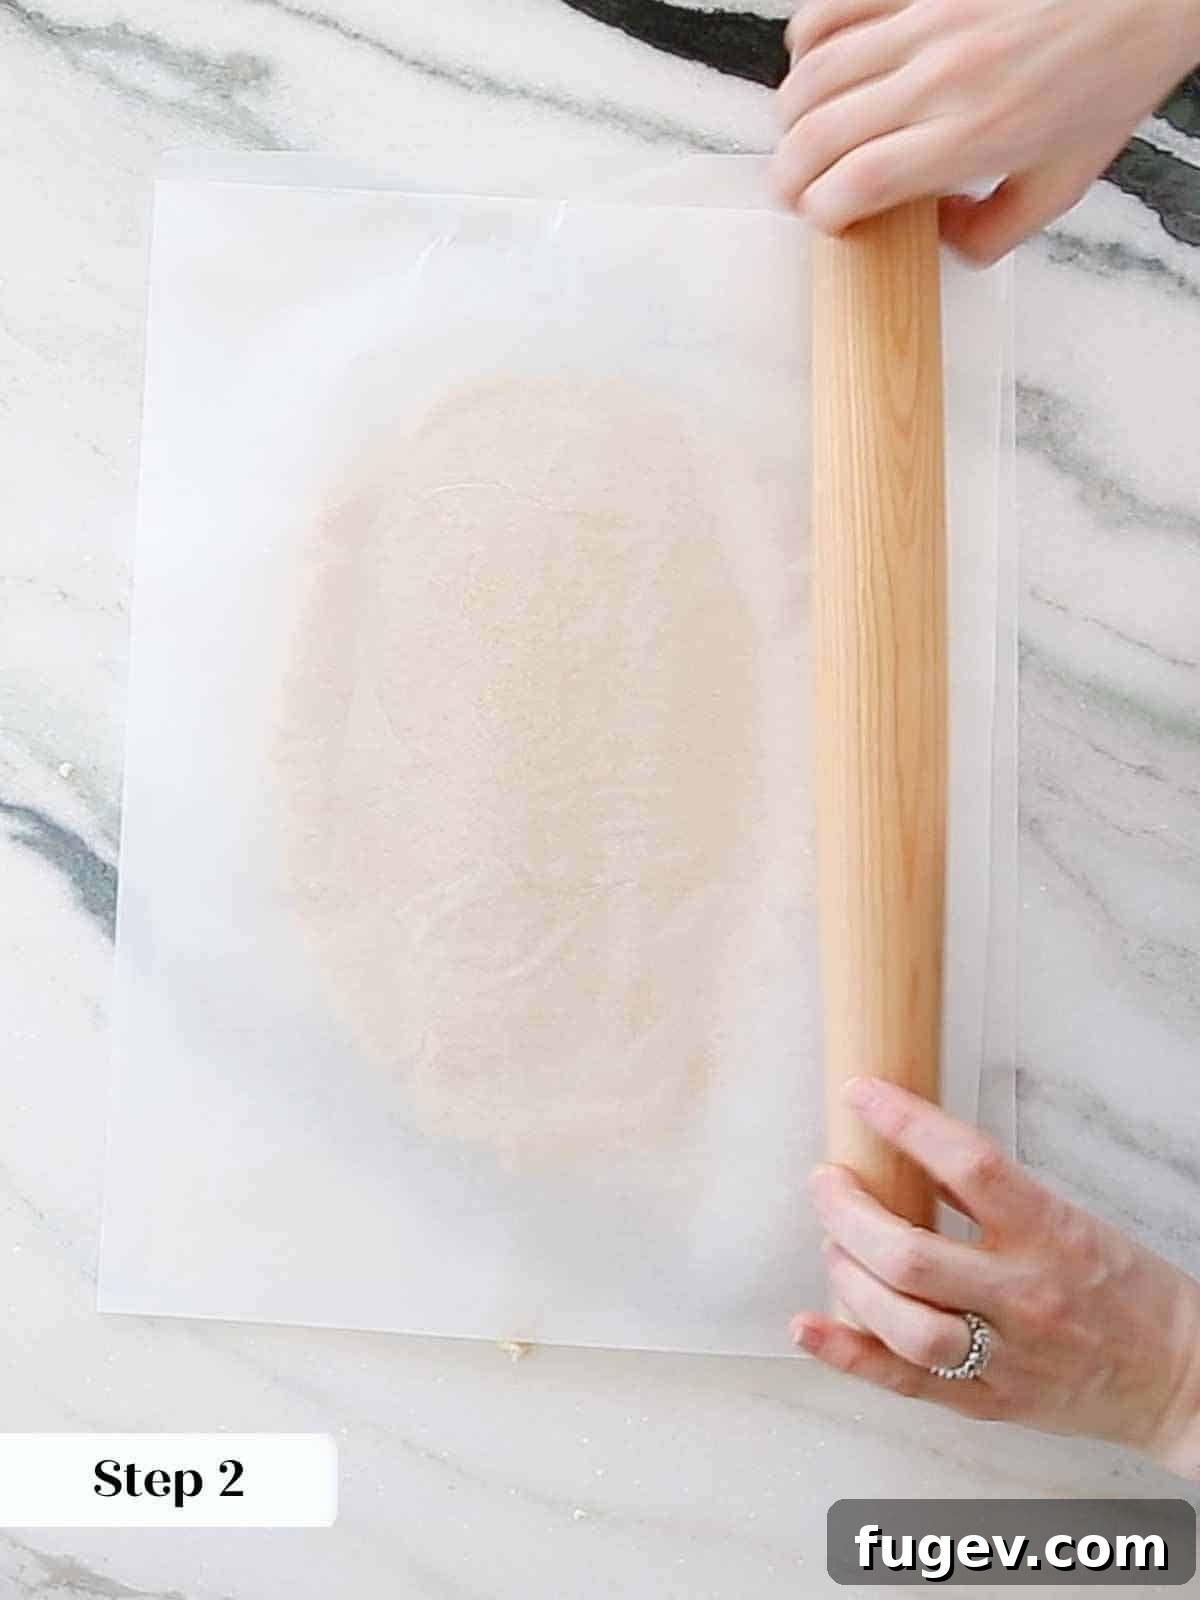
Step 2: Roll and Chill the Dough. Immediately after mixing, while the dough is still at room temperature and pliable, roll it out. For the best, most even results, roll the dough to approximately ¼ inch thickness between two sheets of parchment paper. This technique prevents sticking and ensures uniform thickness. Once rolled, refrigerate the dough until it is thoroughly chilled. While it will firm up in about 30 minutes, I highly recommend chilling it for a full 2 hours or even overnight. This extended chill time allows the gluten to relax completely, resulting in a more tender cookie that holds its shape impeccably during baking.
Patience is a virtue here! A longer chill time for the dough not only prevents spreading but also makes the dough much easier to handle and cut cleanly, ensuring your heart shapes are perfectly defined.
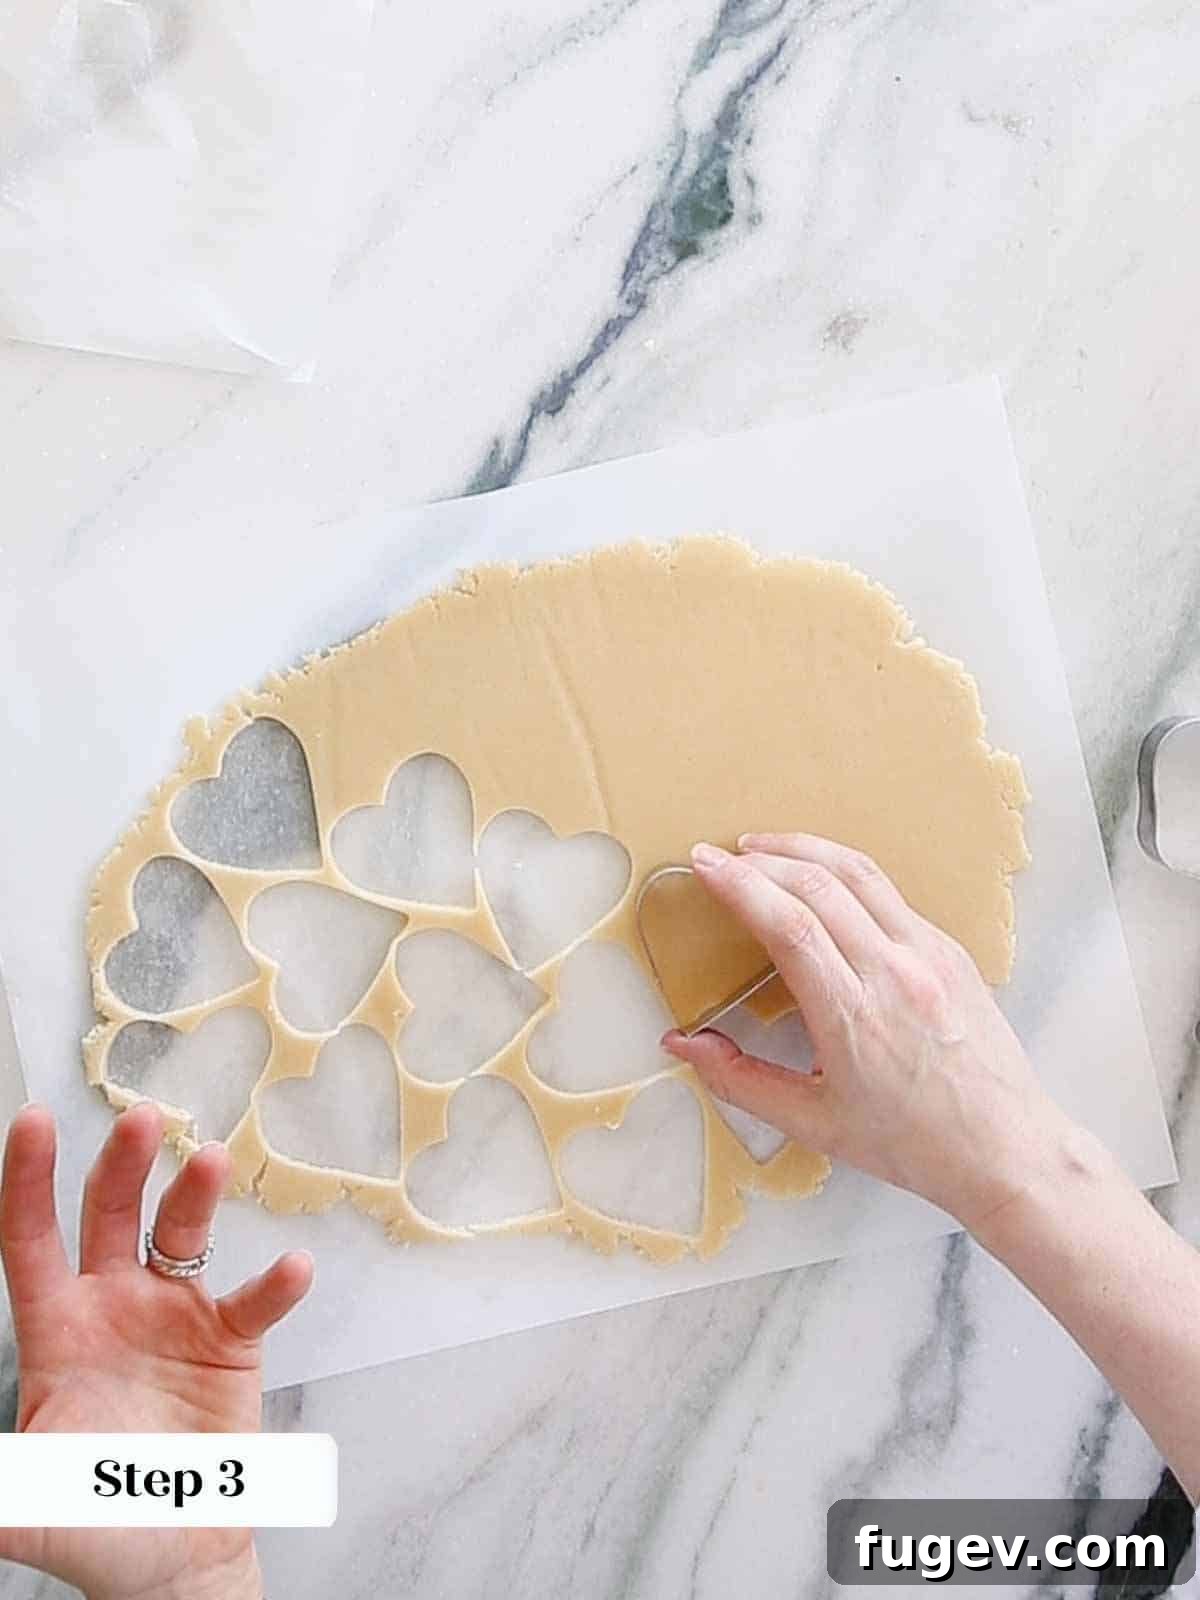
Step 3: Cut and Prepare for Baking. When you’re ready to bake, preheat your oven. If using a convection oven, set it to 325°F (160°C); for a conventional oven, set it to 350°F (175°C). Line two baking sheets with parchment paper. Carefully peel off the parchment paper from both sides of your chilled dough, then use your heart-shaped cookie cutters (lightly floured, if necessary) to cut out your desired shapes. Arrange the cut-out cookies on the prepared baking sheets. Before baking, chill the cut cookies on the baking sheets for another 20 minutes. This second chill is crucial for preventing the cookies from spreading in the oven, ensuring sharp, distinct shapes.
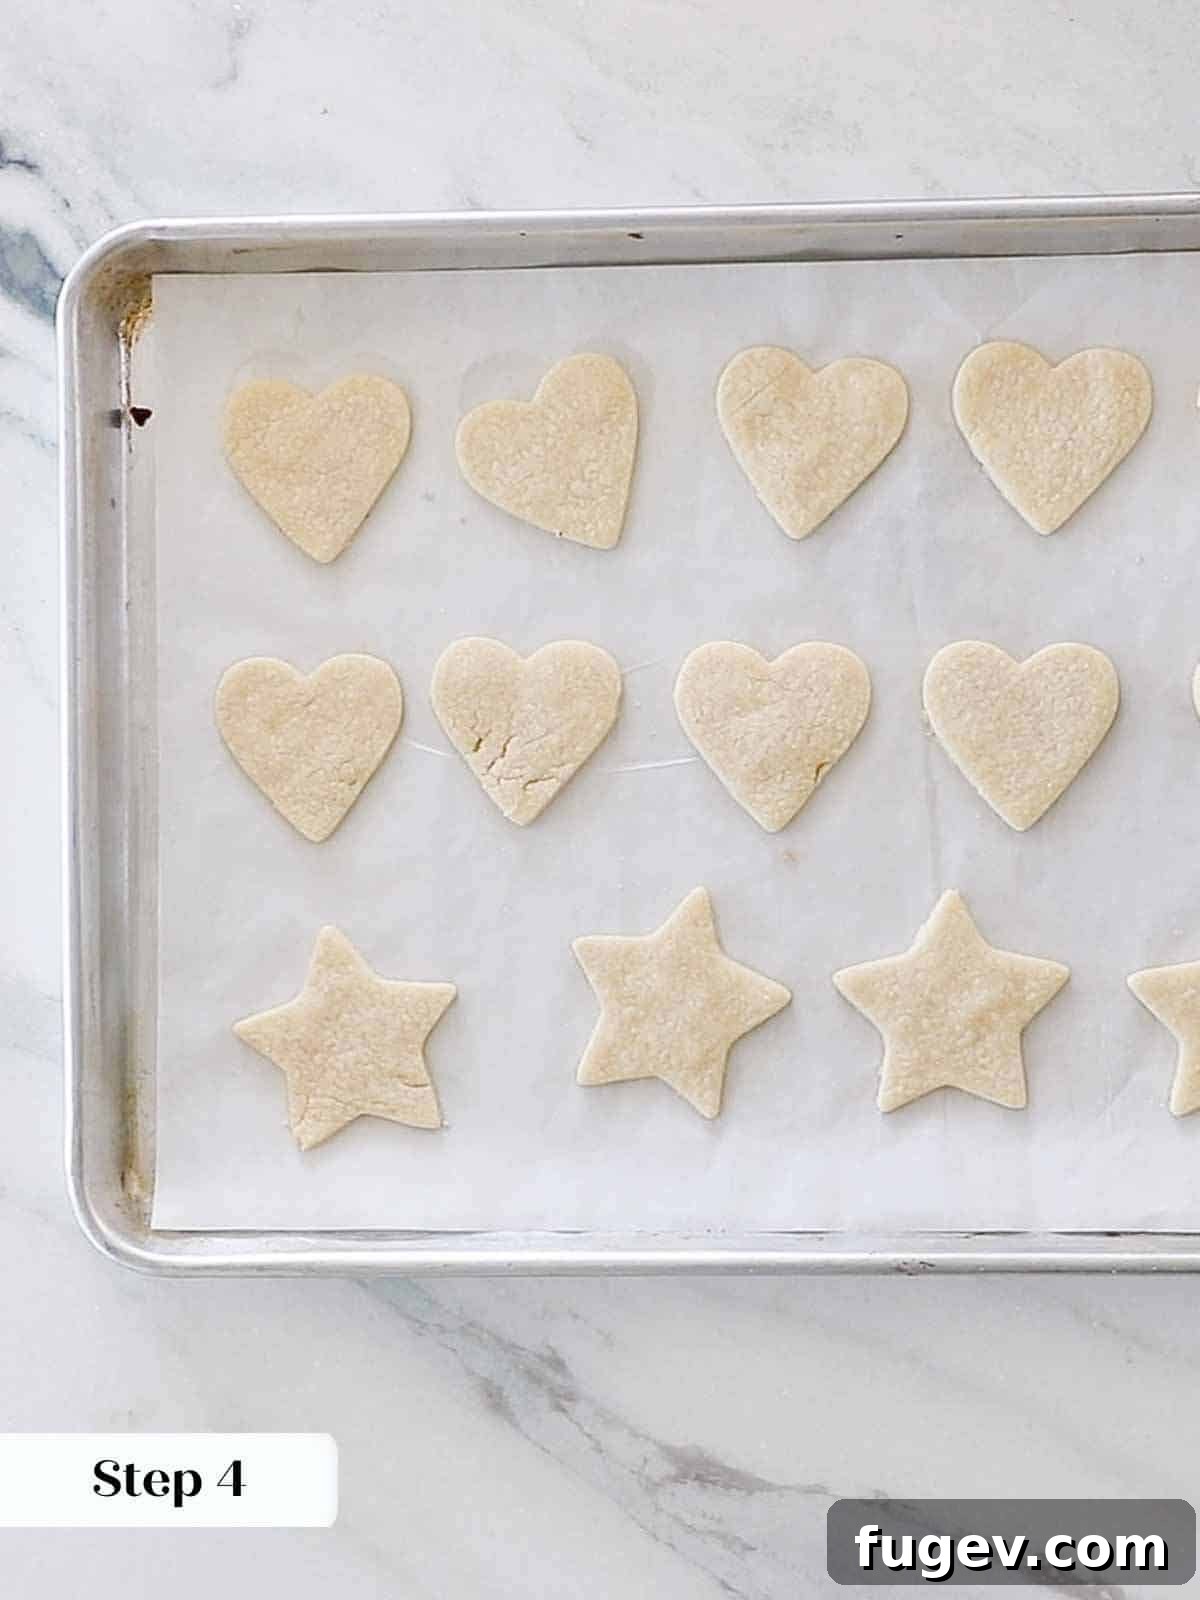



Step 4: Bake to Perfection and Cool. Bake the cookies in your preheated oven for 7-9 minutes. Keep a close eye on them; they are ready when the center appears matte and you notice a few small, delicate cracks on the surface. The very edges might just begin to show a hint of golden brown. It’s a good practice to bake similarly sized shapes on the same sheet to ensure even cooking. Once baked, transfer the cookies to a wire rack and allow them to cool completely before even thinking about icing. Rushing this step can lead to melted or runny icing.
Phase 2: Crafting the Perfect Royal Icing
Step 1: Activate Egg Whites. In a large mixing bowl, or the bowl of a stand mixer fitted with the whisk attachment, combine the dried egg whites (or meringue powder) and fresh lemon juice. Whisk on medium-high speed until soft, billowy peaks begin to form. This process rehydrates the egg whites and creates the necessary structure for stable royal icing.
Step 2: Add Sugar and Color. Gradually add all of the powdered sugar to the egg white mixture, whisking on low speed until fully incorporated and smooth. Once you have your base white icing, separate it into different bowls for coloring. Add your desired food dye to each bowl. Be mindful of the consistency; if the icing becomes too thin, stop adding dye immediately. You can always thicken it slightly by adding a tiny bit more powdered sugar if needed.
For the most vibrant and rich colors, I highly recommend using gel food coloring. Liquid food coloring typically produces pastel hues. To achieve truly vibrant colors with liquid dye, you’d need to add a substantial amount, which would inevitably thin the icing too much, preventing it from setting properly or holding a crisp outline.
Step 3: Test Outline Consistency (Ribbon Test). To achieve the perfect consistency for outlining, perform the “ribbon test.” Drizzle a spoonful of icing back into the bowl. The icing should cascade slowly off your spatula and remain clearly visible on the surface of the icing for approximately 5-6 seconds before gradually smoothing back into the rest of the mixture. This slow-disappearing ribbon indicates the ideal thickness for piping outlines.
Step 4: Test Flooding Consistency (Ribbon Test). For flooding (filling in the outlines), you’ll use the same ribbon test, but the desired speed is different. When you drizzle the flooding icing, it should cascade off your spatula and almost instantly disappear into the rest of the icing, typically within 2-3 seconds. This thinner consistency allows it to spread smoothly and evenly across the cookie surface.
Achieving the perfect icing consistency takes a little practice. If your icing is too thin, it won’t set hard, may spread beyond your outlines, or become transparent. The goal is thin enough to spread easily but thick enough to retain its opacity and set firmly. Don’t be discouraged if it takes a few tries!
Step 5: Prepare Piping Bags. Once your outline and flooding icings have reached their ideal consistencies, carefully transfer each color and consistency into separate piping bags. Using disposable piping bags makes cleanup easy, but reusable bags also work well. Secure the tops with rubber bands to prevent drying.
Phase 3: How to Decorate Your Valentine’s Day Cookies
Step 1: Master Your Piping Tip. Begin by snipping a very small tip off your outline piping bag – think smaller than you imagine. Test a line on a piece of parchment paper. If the line squiggles or breaks, snip the opening just a tiny bit larger. Continue testing and incrementally enlarging the hole until you can achieve a thin, smooth, and straight line with gentle pressure. Repeat this process with the flooding bag, but cut the tip large enough to allow a generous, consistent flow of icing without needing to squeeze too hard.
Step 2: Outline Your Hearts. Working with one to three cookies at a time, use your outline piping bag to carefully trace the border of each cookie. Aim to leave a tiny margin, about 1/16th of an inch, inside the cookie’s edge. This small buffer helps prevent the flooding icing from running over the sides and ensures a clean, crisp finish.
Step 3: Flood with Color. Immediately after outlining, switch to your flooding bag. Squeeze a zigzag or squiggle of flooding icing inside the outlined area across the cookie you are decorating. Use a clean cake tester, a wooden skewer, or even the tip of your flooding piping bag (if you’re feeling a bit lazy like me!) to gently spread the icing around. Guide the icing to fill the entire outlined space, creating one perfectly even and smooth layer.
The goal is to have the flooding icing completely cover the cookie surface without being able to see through it. However, it shouldn’t be so thick that it overflows your outline. The outline and the flood should ideally meld together seamlessly, creating a smooth, unified surface. If you find a visible line between your outline and flood, try outlining fewer cookies at a time before flooding the next batch, or adjust your flooding consistency slightly for better blending.




Step 4: Crafting Wet-on-Wet Hearts. To create those adorable little hearts, you’ll need to work swiftly! I typically recommend decorating only one cookie at a time for this technique. While the base flood icing is still wet, pipe small dots of a contrasting color along the edges or anywhere you envision the hearts. Immediately take a cake tester or a fine toothpick and gently drag the tip through the center of each dot. As you pull the toothpick, the wet icing will naturally form into charming little heart shapes!


Step 5: Dazzle with Sprinkles and Toppings. For cookies with sprinkles, sugar pearls, or other decorative toppings, decorate up to three cookies with your flood icing. While the icing is still wet, immediately sprinkle on your chosen décor. This ensures the toppings adhere perfectly as the icing dries. Consider a variety of delightful options: finely crushed dehydrated strawberries or blueberries for natural color and texture, elegant sprinkles in various shapes and colors, tiny edible hearts, or shimmering gold jimmies. The possibilities for customization are truly limitless, allowing you to create unique and personalized Valentine’s Day treats!
Chef Lindsey’s Expert Decorating Tip
The drying process for royal icing is critical for perfect results. Royal icing absolutely needs to dry at room temperature, ideally overnight, to fully harden and prevent bleeding. I always recommend letting your decorated cookies air-dry, unwrapped, for at least 3 hours before considering any wrapping or stacking. Crucially, never, ever freeze or refrigerate royal icing decorated cookies. The moisture in cold environments will be absorbed by the delicate icing, causing it to soften, become sticky, and most dishearteningly, bleed its colors. You’ve worked so hard to create these beautiful masterpieces; don’t let moisture ruin them!
Recipe FAQs: Your Questions Answered
For un-iced sugar cookies, you can store them in an airtight container at room temperature for up to 3 days before you plan to decorate. However, for longer storage, I prefer to freeze the plain baked cookies. Once your cookies are beautifully iced, store them at room temperature in an airtight container for up to 10 days. The royal icing acts as a protective barrier, actually helping to keep the cookies wonderfully soft and fresh for an extended period! After the icing has fully dried overnight (as per Chef Lindsey’s tip), ensure they are wrapped well or placed in a sealed container for the best freshness.
I strongly advise against freezing royal icing decorated sugar cookies. The delicate nature of royal icing makes it highly susceptible to moisture. Freezing will cause condensation to form when the cookies thaw, leading to the icing absorbing moisture. This results in soft, sticky icing that can bleed its colors and lose its beautiful crisp texture. It’s best to enjoy these freshly decorated or store them at room temperature as recommended.
Absolutely! These decorated Valentine’s Day cookies are excellent candidates for shipping. The royal icing not only keeps them fresh for a longer duration but also adds a layer of durability, making them less prone to breakage during transit. To ensure they arrive in perfect condition, package them securely in a closed, sturdy container with ample padding. I find that bakery paper or crinkled tissue paper works wonderfully as a cushion inside the tin or box, preventing movement and protecting the delicate decorations.

More Romantic Cookie Recipes You’ll Adore
If you’ve enjoyed baking these delightful Valentine’s Day cookies, you’re sure to love these other romantic and chef-tested cookie recipes. Perfect for sharing with loved ones!
Cookie Recipes
Grandma’s Old-Fashioned Soft Sugar Cookie Recipe
Cookie Recipes
Decadent Chocolate Thumbprint Cookies
Date Night
Velvety Red Velvet Cookies with Cream Cheese Frosting
Cookie Recipes
Irresistible White Chocolate Raspberry Cookies
If you tried this delightful recipe and absolutely loved it, please take a moment to leave a ⭐ star rating and share your experience in the comments below. I genuinely love hearing from you; your feedback and comments truly brighten my day!

Valentine’s Day Cookies
Chef Lindsey
20
8
30
58
40 Cookies
Pin Recipe
Comment
Print Recipe
Ingredients (US Customary)
For the Cookies:
- 2 ½ cups all-purpose flour
- ½ teaspoon baking powder
- ½ teaspoon kosher salt
- ½ cup melted butter
- 1 cup granulated sugar
- 1 whole egg
- 2 teaspoons vanilla extract
For Royal Icing:
- 4 cups powdered sugar (1, 1 pound box)
- 6 ½ tablespoons Lemon Juice (juice from approximately 2 medium lemons)
- ¼ cup dried egg whites (or meringue powder, 22g)
- 2 tablespoons whole milk (as needed)
Instructions
Make the cookie dough:
- In a large bowl, whisk together flour, baking powder, and kosher salt. Set aside.
- In another large bowl, melt the butter (I used the microwave) just until melted but not hot. Whisk in the sugar followed by the egg and vanilla. Whisk vigorously until the mixture is emulsified. You shouldn’t see any streaks of butter or egg.
- Slowly stir in the flour mixture.
- The dough does look a bit dry, so I like to finish by hand, gently squeezing the dough together. This incorporates the flour faster without developing too much gluten, ensuring tender cookies.
- Roll your dough while it is at room temperature. Roll the dough to approximately ¼ inch thick. You will achieve the best results if rolled between two pieces of parchment paper, but you can also roll it out on a lightly floured surface.
- Refrigerate the rolled dough until chilled. This will only take about 30 minutes, but I prefer to give it a full 2 hours or even overnight to allow the gluten to relax completely for the tenderest cookies.
Cut & bake cookies:
- When you are ready to bake, preheat your oven to 325° F (160°C) for convection or 350° F (175°C) for conventional, and line two baking sheets with parchment paper.
- Carefully unstick the parchment from both sides of the dough, then cut shapes with a lightly floured cookie cutter. Chill the cut cookies on the baking sheets for about 20 minutes before baking to prevent spreading.
- Bake in the preheated oven for 7-9 minutes or until the cookies look matte in the center and have a few small cracks. Some of the edges might have begun to brown slightly. I always bake all the same shapes on one sheet to ensure even baking.
- Cool completely on a wire rack before attempting to ice them.
Make Royal Icing:
- In a large bowl or in the bowl of a stand mixer fitted with the whisk attachment, combine the dried egg whites and lemon juice. Whisk until soft peaks form.
- Add all the powdered sugar and whisk to combine until smooth.
- Separate the icing into different bowls as needed and add food dye for desired colors. Be sure to carefully monitor the consistency and stop adding if it becomes too thin.
- For outlining, use the ribbon test: the icing should cascade slowly off your spatula and remain clearly visible on the surface for about 5-6 seconds before slowly disappearing.
- For flooding, use the same ribbon test, but the icing should cascade off your spatula and almost disappear instantly (within 2-3 seconds) into the rest of the icing.
Video Tutorial
Notes
Yield – This recipe typically yields about 40, 2-inch cookies when rolled ¼ inch thick.
Variations – Unleash your creativity! Try infusing the sugar with lemon or orange zest for a brighter flavor, experiment with different extracts like almond or peppermint, or incorporate small mix-ins such as mini chocolate chips or sprinkles directly into the dough.
Storage – Store these soft sugar cookies with royal icing at room temperature for up to 10 days in an airtight container. Ensure the royal icing has fully set (ideally 24 hours) before stacking. For best freshness, allow the icing to dry for at least 3 hours before gently wrapping the cookies with plastic wrap, being careful not to let the plastic touch the decorated surface directly until fully hardened.
Nutrition Information (per cookie)
Carbohydrates: 23g |
Protein: 2g |
Fat: 3g |
Saturated Fat: 2g |
Polyunsaturated Fat: 0.1g |
Monounsaturated Fat: 1g |
Trans Fat: 0.1g |
Cholesterol: 10mg |
Sodium: 74mg |
Potassium: 31mg |
Fiber: 0.2g |
Sugar: 17g |
Vitamin A: 78IU |
Vitamin C: 1mg |
Calcium: 8mg |
Iron: 0.4mg
Dessert
American
124
Enjoyed this recipe? Leave a comment below!
Before You Go: Sweet Endings
I sincerely hope you enjoyed creating these beautiful and delicious Valentine’s Day Cookies, a recipe personally tested and perfected by a professional chef. If you’re looking for more ways to celebrate love through food, be sure to explore our other mouth-watering, chef-developed Valentine’s Day recipes. You might also find inspiration in our collection of Best Valentine’s Day Desserts or discover new favorites among our Easy Chocolate Desserts. Happy baking, and happy Valentine’s Day!