Mastering Your Homemade Sourdough Starter: A Comprehensive 5-Day Guide
Embark on a rewarding culinary journey by creating your very own vibrant sourdough starter! This detailed, easy-to-follow recipe will guide you day by day, transforming simple flour and water into a lively ecosystem ready to leaven your fresh sourdough bread in just five days. Dive in to discover the secrets of a robust starter and get answers to all your pressing questions, making your foray into sourdough baking both successful and incredibly satisfying.
A Quick Look At The Recipe
This is a brief summary of the recipe. Jump to the detailed recipe below for full instructions and measurements.
Jump to Recipe
Prep Time
5 days
Total Time
5 days
Yield
Approx. 300-400g active starter
Difficulty
Easy, but requires consistent daily feeding and patience.
Technique
Daily feeding with rye flour and water, transitioning to all-purpose flour for versatile flavor.
Flavor Profile
Earthy, mildly tangy, and distinctly yeasty, developing deeper notes over time.
* Nutritional values for the starter itself are estimates based on flour and water content.
Save and Explore this Recipe:
Pin this Recipe
Featured Comment
⭐⭐⭐⭐⭐ Thank you for all the tips and tricks on how to start and keep a starter happy! My starter is doubling and seems happy, can’t wait to make my first loaf! – Mara
Table of Contents
- What is a Sourdough Starter?
- Why Make Your Own Sourdough Starter?
- Essential Ingredients for Your Sourdough Starter
- Essential Tools for Your Sourdough Starter
- Professional Tips for Sourdough Starter Success
- Liquid vs. Stiff Levain: Understanding the Differences
- How to Make This Sourdough Starter: A Day-by-Day Guide
- Long-Term Sourdough Starter Care: Feeding & Storage
- Troubleshooting Common Sourdough Starter Issues
- Sourdough Starter FAQs
- Recommended Sourdough Bread Recipes
- Full Sourdough Starter Recipe Card
- Before You Go: Your Sourdough Journey Continues
The sourdough starter is much more than just a mixture of flour and water; it’s the living heart and soul of any exceptional sourdough bread. This natural leavening agent harnesses the power of wild yeasts and beneficial bacteria found naturally in flour, water, and even the air around us. With a little patience and consistent care, you can cultivate an active, bubbly starter right in your kitchen in just five days!
In this comprehensive guide, I’ll walk you through every step of making and nurturing your very own sourdough starter, transforming you from a novice into a confident sourdough baker. Be sure to complement this written guide with my 10 Sourdough Starter Tips video for visual insights and additional expert advice.
Once your starter is thriving, a world of baking possibilities opens up! Begin your baking adventure with my easy sourdough bread recipe, perfect for beginners, or explore unique flavors with this delightful cherry pecan sourdough bread. If instant gratification is more your style, you can even try a same-day sourdough bread recipe while your starter matures for future loaves.
What Exactly is a Sourdough Starter?
At its core, a sourdough starter is a living, fermented blend of flour and water. It’s a dynamic, stable ecosystem teeming with beneficial lactic acid bacteria and wild yeasts, which are naturally present in flour and the environment. These microorganisms work together to metabolize sugars in the flour, producing carbon dioxide (which creates the bread’s rise) and organic acids (which impart sourdough’s characteristic tangy flavor and distinct aroma).
This ancient leavening method predates commercial yeast by thousands of years, offering a natural and flavorful alternative for bread making. The fermentation process not only provides lift and flavor but also contributes to numerous health benefits, including improved digestibility and nutrient absorption. A well-maintained and aged starter develops a deeper complexity of flavor, leading to superior texture, aroma, and taste in your homemade sourdough breads. Think of it as a culinary pet that gets better with age and consistent care!
Why Make Your Own Sourdough Starter?
While buying commercial yeast is convenient, creating your own sourdough starter offers an unparalleled baking experience and numerous advantages:
- Unmatched Flavor: Sourdough bread made with a homemade starter develops a complex, tangy flavor profile that cannot be replicated by commercial yeast. The wild yeasts and bacteria produce a unique blend of acids and aromatic compounds, resulting in deeply satisfying bread.
- Health Benefits: The long fermentation process breaks down complex carbohydrates and gluten, making sourdough bread easier to digest for many people. It also increases the bioavailability of certain nutrients and can act as a prebiotic, supporting gut health.
- Control Over Ingredients: When you make your own starter, you know exactly what goes into it – just flour and water. This allows for a clean label and avoids any additives often found in commercial yeast products.
- Cost-Effective: Once established, your sourdough starter is virtually free to maintain, requiring only small amounts of flour and water with each feeding. This makes homemade sourdough a much more economical option than buying artisanal loaves.
- Personal Satisfaction: There’s immense satisfaction in nurturing a living culture and transforming it into a beautiful, flavorful loaf of bread. It’s a connection to ancient baking traditions and a rewarding skill to master.
- Versatility: A healthy starter isn’t just for bread! You can use your “discard” to make a variety of delicious recipes, from pancakes and waffles to crackers and pizza dough, minimizing waste and maximizing flavor.
Essential Ingredients for Your Sourdough Starter
Creating a sourdough starter requires surprisingly few ingredients, but the quality and type you choose can significantly impact its development and flavor.
- Rye Flour: I highly recommend starting your levain with rye flour. Whole grain flours, such as rye or whole wheat flour, are less processed than all-purpose (AP) flour. This means they retain more of their natural wild yeasts and beneficial bacteria, giving your starter a vigorous kick-start and accelerating the fermentation process in the initial days. While rye provides an excellent foundational boost, it does have a distinct, strong flavor. To create a versatile starter that won’t impart a specific rye taste to all your future breads, we’ll switch to unbleached all-purpose flour on Day 4. This transition helps establish a neutral sourdough base, allowing the characteristic sourness to develop without the dominance of rye flavor. You can always add rye flour back into your bread dough later if you desire that specific profile.
- Water: The quality of your water matters. Unchlorinated, room-temperature water is ideal for nourishing your starter. Tap water often works perfectly fine, especially if it’s free of strong chemical tastes. However, if your tap water is heavily chlorinated, it can inhibit the delicate microbial activity in your starter. In such cases, you can use filtered water, bottled spring water, or simply leave tap water uncovered on your counter for 24 hours to allow the chlorine to dissipate. Using room temperature water (around 70-75°F or 21-24°C) ensures optimal conditions for yeast and bacterial growth. If you notice your starter doubling too rapidly and you need to slow its activity down for better timing with your baking schedule, using slightly cooler water (but not cold) can help.
- Unbleached All-Purpose Flour: After the initial rye flour kick, I transition to unbleached all-purpose flour for feeding. This helps maintain a neutral flavor profile, making your starter incredibly versatile. With an AP flour-fed starter, you can create a wide array of delicious recipes, from sweet treats like sourdough hot cross buns to rustic loaves such as whole wheat sourdough bread. The key is “unbleached” – bleached flours contain chemicals that can harm or kill the wild yeast cultures. Bread flour can also be used as an alternative to all-purpose flour, providing a slightly higher protein content which can result in a stronger gluten structure in your final bread.
For precise measurements and quantities, please refer to the detailed recipe card at the bottom of this page.
Essential Tools for Your Sourdough Starter
While sourdough starter creation is simple, having the right tools can make the process much smoother and more accurate. Here’s what you’ll need:
- Digital Kitchen Scale: This is arguably the most crucial tool. Baking with sourdough is a science, and precise measurements are vital. Volumetric measurements (cups) can vary wildly, especially with flour and an active starter, leading to inconsistent results. A digital kitchen scale ensures accuracy, allowing you to feed your starter with exact ratios for optimal health and activity.
- Glass Jar or Container: A clean, clear glass jar (such as a wide-mouth mason jar or a quart container) is perfect for housing your starter. Glass allows you to easily observe its activity – bubble formation, rise, and fall. Ensure it has a lid (loose-fitting or covered with plastic wrap/a tea towel) to prevent drying out and contamination while still allowing for air exchange.
- Rubber Spatula: A flexible rubber spatula is excellent for mixing your starter ingredients thoroughly, ensuring all flour is hydrated, and for scraping down the sides of the jar to prevent dried bits from interfering with your starter’s growth.
- Rubber Band or Marker: A simple rubber band placed around your jar at the initial level of your freshly fed starter is invaluable for tracking its rise and fall. This visual cue helps you understand its activity, observe its peak, and know when it has doubled or even tripled.
- Thermometer (Optional but Recommended): A basic kitchen thermometer can help you ensure your water is at room temperature and that your starter is being kept in an ideal temperature range (typically 70-78°F or 21-26°C) for optimal fermentation.
Investing in these basic tools will set you up for success and make your sourdough journey much more enjoyable and consistent.
Professional Tips for Sourdough Starter Success
- Always Weigh Your Ingredients: As mentioned, baking is a precise science, and a sourdough starter is a living culture that thrives on consistency. While cup measurements can vary significantly, especially for flour, using a kitchen scale ensures you add the exact amounts of flour and water every time. This precision prevents inadvertently adding too much or too little “food” to your starter, which can disrupt its delicate balance and growth cycle.
- Patience is Paramount: Creating a robust sourdough starter is not a race; it’s a cultivation process. You are fostering an ecosystem from scratch, so allow it the time it needs to grow and strengthen. The time required for a starter to become strong and bubbly can vary based on factors like ambient temperature, the type of flour used, and even the natural yeast present in your environment. If using bleached or bromated all-purpose flour, your starter may struggle or never become active enough, as these flours typically contain very little to no natural yeast. Always opt for unbleached flours.
- Get to Know Your Starter: Every starter is unique, much like a fingerprint. Pay close attention to its behavior: how quickly does it double after feeding? What does it smell like at its peak? How long does it take to reach its highest point (its “peak activity”) before it starts to fall? Understanding these rhythms is crucial for timing your bread mixes. You can also influence its growth rate: if it’s doubling in just 6 hours, your kitchen might be warm, encouraging rapid growth. To slow it down, consider moving it to a cooler spot, placing it in a pot of ice water overnight, or feeding it with slightly cooler water. Conversely, if it’s sluggish, a warmer spot might help. Remember to stick to a consistent feeding ratio, typically 1 part starter, 1 part water, 1 part flour (or a 1:1:1 ratio), ensuring the “old starter” component is usually around 10% by weight of the new flour.
- Maintain Cleanliness: Always use clean jars and utensils when working with your starter. While a sourdough starter is resilient and somewhat resistant to spoilage, introducing unwanted bacteria or molds from dirty equipment can compromise its health and lead to undesirable outcomes.
- Mark Your Progress: A simple rubber band around your jar, marking the level of your freshly fed starter, is an invaluable visual aid. It allows you to clearly see how much your starter has risen and confirms when it has doubled, helping you learn its peak activity.
- Consistency is Key: Try to feed your starter at roughly the same time each day, especially during its initial development phase. This consistent schedule helps establish a strong, predictable microbial community.
Liquid vs. Stiff Levain: Understanding the Differences
As you delve deeper into sourdough baking, you’ll encounter the terms “liquid levain” and “stiff levain.” Both are types of sourdough starters, but they differ in their hydration levels and can influence your final bread differently. A “levain” is simply a portion of your main starter that you activate and feed specifically for a baking project, often with a particular flour or hydration ratio.
- Stiff Levain (Traditional Starter): A traditional or stiff levain typically has equal parts flour and water by weight (e.g., 100g flour to 100g water), resulting in a 100% hydration level. This creates a thick, paste-like consistency. Stiff levains tend to ferment more slowly and peak over a longer period compared to liquid levains. They are often favored for developing richer, more complex flavors and can be easier to manage in warmer environments due to their slower activity. They add less additional water to your final dough.
- Liquid Levain (Higher Hydration Starter): A liquid levain contains more water than flour, often at a hydration level of 110% to 150% (e.g., 100g flour to 125g water, as I commonly use, making it 125% hydration). This creates a looser, pourable consistency. Liquid levains tend to become active and peak faster than stiff levains due to the increased water availability for microbial activity. They contribute more hydration to your bread dough, which can result in a more open, airy, and light crumb structure. Many popular artisan sourdough recipes call for a liquid levain.
It’s important to pay attention to what your specific bread recipe calls for and feed your levain accordingly. The beauty is that you can use the same base starter and adapt it to become either a stiff or a liquid levain simply by adjusting the flour-to-water ratio during feeding. For example, to create my preferred 125% liquid levain, I would combine 100g flour + 125g water + 10g of my mature “old” starter. Understanding these differences allows for greater control and versatility in your sourdough baking.
How to Make This Sourdough Starter: A Day-by-Day Guide
Follow these detailed instructions to cultivate your very own active and healthy sourdough starter. Refer to the comprehensive recipe card below for precise measurements and quantities.
Day 1: Initiate Fermentation with Rye Flour
Begin your sourdough journey by combining 100g of rye flour with 100g of room-temperature water in a clean glass container. Stir thoroughly with a rubber spatula, ensuring all the flour is fully hydrated and there are no dry pockets. The mixture should have a thick, paste-like consistency. Cover the container loosely with a lid, plastic wrap, or a clean tea towel to allow for air exchange while preventing it from drying out. Place it in a warm spot (ideally 70-78°F or 21-26°C) on your kitchen counter and let it sit undisturbed for 24 hours. At this stage, you might not see much activity, but the wild yeasts and bacteria are beginning their work!
While you can technically start with unbleached all-purpose flour, using a whole grain flour like rye or whole wheat is highly recommended. These flours are richer in natural microbes, which significantly kick-starts the fermentation process. Starting with AP flour will generally prolong the initial activation phase as it contains fewer natural yeasts and bacteria.
Day 2: First Feeding – Nurturing Activity
After 24 hours, your starter might show some faint bubbles, or it might still look relatively quiet – both are normal. In a *separate clean container*, combine 100g of fresh rye flour, 100g of room-temperature water, and 100g of yesterday’s starter (the mixture from Day 1). Stir vigorously until well combined and smooth. Discard the remaining Day 1 starter (this is your first “discard,” which you can save for other recipes if you wish). Cover loosely and let it sit at room temperature for another 24 hours. By the end of Day 2, you should start observing more noticeable activity, such as small bubbles forming on the surface and along the sides of the jar.
I find it easiest to have two glass jars that I rotate. This way, one jar is always clean, dry, and ready for the next feeding. If you only have one container, you can transfer your 100g portion to a clean bowl, then wash and dry your main jar before returning the fed starter to it. Ensure you scrape all the active starter into your new container to maintain consistency.
Day 3: Boosting the Microbial Community
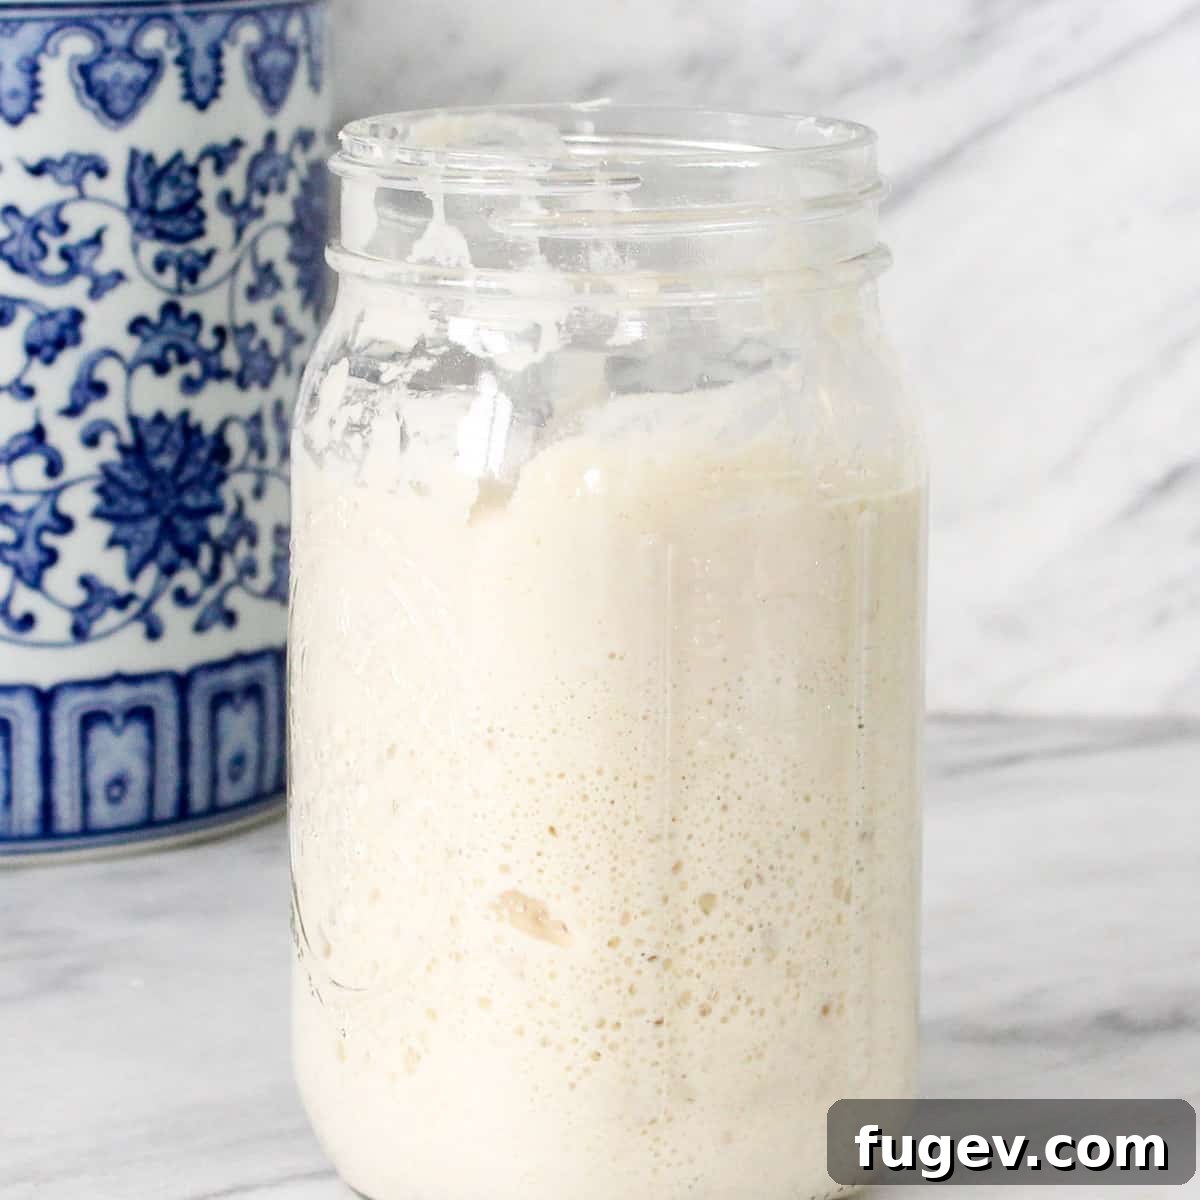
Repeat the feeding process from Day 2: In a clean container, combine 100g rye flour, 100g water, and 100g of yesterday’s active starter. Discard the remainder. Cover loosely and leave at room temperature for 24 hours. By this point, your starter should be significantly more active. Expect to see it nearly double or even more in volume, with a more pronounced bubbly texture and a slightly tangy aroma. This is a clear sign that the wild yeast and bacteria are thriving and multiplying.
Day 4: Transition to All-Purpose Flour
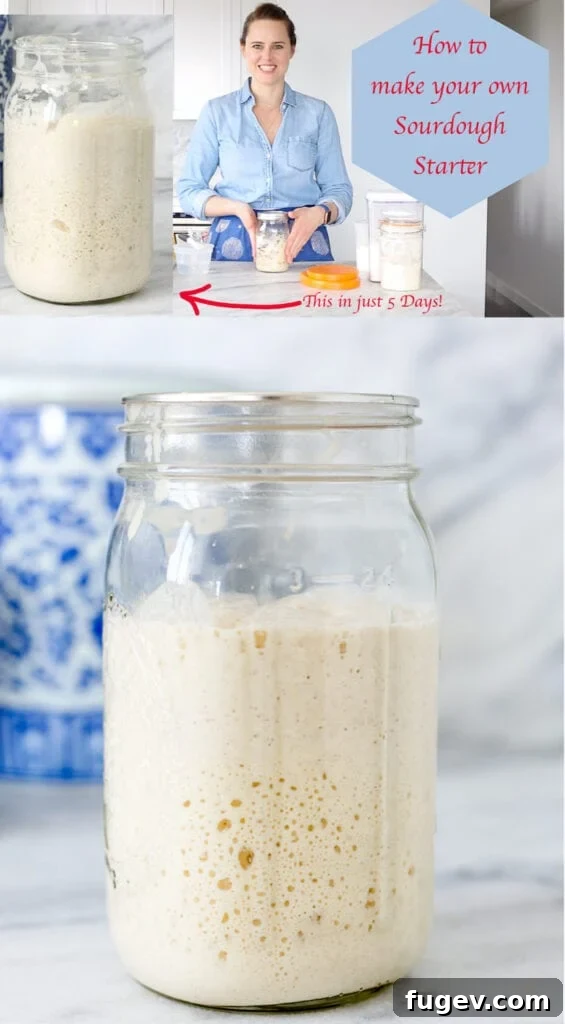
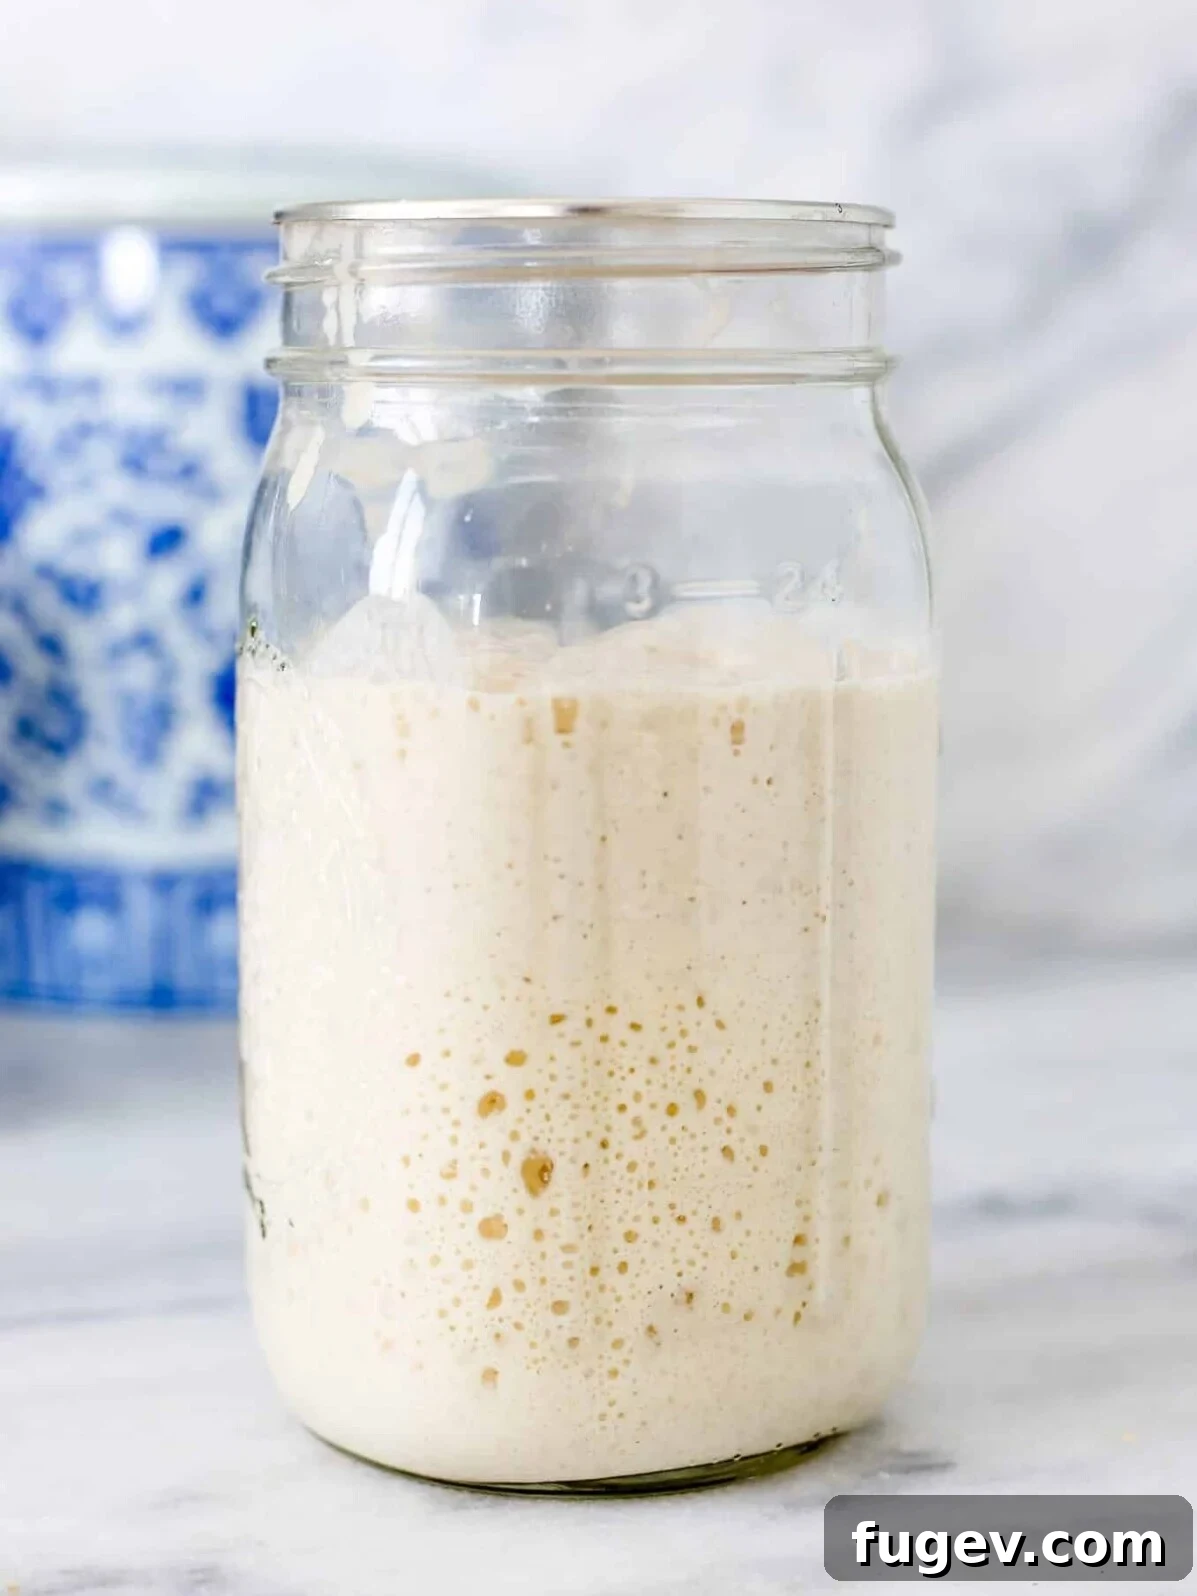
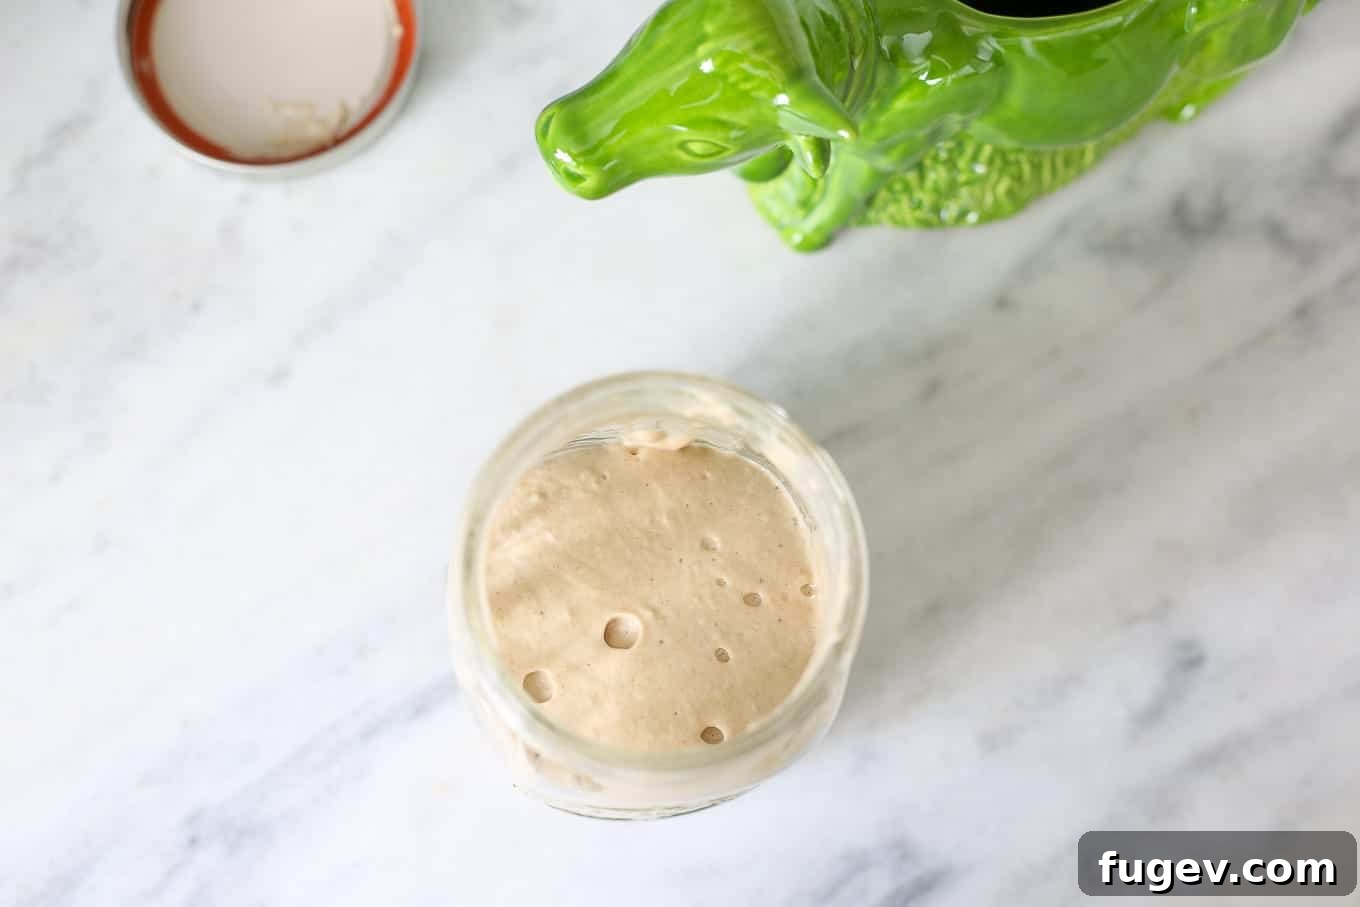
Now it’s time to transition your starter to unbleached all-purpose flour, which will give it a more neutral flavor profile. In a clean container, mix 100g of unbleached all-purpose flour, 100g of room-temperature water, and 100g of yesterday’s starter. Discard the excess. Cover loosely and let it ferment at room temperature for 24 hours. After this feeding, your starter should show vigorous activity, easily doubling in size and exhibiting large, distinct air pockets throughout the mixture, especially towards the top.
If, by Day 4, your starter hasn’t yet consistently doubled in volume or doesn’t show strong activity, it’s perfectly fine to continue feeding it with rye flour for an additional day or two before making the switch to all-purpose flour. Some starters take a little longer to establish their strength.
Day 5: Your Starter is Ready!
Repeat the feeding process from Day 4: Combine 100g all-purpose flour, 100g water, and 100g of yesterday’s starter in a clean jar. Discard the rest. Cover loosely and allow it to sit at room temperature for 24 hours. By now, your starter should be robust and consistently active. Mine has typically tripled in volume by this stage! It should have a pleasant, tangy, slightly yeasty aroma and be full of bubbles. Congratulations, your sourdough starter is now mature enough and strong enough to leaven your first loaf of bread!
Days 6 & 7: Consolidate and Maintain
Continue repeating the Day 4 feeding schedule for Days 6 and 7 to further strengthen your starter and establish a consistent routine. This phase helps ensure your starter is reliably active and ready for regular use.
Long-Term Sourdough Starter Care: Feeding & Storage
Once your sourdough starter is active and consistently doubling, you’ll need to establish a long-term feeding and storage routine to keep it healthy and ready for baking. The goal is controlled growth, ensuring your starter is at its peak activity when you need it for your bread recipes.
Daily Feeding (Room Temperature)
If you plan to bake frequently (daily or every other day), you can keep your starter at room temperature and feed it daily. A common ratio for a stiff levain (100% hydration) is:
- 100g water
- 10g previous day’s starter
- 100g unbleached all-purpose flour
For a liquid levain (e.g., 125% hydration), which creates a more open crumb in your bread:
- 125g water
- 10g previous day’s starter
- 100g unbleached all-purpose flour
Remember to discard most of your old starter before feeding, leaving only the specified “previous day’s starter” amount. This prevents your starter from becoming too large and ensures it has enough fresh “food” to thrive.
Refrigerated Storage (Less Frequent Baking)
For bakers who don’t bake daily, storing your starter in the refrigerator is the most practical method. Cold temperatures significantly slow down microbial activity, meaning your starter needs to be fed much less frequently.
- Feeding Schedule: Feed your starter once every 1-2 weeks.
- How to Store: After feeding your starter (letting it sit at room temperature for 1-2 hours after feeding to kickstart activity), place it in a glass jar with a secure, but not airtight, lid (to prevent it from drying out but allowing gases to escape) and refrigerate.
- Reviving for Baking: When you’re ready to bake, remove your starter from the fridge. Let it come to room temperature for 8-12 hours, then feed it as usual. Repeat this feeding process 1-2 times, allowing it to become fully active and bubbly, usually doubling within 6-8 hours, before using it in your recipe.
Freezer Storage (Extended Breaks)
For very long breaks from baking (e.g., vacations), you can store your starter in the freezer. This puts it into a dormant state. While effective, it’s generally not recommended for maintaining the happiest, strongest starter over the long term, as it can take more effort to revive fully.
- How to Store: Feed your starter, let it peak, then transfer a portion to a freezer-safe container.
- Feeding Schedule: Plan to revive and feed it every 1-2 months.
- Reviving: Thaw your frozen starter in the refrigerator overnight, then bring it to room temperature. Begin a regular feeding schedule (daily for several days) until it shows consistent activity (doubling within 6-8 hours) before using it for baking.
By understanding these feeding and storage methods, you can tailor your starter care to your baking habits, ensuring you always have a vibrant, ready-to-use sourdough starter.
Chef Lindsey’s Recipe Tip
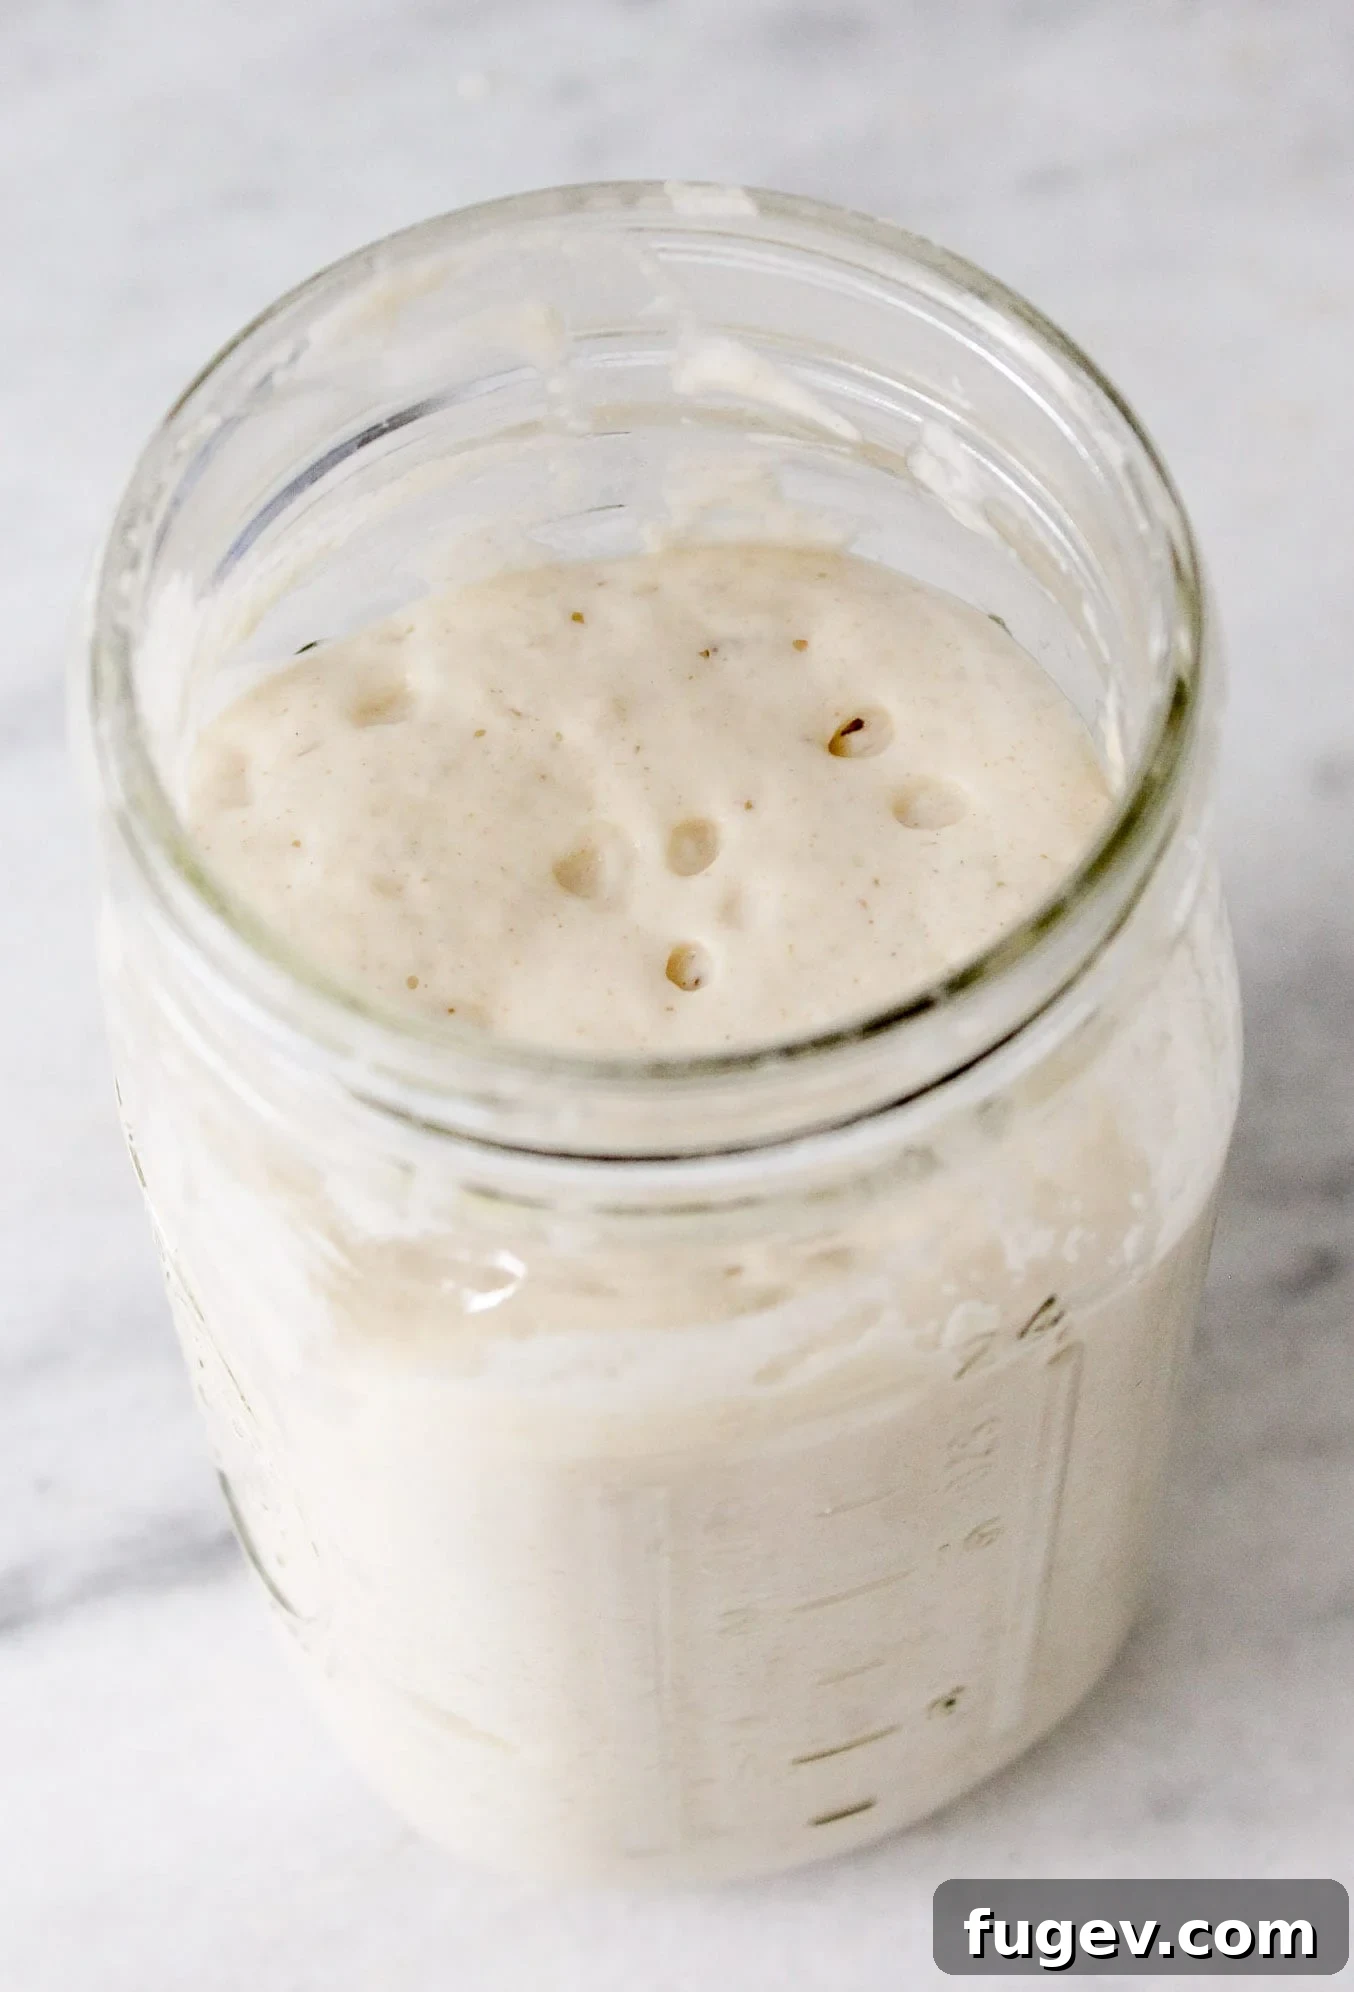
A simple yet effective trick to monitor your starter’s activity is to scrape down the sides of your jar after each feeding. Then, place a rubber band around the jar at the exact level of your freshly fed starter. This visual marker makes it incredibly easy to track its rise and fall, helping you determine when it has doubled and when it reaches its peak activity – crucial information for successful sourdough baking!
Troubleshooting Common Sourdough Starter Issues
Even experienced bakers encounter issues with their sourdough starter from time to time. Don’t panic if your starter isn’t behaving as expected – most problems are easily remedied with a little adjustment and patience. Here are some common issues and how to troubleshoot them:
My Starter is Sluggish / Not Doubling
A slow or inactive starter is often due to one of a few factors:
- Temperature: Sourdough starters thrive in warmth. If your kitchen is too cool (below 70°F/21°C), the yeast and bacteria will be less active. Try moving your starter to a warmer spot, like on top of your refrigerator, inside an oven with just the light on (be careful not to turn on the heat!), or in a proofing box.
- Feeding Ratio: Ensure you are using consistent, accurate feeding ratios by weight. Too much old starter and not enough new food can starve it; too much new food and not enough old starter can dilute its activity. A 1:1:1 ratio (starter:water:flour) is a good starting point for active starters.
- Flour Quality: Bleached or heavily processed flours can lack the necessary microbes for strong activity. Stick to unbleached flours, especially whole grain flours in the initial stages.
- Water Quality: Chlorine in tap water can inhibit yeast and bacterial growth. If you suspect this, use filtered water or let your tap water sit out uncovered for 24 hours before using.
- Patience: Especially in the first few days, activity can be slow and unpredictable. Give it time and consistent feeding.
Black Liquid on Top (Hooch)
This dark liquid, often called “hooch,” is a normal sign that your starter is hungry and has consumed most of its food. It indicates that it’s time to feed your starter. While hooch often appears dark, it can also be a lighter, clear liquid. Don’t worry, your starter is likely not dead! Just follow these steps:
- Pour off the hooch (some people stir it in for a tangier flavor, but pouring it off is generally recommended if it’s very dark or has an off-smell).
- Discard most of your starter, leaving a small portion (e.g., 10-20g).
- Feed your starter with fresh flour and water.
- If your starter has been neglected for a long time (weeks or months), you might need to feed it more frequently (e.g., every 12 hours) for several consecutive days until it’s robust and active again before returning it to its regular schedule.
My Sourdough Starter Changed Color / Smells Off
Understanding the normal changes in your starter’s appearance and aroma is part of the learning process:
- Normal Color Changes: When you first start with rye flour, your starter might have a brownish-red to grayish hue, depending on the specific whole grain flour. As you transition to unbleached all-purpose flour, it will gradually become a medium-cream color. These variations are normal and depend on the processing of your flour.
- Abnormal Colors (Mold): If you see any pink, orange, green, or black furry spots, that is mold, and your starter is contaminated. Unfortunately, there is no saving a moldy starter; it must be discarded immediately. To prevent mold, always use clean containers and utensils. While a healthy starter’s acidic environment generally deters mold, contamination can occur.
- Normal Smells: A healthy, active starter should smell pleasantly tangy, yeasty, somewhat like ripe fruit, or even slightly vinegary when hungry.
- Off Smells: If your starter smells strongly like nail polish remover, vomit, or extremely acrid, it’s likely very hungry. Pour off any hooch, discard generously, and feed it. If the smell persists after a few feedings, it might be struggling. Persistent foul smells can also indicate contamination, especially if accompanied by abnormal colors.
By closely observing your starter and responding to its needs, you can troubleshoot most issues and maintain a thriving, long-lasting culture for all your sourdough baking adventures.
Sourdough Starter FAQs
Store your starter in a glass jar (quart containers or mason jars work well) with a lid. It needs to be covered to prevent drying out. If you plan to bake frequently (daily or every other day), keep it at room temperature and feed it nightly. For less frequent baking, store it in the refrigerator and feed it every one to two weeks. For extended periods away, you can even freeze it, but this is not ideal for maintaining a consistently strong, happy starter.
Take a deep breath! Sourdough starters are incredibly resilient. Most “almost-dead” starters can be revived. If you see black liquid (“hooch”) on top, your starter is just very hungry. Pour off the hooch, then resume feeding it regularly (e.g., every 12-24 hours). The longer it’s been neglected, the more consecutive feedings it will need to regain its strength. For instance, after two months of neglect, you might need to feed it daily for at least five days, or until it consistently doubles within 12 hours, before putting it back in the refrigerator.
While the term “discard” implies waste, you absolutely don’t have to throw it away! Save your sourdough discard in a separate jar in your fridge. It’s a fantastic ingredient for many recipes that don’t rely on active leavening. Some of my favorites include fluffy sourdough pancakes, crispy sourdough waffles, crunchy sourdough discard crackers, or for making a flavorful sourdough pizza dough that yields an amazing crust. There are countless creative ways to use your discard and minimize waste.
Yes, color changes are normal as you feed your starter with different flours. If you start with rye, it will appear brownish-red to gray. As you transition to all-purpose flour, it will gradually lighten to a medium-cream color. The exact shade depends on the flour’s processing. However, if your starter develops pink, orange, green, or black fuzzy spots, that is mold, and it must be discarded immediately. A healthy starter’s acidic environment generally inhibits mold, but contamination can occur from unclean utensils or containers.
Recommended Sourdough Bread Recipes
Now that you have a thriving sourdough starter, it’s time to put it to good use! Explore these delicious sourdough bread recipes designed to help you make the most of your homemade levain.
Sourdough Bread Recipes
Easy Sourdough Bread Recipe
Sourdough Bread Recipes
Sourdough Raisin Bread
Dinner Roll Recipes
Sourdough Rolls
Sourdough Bread Recipes
Cherry Sourdough Bread
If you tried this recipe and loved it, please leave a 🌟 star rating and let me know how it goes in the comments below. I love hearing from you; your comments make my day!
Sourdough Starter Recipe: Your 5-Day Journey
Chef Lindsey
5 days
5 days
300-400
g active starter
Comment
Print Recipe
Ingredients
-
300 g rye flour (unbleached whole grain) -
700 g water (room temperature, unchlorinated) -
400 g unbleached all-purpose flour
Instructions
-
Day 1: Initial Mix. Combine 100g rye flour and 100g water in a clean container. Stir well until all flour is hydrated. Cover loosely and let sit at room temperature (70-78°F or 21-26°C) for 24 hours.
-
Day 2: First Feeding. In a separate clean container, combine 100g rye flour, 100g water, and 100g of yesterday’s starter. Stir thoroughly. Discard the remaining Day 1 starter. Cover loosely and let sit at room temperature for 24 hours. You should begin to see small bubbles.
-
Day 3: Second Feeding. Repeat Day 2. Your starter should be noticeably more active now, potentially doubling in volume, with a more pronounced tangy aroma.
-
Day 4: Transition to AP Flour. Combine 100g unbleached all-purpose flour, 100g water, and 100g of yesterday’s starter in a clean container. Discard the remainder. Cover loosely and let sit at room temperature for 24 hours. The starter should double and show significant air pockets. If still sluggish, continue with rye flour for another day before switching.
-
Day 5: Ready to Bake! Repeat Day 4. By this point, your starter should be consistently tripling in volume and show vigorous activity. It’s now ready to leaven your first loaf of sourdough bread!
-
Days 6 & 7: Maintain. Continue repeating the Day 4 feeding schedule to ensure your starter is strong and consistently active for regular use.
-
Long-Term Feeding (Activated Starter): Once active, adjust your feeding ratios based on your baking needs.
For a stiff levain (1:1:1 ratio):
100g water
10g previous day’s starter
100g all-purpose flour
For a liquid levain (e.g., 125% hydration):
125g water
10g previous day’s starter
100g all-purpose flour
Video Tutorial
Notes
For a visual, day-by-day walkthrough, watch the accompanying video tutorial.
Flavor Tips – The flavor of your sourdough starter will be influenced by the type of flour you feed it. For a versatile starter, I recommend using unbleached all-purpose flour after the initial rye flour boost. This allows you to create a wide variety of breads without a dominant flavor from the starter itself.
Technique – To ensure optimal yeast activity, always ferment your starter at room temperature (70-78°F or 21-26°C). If storing in the fridge or freezer, remove it, allow it to reach room temperature for 8-12 hours, then feed it as usual and let it ferment overnight at room temperature to reactivate before baking.
Storage – Always store your starter in a clean glass jar with a lid to prevent it from drying out. Mason jars or quart containers work perfectly.
Nutrition Information (Estimated Per Serving of Starter)
Carbohydrates: 89g |
Protein: 12g |
Fat: 1g |
Saturated Fat: 1g |
Polyunsaturated Fat: 1g |
Monounsaturated Fat: 1g |
Sodium: 8mg |
Potassium: 258mg |
Fiber: 8g |
Sugar: 1g |
Calcium: 26mg |
Iron: 4mg
Starter
Global
417
Like this? Leave a comment below!
Before You Go: Your Sourdough Journey Continues
I hope you thoroughly enjoyed the process of creating your very own sourdough starter! Establishing a strong, active levain is a significant accomplishment and the foundation for countless delicious baking adventures. Now that you have this incredible living ingredient at your fingertips, the possibilities are truly endless.
Don’t stop here! Be sure to explore my other sourdough bread recipes to put your new starter to good use. You can impress your friends and family with amazing treats like these sourdough cinnamon rolls, perfect for breakfast or brunch, or whip up a batch of my fluffy and flavorful sourdough rolls, ideal for accompanying any meal. Happy baking!