
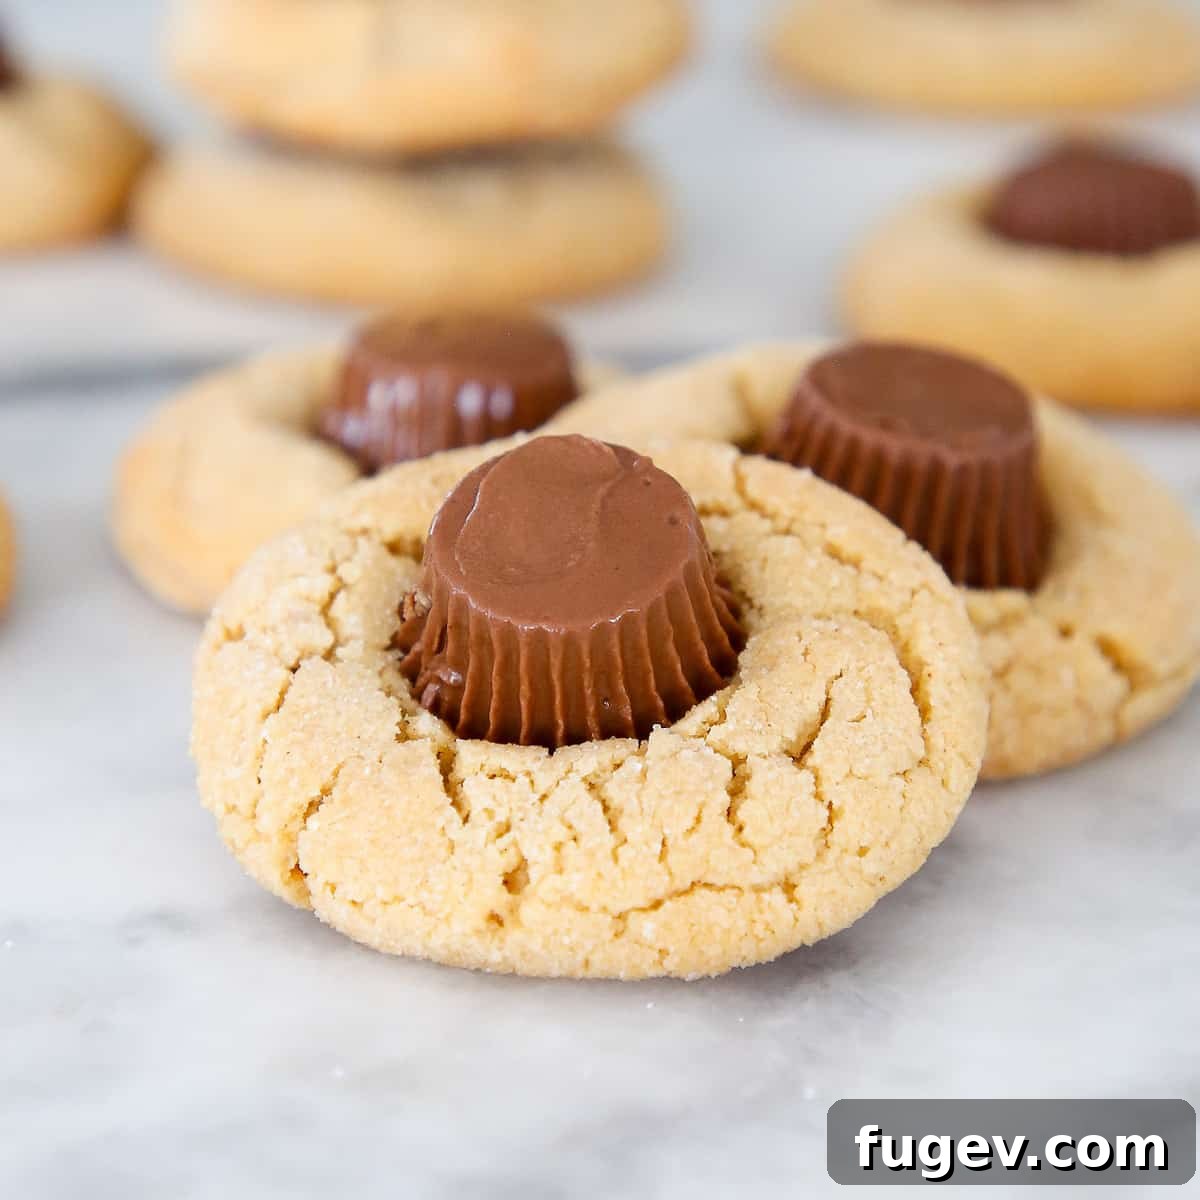
Irresistible Peanut Butter Cup Cookies: Your New Favorite Indulgence
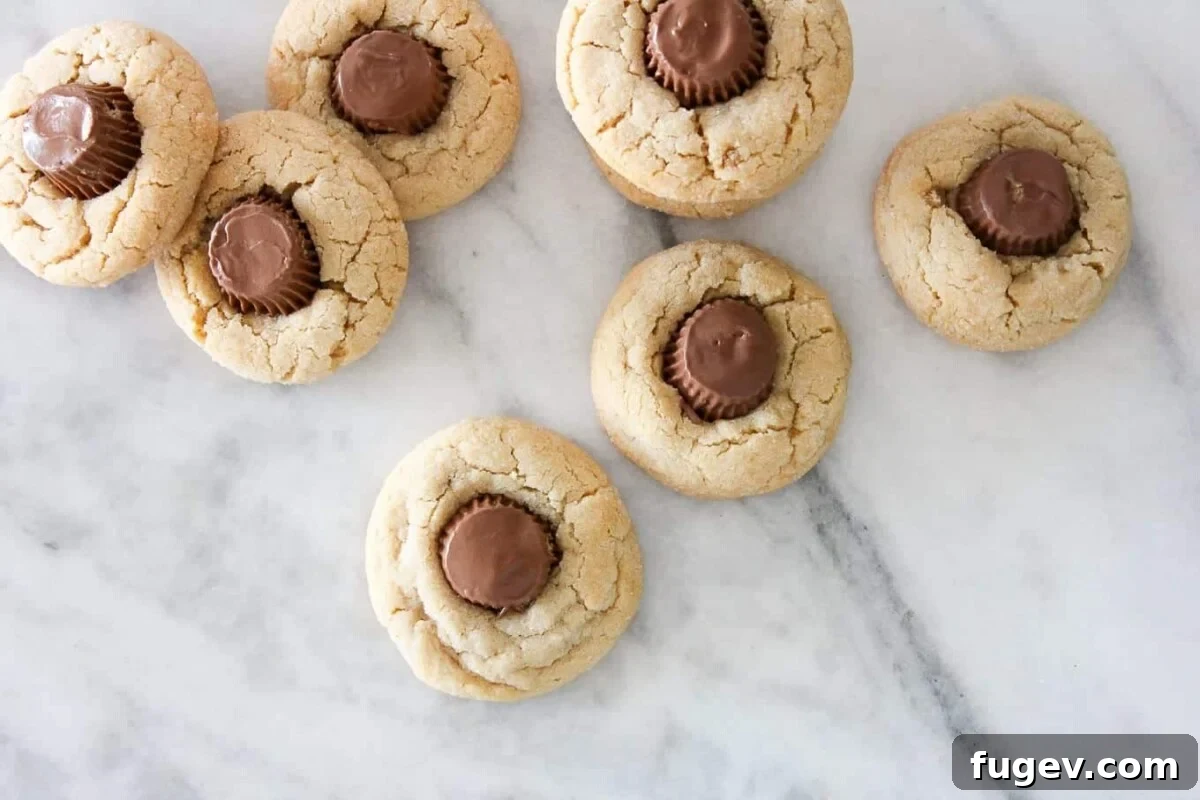
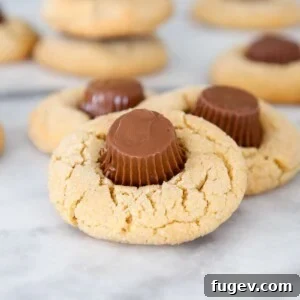
Prepare for an absolute sensation! These Peanut Butter Cup Cookies are not just any treat; they are thick, delightfully chewy peanut butter cookies, each crowned with a perfectly pressed mini Reese’s peanut butter cup at its heart. Forget the classic peanut butter blossoms you grew up with – these are an elevated, undeniably superior version that will capture your heart and taste buds. With their luscious texture and explosion of peanut butter and chocolate, they are destined to become a beloved staple in your baking repertoire.
A Quick Glance at the Recipe
This section provides a brief overview of the recipe. For complete, step-by-step instructions and precise measurements, please jump directly to the full recipe card below.
Jump to Recipe
Prep Time
20 minutes
Cook Time
8 minutes
Total Time
28 minutes
Servings
36 Cookies
Difficulty
Easy
Calories *
118 kcal per serving
Technique
Prepare cookie dough, portion and roll in sugar, bake until golden, then immediately press a Reese’s cup into the warm center.
Flavor Profile
Rich, thick, and wonderfully chewy peanut butter cookies featuring a delightful burst of soft, melty Reese’s peanut butter cups.
* Based on nutrition panel for a single cookie.
Delicious! I’ve made them a lot. I use Jif natural peanut butter and a really high quality butter. They are perfect every time. ⭐⭐⭐⭐⭐
Chelsea
Why These Peanut Butter Cup Cookies Will Become Your Go-To Recipe
More than just a delicious dessert, these Peanut Butter Cup Cookies offer a blend of practicality and pure indulgence. Here’s why they’ll quickly earn a permanent spot in your recipe box:
- Effortless Stacking for Holiday Tins: One of the brilliant innovations of this recipe is the use of mini Reese’s cups. Unlike traditional blossoms with their often pointy “kisses,” the flat profile of these Reese’s cups allows for perfectly stacked cookies. This means no more crushed tops or messy cookie tins when you’re preparing gifts for loved ones during the holidays. They maintain their elegant appearance and are a joy to pack!
- Double the Peanut Butter Delight: For true peanut butter aficionados, this recipe is a dream come true. You get the rich, nutty flavor of a classic peanut butter cookie dough, beautifully complemented by the creamy, familiar taste of a Reese’s peanut butter cup in the center. It’s a harmonious blend that intensifies the peanut butter experience, ensuring every bite is packed with the flavor you crave. If you’re searching for subtle, you’ve come to the wrong place – these are for serious peanut butter lovers!
- Ready in Under 30 Minutes: Craving homemade cookies but short on time? This recipe is your savior! There’s no lengthy chilling required for the dough, meaning you can whip up a batch from start to finish in less than half an hour. This makes them an ideal choice for a quick weeknight treat, an unexpected guest, or a last-minute addition to any party platter. Their speed and simplicity make them perfect for any occasion, from a casual Tuesday evening to an elaborate Christmas cookie spread.
Table of Contents
- Why You’ll Love These Cookies
- Ingredients & Smart Substitutions
- Creative Variations for Peanut Butter Cup Cookies
- Expert Baking Tips for Perfection
- Step-by-Step: How to Make Peanut Butter Cup Cookies
- Chef Lindsey’s Essential Recipe Tip
- Recipe FAQs
- Related Peanut Butter Cookie Recipes
- Peanut Butter Cup Cookies Recipe Card
- Before You Go
These exquisite peanut butter cup cookies originated from a desire to perfect my holiday cookie tins. The classic Hershey’s Kiss blossoms, while charming, often proved challenging to stack neatly without damaging their delicate chocolate peaks. By replacing them with mini Reese’s peanut butter cups, not only did I solve the stacking dilemma, but I also significantly enhanced the cookie’s flavor profile, creating a truly superior treat. Each cookie is crafted to be wonderfully thick and chewy, boasting that irresistible soft, melting Reese’s center that defines pure peanut butter and chocolate perfection.
As you plan your baking for the upcoming holidays or any special gathering, consider adding these gems to your list. They pair beautifully with other festive favorites. I personally never let a Christmas season pass without whipping up a batch of my delightful cherry pecan cookies, classic soft gingerbread boys, decadent brown butter brownies, or elegant traditional raspberry Linzer cookies. Combine these with our stellar Peanut Butter Cup Cookies, and you’ll have an impressive and diverse spread that offers something delicious for every palate!
Essential Ingredients & Smart Substitutions for Perfect Cookies
Crafting the perfect Peanut Butter Cup Cookie starts with the right ingredients. Here’s a detailed look at what you’ll need and how to make the best choices:
- Granulated Sugar: Essential for sweetness and creating that delightful crisp edge when rolled. A small amount is also used in the dough for balance.
- Light Brown Sugar: This ingredient is crucial for adding a wonderful chewiness to your cookies. Its molasses content contributes to a deeper, richer flavor and helps keep the cookies moist. While light brown sugar is recommended, dark brown sugar can also be used for a more pronounced molasses note.
- Unsalted Butter: Always use unsalted butter to control the overall saltiness of your baked goods. Ensure it’s softened to room temperature, which is key for proper creaming with the sugars, creating a smooth and airy base for your cookie dough.
- All-Purpose Flour: The structural backbone of our cookies. For best results, measure your flour by weight (1 cup is approximately 120-125 grams) or use the “spoon and level” method to avoid over-packing, which can lead to dense, dry cookies.
- Baking Soda & Baking Powder: This powerful duo works together to give the cookies their perfect lift and tender texture. Baking soda reacts with the acidic brown sugar, while baking powder provides additional leavening for a soft, pillowy crumb.
- Kosher Salt: A pinch of salt enhances all the other flavors, balancing the sweetness and bringing out the rich peanut butter and chocolate notes.
- Large Egg: Acts as a binder, adding moisture and richness, and helping the cookies hold their shape. Ensure your egg is at room temperature to incorporate smoothly into the batter.
- Vanilla Extract: A splash of pure vanilla extract adds warmth and depth to the cookie’s flavor profile, complementing the peanut butter beautifully.
- Peanut Butter: For this recipe, creamy, regular peanut butter (like Jif or Skippy) is highly recommended. These brands have a consistent fat and sugar content that ensures the cookies bake predictably with a perfect texture. If you opt for natural peanut butter or another nut butter, be aware that the cookies might spread more due to varying oil content. For natural peanut butter, you might find more success with a recipe specifically designed for it, such as our chewy peanut butter chocolate chip cookies.
- Mini Reese’s Cups: The star of the show! Make sure to use the mini, unwrapped versions for ease, or unwrap regular mini cups yourself. Keeping them slightly chilled can help them hold their shape better when pressed into the warm cookies.
Creative Variations: Elevate Your Peanut Butter Cup Cookies
While the classic Peanut Butter Cup Cookie is undeniably perfect, there’s always room to get creative and customize your batch. Here are some exciting variations to try:
- Experiment with Reese’s Flavors: Don’t limit yourself to the classic milk chocolate Reese’s! Try using white chocolate Reese’s cups for a sweeter, creamier profile, or dark chocolate Reese’s cups for a richer, more intense chocolate experience. Holiday-themed Reese’s shapes (like pumpkins or eggs) can also be used, though their larger size might require slightly larger cookie dough balls.
- Delicious Mix-ins for Extra Texture: Boost the flavor and texture by folding in additional ingredients directly into your cookie dough. Semi-sweet chocolate chips are a classic choice, or for an extra peanut butter kick, add peanut butter chips. You can also incorporate colorful M&M’s for a fun, festive touch, or get adventurous with other small candies like chopped Snickers or Rolos for a caramel surprise!
- Transform Them into Bars: For an easier, crowd-pleasing dessert, turn this cookie recipe into delicious bars! Simply press the entire batch of cookie dough evenly into a 9×13 inch baking pan. Bake for approximately 25–30 minutes, or until the edges are golden and the center is set. As soon as they come out of the oven, press the mini Reese’s cups into the warm bars. Once cooled, cut them into individual bar cookies. This method is fantastic for potlucks, parties, or when you need a quick dessert without scooping individual cookies. For more bar inspiration, check out our fudgy peanut butter milk chocolate bars or these scrumptious Reese’s peanut butter blondies.
- Add a Pop of Sprinkles: Make your cookies extra special and festive with colored sanding sugar! Before baking, roll the dough balls in vibrant red, green, gold, or a mix of colors for an eye-catching presentation. This is especially wonderful for holiday baking or birthday celebrations.
Expert Baking Tips for Flawless Peanut Butter Cup Cookies
Achieving bakery-quality Peanut Butter Cup Cookies is simple when you follow these professional tips. These insights will help you avoid common pitfalls and ensure every batch is a success:
- Properly Cream Butter and Sugar: This step is fundamental for light, fluffy cookies. Beat your softened unsalted butter with the granulated and brown sugars until the mixture is visibly light in color and fluffy in texture, typically taking 2-3 minutes. This process incorporates air into the butter, which is crucial for the cookie’s final texture. It also ensures the butter is at the correct consistency and temperature to blend seamlessly with the peanut butter, preventing any unwanted chunks of butter in your dough.
- Press Reese’s Immediately After Baking: Timing is everything when it comes to the Reese’s cups. As soon as the cookies emerge from the oven, while they are still piping hot and pliable, gently but firmly press a mini Reese’s cup into the center of each one. The residual heat from the cookie will slightly melt the chocolate, allowing it to adhere perfectly and create that signature soft, melty center. If you wait too long, the cookies will begin to set and cool, causing them to crack when the candy is pressed in.
- Avoid Overbaking for Ultimate Chewiness: One of the secrets to a chewy cookie is knowing when to pull them from the oven. The cookies will puff up, and you’ll notice a few cracks on the top surface. The center of the cookies might still appear slightly underdone and soft within these cracks – this is perfectly normal and desired! They will continue to bake and set on the hot cookie sheet after being removed from the oven, resulting in that perfect chewy texture rather than a dry, crumbly one.
- Unwrap Reese’s Cups While Cookies Bake: This seemingly small tip makes a big difference in efficiency. Unwrap all your mini Reese’s cups *before* the cookies finish baking. This ensures they are ready to go the moment the cookies come out of the oven, preventing any precious seconds from being wasted. Just like with classic peanut butter blossoms, having the candy ready means you can press them into the warm cookies while they are still soft and receptive, guaranteeing that melty goodness. Consider storing your Reese’s in the fridge beforehand; they often unwrap more easily and hold their shape better when pressed into warm cookies.
Step-by-Step Guide: How to Bake Perfect Peanut Butter Cup Cookies
Follow these detailed instructions to create consistently perfect peanut butter cup cookies every single time. For precise measurements and a printable version, please refer to the comprehensive recipe card located further down the page.
Step 1: Prepare Your Baking Environment. Begin by preheating your oven to 350 degrees F (175°C). While the oven heats, line several baking sheets with parchment paper. Parchment paper prevents sticking and aids in easy cleanup.
Step 2: Combine Dry Ingredients. In a large mixing bowl, thoroughly whisk together the all-purpose flour, baking soda, baking powder, and kosher salt. Ensure these ingredients are well combined to guarantee even leavening throughout your cookies. Set this bowl aside for later.
Step 3: Cream Butter and Sugars. In a separate, larger bowl (or the bowl of a stand mixer fitted with the paddle attachment), beat the softened unsalted butter with the granulated sugar and light brown sugar. Cream these together on medium speed for 2-3 minutes until the mixture appears light, fluffy, and pale in color. This step is crucial for incorporating air and achieving a tender cookie texture.
Step 4: Incorporate Peanut Butter, Egg, and Vanilla. Reduce the mixer speed to low. Add the creamy peanut butter and beat until it is fully incorporated into the butter-sugar mixture. Before adding the egg, take a moment to scrape down the sides of the bowl with a spatula, ensuring all ingredients are well combined. Then, add the large egg and vanilla extract, beating until the mixture is smooth and cohesive. The dough should look rich and well emulsified.
Scrape down the sides of the bowl before adding the egg to ensure the peanut butter is fully incorporated with the butter, preventing any unmixed pockets.
Step 5: Combine Wet and Dry Dough. Gradually add the reserved flour mixture to the wet ingredients in three separate additions. Mix on low speed after each addition, just until combined. Be careful not to overmix, as this can develop the gluten too much and result in tough cookies. Stop mixing as soon as no dry streaks of flour remain.
Step 6: Shape and Sugar-Coat. Take spoonfuls of the peanut butter cookie dough and roll them into uniform 1-inch balls. Place the remaining granulated sugar in a small, shallow bowl. Roll each cookie dough ball thoroughly in the sugar until it’s evenly coated. Arrange the sugar-coated balls on your prepared baking sheets, ensuring they are spaced approximately 2 inches apart to allow for spreading during baking.
While the cookies bake, meticulously unwrap all your Reese’s Mini Peanut Butter Cups. It might be a little tedious, but having them ready the moment the cookies are out of the oven is absolutely worth the effort for that perfect press.
Step 7: Bake to Perfection. Transfer the baking sheets to your preheated oven. Bake for 8–10 minutes. The cookies are done when their edges begin to show slight cracks, and the centers have puffed up. Remember, they may still look a little soft in the center, but they will continue to firm up as they cool on the baking sheet.
Step 8: The Reese’s Finale. Immediately upon removing the baking sheets from the oven, gently but firmly press one mini Reese’s cup into the center of each warm cookie. The heat will cause the chocolate to soften and meld beautifully with the cookie. Once all Reese’s are pressed, carefully transfer the cookies to a wire rack to cool completely. This cooling process helps them set and firm up into their perfect shape.
Chef Lindsey’s Essential Recipe Tip
For the easiest unwrapping and best presentation, I highly recommend storing your Reese’s Mini Peanut Butter Cups in the fridge prior to baking. Chilled Reese’s tend to unwrap without sticking to their wrappers, and they will hold their perfect shape much better when pressed into the warm, soft cookies.
Recipe FAQs: Your Peanut Butter Cup Cookie Questions Answered
To maintain their deliciousness, store your baked peanut butter cup cookies in an airtight container at room temperature for up to one week. For longer storage, they freeze exceptionally well! Place cooled cookies in a single layer in a freezer-safe container or bag, and they can be frozen for up to two months. If you want to prepare dough in advance, roll the dough balls in sugar, then freeze them on a baking sheet until solid before transferring them to a freezer bag. You can bake them from frozen, adding a couple of minutes to the baking time.
Yes, you absolutely can use crunchy peanut butter, but be aware that it will slightly alter the cookie’s texture. The cookies will have a delightful added crunch from the peanut pieces, which some people prefer! It won’t significantly impact the baking process, but the overall mouthfeel will be less uniformly smooth.
Excessive spreading is a common issue with peanut butter cookies and usually points to one of two things: your butter was too warm, or you used natural peanut butter. For this specific recipe, it’s best to use regular creamy peanut butter like Jif or Skippy, as their consistent fat and sugar content helps maintain the cookie’s structure. Ensure your butter is softened to room temperature but not melted or greasy. If it’s too soft, the dough will be too fluid. Chilling the dough briefly before baking can also help if you suspect your kitchen is warm or your butter was a bit too soft.
While this recipe isn’t specifically designed for gluten-free baking, you can often achieve good results by substituting the all-purpose flour with a 1:1 gluten-free baking flour blend that contains xanthan gum. Keep in mind that the texture might be slightly different, potentially a bit more delicate. Always check the ingredients of your specific gluten-free flour blend and adjust liquid if necessary, though it’s usually a straight swap.
More Irresistible Peanut Butter Cookie Recipes to Explore
Cookie Recipes
Classic Peanut Butter Blossoms
Cookie Recipes
Ultimate Reese’s Peanut Butter Cookies
Cookie Recipes
Chewy Peanut Butter Chocolate Chip Cookies
Brownies & Bars Recipes
Decadent Reese’s Peanut Butter Blondies
If you’ve tried and loved this recipe, please consider leaving a ⭐ star rating and sharing your experience in the comments section below. Your feedback truly brightens my day!
Peanut Butter Cup Cookies
Pin Recipe
Comment
Print Recipe
Ingredients
- ¼ cup granulated sugar plus more for rolling
- ½ cup packed light brown sugar
- ½ cup unsalted butter softened
- ½ cup peanut butter creamy, like Jif or Skippy
- 1 large egg
- ½ teaspoon pure vanilla extract
- 1 ½ cups all-purpose flour
- ¾ teaspoon baking soda
- ½ teaspoon baking powder
- ¼ teaspoon kosher salt
- 36 Reese’s Mini Peanut Butter Cups unwrapped
Instructions
- Preheat your oven to 350°F (175°C) and prepare baking sheets by lining them with parchment paper.
- In a medium bowl, whisk together the flour, baking soda, baking powder, and salt. Set aside this dry mixture.
- In a large bowl, using an electric mixer, cream together the softened butter, granulated sugar, and brown sugar until the mixture is light and fluffy, about 2-3 minutes.
- Beat in the creamy peanut butter until it is fully incorporated. Then, add the egg and vanilla extract, continuing to beat until the mixture is smooth and well combined. Remember to scrape down the sides of the bowl to ensure everything is mixed evenly.
- Gradually add the flour mixture to the wet ingredients in three separate additions, mixing on low speed between each addition just until the flour is no longer visible. Avoid overmixing.
- Shape the cookie dough into 1-inch balls. Roll each ball generously in extra granulated sugar to coat. Place the sugared dough balls about 2 inches apart on your prepared baking sheets. While the cookies are baking, make sure to unwrap all your Reese’s cups – this step is tedious but crucial for timely placement!
- Bake for 8-10 minutes, or until the edges of the cookies begin to crack and the centers appear puffed and slightly set, even if they look a little soft.
- Immediately after removing the cookies from the oven, gently press a Reese’s cup into the center of each warm cookie. Let the cookies cool completely on a wire rack to allow them to set.
Video
Notes
Yield: This recipe typically yields about 36 delicious cookies.
Presentation Tip: For the best appearance and texture, press the Reese’s cups into the cookies immediately after they come out of the oven, while they are still very warm and soft. This ensures the chocolate melts slightly and adheres perfectly.
Variation Idea: Peanut Butter Thumbprint Cookies: Transform these into classic peanut butter thumbprint cookies! After baking the cookies as directed, use a measuring spoon to create a deep indent in the center. Fill these indents with your favorite jam (raspberry or strawberry works wonderfully) and bake for an additional 1-2 minutes until the jam is warm and bubbly. A delightful twist!
Storage Instructions: Store the baked cookies in an airtight container at room temperature for up to 1 week. For longer preservation, these cookies freeze beautifully for up to 2 months. You can also freeze the raw dough balls (after rolling in sugar) on a baking sheet until solid, then transfer them to a freezer-safe bag for up to 2 months. Bake from frozen, adding a couple of minutes to the cook time.
Nutrition Information
Carbohydrates: 13g |
Protein: 2g |
Fat: 7g |
Saturated Fat: 3g |
Polyunsaturated Fat: 1g |
Monounsaturated Fat: 3g |
Trans Fat: 1g |
Cholesterol: 12mg |
Sodium: 108mg |
Potassium: 56mg |
Fiber: 1g |
Sugar: 8g |
Vitamin A: 89IU |
Vitamin C: 1mg |
Calcium: 15mg |
Iron: 1mg
Enjoyed this recipe? Leave a comment below!
Your feedback helps others discover delicious recipes like this one.
Before You Go: More Sweet Treats Await!
I genuinely hope you savored every bite of this delightful Reese’s Peanut Butter Cup Cookie recipe. These cookies are truly a game-changer for any occasion! If your sweet tooth is still calling, don’t stop here. I invite you to explore our wide array of other delicious cookie recipes, perfect for everyday indulgence or special gatherings. And for those planning festive baking, be sure to browse all my enchanting Christmas cookie recipes for inspiration that will make your holiday season even sweeter.