
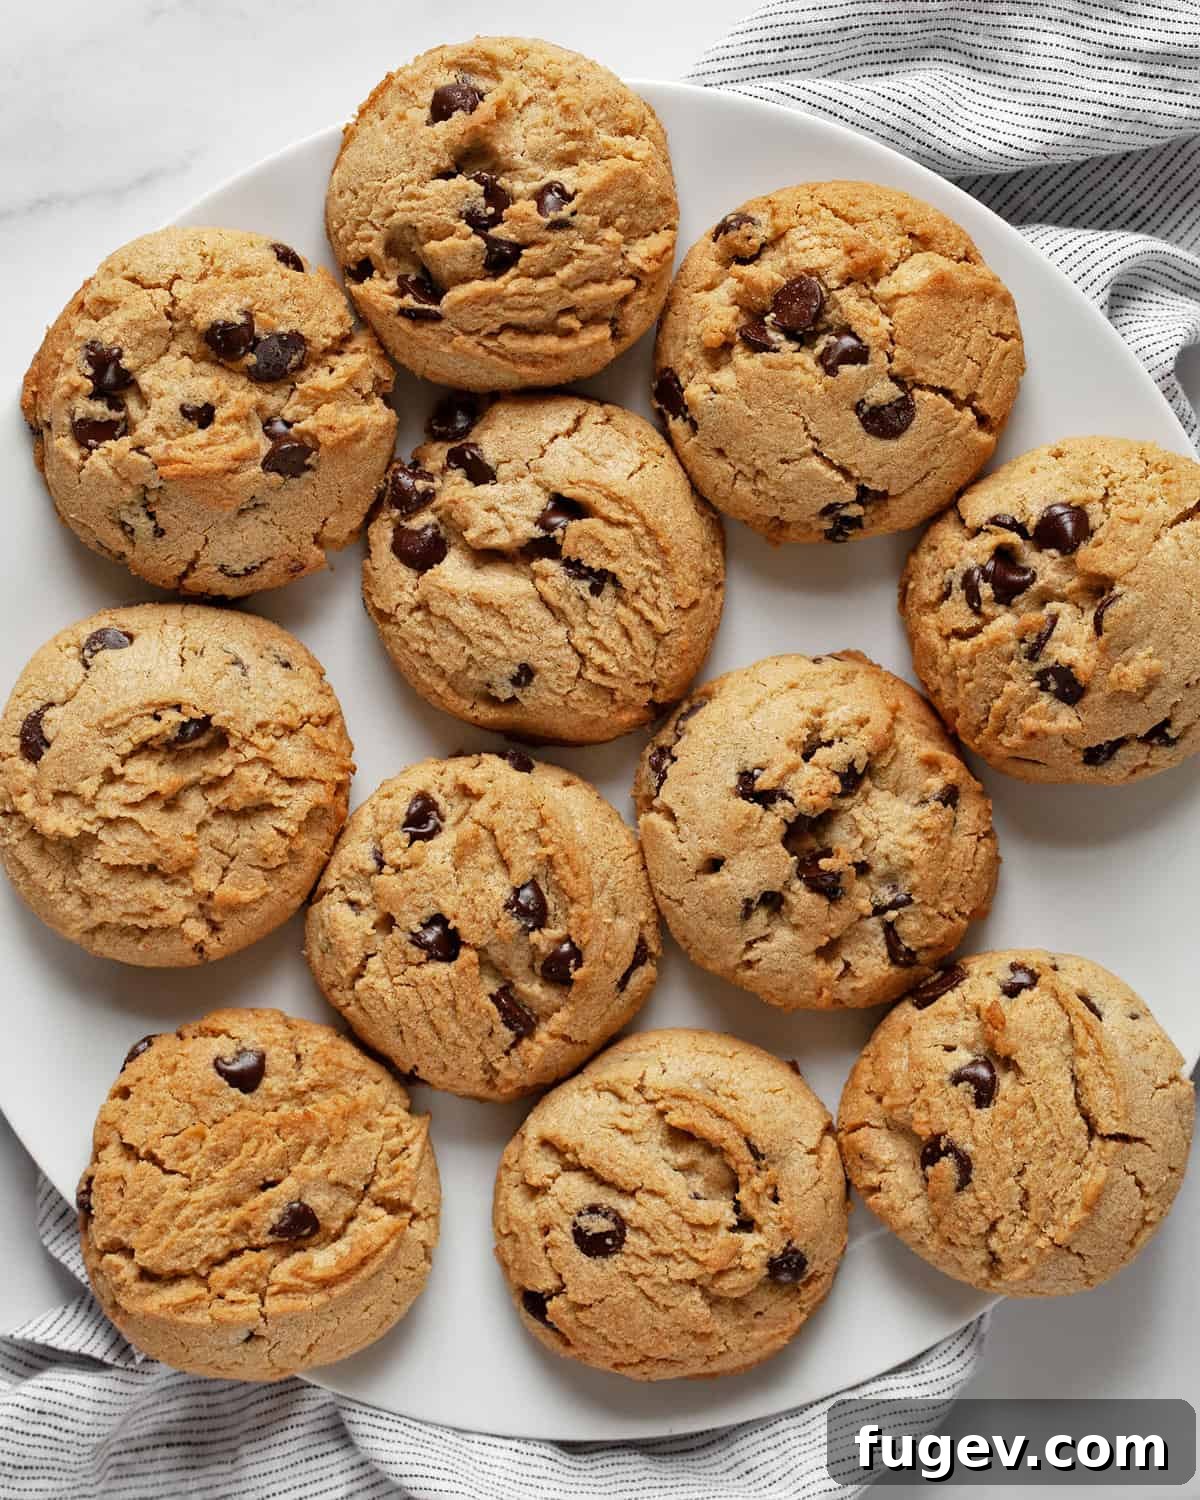
Bakery-Style Chocolate Chip Peanut Butter Cookies: Your New Favorite Recipe
Indulge in the perfect harmony of sweet and salty with these incredible chocolate chip peanut butter cookies. Designed to be irresistibly thick and delightfully chewy, just like those artisanal treats you’d find at your favorite local bakery, this recipe simplifies gourmet baking into just 10 essential ingredients. Whether you prefer the rich depth of natural peanut butter or the creamy consistency of a regular processed spread, this versatile recipe guarantees a batch of golden, nutty, chocolate-studded delights that will become an instant classic in your kitchen.
Craving more nutty and chocolatey goodness? You might also love these peanut butter M&M cookies for another fun and colorful treat!
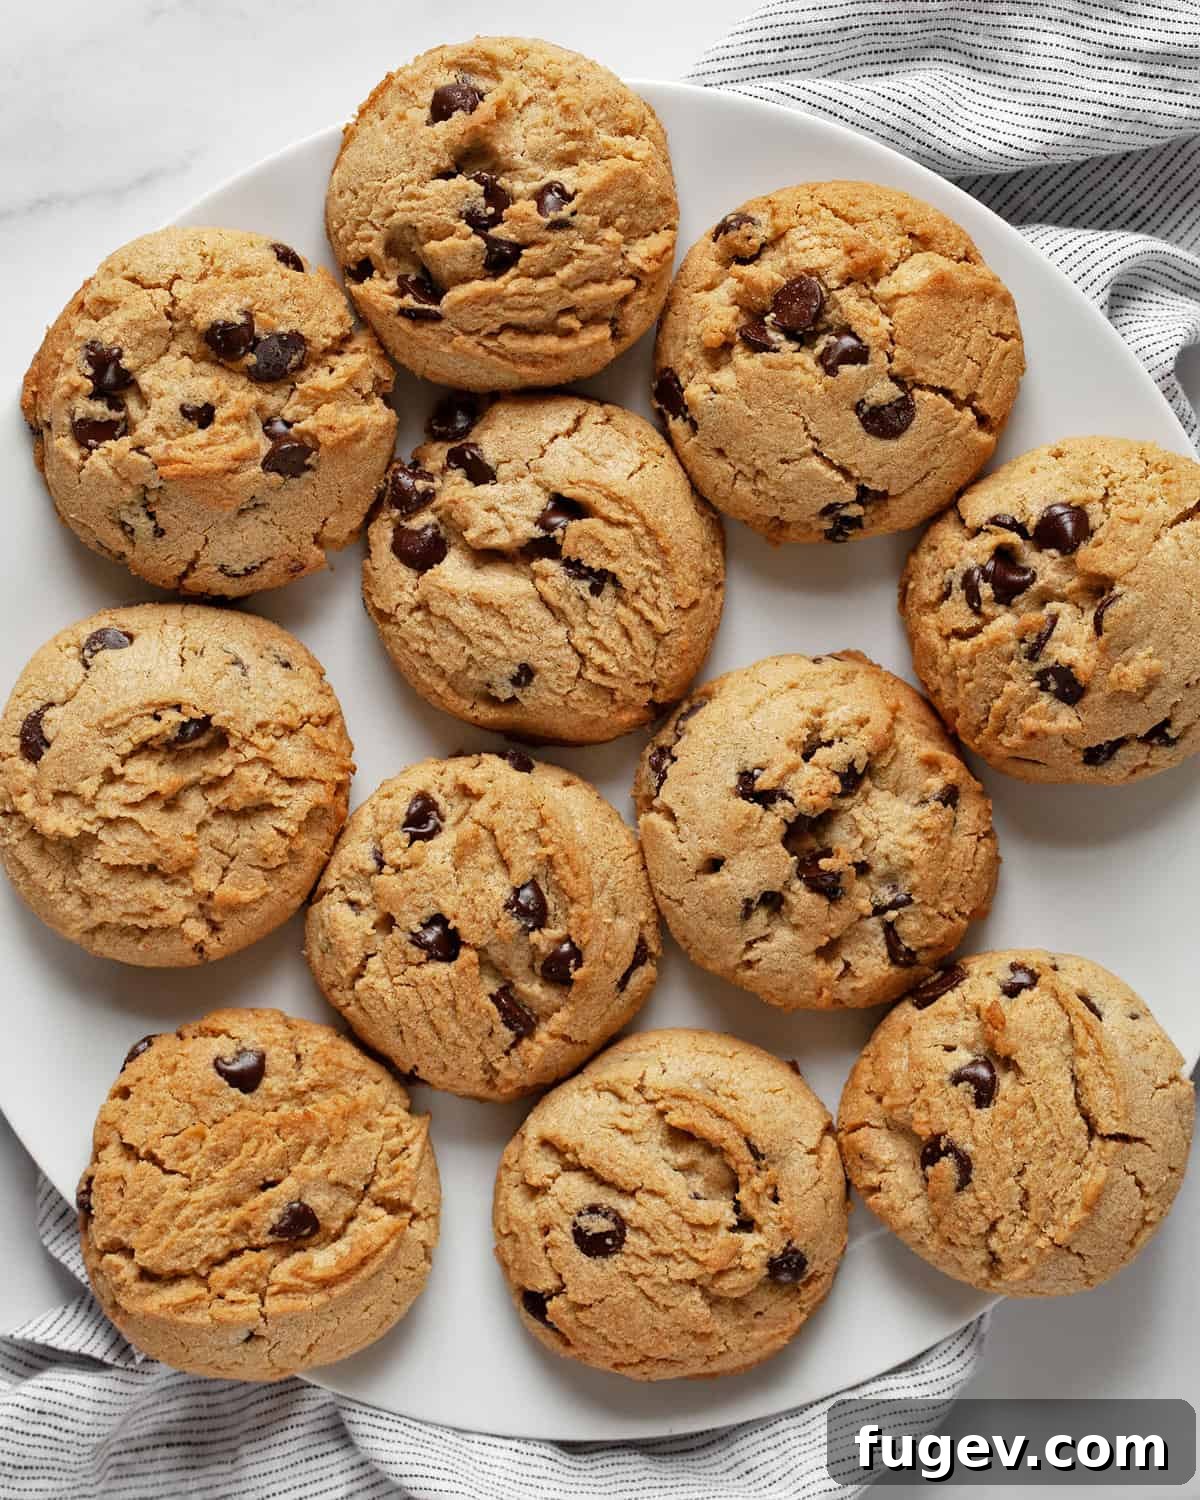
Table of Contents
- Why You’ll Adore This Recipe
- The Essential Ingredients
- How To Bake The Best Chocolate Chip Peanut Butter Cookies
- Serving Suggestions
- Storage & Freezing Tips
- Pro Baking Tips for Perfect Cookies
- Recipe FAQs
- More Irresistible Cookie Recipes
- Chocolate Chip Peanut Butter Cookies Recipe Card
Why You’ll Adore These Chocolate Chip Peanut Butter Cookies
Prepare to fall in love with these cookies! They aren’t just another sweet treat; they’re a delightful experience. Here’s why this recipe will quickly become a cherished part of your baking repertoire:
The Ultimate Flavor Fusion: While classic peanut butter cookies are undeniably delicious, the addition of chocolate chips elevates them to an entirely new level. This iconic pairing delivers a harmonious balance of salty, sweet, and nutty notes in every single bite. The richness of the peanut butter perfectly complements the bittersweet or milky sweetness of the chocolate, creating a dessert that’s truly unforgettable.
Simplicity with Just 10 Ingredients: Don’t let the bakery-quality results fool you – this recipe is surprisingly straightforward. You’ll only need 10 common ingredients, most of which you likely already have in your pantry or refrigerator if you bake regularly. This means less shopping, less fuss, and more time to enjoy your freshly baked cookies!
Achieve Bakery-Style Thickness and Chewiness: The secret to those coveted thick, chewy cookies lies in one crucial step: chilling the dough. This isn’t just a recommendation; it’s essential for preventing excessive spreading and allowing the flavors to meld beautifully. We embrace this chilling period, making it easy to split the baking process into two convenient parts: prepare the dough one day, and bake your fresh cookies the next. This flexible approach is ideal for busy schedules and ensures superior texture.
Versatility with Peanut Butter Choices: Whether your household prefers the wholesome taste and slightly crumbly texture of natural peanut butter or the smooth, soft results from regular processed peanut butter like Skippy or Jif, this recipe is adaptable. Natural peanut butter will yield a cookie with a bit more chew and a rustic crumble, while regular processed peanut butter will result in a softer, melt-in-your-mouth experience. Both options promise a robust peanut butter flavor that shines through.
These cookies are not only simple to make but also offer that perfect balance of familiar comfort and gourmet indulgence, making them a fantastic choice for any occasion – from a casual family treat to a special gathering.
The Essential Ingredients for Perfect Peanut Butter Cookies
Crafting these exceptional cookies starts with understanding the role each ingredient plays. Here’s a detailed look at what you’ll need to gather:
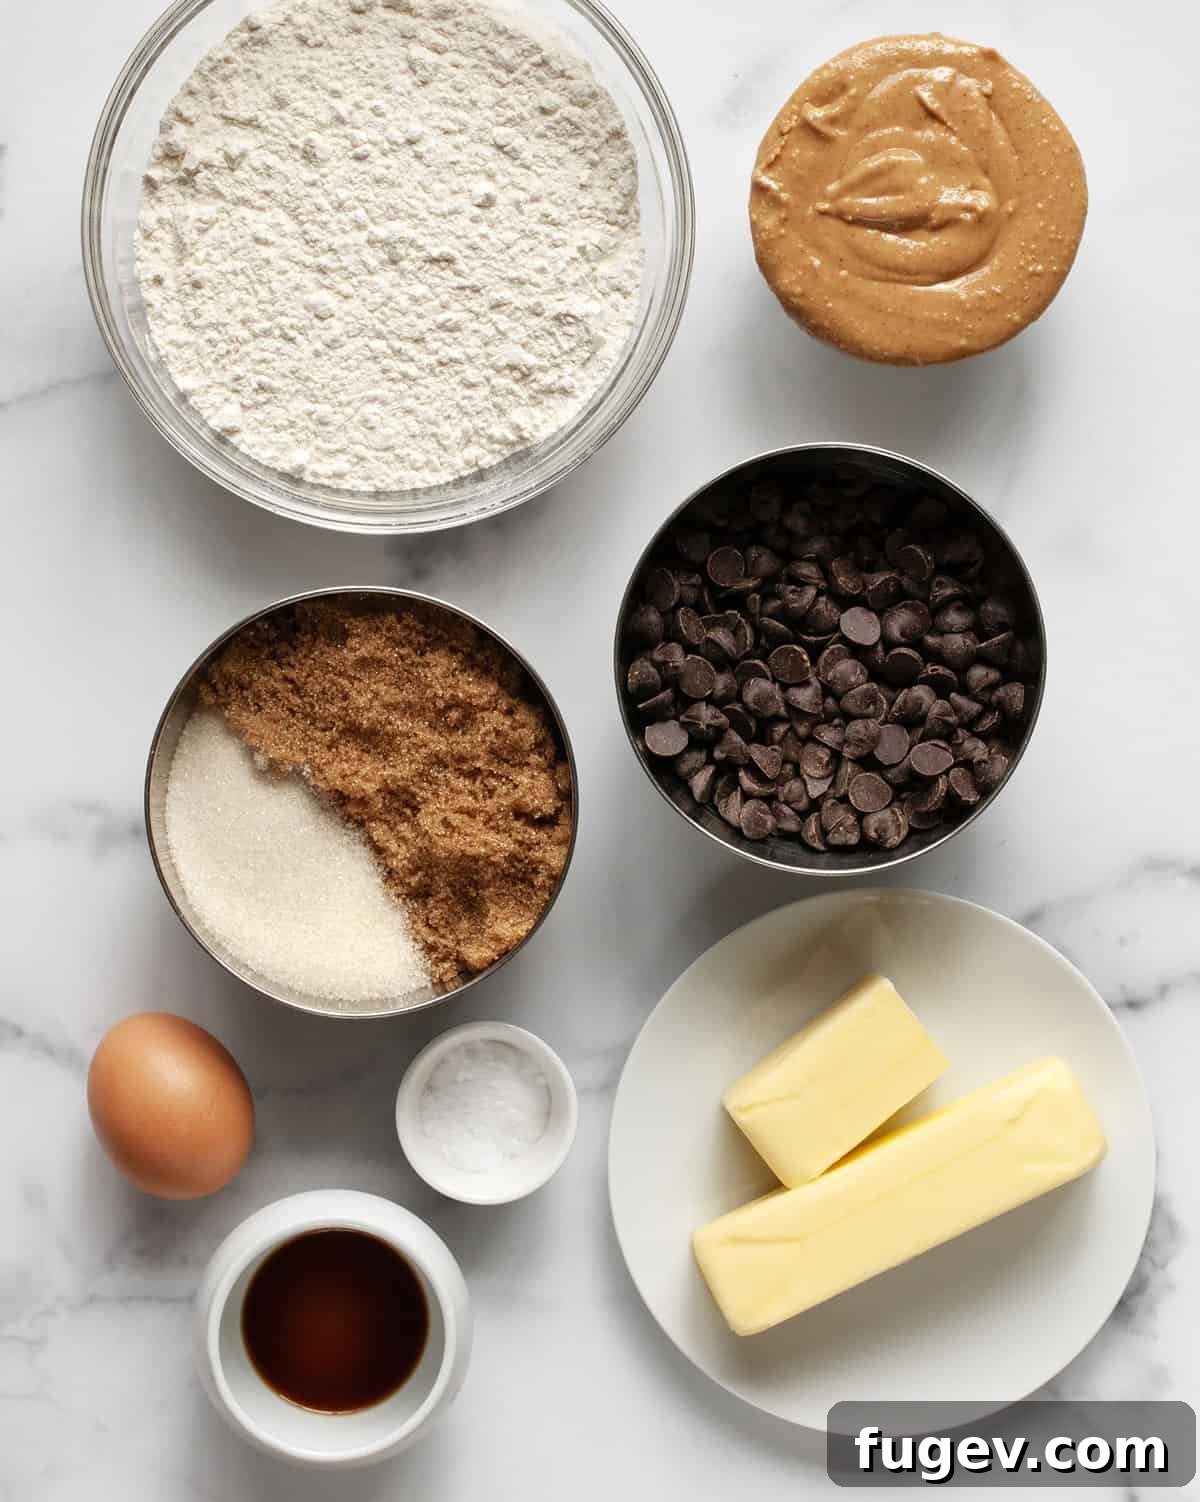
- Unsalted Butter: The foundation of rich, flavorful cookies. Always opt for unsalted butter for baking, as it gives you control over the overall saltiness. It’s crucial for your butter to be truly softened at room temperature, not melted. It should be pliable enough for your finger to leave a dent easily, but still feel cool to the touch. To speed up softening without melting, try cutting the butter into smaller cubes or grating it with a box grater.
- Peanut Butter: The star of the show! As mentioned, both natural (oil separated, needs stirring) and regular processed peanut butter (like Jif or Skippy) work beautifully. Natural peanut butter will contribute to a slightly more crumbly, rustic texture, while regular peanut butter will yield a softer, more uniform cookie. Ensure your natural peanut butter is thoroughly stirred to combine the oil and solids before measuring.
- Chocolate Chips: The perfect companion to peanut butter. While semi-sweet chocolate chips are a classic choice, don’t hesitate to experiment! Bittersweet chocolate chips offer a deeper, more intense chocolate flavor, dark chocolate chips provide a sophisticated edge, and milk chocolate chips will add extra sweetness for those with a sweeter palate. You can also use chocolate chunks for larger pockets of melted chocolate.
- Brown Sugar (Packed Light or Dark): Essential for chewiness and moisture. Brown sugar’s molasses content is key to giving these cookies their soft, chewy texture and preventing them from becoming dry. Light brown sugar provides a milder molasses flavor, while dark brown sugar will give a more intense, caramelized note. Make sure to pack it firmly when measuring.
- Granulated Sugar: While brown sugar ensures chewiness, granulated sugar contributes to the crisp edges and helps with a bit of spread. This recipe intentionally uses a higher ratio of brown sugar (3/4 cup) to granulated sugar (1/4 cup) to achieve that desired thick, bakery-style cookie rather than a thinner, crisper one.
- Large Egg: Acts as a binder, adding structure, moisture, and richness to the dough. Always use one large egg, ideally at room temperature, to ensure it incorporates smoothly into the other ingredients.
- Pure Vanilla Extract: A flavor enhancer. While peanut butter is prominent, a good quality pure vanilla extract deepens the overall flavor profile, adding warmth and enhancing the butteriness and nuttiness without overpowering it. Avoid imitation vanilla for the best results.
- All-Purpose Flour: The primary structural component of our cookies. Proper measurement is key here. For the most accurate amount, use the “scoop and sweep” method: fluff the flour with a fork, then gently spoon it into your measuring cup and level off the top with a straight edge like a knife.
- Baking Soda: Our leavening agent. Baking soda reacts with the acidic brown sugar to help the cookies rise and achieve that characteristic crackled top, contributing to their soft interior.
- Kosher Salt: A flavor activator. Salt is vital in both savory and sweet recipes, balancing and intensifying all the other flavors. In these cookies, it highlights the sweetness of the chocolate and the nuttiness of the peanut butter, preventing them from tasting flat.
Having these quality ingredients at the correct temperatures is your first step towards baking success!
How To Bake The Best Chocolate Chip Peanut Butter Cookies
Follow these detailed steps to create a batch of perfect, bakery-style cookies:
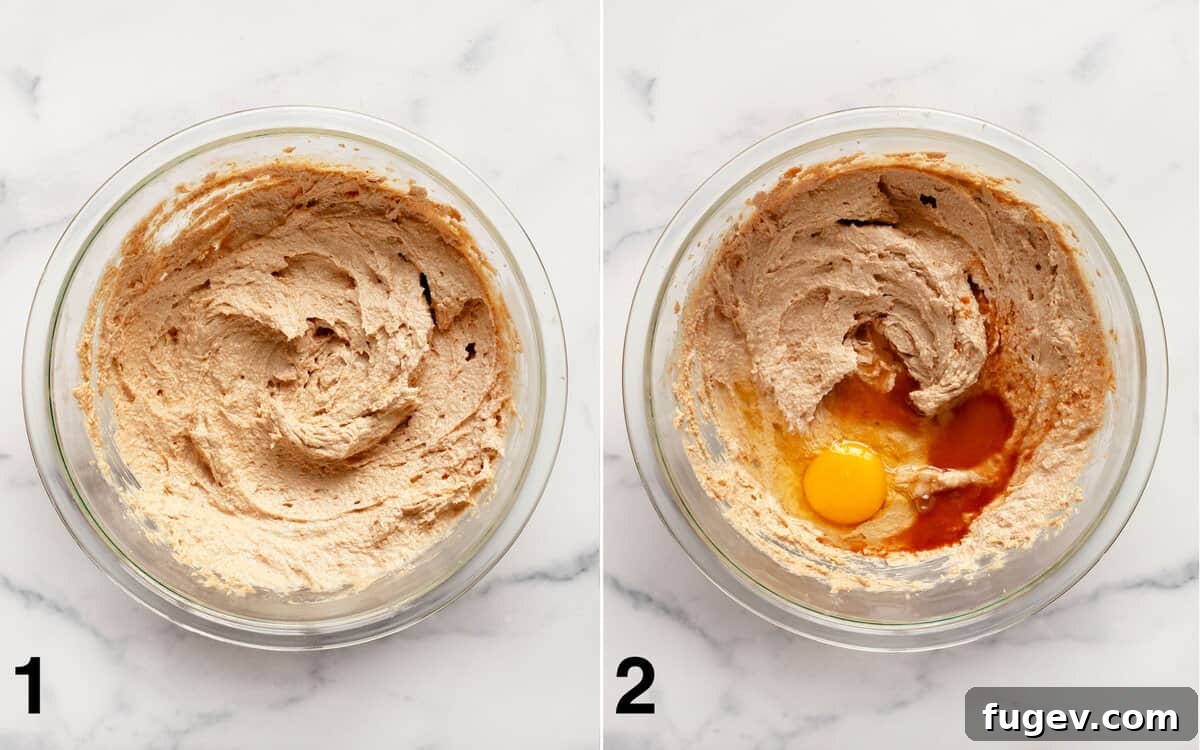
1. Cream the Butter, Peanut Butter, and Sugars: In a large mixing bowl, combine your softened unsalted butter, peanut butter, packed light brown sugar, and granulated sugar. Using either a handheld electric mixer or a stand mixer fitted with the paddle attachment, beat these ingredients together on medium-high speed for a full 4 minutes. This extended creaming time is crucial; it incorporates air into the mixture, resulting in a pale, fluffy consistency that is essential for thick, chewy cookies. Don’t rush this step!
2. Integrate the Egg and Vanilla Extract: Once your butter and sugar mixture is light and airy, crack in the large egg and add the pure vanilla extract. Beat on medium speed until just combined, ensuring the egg is fully incorporated into the wet ingredients. Avoid overmixing at this stage.
3. Prepare the Dry Ingredients: In a separate, medium-sized bowl, whisk together the all-purpose flour, baking soda, and kosher salt. Whisking ensures these dry ingredients are evenly distributed, so the leavening and seasoning are consistent throughout your cookies.
4. Combine Wet and Dry Ingredients: Gradually add the combined dry ingredients to the wet mixture. You can do this by hand using a sturdy wooden spoon or with your mixer on the lowest speed. Mix only until the flour streaks have just disappeared. Overmixing at this stage can develop the gluten too much, leading to tough cookies.
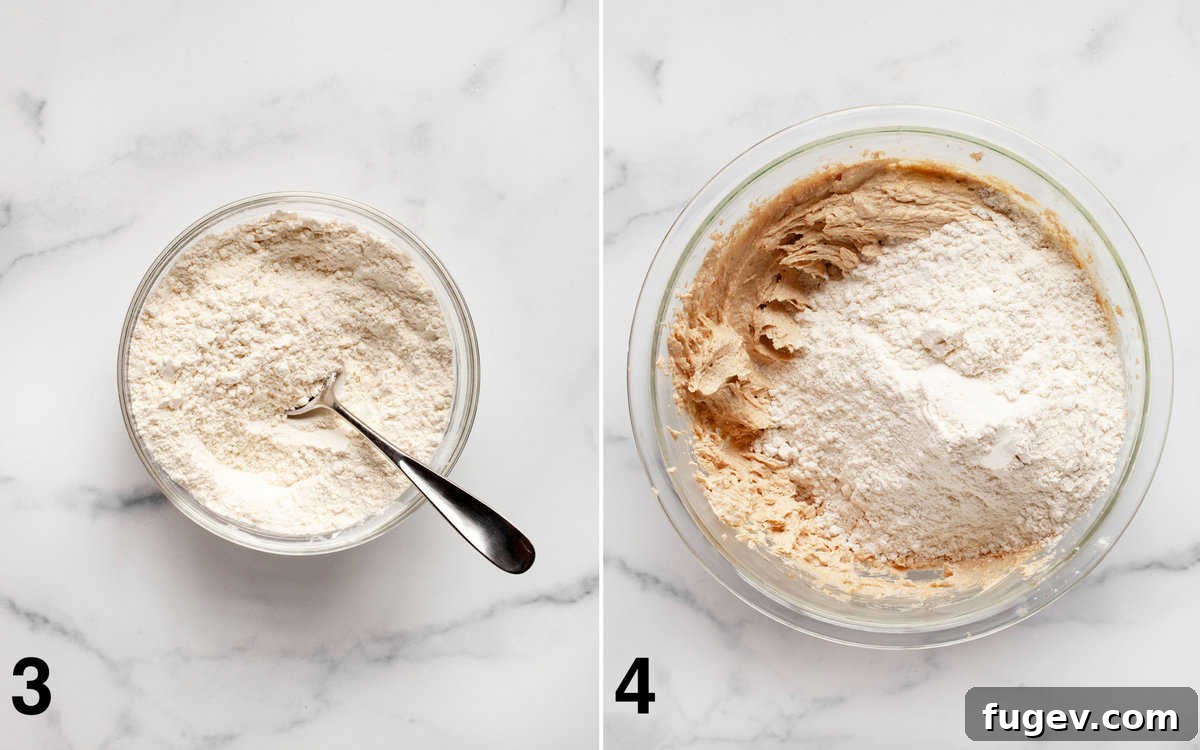
5. Fold in the Chocolate Chips: Gently stir in the chocolate chips (or chunks) by hand with a spatula or wooden spoon until they are evenly distributed throughout the dough. Avoid using the electric mixer for this step to prevent crushing the chocolate and overmixing the dough.
6. Portion and Chill the Dough: This step is non-negotiable for achieving thick, perfectly textured cookies. Using a 1/4-cup cookie scoop is the most efficient way to portion out uniform balls of dough, ensuring they bake evenly. Place these dough balls onto a baking sheet or plate lined with parchment paper. Cover them tightly with plastic wrap and refrigerate overnight (a minimum of 8 hours, but up to 24 hours is ideal). This chilling period allows the flavors to deepen and the butter to firm up, significantly reducing spread during baking.
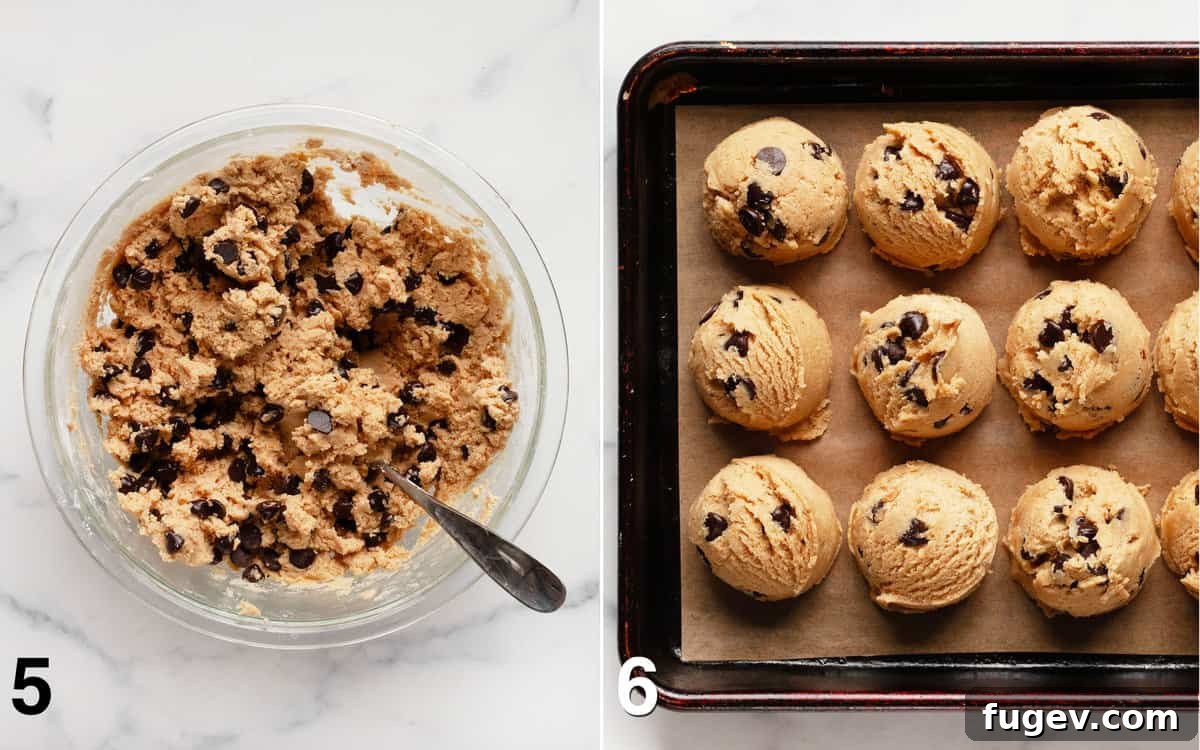
7. Prepare for Baking: When you’re ready to bake, preheat your oven to 350°F (175°C). Line two large baking sheets with parchment paper. Parchment paper is essential for easy removal and prevents sticking.
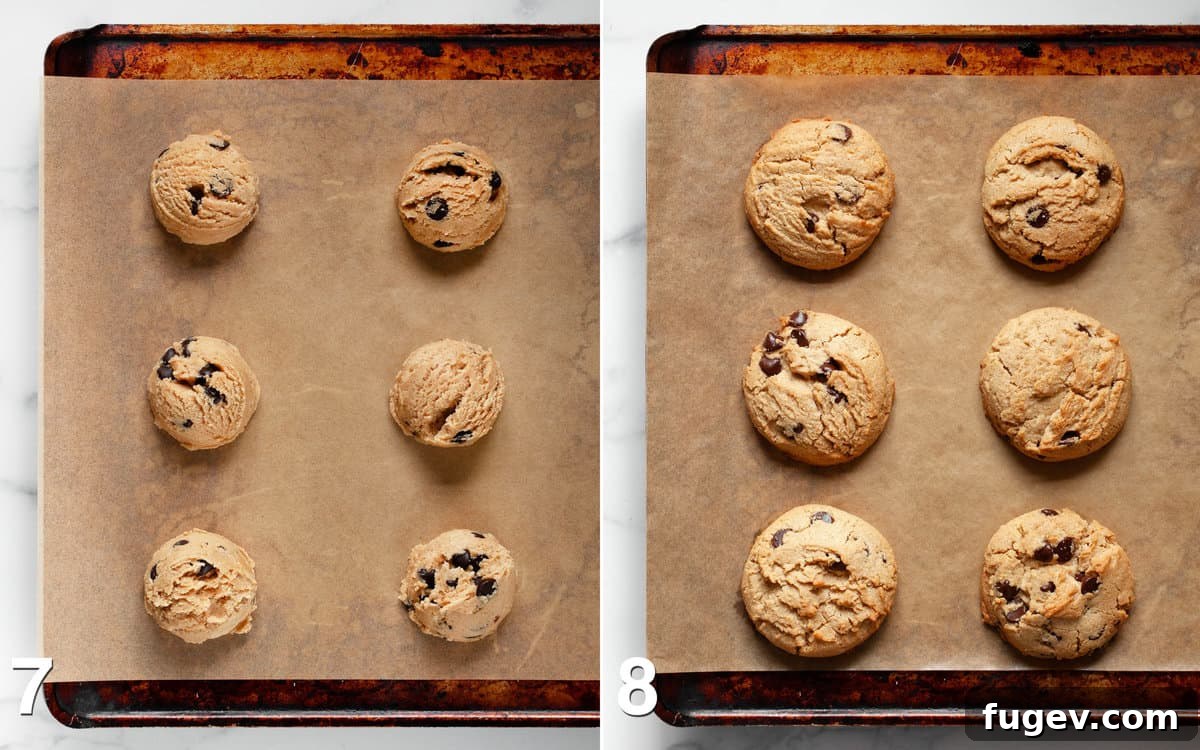
8. Arrange Dough on Baking Sheets: Take your chilled cookie dough balls directly from the refrigerator and place them on the prepared baking sheets, ensuring they are at least 3 inches apart. This spacing is important to prevent them from spreading into each other as they bake.
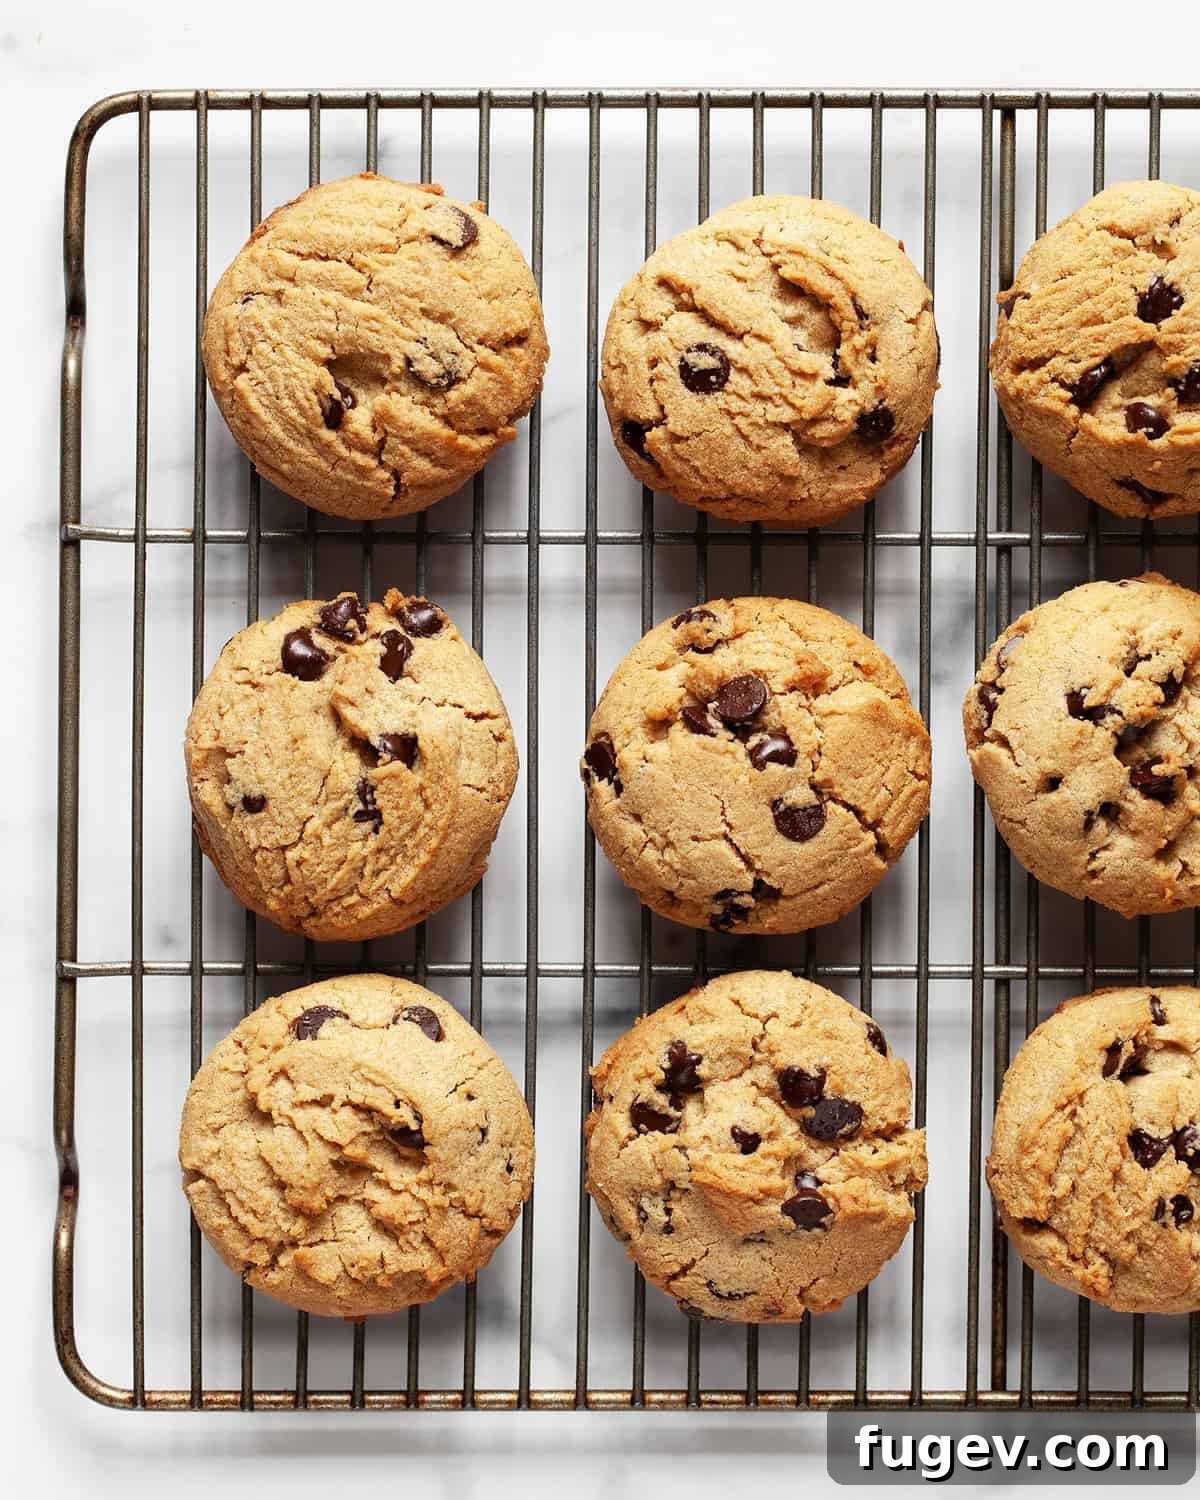
9. Bake to Golden Perfection: Bake the cookies for approximately 20-22 minutes. You’ll know they’re done when the edges are golden brown, the tops are slightly cracked, and the centers still look just a tiny bit soft. For consistent baking results, I highly recommend baking one sheet pan at a time on the center rack of your oven. This ensures even heat distribution. If baking multiple batches, allow your baking sheets to cool completely between batches to avoid the dough melting too quickly.
10. Cool and Enjoy: Once baked, let the cookies cool on the baking sheet for about 5 minutes. This allows them to set up and prevents them from breaking. Then, carefully transfer them to a wire rack to cool completely. The wait is the hardest part, but worth it for perfect cookies!
Serving Suggestions for Your Delicious Cookies
These incredible peanut butter chocolate chip cookies are versatile and delightful whether enjoyed warm right out of the oven, with the chocolate still gooey, or at room temperature when they are perfectly set and chewy. Here are some ideas to make serving them even more special:
- Classic Pairing: Serve them with a tall glass of cold milk for a timeless treat.
- Coffee or Tea Companion: They make a wonderful accompaniment to your morning coffee or an afternoon cup of tea.
- Dessert Upgrade: Crumble them over a scoop of vanilla ice cream for an instant sundae.
- Crowd-Pleaser: They are always a huge hit at potlucks, parties, or cookie exchanges, just be mindful of any nut allergies!
- Thoughtful Gift: Package a few cookies in a decorative box or bag for a homemade gift that everyone will appreciate.
- Optional Flaky Sea Salt: For an extra gourmet touch and to enhance the sweet and salty dynamic, sprinkle a pinch of flaky sea salt over the cookies immediately after they come out of the oven.
However you choose to enjoy them, these cookies are sure to bring smiles!
Storage & Freezing Tips for Freshness
Keep your delicious cookies fresh for longer with these simple storage and freezing recommendations:
- Room Temperature Storage (Baked Cookies): Once completely cooled, store your baked chocolate chip peanut butter cookies in an airtight container at room temperature. They will retain their best quality for 2-3 days. After this, they may start to lose some of their moisture and become drier. To prevent them from drying out faster, you can place a slice of bread in the container with the cookies; the bread will absorb moisture and help keep the cookies soft.
- Freezing Baked Cookies: For longer storage, baked cookies can be frozen for up to 3 months. Arrange cooled cookies in a single layer on a baking sheet and freeze until solid (about 1-2 hours). Once solid, transfer them to a freezer-safe airtight container or heavy-duty freezer bag, layering parchment paper between cookies to prevent sticking. Thaw frozen baked cookies at room temperature for a few hours, or gently warm them in a low oven (around 275°F / 135°C) for 5-10 minutes for a freshly baked taste.
- Freezing Unbaked Cookie Dough: This is a fantastic option for having freshly baked cookies on demand! Portion out the cookie dough balls as directed in the recipe, then place them on a baking sheet lined with parchment or wax paper. Freeze them until they are solid (typically 2-3 hours). Once frozen, transfer the solid dough balls to a freezer-safe airtight container or freezer bag. They can be stored for up to 3 months. When ready to bake, simply place the frozen dough balls on a prepared baking sheet and bake as usual, adding an additional 2-4 minutes to the baking time. There’s no need to thaw the dough first.
Pro Baking Tips for Perfect Cookies Every Time
Achieving consistently perfect cookies is all about paying attention to a few key details. Here are some expert tips to ensure your chocolate chip peanut butter cookies turn out wonderfully:
- Butter Temperature is Critical: Your softened butter should be cool to the touch but easily dented. If it’s too warm and greasy, your cookies will spread excessively during baking, resulting in thin, crispy cookies instead of thick, chewy ones. If your kitchen is warm, you can pop the butter back into the fridge for 5-10 minutes if it feels too soft.
- Accurate Flour Measurement: The “scoop and sweep” method is paramount. Fluff your all-purpose flour in its container, then gently spoon it into your measuring cup until overflowing. Use the back of a knife or a straight edge to level off the top. Never scoop directly from the bag with your measuring cup, as this compacts the flour and can add too much, leading to dry, dense cookies.
- Stir Natural Peanut Butter Thoroughly: If using natural peanut butter, always stir it well until the oil and solids are fully combined and it has a uniform, creamy consistency. This ensures consistent texture and flavor in your cookies. If it’s too oily or too dry, it will affect the dough’s balance.
- Do Not Skip the Dough Chilling: We’ve emphasized this, and for good reason! Chilling the dough for at least 8 hours (preferably overnight) is vital. It allows the gluten to relax, the flour to fully hydrate, and the butter to re-solidify. This process prevents excessive spreading, develops deeper flavors, and ensures a wonderfully thick and chewy cookie.
- Invest in a Cookie Scoop: A cookie scoop (specifically a 1/4-cup size for these cookies) is a baker’s best friend. It guarantees uniform cookie sizes, which means they will all bake evenly. It’s also much faster and less messy than using spoons. Beyond cookies, it’s great for scooping muffins, cupcakes, or even ice cream!
- Bake One Sheet at a Time: For the most consistent baking results, place only one baking sheet on the center rack of your oven at a time. This allows for even heat circulation around each cookie. If you bake two sheets at once, they may bake unevenly. Also, ensure your baking sheets are cool before scooping new dough onto them; warm pans will cause the dough to spread prematurely.
- Optional Flaky Sea Salt Finish: For an enhanced flavor experience, sprinkle a pinch of flaky sea salt on top of the cookies immediately after they come out of the oven. The salt crystals will adhere to the warm cookies, providing a delightful textural contrast and perfectly balancing the sweetness.
- Don’t Overbake: For chewy cookies, it’s better to slightly underbake than overbake. The cookies will continue to cook slightly as they cool on the hot baking sheet. Look for golden edges and a still-soft center.
- Use Parchment Paper: Always line your baking sheets with parchment paper. It prevents sticking, ensures even baking on the bottom, and makes cleanup a breeze.
Recipe FAQs
Absolutely! This recipe works wonderfully as a standalone peanut butter cookie. If you omit the chocolate chips, you might consider pressing the tops of the dough balls with a fork in a classic crosshatch pattern before baking for that traditional peanut butter cookie look and texture.
While creamy peanut butter is recommended for the best texture in this recipe, especially since you’re already adding chocolate chips, you could experiment with chunky peanut butter. Be aware that chunky peanut butter will add extra texture and may make the cookies slightly more crumbly or less uniformly smooth. For a truly thick and chewy cookie, sticking to creamy peanut butter is advised.
Several factors can cause excessive spreading: your butter might have been too warm (melted, not just softened), you didn’t chill the dough long enough (or at all), your flour might have been measured incorrectly (too little flour), or your oven temperature could be inaccurate (too low). Ensure your butter is properly softened, always chill the dough, measure flour precisely using the scoop and sweep method, and consider checking your oven with an oven thermometer.
Yes, you can adjust the size! For smaller cookies, use a smaller scoop (e.g., 1.5 tablespoons) and reduce the baking time by a few minutes. For larger cookies, you can use a larger scoop (e.g., 1/3 cup) and increase the baking time. Always keep an eye on them, as baking times will vary significantly with size adjustments.
More Irresistible Cookie Recipes You’ll Love
If you enjoyed baking these chocolate chip peanut butter cookies, be sure to explore more delightful treats from our collection:
- Crispy M&M Cookies
- Classic Chocolate Crinkle Cookies
- Blood Orange Almond Icebox Cookies
- Extra Chewy Chocolate Chip Cookie Bars
- Decadent Salted Fudge Brownies
Chocolate Chip Peanut Butter Cookies
Paige Adams
20 minutes
20 minutes
8 hours
8 hours 40 minutes
20
cookies

Ingredients
- 6 ounces unsalted butter, softened at room temperature
- 2/3 cup peanut butter (natural or regular processed peanut butter, well-stirred if natural)
- 3/4 cup packed light brown sugar
- 1/4 cup granulated sugar
- 1 large egg
- 1 teaspoon pure vanilla extract
- 2 cups all-purpose flour
- 1 teaspoon baking soda
- 1/2 teaspoon kosher salt
- 1 cup chocolate chips (semi-sweet, dark, or milk chocolate)
Save this Recipe
Get it sent to your inbox plus new recipes every week.
Instructions
-
In a large bowl, cream the butter, peanut butter, and both sugars using an electric mixer until pale and fluffy (about 4 minutes).
-
Beat in the egg and vanilla extract until just combined.
-
In a medium bowl, whisk together the flour, baking soda, and salt.
-
Gradually mix the dry ingredients into the wet ingredients by hand with a wooden spoon or on low speed with the mixer until just combined.
-
Stir the chocolate chips into the dough until evenly distributed.
-
Portion out the dough into 1/4-cup balls onto a parchment-lined sheet pan or plate. Cover and chill overnight in the refrigerator.
-
Preheat oven to 350°F (175°C). Line 2 baking sheets with parchment paper.
-
Place chilled cookie dough balls 3 inches apart on the prepared baking sheets.
-
Bake for 20-22 minutes, or until golden brown and cracked on top. Bake one sheet at a time for best results.
-
Cool on the baking pan for 5 minutes, then transfer to a wire rack to cool completely.
Notes
Choose semi-sweet, dark, or milk chocolate chips/chunks based on your preference.
Store cooled cookies in an airtight container at room temperature for 2-3 days.
Baked cookies can be frozen for up to 3 months; thaw at room temperature. Unbaked dough balls can also be frozen and baked from frozen (add 2-4 minutes to baking time).
Nutrition
Carbohydrates: 28g |
Protein: 4g |
Fat: 14g |
Saturated Fat: 7g |
Polyunsaturated Fat: 1g |
Monounsaturated Fat: 4g |
Trans Fat: 0.3g |
Cholesterol: 26mg |
Sodium: 156mg |
Potassium: 104mg |
Fiber: 1g |
Sugar: 17g |
Vitamin A: 225IU |
Calcium: 23mg |
Iron: 1mg
Nutrition information is automatically calculated and should be used as an approximation.
Additional Info
Cookies & Bars
American