
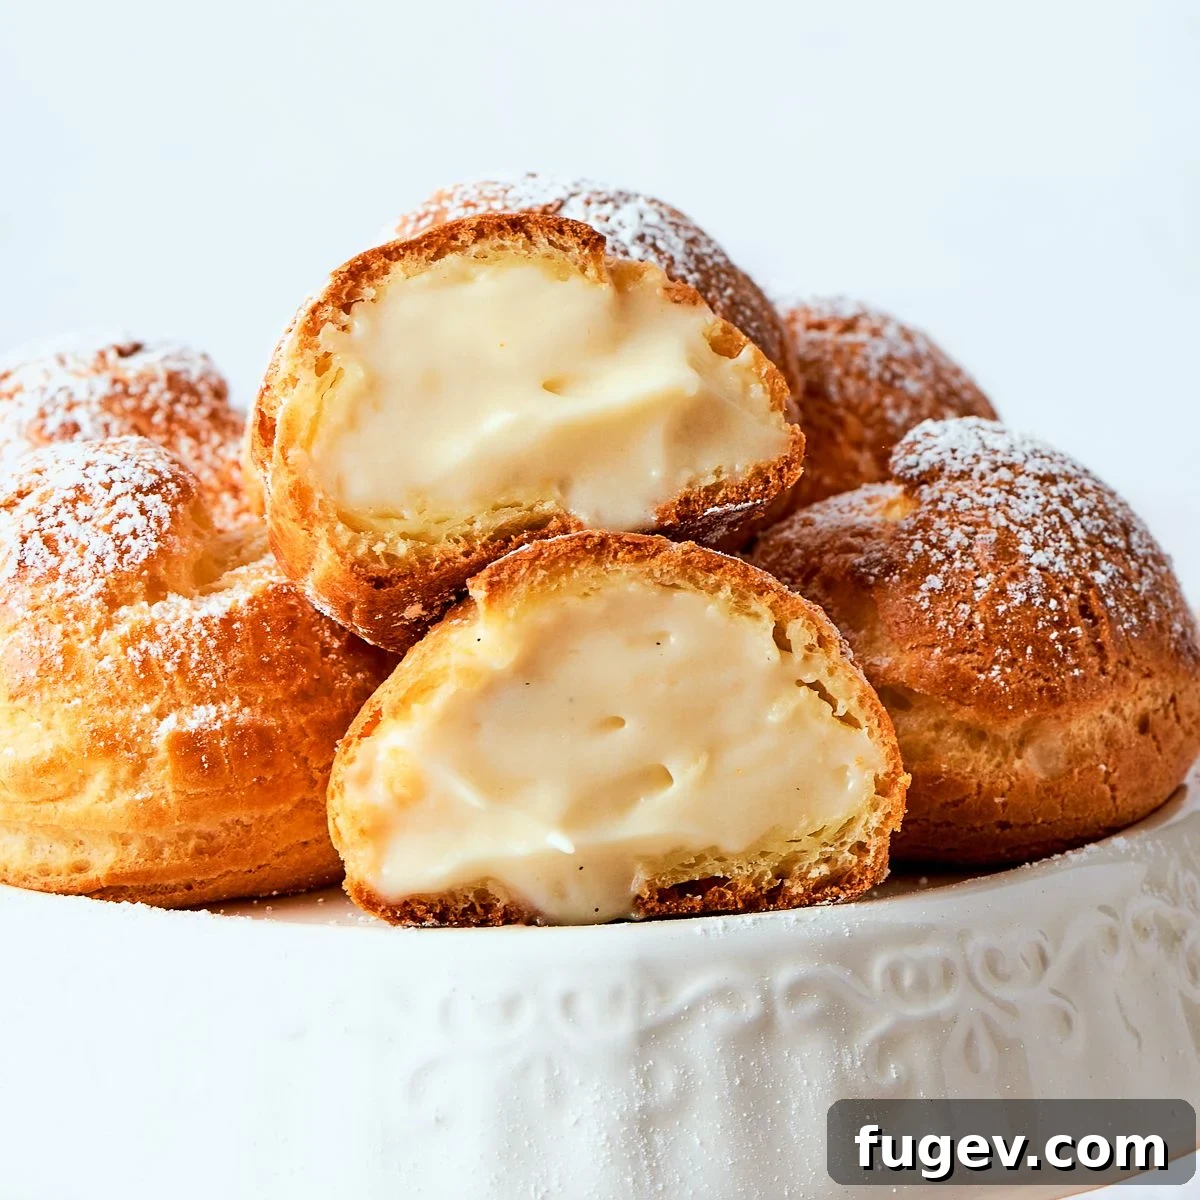
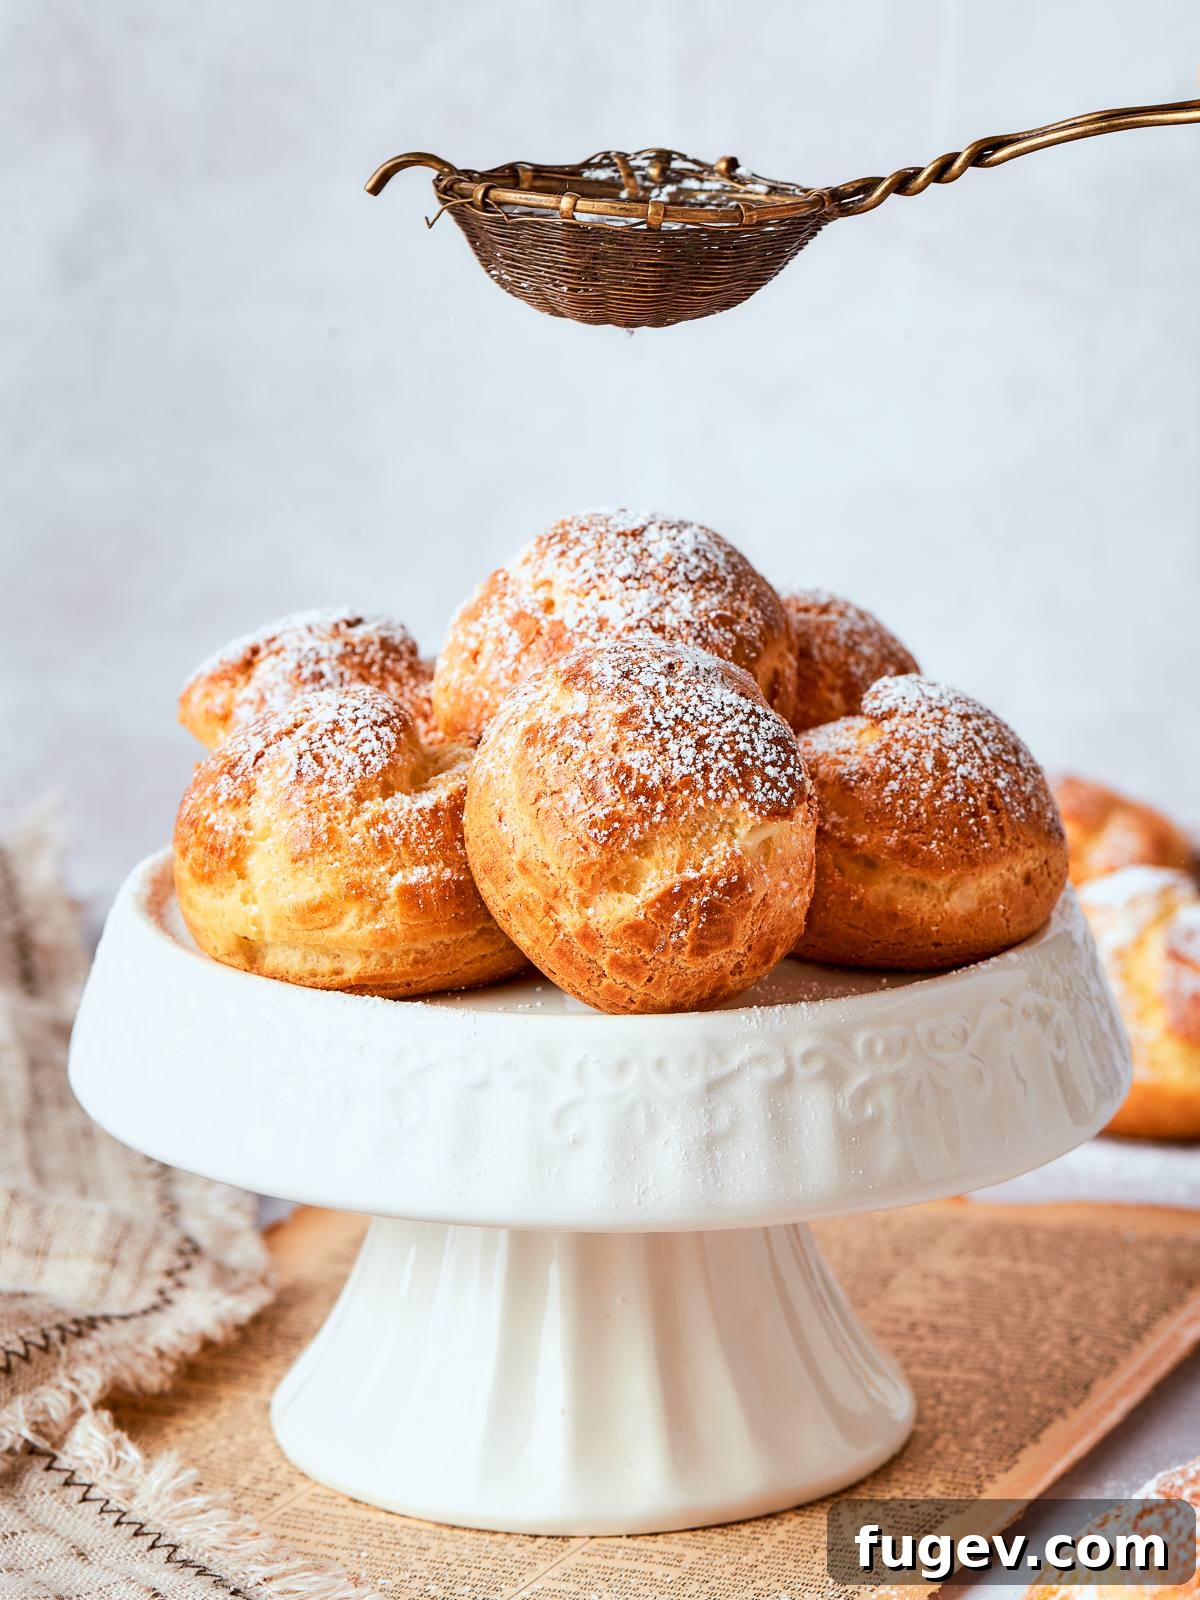
Cream puffs are a timeless delicacy, often admired for their elegant appearance yet surprisingly achievable in your home kitchen. This comprehensive recipe demystifies the art of making these delightful French pastries, providing professional guidance to master both the foundational choux pastry and the exquisitely silky crème légère filling from scratch. Prepare to impress with light, airy shells and a rich, delicate cream that will transport you straight to a Parisian patisserie.
A Quick Look At The Recipe
This is a brief summary of the recipe. Jump to the recipe section below to get the full details, step-by-step instructions, and ingredient quantities.
Jump to Recipe
Prep Time
45 minutes
Cook Time
23 minutes
Cooling Time
1 hour
Total Time
2 hours 8 minutes
Servings
150 4 cm puffs
Difficulty
Intermediate — classic choux method requiring attention to dough consistency and egg incorporation. Mastery is within reach with our expert guidance.
Calories *
33 kcal per serving
Technique
Stovetop choux pastry with eggs incorporated to a specific consistency, ensuring perfect puff; filled with a luxurious crème légère made from a rich pastry cream folded with perfectly whipped heavy cream.
Flavor Profile
Light vanilla, delicately sweet, deeply buttery, with a sumptuously rich yet airy cream filling.
* Based on nutrition panel
Save this content for later
I was nervous about choux pastry but the consistency tests in this recipe made all the difference. My shells came out hollow and crisp, and the crème légère filling was light without being bland. I made the full batch for a party and they were gone within the hour. This is the only cream puff recipe I will use from now on. ⭐⭐⭐⭐⭐
Lauren
Why This Cream Puff Recipe Guarantees Success
Creating perfect cream puffs can seem daunting, but this recipe is meticulously designed to eliminate guesswork and guide you to professional-level results every time. Here’s why this method stands out:
- Precision Consistency Tests Built into the Method: Most homemade choux pastry failures stem from uncertainty about the dough’s hydration and egg incorporation. This recipe provides explicit visual indicators—for the panade, the egg mixture, and the final batter—that tell you precisely when to stop adding ingredients or cooking. These tests are your foolproof guide, replacing guesswork with confidence and ensuring a consistently perfect choux paste.
- Proper Panade Technique for a Stable, Hollow Shell: The crucial step of cooking the flour-butter-liquid mixture (the panade) long enough is meticulously explained. This process is vital for driving off excess moisture, activating the starch in the flour for robust structure, and preventing any raw flour taste. A correctly cooked panade is the foundation for shells that puff beautifully, maintain their shape, and develop that coveted hollow center, ideal for filling.
- Crème Légère Filling That Stays Delightfully Light: Our recipe focuses on creating a crème légère that achieves the perfect balance: rich and luxurious without being heavy or cloying. By carefully folding whipped heavy cream into a perfectly set pastry cream, we achieve a filling that’s stable enough to pipe cleanly and hold its elegant shape, yet incredibly airy and smooth, enhancing the overall delicate nature of the cream puff.
- Optimized Size and Baking Parameters: The precise sizing of cream puff shells is critical for even baking. Our recommended size of 4 centimeters or under ensures that the shells bake through uniformly, developing a crisp exterior and a fully set interior without overbaking. Larger puffs often require additional adjustments like venting and extended baking times, which can compromise texture. This recipe’s dimensions are fine-tuned for optimal results, guaranteeing a light and airy texture in every bite.
Table of Contents
- Why This Recipe Works
- Essential Ingredients & Expert Substitutions
- Delicious Variations on Classic Cream Puffs
- Chef Lindsey’s Professional Tips for Perfect Puffs
- Step-by-Step Guide: How to Make Cream Puffs
- Prepare the Silky Pastry Cream
- Crafting the Perfect Choux Pastry
- Assemble the Crème Légère & Fill Your Puffs
- Chef Lindsey’s Golden Recipe Tip
- Cream Puff FAQs: Your Questions Answered
- More French-Inspired Recipes to Love
- Recommended Dessert Recipes
- Full Cream Puffs Recipe Card
- Before You Go: Share Your Success!
Cream puffs hold a special place in my culinary journey. They were among the very first pastries I mastered with precision in a professional kitchen, a skill honed through countless hours of testing every conceivable variable. From the exact panade cook time to optimal egg ratios and even resting the choux paste overnight, I’ve experimented to bring you the most reliable method.
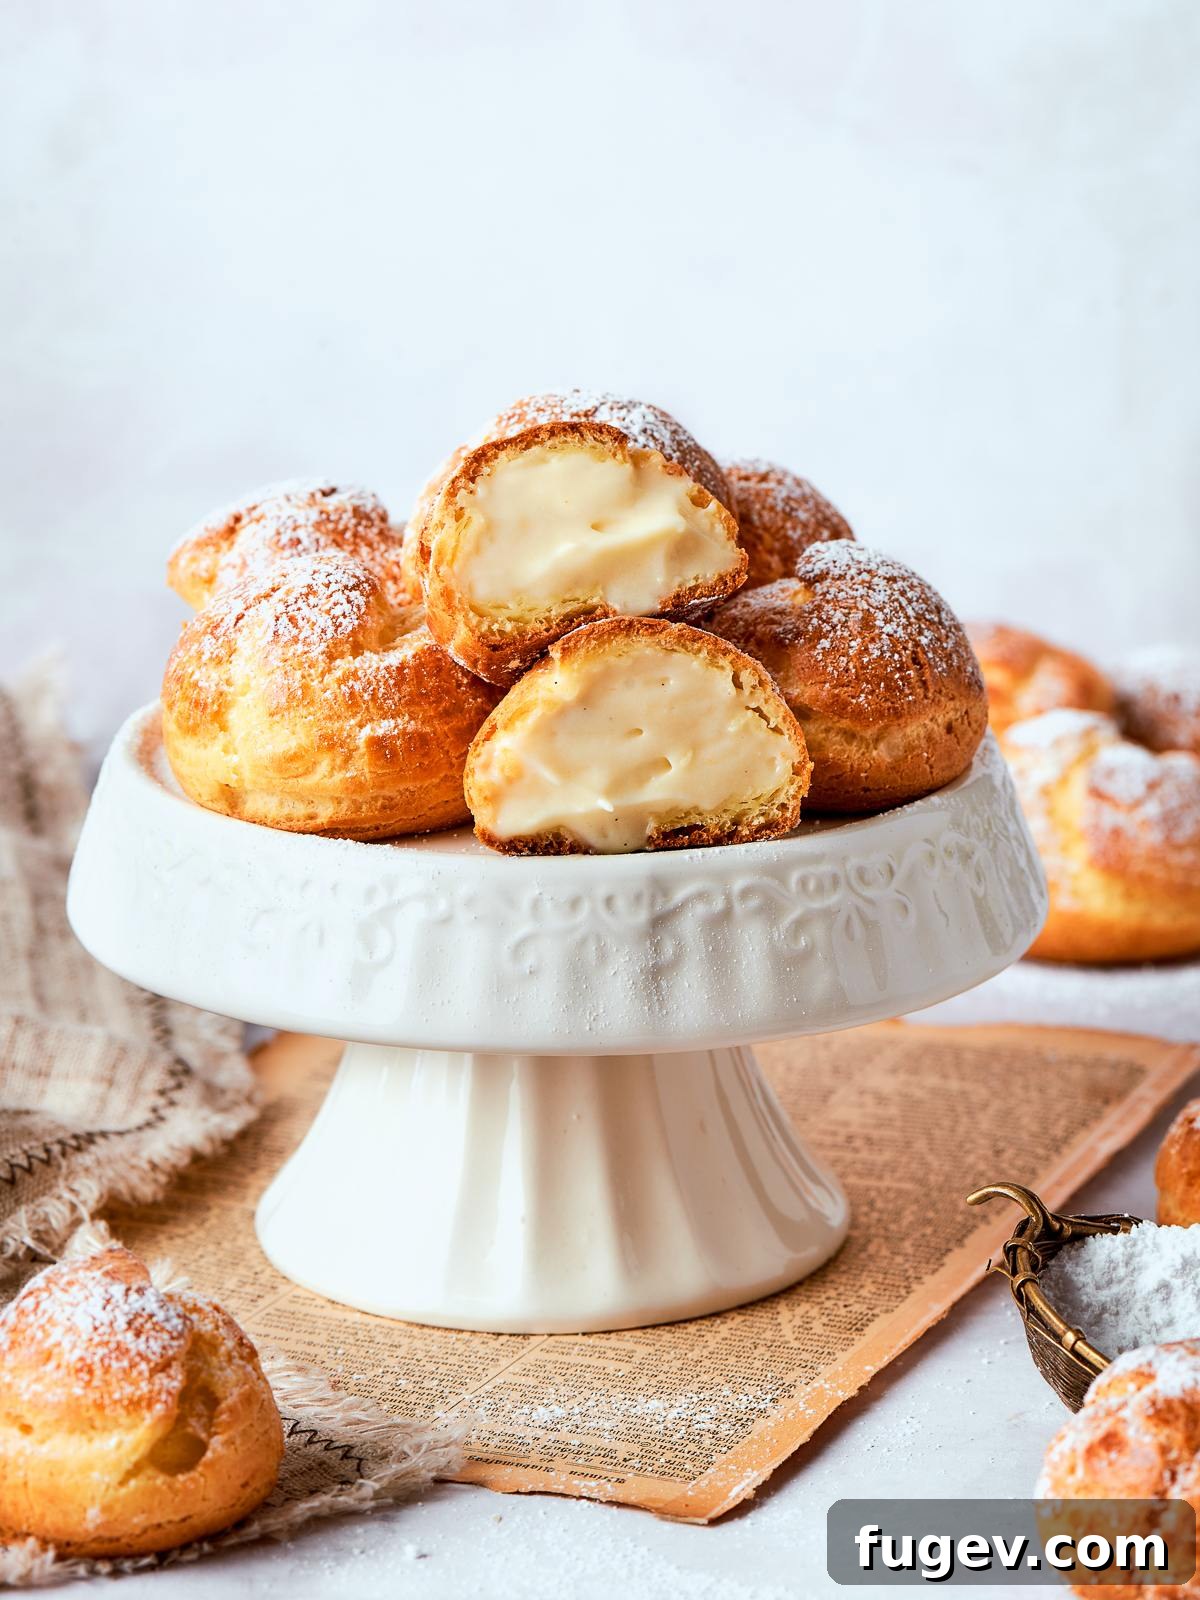
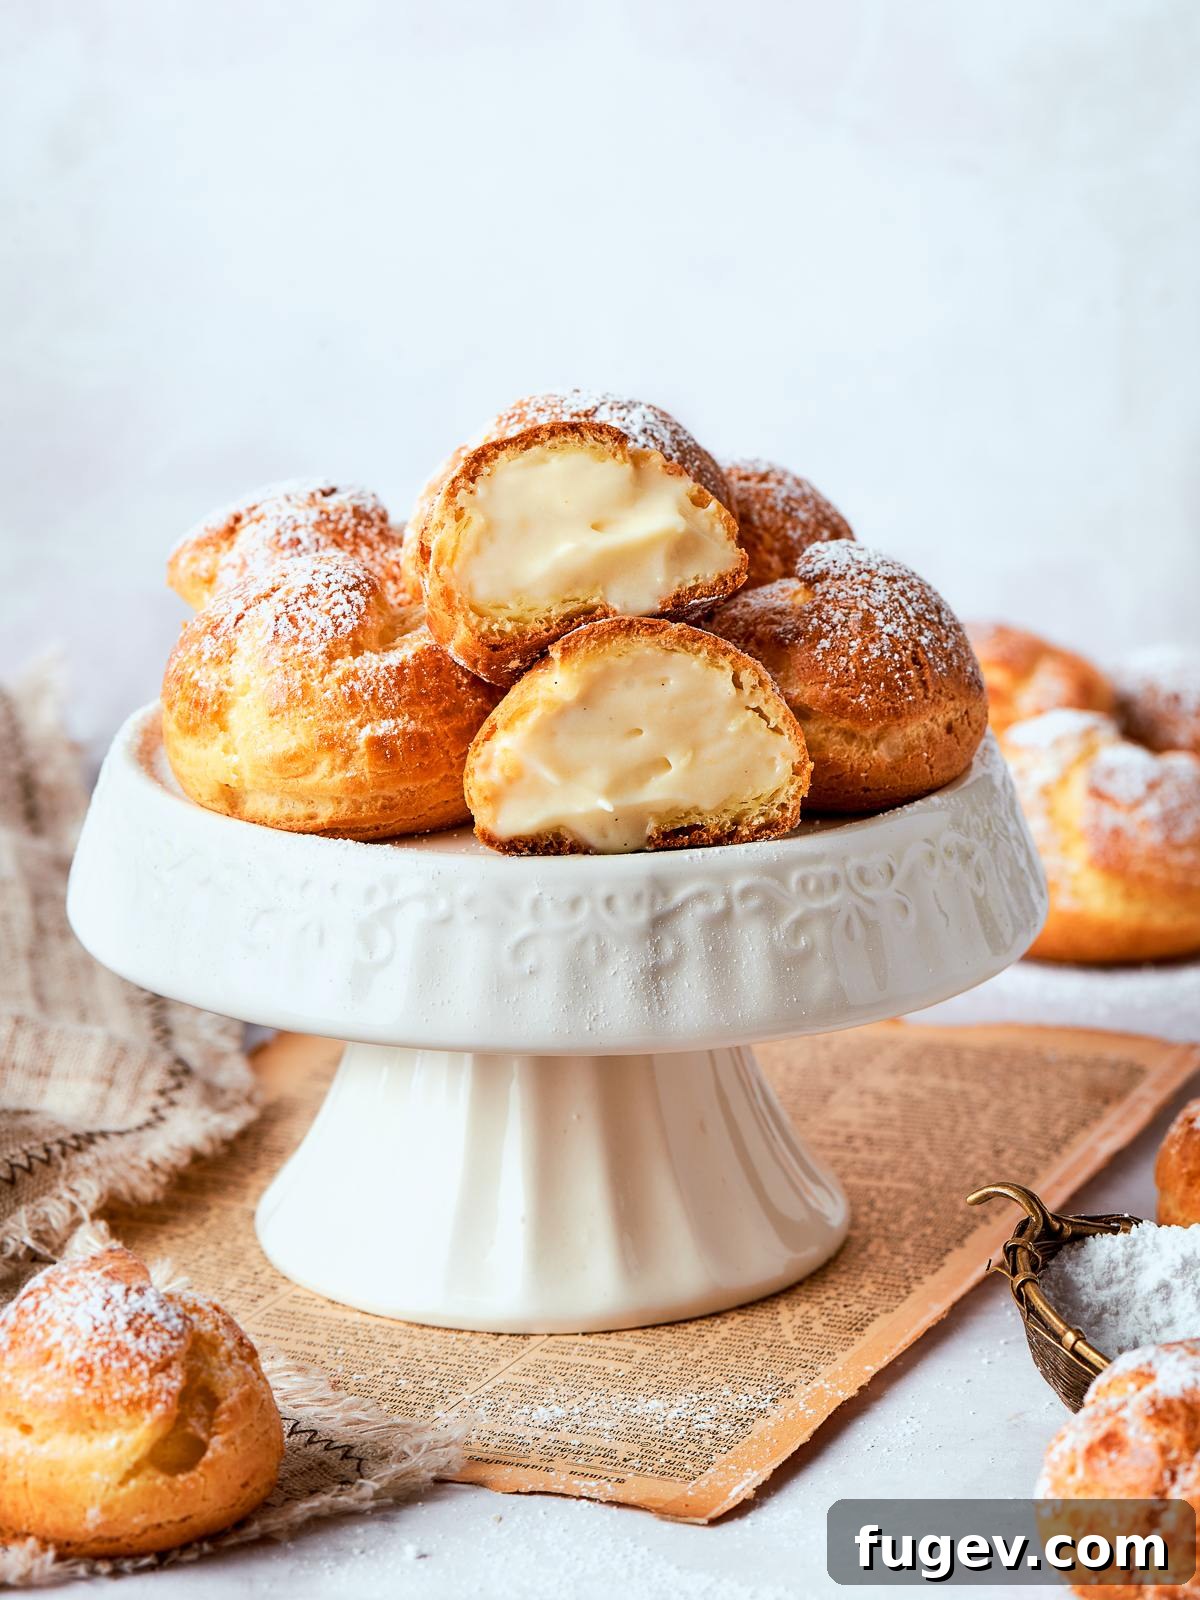
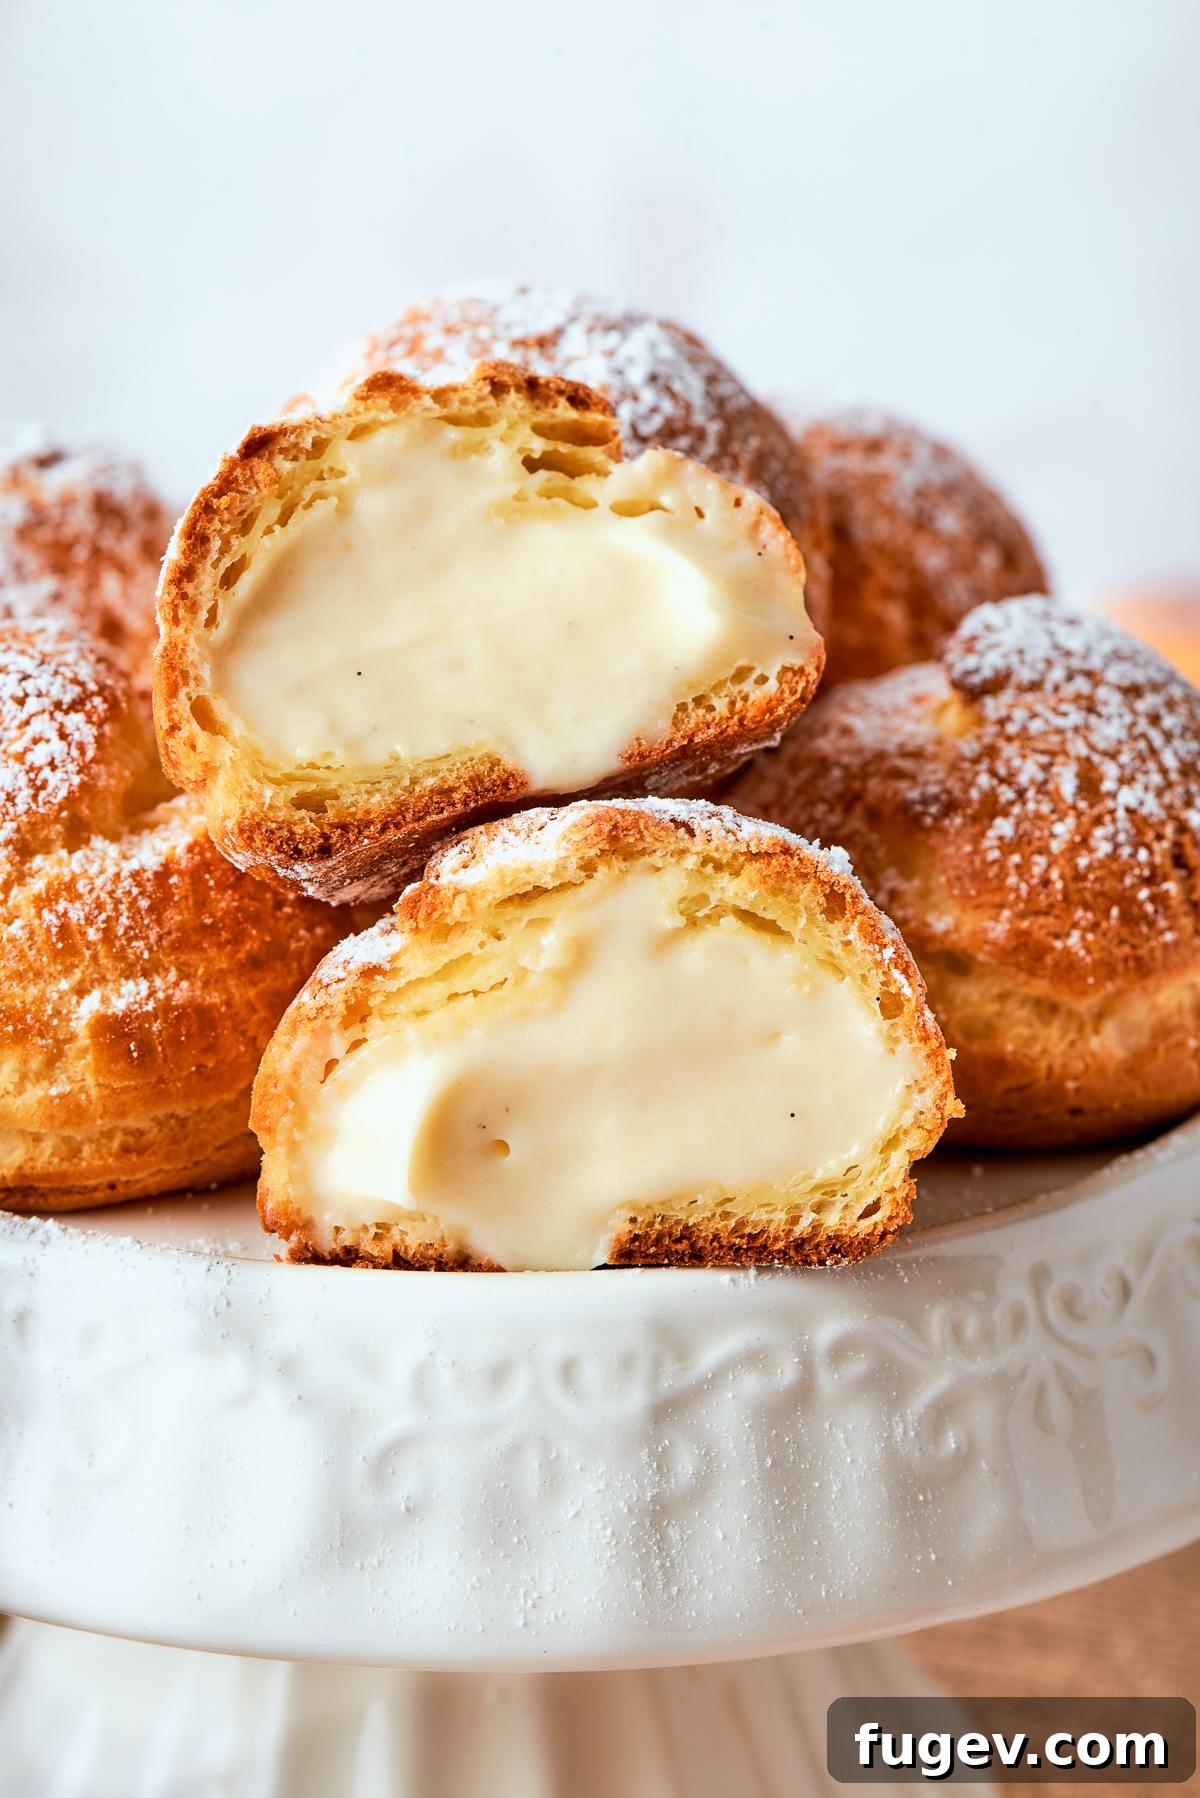
For me, the true magic of a cream puff lies in its filled cross-section: a delicate, crisp shell cradling a cloud-like cream. This recipe guides you through each stage with the specific visual cues that professional chefs rely on. If you’re eager to delve deeper into the fundamental dough, every intricate detail is meticulously covered in my dedicated pâte à choux tutorial, providing an even more profound understanding of this versatile pastry base.
Essential Ingredients & Expert Substitutions for Your Cream Puffs
Crafting perfect cream puffs begins with understanding the role of each ingredient. Here’s a detailed look at what you’ll need and how to approach any necessary substitutions to ensure exceptional results.
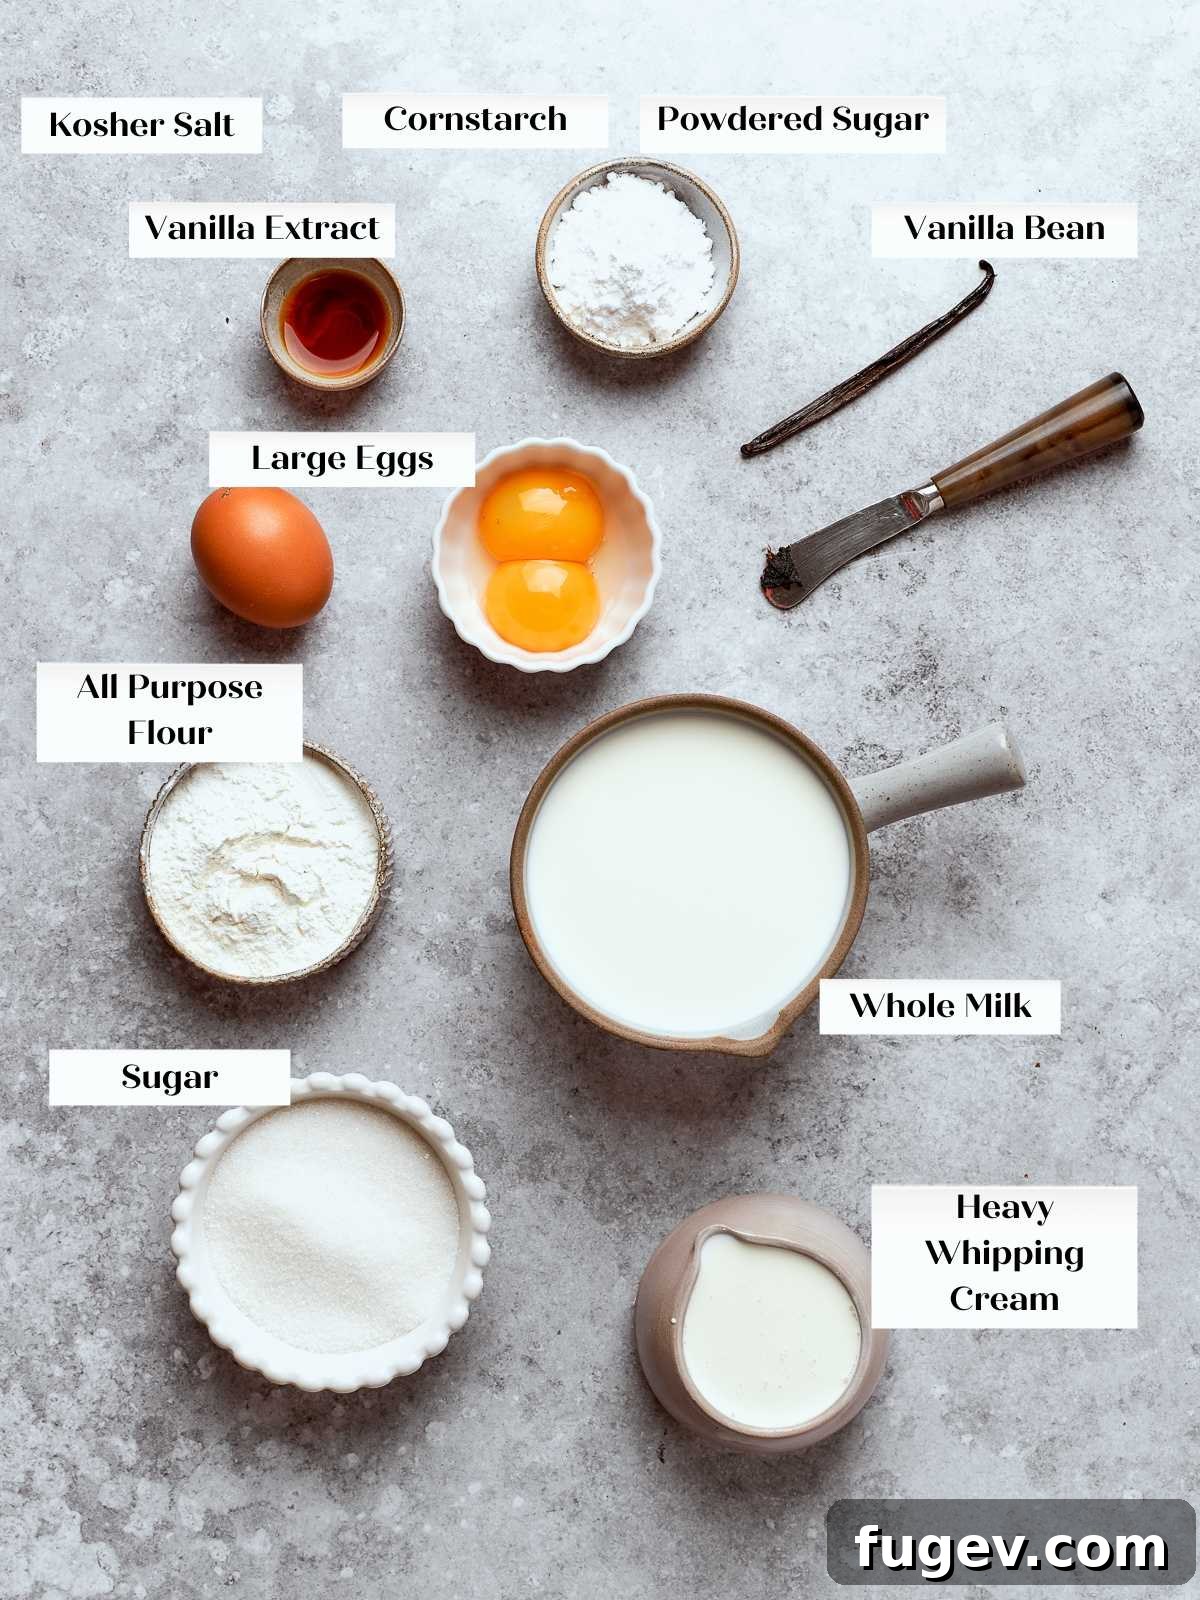
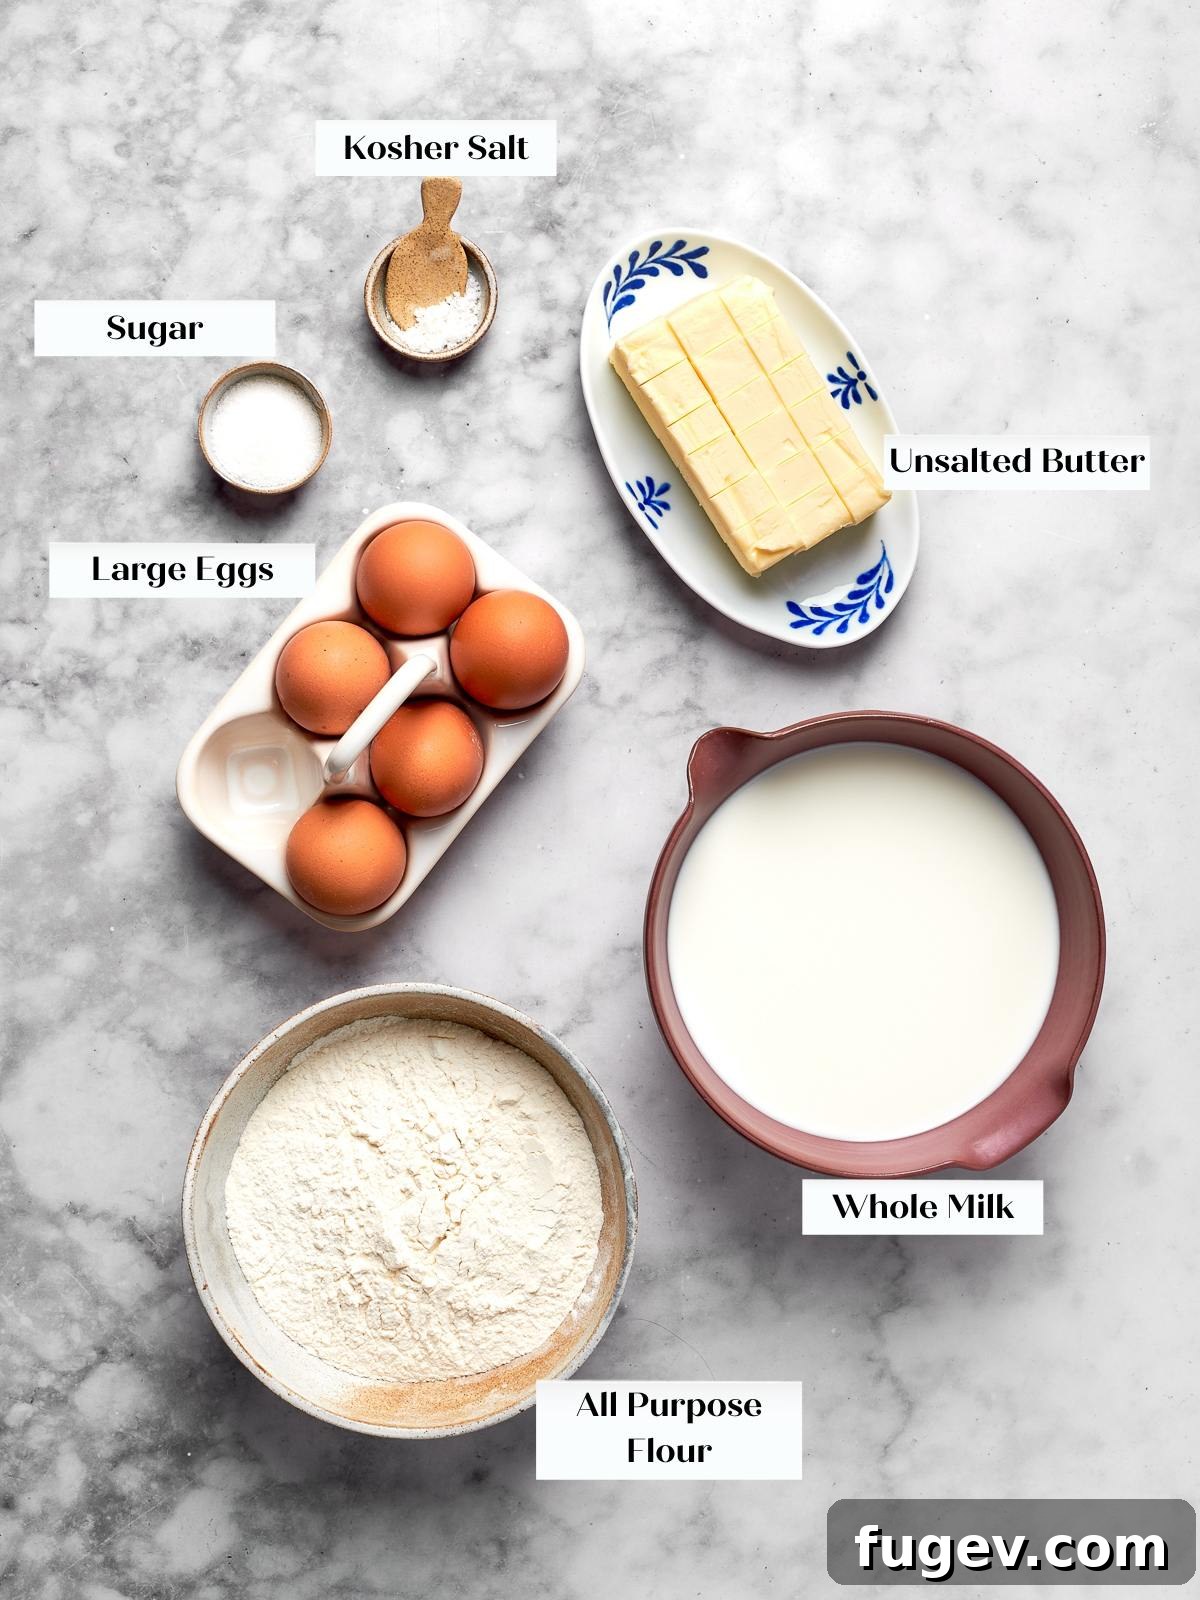
- All-Purpose Flour: This is the structural backbone of your choux pastry shells. When heated with liquid, the proteins in the flour (gluten) and starches gelatinize, creating the framework that traps steam and causes the shells to puff dramatically. Precision is key here; weighing your flour with a kitchen scale is paramount. Even a slight excess of flour can make the paste too stiff, hindering its ability to puff properly and resulting in dense, heavy shells.
- Unsalted Butter: Butter provides richness and a tender crumb to the finished choux shells, contributing to their delicate crispness and beautiful golden color. Using unsalted butter allows you to control the exact salt content in your recipe, ensuring balanced flavor.
- Whole Milk: While some recipes use a milk and water combination, opting for all whole milk in your choux pastry yields a richer flavor and a more desirable golden-brown exterior. The fat in the whole milk contributes to a more tender and flavorful shell.
- Salt and Sugar (for Choux Pastry): These ingredients, though used in small quantities, are not optional. Salt balances the flavor profile, enhancing the inherent sweetness of the pastry and the filling, while a touch of sugar aids in achieving even browning and a subtle hint of sweetness.
- Large Eggs (for Choux Pastry): Eggs are truly the magic behind choux pastry. They supply both the necessary moisture that converts to steam during baking, creating the hollow interior, and the protein structure that allows the shells to expand and set. Crucially, the exact quantity of eggs needed can vary slightly by batch due to factors like egg size, humidity, and how thoroughly the panade was cooked. Always add eggs gradually, until the paste reaches the specific consistency described in the method, rather than strictly following a fixed count.
- Whole Milk (for Pastry Cream): The foundation of your luscious pastry cream. Whole milk is essential for achieving the correct consistency and richness; lower-fat alternatives will result in a thinner, less stable custard that won’t hold its shape adequately within the delicate shells.
- Egg Yolks (for Pastry Cream): Yolks are the primary enriching and thickening agent in pastry cream. They impart a beautiful deep golden color and contribute significantly to its signature creamy, smooth texture. Do not substitute with whole eggs, as this will produce a looser, less stable cream due to the added egg whites.
- Granulated Sugar (for Pastry Cream): Sweetens the pastry cream to perfection and plays a vital role in stabilizing the egg yolks, preventing them from scrambling as the mixture cooks. The quantity is intentionally moderate to ensure the filling complements the puff without being excessively sweet.
- Cornstarch: This is the essential thickening agent for pastry cream. It provides the firm, sliceable set required for the cream to remain perfectly in place inside the choux shells. While flour can be substituted by weight, it may result in a slightly starchier texture and a less clean flavor profile.
- Vanilla Bean: Infusing a split vanilla bean into the warm milk is the secret to an authentic, deep vanilla flavor in your pastry cream. For convenience, 1 to 2 teaspoons of pure vanilla extract can be added off the heat, but the complex aromatic depth of a fresh bean is unparalleled. Vanilla bean paste offers a good compromise if whole beans are difficult to source.
- Heavy Cream (for Crème Légère): Whipped heavy cream is folded into the cooled pastry cream to create the exquisite crème légère, lightening the filling without compromising its structural integrity. Use heavy cream with a minimum fat content of 36%; anything lighter will struggle to hold sufficient volume when whipped and folded in, resulting in a less airy filling.
Refer to the full recipe card below for precise measurements and quantities of all ingredients.
Delicious Variations on These Classic Cream Puffs
While the classic vanilla crème légère cream puff is undoubtedly a masterpiece, the versatility of choux pastry allows for endless creative variations. Here are some delightful ways to customize your batch:
- Decadent Chocolate Pastry Cream Filling: For chocolate lovers, transform your crème légère into a rich chocolate experience. Simply whisk in 2 to 3 ounces of finely chopped dark chocolate into the pastry cream while it is still warm from cooking. The residual heat will melt the chocolate, infusing the cream with deep cocoa notes. Chill and then fold with whipped cream as directed for a truly indulgent filling.
- Elegant Profiteroles: Elevate your cream puffs to classic profiteroles by replacing the crème légère with a small scoop of high-quality vanilla ice cream. Serve them immediately, drizzled generously with a warm, glossy chocolate sauce for a sensational hot-and-cold dessert. Ensure the baked shells are completely cooled and vented to maintain their crispness against the melting ice cream.
- Rich Caramel Cream Puffs: For a sophisticated twist, replace the vanilla pastry cream with a decadent caramel pastry cream. The buttery, sweet notes of caramel perfectly complement the airy choux shell, offering a different but equally compelling flavor profile.
- Simple Chouquettes: Experience the simplest, purest form of choux pastry by making chouquettes. Skip the filling entirely. Instead, brush the piped choux rounds with a simple egg wash, then generously sprinkle them with pearl sugar before baking. These delightful, crisp, and slightly sweet pastries are a beloved French afternoon snack, perfect with coffee or tea.
- Larger, Impressive Cream Puffs: If you desire a more substantial cream puff, you can pipe larger rounds. Cut a slightly wider hole in your piping bag and apply steady pressure while slowly lifting your hand to build a taller, wider dough ball. Be aware that puffs larger than 4 centimeters will require a small vent hole poked in their bottoms immediately after baking and an extended baking time beyond the standard 20-23 minutes. I generally find that anything larger than 5 centimeters can compromise the balance, as the exterior tends to overbake before the center fully sets, making the smaller size ideal for consistency.
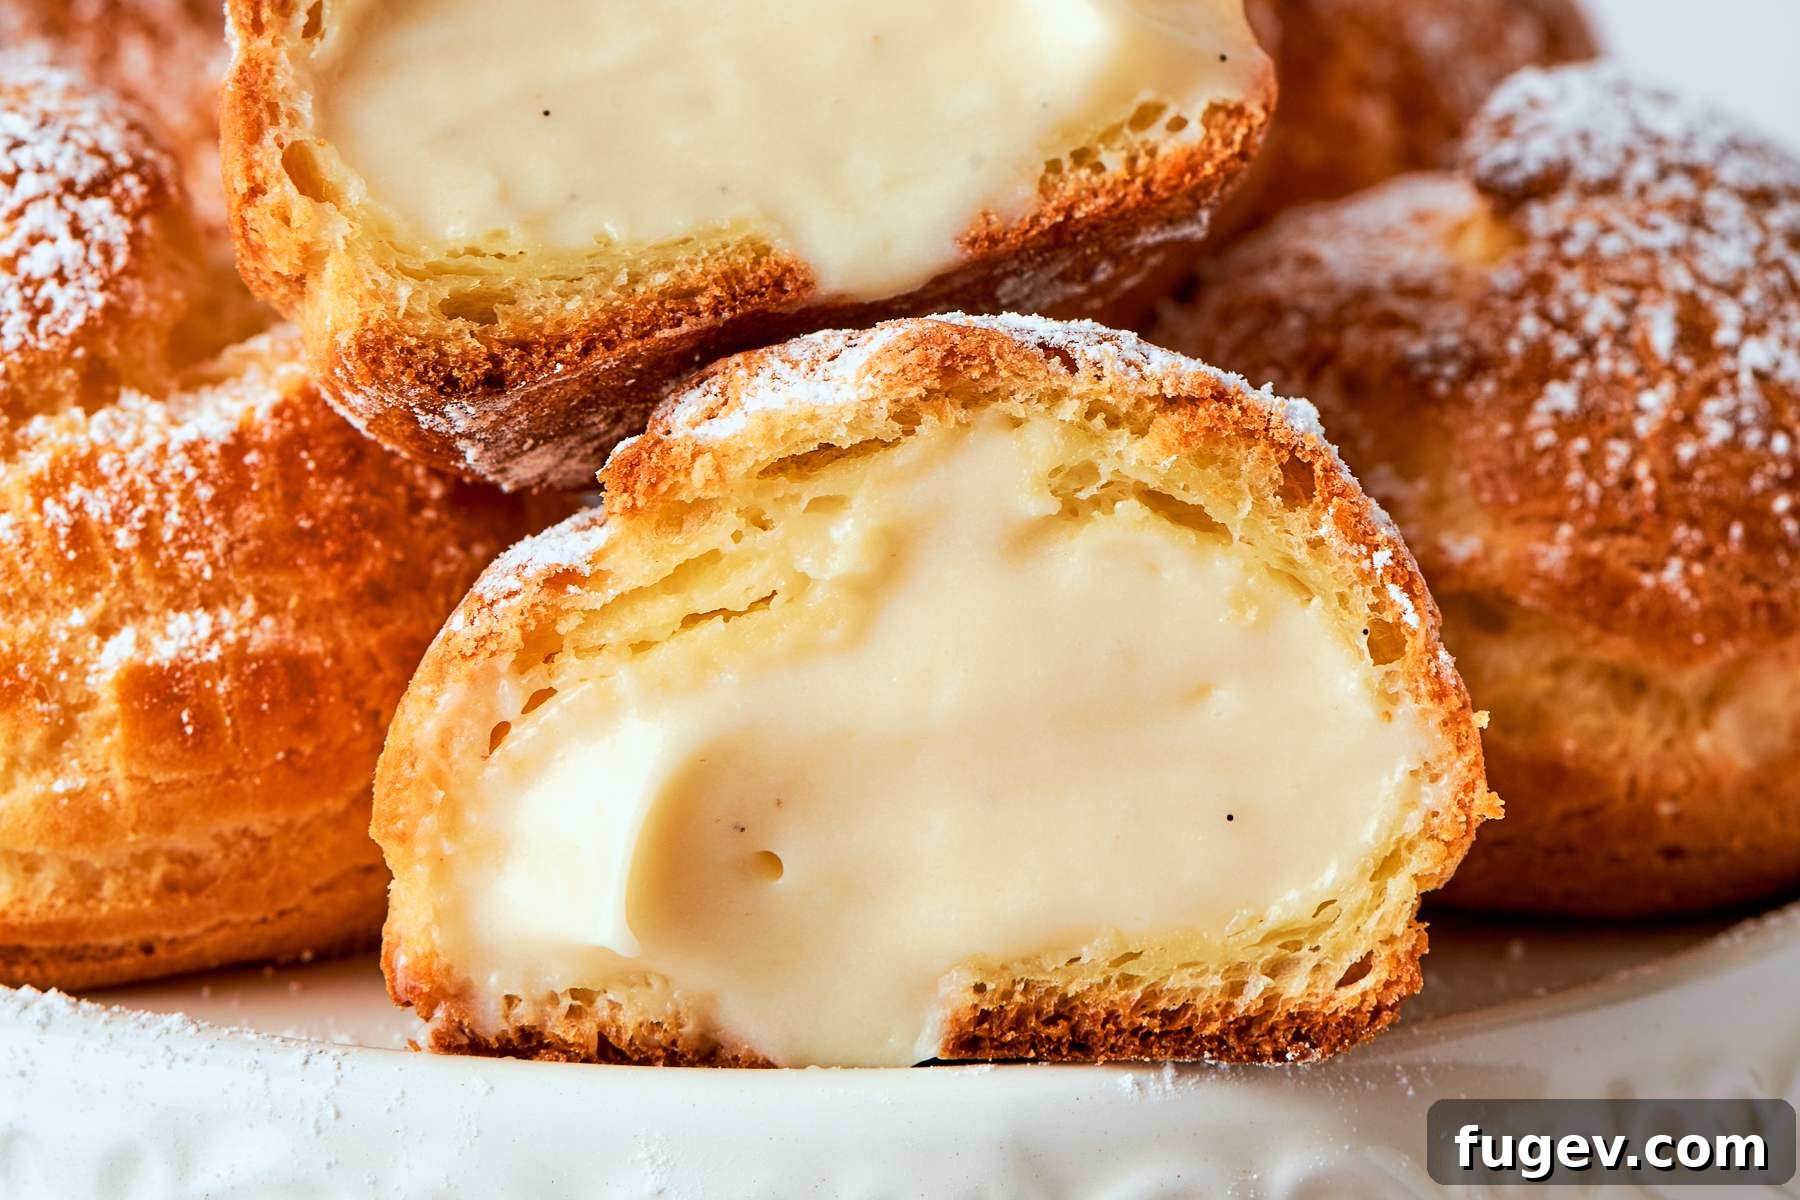
Chef Lindsey’s Professional Tips for Perfect Cream Puffs
Achieving bakery-quality cream puffs involves attention to detail and a few key techniques. Here are my top professional tips to ensure your choux pastry is a resounding success:
- Cook the Panade Until a Film Forms on the Bottom of the Pan: This step is non-negotiable and arguably the most crucial for successful choux pastry. As you vigorously stir the flour mixture over heat, you’ll notice a thin, dry film or crust forming on the bottom of the saucepan. This visual cue signifies that enough moisture has cooked off, creating a stable, pipeable paste and preventing a raw, starchy flour taste. Pulling the panade too early is the most common reason choux pastry spreads flat in the oven and lacks the desired crisp texture.
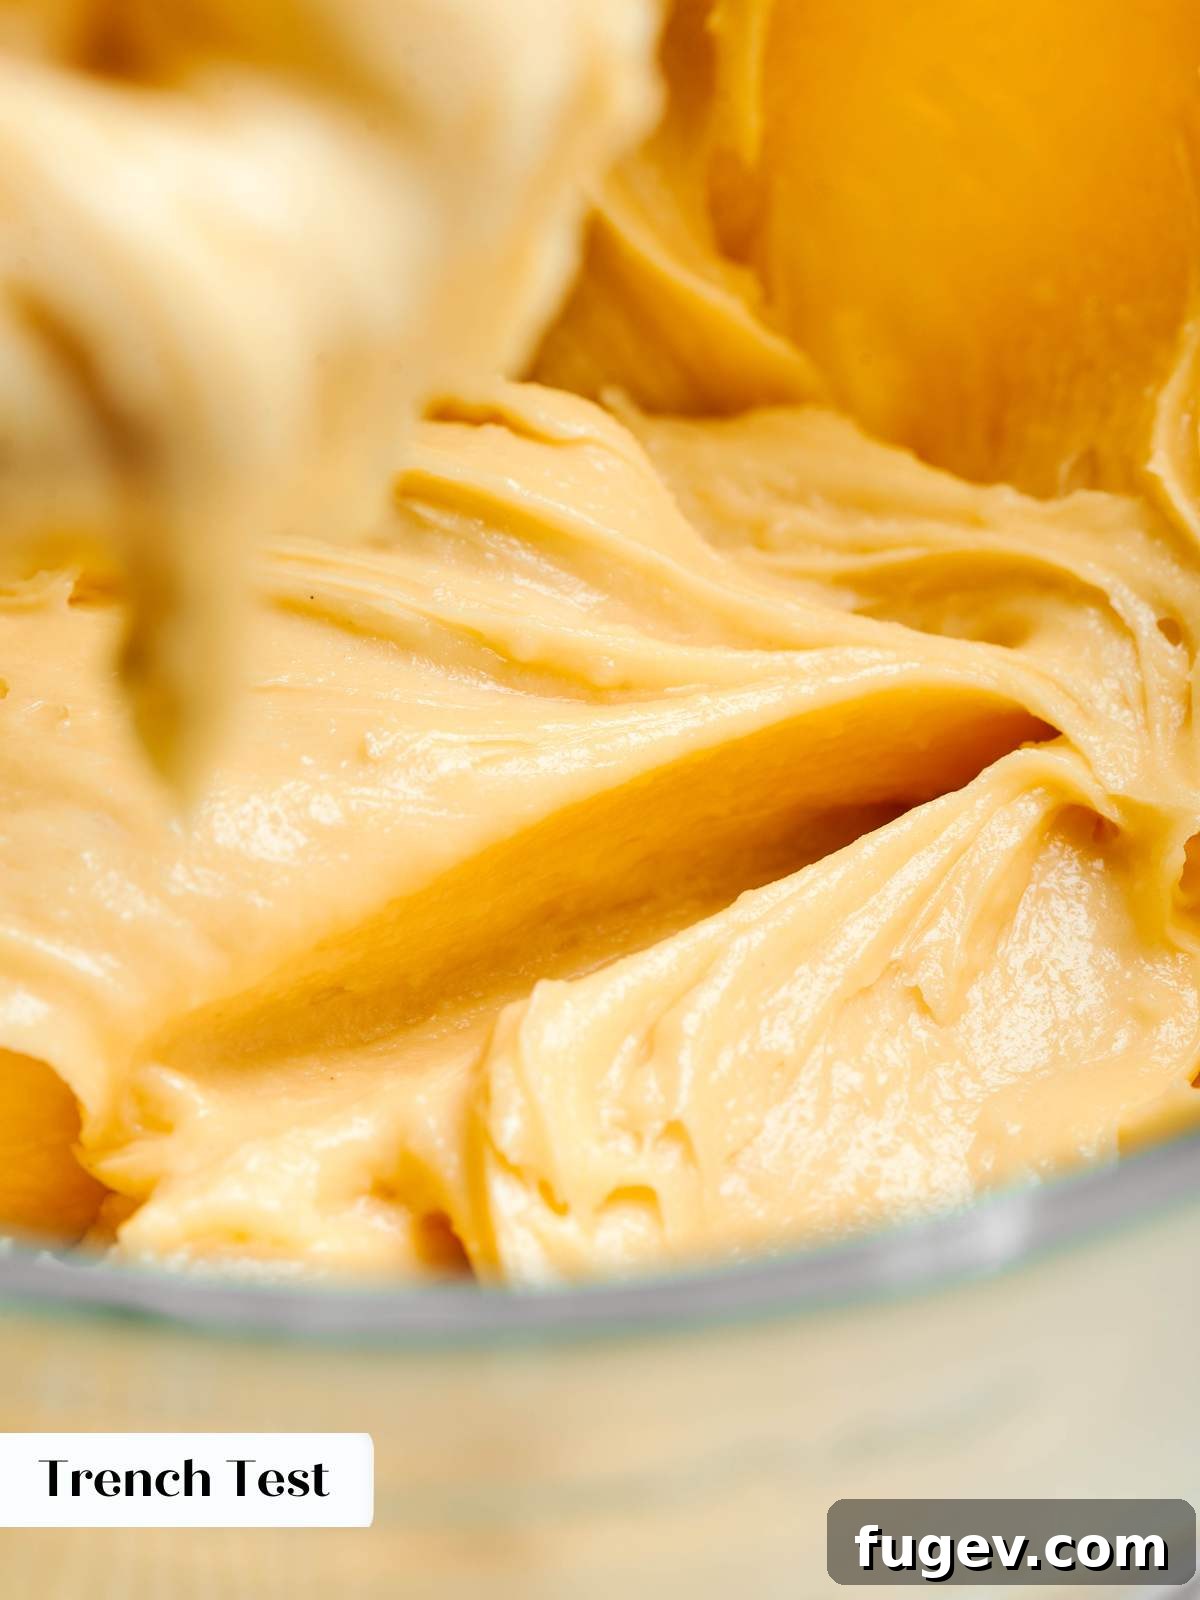
- Add Eggs Gradually and Utilize the Trench Test: The exact number of eggs can vary, so visual cues are more reliable than strict measurements. When incorporating eggs into the warm panade, pour them in slowly, beating thoroughly after each addition. The “trench test” is your ultimate guide: drag a spoon or your paddle attachment across the bowl through the choux paste. If the sides of the trench slowly fall back in, the paste has reached the perfect consistency. If the trench holds its shape perfectly without collapsing, it needs more egg. If it flows back in too quickly, you’ve added too much, and unfortunately, there’s no way to rescue overly wet choux paste. Adding too many eggs will result in a paste that’s too thin to hold its shape when piped, leading to flat, unpuffed shells.
- Temper Refrigerated Choux Paste Before Piping: If you’ve prepared your choux paste in advance and refrigerated it, allow it to sit at room temperature for approximately an hour before attempting to pipe. Cold choux paste is stiff and difficult to work with, resulting in uneven piping and potential tearing of the piping bag. Warming it slightly improves its pliability and flow, making it much easier to pipe smooth, consistent shapes. In my experience, tempering also contributes to a larger, more pronounced air pocket within the finished shell, creating an even better cavity for your filling.
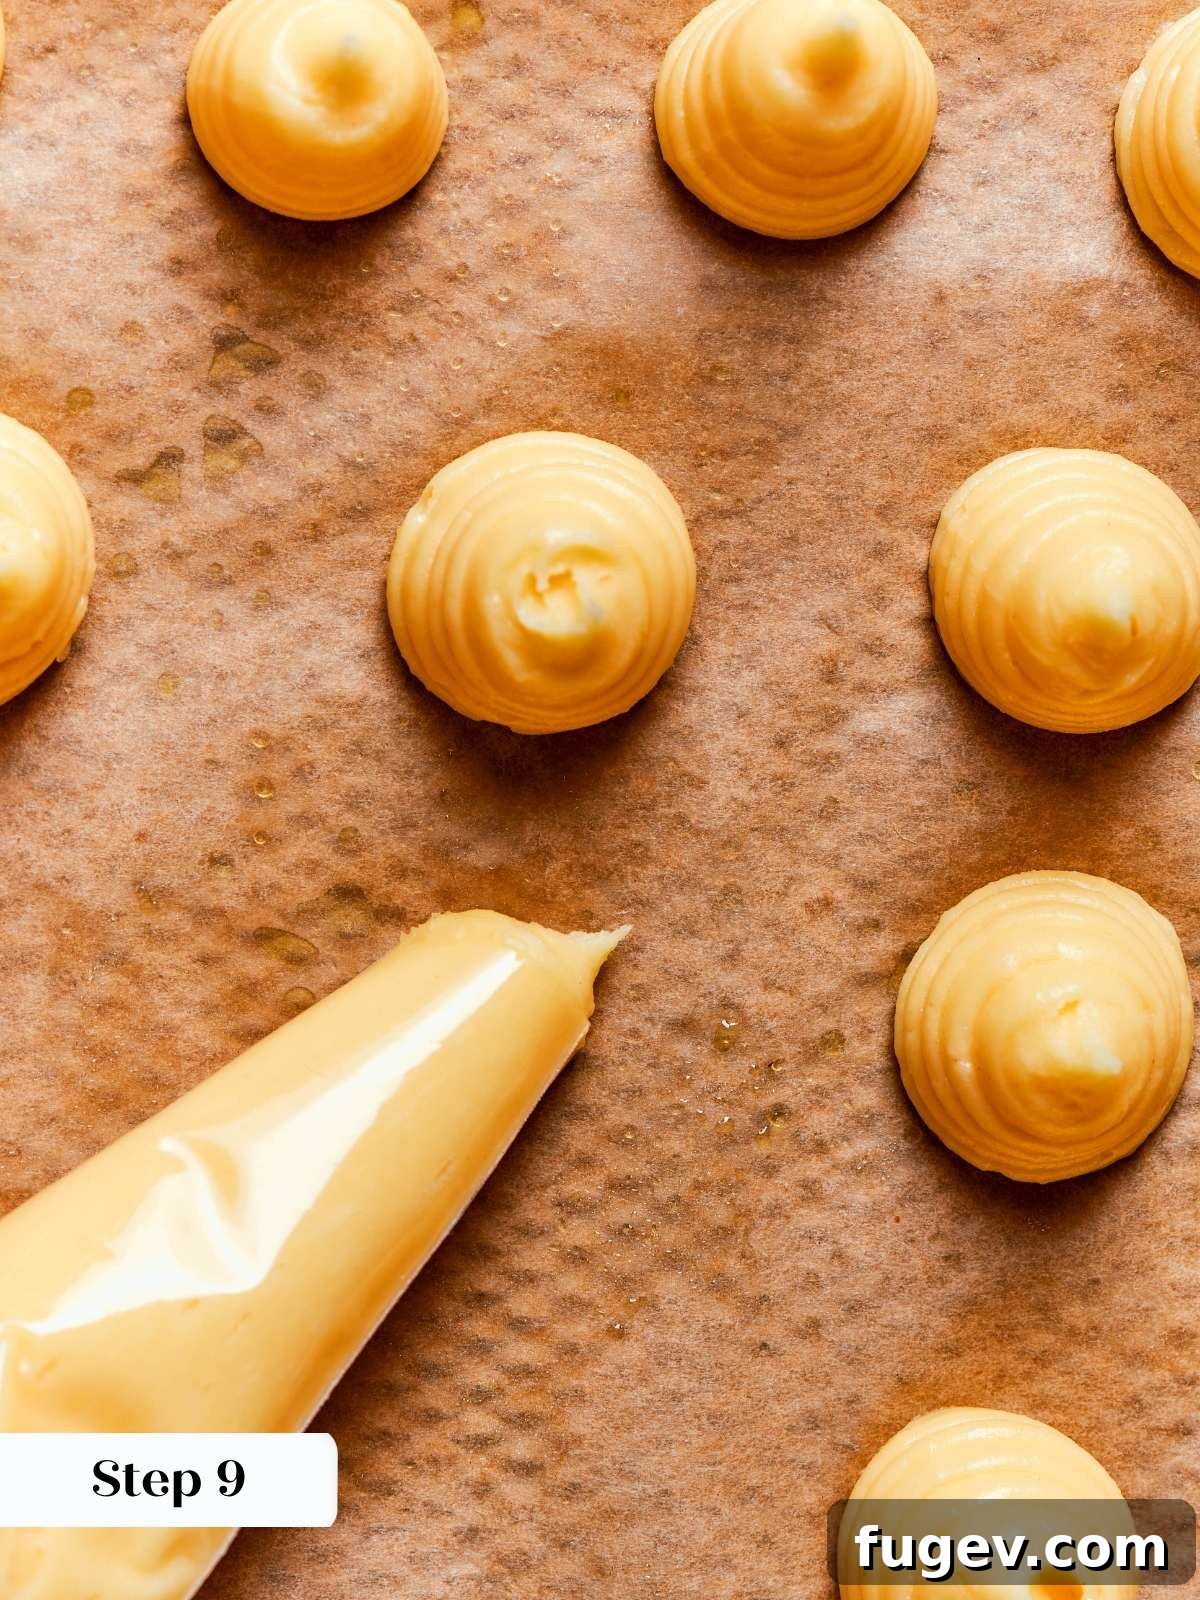
- Properly Space Your Puffs and Smooth Any Points: When piping your choux pastry onto the baking sheet, ensure there is ample space between each puff. Overcrowding causes the shells to steam against each other during baking, hindering the formation of that essential crisp exterior. They need room to expand and dry out properly. Additionally, any pointed tips left by the piping bag should be gently smoothed down with a dampened finger before baking. A browned, sharply pointed tip on a finished gougère or profiterole is a clear indicator of a rushed or unrefined piping job, and it’s an easily avoidable flaw that detracts from the professional finish.
Step-by-Step Guide: How to Make Irresistible Cream Puffs
Creating these exquisite cream puffs involves two main components, each made in sequence: the pastry cream, which requires adequate time to chill and set, and the choux pastry, which is prepared on the stovetop and baked fresh just before assembly. Follow these detailed steps for a truly rewarding baking experience.
Prepare the Silky Pastry Cream
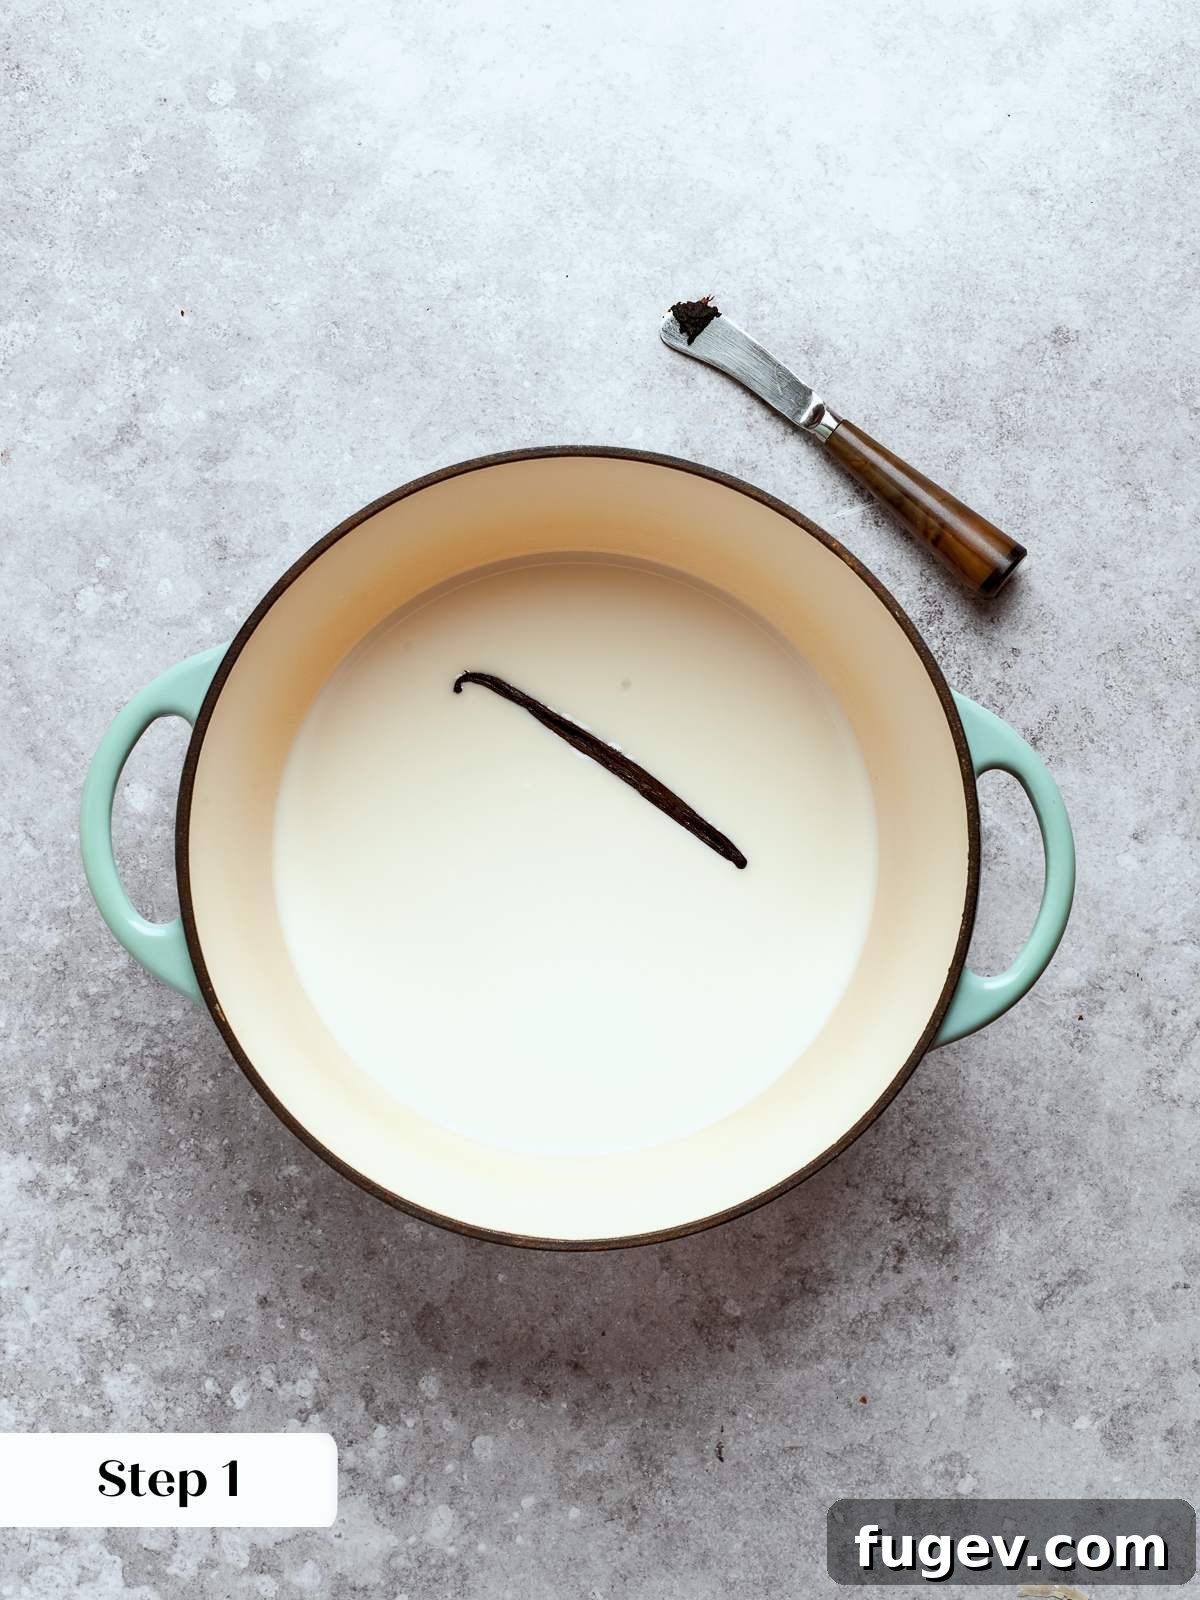
Step 1: Infuse and Heat the Milk. In a substantial, high-sided saucepan, combine the whole milk, the carefully split vanilla bean pod along with its precious seeds, and roughly half of the granulated sugar (photo 1). Stir gently to ensure the sugar begins to dissolve. Place the saucepan over medium-high heat and bring the mixture to a full, rolling boil, stirring occasionally to prevent scorching and ensure the sugar completely dissolves. It’s entirely normal for the milk to foam and rise as it approaches boiling point.
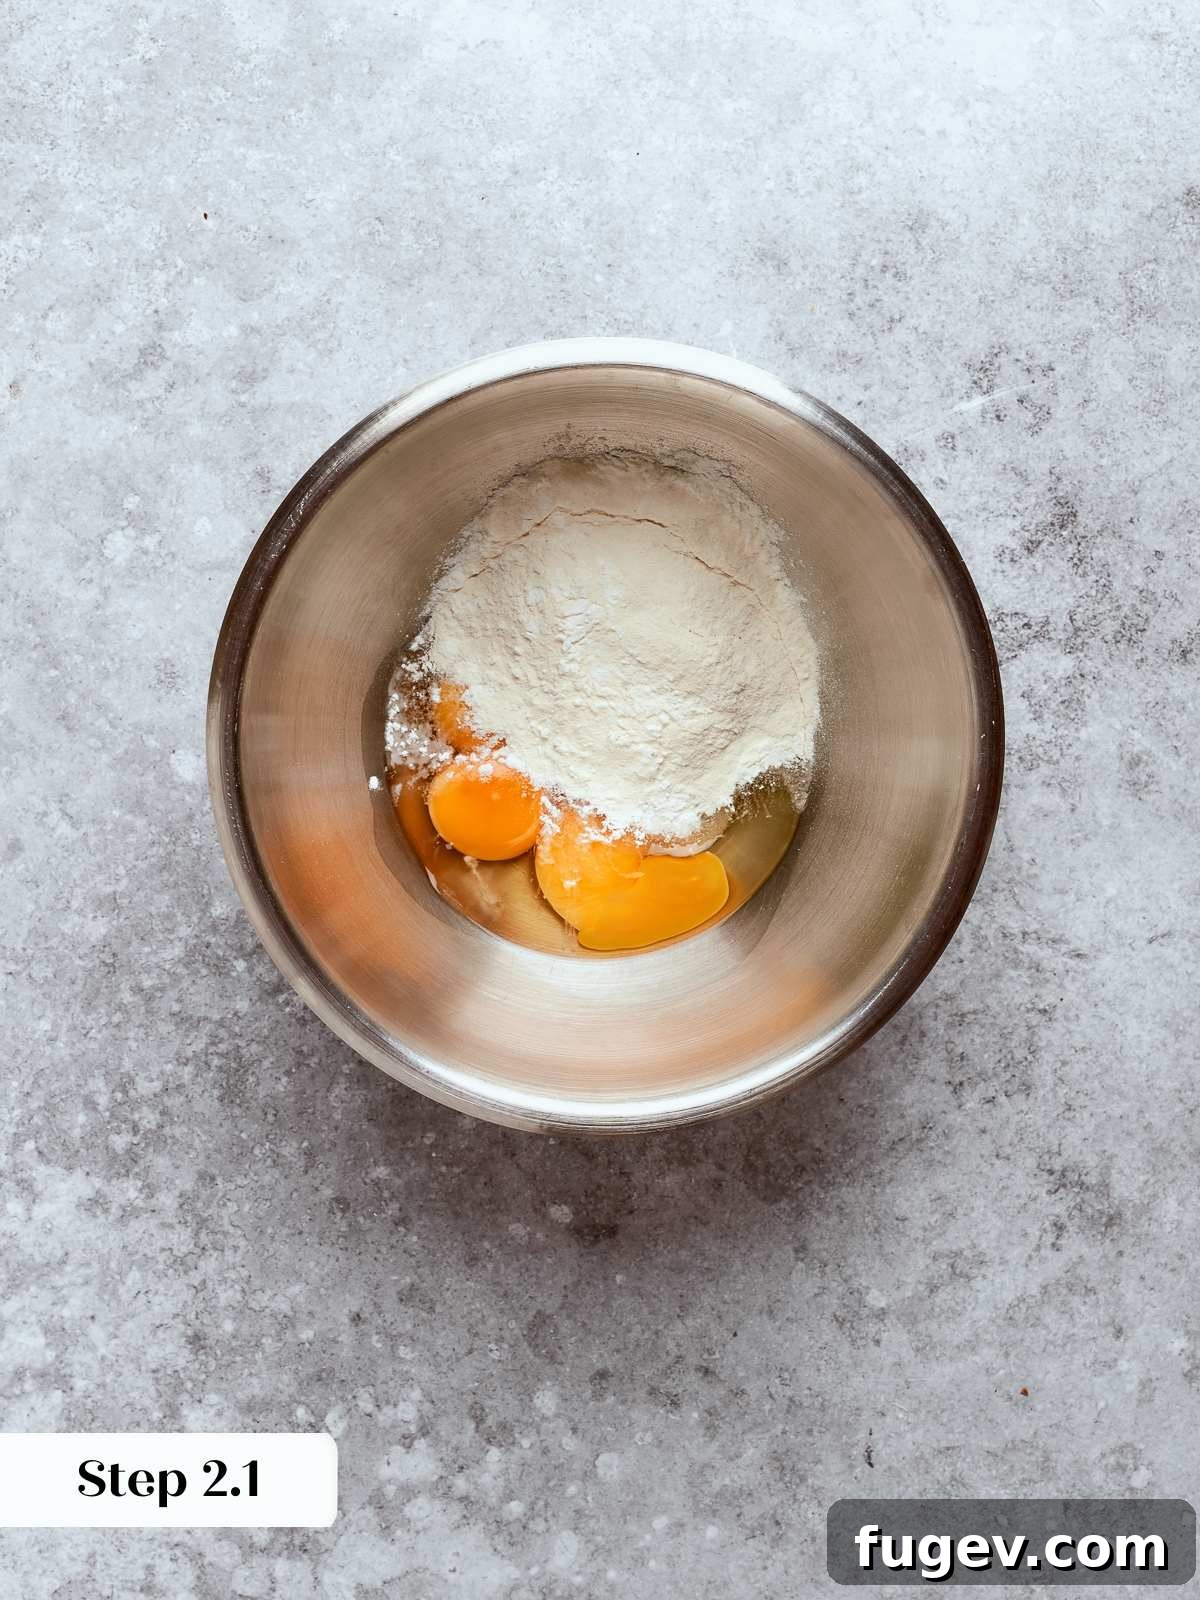
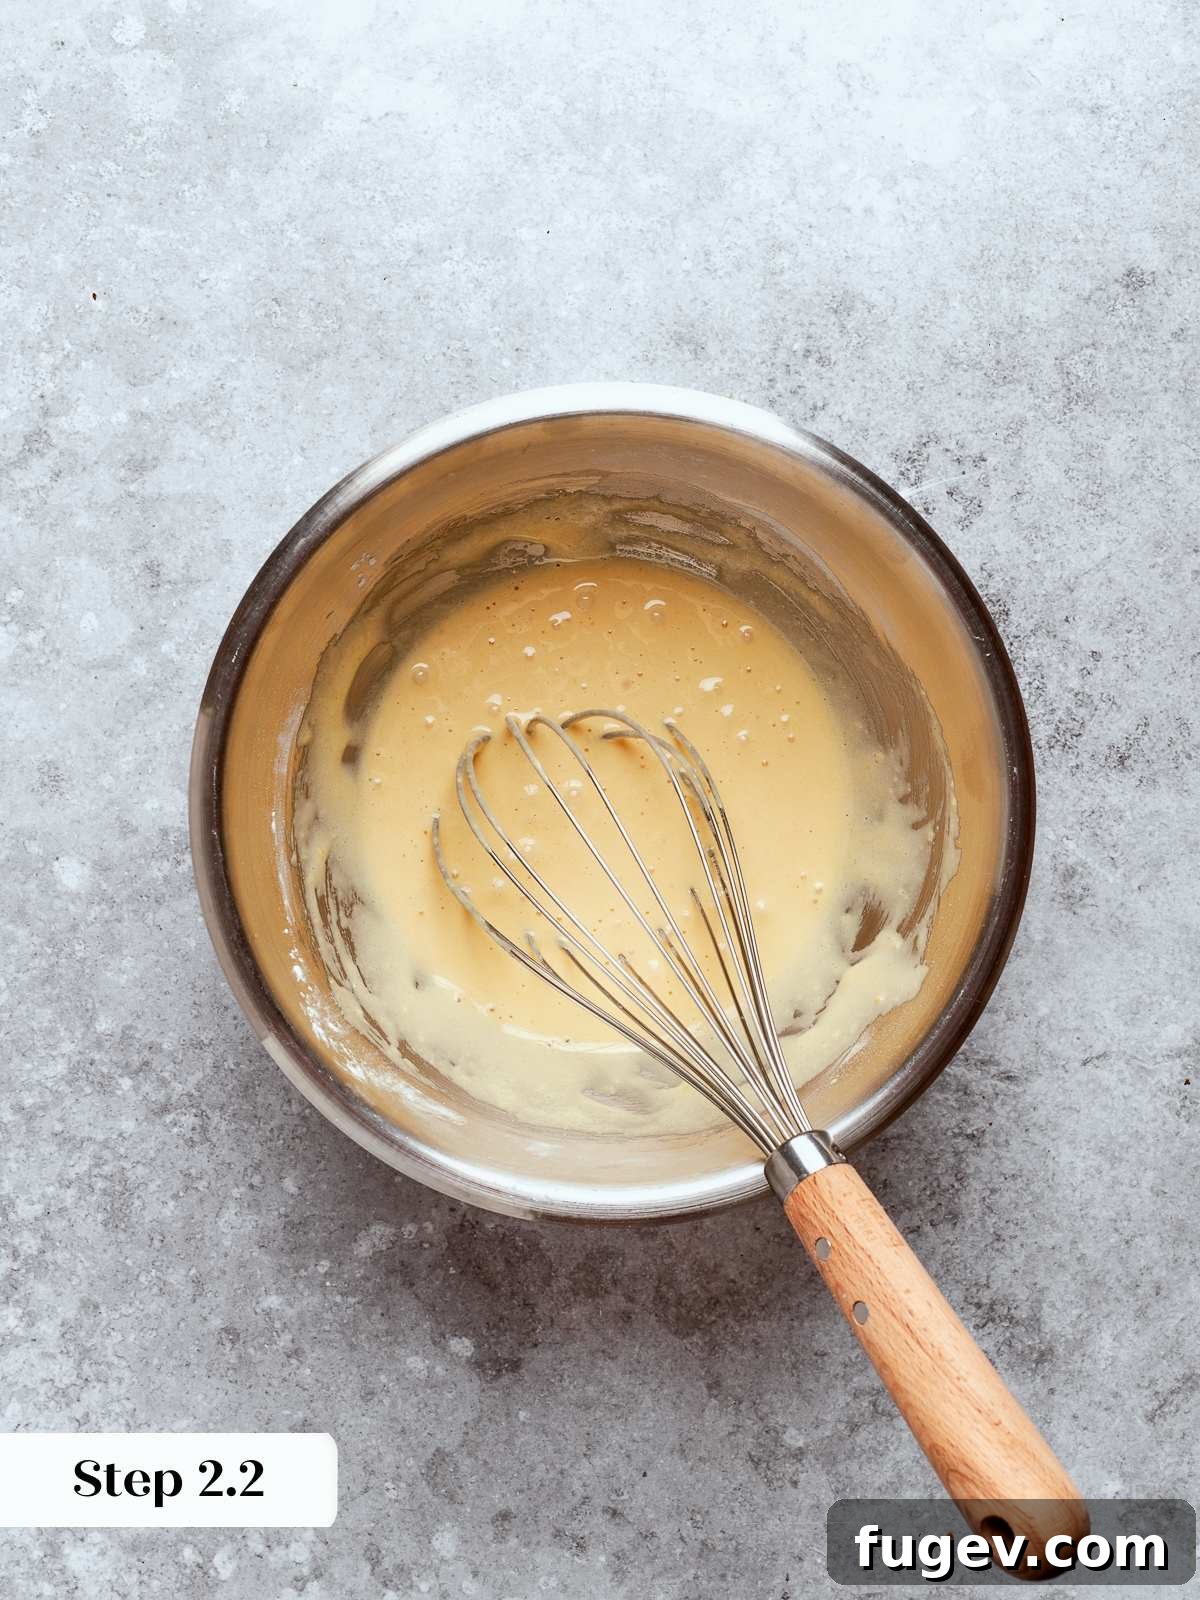
Step 2: Prepare the Egg Mixture and Your Workstation. To prevent your mixing bowl from sliding during vigorous whisking, set a large, clean bowl onto a damp paper towel on your countertop. In this bowl, whisk together the whole egg, the two egg yolks, cornstarch, and the remaining half of the granulated sugar until the mixture transforms into a pale, even yellow, becoming notably light and creamy in texture (photo 2 & 3). Concurrently, prepare a baking sheet by lining it with either plastic wrap or parchment paper; this will be used for rapidly cooling your finished pastry cream.
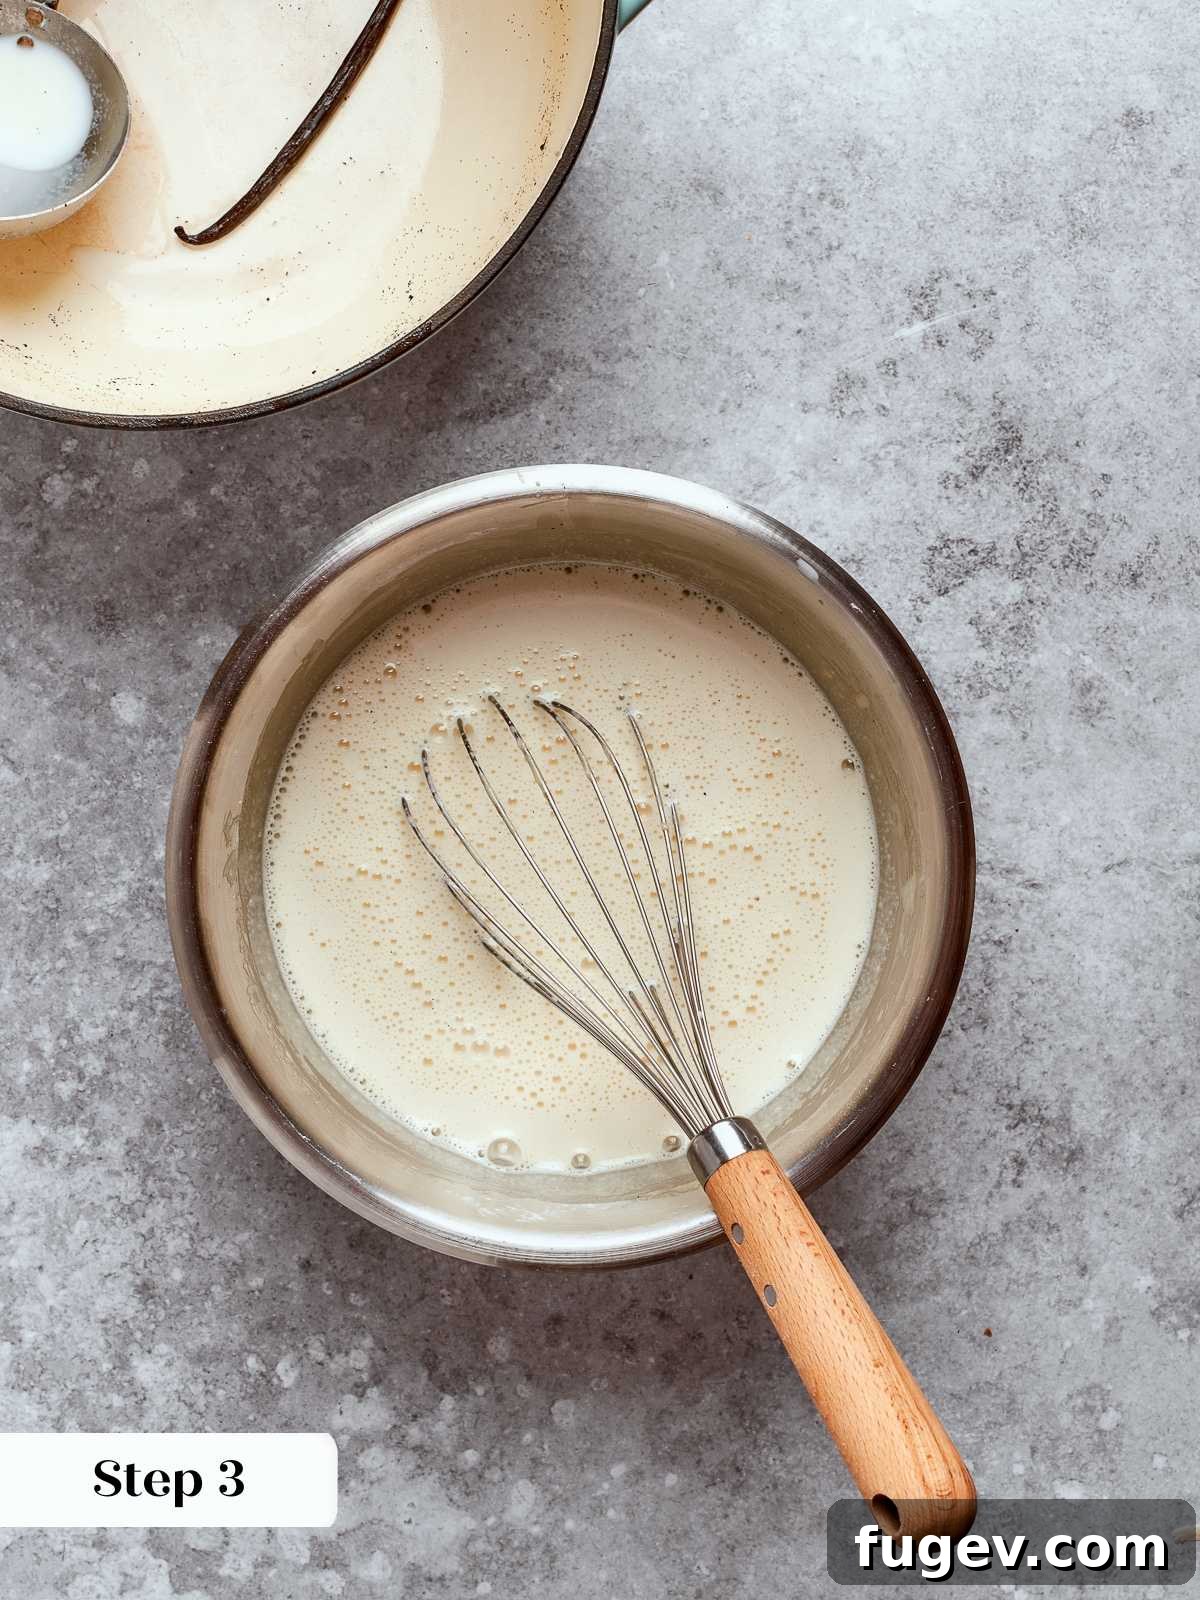
Step 3: Master the Tempering Process. The moment your milk mixture reaches a full, rolling boil, give your egg mixture one final, swift whisk. Carefully pour a small amount (about a quarter cup) of the steaming hot milk into the egg mixture, whisking continuously and vigorously. This initial slow incorporation gradually raises the temperature of the eggs without scrambling them. Gradually add more hot milk, still whisking constantly, until you have incorporated approximately half of the milk. Then, pour in the remaining hot milk and whisk even more vigorously to fully combine everything. This gradual tempering is crucial to preventing the eggs from cooking prematurely and ensuring a smooth, lump-free custard base (photo 3).
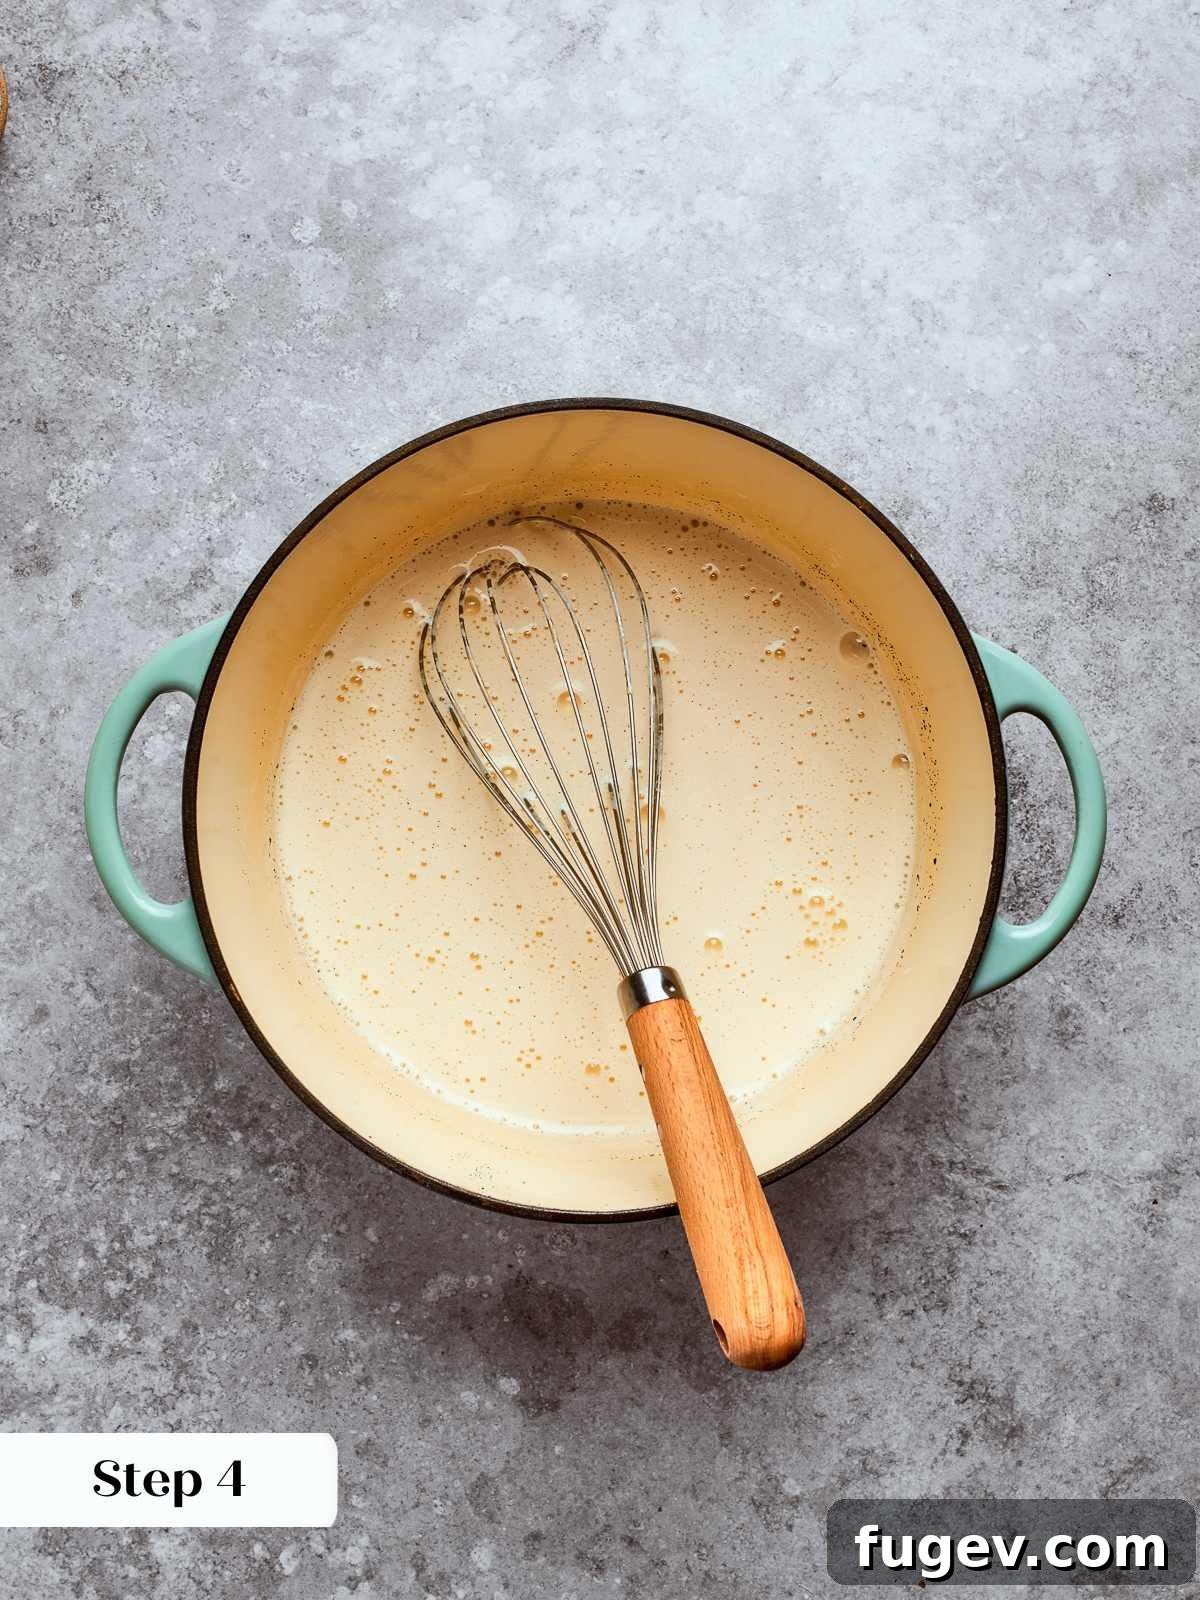
Step 4: Cook the Custard Base to a Boil. Carefully pour the entire tempered custard base back into the same saucepan (no need to clean it thoroughly) and return it to medium-high heat (photo 5). From this point, it is crucial to stir constantly with a heat-resistant silicone spatula, paying meticulous attention to the bottom and edges of the pot to prevent sticking and burning. The mixture will initially appear thin and quite loose for several minutes. However, you will eventually feel a distinct change as it begins to thicken and resist the spatula. The precise moment it starts to thicken, immediately switch from the spatula to a whisk for more efficient and thorough agitation.
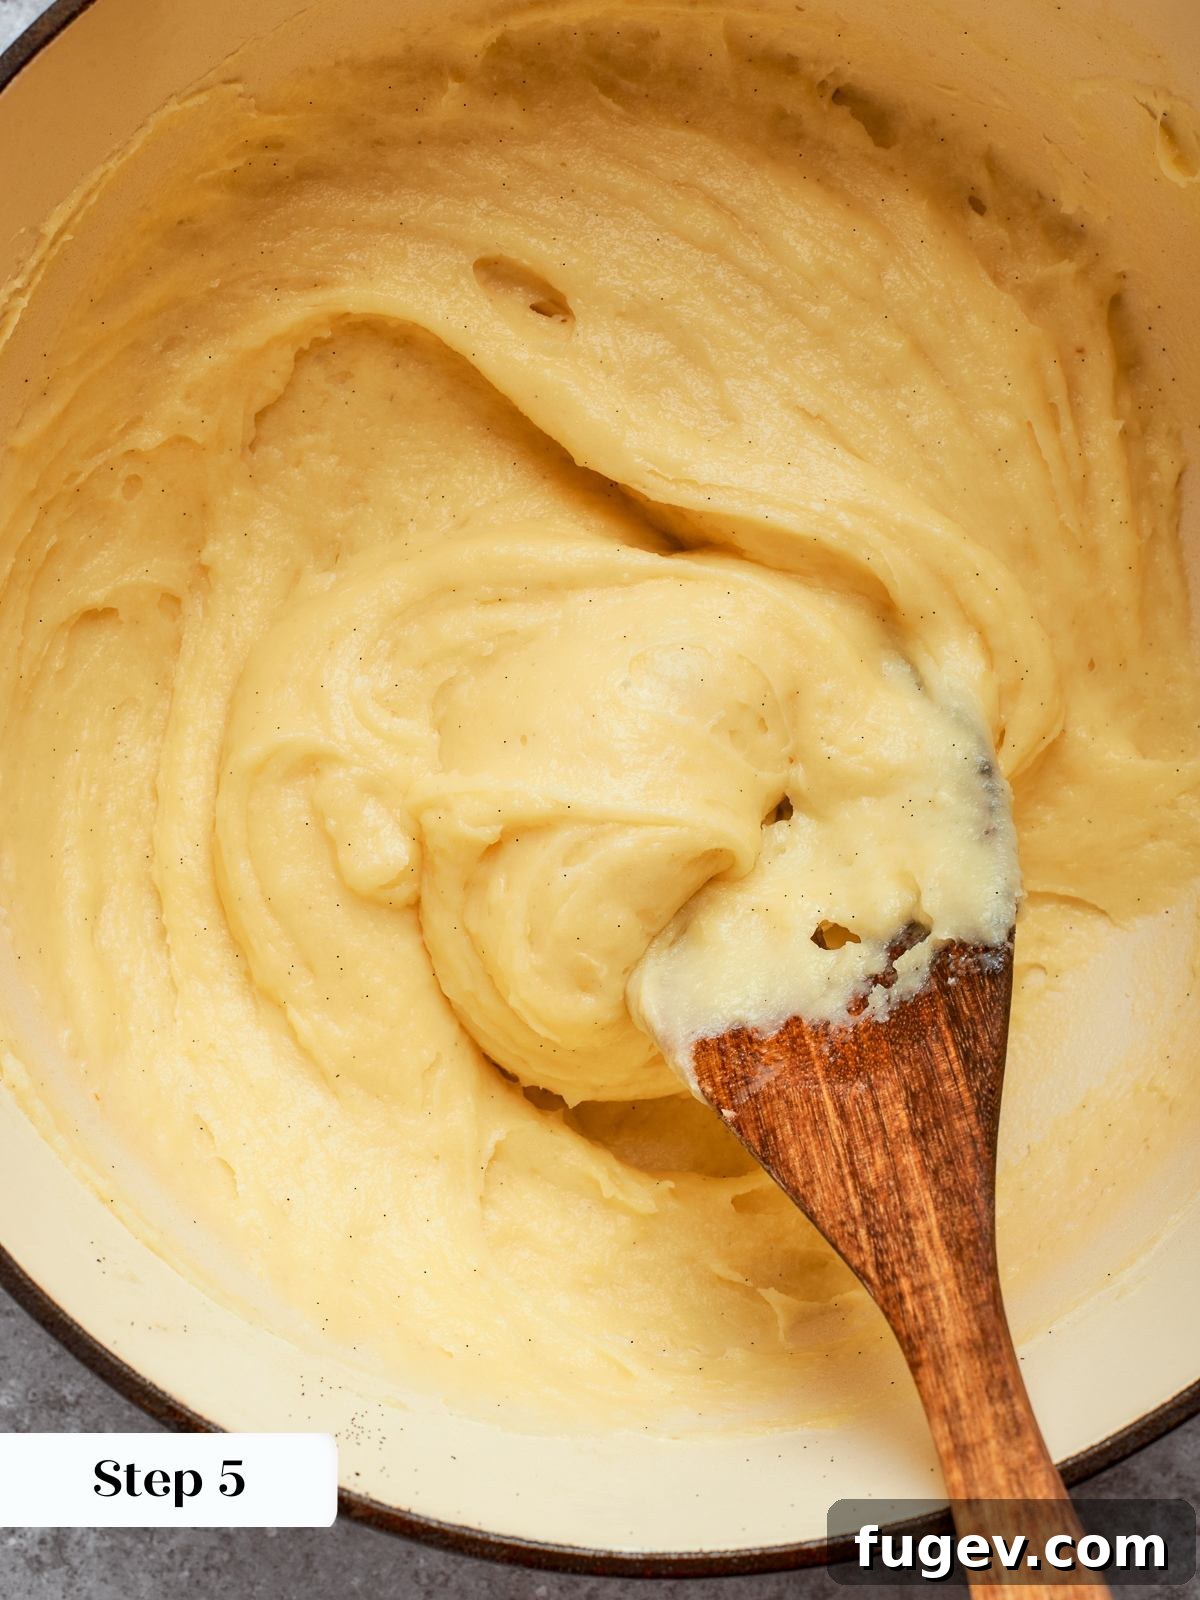
Step 5: Boil the Pastry Cream for One Full Minute. Once the cream begins to thicken, whisk vigorously, ensuring your whisk reaches into all corners of the pot to prevent any lumps. Continue whisking and bring the pastry cream to a full, rolling boil. Maintain this boil for one entire minute. This step is absolutely critical and not optional: boiling fully activates the cornstarch, ensuring maximum thickening power, and more importantly, it eliminates the tell-tale starchy flavor that characterizes undercooked pastry cream. The finished cream will be impressively thick, beautifully glossy, and will hold its shape elegantly on the whisk (photo 6).
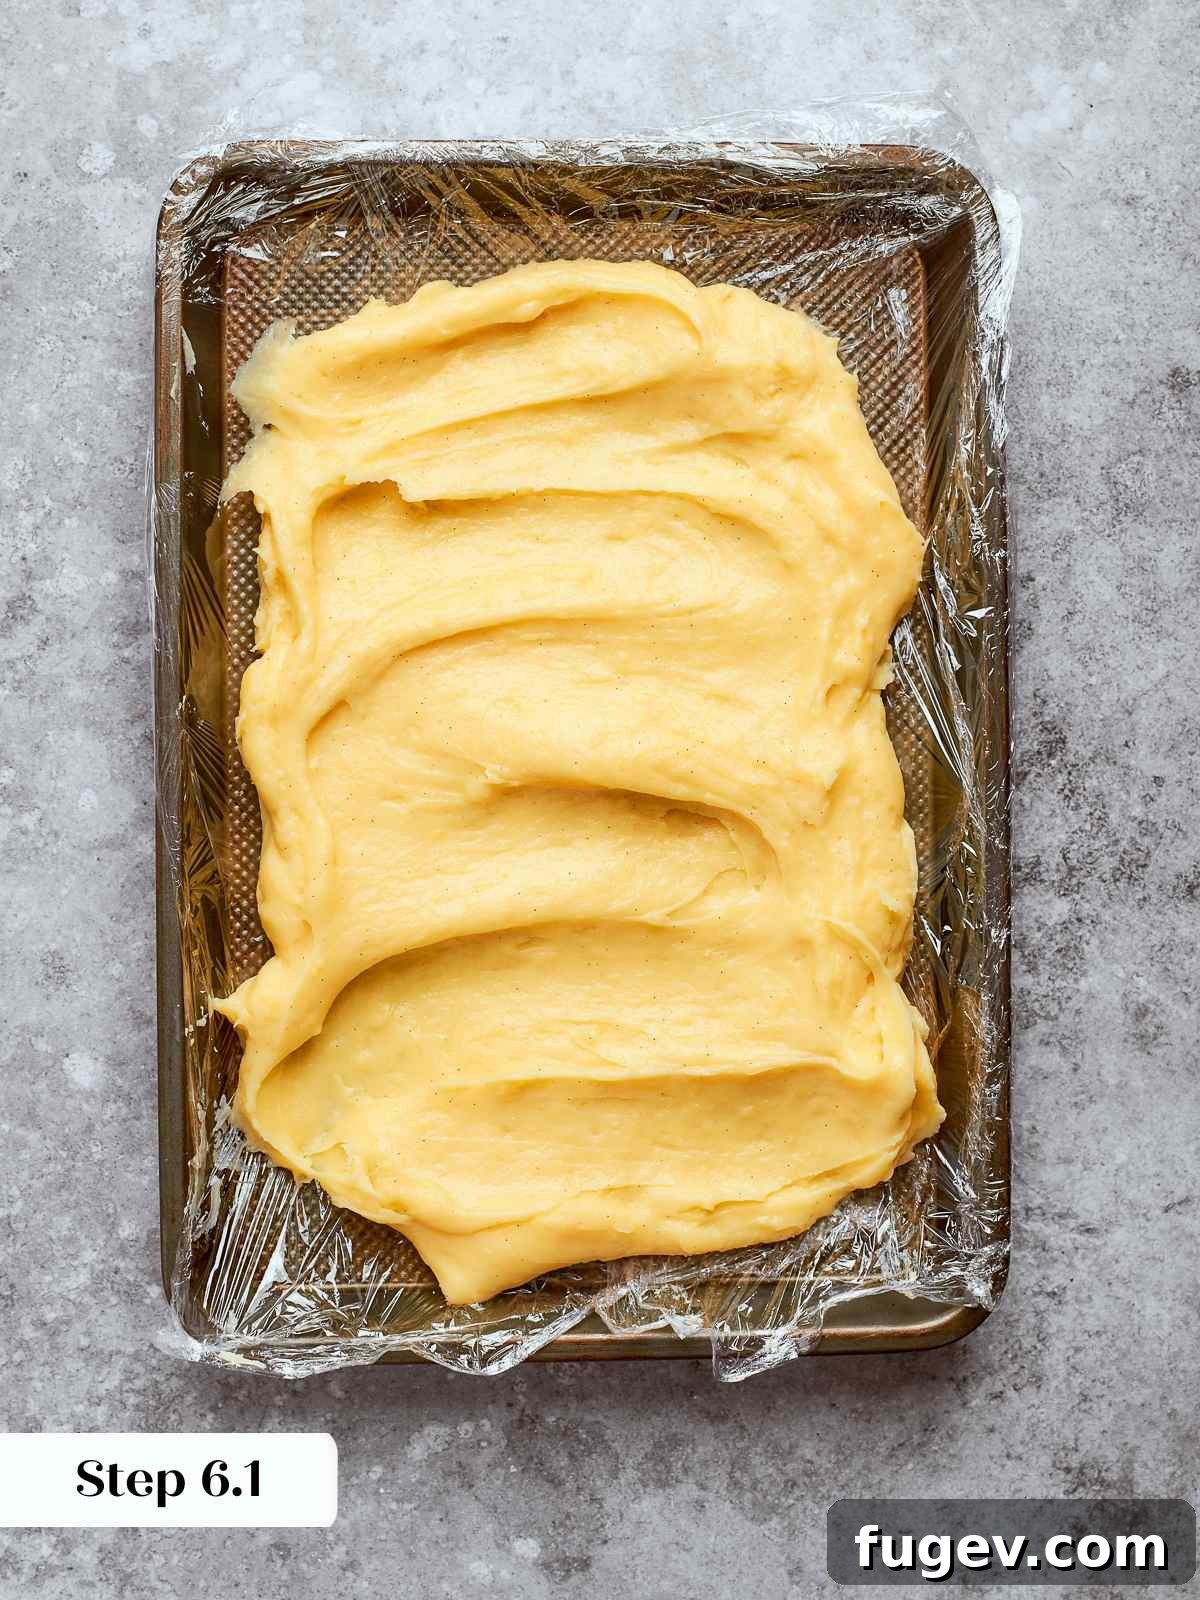
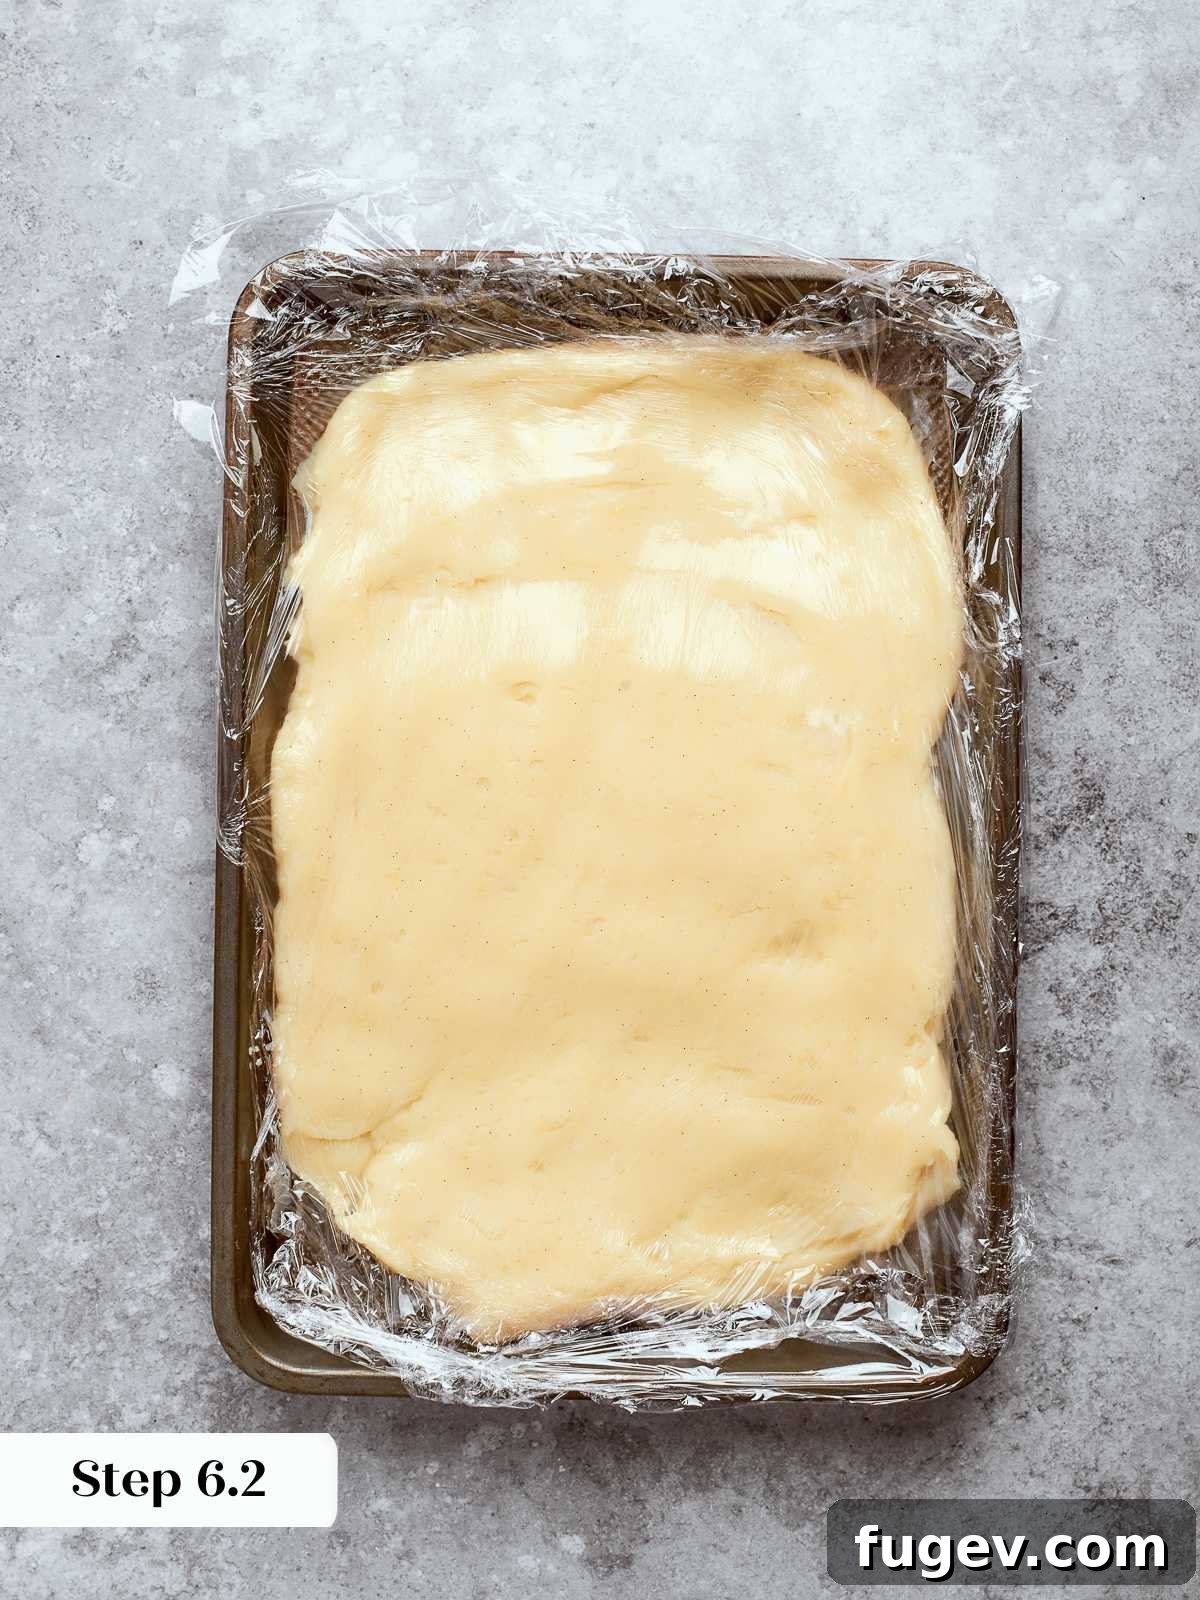
Step 6: Rapidly Cool the Pastry Cream. Immediately scrape the hot, finished pastry cream onto your prepared baking sheet and use an offset spatula or the back of a spoon to spread it into a thin, even layer (photo 7). This maximizes the surface area, allowing it to cool much faster. Press a piece of plastic wrap directly onto the entire surface of the cream, ensuring no air pockets, and poke a few small holes in the plastic to allow any residual steam to escape. Refrigerate until it is completely cold and firm to the touch, which will take at least 1 hour, but it can be prepared up to overnight (photo 8).
Crafting the Perfect Choux Pastry
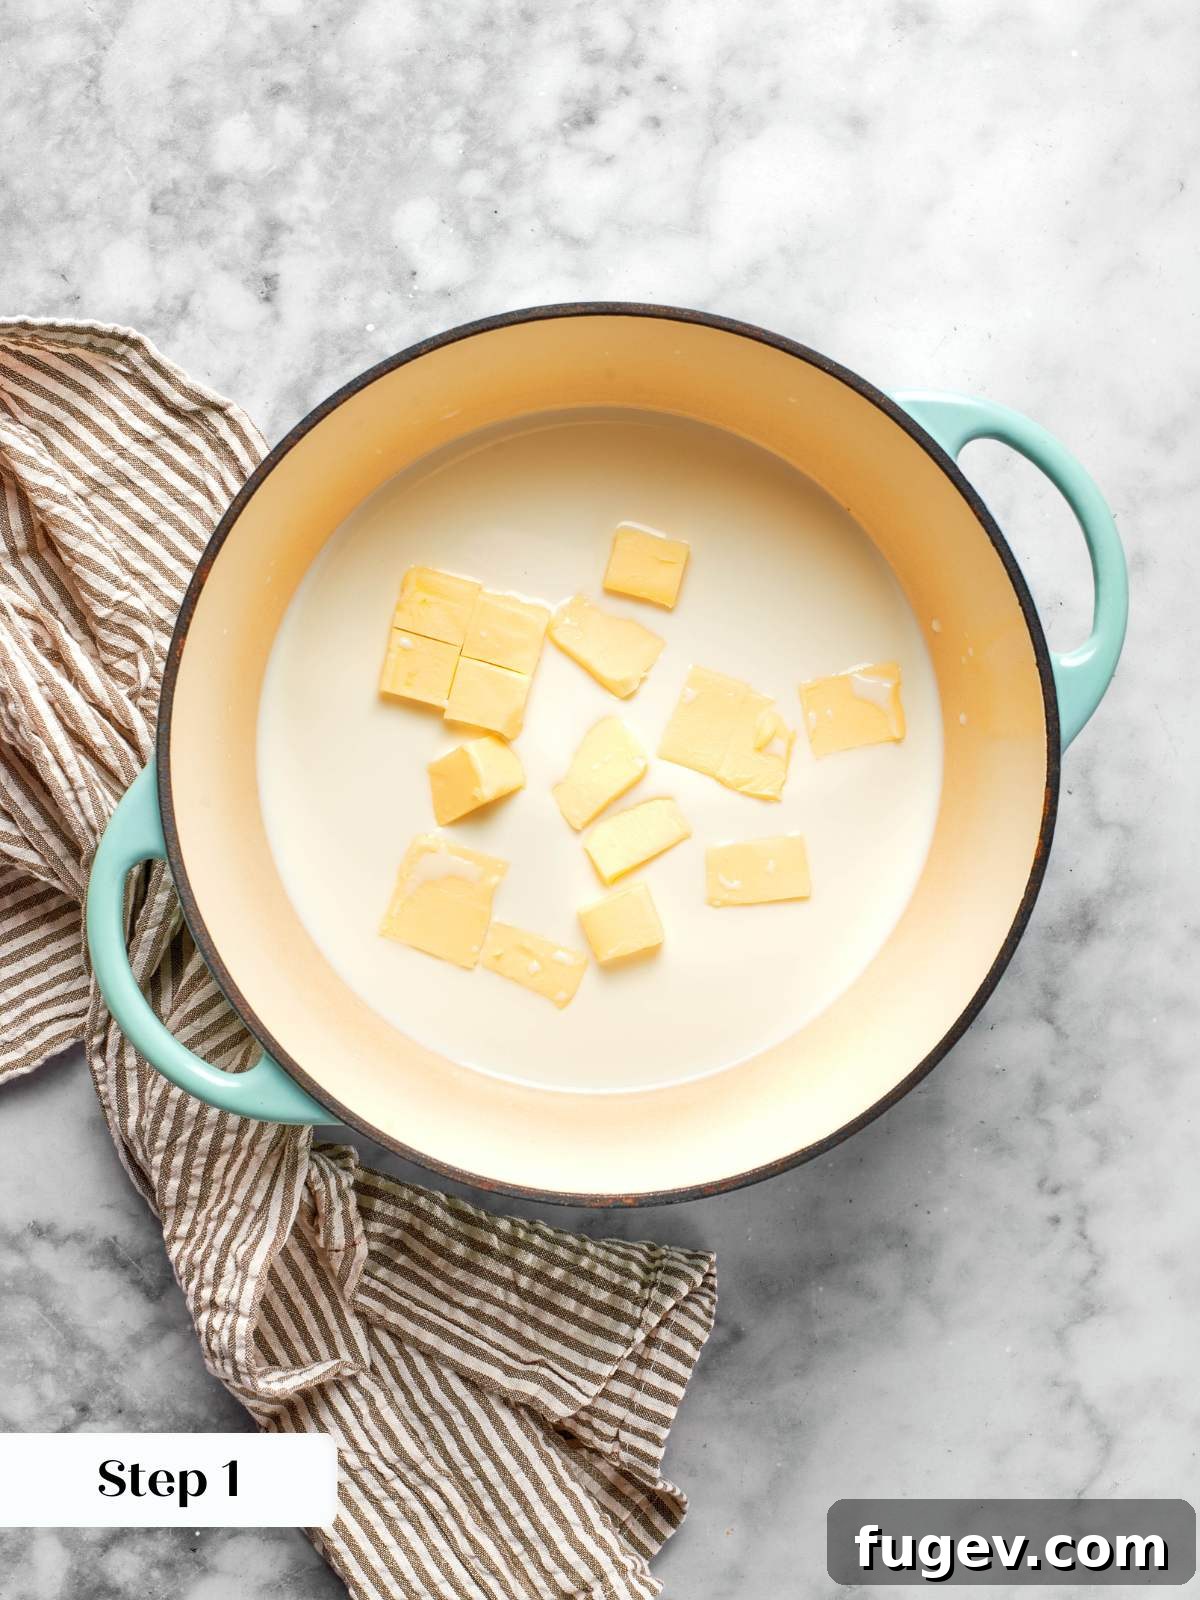
Step 1: Measure and Organize All Ingredients (Mise en Place). Before you begin cooking, ensure all your ingredients are precisely measured and readily accessible. Combine the flour, kosher salt, and granulated sugar in a small bowl and set it aside. Crack the eggs into a separate container so they are perfectly ready for individual addition later. If you haven’t already, cube the unsalted butter into small, uniform pieces. Cubing the butter is a small but important detail; it helps it melt evenly and in sync with the milk coming to a boil (photo 1), preventing the milk from reducing too much while waiting for larger, cold butter chunks to melt.
Step 2: Bring Butter and Milk to a Rolling Boil. In a robust, high-sided, heavy-gauge saucepan, combine the cubed butter and whole milk. Place the saucepan over high heat and watch it closely. The objective is for the butter to be completely melted exactly as the milk reaches a full, rolling boil. The instant the milk begins to boil rapidly, move immediately to the next step. It is crucial not to let it continue boiling for more than a second or two, as excess evaporation will alter the liquid ratio.
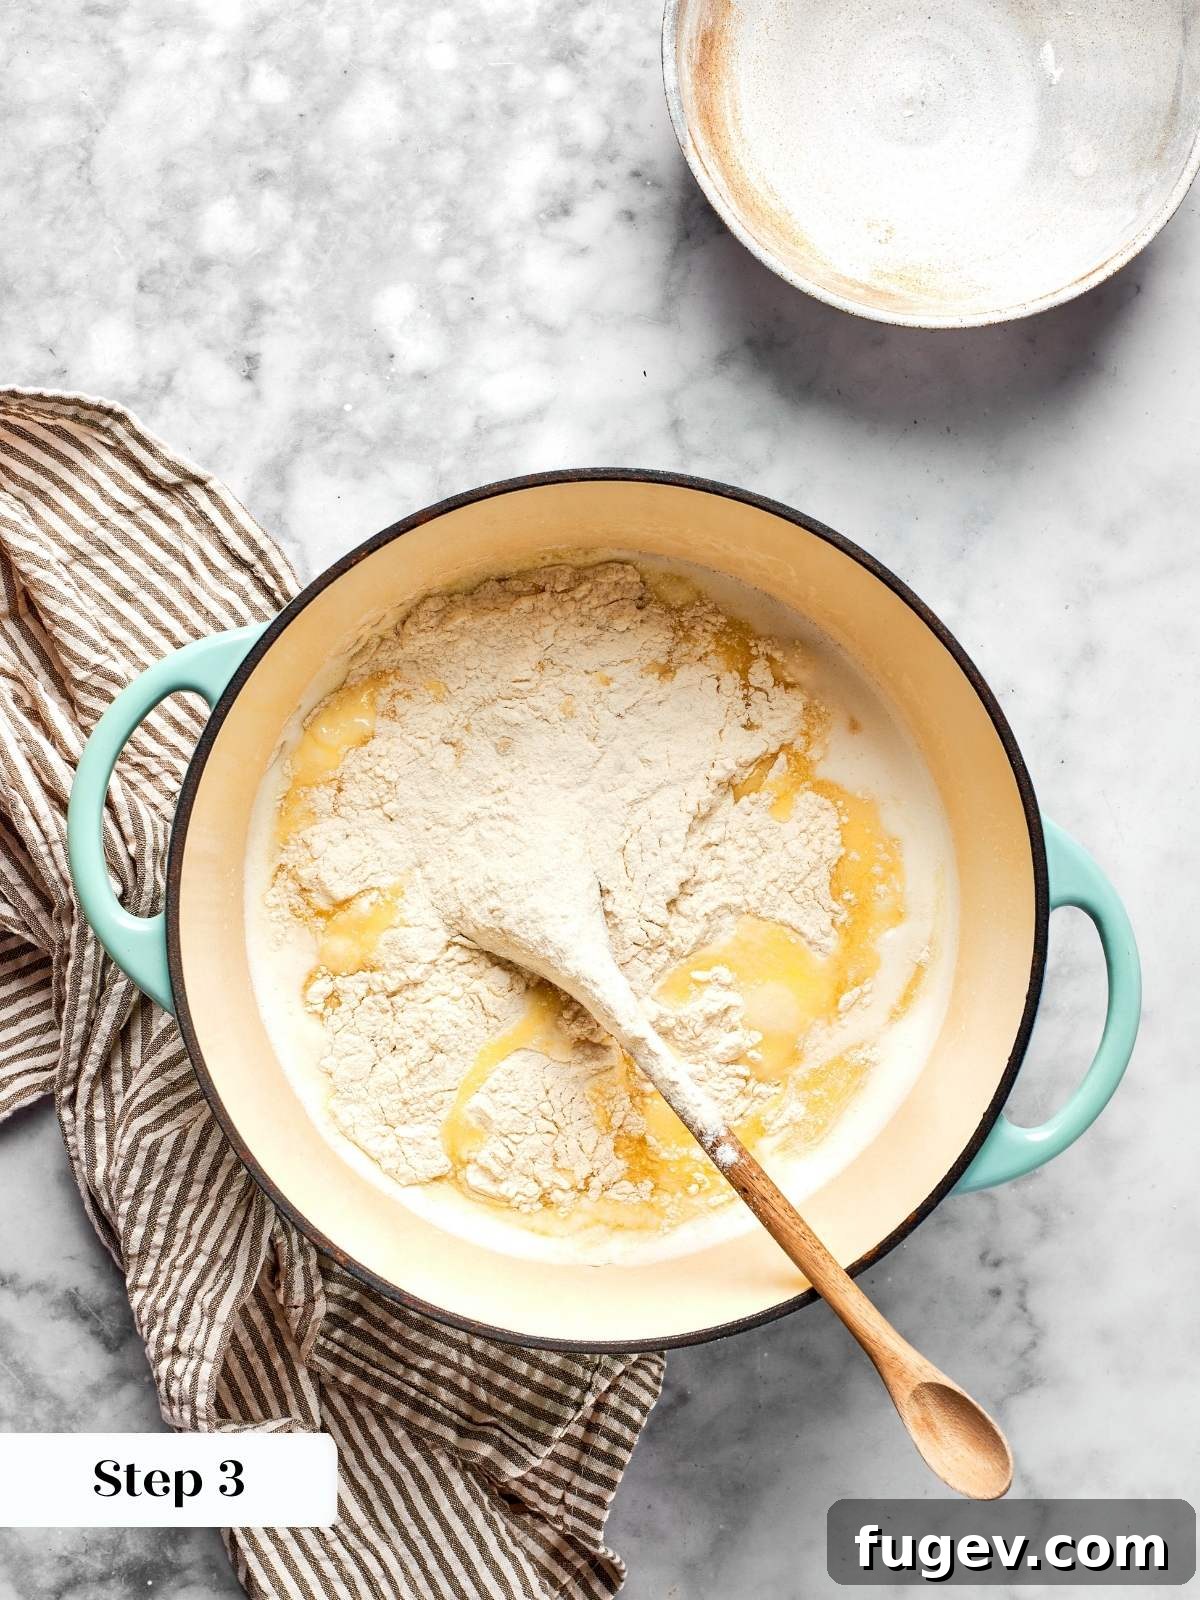
Step 3: Add the Flour Mixture and Begin the Panade. As soon as the milk boils, remove the saucepan from the heat and add the combined flour, salt, and sugar all at once. Initially, stir carefully to integrate the flour into the liquid without splashing. Once the flour has absorbed the liquid and the mixture starts to come together, switch to vigorous stirring to thoroughly smooth out any lumps and form a cohesive dough. A sturdy wooden spoon is the ideal tool for this stage; its rigid nature provides excellent leverage against the rapidly thickening dough and is far easier to grip than a silicone spatula as the paste starts to resist (photo 3).
Step 4: Cook the Panade Until It Clears the Pot. Return the saucepan to high heat and continue stirring constantly and vigorously with your wooden spoon. The dough will gradually pull away from the sides and bottom of the pot, forming a unified ball. Crucially, as you stir, a thin, dry coating or film will form on the bottom of the pan, indicating that sufficient moisture has evaporated from the milk and butter. This film is the critical visual signal that your panade is properly cooked and ready to produce a perfectly pipeable choux paste. This cooking process typically takes about 2 minutes from the moment the flour is added. Do not rush this step or remove the dough prematurely (photo 4).
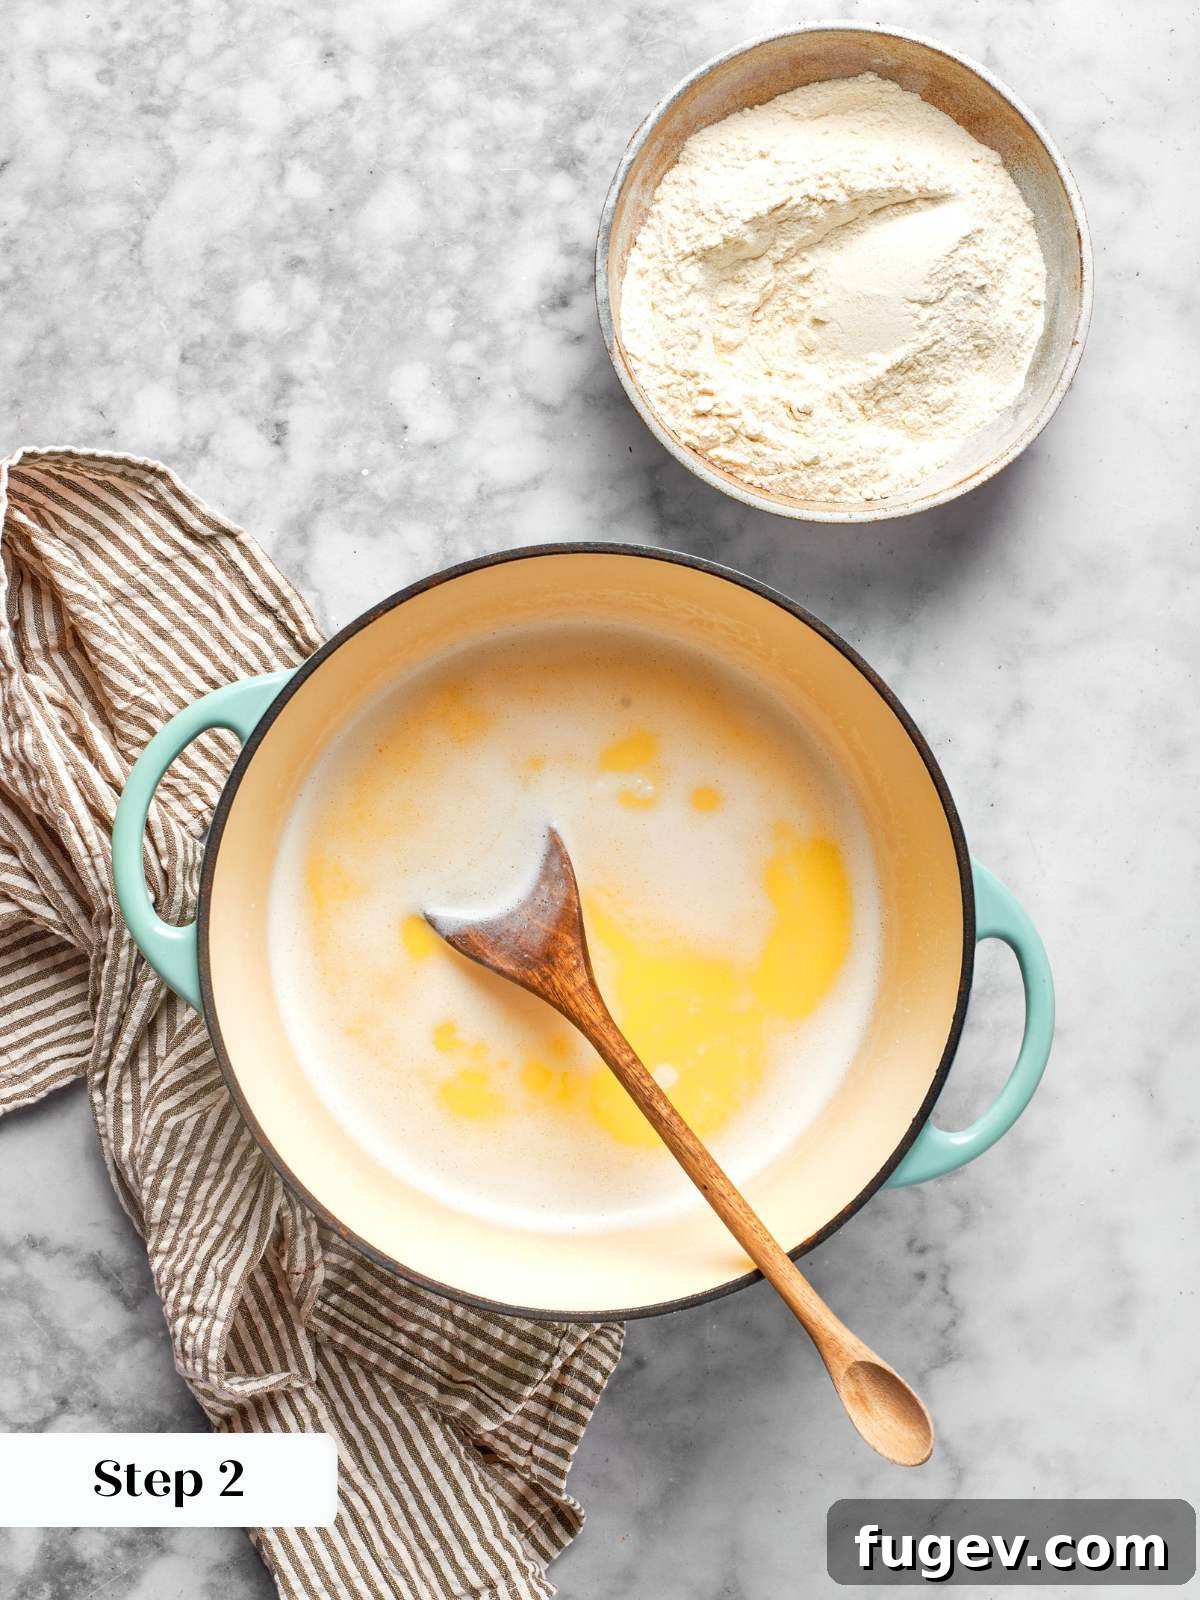
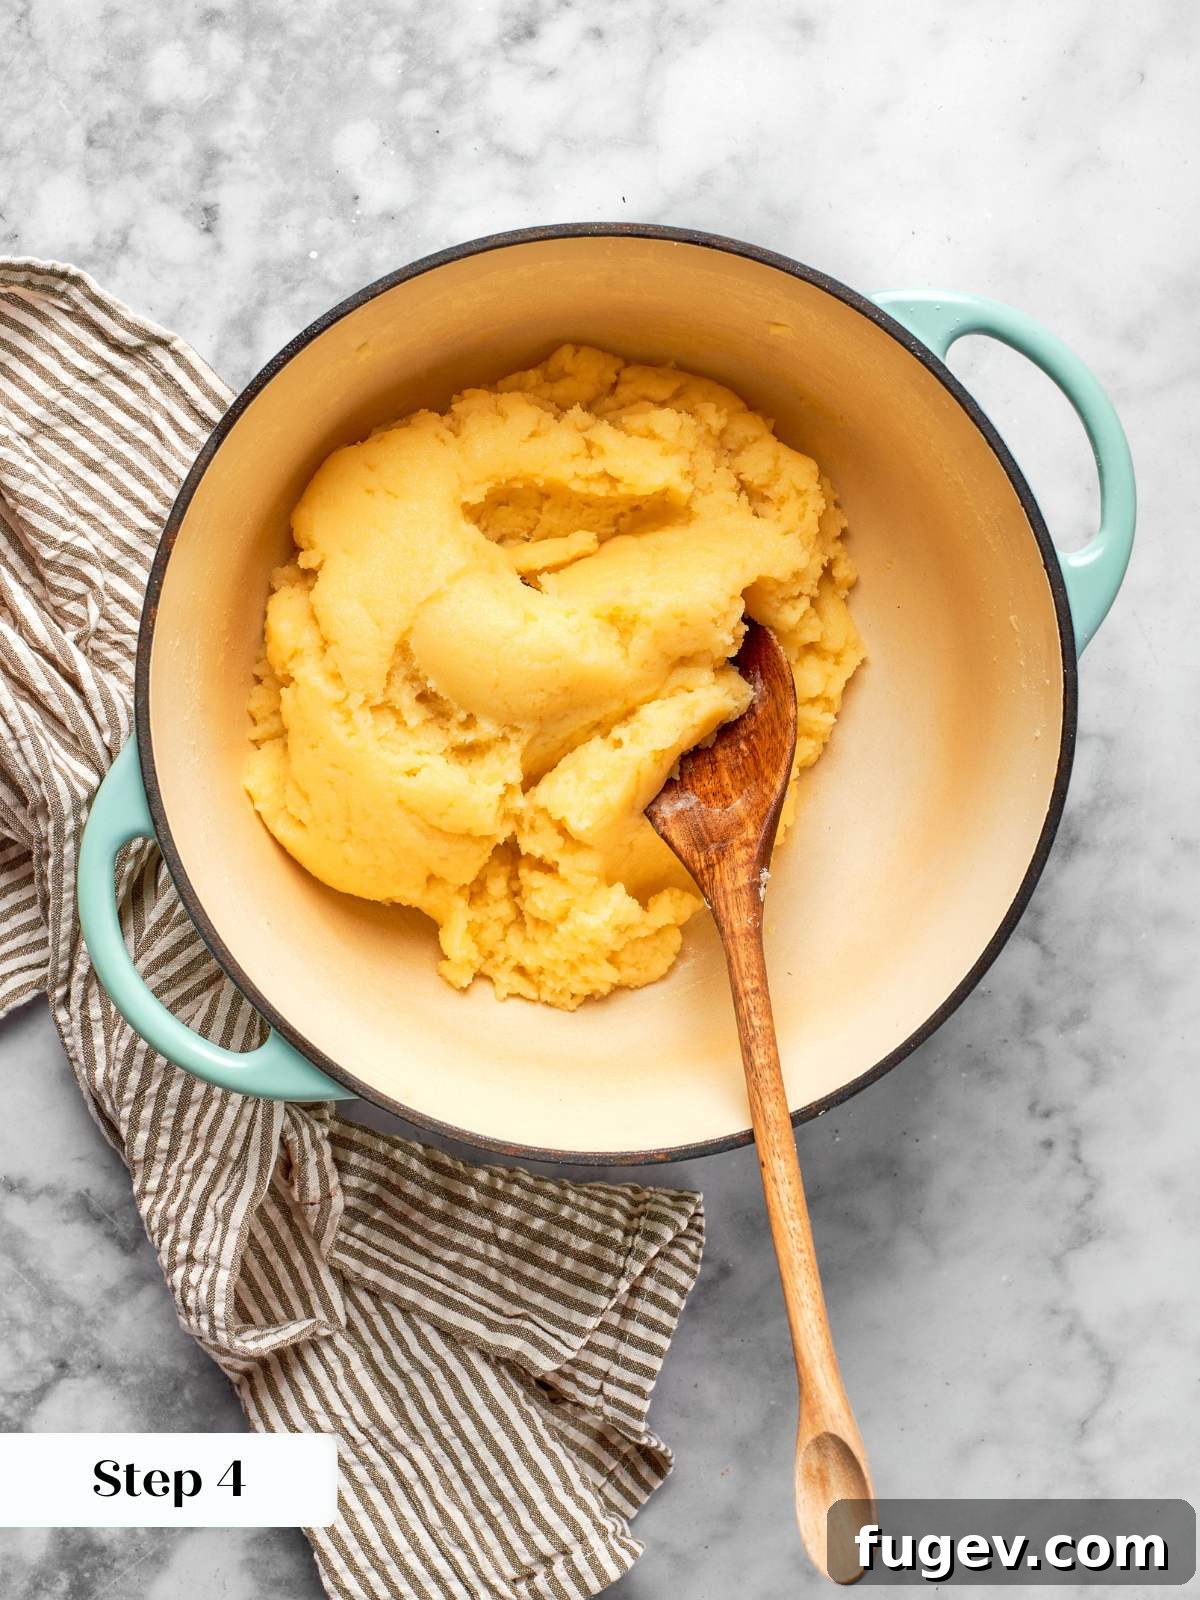
Important Note on Panade Consistency: This recipe features a slightly higher ratio of butter to milk and flour compared to some traditional choux recipes, which inherently reduces the tendency of the paste to stick to the pot. However, if you observe the butter starting to melt out of the dough and pooling (a sign of overcooking the panade or excessive heat), immediately transfer the mixture to your stand mixer bowl and proceed directly to Step 5. In such cases, you may find that the dough requires 1 to 1.5 additional eggs to reach the correct consistency.
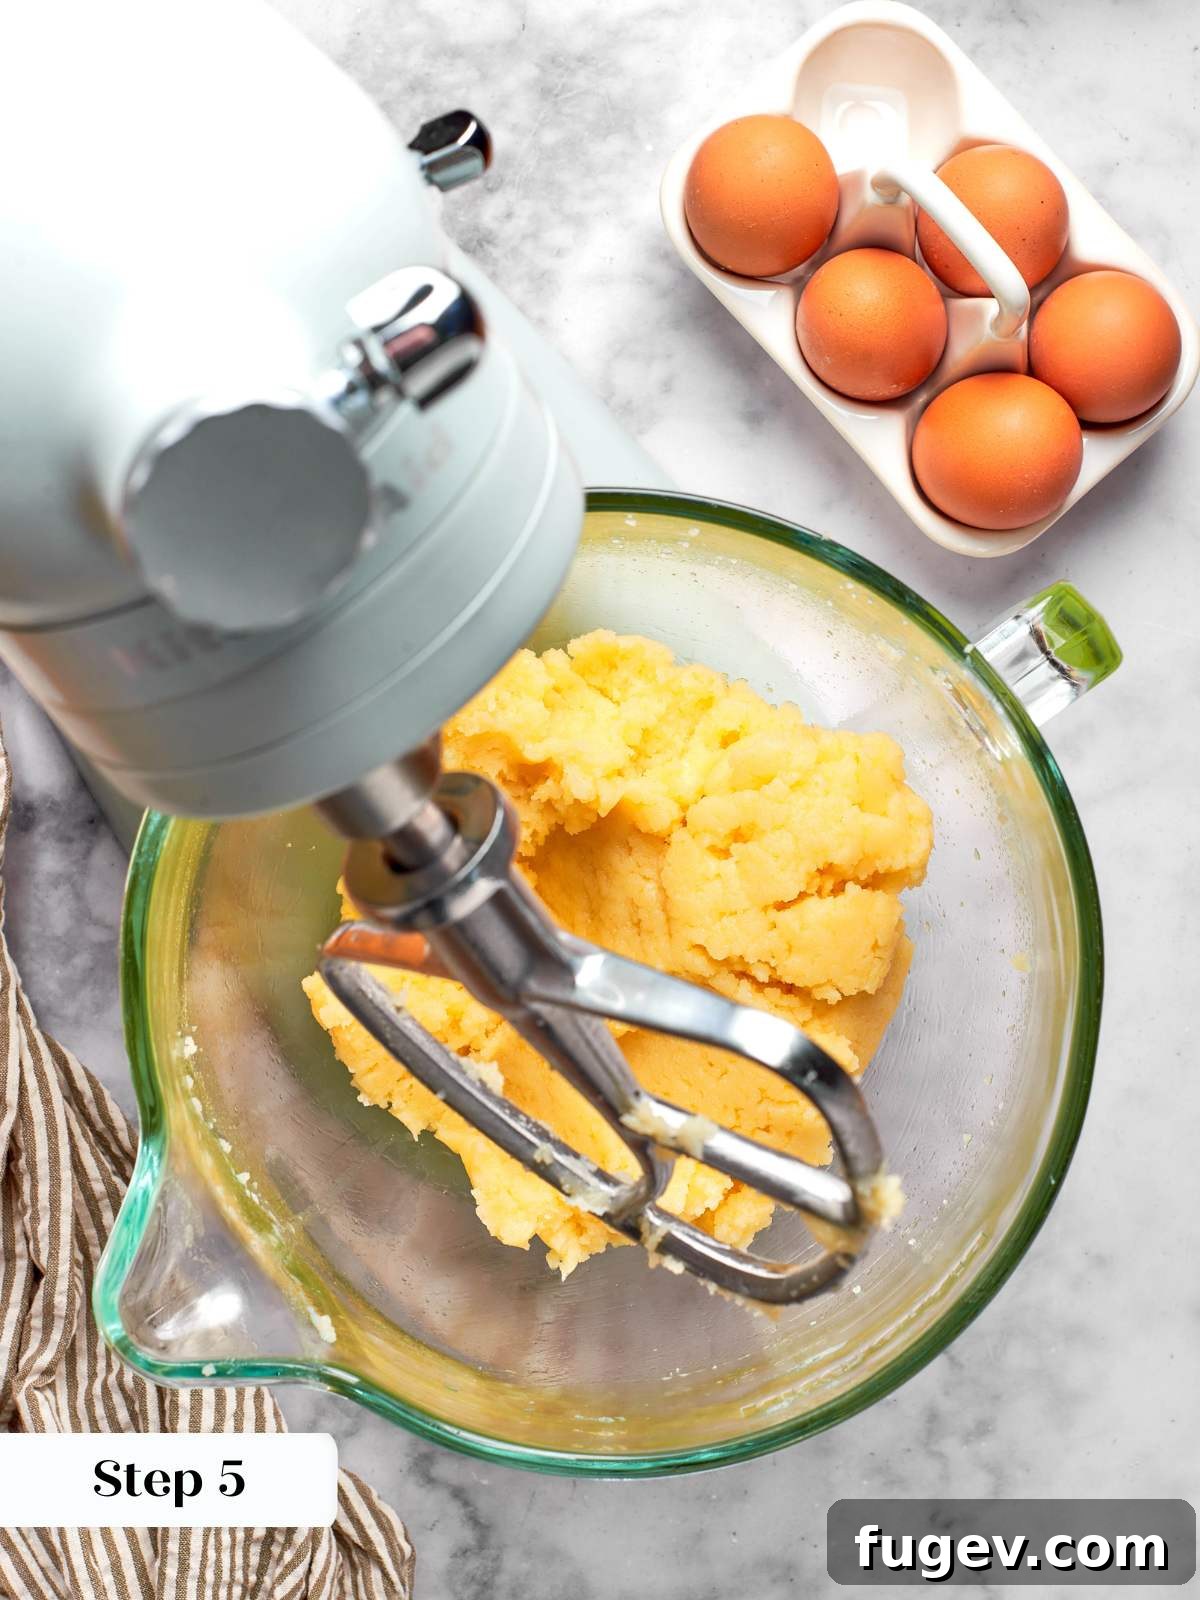
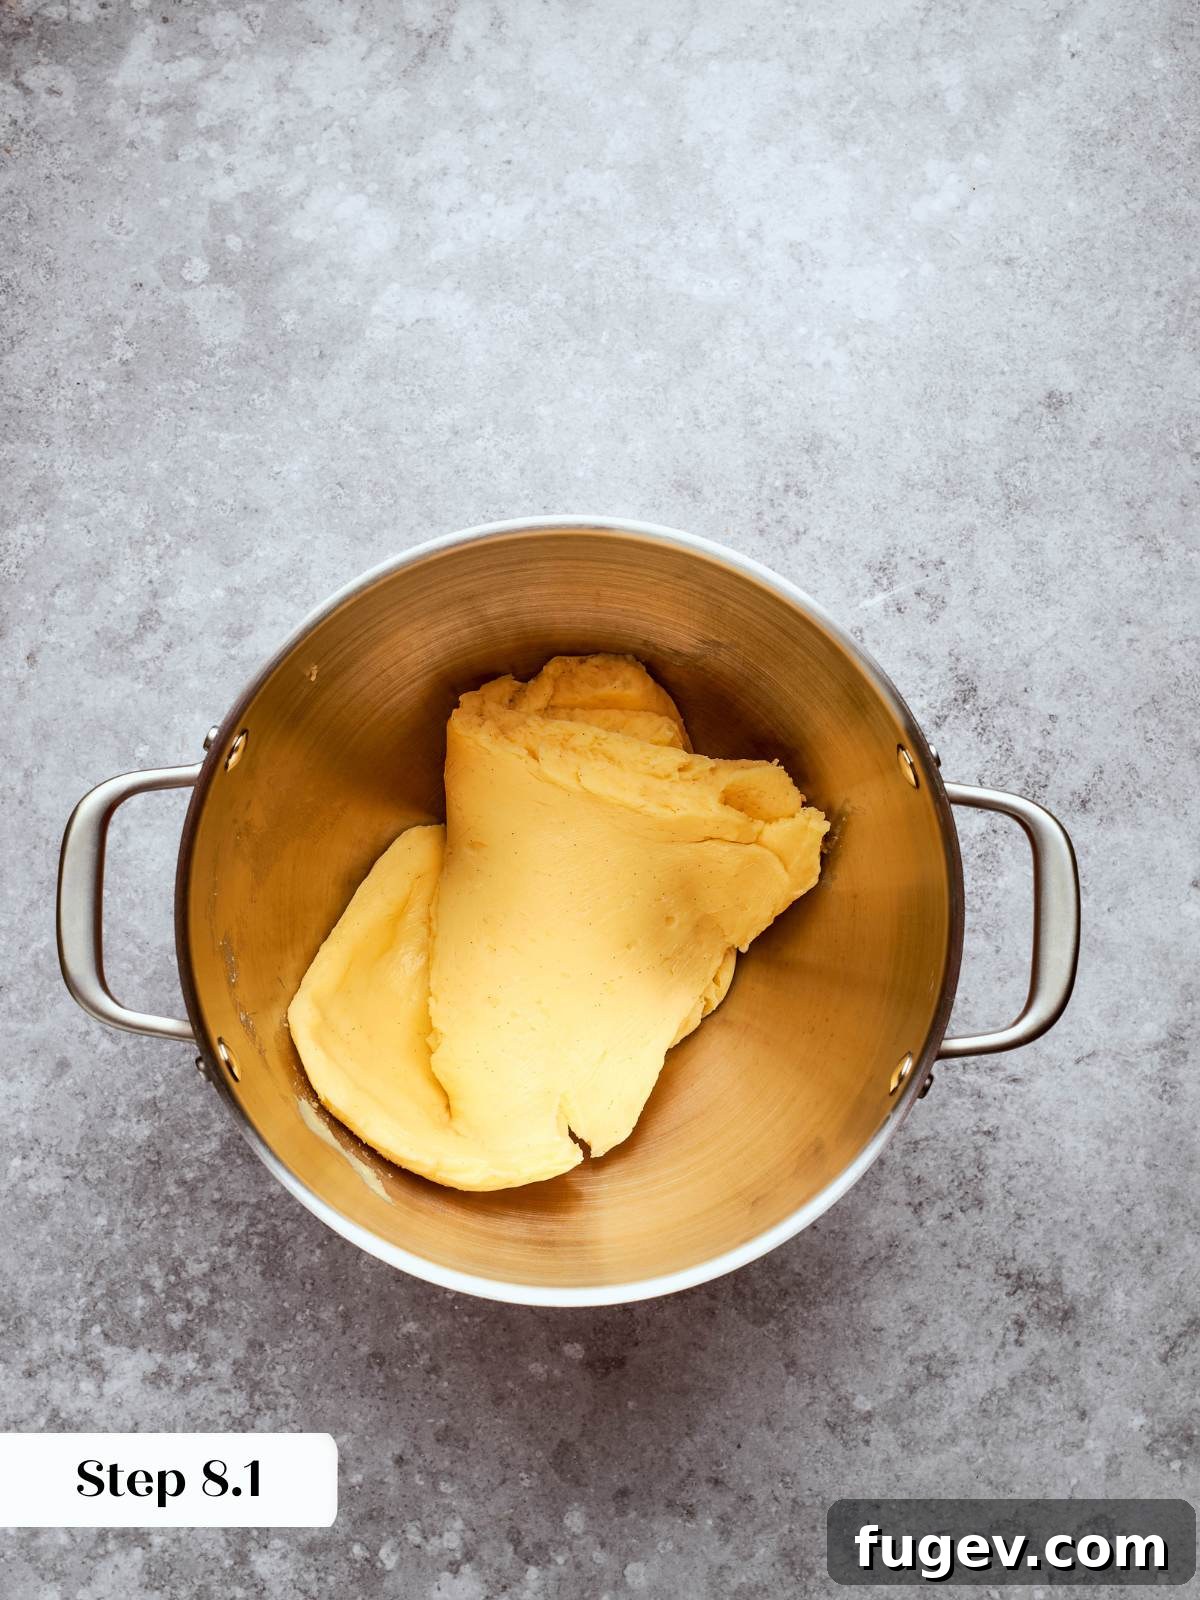
Step 5: Transfer to the Stand Mixer and Release Steam. Promptly transfer the hot panade to the bowl of a stand mixer fitted with the paddle attachment. Begin beating the dough on medium-high speed. Initially, the dough will appear somewhat rough and emit a significant amount of steam; this is completely normal and expected. At this stage, you are not incorporating any new ingredients. Your primary goal is to allow the steam to escape, which cools the mixture sufficiently to receive the eggs without inadvertently scrambling them. Wait patiently until the visible steam stops rising from the dough before attempting to add the first egg (photo 5).
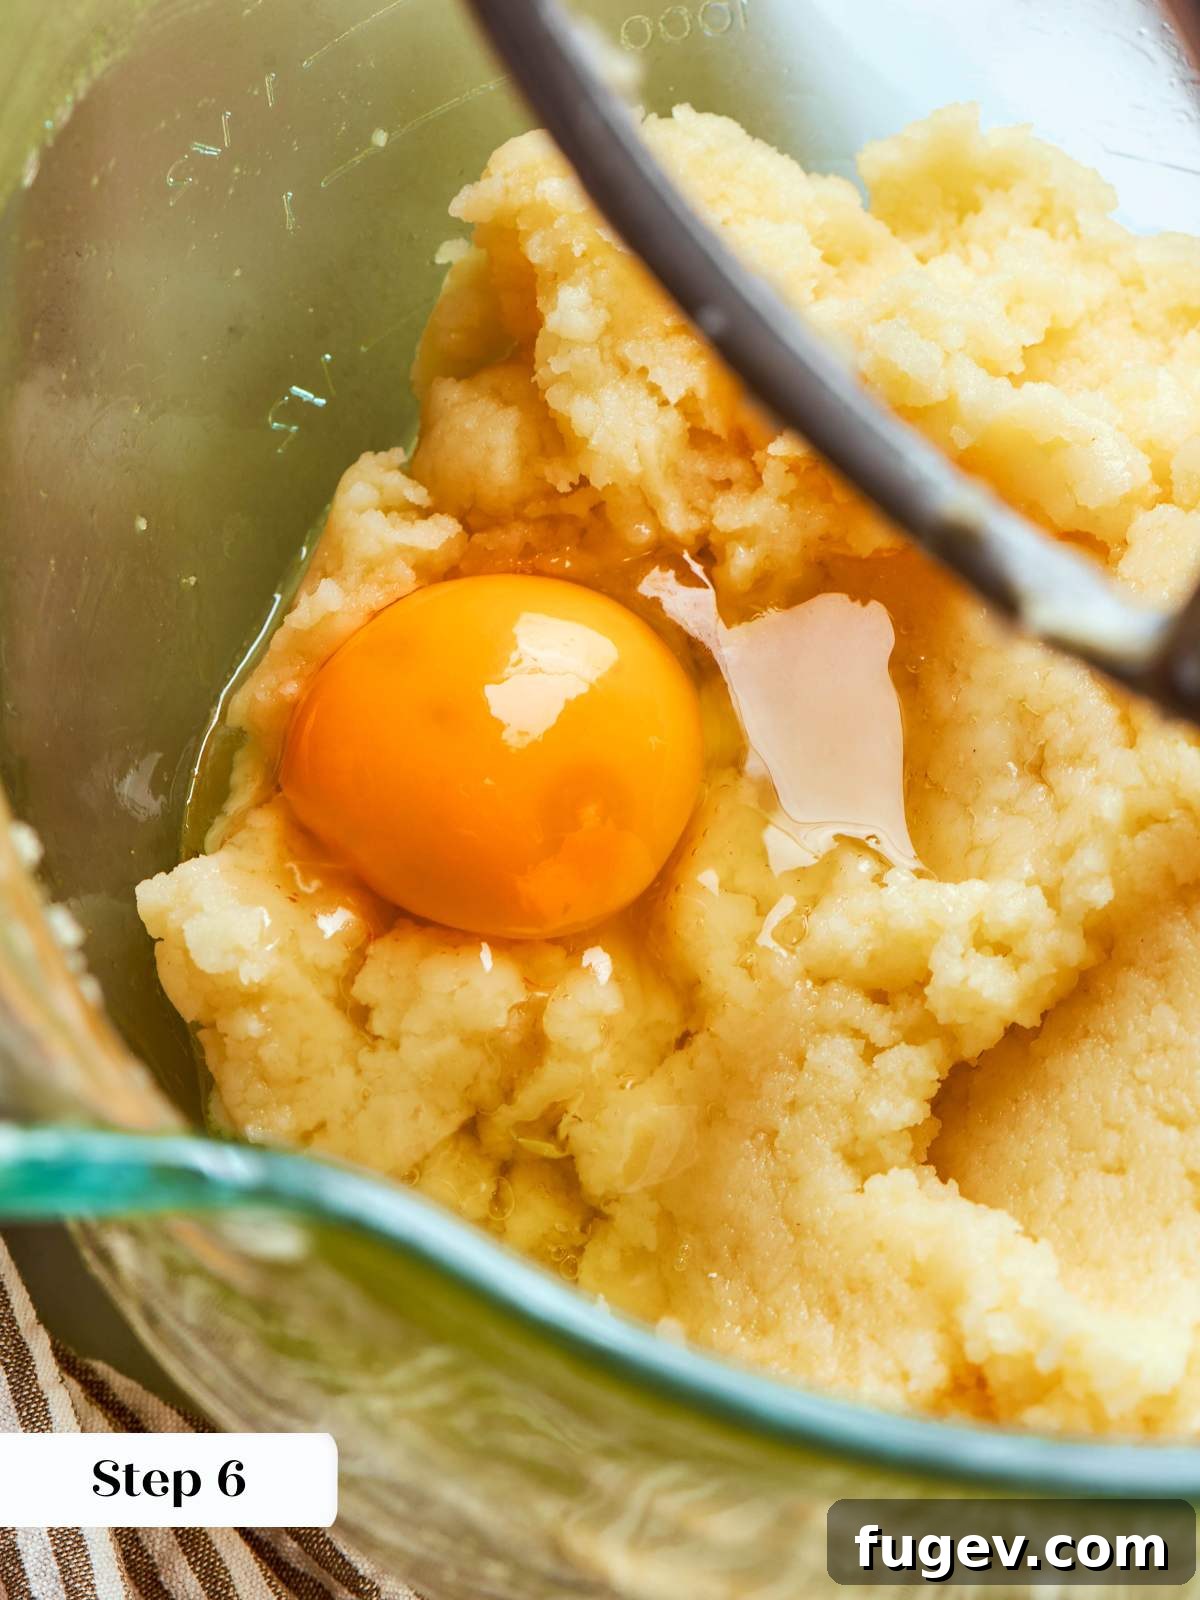
Step 6: Incorporate Eggs One at a Time. Once the dough has stopped steaming, reduce the mixer speed to medium. Begin adding the large eggs one at a time, allowing each individual egg to be fully incorporated into the dough before adding the next. After the first egg or two, the dough may appear somewhat broken, curdled, or separated; do not be alarmed, as this is a normal phase, and the dough will come back together as more eggs are added. The process of adding eggs to choux paste is similar to the final steps of creating an Italian meringue buttercream, where the interplay between the residual heat of the paste and the moisture from the eggs dictates the final dough development. If the panade has cooled excessively before you begin adding eggs, you might find yourself needing more eggs than the recipe specifies to achieve the proper consistency. This can potentially alter both the texture and flavor of the finished pastry, which you ideally want to avoid by monitoring the steam release carefully.
Step 7: Perform the Choux Doneness Test (Trench Test). For this specific cream puff recipe, I consistently find the “trench test” to be the most reliable indicator of doneness (photo 7). While some pastry cooks prefer the “hook test” or a combination of methods, the “ribbon test” often leads to adding too many eggs in the hands of less experienced bakers. To perform the trench test, stop the mixer and scoop up a portion of the dough with your paddle attachment or a spoon. Drag your finger or the back of a spoon through the paste in the bowl to create a “trench.” If the sides of the trench slowly and gradually fall back into themselves, the choux paste is perfectly ready. If the trench holds its shape rigidly, it needs more egg. If it collapses instantly, it’s too wet. My choux pastry tutorial post provides a detailed explanation of all three consistency tests for those who wish to explore further.
A Note on Temperature and Consistency: Remember, the cooler the choux paste, the slower the “trench” will close during the trench test. If you are working with dough that has been refrigerated and then brought back to room temperature, factor this slower closing time into your assessment before adding any additional egg.
Troubleshooting Egg Quantity: In rare instances, particularly if your panade was very thoroughly cooked or your eggs are on the smaller side, you might need to add more egg than the recipe initially specifies. If your dough is still too stiff after adding the recommended quantity, beat an additional large egg separately and add it in very small increments (e.g., a teaspoon or two at a time), testing the dough after each addition with the trench test. For a standard single batch, you should typically need no more than half of an additional egg at most to achieve the correct consistency.
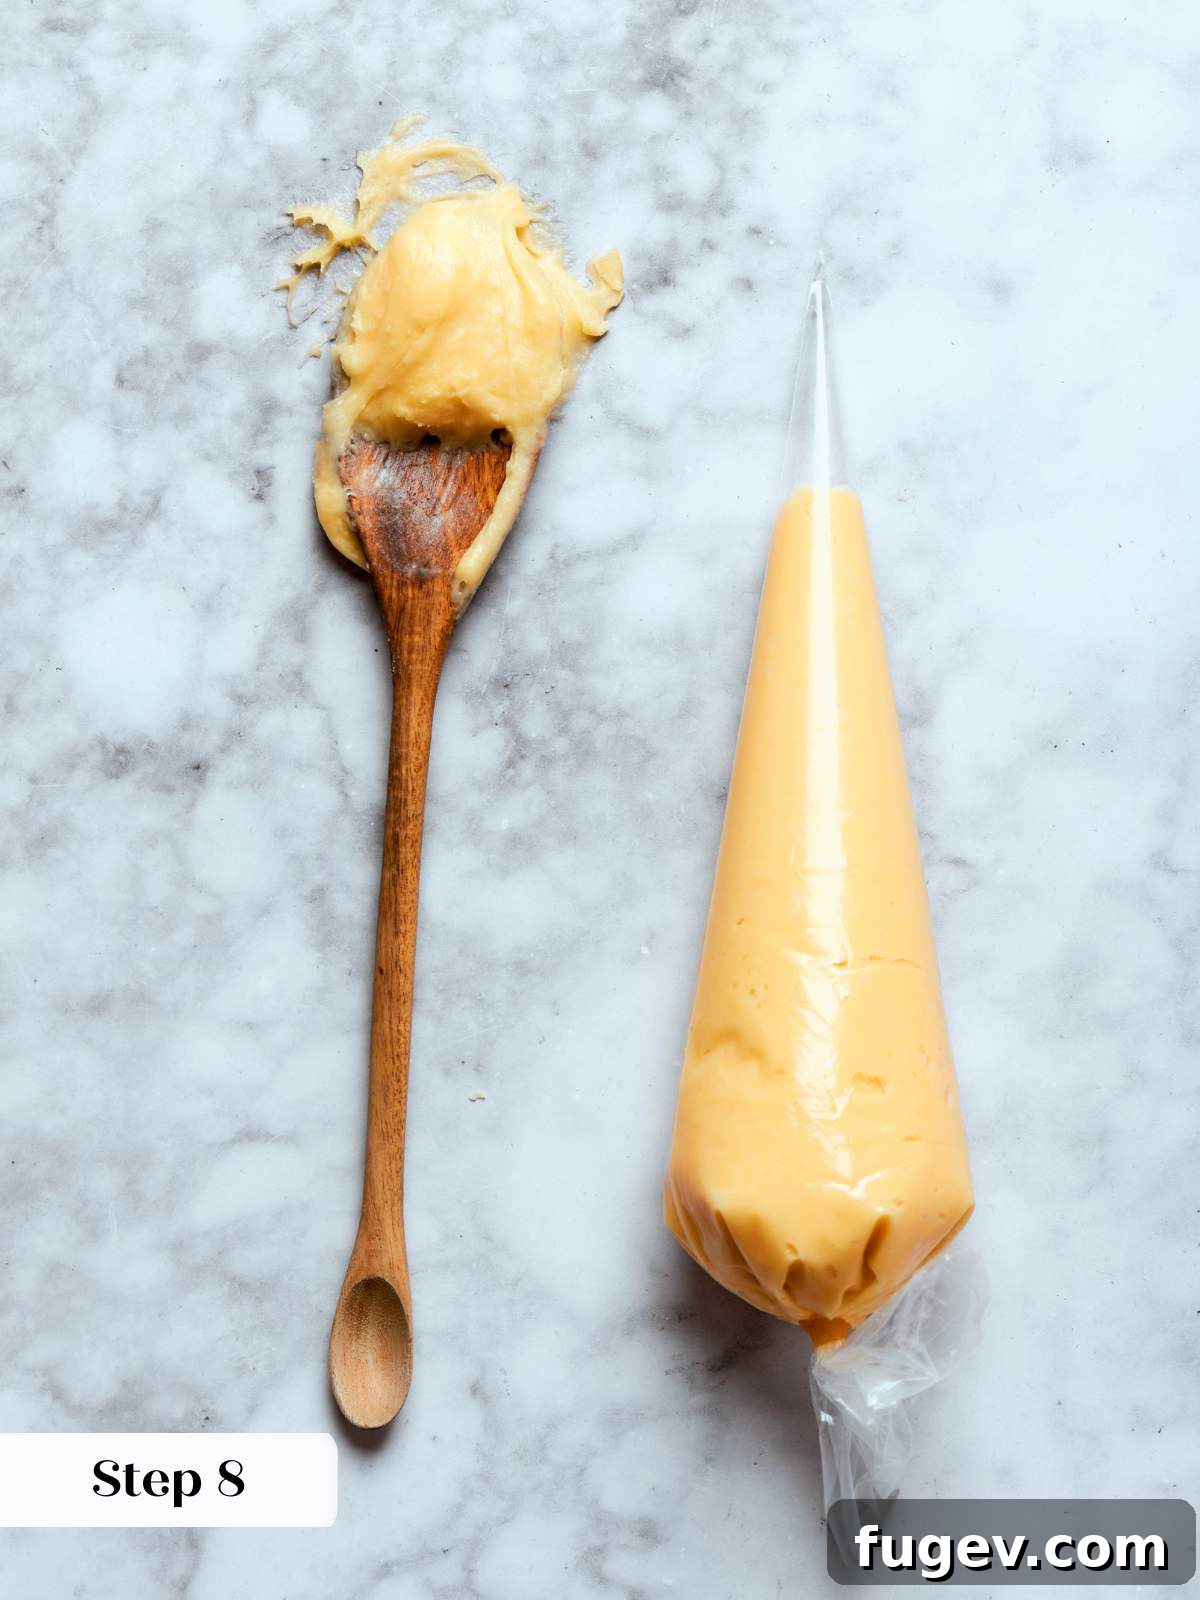
Step 8: Transfer to Piping Bags. Once your choux paste has reached the ideal consistency, immediately transfer it to sturdy piping bags (photo 8). You have the flexibility to pipe the choux rounds immediately, or you can refrigerate the filled piping bags for up to 3 days. While storing, it’s normal for the paste to develop small spots or slight discoloration over time in the refrigerator; this does not affect its quality or performance.
Step 9: Pipe the Choux onto Prepared Baking Sheets. Prepare your baking sheets by lining them with parchment paper. Using an even, consistent pressure, pipe your choux shapes onto the parchment. For standard cream puffs and éclairs, a pastry tip isn’t strictly necessary; simply cutting a straight, clean opening at the end of the piping bag will yield excellent results, eliminating the variable of tip size affecting your flow. Ensure you space the piped pieces with sufficient room to expand significantly during baking, preventing them from fusing together (photos 9).
Tip for Refrigerated Dough: If you are working with choux dough that has been refrigerated, remember to allow it to temper at room temperature for approximately an hour before you begin piping. This will make the dough much more pliable and easier to work with.
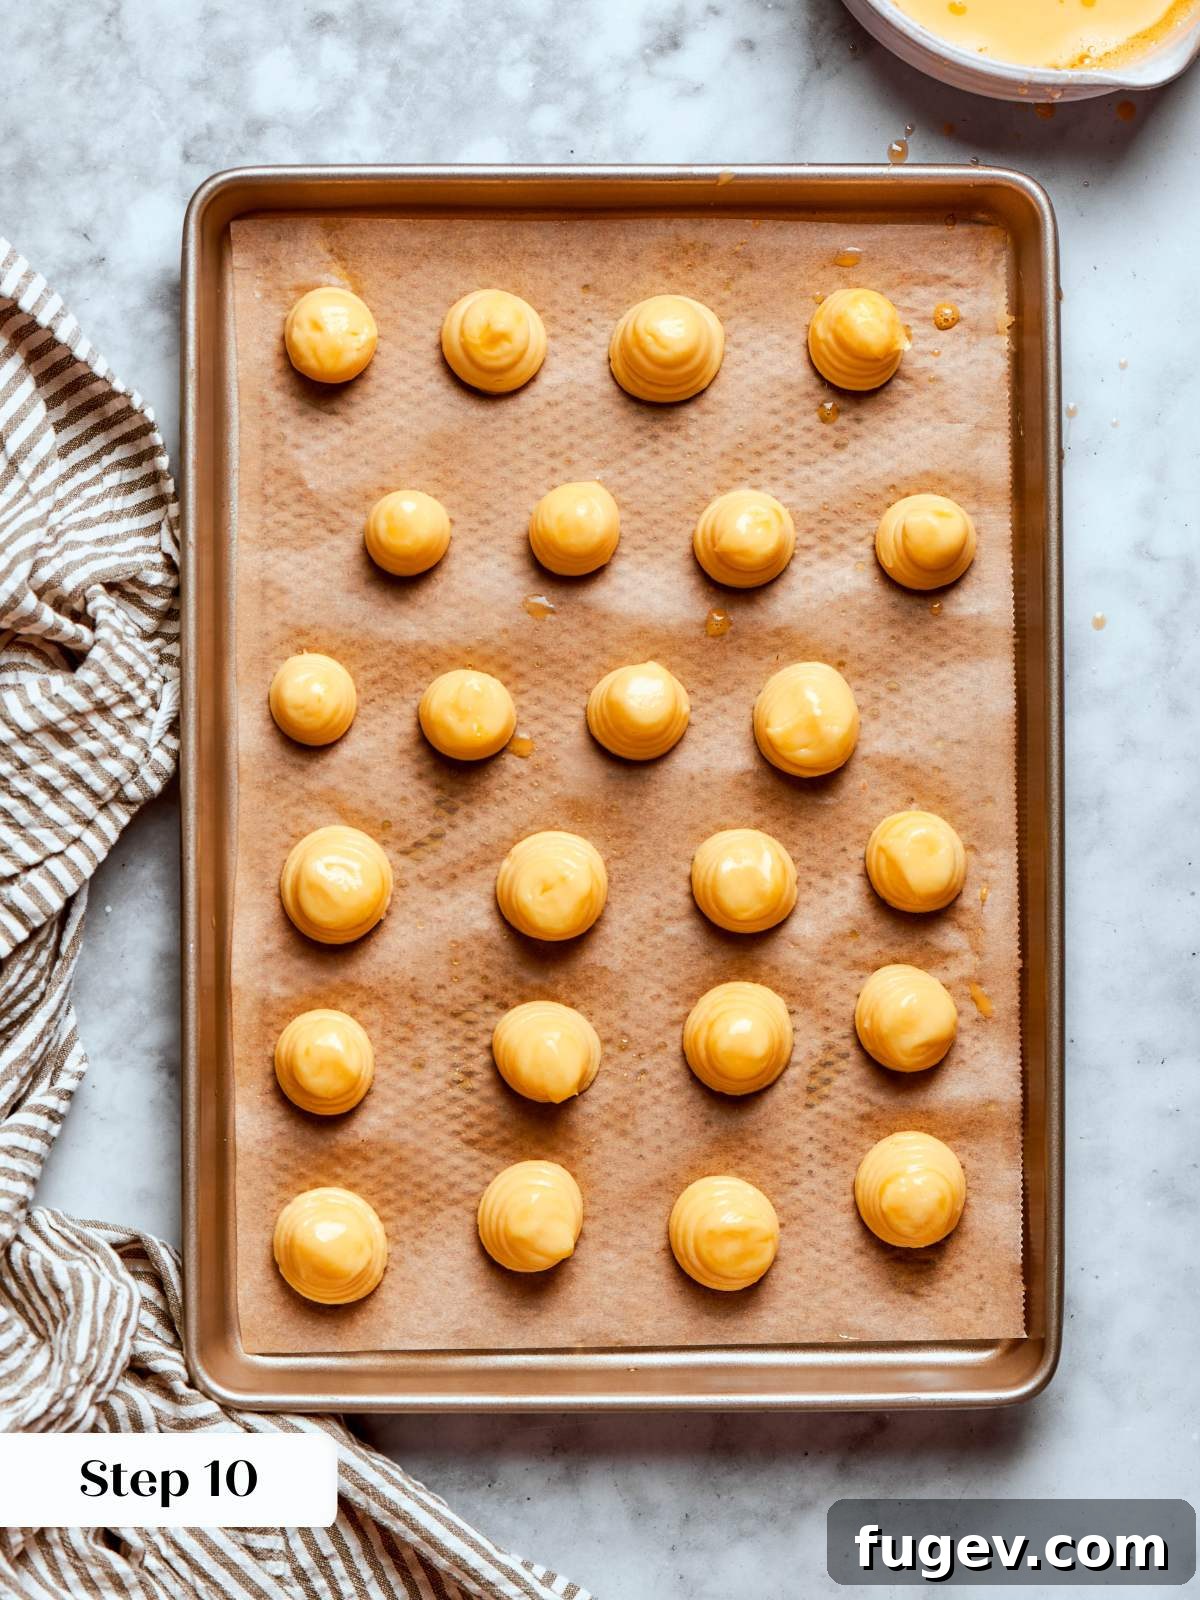
Step 10: Apply an Egg Wash to Piped Choux. Using a clean pastry brush, gently brush the tops of all your piped choux rounds with a beaten egg (photo 10). If you happened to have any leftover beaten egg from preparing the choux dough, it’s perfect for this step! This is also an excellent opportunity to carefully reshape any choux rounds that may have formed undesirable points during piping. Remember, nothing gives away a novice baker quite like a browned, sharp point on a gougère or profiterole – this is an easily avoidable detail that enhances the professional appearance of your pastries!
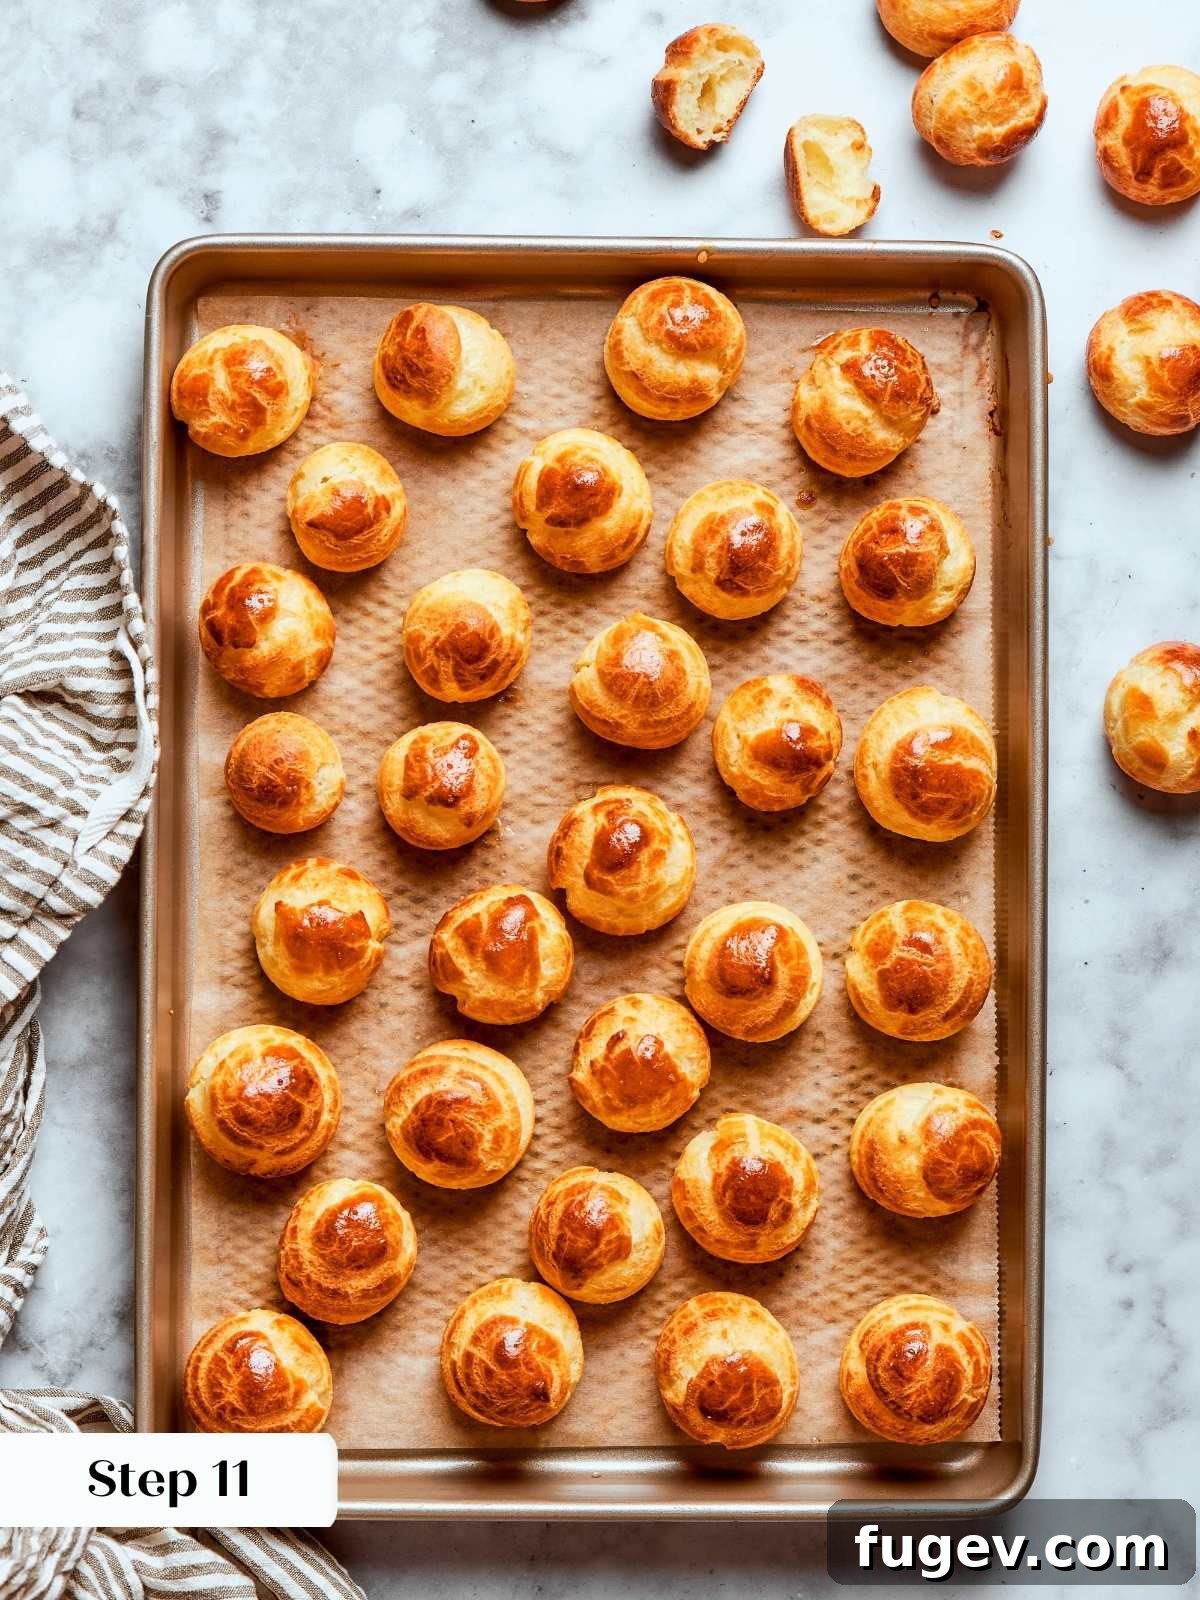
Step 11: Bake to Golden Perfection. Preheat your oven to 350°F on convection setting or 375°F for a conventional oven. The precise bake time will vary depending on the size and shape of your piped choux, so watch them closely. It is critically important not to open the oven door at all during the first two-thirds of the baking process. The shells rely on the sustained, intense heat and the trapped steam within the oven to rise fully and develop their internal structure before setting. The cream puffs are done when they are deeply golden brown all over, including the creases, and feel distinctly hollow and rigid when gently tapped. If a shell still feels slightly soft or gives way when pressed, it requires more baking time. (photo 10).
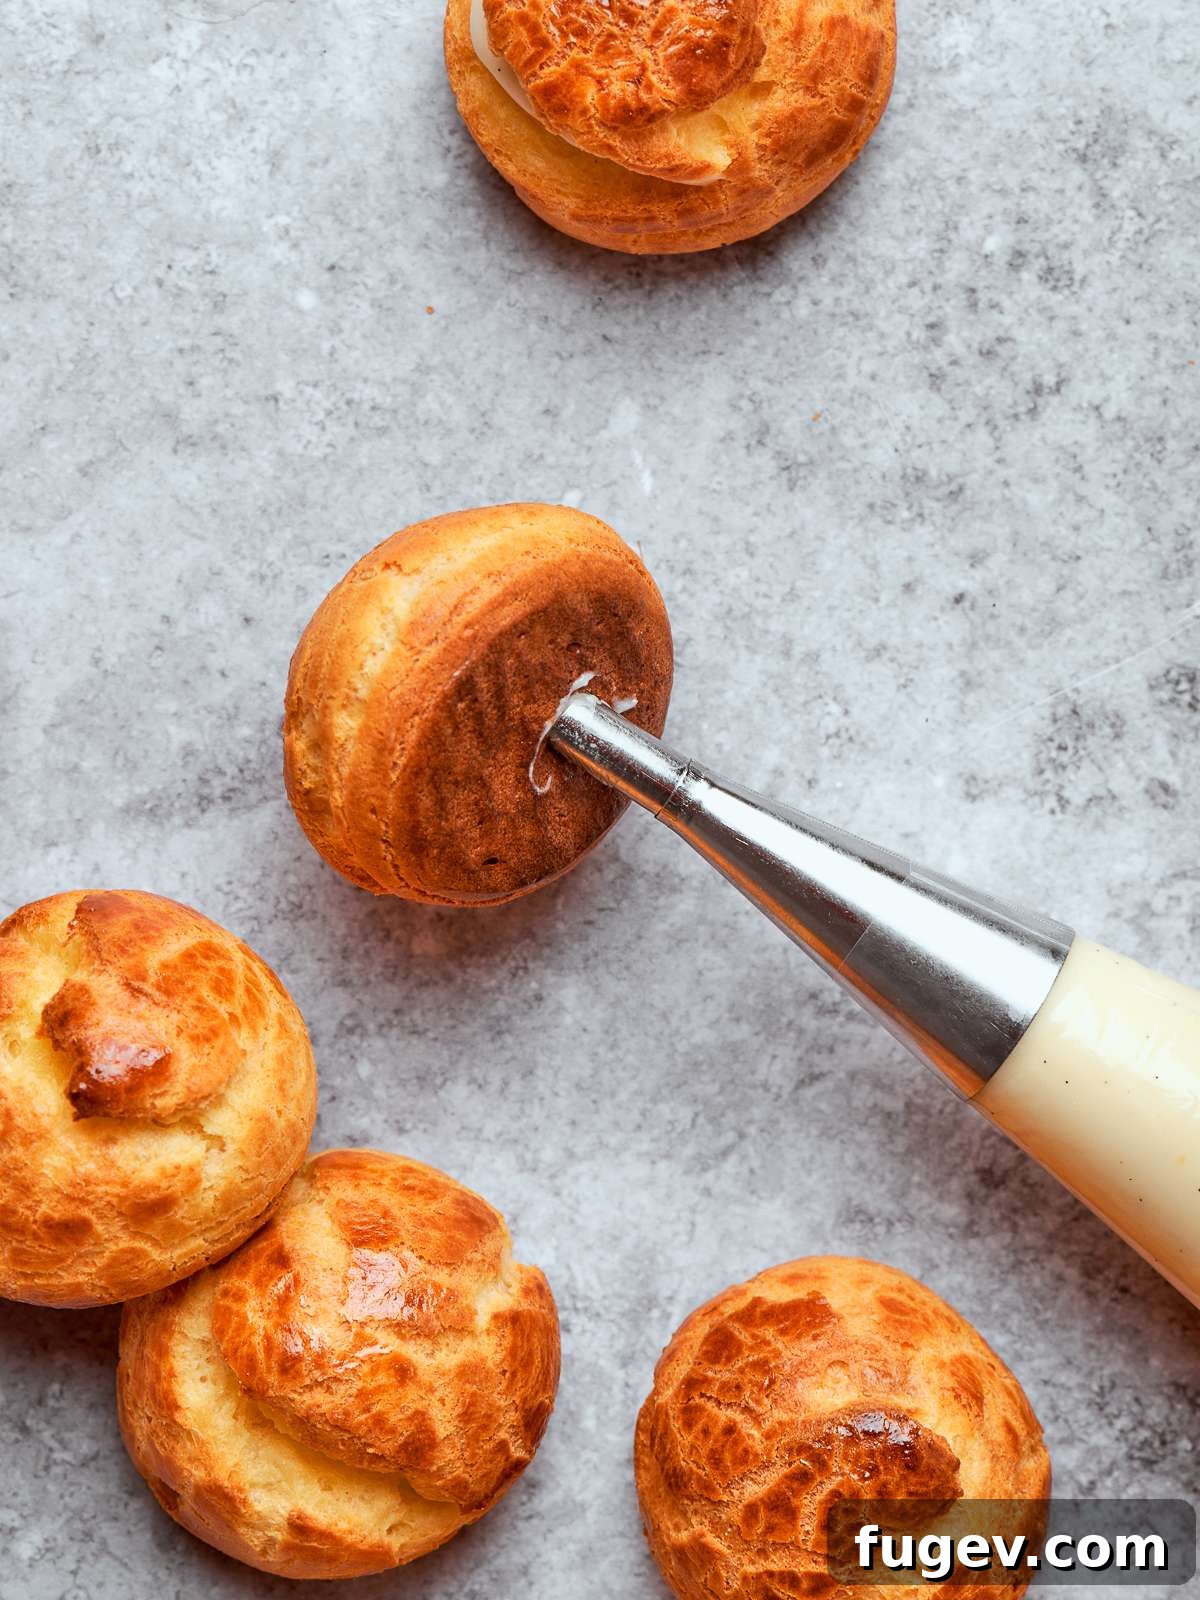
Step 12: Cool and Vent the Cream Puffs. Once baked to perfection, remove the golden cream puffs from the oven. Immediately transfer them to a wire rack, allowing them to cool completely. As soon as they come out of the oven, take a small piping tip (or a sharp knife) and carefully poke a small hole in the bottom of each shell. This crucial step vents any trapped steam as the puffs cool, preventing them from becoming soggy or deflating. It also conveniently creates the perfect opening through which you will later pipe your delicious filling. Skipping this venting step can often lead to a gummy or collapsed interior (photo 11).
Assemble the Crème Légère & Fill Your Puffs
Step 1: Whip the Cream to Soft Peaks. In the meticulously cleaned bowl of a stand mixer, fitted with the whisk attachment, combine the chilled heavy cream, powdered sugar, and vanilla extract. Whip the mixture on high speed until it reaches the soft peak stage: the peaks should stand up momentarily but then gracefully flop over when the whisk is lifted. You are aiming for a consistency that just barely holds its structure, not stiff peaks, as this will result in a lighter crème légère. Carefully transfer the whipped cream to a separate, clean bowl and set it aside in the refrigerator (photo 1 below).
Step 8: Recondition and Smooth the Pastry Cream. Remove the vanilla bean pod from the completely chilled pastry cream. Transfer the firm pastry cream to the stand mixer bowl and fit the mixer with the paddle attachment (a scraper paddle, if you have one, works exceptionally well here). Beat the pastry cream on medium-high speed until it transforms into a completely smooth, luscious, and thick, flowing batter (photo 2 & 3 below). Chilled pastry cream often appears quite stiff and lumpy straight from the refrigerator, so this vital reconditioning step brings it back to a perfectly workable, silken consistency, ready for the next stage.
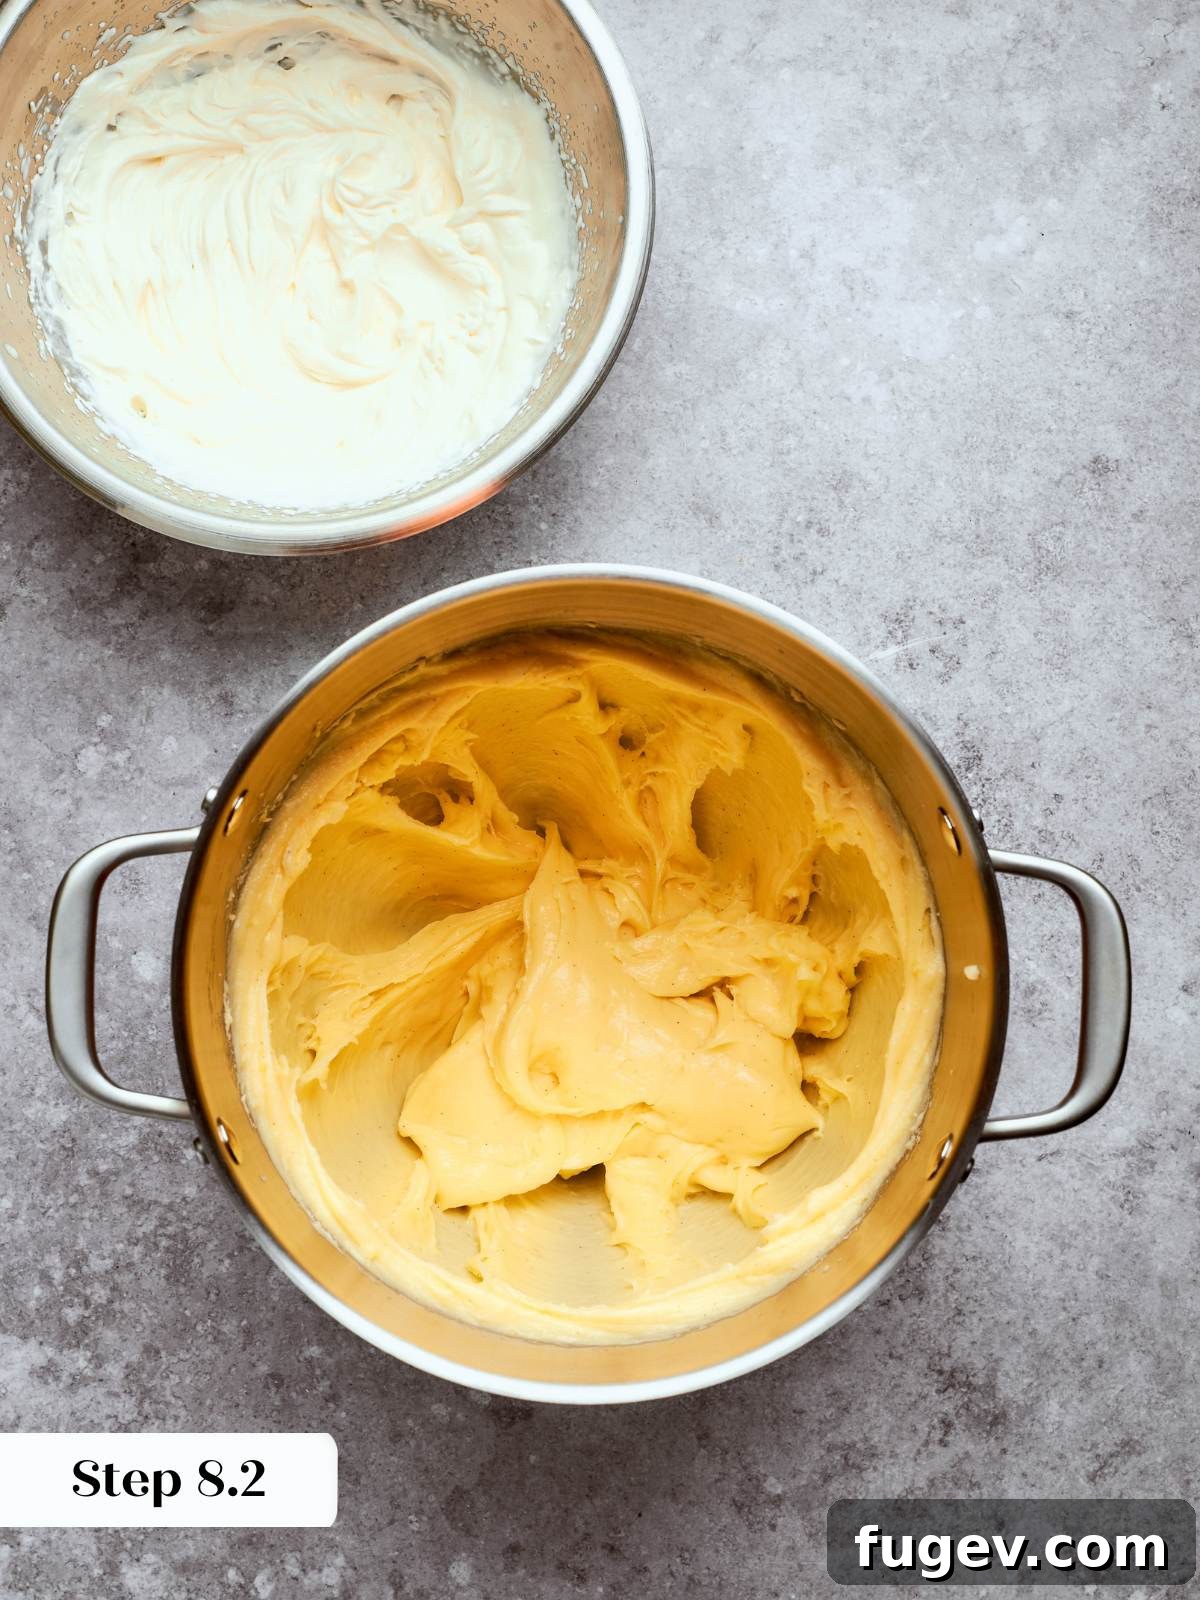
Step 9: Sacrifice a Third of the Whipped Cream (Aggressive Fold). Add approximately one-third of your prepared whipped cream into the reconditioned pastry cream. Using a rubber spatula, aggressively fold this portion into the pastry cream with full, decisive strokes. This technique is often referred to as “sacrificing” a portion of the whipped cream: you are intentionally deflating some of its volume to effectively loosen and lighten the denser pastry cream base, creating a uniform, easier-to-work-with texture before the final, gentler folds.
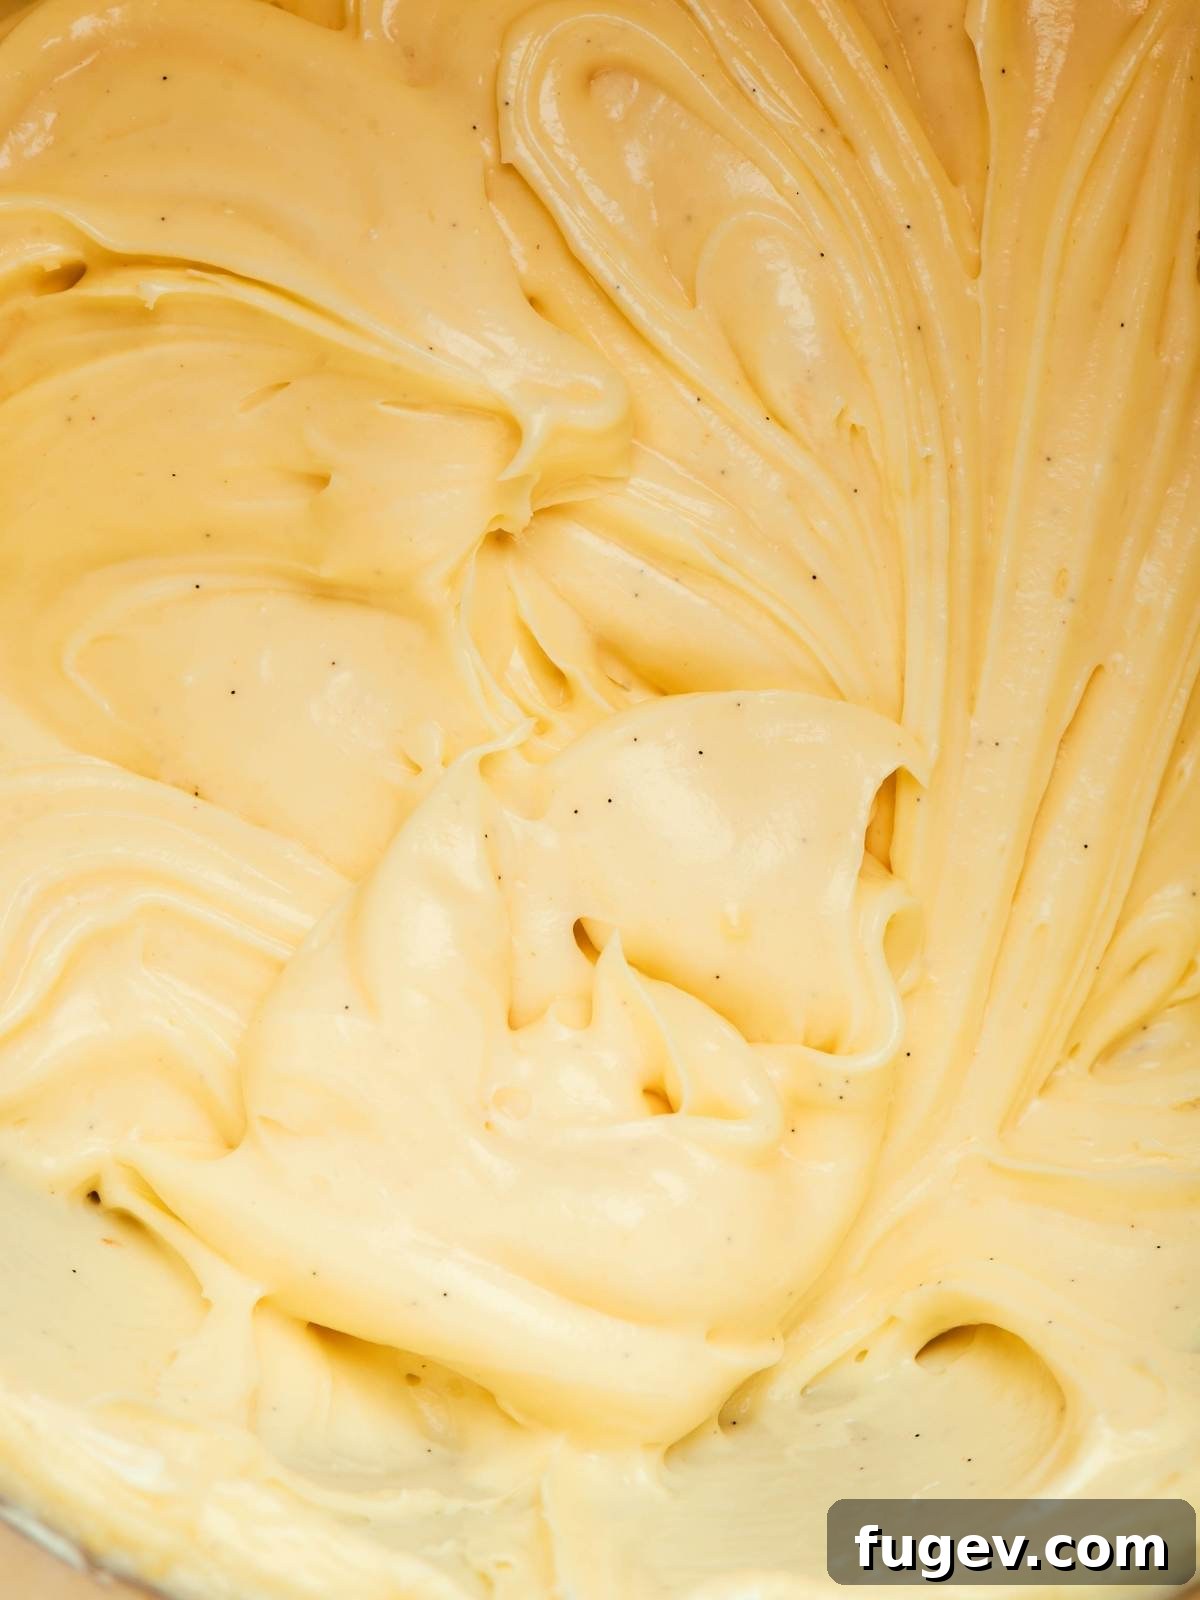
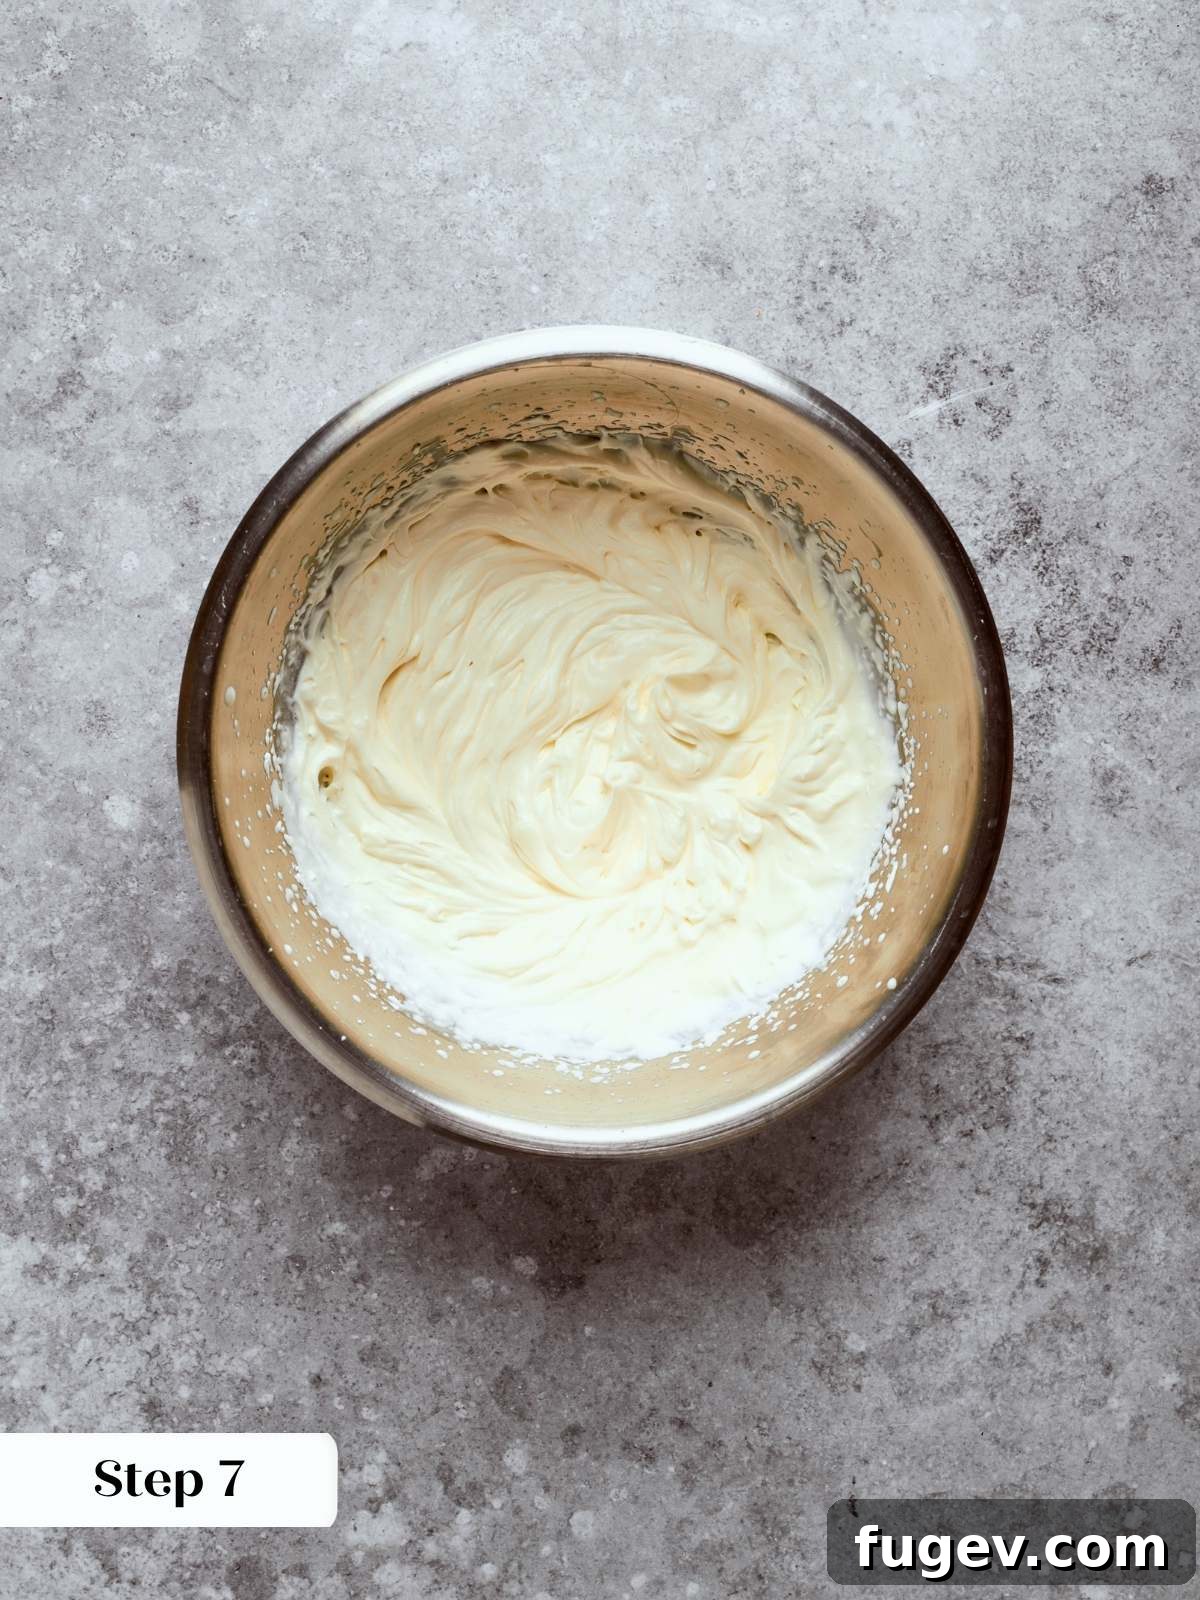
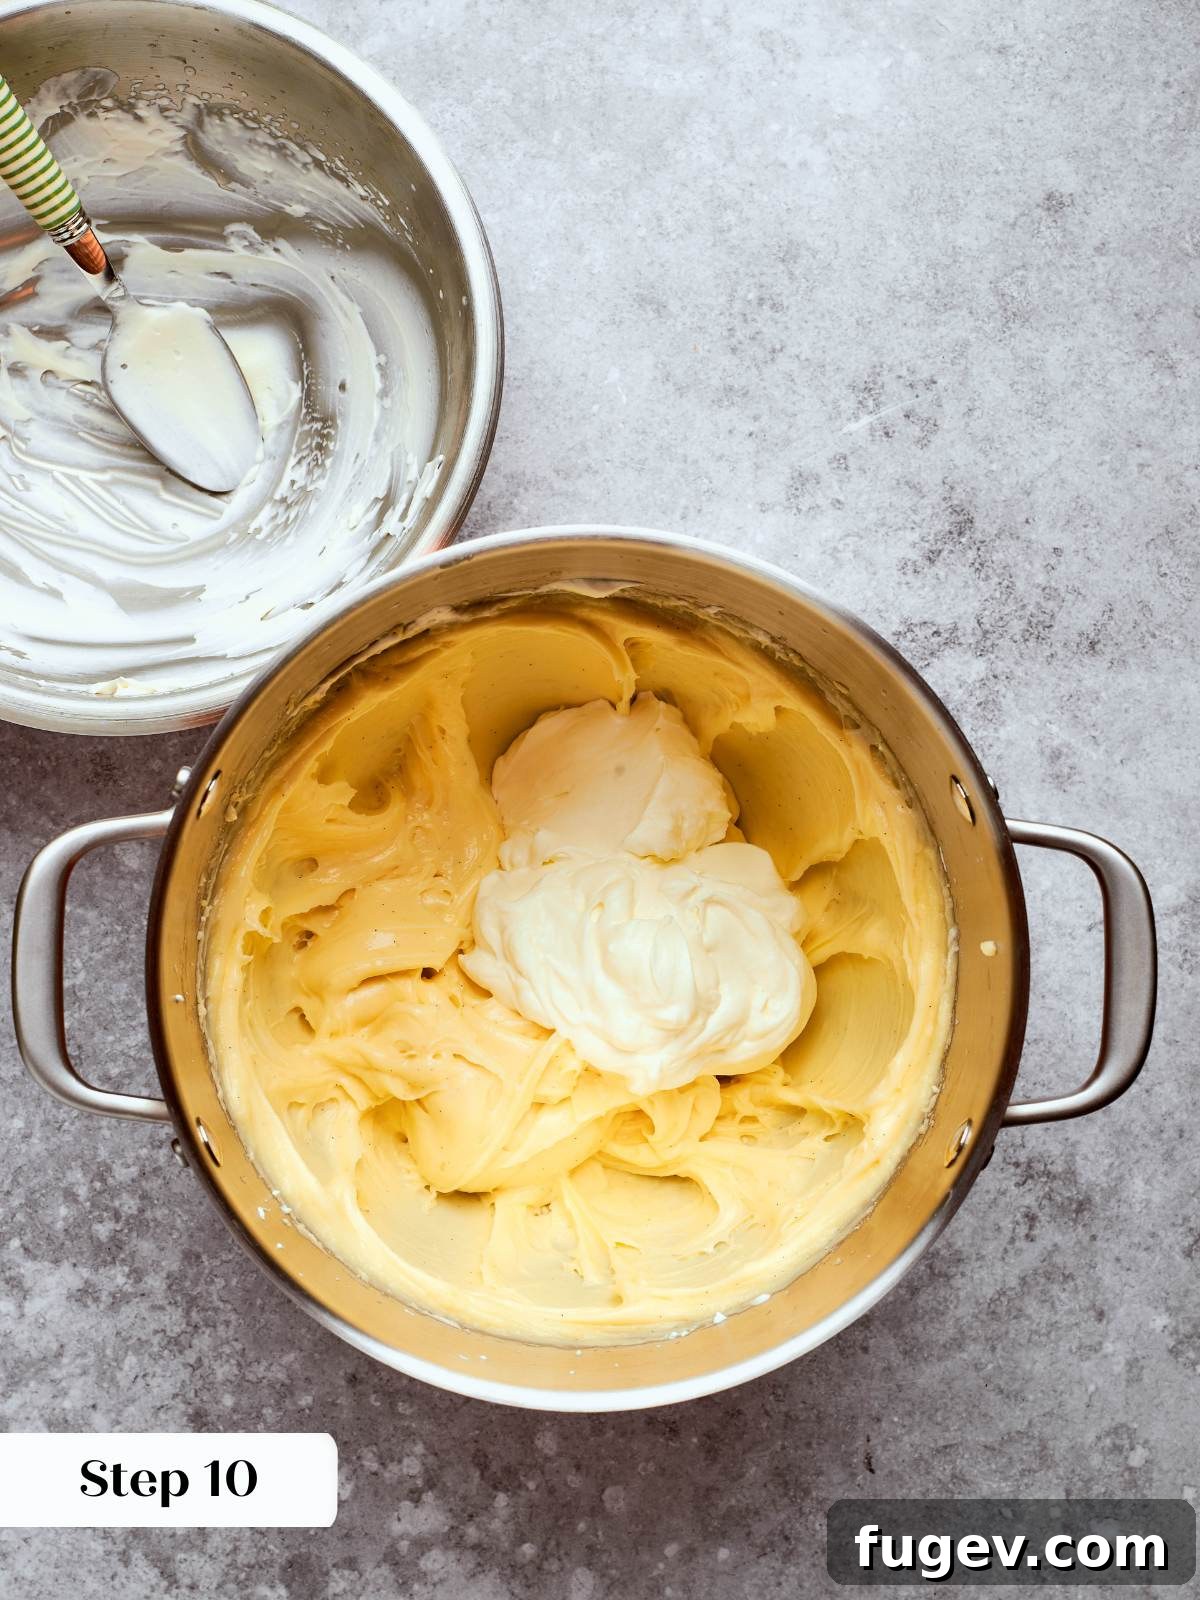
Step 10: Gently Fold in the Remaining Whipped Cream. Add the remaining two-thirds of the whipped cream to the now-loosened pastry cream base. Using wide, gentle, sweeping strokes with your spatula—moving from the bottom of the bowl up and over the top—carefully fold until the mixture is just combined and appears smooth and uniform. Stop mixing the moment you reach this consistency to preserve maximum airiness. The finished crème légère should be wonderfully light, airy, and possess just enough thickness to hold its shape beautifully when spooned or piped. Transfer the crème légère to a piping bag (or store it in the bowl), and refrigerate until you are ready to use it (photo 4, 5 & 6 above).
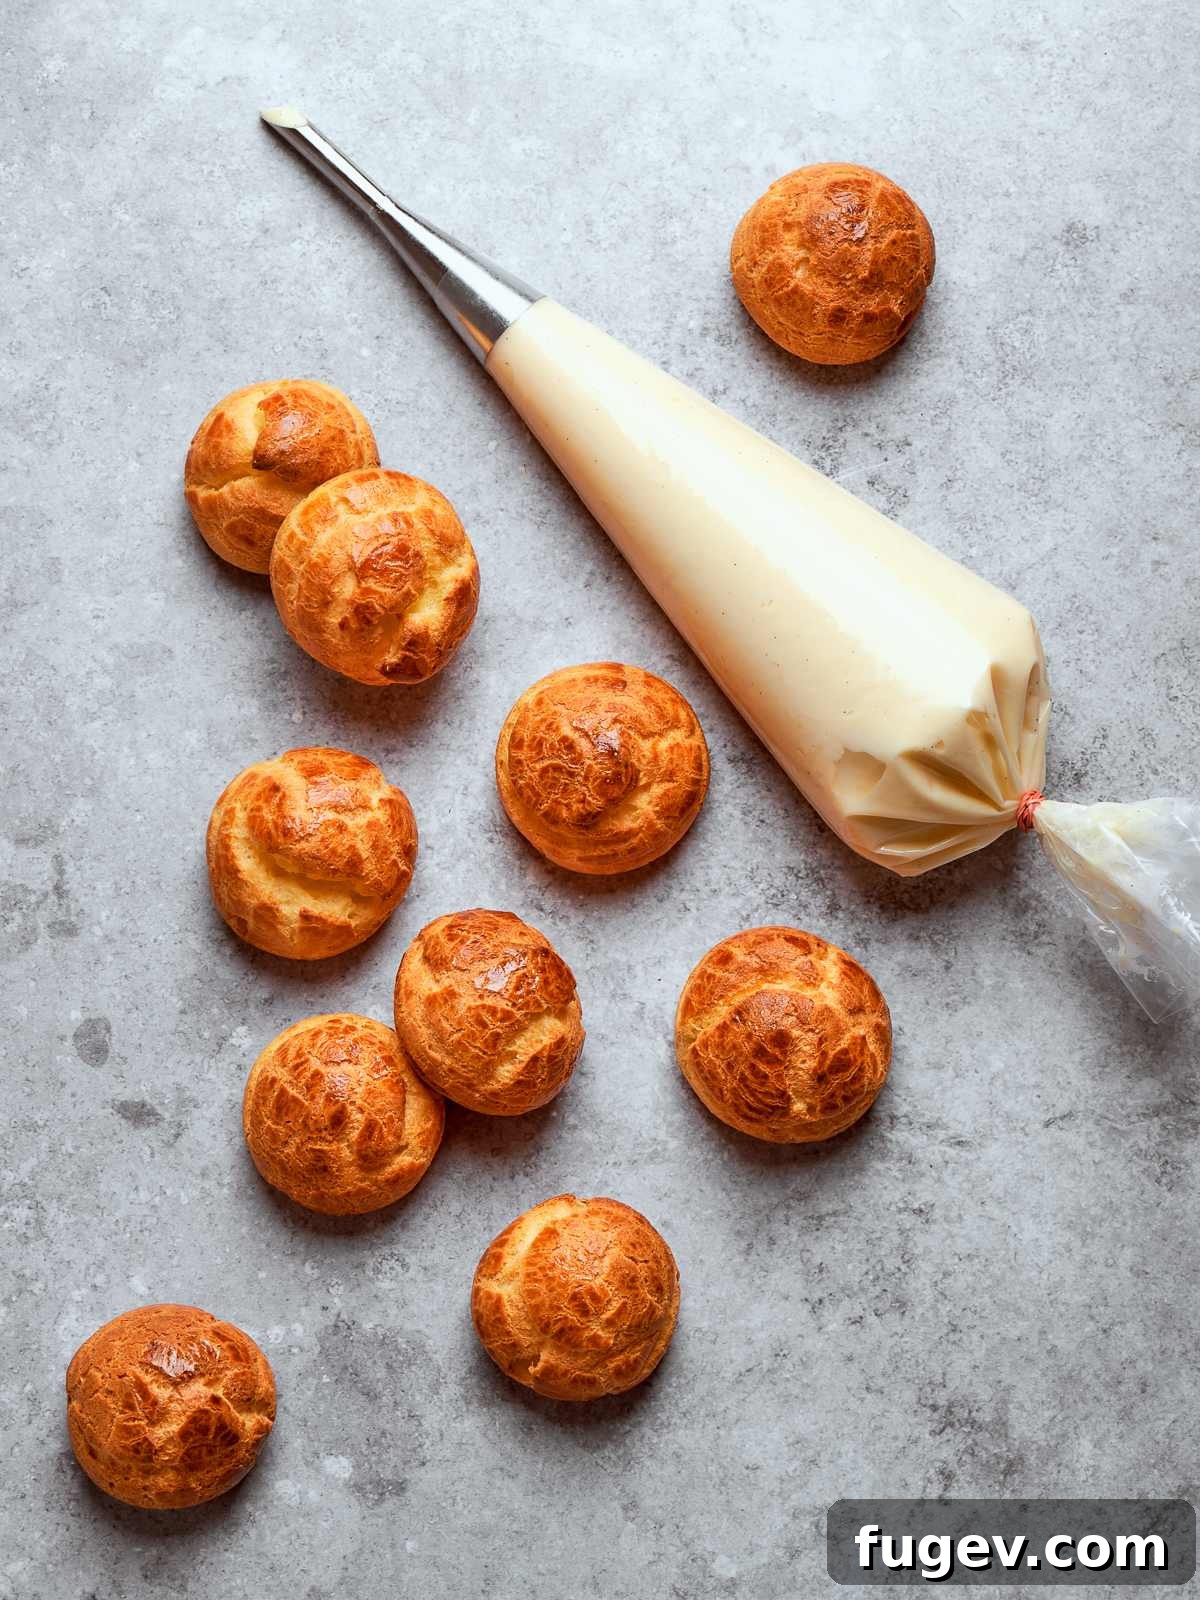
Step 11: Fill the Puffs. Transfer your prepared crème légère filling to a piping bag fitted with a small, round piping tip. If you haven’t already, use a small paring knife to create a tiny hole in the bottom of each cooled choux shell. Alternatively, if you prefer a different presentation, you can carefully slice each puff horizontally in half. Pipe the delicate filling through the hole until you feel a gentle resistance and a small amount of filling begins to subtly press back, indicating that the shell is completely full. If you chose to slice your shells, simply pipe or spoon a generous mound of the airy filling onto the bottom half before gently replacing the top portion (photo 18).
Step 19: Top and Serve with Flair. For a classic bakery-style presentation, dust the filled cream puffs generously with a fine layer of powdered sugar just before serving. For a richer, more indulgent finish, you can dip the tops of the puffs in melted dark or milk chocolate and allow them to set on a wire rack until the chocolate coating is firm. Cream puffs are at their absolute best when served on the day they are filled, ideally within a few hours of assembly. This timing ensures that the delicate choux shells remain wonderfully light and crisp, providing a perfect textural contrast to the cool, creamy filling. Enjoy your masterpiece!
Chef Lindsey’s Golden Recipe Tip: Trust Your Eyes, Not Just the Numbers
The single most important principle to grasp when making cream puffs is that the choux paste is a living, dynamic variable, not a rigid, fixed formula. The precise number of eggs you’ll need will subtly shift based on a multitude of factors: the exact size of your eggs, the ambient humidity in your kitchen, and critically, how thoroughly and vigorously you cooked your panade. Therefore, always trust the visual consistency tests—the trench test, the ribbon test, and the hook test—over simply following a fixed ingredient quantity. When the paste exhibits the correct visual cues—holding a distinct trench that slowly falls back in, forming a thick, supple ribbon from your paddle, and hanging in a characteristic V-shaped hook from the spoon—it is unequivocally ready. No earlier, no later.
Cream Puff FAQs: Your Questions Answered
Properly baked shells will be a deep, uniform golden brown across their entire surface, not just on the prominent peaks. This deep color indicates that the shells have thoroughly dried out and are structurally sound. If you remove them from the oven too early, the residual steam trapped inside will cause them to collapse as they cool, resulting in a soft, deflated pastry. Don’t be afraid of a truly golden color!
Absolutely, cream puffs offer excellent make-ahead flexibility at several stages. The prepared choux paste can be stored in a piping bag in the refrigerator for up to 3 days. Piped, egg-washed but unbaked puffs can also be refrigerated, tightly wrapped, for up to 3 days, or even frozen for up to 1 month and baked directly from their frozen state. Unfilled, baked shells freeze exceptionally well for up to 1 month; simply refresh them in a 350°F (175°C) oven until crisp before allowing them to cool completely and then filling them.
Filled cream puffs should be stored in the refrigerator for up to 3 days. However, it’s important to note that the moisture from the pastry cream will gradually soften the choux shell over time. For the optimal crisp-tender texture, I highly recommend baking the shells ahead of time and filling them as close to serving as possible. Any unfilled, baked shells should be stored in the freezer rather than at room temperature to best preserve their crispness.
The most frequent culprit for flat cream puffs is an undercooked panade. If not cooked sufficiently, too much moisture remains in the paste, preventing the shells from developing proper structure and puffing adequately in the oven. The second most common issue is adding too many eggs without carefully performing the consistency tests at each stage. Once the choux paste becomes too loose and runny from excess egg, it unfortunately cannot be corrected. Always rely on one of the three consistency tests—the trench, ribbon, or hook test—as detailed in our comprehensive pâte à choux tutorial.
For standard cream puffs, a target size of approximately four centimeters (about 1.5 inches) in diameter yields the best results. At this size, the shells bake through uniformly in 20 to 23 minutes at 350°F (175°C) convection or 375°F (190°C) conventional heat, ensuring the exterior becomes perfectly crisp without overbaking before the center fully sets. Puffs larger than 5 centimeters (2 inches) generally require a vent hole and significantly extended baking time, and I find the trade-off for consistent doneness isn’t worth it beyond this size, as larger puffs are prone to uneven baking.
Proper spacing on the baking sheet is just as critical as precise piping for achieving that ideal hollow, crisp shell. Puffs that are piped too close together will trap steam between them as they bake. This trapped steam prevents the sides of the shells from drying out and crisping properly, leaving them soft and undesirable. Ensure each puff has enough room to expand fully without touching its neighbor, allowing for even heat circulation and optimal crispness.
More French-Inspired Recipes to Love
Dessert Recipes
Choux Pastry (Pâte à choux)
Custard Recipes
Pastry Cream Recipe (Crème Pâtissière)
Pies and Tart Recipes
Puff Pastry Fruit Tart
Dessert Recipes
Puff Pastry Recipe
If you tried this recipe and loved it, please leave a 🌟 star rating and let me know how it goes in the comments below. I love hearing from you; your comments make my day!
5 out of 5 stars (based on 1 rating)
Cream Puffs
Pin Recipe
Comment
Print Recipe
Ingredients
For the Pastry Cream
- 2 cups whole milk
- ½ vanilla bean split and seeded
- ½ cup granulated sugar divided
- 1 large egg
- 2 egg yolks
- ¼ cup cornstarch
For the Crème Légère
- 1 cup heavy whipping cream
- 2 tablespoons powdered sugar
- ½ teaspoon vanilla extract
For the Choux Pastry
- 1 cup unsalted butter cubed
- 2 cups whole milk
- 2 cups all-purpose flour
- 1 ¼ teaspoons kosher salt
- 1 teaspoon granulated sugar
- 5 large eggs variable quantity
- Powdered sugar for dusting
Instructions
-
Make the Pastry Cream: Begin by infusing the milk. In a saucepan, combine milk, vanilla bean (split and seeded), and half of the granulated sugar. Bring to a rolling boil over medium-high heat, stirring until sugar dissolves. In a separate bowl, whisk together the egg, egg yolks, cornstarch, and remaining sugar until pale. Temper the hot milk into the egg mixture gradually, whisking constantly to prevent scrambling. Return the combined custard base to the saucepan and cook over medium-high heat, whisking diligently, until it comes to a full boil and visibly thickens. Continue to boil gently for 1 to 2 minutes, ensuring the cornstarch is fully activated and the starchy flavor is cooked out. Remove from heat, and press plastic wrap directly onto the surface to prevent a skin from forming. Refrigerate until completely chilled and firm, at least 1 hour.
-
Prepare the Choux Paste (Panade): In a heavy-gauge saucepan, combine cubed unsalted butter and whole milk over high heat. Bring the mixture to a full boil, ensuring the butter is completely melted at the same time the milk boils. Immediately remove from heat, add all of the all-purpose flour, kosher salt, and granulated sugar at once. Stir vigorously with a sturdy wooden spoon until the dough pulls cleanly away from the sides and bottom of the pan, leaving a thin, dry film on the bottom (this typically takes 1 to 2 minutes of constant stirring over medium-high heat). The panade should appear smooth and have a matte finish.
-
Incorporate the Eggs: Transfer the warm panade to the bowl of a stand mixer fitted with the paddle attachment. Beat on medium speed for 1 to 2 minutes to allow steam to escape and cool the dough slightly. Once steam stops rising, begin adding the large eggs one at a time, allowing each egg to be fully incorporated into the dough before adding the next. Continue adding eggs until the choux paste passes the trench test: when a spoon is dragged through it, the trench’s sides should slowly fall back in. It should also fall from a spoon in a thick ribbon and hang in a V-shaped hook. Do not add any eggs beyond this precise consistency.
-
Pipe and Egg Wash the Choux: Transfer the finished choux paste to a piping bag (a round tip is optional; a clean cut opening is fine). Pipe uniform rounds, approximately 4 cm in diameter, onto parchment-lined baking sheets, ensuring adequate spacing between each. In a small bowl, whisk together an egg for an egg wash. Lightly brush the tops of each piped choux round with the egg wash, using a dampened finger to gently smooth any pointed peaks for an even bake.
-
Bake to Crispness: Preheat your oven to 375°F (190°C) for conventional ovens or 350°F (175°C) for convection ovens. Bake the choux for 30 to 35 minutes, or until the shells are deeply golden brown all over, including within the creases, and feel very light and hollow when tapped. It is crucial not to open the oven door during the first 25 minutes of baking, as this can cause the puffs to collapse. Once baked, remove from the oven and transfer to a wire rack. Immediately poke a small hole in the bottom of each puff with a small piping tip or knife to release trapped steam and ensure a crisp interior. Allow to cool completely.
-
Assemble the Crème Légère: Remove the chilled pastry cream from the refrigerator and whisk it thoroughly until it is completely smooth and flowing. In a separate, clean bowl, whip the heavy cream, powdered sugar, and vanilla extract until medium-soft peaks form. Take about one-third of the whipped cream and aggressively fold it into the pastry cream to loosen the base. Then, gently fold in the remaining whipped cream in two additions until the crème légère is uniform, light, and airy. Transfer to a piping bag or refrigerate until ready to fill.
-
Fill and Serve: Using a piping bag fitted with a small round tip, pipe the crème légère into the bottom hole of each cooled choux shell until it feels full. Alternatively, slice the tops off the cooled shells and spoon in a generous amount of filling before replacing the tops. Dust generously with powdered sugar just before serving. For the best texture, serve immediately or within a few hours of filling to enjoy the contrast of crisp shell and creamy filling.
Notes
Doneness Cue: The shells must be a deep, uniform golden brown all over, including every crease and fold. A pale shell will invariably collapse and become soggy as it cools. If you are ever uncertain, err on the side of caution and bake for an additional 3 to 5 minutes.
Egg Quantity: The precise number of eggs required is variable, influenced by factors such as egg size, ambient humidity, and how thoroughly the panade was cooked. Always trust the visual consistency tests (trench, ribbon, and hook) over the exact recipe quantity; these tests are your ultimate guide to knowing when to stop adding eggs.
Nutrition
Carbohydrates: 3g |
Protein: 1g |
Fat: 2g |
Saturated Fat: 1g |
Polyunsaturated Fat: 0.1g |
Monounsaturated Fat: 1g |
Trans Fat: 0.1g |
Cholesterol: 15mg |
Sodium: 25mg |
Potassium: 16mg |
Fiber: 0.05g |
Sugar: 1g |
Vitamin A: 85IU |
Vitamin C: 0.01mg |
Calcium: 11mg |
Iron: 0.1mg
Like this? Leave a comment below!
Before You Go: Share Your Sweet Success!
There’s nothing more rewarding than seeing your culinary creations come to life. If you embark on the delightful journey of making these classic cream puffs, I would absolutely love to hear about your experience and how they turned out. Please take a moment to leave a star rating and share your thoughts in the comments section below. Your feedback is incredibly valuable; it not only helps other aspiring bakers discover and feel confident about this recipe but also inspires me to create more of the delicious content you love. Happy baking!