
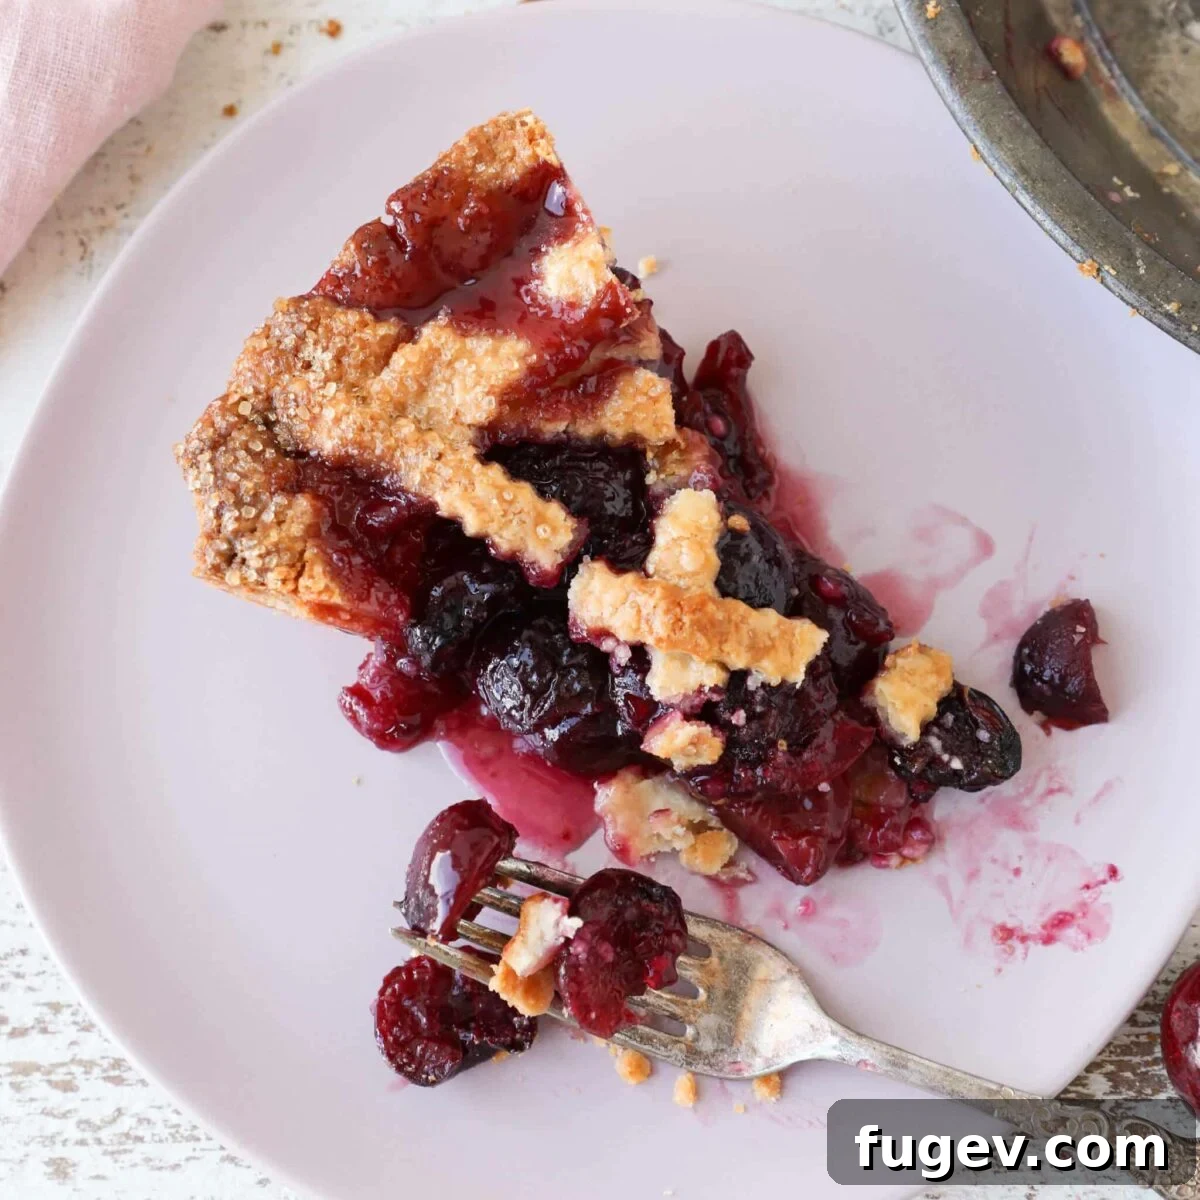
The Ultimate Homemade Cherry Pie: Thick, Juicy, and Flaky Perfection
There’s nothing quite like a slice of warm, homemade cherry pie. Imagine a perfectly balanced filling, bursting with the sweet-tart flavor of ripe cherries, complemented by a subtle hint of almond, all encased in a golden, flaky all-butter pie crust. This isn’t just any cherry pie; it’s a professional pastry chef’s tried-and-true recipe, designed to deliver a thick, juicy, and beautifully sliceable dessert every single time.
This comprehensive guide will walk you through every step, from selecting the best cherries to achieving that ideal flaky crust and a perfectly set filling. Say goodbye to soggy bottoms and runny fillings – your quest for the best homemade cherry pie ends here!
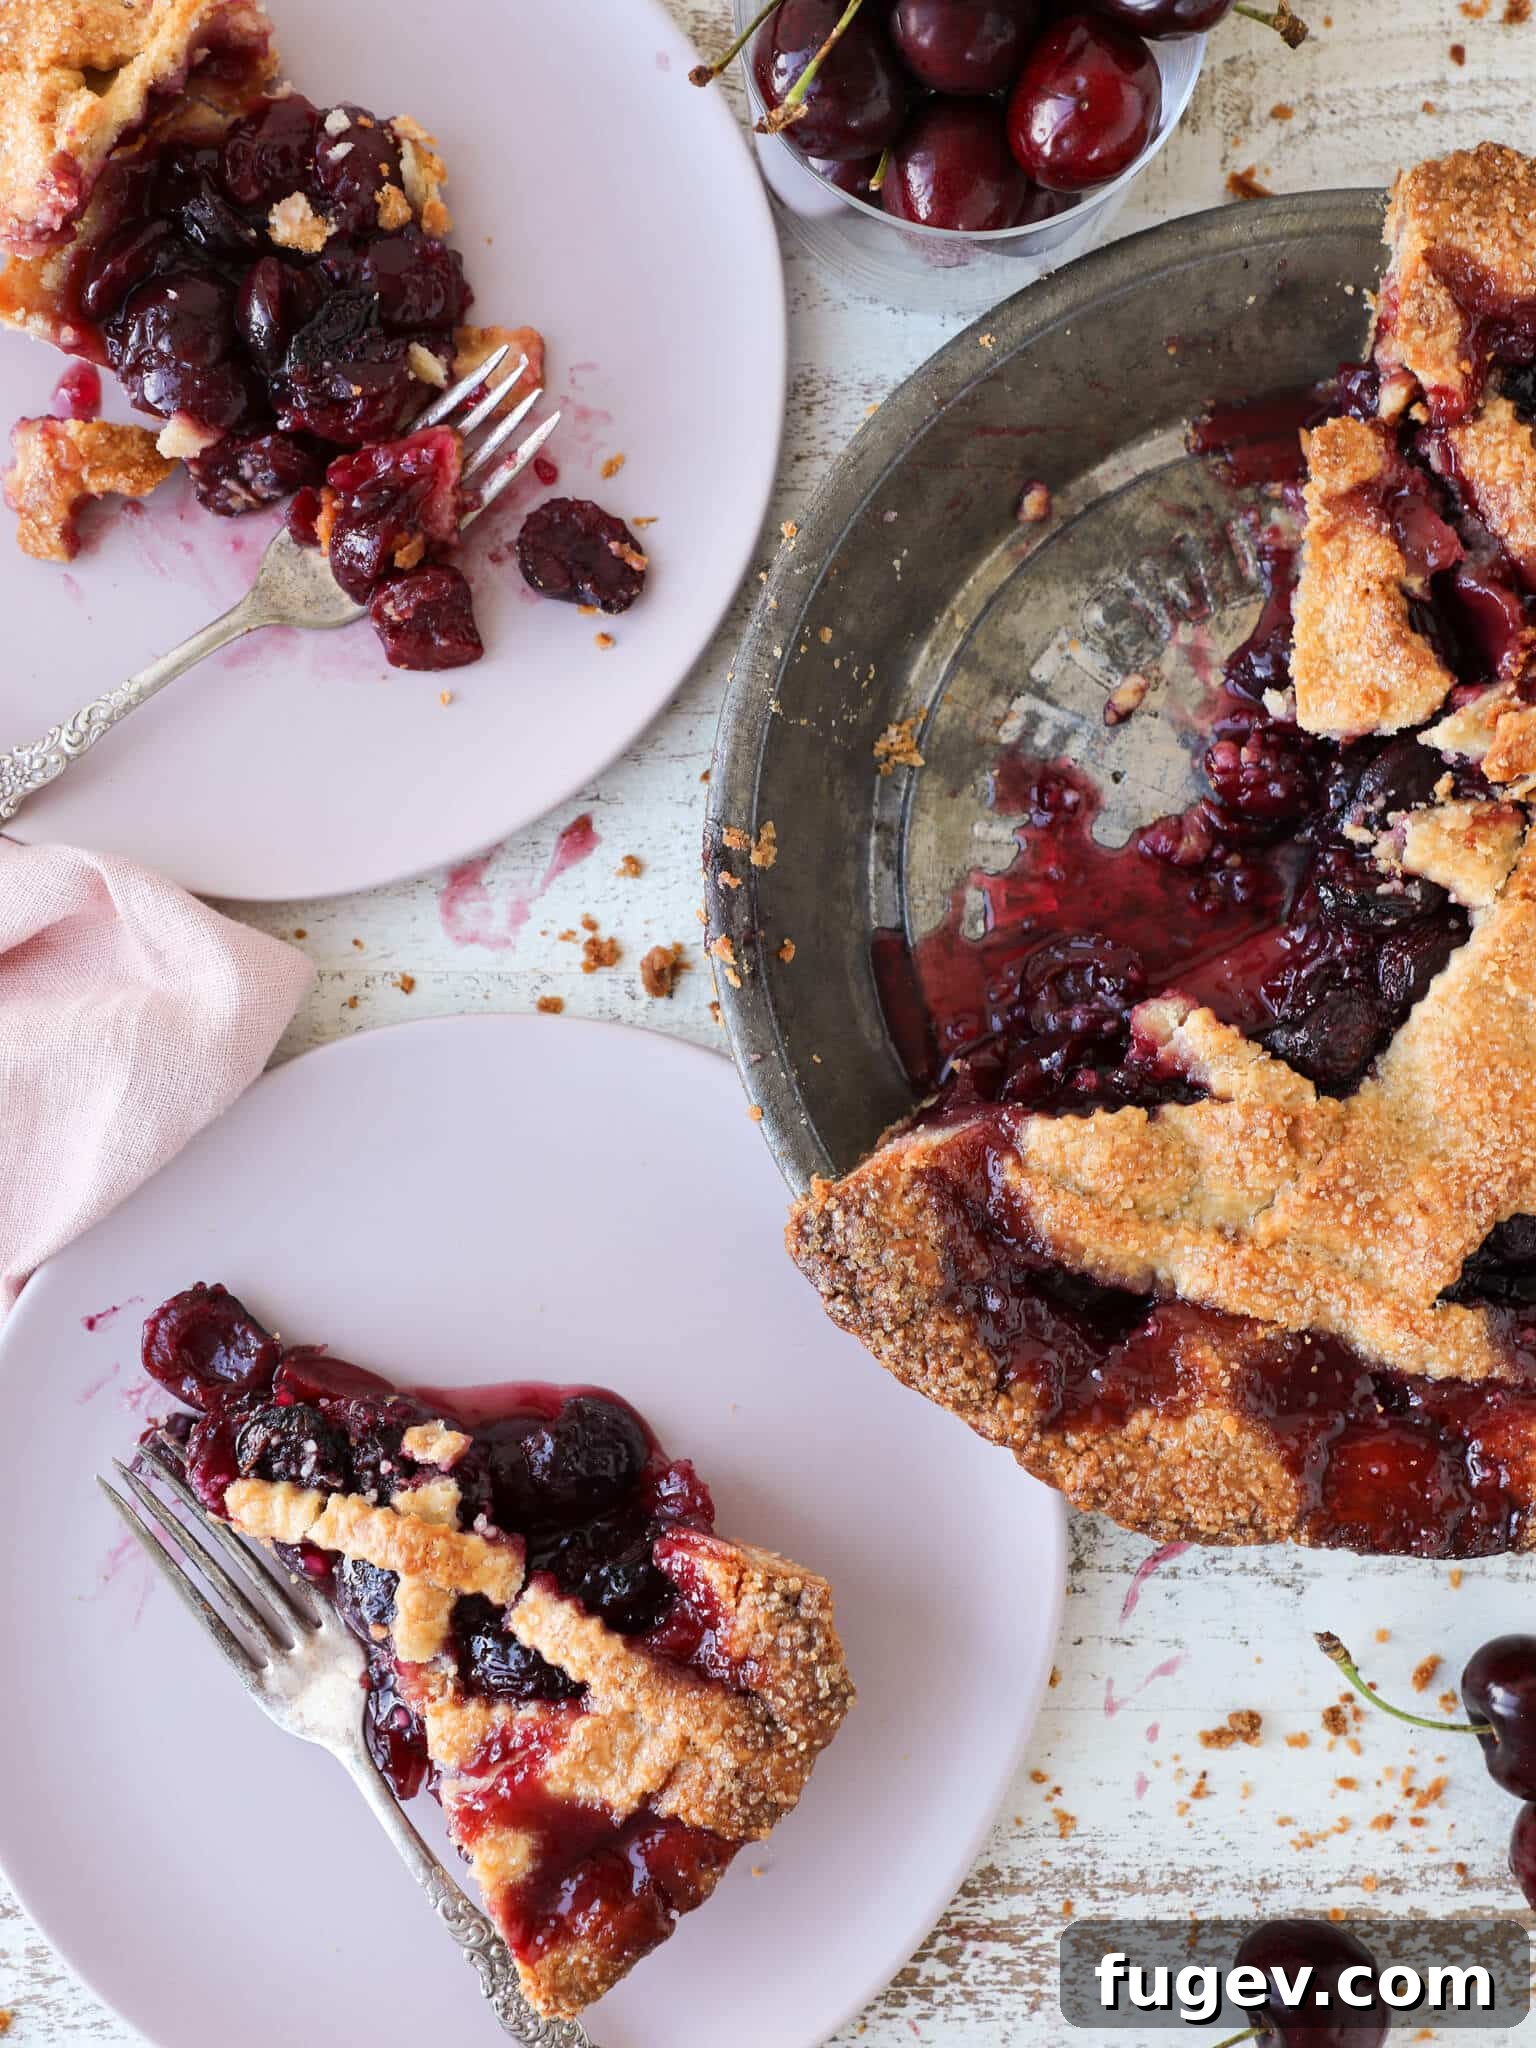
What makes this particular cherry pie stand out? It’s the harmonious blend of robust cherry flavor, subtly elevated by a touch of almond extract – a classic pairing that truly enhances the fruit. The secret to its incredible texture lies in the expertly crafted filling, ensuring each slice holds its form beautifully, without being overly stiff or gelatinous. While we adore baking this pie in our signature all-butter pie crust for its unparalleled flakiness, it’s equally delightful with our crisp vodka pie crust or even a unique almond flour pie crust, which offers a slightly crumbly, nutty texture. Whichever crust you choose, the outcome is always a dessert that will impress family and friends alike.
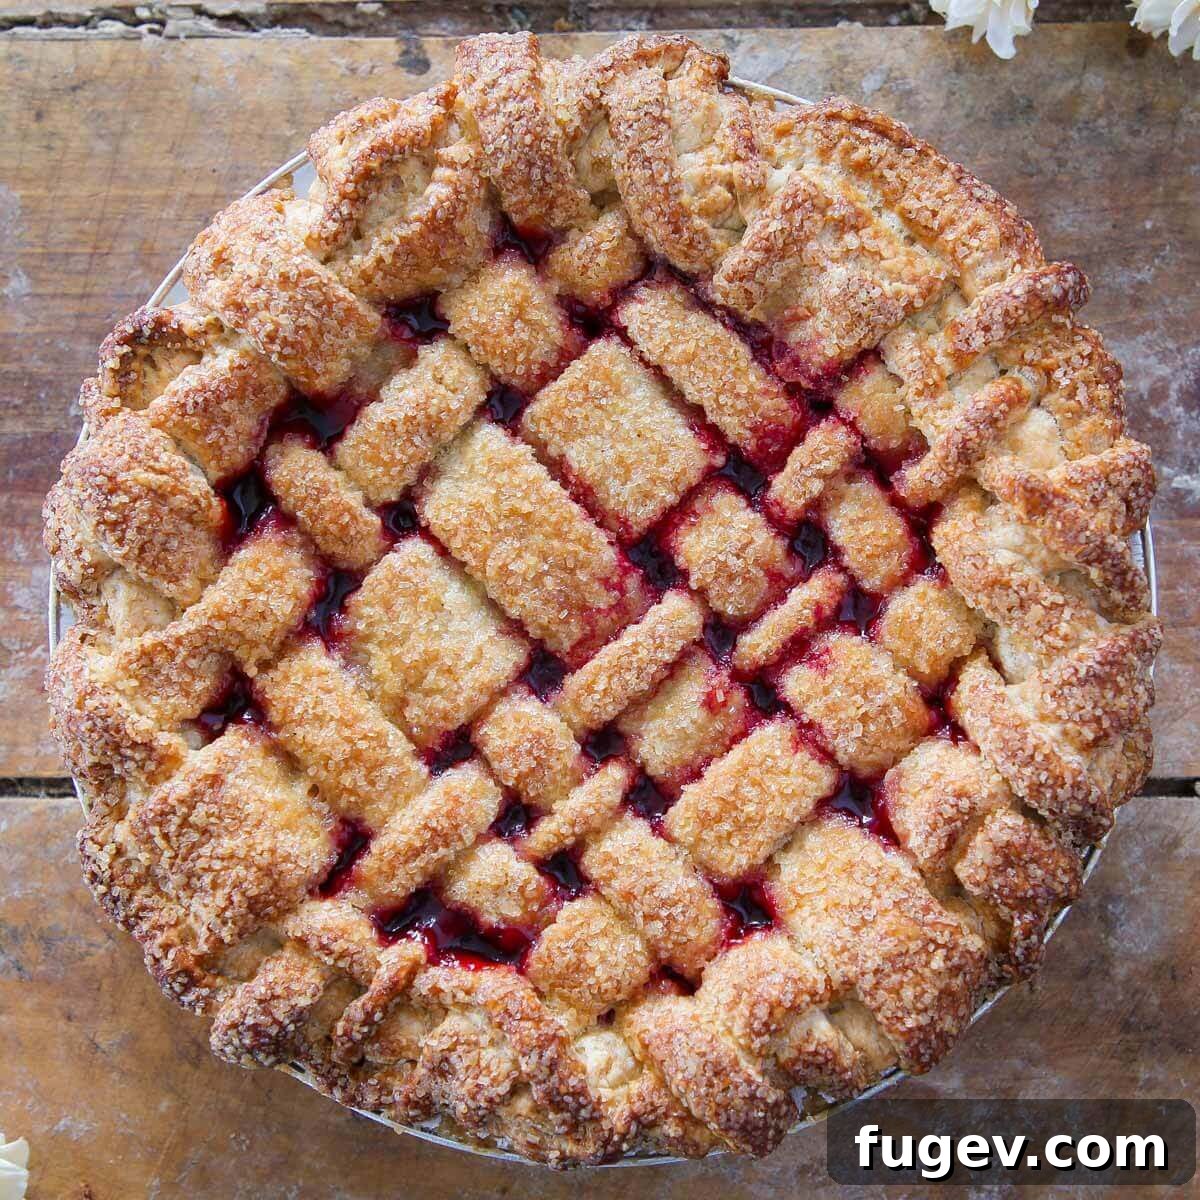
For those who love a baking challenge, the sturdy all-butter crust provides the perfect canvas for an intricate lattice design. However, if you opt for the more delicate almond flour crust, we guide you through an asymmetrical layering technique that is both stunning and practical, minimizing the risk of breakage. And no matter your crust preference, always remember the ultimate accompaniment: a generous scoop of creamy homemade vanilla ice cream, melting gently into each warm, sweet-tart bite for a truly decadent experience.
Table of Contents
- Why You Will Love This Homemade Cherry Pie
- Professional Tips for Crafting the Best Thick Cherry Pie
- Key Ingredients for Your Perfect Cherry Pie
- Exciting Variations & Substitutions for Your Cherry Pie
- How to Make Homemade Cherry Pie: A Step-by-Step Guide
- Chef Lindsey’s Essential Recipe Tip: Mastering Tapioca
- Frequently Asked Questions About Homemade Cherry Pie
- Homemade Cherry Pie Recipe
- Before You Go: Explore More Delicious Pie Recipes!
Why You Will Love This Homemade Cherry Pie
This homemade cherry pie recipe isn’t just delicious; it’s designed for success, even for novice bakers. Here’s why it will quickly become your favorite for any occasion:
- Effortless, No-Fuss Filling: Forget complicated steps and endless stirring! Our cherry filling is remarkably simple to prepare, yet it consistently yields a thick, perfectly sweetened, and vibrantly flavored result every time. Whether you opt for fresh, seasonal cherries to celebrate summer, or the convenience of readily available frozen ones, the process remains straightforward. Using frozen cherries even allows you to bypass the often-tedious pitting process entirely, saving you valuable time without compromising the exceptional taste.
- Consistently Thick and Beautifully Sliceable Pie: No one enjoys a runny, collapsing pie. The secret to our perfectly set, easily sliceable filling is the strategic use of quick-cooking tapioca. This natural, gluten-free thickener ensures your pie sets beautifully as it cools, providing clean, elegant slices that hold their shape from plate to mouth. Tapioca also creates a glossy, clear filling, allowing the vibrant, jewel-like color of the cherries to shine through, unlike other thickeners that can make the filling opaque or cloudy.
- Foolproof Baking for a Flaky Crust and Perfectly Set Filling: Achieving both a bubbling, thick filling and a golden, flaky bottom crust can often be a baker’s greatest challenge. Our innovative two-stage baking method addresses this directly and ensures foolproof results. By starting the pie at a higher temperature (425°F or 220°C) for the initial 30 minutes, we provide a crucial burst of intense heat. This high temperature ensures the bottom crust receives enough direct heat to brown and crisp up quickly, preventing any dreaded sogginess, while simultaneously jump-starting the filling’s cooking process, allowing it to reach a vigorous boil for optimal thickening. Reducing the temperature later to 350°F (175°C) ensures the pie bakes through gently and evenly without any risk of burning the delicate crust.
Professional Tips for Crafting the Best Thick Cherry Pie
Achieving a bakery-quality homemade cherry pie is within reach with these expert tips from a professional pastry chef. These insights will help you elevate your baking and ensure a truly spectacular dessert:
- Invest in a Cherry Pitter (or master alternatives): If you’re fortunate enough to be using fresh, seasonal cherries, a cherry pitter is an invaluable tool. This small, inexpensive gadget makes quick work of removing pits, significantly speeding up prep time and minimizing mess, whether for this pie recipe or other cherry delights like cherry preserves. If you don’t have one on hand, don’t fret! A clever alternative is to simply slice each cherry in half along the seam and gently pop out the pit with your thumb or even a sturdy fingernail. This manual method is often quicker and more efficient than trying to push pits out with a straw or skewer, which can be messy and inefficient.
- Always Taste the Filling Before Adding Thickener: Cherries vary widely in natural sweetness and tartness depending on their type, ripeness, and whether they are fresh or frozen. Before incorporating the quick-cooking tapioca, always take a small spoonful and taste your cherry filling mixture. If you’re using predominantly tart cherries (like Montmorency), you might find yourself wanting to add a little more granulated sugar to achieve your preferred balance. Conversely, if using very sweet cherries (like Bing), you may need slightly less sugar than the recipe calls for. I personally love to use a mix of both sweet and tart cherries when available, as it creates a more complex and balanced flavor profile that truly sings. Remember, adjusting the sugar to your taste ensures a perfectly balanced pie.
- For an Extra Thick Cherry Pie Filling, Consider Pre-cooking: While this recipe is meticulously designed to bake up thick and sliceable without the need for pre-cooking the filling, for those who desire the absolute thickest, most robust filling possible – perhaps for an extra deep-dish pie – you can opt to pre-cook it on the stovetop. To do this, simply combine all the filling ingredients (excluding the butter, which can be stirred in at the very end) in a saucepan and cook over medium heat, stirring constantly, until the mixture thickens to your desired consistency. It’s absolutely crucial to allow this pre-cooked filling to cool completely, preferably in the refrigerator, before assembling your pie. Adding a warm filling to a raw pie crust can cause the bottom crust to cook prematurely, become soggy, or even begin to tear.
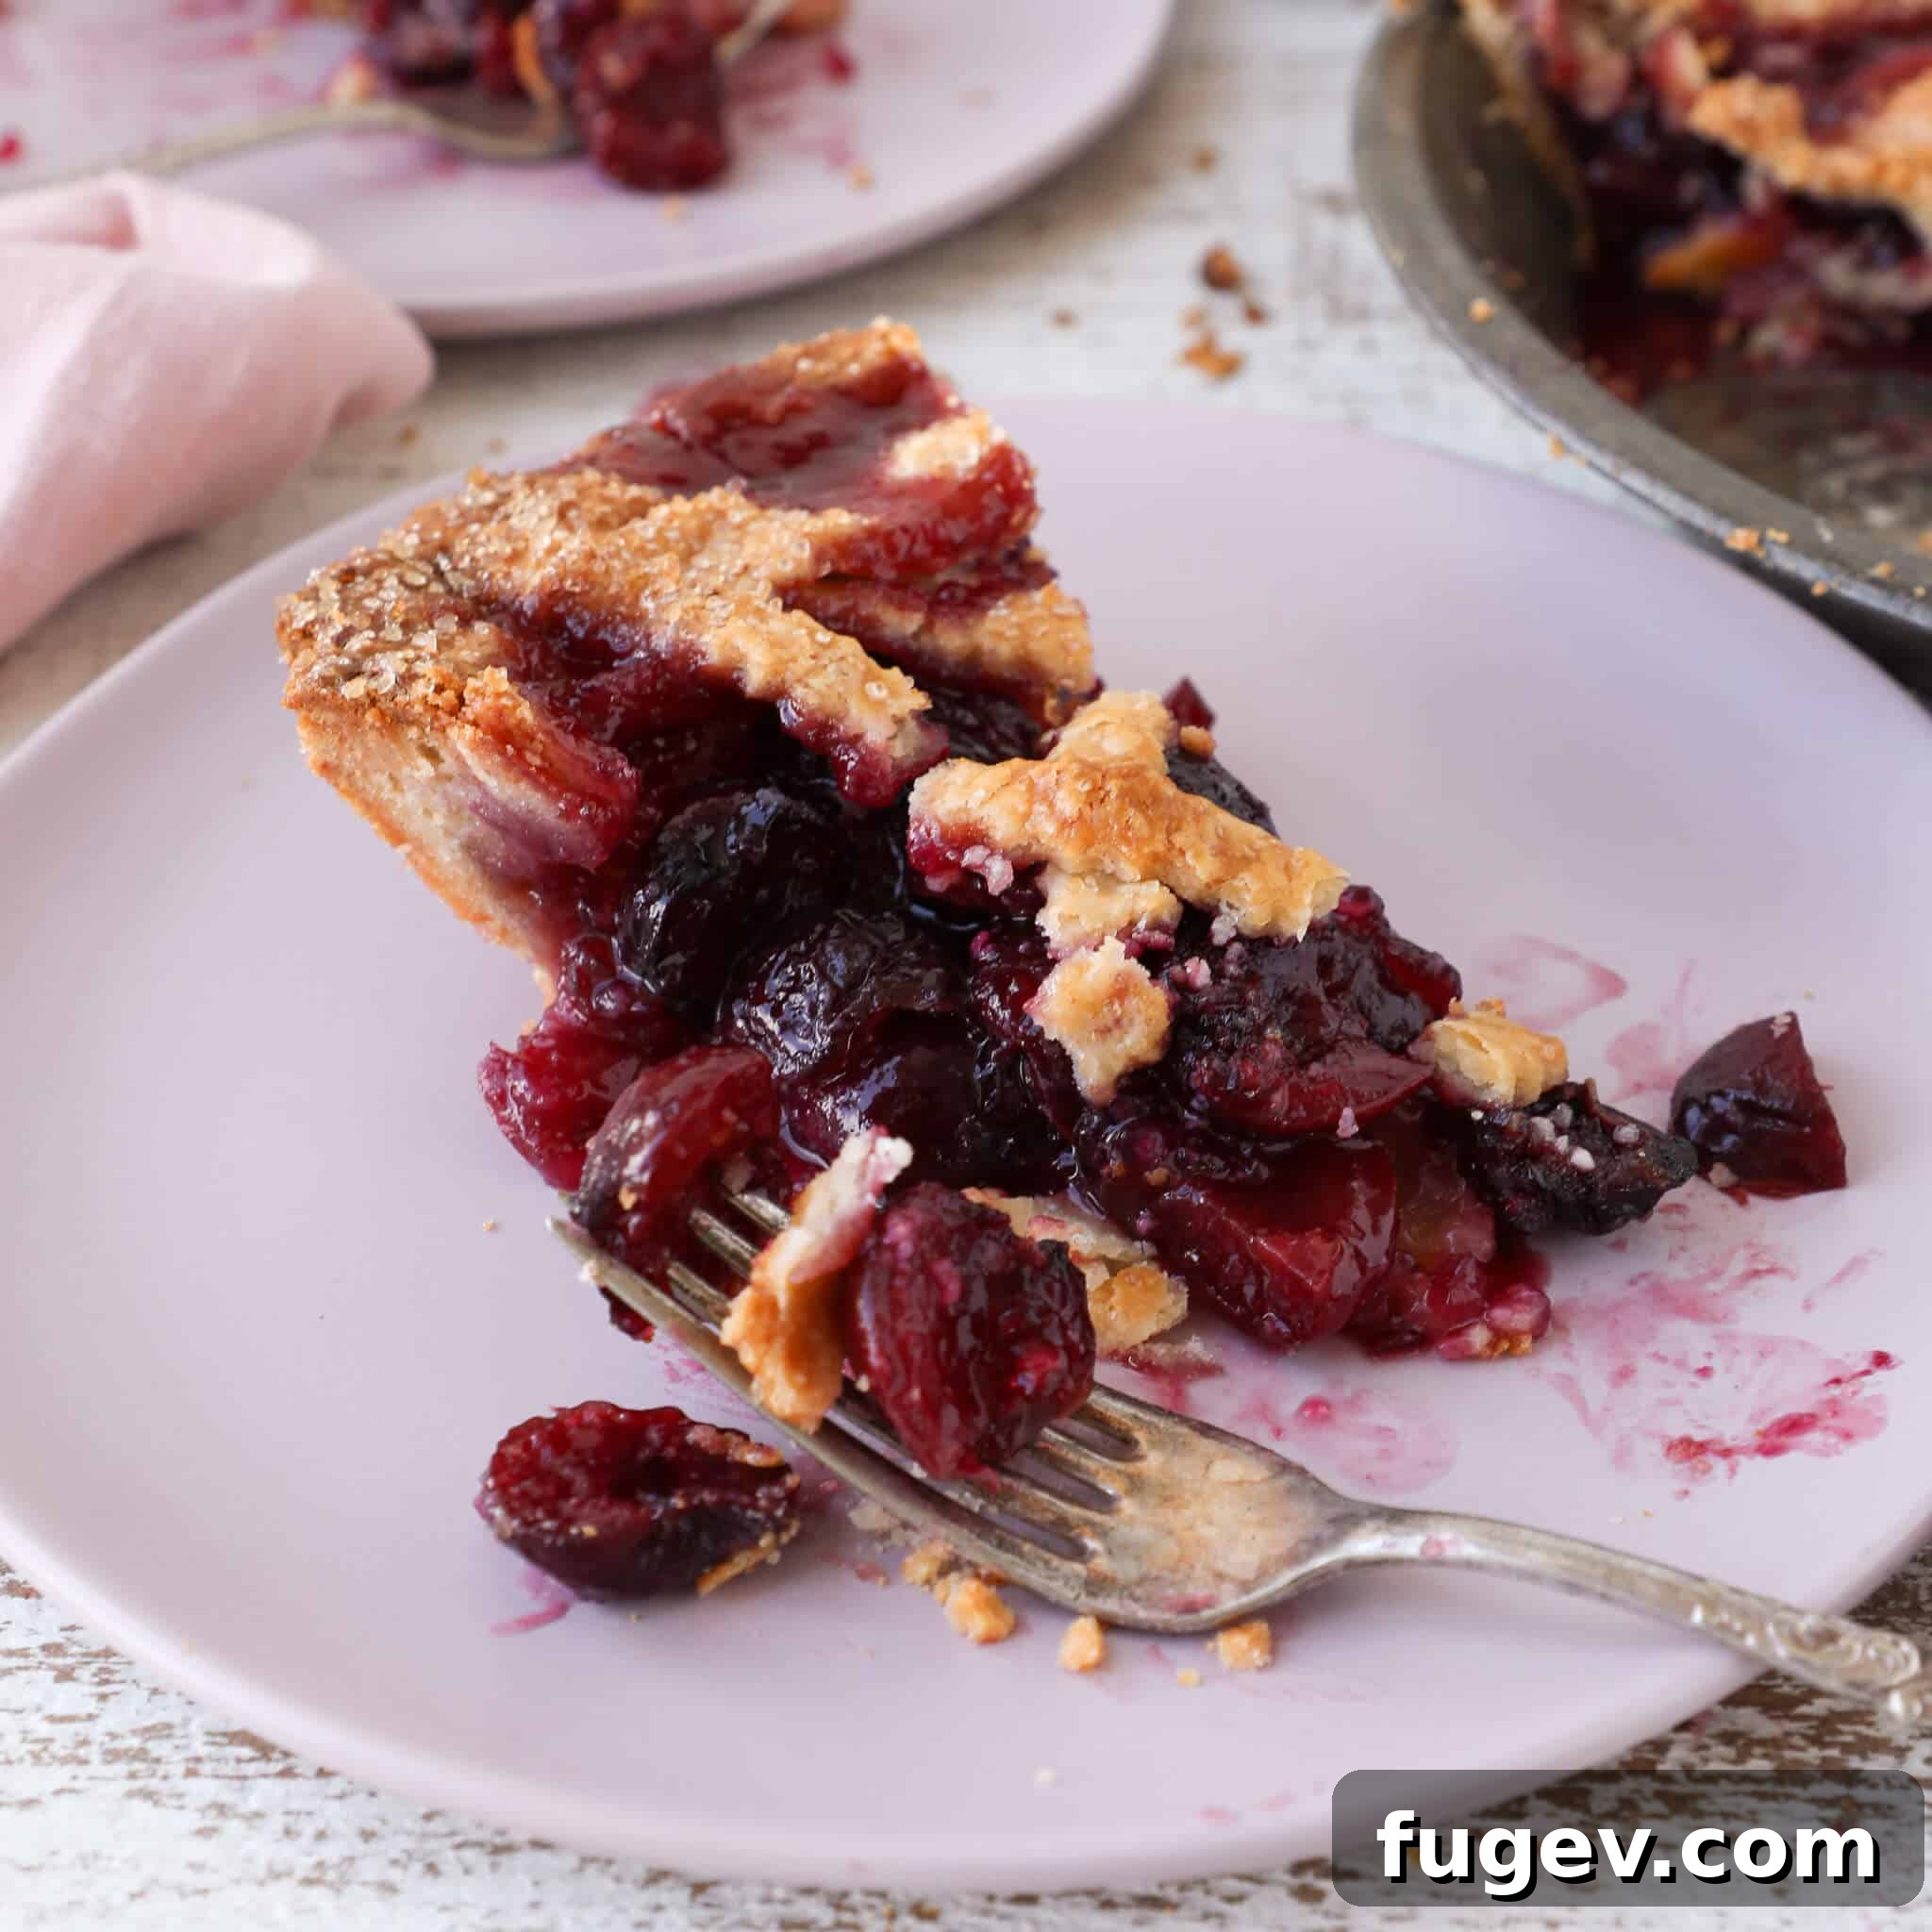
Key Ingredients for Your Perfect Cherry Pie
Crafting a truly exceptional cherry pie starts with understanding the role of each ingredient. Here’s a detailed look at what you’ll need to create this delectable dessert:
- Your Choice of Pie Crust: The foundation of any great pie! While we feature our unique almond flour pie crust in this recipe for its distinctive nutty flavor and tender crumb, this cherry filling is incredibly versatile. It pairs beautifully with a classic all-butter pie crust for maximum flakiness, or even a shortening-based pie crust, which offers a wonderfully crumbly and melt-in-your-mouth texture similar to our almond crust. You can also use good quality store-bought crusts for convenience. Choose the crust that best suits your taste and baking comfort level – each will yield a delicious result.
- Cherries – Fresh or Frozen: The undisputed star of the show! You can use sweet cherries (like Bing or Rainier) for a sweeter pie, sour/tart cherries (Montmorency are ideal for that classic tart cherry pie flavor), or a delightful mix of both to achieve your preferred balance of flavor. If using fresh, make sure they are ripe, firm, and vibrant. Frozen cherries are a fantastic alternative, especially when fresh ones are out of season or too costly. If using frozen, be sure to thaw them completely and drain any excess liquid thoroughly. This step is crucial to prevent a watery pie and ensures the tapioca can effectively thicken the filling. (Save those jarred maraschinos for cherry pecan cookies – their flavor and texture aren’t quite right for this pie!)
- Quick Cooking Tapioca: This is our preferred thickener for several excellent reasons! Quick cooking tapioca creates a glossy, clear, and incredibly stable filling that slices beautifully without becoming gummy or opaque. If quick-cooking tapioca is hard to find, you have a few excellent options:
- Tapioca Flour (Starch): You can substitute tapioca flour directly for quick-cooking tapioca. It thickens very efficiently and doesn’t require a long sitting period before baking.
- Small Tapioca Pearls: If you only have small tapioca pearls, grind them into a finer powder using a spice grinder or a food processor. When using ground pearls, it’s crucial to let your mixed filling sit for at least 30 minutes before baking. This resting period allows the tapioca to properly hydrate and ensures it dissolves fully during baking, leading to a perfectly thick and smooth filling without any gritty texture. Avoid cornstarch for this pie, as it can make the filling cloudy and sometimes less stable; save it for recipes like lemon meringue pie.
- Granulated Sugar: Beyond merely providing sweetness, granulated sugar plays a vital structural role in the pie. As the filling bakes, the sugar actively absorbs moisture from the cherries, contributing significantly to a thicker, more luscious, and perfectly set fruit filling. Always feel free to adjust the amount of sugar based on the natural sweetness of your chosen cherries and your personal taste preferences.
- Unsalted Butter: A few tablespoons of cold, diced unsalted butter folded into the filling add a luxurious richness and contribute to an incredibly silky-smooth texture. As it melts into the hot cherries during baking, it enhances their natural flavor and provides a wonderful, decadent mouthfeel that distinguishes a truly gourmet pie.
- Almond Extract: This is the secret ingredient that truly elevates this cherry pie from great to unforgettable! It’s a fascinating culinary fact that cherry pits naturally contain compounds that taste and smell distinctly like almonds (specifically benzaldehyde). Adding just a small amount of high-quality almond extract intensifies and complements the natural cherry flavor in the most exquisite way, giving your cherry pie filling a depth and complexity that will surprise and delight your taste buds. Do not skip this essential flavor enhancer!
- Kosher Salt: A pinch of kosher salt is absolutely essential for balancing the sweetness of the fruit and sugar. It acts as a flavor amplifier, bringing out the full spectrum of sweet, tart, and almond notes in the pie, preventing it from tasting one-dimensional.
- Heavy Cream: Used as an excellent alternative to an egg wash, brushing the top crust with a small amount of heavy cream before baking helps it achieve a truly beautiful, deep golden-brown color and a lovely, inviting sheen. It also aids in crisping the crust.
- Turbinado Sugar: A generous sprinkle of turbinado sugar (or any coarse sugar like demerara or sparkling sugar) on top of the cream-brushed crust adds a delightful sparkle, an attractive visual texture, and a pleasant, sweet crunch that beautifully contrasts with the soft filling.
For precise measurements and detailed instructions, please refer to the complete recipe card below.
Exciting Variations & Substitutions for Your Cherry Pie
While our classic cherry pie recipe is phenomenal as is, it’s also incredibly adaptable. Feel free to experiment with these creative variations and substitutions to personalize your pie and suit your unique taste preferences or ingredient availability:
- Choose Your Cherries: Fresh or Frozen: This recipe is wonderfully forgiving whether you use fresh or frozen cherries. If opting for frozen, it’s best to allow them to thaw completely and drain any excess liquid thoroughly before mixing them into the filling. This prevents a watery pie and ensures the tapioca can work its magic effectively, resulting in a perfectly set filling. Gently pat them dry if they seem excessively wet.
- Experiment with Flavor Enhancers:
- Citrus Zest: A little bit of freshly grated orange zest or lemon zest can wonderfully brighten the cherry flavor and add a delightful aromatic note to the filling. Lemon juice also offers a similar brightening effect and can help balance very sweet cherries.
- Vanilla Extract: While almond extract is a key component, a splash of pure vanilla extract can add another layer of classic sweetness and depth, complementing the cherries beautifully without overpowering the almond notes.
- Warm Spices: For a cozy, comforting twist, consider adding a pinch (¼ to ½ teaspoon) of ground cinnamon, a tiny hint of nutmeg, or even a tiny amount of cardamom to your cherry filling. These warm spices pair exceptionally well with cherries, especially in colder months or for holiday gatherings.
- Infuse with Alcohol for an Adult Twist: Certain spirits wonderfully enhance the complex flavor profile of cherries. Don’t be shy about adding a tablespoon or two of one of these to your filling (ensure it’s fully incorporated):
- Bourbon: Its rich caramel, vanilla, and oak notes are a match made in heaven with the sweetness and tartness of cherries.
- Dark Rum: Adds a deep, molasses-like sweetness and a hint of spice, creating a truly decadent pie.
- Cointreau or Grand Marnier (Orange Liqueurs): Provides a bright, citrusy counterpoint to the fruit, adding a sophisticated zest.
- Brandy: Offers a warm, fruity complexity that enhances the natural notes of the cherries.
Alternatively, if you prefer to keep the pie filling alcohol-free, you could infuse a few tablespoons of one of these spirits into a homemade vanilla crème anglaise recipe or whipped cream to serve alongside your pie – an elegant and delicious pairing!
- Mixed Fruit Pie: While cherry reigns supreme, feel free to combine it with other complementary fruits! A cherry-berry pie (with raspberries or blueberries) or a cherry-peach pie are delightful seasonal variations. Just ensure you adjust the sugar and thickener as needed based on the juiciness and sweetness of the additional fruits. A good rule of thumb is to keep the total fruit volume the same.
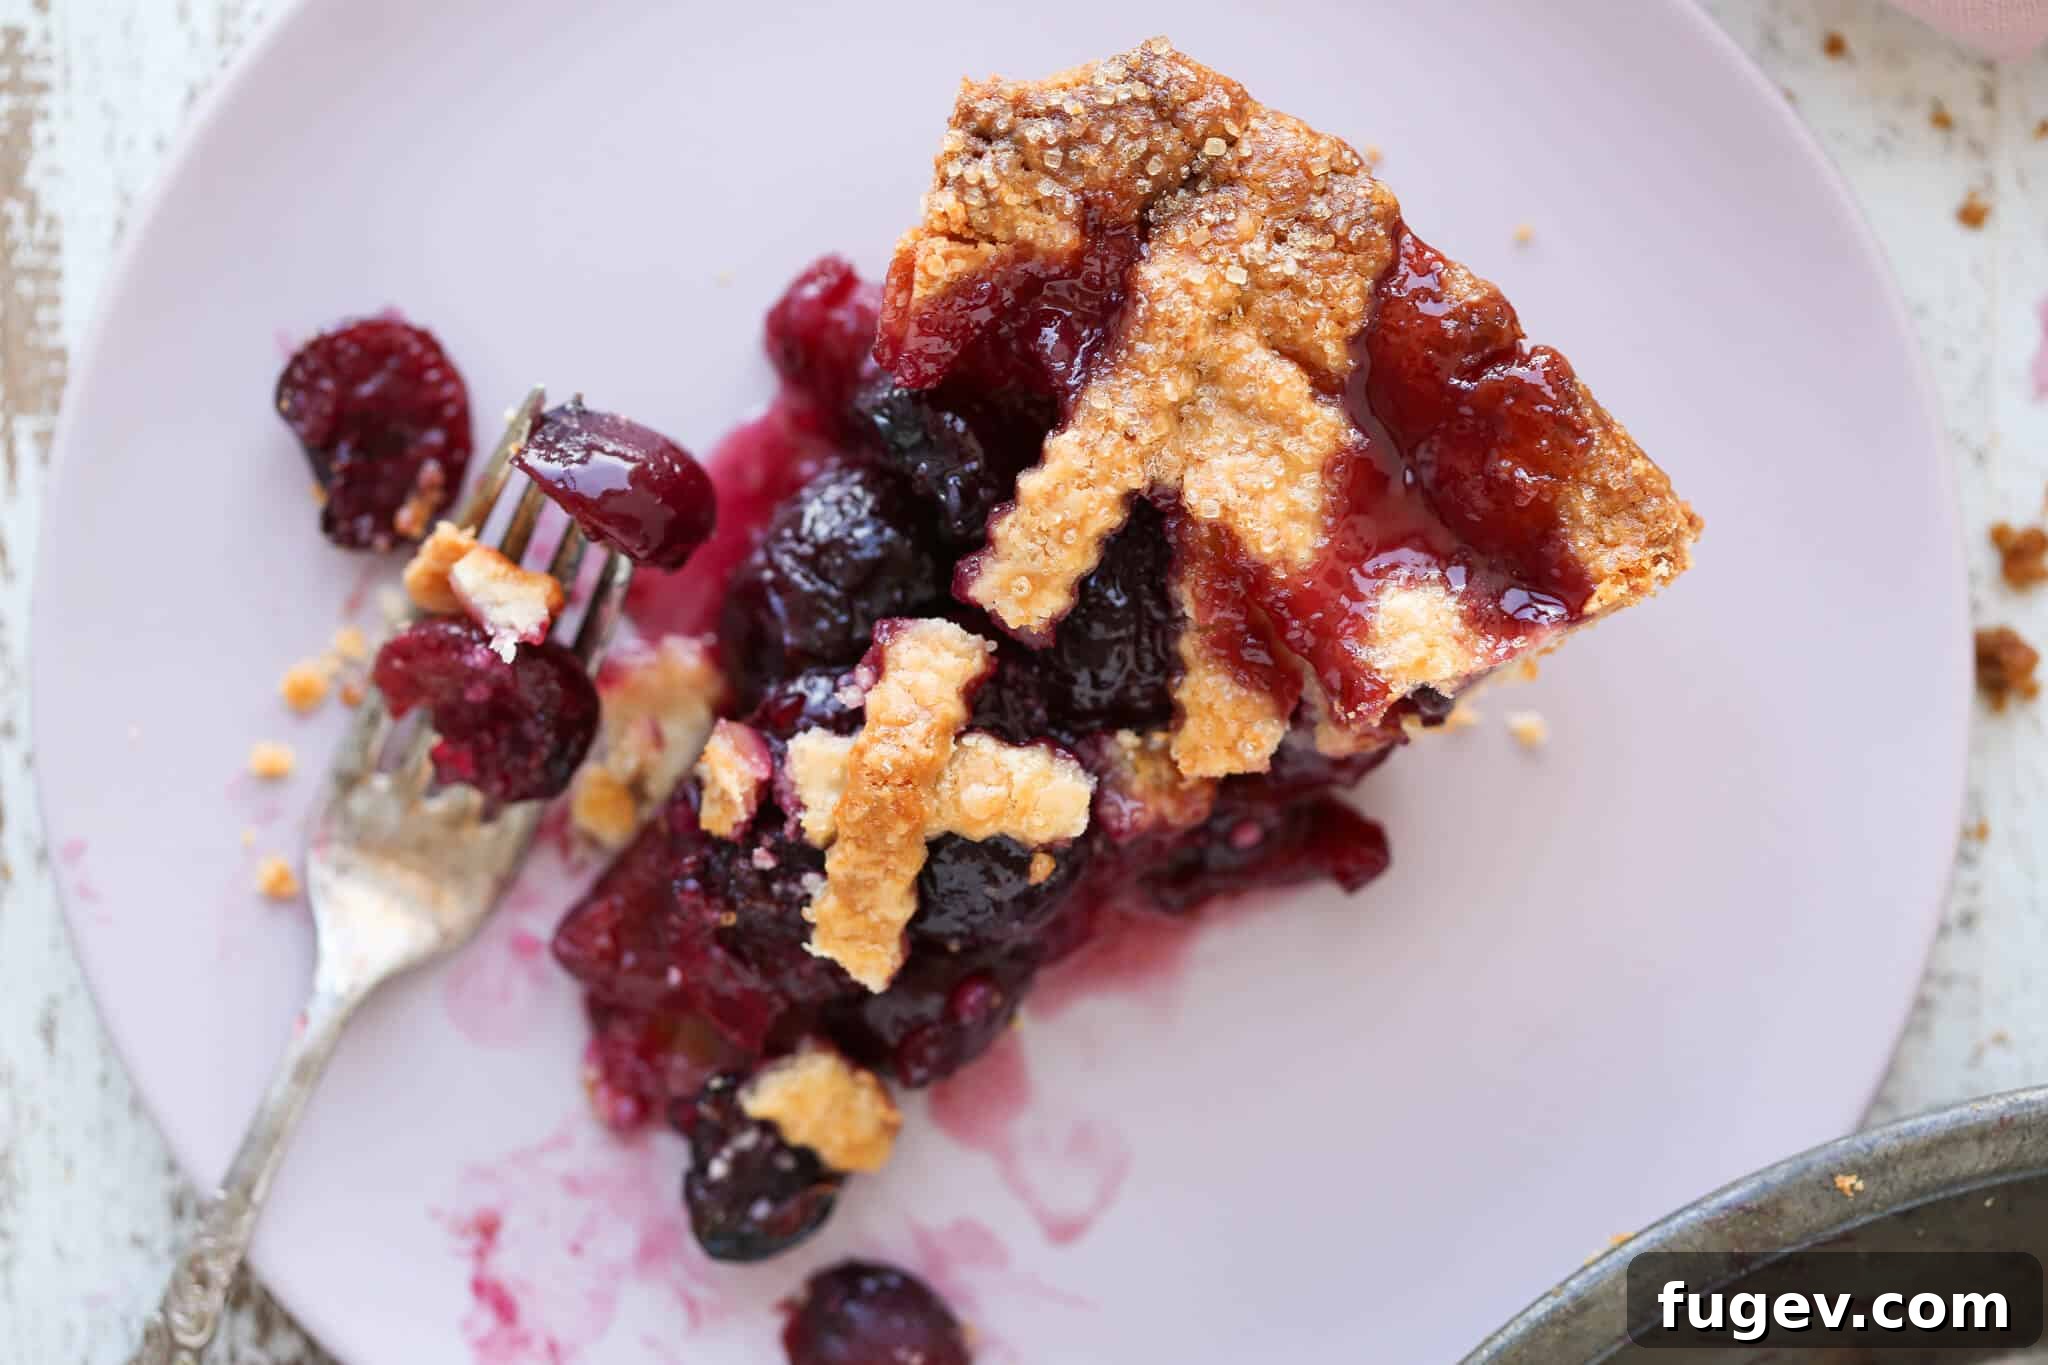
How to Make Homemade Cherry Pie: A Step-by-Step Guide
Follow these detailed instructions to ensure your homemade cherry pie turns out perfectly every time, from the flaky crust to the bubbling, thick filling. For precise measurements, please refer to the complete recipe card below.
Part 1: Preparing Your Pie Dough and Top Crust Design
The key to a spectacular pie starts with proper dough handling. Always ensure your dough is well-chilled but pliable enough to roll without excessive cracking. Work efficiently to keep the butter in the dough cold.
- Roll Out the Dough: On a lightly floured surface, use a rolling pin to carefully roll out both your bottom and top pie crusts. Aim for an even thickness of approximately ¼ inch for sturdier crusts like our almond flour pie crust. If you’re using a more forgiving and flexible dough, such as an all-butter pie crust or vodka pie crust, you can roll it a bit thinner, around ⅛ inch, for extra flakiness. If your dough cracks significantly or resists rolling, it might be too cold; let it rest at room temperature for just 5-8 minutes to soften slightly before continuing.
- Choose Your Top Crust Design: You have several creative and functional options for your top crust, each offering a different aesthetic and steam-release capability:
- Traditional Lattice: For an impressive and classic woven top, consult a detailed tutorial on how to lattice pie crust. This method, often seen in pies like our strawberry rhubarb pie, creates a beautiful pattern and provides ample ventilation for steam to escape during baking.
- Simple Vent Holes: If you prefer a full top crust, simply use a sharp knife or small cookie cutters to cut a few decorative vent holes in the center or in a circular pattern around the top. This step is crucial for steam release during baking, preventing a soggy crust and ensuring even cooking of the filling, similar to the technique used for our peach pie.
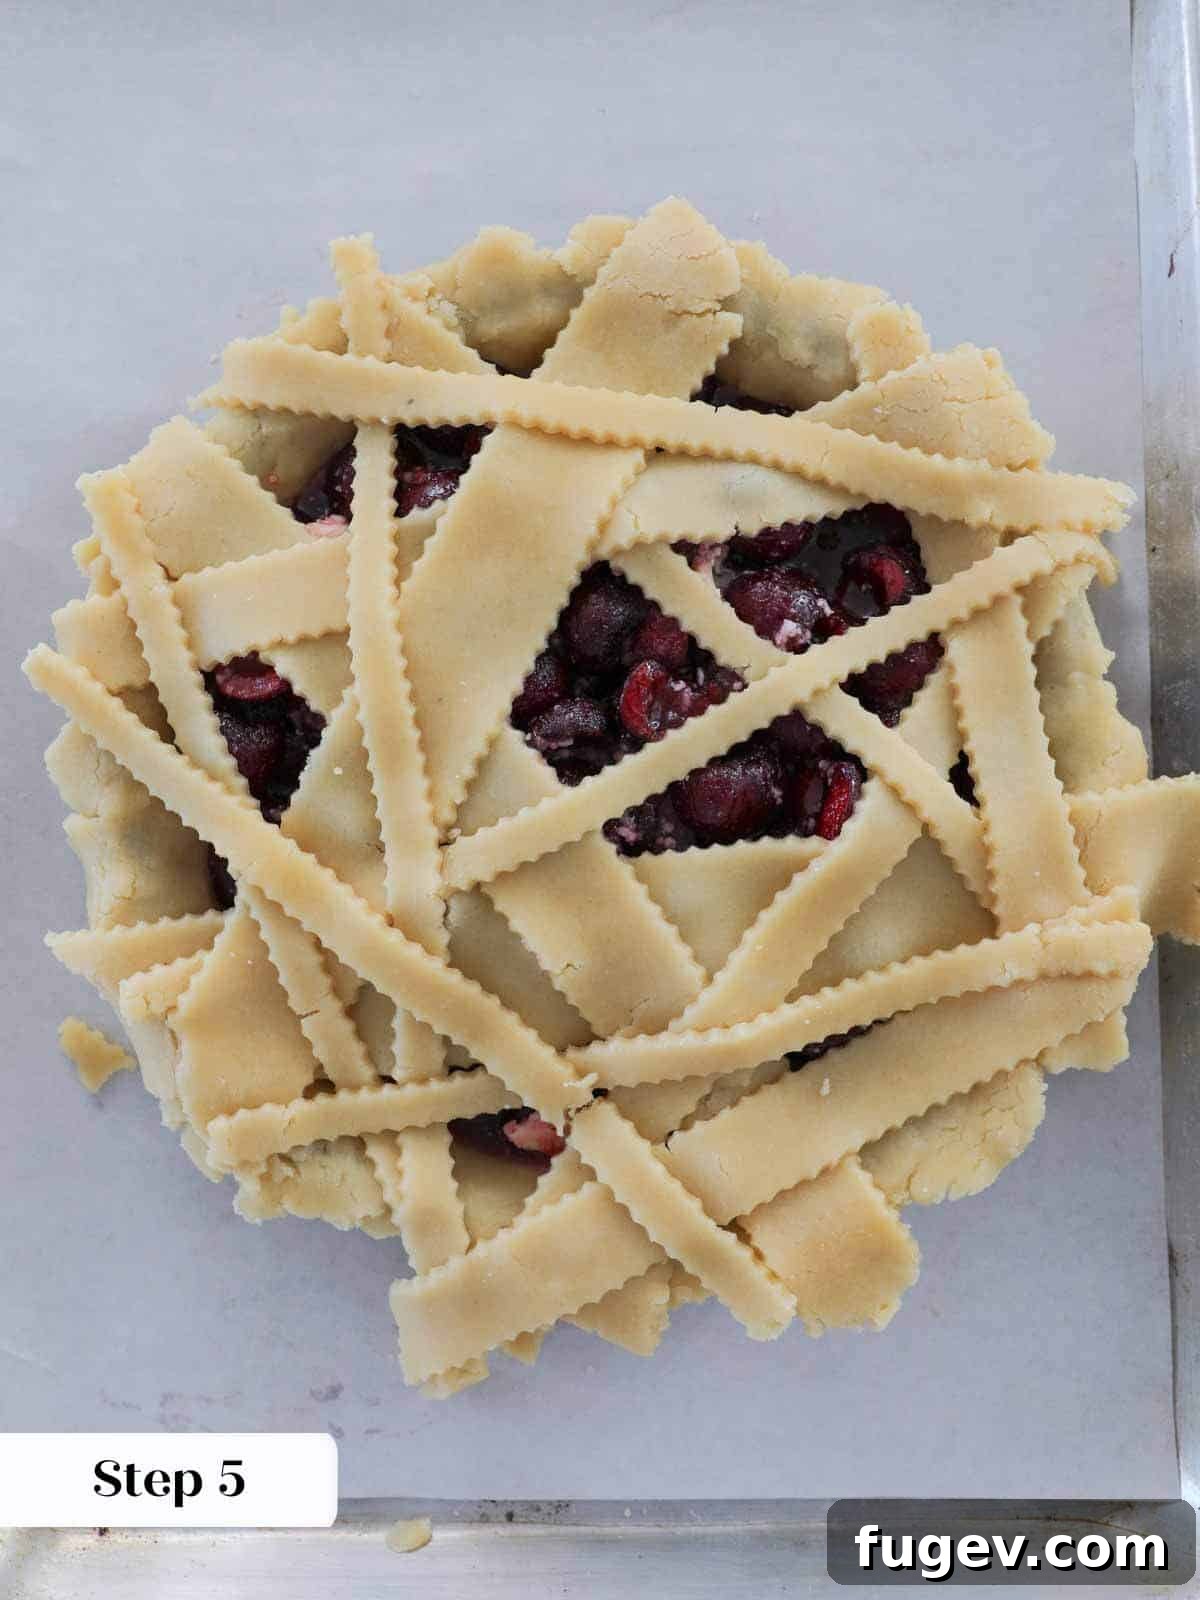
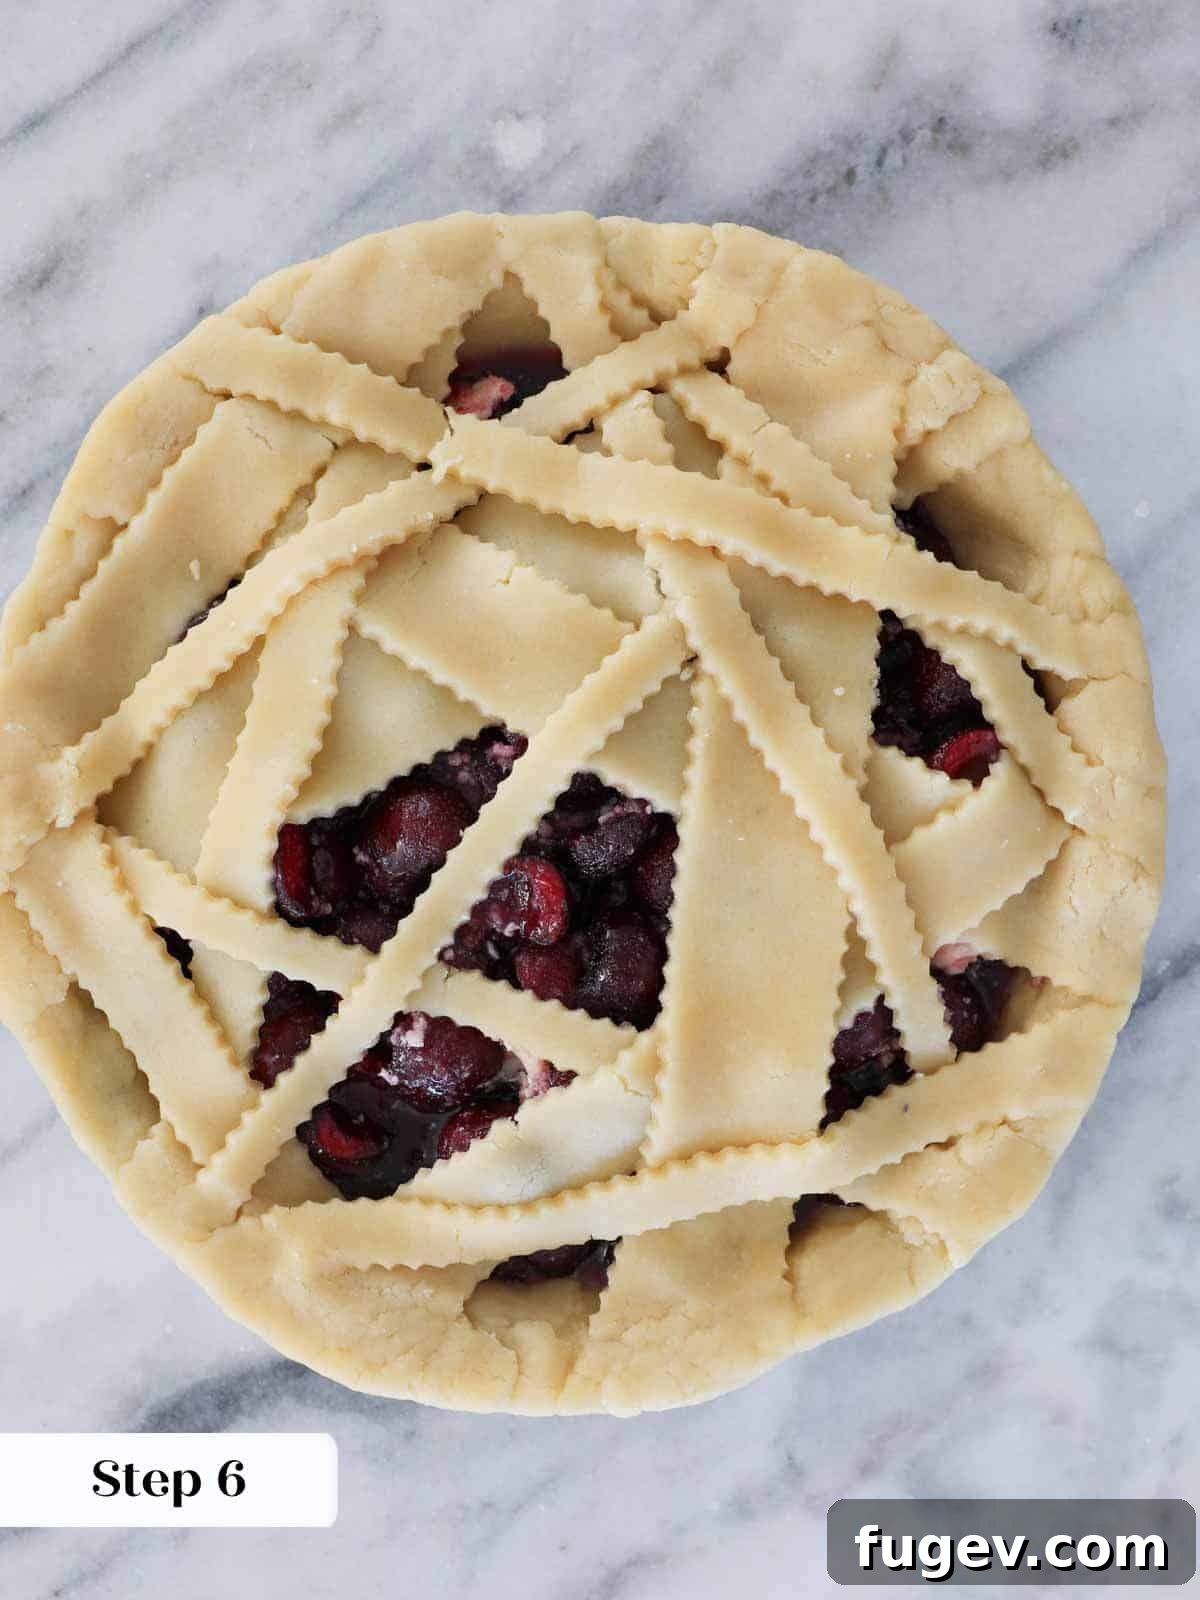
- Asymmetrical Layering: For a rustic yet elegant look, especially recommended for more delicate crusts, you can simply lay strips of dough irregularly on top of the filling without weaving them. This creates visual interest and is much easier to execute.
Chef’s Note for Almond Flour Crust: If you are working with our almond flour pie crust, please be aware that it is inherently more delicate and prone to breaking compared to traditional butter crusts. For this reason, I strongly advise performing any latticing or intricate top crust work directly on top of the filled bottom crust in the pie dish. Attempting to pre-weave it on parchment paper and then carefully transferring it (as you might for a sturdier dough like in our blueberry pie) can be quite challenging and lead to frustration.
Part 2: Preparing the Filling and Assembling the Pie
With your crust ready and waiting, it’s time to bring together the delicious cherry filling and assemble your masterpiece for baking.
- Preheat Your Oven: Set your oven to 425°F (220°C). This initial high heat is a critical step for achieving a crisp, golden bottom crust and kick-starting the thickening process of the filling.
- Prepare the Cherry Filling: In a large mixing bowl, combine the quick-cooking tapioca, granulated sugar, kosher salt, pitted and halved cherries (ensure they are well-drained if frozen), almond extract, and the small pieces of cold unsalted butter. Mix gently but thoroughly with a spatula or your hands to ensure all cherries are coated and ingredients are evenly distributed. Allow this mixture to sit for about 15-20 minutes, especially if using tapioca pearls or ground pearls, to give the tapioca time to begin hydrating. This crucial step helps prevent a gritty texture in the final pie.
- Line the Pie Dish: Carefully transfer your rolled-out bottom pie crust into a standard 9-inch pie dish. Gently press it into the contours of the pan, making sure not to stretch the dough, which can lead to shrinkage during baking.
- Fill the Pie: Pour the prepared cherry filling evenly into the lined pie dish. Mound it slightly in the center, as the fruit will settle during baking.
- Add the Top Crust: Carefully place your chosen top crust design over the filling. Whether you’ve latticed it decoratively or opted for the simple asymmetrical layering technique, ensure it covers the filling adequately and reaches the edges of the bottom crust. If you chose a solid top crust, double-check that you’ve cut those essential vent holes to allow steam to escape.
- Trim and Crimp the Edges: Use kitchen shears or a sharp knife to trim any excess dough from the edges of the pie, leaving about a ½ to 1-inch overhang. Roll this excess dough under itself to create a neat, sturdy rim. You can then crimp the edges decoratively using your fingers, a fork, or a specialty crimping tool to firmly seal the pie and create a beautiful finish.
Part 3: Baking Your Cherry Pie to Golden Perfection
The baking process is crucial for achieving that coveted flaky crust and a beautifully bubbling, thick filling. Follow these steps carefully for the absolute best results:
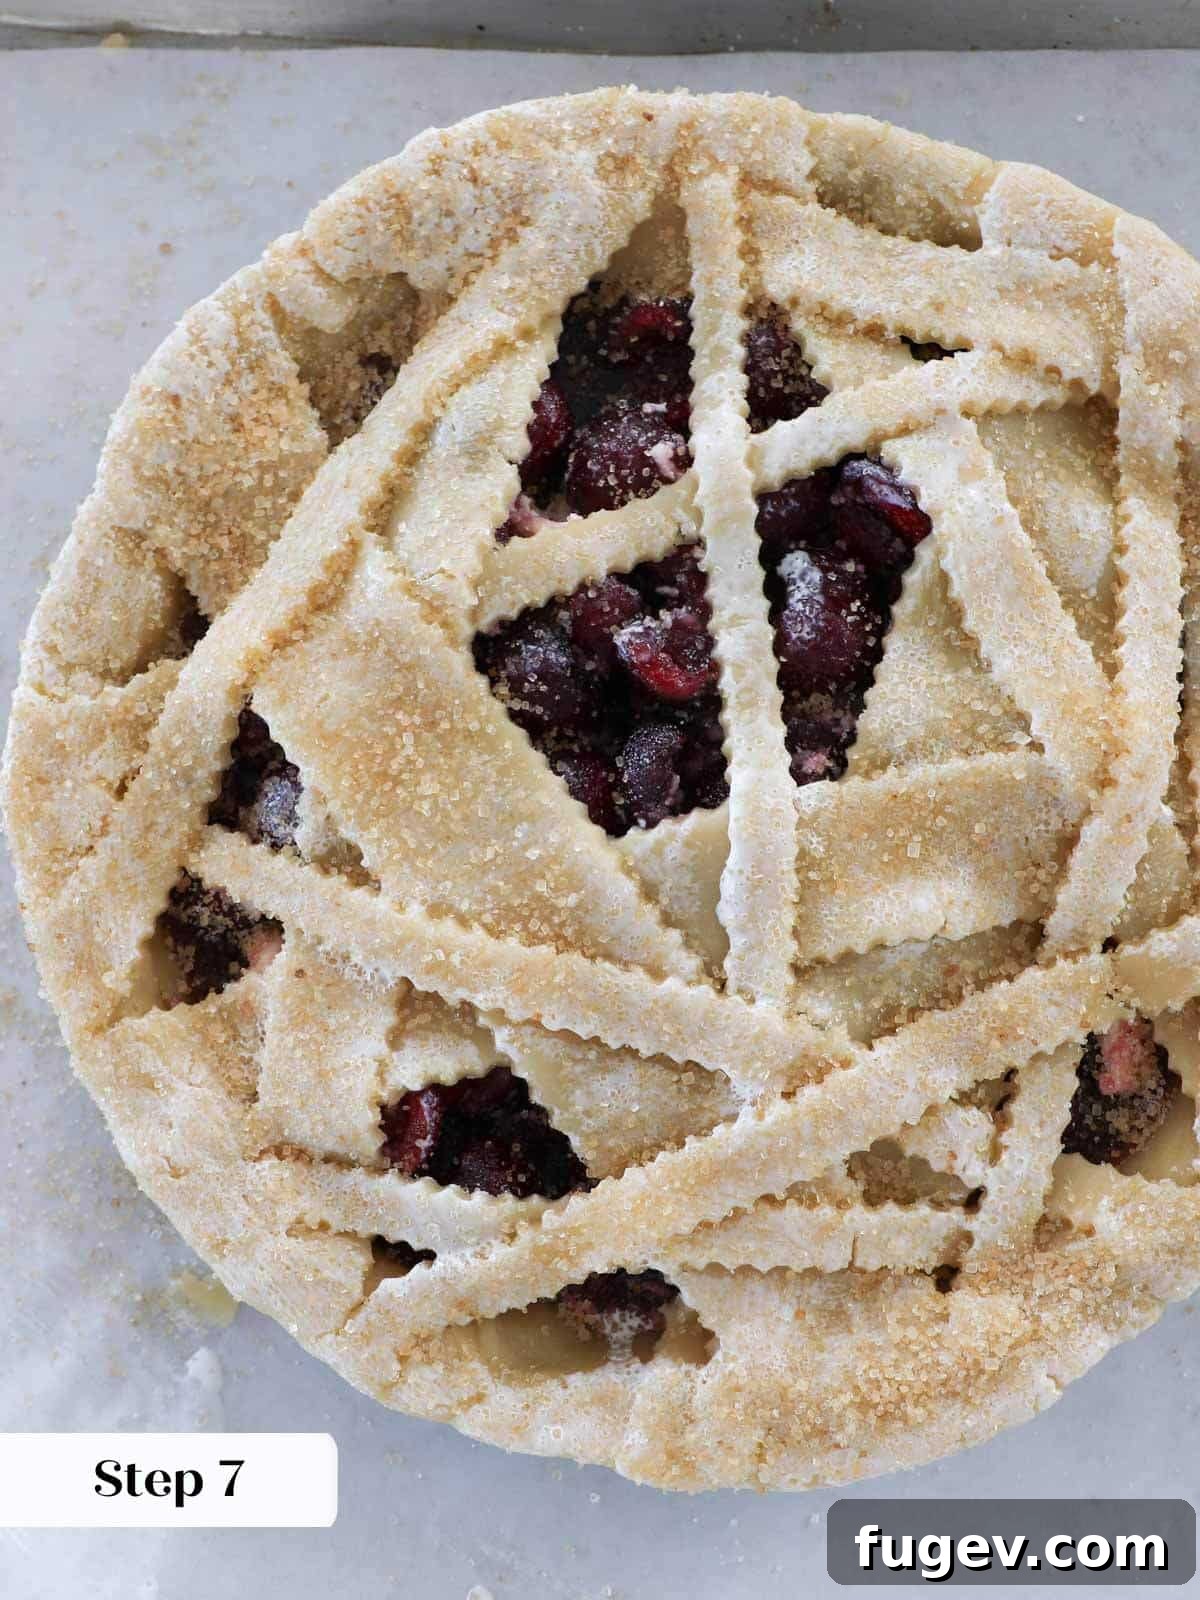
- Prepare for Baking: Using a pastry brush, generously brush the entire top surface of the pie crust with heavy cream. This step is vital as it helps the crust achieve a beautiful, rich golden-brown color and a lovely sheen during baking. Then, evenly sprinkle a layer of turbinado or coarse sugar over the cream for an added delightful sparkle and a pleasant crunch on the finished crust.
- Chill Before Baking: This step is often overlooked but is incredibly vital for pie perfection! Place the assembled pie, uncovered, in the refrigerator to chill for at least 30 minutes. Chilling allows the butter in the pie crust to firm up, preventing it from melting too quickly in the oven and ensuring maximum flakiness. It also helps the crust hold its crimped shape much better during the high heat of initial baking, preventing shrinkage.
- Initial High-Heat Bake: Place the chilled pie on a rimmed baking sheet (this is a safeguard to catch any potential drips from bubbling filling) and transfer it to your preheated 425°F (220°C) oven. Bake for 30 minutes. During this crucial initial phase, the high heat rapidly sets the crust, promotes browning on the bottom, and encourages the filling to start bubbling vigorously, which is essential for the tapioca to activate and thicken properly. Keep a close eye on the crust; if it begins to brown too quickly, proceed to the troubleshooting tip below.
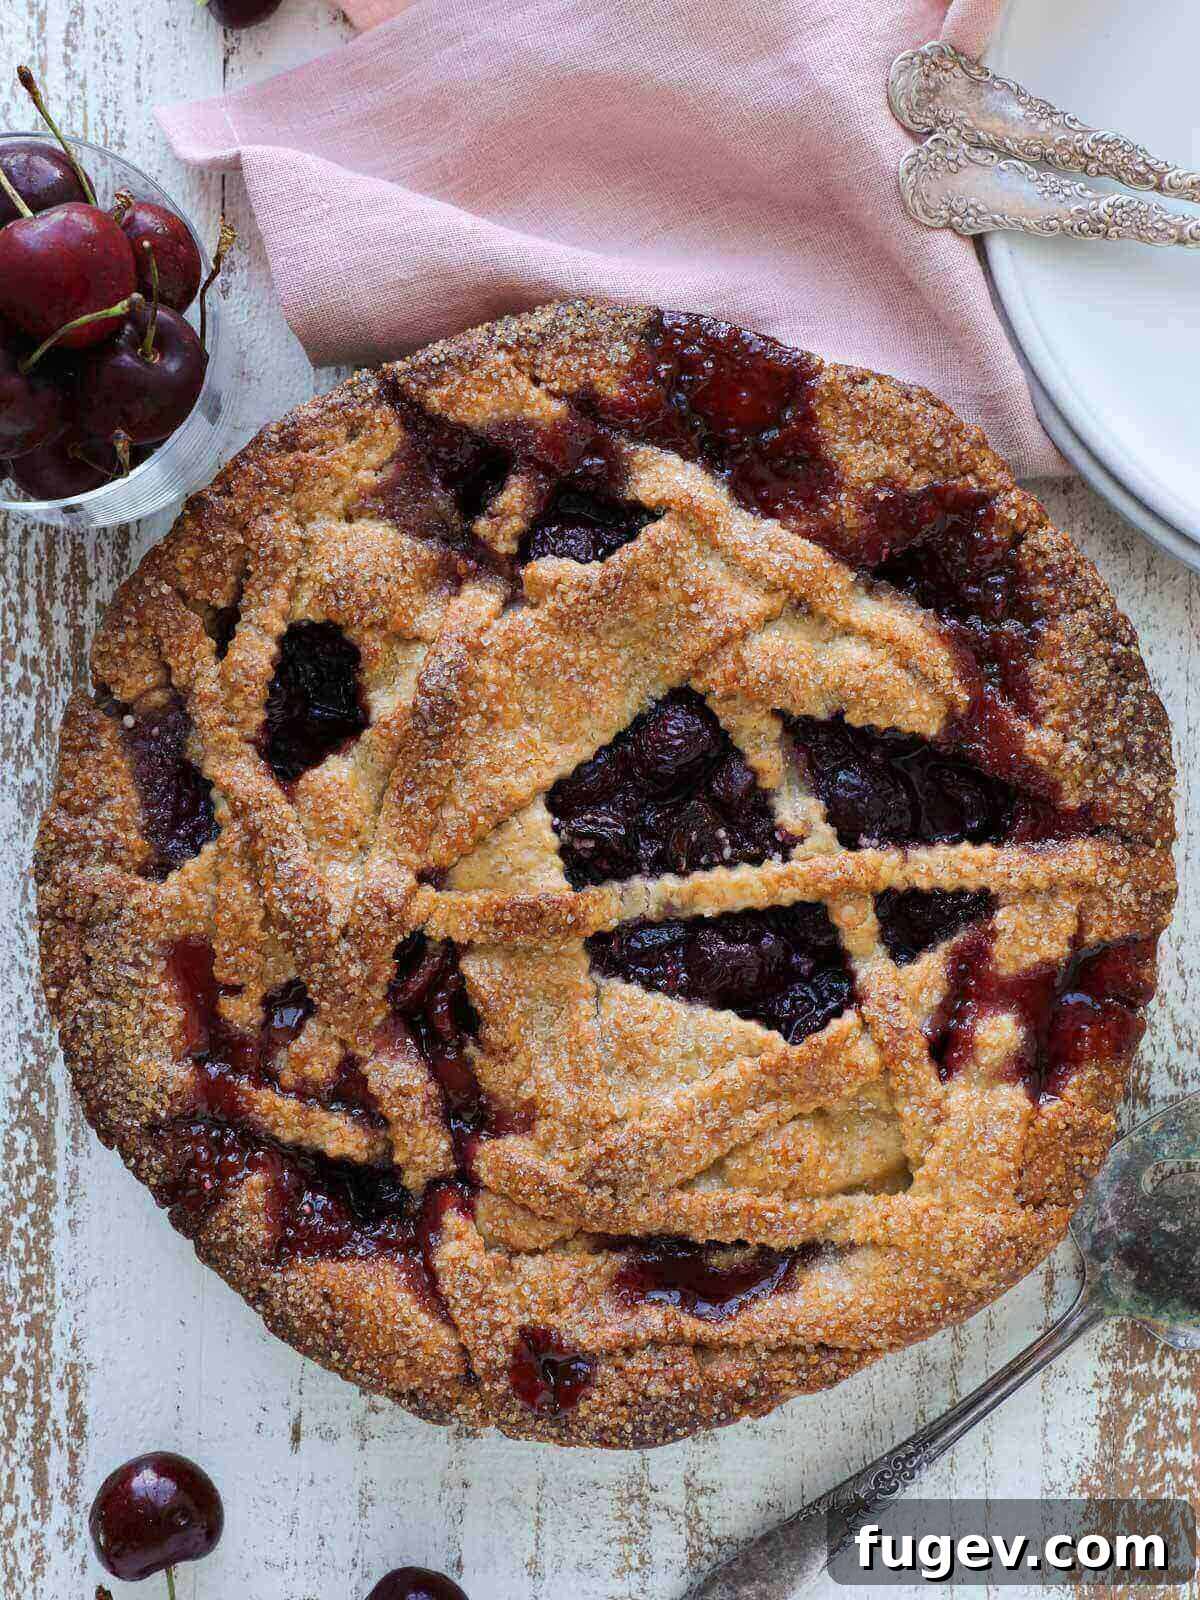
- Reduce Heat and Continue Baking: After the initial 30 minutes, reduce the oven temperature to 350°F (175°C) and continue baking. This lower temperature allows the pie to cook through gently and evenly without burning the crust, ensuring the fruit softens and the filling fully thickens. Bake until the filling is visibly bubbly and thick in the very center (you should see it actively bubbling through the lattice openings or vent holes), and the entire crust is deeply golden brown. This usually takes another 40-60 minutes, but oven temperatures can vary, so always rely on visual cues for doneness.
Troubleshooting Tip: Is Your Crust Browning Too Quickly? If you notice your pie crust is browning faster than the filling appears to be cooking, don’t worry! Simply create a loose foil “tent” over the entire top of the pie to shield it from direct heat. Alternatively, you can fashion three narrow strips of aluminum foil and gently fold them around just the edges of the pie to prevent them from burning. This technique allows the filling to continue cooking and thickening without over-browning the crust.
Chef Lindsey’s Essential Recipe Tip: Mastering Tapioca
The key to a perfectly thick, clear, and glossy cherry pie filling often lies in your choice and handling of tapioca, our preferred thickener. If you’re struggling to find quick-cooking tapioca at your local grocery store, don’t despair! You can easily substitute it with readily available small tapioca pearls, provided you prepare them correctly.
To use small tapioca pearls, simply take the required amount and grind them into a fine powder using a spice grinder or a food processor. This process breaks down the larger pearls, making them behave much more like quick-cooking tapioca or tapioca flour. Once you’ve mixed all your pie filling ingredients with the freshly ground tapioca, it’s absolutely crucial to allow the entire mixture to sit for at least 30 minutes before pouring it into your pie crust and baking. This resting period gives the tapioca ample time to hydrate properly, which is essential for it to fully dissolve during baking and reach its maximum thickening potential. The result will be a filling that is wonderfully smooth, luscious, and beautifully set without any gritty texture, ensuring your pie is a true delight.
Frequently Asked Questions About Homemade Cherry Pie
Once your cherry pie has completely cooled to room temperature (this is critical for the filling to set), you can store it in a few ways depending on how long you plan to keep it. For up to 3 days, wrap it well with plastic wrap or foil and store it at room temperature. For longer storage, refrigerate the wrapped pie for up to a week. This pie also freezes beautifully; wrap it tightly in several layers of plastic wrap and then an outer layer of heavy-duty foil, and it will keep well in the freezer for up to 3 months. Thaw frozen pie in the refrigerator overnight before serving or reheating.
To reheat a fruit pie, whether it’s from the refrigerator or thawed from the freezer, first unwrap it and allow it to come to room temperature (this might take an hour or two for a chilled pie, or several hours for a frozen pie). Then, to re-crisp the crust and warm the filling gently, place the pie in a preheated 325°F (160°C) oven for 15-25 minutes, or until it’s warmed through to your liking. This low temperature helps to rejuvenate the crust without overcooking the filling, bringing back that delicious, freshly baked taste and texture.
A soggy bottom crust is a common pie challenge, but it’s easily preventable with a few key techniques:
- High Initial Heat: Begin baking your pie at a higher temperature, such as 425°F (220°C), for the first 15-30 minutes. This provides a crucial burst of heat that helps the bottom crust cook and brown quickly before the filling releases too much moisture.
- Proper Thickener: Ensure you’re using enough quick-cooking tapioca and allowing it to hydrate properly (especially if using ground pearls). Tapioca is excellent at binding liquids and creating a stable filling.
- Pre-cook the Filling (Optional): For very juicy cherries or extra assurance, lightly pre-cooking and cooling your filling on the stovetop before assembling the pie can significantly reduce excess moisture that could otherwise soak the crust.
- Baking Dish Material: Use a glass or metal pie dish. These materials conduct heat more efficiently to the bottom crust than ceramic dishes, promoting better browning.
- Ample Baking Time: Do not pull your pie out of the oven too early! Allow it to bake until the filling is visibly bubbling thickly in the very center, indicating it has thickened sufficiently, and the crust is deeply golden brown.
- Cool Completely: Always allow your pie to cool completely for several hours (at least 3-4 hours, or even overnight) before slicing. This extended cooling period is absolutely crucial for the filling to fully set, preventing it from weeping and re-saturating the crust.
For a double-crust cherry pie like this one, pre-baking (also known as blind baking) the bottom crust is generally not necessary and can even be logistically challenging. Our recommended method of initially baking the entire pie at 425°F (220°C) provides sufficient heat for the bottom crust to brown and become beautifully flaky without becoming soggy. Pre-baking a bottom crust for a double-crust pie would mean then adding a raw filling and a second raw top crust to an already baked base, which can lead to uneven cooking, difficulties in handling, and a less cohesive final product. Trust the two-stage baking temperature to deliver a perfect bottom crust every time without this extra step.
Absolutely! This recipe is wonderfully adaptable to various cherry types. You can use sweet cherries (like Bing, Rainier, or Chelan) for a sweeter pie, tart cherries (such as Montmorency or Morello) for a classic sour cherry pie, or a delicious combination of both to achieve a balanced flavor profile. If using predominantly tart cherries, you might want to slightly increase the sugar amount to temper the tartness to your preference. If using frozen cherries, always ensure they are thoroughly thawed and well-drained before mixing with the other filling ingredients to avoid excessive moisture in your pie.
We hope you loved creating and tasting this professional chef-tested recipe. If you tried this recipe and enjoyed it, please consider leaving a 🌟 star rating and sharing your thoughts in the comments section below. Your feedback truly makes our day!
Homemade Cherry Pie
by Chef Lindsey
A juicy, sliceable homemade cherry pie recipe from a professional pastry chef. Flavored with a touch of almond extract, butter, cherries and sugar, and is baked in a flaky all-butter pie crust. This recipe ensures a thick, perfectly set filling and a golden, crisp crust every time.
Ingredients
For the Cherry Pie Filling:
- 2 tablespoons quick cooking tapioca
- 1 cup granulated sugar (adjust to taste based on cherry sweetness)
- ⅛ teaspoon kosher salt
- 3 ½ cups cherries, pitted and halved (fresh or frozen, thoroughly thawed and drained)
- ¼ teaspoon almond extract
- 2 tablespoons unsalted butter, chopped into small pieces
For Assembly:
- 2 tablespoons heavy whipping cream
- Turbinado sugar (for sprinkling)
- 2 Single Pie Crusts (homemade or good quality store-bought, preferably a flaky all-butter crust)
Instructions
- Pre-heat oven to 425°F (220°C).
- In a large bowl, mix quick cooking tapioca, granulated sugar, kosher salt, pitted and halved cherries, almond extract, and chopped butter. Mix gently until all ingredients are well combined. Set aside for 20-30 minutes to allow the tapioca to hydrate and begin dissolving, ensuring a smooth filling.
- Roll out one pie crust to fit a 9-inch pie pan. Carefully line an ungreased 9-inch pie pan with the dough, gently pressing it into the contours without stretching.
- Arrange the prepared cherry filling evenly into the bottom crust, mounding it slightly in the center.
- Place the second rolled-out pie crust on top of the filling. If not using a woven lattice design, ensure you cut several vent holes into the top crust using a sharp knife or small cookie cutters for steam to escape. If using a delicate crust like almond flour, consider layering strips asymmetrically rather than attempting a traditional weave.
- Trim any excess dough from the edges, leaving about a ½ to 1-inch overhang. Roll the excess dough under itself to create a neat, sturdy rim, then crimp the edges decoratively using your fingers or a fork to seal the pie.
- Chill the assembled pie in the refrigerator for 30 minutes prior to baking. This crucial step helps prevent the crust from shrinking and ensures maximum flakiness.
- Brush the entire top surface of the dough generously with heavy whipping cream, then sprinkle evenly with turbinado sugar for a beautiful golden crust and a delightful crunch.
- Place the pie on a rimmed baking sheet (to catch any potential drips) and bake in the preheated 425°F (220°C) oven for 30 minutes. Monitor the crust for browning; if it starts to brown too quickly, loosely tent the pie with aluminum foil.
- After 30 minutes, reduce the oven temperature to 350°F (175°C) and continue baking for another 40-60 minutes, or until the crust is deeply golden brown and the filling is visibly bubbling thickly in the very center (this indicates the tapioca has activated and the filling is fully set).
- Allow the pie to cool completely on a wire rack for several hours (at least 3-4 hours, or preferably longer, even overnight). This cooling period is absolutely crucial for the filling to set properly, ensuring beautifully sliceable pieces.
Notes
Yield: 1, 9-inch pie (serves approximately 12 people)
Presentation: For best results and a crisp, well-baked bottom crust, we recommend baking your pie in a glass or metal pie dish, as these materials conduct heat more efficiently than ceramic dishes.
Tapioca Substitutions: If quick cooking tapioca is unavailable, you can use tapioca flour (starch) as a direct substitute. If you only have small tapioca pearls, grind them into a fine powder using a spice grinder or food processor. When using ground pearls, it is essential to allow the mixed filling to sit for at least 30 minutes before baking to ensure proper hydration and optimal thickening, preventing a gritty texture.
Storage: Store the baked, completely cooled pie, well wrapped with plastic wrap or foil, at room temperature for up to 3 days. For extended freshness, refrigerate the wrapped pie for up to a week. This pie also freezes beautifully; wrap it tightly in several layers of plastic wrap and then an outer layer of heavy-duty aluminum foil, and it will keep in the freezer for up to 3 months. Thaw frozen pie in the refrigerator overnight before serving or reheating.
The delicious filling recipe is adapted from a classic found in the Good Housekeeping Cookbook, 1955 Edition.
Nutrition Information
Per serving (based on 12 servings):
Calories: 251 kcal | Carbohydrates: 39g | Protein: 2g | Fat: 10g | Saturated Fat: 4g | Polyunsaturated Fat: 1g | Monounsaturated Fat: 4g | Trans Fat: 0.1g | Cholesterol: 8mg | Sodium: 156mg | Potassium: 120mg | Fiber: 2g | Sugar: 22g | Vitamin A: 121 IU | Vitamin C: 3mg | Calcium: 13mg | Iron: 1mg
Before You Go: Explore More Delicious Pie Recipes!
We truly hope you savored every moment of baking and tasting this expertly crafted homemade cherry pie recipe. It’s a testament to how simple yet precise techniques, combined with quality ingredients, can yield extraordinary results right in your home kitchen. This pie is perfect for summer gatherings, holiday meals, or simply as a comforting treat.
If you’re now inspired to explore more delightful baked goods and expand your pastry repertoire, be sure to delve into our extensive collection of other delicious, chef-developed pie recipes. From vibrant fruity delights to rich and creamy classics, there’s something for every occasion, every season, and every palate waiting to be discovered.
Planning for a special meal or holiday? Peruse our curated list of the 20 Best Thanksgiving Pies, where you’ll find cherished family favorites and perhaps a new tradition to start. And whatever you do, don’t miss out on one of our all-time favorites: the incredibly rich, smooth, and satisfying Easy Chocolate Pie – it’s a chocolate lover’s dream come true!
Happy baking, and enjoy sharing your wonderful homemade creations with those you love!