
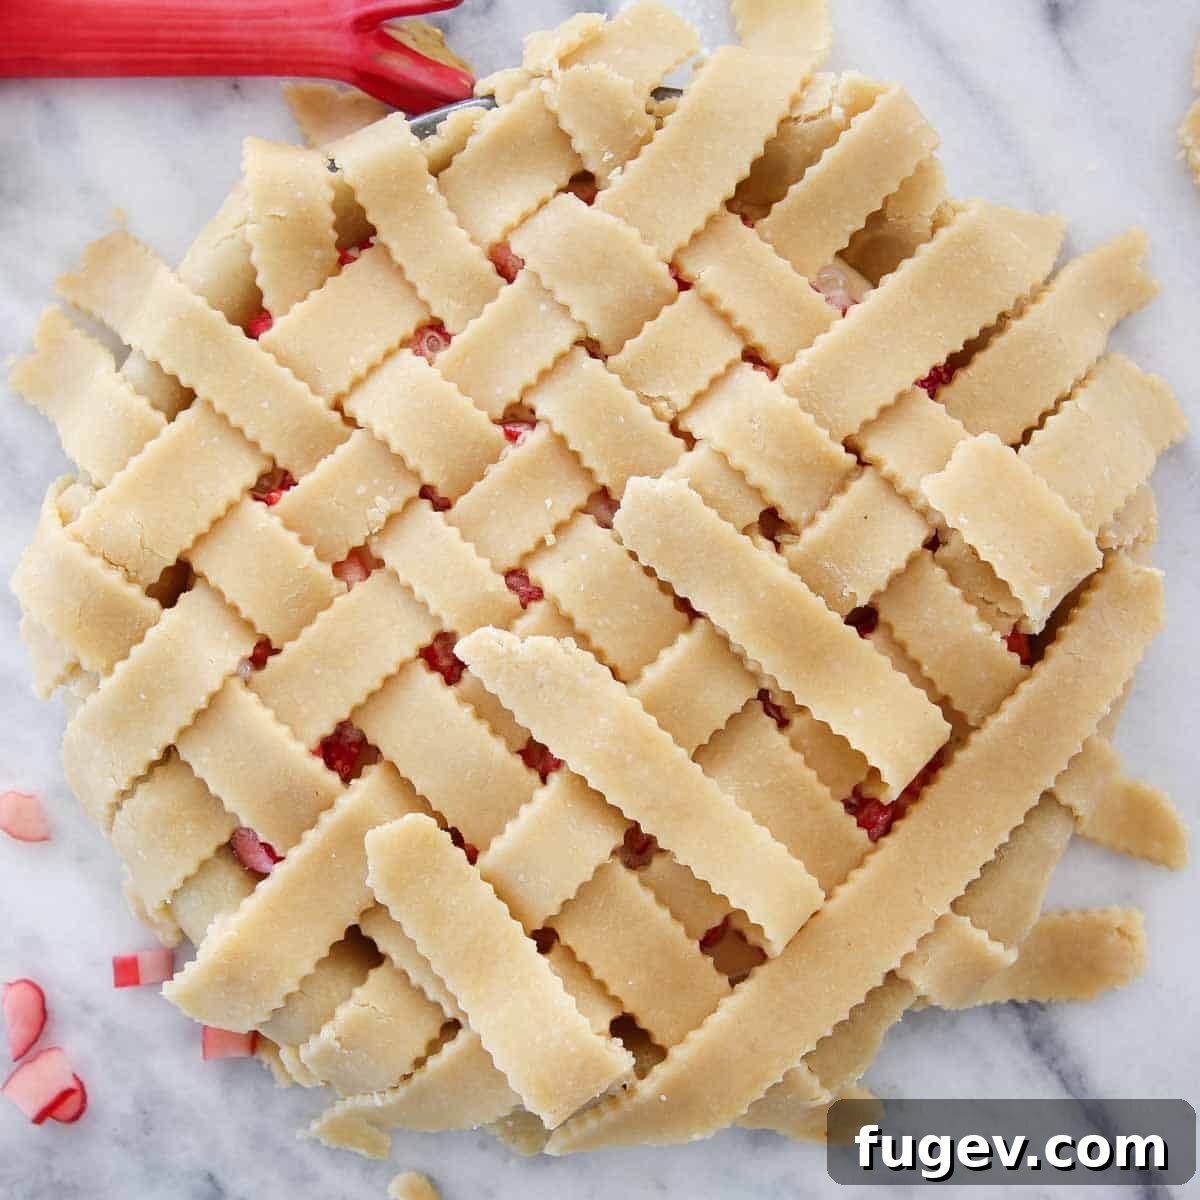
Unlock the secrets to crafting a stunning, professional-looking lattice pie crust with this comprehensive tutorial from a seasoned pastry chef. Whether you’re a baking novice or an experienced home cook, this guide provides all the essential tips and techniques to master latticing any type of pie dough in a variety of breathtaking ways. Prepare to transform your homemade pies into true culinary masterpieces, complete with an accompanying video demonstration for visual learners.

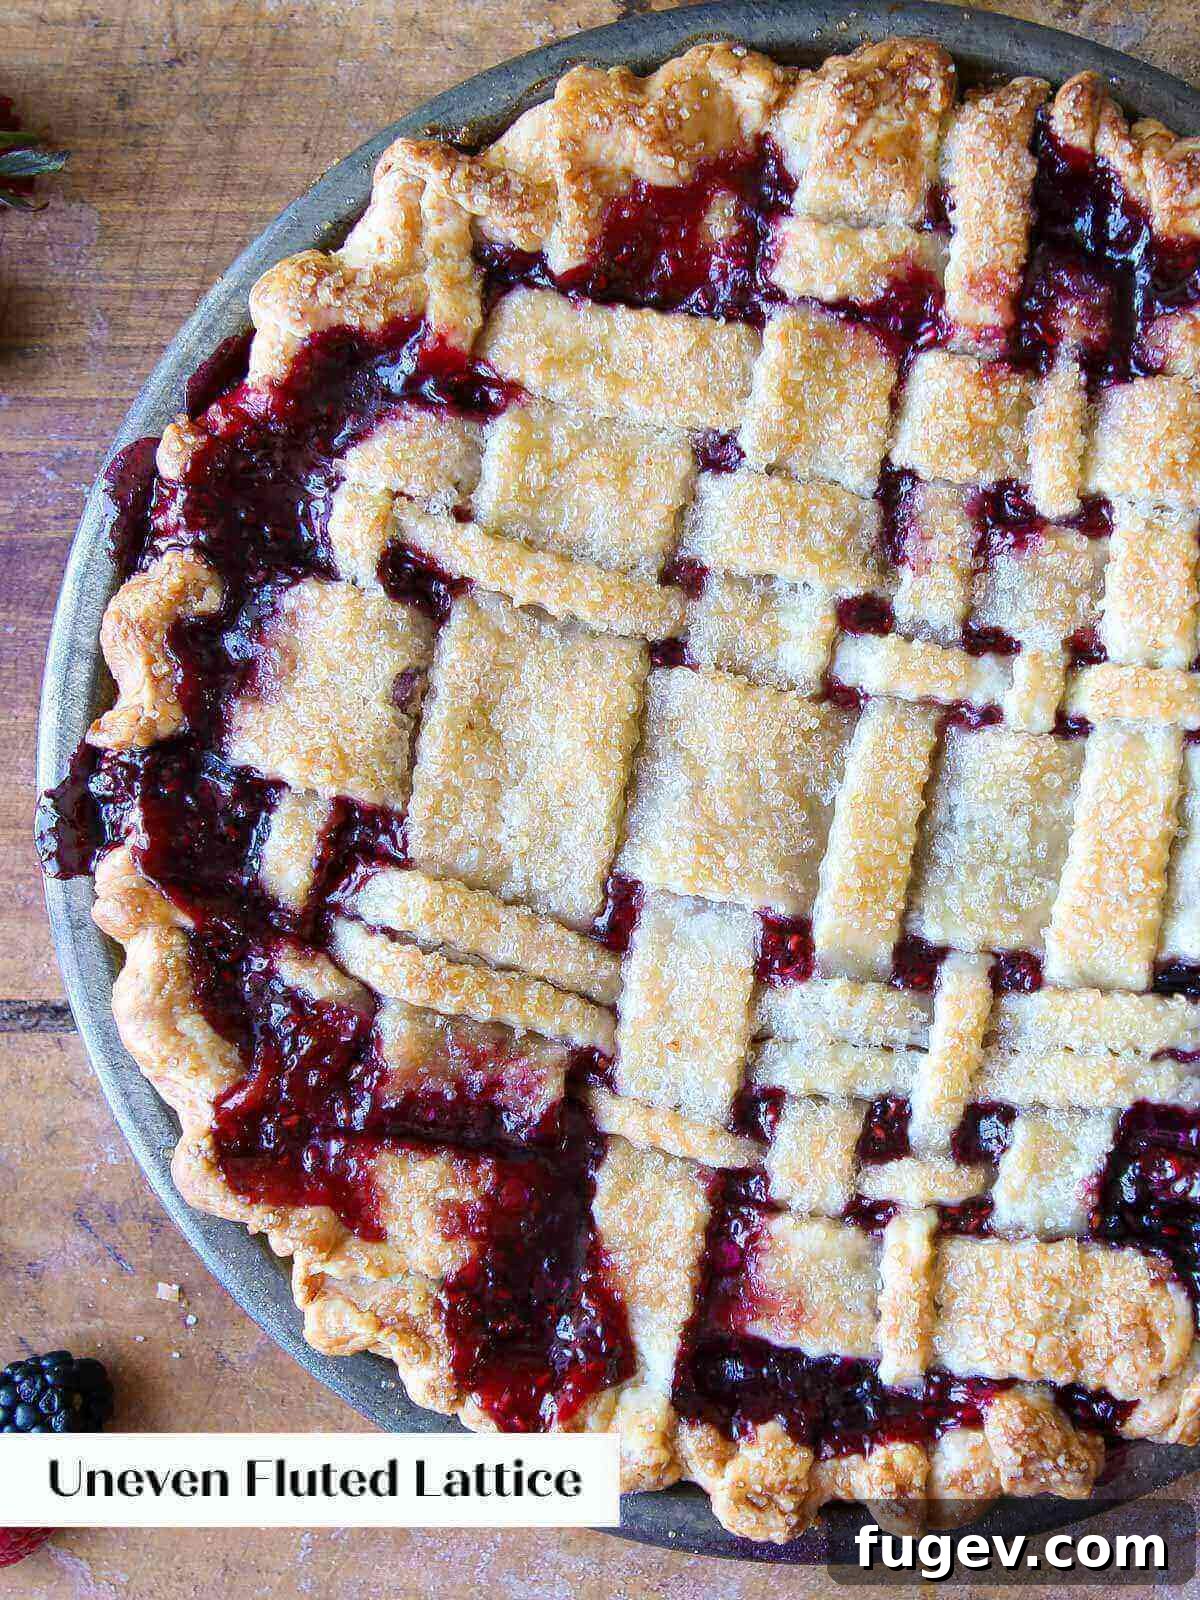
While the classic woven lattice is a timeless choice, this tutorial empowers you to infuse your unique style into every pie. Beyond the foundational woven design, you’ll discover how to create an elegant asymmetrical layered crust, a clean straight-edged lattice, and a charming varied fluted lattice. Imagine presenting a different, professionally finished pie for every occasion this year, each reflecting your growing skill and artistic flair!
I assure you, crafting an impressive lattice pie crust is far simpler than it appears. And no matter its final aesthetic, your pie will always carry that irresistible, comforting taste of homemade goodness. Lattice tops are particularly striking on any double-crust pie, enhancing both visual appeal and texture. They truly shine on fruit-filled creations such as a vibrant blueberry pie, a succulent peach blackberry pie, a delightful mixed berry pie, or a classic, comforting easy apple pie. Let’s embark on this rewarding journey to elevate your pie-making prowess!
Table of Contents
- Professional Tips for a Flawless Lattice Pie Crust
- Essential Tools and Ingredients
- Troubleshooting Common Pie Crust Challenges
- Step-by-Step Guide: How to Lattice Pie Crust
- Chef Lindsey’s Golden Rule: Embrace Imperfection
- Lattice Pie Crust Inspiration Gallery
- Frequently Asked Questions About Latticing
- How to Lattice Pie Crust Recipe
- Expand Your Baking Horizons
Professional Tips for a Flawless Lattice Pie Crust
- Understand Your Dough: Not all pie doughs are created equal for latticing. For optimal results and a more forgiving experience, opt for an all-butter pie crust, a Crisco (shortening) pie crust, or a rich sweet tart crust (pâte sûcrée). These doughs tend to be more pliable and less prone to breaking. While an almond flour pie crust can be layered beautifully, as demonstrated in this cherry pie, it’s generally more delicate for intricate weaving directly on the filling, like the strawberry rhubarb pie. Choosing the right dough is your first step to success.
- Maintain Cold Temperatures: The golden rule of pie crusts is to keep your dough cold! As pie dough warms, especially during handling, the gluten starts to develop, and the butter melts. This leads to a tough, shrinking crust rather than a tender, flaky one. Work efficiently on a cool surface, such as marble or stone. If your dough becomes difficult to manage, don’t hesitate to pop it back into the refrigerator for 10-15 minutes to firm up before continuing. Short bursts of work with chilling intervals are key.
- Pre-Construct Your Lattice: This invaluable tip comes straight from professional bakeries. Instead of weaving directly onto a fruit-filled pie, which can be messy and time-consuming, construct your lattice on a piece of parchment paper. Once complete, refrigerate or even freeze the entire lattice. This firms up the dough, making it incredibly easy to transfer and position onto your prepared pie filling when you’re ready to assemble.
- Seamless Strip Joining: Don’t despair if you run out of long strips towards the end of your latticing! It’s perfectly acceptable to join two (or even three) shorter pieces of dough. Simply overlap them slightly and gently press the seam together. The beauty of a woven lattice is that you can strategically hide these joins under another cross-strip, making them completely invisible in the final product. No one will ever know!
Essential Tools and Ingredients for Latticing
Having the right equipment and ingredients at hand will make the latticing process smooth and enjoyable. Here’s what you’ll need:
- Quality Pie Dough: As mentioned, the type of dough matters. I highly recommend a forgiving pastry like my vodka pie crust (known for its flakiness), a shortening pie crust, or a pâte sûcrée for its superior handling. These are less crumbly compared to alternatives like an almond pie crust. The quantity of dough depends on your desired lattice design. A traditional weave with visible gaps between strips can typically be made with a single-crust recipe. However, for more intricate patterns, a tight weave with no gaps, or elaborate decorative elements, you’ll need approximately 1.5 to 2 times the amount of dough. It’s always better to have a little extra than not enough!
- Reliable Rolling Pin: A good rolling pin is indispensable. My personal preference is a French rolling pin due to its tapered ends. This design allows for more even pressure distribution when rolling out larger sections and offers superior control for thinning specific areas or edges with precision.
- Ruler (Optional but Recommended): Precision in pastry can be a virtue, and a ruler helps achieve perfectly uniform strips for a classic, symmetrical lattice. However, don’t feel constrained by it! Embracing a more rustic look with varied strip widths can also be charming and unique. It’s perfectly okay to eyeball it and let your creativity shine!
- Cutting Tools: For perfectly straight-edged strips, a pizza cutter or a sharp chef’s knife works wonderfully. If you’re aiming for those elegant, decorative fluted edges, a specialized pie wheel (pastry wheel) is a must-have. For those who want to save time and achieve consistent strip sizes without a ruler, an accordion wheel cutter is an excellent investment, making quick work of cutting multiple strips simultaneously.
For detailed information on ingredient quantities and specific measurements, please refer to the comprehensive recipe card below.
Troubleshooting Common Pie Crust Challenges
Even seasoned bakers encounter issues with pie dough. Here are solutions to common problems you might face while preparing your lattice:
- The Pie Dough is Cracking When Rolling: Cracking is usually a sign that your dough is either too cold or too dry. If it’s too cold, let it sit on your counter at room temperature for about 5 to 10 minutes to soften slightly before attempting to roll again. If dryness is the culprit, gently dip your fingertips in a little cold water and carefully apply it directly to the cracked areas. Press the dough together to re-form it, then chill it briefly before trying to roll again.
- The Pie Dough is Falling Apart When Rolling: If your dough crumbles into chunks as you try to roll, it indicates insufficient hydration or too much handling, which breaks down the fat structure. To remedy this, dip your hands in ice water and apply a very small amount of water to the crumbling sections. Using the heel of your hand, gently knead the dough by pushing it away from you and then pulling it back together, just 2-3 times. This minimal working helps the dough come together without developing too much gluten. Thoroughly chill the dough for at least 30 minutes before attempting to roll it out again.
- The Pie Dough is Shrinking Back When Rolling: This is a classic sign of overworking or warmth. When dough is handled too much or becomes too warm, the gluten strands tighten and cause it to snap back. If you force the dough to roll further at this stage, it will become tough and lose its coveted flaky, tender texture. The solution is simple but crucial: immediately stop working the dough and chill it thoroughly, ideally for at least 30-60 minutes. This allows the gluten to relax, making the dough more pliable.
- There Isn’t Enough Pie Dough to Cover the Top of the Pie: This can be a frustrating moment, but several solutions can save your lattice.
- Combine Scraps: Gather any leftover dough scraps, gently press them together into a disc, and chill for at least 30 minutes (or even 2 hours for best results). You can then re-roll this dough to create additional strips. Be aware that re-rolled dough might be slightly tougher.
- Join Shorter Pieces: As mentioned in the professional tips, if you’re short on long strips, join two or three shorter pieces together by gently pressing their ends. These seams can be cleverly hidden under perpendicular lattice strips.
- Adjust Spacing: If you’ve planned a tight lattice, you can slightly increase the gaps between your strips to make the available dough stretch further. A little extra space allows the filling to peek through beautifully.
My preference is always to start with a bit more pie dough than I think I’ll need. This provides the flexibility to create the exact design I envision without last-minute stress.
Step-by-Step Guide: How to Lattice Pie Crust
Creating a beautiful lattice pie crust is a rewarding process that’s much simpler than it looks. Follow these detailed instructions to achieve stunning results. Remember, comprehensive details and precise measurements can also be found in the recipe card below.
Step 1: Prepare Your Workspace and Dough
Lightly flour a clean, flat work surface (preferably cool, like marble or stone). Lightly dust the top of your chilled pie dough disc and your rolling pin with flour to prevent sticking.
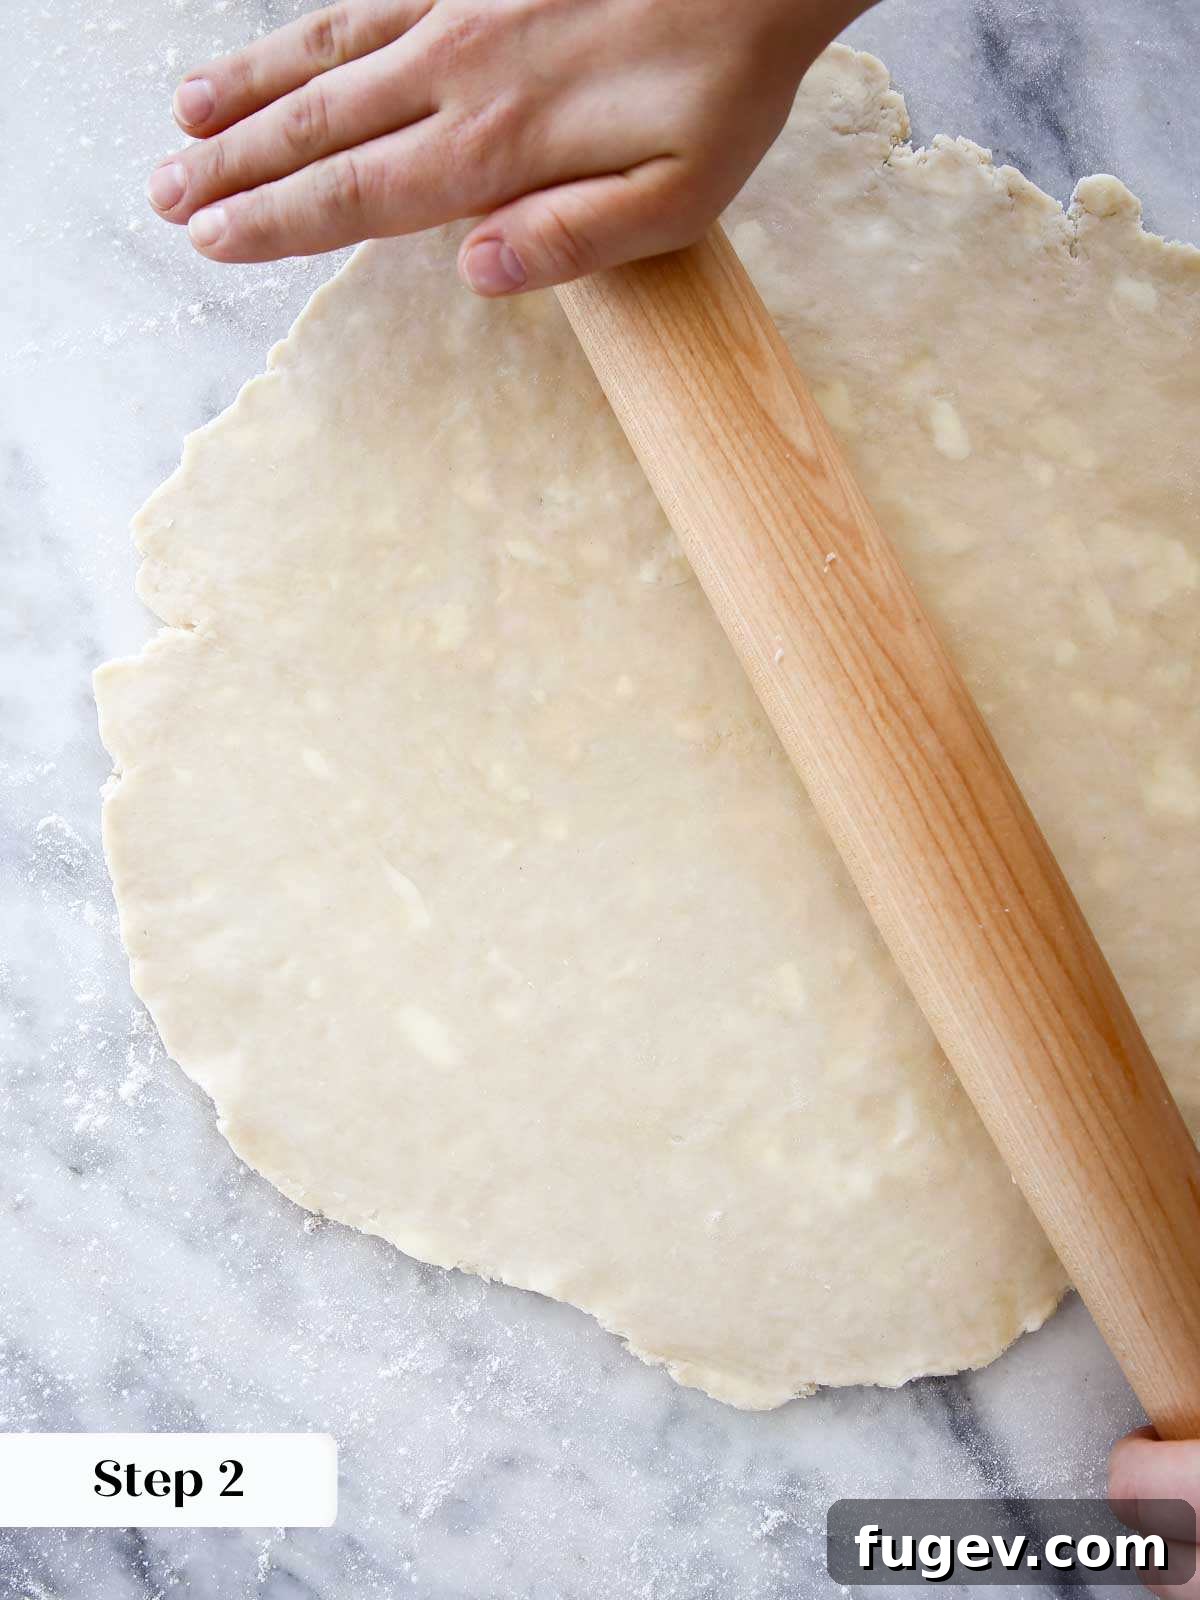
Step 2: Roll Out the Dough
Using your rolling pin, roll the dough out to an even thickness of approximately 1/8 inch. Aim for a shape as close to a circle as possible, making it slightly larger than your pie dish. Once rolled, carefully transfer the dough to a piece of parchment paper and chill it in the refrigerator for at least 30 minutes. This chilling step is crucial for the dough to firm up and relax, preventing shrinkage and making it easier to cut and handle.
While you *can* skip chilling at this stage if you’re in a hurry, taking the time to chill your rolled-out dough will undoubtedly yield the best, most stable pie crust for latticing.
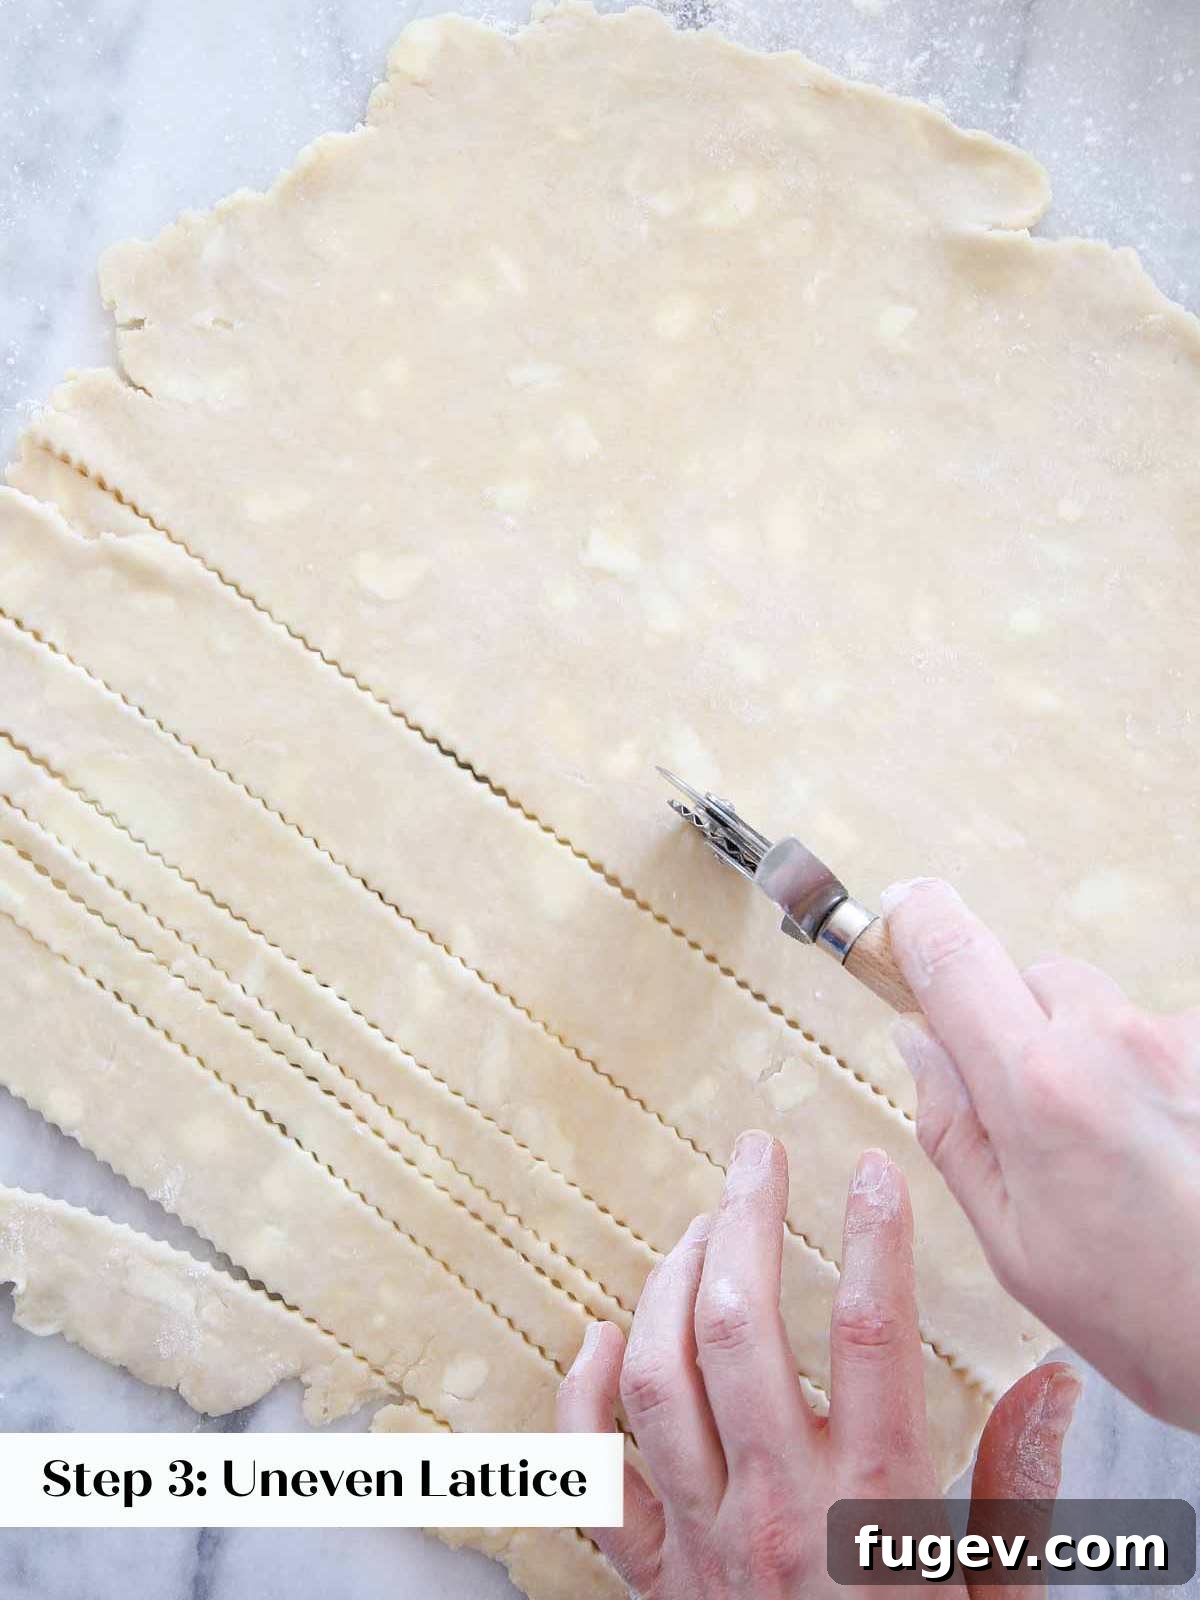
Step 3: Cut the Dough Strips
Once chilled, remove the dough from the refrigerator. Now it’s time to cut your strips. For a classic, uniform lattice, use a ruler to mark out 12 equally sized strips (e.g., 1-inch wide). Then, use a pizza cutter, chef’s knife, or a pie wheel to cut along your marks. Alternatively, embrace a more rustic or artistic look by cutting strips of varying widths and shapes, as I’ve done in some of my examples. Feel free to get creative with a fluted pie wheel for decorative edges!
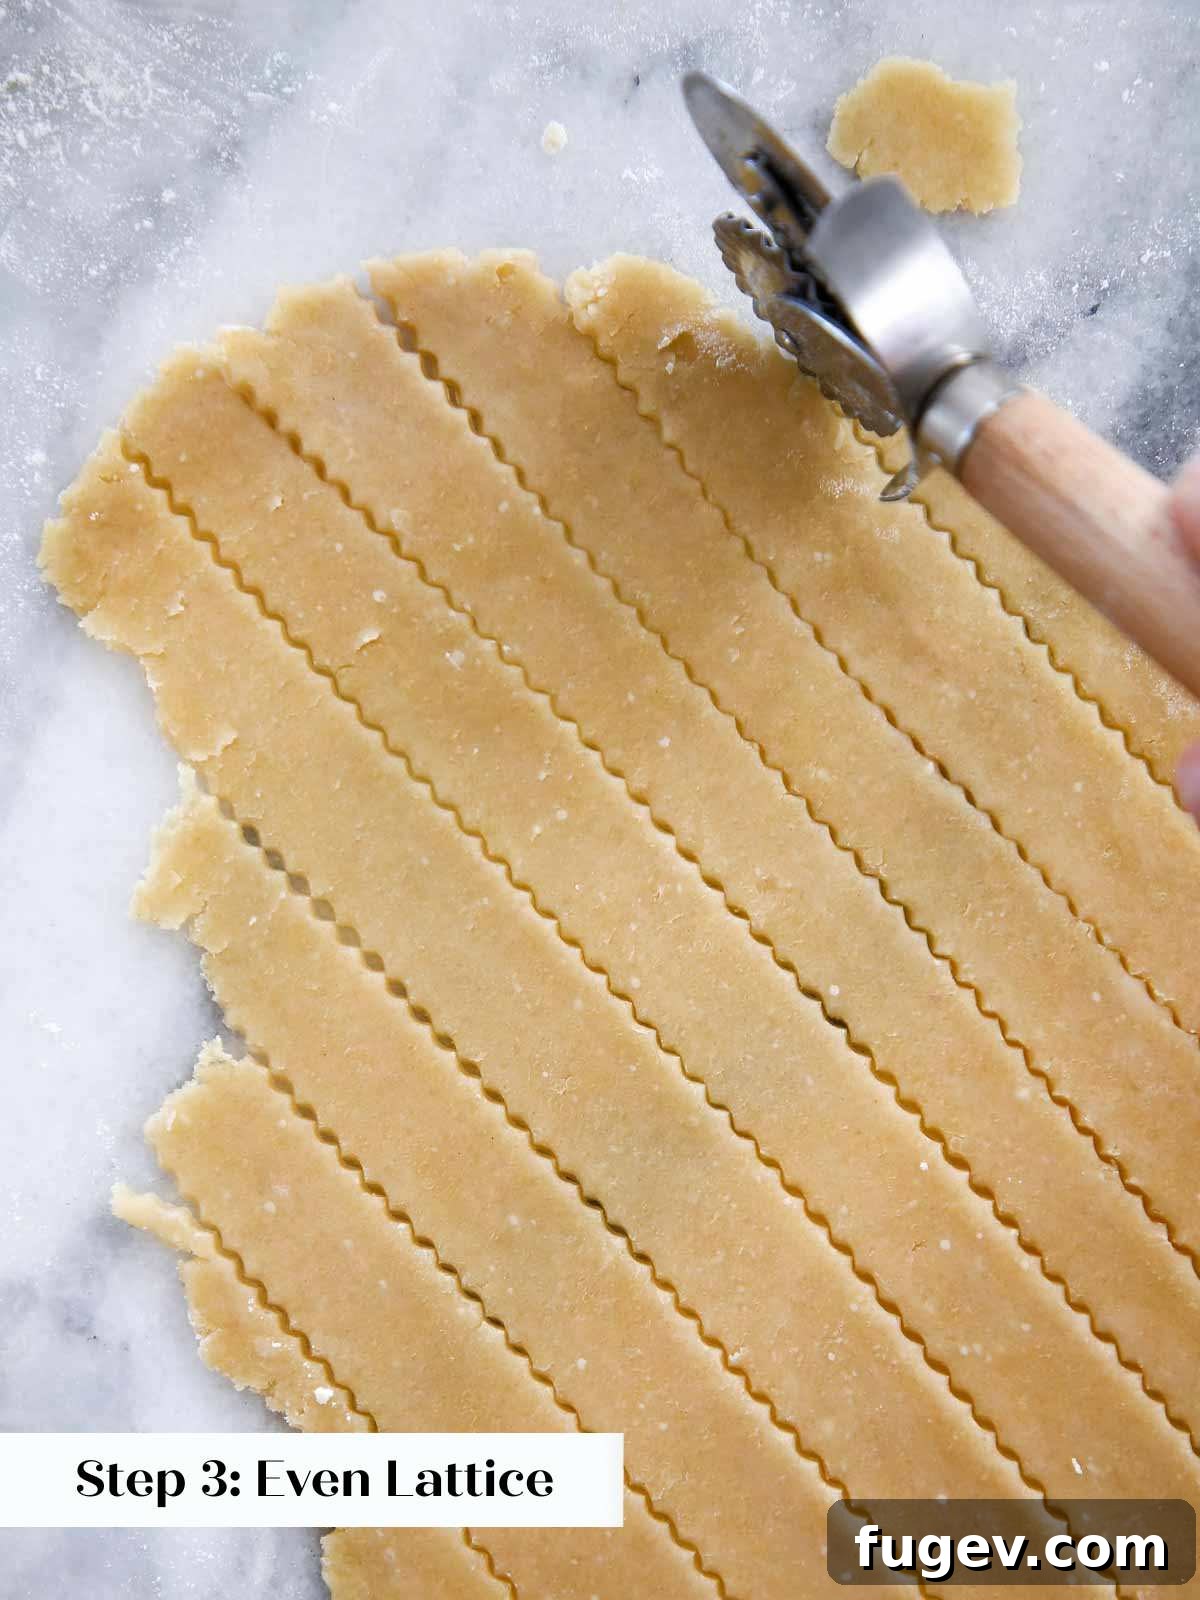
Step 4: Lay the Foundation Strips
Before you begin weaving, decide whether you will lattice directly on top of your filled bottom crust (as shown with the rhubarb pie below) or construct it separately on a piece of parchment paper. For the latter, it’s easier to chill the lattice before transferring. Place 6 of your dough strips vertically, parallel to each other, either directly onto your pie filling or onto the parchment paper. Leave a small, even gap between each strip, or place them closer for a tighter weave.
Strategically, use your longest strips for the center of the lattice, as these will span the widest part of the pie. Reserve shorter pieces for the edges, where the circumference is smaller.
Step 5: Begin the Weave – First Horizontal Strip
Gently lift up every other vertical strip (e.g., the 1st, 3rd, and 5th strips) and fold them back onto themselves, almost to the halfway point of the pie. Take one of your unused strips of dough and place it horizontally, perpendicular to the folded-back strips, right in front of the fold. Now, carefully fold each of the lifted vertical strips back over the new horizontal strip you just placed.
Step 6: Continue the Weave – Alternating Strips
Next, fold back the *other* set of vertical strips (the 2nd, 4th, and 6th strips) – these are the ones that were initially lying flat and went *under* the horizontal strip you just placed. Take another unused strip and place it horizontally, parallel to the first horizontal strip, in front of the newly folded-back vertical pieces. Then, fold the vertical strips back over this second horizontal strip. The fundamental concept here is to ensure that the initial vertical strips alternately go over and under the horizontal cross pieces you are adding. Repeat this alternating process in both directions until your entire pie top is covered with a beautiful woven lattice pattern. Take your time, and adjust as needed.
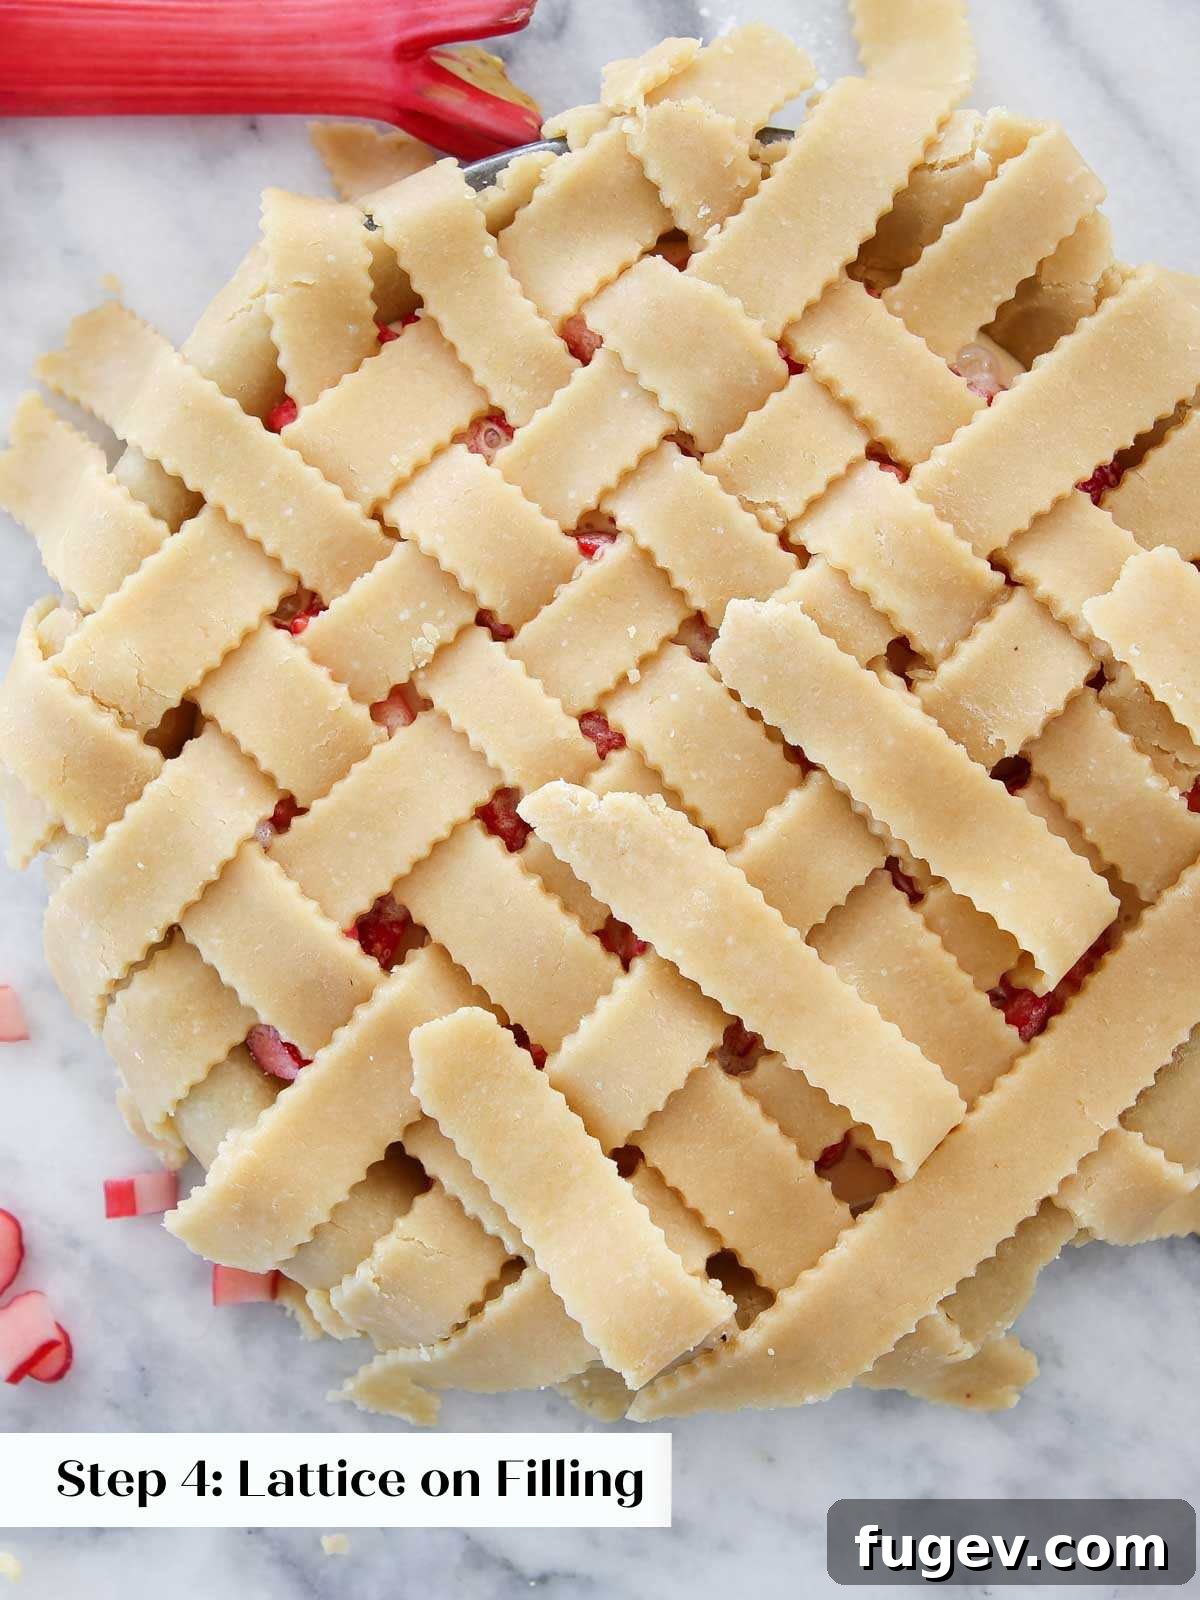
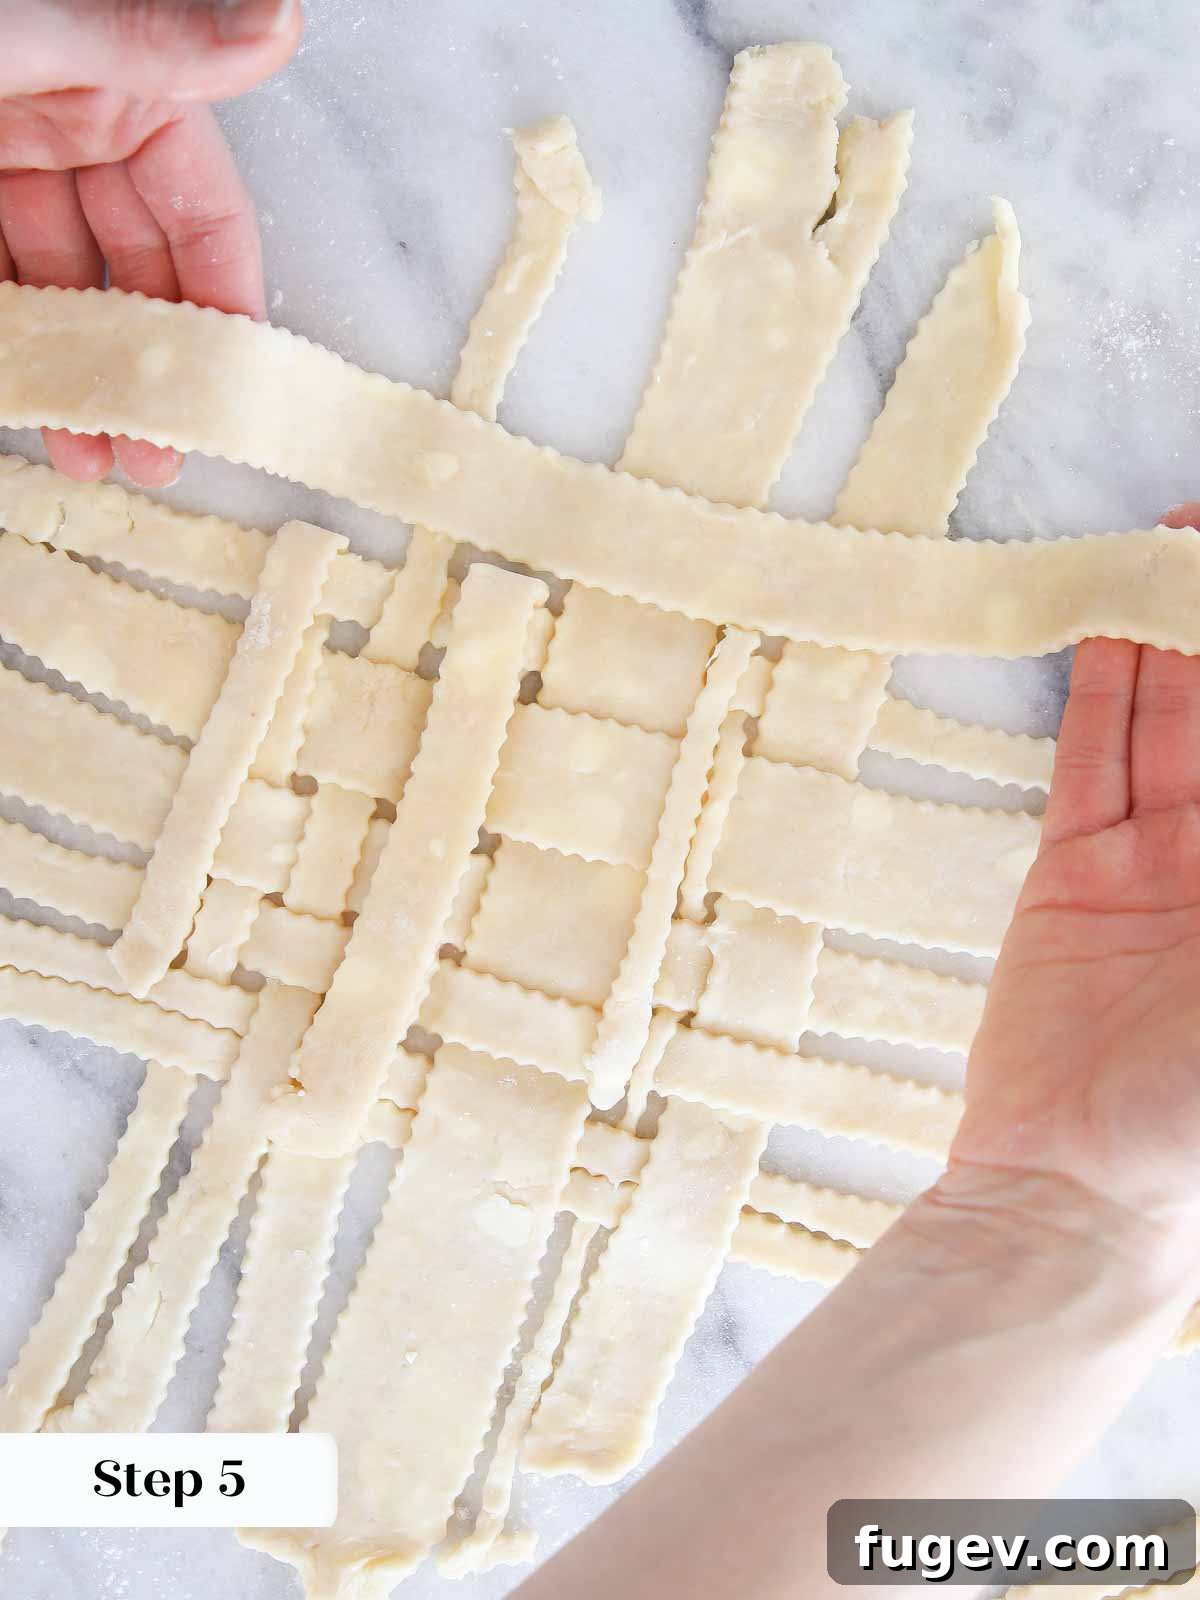
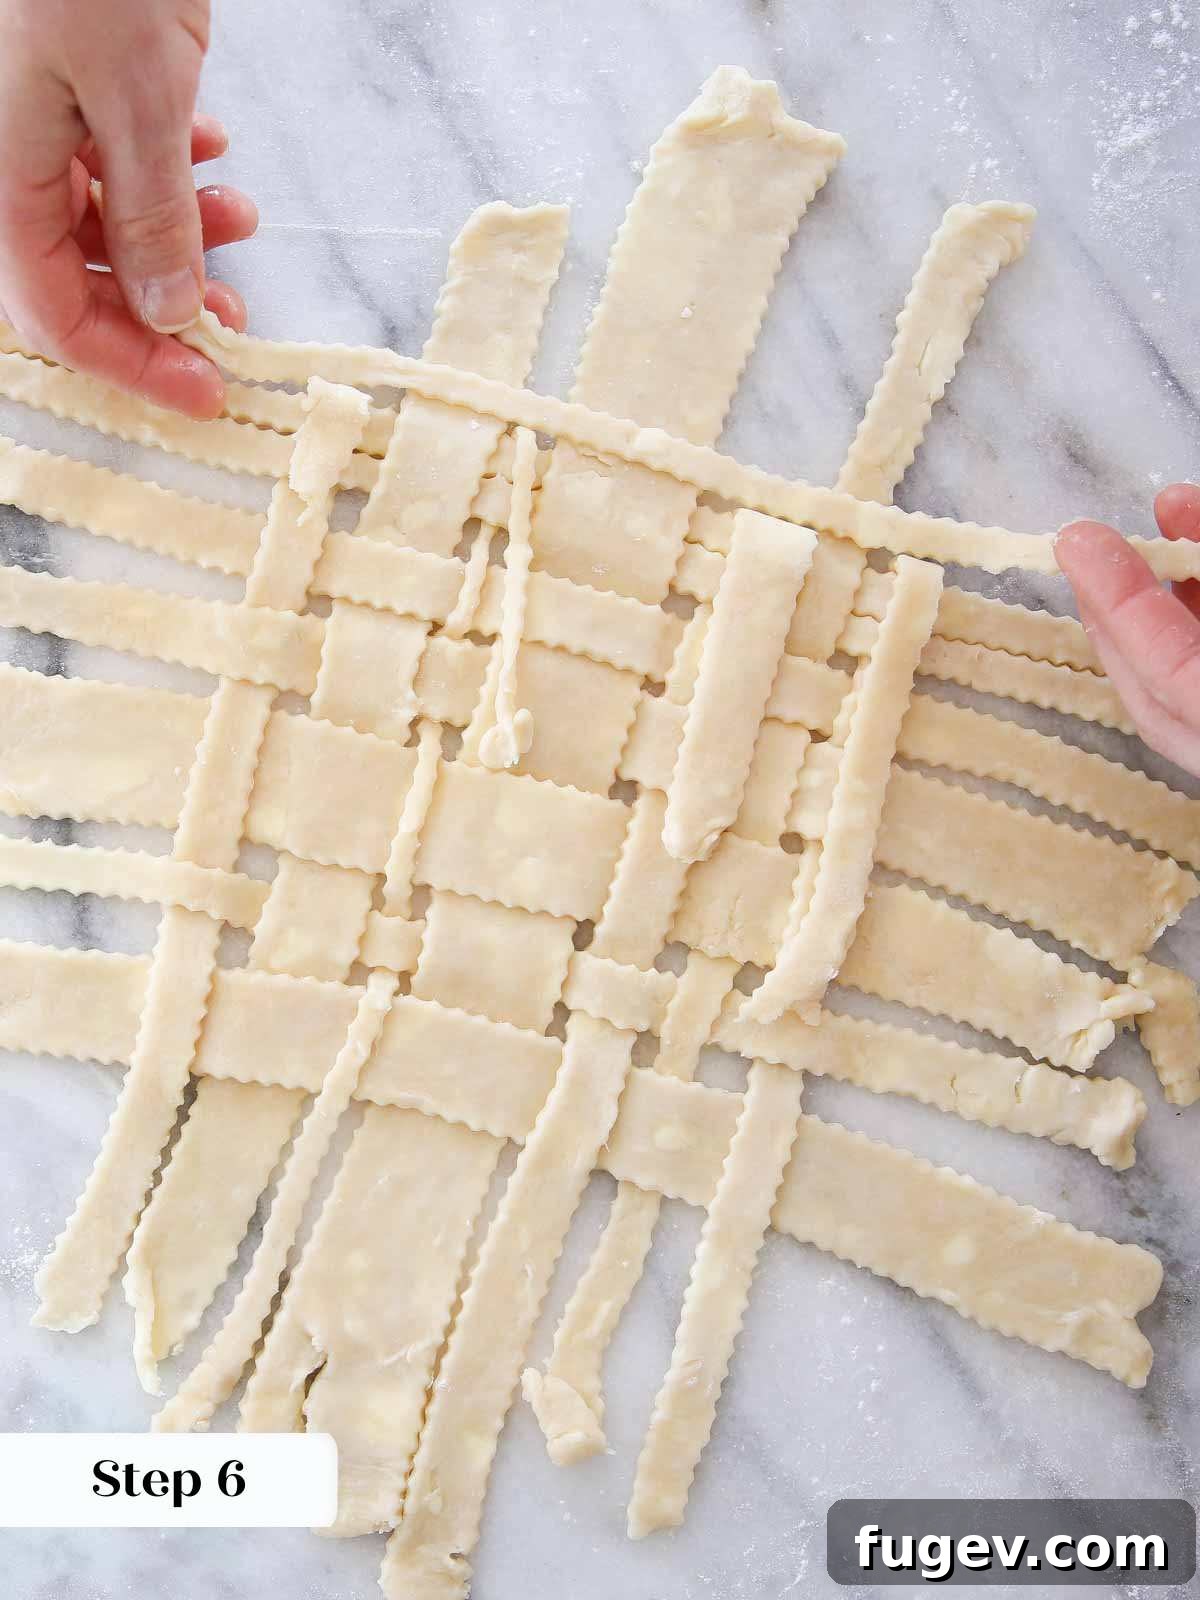
If you accidentally misplace a piece of dough or make a weaving error, don’t fret! Simply undo that section of the weave and correct it. Or, if it’s minor, decide that it adds character and leave it be. Remember, homemade pies are about warmth and taste, not absolute perfection!
Alternative: Layered Lattice (No Weaving Required!)
For a stunning, modern look that completely bypasses the weaving process, try a layered lattice. This technique, demonstrated in the pie below, is less labor-intensive but equally impressive. To make it appear intentionally artistic, I recommend cutting strips of varying widths and layering them asymmetrically across the pie top. This creates a dynamic, visually interesting pattern without the intricate over-under steps. This same layered method also works beautifully if you prefer a simple crisscross pattern without true weaving.
Step 7: Trim and Crimp the Edges
Once your lattice is complete, trim off any excess crust, leaving about a 1-inch overhang around the edge of your pie dish. Now, it’s time to crimp, securing your lattice to the bottom crust. Grab the edges of both the bottom crust and the lattice together, pinching them firmly and rolling them under towards the rim of the pie dish. Press this tight, rolled edge onto the baking dish. Continue this process all the way around the pie. To create a decorative fluted edge, use your knuckles: place one knuckle on the outside edge of the pie crust and two knuckles on the inside edge, embracing the outside one. Gently press the pie crust together, allowing the outside knuckle to form a defined crimp between the two inside knuckles. Repeat this motion around the entire circumference for a beautiful, classic finish.
Step 8: The Finishing Touch – Egg Wash and Sugar (Optional)
For a professional, golden-brown sheen and a hint of sweetness, gently brush the entire lattice crust with heavy cream or a beaten egg. If using an egg, an egg white wash will provide a very shiny, almost lacquered finish, while a whole egg or egg yolk wash will give a richer, deeper golden color. For an extra sparkle and delightful caramelized crunch, sprinkle generously with turbinado sugar or sanding sugar. This optional step adds both visual appeal and a wonderful textural contrast. Your pie is now ready for baking!
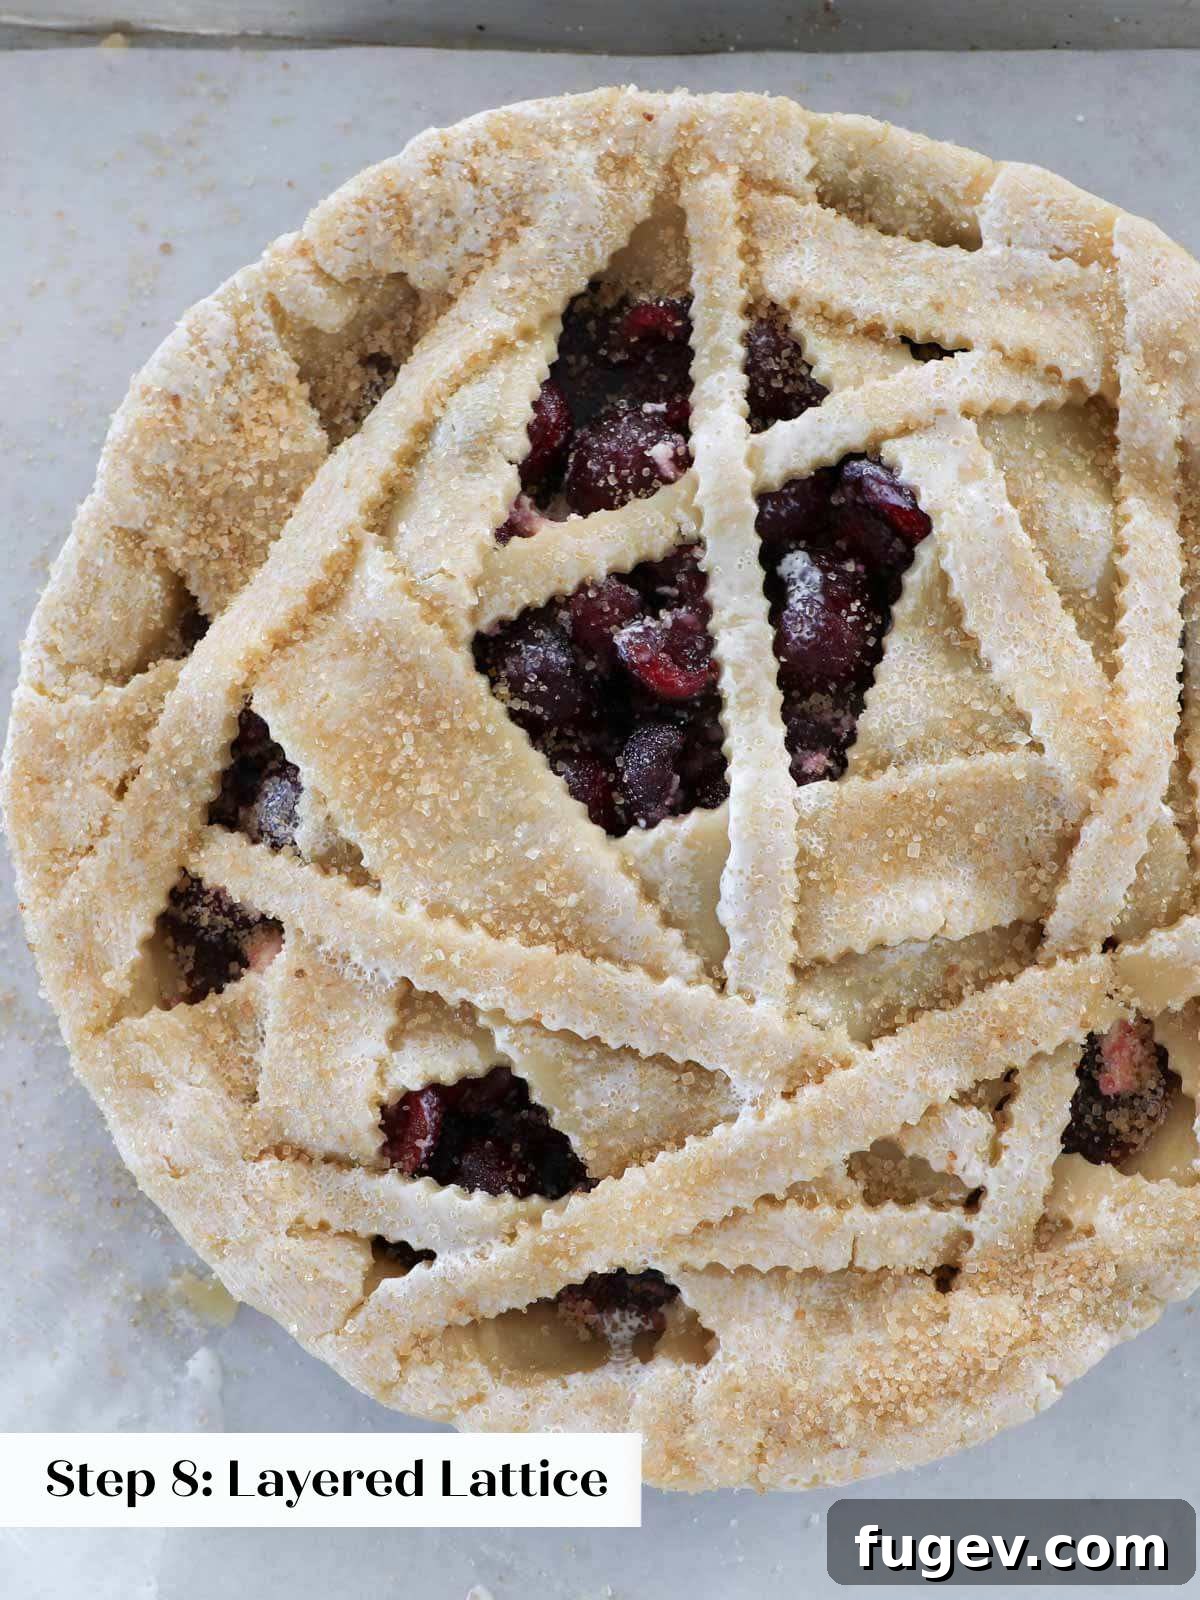
Chef Lindsey’s Golden Rule: Embrace Imperfection
If there’s one piece of advice I want you to carry forward from this tutorial, it’s this: it’s not that serious. Baking, especially at home, should be enjoyable and liberating. Your pie crust, no matter how perfectly or imperfectly latticed, will be beautiful because *you* made it. If you start with a traditional weave and encounter a snag, don’t be afraid to pivot to a layered design or simply patch it up. I do this constantly in my own kitchen, and often, the most enchanting and unique “mistakes” lead to surprisingly magical results. Let your intuition guide you, and relish the process!
Lattice Pie Crust Inspiration Gallery
Feast your eyes on these inspiring examples of various lattice pie crust designs. Each showcases a different technique and aesthetic, proving that there’s a world of creativity within pie making. Let these images spark your imagination for your next baking project!
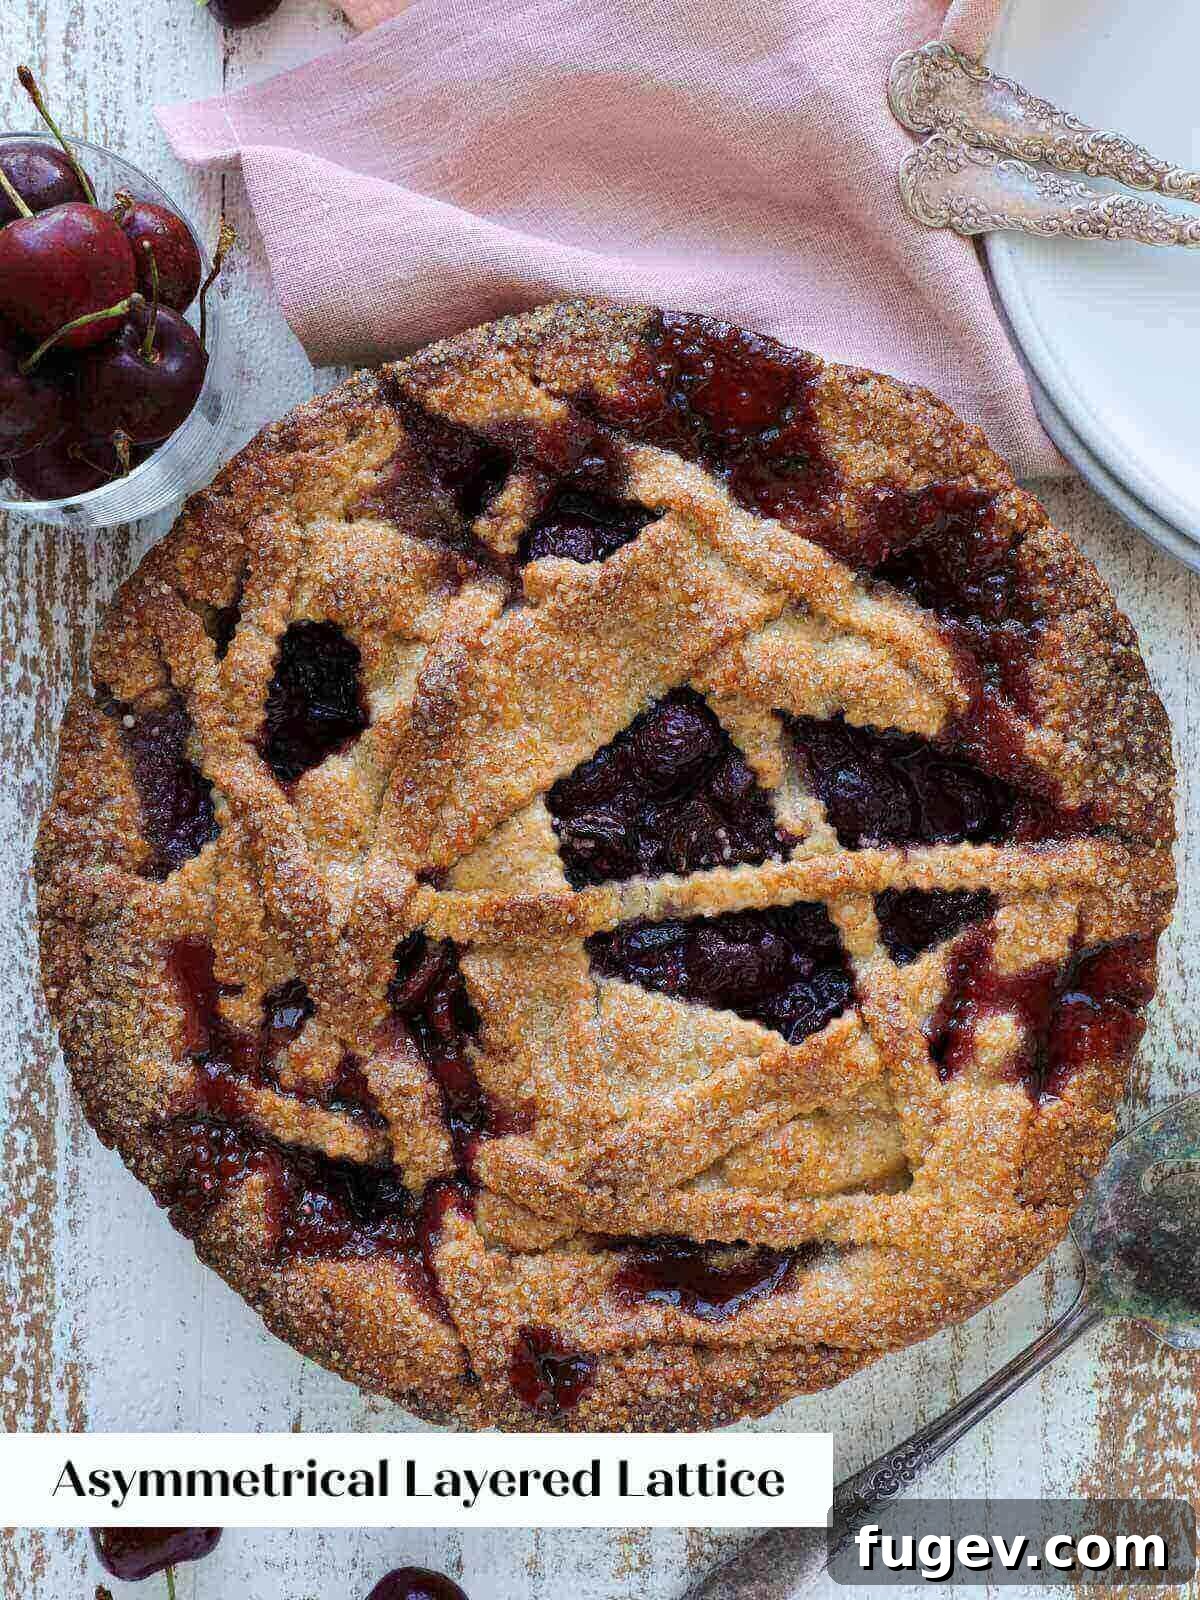
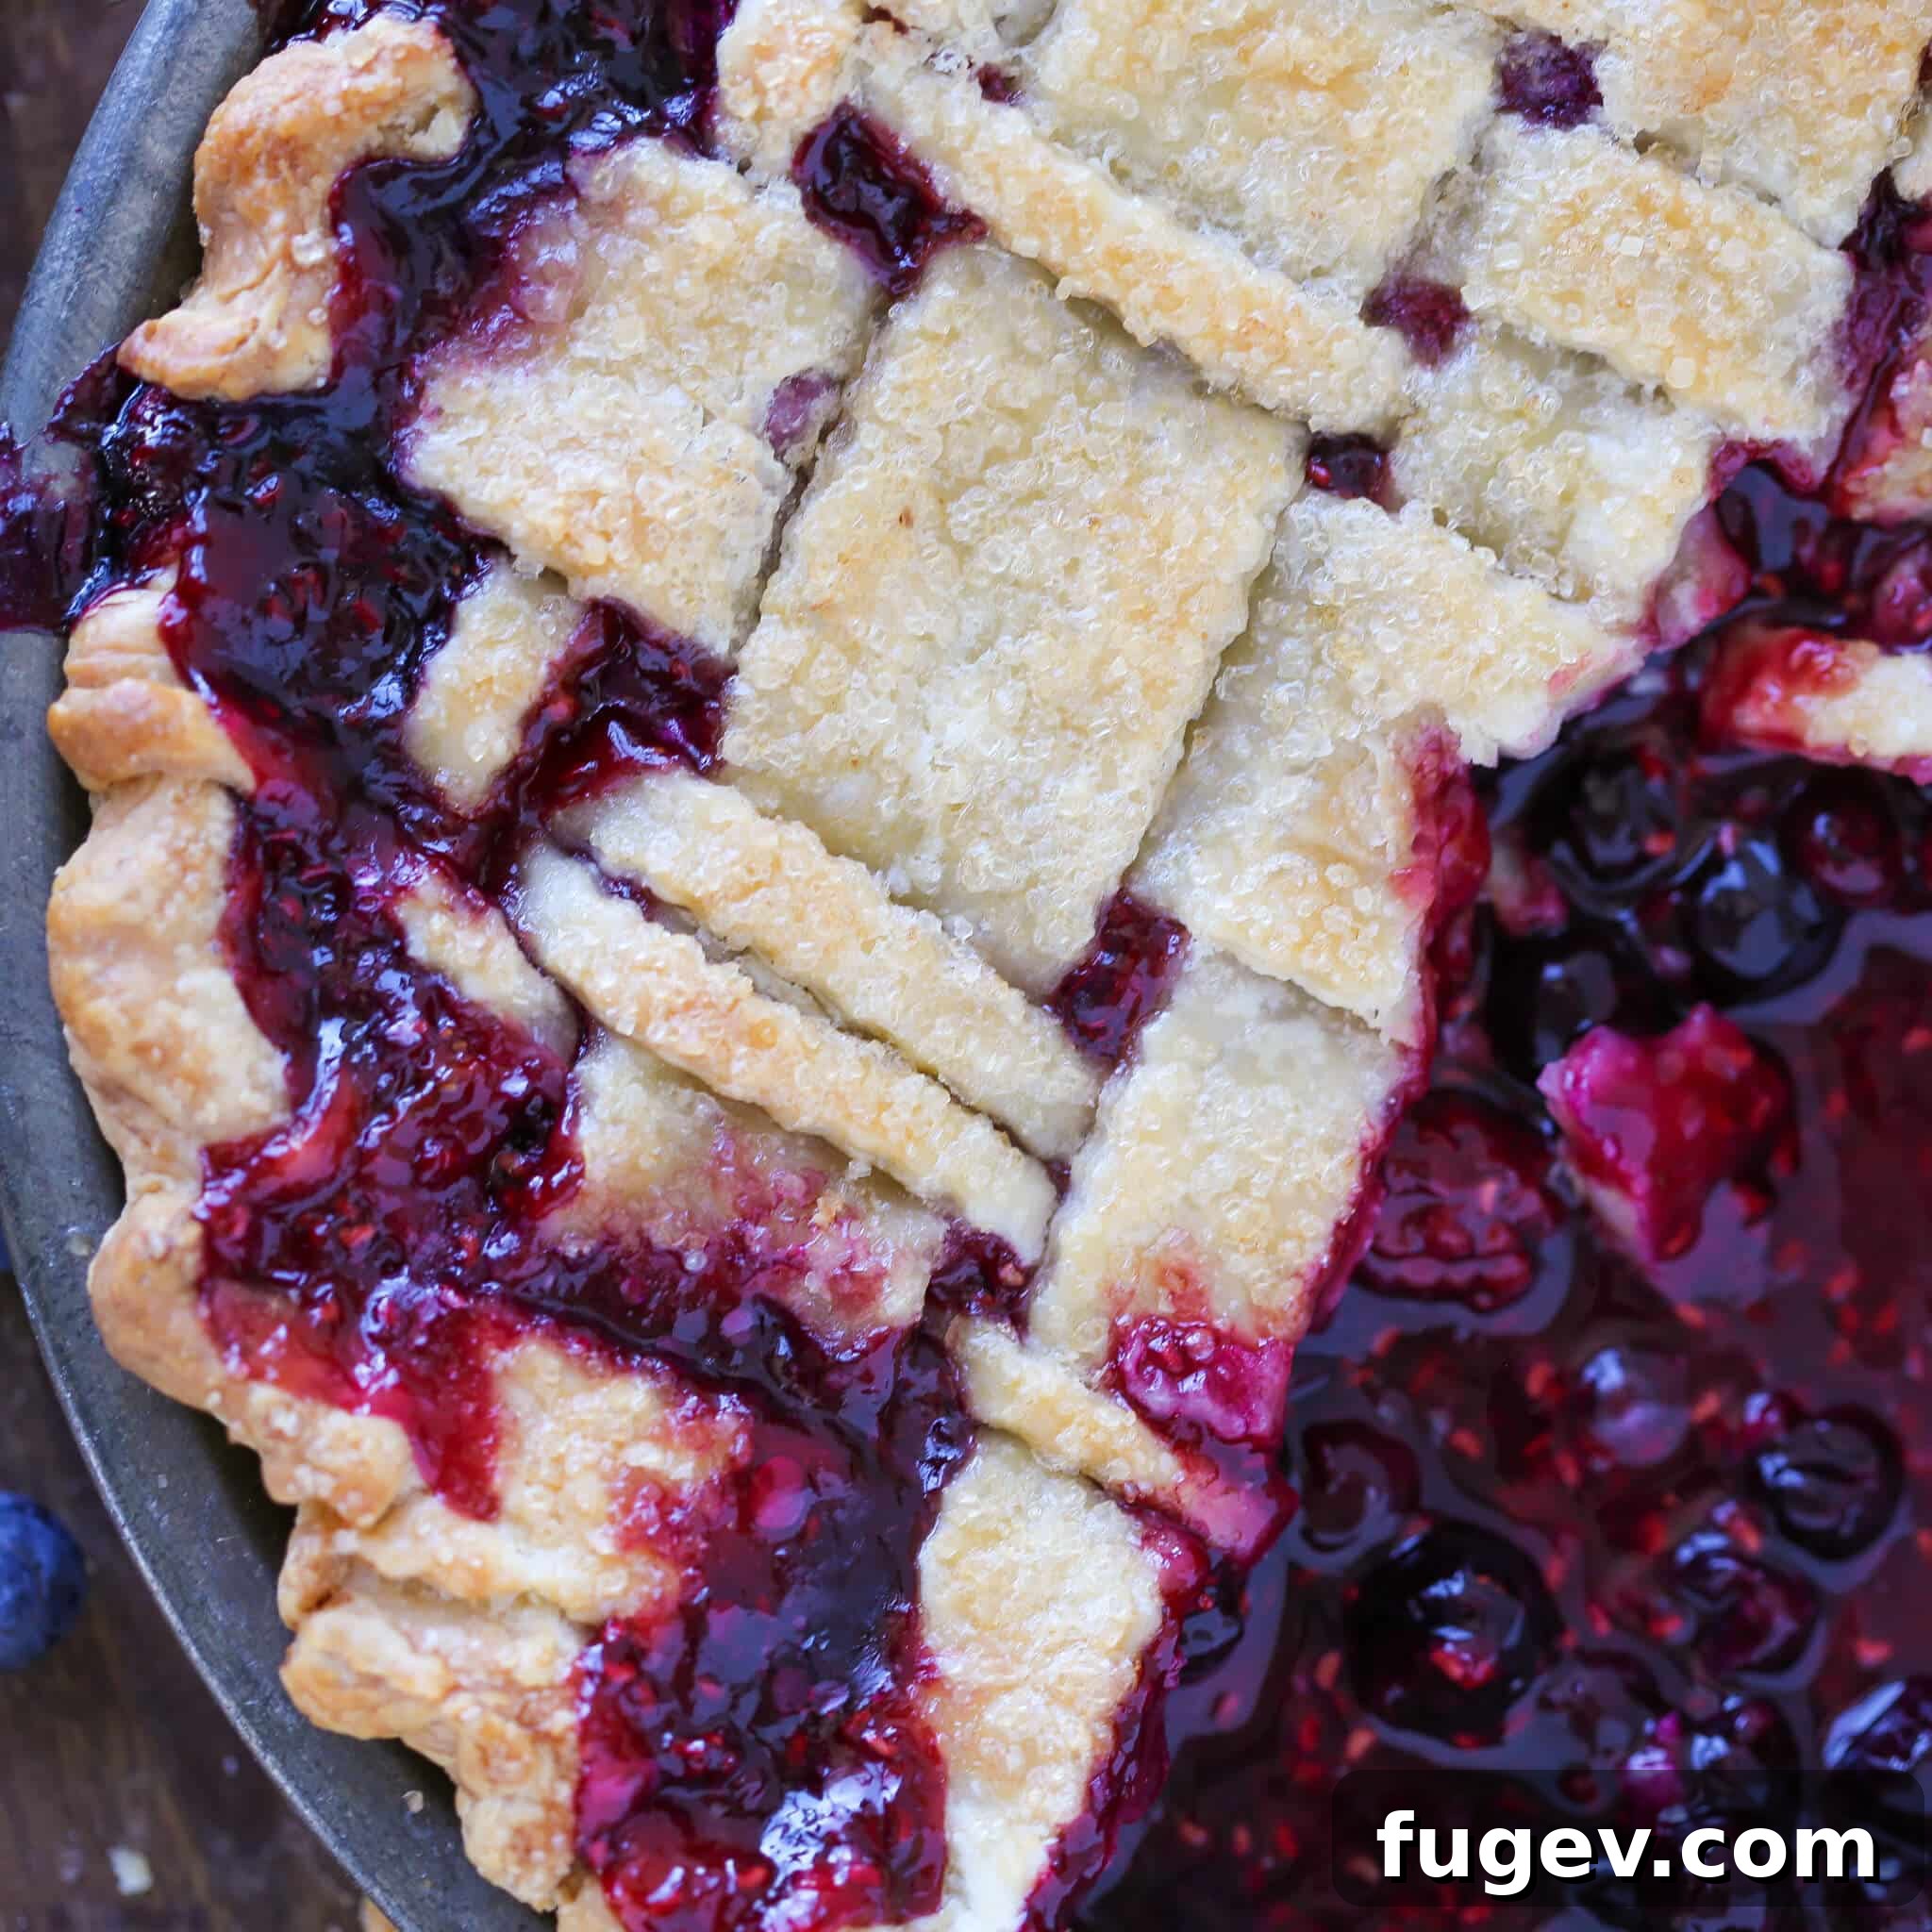
Asymmetrical Layered Lattice: A contemporary and stylish design achieved by layering strips of varying widths without weaving, creating an artistic, deconstructed look.
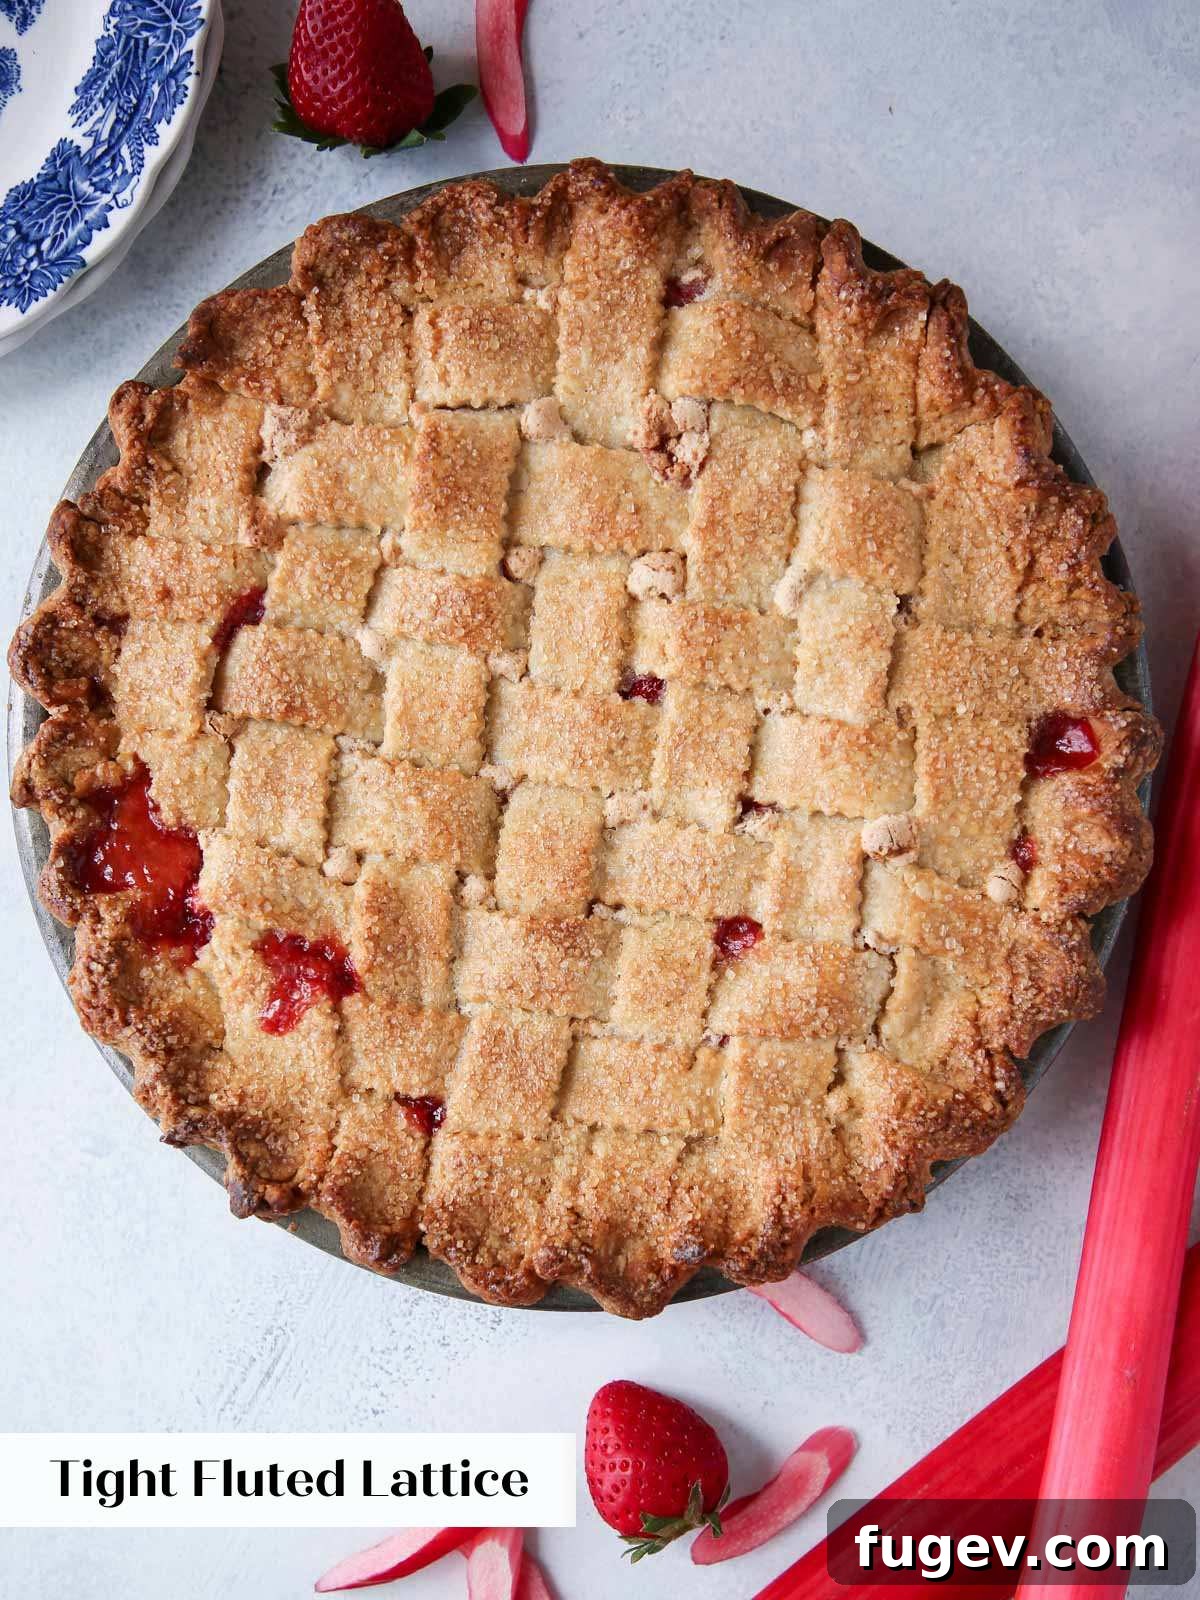
Symmetrical Fluted Lattice: A classic woven pattern where each dough strip has delicate fluted edges, adding a touch of traditional elegance and texture.
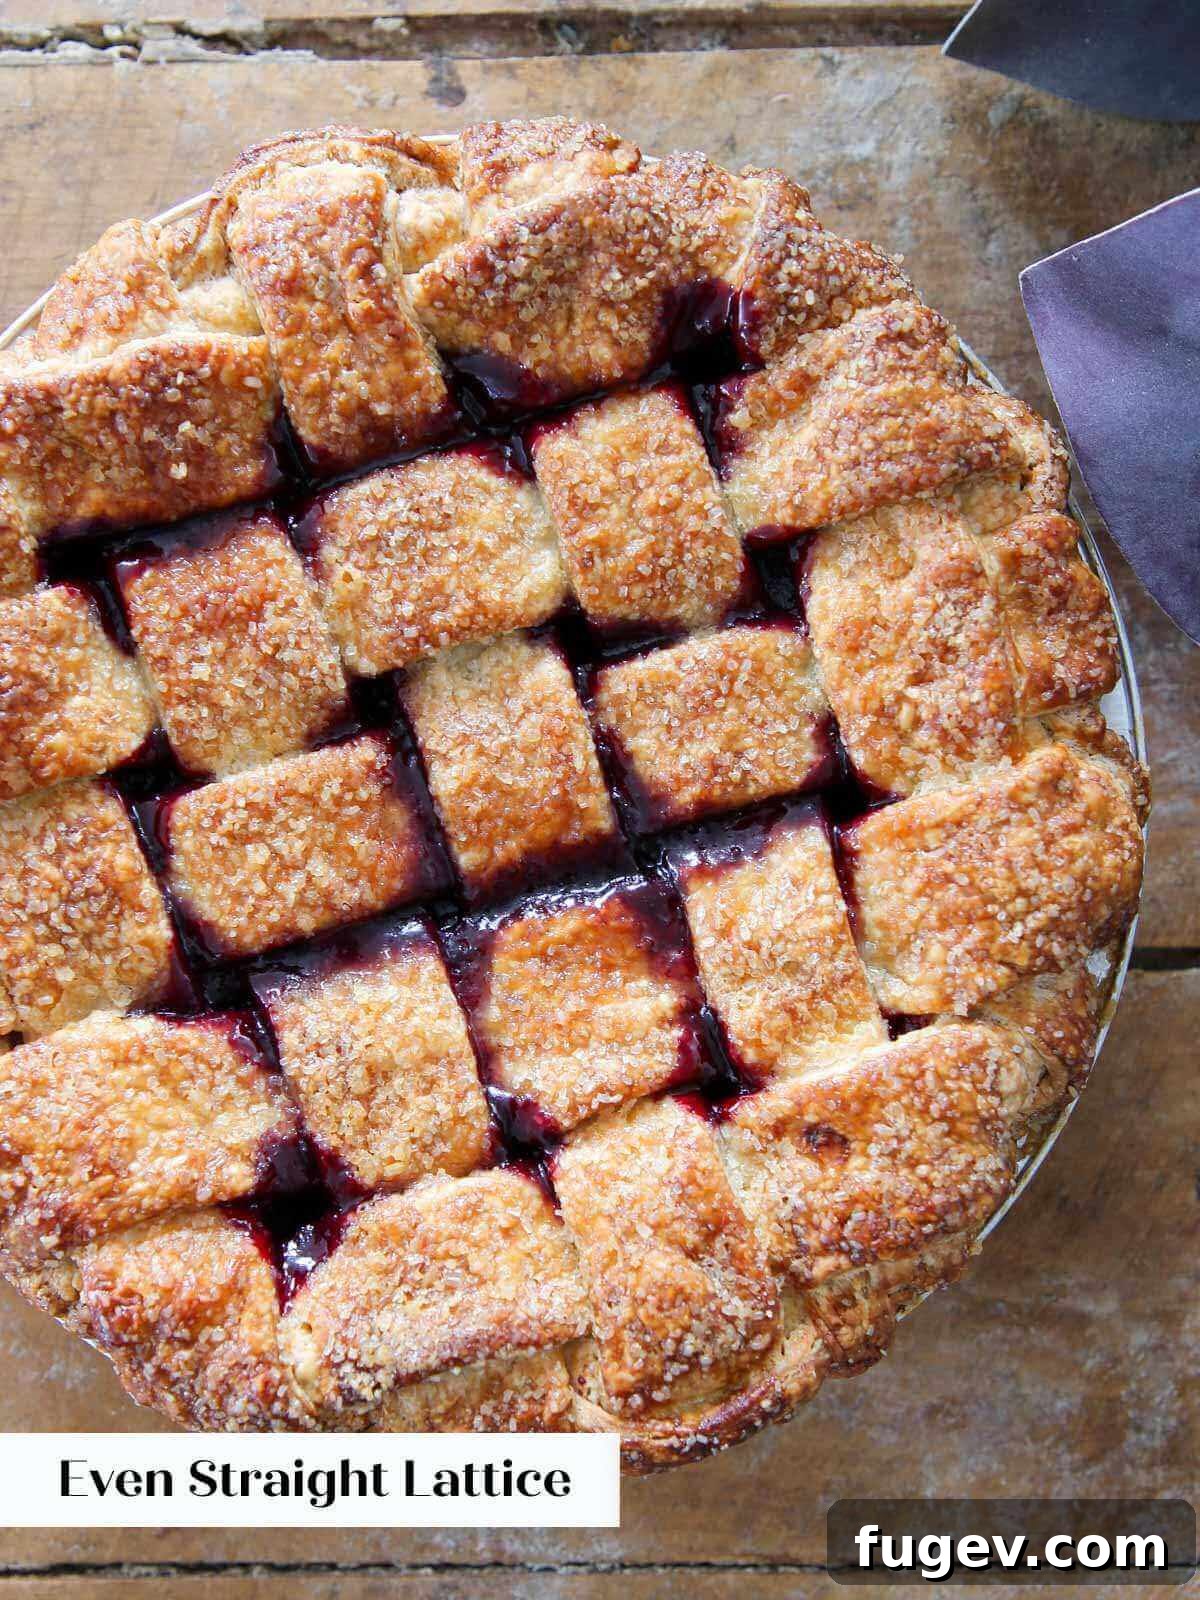
Symmetrical Straight-Edged Lattice: The quintessential lattice, featuring uniform, straight-cut strips woven in a precise over-under pattern for a timeless and tidy appearance.
Artistic Lattice Crust: A free-form, creative approach that combines different widths, angles, and even braided elements, resulting in a unique and personalized design.
Frequently Asked Questions About Latticing
A lattice pie crust is a decorative method for topping a double-crust pie, where strips of pie dough are woven together in an interlocking, basket-like pattern. This signature look is achieved by alternately folding back vertical strips of dough and then laying a new horizontal strip perpendicularly. The folded strips are then unfolded over the new strip, and the process is repeated with the other set of vertical strips, creating a beautiful over-and-under design. Beyond aesthetics, the open weave allows steam to escape, which helps prevent the bottom crust from becoming soggy.
Absolutely! Latticed pie crusts can be frozen successfully, offering a convenient way to prepare ahead. To do this, construct your lattice on a piece of parchment paper. Once complete, carefully place the parchment with the lattice onto a baking sheet and freeze until solid. Once frozen, you can transfer it (still on parchment) between two layers of plastic wrap or in an airtight container for up to 2 months. For best results, ensure it’s stored flat to prevent breakage. When you’re ready to use it, allow the frozen lattice to warm just enough to become pliable – typically 10-15 minutes at room temperature – before carefully sliding it onto your pie filling.
Crimping a lattice-topped pie is similar to a regular double-crust pie, but with careful attention to securing both layers. Begin by trimming any excess crust, leaving an overhang of about 1 inch around the perimeter of your pie dish. Next, gather the edges of both the bottom crust and the lattice together. Pinch them firmly and roll this combined edge under, tucking it snugly against the rim of the pie dish. Press this rolled edge down onto the dish to seal it. To create the classic fluted edge, use your thumb and forefinger on the outside of the rolled edge, and the knuckle of your other hand (or another finger) on the inside. Gently press these points together, forming a scallop. Work your way around the entire pie, repeating this motion for a consistently beautiful, sealed edge.
You have two primary options for transferring your lattice. The first is to lattice directly on the filled bottom crust in your pie dish. This method is straightforward but requires careful handling to avoid disturbing the filling. The second, often preferred by professional bakers for its ease and reduced risk, is to weave the lattice separately on a piece of parchment paper. Once woven, refrigerate or even freeze the entire lattice on the parchment until it’s firm. This makes the lattice much more stable and easier to handle. When ready, simply slide the chilled, firm lattice off the parchment and onto your prepared pie filling. This method minimizes direct contact with the dough, ensuring a cleaner transfer.
If you tried this wonderful recipe and loved it, please take a moment to leave a 🌟 star rating and share your experience in the comments below. Your feedback truly brightens my day and helps other bakers!
How to Lattice Pie Crust
Comment
Print Recipe
Ingredients
- 1 cup all-purpose flour
- ½ teaspoon kosher salt
- ½ teaspoon granulated sugar
- 4½ tablespoons unsalted butter cubed and very cold
- 1¼ oz cold water adjust as needed for dough consistency
Instructions
-
Prepare your pie crust using any of the 5 methods detailed in this all-butter pie crust recipe tutorial, or use a high-quality store-bought dough. Ensure your dough is thoroughly chilled before starting.
-
Lightly flour your flat work surface, the top of your chilled dough, and your rolling pin to prevent sticking.
-
Roll the dough out to approximately 1/8 inch thickness, aiming for a circular shape slightly larger than your pie dish. Chill the rolled-out dough for 30 minutes to firm up.
-
Using a ruler as a guide, mark the dough for 12 equal strips, then cut them with a pizza cutter, chef’s knife, or pie wheel. For varied designs, simply cut strips of different widths without a ruler.
-
Decide whether to lattice directly on the pie filling or on a piece of parchment paper. Arrange 6 strips vertically, parallel to each other, leaving small gaps in between.
-
Lift every other vertical strip (e.g., 1st, 3rd, 5th) and fold them back onto themselves. Place one of your unused strips horizontally, perpendicular to the folded strips, right at the fold line. Then, gently fold the lifted vertical strips back over the new horizontal strip.
-
Now, gently fold back the *other* set of vertical strips (e.g., 2nd, 4th, 6th). Place another horizontal strip parallel to the first. Fold the vertical strips back over this new horizontal piece. Continue this alternating over-and-under pattern until the entire lattice is complete.
-
For a Layered Lattice (no weaving): Instead of weaving, cut strips of varying widths and layer them asymmetrically across the pie filling. This creates a distinct, artistic look without the traditional weave.
-
Trim any excess crust, leaving a 1-inch overhang. Pinch and roll the edges under, pressing them onto the pie dish. Crimp decoratively as desired (e.g., with knuckles for fluted edges).
-
Optional: Brush the lattice with heavy cream or a beaten egg for a golden sheen, and sprinkle with turbinado or sanding sugar for a beautiful, caramelized finish. Your pie is now ready for baking according to your pie recipe’s instructions.
Video Tutorial
Notes
Storage: Unbaked latticed pie crusts can be stored in the refrigerator for up to 3 days, or frozen for up to 2 months. To freeze, place the latticed crust flat on a baking sheet between two pieces of parchment paper and wrap tightly in plastic wrap. Allow it to soften slightly at room temperature before using, just enough to be pliable without becoming too warm.
Nutrition Information (Per Serving)
Expand Your Baking Horizons
I genuinely hope you found this professional pastry chef’s tutorial on latticing pie crusts both informative and inspiring. Mastering this technique will undoubtedly elevate your homemade pies to new levels of elegance and deliciousness. As you continue your baking journey, you might also be interested in exploring our wider collection of pie recipes, delving deeper into various pie crust recipes, or learning about the crucial technique of when and how to dock a pie crust for perfectly baked results. Happy baking!