
Effortless Sourdough Pizza Dough: Your Food Processor Secret to a Perfect Crust
Transform your homemade pizza experience with this incredibly easy and fast sourdough pizza dough recipe. Crafted entirely in your food processor, this method eliminates the need for extensive kneading, making gourmet pizza accessible to everyone. The result is a profoundly flavorful crust that’s delightfully chewy and satisfyingly crispy – and the best part? It’s an excellent way to utilize your sourdough starter discard, turning potential waste into culinary triumph!
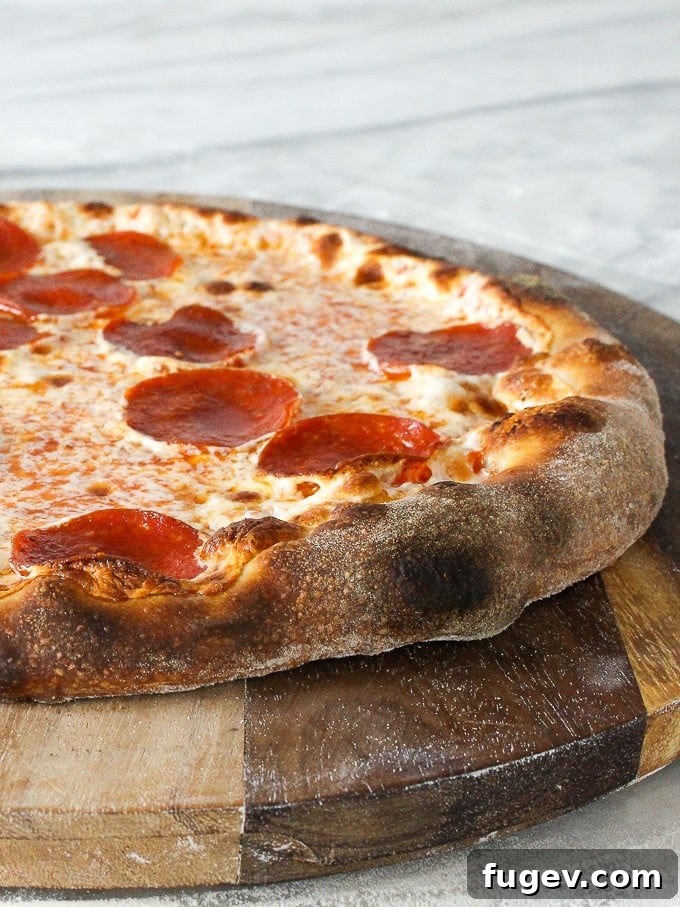
While culinary trends come and go, some classics endure. Sourdough bread might cycle through popularity, but pizza remains a timeless staple in kitchens worldwide. And now, combining the irresistible tang of sourdough with the universal love for pizza, we present the easiest, fastest sourdough pizza dough recipe you’ll ever encounter. Forget tedious kneading; this entire process unfolds in your food processor, yielding a crust that boasts an exciting depth of sourdough flavor. It elevates your pizza from a mere vehicle for cheese to a culinary masterpiece, infinitely more delicious than any bland base.
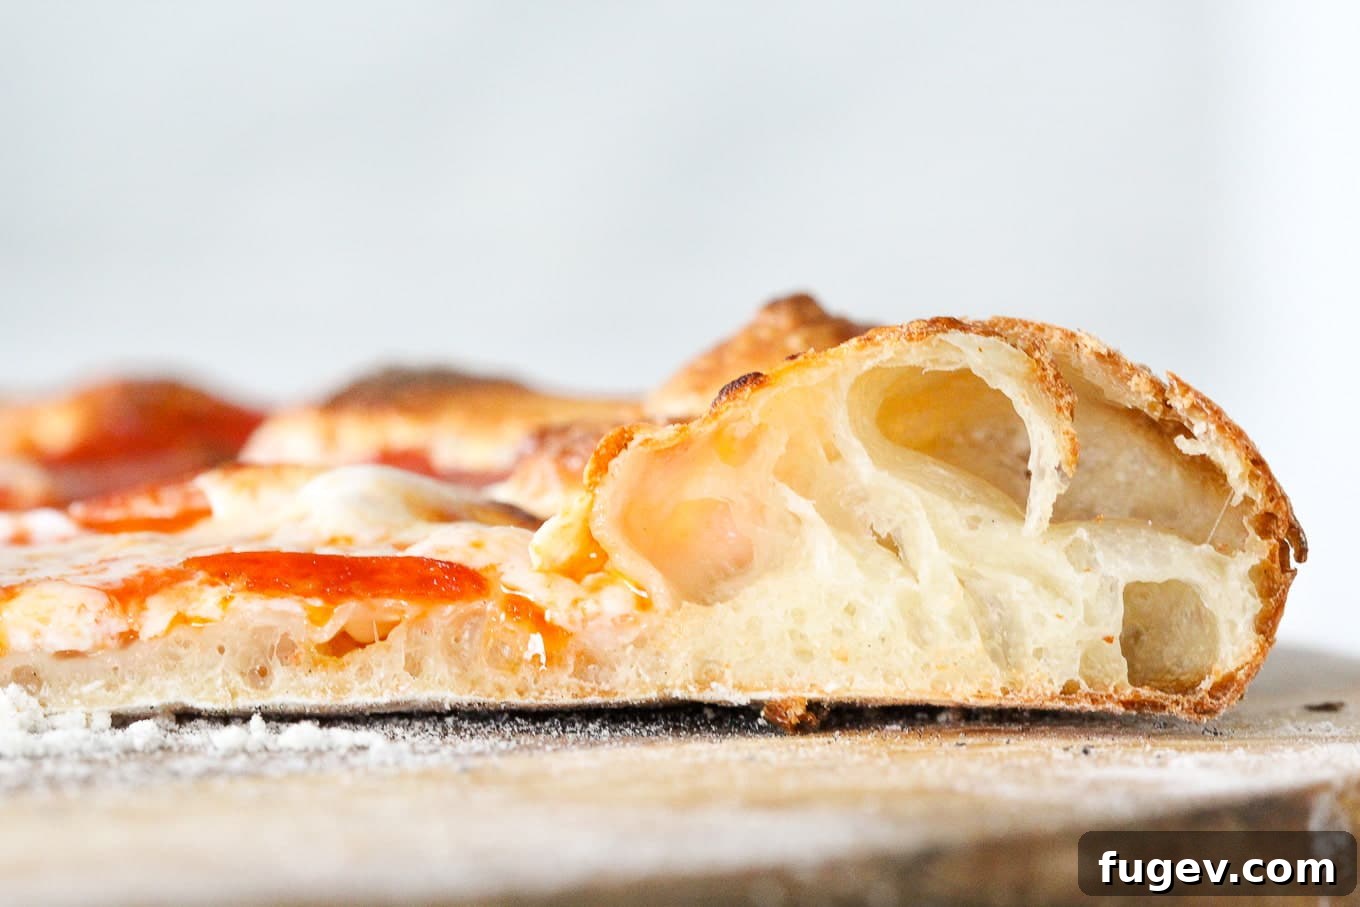
This exceptional crust is designed to completely revolutionize your pizza nights. Imagine a crust that’s perfectly chewy in the middle and wonderfully crispy at the edges – a textural symphony in every bite. Don’t just take our word for it; experience the difference yourself! Once you’ve mastered this dough, you’ll be inspired to explore other homemade pizza essentials, such as the best pizza sauce, a rich homemade tomato sauce, or perhaps delve into recipes like pepperoni pizza or even a savory pizza rustica.
Table of Contents
- Why You Will Love This Sourdough Pizza Crust Recipe
- Professional Tips for Perfect Pizza Dough
- Essential Ingredients for Your Sourdough Pizza Dough
- Sourdough Pizza Dough Variations and Customizations
- How to Make Sourdough Pizza Dough: A Step-by-Step Guide
- Chef Lindsey’s Expert Baking Tip
- Frequently Asked Questions About Sourdough Pizza Dough
- Sourdough Pizza Dough Recipe
- Before You Go: Explore More Sourdough Delights
Why This Sourdough Pizza Dough Will Transform Your Pizza Night
This isn’t just another pizza dough recipe; it’s a game-changer for anyone seeking a superior homemade pizza with minimal fuss. Here’s why this sourdough pizza crust will become your new go-to:
- Effortless, Rapid, and Eco-Friendly: Say goodbye to complex techniques and long bulk fermentations. This recipe is incredibly straightforward and quick to prepare. It’s also one of the most brilliant ways to put your sourdough starter discard to good use, ensuring nothing goes to waste while infusing your crust with that signature tangy sourdough character. Simply mix, divide, shape, and proof – no fancy folds required!
- Unbelievable Flavor Development Without the Kneading: Thanks to an intelligent refrigeration process, this dough develops an extraordinary depth of flavor and complex aroma without any hands-on kneading or constant monitoring. The extended cold fermentation allows the sourdough to work its magic, breaking down starches and developing glutens for an irresistible taste and texture that’s usually only achieved with laborious techniques.
- The Ultimate Make-Ahead Pizza Dough: Planning ahead for pizza night has never been easier. Once the dough is prepared and chilling in your refrigerator, it’s ready whenever you are, offering unparalleled convenience. This flexibility makes it perfect for busy schedules. You can even double the batch and freeze individual portions, tightly wrapped, for spontaneous pizza feasts whenever the craving strikes. It requires a little foresight, but the reward is a stress-free, delicious homemade meal.
Professional Tips for Crafting the Perfect Sourdough Pizza Dough
Achieving that iconic, restaurant-quality pizza crust at home is easier than you think with these expert insights:
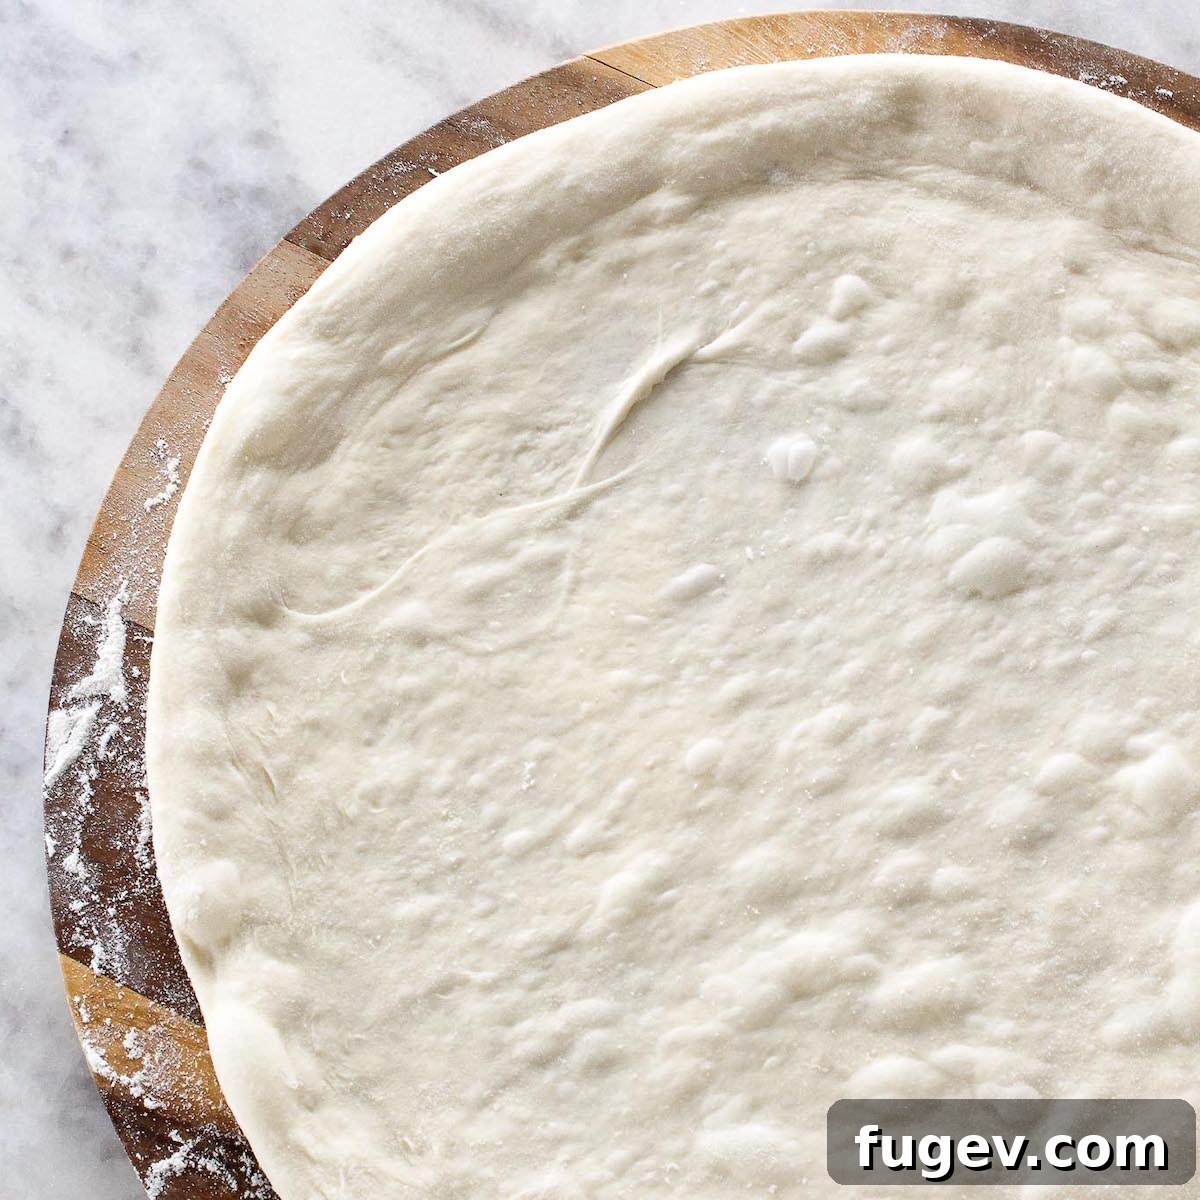
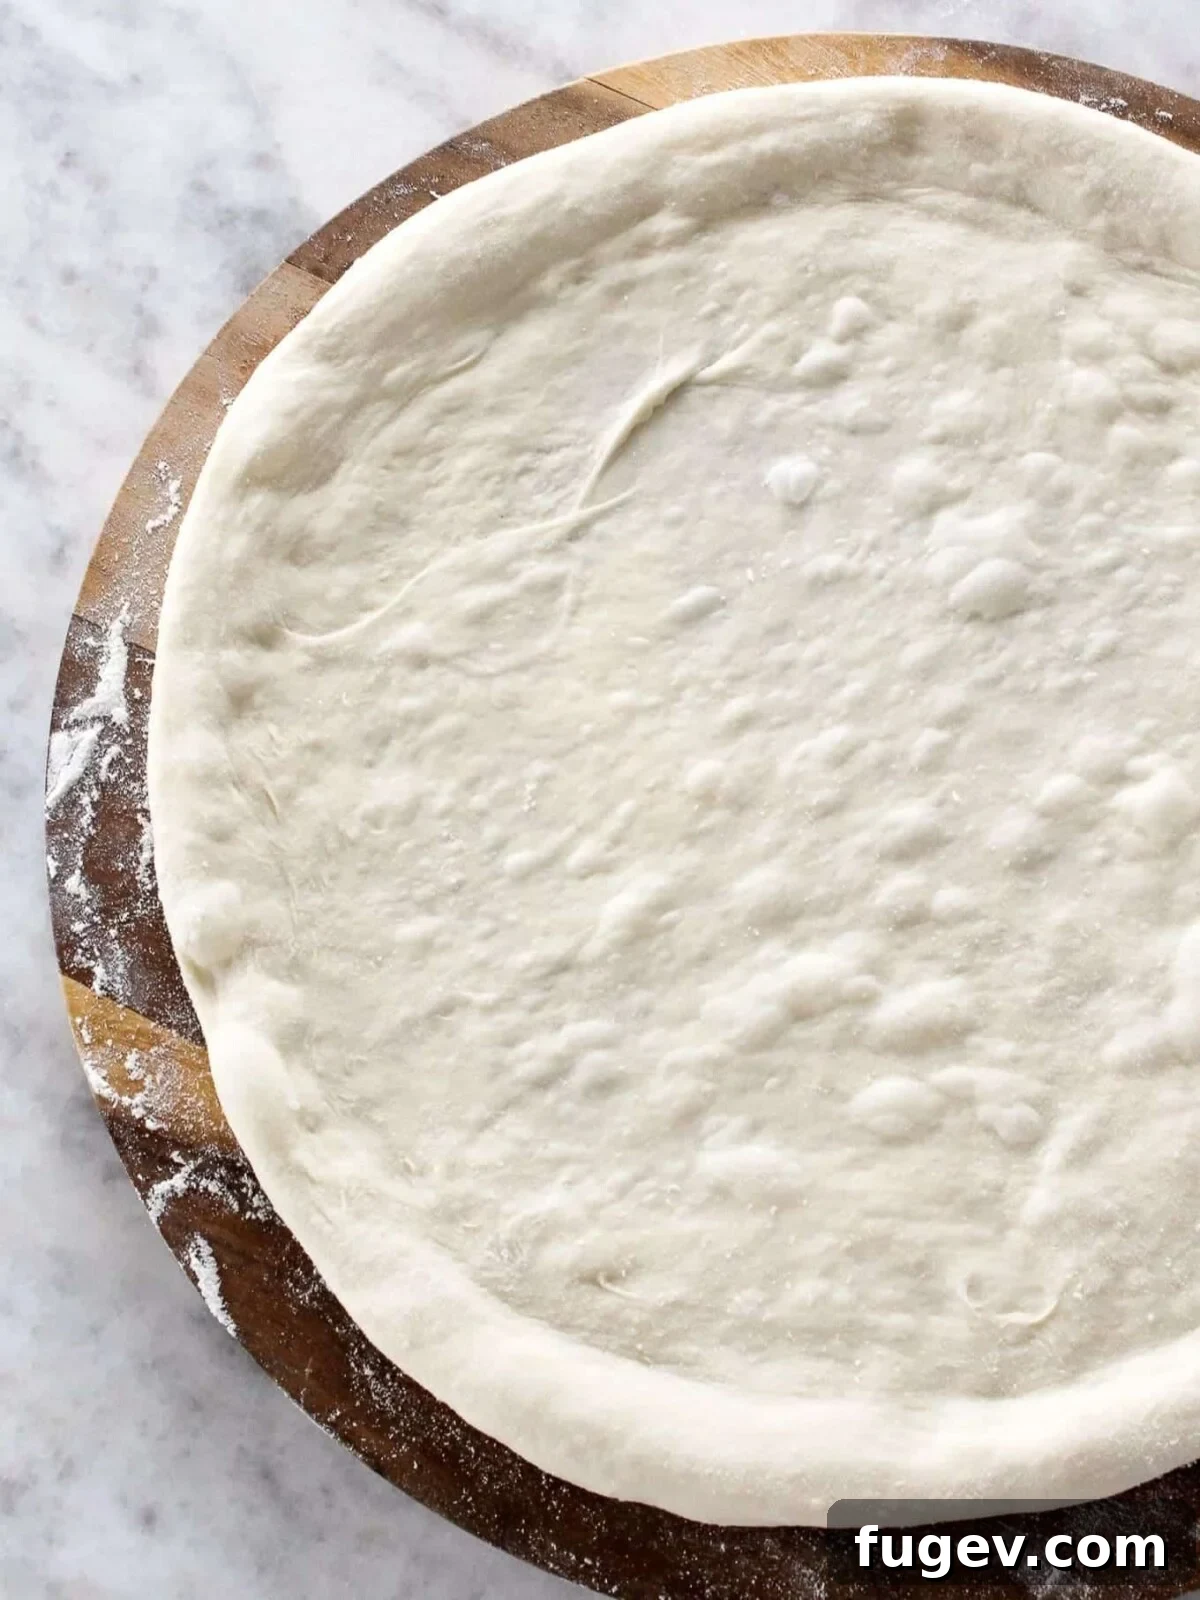
- Embrace Hand-Shaping; Ditch the Rolling Pin: The most crucial step in achieving a truly authentic, airy crust, reminiscent of a New York slice, is in the shaping. Avoid using a rolling pin at all costs. A rolling pin crushes the precious air bubbles that have developed during fermentation, resulting in a dense, flat crust. Instead, gently stretch and coax the dough with your hands, working from the center outwards, leaving a slightly thicker edge for that perfect puffy cornicione.
- Handle with Care to Preserve Bubbles: Those beautiful bubbles within your dough are the secret to an airy, light, and crispy crust. When shaping, be mindful not to deflate them. Use a gentle touch, stretching the dough slowly and deliberately. Think of it as encouraging the dough to expand, rather than forcing it. This careful handling ensures a delightful open crumb structure.
- Allow for a Final Room Temperature Proof: Before baking, give your dough adequate time to relax and proof at room temperature for 1-2 hours. This step is essential for softening the gluten structure, making the dough incredibly pliable and easy to shape without resistance. If you’ve seen my pizza dough tutorial, you’ll notice how soft and workable the dough becomes after this crucial rest, which directly contributes to its excellent bake and texture.
Essential Ingredients for Your Sourdough Pizza Dough
Each ingredient plays a vital role in developing the complex flavor and perfect texture of this sourdough pizza crust:
- 00 Flour: Also known as Caputo flour, 00 flour is finely milled Italian flour with a lower protein content than bread flour, yet it’s strong enough to create excellent elasticity. It’s renowned for producing incredibly tender, chewy crusts with a delicate crispness, especially in high-temperature ovens. If you can find it, it makes a noticeable difference.
- Bread Flour: With its higher protein content, bread flour contributes to the dough’s strength and chewiness, providing the necessary structure for those desirable air pockets and a robust crust that can hold up to toppings.
- Kosher Salt: Beyond seasoning, salt plays a crucial role in regulating fermentation, strengthening the gluten network, and enhancing the overall flavor profile of the dough.
- Sugar: A small amount of sugar acts as food for the yeast, aiding in fermentation and contributing to a beautifully golden-brown crust. It balances the tangy notes of the sourdough.
- Dry Active Yeast: While sourdough starter provides the primary leavening and flavor, a small amount of dry active yeast gives a boost, ensuring a reliable rise and allowing for a faster fermentation period than with sourdough alone.
- Water: The quality of your water significantly impacts your dough. I use New York City tap water, which is generally soft and ideal for baking. However, if you live in an area with hard water (high mineral content), consider using distilled, bottled, or filtered water. High mineral levels can inhibit yeast activity and tighten gluten, leading to a less airy dough. Chlorine, often present in tap water, can also hinder yeast and bacterial growth. If concerned, boil and cool tap water to room temperature or leave it in an open container for 24 hours to allow chlorine to dissipate naturally.
- Extra Virgin Olive Oil: Olive oil adds richness, flavor, and tenderness to the dough, contributing to a softer crumb and a more desirable chew. It also aids in browning the crust beautifully.
- Sourdough Starter (Fed or Unfed/Discard): This recipe welcomes both active, fed starter and sourdough starter discard. An active starter, one that doubles within 12-14 hours, will provide a more vigorous rise. However, using discard is a fantastic way to impart the characteristic sourdough tang and complexity without having to plan around feeding schedules. If you’re new to sourdough, start with my comprehensive sourdough starter recipe, then try some delightful rosemary sourdough rolls!
For precise measurements and detailed quantities, please refer to the recipe card below.
Sourdough Pizza Dough Variations and Customizations
This recipe is wonderfully versatile, allowing for adjustments based on your preferences and pantry availability:
- Yeast-Free Sourdough Pizza Dough: For a purely sourdough experience, you can absolutely omit the dry active yeast. Your sourdough starter will act as the sole leavening agent. Be aware that this will extend the fermentation time significantly, likely requiring closer to 48 hours (or even more, up to 72 hours) of refrigeration for optimal flavor development and rise. This method yields a more pronounced sourdough tang.
- Using All Bread Flour: If 00 flour isn’t readily available, you can substitute it entirely with bread flour. While the texture might be slightly less tender and more robust than with a blend, it will still produce a fantastic crust. I highly recommend using bread flour over all-purpose flour for its superior gluten development, which is essential for a good pizza crust. All-purpose flour can lead to a less structured and chewier result.
- Understanding Sourdough Starter Ratios: The specific feeding ratio for your sourdough starter is a personal choice and can vary based on your environment and desired activity. The critical takeaway is that any active starter, regardless of its feeding ratio, can be used to create an effective levain for this pizza dough. I touch upon this in my sourdough focaccia recipe, and for a deeper dive, check out this guide on how to feed sourdough starter. Don’t stress too much about the ratio as long as your starter is active and bubbly.
How to Make Sourdough Pizza Dough: A Simple Step-by-Step Guide
Creating this delicious sourdough pizza dough is surprisingly simple, thanks to the food processor. Detailed measurements are provided in the recipe card below.
- Prepare Your Baking Sheet: Lightly oil a baking sheet or a baking dish with canola oil. This will prevent the dough from sticking during its initial rest and make handling easier later. Set it aside.
- Combine Dry Ingredients: Fit your food processor with its standard blade – any blade will do the trick! Add the 00 flour, bread flour, kosher salt, sugar, and dry active yeast. Secure the lid and pulse a few times to thoroughly combine these dry ingredients, ensuring an even distribution.
- Incorporate Wet Ingredients: In a small separate bowl, whisk together the water, extra virgin olive oil, and your sourdough starter (fed or unfed). With the food processor running continuously, slowly pour this wet mixture through the feed tube. Chef’s Note: I learned the hard way in my video – combining the starter with water and oil beforehand prevents a sticky mess trying to get it through the tube!
- Process to Form Dough: Allow the food processor to run until a cohesive ball of dough forms. Once formed, let it continue to run for an additional 30 seconds. This brief extra processing helps to develop the gluten. Then, stop the food processor.
- Prepare Work Surface and Divide Dough: Lightly flour your work surface. The dough should not be excessively sticky, so you won’t need a large amount of flour. Using a spatula, carefully scrape all the dough out of the food processor bowl onto the floured counter. With a bench scraper, divide the dough into two equal pieces, which will make two individual pizza crusts. Tip: Only add a small amount of bench flour as needed to prevent sticking, preserving the dough’s hydration.
- Shape the Dough Balls: Take each piece of dough and form it into a smooth ball. Do this by gently folding all four sides of the dough into the center. Then, flip the dough ball over so the seam-side is down. To tighten the dough and create surface tension, pull the dough towards you across the counter, rotate it slightly, and repeat the pulling motion until you have a smooth, taut round. Alternatively, watch my sourdough pizza dough tutorial on YouTube for a visual guide, including shaping with a bench scraper. While I prefer a thin crust, feel free to shape it to your desired thickness.
- Oil and Refrigerate: Place each shaped dough ball on the oiled baking sheet you prepared earlier. Lightly rub a little extra oil over the top of each dough ball. This creates a protective barrier. Then, wrap each dough ball tightly in plastic wrap to prevent a dry skin from forming. Place the wrapped dough balls into the refrigerator.
- Cold Fermentation for Flavor: Refrigerate the dough for a minimum of 24 hours and up to 72 hours. The longer the dough rests in the cold, the more complex and developed its sourdough flavor will become. For an ideal balance of flavor and texture, 36-48 hours is often perfect.
- Room Temperature Proof Before Baking: Before you plan to use the dough, remove it from the refrigerator and let it sit at room temperature for 2-4 hours. This allows the dough to relax, become pliable, and warm up slightly, ensuring a better rise and easier shaping for baking. Assemble your pizza with your favorite toppings on a piece of parchment paper placed on a cutting board for effortless transfer to the oven. I always recommend a combination of fresh basil, creamy fresh mozzarella cheese, and your homemade pizza sauce for an unparalleled taste!
Chef Lindsey’s Expert Baking Tip for a Crispy Crust
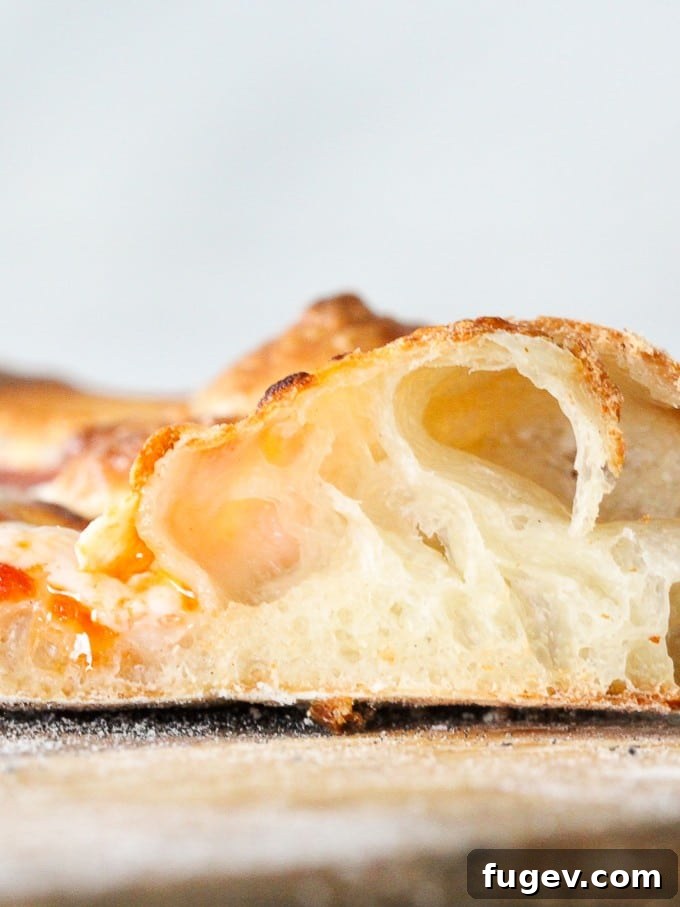
To achieve that coveted chewy interior and perfectly crispy exterior, a high-temperature bake is essential. If you’re using a pizza stone, generously flour your pizza peel or dust it with cornmeal. This creates a non-stick surface, allowing the pizza to effortlessly slide off the peel onto the hot stone. If you don’t have a pizza stone, a preheated rimmed baking sheet, turned upside down, or even a cast iron skillet can mimic a pizza stone effectively. Sprinkle cornmeal on these surfaces too. Always give your pizza peel a gentle shake to ensure the pizza moves freely before attempting to transfer it into the oven. If it sticks, lift gently and dust a little more flour or cornmeal underneath. This crucial step not only prevents frustrating sticking but also ensures safety when dealing with a blazing hot oven, which is key for achieving that perfect texture.
Frequently Asked Questions About Sourdough Pizza Dough
Absolutely! This recipe is designed to be versatile, so you can use either a freshly fed, active sourdough starter or unfed sourdough starter (discard). Using discard is a fantastic way to impart that signature sourdough tang and reduce food waste without needing to time your starter feedings perfectly.
You can safely leave this sourdough pizza dough in the refrigerator for up to 72 hours. While it’s safe for this duration, I find that 36-48 hours provides the ideal balance of flavor development and dough texture. Beyond 72 hours, the dough may begin to overproof, potentially developing an overly sour taste and a weaker gluten structure. For longer storage, tightly wrap the dough in plastic wrap and then aluminum foil, and freeze it for up to two months. Freezing immediately after initial preparation will ensure the best quality for extended storage, so you can enjoy fresh homemade pizza anytime!
While I demonstrate baking with a pizza stone in my video for superior results, it’s certainly not a requirement. A preheated rimmed baking sheet, turned upside down, can provide a good hot surface to slide your pizza onto. Alternatively, you can build your pizza directly on a regular baking sheet and bake it all together. While the crust might not achieve the exact same level of crispness and char as one baked on a stone, it will still be exceptionally delicious and far superior to store-bought crusts.
If you tried this recipe and loved it, please consider leaving a ⭐ star rating and sharing your experience in the comments below. Your feedback makes my day and helps other home bakers!
Rating: 4.72 out of 5 stars from 7 ratings
Sourdough Pizza Dough
by Chef Lindsey
This sourdough pizza dough recipe is incredibly easy, remarkably fast, and completely made in the food processor. It yields a profoundly flavorful, chewy, and crispy crust — and it cleverly utilizes your sourdough starter discard!
Prep Time: 10 mins
Total Time: 10 mins (plus fermentation)
Yields: 10 servings (or 2 large pizzas)
Comment
Print Recipe
Ingredients
- 13 ⅓ tablespoons 00 flour (Caputo)
- 20 tablespoons bread flour
- 1 teaspoon kosher salt
- 1 tablespoon sugar
- ⅙ teaspoon dry active yeast
- 9 tablespoons water
- 5 teaspoons extra virgin olive oil
- 10 tablespoons sourdough starter (fed or unfed/discard)
Instructions
- Oil a baking sheet or baking dish with canola oil. Set aside.
- Fit a food processor with any blade. Add 00 flour, bread flour, salt, sugar, and yeast. Secure the top and pulse to combine.
- Combine water, olive oil, and starter in a small bowl. With the food processor running, pour the wet ingredients through the feed tube.
- Allow the food processor to run until a ball forms, then continue for another 30 seconds. Stop the food processor.
- Lightly flour your work surface. Scrape the dough onto the counter. With a bench scraper, divide it into two equal pieces.
- Form each piece into a ball by folding all four sides into the center. Flip seam-side down and tighten by pulling the dough towards you, rotating, and repeating. Shape into a smooth round.
- Place each ball on the oiled sheet. Rub some oil on top of the dough. Wrap each tightly in plastic wrap and place in the refrigerator.
- Refrigerate for 24-72 hours. Flavor develops with longer refrigeration.
- Before use, remove dough from the refrigerator and let it sit at room temperature for 2-4 hours. Further baking instructions can be found in my pepperoni pizza post!
Video
Notes
Yield: This recipe makes enough dough for 2, 14-inch pizzas.
Technique: For an airy crust, shape gently by hand without a rolling pin to preserve valuable air bubbles.
Variations: To make a yeast-free dough, simply omit the dry active yeast. In this case, refrigerate the dough for approximately 48-72 hours to allow the sourdough starter sufficient time for leavening.
Storage: The dough can be refrigerated for up to 72 hours. For longer storage, wrap it tightly and freeze for up to a month, allowing you to enjoy fresh homemade pizza whenever you desire!
Nutrition
Calories: 123 kcal | Carbohydrates: 22g | Protein: 3g | Fat: 2g | Saturated Fat: 1g | Polyunsaturated Fat: 1g | Monounsaturated Fat: 2g | Sodium: 234mg | Potassium: 26mg | Fiber: 1g | Sugar: 1g | Vitamin A: 1IU | Vitamin C: 1mg | Calcium: 4mg | Iron: 1mg
Course: Dinner, Main Course
Cuisine: American, Italian
Calories per serving: 123
Enjoyed this recipe? Share your thoughts! Leave a comment below.
Before You Go: Explore More Sourdough Delights
I genuinely hope you enjoyed this professional chef-tested recipe for sourdough pizza dough. There’s a world of flavor waiting to be explored with sourdough! Feel free to check out our other delicious, chef-developed bread recipes, including a variety of our favorite sourdough creations. Happy baking!