
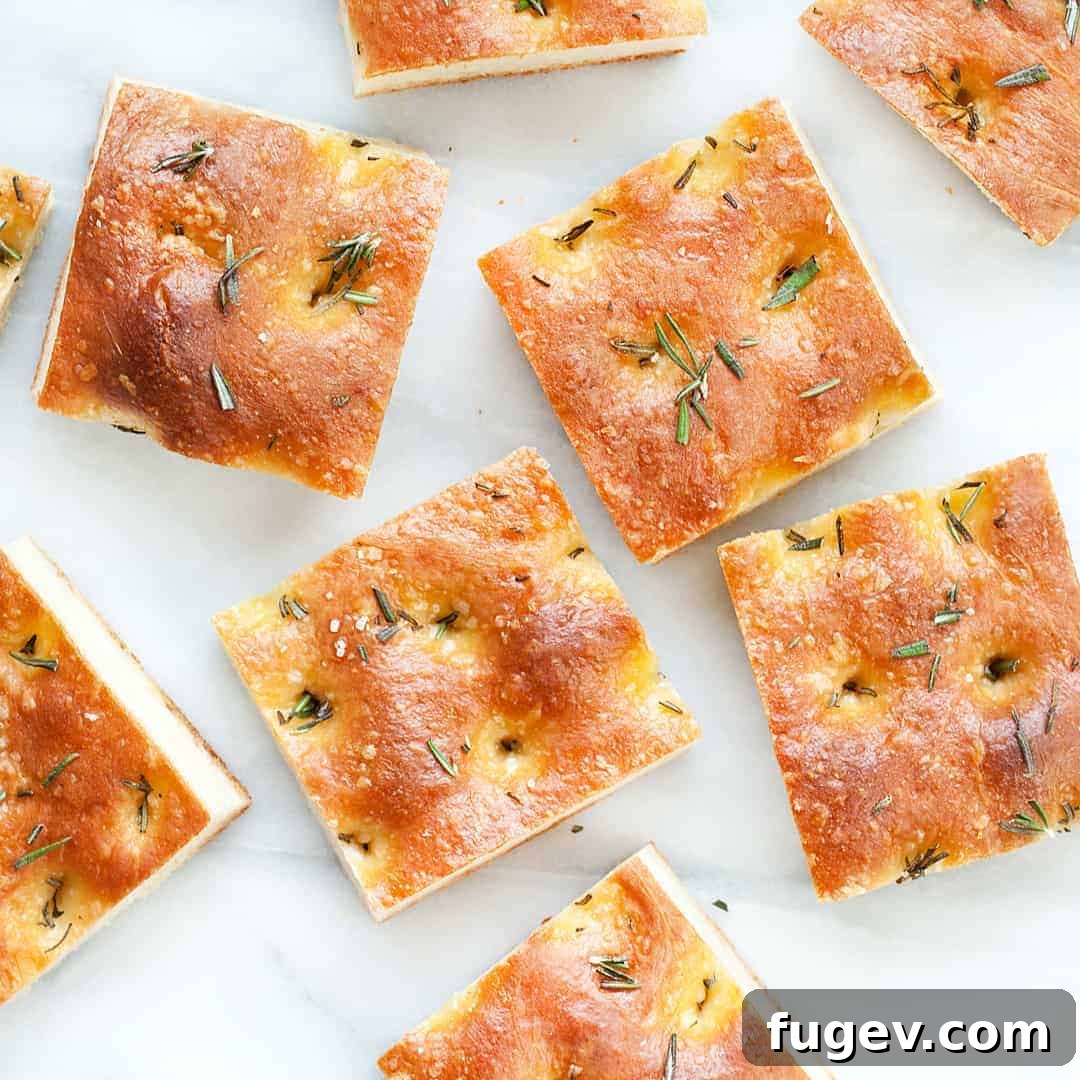
This classic rosemary focaccia is wonderful just dipped in olive oil, but try it for sandwiches or as a bread side for a meal, too.
Mastering Homemade Rosemary Focaccia: A Culinary Journey to Italian Perfection
There’s an undeniable magic in homemade bread, especially when it comes to the aromatic and deeply satisfying Italian focaccia. This dimpled, olive oil-rich flatbread, often studded with fresh rosemary and coarse sea salt, is a versatile masterpiece that elevates any meal. While excellent simply dipped in a high-quality olive oil, its soft interior and crisp crust make it an ideal foundation for gourmet sandwiches or a delightful accompaniment to soups, salads, and pasta dishes.
My journey to perfecting homemade focaccia began with a rather disappointing restaurant experience. Dining out, I often find myself agonizing over menu choices, searching for that one standout element that promises culinary delight. On a recent lunch outing, the decision was between a vibrant salmon salad and a Mediterranean chicken sandwich. It wasn’t the exotic sun-dried tomato olive relish or the creamy burrata that sealed the deal for the sandwich; it was the promise of focaccia as the bread, a far more appealing prospect than a standard bun.
As a firm believer that the bread can truly make or break a sandwich, my excitement quickly turned to dismay when the plate arrived. What lay before me was a perfectly factory-round, uniformly dimpled imitation, a far cry from the rustic, authentic focaccia I had envisioned. It lacked the irregular charm, the golden sheen, and the airy texture that defines true focaccia. Determined to erase the memory of that “faux focaccia,” I resolved to bake my own — a real loaf, glistening with fragrant olive oil, boasting a perfectly golden crust, and infused with the earthy aroma of fresh rosemary.
Fresh from the oven, still warm and inviting, I couldn’t resist tearing off pieces of the addictive rosemary focaccia. Each bite was a testament to the simple perfection of this Italian classic. Before it all vanished, I wisely stashed a few generous slices in the freezer, ensuring future sandwiches would be built upon a truly superior foundation.
The Irresistible Allure of Focaccia
Focaccia, originating from Liguria, Italy, is more than just bread; it’s a celebration of simple ingredients and time-honored techniques. Its name is derived from the Latin “panis focacius,” meaning “hearth bread,” reflecting its ancient origins as bread baked on hot coals. What sets focaccia apart is its unique texture: a wonderfully crisp and chewy crust, a soft and airy interior, and the signature dimples that act as perfect reservoirs for olive oil and toppings. Rosemary, a staple herb in Italian cooking, adds an exquisite fragrance and flavor that complements the richness of the olive oil beautifully.
Making focaccia from scratch might seem daunting to some, but it’s a remarkably rewarding process that requires patience more than complex skills. The result is a deeply satisfying, incredibly flavorful bread that far surpasses any store-bought alternative. This recipe guides you through creating a classic rosemary focaccia that’s perfect for any occasion.
Rosemary Focaccia
Paige Adams
15
40
3
3
55
16
Ingredients
- 1-3/4 cups warm water
- 1 teaspoon dry active yeast
- 3-1/2 cups all-purpose flour plus more for dusting
- 1-1/4 cups bread flour
- 3 teaspoons kosher salt
- 3/4 cup olive oil plus more for oiling bowl
- Medium-coarse yellow cornmeal for dusting sheet pan
- 2 tablespoons fresh rosemary, roughly chopped
Instructions
-
Activate the Yeast: In the bowl of a stand mixer fitted with a dough hook, combine the warm water (ensure it’s between 105-115°F / 40-46°C to properly activate the yeast) and dry active yeast. Let this mixture sit for 5-10 minutes until it becomes foamy, indicating that the yeast is active and alive. If it doesn’t foam, your yeast might be old or the water temperature was off, and you should start again.
-
Form the Dough: Add both all-purpose flour, bread flour, and 1 teaspoon of kosher salt to the yeast mixture. Turn the mixer on low speed and mix until a shaggy, somewhat sticky dough forms, typically taking about 2-3 minutes. While the mixer is still running on low, slowly drizzle in 1/2 cup of olive oil against the inside of the bowl. This helps to prevent splashing and ensures the oil is gradually incorporated. Once the oil is mostly absorbed, increase the mixer speed to medium and knead the dough for about 8-10 minutes. The dough should become smooth and elastic, though it will remain slightly sticky.
No Stand Mixer? No Problem!: If you’re kneading by hand, use a sturdy wooden spoon to stir the dry ingredients into the water-yeast mixture until a shaggy dough forms. Turn the dough out onto a lightly floured work surface. Knead vigorously for approximately 8-12 minutes, stretching and folding the dough until it is smooth, elastic, and passes the windowpane test (where you can stretch a small piece thin enough to see light through it without tearing).
-
First Rise: Gently shape the dough into a ball. Lightly oil a large bowl with olive oil, place the dough in it, and turn it once to coat all sides. Cover the bowl tightly with plastic wrap or a damp kitchen towel. Allow the dough to rise in a warm, draft-free place for 2-3 hours, or until it has noticeably doubled in size. This slow rise is crucial for developing the focaccia’s characteristic flavor and airy texture.
-
Shape and Second Rise: Lightly flour a clean work surface. Gently turn the risen dough out onto the surface. Carefully stretch and press the dough into a 10-inch by 15-inch rectangle. Try to handle the dough as little as possible to preserve the air bubbles. Sprinkle a standard sheet pan with medium-coarse yellow cornmeal; this prevents sticking and adds a lovely texture to the bottom of the focaccia. Carefully transfer the stretched dough to the prepared sheet pan. Cover the dough again and let it rise for another hour, or until it looks slightly puffy and increased in volume.
-
Preheat and Prepare: While the dough undergoes its second rise, preheat your oven to 425 degrees F (220 degrees C). This ensures the oven is at the correct temperature for immediate baking once the dough is ready.
-
Dimple and Season: Once the dough is puffy, it’s time for the signature focaccia dimples. Using your fingertips, press deep dimples into the dough, spacing them about 2 inches apart. Be firm but gentle, pressing almost all the way to the bottom of the pan. These dimples prevent large air pockets from forming and create perfect pockets for olive oil. Sprinkle the fresh, roughly chopped rosemary over the surface, followed by the remaining kosher salt. Finally, drizzle generously with the remaining olive oil, ensuring it pools slightly in the dimples.
-
Bake to Golden Perfection: Place the sheet pan in the preheated oven. Bake for 35 – 45 minutes, or until the focaccia is beautifully golden brown on top. For truly perfect focaccia, about 5 minutes before the end of baking, carefully lift a corner of the focaccia with a spatula to check that the bottom is also golden brown. A pale bottom can lead to a soggy texture, so bake a little longer if needed.
-
Cool and Serve: Once baked, transfer the focaccia from the sheet pan to a wire rack to cool for at least 30 minutes before cutting and serving. Cooling allows the internal structure of the bread to set and prevents it from becoming gummy.
-
Storage and Freezing Tips: Store any leftover focaccia wrapped tightly in plastic wrap or in an airtight container at room temperature for up to 3 days. To freeze, wrap individual slices or the entire loaf tightly in plastic wrap, then place in a freezer-safe bag. It can be frozen for up to 3 months. Thaw frozen focaccia at room temperature, then refresh it in a 300-degree F (150 degrees C) oven for 5-10 minutes to restore its crispness and warmth.
Notes
Adapted from Flour by Joanne Chang
Nutrition
Calories:
140
kcal
|
Carbohydrates:
10
g
|
Protein:
2
g
|
Fat:
10
g
|
Saturated Fat:
1
g
|
Polyunsaturated Fat:
1
g
|
Monounsaturated Fat:
7
g
|
Sodium:
437
mg
|
Potassium:
18
mg
|
Fiber:
0.5
g
|
Sugar:
0.04
g
|
Vitamin A:
8
IU
|
Vitamin C:
0.1
mg
|
Calcium:
3
mg
|
Iron:
1
mg
Nutrition information is automatically calculated, so should only be used as an approximation.
Additional Info
Bread
Italian
Did you make this recipe?
Mention @lastingredient on Instagram and tag it #lastingredient!
Tips for Focaccia Success: Achieving Bakery-Quality at Home
Creating the perfect rosemary focaccia involves understanding a few key principles that contribute to its distinctive texture and flavor:
The Power of Proper Yeast Activation
The first step, activating the yeast, is paramount. Warm water (not hot, not cold) provides the ideal environment for the dry active yeast to bloom. You’re looking for a foamy, bubbly surface after 5-10 minutes. This visual cue assures you that your yeast is alive and ready to make your bread rise beautifully. If you don’t see this activity, it’s best to discard the mixture and start with fresh yeast or adjust your water temperature.
Flour Choice and Its Impact
This recipe uses a blend of all-purpose flour and bread flour. All-purpose flour provides tenderness, while bread flour, with its higher protein content, contributes to a stronger gluten structure. This combination gives focaccia its characteristic chewiness and elasticity. If you only have one type of flour, you can use all-purpose, but the texture might be slightly less chewy. For optimal results, stick to the specified blend.
The Art of Kneading
Whether by stand mixer or by hand, kneading is essential for developing gluten, which gives the bread its structure. The goal is an elastic dough that is smooth but still slightly sticky. Over-kneading can make the dough tough, while under-kneading will result in a dense, crumbly focaccia. Aim for the “windowpane test”: pull a small piece of dough and stretch it thin enough to see light through it without tearing. If it tears easily, keep kneading.
Olive Oil: The Soul of Focaccia
Olive oil is not just an ingredient; it’s a vital component of focaccia, lending it moisture, flavor, and that signature golden crust. Use a good quality extra virgin olive oil for the best taste. Don’t skimp on the oil used for coating the bowl, mixing into the dough, or drizzling generously on top before baking. It creates a rich flavor profile and contributes to the irresistible crispness.
The Importance of a Slow Rise
The initial 2-3 hour rise is crucial for flavor development. This slow fermentation allows the yeast to produce more complex flavors, resulting in a bread that tastes deeper and more nuanced. A warm, draft-free spot is key for consistent rising. A slightly puffed dough for the second rise on the sheet pan indicates it’s ready for dimpling.
Dimpling for Texture and Flavor
The dimples are not just for aesthetics; they serve a functional purpose. They prevent the focaccia from puffing up too much in the oven, ensuring a flatter, more consistent texture. More importantly, they create little pools for the olive oil, rosemary, and salt to collect, infusing every bite with concentrated flavor.
Serving Suggestions and Creative Variations
While rosemary focaccia is delightful on its own, it also lends itself to endless culinary creativity:
- Sandwiches: As mentioned, it’s a superior sandwich bread. Think caprese, roasted vegetables, grilled chicken, or even a simple ham and cheese.
- Dipping: Serve with a small bowl of high-quality extra virgin olive oil, perhaps infused with a touch of balsamic vinegar or red pepper flakes.
- Accompaniment: It’s a perfect side for Italian meals like pasta, lasagna, or hearty stews. It’s also fantastic with a fresh garden salad.
- Bruschetta Base: Slice thin and toast lightly, then top with classic bruschetta ingredients like diced tomatoes, basil, and garlic.
- Focaccia Pizza: Before baking, top with a thin layer of tomato sauce, mozzarella, and your favorite pizza toppings for a quick and easy focaccia-style pizza.
Flavor Variations to Explore:
- Garlic & Herb: Add minced garlic and a blend of Italian herbs (thyme, oregano, parsley) along with the rosemary.
- Olive & Sea Salt: Press pitted Kalamata or Castelvetrano olives into the dough before baking, along with a generous sprinkle of flaky sea salt.
- Cherry Tomato & Basil: Halve cherry tomatoes and press them into the dimples, then add fresh basil leaves after baking.
- Caramelized Onion: Sauté onions until deeply caramelized, then spread them over the focaccia before baking.
- Fig & Prosciutto: For a more gourmet option, scatter fresh fig slices and crumbled prosciutto over the dough (add prosciutto halfway through baking).
Baking homemade rosemary focaccia is more than just following a recipe; it’s an experience. The aroma filling your kitchen, the satisfaction of working with dough, and finally, the joy of biting into a warm, flavorful slice are unparalleled. This versatile bread is a testament to the fact that sometimes, the simplest ingredients, handled with care and a bit of patience, yield the most extraordinary results. Enjoy your culinary journey!