
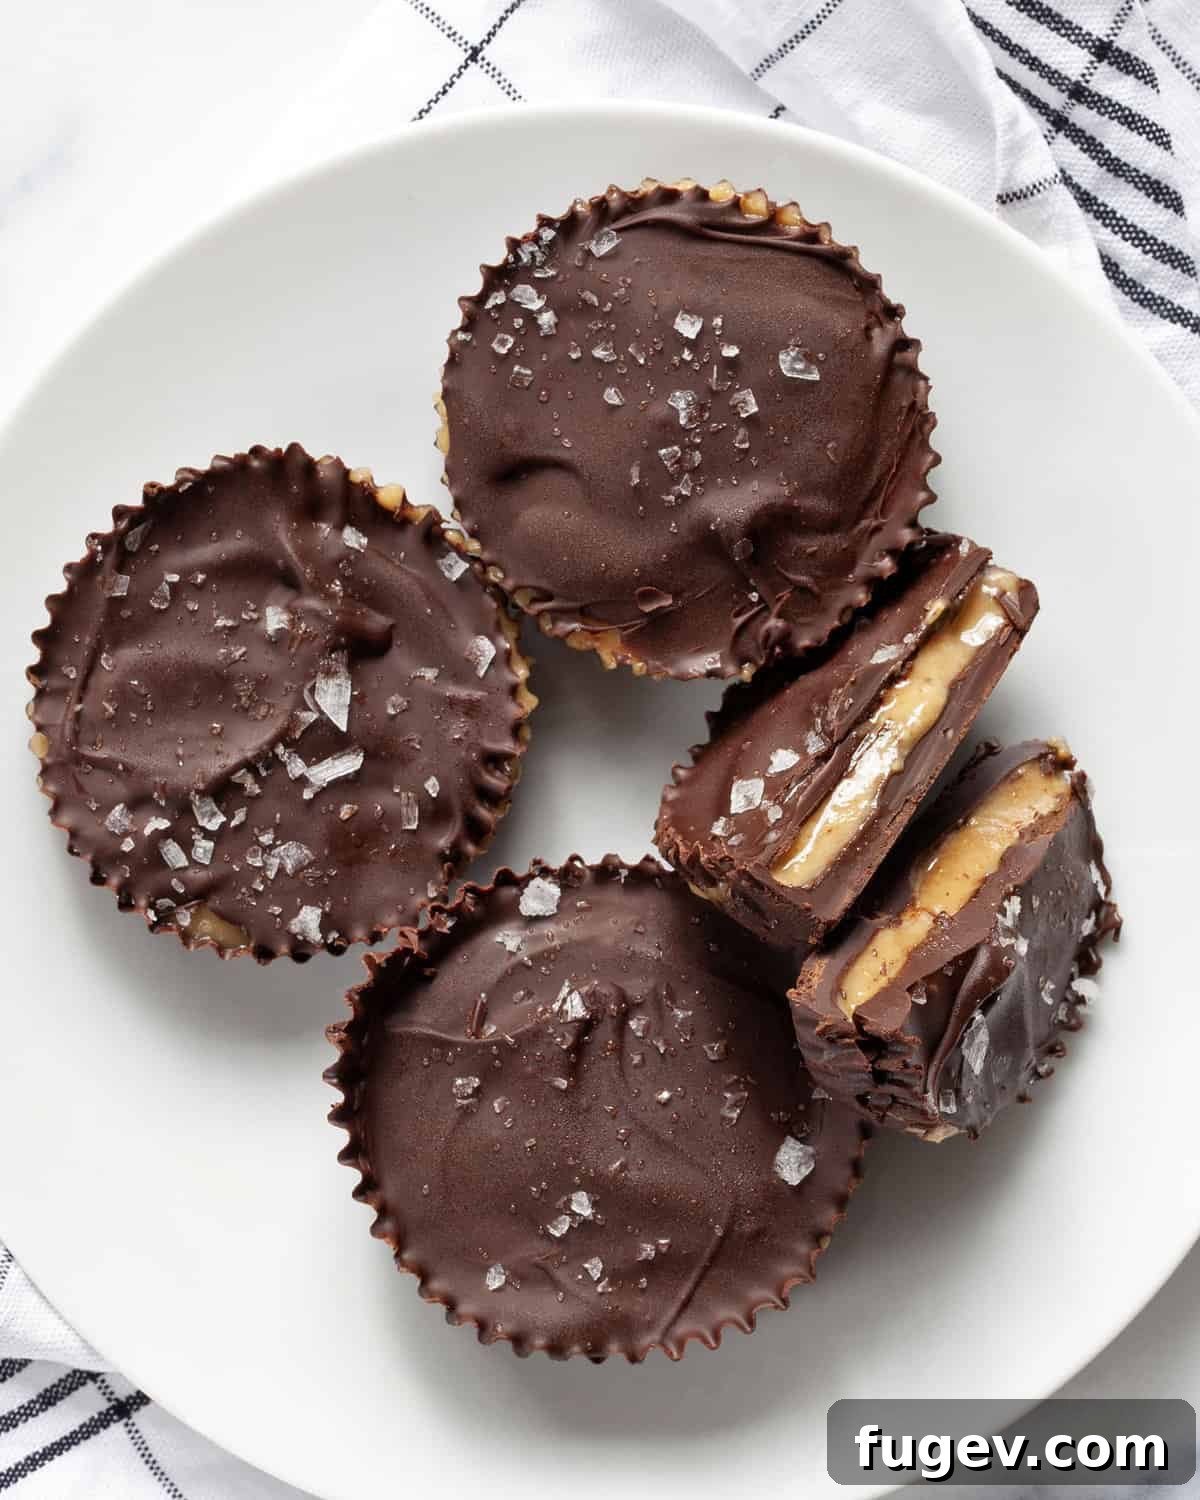
Easy Homemade Peanut Butter Cups: Your New Favorite Indulgence
Craving a classic chocolate and peanut butter treat but want a healthier, homemade alternative? Look no further! These **easy homemade peanut butter cups** are incredibly simple to make and will quickly become your go-to recipe for satisfying that sweet tooth. Crafted with just a handful of wholesome ingredients like rich dark chocolate chips, natural peanut butter, coconut oil, pure vanilla extract, and a touch of honey, they offer a delightful twist on typical store-bought varieties.
What makes them truly exceptional is the thoughtful balance of flavors. The slight bitterness of dark chocolate perfectly complements the creamy, sweet peanut butter filling. A finishing sprinkle of flaky sea salt elevates each cup, creating that irresistible salty-sweet harmony that’s impossible to resist. Forget complex candy-making; this approachable recipe is perfect for beginners and seasoned bakers alike, promising delicious results every time.
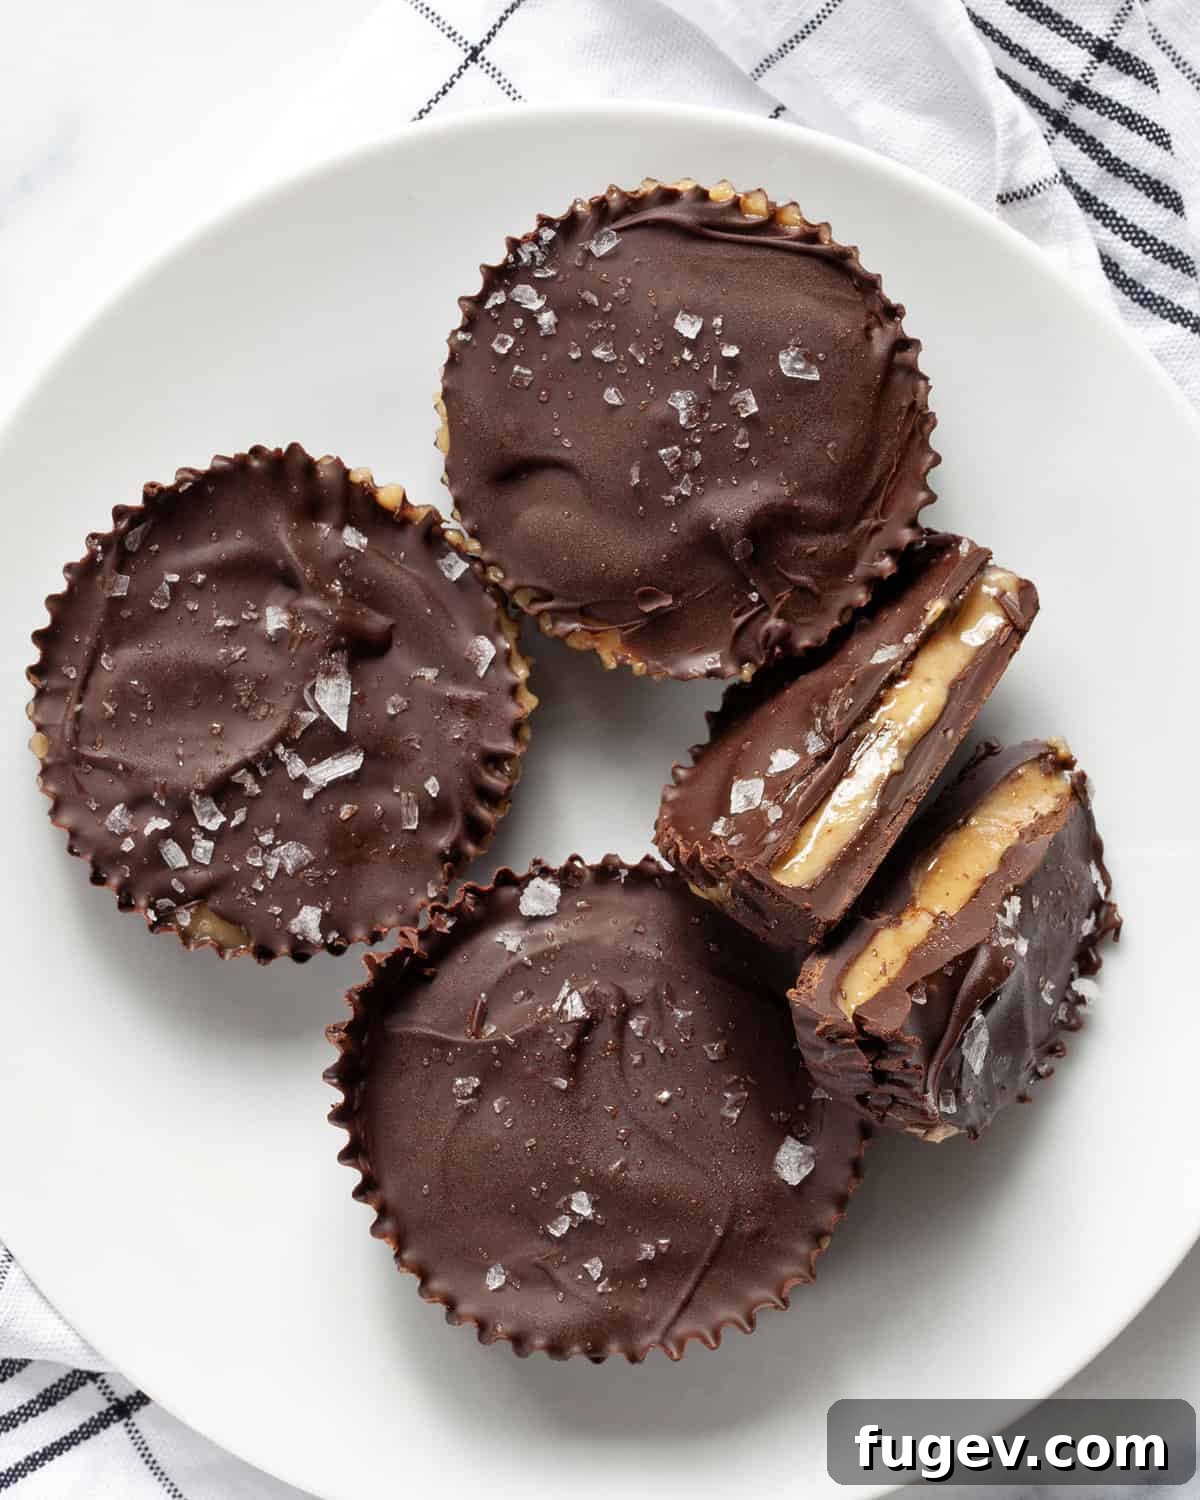
Table of Contents
- Why You’ll Love This Homemade Recipe
- The Essential Ingredients
- How To Make Homemade Peanut Butter Cups: A Step-by-Step Guide
- Recipe Tips for Perfect Peanut Butter Cups
- Serving Your Homemade Delights
- Leftovers & Storage
- Recipe FAQs
- More Chocolate & Nut Recipes
- Homemade Peanut Butter Cups Recipe Card
Why You’ll Love Making These Homemade Peanut Butter Cups
There are countless reasons to fall in love with this **homemade peanut butter cup recipe**. Beyond the sheer joy of creating your own candy, these treats offer several distinct advantages that set them apart:
A Healthier Indulgence
Unlike many store-bought peanut butter cups that are loaded with refined sugars and artificial ingredients, our version offers a significantly healthier profile. By using natural peanut butter and sweetening the filling with honey, you dramatically reduce the amount of processed sugar. Dark chocolate, rich in antioxidants, adds another layer of health benefits compared to milk chocolate. You control exactly what goes into your treats, making them a guilt-free pleasure you can feel good about enjoying.
Minimal Ingredients, Maximum Flavor
You might be surprised to learn that these decadent peanut butter cups require just six core ingredients: dark chocolate chips, natural peanut butter, coconut oil, vanilla extract, honey, and a pinch of flaky sea salt. While some recipes boast an even shorter list, we firmly believe that vanilla extract is a non-negotiable addition. It doesn’t just add a subtle depth; it truly enhances and rounds out the rich chocolate flavor, transforming a simple dessert into something truly special. And that sprinkle of flaky sea salt? It’s the secret ingredient that amplifies both the sweet and salty notes, creating an irresistible complexity that will have you reaching for another.
Effortlessly Simple Candy Making
If the thought of making homemade candy seems intimidating, these peanut butter cups are the perfect entry point. This recipe demystifies the process, proving that crafting delicious treats from scratch doesn’t require advanced culinary skills or specialized equipment. The method is incredibly straightforward: simply melt the chocolate and peanut butter mixtures in the microwave, stir them together, layer them into a muffin pan, and let the freezer do the rest. It’s an approachable and rewarding experience that will boost your confidence in the kitchen.
Embrace Imperfection: The Charm of Homemade
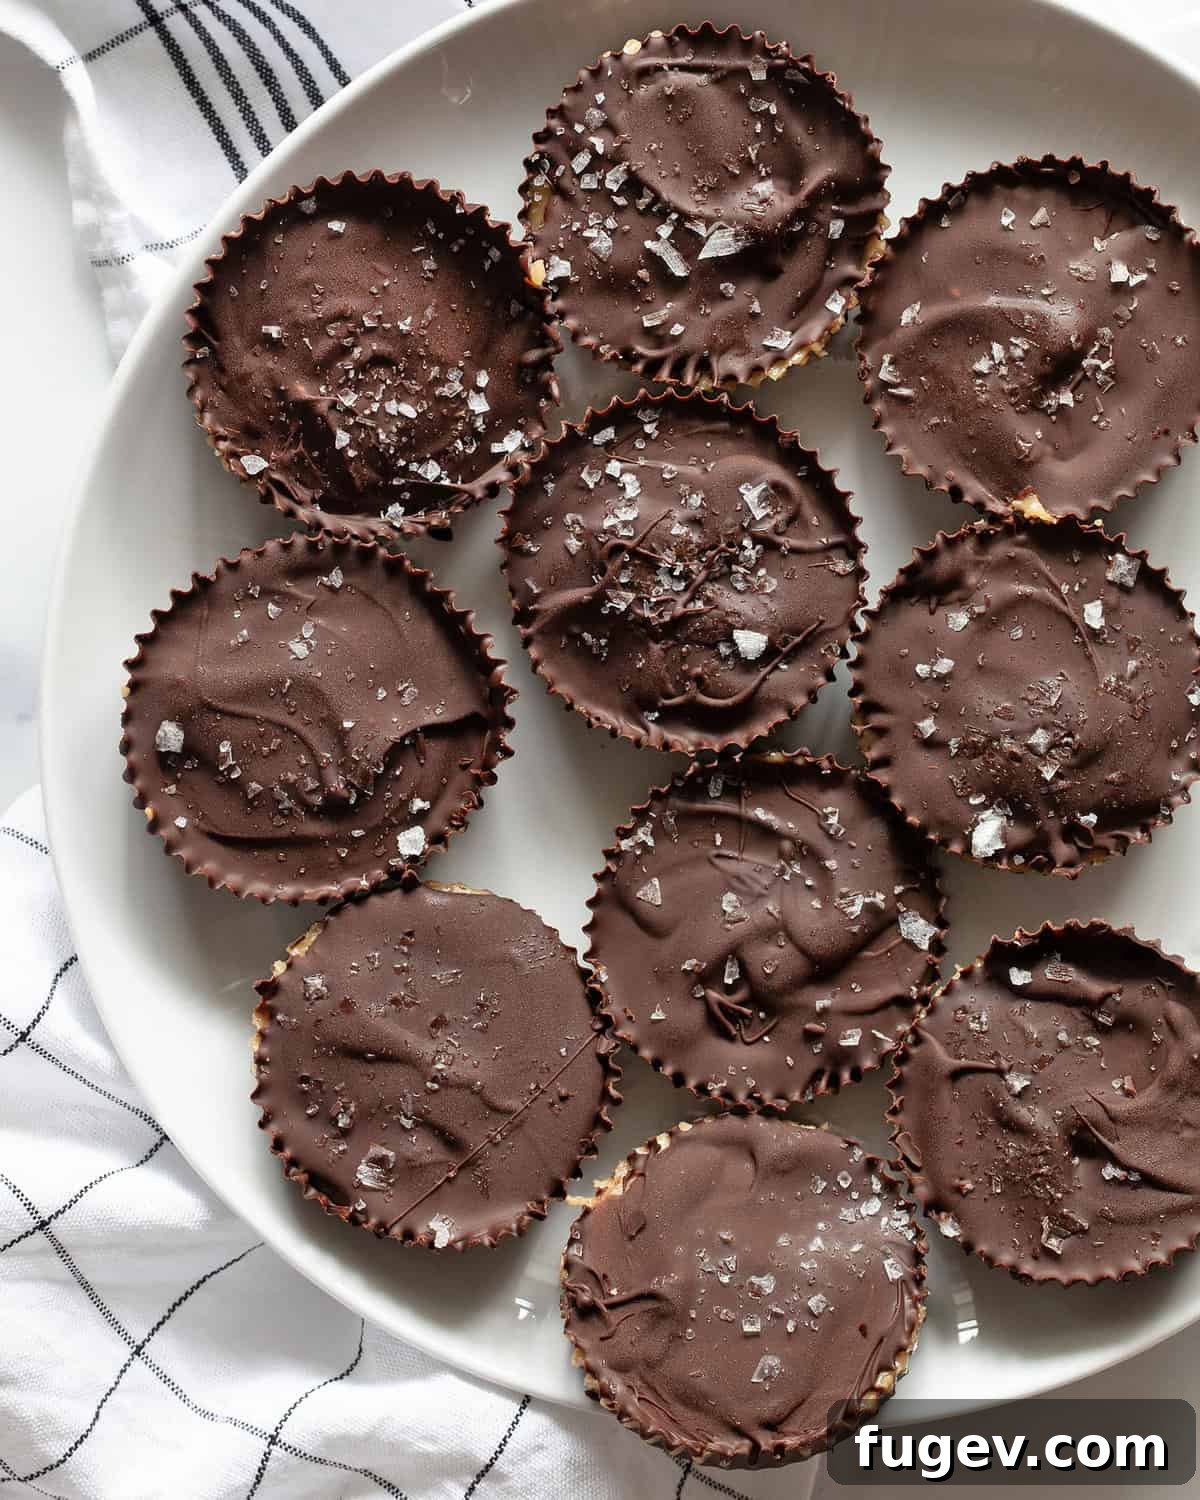
One of the most endearing qualities of these homemade peanut butter cups is their perfectly imperfect nature. Unlike the uniform appearance of mass-produced candies, yours will have unique bumps, ripples, and delightful irregularities. These small imperfections are not flaws; they are badges of honor, showcasing the authentic, handcrafted charm of your efforts. They tell a story of care and dedication, making each bite even more special and visually appealing in its own rustic way.
Generous Chocolate Layers
Have you ever made a homemade candy recipe only to find yourself scraping the bowl, barely having enough mixture for a full batch? Not with this recipe! We ensure there’s a generous amount of chocolate for both the bottom and top layers, guaranteeing a satisfyingly thick, rich chocolate shell for all 12 peanut butter cups. This means no skimping on flavor or texture, providing a truly indulgent experience from the first bite to the last.
The Essential Ingredients for Your Peanut Butter Cups
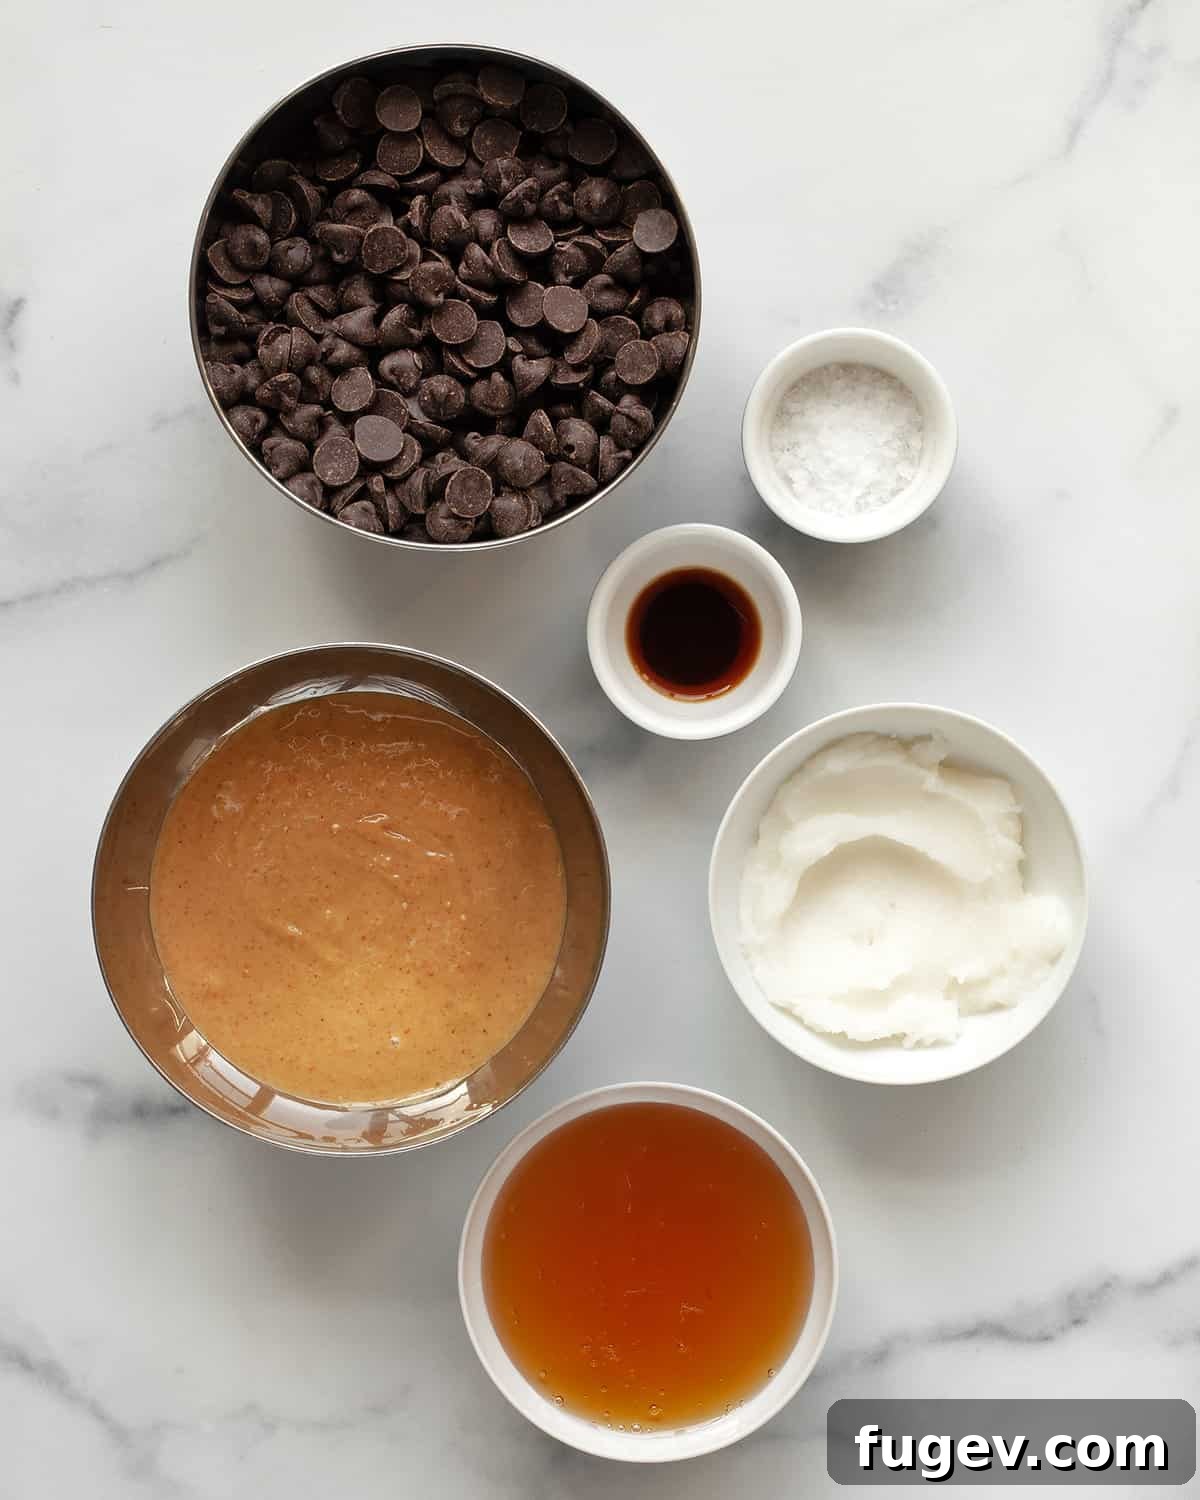
To create these delectable peanut butter cups, here’s a closer look at the key ingredients and why they are chosen:
- Dark Chocolate Chips: The cornerstone of the chocolate shell, dark chocolate delivers a rich, intense flavor and a satisfying snap when chilled. We recommend dark chocolate over milk chocolate for its deeper, more “chocolate-forward” taste and reduced sweetness, allowing the peanut butter to shine. For a vegan option, simply choose dairy-free dark chocolate chips.
- Natural Peanut Butter: The heart of your filling. Opt for natural peanut butter with a somewhat drippy consistency, as this will yield a wonderfully creamy and smooth interior. Avoid overly dry or separated peanut butter; a well-stirred jar is key. You can also experiment with other creamy nut butters like almond butter or cashew butter for a different flavor profile.
- Coconut Oil: This ingredient plays a crucial role in achieving the perfect texture for both the chocolate and peanut butter layers. When using refined coconut oil, you won’t detect any coconut flavor in the finished product, ensuring the pure chocolate and peanut butter flavors dominate. It helps the chocolate melt smoothly and gives the peanut butter filling its delightful creaminess.
- Vanilla Extract: A subtle yet powerful flavor enhancer. Vanilla extract elevates the complexity and richness of the dark chocolate, adding a warm, aromatic note that makes a significant difference to the overall taste experience. Don’t skip it!
- Honey: Used to naturally sweeten the peanut butter filling, honey provides a lovely depth of flavor. If you’re looking to make these peanut butter cups vegan, simply substitute maple syrup for the honey, which offers a similar sweetness and consistency.
- Flaky Sea Salt: This is the ultimate finishing touch that transforms these simple treats into gourmet delights. A sprinkle of flaky sea salt, such as Maldon, on top of each peanut butter cup creates an incredible contrast, enhancing the chocolate and peanut butter flavors with a delightful salty crunch. This salty-sweet combination is truly addictive.
How To Make Homemade Peanut Butter Cups: A Simple Guide
Making your own **easy peanut butter cups** is a rewarding process. Follow these straightforward steps to create your perfect batch:
- Prepare Your Muffin Pan: Begin by lining a standard 12-cup muffin pan with paper or silicone liners. This ensures your peanut butter cups will be easy to remove once set.
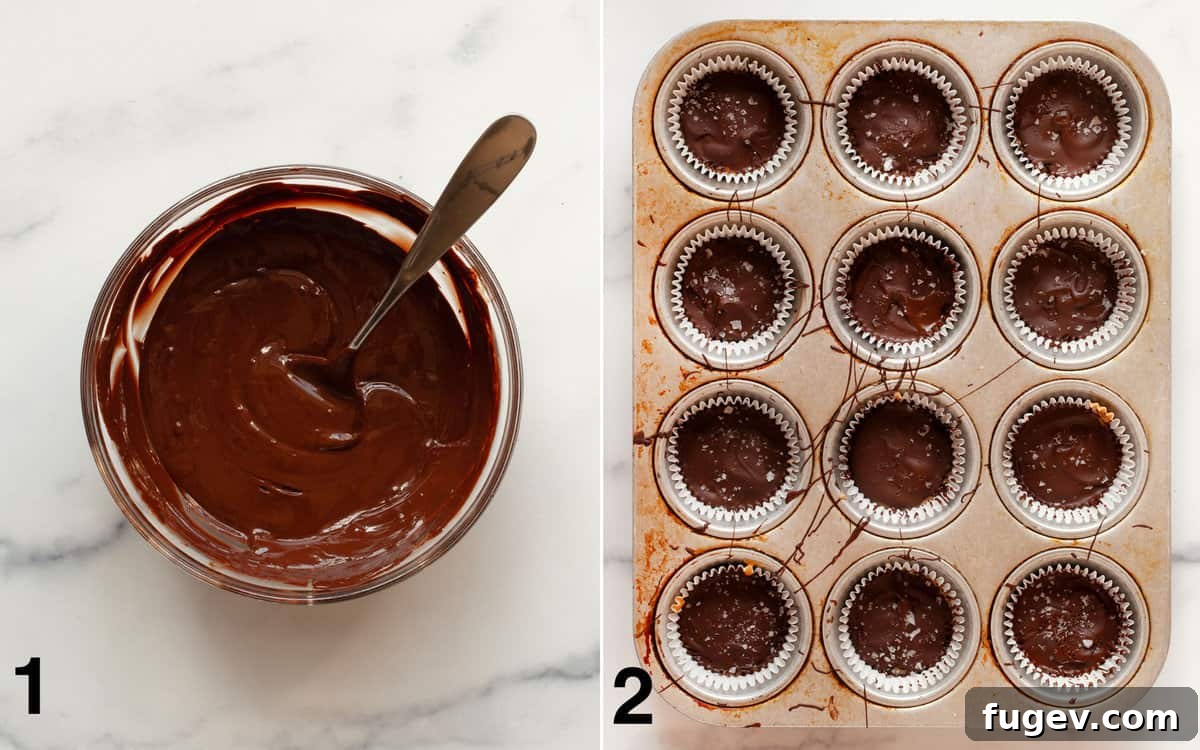
- Melt the Chocolate Base: In a microwave-safe bowl, combine the dark chocolate chips and 1½ tablespoons of coconut oil. Microwave in short 20-second bursts, stirring thoroughly after each interval. Stirring helps to distribute the heat and encourages the chocolate to melt smoothly, preventing it from seizing or becoming grainy. Continue until the mixture is mostly melted with just a few small chips remaining, then stir until completely smooth. Finally, stir in the vanilla extract for enhanced flavor.
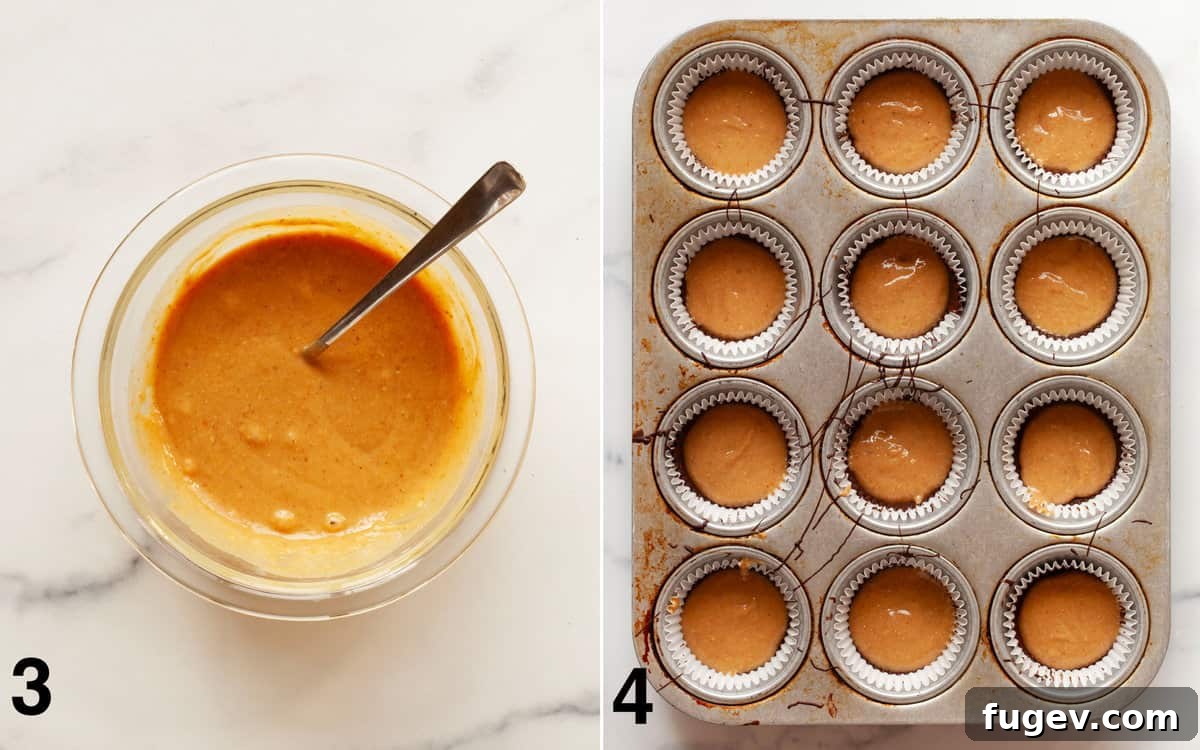
- Form the First Chocolate Layer: Spoon approximately 2 teaspoons of the melted chocolate mixture into the bottom of each prepared muffin liner. Use the back of your spoon to gently spread the chocolate across the bottom and slightly up the sides of each cup. Place the muffin pan in the freezer for 10 minutes to allow this layer to set firmly.
- Prepare the Peanut Butter Filling: In a separate microwave-safe bowl, combine the natural peanut butter, honey, and the remaining 2 tablespoons of coconut oil. Microwave for 10-20 seconds, just enough to melt the coconut oil and make the mixture easier to stir. Stir vigorously until all ingredients are well combined and the filling is smooth and creamy.
- Add the Peanut Butter Layer: Carefully spoon about 1 tablespoon of the peanut butter mixture into the center of each chocolate-lined cup, spreading it gently over the set chocolate layer. Return the muffin pan to the freezer for another 10 minutes to allow the peanut butter layer to firm up.
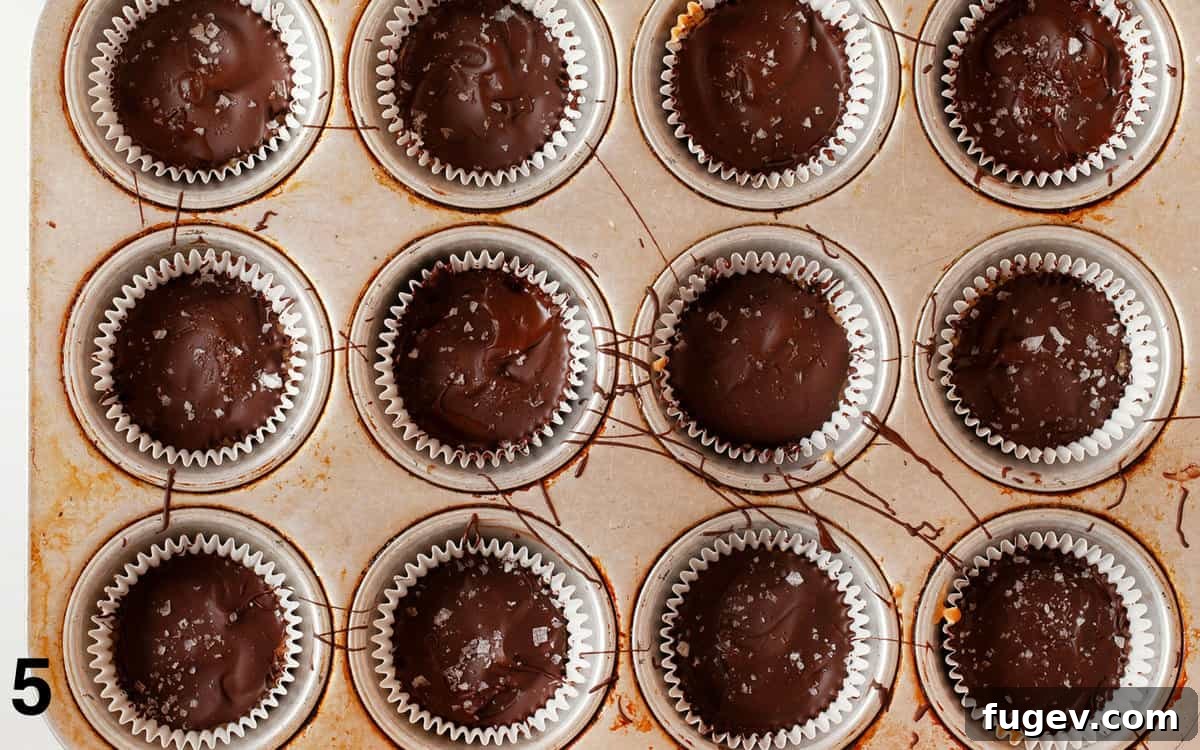
- Apply the Final Chocolate Layer and Salt: Take the muffin pan out of the freezer. Spoon the remaining melted chocolate over the peanut butter layer, using about 1 teaspoon per cup. Work quickly, doing one cup at a time, and immediately sprinkle each with a pinch of flaky sea salt. Because the peanut butter layer is frozen, the chocolate will set very rapidly. This one-at-a-time method ensures a beautiful finish.
- Final Freeze: Once all cups are topped and salted, return the muffin pan to the freezer for a final 10 minutes, or until the peanut butter cups are completely firm and set. Then, they are ready to be enjoyed!
Recipe Tips for Perfect Homemade Peanut Butter Cups
Achieving perfectly delicious **dark chocolate peanut butter cups** is simple with a few insider tips:
- Invest in Quality Chocolate: The flavor of your peanut butter cups largely depends on the quality of your chocolate. Opt for a reputable brand like Guittard, Ghirardelli, or Callebaut. Higher quality chocolate melts more smoothly and offers a superior, richer taste and texture that truly elevates the final product.
- Avoid Overheating Chocolate: This is crucial for a smooth, glossy chocolate shell. Never overheat your chocolate in the microwave. Instead, use short 20-second increments, stirring diligently after each. You want the chocolate to be *mostly* melted, with some small chips still visible. The residual heat from the bowl and the stirring action will melt these last few pieces, resulting in a perfectly smooth, un-grainy chocolate. Alternatively, a double boiler on the stovetop offers a gentler, more controlled melting method.
- Organize Your Freezer: Before you even start melting, make sure you have a clear, flat space in your freezer to accommodate the muffin tin. This will make the multiple freezing steps much smoother and prevent any spills or uneven setting.
- Re-melt Hardened Chocolate Gently: If your remaining chocolate hardens between layers, don’t panic. Microwave it for just 5 seconds and stir well. Repeat this in very short bursts as needed. The goal is to soften it just enough to work with, without overheating and risking it seizing or becoming grainy.
- Master the Final Chocolate Layer: The top chocolate layer, with its sprinkle of sea salt, is best applied one peanut butter cup at a time. Because the peanut butter layer is frozen solid, the chocolate will set almost instantly. Working quickly on individual cups ensures you can spread the chocolate evenly and apply the sea salt before it hardens, creating a beautiful and well-distributed finish.
- Use Appropriate Bowls: Always use microwave-safe bowls for both the chocolate and peanut butter mixtures. You will need two separate bowls for this recipe to keep the flavors distinct and the process efficient.
Serving Your Homemade Delights
These **homemade peanut butter cups** are wonderfully generous in size, making each one a satisfying single-serving dessert. They are best enjoyed chilled, straight from the fridge or freezer. If you plan to serve them to guests, consider chilling your serving plate beforehand to help maintain their firmness and fresh taste, ensuring a delightful experience for everyone.
Leftovers & Storage
Storing your **easy peanut butter cups** correctly ensures they remain fresh and delicious. Keep them in an airtight container in the refrigerator for up to 5-7 days. For longer storage, they can be frozen for up to 2 months. When ready to enjoy from the freezer, simply let them thaw at room temperature for 20-30 minutes for the perfect texture.
Frequently Asked Questions About Homemade Peanut Butter Cups
Absolutely! To make this recipe entirely vegan, simply ensure you use dairy-free dark chocolate chips for the chocolate layers. For the peanut butter filling, substitute maple syrup in place of the honey to maintain sweetness and consistency.
Yes, definitely! This recipe is quite versatile. You can easily substitute almond butter or other creamy nut butters like cashew butter for the peanut butter. Just ensure the alternative nut butter has a thick but somewhat pourable or drippy consistency to achieve the desired creamy filling texture.
Certainly! If you prefer a more textured filling, chunky peanut butter is an excellent choice. It will add an extra layer of crunch and a satisfyingly varied texture to your homemade peanut butter cups, complementing the smooth chocolate shell beautifully.
Yes, you can easily adjust the size. For mini peanut butter cups, use a mini muffin pan and mini cupcake liners. You’ll need to adjust the quantities per cup accordingly (less chocolate and peanut butter per layer) and you’ll likely yield more servings.
More Delightful Chocolate & Nut Recipes
If you love the combination of chocolate and nuts, explore these other delicious recipes:
- Flourless Peanut Butter Chocolate Cookies
- Peanut Butter M&M Cookies
- Almond Brownies
- Chocolate Chip Walnut Skillet Cookie
- Mocha Almond Cake
Homemade Peanut Butter Cups Recipe
Rating: 5 out of 5 stars (from 1 vote)
By: Paige Adams
Prep Time: 15 mins
Setting Time: 30 mins
Total Time: 45 mins
Yields: 12 peanut butter cups
Summary: With dark chocolate chips, peanut butter, coconut oil, vanilla extract and honey, these homemade peanut butter cups are a healthier version of the typical pb cups.
Ingredients
For the Chocolate Layers
- 1½ cups dark chocolate chips
- 1½ tablespoons coconut oil
- ½ teaspoon vanilla extract
For the Peanut Butter Filling
- ½ cup natural peanut butter
- ¼ cup honey
- 2 tablespoons coconut oil
For Finishing
- Flaky sea salt (for sprinkling)
Instructions
- Line a 12-cup muffin pan with paper or silicone liners.
- Melt the chocolate chips and 1½ tablespoons coconut oil in a microwave-safe bowl. Microwave in 20-second intervals, stirring after each, until smooth. (This typically takes 5-6 intervals). Stir in the vanilla extract.
- Spoon 2 teaspoons of melted chocolate into each cup. Spread it to coat the bottom and slightly up the sides. Freeze for 10 minutes until set.
- In a separate medium bowl, combine the peanut butter, honey, and 2 tablespoons coconut oil. Microwave for 10-20 seconds to melt the coconut oil, then stir until smooth and well combined.
- Pour about 1 tablespoon of the peanut butter filling into each cup over the set chocolate layer. Freeze for 10 minutes until set.
- Spoon the remaining melted chocolate on top of each cup (about 1 teaspoon each). Immediately sprinkle with flaky sea salt. Work one cup at a time as the chocolate will harden quickly due to the frozen layer beneath.
- Freeze the peanut butter cups for a final 10 minutes, or until completely set.
Video
Notes
- You can substitute other nut butters (like almond or cashew butter) for peanut butter, and chunky peanut butter can be used for added texture.
- For a vegan version, use dairy-free chocolate chips and swap maple syrup for honey.
- If the remaining chocolate hardens during the process, microwave it for 5 seconds and stir, repeating as needed until pliable.
- Store finished peanut butter cups in an airtight container in the refrigerator for 5-7 days, or freeze for up to 2 months. Thaw at room temperature for 20-30 minutes before serving from frozen.
Nutrition Facts (per serving)
Nutrition information is an approximation and calculated automatically.
- Calories: 232 kcal
- Carbohydrates: 21g
- Protein: 4g
- Fat: 15g
- Saturated Fat: 10g
- Polyunsaturated Fat: 1g
- Monounsaturated Fat: 3g
- Cholesterol: 0.2mg
- Sodium: 75mg
- Potassium: 206mg
- Fiber: 1g
- Sugar: 15g
- Vitamin A: 2 IU
- Vitamin C: 0.1mg
- Calcium: 74mg
- Iron: 1mg
Additional Info
Course: Candy
Cuisine: American
Did you make this recipe? Mention @lastingredient on Instagram and tag it #lastingredient!