
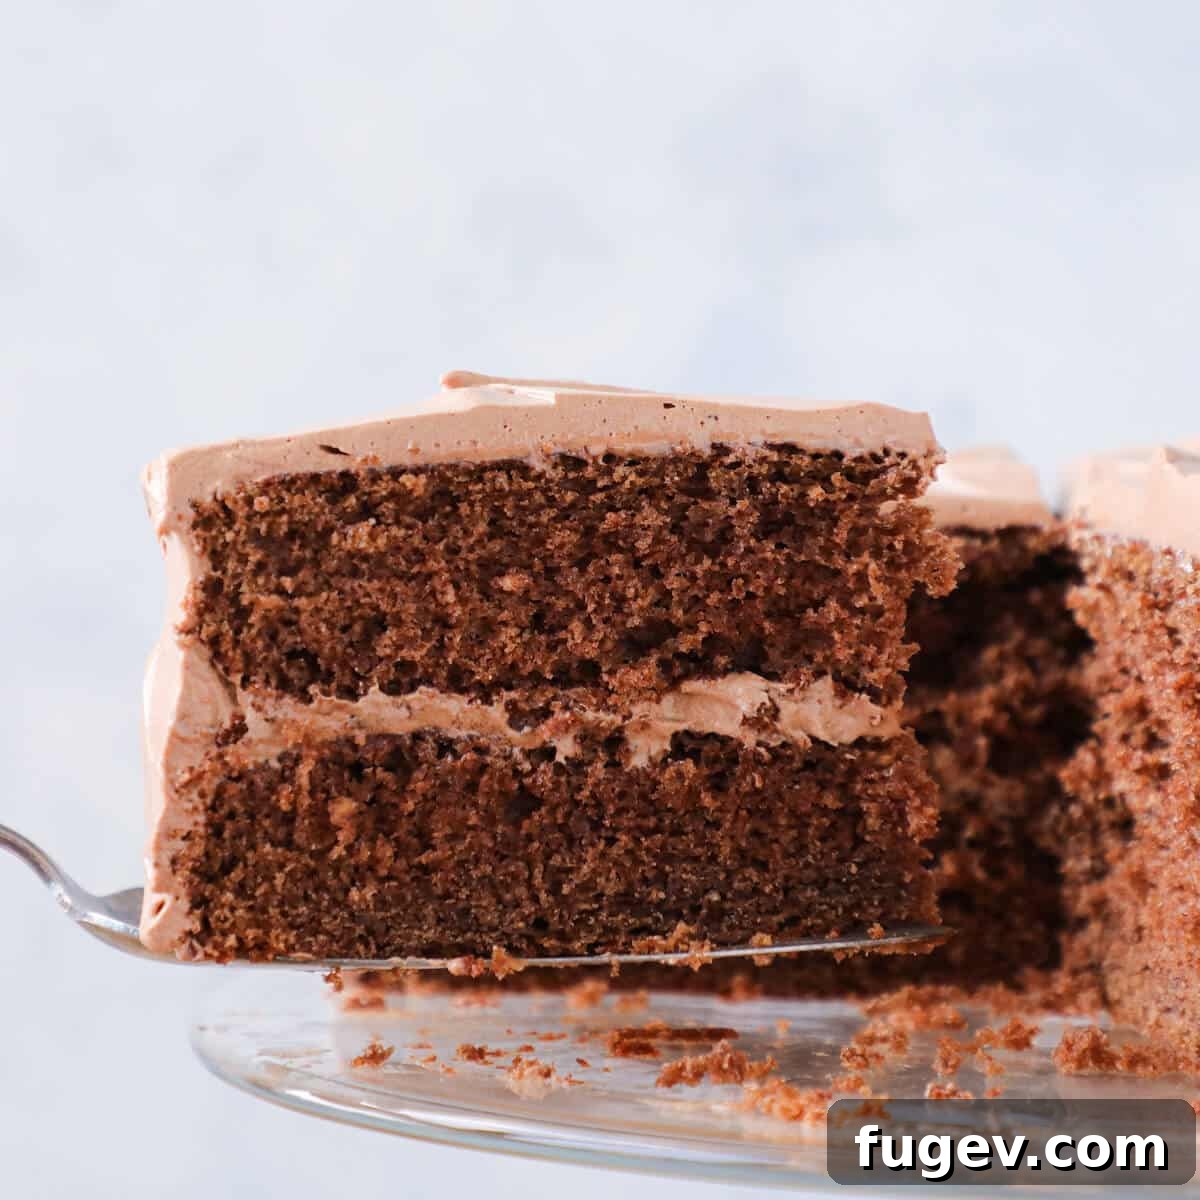
Ultimate Old-Fashioned Chocolate Fudge Cake: A Timeless Indulgence
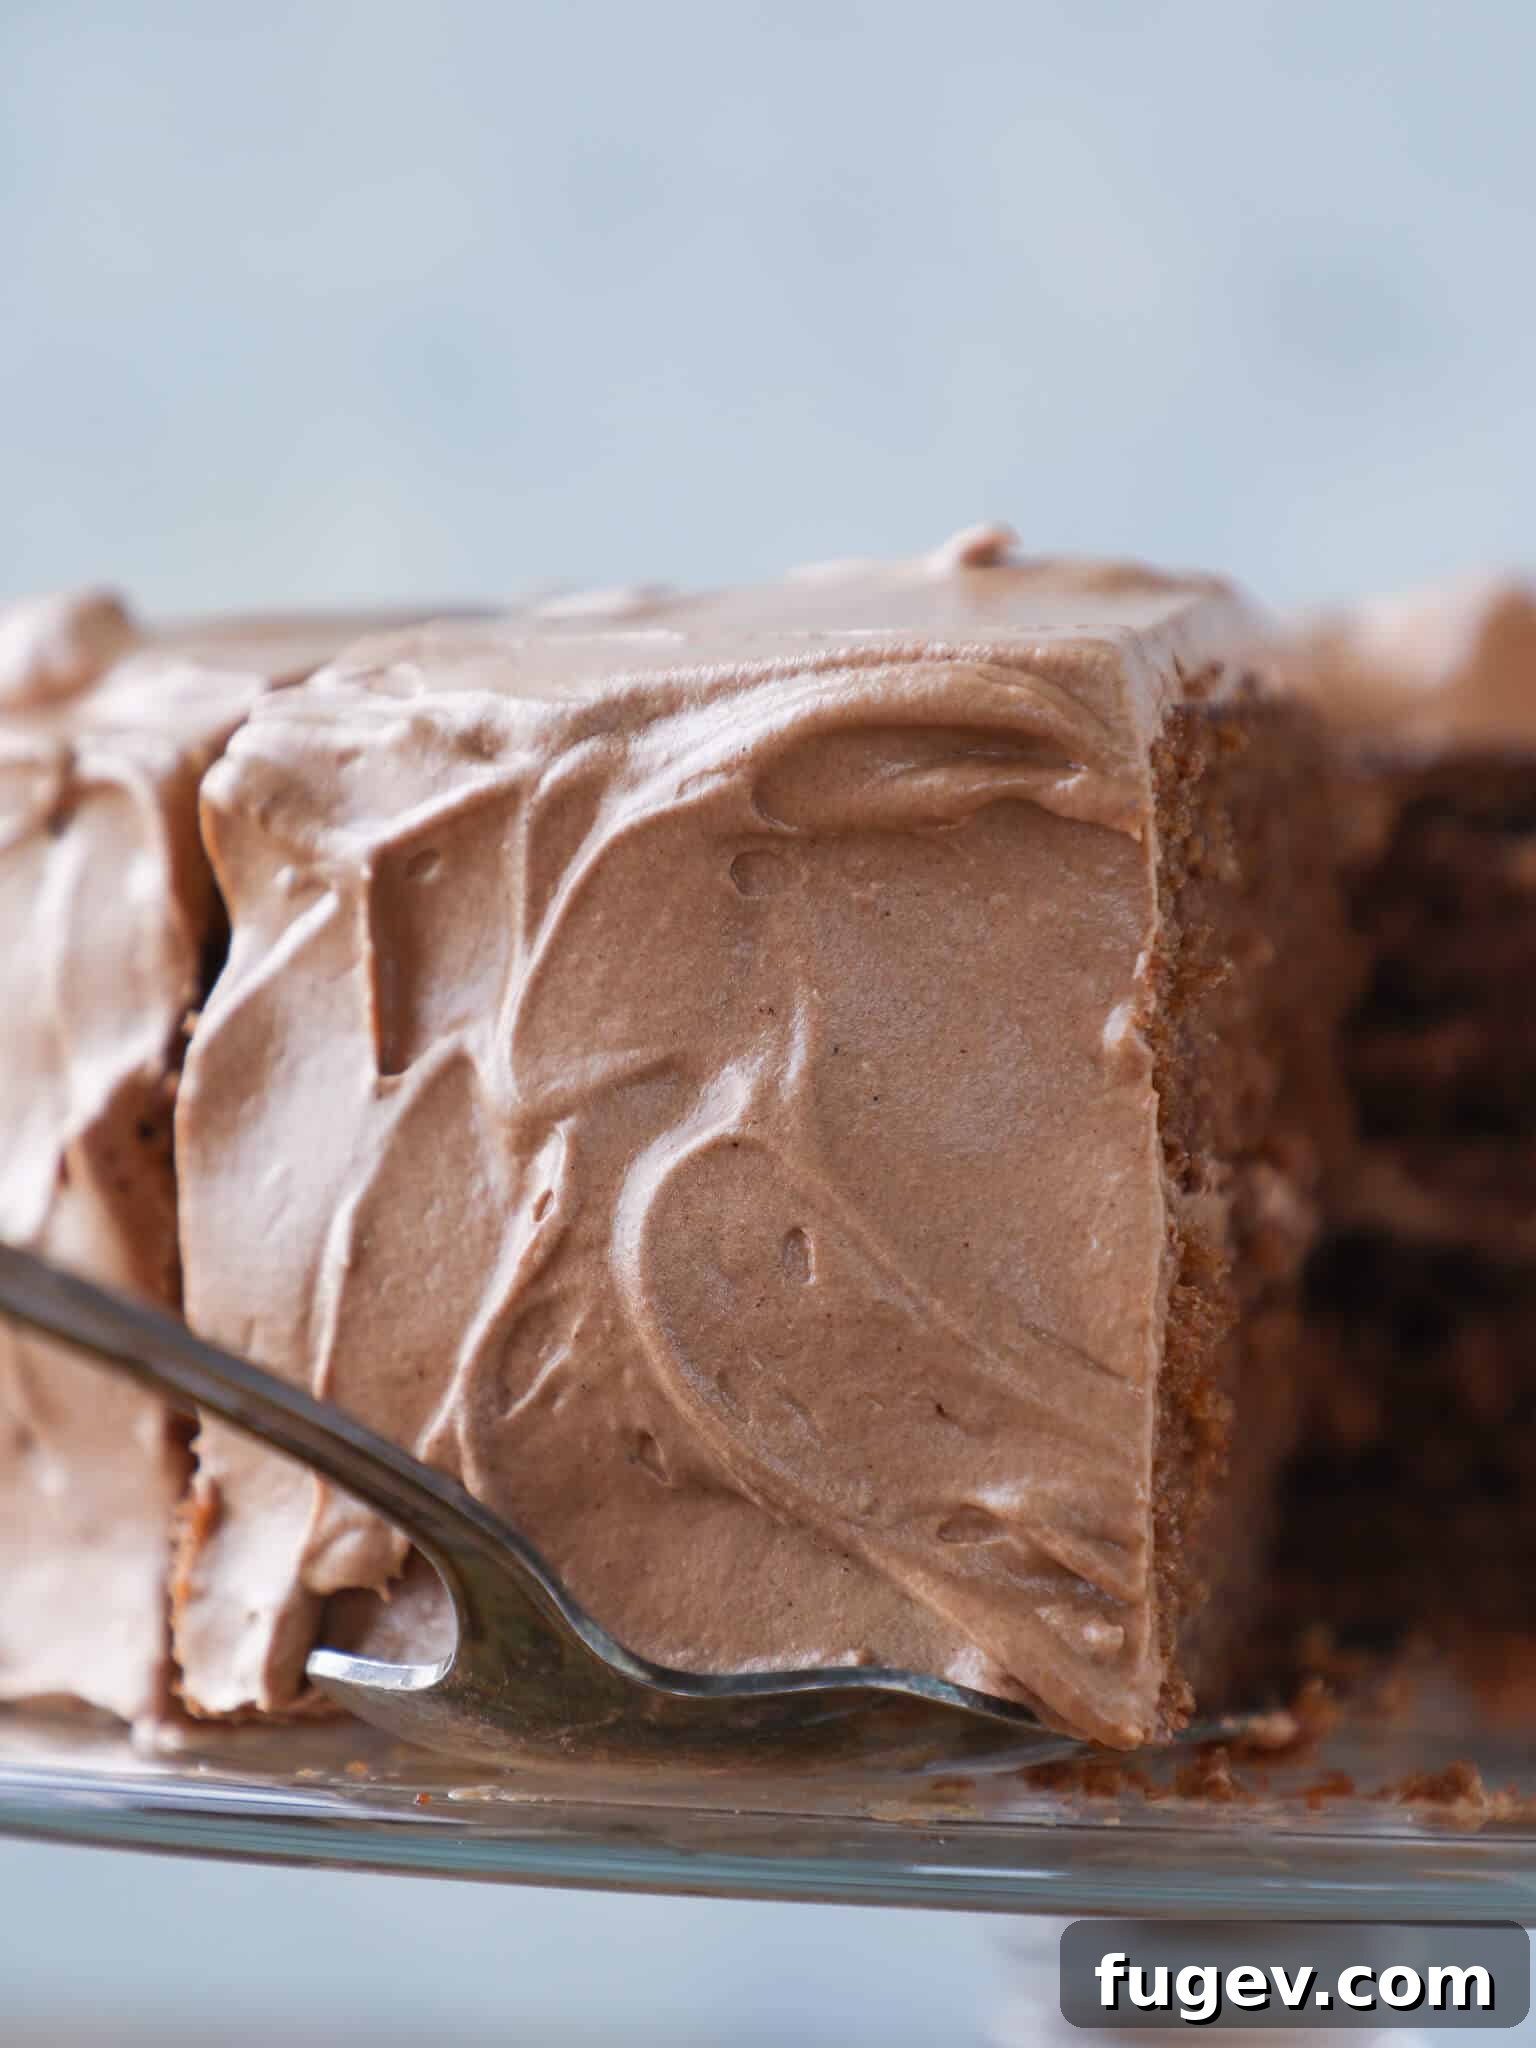
Prepare for an unforgettable journey into chocolate bliss with our signature chocolate fudge cake. Every luxurious bite of this dessert promises an intense, deeply fudgy chocolate richness that will captivate your senses. This isn’t just any cake; it’s an old-fashioned recipe, celebrated for its simplicity and exceptional results. It’s so straightforward that even my friend’s 11-year-old successfully baked it independently, mastering both the moist cake layers and the smooth, creamy chocolate icing.
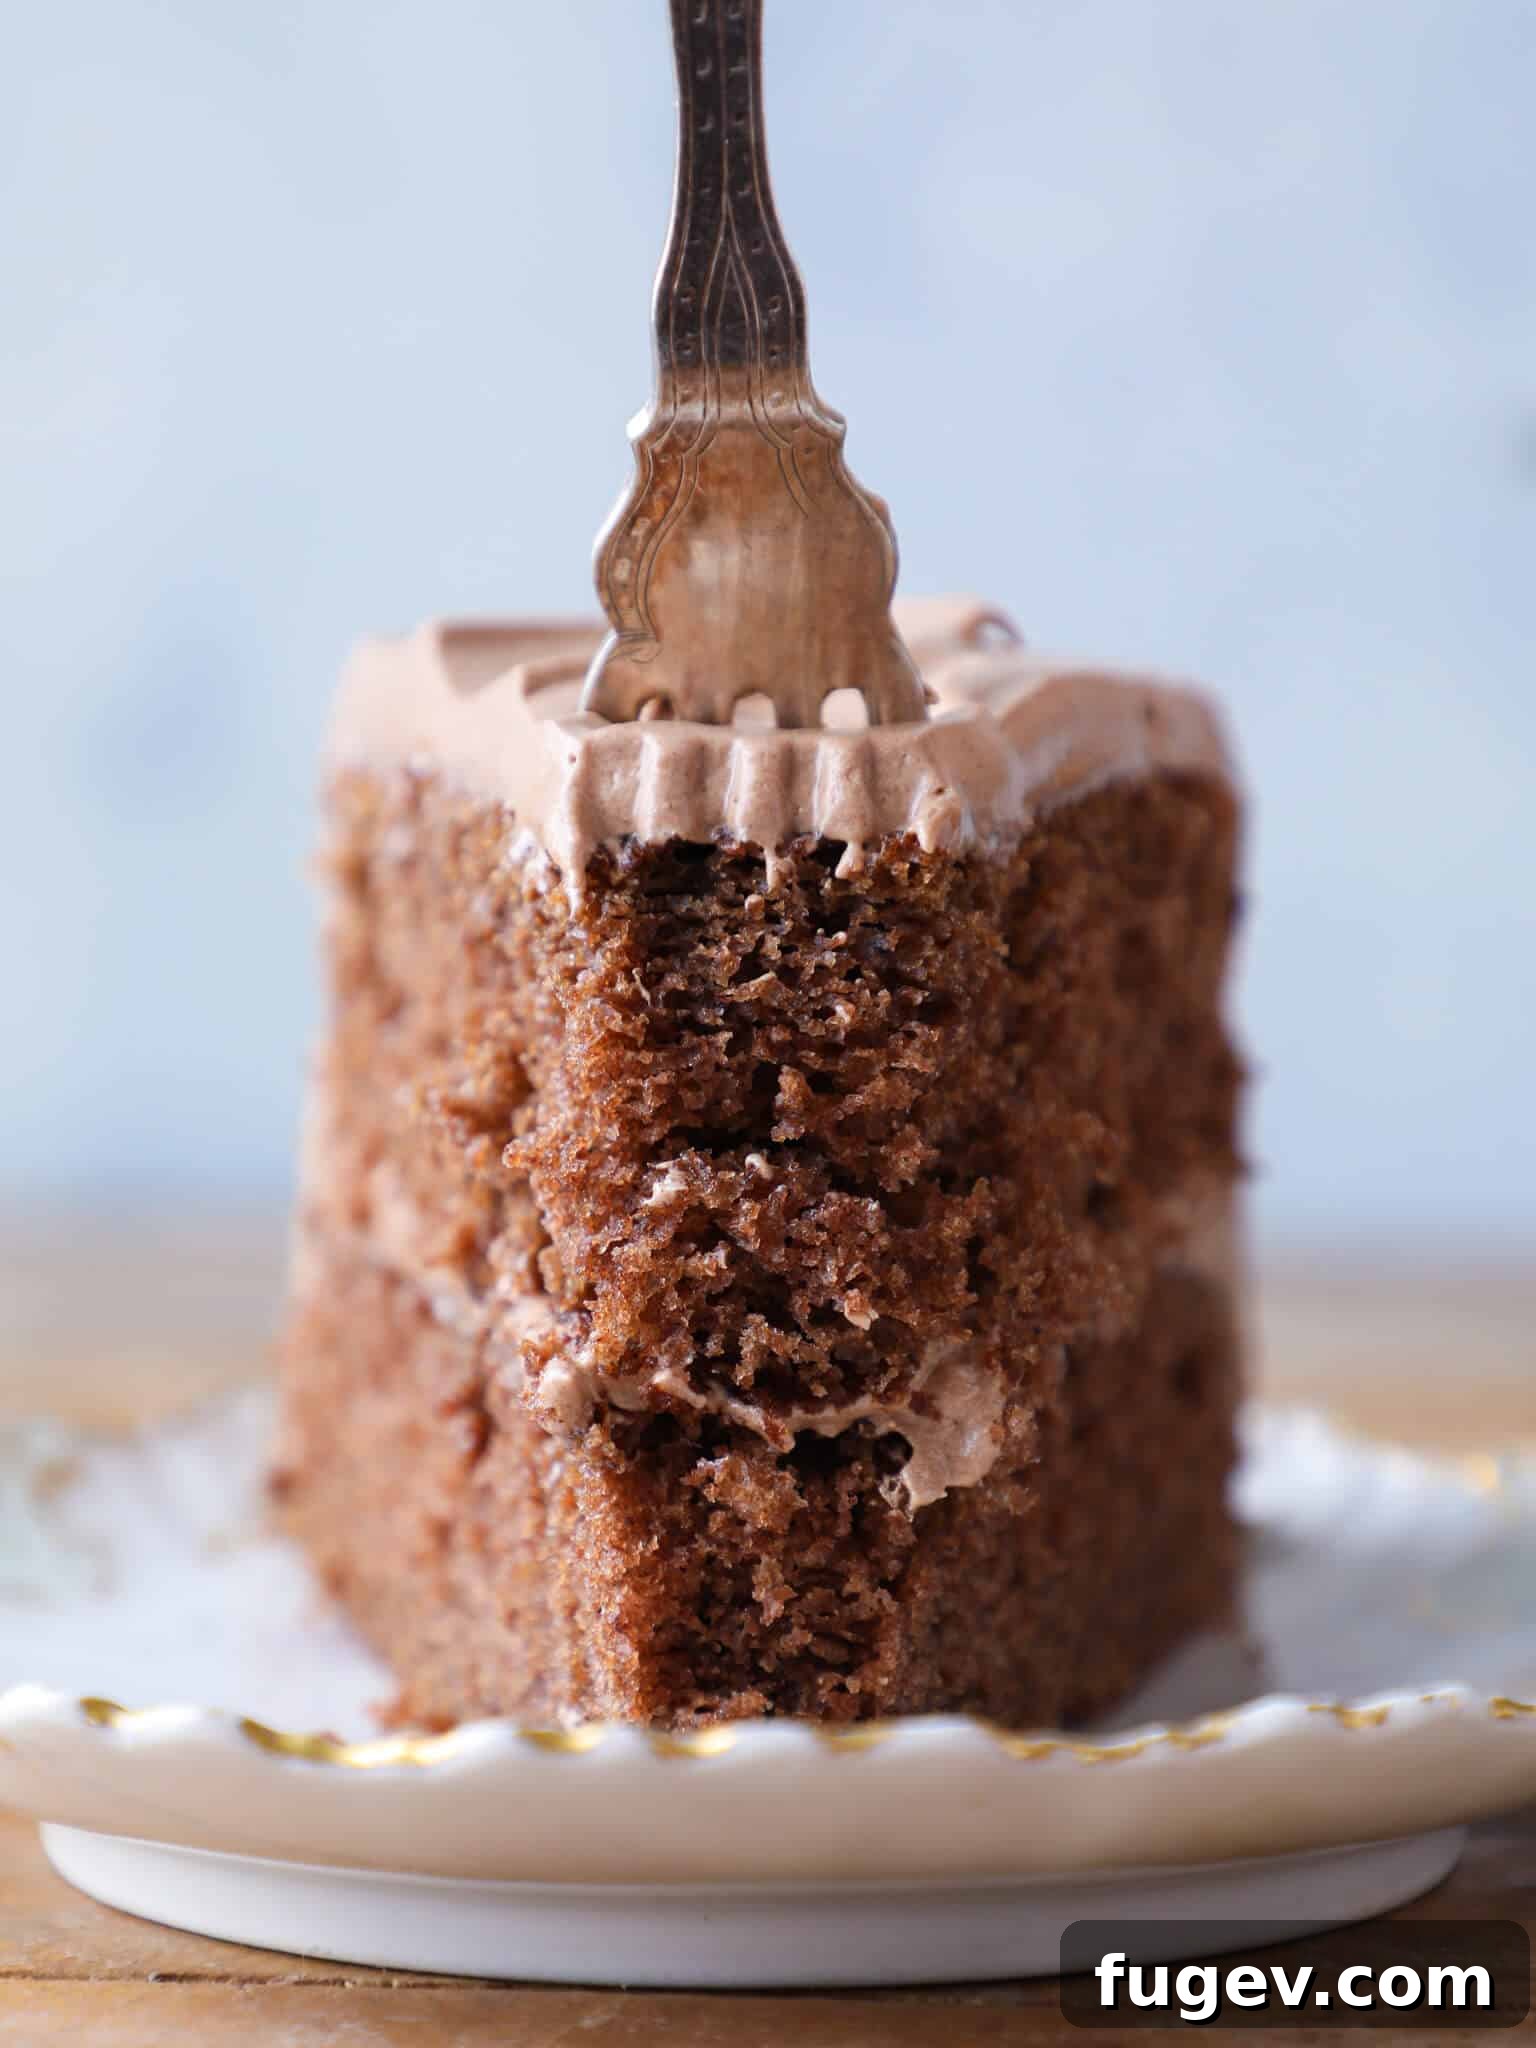
Forget dry, crumbly cakes; this recipe delivers unparalleled moisture and a texture so fudgy it melts in your mouth. The secret lies in a generous amount of high-quality unsweetened baking chocolate, far surpassing the chocolate content found in most contemporary recipes. Topped with a luscious, whipped chocolate icing, this cake is an ode to classic baking techniques and pure chocolate indulgence.
A Quick Look At The Recipe
This is a brief summary of the recipe. Jump to the recipe section for full details and step-by-step instructions.
Jump to Recipe
Prep Time
45 minutes
Cook Time
30 minutes
Total Time
1 hour 15 minutes
Servings
16 people
Difficulty
Easy
Calories *
395 kcal per serving
Technique
Make cake, cool, make icing and frost cake.
Flavor Profile
Rich, fudgy chocolate cake with creamy chocolate icing.
* Based on nutrition panel
“This was a fun recipe to make with my niece. I’ve never made a frosting like that and I was shocked on how creamy and light the frosting was, perfect pairing for the rich cake.” ⭐⭐⭐⭐⭐
Mara
This dessert promises a moist cake with a perfect balance of deep chocolate flavor, elegantly crowned with a decadent whipped chocolate icing. Its irresistibly indulgent fudgy texture evokes memories of the most exquisite old-fashioned fudge. This easy-to-master chocolate cake has truly won over my chocolate-loving heart, standing out from countless recipes in my extensive research on chocolate dessert recipes due to its remarkably high unsweetened baking chocolate content. It’s this commitment to chocolate that sets our recipe apart, delivering an unparalleled depth of flavor.
Continue to explore the delightful world of old-fashioned baking wisdom with other cherished recipes like these chocolate halfway bars, our comforting cinnamon flop, and the ever-popular butterscotch brownies. When you make this chocolate fudge cake, be sure to cut yourself a generous slice – it has a charming way of disappearing before you know it!
Table of Contents
- Why this is the best chocolate cake recipe:
- Expert Baking Tips for Success
- Essential Ingredients Explained
- Creative Variations & Serving Suggestions
- Step-by-Step Guide to Baking Perfection
- Chef Lindsey’s Expert Tip
- Frequently Asked Questions
- Chocolate Fudge Cake Recipe
- Before You Go
Why This Old-Fashioned Chocolate Fudge Cake Recipe Shines
What makes this particular chocolate fudge cake truly exceptional? It boils down to a few key elements that ensure a superior baking and eating experience:
- Unrivaled Rich, Fudgy Chocolate Flavor: Unlike many recipes that rely heavily on cocoa powder, our old-fashioned fudge cake is crafted with generous amounts of actual unsweetened baking chocolate. This crucial difference delivers a profoundly richer, more authentic chocolate taste and contributes to that signature slightly chewy, intensely fudgy texture that defines a true fudge cake. It’s the depth of flavor only real chocolate can provide.
- Remarkably Soft, Moist Crumb: Achieving a truly luscious and moist cake is an art, and this recipe masters it. Through the careful creaming of butter and sugar until perfectly light and fluffy, and by precisely mixing ingredients only until just combined, we guarantee a cake that is incredibly soft, tender, and moist. This attention to detail prevents a dry cake, making every slice an unforgettable delight.
- Harmonizing Old-Fashioned Wisdom with Modern Insights: This treasured recipe draws inspiration from the timeless culinary expertise found in Maida Heatter’s Book of Great Chocolate Desserts. It’s a beautiful blend of her hard-earned wisdom and my professional culinary insights, updated with modern baking techniques to ensure consistent success for today’s home bakers. It’s tradition perfected.
Expert Baking Tips for Chocolate Fudge Cake Perfection
To ensure your chocolate fudge cake turns out perfectly every time, here are a few professional tips that will elevate your baking game:
- Always Sift Your Dry Ingredients, Especially Cake Flour: When working with cake flour, sifting is not just recommended, it’s absolutely essential. Cake flour has a finer texture and a tendency to clump more easily than all-purpose flour. Sifting ensures all dry ingredients are perfectly aerated and evenly distributed, preventing lumps in your batter and contributing to a light, uniform crumb. This small step makes a big difference in the final texture of your cake.
- Cool Cake Layers on a Wire Rack Promptly and Completely: As soon as your cake layers are out of the oven, don’t leave them in the hot pans for too long. Remove them immediately and transfer them to a wire rack to cool completely. This crucial step halts the baking process, preventing the edges from overcooking, and allows air circulation around the cakes, which is vital to prevent them from becoming soggy due to trapped steam. Proper cooling is paramount for a sturdy, frost-ready cake.
- Utilize Parchment Paper for a Clean Frosting Experience: Parchment paper is a baker’s best friend, and not just for lining cake pans. To keep your cake stand or serving plate pristine while frosting, cut four strips of parchment paper and arrange them around the perimeter of your cake base, creating a “paper shield.” Once you’ve finished frosting, gently slide the parchment strips out from underneath the cake. This simple trick catches any errant drips or smears, leaving you with a beautifully presented cake and a spotless serving surface.
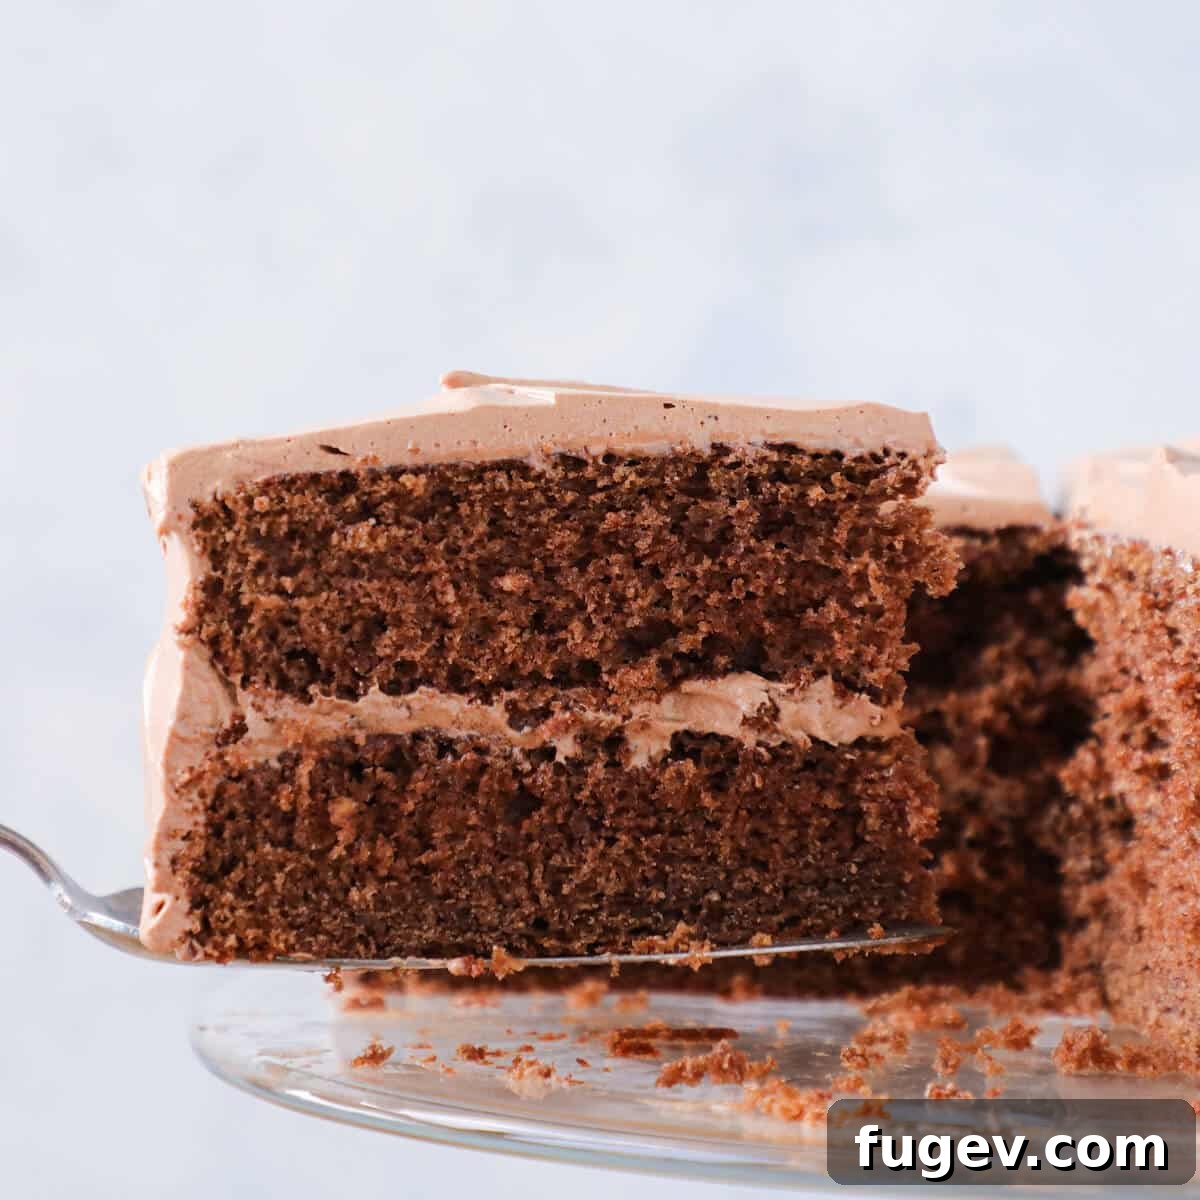
Essential Ingredients Explained for Your Fudge Cake
Each ingredient in this old-fashioned chocolate fudge cake recipe plays a vital role in achieving its signature flavor and texture. Understanding their purpose will help you appreciate the magic of this timeless dessert:
- Sugar (Granulated): Beyond sweetness, granulated sugar is critical for creating a tender crumb, retaining moisture, and aiding in the leavening process. When creamed with butter, it creates tiny air pockets, contributing to the cake’s light yet moist texture.
- Eggs (Whole): Eggs are powerhouse ingredients that emulsify the batter, binding fats and liquids together for a smooth, cohesive mixture. This results in a moist, tender cake with excellent structure. We even incorporate eggs into the frosting for an added layer of richness and a truly luxurious mouthfeel, much like how egg yolks enrich my chocolate mousse recipe!
- Cake Flour: Our choice of cake flour is deliberate. Its lower protein (gluten) content and finer texture produce an exceptionally light, tender, and airy cake crumb. If cake flour isn’t available, you can substitute it with all-purpose flour, though the cake’s texture will be slightly denser.
- Milk (Whole): Whole milk is preferred for its higher fat content, which imparts a beautiful richness and the perfect amount of moisture, contributing significantly to the cake’s final flavor and tender texture.
- Unsweetened Chocolate: The star of the show! Using Baker’s unsweetened chocolate (100% cocoa solids) allows for precise control over the cake’s sweetness, creating a deeply intense chocolate flavor. Its high fat content also contributes to the cake’s characteristic fudgy texture and rich mouthfeel. This is where the “fudge” truly comes from.
- Baking Powder & Baking Soda: These leavening agents work in harmony to create the cake’s rise and light texture. Baking soda reacts with acidic ingredients (like vinegar) to produce carbon dioxide, while baking powder provides additional lift, ensuring a well-risen cake.
- Kosher Salt: A touch of salt is essential in baking to enhance and balance the sweetness of the chocolate and sugar, bringing out the full depth of flavor.
- Unsalted Butter: Using unsalted butter allows you to control the overall salt content of the recipe. It adds richness, flavor, and helps create a tender crumb through the creaming process.
- White Vinegar: An intriguing yet crucial old-fashioned ingredient! White vinegar serves a dual purpose: it activates the baking soda, boosting the cake’s rise, and subtly tempers the sweetness, creating a more balanced and nuanced flavor profile while contributing to a beautifully moist crumb.
- Confectioners’ Sugar: The foundation of our smooth, whipped icing, providing sweetness and body.
- Hot Water: Helps achieve the perfect consistency in the icing, ensuring it’s spreadable and creamy.
- Vanilla Extract: A touch of vanilla extract complements and enhances the chocolate flavor, adding a warm, aromatic note to both the cake and the icing.
See the full recipe card below for exact quantities and detailed instructions on how these ingredients come together to create perfection.
Creative Variations & Serving Suggestions for Your Fudge Cake
While this old-fashioned chocolate fudge cake is perfect as is, you can always explore delightful variations and substitutions to customize it to your taste or occasion:
- Amplify the Chocolate with Espresso Powder: For an even deeper, more intense chocolate experience, consider adding up to ½ teaspoon of espresso powder to the cake batter. You can also incorporate 1 tablespoon into the frosting. Espresso doesn’t make the cake taste like coffee; instead, it subtly enhances and brings out the richness of the chocolate notes, making the flavor more profound.
- Create Delightful Bite-Sized Versions: Transform this incredible cake into individual treats! Bake the same batter into cupcakes for convenient, portioned servings. For an extra decadent twist, fill them with an over-the-top chocolate ganache, drawing inspiration from my Chocolate Cupcakes recipe. Alternatively, venture into the realm of cookies with a similar fudgy profile by trying my Fudgy Brownie Cookies.
- Experiment with Diverse Buttercream Flavors: The possibilities for elevating your cake with different buttercreams are truly endless! For a fruity and tangy counterpoint, try the strawberry cream cheese buttercream from my Best Red Velvet Cupcake Recipe. Or, for a festive and boozy flair, explore the rich Bailey’s Buttercream from my Guinness Chocolate Cupcakes with Bailey’s Buttercream and Salted Caramel. A classic vanilla bean or a rich caramel buttercream would also be exquisite choices.
- Delicious Toppings & Garnishes: Enhance your finished cake with a sprinkle of chocolate shavings, a dusting of cocoa powder, fresh berries (raspberries or strawberries pair beautifully with chocolate), or even a dollop of whipped cream on each slice for an extra touch of elegance.
Step-by-Step Guide to Baking Perfection: How to Make Chocolate Fudge Cake
Creating this magnificent old-fashioned chocolate fudge cake is a rewarding experience. Follow these detailed steps to ensure a flawless result. Further details and exact measurements can be found in the comprehensive recipe card below.
Make the cake:
Step 1: Prepare Your Pans and Preheat Oven. Preheat your oven to 350°F (175°C) for standard baking or 325°F (160°C) for convection ovens. Prepare two 9-inch round cake pans by generously greasing and flouring them. For easy release and perfect layers, line the bottom of each pan with a circle of parchment paper. This simple step is a baker’s secret for flawless cakes.
Pro Tip for Parchment Circles: To cut parchment paper to perfectly fit any round pan, simply place the pan right-side-up on a sheet of parchment. Trace around the base with a pencil, then cut out the desired circle. Voilà, perfectly sized liners every time!
Step 2: Combine and Sift Dry Ingredients. In a medium bowl, thoroughly whisk together the cake flour, baking powder, baking soda, and kosher salt. It’s crucial to sift this mixture afterwards. This ensures all ingredients are evenly distributed, aerated, and free of any clumps, which contributes to a light and tender cake crumb. Set the sifted dry ingredients aside.
Sifting Note: If you opt to use all-purpose flour instead of cake flour, which is a common substitution, you can generally skip the sifting step as all-purpose flour is less prone to clumping.
Step 3: Melt and Cool the Chocolate. Gently melt the unsweetened chocolate. You can do this using a bain-marie (placing a heatproof bowl over a pot of simmering water, ensuring the bowl does not touch the water) or carefully in the microwave in 30-second intervals, stirring between each. Once melted and smooth, allow the chocolate to cool slightly to a warm, not hot, temperature before adding it to the batter. This prevents it from scrambling the eggs or melting the butter prematurely.
Step 4: Cream Butter and Sugar. In the bowl of an electric mixer fitted with the paddle attachment (or using a hand-held electric mixer), cream the softened unsalted butter and granulated sugar together. Beat on medium-high speed until the mixture becomes visibly light in color, fluffy, and significantly increased in volume. This process incorporates air, which is vital for the cake’s structure and tenderness.
Step 5: Incorporate Eggs and Vinegar. Add the eggs one at a time, beating well after each addition until fully incorporated. Scrape down the sides of the bowl as needed to ensure everything is evenly mixed. With the last egg, add the white vinegar. The vinegar reacts with the baking soda, aiding in leavening and contributing to a tender, moist crumb.
Don’t Stress the Curdling! If your mixture appears slightly curdled after adding the eggs, don’t worry! This is completely normal and will smooth out once the dry ingredients are incorporated. Keep going!
Step 6: Blend in Melted Chocolate. Pour the slightly cooled melted chocolate into the butter-sugar-egg mixture. Beat on medium speed until the chocolate is fully incorporated and the batter is smooth and uniformly colored. Scrape down the bowl to ensure no streaks of unmixed chocolate remain.
Step 7: Alternate Dry Ingredients and Milk. Reduce your mixer speed to low. Alternately add the sifted flour mixture and the whole milk, beginning and ending with the flour mixture. I typically do this in three additions of flour, alternating with two additions of milk. Mix only until the ingredients are just combined. Overmixing at this stage can develop gluten, resulting in a tough cake. Scrape down the sides of the bowl frequently to ensure a thoroughly mixed batter.
Step 8: Fill Pans and Bake. Divide the cake batter evenly between your two prepared 9-inch pans. Use an offset spatula to gently smooth the tops. Bake in the preheated oven for 30-45 minutes. The cake is ready when the center springs back lightly to the touch, and the edges appear set and slightly pulled away from the sides of the pan. A traditional toothpick test might not work perfectly here due to the fudgy nature of the cake, so rely more on the visual and touch cues.
Baking Tip: For this fudgy cake, a cake tester or toothpick might not come out completely clean, and that’s okay! I found my cake was slightly overcooked when aiming for a perfectly clean toothpick. Trust the spring-back test and visual cues more to ensure maximum moistness.
Step 9: Cool the Cake Layers Properly. After baking, let the cake layers cool in their pans for exactly 5 minutes. This allows them to firm up slightly before handling. Then, carefully invert each cake onto a wire cooling rack. Gently peel off the parchment paper lining from the bottom. Place another wire rack on top of each inverted cake and carefully flip them back over so they cool right side up. Allow them to cool completely at room temperature before you even think about frosting them. Frosting a warm cake will result in a melted, messy disaster!
Cooling Method for Perfect Layers: To ensure your cake layers come out beautifully and cool evenly, after 5 minutes in the pans, run a thin knife around the edges to loosen. Cover each pan with a wire rack, invert, remove the pan, and peel off the parchment. Place another rack on top and invert again. This ensures they cool right-side-up, preventing flattening or sticking.
Make the icing & assemble:
Step 10: Melt Chocolate and Butter for Icing. In the top of a double boiler (or a heatproof bowl set over a pot of simmering water), place the unsweetened baking chocolate and unsalted butter. Cover and heat over moderate heat until they are partially melted. Remove from the heat and stir continuously with a rubber spatula until the chocolate and butter are completely melted and smooth. This gentle melting process prevents scorching and ensures a silky smooth base for your icing.
Step 11: Prepare and Whip the Icing. In a small metal bowl, combine all the remaining icing ingredients (confectioners’ sugar, eggs, hot water, and vanilla extract). Beat them briefly, just until they are mixed. Fill a larger bowl partially with ice water and nest the small bowl containing your icing mixture inside it. Add the melted chocolate and butter mixture to the small bowl. Begin to beat with an electric mixer until the mixture thickens slightly. Continue stirring the chocolate icing with a rubber spatula, keeping the bowl nestled in the ice bath, until the icing reaches a thick, spreadable consistency. The ice bath is crucial for achieving that wonderfully whipped, creamy texture.
Icing Consistency: The original recipe masterfully described the ideal consistency for this icing as reaching the richness and thickness of “thick mayonnaise.” Aim for that perfect balance of spreadability and body.
Step 12: Assemble and Frost the Cake. Once your cake layers are completely cool and your icing is ready, it’s time to assemble! Place one cake layer on your serving plate or cake stand. Spread a light, even coating of the chocolate icing over the top. Carefully align the second cake layer on top of the first. Proceed to ice the sides and top of the entire cake, spreading the decadent chocolate icing smoothly and evenly. For a rustic look, use the back of a spoon to create swirls in the icing. Serve immediately or store as recommended.
Chef Lindsey’s Expert Tip
Temperature Matters: Room Temperature Wet Ingredients! For the absolute best results with your cake and a perfectly lump-free frosting, it is paramount to bring your eggs, butter, and milk to room temperature before you begin mixing. This allows them to emulsify and combine much more easily and uniformly, creating a smooth batter and a consistent, creamy frosting that is a joy to work with and ensures the finest crumb in your cake.
Frequently Asked Questions About Chocolate Fudge Cake
Storing your chocolate fudge cake correctly is key to maintaining its freshness and deliciousness. If the cake is unfrosted, wrap it tightly in plastic wrap and store it at room temperature for up to 3 days, or in the refrigerator for up to a week. For longer storage, an unfrosted cake can be frozen for up to two months; thaw overnight in the refrigerator before frosting. Any leftover frosting should be stored in an airtight container in the refrigerator for up to 2 weeks. Once the cake has been frosted and assembled, it is best kept at room temperature for up to three days, covered to prevent it from drying out.
The primary difference lies in their texture, density, and depth of chocolate flavor. A typical chocolate cake often uses cocoa powder, resulting in a lighter, airier, and more crumbly texture. In contrast, a chocolate fudge cake is notably smoother, denser, and significantly richer, much like actual fudge. This characteristic fudgy texture comes from the generous use of melted baking chocolate and butter, which adds weight and richness to the crumb. The inclusion of pure chocolate instead of just cocoa powder also imparts a more intense, profound, and complex chocolate flavor profile.
No, fudge is distinctly not a type of cake. Fudge is classified as a confection, or candy, made by heating sugar, butter, and milk (or cream) to a specific soft-ball stage temperature (around 235°F or 113°C), then cooling and beating the mixture vigorously until it becomes smooth and thick. It’s typically cut into squares or rectangles. Cake, on the other hand, is a baked good primarily made from flour, sugar, eggs, and butter or oil, typically leavened with baking powder or soda. Cakes can range widely in texture, from very light and airy (like angel food cake) to dense and rich (like pound cake). They are often round or rectangular and frequently layered with fillings and frostings. While both fudge and cake are sweet and come in various flavors, their preparation methods, ingredients, and resulting textures are fundamentally different.
If you tried this recipe and absolutely loved it, please take a moment to leave a 🌟 star rating and share your experience in the comments below. I truly value your feedback and love hearing how my recipes brighten your day!
★
★
★
★
Chocolate Fudge Cake
Chef Lindsey
45 minutes
30 minutes
1 hour
15 minutes
16
people
Comment
Print Recipe
Ingredients (US Customary)
For The Old-Fashioned Fudge Cake
- 3 ounces unsweetened chocolate (3 squares)
- 1-¾ cups cake flour
- 1 teaspoon baking powder
- 1 teaspoon baking soda
- ½ teaspoon kosher salt
- ½ cup unsalted butter (1 stick)
- 1 ½ cups granulated sugar
- 2 large eggs
- 7 ½ teaspoons white vinegar
- 1 cup whole milk
For the Whipped Chocolate Icing
- 6 ounces unsweetened baking chocolate (6 squares)
- ½ cup unsalted butter (1 stick)
- 2 ¼ cups confectioners sugar (sifted)
- 2 large eggs
- 3 tablespoons hot water
- ½ teaspoon vanilla extract
9
inch
round
Instructions
Make the cake:
- Preheat the oven to 350°F (standard) or 325°F (convection). Grease and flour two 9-inch cake pans and line with parchment paper.
- In a medium bowl, whisk together cake flour, baking powder, baking soda, and salt. Sift & set aside.
- Melt chocolate either in a bain-marie (in a bowl over a pot of simmering water) or in the microwave in 30-second intervals. Once melted, allow to cool slightly.
- With an electric mixer, or in the bowl of a stand mixer fitted with the paddle attachment, cream the butter and sugar together until the mixture is light in color and fluffy.
- Add the eggs one at a time, beating well after each addition. Add the vinegar in with the last egg.
- Add the melted chocolate and beat until smooth.
- Reduce the mixer to low speed, and alternately add the flour mixture and milk. It is best to begin and end with the flour mixture. Scrape down the sides of the bowl as needed. This process is typically done in three additions. Stop mixing as soon as the last of the flour has incorporated.
- Portion the cake batter evenly between the two prepared pans and smooth the top with an offset spatula. Bake in the preheated oven for 30-45 minutes. The center of the cake should spring back to the touch, and the edges will look set.
- After 5 minutes in the pans, remove the cakes to a cooling rack and let cool completely before frosting.
Make the icing & assemble:
- Place chocolate and butter in the top of a double boiler over moderate heat and cover until partially melted. Remove from heat and stir until completely melted and smooth.
- Place all remaining icing ingredients (confectioners’ sugar, eggs, hot water, vanilla extract) in a small metal bowl. Beat briefly just until mixed. Fill a larger bowl partially with ice water and nest the small bowl inside. Add the melted chocolate and butter mixture. Beat with an electric mixer until the mixture thickens slightly. While keeping the small bowl on ice, continue to stir the chocolate icing with a rubber spatula until it reaches a thick, spreadable consistency.
- Spread a light coating of icing on the bottom cake layer. Carefully align the top layer onto the bottom and continue icing the rest of the cake, spreading smoothly and evenly.
Notes
Yield: This recipe yields one 8 or 9-inch, beautiful two-layer cake, providing approximately 16 generous servings.
Adapted from: This cherished recipe draws its original inspiration from the classic culinary wisdom found in Maida Heatter’s timeless Book of Great Chocolate Desserts, published in 1981.
Technique Tip: For flawless cake layers, it’s crucial to allow the cakes to cool for 5 minutes in their pans before turning them out to cool completely on a wire rack. Skipping this step, even with properly prepared pans, can cause the layers to break. For exceptionally even frosting layers, consider chilling the cake in the fridge briefly between frosting applications.
Variation Idea: To intensely deepen the chocolate flavor without a coffee taste, add up to ½ teaspoon of espresso powder to the cake batter, or 1 tablespoon to the frosting. This simple addition elevates the chocolate notes beautifully.
Storage Guidelines: Unfrosted chocolate fudge cake, tightly wrapped, can be stored at room temperature for up to 3 days, in the refrigerator for a week, or frozen for up to two months. Store any unused frosting in an airtight container in the refrigerator for up to 2 weeks. Once frosted, the assembled cake can be kept at room temperature, covered, for up to three days.
Nutrition
Carbohydrates: 51g |
Protein: 6g |
Fat: 22g |
Saturated Fat: 13g |
Polyunsaturated Fat: 1g |
Monounsaturated Fat: 6g |
Trans Fat: 1g |
Cholesterol: 73mg |
Sodium: 195mg |
Potassium: 188mg |
Fiber: 3g |
Sugar: 36g |
Vitamin A: 439IU |
Calcium: 62mg |
Iron: 3mg
Dessert
American
395
Like this recipe? Leave a comment below!
Before You Go: Explore More Delicious Cake Recipes
We hope you thoroughly enjoyed preparing and indulging in this professional chef-tested recipe for our ultimate old-fashioned chocolate fudge cake. It’s truly a testament to the timeless appeal of classic baking.
If you’re eager to explore more culinary creations, I invite you to check out our other delicious, chef-developed Cake Recipes. From fruit-infused delights to other chocolate masterpieces, there’s a perfect cake waiting for every occasion and palate. Perhaps our delightful chocolate raspberry cake will be your next baking adventure!