
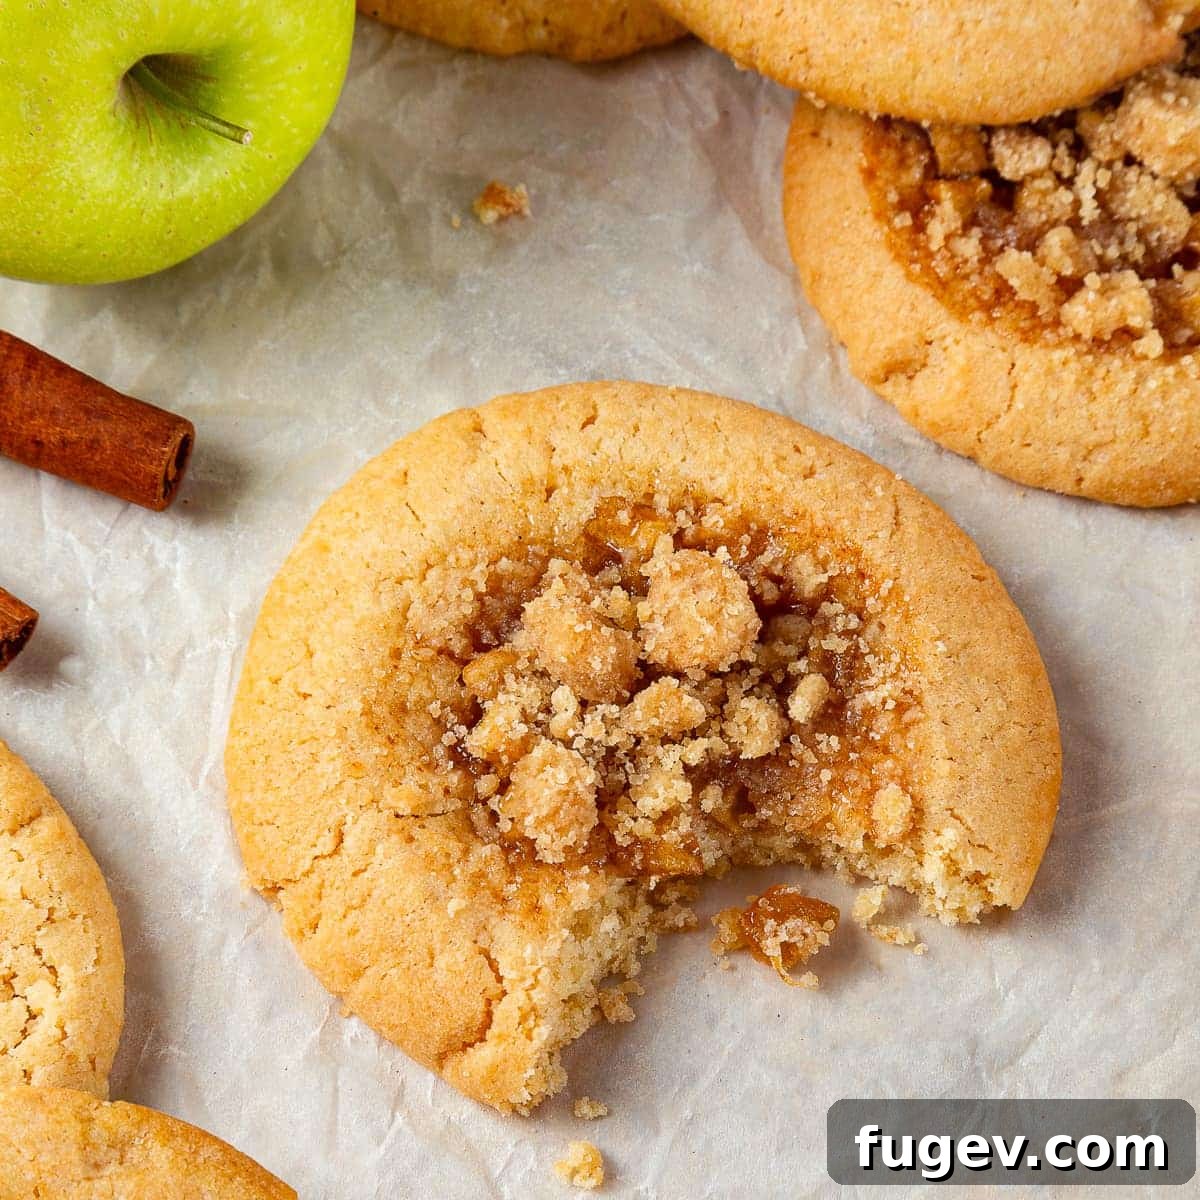
Ultimate Chewy Apple Pie Cookies: Your New Favorite Fall Dessert
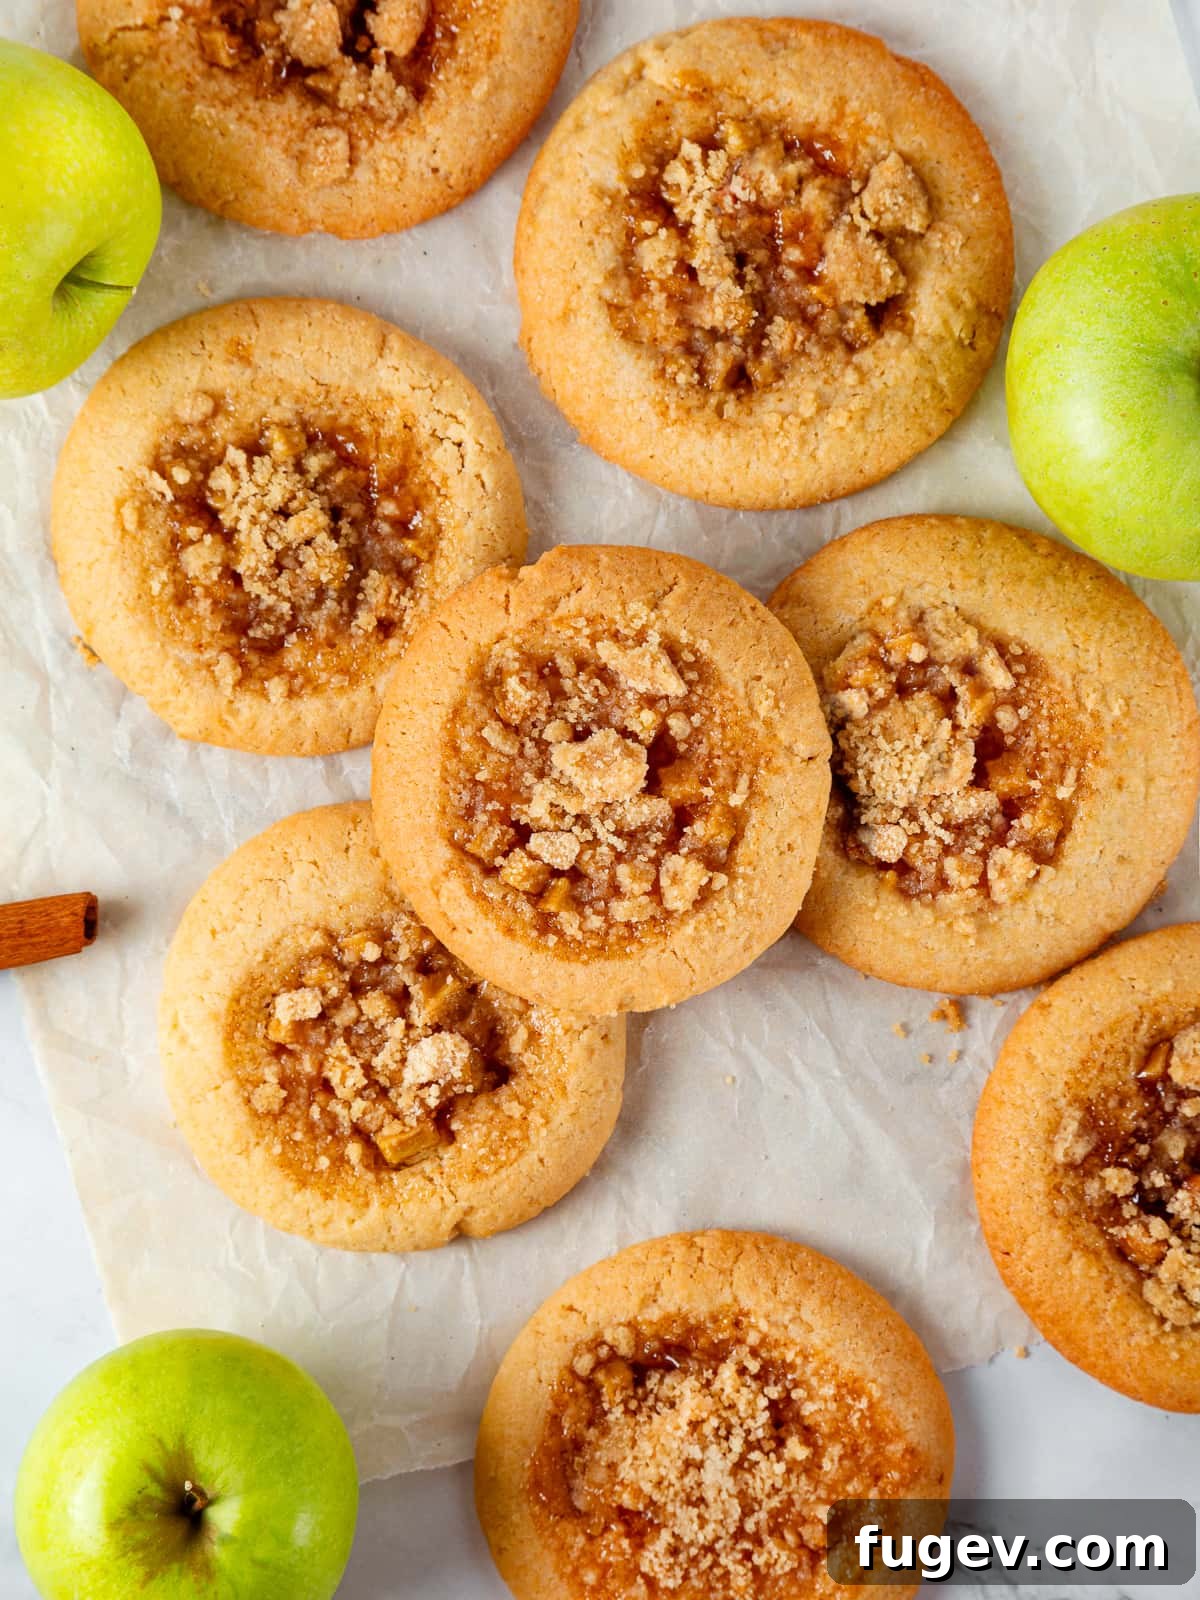
Step into the cozy flavors of autumn with these incredibly chewy apple pie cookies. Imagine a soft, rich brown sugar cookie base, generously filled with a luscious homemade apple pie filling, all crowned with a golden, buttery crumble topping. This recipe brings all the comforting essence of a classic apple pie into an easy-to-handle, no-chill cookie, making it an absolute must-try for any season, especially the crisp days of fall.
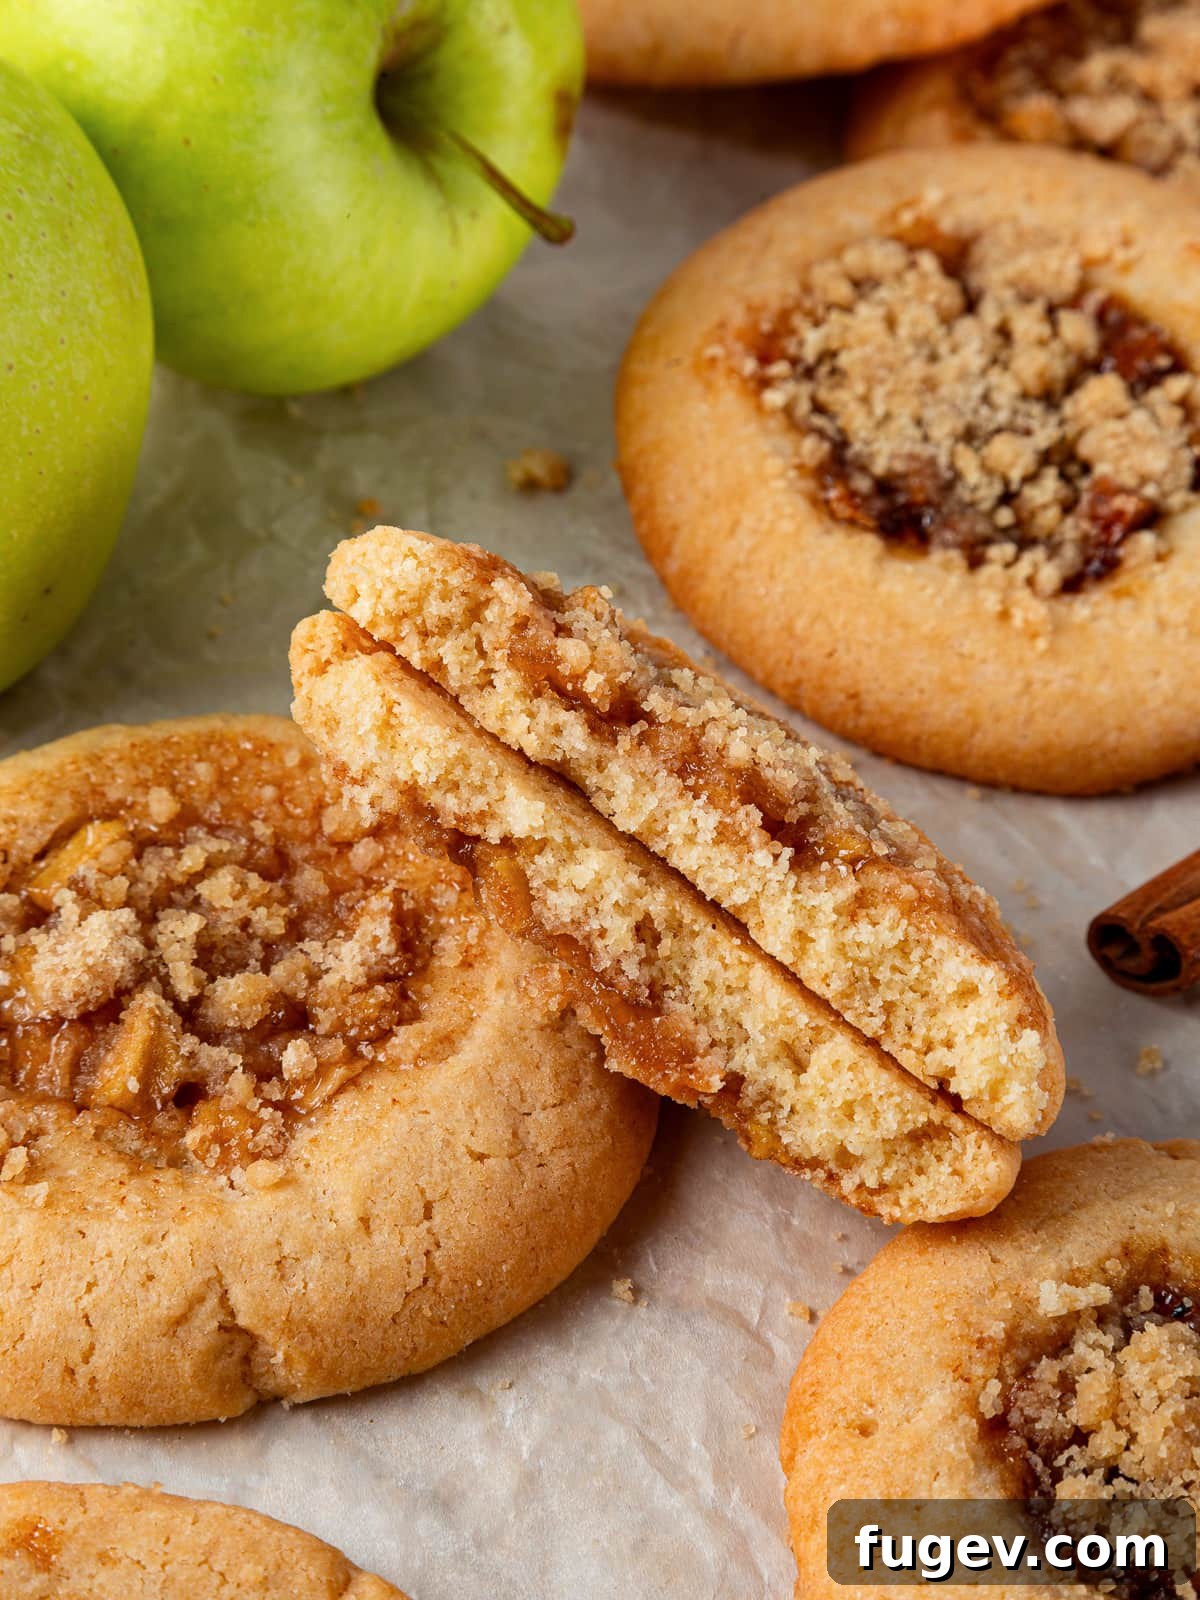
Forget the fuss of rolling out pie crusts or complicated baking techniques. These apple pie cookies are designed for confident beginners and seasoned bakers alike, offering a straightforward path to an impressive dessert. They are the perfect embodiment of comfort food, blending the sweet and tart notes of fresh apples with the warmth of cinnamon and the rich depth of brown sugar. Ideal for sharing at holiday gatherings, enjoying with a warm cup of coffee, or simply savoring as a delightful treat, these apple pie cookies are poised to become a staple in your recipe collection.
A Quick Look at These Delightful Apple Pie Cookies
Before diving into the full details of this scrumptious recipe, here’s a snapshot of what to expect when making these irresistible apple pie cookies:
- Prep Time: Approximately 40 minutes – This includes time dedicated to peeling and dicing apples, preparing the filling, and mixing the cookie dough.
- Cook Time: Around 20 minutes – A relatively quick bake time for perfectly golden and set cookies.
- Total Time: About 1 hour – A surprisingly fast turnaround for a homemade, fruit-filled dessert that tastes like it took hours.
- Servings: This recipe yields approximately 13 generous cookies, making them perfect for a small gathering or to enjoy throughout the week.
- Calories: Estimated around 310 kcal per cookie, based on typical nutritional calculations for a treat of this size and richness.
- Technique: The process involves three main components: crafting a flavorful homemade apple pie filling, preparing a soft and pliable brown sugar cookie dough, and assembling them with a delightful crumble topping before baking.
- Flavor Profile: Experience a harmonious blend of warm, aromatic cinnamon-spiced apples, a rich and buttery brown sugar cookie foundation, and a sweet, slightly crunchy streusel topping that delivers an explosion of autumn flavors in every bite.
- Difficulty: While it involves multiple steps, each is manageable, making this recipe suitable for confident beginners looking to expand their baking skills without undue stress.
Why You Will Absolutely Love These Apple Pie Cookies
These apple pie cookies aren’t just another dessert; they’re a celebration of flavor, convenience, and pure comfort. Here’s why they’re destined to become a perennial favorite in your kitchen, especially during the colder months:
- All the Comfort of Apple Pie, Simplified into Portable Cookie Form!
Why wrestle with a full pie crust, lengthy baking times, and messy slices when you can have all its beloved flavors in a perfectly portable, easy-to-eat cookie? These chewy apple pie cookies expertly capture the essence of a classic apple pie – the tender, spiced fruit, the warming spices, the buttery “crust” – but with significantly less effort and mess. They’re perfect for when you crave that nostalgic apple pie taste without the extensive baking project, making them ideal for casual snacking, elegant dessert platters, or even as delightful lunchbox treats. - Effortless, Authentic Homemade Apple Pie Filling.
Our recipe features a truly exceptional apple pie filling that’s both simple to make from scratch and bursting with genuine, vibrant apple flavor. We specifically recommend using Granny Smith apples for their ideal balance of tartness, which beautifully prevents the filling from becoming overly sweet, and their firm texture, ensuring they hold their shape perfectly during cooking and baking. A touch of cornstarch ensures the filling thickens just right, providing a moist, flavorful center without making the cookies soggy. This attention to detail results in a filling that tastes remarkably fresh and authentic, much like a gourmet pie. - The Perfect Brown Sugar Streusel Topping.
No apple pie cookie is complete without a glorious, golden crumble topping! Our brown sugar streusel is a symphony of buttery sweetness and delicate crunch. It’s meticulously designed to perfectly complement the rich brown sugar cookie base and the spiced apple filling, adding an irresistible extra layer of texture and depth that elevates each bite. The subtle caramel notes from the brown sugar in the crumble ties all the elements together harmoniously, creating a cohesive and utterly delicious finish that will have everyone reaching for another cookie. - A Scrumptious, Melt-in-Your-Mouth Cookie Base!
Beyond the incredible filling and topping, the foundation of these cookies is a masterpiece in itself. This cookie base is crafted to be wonderfully chewy, with edges that gently crisp and a center that practically melts in your mouth. The strategic combination of unsalted butter, granulated sugar, and light brown sugar creates a tender yet sturdy dough that holds the filling perfectly while delivering an unforgettable texture. It’s the ideal cozy fall dessert base, offering a delightful contrast to the soft, spiced apple filling, making every bite a truly satisfying experience.
Table of Contents
- A Quick Look at These Delightful Apple Pie Cookies
- Why You Will Absolutely Love These Apple Pie Cookies
- Ingredients & Essential Substitutions for Perfect Apple Pie Cookies
- Creative Variations for Your Apple Pie Cookies
- Expert Baking Tips for Perfect Apple Pie Cookies Every Time
- How to Make These Irresistible Apple Pie Cookies: A Step-by-Step Guide
- Chef Lindsey’s Special Recipe Tip: The Magic of Pliable, Cold Butter
- Frequently Asked Questions About Apple Pie Cookies
- More Delightful Cookie Recipes to Explore
- Apple Pie Cookies: The Full Recipe
- Before You Go: More Sweet Treats!
These apple pie cookies are truly the epitome of cozy fall desserts! The tender, chewy brown sugar cookies serve as the perfect vessel for a perfectly spiced, subtly sweet homemade pie filling. Each bite is then wonderfully contrasted by a crunchy, golden brown sugar crumble topping. It’s everything you adore about mini apple pies, ingeniously reimagined in a convenient and utterly delicious cookie form, making them an ideal treat for any occasion.
Whether you’re hosting a festive gathering, preparing for a holiday potluck, or simply enjoying a quiet evening at home, these cookies are a stellar addition to any dessert spread. Imagine pairing them alongside an easy pumpkin pie for a Thanksgiving feast, or serving them alongside delicate Linzer cookies to create a stunning Christmas dessert platter. For those who love a variety of fruit desserts, consider making an apple cobbler or a vibrant cherry pie to complete your party menu. These apple pie cookies offer unparalleled versatility and undeniable charm, ensuring every moment is a little sweeter and more memorable.
Ingredients & Essential Substitutions for Perfect Apple Pie Cookies
Crafting these delectable apple pie cookies starts with a selection of fresh, quality ingredients. Each component plays a vital role in achieving that perfect balance of flavor and texture, from the tender cookie to the luscious filling. Here’s a closer look at what you’ll need and some helpful substitution tips to ensure your baking success:
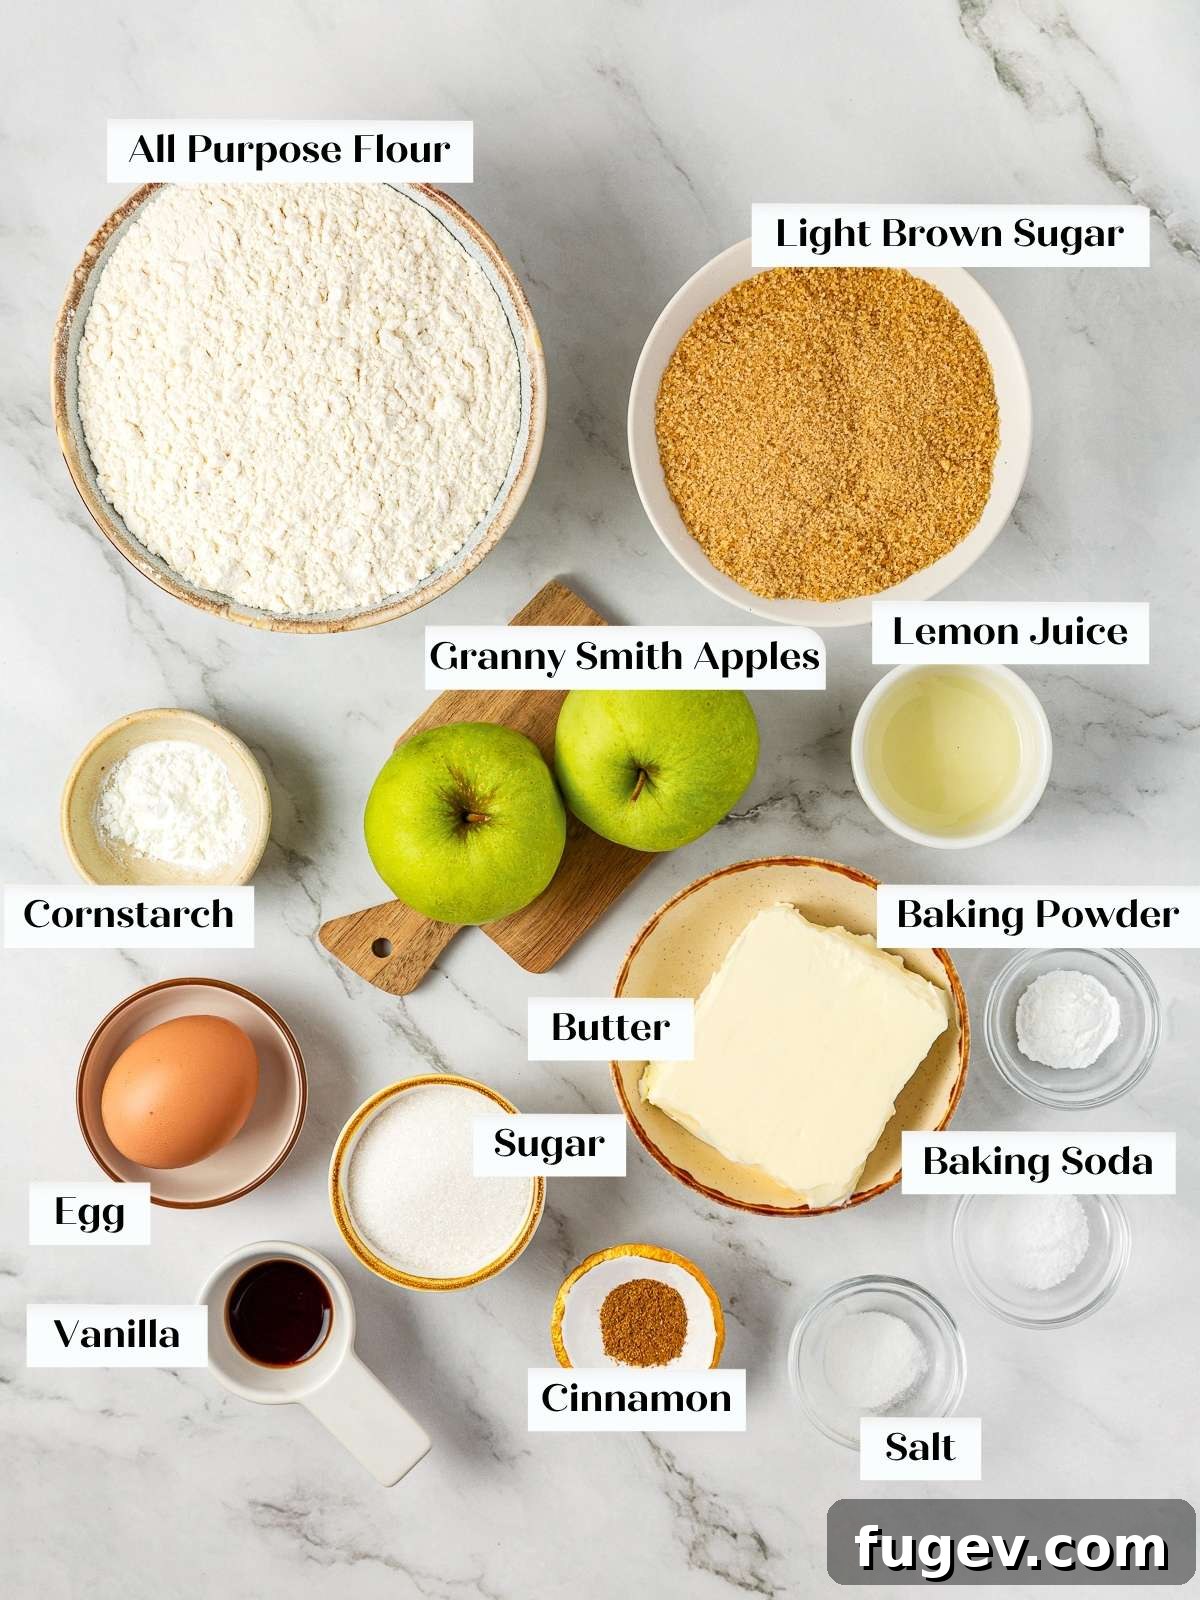
- Granny Smith Apples: These tart, firm apples are truly the star of our filling. Their natural acidity beautifully balances the sweetness of the sugars, preventing the cookies from being cloyingly sweet. Furthermore, their sturdy texture holds up incredibly well during cooking, maintaining a pleasant bite without turning to mush. While you can experiment with other firm baking apples like Honeycrisp, Fuji, or Braeburn, remember their sweetness levels differ. If using a sweeter variety, I highly recommend slightly reducing the amount of brown sugar in the apple filling to maintain a perfectly balanced flavor.
- Fresh Lemon Juice: Always opt for fresh lemon juice! Its bright, zesty acidity is crucial for cutting through the richness and sweetness of the apples and sugars, adding a vibrant layer of complexity to the filling. It also helps prevent the apples from browning as they cook. Bottled lemon juice can work in a pinch, but fresh provides a superior, more nuanced flavor that truly makes a difference.
- Light Brown Sugar: This ingredient is a cornerstone of our recipe, lending its distinctive molasses flavor and moistness to the apple filling, the chewy cookie base, and the crunchy crumble topping. Its fine crystals dissolve beautifully, contributing to the tender crumb of the cookies and the rich, caramel-like notes. If you only have dark brown sugar on hand, you can certainly use it, but be aware it will impart a stronger, deeper molasses flavor. For the filling specifically, granulated sugar can also be used, though it will result in a slightly less rich and complex flavor profile.
- Cornstarch: Cornstarch is our secret weapon for achieving a perfectly thickened apple filling. It creates a glossy, smooth sauce that clings beautifully to the apples without being overly gluey or pasty. The key is to ensure it boils for at least one minute once added to fully activate its thickening properties. If you don’t have cornstarch, tapioca flour (also known as tapioca starch) makes an excellent 1:1 substitute, offering a similar clear, smooth thickening effect.
- Unsalted Butter: Using unsalted butter across the recipe allows you to precisely control the overall salt content, ensuring a perfectly balanced flavor that isn’t too salty or bland. For the cookie dough, the butter should be cold yet pliable – firm enough to hold its shape but soft enough to yield to a gentle press. This specific temperature is essential for achieving the “no-chill” dough characteristic, contributing significantly to the cookie’s desired tender-chewy texture and preventing excessive spreading.
- Baking Powder & Baking Soda: The dynamic duo of leavening agents! Utilizing both baking powder and baking soda is key to giving our cookies a strong, even rise and a wonderfully soft, airy texture while maintaining that desired chewiness. Baking soda reacts with acidic ingredients (like brown sugar and lemon juice), while baking powder provides an additional lift, ensuring a perfectly balanced rise and tender crumb.
- All-Purpose Flour: The structural backbone of our cookies and crumble. Ensure you measure your flour correctly by fluffing it first, then gently spooning it into your measuring cup and leveling off the top with a straight edge. This prevents over-measuring, which can lead to dry, dense, or crumbly cookies.
- Granulated Sugar: Used in combination with brown sugar for the cookie base, granulated sugar contributes to the cookies’ golden-brown edges, spread, and overall chewiness, as well as providing a clean, bright sweetness.
- Kosher Salt: A touch of salt is vital in all baking. It acts as a flavor enhancer, balancing the sweetness of the sugars and bringing out the subtle nuances of the apple and spice. Don’t skip it!
- Large Egg: The large egg acts as a crucial binder, bringing the cookie dough together and adding essential moisture. It also contributes significantly to the rich flavor, structure, and chewiness of the cookies.
- Vanilla Extract: Pure vanilla extract adds a foundational layer of warm, aromatic flavor that complements the cinnamon and apple beautifully, providing depth and complexity to the overall taste profile.
Creative Variations for Your Apple Pie Cookies
While these apple pie cookies are perfect as is, they also serve as a fantastic canvas for culinary creativity! Don’t hesitate to experiment with these exciting variations to customize your baking experience and impress your taste buds:
- Change the Fruit Filling: Why limit yourself to just apples? These versatile brown sugar cookies pair beautifully with a variety of fruit fillings. For a sweet-tart twist, try a vibrant cherry pie filling, or use the luscious filling from a blueberry pie recipe or a mixed berry pie for a burst of summer flavor. You could even pre-cook the flavorful filling from a cranberry orange pear pie for a unique, sophisticated holiday-inspired cookie. Remember to dice the fruit finely to ensure it fits well within the cookie indentation and cooks evenly.
- Add a Decadent Drizzle: Elevate your cooled cookies with a luxurious drizzle that adds both flavor and visual appeal. A rich salted caramel sauce would be an exquisite pairing, its sweet and savory notes perfectly complementing the apple. Alternatively, a salted maple caramel sauce offers an extra touch of fall charm, or a homemade butterscotch sauce would add a delightful, buttery sweetness. For a simpler yet equally delicious option, a quick cream cheese glaze or a warm spiced glaze (made with powdered sugar, milk, and a pinch of cinnamon or nutmeg) would add an extra layer of sweetness and elegance.
- Transform Them into Cookie Bars: If you’re looking to feed a crowd with minimal individual assembly, turn these individual cookies into impressive apple pie cookie bars! Simply press two-thirds of the cookie dough evenly into a greased and parchment-lined 9×9 or 9×13 inch baking dish. Parbake this base for about 10-15 minutes until it’s lightly puffed and matte. Then, spread the cooled apple pie filling evenly over the partially baked cookie base, sprinkle the remaining crumble topping generously over the filling, and bake until the filling is bubbling and the topping is golden brown and crisp. Let cool completely before slicing into squares and serving for an easy, delicious, and shareable dessert.
- Experiment with Spices: Customize the spice profile to your liking and seasonal preferences. Instead of just cinnamon, try making the apple filling with a full-bodied homemade apple pie spice mix, which often includes nutmeg, allspice, and cloves for a more complex flavor. For a unique European-inspired taste, consider using a speculoos spice mix, which typically features cinnamon, cloves, nutmeg, ginger, and cardamom. You can also incorporate these warming spices directly into the brown sugar cookie base or sprinkle a pinch into the streusel topping for an all-encompassing aromatic experience that will fill your kitchen with wonderful scents.
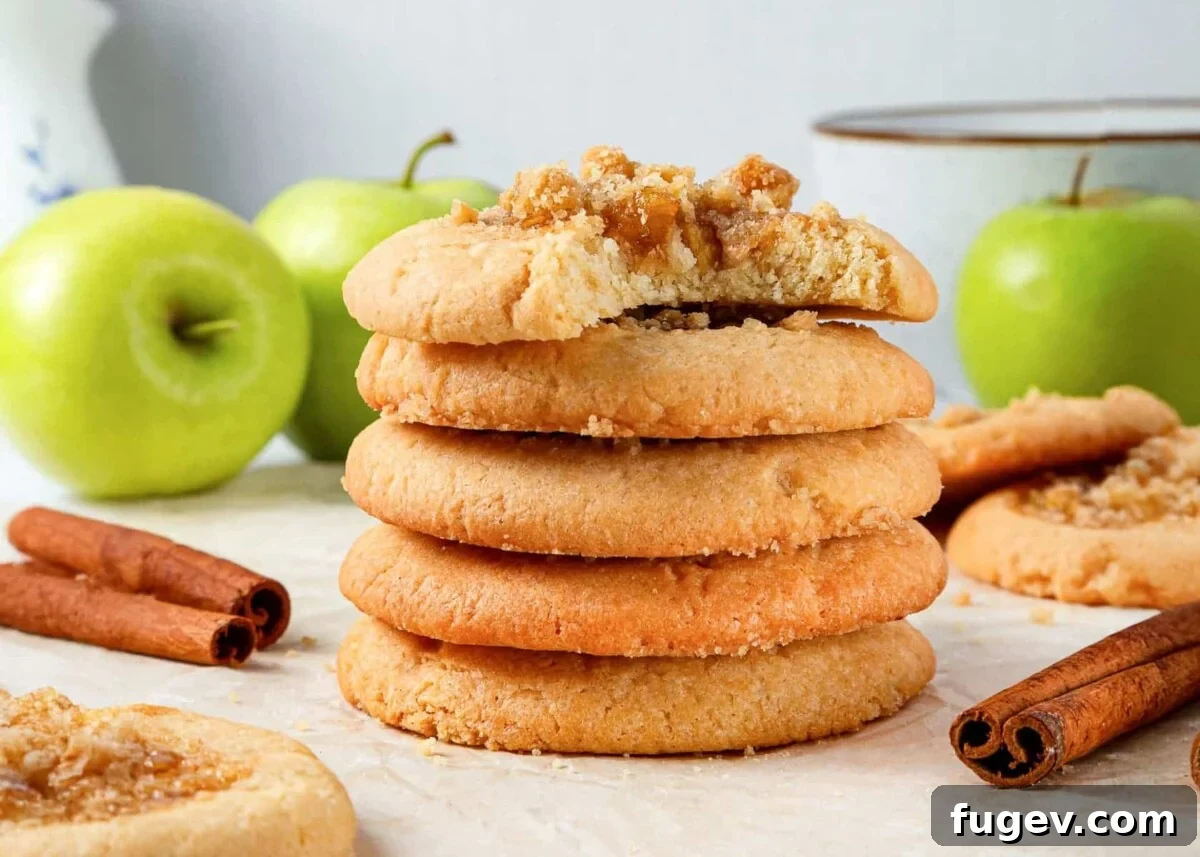
Expert Baking Tips for Perfect Apple Pie Cookies Every Time
Achieving bakery-quality apple pie cookies is easier than you think with these professional insights and clever tricks. Follow these tips to ensure your cookies turn out perfectly moist, flavorful, beautifully structured, and utterly irresistible:
- Batch Cook the Apple Filling for Future Delights!
Don’t limit yourself to just one batch of cookies. When you’re peeling and dicing apples, consider doubling or even tripling the quantity to make a large batch of the apple pie filling. This versatile filling is a culinary gem! You can store it in an airtight container in your refrigerator for up to a week, or freeze it for up to two months. Having pre-made filling on hand means you’re always just a step away from creating other delicious treats like apple hand pies, caramel apple cupcakes, or even a stunning caramel apple tart without starting from scratch. It’s a wonderful time-saver for future baking endeavors! - Preparing Ahead? Keep Components Separate Until Baking Day.
While these cookies are undeniably at their absolute best fresh from the oven, they can be stored for up to three days at room temperature. If your goal is to bake them ahead of a special occasion, I strongly recommend preparing the cookie dough, apple filling, and streusel topping separately and storing them individually. The cookie dough can be chilled, the filling refrigerated or frozen, and the crumble kept in a sealed bag. Assemble and bake the cookies on the day you plan to serve them to ensure maximum freshness, optimal texture, and the most delightful aroma that fills your home. - Working with an Electric Hand Mixer (and the Cold Butter Advantage).
If you’re using an electric hand mixer for the cookie dough, you might notice that the dough is quite thick, especially if you’re aiming for that signature chewy texture achieved with colder butter. To make mixing easier, ensure your butter is soft but still pliable and cool to the touch (as explained in Chef Lindsey’s tip below). If your butter is too cold and the mixer struggles, you can gently warm the bowl with your hands for a few moments to help it soften. Alternatively, if working with colder butter, scoop and form your cookie dough balls, then freeze them briefly before assembling and baking. This helps maintain their shape and prevents excessive spreading, particularly when using an electric mixer that might not incorporate cold butter as smoothly as a stand mixer. - Preventing Soggy Bottoms:
To ensure your cookies have perfectly crisp bottoms and aren’t soggy, make sure the apple filling is thoroughly cooled before spooning it into the cookie dough. Warm filling can cause the cookie dough to soften too much and potentially spread excessively or become overly moist at the base. Refrigerating the formed cookie dough balls before filling can also help them hold their shape better, contributing to a superior final product. - Achieving Even Baking:
Ovens often have hot spots, which can lead to unevenly baked cookies. To combat this, rotate your baking sheets halfway through the baking time. For example, if you have two sheets in the oven, swap their positions and rotate each sheet 180 degrees. This ensures that all your cookies bake evenly, resulting in a consistent golden-brown finish and uniform texture across the entire batch.
How to Make These Irresistible Apple Pie Cookies: A Step-by-Step Guide
Creating these delightful apple pie cookies is a rewarding process that combines classic flavors with a simple technique. Follow these detailed instructions to ensure perfect results every time. Refer to the full recipe card below for precise measurements and additional details.
Prepare the Homemade Apple Pie Filling:
The heart of these cookies lies in their flavorful apple filling. Proper preparation, particularly ensuring the apples are correctly cut and the filling is adequately thickened and cooled, is key to a delicious, non-soggy center.
Step 1: Peel, Core, and Precisely Cut the Apples. Begin by thoroughly peeling, coring, and dicing your Granny Smith apples. For optimal fitting within the cookies and a pleasant, tender-crisp texture, aim for small, uniform pieces, approximately 1 cm (about ⅜ inch) squares. Consistent sizing ensures even cooking and prevents large chunks from breaking through the cookie dough or creating an uneven bake.
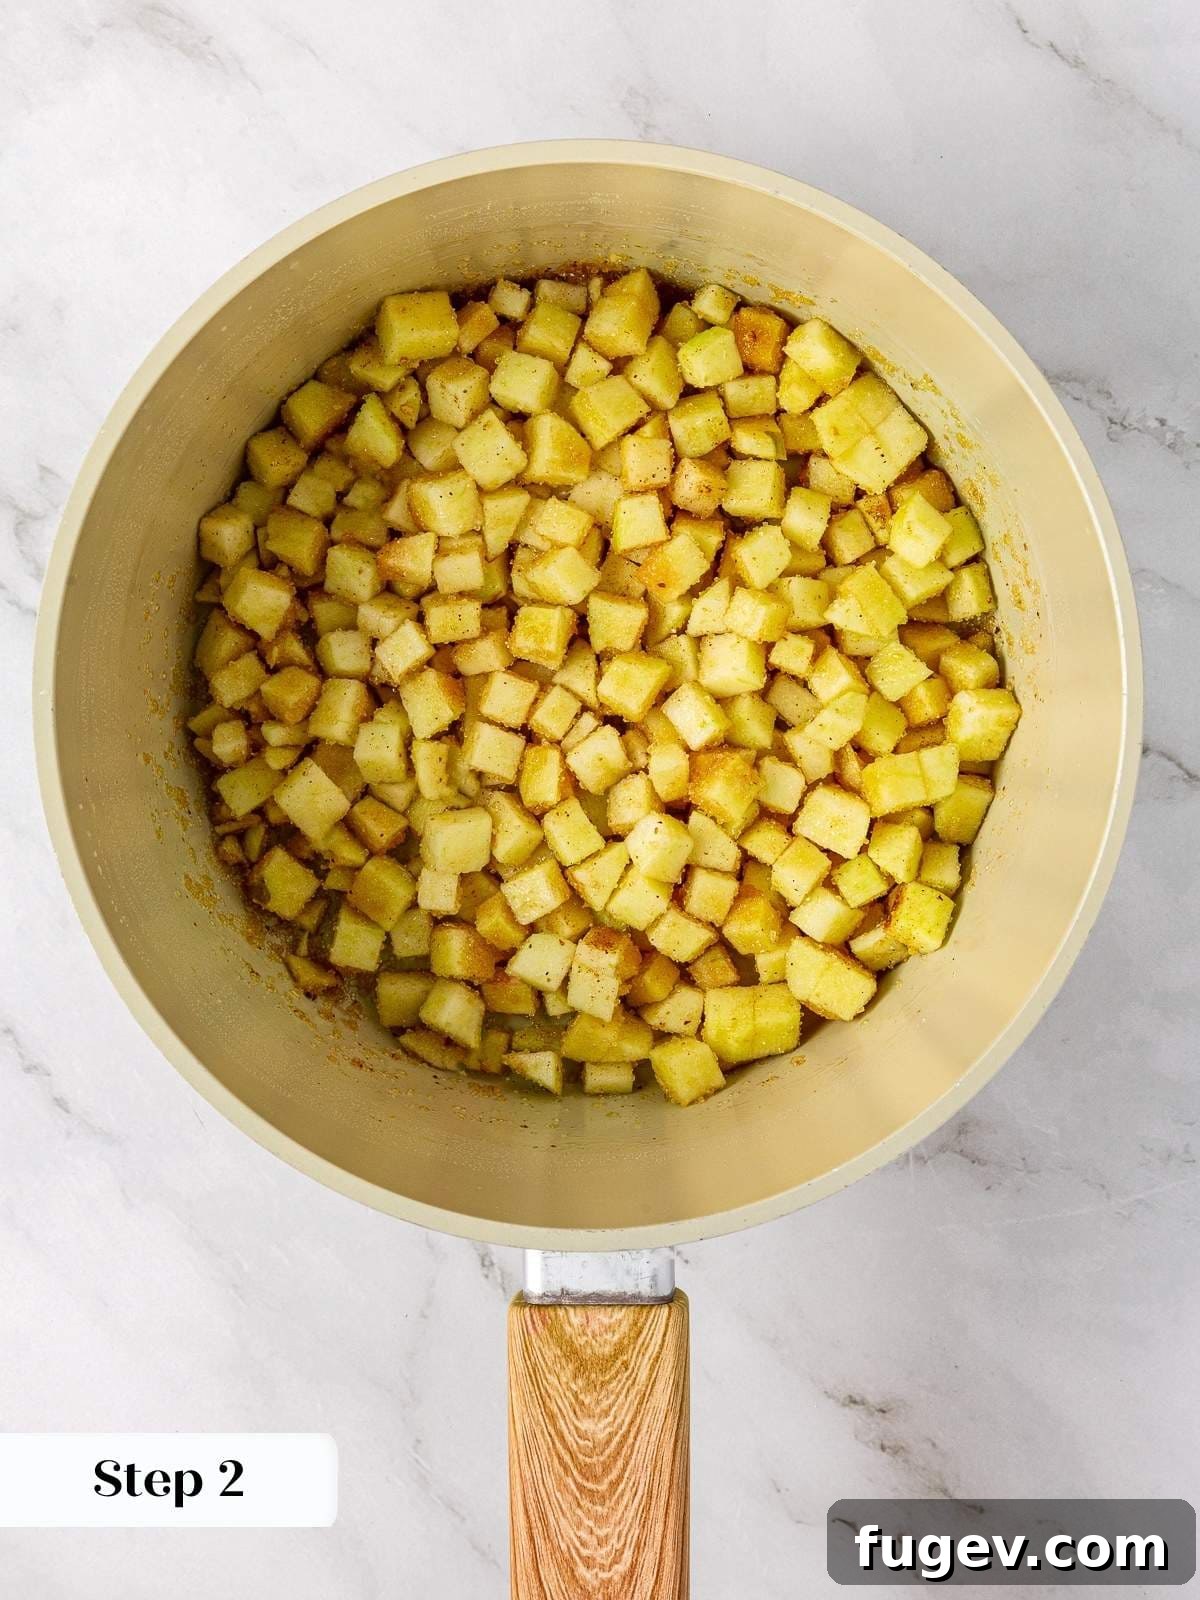
Step 2: Combine and Flavor the Apples. In a medium saucepan, combine the precisely diced apples with the measured light brown sugar, fresh lemon juice, and ground cinnamon. Stir thoroughly to ensure all apple pieces are evenly coated with the sugar and spices. At this initial stage, it’s a good idea to taste a small piece of apple (raw or briefly warmed) and adjust the sugar, lemon juice, or spices to your personal preference. This is your chance to customize the filling’s flavor profile before cooking.
Step 3: Introduce the Thickener. Sprinkle the cornstarch evenly over the apple mixture and stir again until it’s fully incorporated and no dry lumps remain. Begin cooking the mixture over low heat. This gentle start allows the apples to slowly release their natural juices without scorching, creating a foundational liquid for the sauce. It also helps the cornstarch dissolve smoothly before thickening.
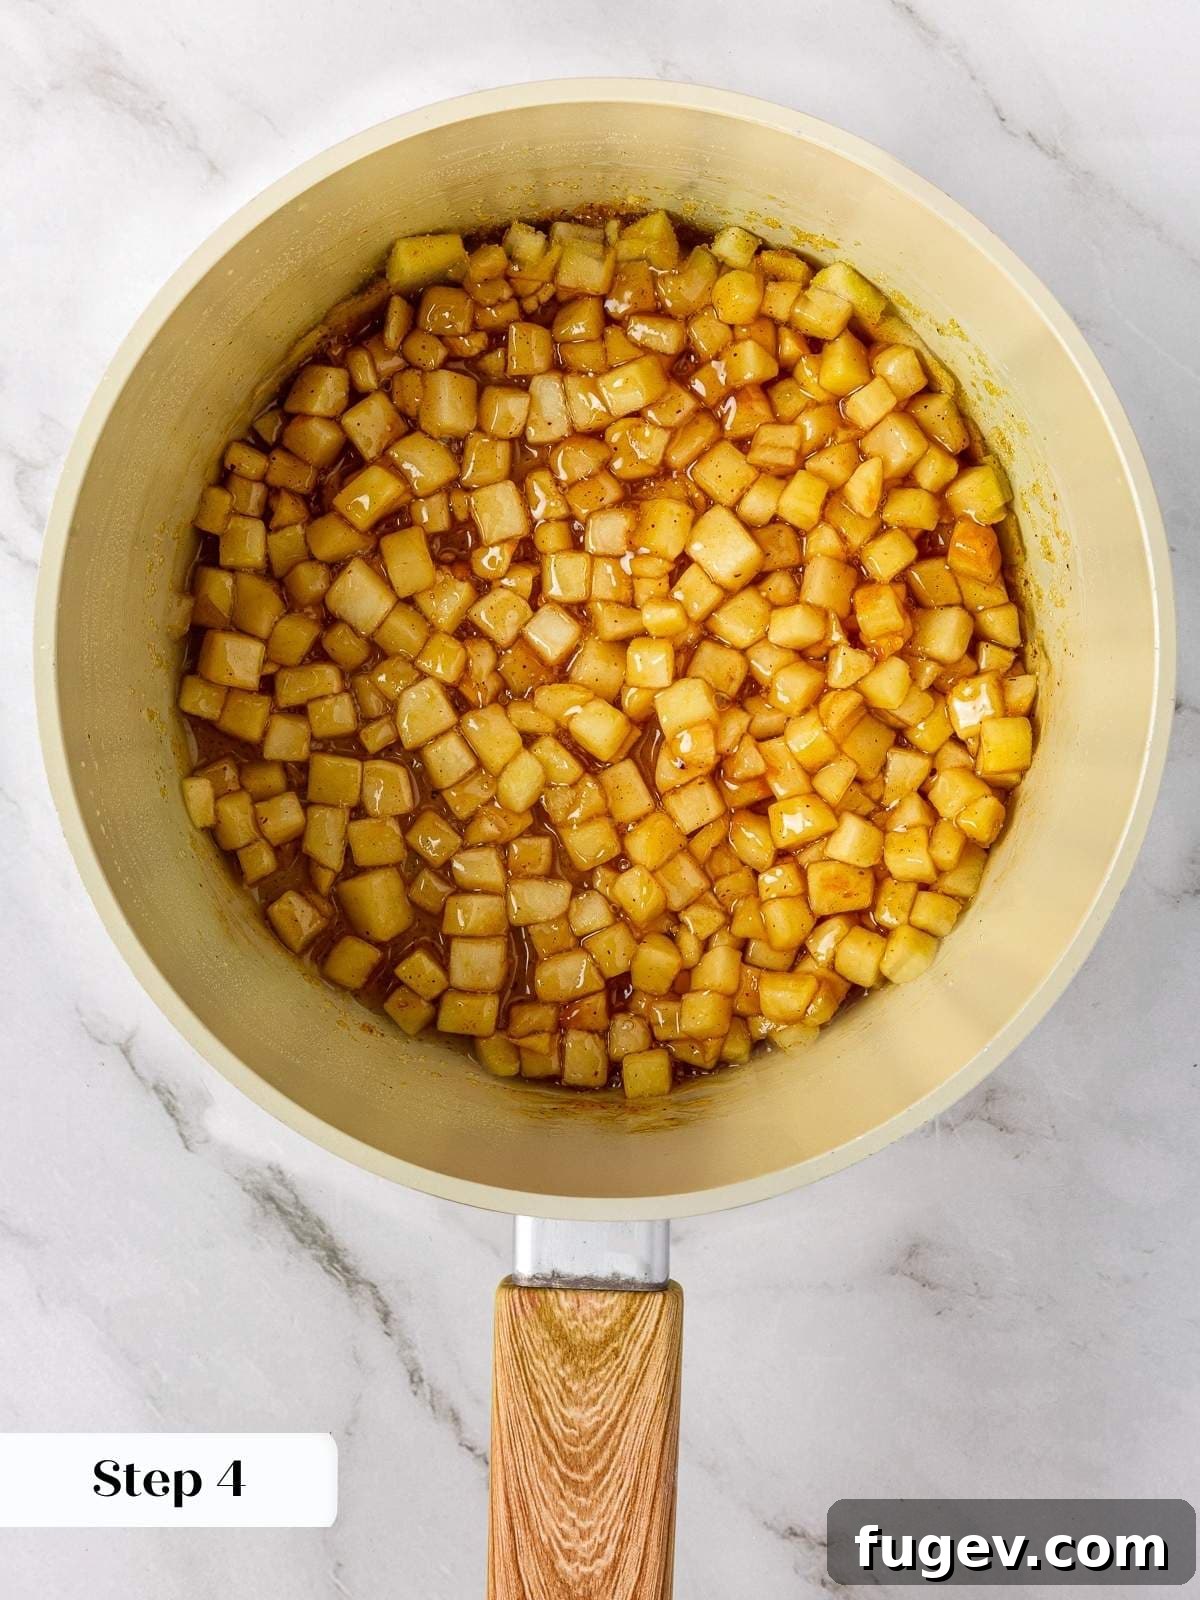
Step 4: Thicken the Filling to Perfection. Once the apples are simmering in their own developing sauce, increase the heat to medium and bring the mixture to a gentle boil. Continue to cook over medium-low to medium heat, stirring frequently. This constant agitation prevents sticking to the bottom of the pan and ensures the cornstarch activates evenly. Cook until the apples have softened slightly but still retain a pleasant bit of bite (al dente), and the sauce has visibly thickened to a syrupy consistency. It should coat the back of a spoon thickly.
Step 5: Rapidly Cool the Apple Filling. To expedite the cooling process, which is crucial for cookie assembly, pour the hot apple filling onto a large plate or a rimmed baking sheet. Spreading it out thinly increases the surface area, allowing it to cool much more quickly. Refrigerate it until it reaches a cool, almost room temperature state. This prevents the warm filling from melting your cookie dough prematurely during assembly, which could lead to excessively spreading cookies.
Make the Chewy Brown Sugar Cookie Dough:
This “no-chill” cookie dough is designed for convenience without compromising on incredible flavor or that coveted chewy-soft texture. Precise butter temperature is key here.
Step 6: Preheat Your Oven and Prepare Baking Sheets. Set your oven to 350°F (175°C) for conventional baking (without a fan or convection setting, if your oven has this option). Line two large baking sheets with parchment paper; this simple step prevents sticking, ensures easy cleanup, and promotes even baking. Set them aside for later use.
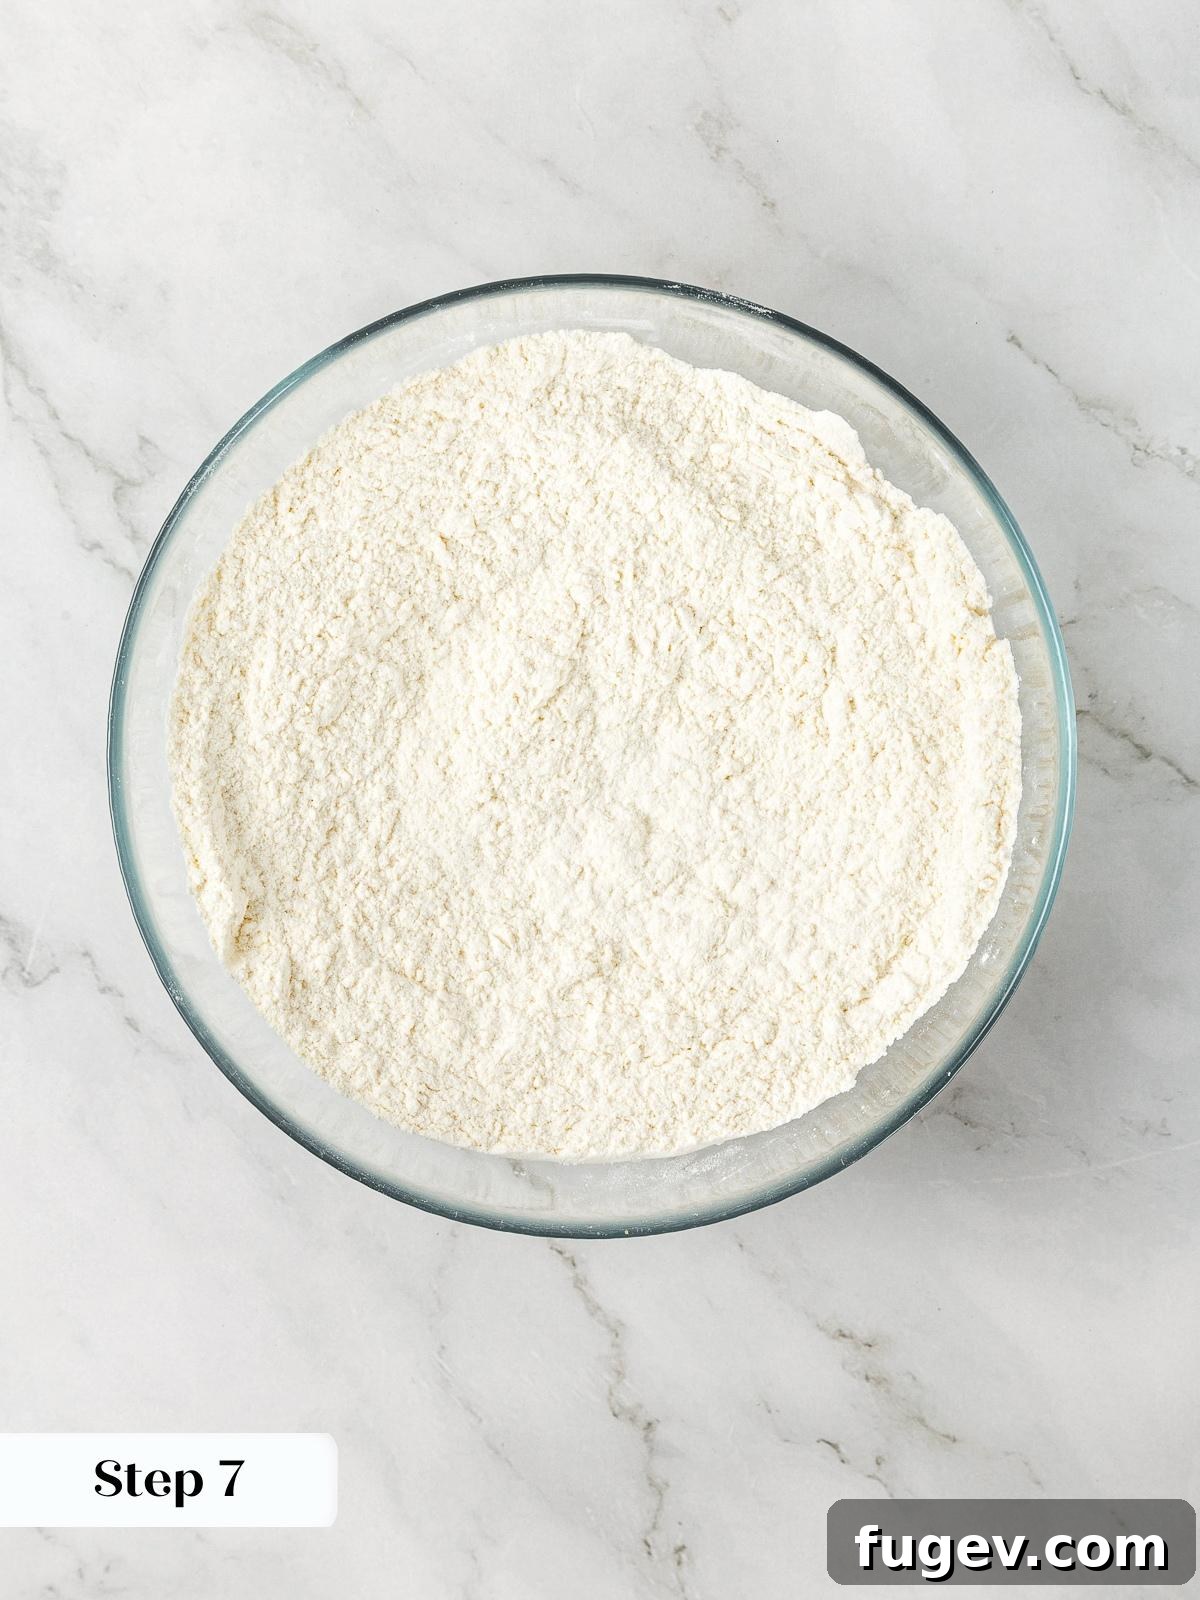
Step 7: Whisk Together the Dry Ingredients. In a medium-sized bowl, combine the all-purpose flour, baking powder, baking soda, and kosher salt. Use a whisk to thoroughly blend these ingredients, ensuring that the leavening agents and salt are evenly distributed throughout the flour. This step is crucial for an even rise and balanced flavor in your cookies. Set this bowl aside for when you’re ready to incorporate it into the wet ingredients.
Step 8: Prepare the Butter. In the bowl of a stand mixer fitted with the paddle attachment, or a large mixing bowl if using a sturdy electric hand mixer, ensure your unsalted butter is at the correct “cold but pliable” temperature. If it’s too firm, you can gently work it with the paddle attachment on low speed for a minute or two, or even use the warmth of your hands on the outside of the bowl, until it reaches the desired consistency – soft enough to leave an indentation when pressed, but still noticeably cool to the touch.
Chef’s Note: The goal is butter that’s responsive but not fully softened to room temperature. This specific state is key to achieving a truly no-chill dough that maintains its shape beautifully and results in delightfully chewy cookies.
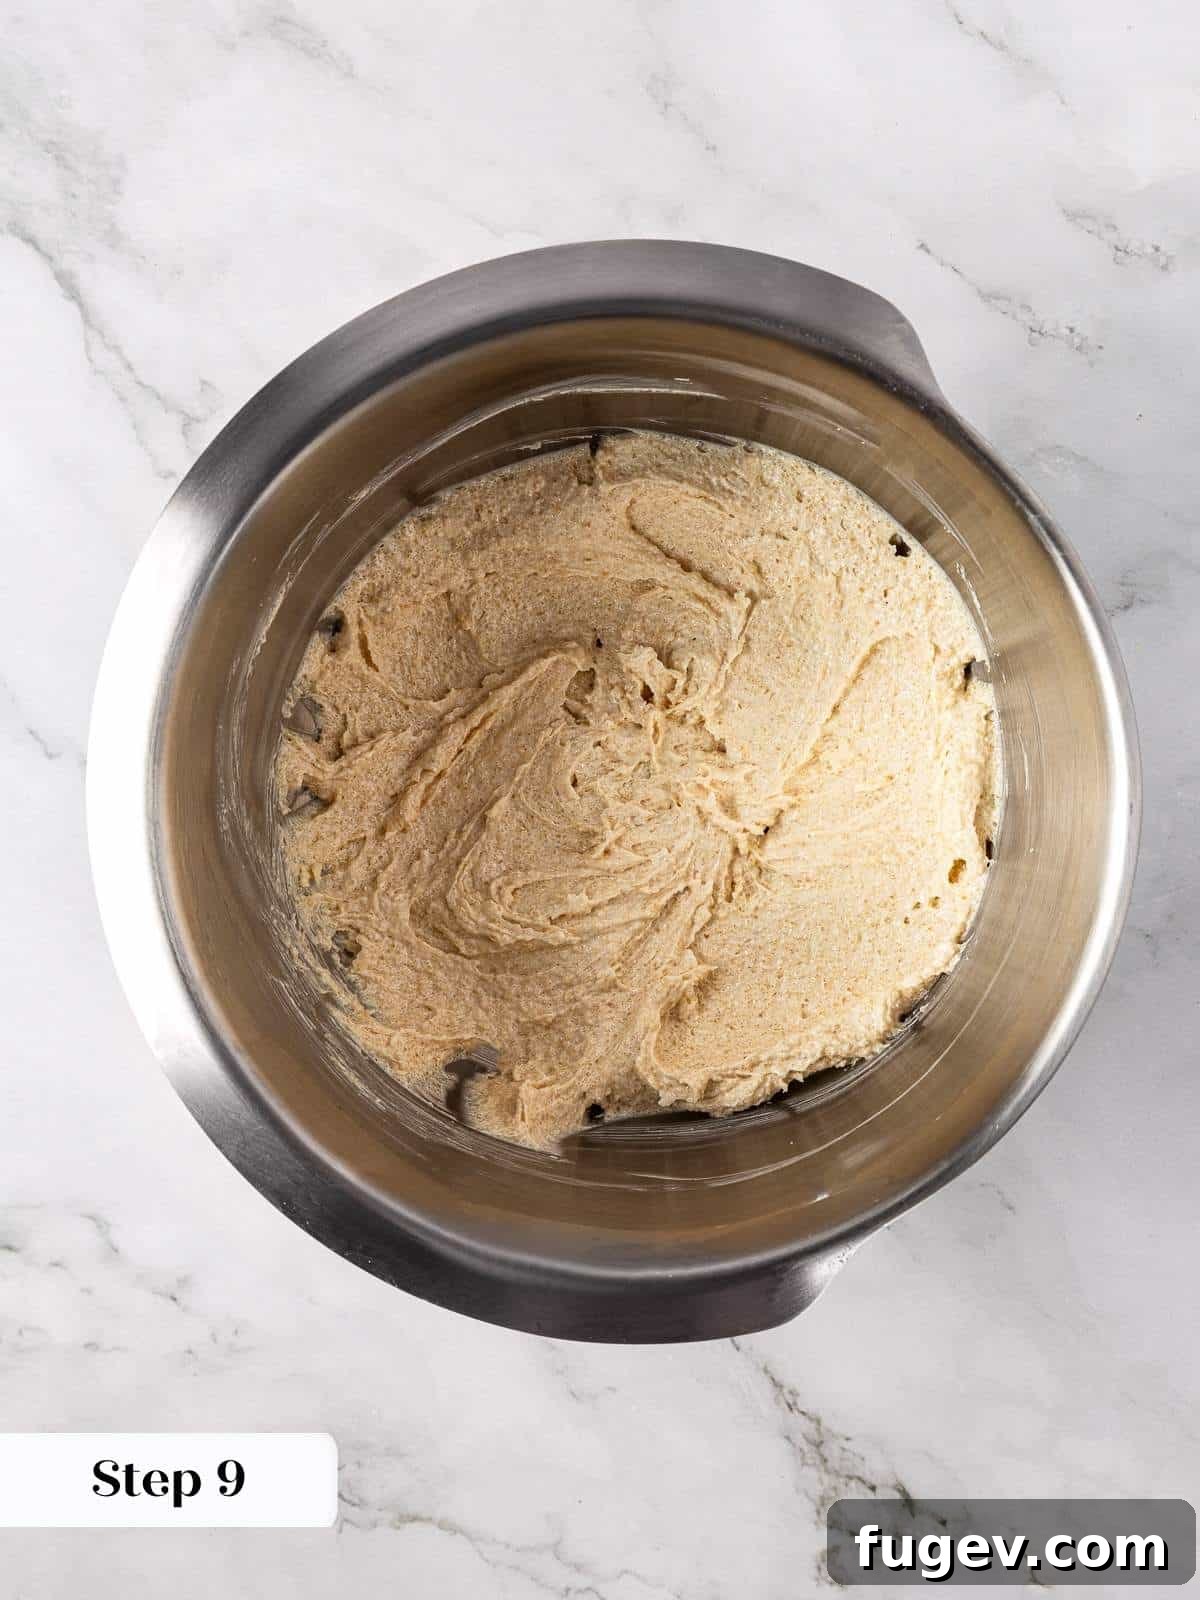
Step 9: Cream the Butter and Sugars. Add the granulated sugar and light brown sugar to the prepared butter in the stand mixer. Begin mixing on medium-low speed. Continue to mix until the butter and sugars combine into a smooth, creamy paste. This process should take a few minutes. Periodically stop the mixer to scrape down the sides of the bowl and the paddle attachment to ensure all ingredients are fully incorporated and no sugar crystals are clinging to the edges. This ensures a consistent dough texture.
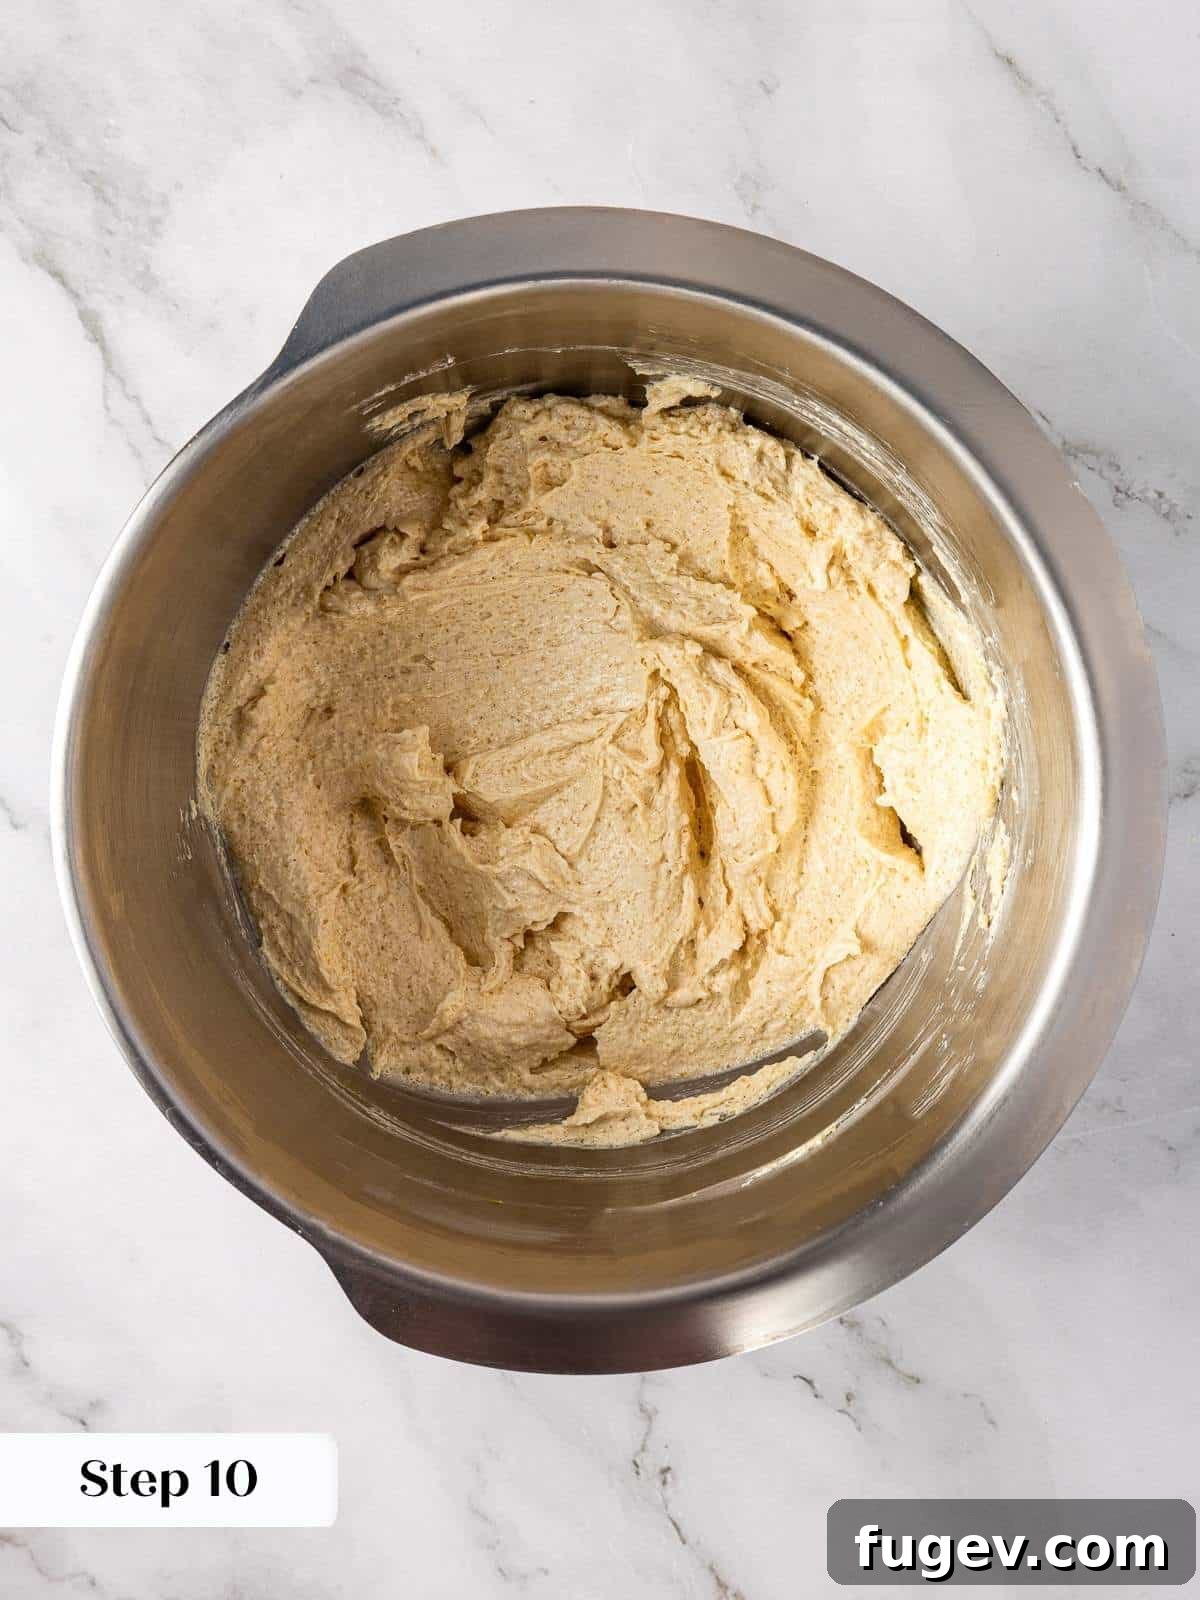
Step 10: Incorporate the Egg and Vanilla. Add the large egg and vanilla extract to the creamed butter and sugar mixture. Continue to mix on medium speed until the mixture lightens in color and appears fluffy and well-combined. This might take a few minutes as the egg emulsifies into the fats. Due to the potentially cooler butter and egg, it’s advisable to stop and scrape down the bowl several times during this step. This ensures that the egg and vanilla are thoroughly incorporated, preventing any streaks and guaranteeing an even texture in your final cookie.
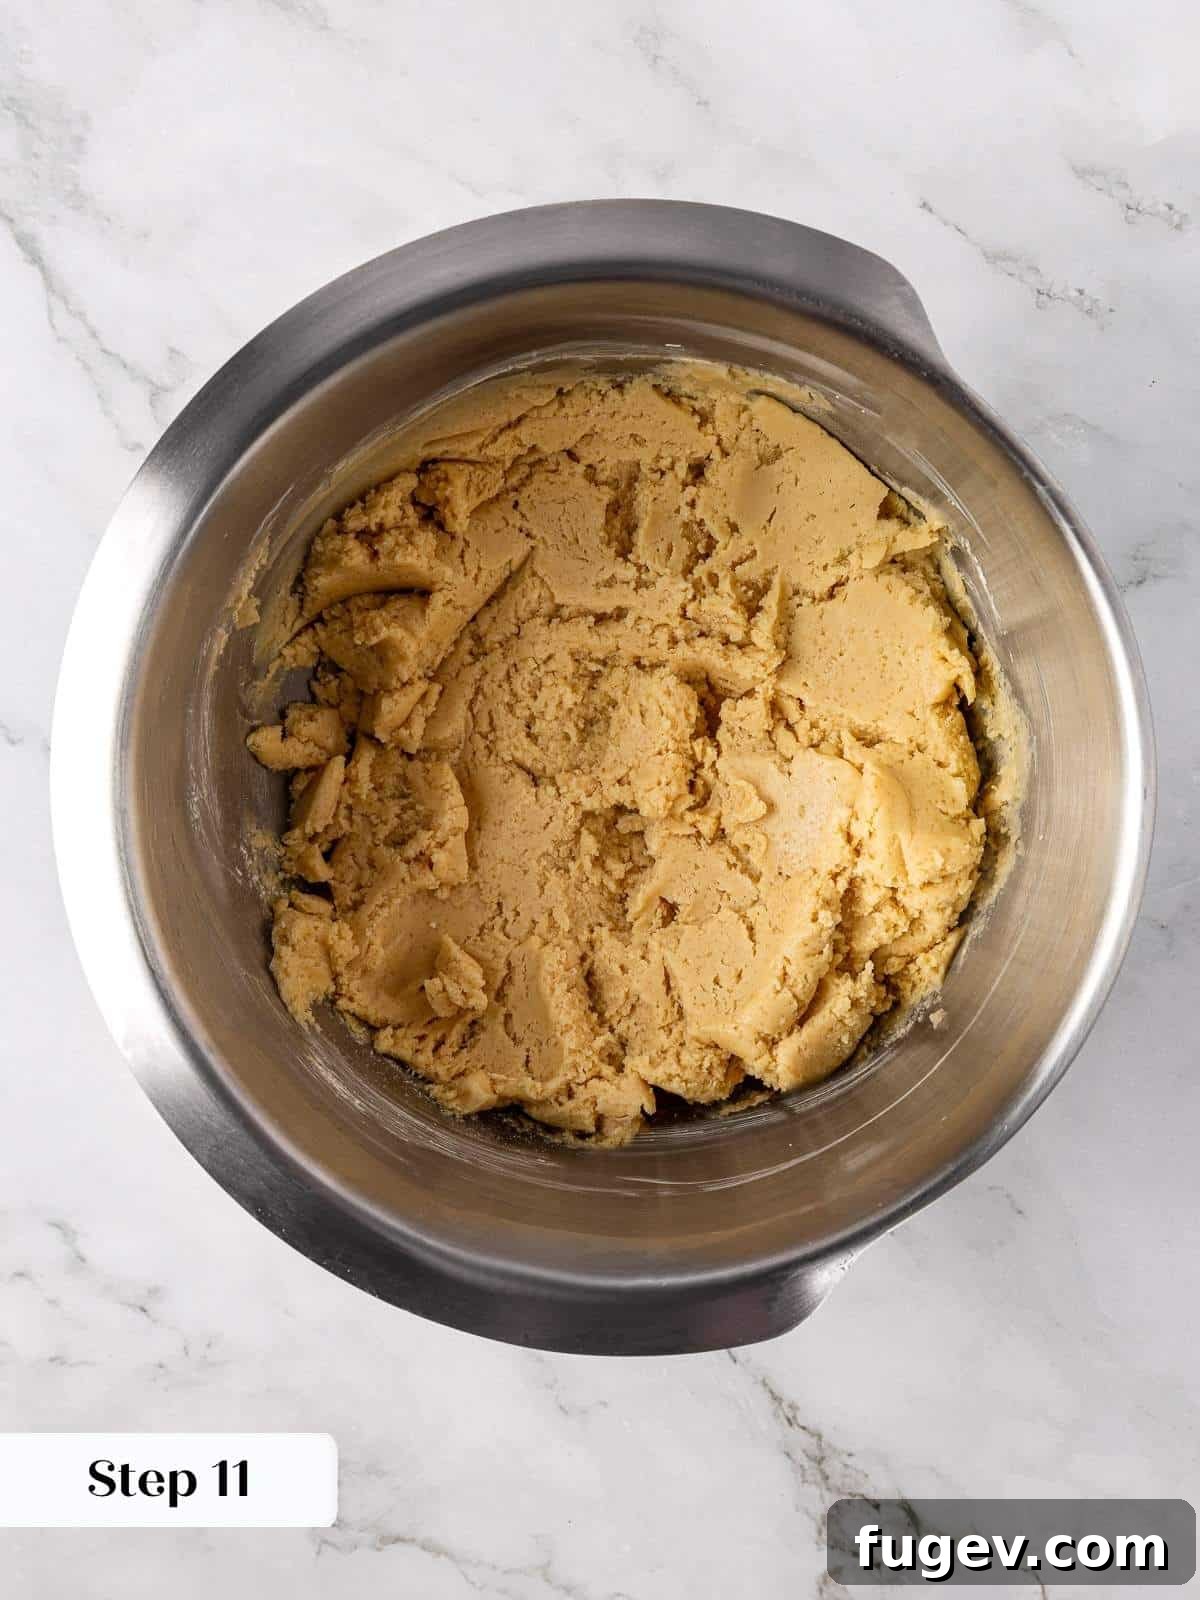
Step 11: Gently Mix in the Flour Mixture. Reduce the mixer speed to low. Gradually add the whisked dry ingredients (flour, baking powder, baking soda, salt) to the wet mixture, one large scoop at a time. I find it helpful to use a spatula to gently fold in each addition. Wait until the previous scoop of flour is almost fully incorporated before adding the next one. This gentle approach prevents overmixing, which can develop too much gluten and result in tough, dry cookies.
Baking Tip: When working with colder butter doughs, such as the one for our thick chocolate chip cookies, the flour may not incorporate as readily as with softened, room-temperature butter doughs. Be patient and mix just until no dry streaks of flour remain, ensuring a tender crumb and chewy texture.
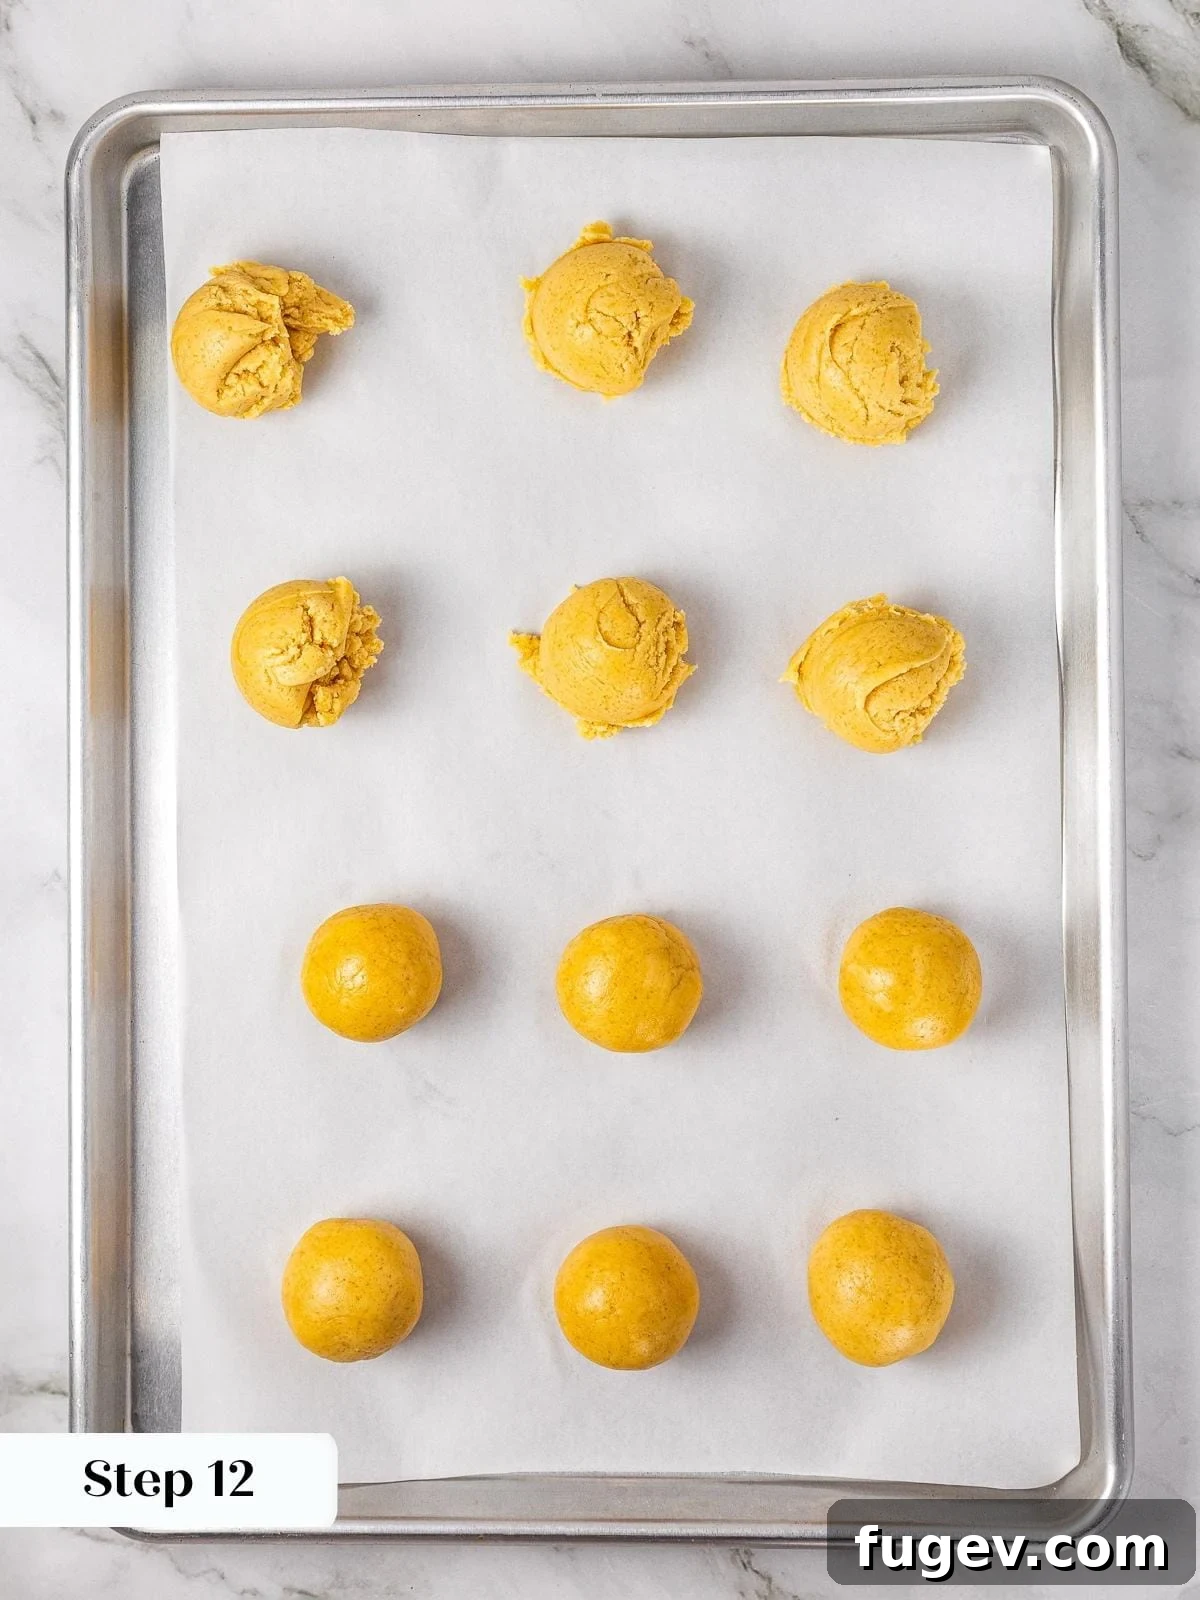
Step 12: Scoop and Create Indentations. Using a ¼ cup cookie scoop (or a similar size for generous cookies), scoop uniform portions of the dough and place them directly onto your parchment-lined baking sheets, spacing them about 2 inches apart to allow for spread. Roll each scoop into a smooth ball. Then, using the back of a round tablespoon measure, a smaller cookie scoop, or even a melon baller (a fun, nostalgic tool!), press a firm indentation into the center of each cookie dough ball. This creates the perfect, sturdy pocket for our delicious apple filling.
Important: Ensure you leave at least ¼ inch (about 0.6 cm) of dough at the bottom and sides of the indentation. If the bottom or sides are too thin, the delicious apple filling might seep through or leak during baking, leading to messy cookies and burnt filling on your baking sheet.
Step 13: Briefly Chill the Dough (Optional but Recommended). While this is a “no-chill” recipe in terms of the dough formulation, a brief chill of the scooped and indented dough balls in the refrigerator for about 10-15 minutes can significantly help them hold their shape even better before assembly and during baking. This is especially useful if your kitchen is warm or if you’ve handled the dough extensively, as it firms up the butter in the dough.
Make the Buttery Brown Sugar Crumble Topping:
This simple yet essential streusel topping adds a crucial layer of crunchy texture and rich brown sugar flavor that perfectly complements the apple and cookie base.
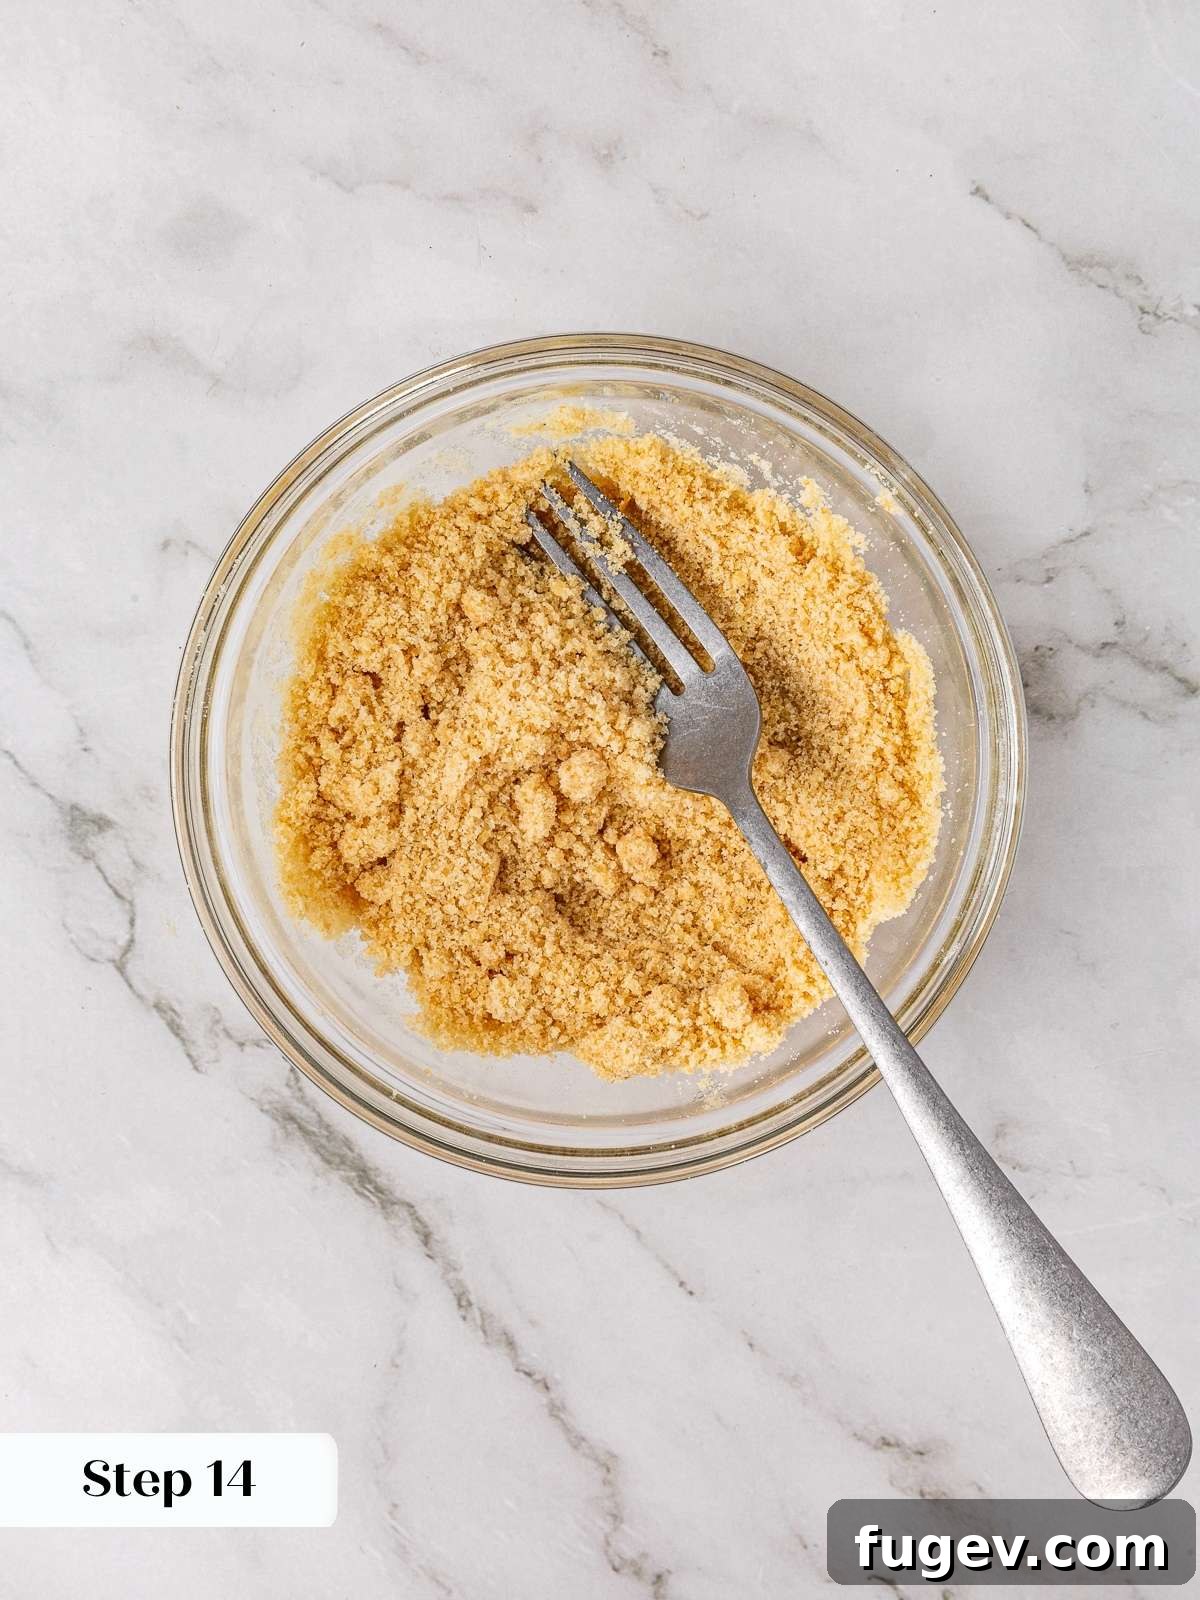
Step 14: Combine Crumble Ingredients. In a small bowl, combine the all-purpose flour, light brown sugar, vanilla extract, and melted unsalted butter. Use a fork to stir the ingredients together until they are equally moistened and form distinct crumbles. When squeezed in your hand, the mixture should hold together briefly before breaking apart into a sandy, crumbly texture. This is the ideal consistency. If the mixture appears too dry, you can add a tiny bit more melted butter, one teaspoon at a time, but be careful not to overdo it. Too much butter will make the crumble greasy and cause it to spread excessively during baking, losing its delightful texture.
Assemble & Bake Your Exquisite Apple Pie Cookies:
The final steps bring all the meticulously prepared components together for a truly magical cookie experience. This is where the magic happens!
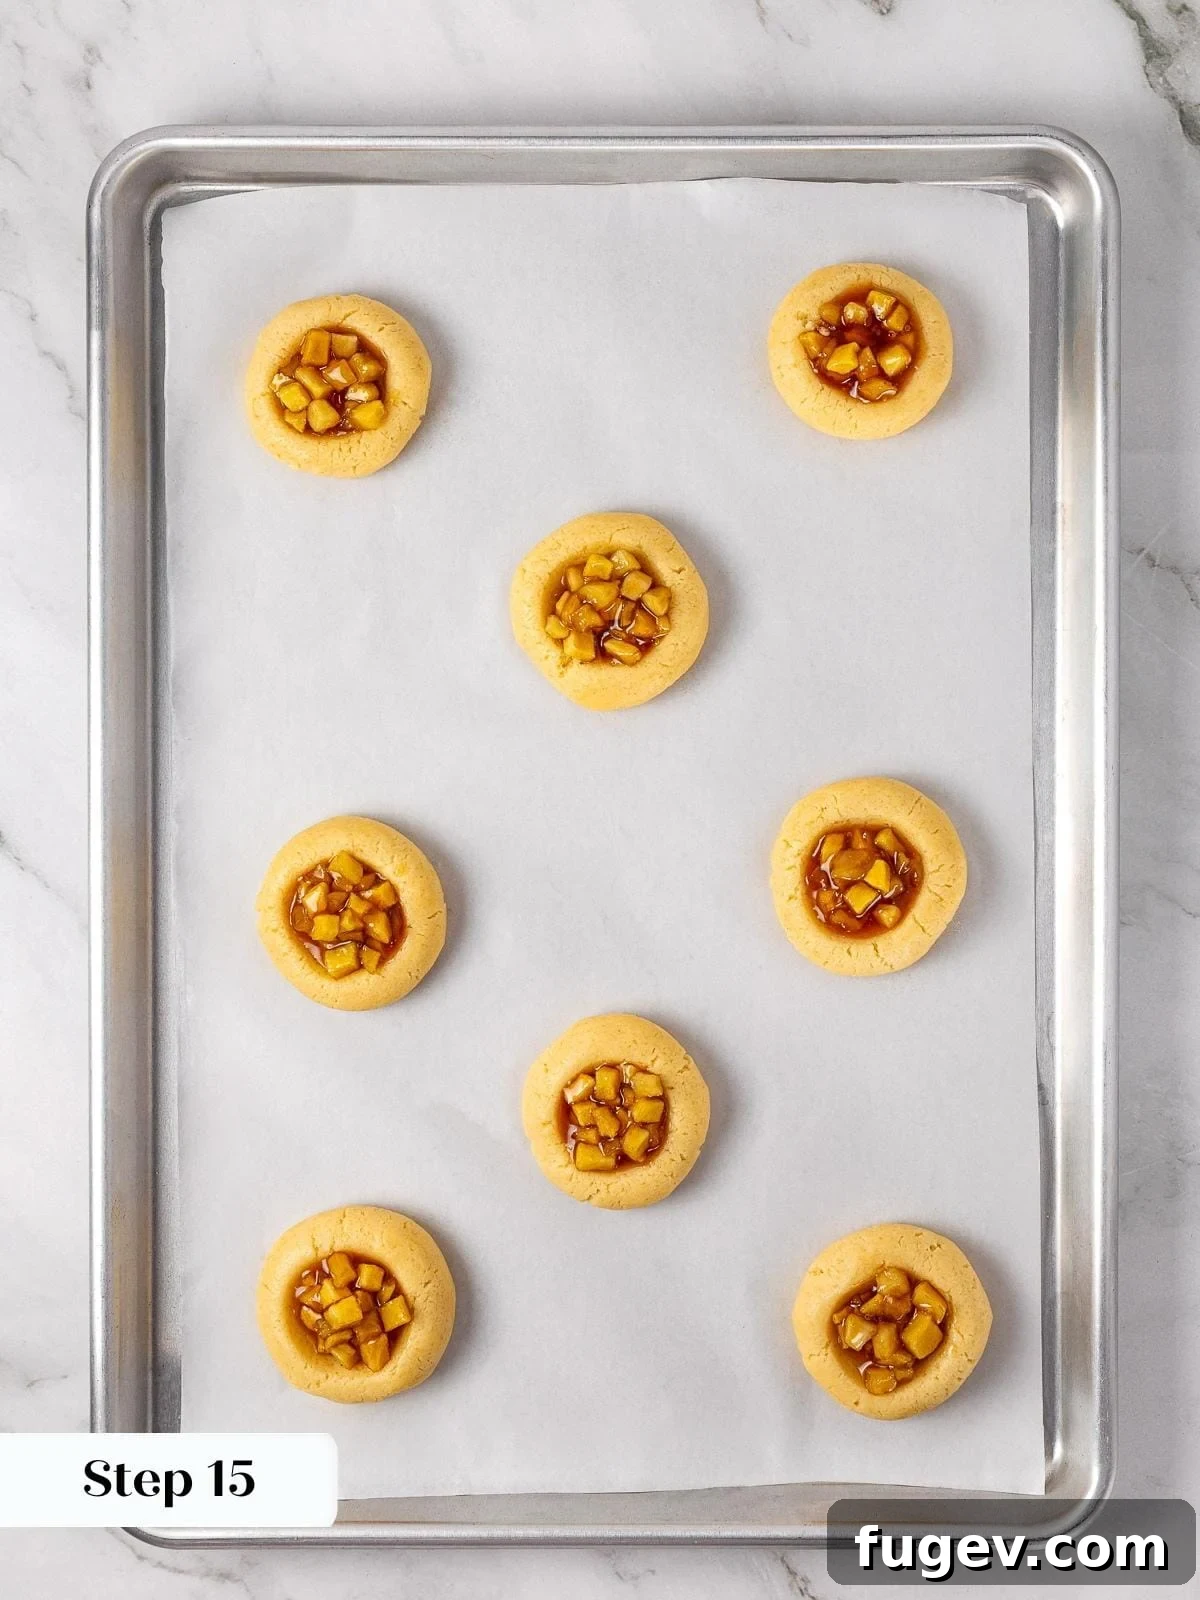
Step 15: Fill Each Cookie Indentation. Carefully scoop the completely cooled apple pie filling into the center of each cookie dough ball’s indentation. Focus on scooping mostly the diced apple pieces, adding just enough of the thickened sauce to moisten them without overfilling. Overfilling with too much liquid can lead to soggy cookies or cause the filling to bubble over excessively during baking, potentially burning on the sheet.
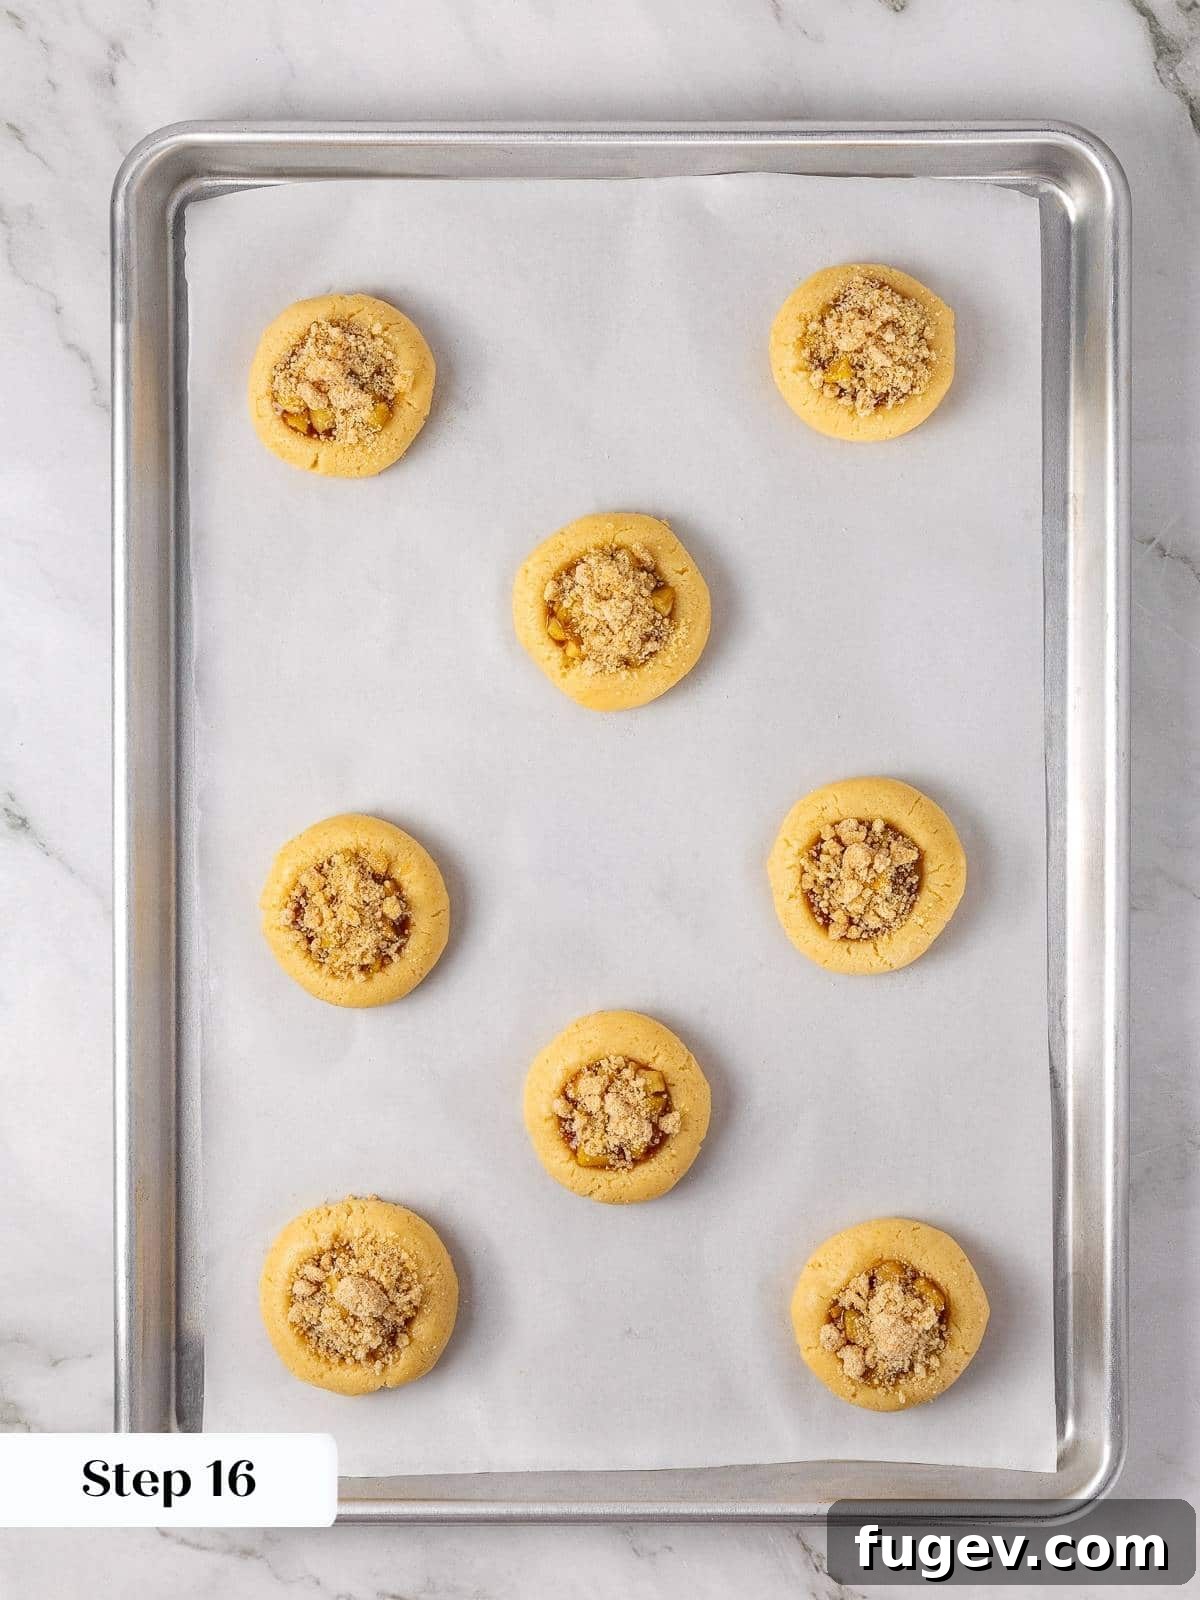
Step 16: Top with the Delicious Crumble. Generously sprinkle the prepared brown sugar crumble over the apple filling in each cookie. Gently press the crumble down a little to help it adhere to the filling and the soft cookie dough. Since the dough should still be relatively soft at this point, it will readily accept the crumble, helping it stay in place during baking and ensuring a beautiful, integrated topping.
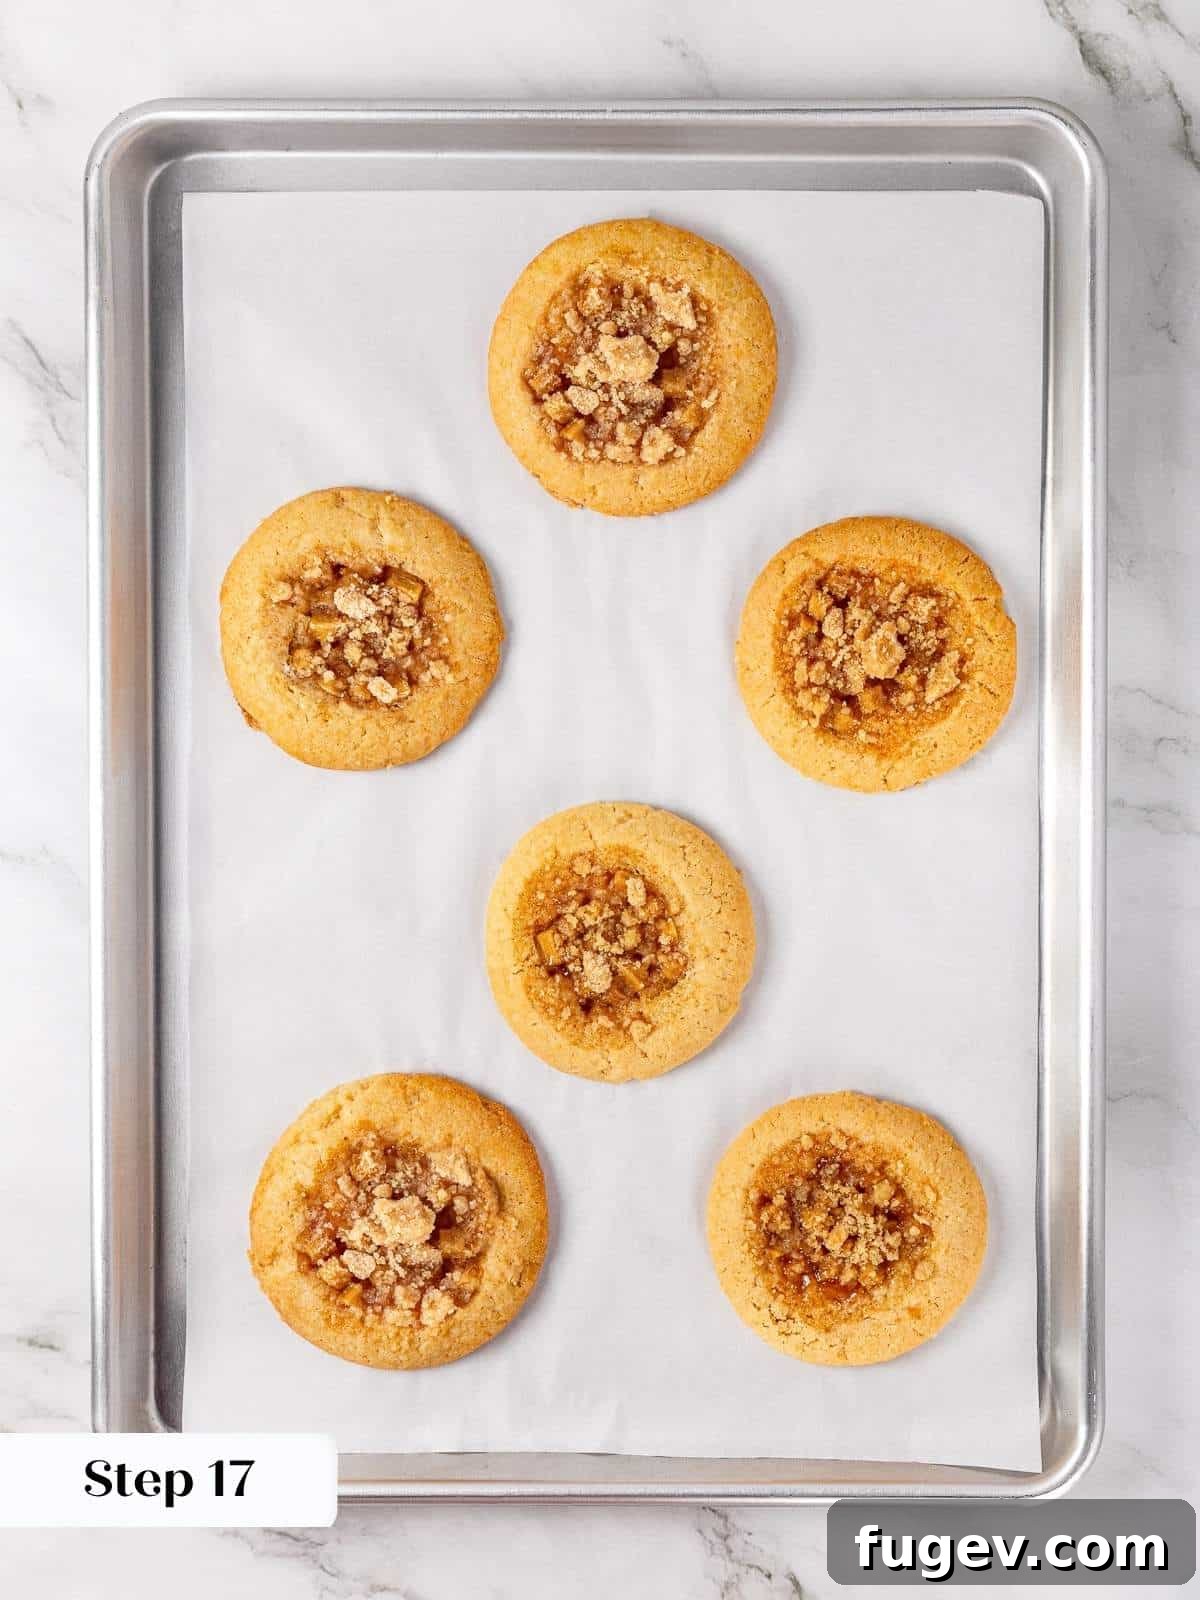
Step 17: Bake Until Golden. Place the filled and topped cookie sheets into your preheated oven. Bake for approximately 20 minutes, or until the edges of the cookies are a beautiful golden brown and the crumble topping is lightly toasted and fragrant. Keep in mind that warmer cookie dough will tend to spread more during baking, resulting in flatter cookies, so maintaining a slightly chilled dough from Step 13 is beneficial for thicker cookies.
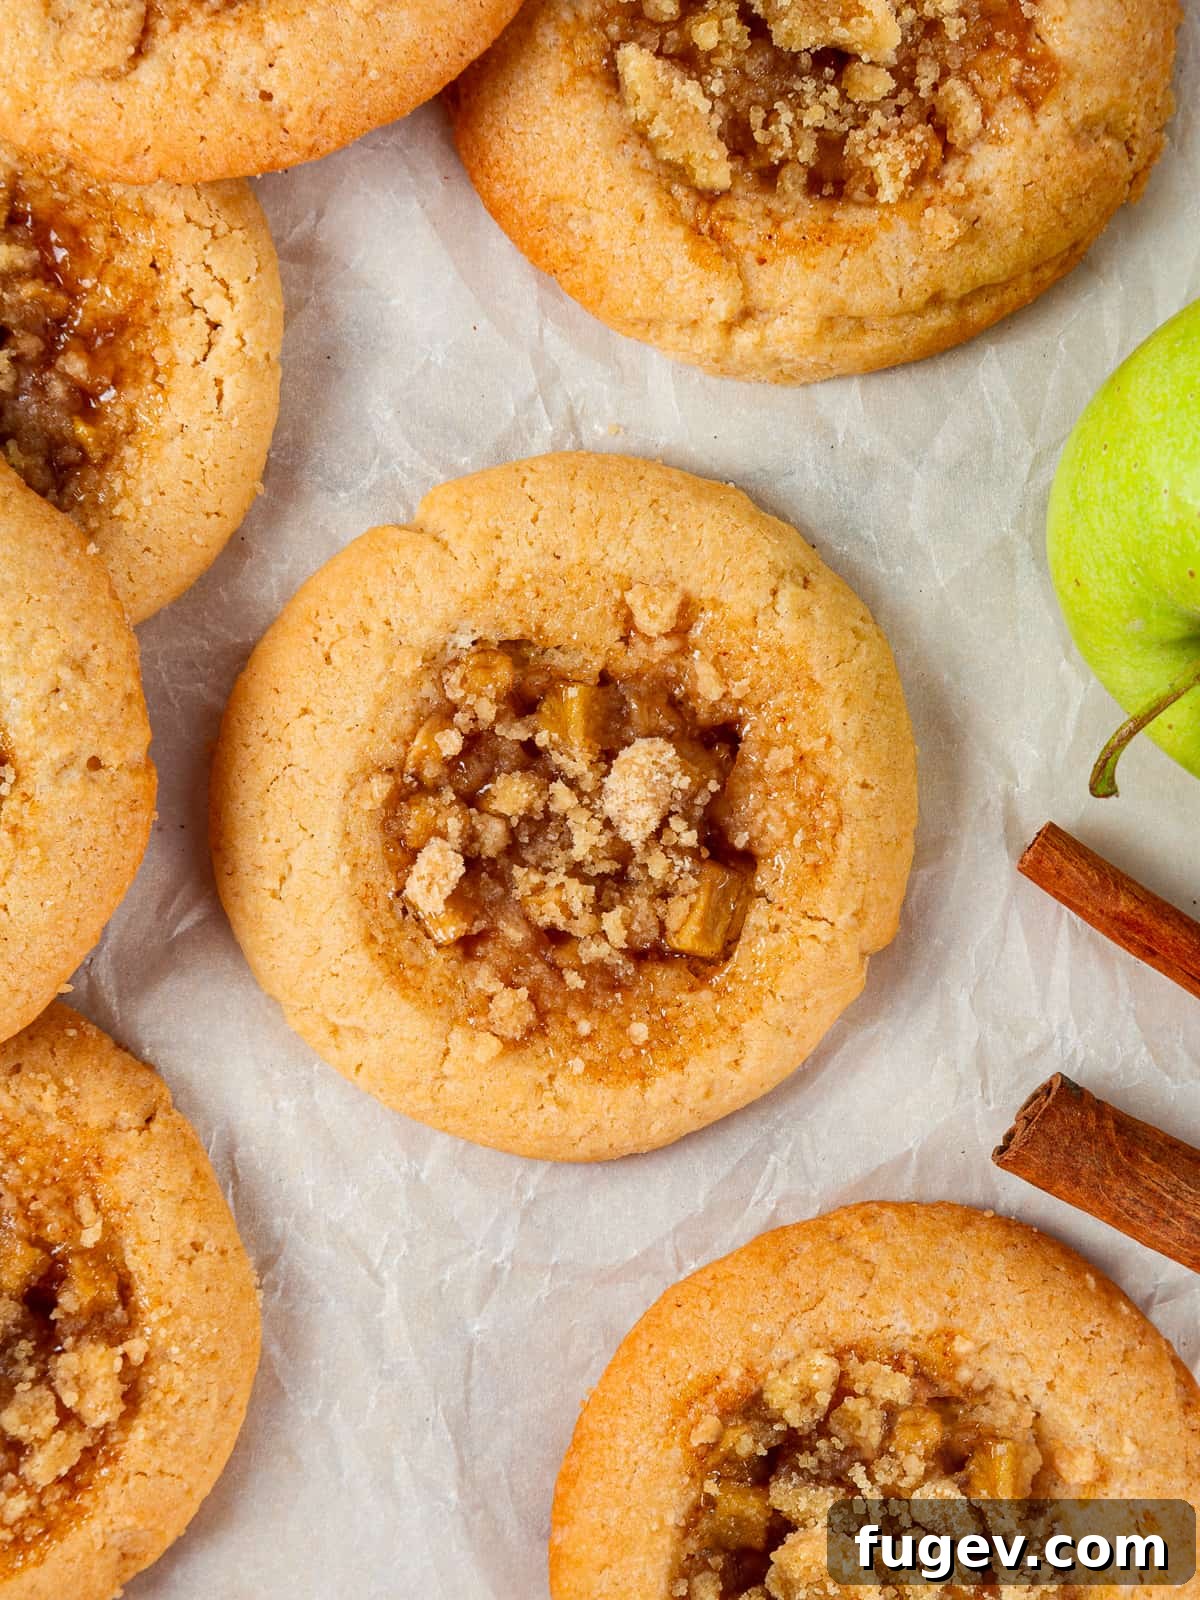
Step 18: Cool and Enjoy. Once baked, remove the baking sheets from the oven. Allow the cookies to cool completely on the baking sheet for at least 10 minutes. This crucial resting period allows the cookies to set and firm up, preventing them from breaking or falling apart when transferred. After 10 minutes, carefully transfer the cookies to a wire rack to cool completely. Cooling on a rack promotes air circulation, ensuring a crisp bottom and preventing residual steam from making them soggy.
Chef Lindsey’s Special Recipe Tip: The Magic of Pliable, Cold Butter
The secret to our no-chill cookie dough’s success and its delightful chewy texture lies in the butter’s temperature. You want the butter to be pliable but still cold. This means it should be soft enough that you can easily press your finger into it, but it should still feel noticeably cool to the touch, not greasy or completely softened to room temperature. I typically cut my butter into cubes and weigh it, then let it sit on the counter while I gather and measure all the other ingredients. The final softening can be done efficiently in the mixer with the paddle attachment. If your kitchen is cool, you can even gently hold your hands around the mixing bowl to transfer a little warmth and speed up the process. If your butter becomes too soft or room temperature, the cookies will spread more during baking, resulting in a thinner, crispier cookie rather than the desired thick, chewy texture. A slightly colder, pliable butter helps the cookies maintain their shape and thickness, eliminating the need for a separate chilling step for the dough while still being easy to work with.
Frequently Asked Questions About Apple Pie Cookies
For optimal freshness and to maintain their soft, chewy texture, store your baked apple pie cookies in an airtight container at room temperature for up to three days. This prevents them from drying out and keeps them perfectly enjoyable. If you need to store them longer, they freeze beautifully! Simply place them in a single layer in a freezer-safe airtight container or bag, separated by parchment paper, for up to two months. When ready to enjoy, thaw them at room temperature or gently warm them in a microwave or oven for a “freshly baked” experience. We do not recommend storing these cookies in the refrigerator, as the moisture can make them soft and unappealingly hard to serve. The unbaked cookie dough can be frozen for up to three months, and the prepared apple filling can be refrigerated for up to 1 week or frozen for up to 2 months.
Granny Smith apples are unequivocally the top choice for this particular cookie recipe. Their distinct tartness provides a crucial counterpoint to the sweetness of the brown sugar cookie and crumble, creating a perfectly balanced flavor profile that prevents the cookies from being overly saccharine. Moreover, their firm flesh holds its shape exceptionally well during both the cooking of the filling and the baking processes, ensuring delightful, tender chunks of apple in every bite without turning mushy. If you prefer to use a different baking apple, such as Honeycrisp, Fuji, or Gala, I highly recommend tasting the apples first and then reducing the sugar content in the filling accordingly to prevent the cookies from becoming excessively sweet.
While homemade filling offers the best flavor, texture, and control over sweetness, you can use store-bought pie filling if you’re truly short on time. However, it’s crucial to make a modification: you MUST slice or dice the larger pieces of fruit in canned filling into small, approximately 1 cm (⅜ inch) squares, similar to how you’d prepare fresh apples. Canned filling often contains large apple slices that are too big for individual cookies and may leak or cause structural issues during baking. Additionally, store-bought fillings tend to be much sweeter, so be prepared for a sweeter cookie overall. You could also adapt another trusted recipe like this apple pie filling recipe or this easy apple compote, making sure to reduce the sugar and cut the apples into small pieces to fit neatly into the cookie indentations.
These apple pie cookies are incredibly versatile and delicious in many ways! Serve them at room temperature for a delightful everyday treat, or gently warm them in the microwave or oven for a more indulgent, comforting experience, especially on a chilly evening. They pair wonderfully with a side of delicate crème anglaise, a classic custard sauce that adds a touch of elegance. For a truly decadent dessert, a scoop of rich vanilla bean ice cream melting over a warm cookie is simply divine. I also believe they would complement my velvety caramel pudding beautifully, creating a symphony of fall flavors. Don’t forget a warm cup of coffee, a glass of cold milk, or spiced cider for the ultimate cozy experience!
Several factors can contribute to cookies spreading excessively and coming out flat. The most common culprit is butter that is too soft or warm – remember Chef Lindsey’s tip to use “cold but pliable” butter. Over-creaming the butter and sugar can also incorporate too much air, which can cause the cookies to rise rapidly and then collapse in the oven. Ensure your oven temperature is accurate (an oven thermometer is a great investment!) as an oven that isn’t hot enough can cause excessive spreading before the cookies set. Lastly, make sure your baking powder and baking soda are fresh and active – expired leavening agents won’t provide the necessary lift, leading to flat and dense results. Chilling the formed cookie dough for 10-15 minutes before baking (as suggested in Step 13) can also help prevent spreading.
More Delightful Cookie Recipes to Explore
Cookie Recipes
Old Fashioned Date Pinwheels
Cookie Recipes
Almond Crescent Cookies
Cookie Recipes
Browned Butter Cardamom Snickerdoodles
Cookie Recipes
Chai Sugar Cookies
If you tried this recipe and loved it, please consider leaving a 🌟 star rating and share your thoughts in the comments below. Your feedback truly brightens my day and helps other bakers discover these wonderful cookies!

Apple Pie Cookies: The Full Recipe
These chewy apple pie cookies are a delightful fusion of a soft brown sugar cookie, a generous filling of homemade spiced apple goodness, and a crunchy crumble topping. Enjoy all the beloved flavors of apple pie in an easy, no-chill cookie form!
Recipe by: Chef Lindsey
Prep Time: 40 minutes
Cook Time: 20 minutes
Total Time: 1 hour
Yields: 13 cookies
Course: Dessert
Cuisine: American
Ingredients
For the Filling:
- 1 ¼ cups apple, peeled & diced into small pieces (~1 Granny Smith apple)
- ¼ cup light brown sugar, not packed
- 1 ½ teaspoons fresh lemon juice
- ¼ teaspoon ground cinnamon
- 1 teaspoon cornstarch
For the Cookies:
- 2 ½ cups all-purpose flour, fluffed, scooped & leveled
- ¾ teaspoon baking powder
- ¼ teaspoon baking soda
- 1 teaspoon kosher salt
- ¼ cup granulated sugar
- ¾ cup light brown sugar
- ¾ cup unsalted butter, cold but pliable
- 1 large egg
- 1 teaspoon vanilla extract
For the Crumble:
- 1 ½ tablespoons unsalted butter, melted
- ¼ teaspoon vanilla extract
- ¼ cup light brown sugar, packed
- ¼ cup all-purpose flour
Instructions
Prepare the Apple Pie Filling:
- Peel, core, and cut the apples into small pieces (about 1 cm squares) so they fit perfectly into the cookies.
- Combine the diced apples, light brown sugar, fresh lemon juice, and ground cinnamon in a medium saucepan. Stir well to coat the apples evenly. You can taste and adjust sugar, lemon juice, or spices if desired.
- Add the cornstarch to the mixture and stir thoroughly to ensure it’s evenly coated. Begin cooking the apples over low heat, allowing them to gently release their juices.
- Once the apples are cooking in their own sauce, increase the heat to medium and bring the mixture to a boil. Continue to cook over medium-low or medium heat, stirring frequently, until the apples have softened slightly and the sauce has thickened to a syrupy consistency.
- To cool the filling quickly, pour the mixture onto a large plate or a rimmed baking sheet, spreading it thinly. Refrigerate until completely cool.
Make the Cookie Dough:
- Preheat your oven to 350°F (175°C) for conventional baking. Line two baking sheets with parchment paper and set them aside.
- In a medium bowl, whisk together the all-purpose flour, baking powder, baking soda, and kosher salt. Set aside.
- In the bowl of a stand mixer fitted with the paddle attachment (or using a hand mixer), ensure your unsalted butter is cold but pliable. Gently work it if necessary.
- Add the granulated sugar and light brown sugar to the butter in the mixer. Mix on medium-low speed until a smooth, creamy paste forms. Remember to scrape down the sides of the bowl and the paddle to ensure even mixing.
- Add the large egg and vanilla extract to the mixture. Mix on medium speed until the mixture is lighter in color and well combined. Scrape down the bowl periodically to ensure even incorporation.
- Reduce the mixer speed to low and gradually add the flour mixture, one large scoop at a time. Add the next scoop only when the previous one has almost fully incorporated, to avoid overmixing.
- Using a ¼ cup cookie scoop, scoop portions of dough onto the parchment-lined baking sheets, leaving about 2 inches between them. Roll each scoop into a smooth ball. Then, use the back of a round tablespoon or a smaller scoop to press an indentation into the top of each ball. Ensure at least ¼ inch of dough remains at the bottom of the indentation to prevent leaks.
- Place the scooped and indented cookie dough balls in the refrigerator until you are ready to assemble and bake the cookies.
Make the Crumble Topping:
- In a small bowl, combine the melted unsalted butter, vanilla extract, light brown sugar, and all-purpose flour. Stir with a fork until all ingredients are equally moistened and form a crumbly mixture. When squeezed, it should hold together briefly before breaking apart. If too dry, add a tiny bit more melted butter (1 teaspoon at a time).
Assemble & Bake the Cookies:
- Retrieve the chilled cookie dough balls. Carefully scoop the completely cooled apple pie filling into the center of each cookie dough indentation. Focus on adding mostly apple pieces with just enough sauce to keep them moist.
- Generously sprinkle the prepared crumble topping over the apple filling in each cookie. Gently press the crumble down a little to help it adhere.
- Bake in the preheated oven for approximately 20 minutes, or until the edges of the cookies are golden brown and the crumble topping is lightly toasted.
- Once baked, allow the cookies to cool on the baking sheet for 10 minutes before carefully transferring them to a wire rack to cool completely.
Notes
- Yield: This recipe makes approximately 13 delicious cookies.
- Presentation: For the best visual and textural outcome, fill each indentation with mostly chopped apples and only a small amount of liquid from the filling. Too much liquid can make the cookies soggy and harder to handle.
- Technique: Ensuring the apples are cut into small (1 cm square) pieces is key to fitting more filling into each cookie and ensuring even cooking.
- Storage: Store baked cookies in an airtight container at room temperature for up to 3 days, or freeze for up to 2 months. Avoid refrigerating baked cookies as they can become undesirably soft and difficult to serve.
Nutrition Information (Estimated per cookie)
- Calories:
- 310 kcal
- Carbohydrates:
- 47g
- Protein:
- 3g
- Fat:
- 13g
- Saturated Fat:
- 8g
- Polyunsaturated Fat:
- 1g
- Monounsaturated Fat:
- 3g
- Trans Fat:
- 0.5g
- Cholesterol:
- 44mg
- Sodium:
- 237mg
- Potassium:
- 79mg
- Fiber:
- 1g
- Sugar:
- 26g
- Vitamin A:
- 393 IU
- Vitamin C:
- 1mg
- Calcium:
- 42mg
- Iron:
- 1mg
Before You Go: More Sweet Treats!
I sincerely hope you’ve enjoyed discovering and preparing this delightful variation on a classic apple pie recipe! These apple pie cookies are a testament to the joy of homemade baking, and I trust they’ll bring warmth and sweetness to your home. Don’t let your baking adventure end here; I encourage you to explore our other delicious cookie recipes to find your next favorite treat. Perhaps you’ll be inspired by our comforting pumpkin snickerdoodle cookies, perfect for more autumnal baking, or indulge in the rich, spiced goodness of these chewy molasses cookies. Happy baking, and happy eating!