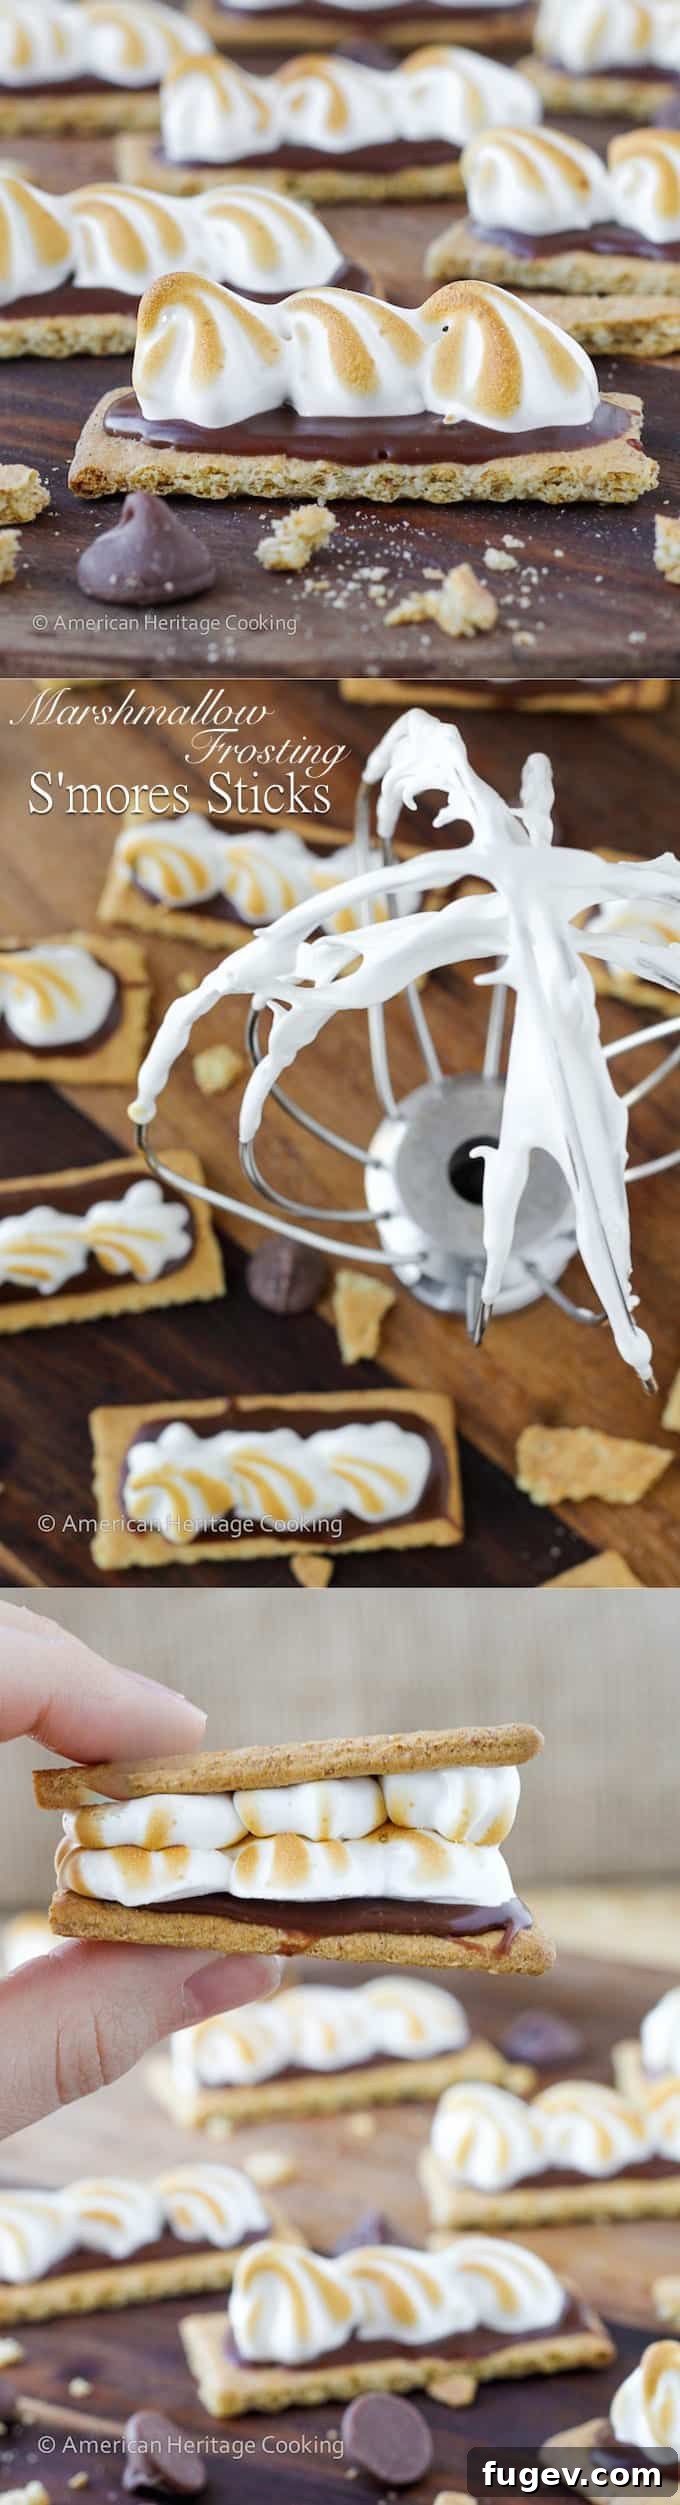
Easy Homemade Marshmallow Frosting: A Professional Pastry Chef’s Secret to Glossy, Airy Perfection
Prepare to transform your baking with this definitive guide to creating a light, glossy, and utterly delicious Homemade Marshmallow Frosting. Meticulously developed and perfected in a professional pastry kitchen, this remarkable recipe utilizes just 4 core ingredients, delivering a cloud-like topping that is perfect for enhancing a vast array of desserts, from elegant cakes to playful cupcakes and comforting pies. Forget corn syrup – this recipe champions simplicity and natural flavor, proving that exceptional quality is easily achievable at home.
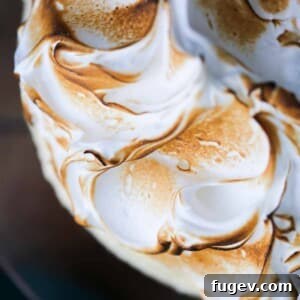
This exquisite marshmallow frosting is celebrated for its ethereal lightness and beautifully airy texture, offering a stunning visual appeal whether left pristine white or artfully toasted to a golden-brown finish. Imagine it gracefully piped atop rich chocolate cupcakes, elegantly swirled onto vibrant lemon blondies, or adding a truly dramatic flourish to a classic carrot cake. What truly distinguishes this recipe is its exceptional ability to deliver that coveted, perfectly shiny, and stable finish without the use of corn syrup, a common component in many marshmallow-based confections.
Unlike the denser, butter-enriched confections such as Italian meringue buttercream or Swiss meringue buttercream, this remarkably easy frosting recipe stands apart as it requires no butter whatsoever! It harks back to the charm of an old-fashioned marshmallow frosting or the classic “7-minute frosting.” Once prepared and set, it retains its gorgeous, reflective gloss and boasts a delightfully pillowy texture and a delicate vanilla bean flavor, reminiscent of the finest homemade marshmallows you could ever dream of.
Why This Marshmallow Frosting Recipe Stands Out as the Best
In the vast world of dessert toppings, finding a marshmallow frosting that consistently delivers on taste, texture, and stability can be a challenge. This particular recipe, however, has been honed through extensive testing and experience, guaranteeing an exceptional outcome every single time. Here’s a deeper look into what makes this recipe truly superior:
- Developed and Perfected in a Professional Kitchen Environment: This isn’t just a casual home recipe; it’s the very backbone for numerous iconic restaurant desserts that I’ve crafted and served. This means the recipe has undergone rigorous scrutiny and refinement under demanding conditions, proving it to be utterly foolproof. I possess an intimate understanding of its nuances, including its capabilities, limitations, and every potential misstep. My comprehensive tips, embedded throughout this post, are direct insights from this professional background, designed to guide you to flawless results.
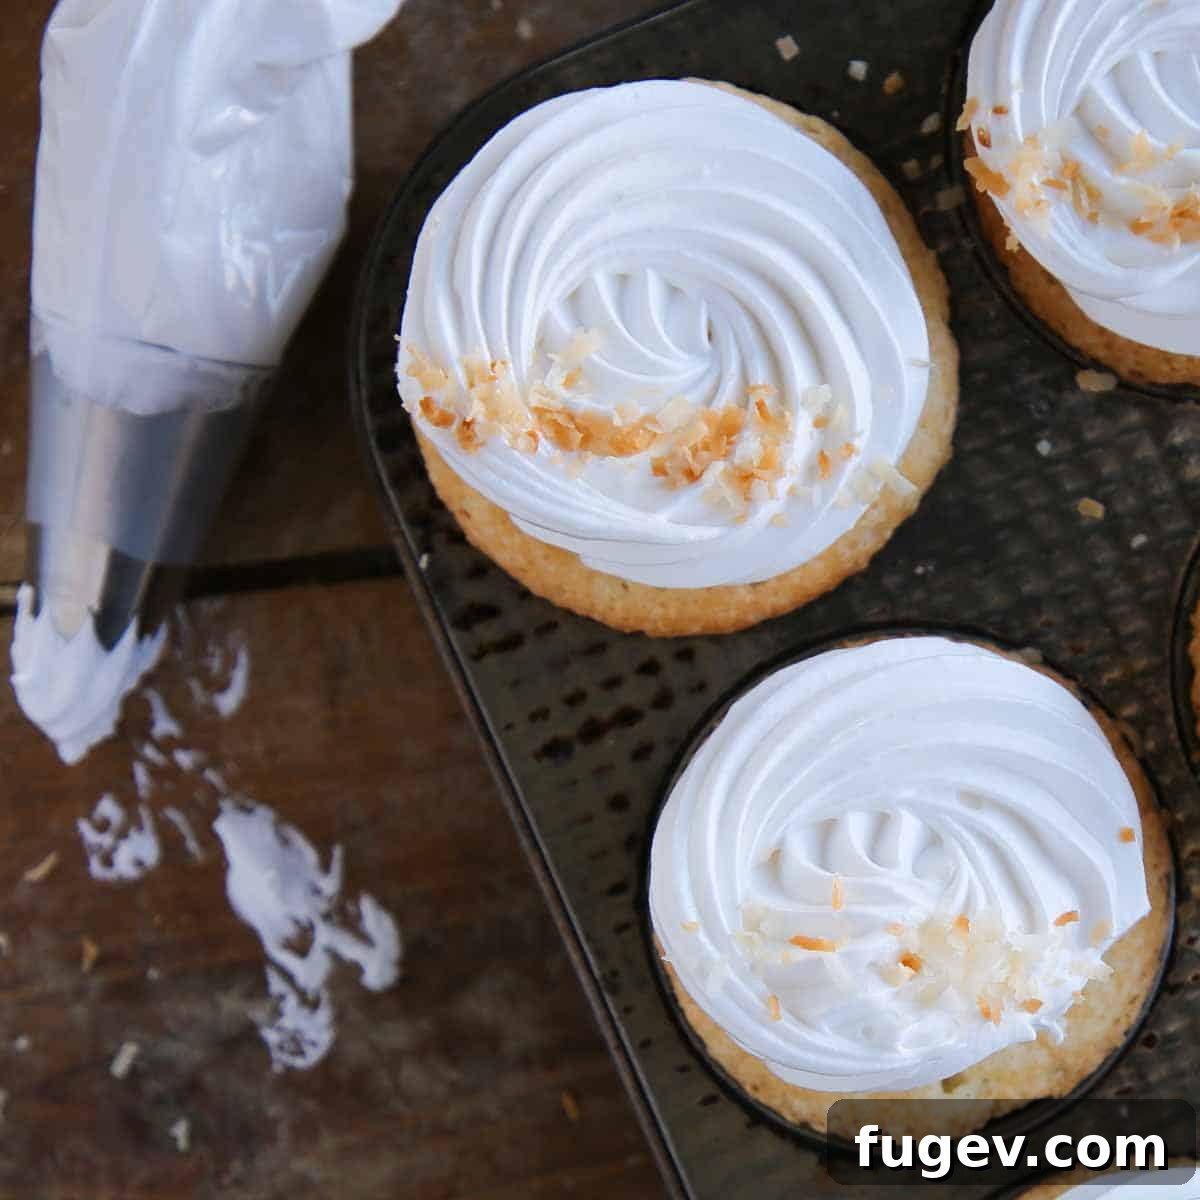
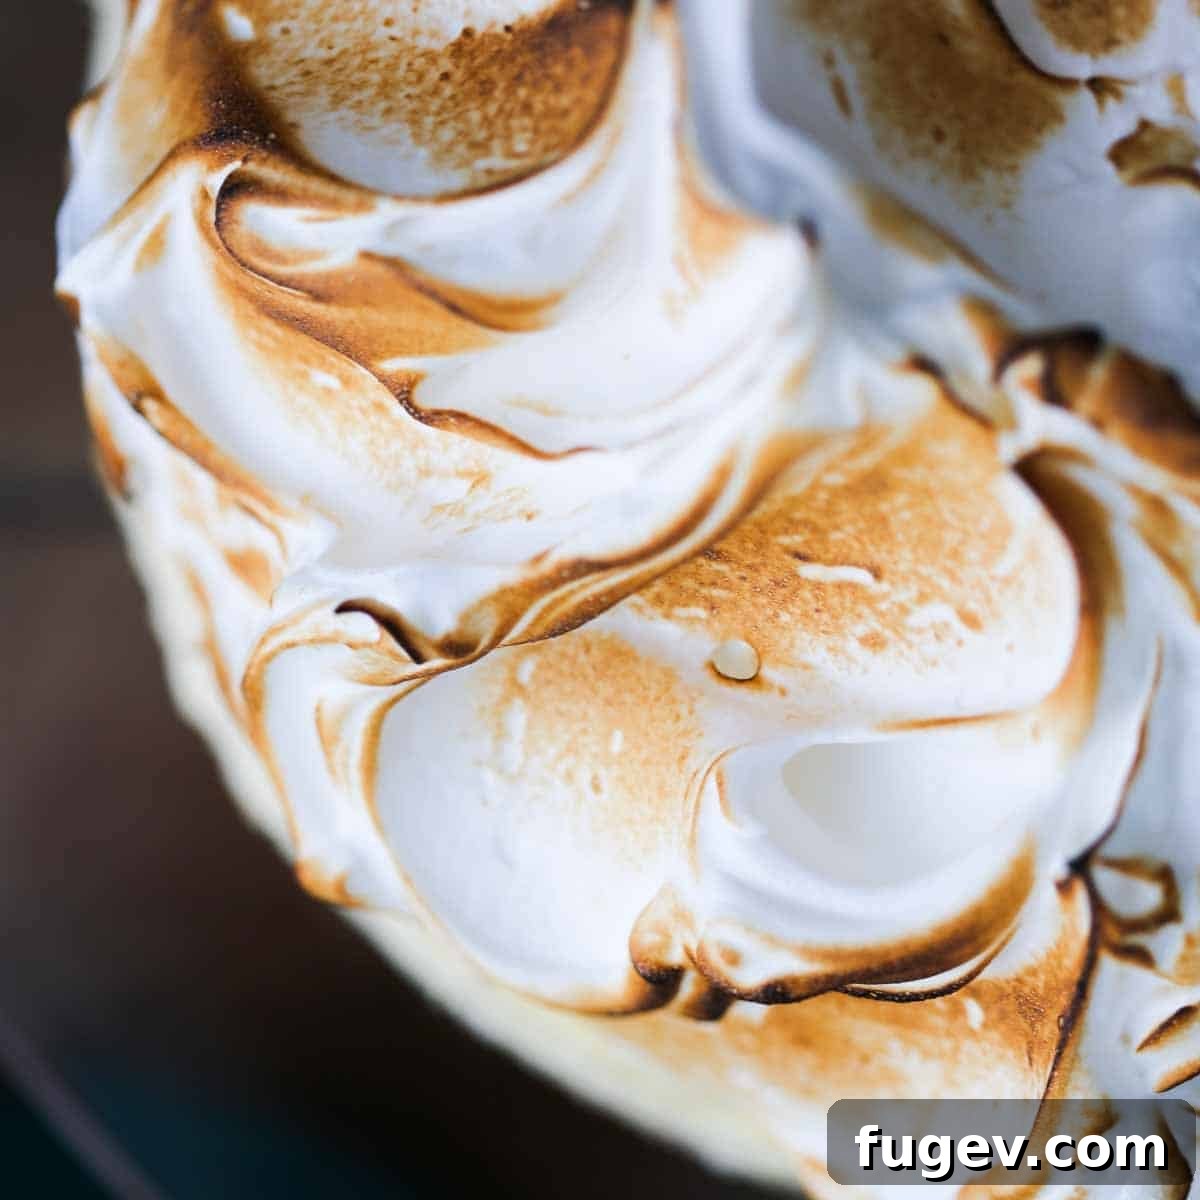
- Visually Stunning and Delicious, Whether Toasted or Untoasted: The versatility in presentation is a hallmark of this marshmallow frosting. You have the elegant option of keeping it a pristine, brilliant white, which offers a clean and sophisticated aesthetic, perfect for delicate coconut cupcakes. Alternatively, you can achieve a dramatic, caramelized effect by expertly torching its peaks, creating beautiful golden-brown highlights, as gorgeously displayed on these comforting sweet potato cupcakes. Both finishes are equally delectable and provide a unique visual appeal, allowing for creative freedom in your dessert styling.
- Remarkably Easy to Make with Readily Available Ingredients: Simplicity is key to this recipe’s appeal. Unlike many recipes that call for store-bought marshmallow fluff or specific types of marshmallows, this is a fully homemade creation. It relies solely on fundamental pantry staples – egg whites, sugar, salt, and vanilla extract. This accessibility ensures that you can whip up a batch of this fantastic frosting whenever the craving strikes, without needing a special trip to the grocery store.
- Incredibly Light, Airy, and a Perfect Companion for Any Flavor Profile: The defining characteristic of this frosting is its extraordinary texture: exceptionally light, airy, and yielding. This makes it an ideal counterpart to virtually any dessert flavor. It’s truly delicious on a rich and intense devil’s food cake, complements the understated elegance of a classic white cake, and provides a delightful, fluffy topping for zesty lemon bars. Its balanced sweetness and delicate vanilla profile enhance rather than overpower, making it hard to find a dessert that wouldn’t be improved by its presence!
Table of Contents: Your Guide to Perfect Marshmallow Frosting
- Why This Marshmallow Frosting Recipe Stands Out as the Best
- What is Marshmallow Frosting? Understanding Swiss Meringue
- Essential Ingredients for Your Marshmallow Frosting
- Professional Tips for Perfect Marshmallow Frosting
- How to Make Homemade Marshmallow Frosting: Step-by-Step Guide
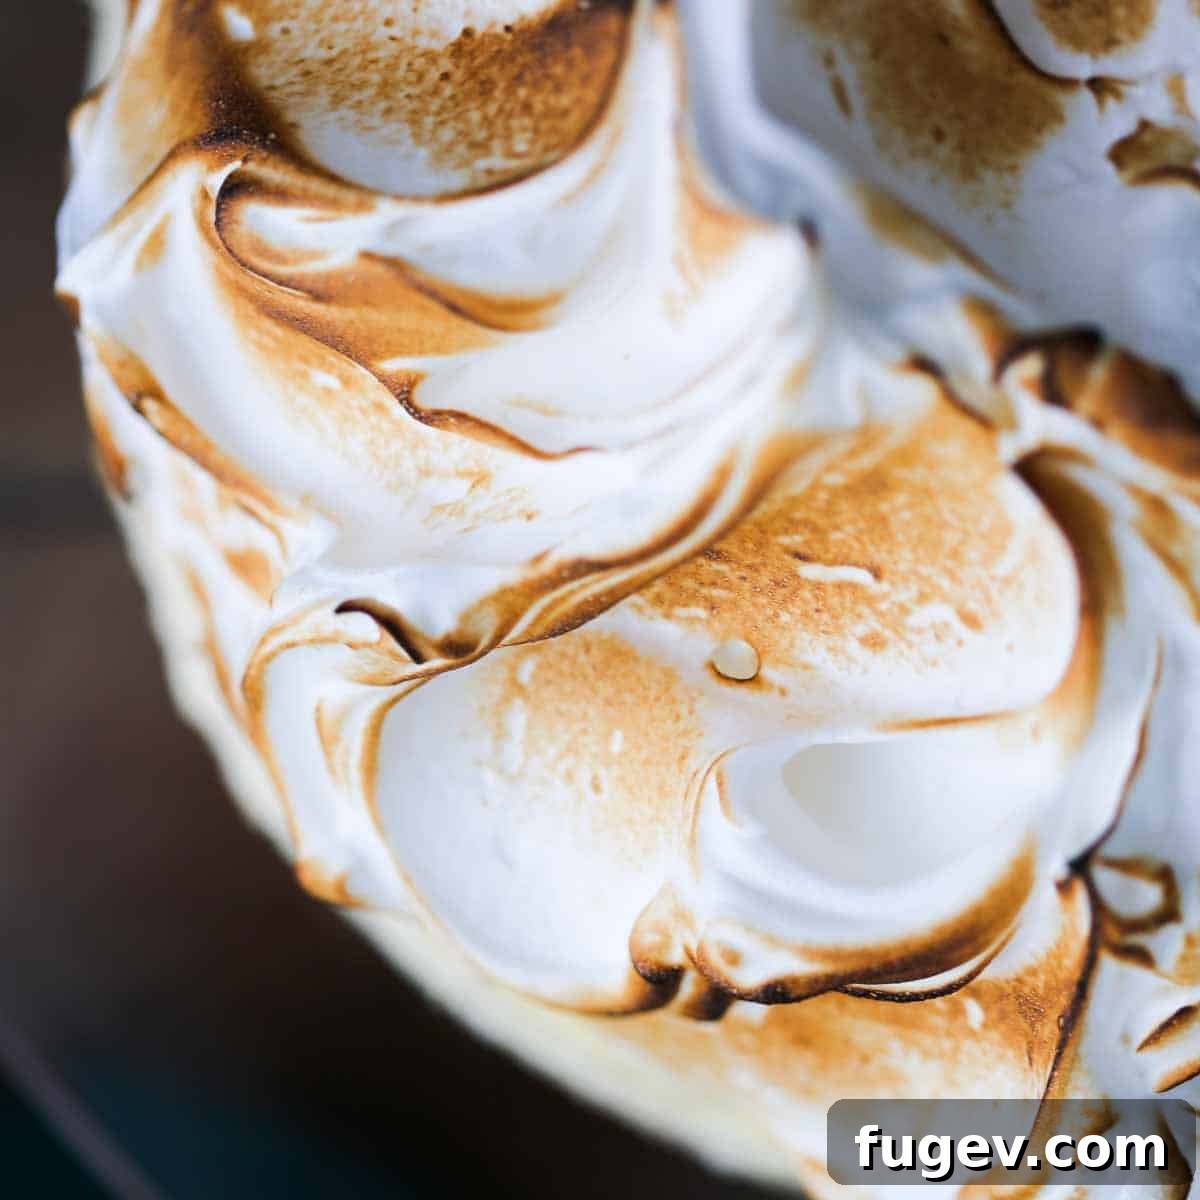
- How to Toast Marshmallow Frosting for a Golden Finish
- Chef Lindsey’s Expert Recipe Tip: Optimal Temperature for Application
- How to Store Marshmallow Frosting for Maximum Freshness
- Creative Ways to Use Marshmallow Frosting in Your Desserts
- Marshmallow Frosting Recipe FAQs: All Your Questions Answered
- Recommended Cupcake Recipes to Pair with Marshmallow Frosting
- Detailed Marshmallow Frosting Recipe Card
- Before You Go: Explore More Frosting Inspiration
What is Marshmallow Frosting? Understanding Swiss Meringue
At its core, this delightful marshmallow frosting is essentially a Swiss meringue. Meringue itself is a classic confection born from the simple combination of whipped egg whites and sugar. While there are three primary methods for preparing meringue – French, Italian, and Swiss – each offers a distinct texture and level of stability, with Swiss meringue striking a perfect balance for this application.
- The Swiss Meringue Method, Simplified: The process begins by gently whisking egg whites, granulated sugar, and a crucial pinch of salt together in a heatproof bowl. This bowl is then placed over a bain-marie (a pot of simmering water), ensuring the bottom of the bowl does not touch the water. The mixture is then slowly heated, with constant whisking, until it reaches a specific temperature—in this recipe, a precisely calibrated 120°F (49°C). This gentle heating serves a dual purpose: it completely dissolves the sugar, preventing a grainy texture, and it lightly cooks the egg whites, making them safer for consumption while enhancing their structural integrity. Once the target temperature is achieved, the mixture is swiftly removed from the heat and whipped vigorously, typically in a stand mixer, until it transforms into beautifully stiff, glossy peaks. The resulting Swiss meringue is renowned for its smooth, satiny consistency and remarkable stability, making it an ideal choice for a light, airy, and butter-free frosting.
- Beyond Frosting: Versatile Applications of Swiss Meringue: The true beauty of this Swiss meringue marshmallow frosting lies in its incredible versatility. You can use it in much the same way you would use any traditional buttercream, or even as a superior substitute for store-bought marshmallow fluff. Imagine piping elegant, voluminous swirls onto a celebratory cake, creating lofty crowns for cupcakes, or adding a delicate, fluffy layer to cheesecakes. It’s also fantastic for covering pies, such as a lemon meringue pie, for filling cupcakes, or as a decadent topping for fudgy brownies or chewy blondies. What’s more, I particularly love swirling it into homemade ice cream; its unique composition allows it to maintain its soft, pillowy texture whether refrigerated or frozen, offering a consistently delightful bite in every spoonful.
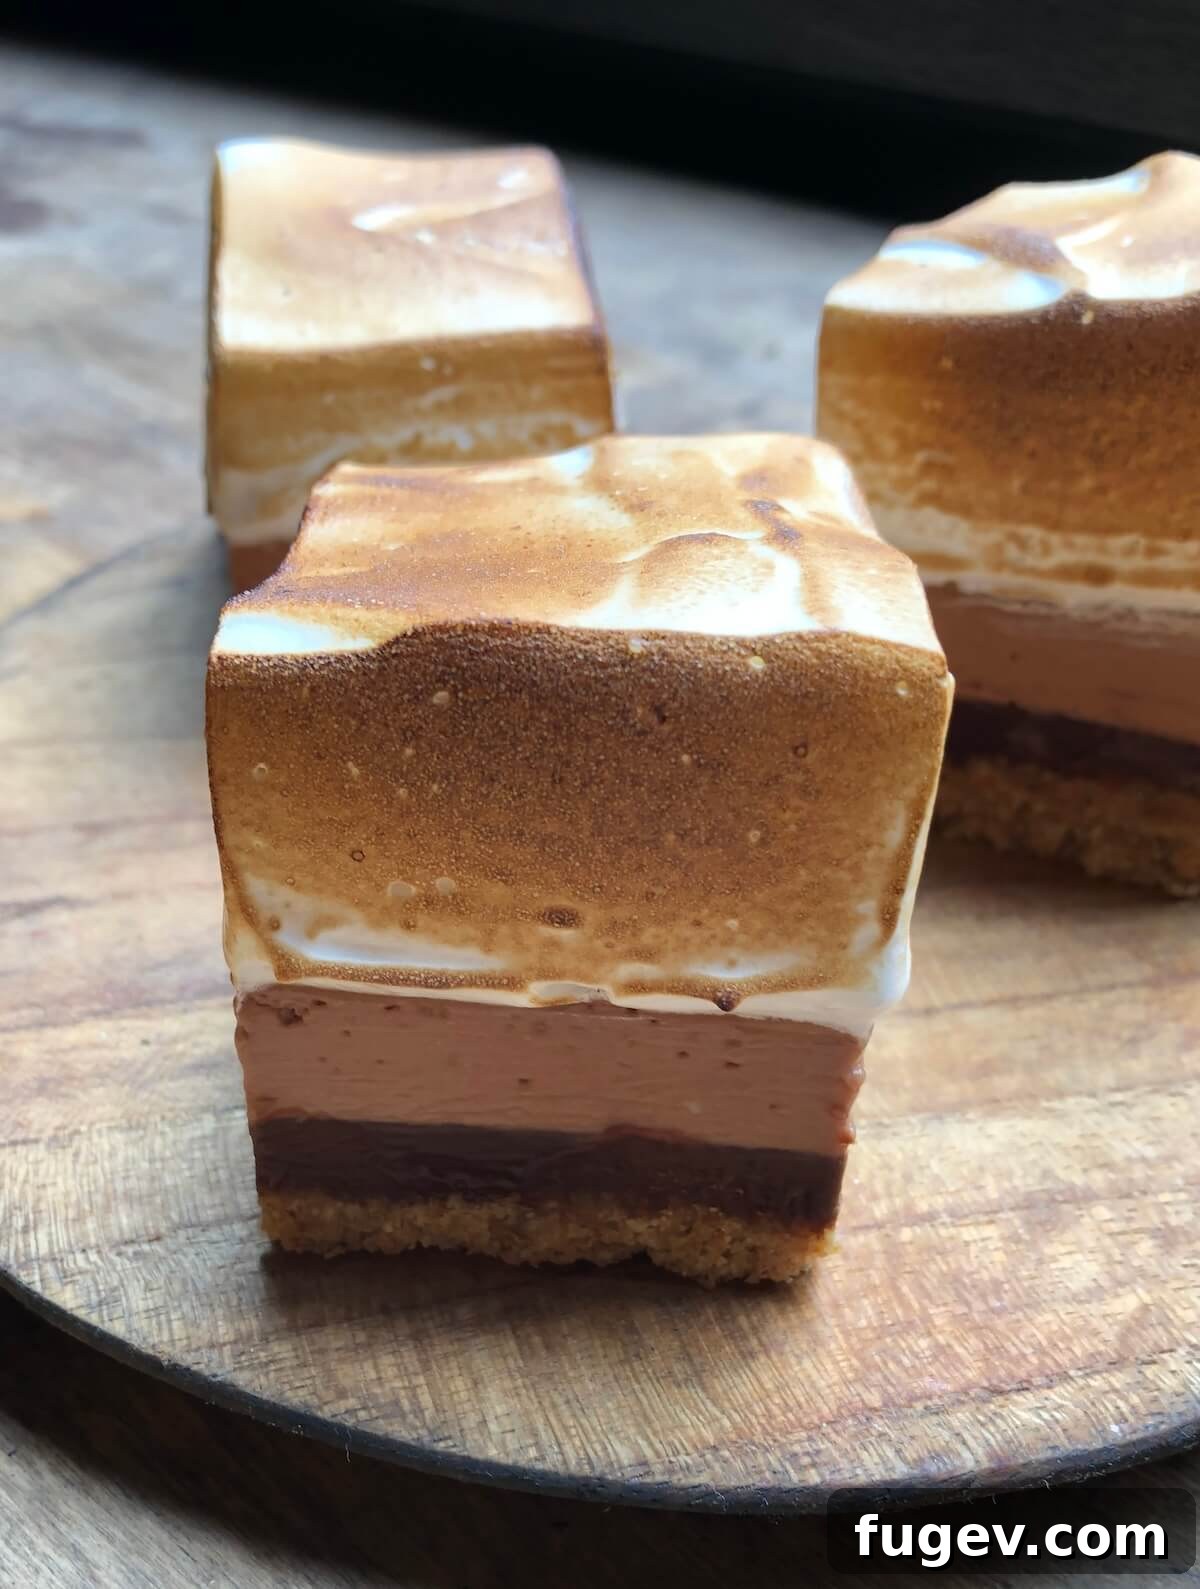
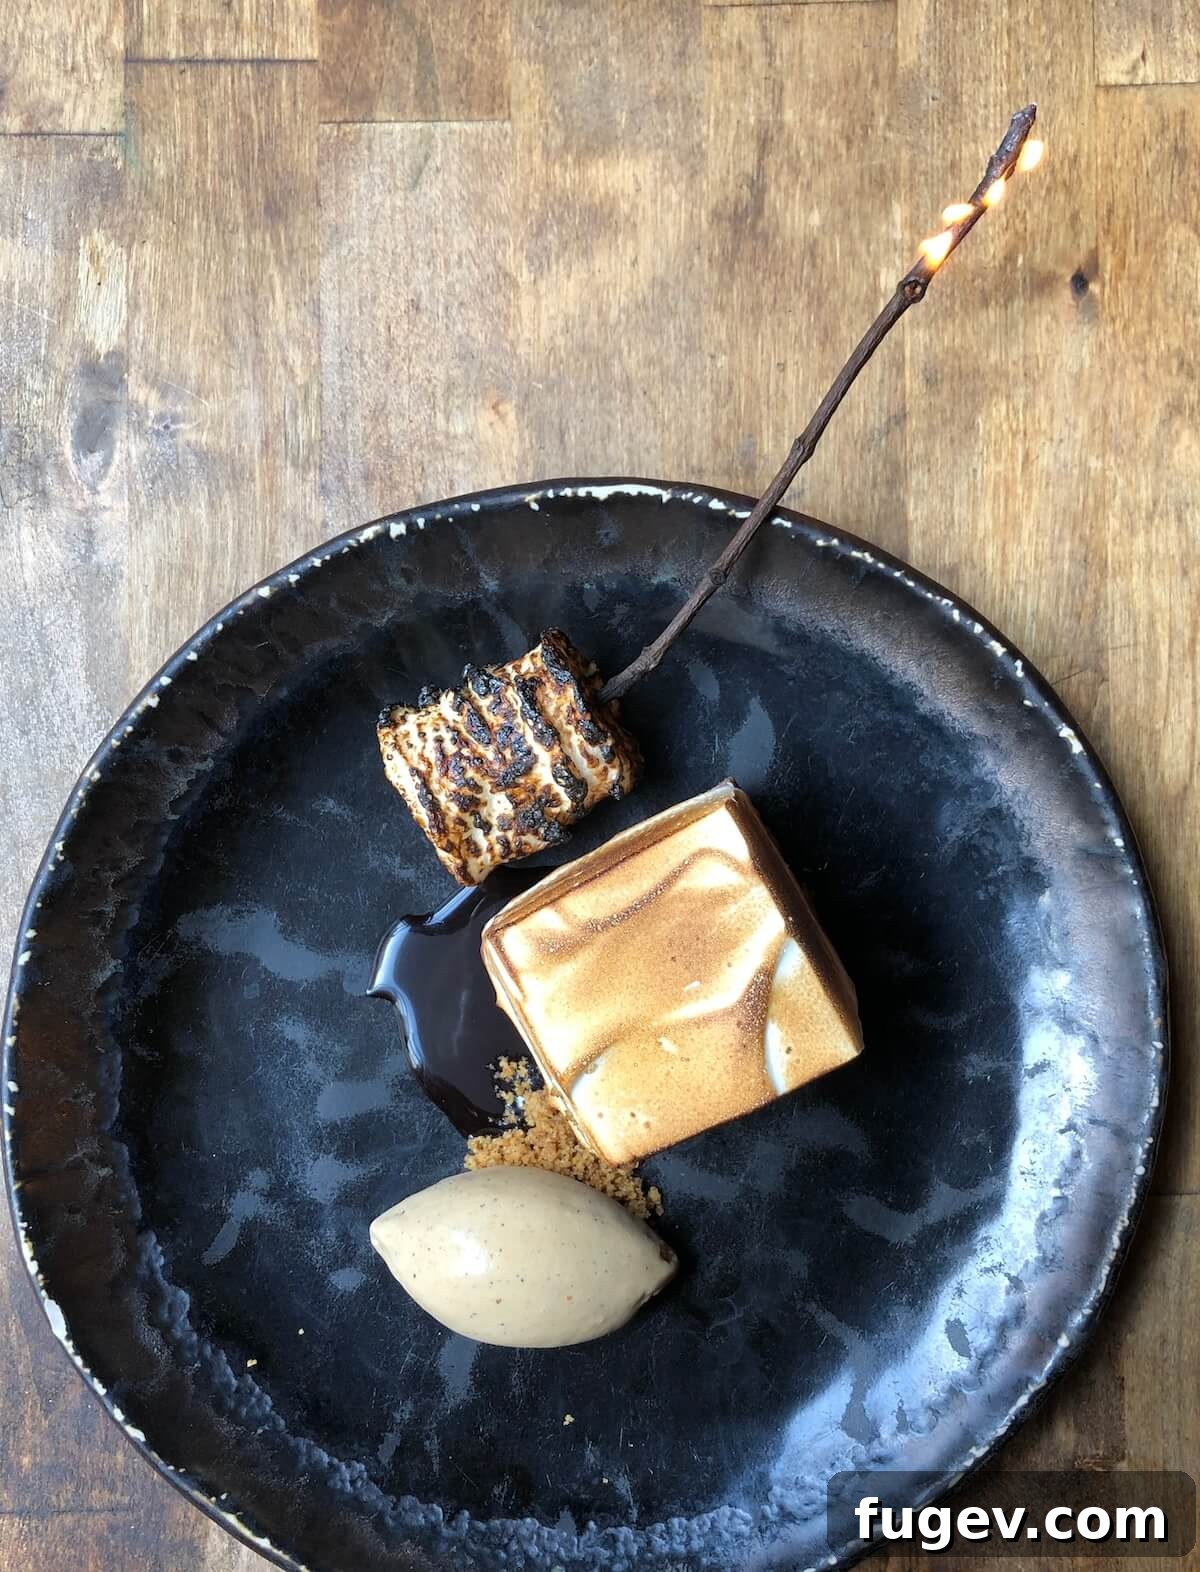
Essential Ingredients for Your Marshmallow Frosting
Creating this exceptional marshmallow frosting requires just a few readily available ingredients. The quality and proper handling of each component are crucial for achieving the perfect light, airy, and stable meringue. Let’s delve into what you’ll need and the specific role each ingredient plays:
- Egg Whites: As the fundamental building block of any meringue, egg whites are responsible for creating the light, voluminous structure. For the silkiest, most brilliantly shiny, and incredibly stable marshmallow frosting, I cannot stress enough the importance of using freshly separated egg whites. The delicate protein structure in fresh whites whips up more robustly. While pasteurized egg whites from a carton can certainly be used, be aware that the heat treatment they undergo can slightly alter their proteins, potentially resulting in a meringue that is less stable, more prone to weeping sooner, and with a slightly less satiny texture. Always ensure your egg whites are completely free of any yolk, as even a microscopic speck of fat will prevent them from whipping properly.
- Granulated Sugar: Beyond simply providing sweetness, granulated sugar is a critical structural element in this recipe. When gently heated with the egg whites, the sugar dissolves completely, forming a stable syrup. This syrup then helps to stabilize the whipped egg white proteins, allowing them to trap and hold air more effectively, which contributes significantly to the frosting’s body, volume, and its signature glossy finish.
- Kosher Salt: The addition of kosher salt, though small, is profoundly important for two key reasons. Firstly, it acts as a masterful flavor enhancer, expertly balancing and elevating the overall taste profile while cleverly dampening the intense sweetness of the sugar to create a more harmonious and refined flavor. Secondly, and equally crucial for meringue, salt functions as a stabilizer. It helps to strengthen the delicate protein bonds within the egg whites, allowing them to expand and maintain their whipped structure more effectively and for a longer duration, resulting in a more resilient and enduring frosting.
- Vanilla Extract: Vanilla is the quintessential flavor for marshmallow frosting, imparting a warm, fragrant, and universally appealing depth. To ensure its delicate aromatic compounds are not diminished by heat and to allow the meringue to achieve its maximum volume potential, it is imperative to incorporate the vanilla extract only after the meringue has been fully whipped to stiff peaks. For an elevated flavor experience, consider using high-quality vanilla bean paste or even scraping the seeds from half a vanilla bean directly into the cooled meringue.
For precise measurements and detailed quantities required for this recipe, please consult the complete recipe card located at the bottom of this page.
Professional Tips for Achieving Perfect Marshmallow Frosting Every Time
While this marshmallow frosting recipe is designed to be easy, incorporating these professional insights will ensure your results are consistently impeccable, mirroring the quality of a high-end bakery. These are the nuances that elevate a good frosting to a truly exceptional one:
- Utilize an Instant-Read Thermometer for Unwavering Consistency: The temptation to gauge meringue readiness by simply dissolving sugar granules is common, but it’s an unreliable method that often leads to inconsistent outcomes. A quality instant-read thermometer is an indispensable tool here. Heating the meringue mixture to the exact specified temperature is paramount for optimal sugar dissolution and the gentle coagulation of egg white proteins, which prevents premature separation or weeping. Overheating the meringue can lead to a broken, unstable texture, whereas hitting the precise 120°F (49°C) ensures maximum stability and gloss. This investment in a thermometer will pay dividends in consistent, professional-grade results.
- The Game-Changing Secret: Heating the Swiss Meringue to 120°F (49°C) Instead of 130°F (54°C): This specific tip has been a closely guarded secret in my professional kitchen for years – and now I’m sharing it with you! While many traditional Swiss meringue recipes advocate heating the mixture to 130°F (54°C) or higher, I have rigorously tested and confirmed that a slightly lower temperature of 120°F (49°C) yields significantly superior results. This subtle yet critical adjustment results in a frosting that is noticeably shinier, more voluminous, and remarkably more stable. It’s a small change in temperature with a profoundly positive impact on the overall quality, appearance, and shelf life of your marshmallow frosting.
- Toasting the Meringue Extends Shelf Life and Adds a Protective Barrier: If you plan to prepare your frosted desserts in advance or desire a longer-lasting topping, toasting the marshmallow frosting is an excellent strategy. My professional experience shows that a toasted marshmallow frosting will typically remain stable and resist weeping (the undesirable separation of liquid) for up to 3 days when properly refrigerated. In contrast, untoasted meringue usually begins to show signs of weeping after just 24 hours. The act of toasting creates a delicate, caramelized crust on the surface of the meringue. This crust acts as a physical barrier, shielding the delicate internal protein structure from ambient air exposure, which is a primary catalyst for meringue breakdown. For even greater, week-long stability, consider using my dedicated marshmallow fluff recipe, which is based on a more stable Italian meringue.
- Always Start with Cold Egg Whites for the Most Stable Meringue: Here’s another professional secret that might seem counterintuitive but is incredibly effective! Beginning your Swiss meringue with cold egg whites, rather than room temperature ones, allows for the perfect amount of gentle whisking time over the simmering water. This extended whisking period while the whites slowly warm up allows for the optimal development and strengthening of the egg white proteins, which is crucial for creating the most robust and stable meringue possible. If you start with room temperature whites, they will reach the target heating temperature too rapidly, often before you’ve had sufficient time to build their structure through whisking. The consequence? A significantly less stable frosting that is far more prone to weeping, often at twice the rate of meringue made with cold whites.
- Ensure All Equipment is Impeccably Clean and Grease-Free: This cannot be overstated. Even a minuscule speck of fat – whether from residual egg yolk, oil on your mixing bowl, or remnants on your whisk attachment – can completely prevent egg whites from whipping up properly. Always use a meticulously clean, dry metal or glass mixing bowl (plastic bowls can sometimes retain grease). For absolute assurance, wipe down your bowl and whisk with a paper towel dampened with lemon juice or white vinegar before starting.
- Be Mindful of Humidity Levels: Meringues are notoriously sensitive to moisture in the air. On exceptionally humid days, egg whites can struggle to achieve stiff peaks, and the finished meringue may become sticky, porous, or weep more quickly. While not always controllable, choosing a dry day to make meringue, if possible, can greatly improve your chances of success.
How to Make Homemade Marshmallow Frosting: Step-by-Step Guide for Flawless Results
Crafting this luscious marshmallow frosting is a rewarding and straightforward process when each step is followed with precision. For exact ingredient measurements and quantities, please refer to the comprehensive recipe card provided further below.
Step 1: Setting Up Your Bain-Marie (Double Boiler)
Begin by pouring approximately one inch of water into the bottom of a medium-sized saucepan. It is crucial to select a saucepan that will allow your stand mixer bowl to sit securely on top without the bottom of the bowl touching the water – this might mean using a smaller saucepan than you instinctively reach for. Bring this water to a full boil, then immediately reduce the heat to a gentle, steady simmer. Congratulations! You have successfully created a bain-marie, also known as a double boiler. This setup is vital for ensuring gentle, indirect heat, which prevents the egg whites from scrambling as they cook.
Step 2: Gently Heat and Whisk the Egg White Mixture
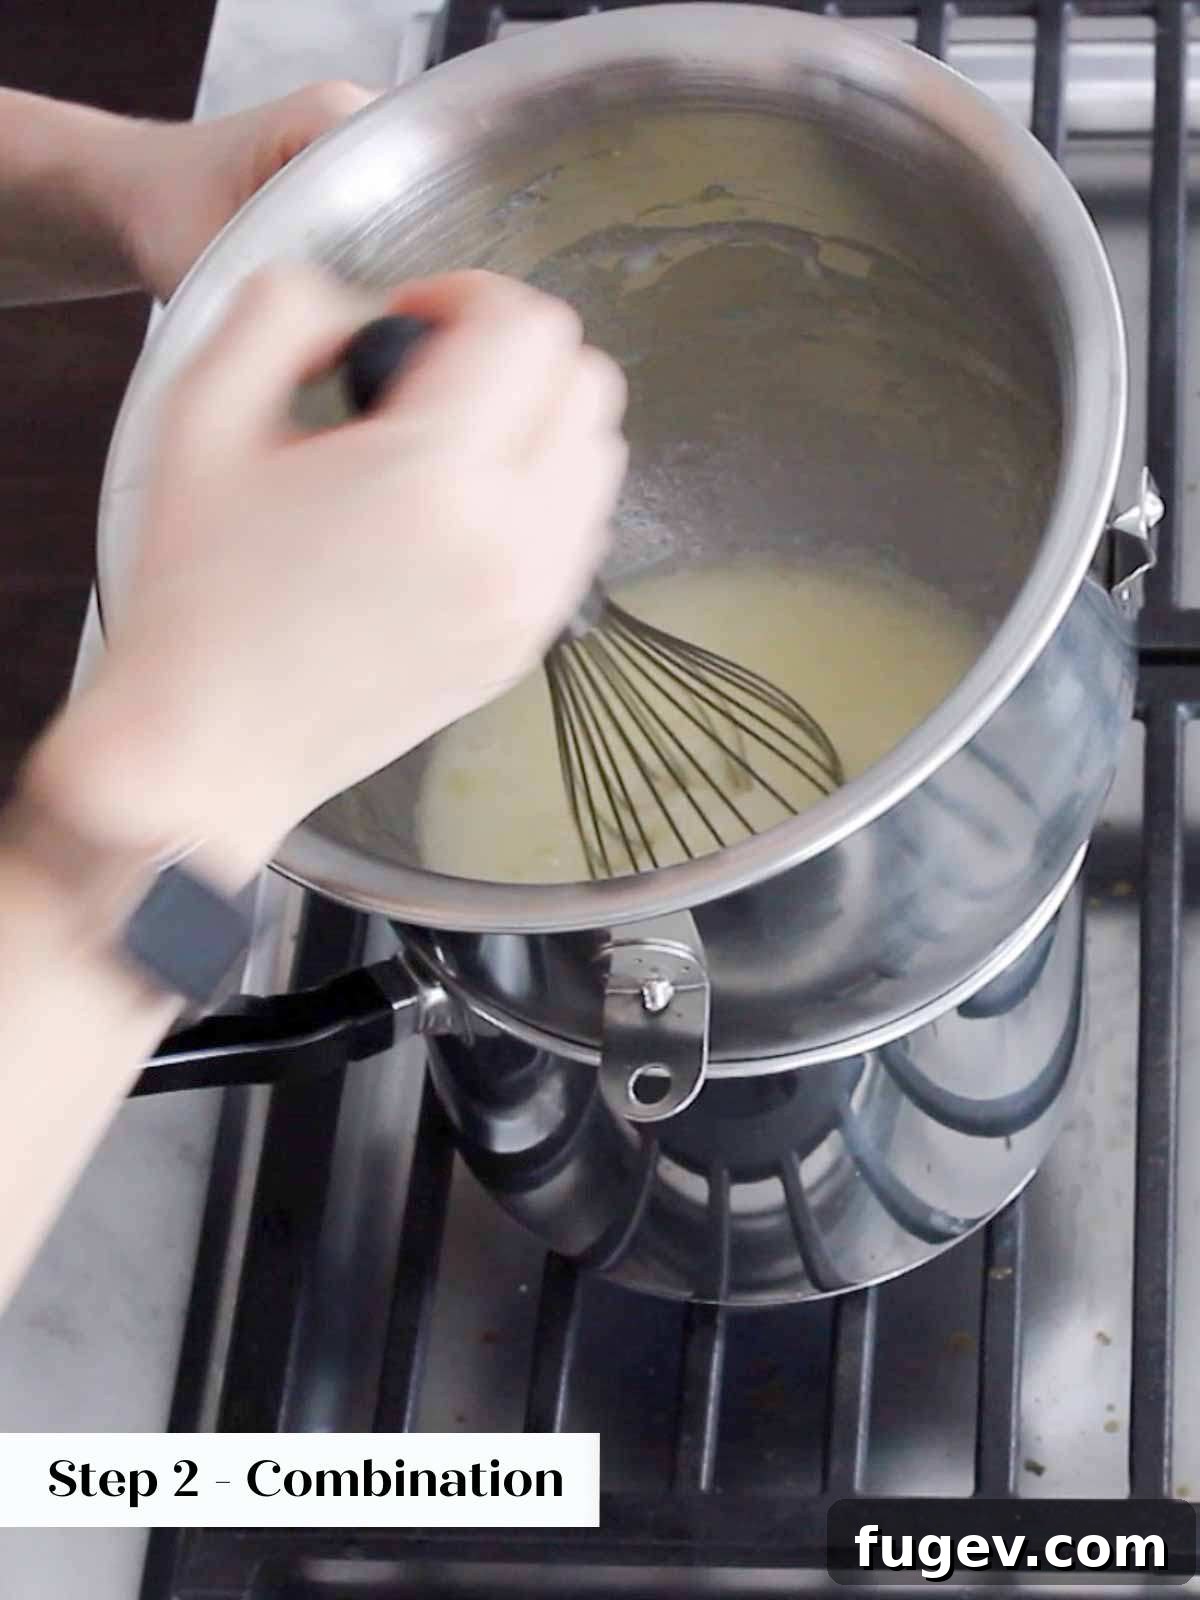
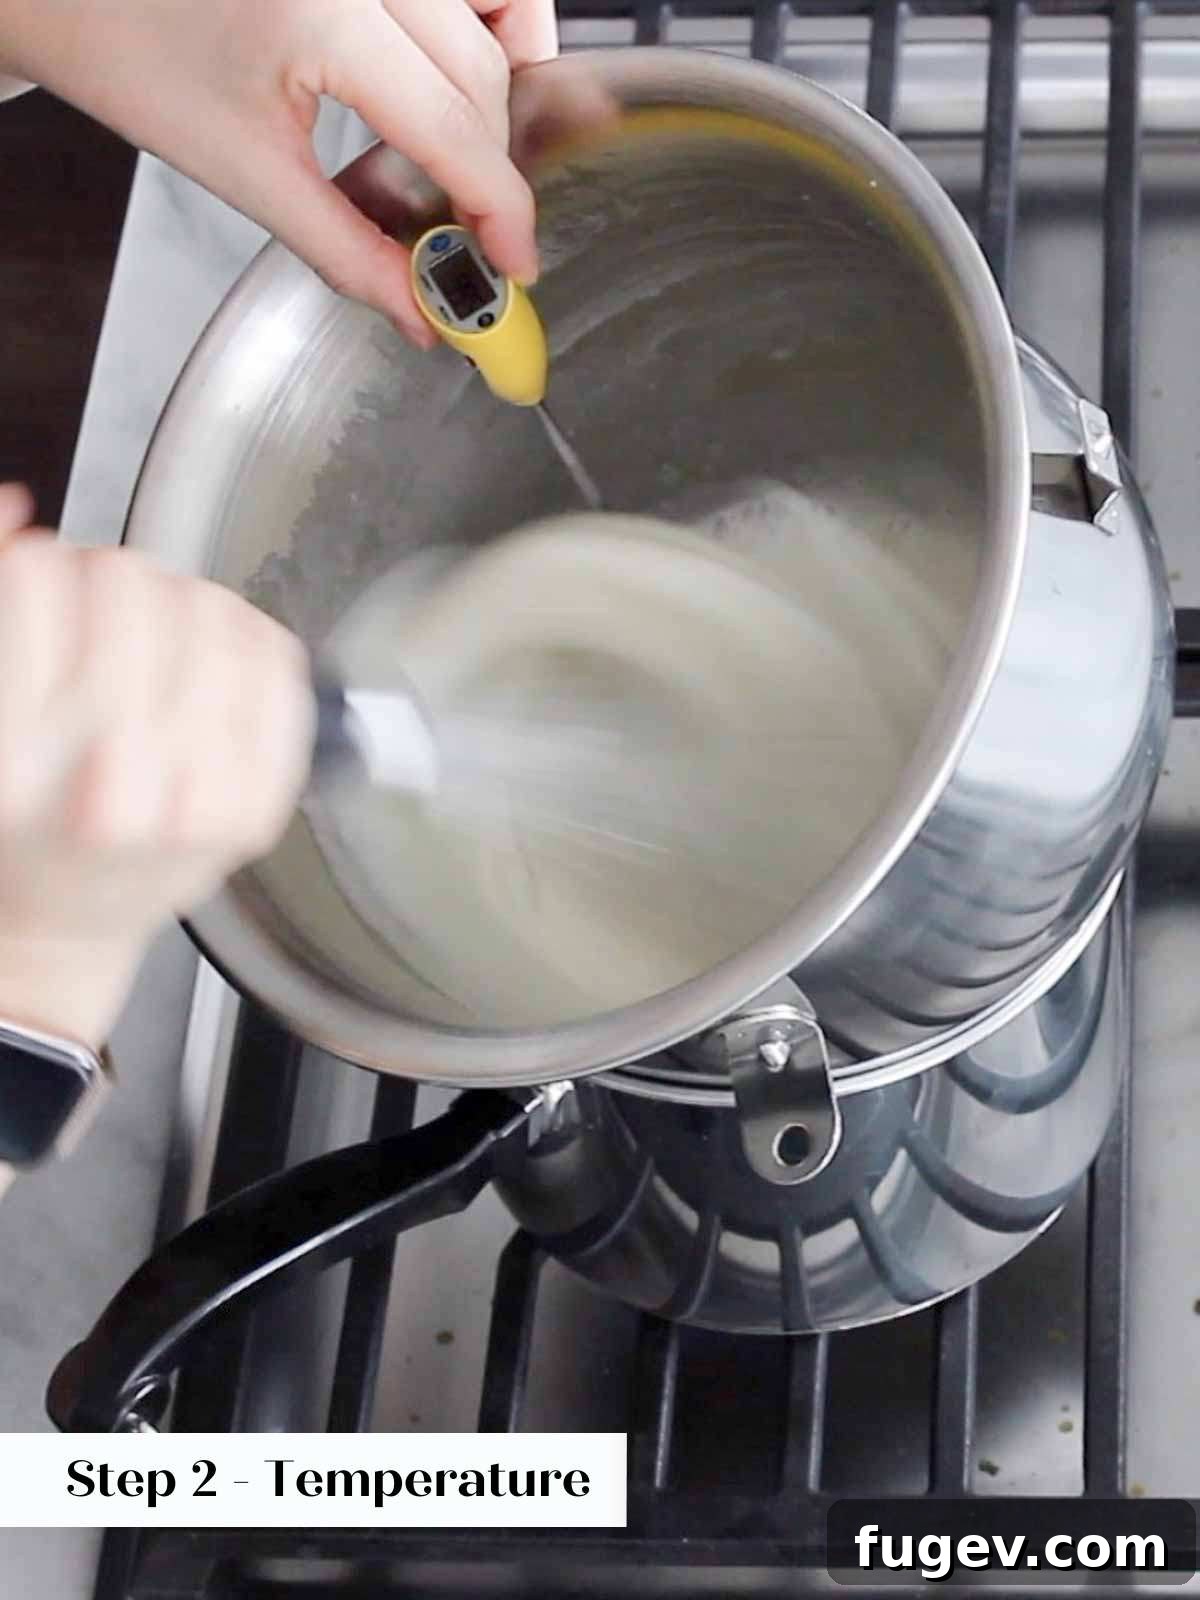
In the impeccably clean and dry bowl of your stand mixer, combine the cold egg whites, granulated sugar, and kosher salt. Whisk these ingredients together just until they are fully combined and the mixture looks uniform. It’s important to avoid over-whisking at this initial stage, as incorporating too much air before heating can actually reduce the ultimate stability of the meringue. Carefully place the mixer bowl directly over your simmering bain-marie, once again ensuring that the bottom of the bowl remains elevated and does not make contact with the simmering water. Begin to whisk the mixture constantly and gently over the heat until it reaches a precise temperature of 120°F (49°C) on your instant-read thermometer.
The Cardinal Rule for Swiss Meringue: Do Not Stop Whisking! This is arguably the single most critical instruction for successfully preparing Swiss meringue and, by extension, this marshmallow frosting. Continuous and even whisking over the heat prevents the egg whites from scrambling at the bottom of the bowl, ensures uniform heating throughout the mixture, and guarantees that all the sugar granules dissolve completely. Maintain a steady, rhythmic whisking motion throughout this entire heating phase to achieve a smooth, stable base.
As brilliantly illustrated in the Step 2: Temperature photo above, a professional technique involves holding both the thermometer and the edge of the mixing bowl with one hand while continuously whisking with the other. This skillful maneuver ensures the bowl remains perfectly stable over the heat and allows for uninterrupted monitoring of the temperature, minimizing any fluctuations and contributing significantly to consistently perfect results. It’s a “pro-move” that embodies precision and control in the kitchen.
Step 3: Rapid Transfer to Stand Mixer
The moment your egg white mixture reaches precisely 120°F (49°C), remove the mixer bowl immediately from the heat. Carefully, but swiftly, transfer the hot bowl to the base of your stand mixer, ensuring it is securely locked into place and fitted with the whisk attachment. Speed is of the essence during this transfer to minimize any significant loss of heat.
Step 4: Whip to Glorious Stiff Peaks
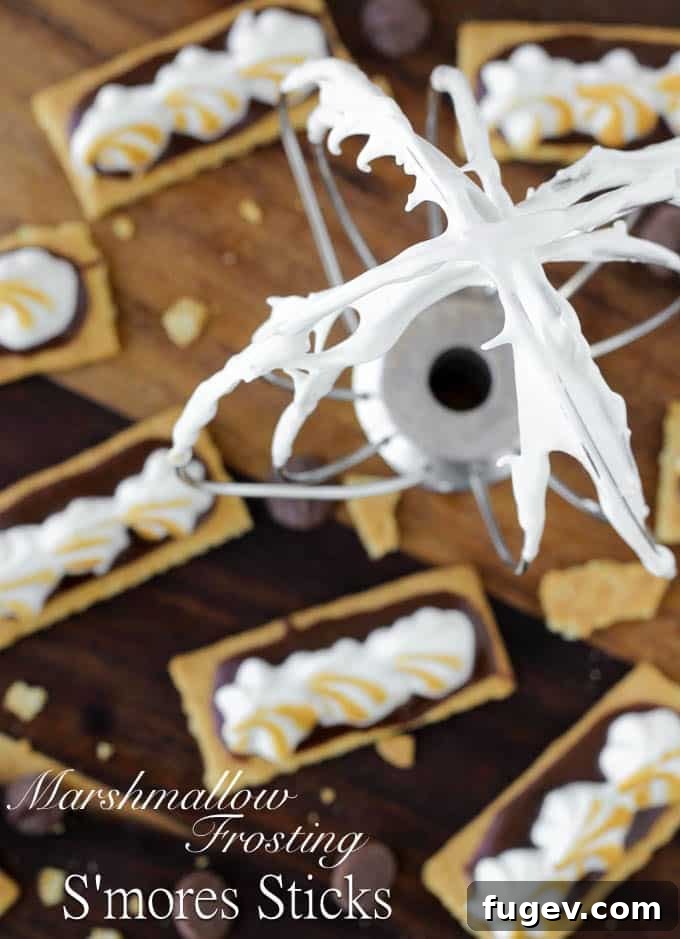
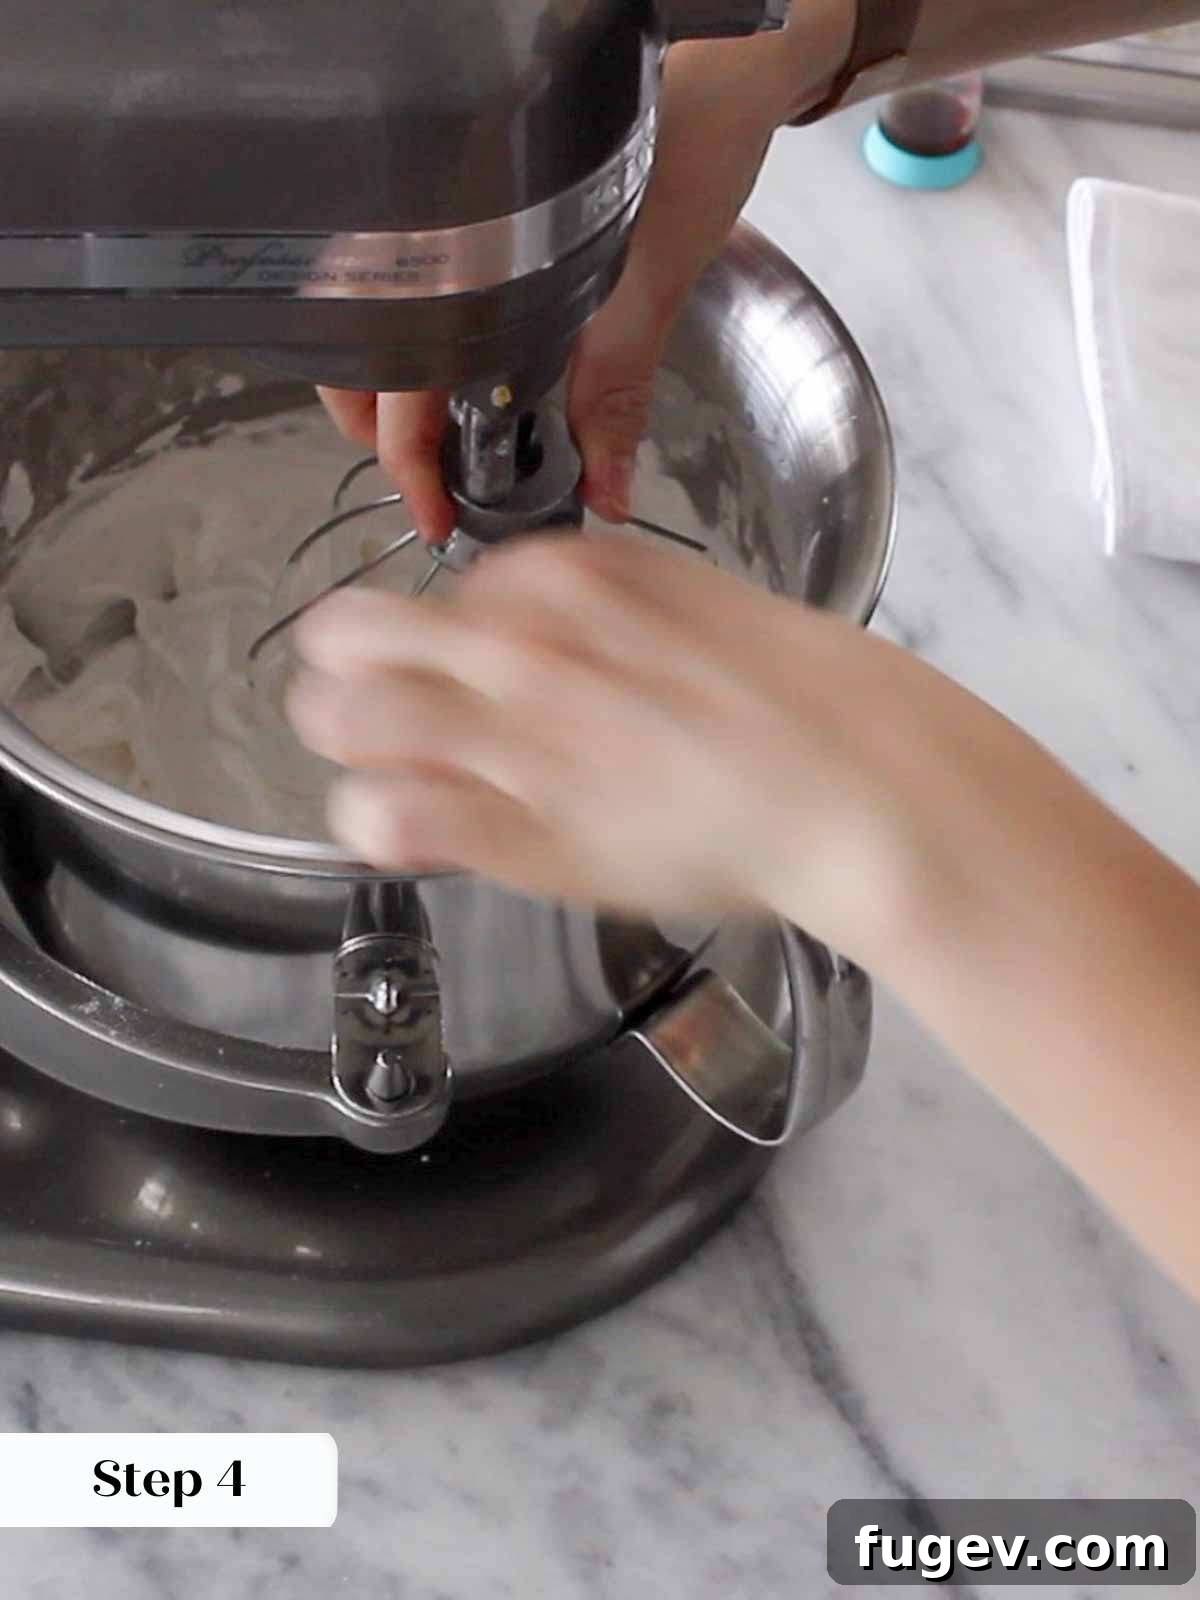
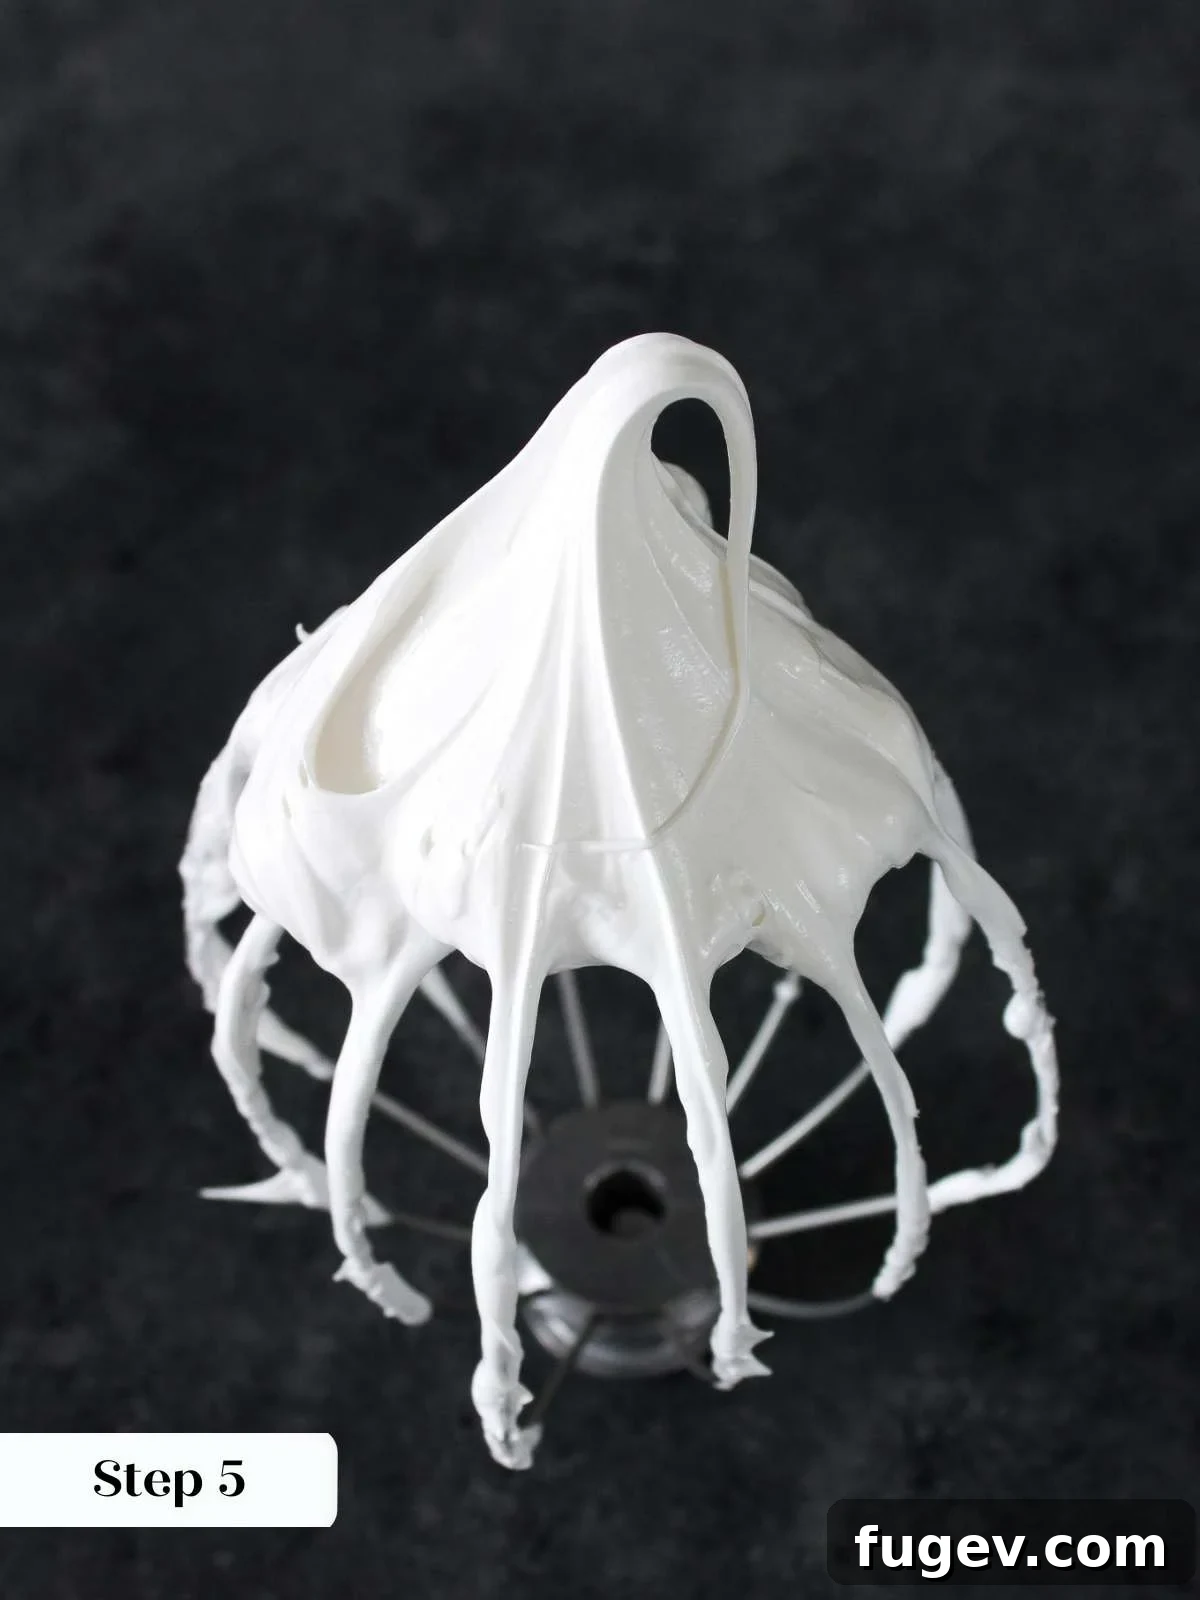
Immediately turn your stand mixer on high speed and begin to beat the meringue. Continue whipping vigorously for approximately 7 to 10 minutes. During this time, the meringue will gradually cool down – it should feel just slightly warm or at body temperature to the touch when ready – and will transform into a brilliantly white, remarkably glossy, and incredibly firm meringue with stiff peaks. You’ll know it’s perfectly done when you lift the whisk attachment and the meringue forms a peak that stands tall and holds its shape without drooping or wilting. It will also be significantly more voluminous than when you started.
Step 5: Infuse with Vanilla Extract
Once your meringue has achieved stiff peaks, reduce the mixer speed to low. Carefully add the vanilla extract (and the optional pinch of ground cinnamon, if desired). Beat for just a short moment, only until the vanilla is fully incorporated into the meringue, being careful not to overmix. At this final stage, the marshmallow frosting should ideally be around body temperature or feel just a little warm. This precise temperature is absolutely perfect for achieving maximum sheen and the silkiest texture during application.
Step 6: Elegantly Frost Your Masterpiece!
Your exquisitely light and airy homemade marshmallow frosting is now complete and ready to elevate your baked goods! You have the creative freedom to either generously spread it over your favorite cakes, cupcakes, or pies with an offset spatula for a charming, rustic aesthetic, or transfer it to a piping bag fitted with your favorite piping tip for more intricate and decorative designs. Get ready to impress with this cloud-like, glossy topping!
How to Toast Marshmallow Frosting for a Golden, Caramelized Finish
One of the most appealing and visually stunning ways to enhance marshmallow frosting is by toasting it. This technique not only adds a beautiful golden-brown color and a delicious caramelized flavor, reminiscent of roasted marshmallows, but also contributes to its stability. Here’s how to achieve that perfect toasted finish:
Once you have piped or spread the frosting onto your baked goods as desired, you have two effective methods for toasting: utilizing a kitchen torch or your oven’s broiler.
- Method 1: Using a Kitchen Torch (Recommended for Precision): A kitchen torch is generally the preferred tool for achieving professional-looking results. It offers exceptional control, allowing you to selectively brown peaks, edges, and intricate details of your piped frosting. Hold the torch flame a few inches away from the meringue and move it continuously in gentle, sweeping motions. Keep a close eye on the frosting as it quickly transforms from white to a beautiful golden-brown, then to a rich, deep caramel. This method is faster, more precise, and allows you to achieve the desired toasted marshmallow aesthetic without excessively heating the underlying cake or cupcake.
- Method 2: Using Your Oven’s Broiler (Effective Alternative): If you do not have a kitchen torch, your oven’s broiler can serve as a suitable alternative. To use this method, place your frosted desserts on a sturdy baking sheet. Position the baking sheet on the top rack of your oven, ensuring there are several inches of space between the frosting and the broiler’s heating element to prevent rapid burning. Keep the oven door slightly ajar and watch the frosting continuously and vigilantly – it can transition from perfectly golden to charred in mere seconds. Broil for a very short duration, typically 30 to 60 seconds, or until the desired golden-brown color is achieved. Remove the desserts immediately from the oven. This method is less precise than a torch but can still yield beautiful results with careful attention.
Chef Lindsey’s Expert Recipe Tip: Optimal Temperature for Application
For the absolute best results in terms of both dazzling appearance and silky-smooth texture, the ideal temperature for applying this marshmallow frosting is precisely at body temperature, or just ever-so-slightly warmer. When the meringue is at this optimal warmth, it will exhibit its peak sheen and possess the most fluid, malleable texture, making it incredibly easy and enjoyable to pipe or spread with precision. As the frosting begins to cool, its delicate protein structure will gradually set and firm up. While still perfectly delicious to eat, attempting to pipe or spread it after it has significantly cooled will invariably disturb this set structure, which can result in a slightly less shiny, or even a subtly “broken” or less uniform appearance. Always aim to work with your marshmallow frosting while it’s still warm from the mixer for that consistently perfect, professional-looking, glossy finish!
How to Store Marshmallow Frosting for Maximum Freshness
Proper storage is paramount to preserving the delicate structure, optimal freshness, and aesthetic appeal of your homemade marshmallow frosting. Understanding how its unique properties react to various environmental factors will help you maintain its quality for longer:
- Room Temperature Guidelines: Due to its egg white content, I strongly advise against storing marshmallow frosting at room temperature for longer than 2 hours prior to serving. For both food safety reasons and to maintain its structural integrity, refrigeration is essential. When serving cakes or pies adorned with this frosting, you will achieve the cleanest, most precise slices if they are cut straight from the refrigerator, as the chilled frosting will be much firmer and less prone to smearing.
- Refrigerated Storage for Short-Term Freshness: When stored in an airtight container within the refrigerator, this homemade marshmallow frosting will generally maintain its ideal consistency and integrity for up to 3 days before it may begin to “weep” (a common meringue phenomenon where moisture separates from the whipped egg whites). As highlighted in my professional tips, actively toasting the meringue significantly extends this period. The caramelized crust created by toasting acts as a protective barrier against air exposure and humidity, which are primary catalysts for meringue breakdown, allowing the toasted version to last longer without showing signs of separation.
- Frozen Storage for Extended Preservation: For longer-term storage, both toasted and untoasted marshmallow frosting can be placed in an airtight, freezer-safe container and stored in the freezer for up to 1 month. To ensure the highest quality upon thawing and to prevent premature weeping, I recommend storing it in a freezer that is not frequently opened and closed. Consistent temperature is key; frequent fluctuations (such as those caused by repeatedly opening the freezer door) can stress the meringue’s delicate structure and cause it to weep more rapidly once it thaws. When you are ready to use frozen frosting, allow it to thaw slowly overnight in the refrigerator. A gentle re-whip with a whisk might be necessary to restore some of its original fluffiness, though its texture might be slightly softer than freshly made.
Creative Ways to Use Marshmallow Frosting in Your Desserts
The exceptional versatility of this homemade marshmallow frosting extends far beyond simply topping a batch of cupcakes. Its light, airy texture, delicate sweetness, and stunning visual appeal make it a fantastic addition to an impressive array of desserts. Here are some inspiring and creative ways to incorporate this delightful frosting into your baking repertoire:
- Embrace Classic Frosting Applications: Naturally, this frosting excels in traditional roles. Use it to pipe elegant, voluminous swirls onto individual cupcakes for a stunning presentation. Spread a generous, cloud-like layer over an entire celebration cake to create a truly show-stopping centerpiece. It also makes an impressive and delicious topping, mounded high, on a rich, creamy cheesecake, such as this delightful lemon meringue cheesecake. Its stability and glossy finish are perfect for both simple spreads and more intricate piping designs.
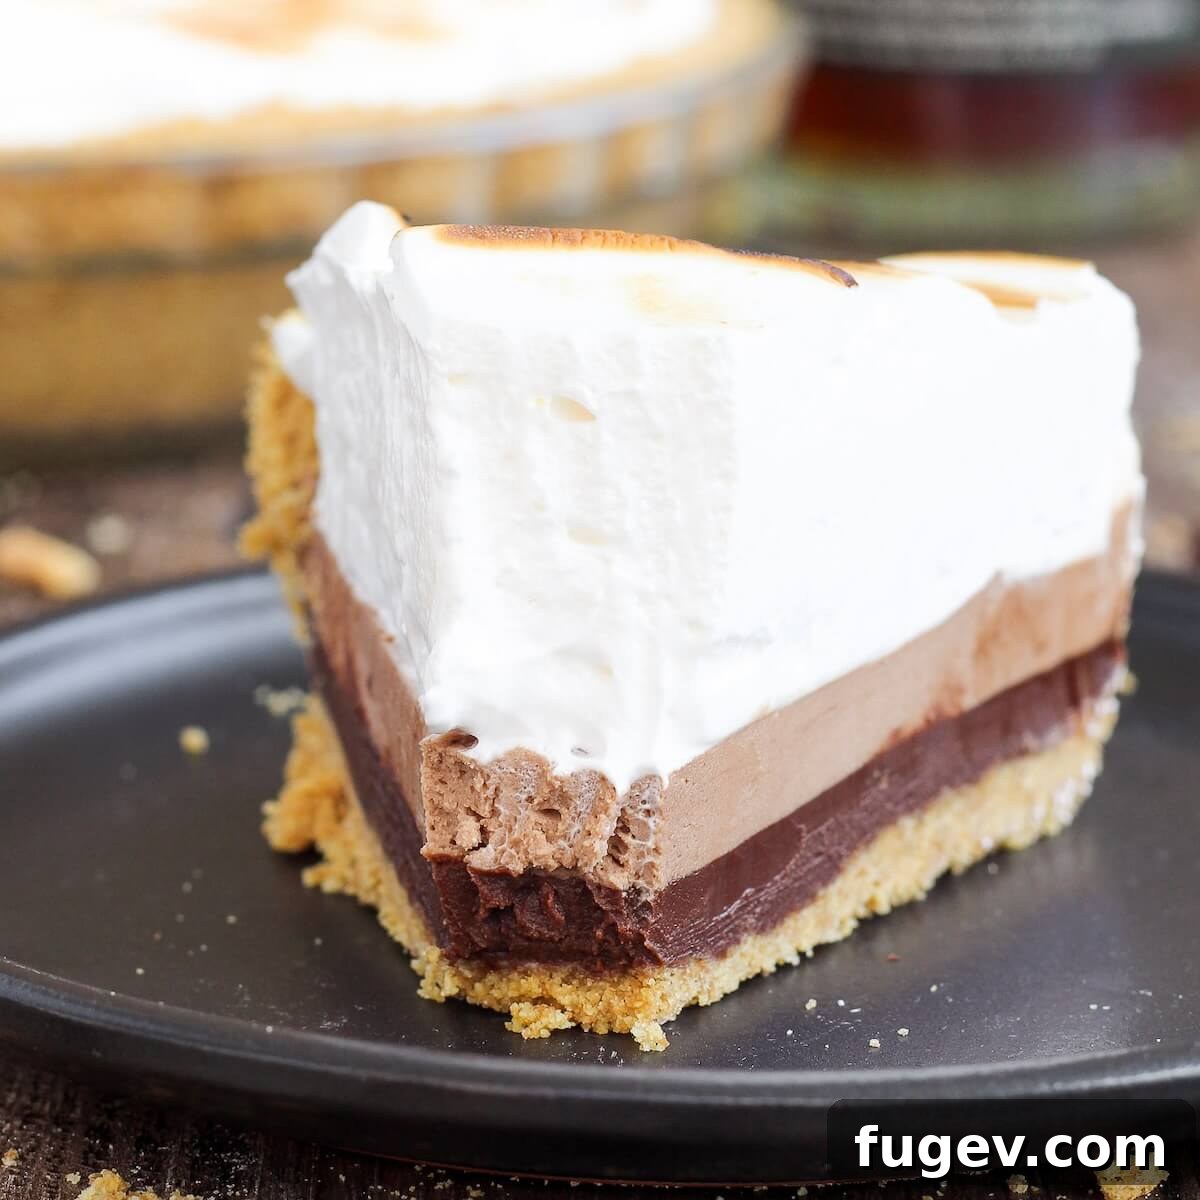
- Explore Unexpected Dessert Enhancements: Don’t limit your imagination! This frosting shines in creative and surprising applications. It forms an absolutely irresistible topping for a rustic, no-bake s’mores pie, adding that authentic campfire flavor, or provides a delicate sweet counterpoint to a tangy key lime pie. For an extra dimension of texture and flavor, swirl it into homemade ice cream before freezing solid to create delightful marshmallow ribbons throughout. It can also serve as a fluffy, flavorful filling for cupcakes, pastries, or even layered into elegant trifles for a light and airy component.
- Whip Up Decadent Dessert Dips: This marshmallow frosting serves as an incredible and easy base for various dessert dips that are perfect for entertaining. Try using this recipe to create a creamy, sweet, and irresistible marshmallow cream cheese fruit dip, which pairs beautifully with fresh berries, apple slices, or graham crackers. Alternatively, for a fun, nostalgic treat, transform it into a luscious fluffernutter dip, ideal for dipping pretzel sticks or banana slices.
- The Perfect Topping for Frozen Delights: A unique and fantastic quality of this frosting is its ability to retain its exact consistency and pillowy texture even when frozen. This makes it an absolutely ideal candidate for a wide range of frozen desserts. Use it as the crowning glory for a rich peanut butter ice cream pie, layer it into homemade ice cream sandwiches for a soft, chewy element, or generously mound it on a quick and easy 5-minute ice cream pie. You can even pipe individual dollops of frosting in advance, freeze them, and then use them to top scoops of your favorite s’mores ice cream – especially when torched right before serving for that extra special touch!
Marshmallow Frosting Recipe FAQs: All Your Questions Answered
To ensure you feel completely confident and informed as you embark on making and enjoying this delicious marshmallow frosting, here are comprehensive answers to some of the most frequently asked questions:
While both marshmallow fluff and this marshmallow frosting deliver that undeniably pillowy, sweet, and shiny marshmallow experience, their core difference lies in the specific meringue preparation technique employed, which in turn affects their stability. This particular marshmallow frosting is crafted as a Swiss meringue, where egg whites and sugar are gently heated together over a bain-marie before being whipped. Marshmallow fluff, conversely, is typically an Italian meringue, a method that involves slowly drizzling hot sugar syrup into already whipping egg whites. Both methods result in a light, glossy confection that tastes remarkably like authentic homemade marshmallows. However, Italian meringue (marshmallow fluff) is generally considered more stable and marginally denser. This increased stability allows it to maintain its structure without weeping for up to a week when refrigerated and can be frozen for over 2 months, offering a longer shelf life compared to the Swiss meringue frosting, which tends to be slightly less robust.
Understanding the food safety aspects of meringue is crucial. Swiss meringue, like this frosting, involves heating egg whites, sugar, and salt over a bain-marie to a temperature of 120°F (49°C). While this process does heat the egg whites and dissolves the sugar, which contributes to some pasteurization and denaturing of proteins, it’s generally not sufficient to fully cook the egg whites to the temperatures universally recommended for complete safety by health organizations. The FDA advises cooking eggs to 160°F (71°C), or holding them at 134°F (57°C) for 3.5 minutes, to be deemed entirely safe. If you have significant concerns about consuming undercooked egg whites, particularly for vulnerable individuals such as young children, pregnant women, the elderly, or those with compromised immune systems, you have alternatives. You can opt to use pasteurized liquid egg whites (though be aware of their potential impact on texture, as discussed below) or consider a meringue powder-based recipe, which is entirely egg-free, to eliminate any risk.
Yes, it is certainly possible to make this marshmallow frosting using pasteurized liquid egg whites from a carton, and this is a perfectly valid choice, especially for those prioritizing maximum food safety. However, it’s important to set realistic expectations regarding the final outcome. Pasteurized egg whites have undergone a heat treatment process that can alter their delicate protein structure. As a direct consequence, the meringue produced from them will typically be less stable than one made with fresh egg whites, meaning it might be more prone to weeping a bit sooner. Furthermore, the texture may not achieve the same silky-smoothness or the same voluminous loftiness. While it will still yield a delicious and functional frosting, there might be a slight compromise on the ultimate professional finish and aesthetic appeal compared to using freshly separated eggs.
Meringues, despite their reputation, are not as finicky as some might believe, and most issues can be resolved with a little understanding. Don’t let a setback deter you! If your meringue is struggling to whip up to stiff peaks even after it has cooled completely, you’re likely facing one of a few common problems:
- Fat Contamination: This is the most frequent culprit. Even a minuscule amount of egg yolk, grease residue on your mixing bowl, or oil on your whisk attachment can completely inhibit egg whites from whipping properly. Always ensure all your equipment is impeccably clean and completely dry.
- Insufficient Heating: If the sugar didn’t fully dissolve over the bain-marie or the egg white mixture didn’t reach the target temperature of 120°F (49°C), the egg proteins won’t be adequately prepared for stable whipping, and the sugar won’t contribute its full stabilizing power. This is where an accurate thermometer is indispensable.
- Over-whipping Before Heating: As discussed in the step-by-step guide, introducing too much air into the mixture *before* it has been heated can paradoxically destabilize the meringue’s structure.
- High Humidity: Meringues are notoriously sensitive to moisture in the air. On very humid days, egg whites can find it extremely difficult to achieve and hold stiff peaks, often resulting in a softer, stickier meringue.
If you find your meringue stubbornly refusing to stiffen, try adding a tiny pinch of cream of tartar, about ⅛ teaspoon, while continuing to whip. Cream of tartar is an acidic salt that acts as a powerful stabilizer for egg whites. Whip for a minute after adding, and if it still hasn’t stiffened, you can add another tiny pinch. The worst-case scenario is that you add too much, which can impart a slight metallic taste and necessitate starting over. However, if your meringue was so unstable that it required that much cream of tartar, it was likely beyond saving anyway. So, consider it a valuable learning experience – you get bonus points for attempting to salvage it! Learning from troubleshooting is an essential and rewarding part of becoming a skilled baker.
Recommended Cupcake Recipes to Pair with Your Marshmallow Frosting
Seeking the perfect canvas for your glorious, cloud-like homemade marshmallow frosting? These carefully selected cupcake recipes are specifically chosen to beautifully complement its light, airy texture and delicate vanilla notes, creating a harmonious and utterly delicious dessert experience:
Cupcake Recipes
Coconut Cupcakes
These incredibly light and moist coconut cupcakes are a match made in heaven for marshmallow frosting, offering a delightful tropical twist that perfectly complements its sweetness.
Fall Dessert Recipes
Sweet Potato Casserole Cupcakes
Experience everything you adore about classic sweet potato casserole, skillfully transformed into an adorable cupcake, beautifully crowned with toasted marshmallow frosting.
Cupcake Recipes
Vanilla Cupcakes
The ultimate classic! These soft and moist vanilla cupcakes provide the perfect, versatile base for showcasing the delicate flavor and stunning appearance of your homemade marshmallow frosting.
Cupcake Recipes
Lemon Cupcakes
Brighten up any occasion with these zesty and refreshing lemon cupcakes! Their delightful tangy notes provide an exquisite counterpoint to the sweet, airy marshmallow frosting.
If you tried this wonderful recipe and absolutely loved it, please take a moment to leave a 🌟 star rating and share your experience in the comments section below. Your feedback truly brightens my day and helps other bakers!
Marshmallow Frosting
Chef Lindsey
5 minutes
10 minutes
25 minutes
20 servings
Comment
Print Recipe
Ingredients
For the Marshmallow Frosting:
- 4 large egg whites
- 1 cup granulated sugar
- pinch kosher salt
- 1 teaspoon vanilla extract
- pinch ground cinnamon (optional, for a warmer, spicy note)
Instructions
Make the Marshmallow Frosting:
-
Bring approximately 1 inch of water to a gentle simmer in a pot. In the impeccably clean and dry bowl of your stand mixer, add the cold egg whites, granulated sugar, and kosher salt. Whisk these ingredients together until just combined. Place the mixer bowl over the simmering water, ensuring that the bowl fits tightly but its bottom does not touch the water.
-
Heat the egg white and sugar mixture, whisking constantly and without interruption, until an instant-read candy thermometer registers precisely 120°F (49°C). Alternatively, you can test by carefully rubbing a small amount between your fingers; the sugar granules should feel completely dissolved and the mixture should be very warm to the touch. Remove the bowl immediately from the heat and securely place it in the base of your stand mixer, fitted with the whisk attachment.
-
Turn the mixer to high speed and beat the meringue vigorously. Continue whipping until it is completely cool (or just slightly warm to the touch), becomes brilliantly white, incredibly glossy, and forms firm, stiff peaks that hold their shape. This process typically takes about 7-10 minutes. Once stiff peaks are achieved, reduce the mixer speed to low, add the vanilla extract and the optional pinch of cinnamon, then beat briefly until fully incorporated.
-
Your glorious marshmallow frosting is now ready to use! Spoon it into a large piping bag fitted with your favorite tip for decorative flourishes, or simply mound it generously and artistically over your freshly baked goods, just like the beautiful cheesecake pictured!
Recipe Video Tutorial
Chef’s Notes & Tips
Presentation Versatility: You have the option to use this frosting as a brilliant, pristine white topping, or you can elevate its visual appeal and flavor by delicately toasting it with a kitchen torch or under a broiler. Notably, a toasted meringue will generally store longer without weeping (separating) due to the protective caramelized barrier it forms.
Key Technique Reminder: The most crucial step for achieving a perfect, stable Swiss meringue is to whisk constantly and without interruption while the egg white mixture is heating over the bain-marie. This prevents scrambling and ensures a smooth, homogeneous, and robust meringue.
Optimal Storage: For best results, store your marshmallow frosting in an airtight container in the refrigerator for up to 3 days. For longer preservation, it can be stored frozen for up to 1 month.
Nutrition Information (Per Serving)
|
Carbohydrates: 10g
|
Protein: 1g
|
Fat: 0.04g
|
Sodium: 10mg
|
Potassium: 10mg
|
Sugar: 10g
|
Calcium: 1mg
|
Iron: 0.01mg
Enjoyed This Recipe? Share Your Thoughts Below!
Before You Go: Explore More Frosting Inspiration!
I genuinely hope you’ve thoroughly enjoyed mastering this exceptional homemade marshmallow frosting recipe. It truly is a versatile and utterly delightful topping that brings a touch of professional elegance and irresistible flavor to any home-baked treat. Don’t let your culinary exploration stop here!
I warmly invite you to delve into my other easy-to-follow and equally delectable buttercream & frosting recipes to further expand your baking repertoire and discover new favorites. Perhaps you’ll be inspired to try my rich and aromatic maple frosting recipe next, or find another perfect topping to elevate your next dessert creation!