
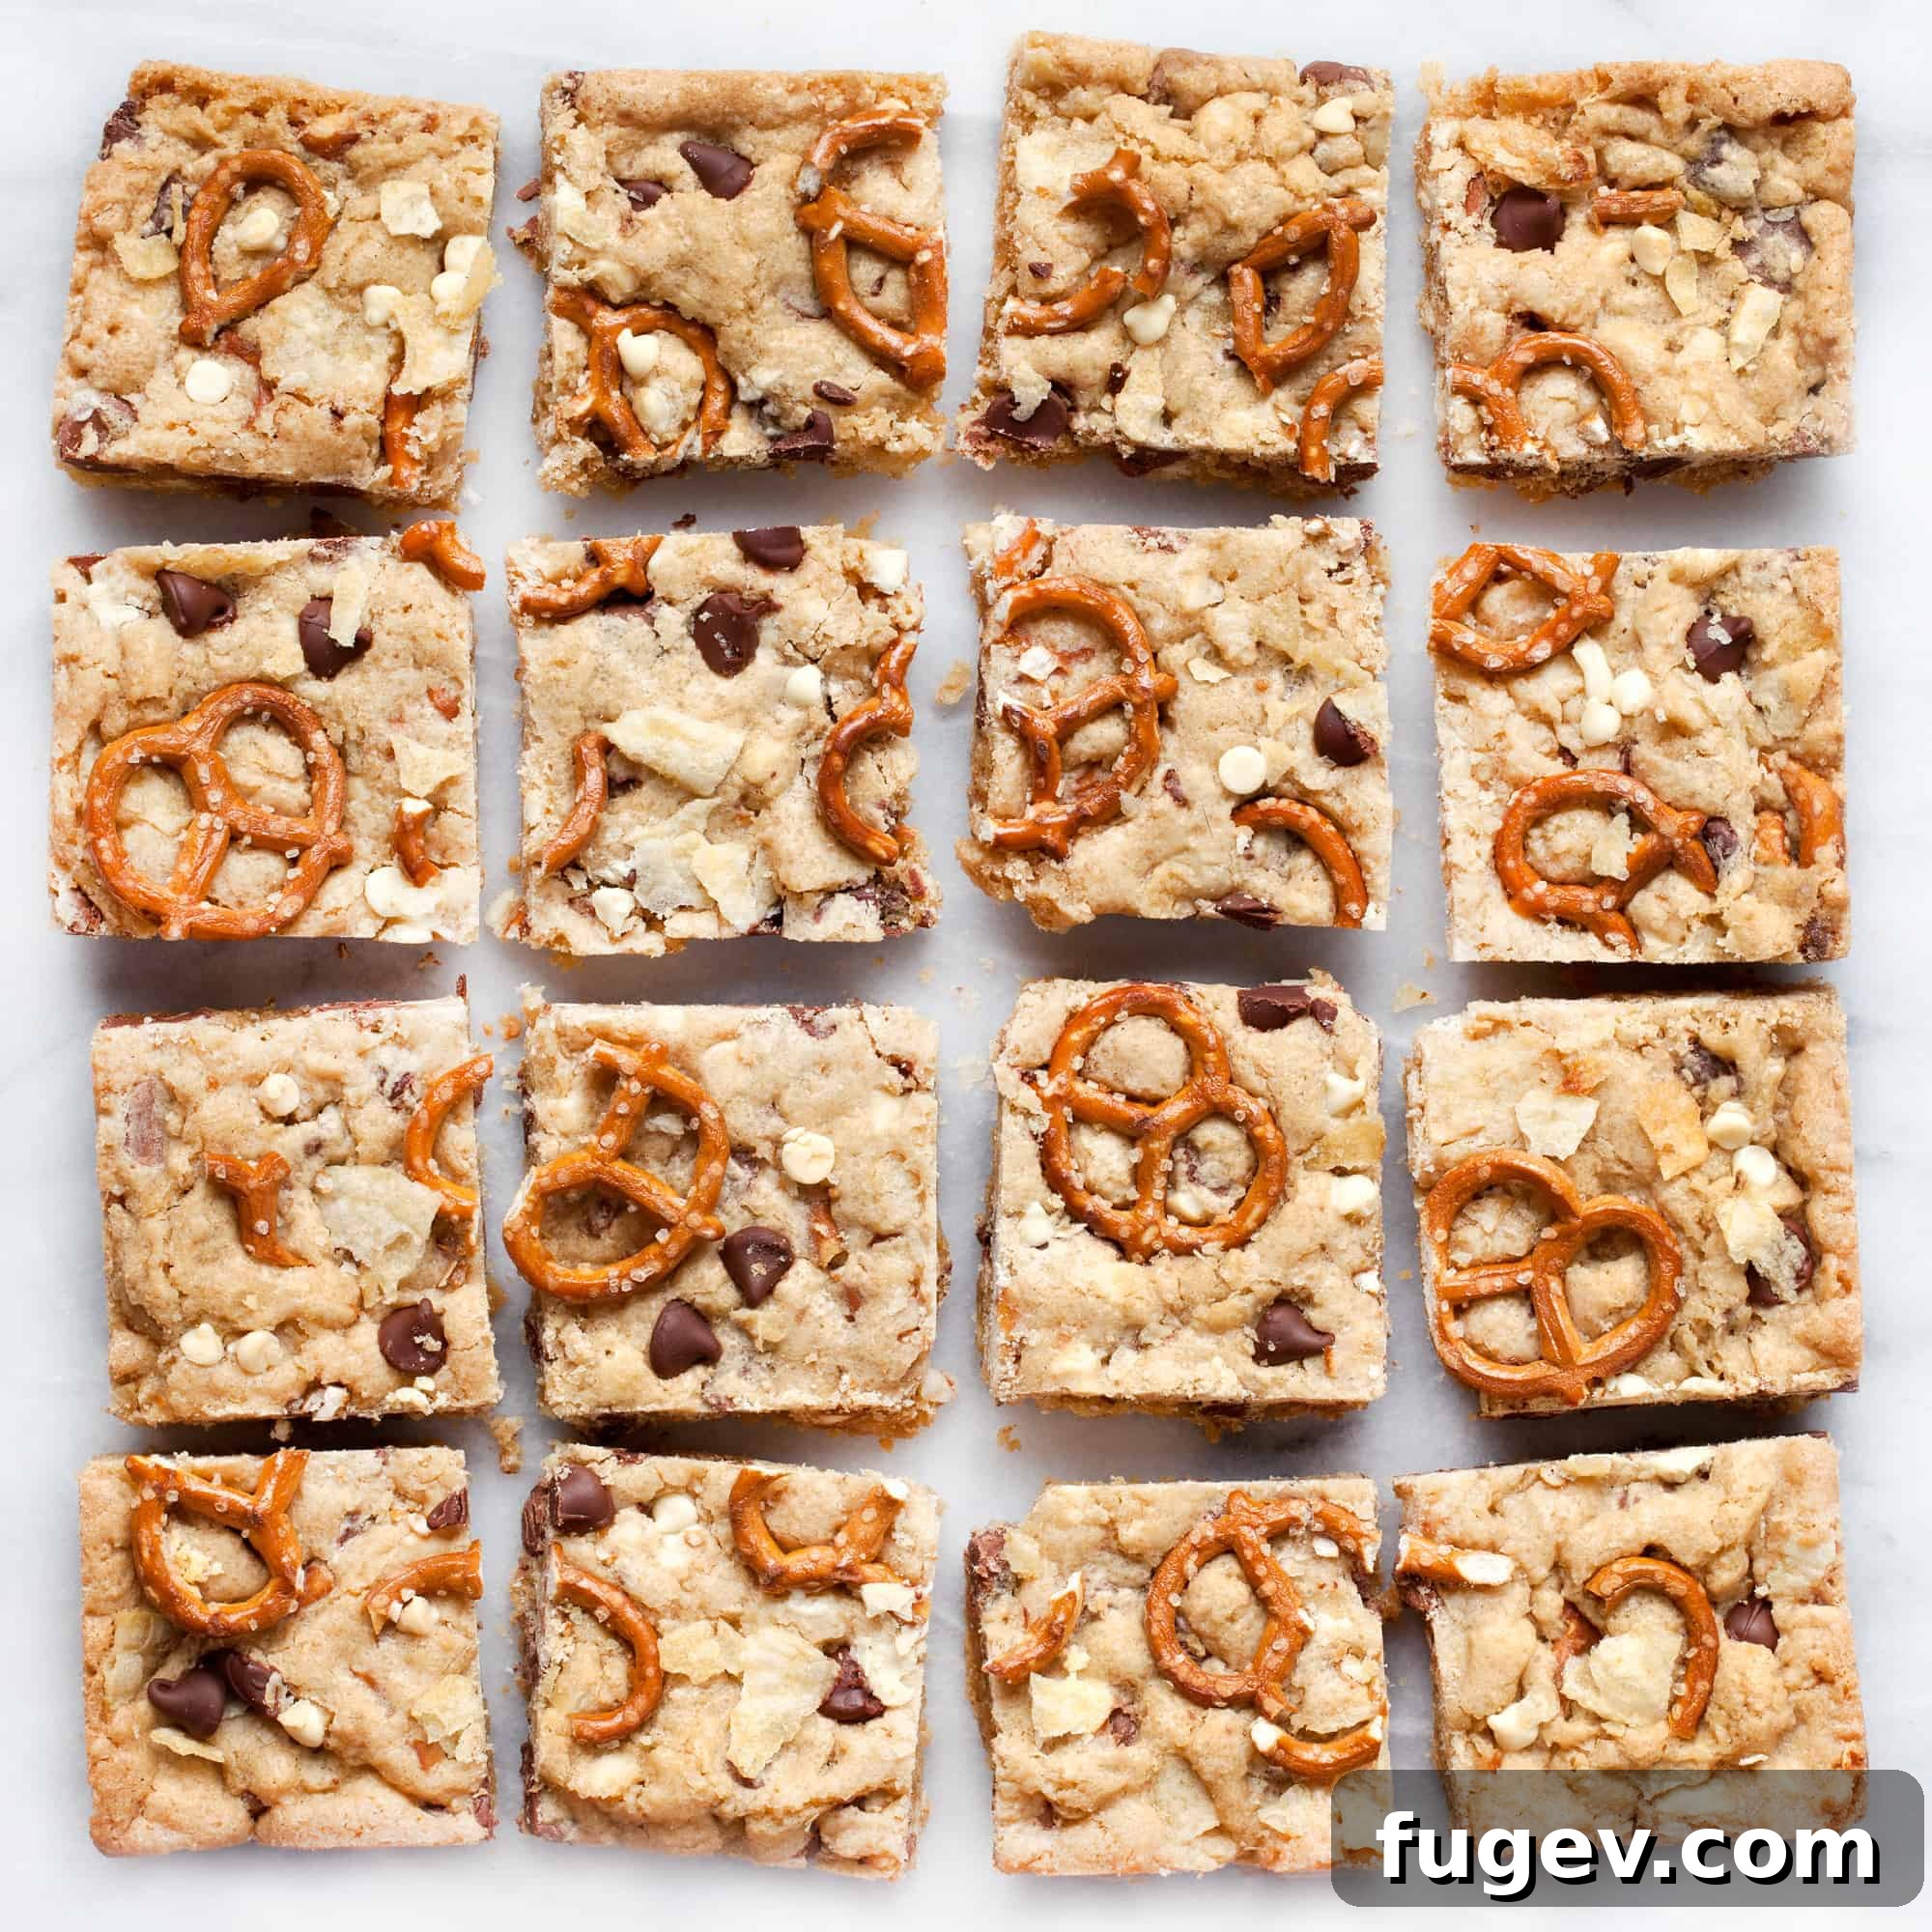
Get ready to discover the ultimate crowd-pleaser that combines all your favorite sweet and salty cravings into one irresistible bite: Kitchen Sink Bars! Perfect for any gathering, these delightful bars are named for their versatility, allowing you to throw in “everything but the kitchen sink.” Imagine a chewy, buttery base loaded with a harmonious mix of white, milk, and dark chocolate chips, crunchy pretzels, savory crushed potato chips, and any other delicious bits you can find in your pantry. These aren’t just a treat; they’re an experience, offering a different flavor and texture sensation with every single square.
The Perfect Potluck Star: Kitchen Sink Bars for Every Occasion
Anticipation for the weekend’s Super Bowl party is already building, and with it, the excitement of a grand potluck feast. This annual tradition with friends isn’t just about the game; it’s a celebration of good company and, most importantly, incredible food. While chili and nachos are sure to make an appearance, the unspoken rule for our group is that food almost always takes priority over football, especially when your team isn’t playing. This year, my contribution aims to steal the show: these glorious Kitchen Sink Bars.
These bars are more than just a dessert; they’re a clever way to clean out your pantry and transform seemingly random snacks into a cohesive, delectable treat. The beauty of Kitchen Sink Bars lies in their boundless adaptability. Whether you lean towards salty or sweet, or crave that perfect balance of both, almost any mix-in you choose will work harmoniously. For my inaugural batch, I opted for a classic yet irresistible combination of white, milk, and dark chocolate chips, crunchy pretzels, and salty crushed potato chips. But the possibilities are truly endless! Consider adding nuts for extra crunch, dried fruit for a chewy, tangy note, or even shredded coconut for a tropical twist. You simply can’t go wrong when crafting these customizable masterpieces.
Kitchen Sink Bars
By Paige Adams
Prep Time: 10 mins
Cook Time: 22 mins
Total Time: 32 mins
Yields: 16 bars
These delightful Kitchen Sink Bars are the perfect blend of sweet and salty, combining your favorite chocolate chips, pretzels, and crushed potato chips into an irresistible treat. Incredibly versatile and easy to make, they’re ideal for any gathering or a simple pantry clean-out. Their chewy texture and dynamic flavor profile make them a guaranteed crowd-pleaser.
Ingredients
- 1/4 cup unsalted butter, at room temperature, plus extra for greasing the pan
- 1/2 cup packed light brown sugar
- 1/2 cup granulated sugar
- 1 large egg
- 1 teaspoon vanilla extract
- 1 cup all-purpose flour
- 1 teaspoon baking powder
- 1 teaspoon fine sea salt
- 1-1/2 cups assorted mix-ins (e.g., a combination of white, milk & dark chocolate chips, chopped pretzels, nuts like pecans or walnuts, crushed potato chips, dried fruits such as cranberries or raisins, or shredded coconut)
Instructions
-
Preheat Oven and Prepare Pan: Preheat your oven to 350 degrees Fahrenheit (175 degrees Celsius). Lightly butter an 8-inch square baking pan. For even easier removal of the bars, you can also line the pan with parchment paper, leaving an overhang on the sides that can be used as “handles.”
-
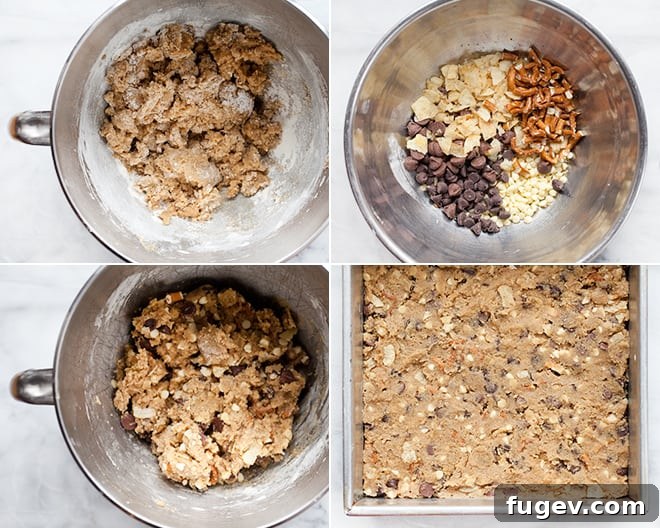
Cream Butter and Sugars: In a large mixing bowl, using an electric mixer or a sturdy whisk, cream together the softened unsalted butter, packed light brown sugar, and granulated sugar until the mixture is light, pale, and fluffy. This step is crucial for incorporating air into the dough, which contributes to a tender, chewy texture in the finished bars. Beat in the large egg and vanilla extract until they are fully incorporated and the mixture is smooth, making sure to scrape down the sides of the bowl as needed to ensure everything is evenly combined.
-
Combine Dry Ingredients: In a separate, smaller bowl, whisk together the all-purpose flour, baking powder, and fine sea salt. Whisking dry ingredients together ensures that the leavening agent (baking powder) and salt are evenly distributed throughout the dough, preventing pockets of unmixed ingredients.
-
Fold in Dry Ingredients and Mix-ins: Gradually add the dry ingredients to the wet ingredients, mixing on low speed or folding gently with a spatula until just combined. Be careful not to overmix the dough, as overmixing can develop the gluten in the flour too much, resulting in tough or dense bars. Once the dough is nearly mixed, gently stir in 1 cup of your chosen mix-ins. Transfer the dough to the prepared baking pan, spreading it into an even layer using a spatula or your hands. Evenly press the remaining 1/2 cup of mix-ins on top of the dough for a beautiful and appealing finish that showcases all the wonderful textures and flavors.
-
Bake to Golden Perfection: Place the pan in the preheated oven and bake for 22-25 minutes. The bars are ready when the edges are golden brown and a wooden skewer or toothpick inserted into the center comes out with moist crumbs attached, but no wet batter. It’s important to avoid overbaking, as this can make the bars dry and less chewy.
-
Cool and Cut: Once baked, remove the pan from the oven and let the bars cool completely on a wire rack before attempting to cut them. Cooling is a critical step for the bars to properly set and firm up, making them much easier to cut into neat squares. Once fully cooled, use the parchment paper overhang (if used) to lift the entire slab out of the pan, then cut into 16 equal bars.
-
Store: Store your delightful Kitchen Sink Bars in an airtight container at room temperature for up to 3-4 days to maintain their freshness and chewy texture. For extended storage, they can be kept in the refrigerator for up to a week or frozen for several months. Ensure they are well-wrapped if freezing to prevent freezer burn.
Nutrition Information
(Approximate values per serving, based on ingredients provided)
- Calories: 141 kcal
- Carbohydrates: 24g
- Protein: 2g
- Fat: 5g
- Saturated Fat: 3g
- Polyunsaturated Fat: 0.2g
- Monounsaturated Fat: 1g
- Trans Fat: 0.1g
- Cholesterol: 19mg
- Sodium: 183mg
- Potassium: 23mg
- Fiber: 0.4g
- Sugar: 17g
- Vitamin A: 118 IU
- Vitamin C: 0.04mg
- Calcium: 32mg
- Iron: 1mg
Nutrition information is automatically calculated and should only be used as an approximation. Actual values may vary based on specific brands, preparation methods, and ingredient choices.
Additional Info
Course: Cookies & Bars
Cuisine: American
Tips for Crafting the Perfect Kitchen Sink Bars Every Time
While these bars are incredibly forgiving, a few simple tips can elevate your baking experience and ensure a consistently delicious outcome:
- Room Temperature Butter and Egg: Ensure your butter and egg are at room temperature. This allows them to cream together more effectively with the sugars, creating a smoother, lighter batter that incorporates air beautifully, leading to a softer, chewier bar.
- Don’t Overmix: When combining the wet and dry ingredients, mix only until just combined. Overmixing can develop the gluten in the flour, resulting in a tougher, denser bar. A few streaks of flour are better than an overmixed batter.
- Chop Mix-ins Evenly: For a balanced distribution of flavors and textures, try to chop larger mix-ins (like nuts or dried fruit) into pieces roughly the same size as your chocolate chips or pretzel bits.
- Press Toppings Gently: While the recipe calls for mixing some ingredients into the dough and pressing the rest on top, ensure you don’t press them too deeply. This prevents them from sinking to the bottom during baking and ensures a visually appealing, generously topped bar.
- Parchment Paper is Your Friend: Lining your baking pan with parchment paper, allowing some overhang on the sides, makes removing the cooled bars incredibly easy. You can simply lift the entire slab out before cutting.
- Cool Completely: Patience is key! Resist the urge to cut into these bars while they are still warm. Cooling completely allows them to set properly, making for clean cuts and a perfect texture. Warm bars tend to crumble or be too soft to handle.
- Quality Ingredients Matter: While it’s a “kitchen sink” recipe, using good quality chocolate, fresh nuts, and flavorful pretzels will make a noticeable difference in the final taste.
Unleash Your Creativity: Endless Mix-in Possibilities
The true magic of Kitchen Sink Bars lies in their incredible customization. This recipe is your canvas; feel free to experiment with a vast array of ingredients to create your unique flavor profile. Here are some ideas to spark your imagination:
- Chocolate Varieties: Beyond white, milk, and dark chips, consider butterscotch chips, peanut butter chips, mint chocolate chips, or even chopped candy bars (like Snickers, Reese’s, or Kit Kat).
- Salty Crunch: Explore different types of pretzels (mini twists, rods, snaps), corn chips, ridged potato chips for extra texture, or even crushed Ritz crackers for a buttery-salty kick.
- Nutty Additions: Walnuts, pecans, almonds, cashews, peanuts, or macadamia nuts all add a wonderful richness and crunch. Lightly toasting them before adding can enhance their flavor.
- Fruity Flair: Dried cranberries, raisins, chopped apricots, dried cherries, or even candied orange peel can introduce a pleasant chewiness and tangy sweetness.
- Caramel & Toffee: Caramel bits, Heath bar bits, or toffee pieces melt into gooey pockets of deliciousness.
- Coconut Love: Shredded coconut (sweetened or unsweetened) adds a distinct flavor and texture. Lightly toast it before adding for an extra nutty dimension.
- Cereal Surprises: Crushed cornflakes, Rice Krispies, or even a handful of Chex cereal can add an unexpected crunch.
- Spice it Up: A pinch of cinnamon, nutmeg, or a dash of chili powder (if you’re feeling adventurous) can add subtle complexity to the flavor profile.
- Mini Marshmallows: Stir them in during the last few minutes of baking for a melted, gooey topping, or add them to the dough for soft pockets.
Remember to keep the total quantity of mix-ins to about 1.5 cups to maintain the ideal dough-to-inclusion ratio, ensuring your bars hold together beautifully.
Serving and Storage Suggestions
These Kitchen Sink Bars are incredibly versatile, making them perfect for almost any occasion. Serve them slightly warm for a gooey, melted chocolate experience, or completely cooled for a firmer, chewy texture. They are fantastic as a dessert for family dinners, a delightful treat for school lunchboxes, or a much-appreciated edible gift for friends and neighbors.
For storage, ensure the bars are completely cool before transferring them to an airtight container. They will stay fresh and chewy at room temperature for up to 3-4 days. If you need to store them for longer, they can be kept in the refrigerator for up to a week. For maximum longevity, these bars freeze beautifully. Wrap individual bars tightly in plastic wrap, then place them in a freezer-safe bag or container. They can be frozen for up to 3 months. Thaw at room temperature or warm slightly in the microwave for a quick treat.
Beyond the Super Bowl: When to Enjoy Kitchen Sink Bars
While these bars are an absolute triumph for game day, their universal appeal means they’re perfect for countless other events. Think of them for birthday parties, bake sales, holiday gatherings, or simply as a comforting treat to enjoy with a cup of coffee or tea. Their easy preparation also makes them an excellent choice for a quick weeknight dessert or when you need a last-minute contribution to a potluck. Embrace the joy of using up those odds and ends in your pantry and transforming them into something truly spectacular. These Kitchen Sink Bars are more than just a recipe; they’re an invitation to get creative in the kitchen and share deliciousness with those you love.
Did you make this delightful recipe? We’d love to see your creations! Share your Kitchen Sink Bars on Instagram and tag us @lastingredient. Don’t forget to use the hashtag #lastingredient so we can admire your sweet and salty masterpieces!