
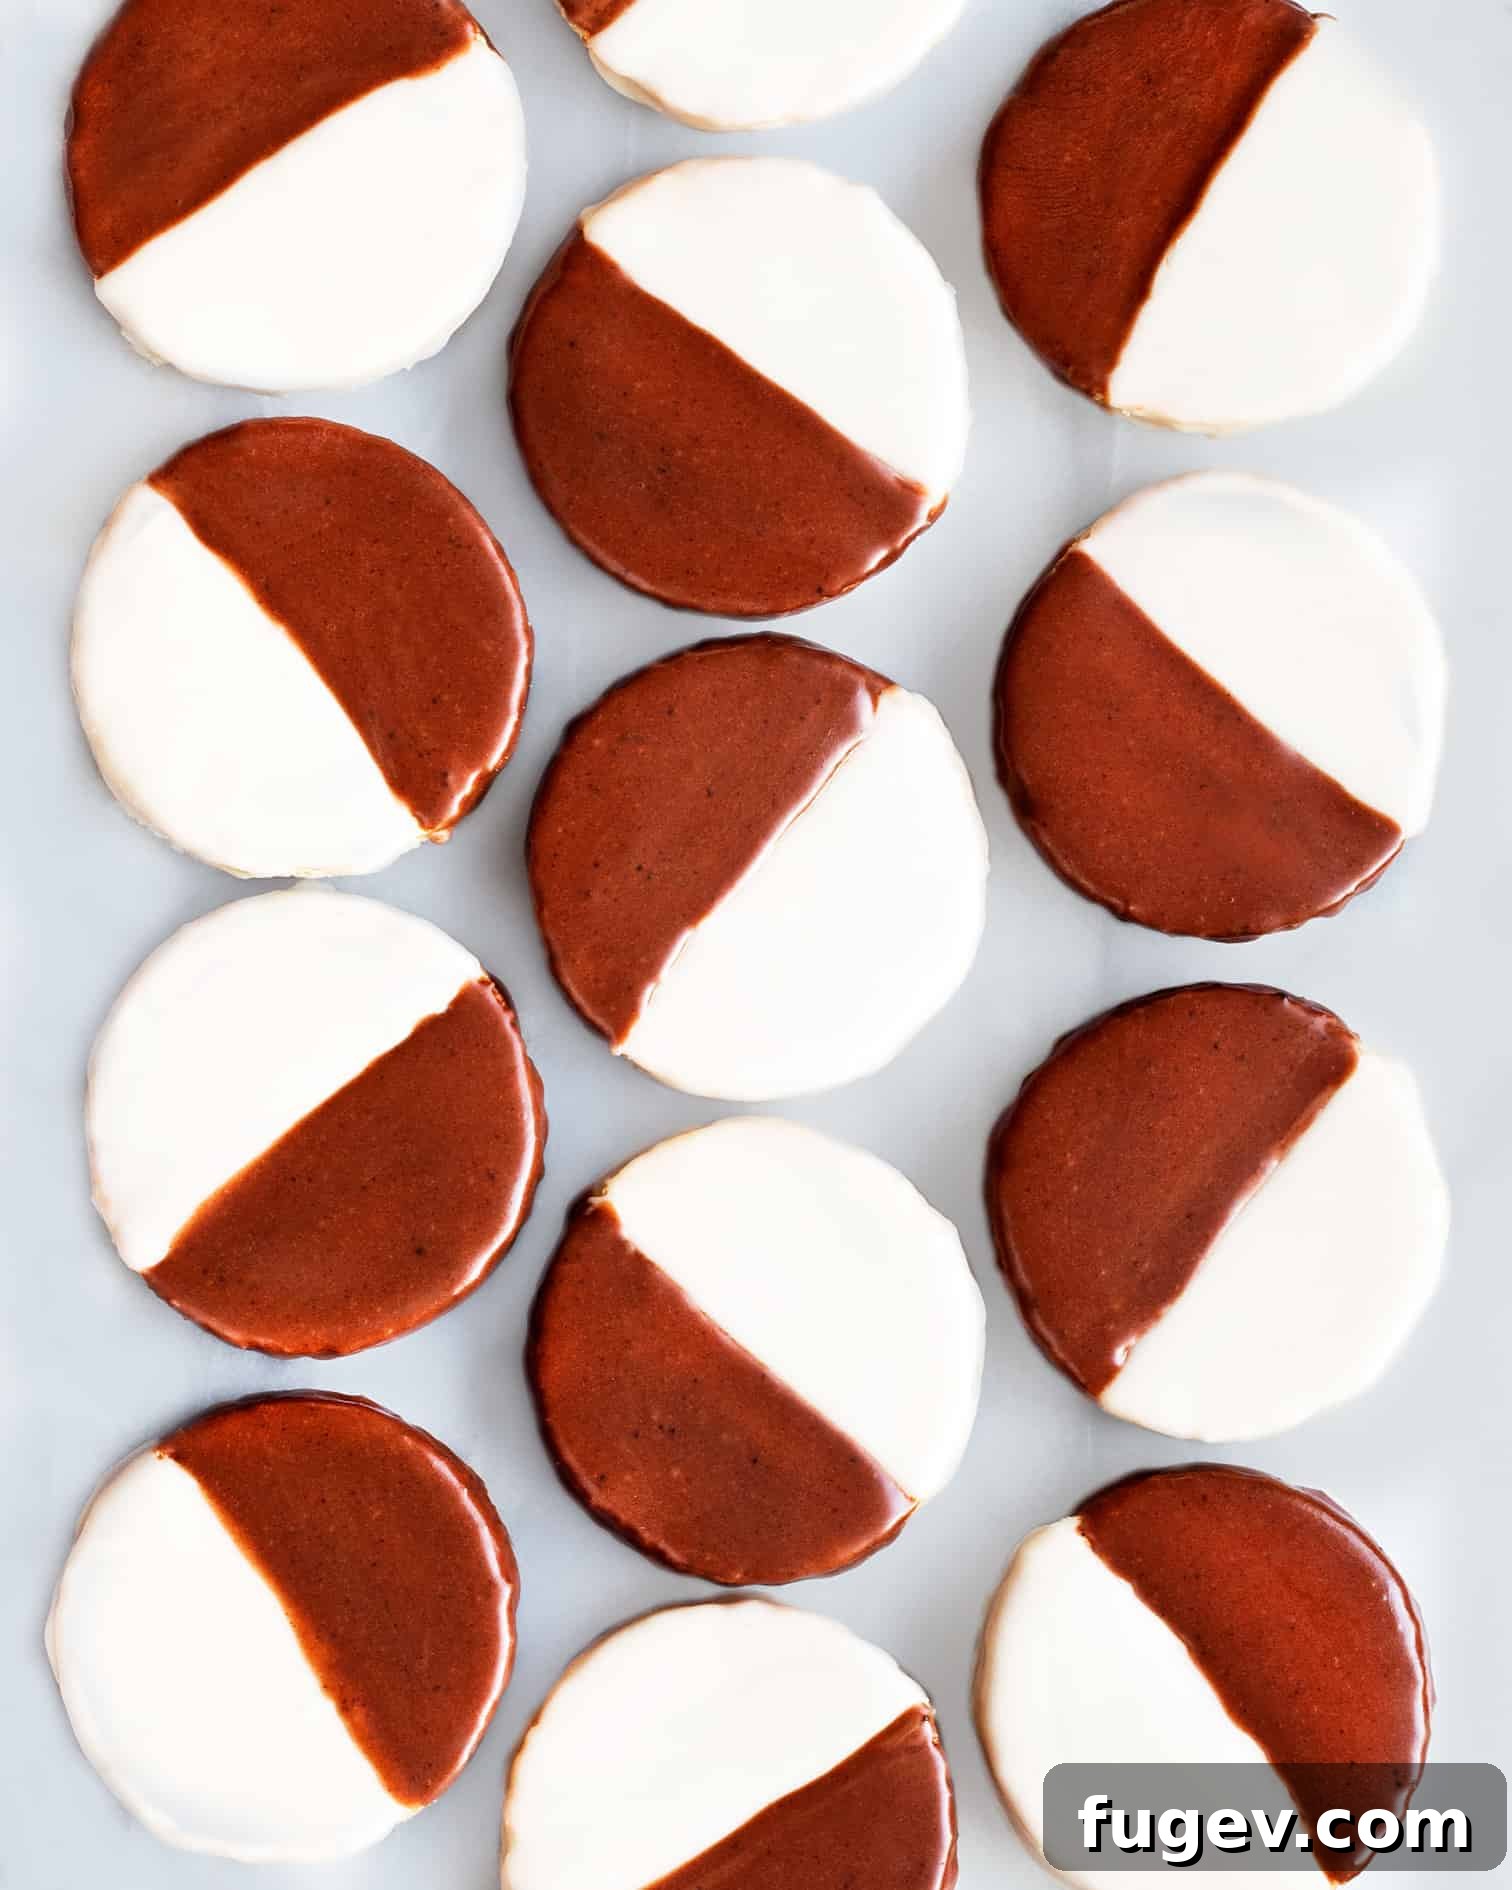
The Ultimate New York Black and White Cookies Recipe: A Timeless Classic
Step into any classic New York bakery, and you’re bound to encounter a true culinary icon: the Black and White Cookie. These aren’t just any cookies; they’re a delightful paradox of flavor and texture, offering a soft, cake-like bite crowned with a distinct duality of rich chocolate and smooth vanilla icing. What truly sets them apart is a subtle hint of lemon extract in the cookie base, a secret ingredient that masterfully cuts through the sweetness of the frosting, creating an exquisitely balanced treat that leaves a lasting impression.
More Than Just a Cookie: A New York Experience
Unlike their chewier or crispier counterparts, Black and White cookies are characterized by their tender, almost cake-like consistency. This unique texture, combined with their striking monochrome frosting, is what captivated me from my very first bite. My introduction to these delightful confections happened during a pivotal chapter of my life – a college internship that whisked me away from my Midwestern roots to the vibrant, bustling streets of New York City.
That semester was an exhilarating whirlwind of discovery. Each day brought new adventures, from navigating the labyrinthine subway lines to exploring diverse neighborhoods on foot, soaking in the city’s unparalleled energy. And, of course, no exploration of New York would be complete without indulging in its incredible culinary landscape. From street food vendors to hidden gem restaurants, the city offered an endless array of flavors, but it was the simple elegance of the Black and White cookie that truly stole my heart.
Even now, years later, whenever I find myself reminiscing about those formative months in NYC, a powerful urge to recreate those iconic cookies washes over me. It’s more than just a recipe; it’s a tangible link to a cherished memory, a way to bring a piece of that New York magic into my own kitchen. The distinct sweet and tangy profile, the soft crumb, and the visual appeal all converge to form a treat that embodies the spirit of the city itself – classic, bold, and utterly unforgettable.
The Art of the Black and White: Crafting Perfection
Baking Black and White cookies is a rewarding two-step process that feels more like an art form than mere cooking. First, you bake the delicate, fluffy cake-like cookie bases. Once cooled, comes the signature step: flipping them over and meticulously frosting their flat undersides with both vanilla and chocolate icing. While the perfect half-and-half division might seem daunting, it’s part of the charm. My personal touch, a subtle yet crucial addition of a few drops of lemon extract into the cookie batter, serves a vital purpose – it beautifully offsets the intense sweetness of the dual icings, ensuring each bite is perfectly balanced and never cloyingly sweet.
Achieving the distinctive look is simpler than you might imagine. I typically use a small offset spatula to carefully spread the chocolate and vanilla icings, striving for a neat division. However, I’ve learned over time not to fret over absolute perfection when making them at home. The rustic charm of a slightly imperfect line often adds to their homemade appeal, reminding us that the joy is in the process and the delicious outcome. Whether flawlessly divided or charmingly asymmetrical, the flavor remains undeniably delightful. This cookie isn’t just about taste; it’s about the experience, the history, and the simple pleasure of a homemade classic.
Classic Black and White Cookies
By Paige Adams
These classic New York Black and White Cookies feature a wonderfully soft, cake-like texture, generously topped with both rich chocolate and delicate vanilla icing. A hint of lemon in the cookie batter ensures a perfectly balanced sweetness.
Print Recipe
Ingredients
For the Cookies:
- 1/2 cup unsalted butter, at room temperature
- 1 cup granulated sugar
- 2 large eggs
- 1/2 cup whole or 2% milk
- 1/2 teaspoon vanilla extract
- 1/8 teaspoon lemon extract (essential for authentic flavor)
- 1-1/4 cups cake flour
- 1-1/4 cups all-purpose flour
- 1/2 teaspoon baking powder
- 1/4 teaspoon salt
For the Icing:
- 4 cups confectioners’ sugar, sifted
- 7 tablespoons whole or 2% milk, divided
- 1 teaspoon vanilla extract
- 2 tablespoons unsweetened cocoa powder
Instructions
- Prepare for Baking: Preheat your oven to 350°F (175°C). Line two large baking sheets with parchment paper or silicone baking mats. This crucial step prevents sticking and ensures even baking.
- Cream Butter and Sugar: In the bowl of a stand mixer fitted with the paddle attachment (or using a hand mixer), cream together the softened unsalted butter and granulated sugar on medium-high speed until the mixture is light, fluffy, and pale in color, about 3-5 minutes. This creaming process incorporates air, which contributes to the cake-like texture of the cookies. Scrape down the sides of the bowl as needed to ensure everything is evenly mixed.
- Add Wet Ingredients: Beat in the large eggs one at a time, ensuring each is fully incorporated before adding the next. Gradually add the milk, vanilla extract, and the crucial lemon extract. Mix on low speed until just combined. The mixture might appear slightly curdled at this point, which is completely normal due to the different fat and liquid densities.
- Combine Dry Ingredients: In a separate medium bowl, whisk together the cake flour, all-purpose flour, baking powder, and salt. Sifting these dry ingredients together beforehand ensures a lighter, lump-free batter and an even distribution of leavening agents.
- Incorporate Dry into Wet: Gradually add the dry ingredient mixture to the wet ingredients in the stand mixer. Mix on low speed until just combined. Be careful not to overmix, as this can develop the gluten too much and lead to tough, dense cookies. Stop mixing as soon as no streaks of flour remain visible.
- Shape the Cookies: Using a 2-ounce ice cream scoop (or a large spoon), drop portions of the dough onto the prepared baking sheets, spacing them about 3 inches apart to allow for spreading. The dough will be thick. With the back of a small offset spatula or the wet tips of your fingers, gently spread each portion of dough into a uniform 3 to 3.5-inch diameter circle, aiming for a consistent thickness of approximately 3/8-inch. These cookies are meant to be flat and disc-shaped.
- Bake the Cookies: Bake for 18-22 minutes, or until the edges are lightly golden brown and the centers are set. The cookies should be soft and puffy when gently pressed. Avoid overbaking at all costs, as this will result in dry, crumbly cookies rather than the desired cake-like texture.
- Cool Completely: Carefully transfer the baked cookies to a wire rack to cool completely. It is absolutely essential that the cookies are entirely cool before frosting to prevent the icing from melting, sliding off, or creating a messy finish. Patience here is key!
- Prepare Vanilla Icing: While the cookies cool, prepare the vibrant icing. In a medium bowl, whisk together 3 cups of the sifted confectioners’ sugar, 4 tablespoons of milk, and the vanilla extract until smooth and thick. The consistency should be spreadable but not runny. If the icing is too thick, add more milk a teaspoon at a time until it reaches the desired consistency. If it’s too thin, add a bit more confectioners’ sugar. This will be your luscious vanilla icing.
- Apply Vanilla Icing: Once the cookies are completely cool, turn them flat-side up. Using a small offset spatula or a butter knife, generously spread the vanilla icing over half of each cookie, covering the entire flat surface from edge to the center line. Strive for a clean, straight division. Allow this vanilla half to set slightly before moving to the chocolate.
- Prepare Chocolate Icing: To the remaining vanilla icing in the bowl, add the remaining 1 cup of sifted confectioners’ sugar, 2 tablespoons of unsweetened cocoa powder, and the remaining 3 tablespoons of milk. Whisk until smooth and uniform, ensuring there are no lumps of cocoa powder. Adjust milk or cocoa powder as needed to achieve a smooth, spreadable chocolate icing that mirrors the vanilla’s consistency.
- Apply Chocolate Icing: Now, carefully spread the chocolate icing over the remaining bare halves of each cookie, completing the iconic black and white contrast. Take your time to create a neat division between the two colors.
- Set the Icing: Allow the iced cookies to sit undisturbed at room temperature for at least 30 minutes, or until the icing has hardened and set to the touch. This step prevents smudging and ensures easy handling.
- Serve and Store: These glorious cookies are best enjoyed fresh, when their cake-like texture is at its peak. Store any remaining cookies in an airtight container at room temperature for up to 3-4 days to maintain their freshness. For longer storage, they can be frozen (unfrosted or frosted, if fully set) for up to a month.
Notes and Tips for Success
- This recipe typically yields 12-14 generously sized cookies, depending on how large you spread them. Adjusting the size will affect bake time slightly.
- For the best cake-like texture, ensure your butter and eggs are at true room temperature. This allows them to cream together properly, incorporating maximum air for a lighter crumb. Cold ingredients will not emulsify correctly.
- Do not substitute all-purpose flour for cake flour entirely; the combination of both flours is key to the unique soft, tender texture. If you don’t have cake flour, you can create a makeshift version: for every 1 cup of cake flour needed, measure 1 cup of all-purpose flour, remove 2 tablespoons, and then replace those 2 tablespoons with cornstarch. Sift well before using.
- When spreading the dough into circles, dipping your spatula in a little water can help prevent sticking and achieve smoother, more uniform rounds.
- The icings should be thick enough to hold their shape and stay within their half of the cookie, but thin enough to spread smoothly without tearing the cookie. Always adjust with tiny amounts of milk or confectioners’ sugar as needed.
- For a truly professional look and a perfectly straight line between the two icings, you can use a ruler or the edge of a clean knife to gently mark a dividing line on the cookie before applying the second color of icing.
- Consider chilling the cookies for 10-15 minutes after baking and before frosting if your kitchen is very warm, to ensure they are thoroughly cooled.
This recipe is adapted from a classic approach, drawing inspiration from culinary masters such as Gale Gand’s Butter Sugar Flour Eggs, ensuring an authentic and delightful outcome.
Nutrition Information (per cookie, estimated)
Please note: Nutrition information is an approximation calculated automatically and can vary based on specific ingredients, brands, and portion sizes. It should only be used as a guide.
- Calories: 252 kcal
- Carbohydrates: 79 g
- Protein: 5 g
- Fat: 9 g
- Saturated Fat: 6 g
- Polyunsaturated Fat: 1 g
- Monounsaturated Fat: 2 g
- Trans Fat: 0.3 g
- Cholesterol: 50 mg
- Sodium: 86 mg
- Potassium: 82 mg
- Fiber: 1 g
- Sugar: 18 g
- Vitamin A: 307 IU
- Calcium: 45 mg
- Iron: 1 mg
Additional Info
Course: Cookies & Bars
Cuisine: American
Share Your Creations!
Did you try this recipe and make your own batch of delightful Black and White Cookies? We’d love to see your culinary masterpieces!
Mention @lastingredient on Instagram and tag your photos with #lastingredient!
Happy baking!