
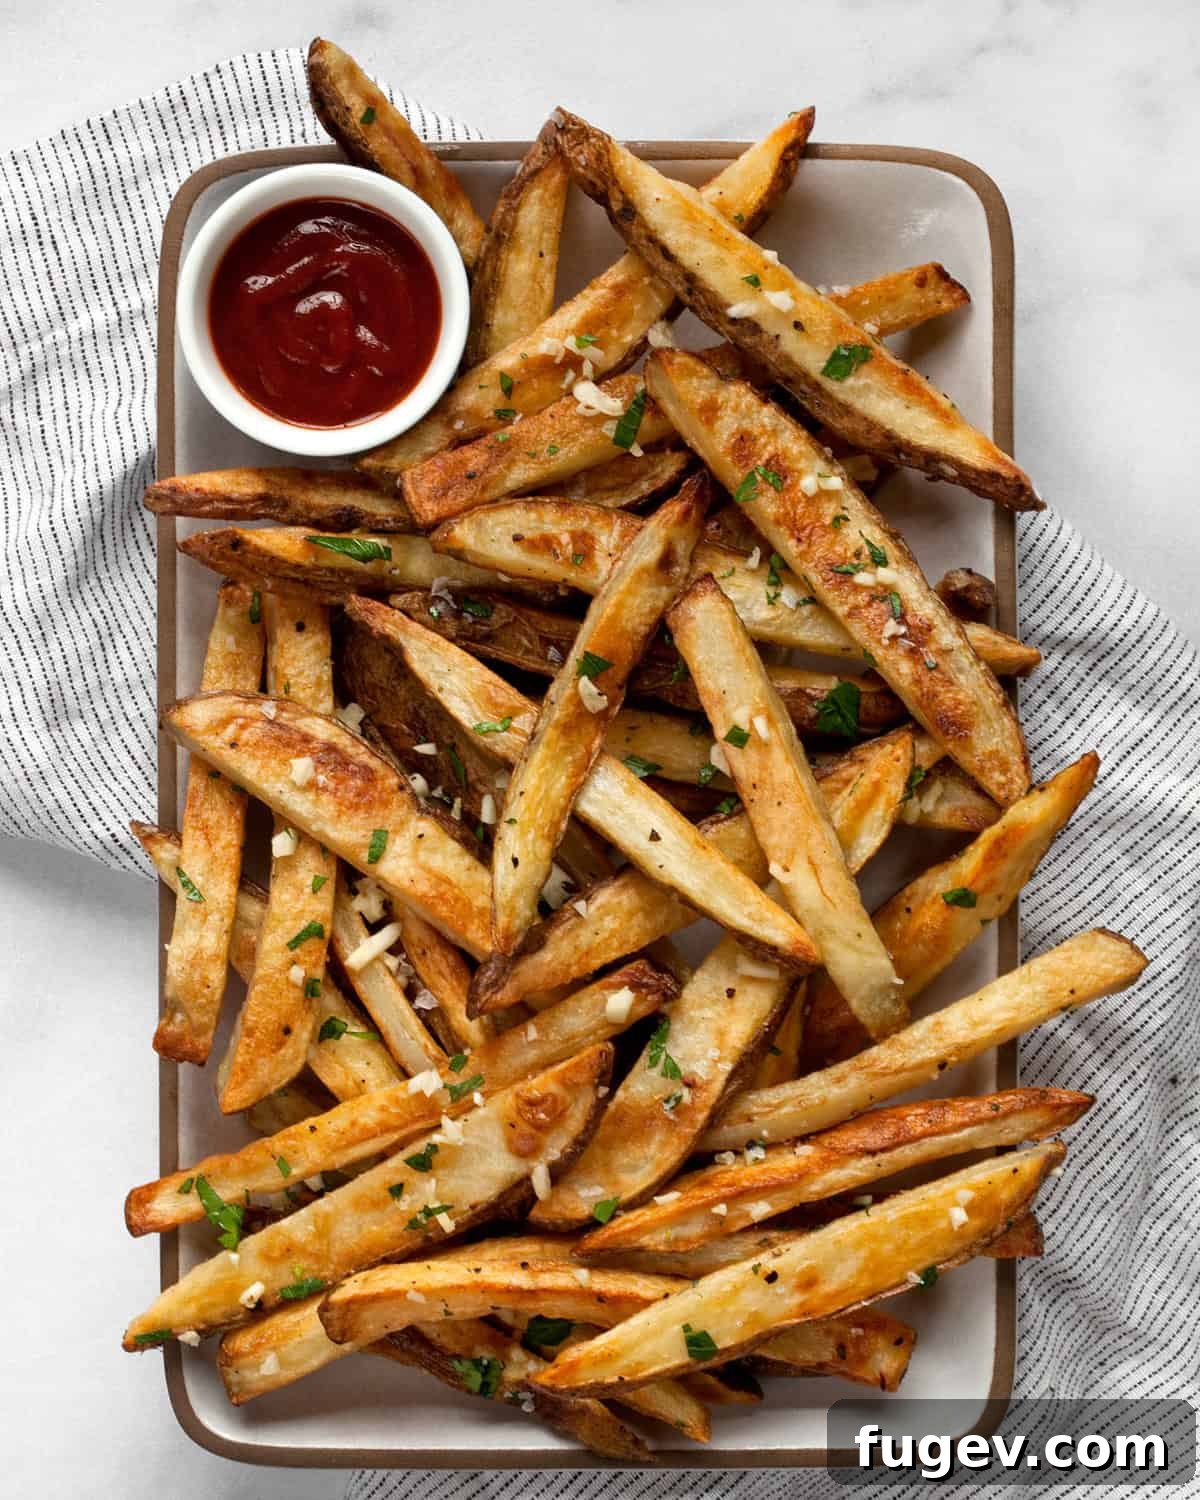
Craving perfectly browned, irresistibly crisp French fries but want a healthier option without the mess of deep-frying? Look no further! With just an oven and a trusty sheet pan, you can effortlessly create these incredible oven baked garlic fries. This recipe transforms humble potatoes into a mouthwatering side dish that’s crisp on the outside and fluffy on the inside. Infused with fresh minced garlic, these homemade fries are a healthier, vegan, and gluten-free alternative to classic fried versions, perfect as a snack, appetizer, or a delightful accompaniment to any meal. Say goodbye to the air fryer and embrace the simplicity and deliciousness of oven-baked perfection!

Table of Contents
- Why You’ll Love This Recipe
- The Ingredients for Perfect Garlic Fries
- How To Make Baked Garlic Fries: Step-by-Step
- Expert Tips for the Best Crispy Baked French Fries
- Serving Suggestions
- Leftovers & Storage
- FAQs About Baked Fries
- More Delicious Potato Recipes
- Oven Baked Garlic Fries Recipe
Why You’ll Love This Recipe
This recipe for oven baked garlic fries isn’t just another potato dish; it’s a game-changer for anyone seeking a delicious, convenient, and healthier alternative to traditional deep-fried options. Here’s why these homemade fries are about to become a staple in your kitchen:
- No Air Fryer Required: While air fryers are fantastic gadgets for achieving crispy results, they aren’t essential for truly great fries. This recipe perfectly leverages the consistent heat of your conventional oven and the excellent conductivity of a simple sheet pan. It’s ideal for those who prefer not to invest in another kitchen appliance or simply lack the counter and storage space. You’ll master the art of achieving golden, crispy fries without any specialized equipment.
- Effortlessly Easy Homemade Fries: Forget the potential mess and hazards of deep-frying in a vat of hot oil. Making fries at home can often seem daunting, but these oven-baked French fries are as straightforward as roasting any other vegetable. With just a few simple tricks – primarily proper preparation and optimal cooking conditions – you can achieve results that rival your favorite restaurant fries, all with minimal cleanup.
- Healthier Without Sacrificing Flavor: We’ll be honest: nothing can perfectly replicate the experience of a heavily deep-fried potato. However, these oven-baked garlic fries come incredibly close to satisfying that craving, delivering a delightful texture and flavor profile. They emerge from the oven beautifully crisp and browned on the outsides, with a wonderfully soft and fluffy interior. Best of all, they achieve this deliciousness with significantly less oil and fat than their deep-fried counterparts, making them a much healthier choice you can feel good about enjoying more often. They are naturally vegan and gluten-free, fitting a wide range of dietary preferences.
The Ingredients for Perfect Garlic Fries
Achieving outstanding baked garlic fries starts with selecting the right ingredients. Each component plays a vital role in ensuring your fries are perfectly seasoned, wonderfully aromatic, and, most importantly, incredibly crispy. Here’s a closer look at what you’ll need:
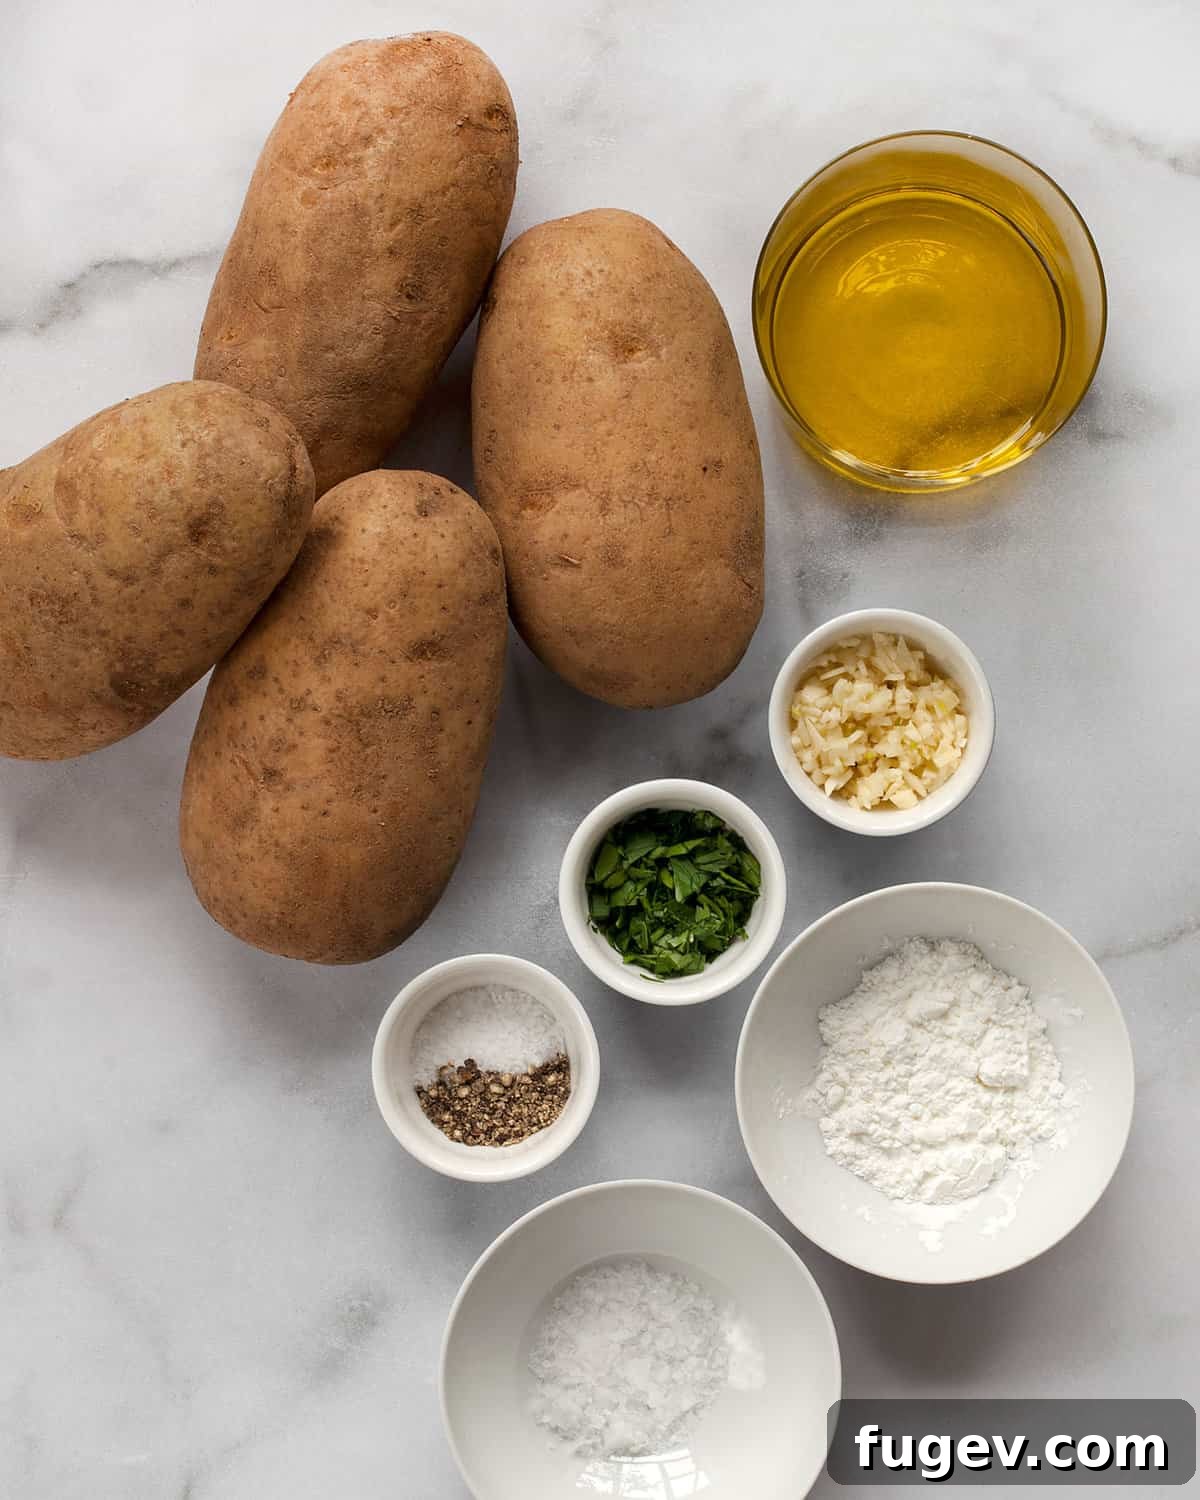
- Potatoes: The foundation of any great fry! For optimal crispiness and a fluffy interior, Russet potatoes are highly recommended. Their high starch content and low moisture levels make them ideal for baking, helping them achieve that coveted crunchy exterior. While Russets are best, you can also use Idaho potatoes, which are very similar. Avoid waxy varieties like red or new potatoes, as they tend to hold more moisture and result in a softer texture.
- Oil: We prefer using high-quality olive oil for its delicious flavor and health benefits. Its fruity notes complement the garlic beautifully. If you prefer a more neutral-flavored oil or need a higher smoke point, canola oil, avocado oil, or grapeseed oil are excellent alternatives that will still deliver crispy results.
- Cornstarch: This is our secret weapon for achieving that extra layer of crispness! When mixed with the oil and seasonings, cornstarch creates a thin, almost imperceptible coating on the potato batons. This coating helps absorb surface moisture and promotes incredible browning, mimicking the texture of fried potatoes. Don’t skip this crucial ingredient!
- Garlic: The star of these garlic fries! For the most vibrant and pungent flavor, use fresh garlic and mince it yourself. Three cloves are a good starting point, but feel free to adjust to your garlic preference. Pre-minced garlic in a jar often has a duller flavor and can contain preservatives; fresh is always superior here.
- Parsley: Freshly chopped parsley adds a beautiful herbaceous note and a pop of color that brightens the overall flavor of the fries. It pairs wonderfully with garlic and provides a fresh counterpoint to the richness of the potatoes.
- Salt & Pepper: Essential flavor enhancers. The recipe calls for kosher salt and freshly ground black pepper to be mixed into the oil and cornstarch coating. This ensures even seasoning from the start. Adjust amounts to your taste.
- Flaky Sea Salt: A finishing touch that makes a world of difference! A sprinkle of flaky sea salt just before serving adds an additional layer of texture, a burst of bright salinity, and a gourmet presentation to your baked fries.
How To Make Baked Garlic Fries: Step-by-Step
Creating these delicious oven baked garlic fries is a straightforward process that yields impressive results. Follow these simple steps for perfectly crispy and flavorful fries every time:
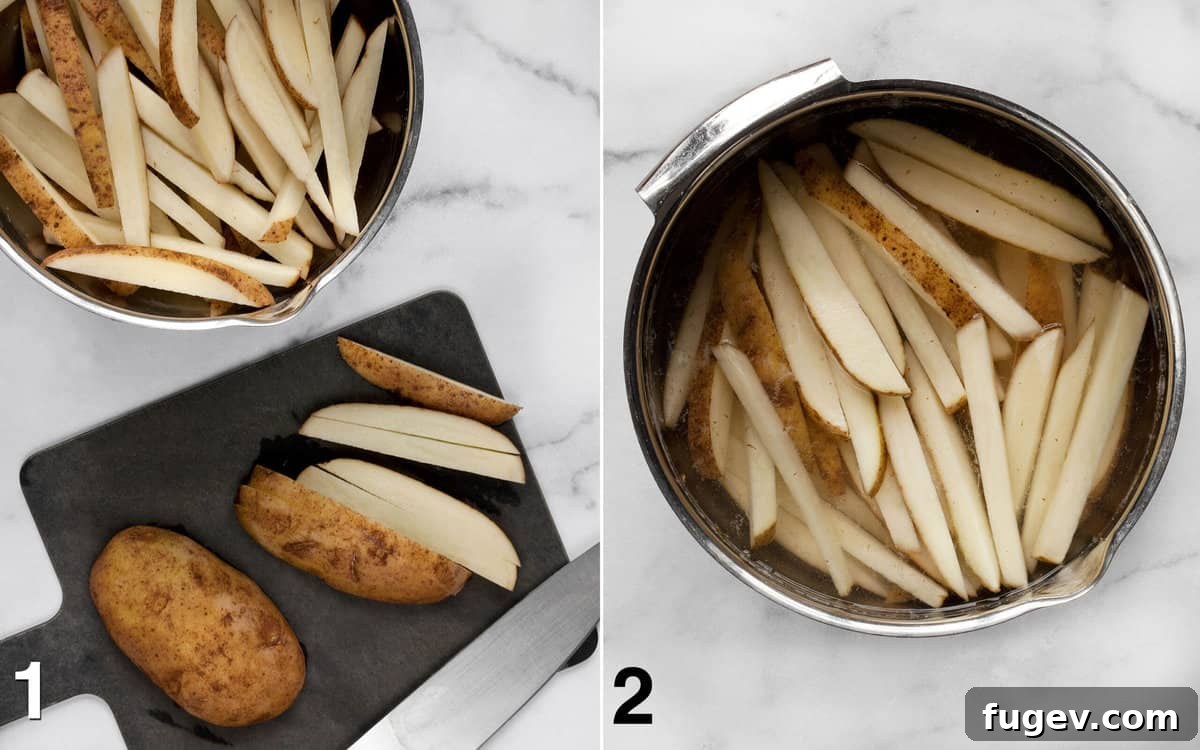
1. Prepare the Potatoes: Cut into Uniform Batons. Begin by washing and scrubbing your Russet potatoes thoroughly. You do not need to peel them; the skin adds nutrients and extra crispiness. Carefully cut each potato into batons approximately 1/2-inch thick. Aim for consistent thickness across all your fries. While the length can vary, uniform thickness is crucial for even cooking, ensuring all fries become tender and crispy at the same rate.
2. Soak for Maximum Crispness. Place the freshly cut potato batons into a large bowl and cover them completely with cold water. Let them soak for at least 30 minutes. This vital step helps to rinse away excess surface starch, which is a primary culprit for soggy fries. Removing this starch allows the potatoes to crisp up more effectively in the oven.
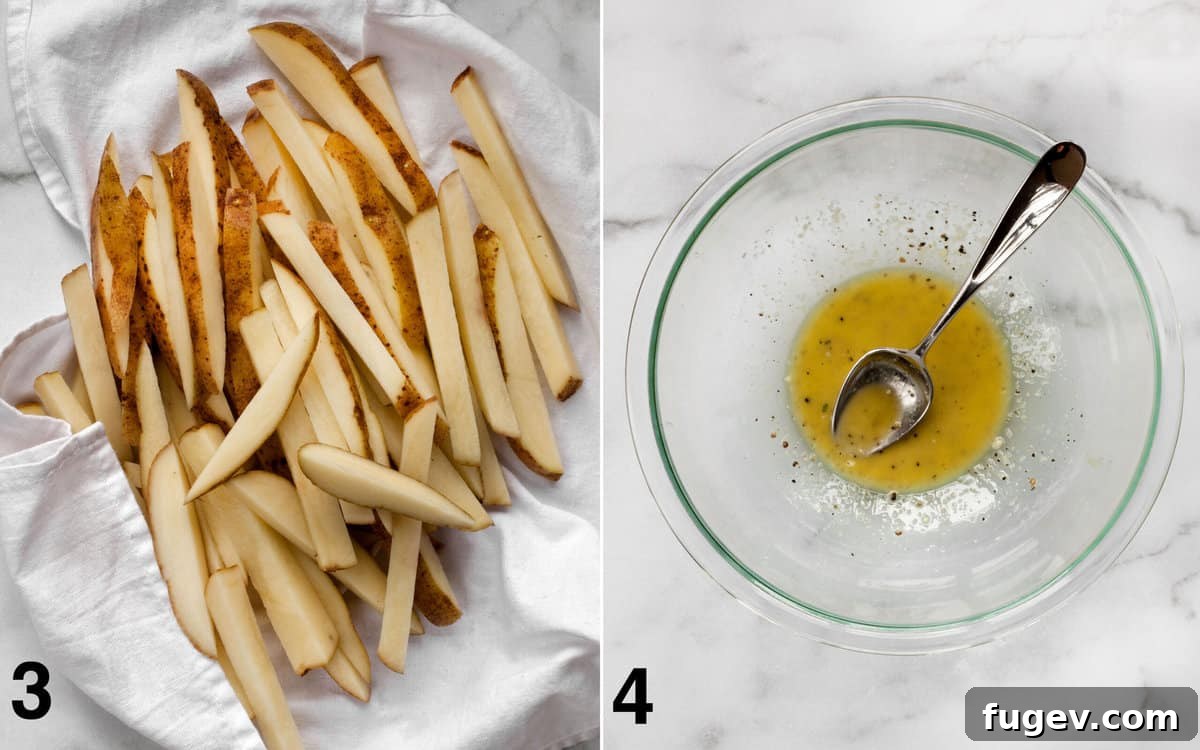
3. Thoroughly Dry the Potatoes. After soaking, drain the water from the bowl. Spread the potato batons in a single layer on a clean kitchen towel or several layers of paper towels. Pat them completely dry. Any lingering moisture will prevent the fries from crisping properly, so take your time with this step.
4. Prepare the Seasoning Mixture. In a large, clean bowl, combine the olive oil, kosher salt, black pepper, and cornstarch. Whisk these ingredients together until the cornstarch is fully dissolved and the mixture is smooth. This creates a flavorful, crisp-promoting coating for your potatoes.
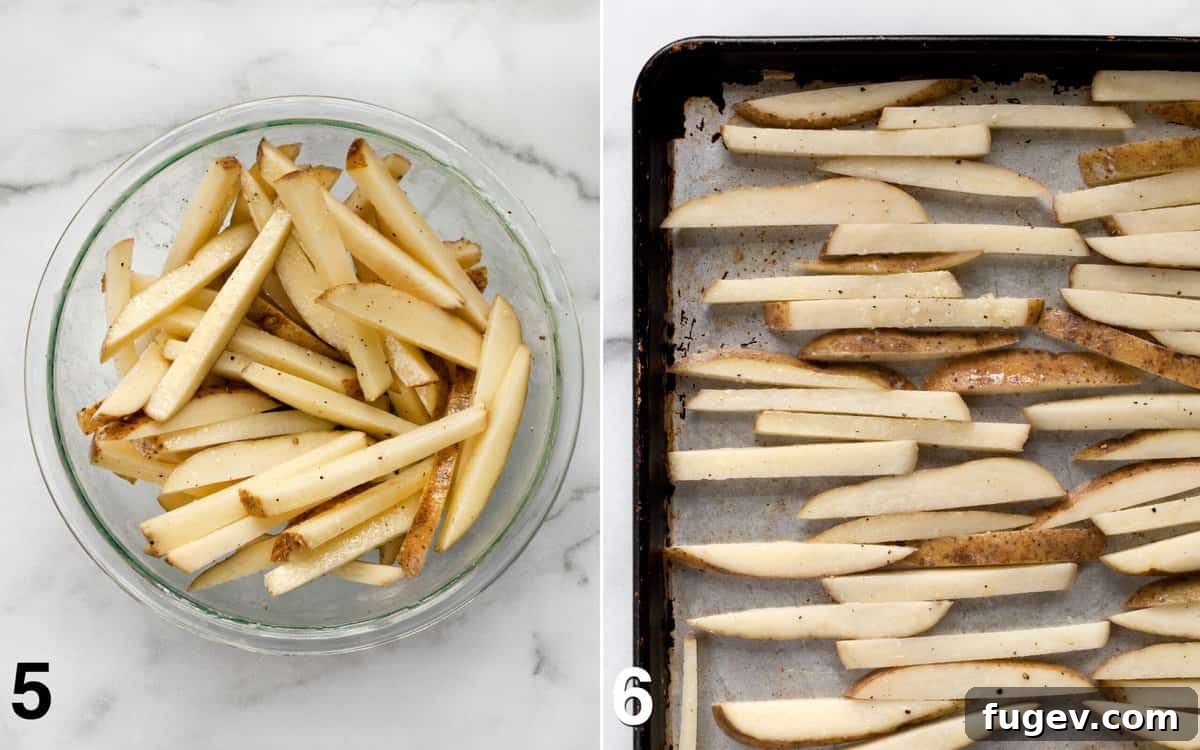
5. Coat the Potatoes Evenly. Add the dried potato batons to the bowl with the oil-cornstarch mixture. Toss thoroughly, ensuring every piece is evenly coated. This uniform coating is key to consistent crispiness and flavor across all your fries.
6. Arrange on a Sheet Pan for Optimal Roasting. Preheat your oven to 425 degrees F (220 degrees C). Lightly grease a large baking sheet with non-stick cooking spray or a thin layer of oil. Arrange the coated potato batons in a single layer on the prepared sheet pan. It is absolutely critical that the fries do not overlap or touch too much. Crowding the pan will cause the potatoes to steam rather than roast, resulting in soggy fries.
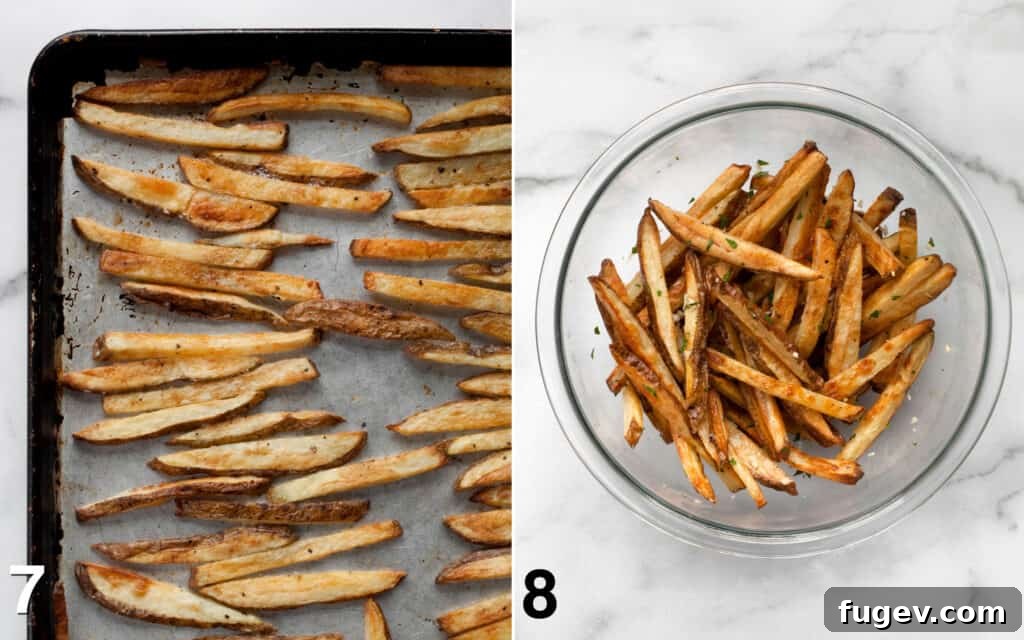
7. Bake and Flip for Golden Perfection. Place the sheet pan in the preheated oven. Bake for 20-25 minutes, or until the fries are beautifully golden brown and crispy on one side. Carefully flip each fry over to the other side. Continue baking for an additional 10-15 minutes, or until the second side is equally golden and crisp. Keep a close eye on them during the final minutes to prevent over-browning.
8. Infuse with Garlic and Parsley. Immediately after removing the hot fries from the oven, transfer them back to a large bowl. Add the freshly minced garlic and chopped parsley. Toss vigorously while the fries are still hot. The residual heat will slightly soften the garlic, releasing its potent aroma and flavor, allowing it to cling beautifully to the crispy potatoes. Finish with a generous sprinkle of flaky sea salt before serving immediately.
Expert Tips for the Best Crispy Baked French Fries
Achieving truly crispy, golden oven-baked fries is an art form, but with these expert tips, you’ll master it in no time. These techniques will elevate your homemade garlic fries from good to absolutely outstanding:
- Uniformity in Cutting is Key: This is a golden rule for roasting any vegetable, and especially crucial for fries. Strive to cut your potatoes into batons of a consistent 1/2-inch thickness. While the length can vary naturally with the shape of the potato, uniform thickness ensures that all fries cook evenly. This prevents a mixture of undercooked, soft fries and overly browned, burnt pieces. If you have irregularly shaped potatoes, consider cutting them into more manageable pieces to achieve better consistency. Buying slightly larger potatoes can also help minimize waste during prep.
- Never Skip the Soak: This step is non-negotiable for crispy fries! Soaking the cut potato batons in a bowl of cold water for at least 30 minutes (or even longer, up to an hour, if time allows) draws out excess starch from the potatoes. Starch is a natural tenderizer, and reducing its presence on the surface allows the fries to develop a much crispier exterior. Remember to completely drain and thoroughly pat the potatoes dry with a clean kitchen towel before moving on to the next step. Any residual moisture will create steam in the oven, leading to soggy, rather than crispy, results.
- Embrace the Power of Cornstarch: For an extra layer of crunch that mimics deep-fried textures, coating your potatoes in cornstarch is a game-changer. When mixed with the olive oil, salt, and pepper, the cornstarch forms a fine, dry barrier around each potato piece. This coating effectively absorbs surface moisture and promotes superior browning and crisping as the fries bake, contributing significantly to that irresistible crunch.
- Give Them Space: Don’t Crowd the Pan: This is perhaps the most critical rule for oven-baked crispiness. If fries are too close together or overlapping, they release moisture, creating steam rather than roasting. This steam gets trapped, making the fries soft and limp. The recipe typically calls for 2 pounds of potatoes; if your baking sheet isn’t large enough to accommodate them in a single, uncrowded layer, use two separate sheet pans. If using two pans, rotate them between the top and bottom oven racks halfway through baking when you flip the fries, to ensure even cooking and browning. Ample space allows hot air to circulate freely around each fry, promoting maximum crispiness.
- Direct Contact with Hot Metal is Best: Resist the urge to line your baking sheet with aluminum foil or parchment paper for easier cleanup. While convenient, these liners can hinder direct contact between the potatoes and the hot metal of the pan. Direct contact is essential for maximizing the Maillard reaction, the chemical process responsible for that deep golden-brown color and intensely savory, caramelized flavor. A lightly greased bare metal pan will yield superior browning and crispness.
- Monitor Your Fries as They Bake (But Don’t Over-Open the Door!): Ovens can have hot spots, and cooking times can vary. While it’s tempting to constantly check, avoid opening the oven door too frequently, as this causes significant heat loss and can prolong cooking or lead to less crispy results. Instead, utilize your oven light to observe the progress. If you notice some fries browning faster than others, carefully remove the done ones to prevent burning, or rearrange the less-cooked ones. Even with consistent cutting, slight variations in temperature across the oven can occur.
- Preheat Your Baking Sheet: For an extra boost of crispiness, consider placing your empty baking sheet in the oven while it preheats. This allows the pan to get searing hot. When you add the seasoned potatoes to the hot pan, they’ll immediately start to sizzle and brown, giving them a head start on developing that coveted crunchy crust.
Serving Suggestions
These oven baked garlic fries are best enjoyed immediately, hot and fresh from the oven, to savor their ultimate crispness. While they are incredibly satisfying on their own as a standalone snack or appetizer, they also make a versatile side dish. Here are a few ideas to elevate your garlic fry experience:
- Classic Dipping: A generous dollop of classic ketchup is always a winning combination. For a gourmet twist, try a homemade aioli, a spicy mayonnaise, or even a tangy ranch dressing.
- Herbaceous Pairings: Beyond the fresh parsley and garlic already incorporated, these fries are fantastic with other herb-infused sauces. A vibrant basil pesto offers a fresh, aromatic counterpoint, or consider a chimichurri for a zesty, garlicky kick.
- Cheesy Indulgence: For an irresistible variation, toss the hot fries with a handful of finely grated Parmesan cheese along with the garlic and parsley. The heat from the fries will slightly melt the cheese, creating savory baked garlic Parmesan fries that are truly addictive.
- Beyond the Side: Don’t confine these delicious fries solely to a side dish role! They shine as a crowd-pleasing appetizer for game day gatherings, holiday parties, or casual movie nights. They offer a delightful and healthier alternative to traditional roasted potatoes, perfect for any occasion when you want something comforting yet elevated.
Leftovers & Storage
While these oven baked garlic fries are undoubtedly at their best when served fresh, you can certainly store and reheat leftovers. To keep them as enjoyable as possible:
- Storage: Allow any leftover fries to cool completely to room temperature. Transfer them to an airtight container and store them in the refrigerator for up to 3 days.
- Reheating: For the best results, avoid the microwave, which tends to make fries soggy. To regain some crispness, spread the leftover fries in a single layer on a baking sheet. Reheat them in a preheated oven at 350-degrees F (175°C) for about 10-15 minutes, or until they are heated through and have crisped up again. Alternatively, an air fryer can also do a decent job of crisping them up quickly at around 375°F (190°C) for 5-7 minutes. They may not be quite as perfectly crisp as they were fresh, but they will still be incredibly tasty!
FAQs About Baked Fries
Soggy oven fries are usually due to excess starch or overcrowding. To prevent this, always soak your cut potatoes in cold water for at least 30 minutes to wash off surface starch. After soaking, ensure you pat them thoroughly dry. Most importantly, arrange the potatoes in a single layer on your baking sheet, ensuring they do not overlap. This allows hot air to circulate freely around each fry, promoting crispness rather than steaming.
Yes, oven-baked fries are generally a much healthier alternative to traditional deep-fried French fries. They use significantly less oil, which means they contain fewer saturated fats and calories. By baking instead of frying, you can enjoy a delicious potato treat with less guilt, making them a great option for a balanced diet.
At 425 degrees F (220°C), you typically bake fries in two stages. First, roast them for 20-25 minutes until one side is golden brown and crispy. Then, flip them over to the other side and continue baking for an additional 10-15 minutes, or until both sides are evenly browned and crunchy. Always keep an eye on them during the last few minutes to prevent overcooking.
While this recipe is optimized for fresh potatoes, you can adapt it for frozen fries. Most frozen fries are pre-blanched and coated, so you would skip the soaking and cornstarch steps. Simply toss the frozen fries with olive oil, salt, pepper, and then bake according to package directions, or at 425°F for a similar duration, adding fresh minced garlic and parsley once they are out of the oven.
For the absolute best crispness and flavor, these baked garlic fries are best prepared and served immediately. The fresh garlic flavor is most potent when tossed with hot fries. While you can cut and soak the potatoes a few hours in advance (keeping them in cold water in the fridge), we don’t recommend coating and baking them until just before serving.
More Delicious Potato Recipes
If you’re a potato lover, you’ll definitely want to explore these other fantastic recipes:
- Baked Sweet Potato Fries
- Smashed Roasted Potatoes
- Garlic Herb Roasted Fingerling Potatoes
- Roasted Corn Red Potato Salad
- Lemon Roasted Fingerling Potatoes
- Hasselback Sweet Potatoes
Did you make these incredible oven baked garlic fries? Please leave a rating and comment below. Your feedback means a lot!
Oven Baked Garlic Fries
Paige Adams
5 minutes
30 minutes
35 minutes
6

Ingredients
-
2
pounds
russet potatoes
rinsed and scrubbed as necessary - Non-stick cooking spray
-
3
tablespoons
olive oil -
1/2
teaspoon
kosher salt -
1/2
teaspoon
black pepper -
1
tablespoon
cornstarch -
3
garlic cloves
minced -
1
tablespoon
chopped parsley - Flaky sea salt for serving
Enjoyed this recipe?
Don’t miss out on more delicious meals! Visit our website to explore our full collection of recipes and culinary tips.
Instructions
-
Cut the potatoes into 1/2-inch thick batons. It’s important to cut them all about the same thickness for even cooking. It is ok for the length to vary.
-
Soak the potatoes in a large bowl of cold water for 30 minutes to remove excess starch. Drain the potatoes thoroughly and pat them completely dry with a towel.
-
Preheat the oven to 425 degrees F (220°C). Lightly grease a large sheet pan with non-stick cooking spray or a thin layer of olive oil.
-
In a large bowl, whisk together the olive oil, kosher salt, pepper, and cornstarch until smooth. Add the dried potatoes and toss them around until they are fully and evenly coated in the oil mixture.
-
Arrange the coated potatoes in a single layer on the prepared sheet pan. Ensure there is no overlapping; give each fry enough space to crisp up.
-
Roast the potatoes for 20-25 minutes until they are golden brown and crispy on one side. Carefully flip each fry to the other side and continue cooking for another 10-15 minutes, or until nicely browned and crunchy all over.
-
Transfer the hot fries to a large bowl. Toss immediately with the minced garlic and chopped parsley. Sprinkle them with flaky sea salt just before serving for an extra crunch and burst of flavor. Serve hot.
Notes
If your potatoes cannot fit comfortably on one baking sheet without crowding, spread them across two pans. To ensure even cooking, rotate the pans between the oven racks halfway through roasting when you flip the fries.
Store any leftover fries in an airtight container in the refrigerator for up to 3 days. For best results, rewarm them on a sheet pan in a 350-degree F (175°C) oven. They may not regain their original crispness entirely, but they will still be delicious.
Nutrition
Calories:
189
kcal
|
Carbohydrates:
29
g
|
Protein:
3
g
|
Fat:
7
g
|
Saturated Fat:
1
g
|
Polyunsaturated Fat:
1
g
|
Monounsaturated Fat:
5
g
|
Sodium:
202
mg
|
Potassium:
643
mg
|
Fiber:
2
g
|
Sugar:
1
g
|
Vitamin A:
59
IU
|
Vitamin C:
10
mg
|
Calcium:
24
mg
|
Iron:
1
mg
Nutrition information is automatically calculated, so should only be used as an approximation.
Additional Info
Appetizers & Snacks
American
Did you make this recipe?
Mention @lastingredient on Instagram and tag it #lastingredient!
Originally published June 2, 2014. Updated: December 26, 2022.