
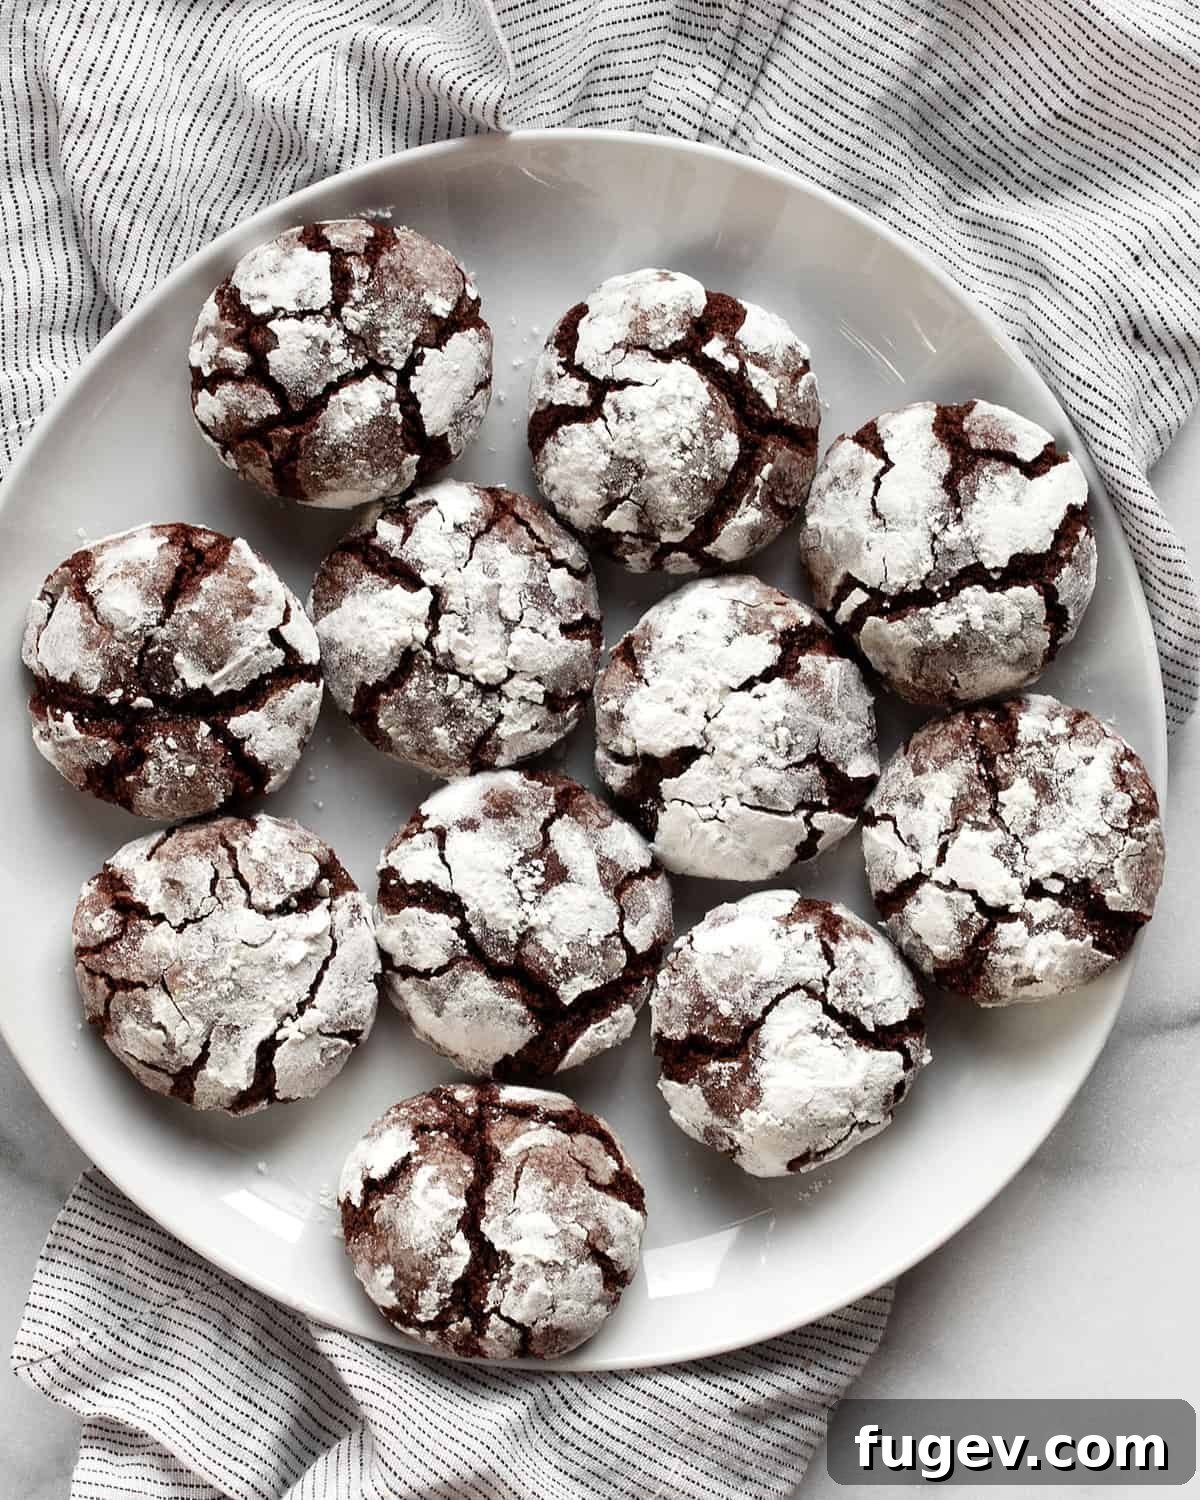
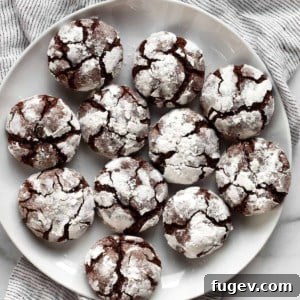
Dusted with powdered sugar that evokes images of a serene winter landscape, these **chocolate crinkle cookies** are a beloved classic, making an anticipated annual appearance on holiday cookie trays. However, their rich, fudgy texture and delightful chocolate flavor make them a perfect treat for any time of the year. Often described as a cookie version of a brownie, they offer a wonderfully soft and chewy bite that melts in your mouth. For an extra touch of indulgence, serve them warm with a generous scoop of creamy vanilla ice cream.
Craving more fudgy goodness? Don’t miss out on our irresistible salted fudge brownies, a perfect complement to these delightful cookies.
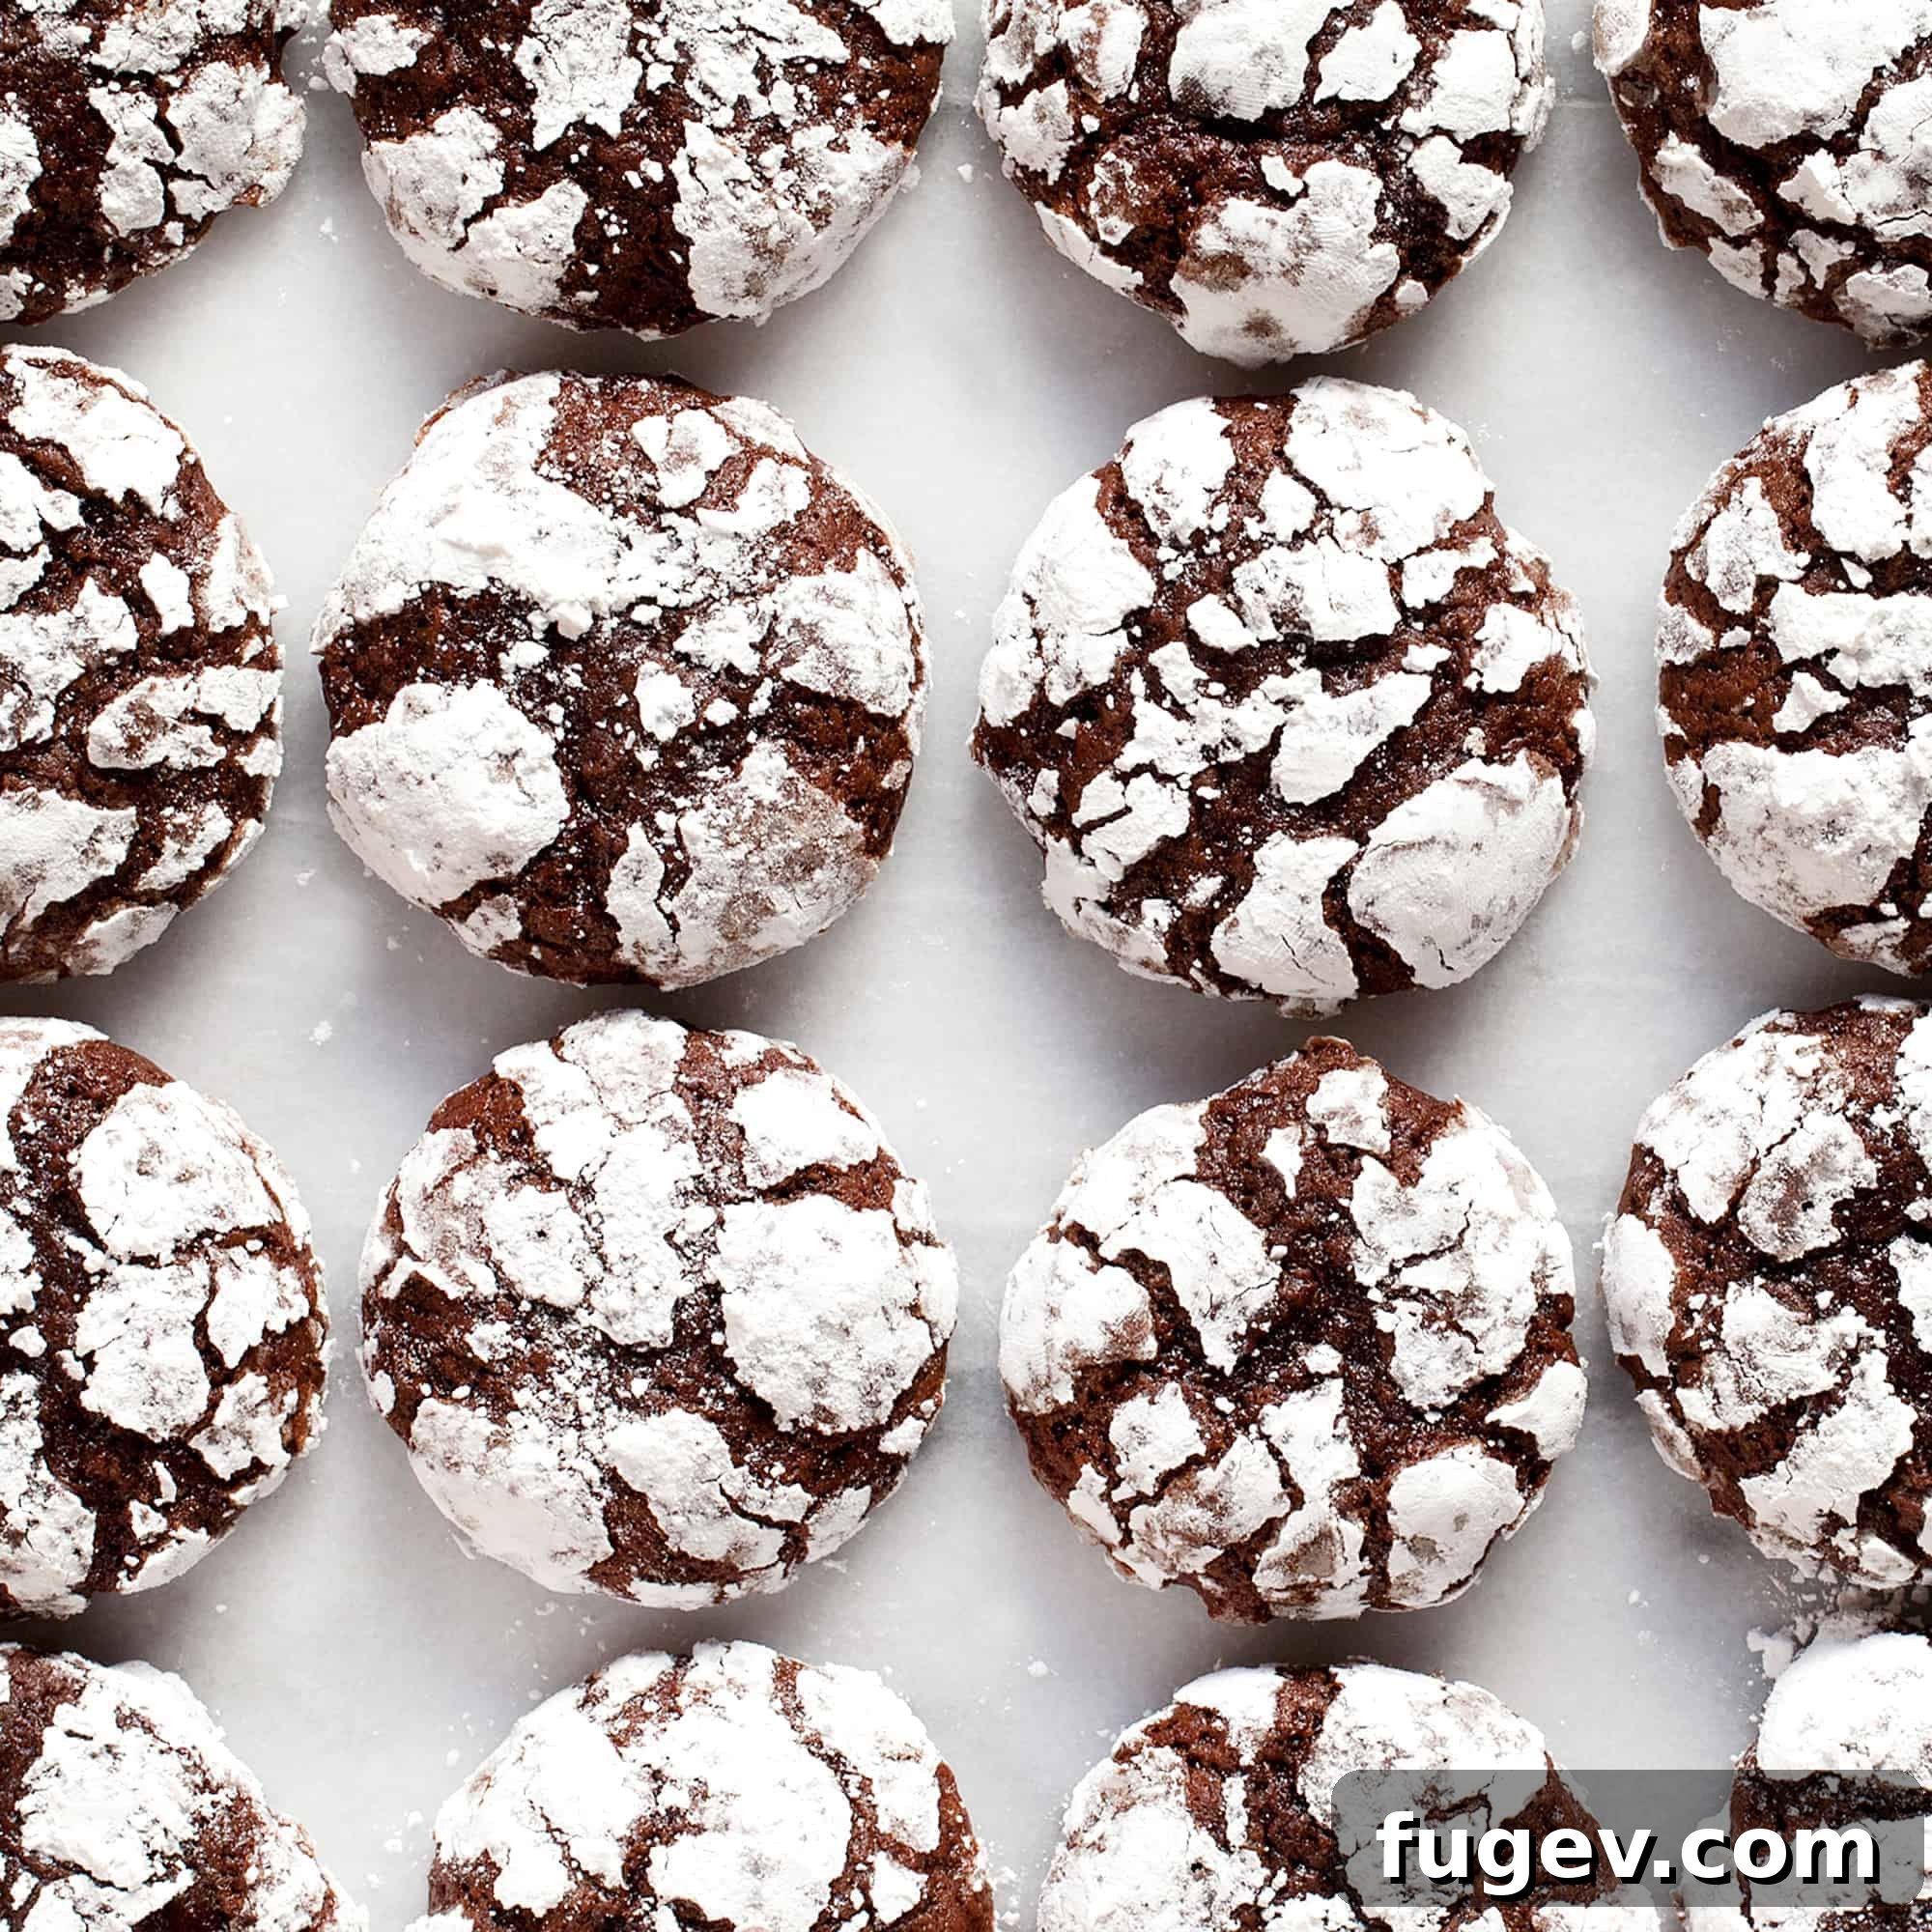
Table of Contents
- Why You Will Love These Cookies
- What Are Chocolate Crinkle Cookies?
- The Essential Ingredients
- Step-by-Step Guide: How to Make Chocolate Crinkle Cookies
- Serving Suggestions
- Storage & Freezing Tips
- Expert Baking Tips
- Frequently Asked Questions
- More Irresistible Cookie Recipes
- Chocolate Crinkle Cookies Recipe
Why You Will Love These Chocolate Crinkle Cookies
These exquisite chocolate crinkle cookies aren’t just a treat for the palate; they’re a joy to bake and share. Here’s why they’ll quickly become a favorite in your baking repertoire:
- Effortlessly Elegant “Decorated” Cookies: For those who admire beautifully decorated cookies but lack the time, patience, or intricate skill required for elaborate icing, crinkle cookies are a revelation. Their signature cracked, powdered sugar coating provides a naturally stunning aesthetic. Each cookie develops unique fissures during baking, much like a delicate snowflake, ensuring that no two are exactly alike. This distinctive appearance makes them look sophisticated and festive without any extra decorating effort, allowing you to achieve an impressive result with minimal fuss.
- Convenient Make-Ahead Dough for Busy Schedules: Life gets hectic, especially during the holidays. That’s why the make-ahead nature of this dough is a game-changer. The dough *requires* chilling for at least a few hours in the refrigerator, and it can even be prepared a day or two in advance. This crucial chilling period not only deepens the chocolate flavor but also makes the dough easier to handle and prevents excessive spreading during baking. This flexibility allows you to fit baking around your busy schedule, preparing the dough when you have a moment and baking fresh cookies when guests arrive or when a craving strikes.
- Simplified Baking with Oil, Not Butter: Unlike many traditional cookie recipes that rely on softened butter and the creaming method, these chocolate crinkle cookies use vegetable oil as their primary fat. This eliminates the waiting game for butter to reach room temperature, streamlining your baking process significantly. Oil contributes to a distinctly soft, moist, and chewy texture, enhancing the brownie-like quality of the cookies. While butter is not required, a small but important tip is to let your eggs come to room temperature. This ensures they emulsify better with the other ingredients, leading to a smoother, more uniform dough. For ultimate convenience, simply set your eggs out on the counter the night before you plan to make the dough.
What Are Chocolate Crinkle Cookies?
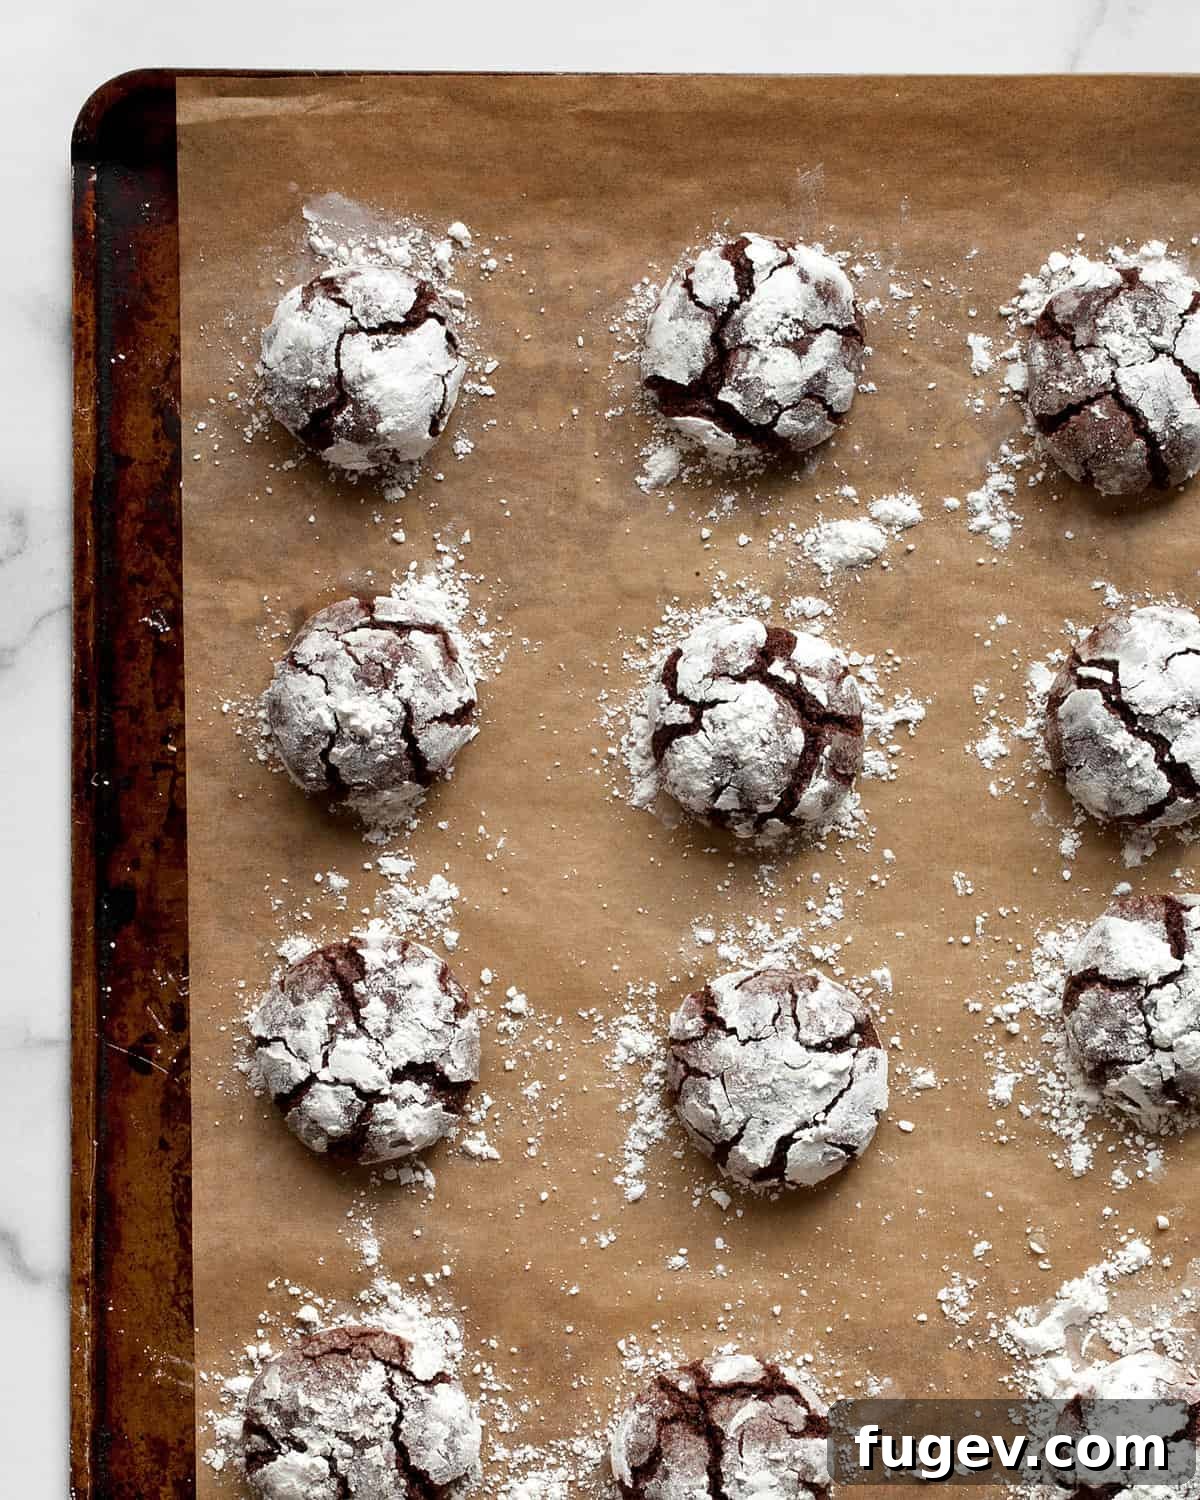
Chocolate crinkle cookies are a truly unique confection, best described as a delightful hybrid between a rich, fudgy brownie and a traditional chewy cookie. Their texture is wonderfully soft and incredibly moist, delivering an intense chocolate flavor in every bite. What truly sets them apart from regular brownie cookies, however, is their iconic appearance. Before baking, balls of the chocolate dough are generously rolled in powdered sugar. As the cookies bake, they expand, causing the sugar coating to crack and reveal the dark, rich chocolate beneath. This striking contrast of dark cracks against a snowy white exterior gives them their distinctive “crinkled” look, earning them charming nicknames like “chocolate snowflake cookies.” This visual appeal, coupled with their irresistible taste, ensures they always make a statement, whether on a holiday platter or as an everyday indulgence.
The Essential Ingredients for Perfect Crinkle Cookies
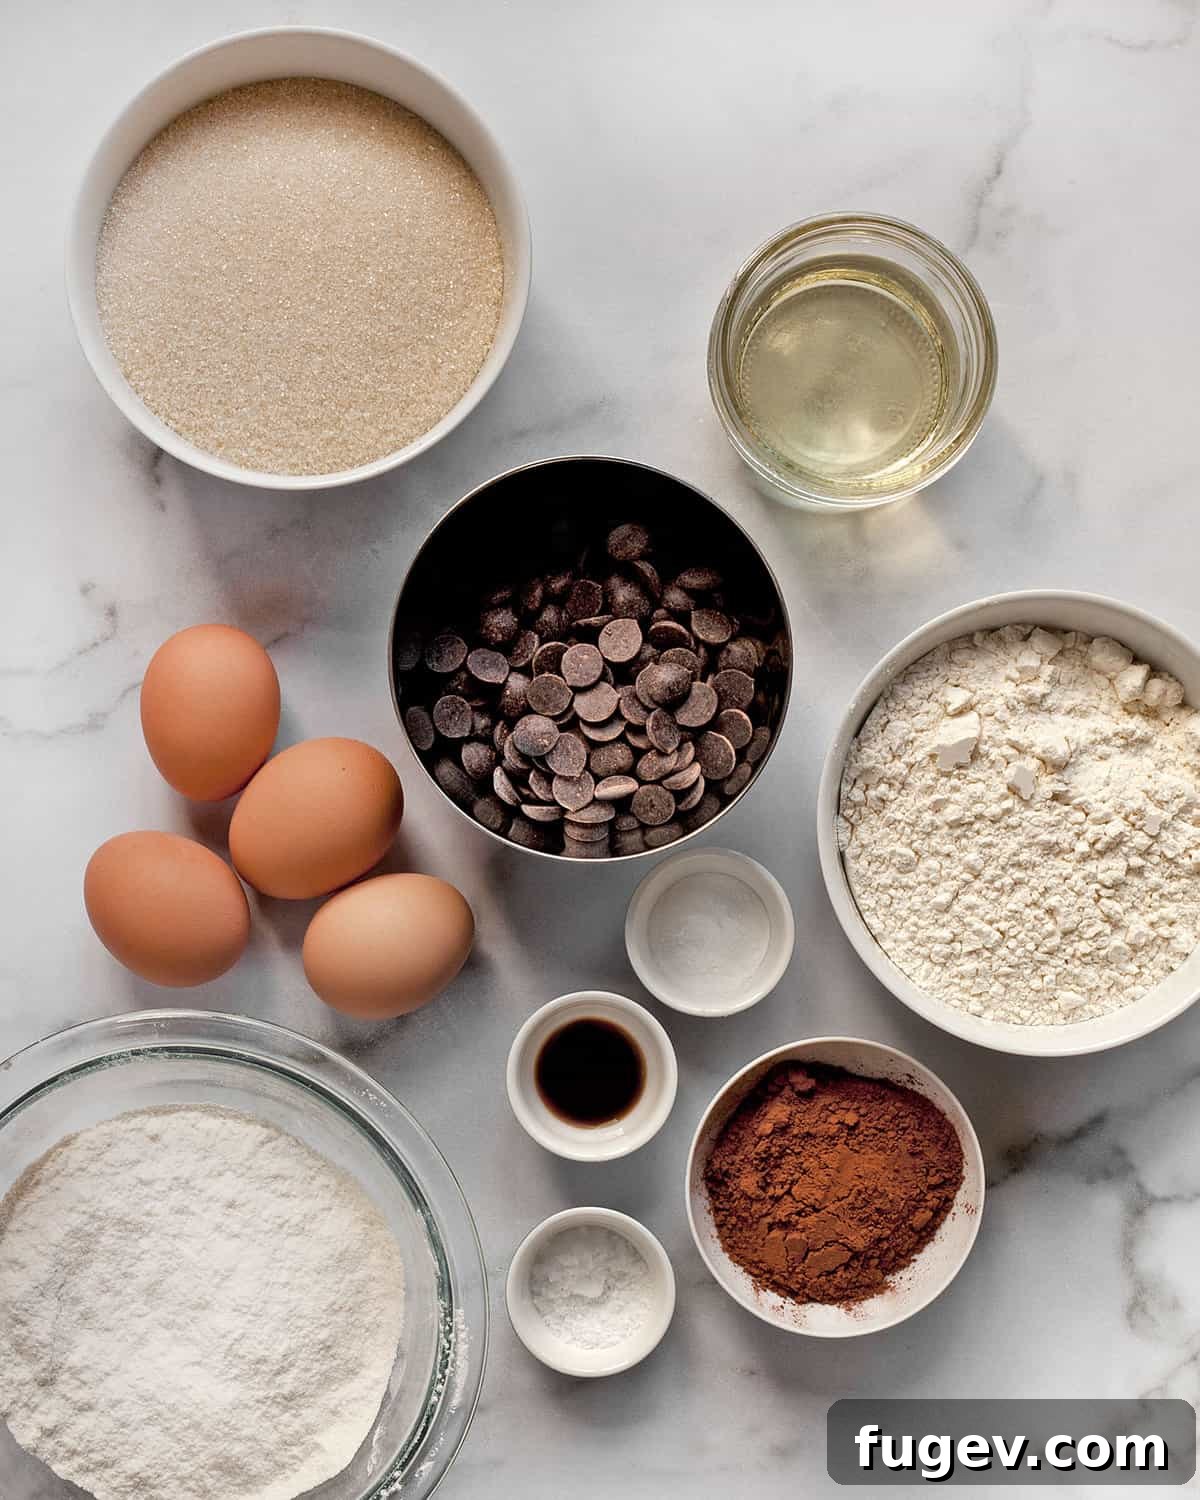
Crafting these delectable cookies requires a thoughtful selection of common pantry staples. Here’s a closer look at what you’ll need and the role each ingredient plays:
- Unsweetened Chocolate: This recipe specifically calls for unsweetened chocolate. You can opt for chocolate chips or roughly chop it from a large block. Using unsweetened chocolate is crucial because the sweetness of these cookies is carefully controlled by the granulated sugar added to the dough, allowing for a deep, unadulterated chocolate flavor that shines through.
- Eggs: You might notice the recipe calls for 4 large eggs, which may seem like a lot for a cookie recipe. However, remember that crinkle cookies boast a consistency akin to brownies – ultra-fudgy and incredibly moist. The eggs provide structure, moisture, and richness, contributing to that signature chewy texture. Always ensure your eggs are at room temperature for optimal mixing and emulsion with the other ingredients.
- Vanilla Extract: A touch of vanilla extract is essential. It doesn’t just add its own subtle, aromatic hint but also enhances and amplifies the complex chocolate flavors in the cookie, creating a more balanced and profound taste profile.
- All-Purpose Flour: Standard all-purpose flour is perfect for these cookies. It provides the necessary structure without making the cookies tough, resulting in a tender crumb that complements the fudgy interior.
- Dutch-Processed Unsweetened Cocoa Powder: For a truly rich, dark, and decadent chocolate flavor, Dutch-processed cocoa powder is highly recommended. This type of cocoa powder has had its acidity neutralized through an alkali treatment, resulting in a darker color and a milder, less bitter chocolate taste. Its non-acidic nature also means it pairs best with baking powder as the leavening agent, which is used in this recipe.
- Baking Powder: As the primary leavening agent, baking powder works with the other ingredients to give the cookies a slight lift and contributes to their soft, chewy texture. It’s mixed in with the rest of the dry ingredients to ensure even distribution.
- Kosher Salt and Sea Salt Flakes: Don’t underestimate the power of salt in a sweet recipe. The combination of kosher salt in the dough and a sprinkle of sea salt flakes (optional, but highly recommended) is not excessive. These salts are vital for cutting through the richness of the chocolate and the sweetness of the sugars, enhancing and balancing the overall flavor profile of the cookies. They truly make the chocolate taste “more chocolatey.”
- Vegetable Oil: The fat component in this recipe is vegetable oil, ideally a neutral one like canola oil. Using oil instead of butter contributes to the soft, chewy, brownie-like texture. It also streamlines the preparation process as there’s no need to wait for butter to soften. Ensure your oil has a neutral flavor so it doesn’t interfere with the delicious chocolate notes.
- Granulated Sugar and Confectioners’ Sugar: You’ll need both types of sugar for these cookies. Granulated sugar is incorporated into the dough, providing the primary sweetness. Confectioners’ sugar (also known as powdered sugar) is reserved for rolling the dough balls before baking. This coating is what creates the iconic “crackle” effect. For the best results, always sift your confectioners’ sugar to eliminate any clumps, ensuring a smooth, even coating on each cookie.
Step-by-Step Guide: How To Make Chocolate Crinkle Cookies
Follow these detailed steps to bake perfect chocolate crinkle cookies every time:
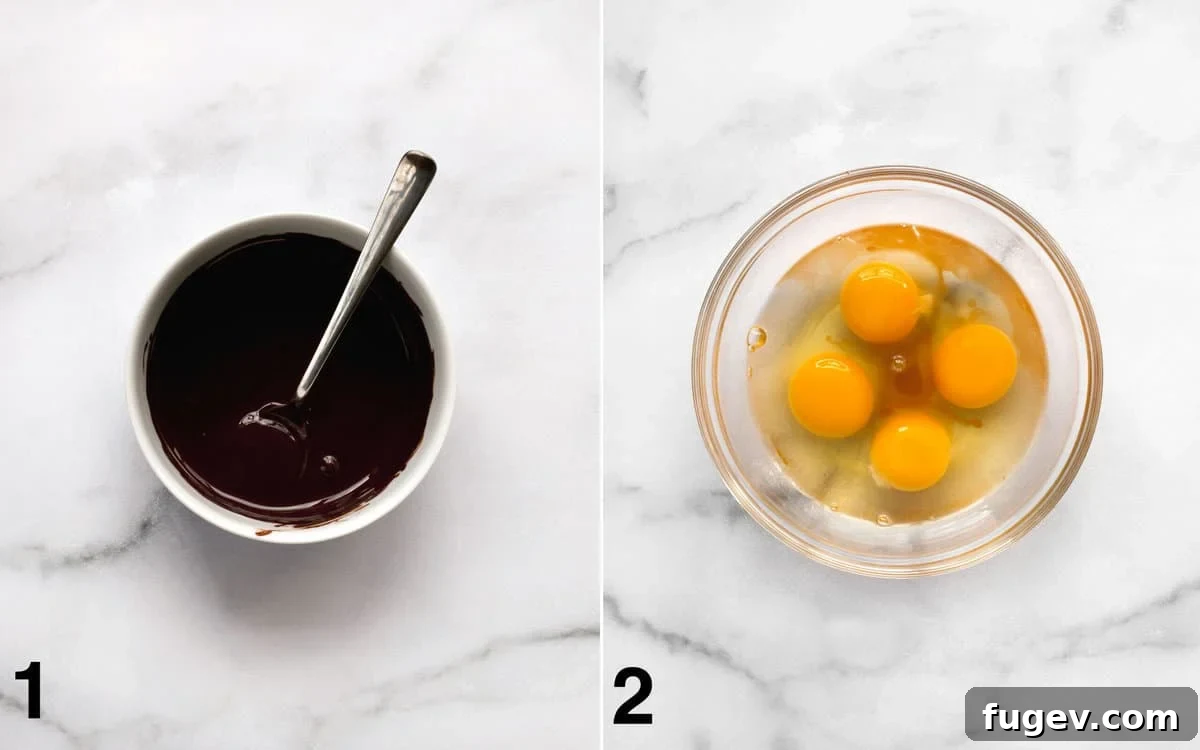
1. Melt the Unsweetened Chocolate. Place the unsweetened chocolate in a microwave-safe bowl. Heat it in 30-second intervals in the microwave, stirring thoroughly after each blast. This technique helps distribute the heat evenly and prevents the chocolate from scorching, ensuring a smooth, glossy melted chocolate. Continue until the chocolate is completely melted and smooth.
2. Prepare Eggs and Vanilla. In a small bowl, gently combine the room temperature eggs and vanilla extract. There’s no need to whisk them vigorously at this stage, as you’ll be incorporating them one at a time later in the process.
3. Combine Dry Ingredients. In a separate, medium-sized bowl, whisk together the all-purpose flour, Dutch-processed cocoa powder, baking powder, and both kosher salt and sea salt flakes. Ensure these dry ingredients are thoroughly combined to guarantee even leavening and flavor distribution throughout the dough.
4. Mix Oil and Granulated Sugar. In a large mixing bowl, using an electric mixer, beat the vegetable oil and granulated sugar together on low speed for approximately 1 minute. The mixture should become well combined and slightly lighter in color.
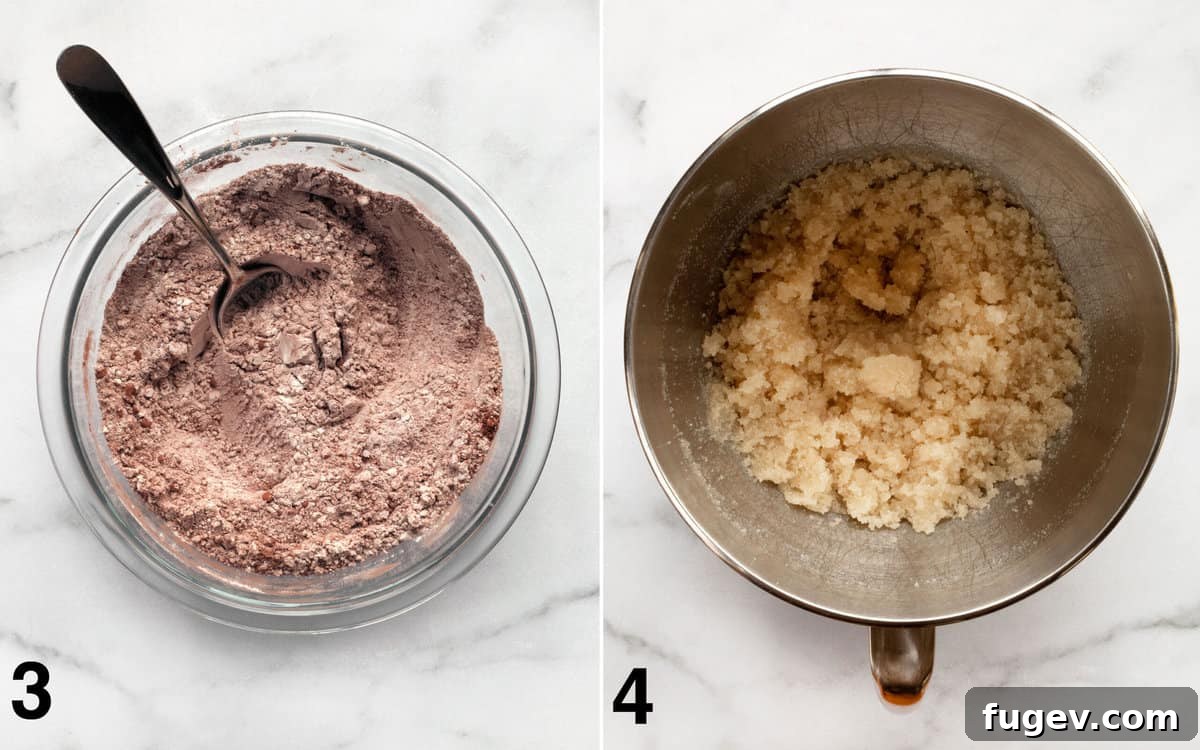
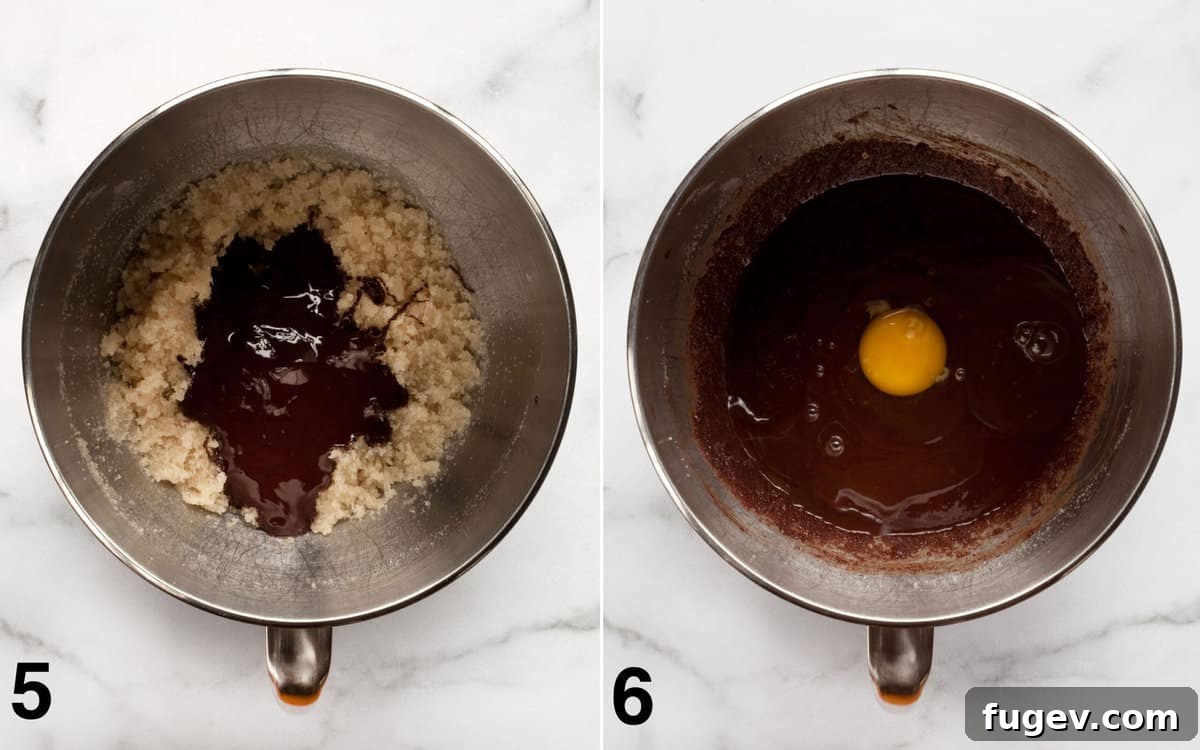
5. Incorporate Melted Chocolate. Pour the melted chocolate into the oil and sugar mixture. Mix with the electric mixer until it is fully combined, which should take about 30 seconds. Use a spatula to scrape down the bottom and sides of the bowl to ensure everything is evenly incorporated.
6. Add Eggs Gradually. With the mixer on medium speed, beat in the eggs one at a time, allowing each egg to fully incorporate before adding the next. After all eggs have been added, continue beating for an additional 20-30 seconds. At this point, the mixture should transform into a beautiful, dark, and glossy batter.
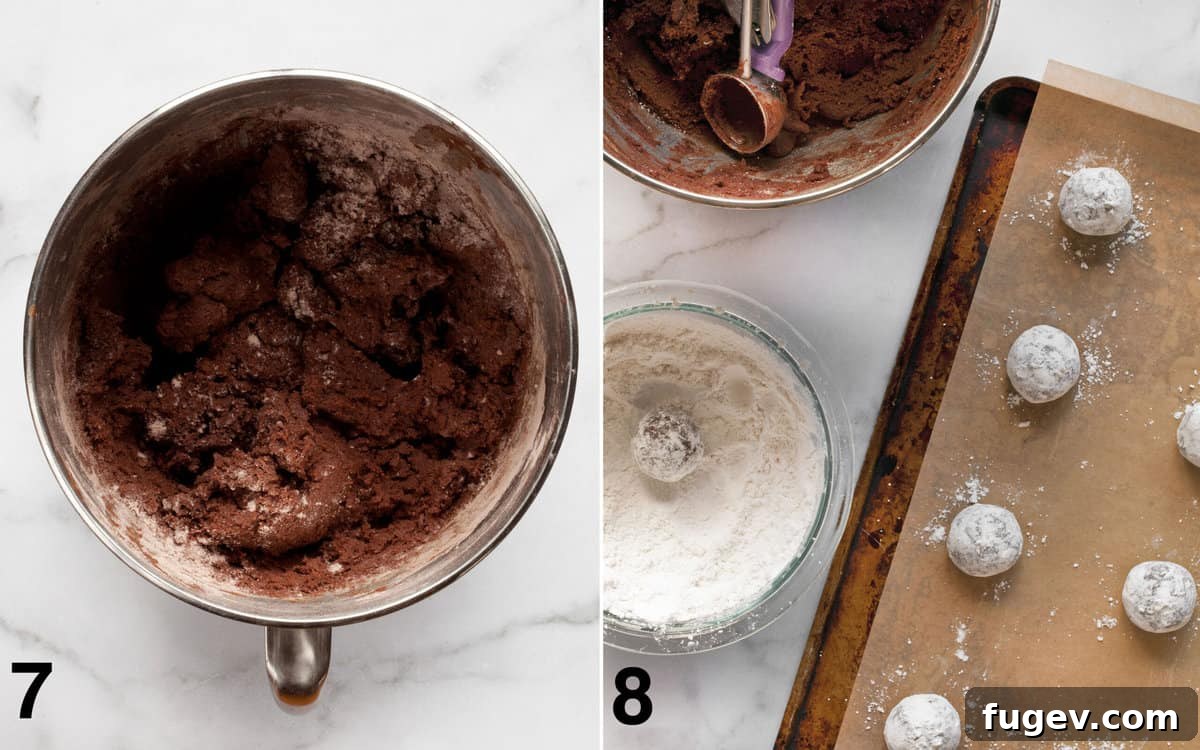
7. Combine Wet and Dry Ingredients, Then Chill. Gradually add the flour mixture (dry ingredients) to the wet ingredients. Mix on low speed for about 30 seconds, just until a shaggy dough begins to form and no dry streaks of flour are visible. Avoid overmixing, as this can lead to tough cookies. Take your hands and gently press the dough together to form a cohesive mass. Cover the bowl tightly with plastic wrap and refrigerate the dough for a minimum of 3 hours, or ideally, up to 1 day. This chilling period is crucial for the dough to firm up, making it easier to handle and preventing the cookies from spreading too much during baking.
When you’re ready to bake: Preheat your oven to 350 degrees F (175 degrees C). Line two baking sheets with parchment paper to prevent sticking and ensure even baking.
8. Shape, Roll, and Bake the Cookies. Place the sifted confectioners’ sugar in a shallow bowl. Using a 3/4-ounce (1-1/2-tablespoon) ice cream scoop, portion out the chilled dough into uniform balls. This helps ensure consistent cookie size and even baking. Generously roll each dough ball in the powdered sugar, ensuring it’s completely coated for that iconic snowy crinkle effect. Place the sugar-dusted dough balls onto the prepared baking sheets, leaving about 2 inches of space between each to allow for spreading. For an even more pronounced white coating, you can gently sprinkle an extra pinch of powdered sugar on top of each ball before baking. Bake the cookies for 11-12 minutes, rotating the baking sheets halfway through (around the 6-minute mark) to promote even browning. The cookies are done when they are visibly crinkled and appear just set in the middle, but still soft. To maintain optimal dough temperature, work in batches, keeping the unused dough in the refrigerator until you’re ready to scoop and roll. Allow the freshly baked cookies to cool on the baking sheet for 1 to 2 minutes before carefully transferring them to a wire rack to cool completely. This brief rest on the hot pan helps them firm up without becoming brittle.
Serving Suggestions for Chocolate Crinkle Cookies
These versatile chocolate crinkle cookies are delicious whether enjoyed warm straight from the oven or after they have completely cooled. While they are a staple on Christmas cookie platters, don’t feel obligated to reserve these delightful treats solely for the holiday season. Their rich, fudgy chocolate flavor makes them a fantastic dessert year-round. Consider pairing them with a glass of cold milk, a steaming mug of coffee or hot chocolate, or even a robust espresso. For a truly decadent experience, serve them alongside a scoop of vanilla bean ice cream, allowing the warm cookie to slightly melt the ice cream for a delightful contrast of temperatures and textures. They also make a wonderful addition to a dessert bar, potluck, or as a thoughtful homemade gift.
Storage & Freezing Tips for Maximum Freshness
Proper storage is key to enjoying your chocolate crinkle cookies for as long as possible, whether freshly baked or as make-ahead treats.
Storing Baked Cookies:
Once completely cooled, store your baked chocolate crinkle cookies in an airtight container at room temperature. They will remain wonderfully fresh and chewy for up to 4 days. To maintain their soft texture, you can even place a slice of bread in the container; the cookies will absorb moisture from the bread, keeping them soft.
Freezing Options: Baked Cookies and Dough
These cookies are excellent candidates for freezing, either baked or as unbaked dough, offering great flexibility for future enjoyment.
Freezing Baked Cookies: Ensure the cookies are entirely cool before freezing. Arrange them in a single layer on a baking sheet and flash freeze for about 30 minutes until solid. This prevents them from sticking together. Once firm, transfer them to a freezer-safe airtight container or heavy-duty freezer bag, layering them with parchment paper if stacking. They will keep well for up to 1 month. To enjoy, simply thaw the cookies at room temperature for a few hours.
Freezing Cookie Dough: This is a fantastic option for fresh-baked cookies on demand. Portion out the dough into balls as instructed in the recipe. Place these dough balls on a baking sheet lined with wax paper or parchment paper, ensuring they don’t touch. Freeze until they are completely solid (about 1-2 hours). Once frozen, transfer the solid dough balls to a single freezer-safe airtight container or bag. They can be stored for up to 3 months.
Baking from Frozen Dough: When you’re ready to bake, remove the desired number of frozen dough balls. Place them in the refrigerator for 30 minutes to 1 hour to slightly soften. After this partial thaw, roll them generously in confectioners’ sugar and bake as per the recipe instructions. You may need to add an extra minute or two to the baking time, but always watch for the crinkled tops and a slightly set center.
Expert Baking Tips for the Best Chocolate Crinkle Cookies
Achieving perfectly fudgy and beautifully crinkled chocolate cookies is easy with a few key techniques:
- Maintain Chilled Dough: The dough for chocolate crinkle cookies is naturally soft and a bit sticky, especially after mixing. It’s crucial to keep it well chilled throughout the entire process. When you’re scooping, rolling, and even between batches during baking, always return the bowl of dough to the refrigerator. Cold dough is much easier to handle, and more importantly, it helps prevent the cookies from spreading too much in the oven, ensuring they retain their shape and characteristic height, which is essential for developing those perfect crinkles.
- Be Generous with Powdered Sugar: The iconic snowy white contrast and deep crinkles are achieved by a liberal coating of confectioners’ sugar. Don’t be shy! Roll each dough ball thoroughly, ensuring it’s completely blanketed in a thick layer of sugar. If the coating is too thin, the chocolate will show through more, and you won’t get that desired opaque white “snow” look when they come out of the oven. For an extra boost of whiteness, a final light sprinkle of powdered sugar on top of each cookie just before they go into the oven can enhance the visual appeal.
- Avoid Overbaking for Optimal Texture: This is perhaps the most critical tip for any fudgy cookie or brownie. Chocolate crinkle cookies are meant to be incredibly moist, rich, and fudgy, like a brownie in cookie form. Overbaking will lead to dry, cakey cookies. Keep a close eye on them during the last few minutes of baking. They should appear puffed, with distinct crinkles and a slightly set edge, but the center should still look very soft, almost underdone. They will continue to set as they cool on the baking sheet and then on the wire rack. Trust the process – slightly underbaked is far better than overbaked for that perfect fudgy consistency.
- Room Temperature Eggs: As mentioned in the ingredients section, ensure your eggs are at room temperature. This allows them to incorporate more smoothly and evenly into the batter, preventing curdling and leading to a more uniform dough texture.
- Use Parchment Paper: Always line your baking sheets with parchment paper. This prevents the cookies from sticking, makes cleanup a breeze, and helps regulate the bottom temperature of the cookies, ensuring even baking and preventing burnt bottoms.
Frequently Asked Questions (FAQs) About Chocolate Crinkle Cookies
Flat cookies are a common issue, and for crinkle cookies, it often comes down to dough temperature. It is paramount to give the dough sufficient time to rest and chill in the refrigerator—at least 3 hours, ideally longer. This chilling period solidifies the fat (vegetable oil), preventing the cookies from spreading too rapidly in the oven and helping them maintain their distinct volume and crinkled shape. Additionally, ensure your oven is accurately preheated to the correct temperature.
No, traditional chocolate crinkle cookie recipes, including this one, typically use vegetable oil as the fat instead of butter. This is a key characteristic that contributes to their wonderfully soft, moist, and chewy, brownie-like texture. Butter, while delicious, would yield a slightly different, often chewier, result.
Absolutely! Both the baked cookies and the unbaked dough freeze exceptionally well, making them perfect for meal prep or future enjoyment. For baked cookies, allow them to cool completely before placing them in an airtight, freezer-safe container. Thaw them at room temperature. For unbaked dough, portion it into balls, flash freeze them until solid, then transfer to an airtight container. When ready to bake, partially thaw the dough balls in the fridge, then roll in powdered sugar and bake as directed.
This recipe specifies unsweetened chocolate for its rich, deep cocoa flavor, allowing you to control the sweetness with granulated sugar. For cocoa powder, Dutch-processed is recommended as it gives a darker color and mellower chocolate taste, and works well with baking powder.
Two main factors contribute to the perfect crinkle: very cold dough and a generous coating of sifted powdered sugar. The cold dough helps the cookies hold their shape longer, allowing the sugar coating to crack as they expand. A thick, even layer of powdered sugar ensures a stark contrast against the dark chocolate, making the crinkles pop.
More Irresistible Cookie Recipes to Try
If you loved these chocolate crinkle cookies, explore more delightful cookie recipes from our collection:
- Crispy M&M Cookies
- Peanut Butter M&M Cookies
- Flourless Peanut Butter Chocolate Cookies
- Brookies (Brownie Cookies)
- Crunchy Cornflake Cookies
- Classic Chocolate Chip Peanut Butter Cookies
Chocolate Crinkle Cookies
Print Recipe
Ingredients
- 4 ounces unsweetened chocolate (chips or roughly chopped)
- 4 large eggs, at room temperature
- 1 teaspoon vanilla extract
- 1-3/4 cups all-purpose flour
- 1/4 cup Dutch-processed cocoa powder
- 1-1/2 teaspoons baking powder
- 1 teaspoon kosher salt
- 1 teaspoon sea salt flakes
- 1/2 cup vegetable oil (such as canola)
- 1-3/4 cups granulated sugar
- 1 cup confectioners’ sugar, sifted (for rolling)
Instructions
- Place the unsweetened chocolate in a microwave-safe bowl. Melt in 30-second intervals in the microwave, stirring after each time to distribute the heat and ensure smooth melting.
- In a small bowl, combine the room temperature eggs and vanilla extract. Do not whisk them together at this stage.
- In a medium bowl, whisk together the all-purpose flour, Dutch-processed cocoa powder, baking powder, kosher salt, and sea salt flakes until thoroughly combined.
- In a large bowl, use an electric mixer to beat the vegetable oil and granulated sugar together for 1 minute on low speed until well combined.
- Pour the melted chocolate into the oil and sugar mixture. Mix until fully combined, about 30 seconds. Scrape down the bottom and sides of the bowl with a spatula to ensure even incorporation.
- On medium speed, beat in the eggs one at a time, allowing each egg to fully incorporate before adding the next. After all eggs are added, beat for an additional 20-30 seconds until the mixture is dark and glossy.
- Add the dry ingredients to the wet ingredients and mix on low speed for 30 seconds until a shaggy dough forms and no dry streaks remain. Avoid overmixing. Use your hands to gently press the dough together. Cover the bowl with plastic wrap and refrigerate the dough until firm, at least 3 hours or up to 1 day.
- When ready to bake, preheat your oven to 350 degrees F (175 degrees C). Line 2 baking sheets with parchment paper.
- Place the sifted confectioners’ sugar in a shallow bowl. Using a 3/4-ounce (1-1/2-tablespoon) ice cream scoop, portion the chilled dough into balls. Roll each dough ball generously in the confectioners’ sugar, ensuring a thick, even coating. Place the coated balls 2 inches apart on the prepared baking sheets. Optionally, sprinkle each one with a pinch of extra confectioners’ sugar.
- Bake the cookies for 8 minutes, then rotate the sheet pan and bake for an additional 3 to 4 minutes, or until the cookies are visibly crinkled and the centers are just set (they will still look soft). Do not overbake. Cool the cookies on the pan for 1 to 2 minutes before carefully transferring them to a wire rack to cool completely. Work in batches, keeping the remaining dough chilled in the refrigerator.
Notes
Store baked cookies in an airtight container at room temperature for up to 4 days. The unbaked dough can be stored in the refrigerator for up to 1 week.
Always ensure cookies are completely cooled before storing them to prevent condensation.
Both baked cookies and unbaked dough can be frozen. For baked cookies, store in an airtight container for up to 1 month and thaw at room temperature.
To freeze unbaked dough, portion it into balls and place on a wax paper-lined sheet pan in the freezer until solid. Transfer to an airtight container. Before baking, let them sit in the fridge for 30 minutes to 1 hour, then roll in confectioners’ sugar and bake.
Recipe adapted from Cookie Love by Mindy Segal.
Nutrition Information
Carbohydrates: 19 g
Protein: 2 g
Fat: 5 g
Saturated Fat: 2 g
Polyunsaturated Fat: 2 g
Monounsaturated Fat: 1 g
Trans Fat: 0.02 g
Cholesterol: 18 mg
Sodium: 155 mg
Potassium: 49 mg
Fiber: 1 g
Sugar: 10 g
Vitamin A: 27 IU
Calcium: 18 mg
Iron: 1 mg
Nutrition information is automatically calculated and should only be used as an approximation.